Toggle Nav
 Inspire.
Create.
Stitch.
Inspire.
Create.
Stitch.
Search
Learn fun ways to add applique to premade clothes, gifts, and decor for easy, custom creations at every skill level.
This is Part 5 of our 8-part series, Applique Made Easy. In this installment, we’re exploring the enormous potential of personalizing premade items with embroidery.
If you’re looking for a simple, creative way to make your gifts and garments stand out, look no further! Embroidery is a fun, beginner-friendly technique that adds personality and charm to all kinds of premade items. You can use baby onesies, T-shirts, napkins, tote bags, and even seasonal decor. Whether you're stitching a sweet monogram, a playful patch, or a sentimental design using fabric that holds fond memories, these small touches can turn everyday pieces into something special.
In this post, we’ve rounded up our favorite tips, tutorials, and inspiration to help you confidently customize ready-to-use items with your embroidery machine.
Here’s what you can expect from the full series:
Using premade or ready-to-wear items as the base for your applique projects is a smart, sustainable, and time-saving choice. Instead of starting from scratch, you can take something that already exists, such as a plain T-shirt, a tote bag, or a well-loved hoodie, and give it a fresh, personalized update. This not only cuts down on sewing time and effort, but also helps reduce textile waste. It makes me feel good to extend the life of clothing that might otherwise be donated, forgotten, or thrown away. It’s an especially practical option for our busy schedules or when I want to give a gift with that handmade touch without committing to a full project construction. Plus, the variety of available ready-made items means you can focus more on creative design and less on pattern cutting and assembly. This will make it easier to jump right into the fun—bringing your ideas to life.
And the best part? Applique works for all skill levels, styles, and machines.
Applique isn’t just for quilts—it’s perfect for:
Pretty much anything you can hoop, you can embroider on!
There are so many reasons to try applique on clothing you already own. It adds a personal, one-of-a-kind touch that makes even the simplest shirt or hoodie feel special. It’s also a practical way to cover up small stains or spots where the fabric is starting to thin. If you have kids’ clothes they’ve outgrown, you can use those clothes as the applique piece on something else to preserve the memory. If you have plain clothing pieces you’re not excited about anymore, a well-placed applique can repurpose them beautifully. Best of all, adding thoughtful designs by using fabrics that hold fond memories, monograms, or motifs that reflect someone’s personality makes for incredibly meaningful handmade gifts.
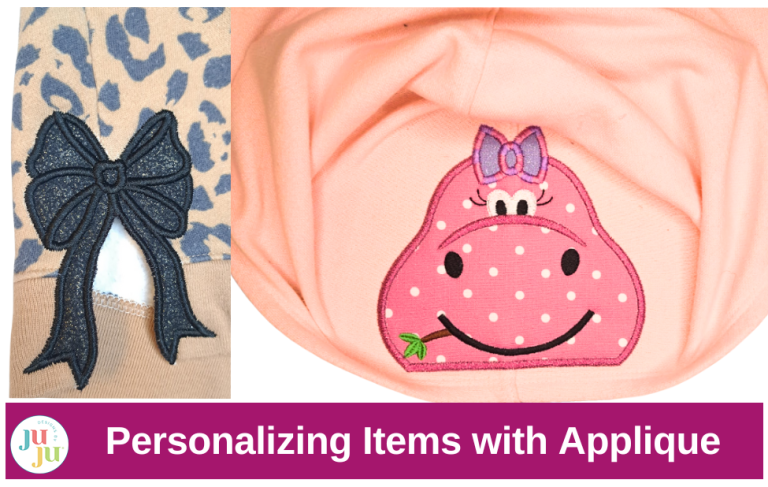
Think outside the box for wearables. We aren’t limited to placing the designs in the center of a shirt. You can place a design on the hem of your shirt or pants, over a chest pocket, or along the sleeve or bottom hem. And for a cute baby onesie, feel free to put a sweet design on the bum!
In the following section you'll find lots of ideas for embellishing premade items. Not all projects shown specifically demonstrate using applique designs as the embellishment, but applique designs could easily be used on any of them.
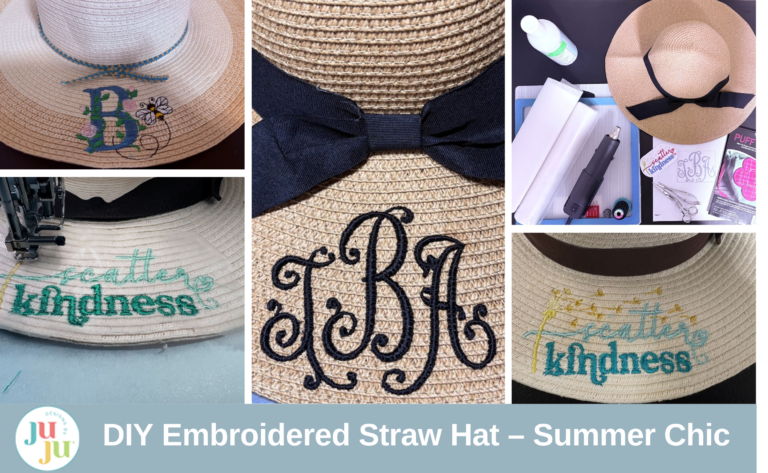
Check out this article that shows you how to embroider on a straw hat! Perfect for summer!
Create a raggy applique font on your clothes or totes with this fun tutorial.

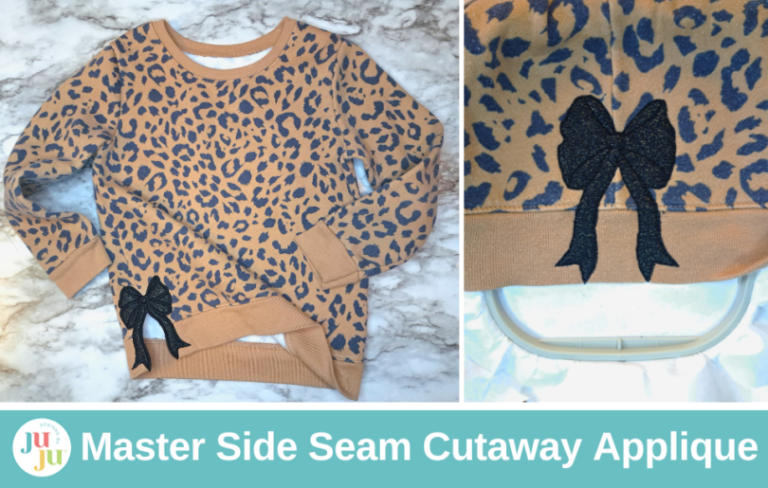
And adding a side seam design to an existing shirt or sweatshirt is always a fun project.
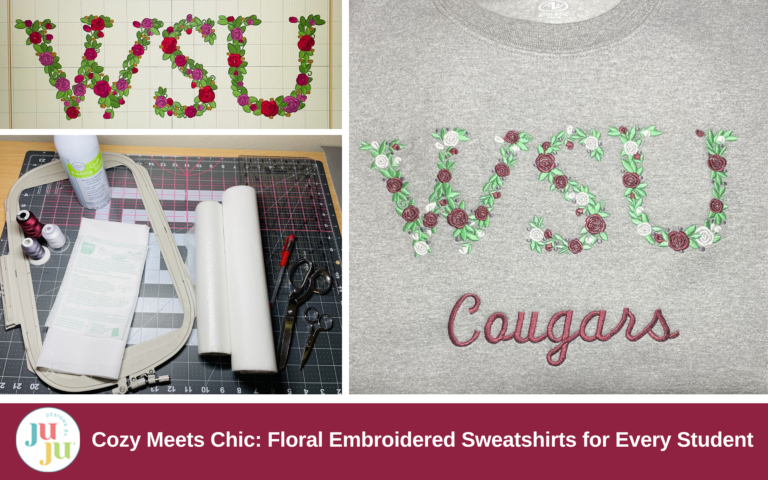
Show your team spirit by embellishing a sweatshirt.
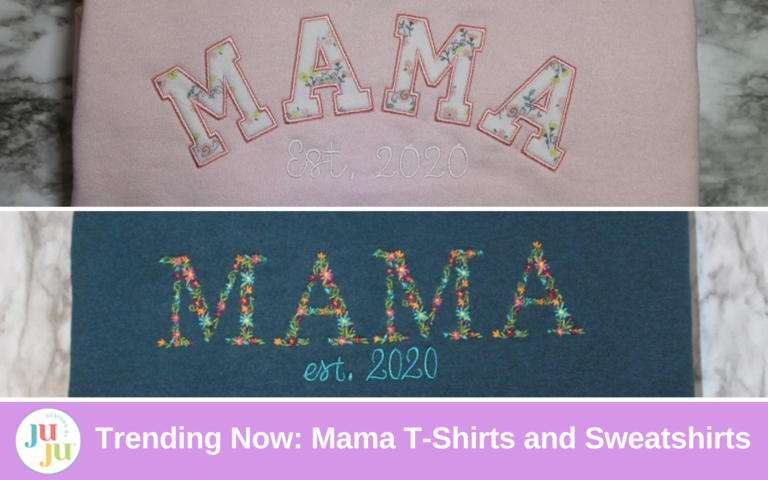
Or bless the mama in your life.
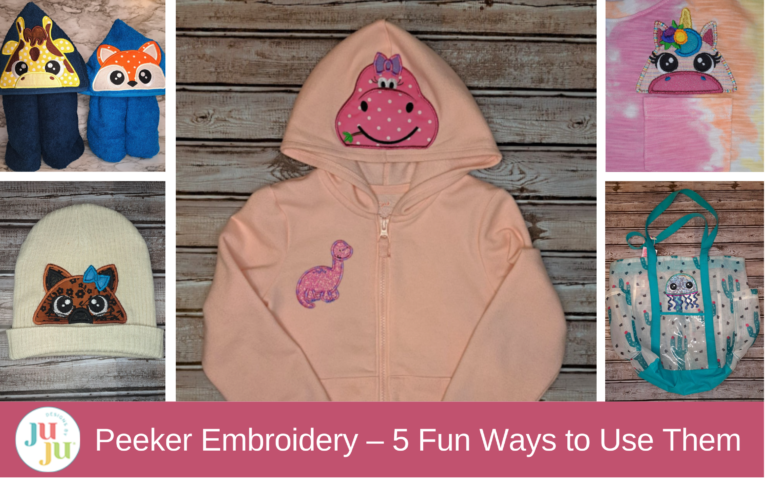
Use a peeker design to create unique clothing.
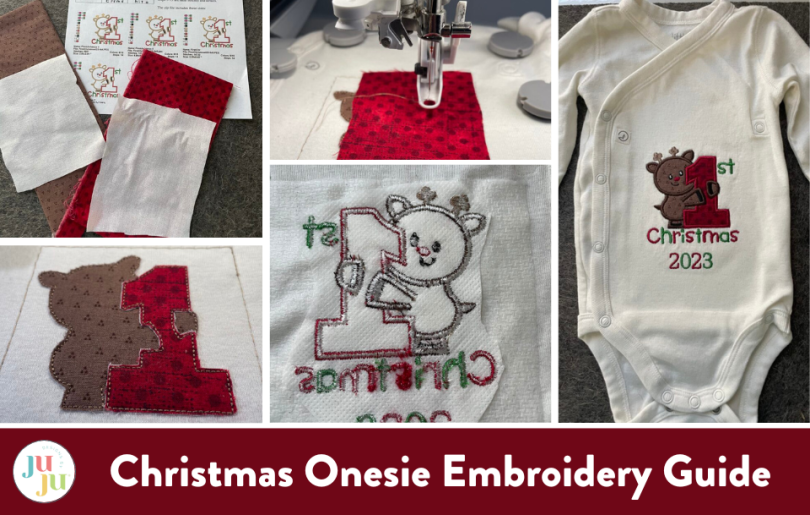
Embroider a design on a onesie.
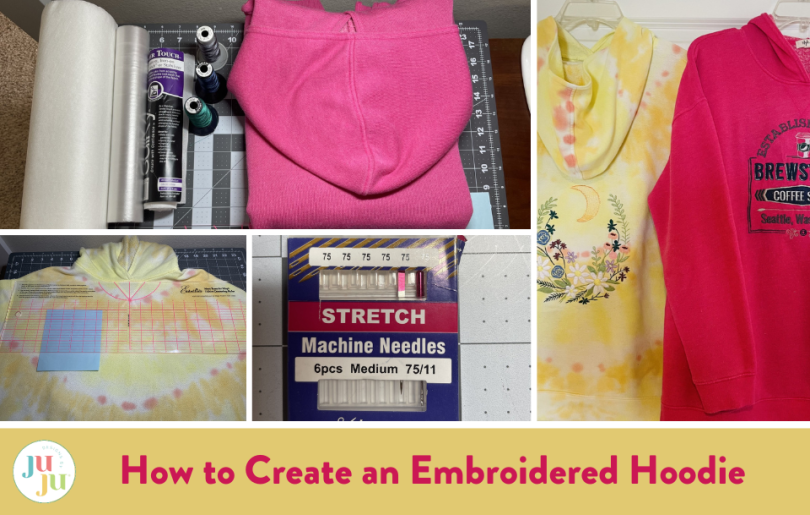
And create a design on a hoodie.
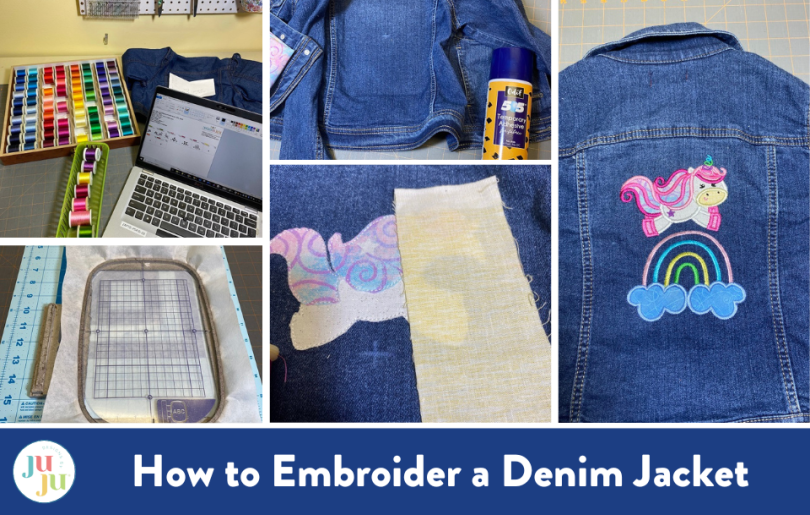
For a fun personalized look, embroider on your denim jacket.
Who doesn’t like to bring a handmade touch to their living space? Our home decor projects are all about combining creativity with comfort. From coordinated kitchen items to seasonal tablecloths and napkins, these ideas are designed to help you make your house feel more like home. Whether you're upcycling fabric, adding embroidery, or just starting your DIY journey, you'll find inspiration here to infuse your space with personality and warmth, one stitch at a time.
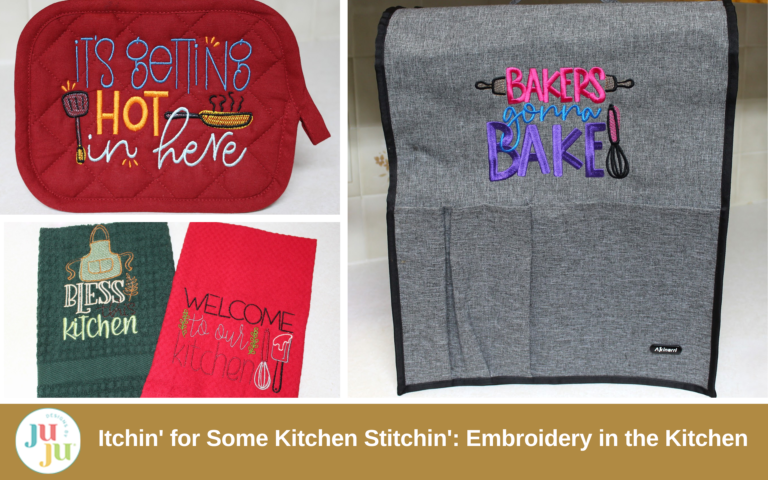
Coordinate your kitchen with embroidery.
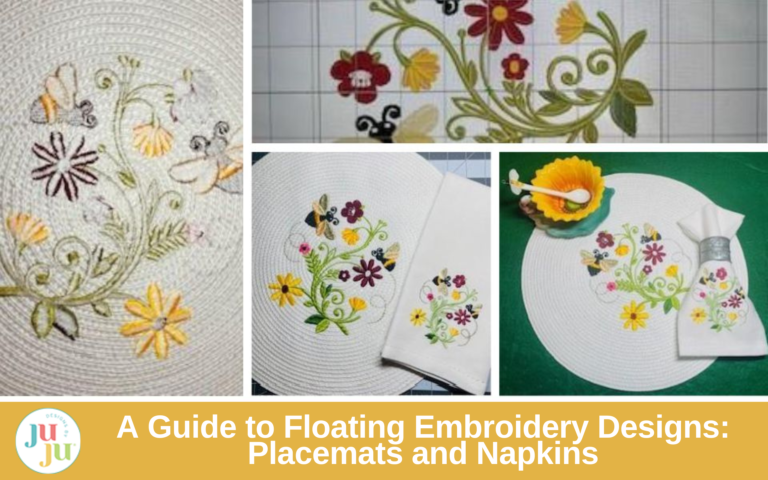
Here’s an article to help you get the basics on floating a napkin or placemat.
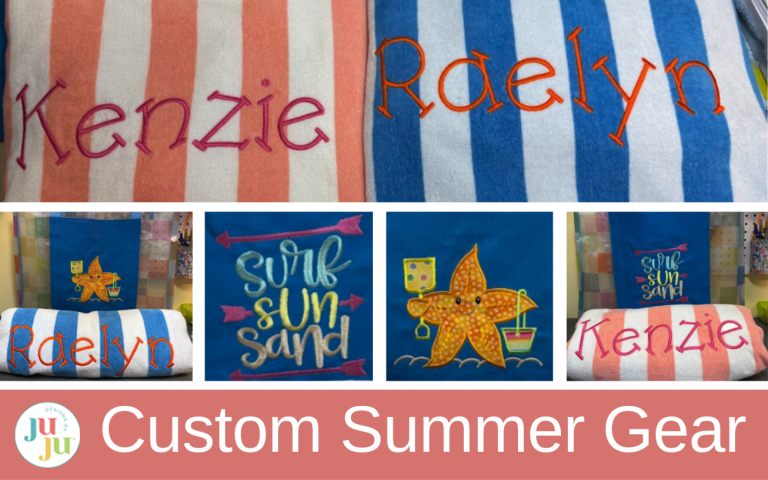
Personalized towels and totes for the beach are always fun.
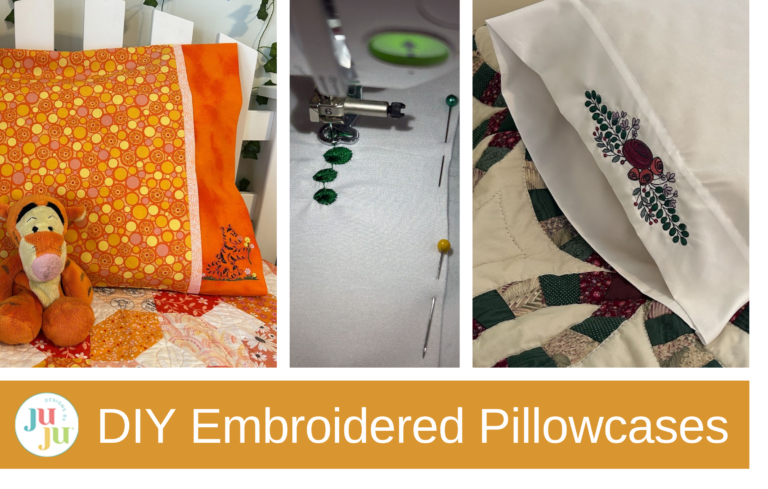
Store-bought pillowcases are an easy and quick way to decorate a bedroom.
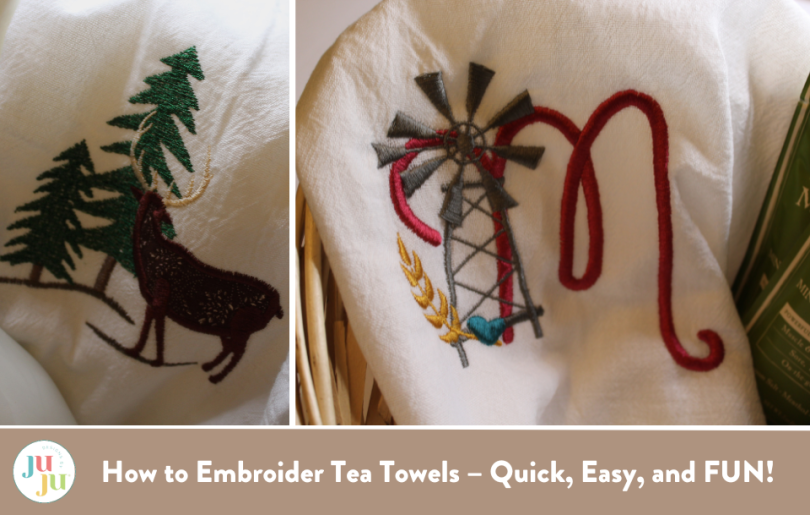
A tea towel is always a fun way to spruce up your kitchen.
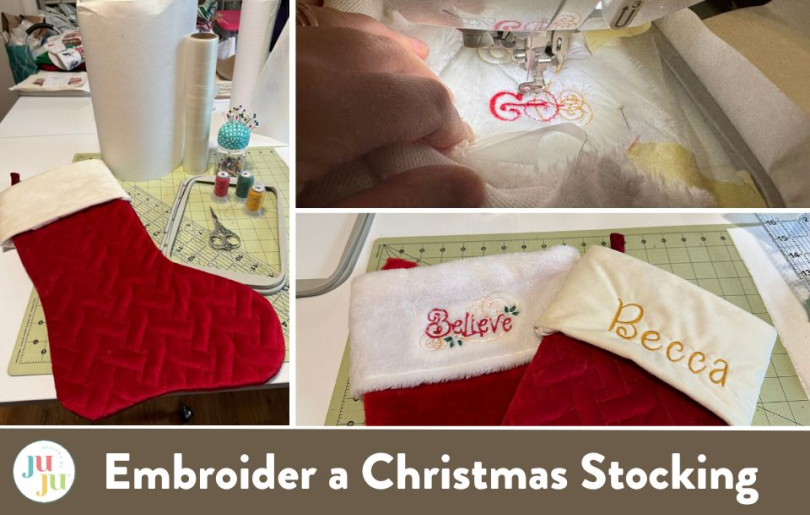
Personalize your Christmas Stockings.
Make a holiday tablecloth . . .
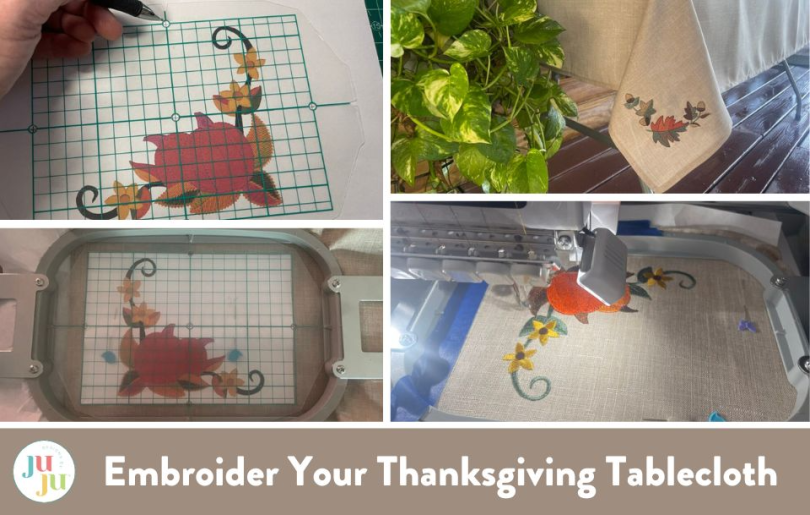
. . . and matching napkins.

Handmade gifts show thought, effort, and love. In this section, you’ll find creative and meaningful gift ideas perfect for any occasion, from birthday gifts, holidays, back to school, and “just because.” These ideas will help you create something that feels truly special and one-of-a-kind.
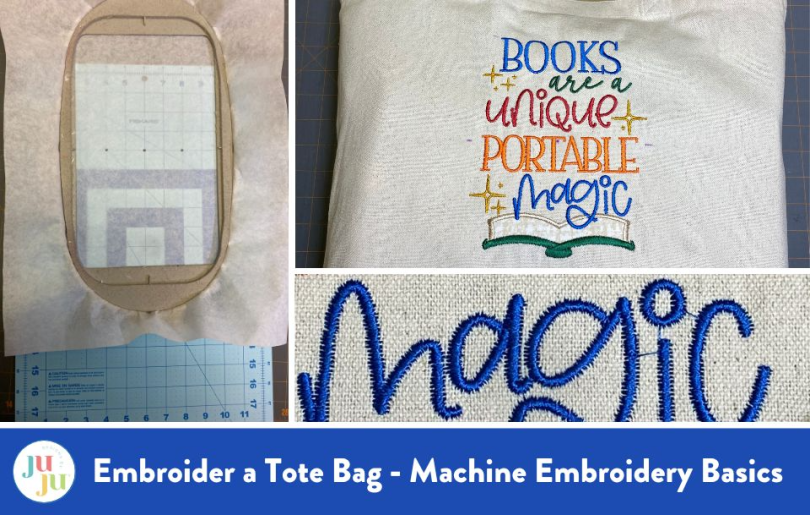
Here’s how to embroider a tote bag. Use one of these as the wrapping for another project!
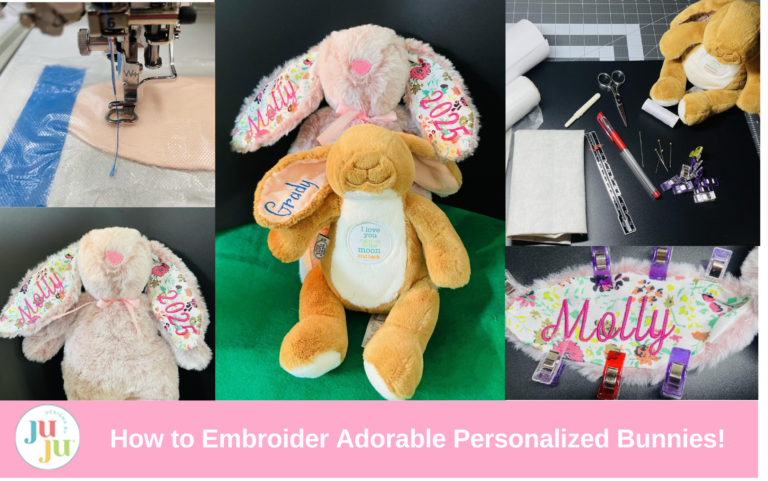
Personalizing a stuffed animal is a great gift idea.
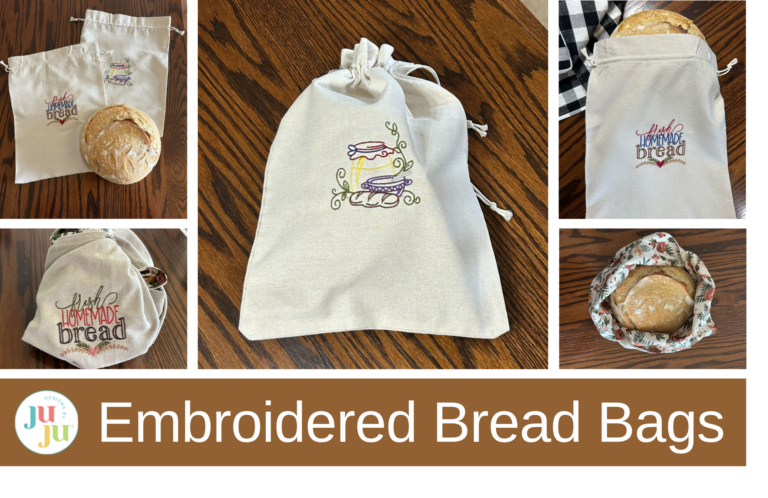
Check out these embroidered bread bags.
Send the kids off to school in style with pencil cases and totes.

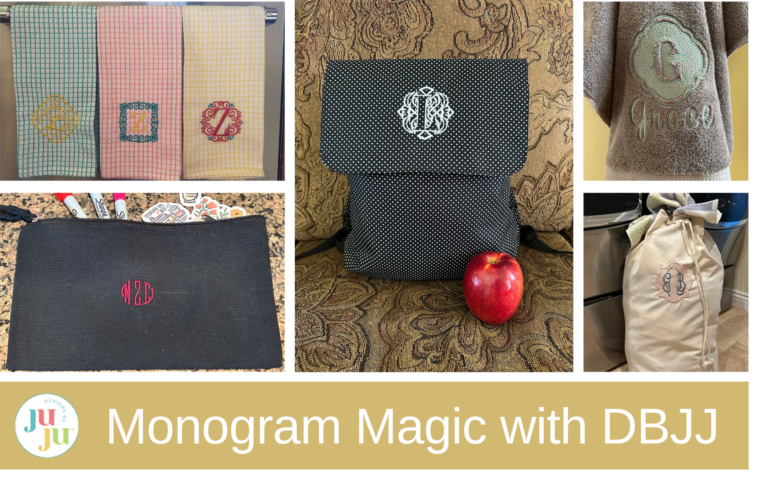
Use a monogram to personalize your gifts.
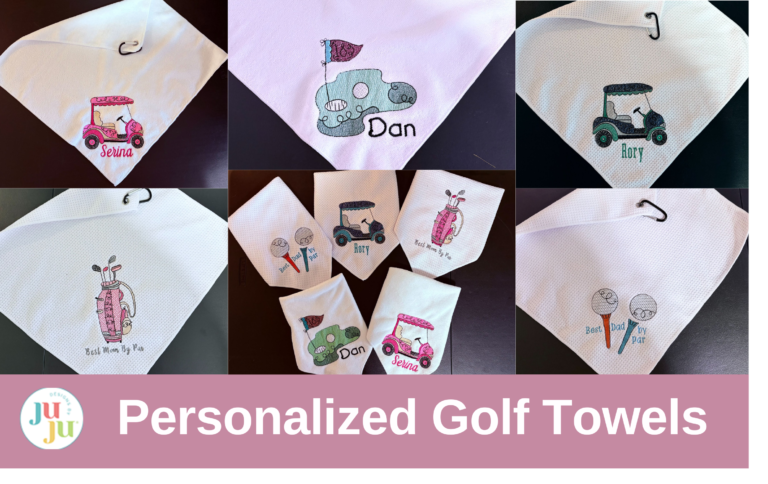
If you have a golfer in your life, make them some personalized towels!
Applique on premade items is more than just a sewing technique; it’s the perfect way for us to add our personality to an already existing item. Whether you're dressing up a hand-me-down or stitching up a heartfelt gift, remember every piece becomes a canvas for creativity. Every stitch will help tell the story of your unique project.
Looking for other ideas and inspiration? Join the Designs by JuJu Embroidery Blessings Facebook Group to see lots of other project ideas, and share your own creations using the hashtag #designsbyjuju. We can’t wait to see what you make!
Remember to check out the next post in our Applique Made Easy series: "Applique Made Easy - Creative Applique Ideas: Adding Personality to Your Embroidery,” available September 11. We’ll show you how to take your projects up a notch using fussy cutting and creative embellishment techniques. Join us!
