Toggle Nav
 Inspire.
Create.
Stitch.
Inspire.
Create.
Stitch.
Search
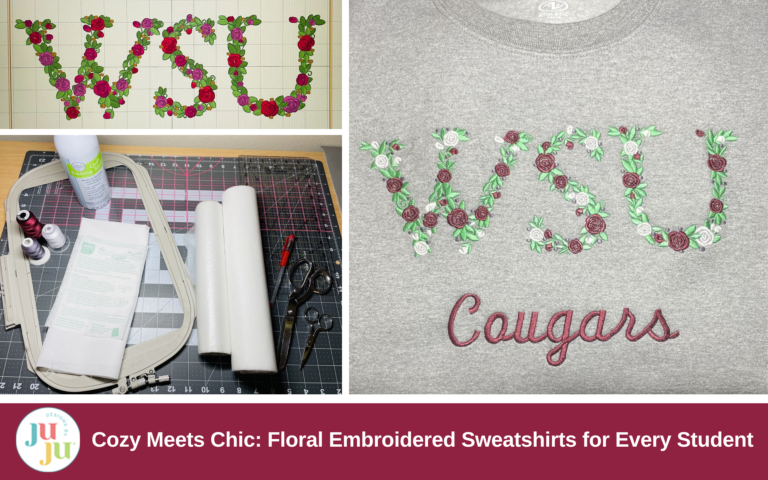
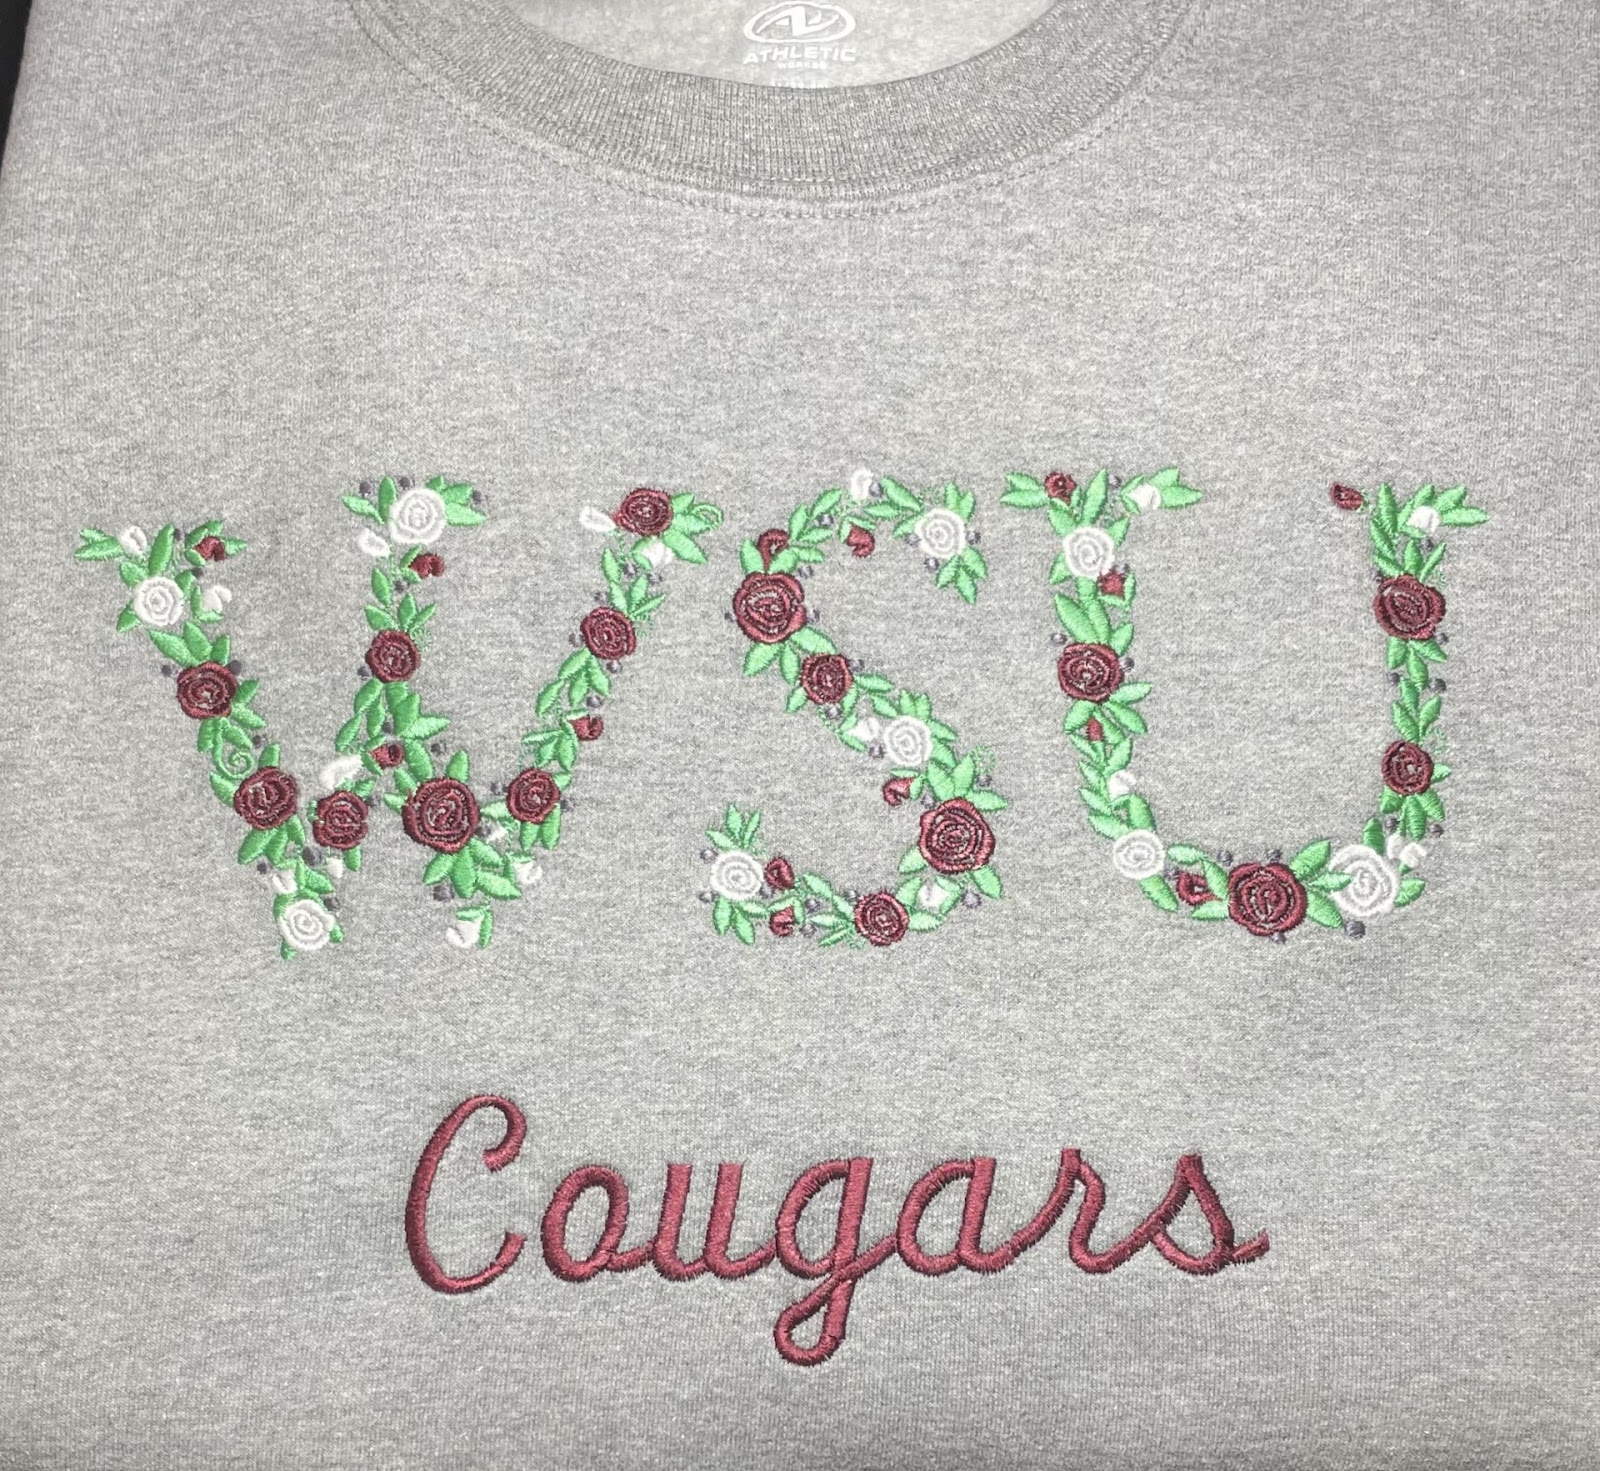
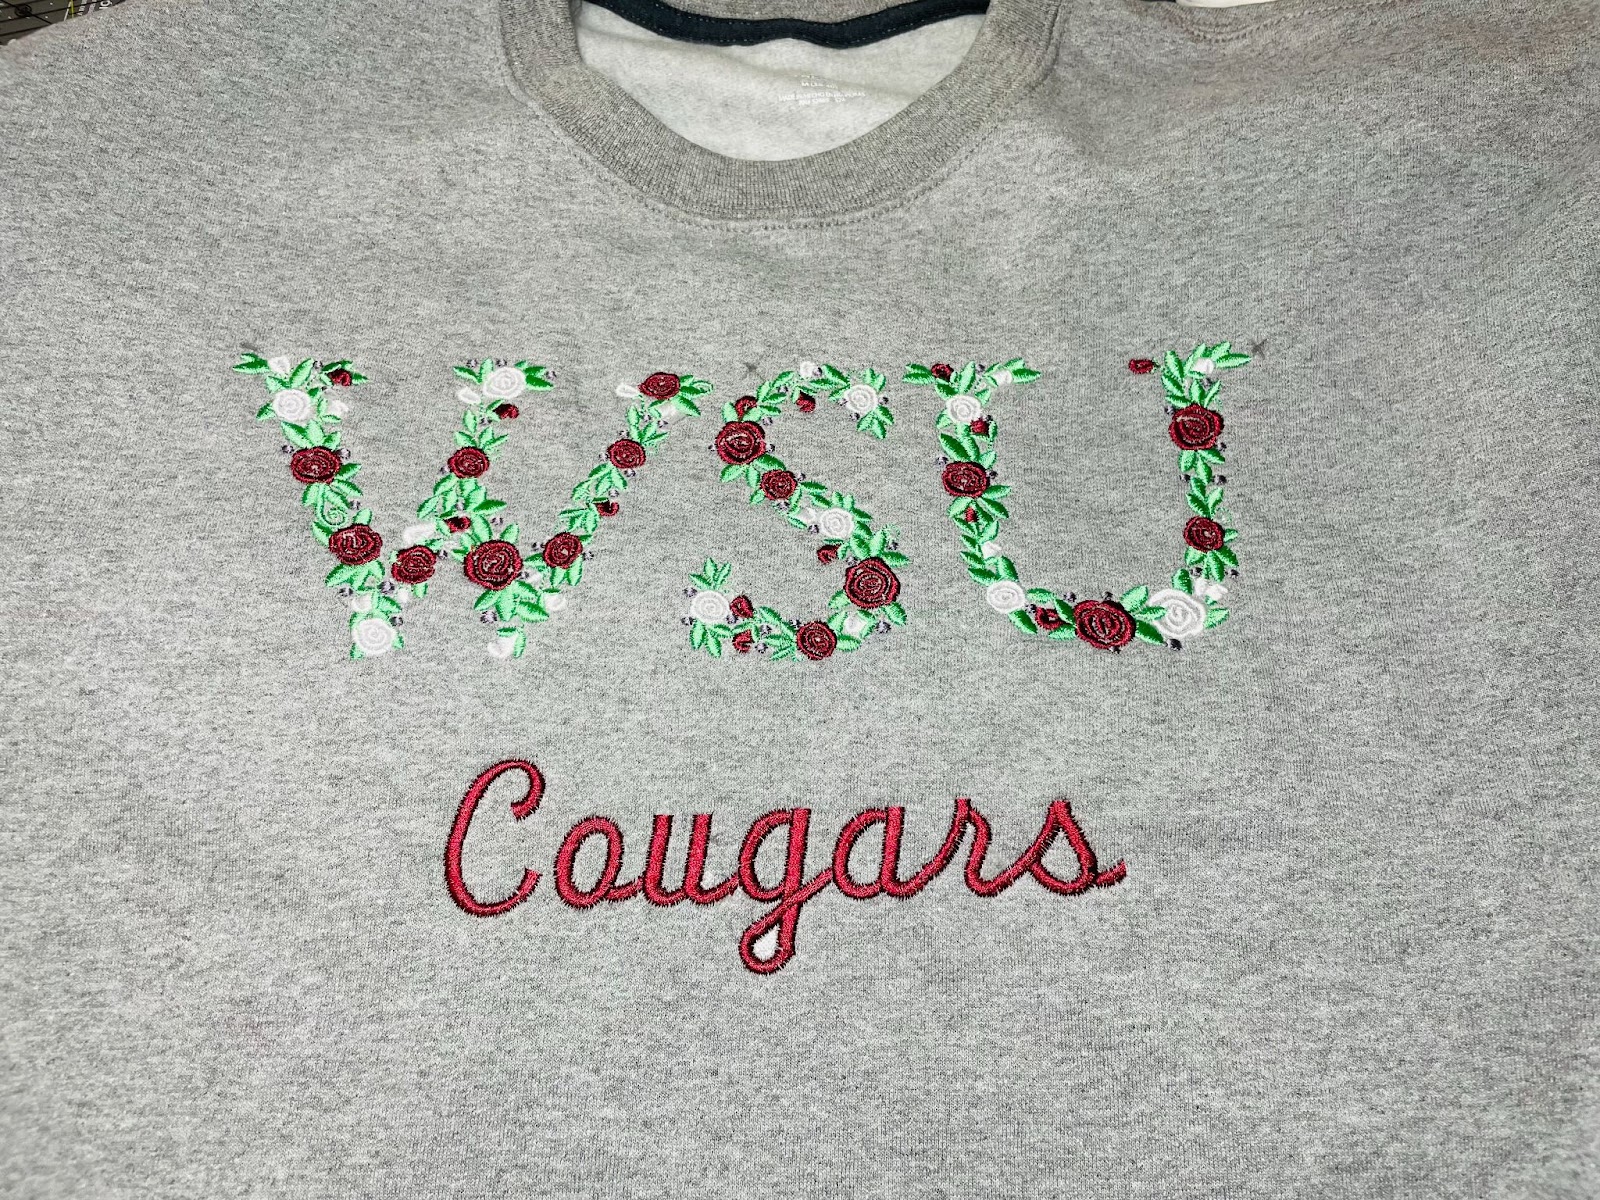
Do you have a favorite college or fond memories of those high school days? Are you looking to show some school spirit with an original sweatshirt instead of one off the rack? These embroidered school sweatshirts with a unique floral design will quickly become your favorite to cozy up with. Want to elevate your gift giving? Make one for that special student in your life. Why pay someone else when you can make it yourself? In this tutorial, I will show you step by step how you can embroider your own floral school sweatshirt.
Check out the DBJJ team’s favorite supplies on the Designs by JuJu's Amazon page.
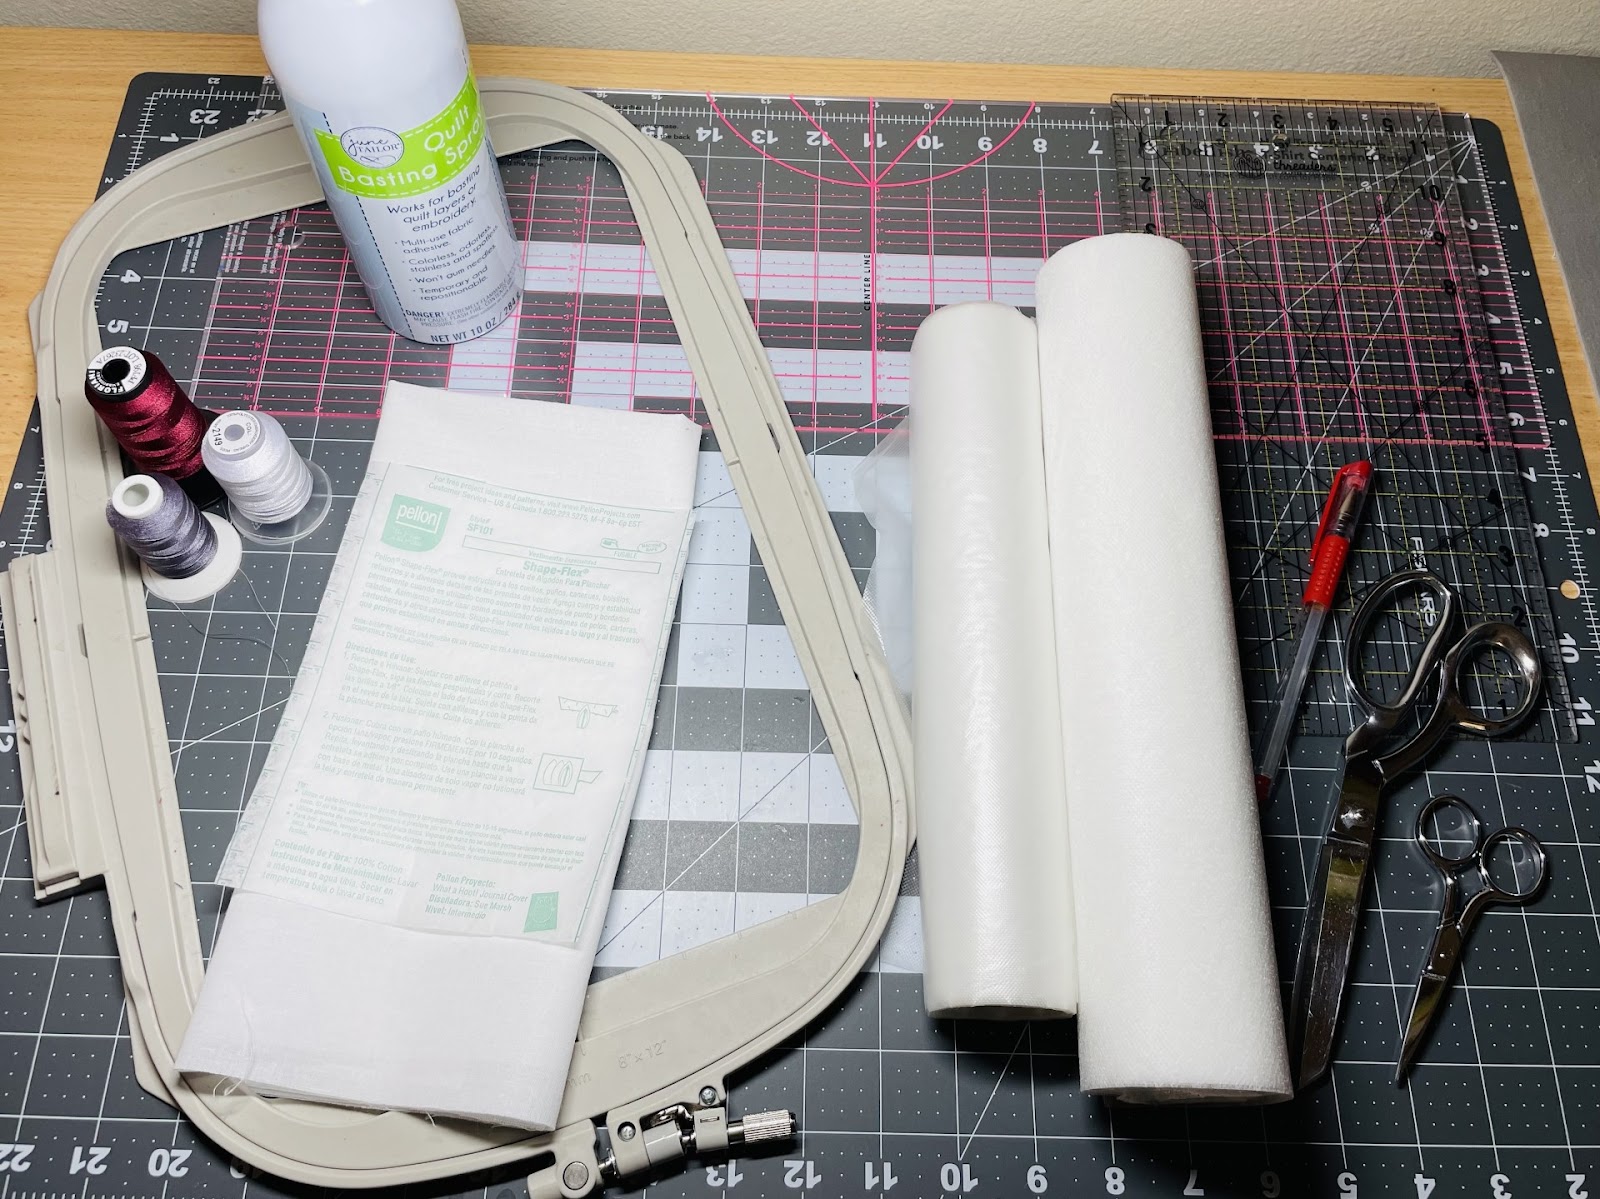
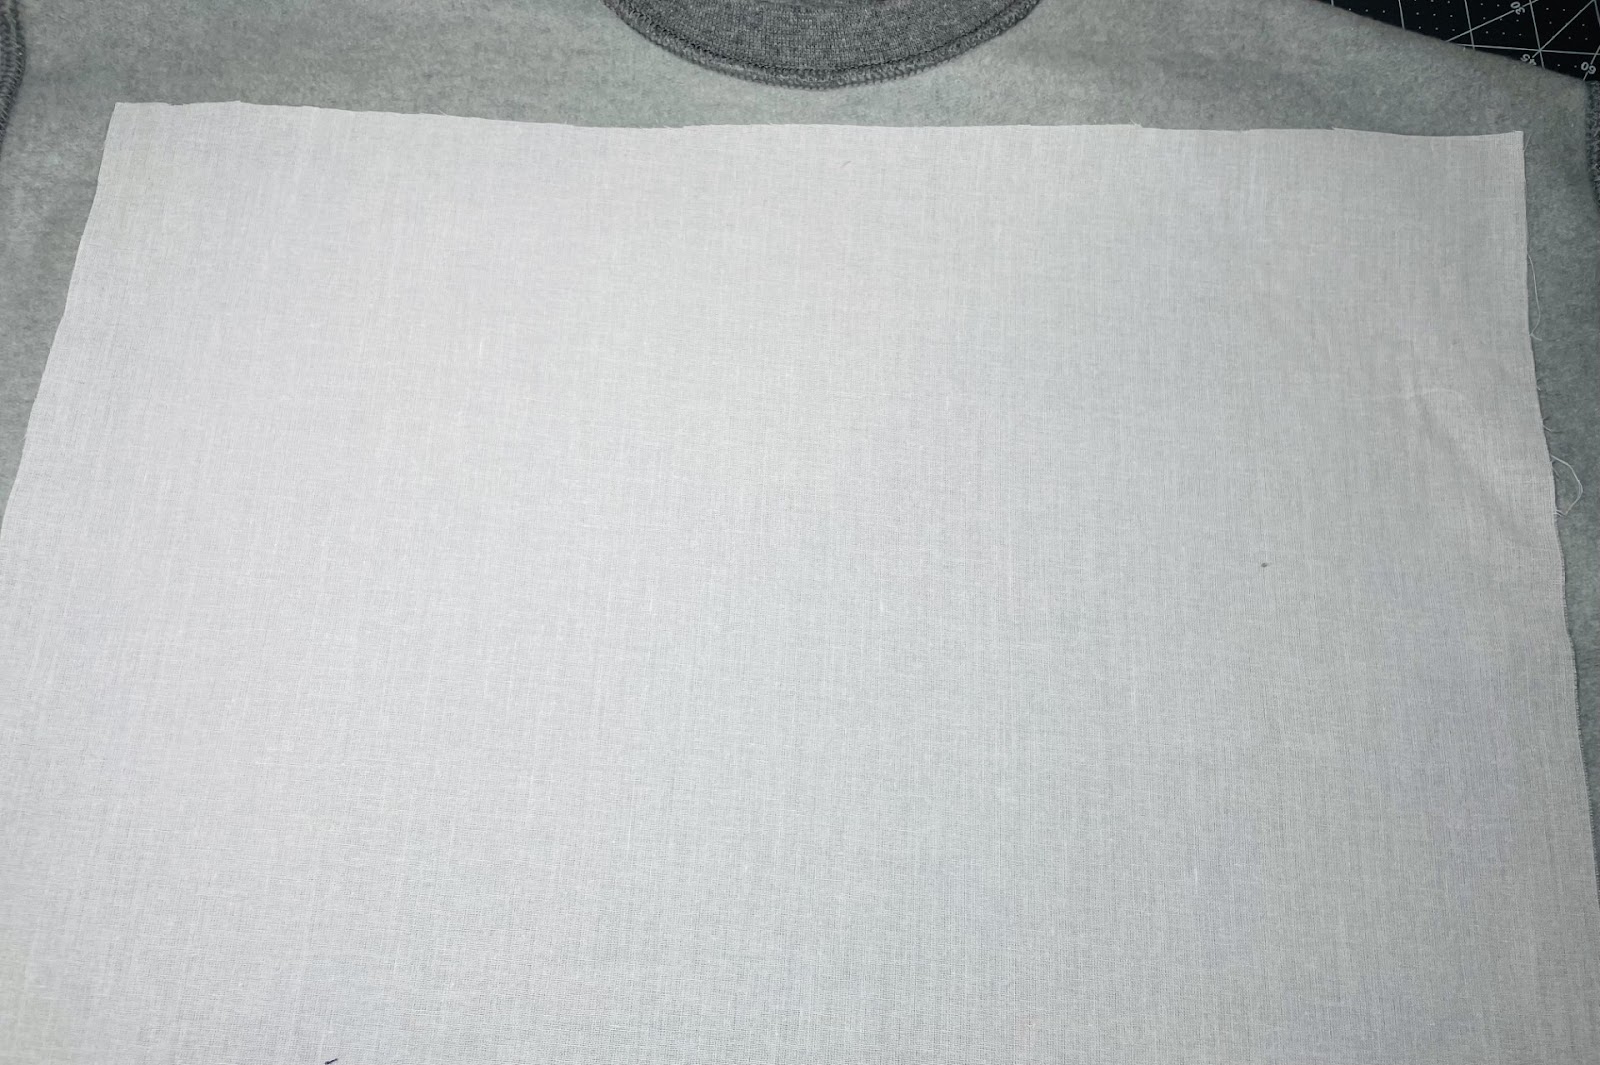
Before you begin, wash, dry, and iron out all wrinkles. This will prevent future shrinkage. Iron SF101 to the inside front of the sweatshirt. This is an all-purpose fusible interfacing that will add support to the fabric and help prevent puckering. I just lightly iron this on so when I am finished with my design I can trim it away along with the stabilizer.
Now let’s set our machine to the correct settings. Doing this will also set you up for success.
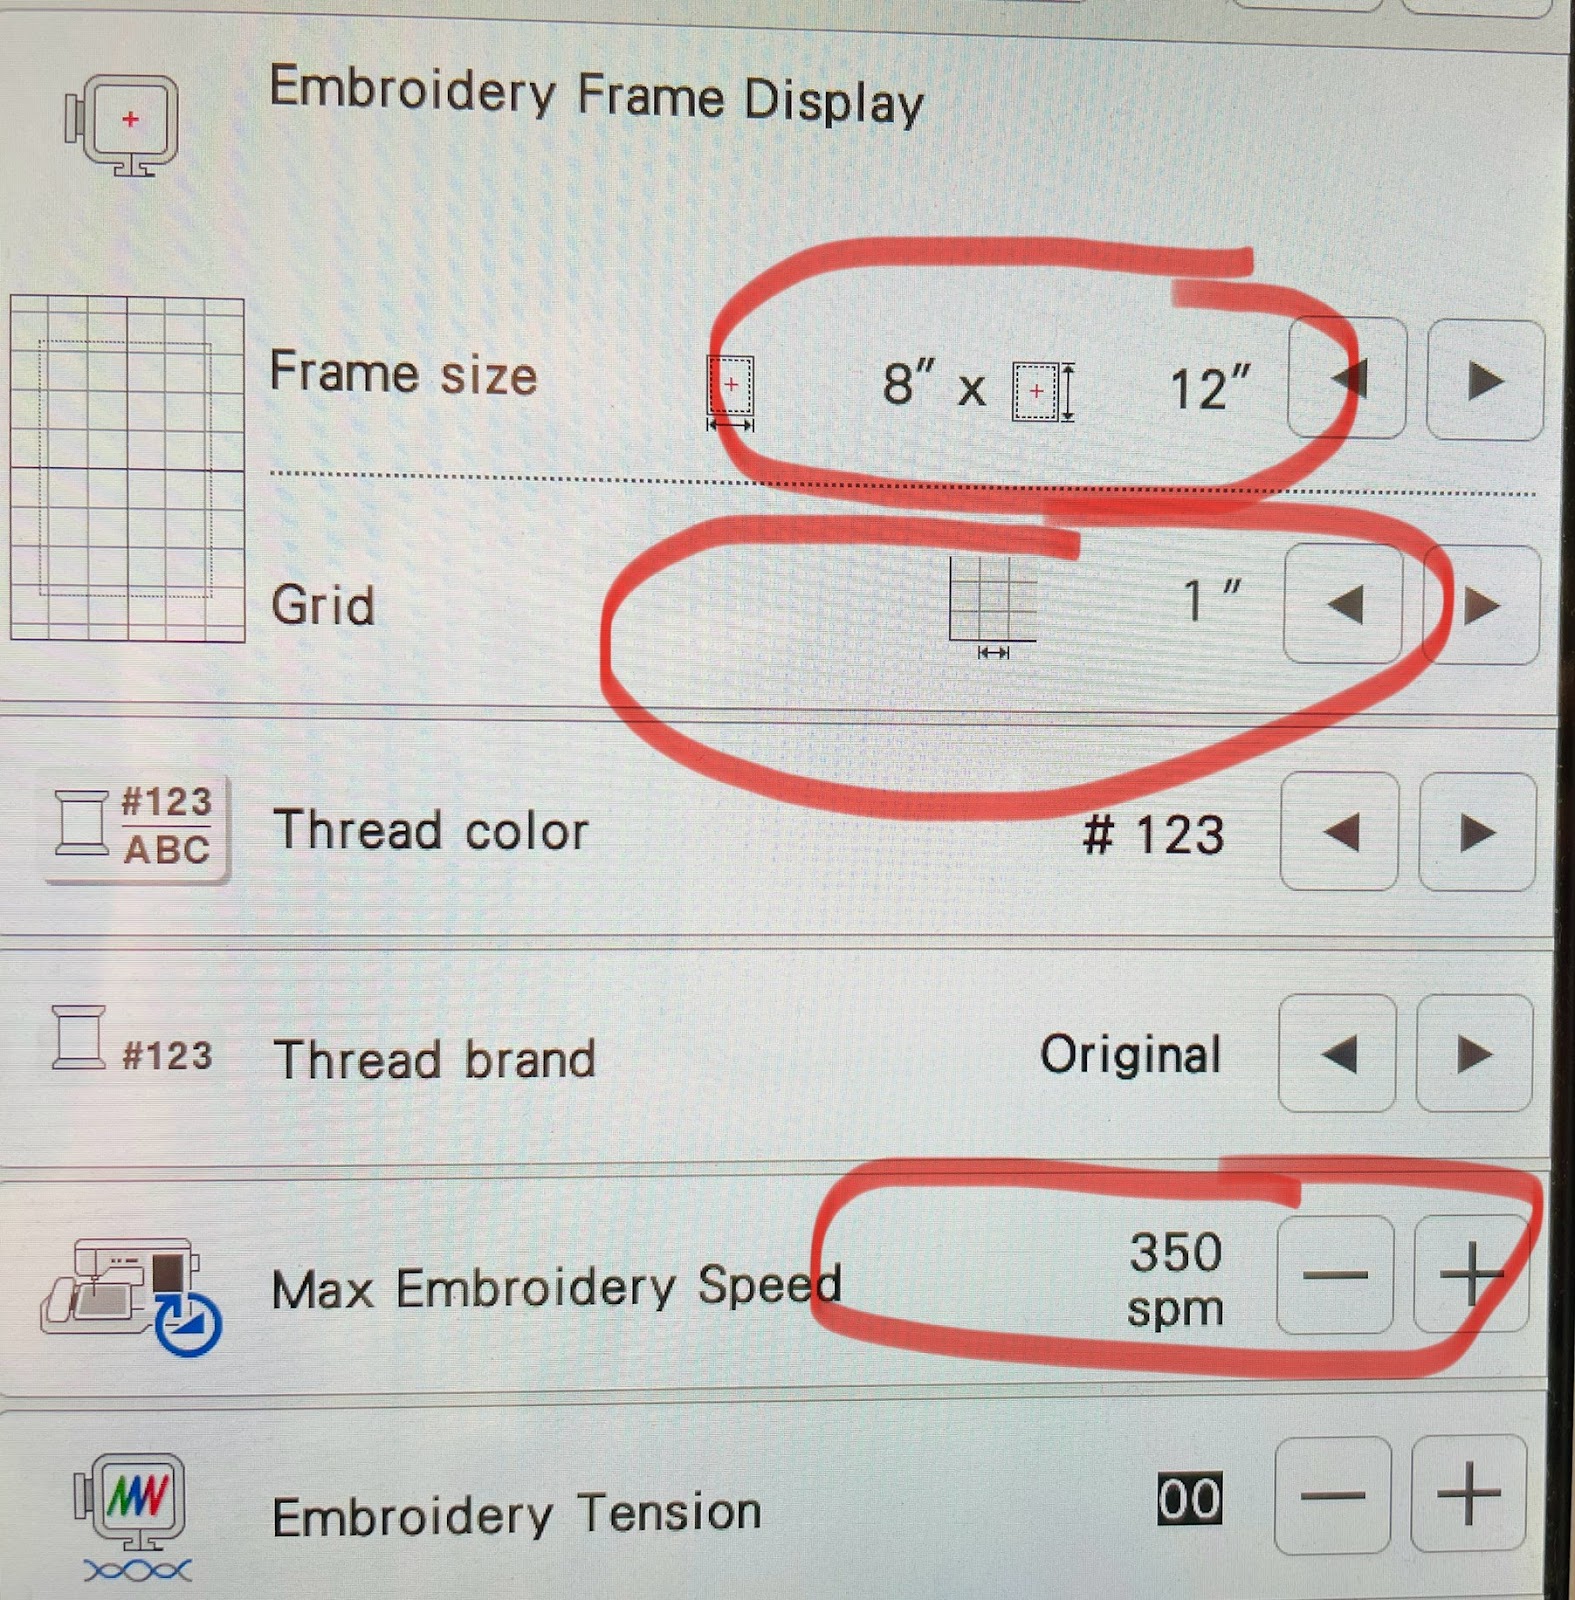
Open up your Embroidery Frame Display Screen. (My machine is a Brother Stellaire; your screen may look different. If you are unsure where to find this setting, check your manual.) Change your frame size to your largest hoop or the hoop you will be using. Add a 1” grid to the screen, and slow your machine down to 350 spm. Slowing down your machine can prevent puckering, help with tension, and allow the fabric to lay more naturally.

Now let's talk about placement. You will need to determine how much space you have to work with on the sweatshirt. You can do this in a few different ways.
Method 1: Lay your sweatshirt flat. Measure the chest width of the sweatshirt. Do not measure too close to the side seams. I recommend giving yourself at least 4” between the edge of the design and the side seam on each side. Typically that leaves you with anywhere from 10” to 14”, depending on the size of the shirt.
Method 2: This one might seem odd but is actually my favorite. Put the sweatshirt on. Stand in front of the mirror. This will show you how the sweatshirt hangs once it’s on the body. Pin or mark across the top where you want the design to be.
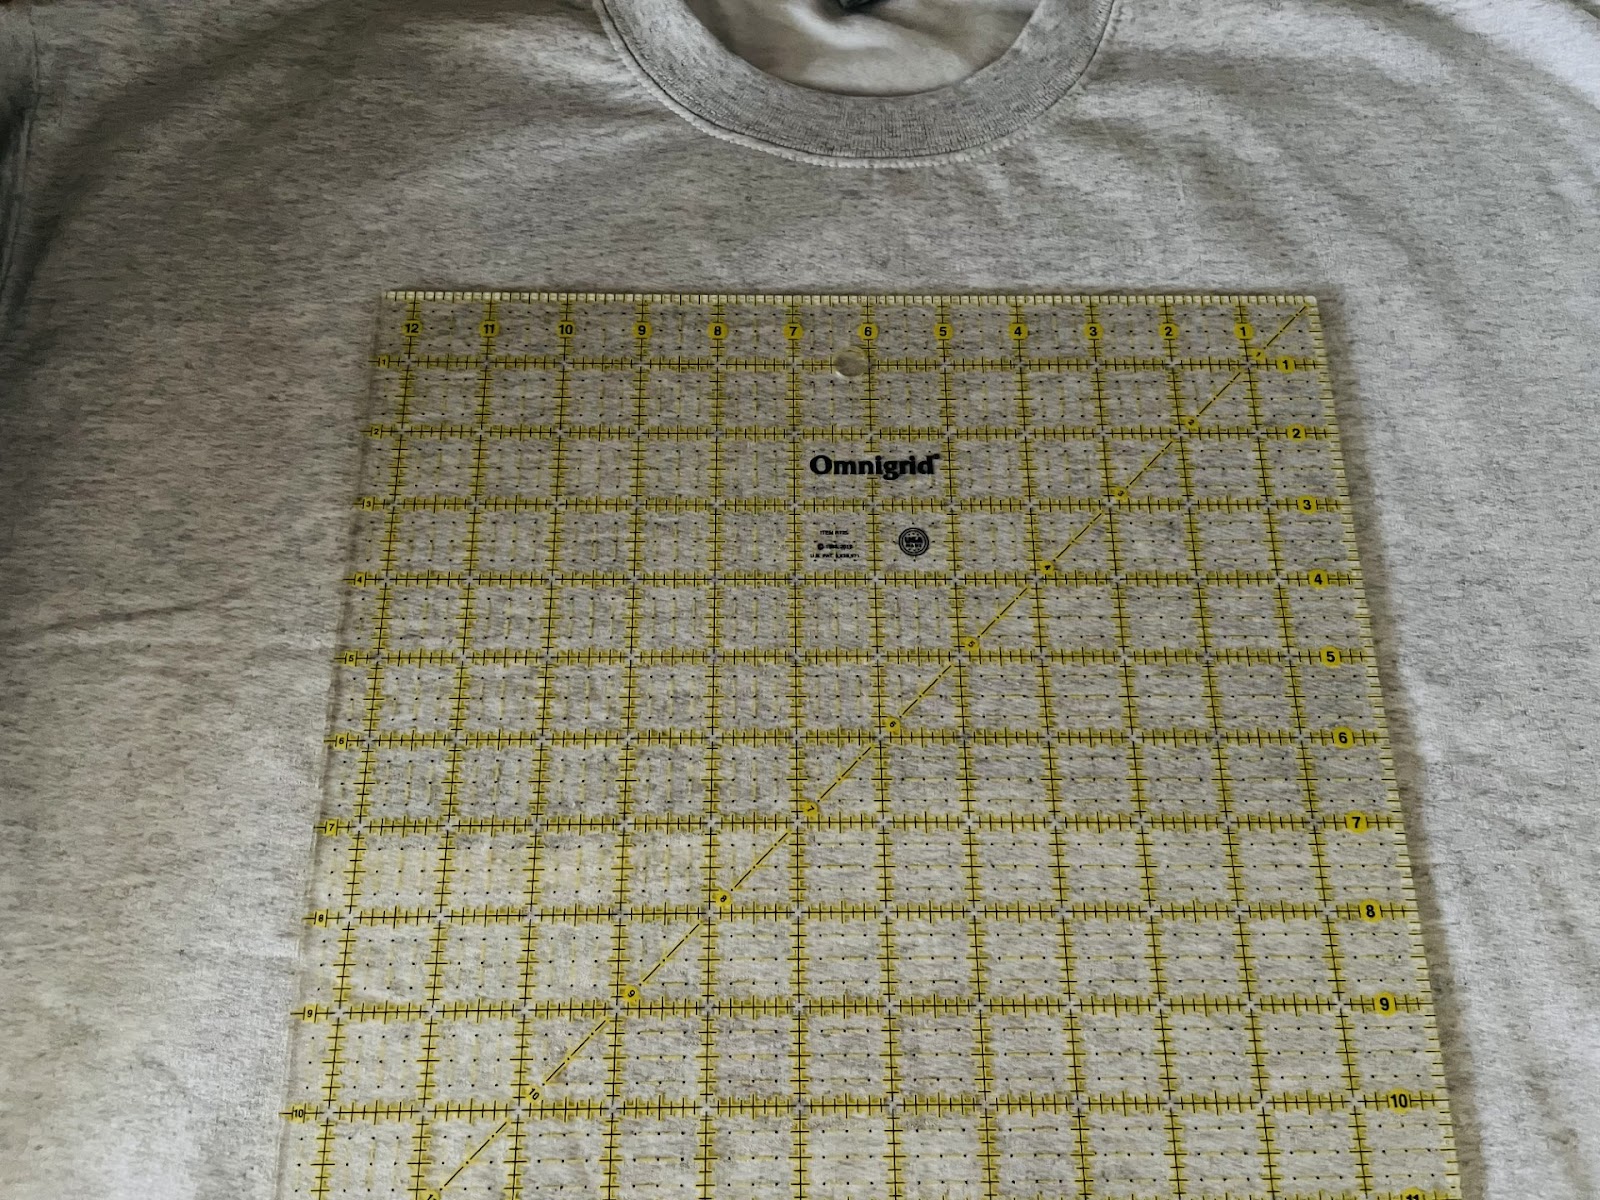
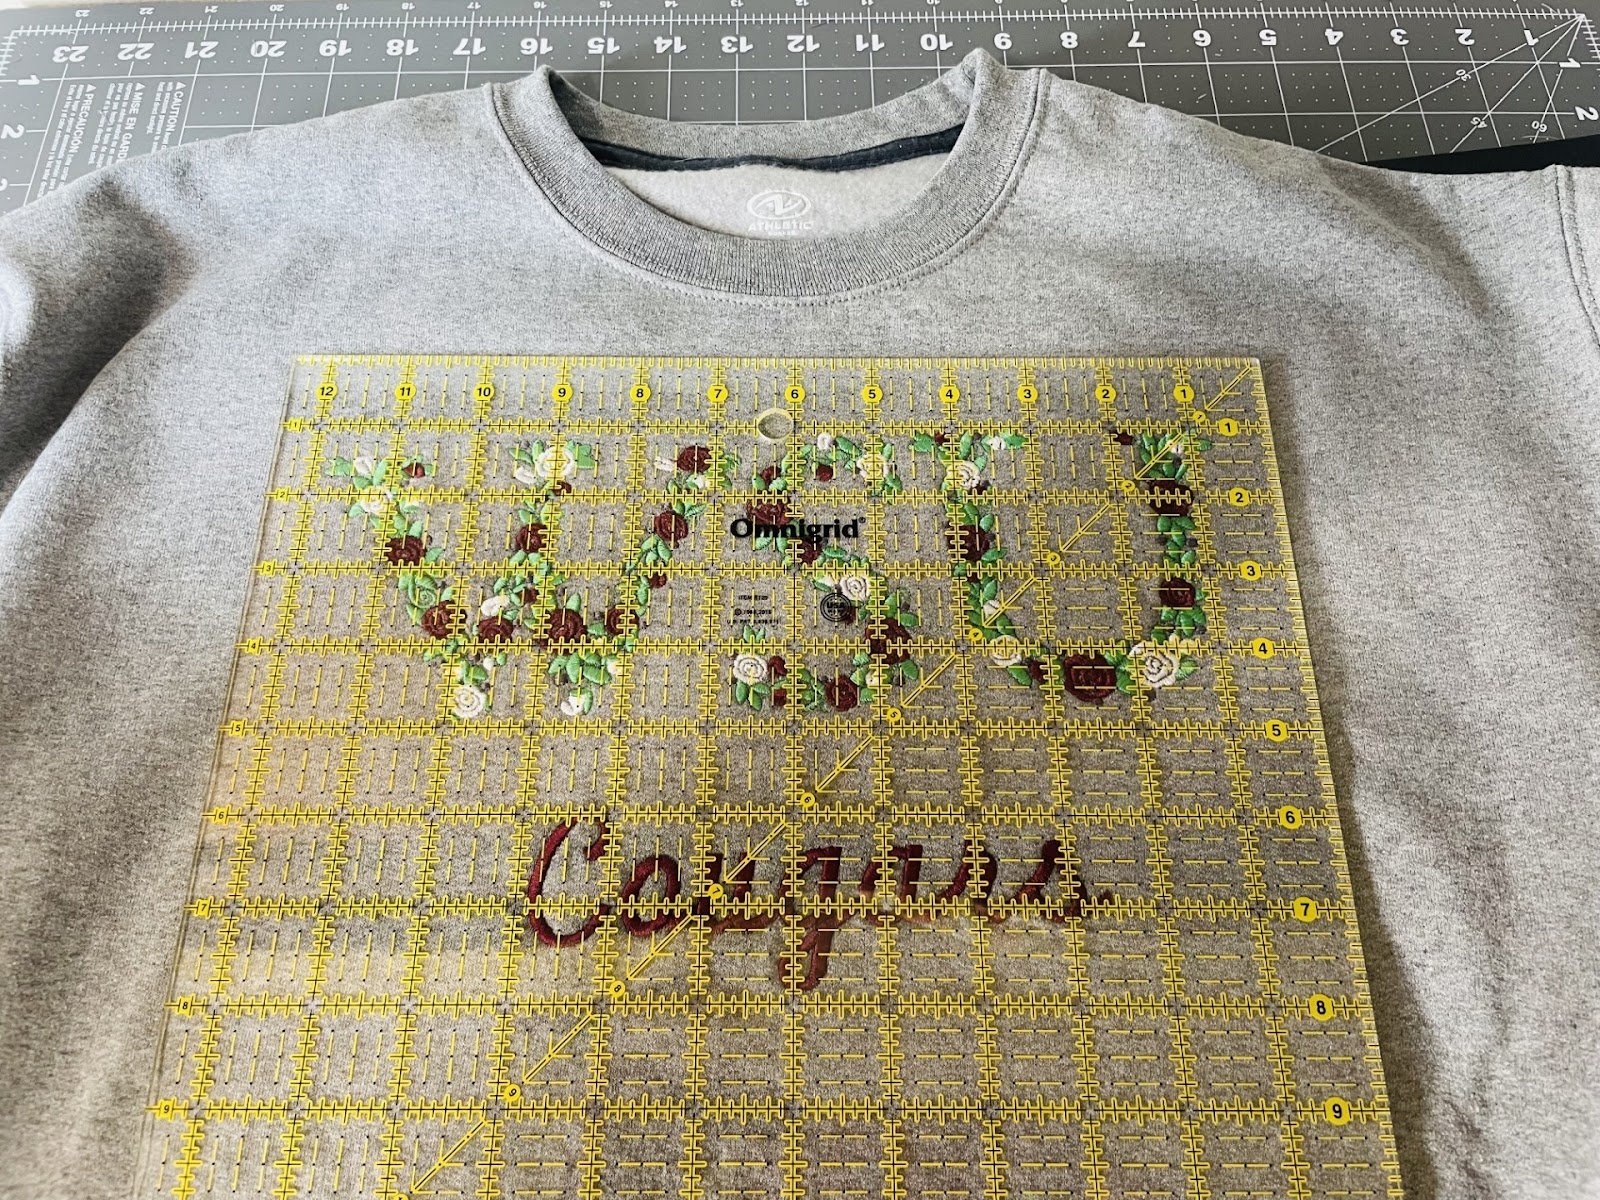
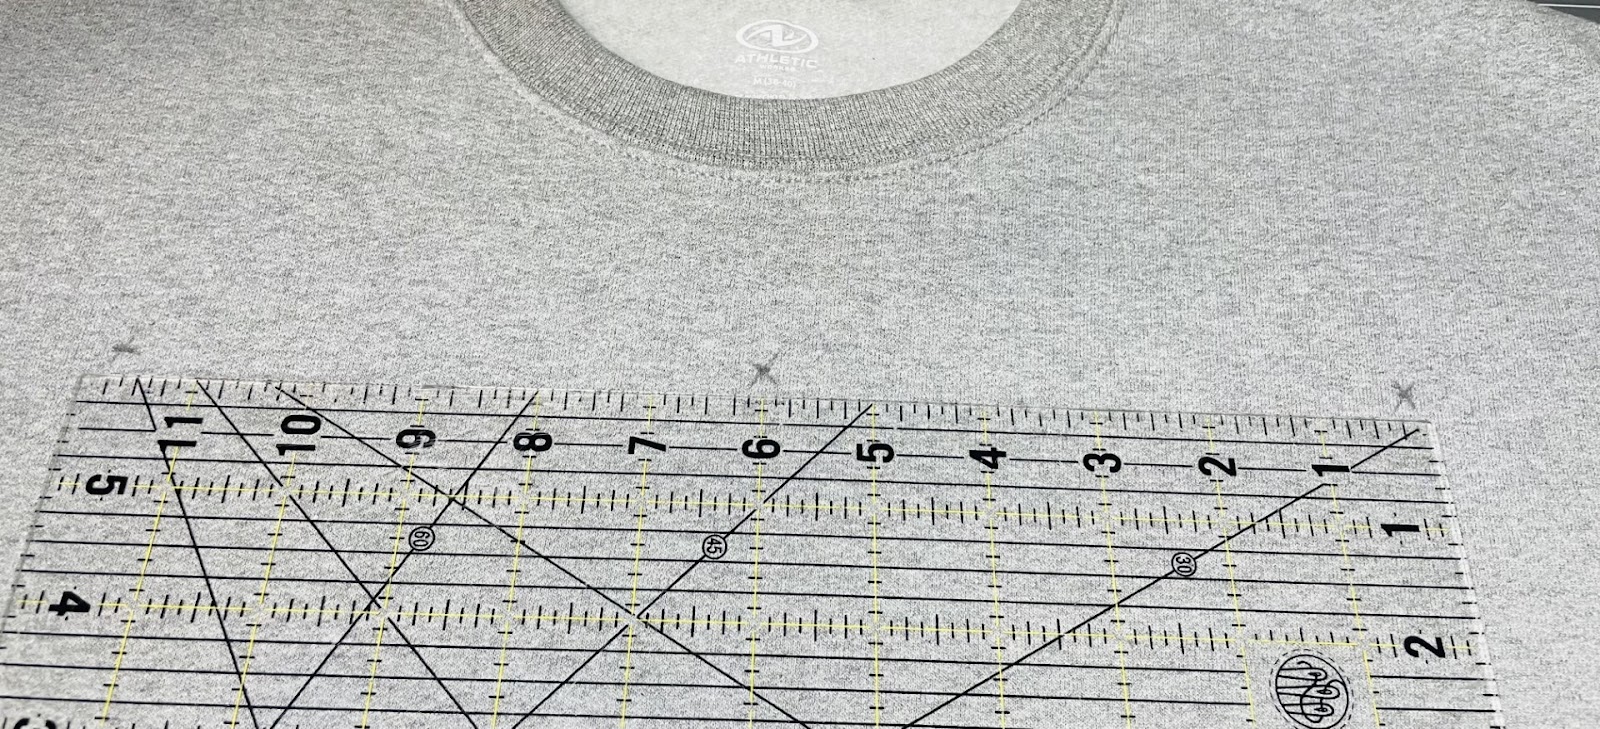
Method 3: Use a large, square quilting ruler. This will give you a good idea of how big the design space will be. These are before and after pictures using this method.
Once you have determined how much design space you have to work with, divide this number by the number of letters you are going to use. For example I have 12” across to work with and will be using three letters. So I know I will need to use the 3” or 4” letters.
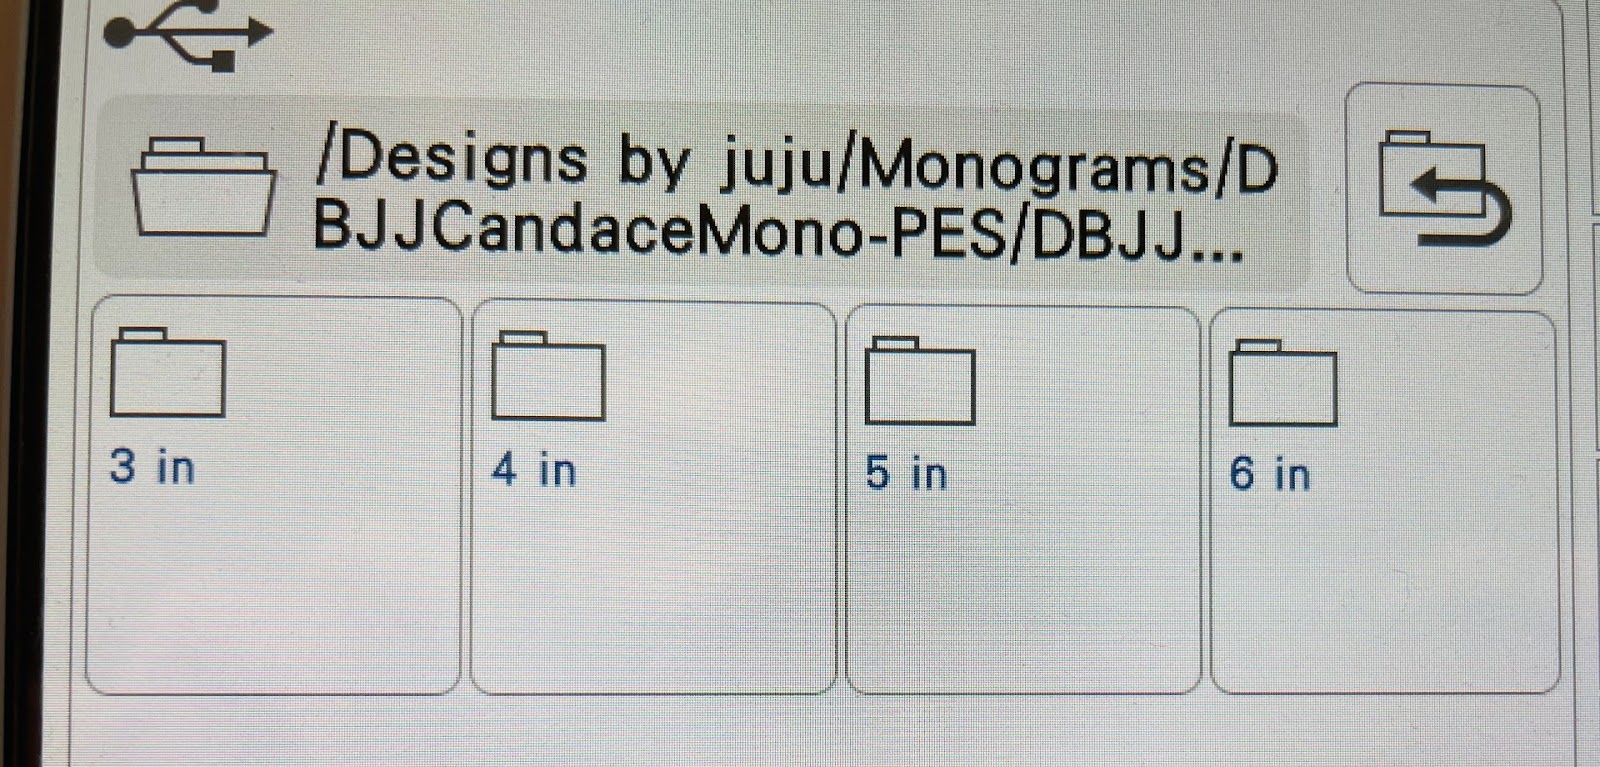
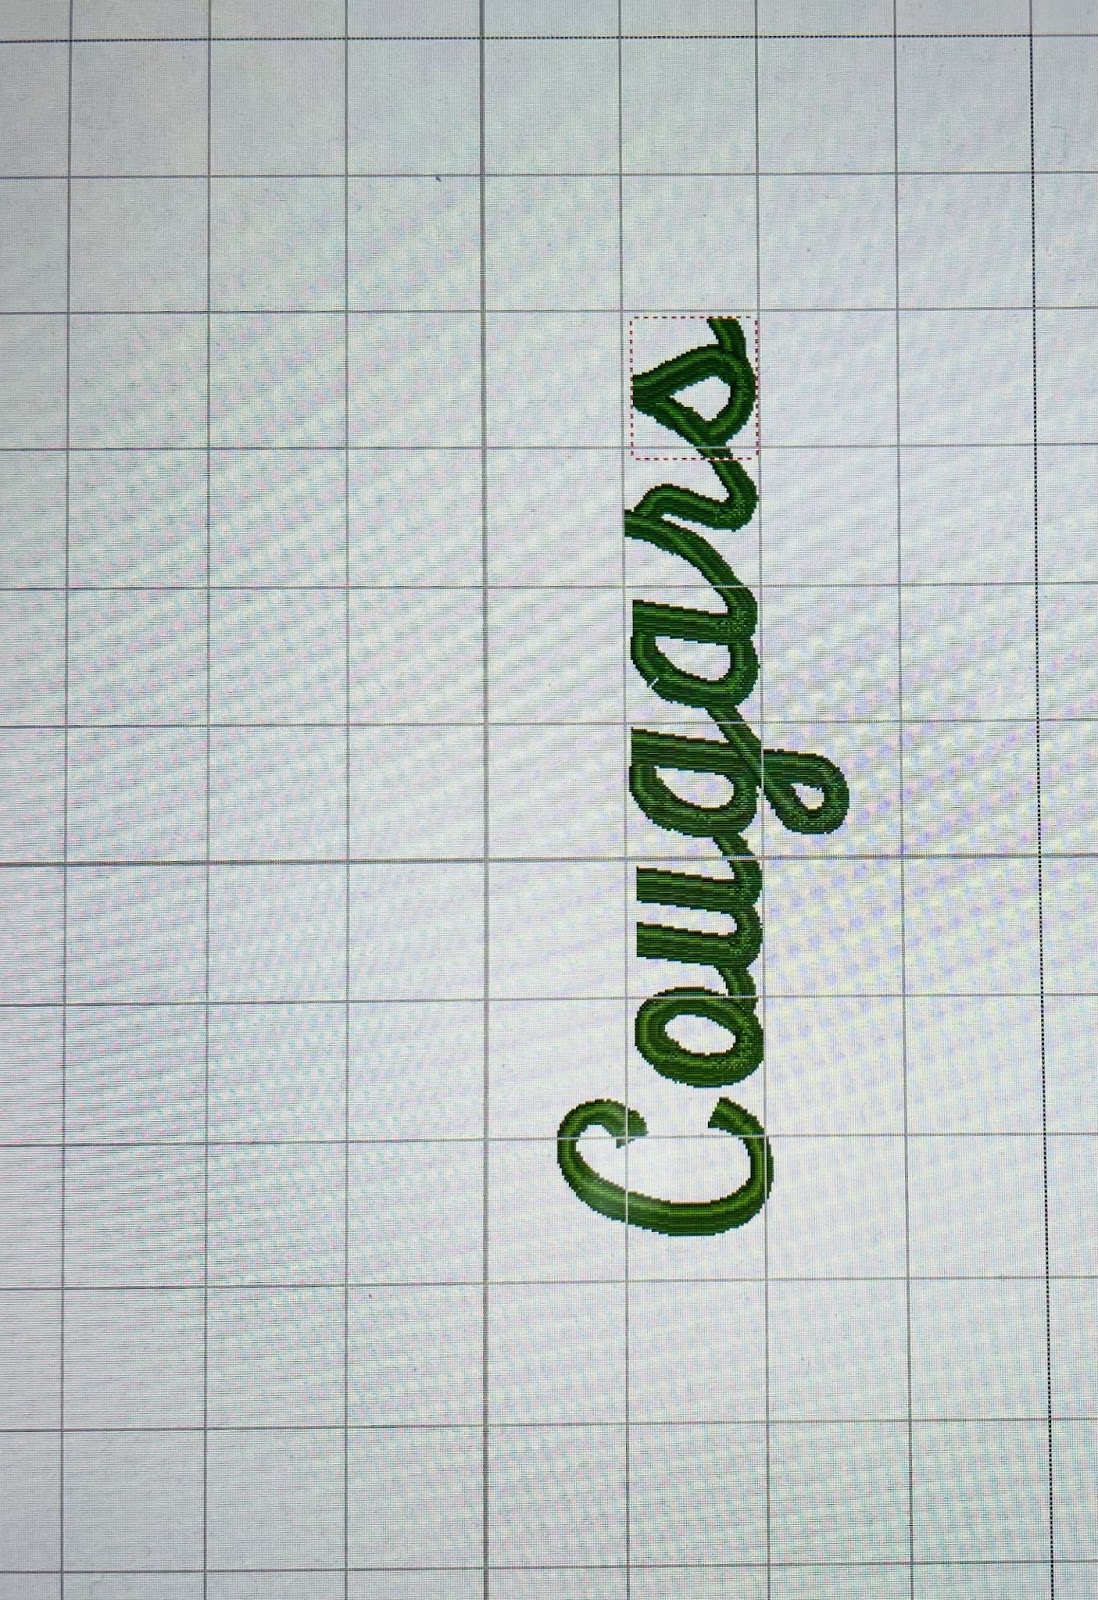
Load the Candace Monogram by Designs by JuJu onto your machine. These letters come in multiple sizes ranging from 3” to 6”. Depending on the size of the design space on your sweatshirt and the number of letters you will be using, choose the size that will work best for you. (Note: The inch size of the letters refers to the height of the letter, not the width. The width varies with each letter.) Once you have all the letters loaded, add up the width of each letter to determine the size to work with. You may want to load and play with the different sizes until you are satisfied. I will try the 4” letters and see if they will fit my space.
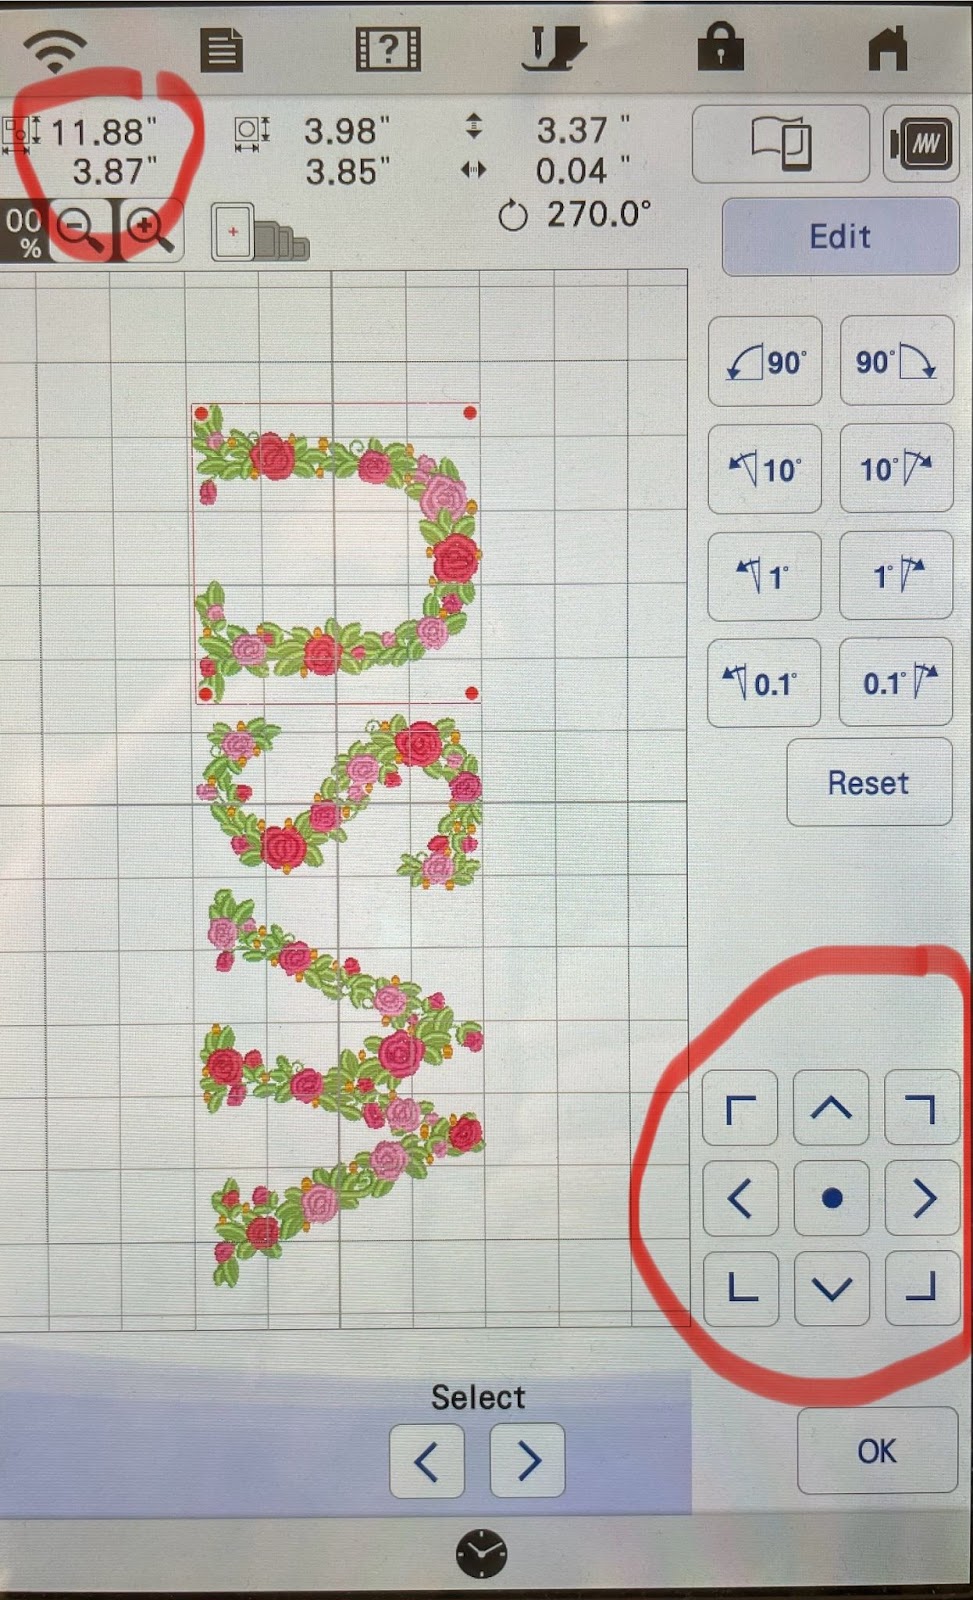
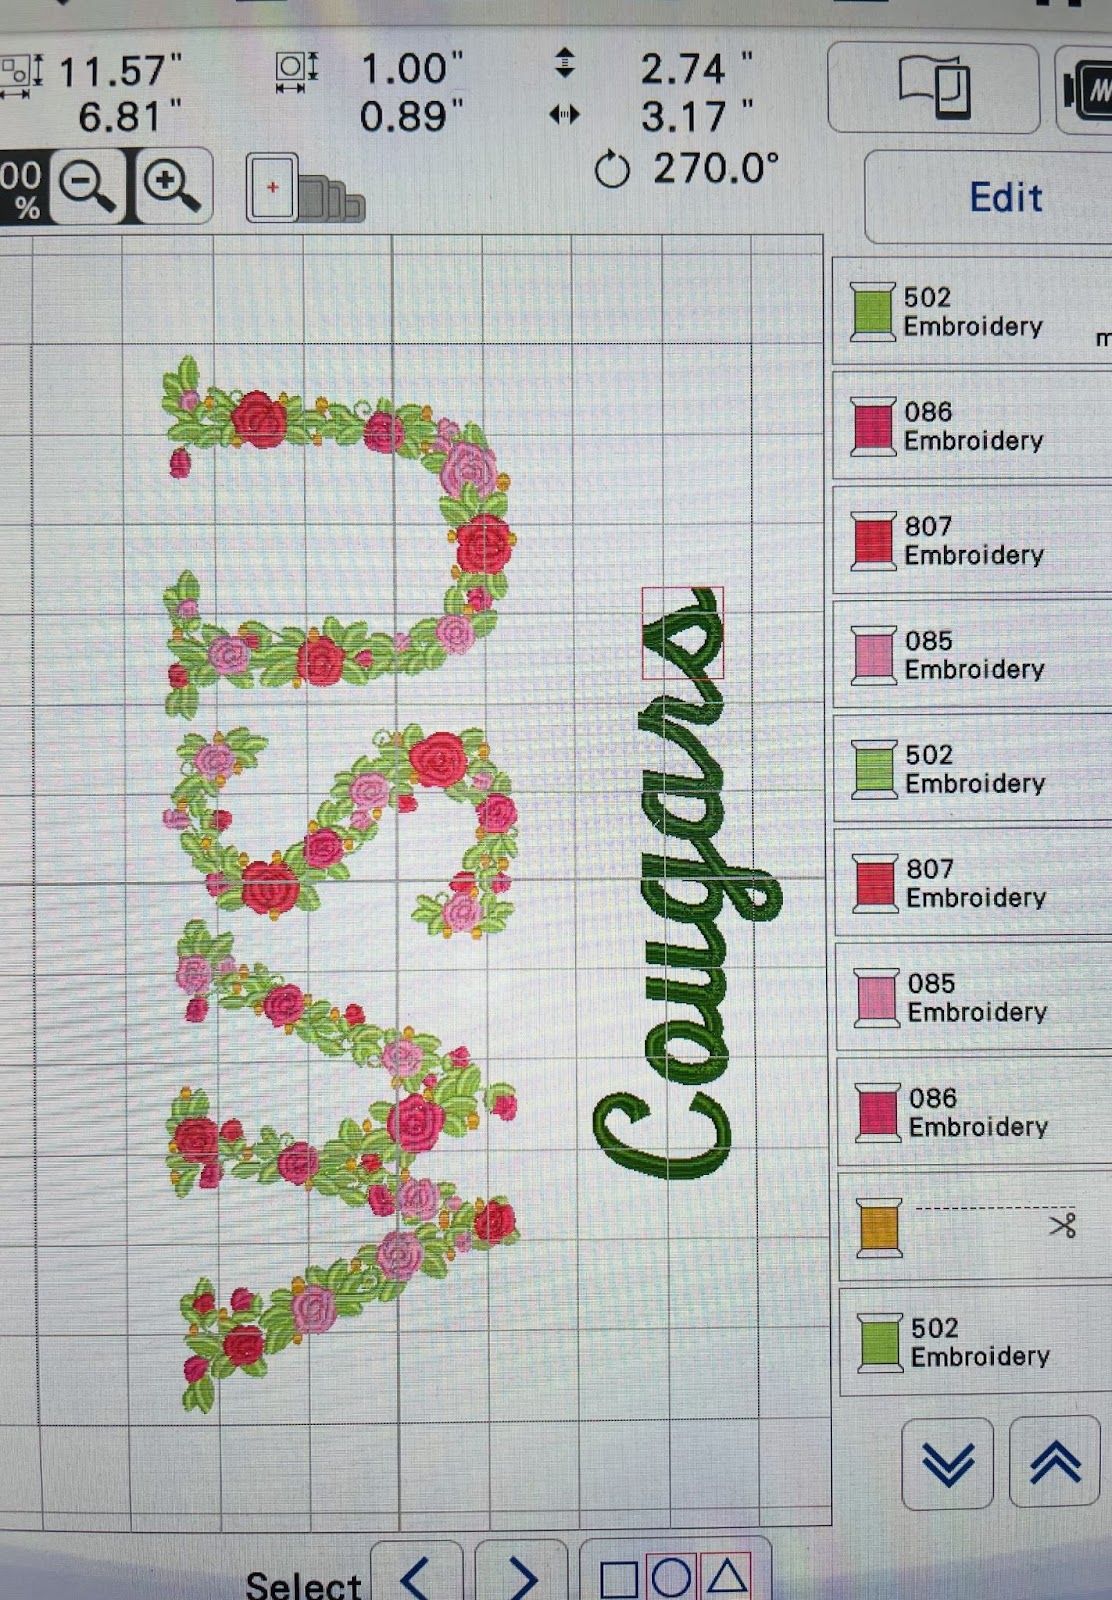
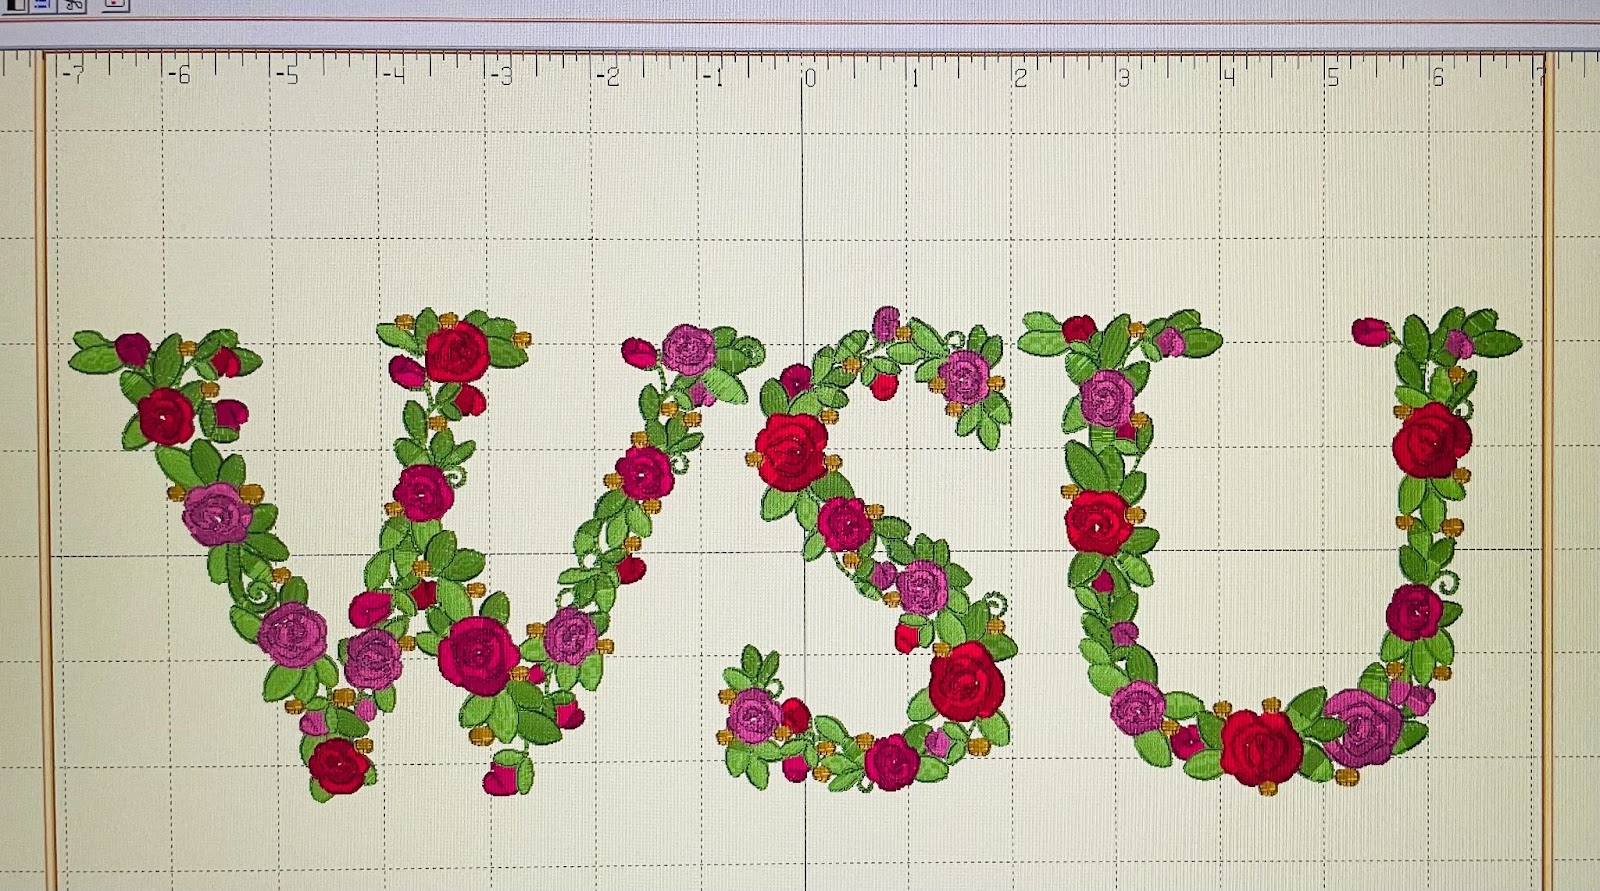
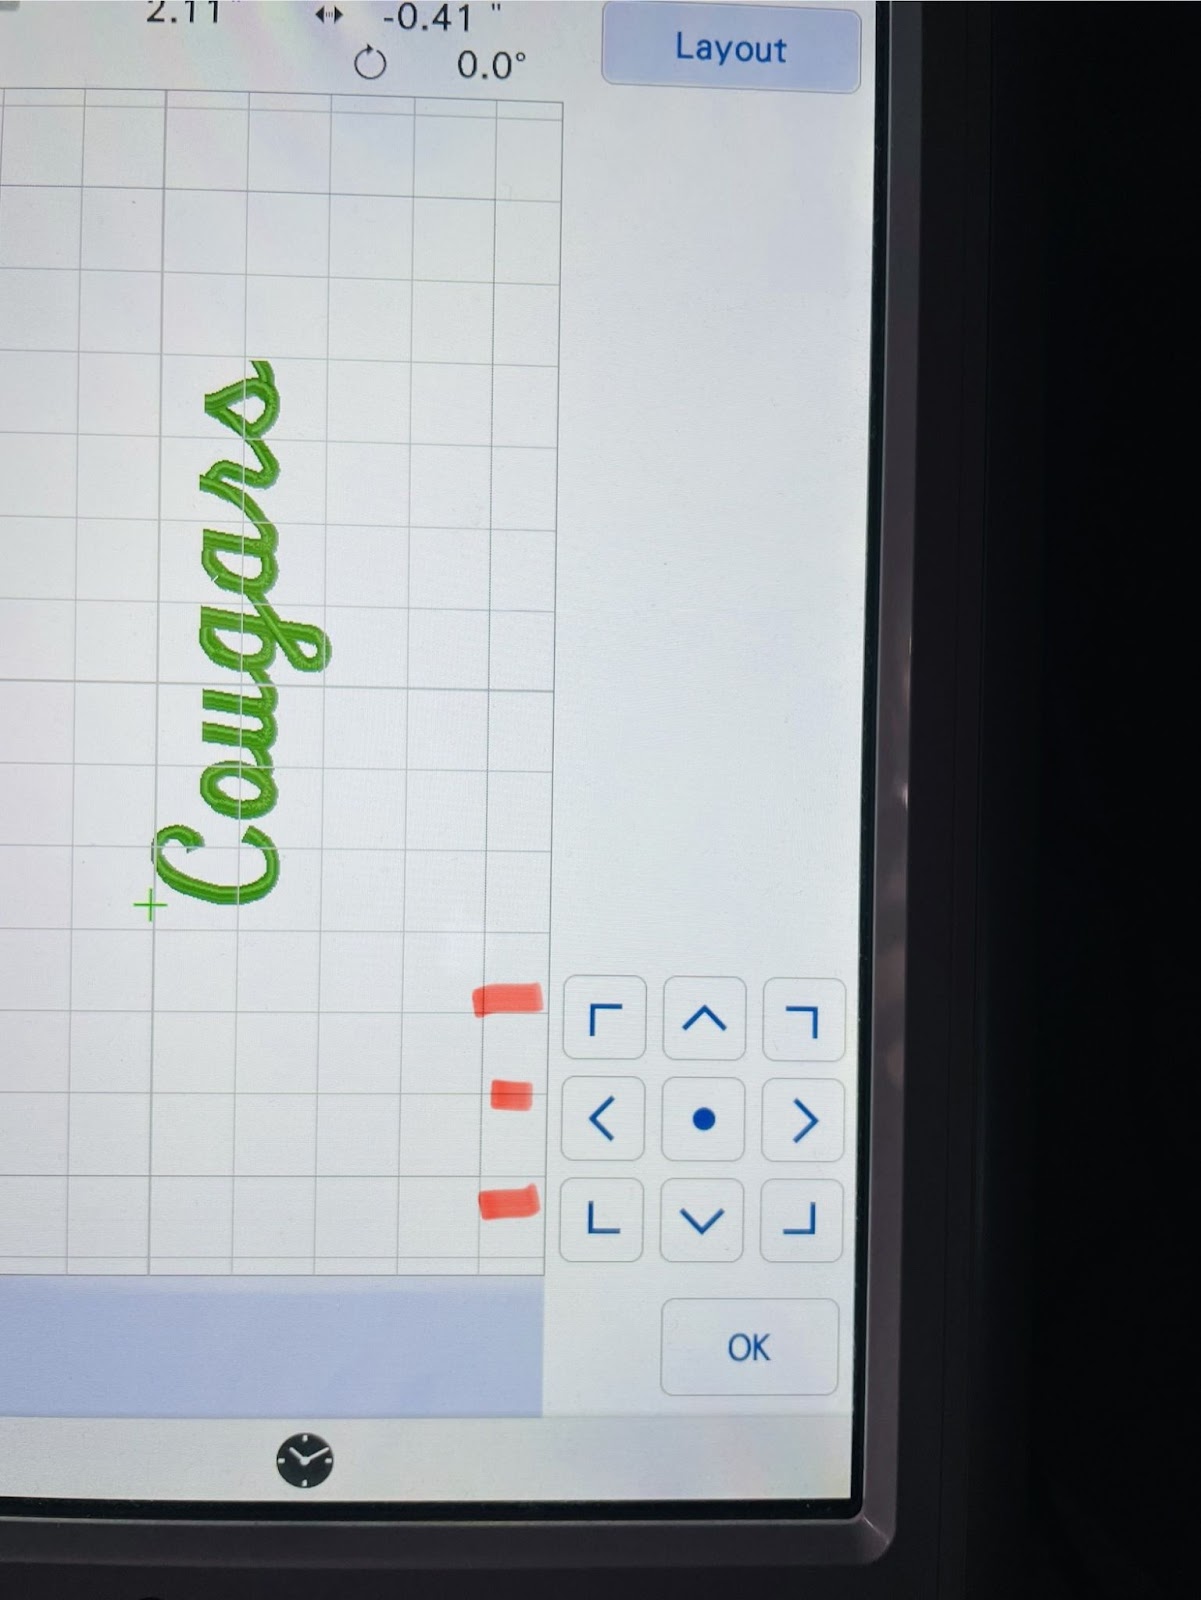
Add all the letters you will be using to your screen. Adjust and space each letter. Rotating the letters to fit the length of your frame will accommodate more letters. I spaced mine approximately ⅛” apart at the top. To accurately line up all your letters, use the grid lines on the screen as well as your rotate and move keys. Try to keep the distance between each letter approximately the same. I have added my 4” letters. My finished width across will be 11.88”. This will fit inside my frame and fit nicely across the front of my sweatshirt with enough room to add a script font below. Depending on your frame size you may be able to stitch out your entire design in one hooping.
If your frame is large enough, you can add a script below the letters as well. For those whose frame is not large enough, I will give step-by-step instructions on how to add this later.
If you have to do multiple hoopings, load as many letters as will fit your frame. If you are working with a 5” x 7” frame, you should be able to fit two letters in one hooping. If you are working with a 4” x 4” frame, each letter will be a single hooping. Don’t let your frame size discourage you. Take your time and remember to use the needle position key to check your placement with each hooping.
If you have software, you can create your design there and then transfer it to your machine.
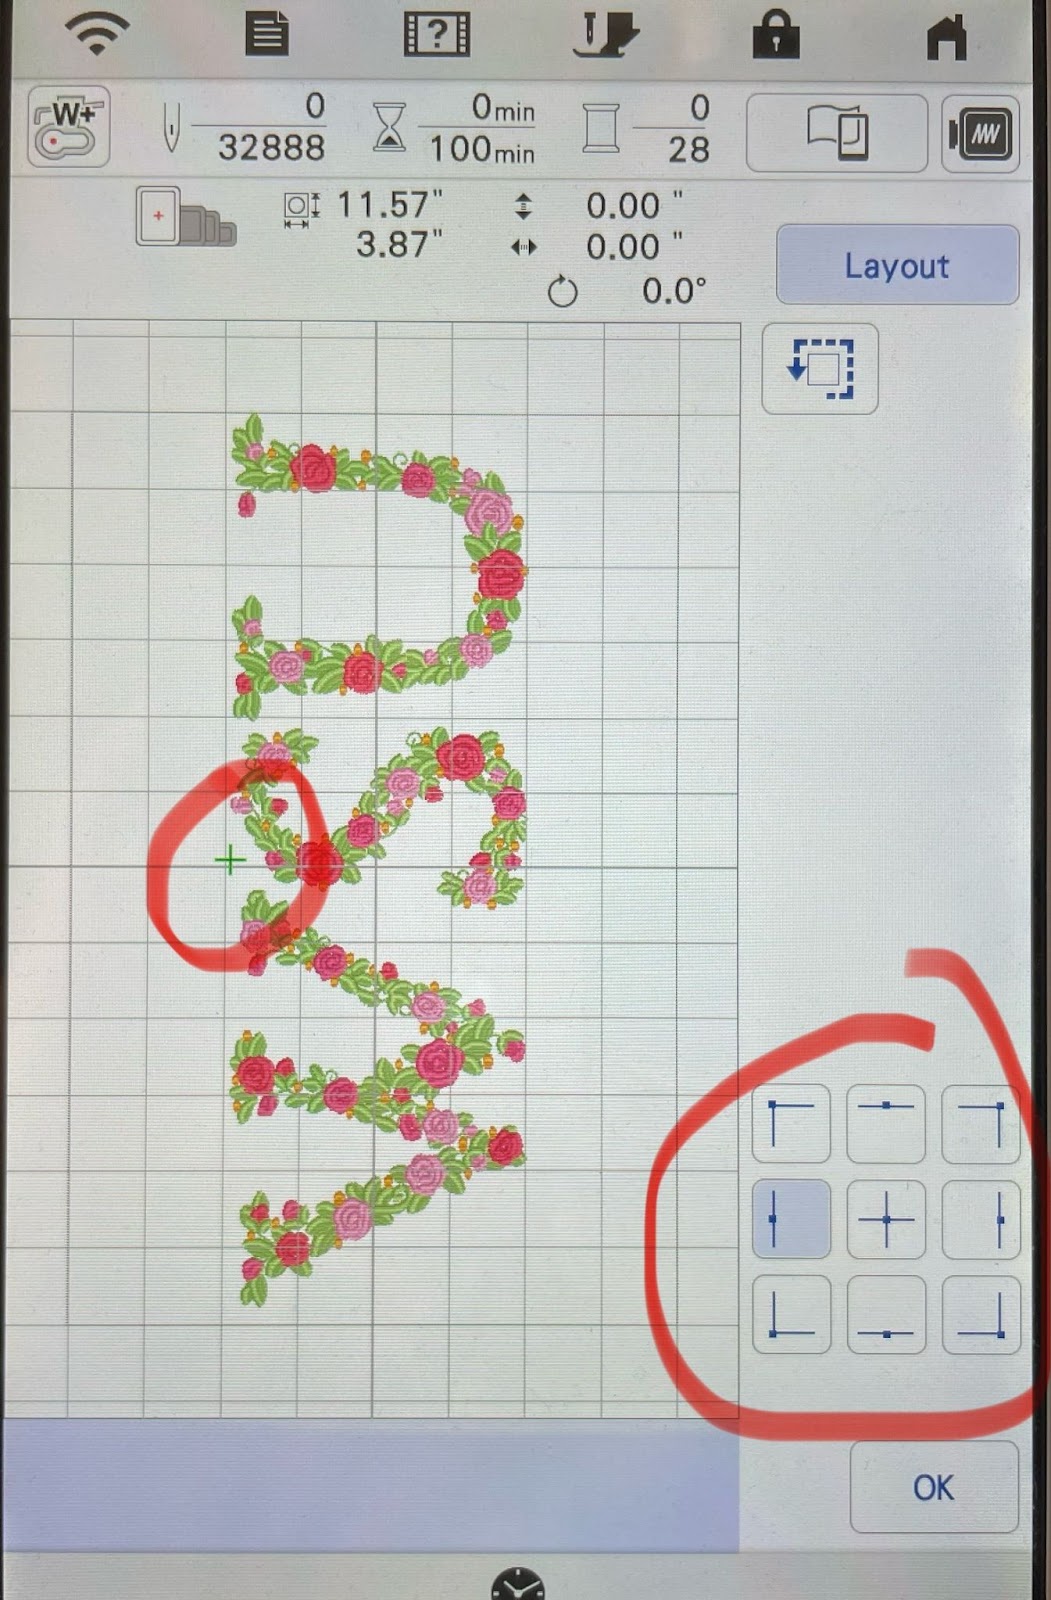
With your design loaded onto the machine, use the needle placement button to find the top center.
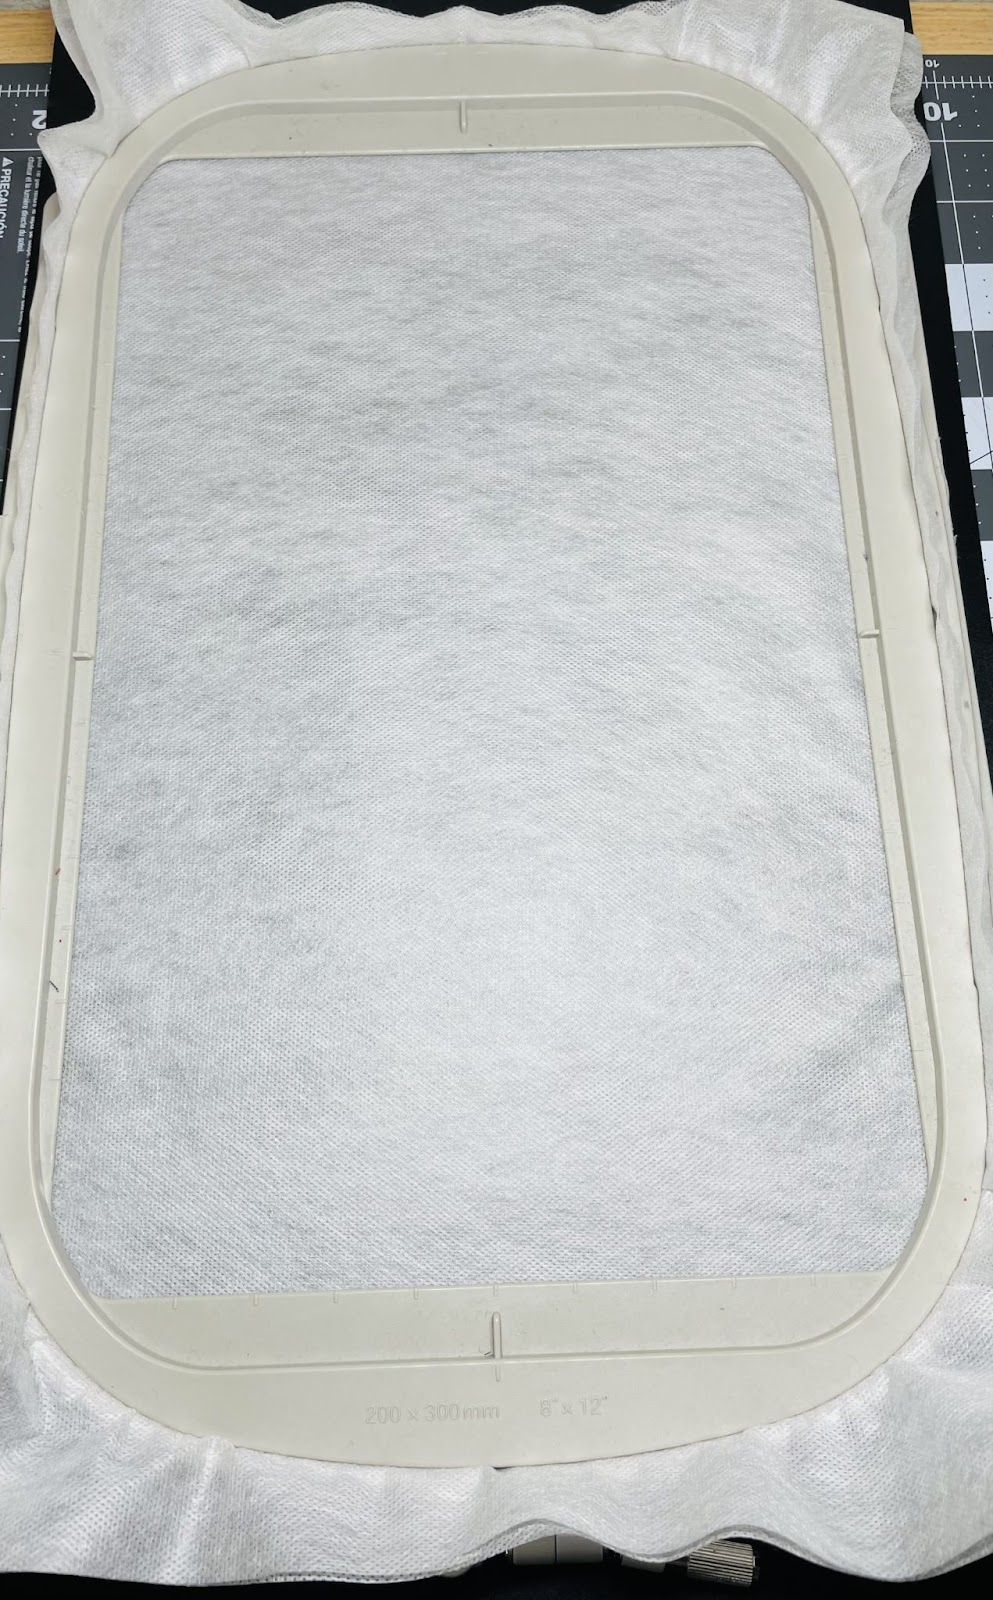
Hoop 2 layers of wash-away stabilizer. We will float the sweatshirt on top of the hooped stabilizer. Attach the hoop to your machine.
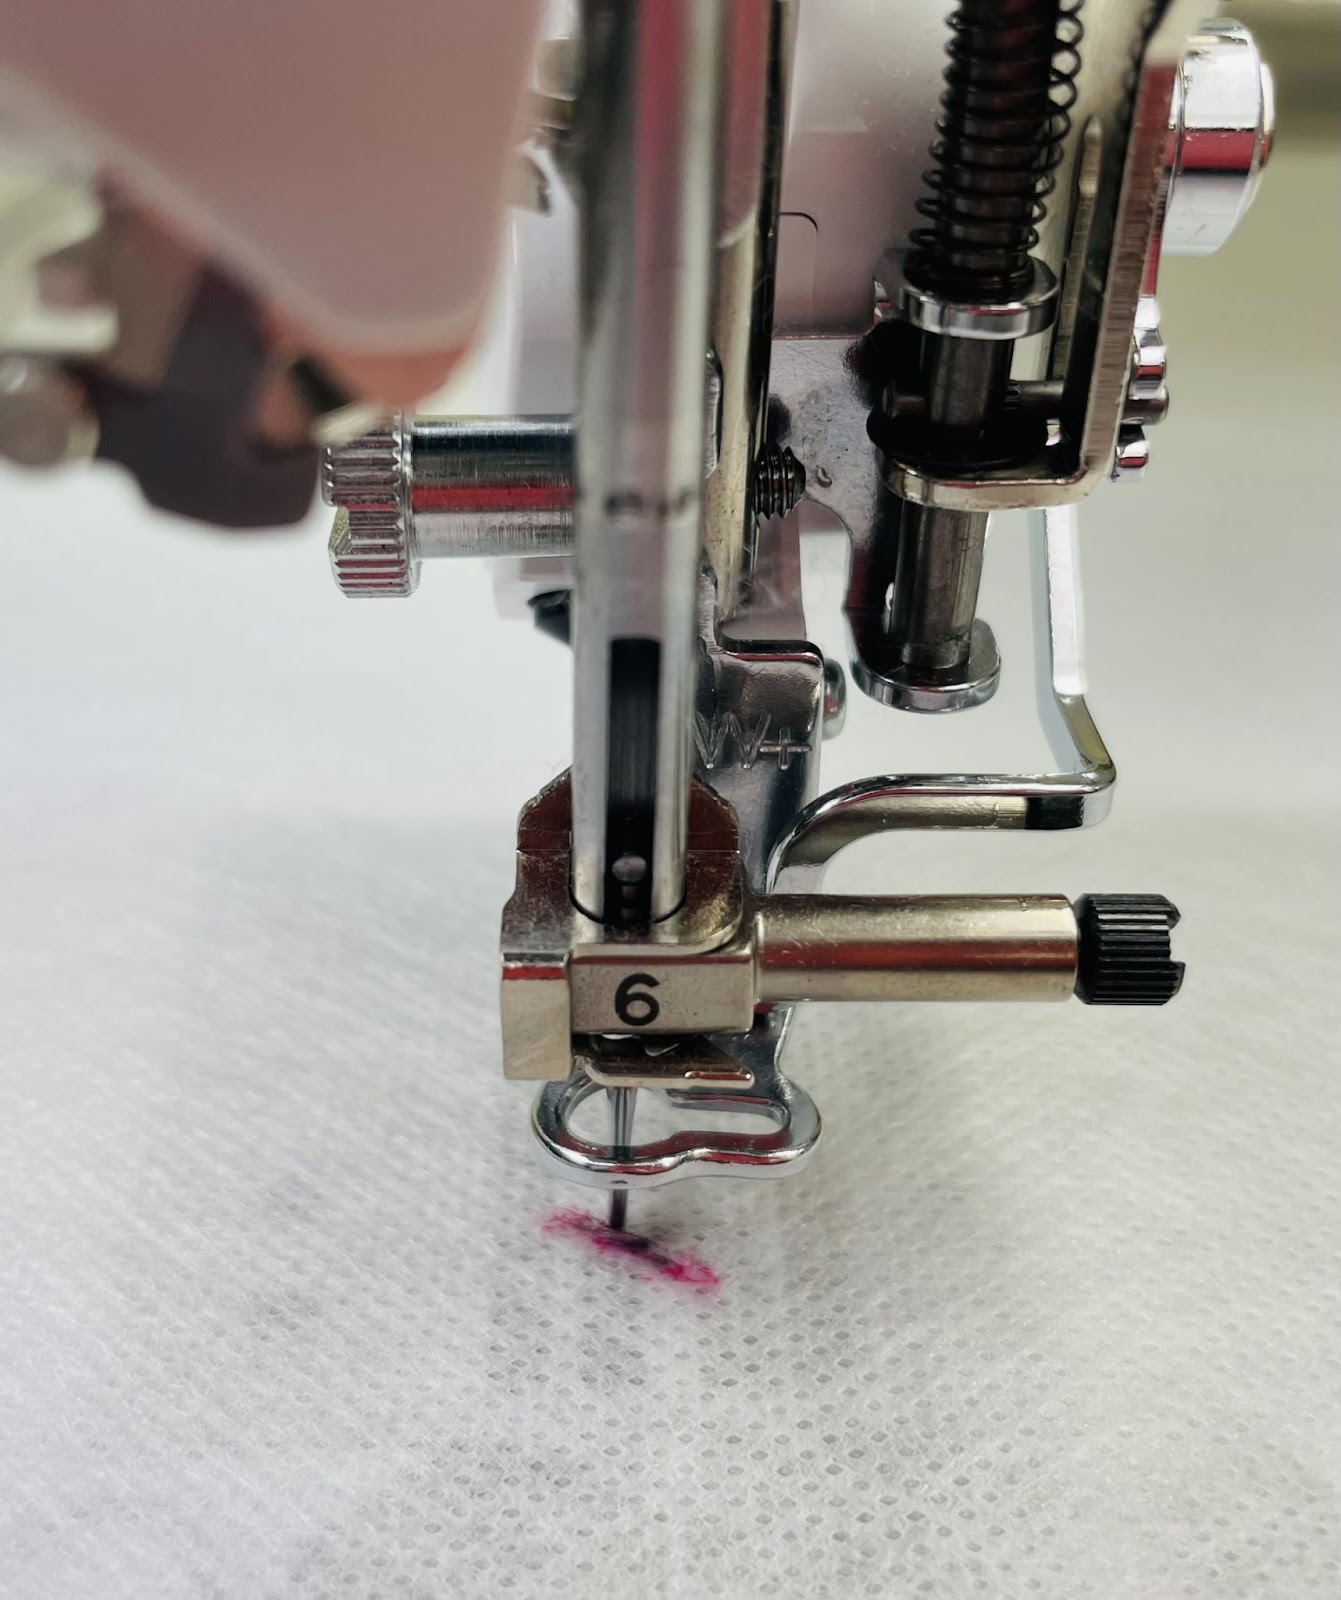
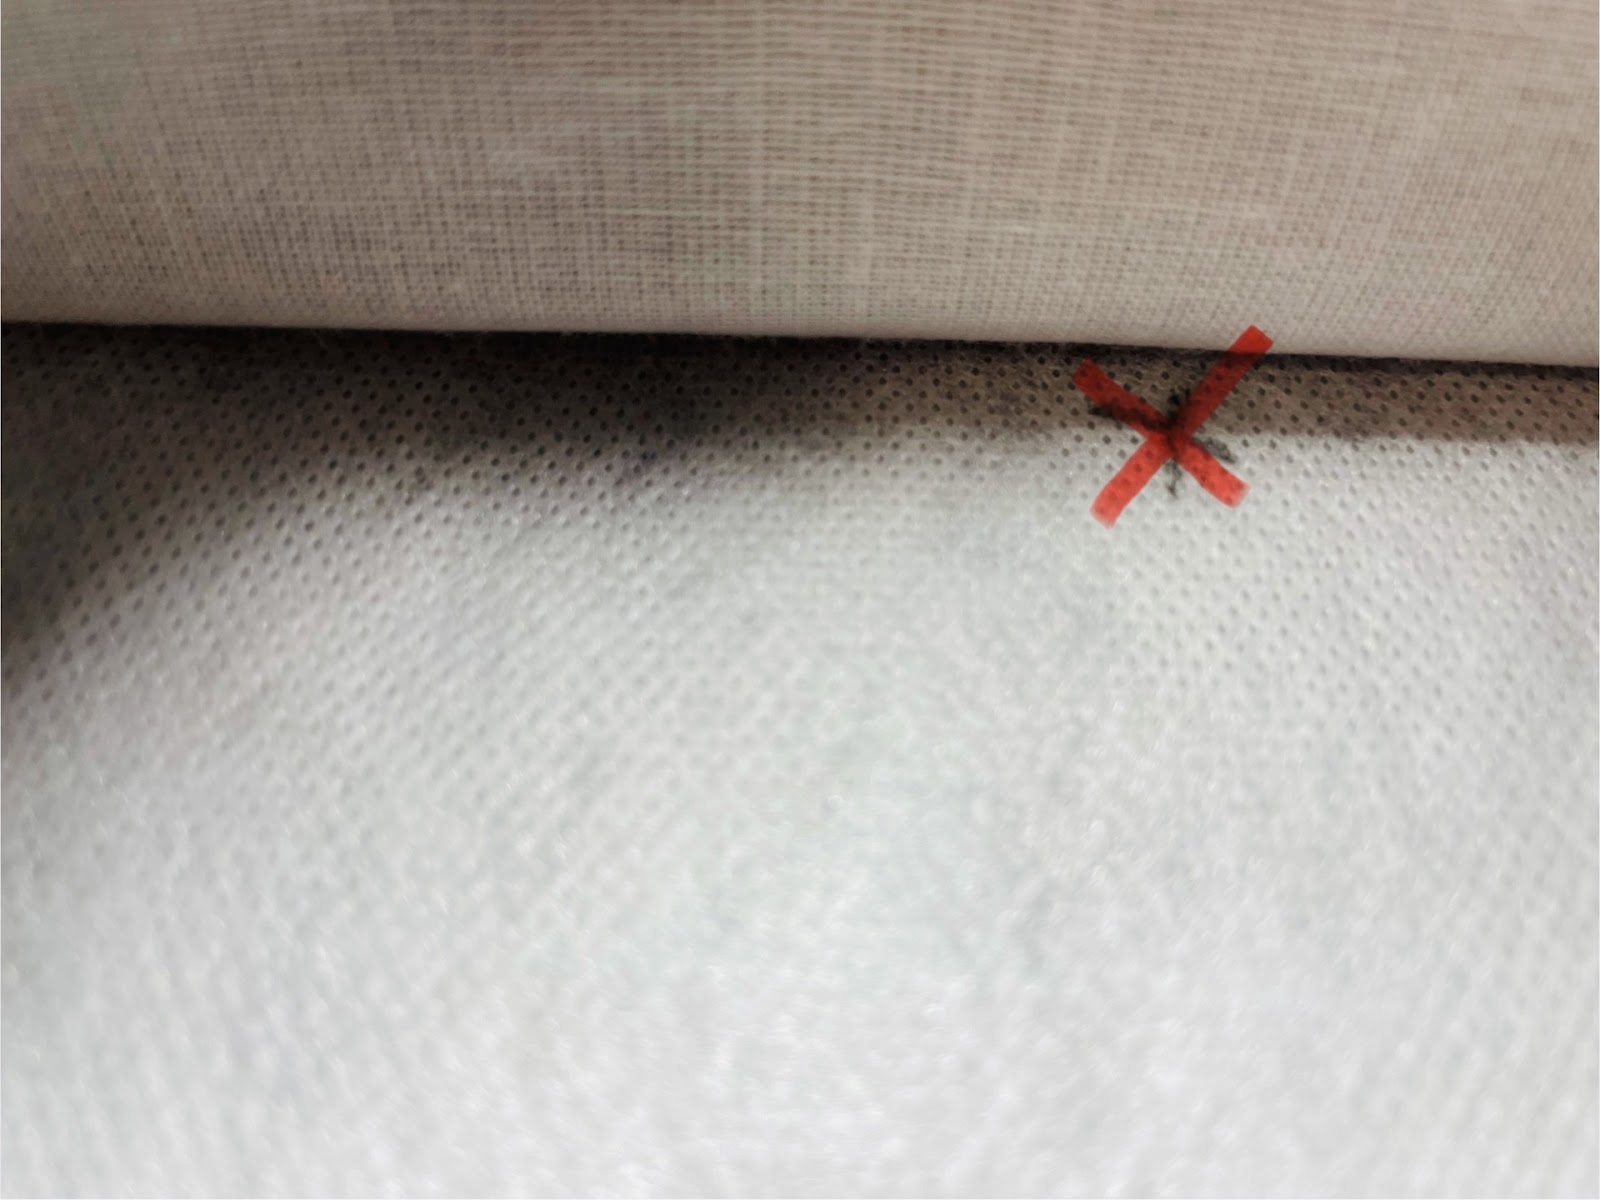
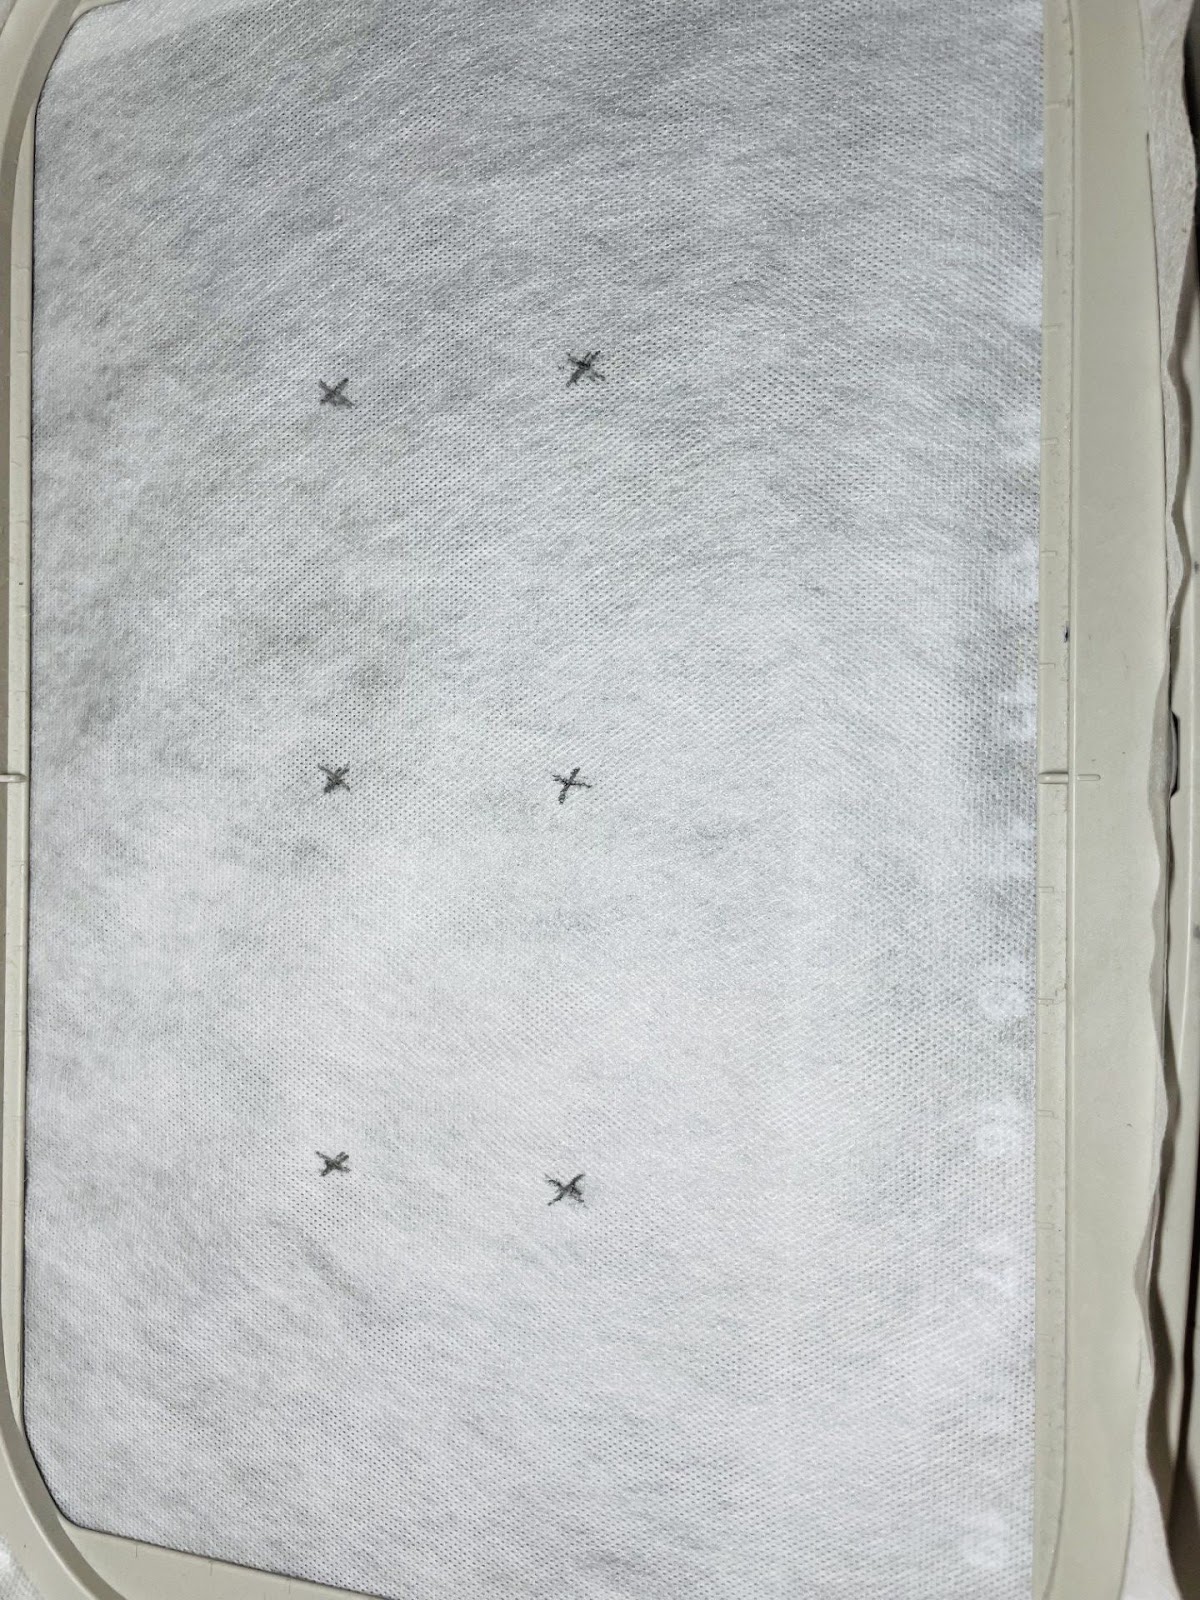
With the needle down button, mark the top center of your design onto the stabilizer.
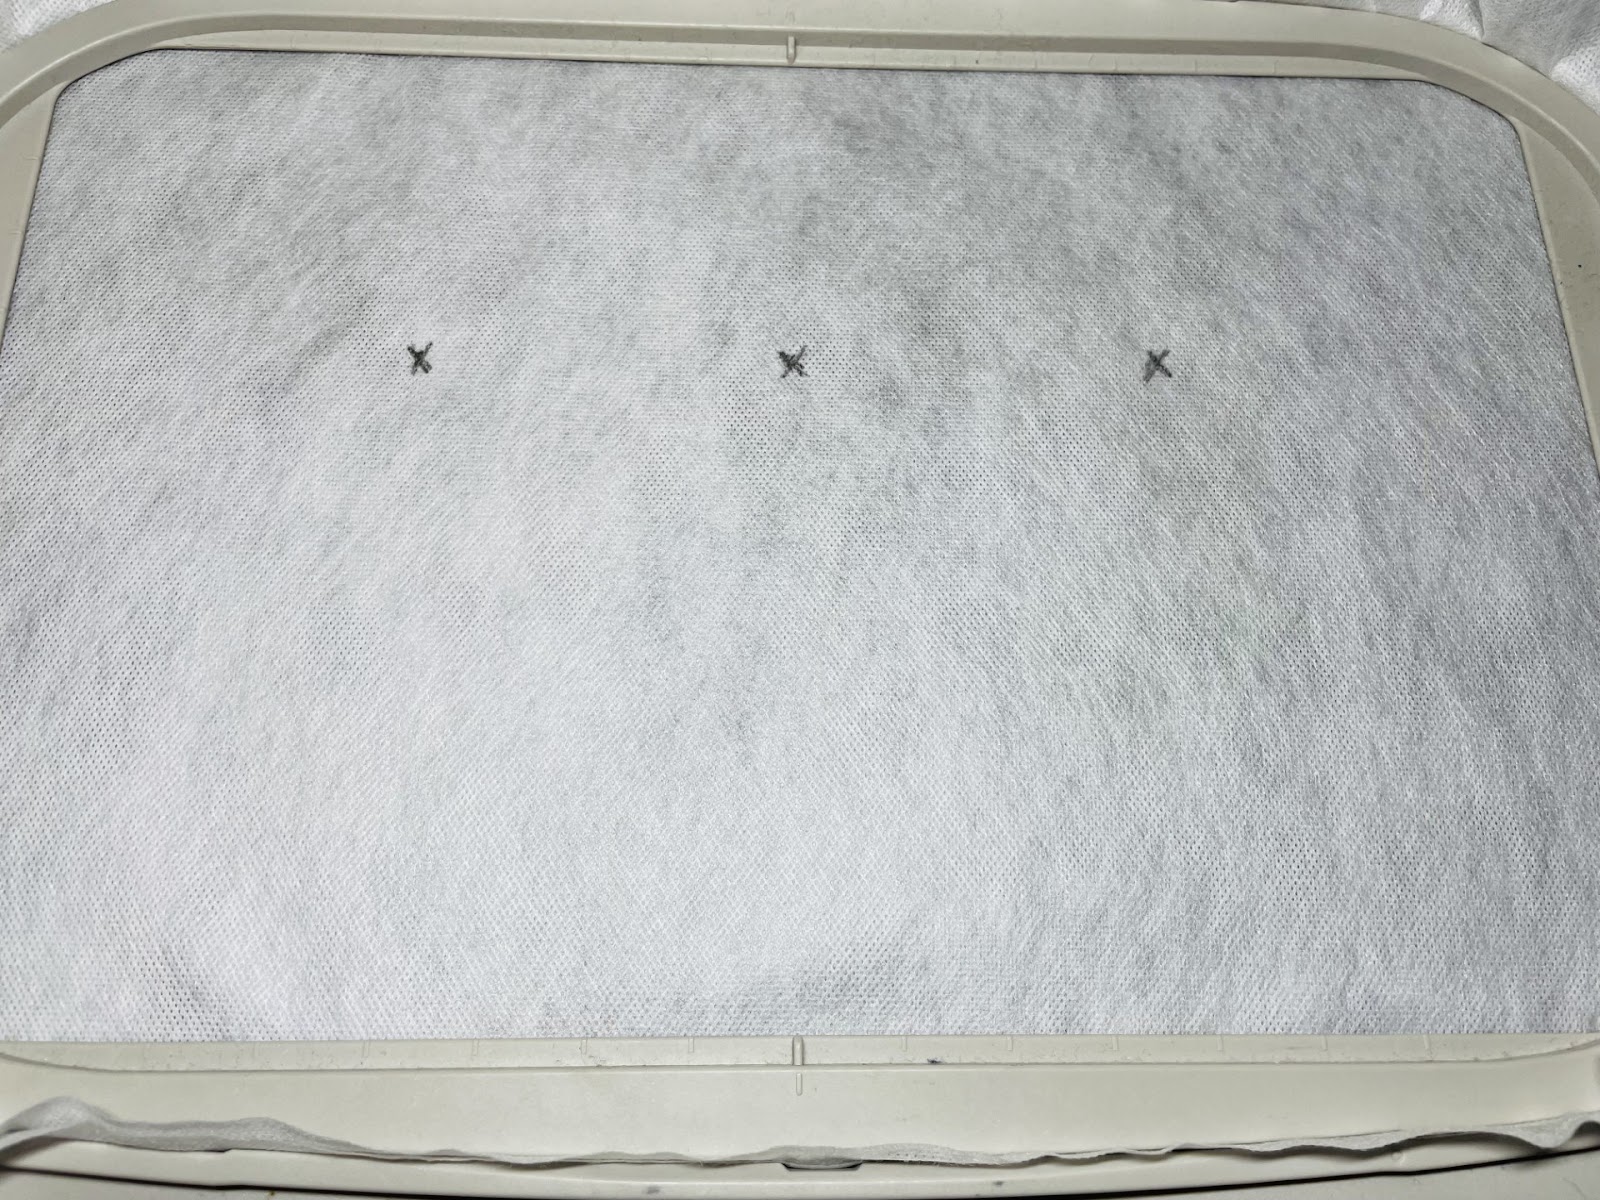
With the needle position keys, continue to mark across the top of your stabilizer. We will later match up these marks with markings on the sweatshirt. This will ensure the sweatshirt is straight and even when laid on top. Remove the hoop from the machine and lay on a flat surface.
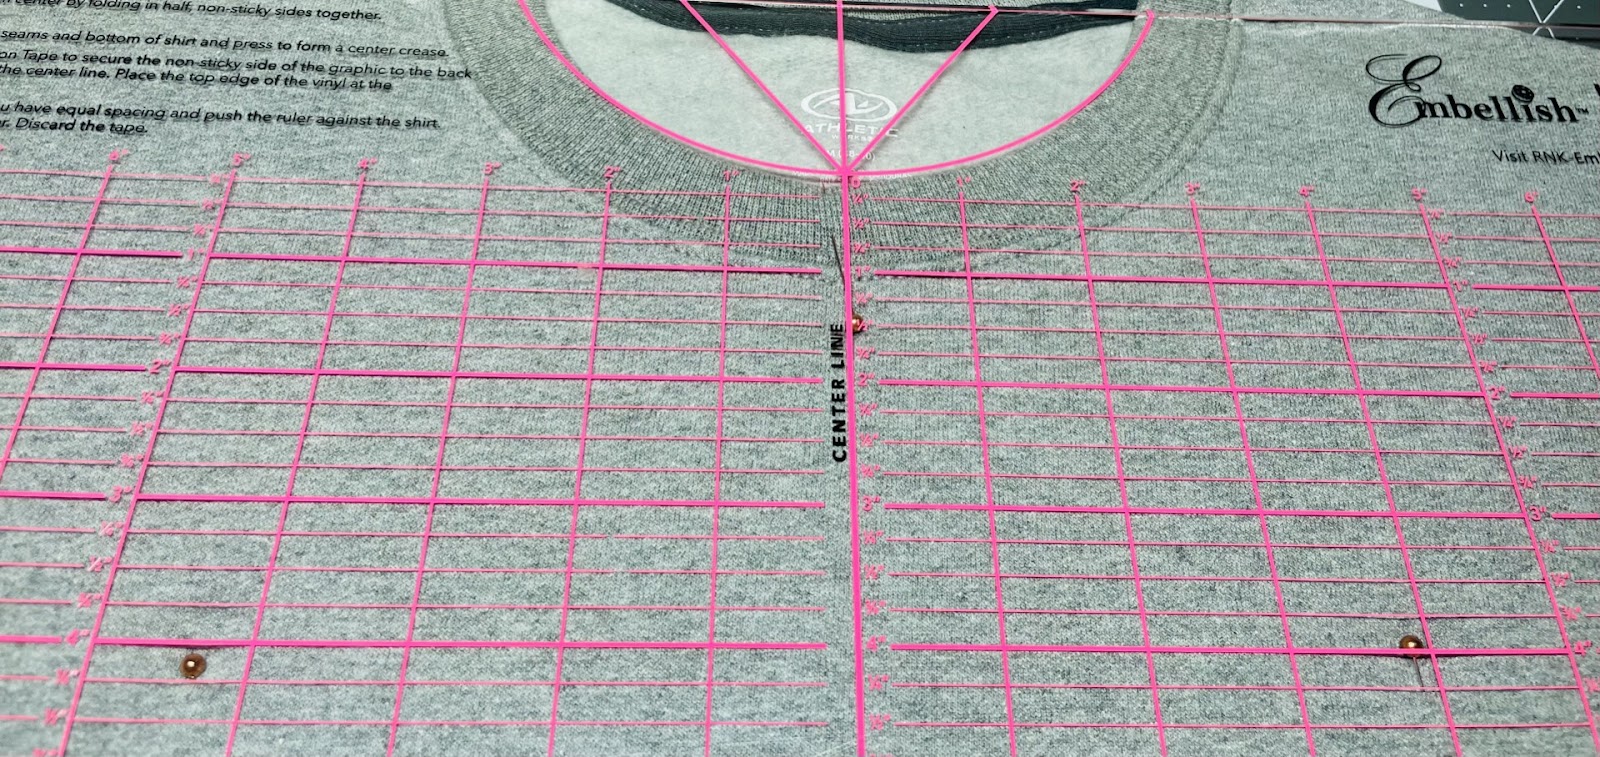
You have already determined the size of your design space. Now we need to find the center of the sweatshirt. Do this with either a T-shirt ruler or by folding the shirt in half and finger pressing or pinning to mark the center.
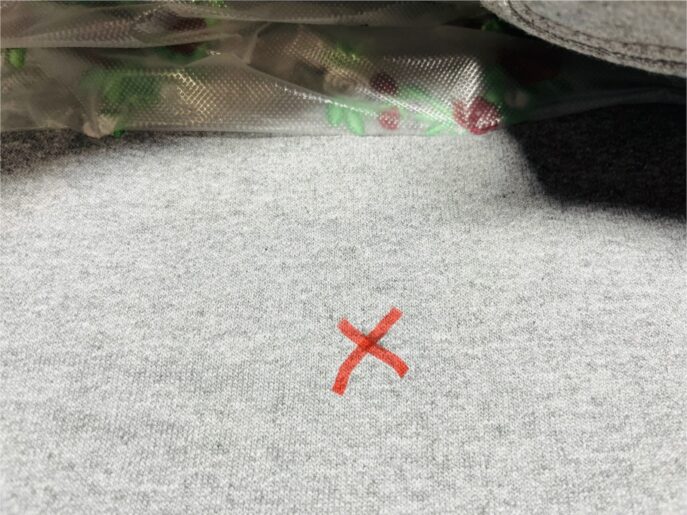
Measure down 3” from the top. This will be the top of your design. With a ruler and erasable pen, mark the center and each end of the design space on the front of your sweatshirt. These are the marks we will match up with our marked stabilizer. We will remeasure for the script font later. If you are not comfortable using an erasable pen you can always use tailor’s chalk.
Spray the stabilizer with a fabric adhesive. This will help to hold the sweatshirt in place. When laying your sweatshirt on the hooped stabilizer, take extra care not to pull or stretch the fabric. It should lay naturally with no distortion. Line up the marks on the sweatshirt with the marks on the stabilizer.
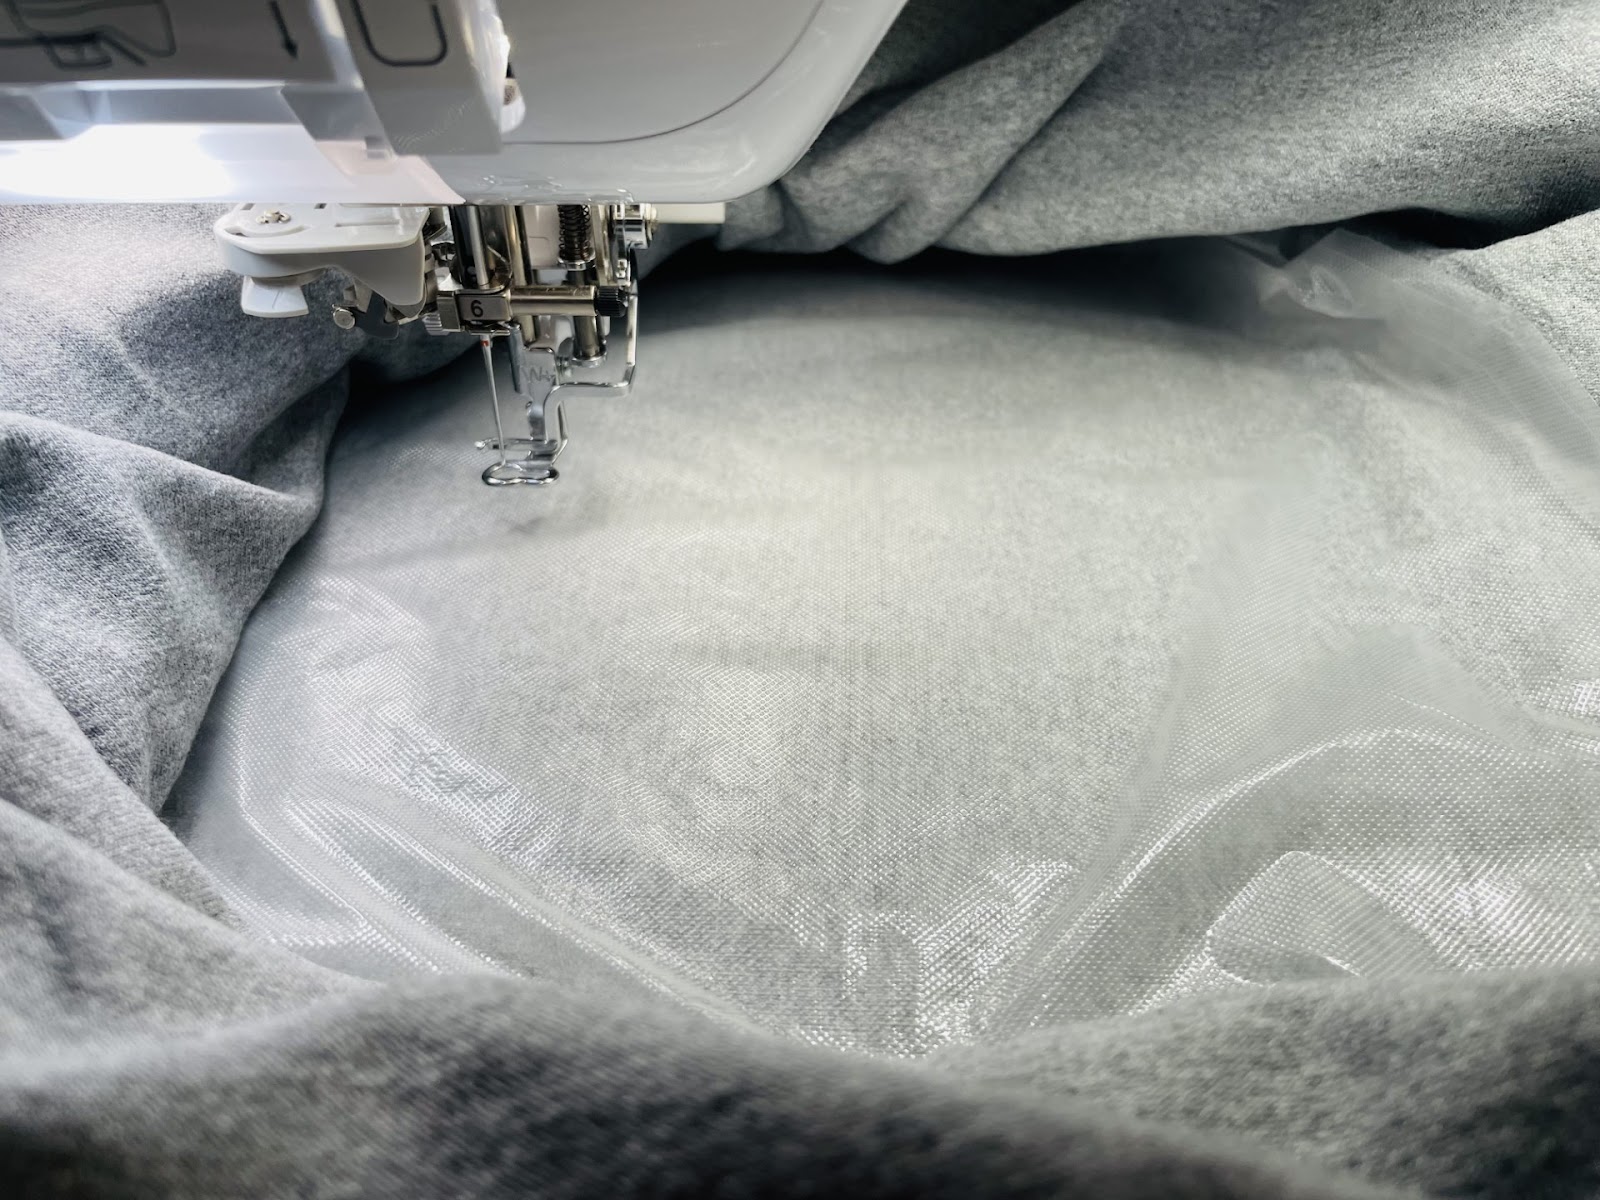
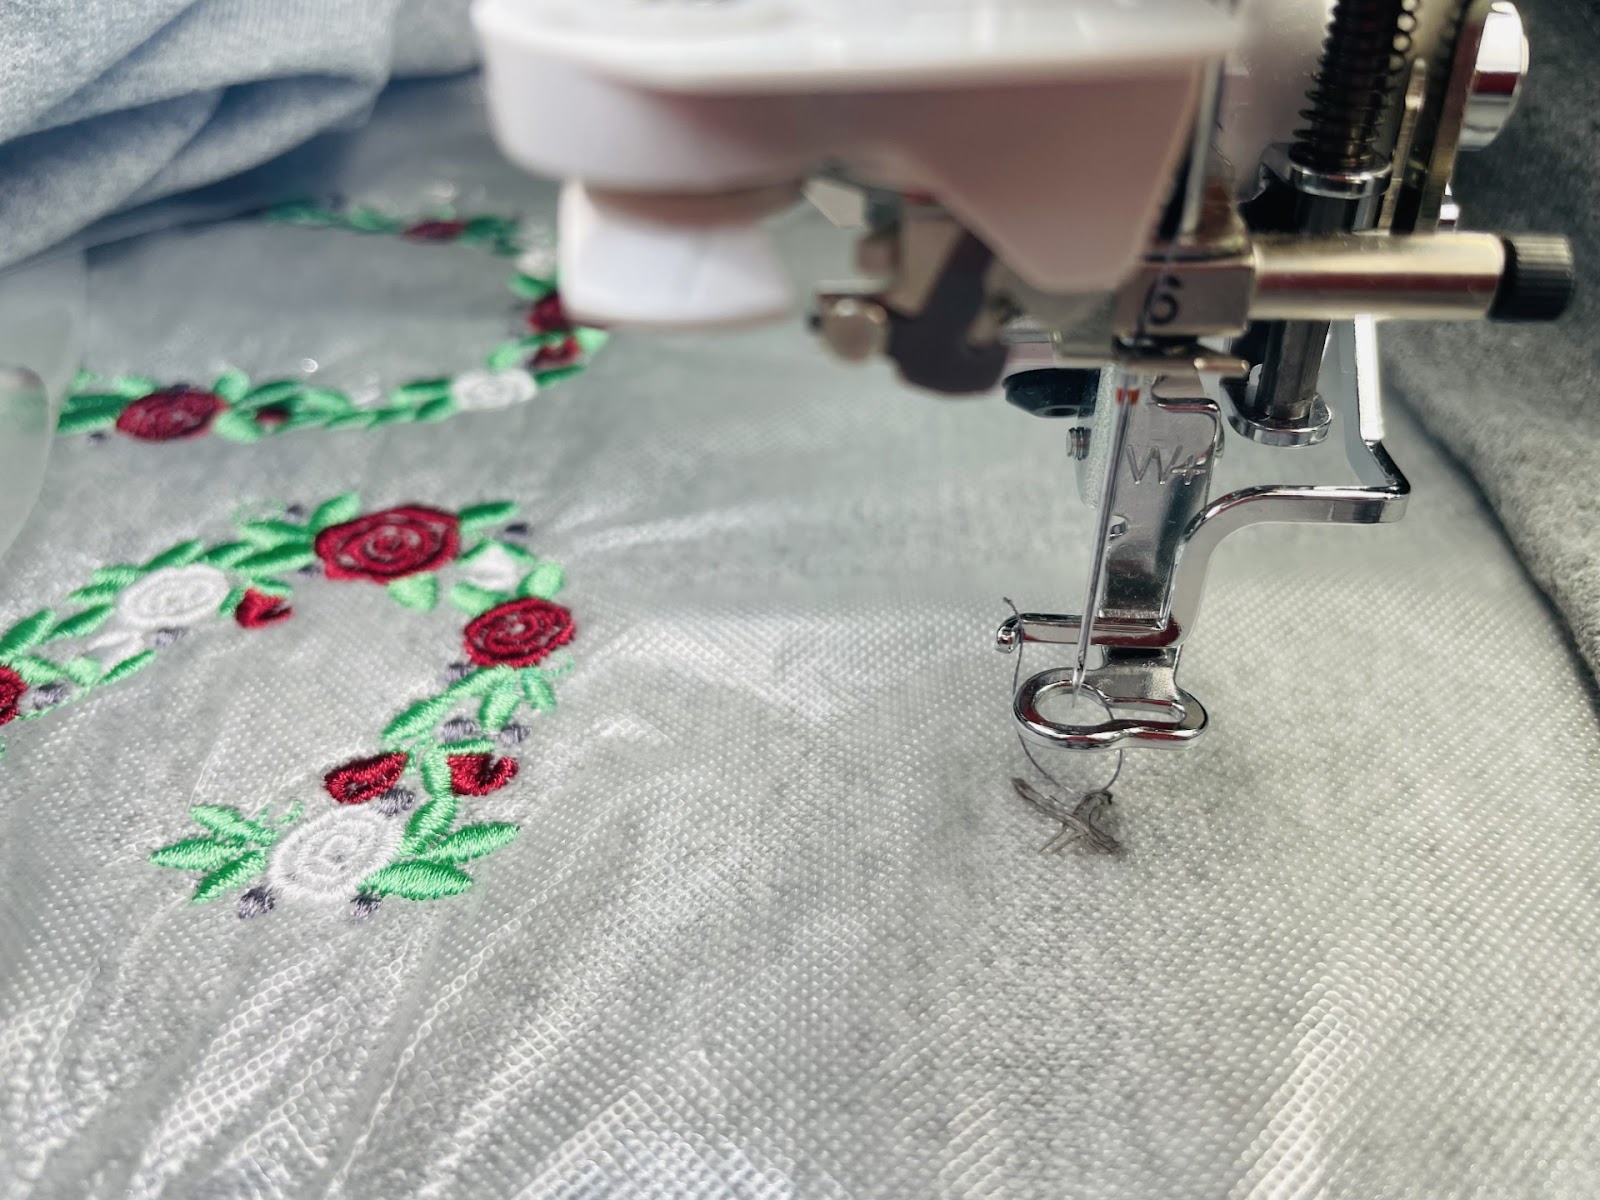
Gently ease the sweatshirt under the embroidery foot and attach the hoop to your machine. I like to use a film topper to give an added layer of support. This is optional.
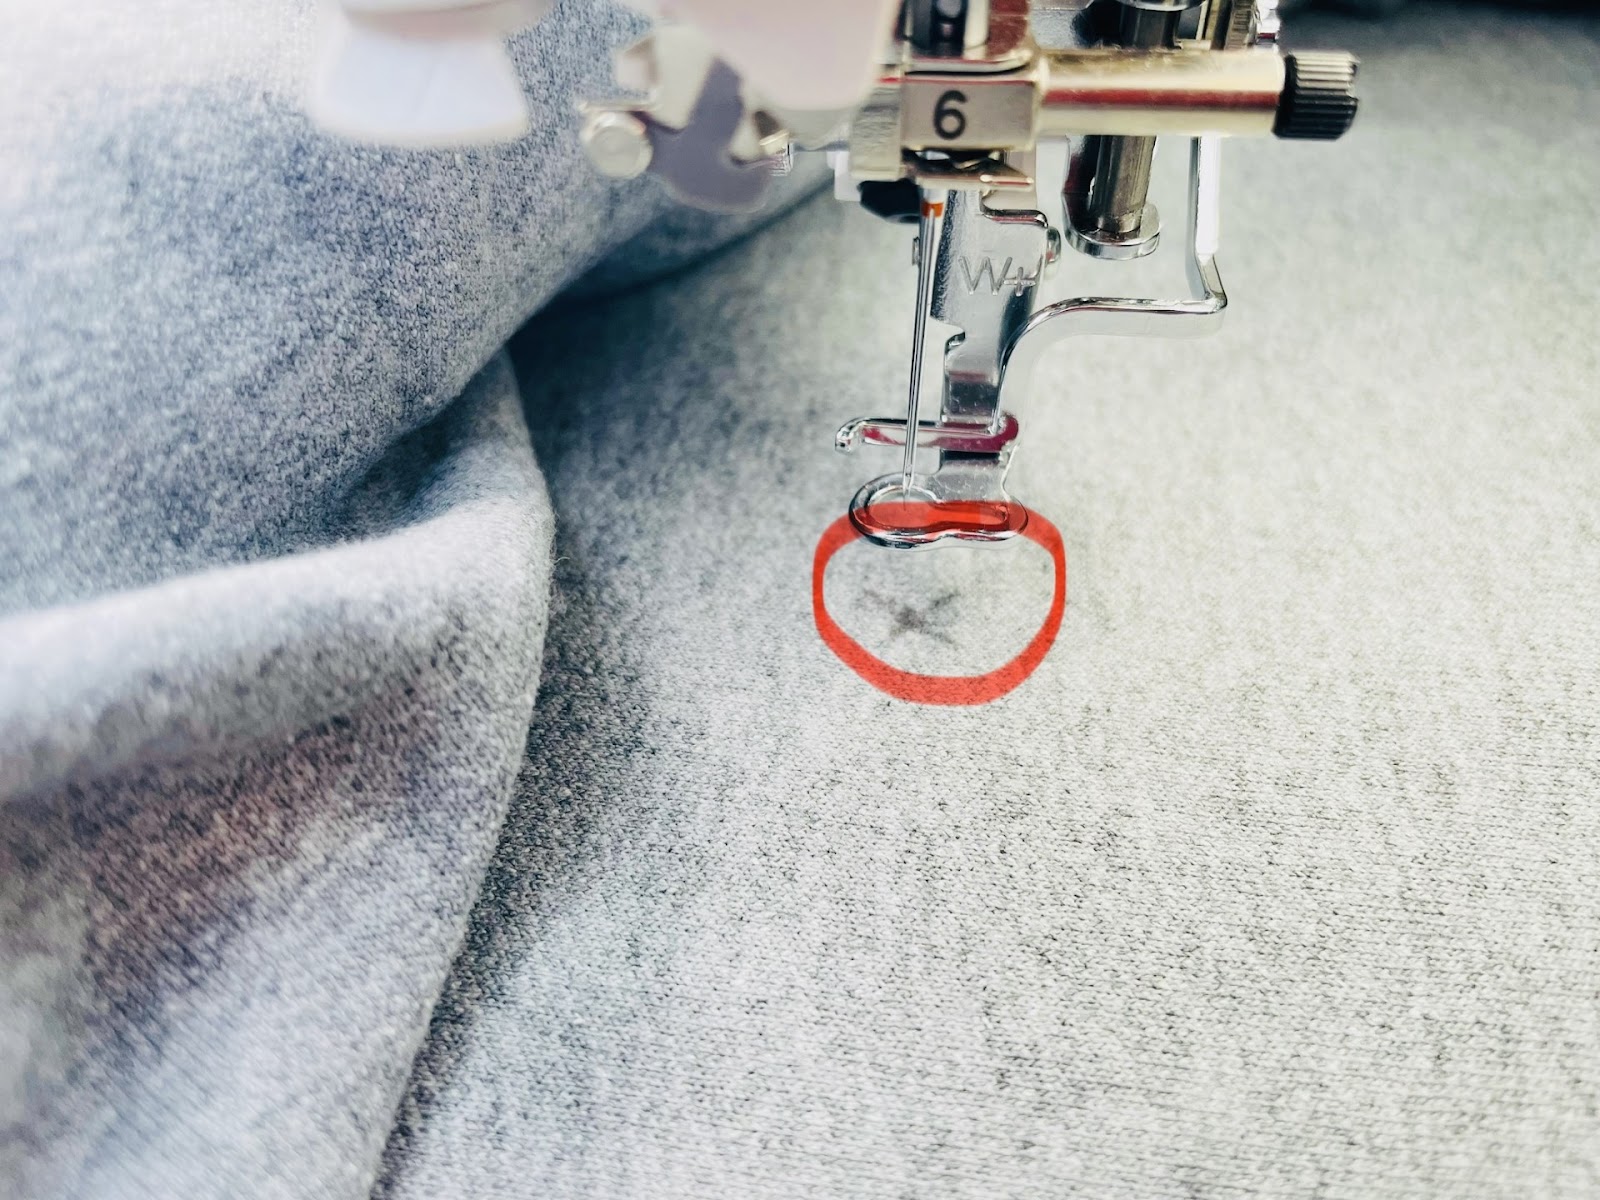
Smooth out your sweatshirt. Use the needle position keys and the three marks on the sweatshirt to check to see that your design is centered and straight. If it is not lined up, gently ease up the fabric and readjust the shirt. Recheck the placement again. Always check completely across the top to assure your marks line up. This tells you the shirt is straight. Once satisfied, begin your design.
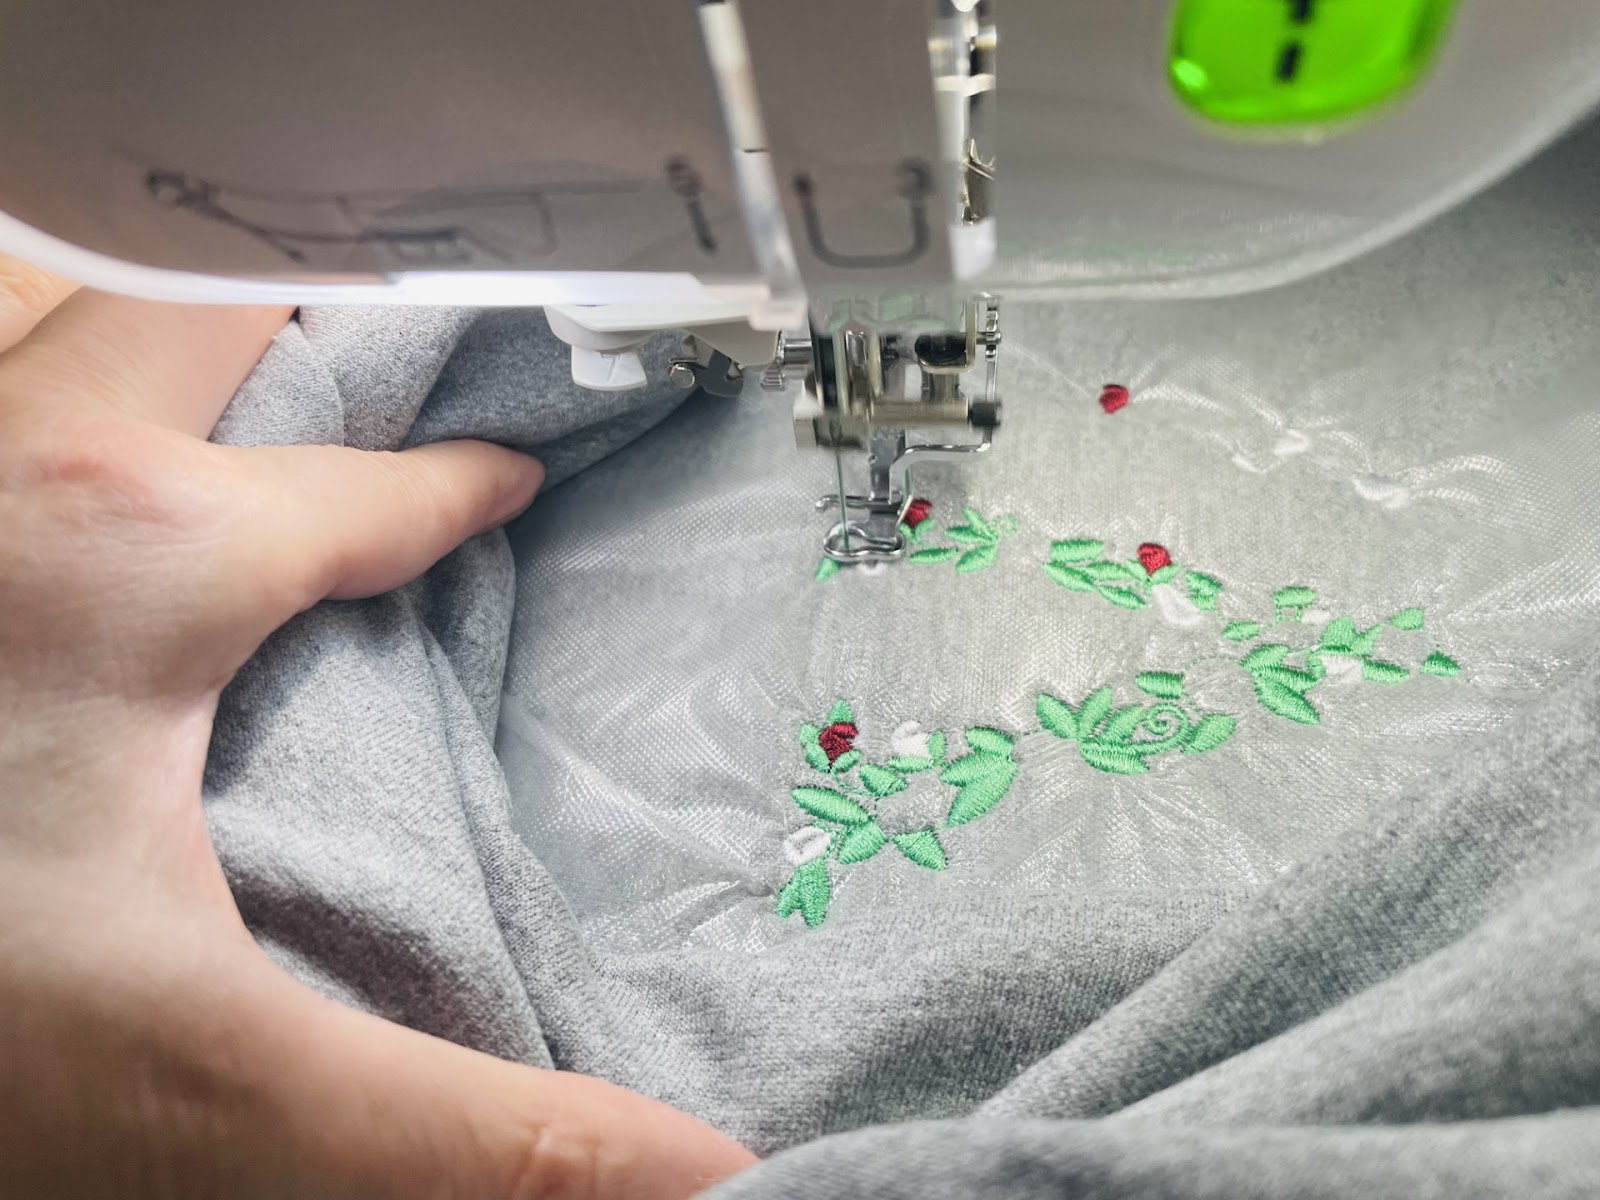
With the machine at a slower speed, you have more control to keep the remaining sweatshirt away from the embroidery area. Always be mindful of the needle and keep all fingers clear. The spray adhesive really helps keep the fabric secure, but never walk away from the machine. It only takes a second for unwanted fabric to get under the needle. When finished, remove the hoop from the machine and the sweatshirt from the hoop.

Now that we have our school letters completed, let’s add a script just below those letters. You might choose the school name or mascot.
Load the script font of your choice to your machine. I chose to use Lizzie Script Embroidery Font. These come in multiple sizes as well. I am using the 1.5” letters. Line up each letter to the same grid line. When using a script font, line the letters up next to each other just close enough that they touch. If your machine has a multiple selection key, you can select to join and move all the letters together. This will give you the cursive look you want.
Hoop two layers of wash-away stabilizer and return the frame to the machine.

With the needle position keys, mark the stabilizer like before but this time mark both the top and bottom of the design. This will tell you how large the letters will be and if you are not satisfied you can make any changes before stitching out. If you find it to be too large or too small, change the letter size and repeat these steps. Remove the hoop from the machine. Lay on a flat surface and spray with adhesive.
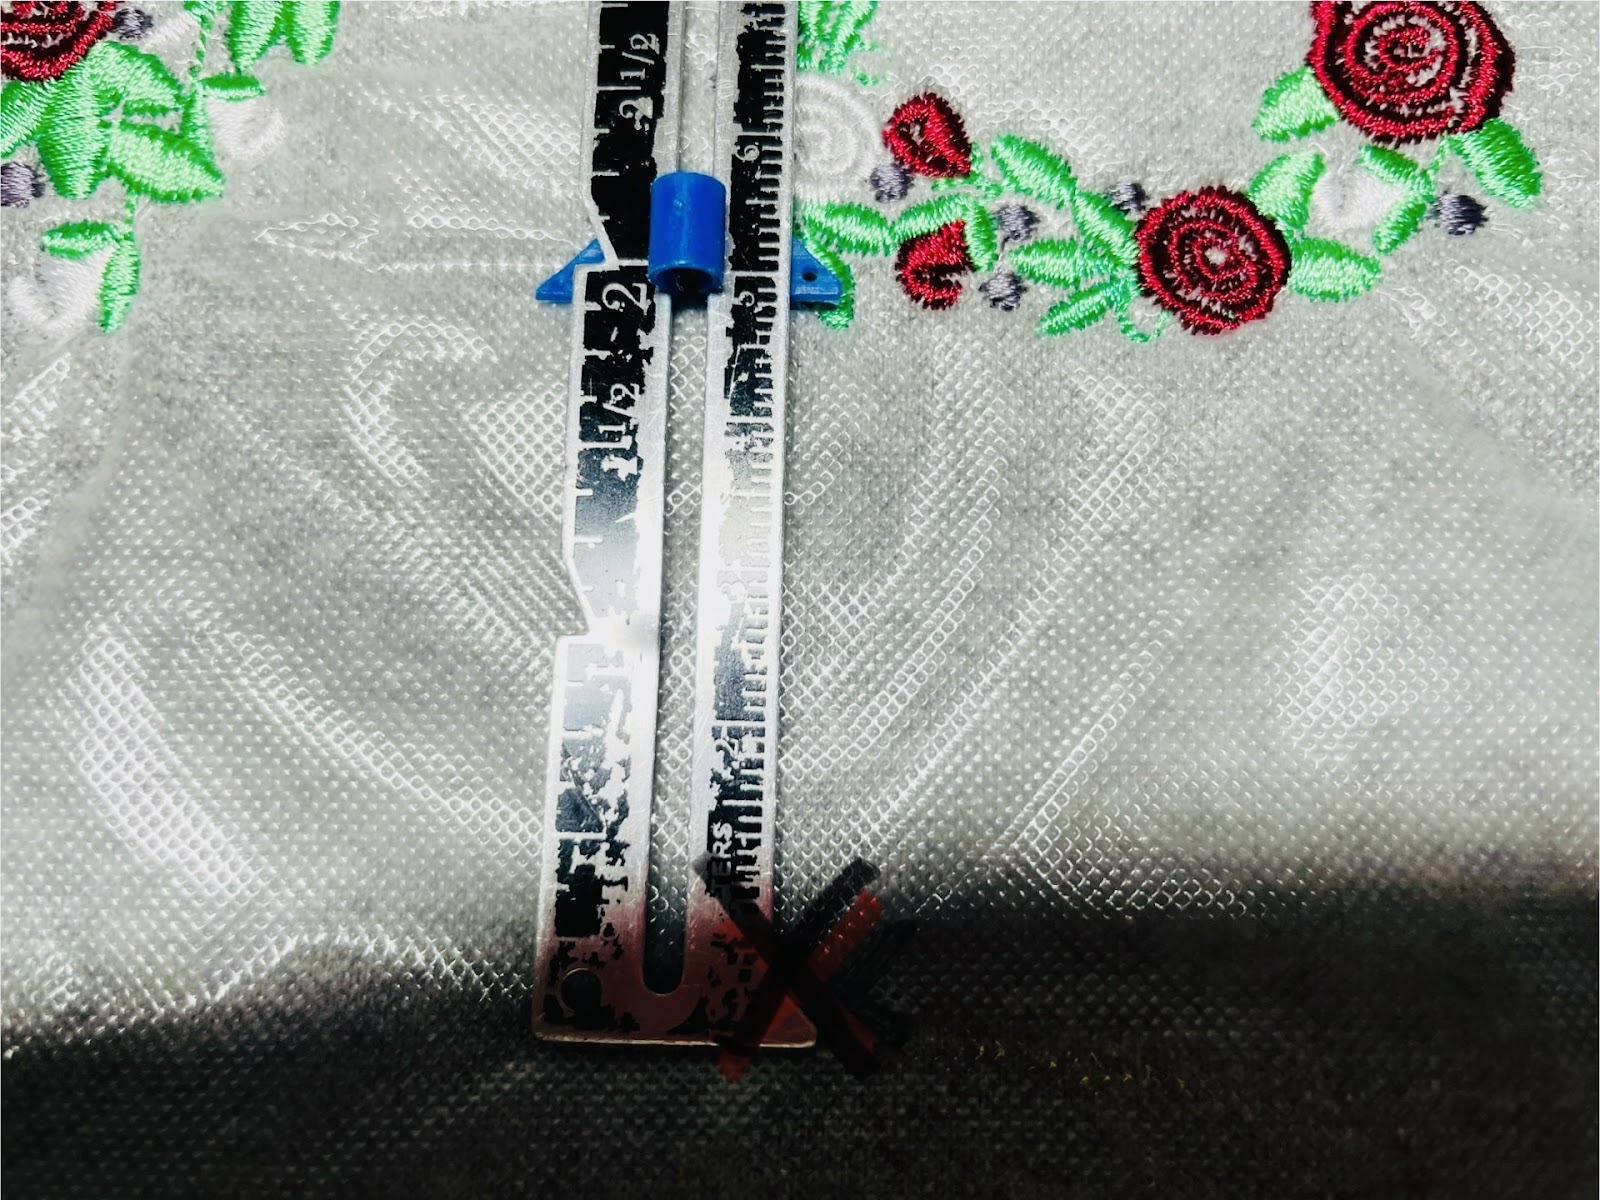
Trim away the excess stabilizer on the back of the sweatshirt, but leave the topper on the front. Your original center mark should still be visible. Use this mark to locate the center of your sweatshirt. If need be, use the previous steps to find the center. Lay the sweatshirt flat and measure down from the center of the stitched letters to where you want the top of the script to be. This is a personal preference. I chose to go down 2” from the bottom of the finished letters. Mark this spot. This will be the center top of the script.

Line up the center mark on the sweatshirt with the center mark on the stabilizer. Smooth the sweatshirt over the sprayed stabilizer. Take care not to pull or distort the fabric. Take the hoop and sweatshirt back to the machine.
Use the needle position keys to assure the center mark on the shirt is in line with the center of the design.
With the position keys and a sewing gauge, check to assure your sweatshirt is straight and measures the same length down from the previous stitching all the way across. For example I want to assure my letters are going to be 2” down from my previous design all the way across. Ease the sweatshirt up and readjust if needed. Once you are satisfied with your placement, stitch out the design.

When finished, remove from the hoop and trim the stabilizer and SF101. The remaining stabilizer will dissolve in water.
Congratulations, your embroidered floral school sweatshirt is finished! Please share your projects in the Designs by JuJu Embroidery Blessings Group on Facebook or anywhere on social media using the hashtag #designsbyjuju. We’d love to see what you create!
