Toggle Nav
 Inspire.
Create.
Stitch.
Inspire.
Create.
Stitch.
Search
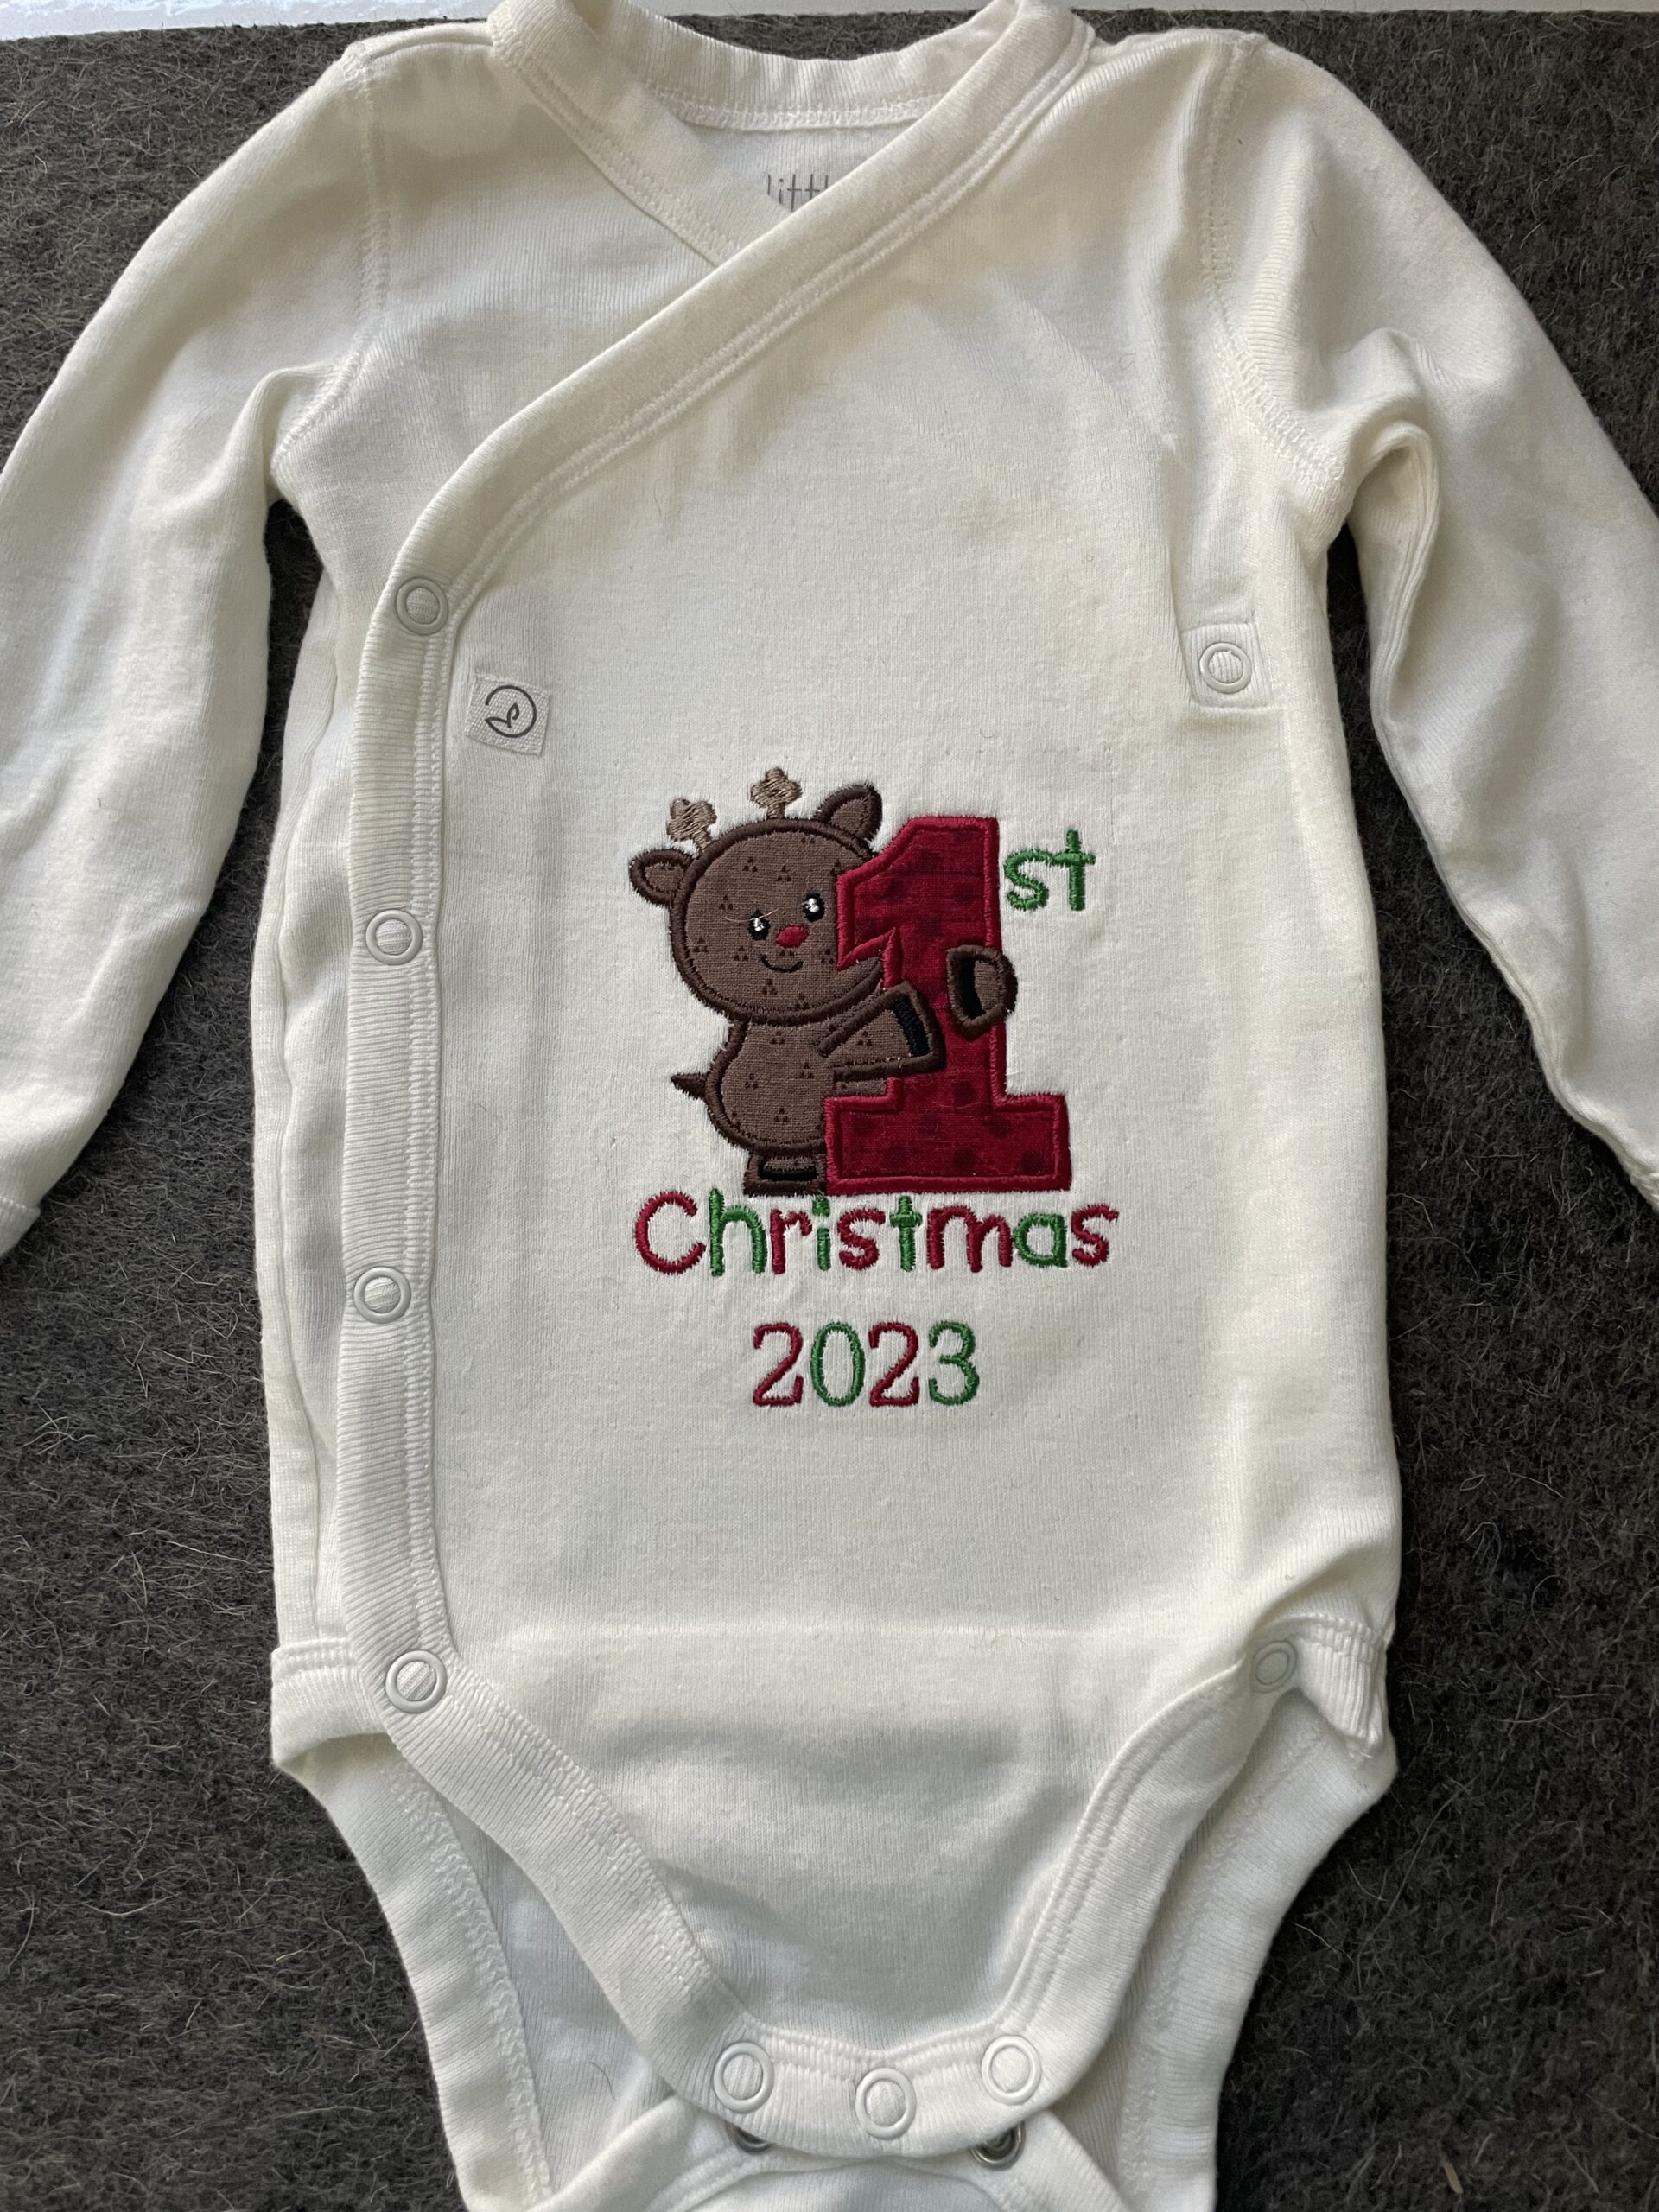
The first holidays for every baby are incredible milestones. What better way to commemorate them than with a cute onesie? When embroidered onto a onesie, this adorable design is functional for any occasion during the Christmas season.
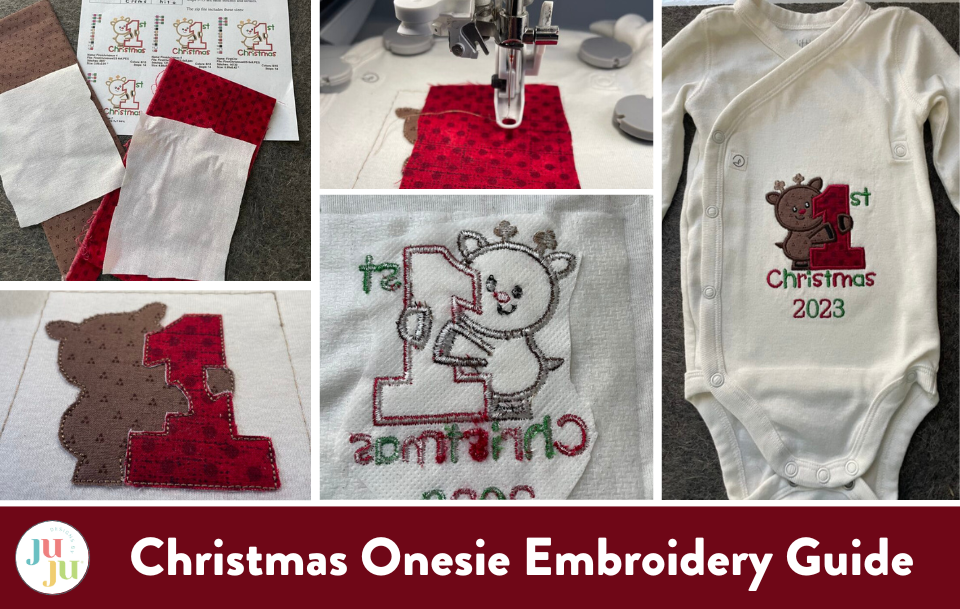
The First Christmas Applique design incorporates two fabrics to be added to the embroidery pattern. These small pieces of fabric needed for the design are a great way to use up your fabric stash or add a coordinating fabric to another clothing item to be worn with the My First Christmas onesie. When you purchase an applique design from DBJJ, there are three tutorials available regarding appliques:
Jersey Embroidery Needle (80/12): needed because the onesie is a knit, and this needle performs better than everyday embroidery needles
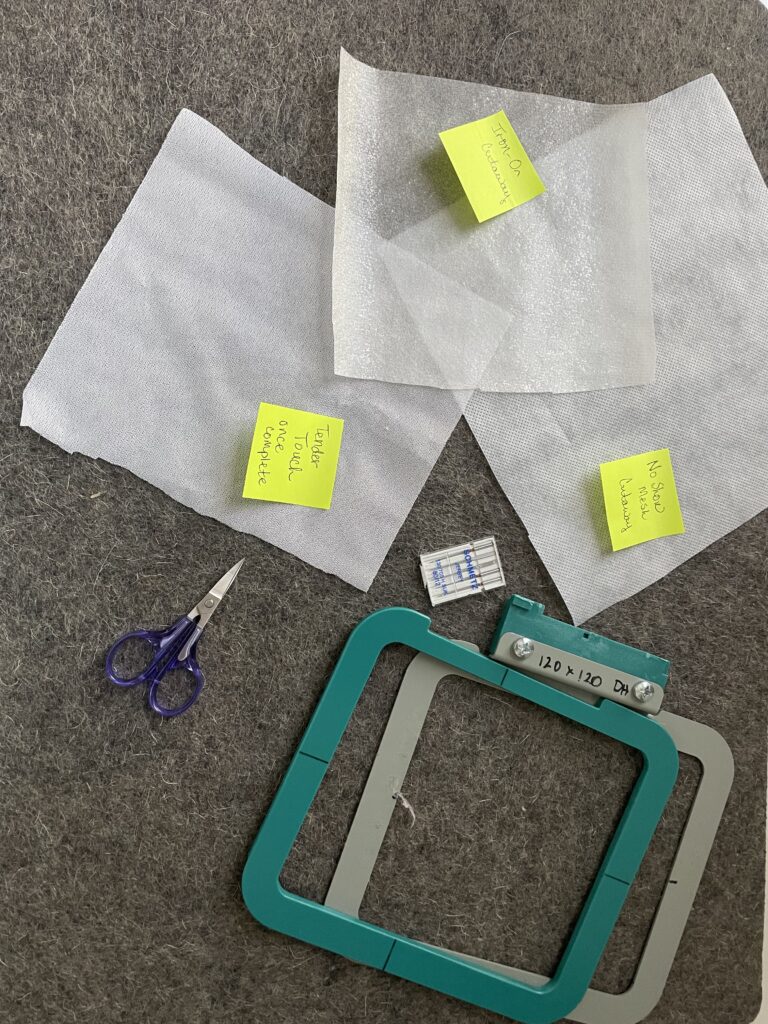
Iron-On No Show Cutaway Mesh Stabilizer: to iron to the onesie on the inside
Another layer of Cutaway Mesh Stabilizer: to use in the hoop for additional stabilization
Tender Touch: to iron over the design inside the onesie and provide soft, non-itchy contact with the baby’s skin
Hoop: regular or magnetic, the design size is 4 x 4 – if the year or a name is added, then a 5 x 5 hoop will be needed.
Applique scissors: I like smaller scissors with curved edges to get in tight spaces to trim.
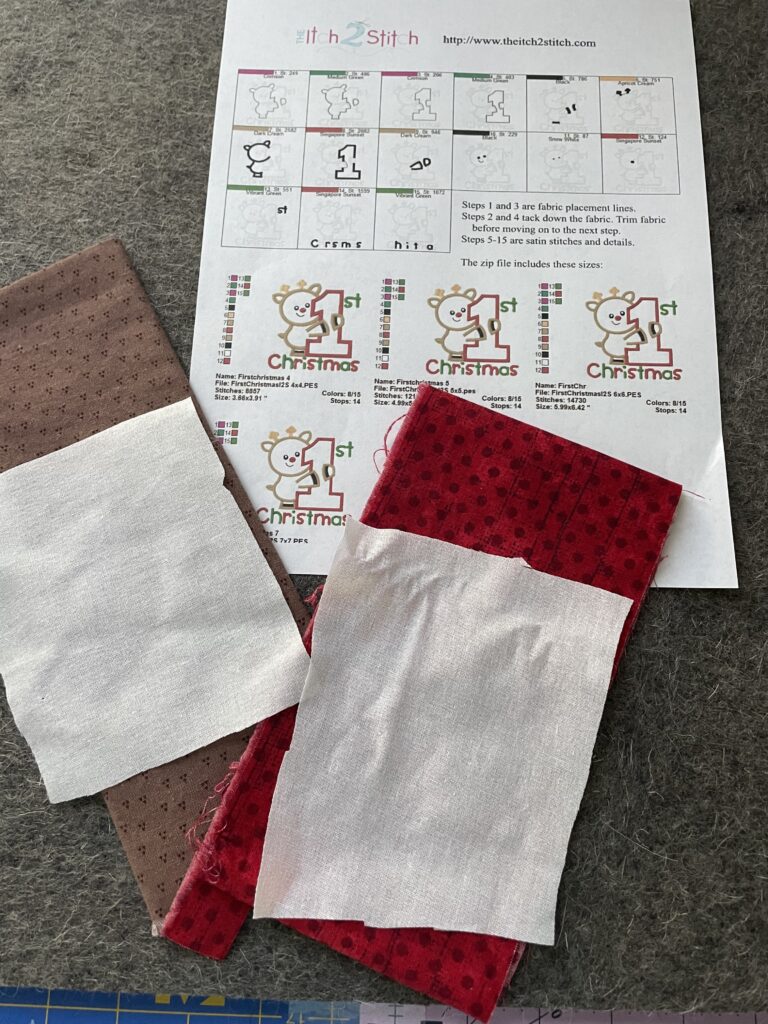
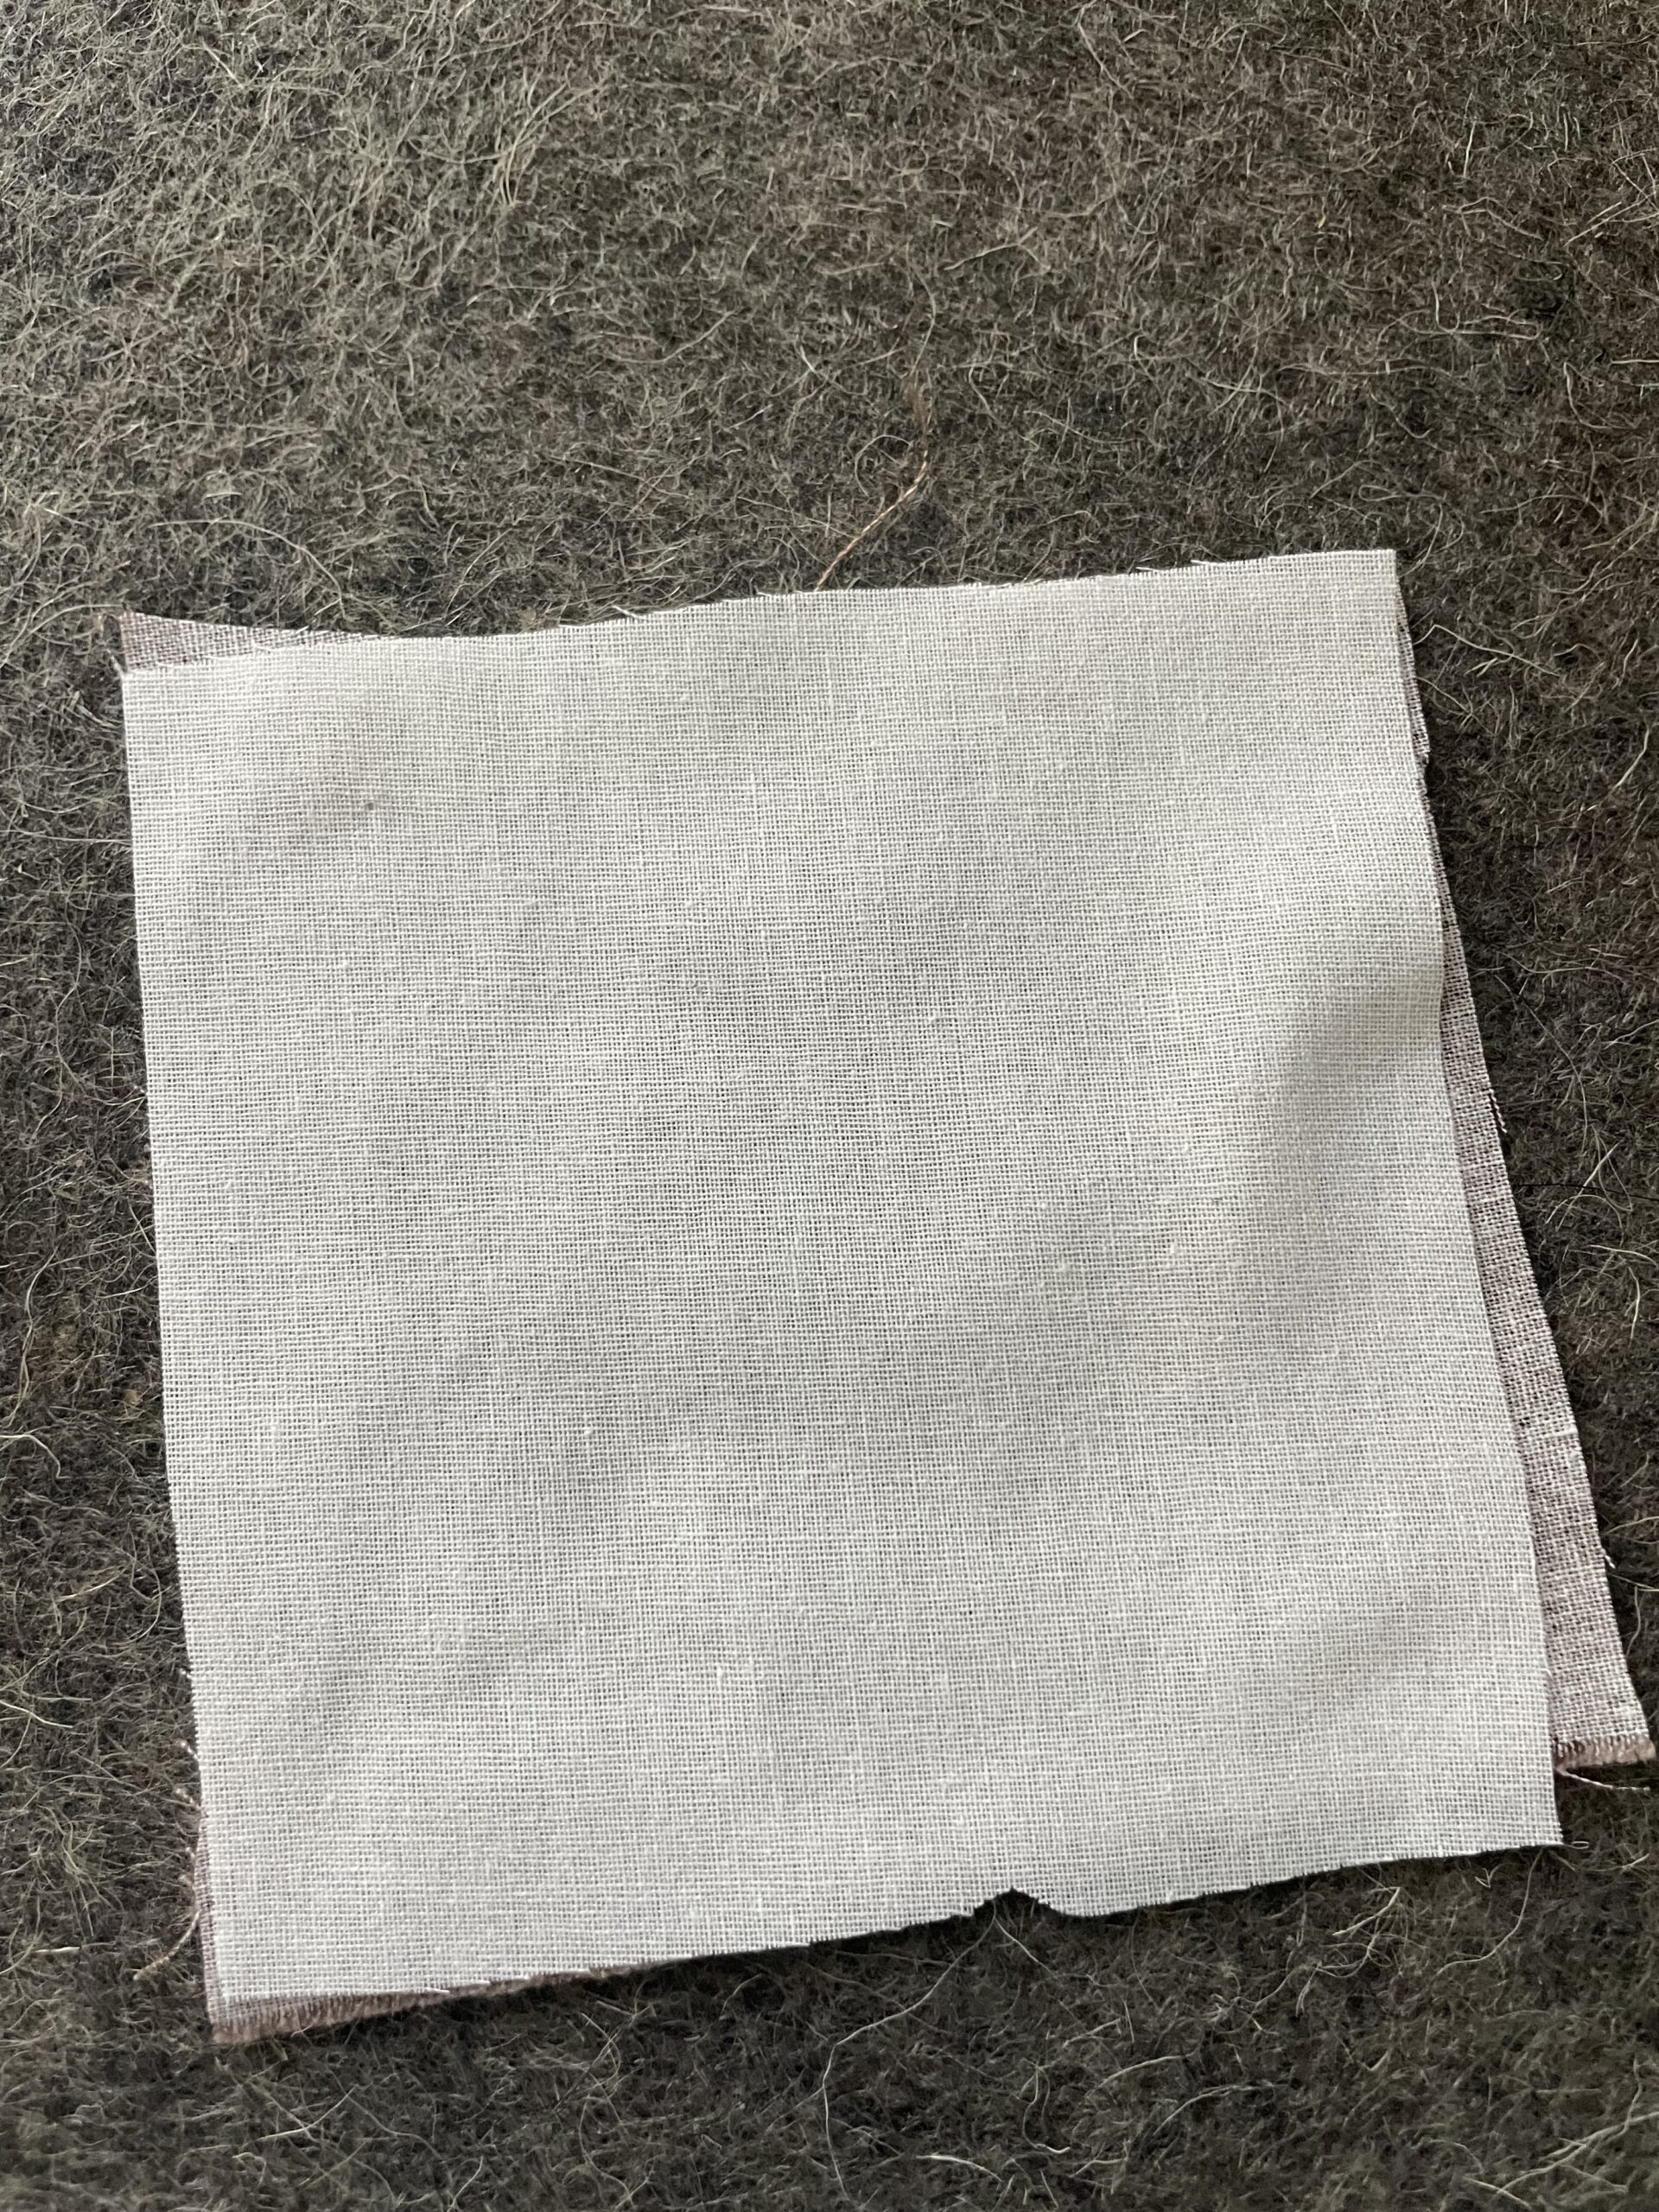
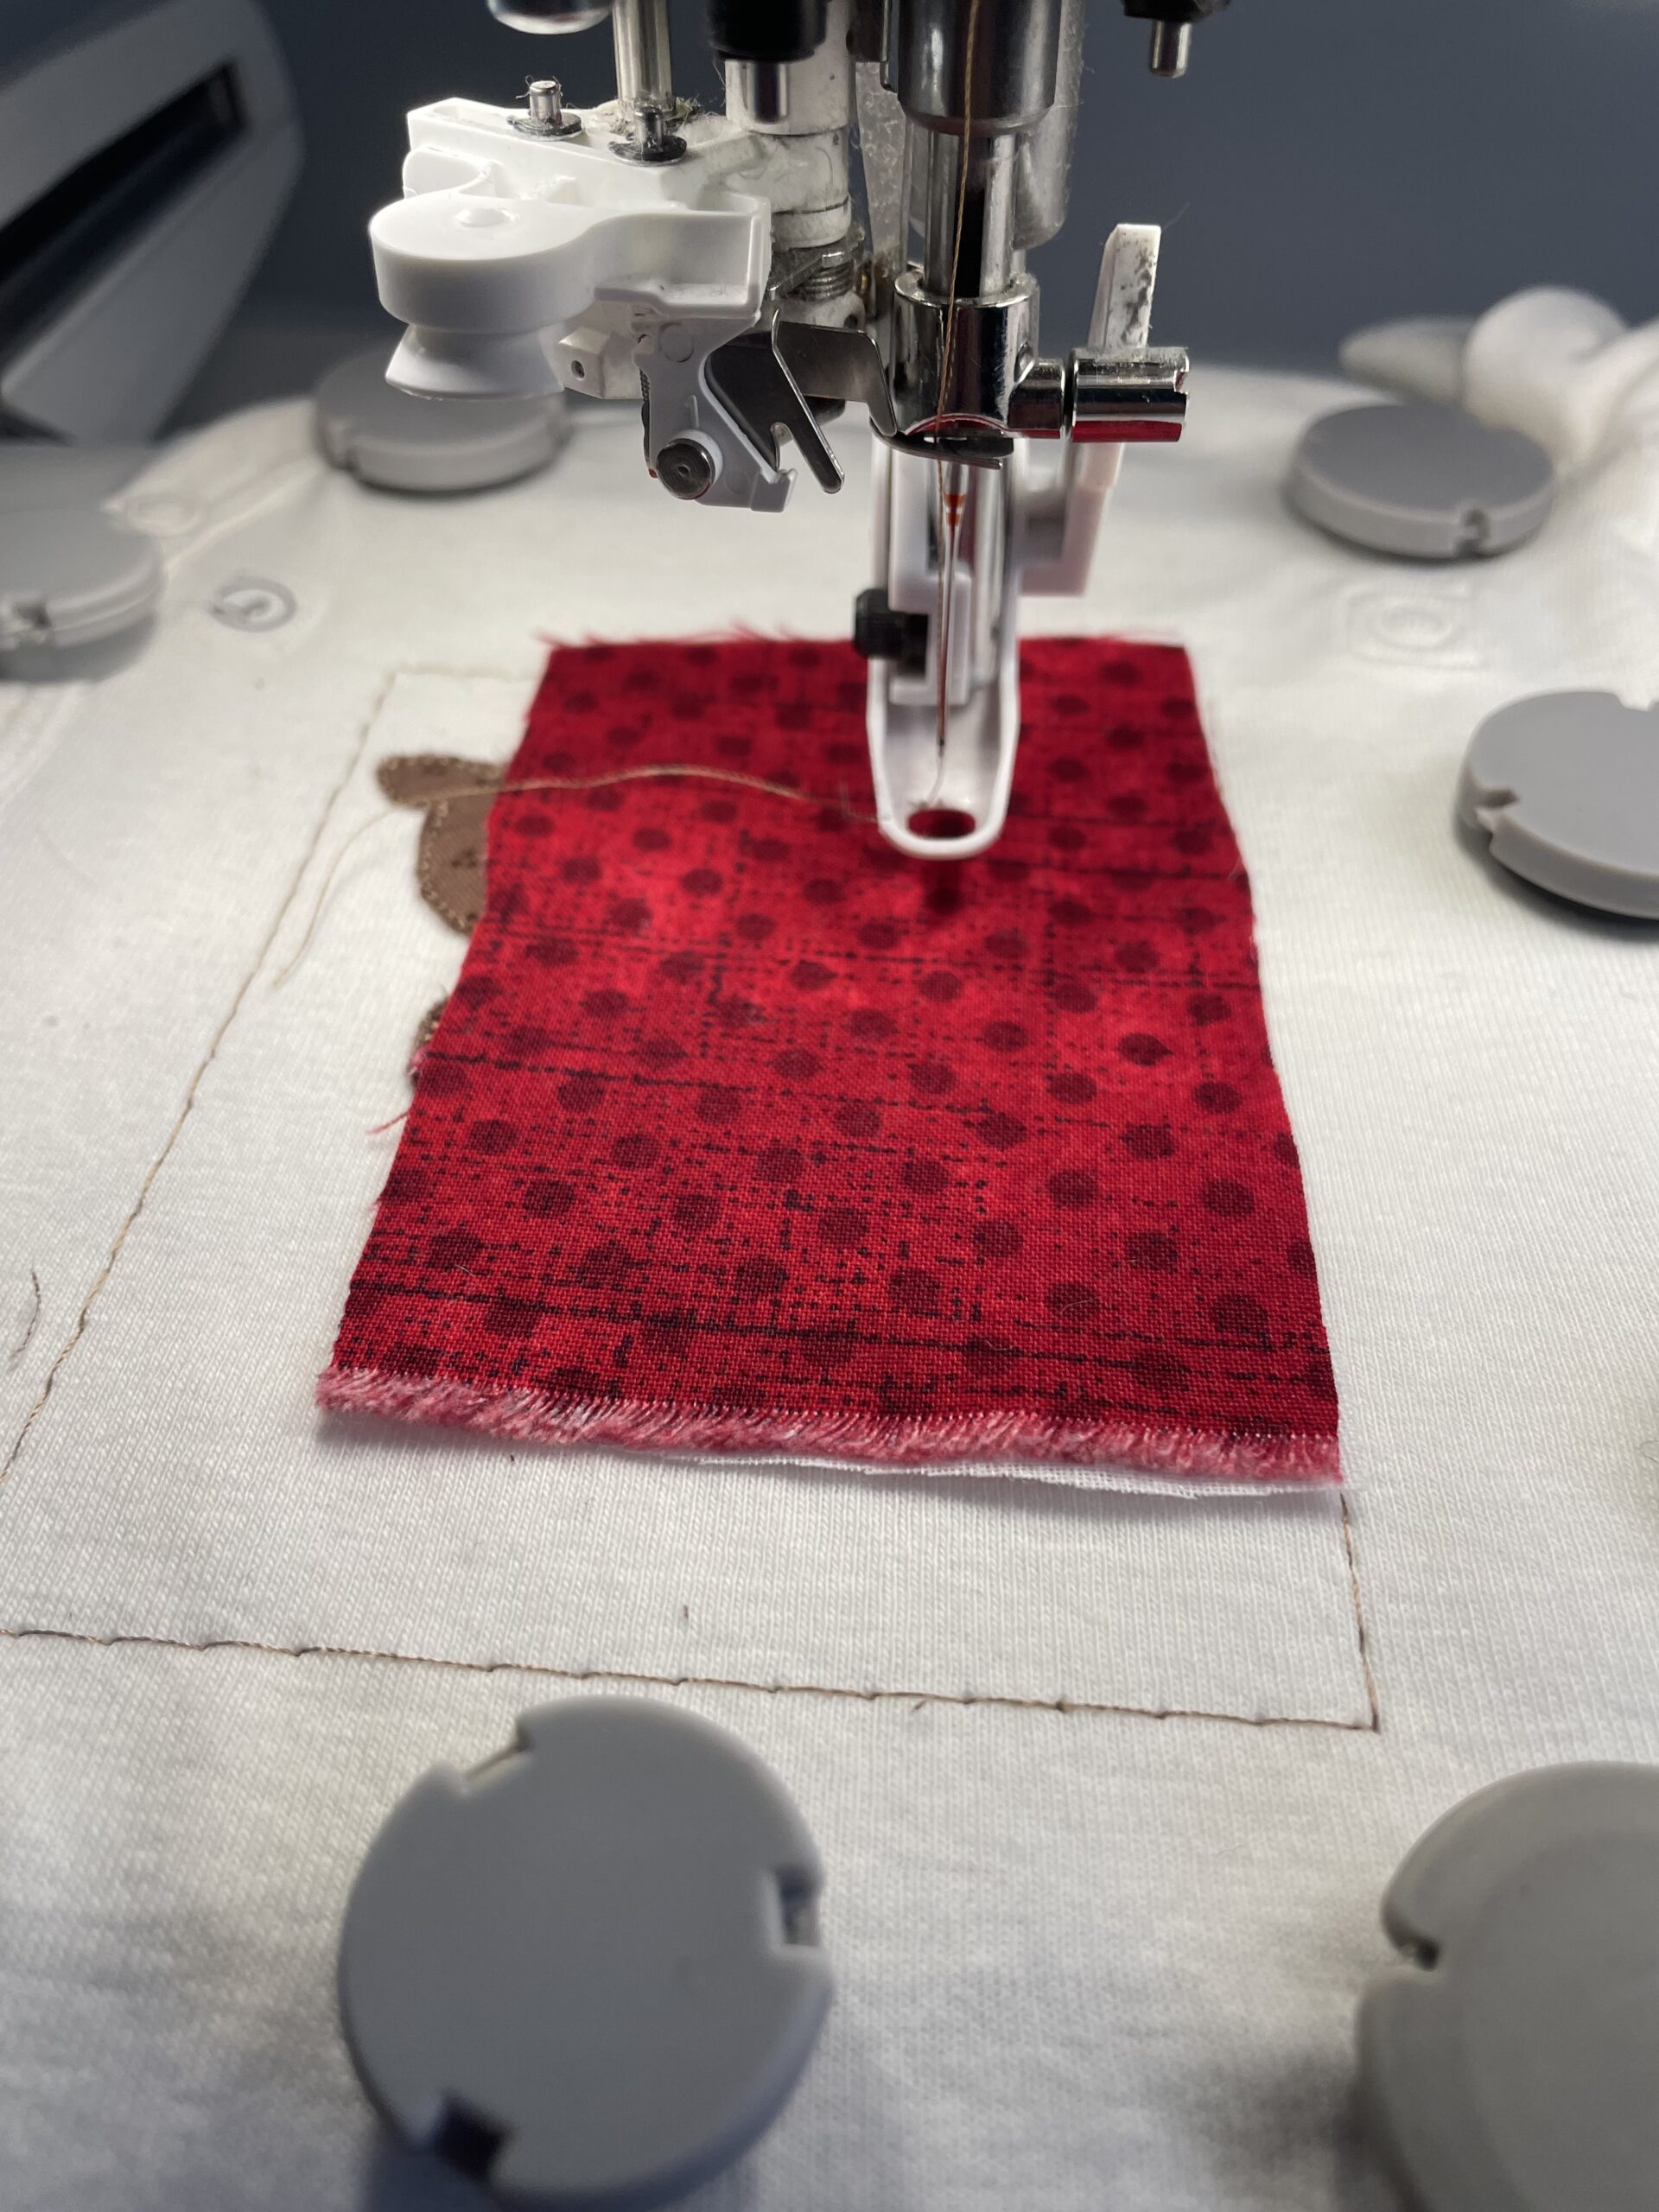
Two applique fabrics (approx. 3” x 3): one for the body of the reindeer and one for the number “1”.
Two pieces of SF101 Fusible Interfacing: cut to the size of applique fabric once the applique placement line is done. Heat N Bond Lite or lightweight fusible interfacing are other options to bond to the applique fabric. Any of these options give the material some weight and add another layer for the satin stitches to catch.
A quality onesie large enough to allow space for the design (4” x 4”). I purchased onesies with side snaps or open side seams from Amazon (Kimberell has a few short-sleeve ones to choose from on Amazon).
I have embroidered on regular store-bought onesies with side seams intact; the design space in your machine is very tight, and the onesie can become cumbersome to work with limited space. A good video tutorial on DBJJ shows how to hoop a onesie if you don’t want to open the side seam.
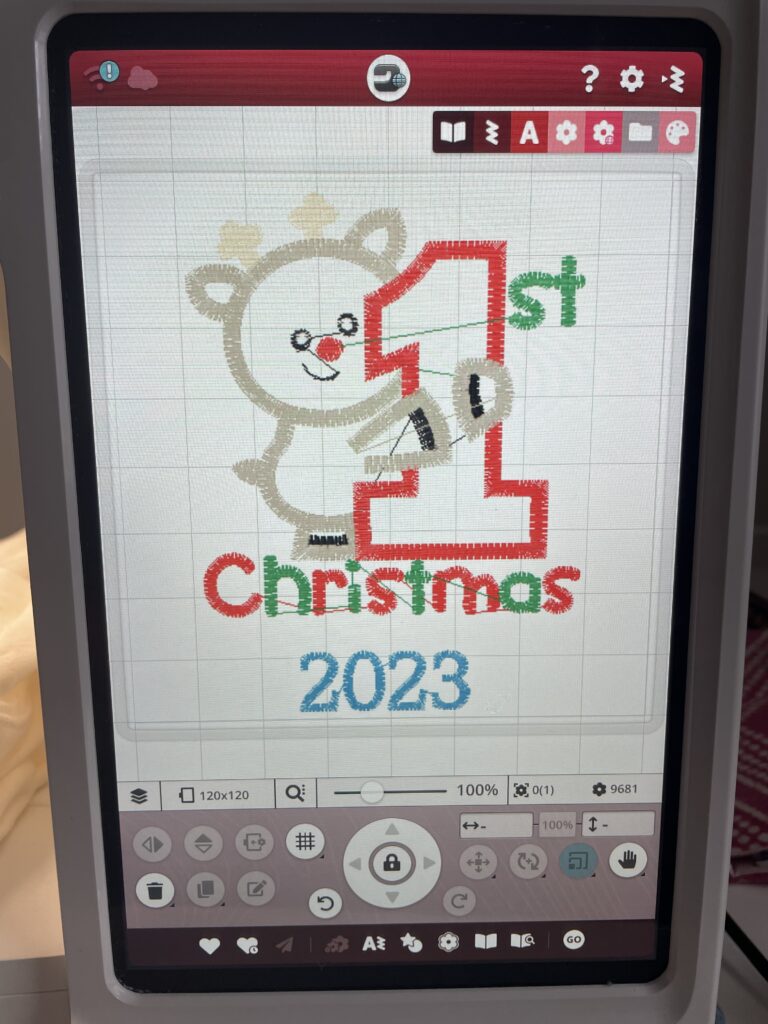
The First Christmas Applique (I2S_1009) was downloaded from DBJJ in a 4” x 4” format. The onesie is a 6-month size with side snaps so the design space can be flattened. Three larger size formats are available depending on the design space available. Also in the download folder was a color chart, a .jpg picture of the design, and instructions on Embrillance and appliques.
I always download the color chart to see the steps and stitch count easily. I selected two applique fabrics from my cotton fabric stash that I thought would work for the reindeer (brownish) and number “1” (red with darker dots).
Since the onesie is off-white, my fabric color selection left many options since almost any color would appear. Thread color is selected after selecting the applique fabric to coordinate or match as closely as possible.
You can use whatever thread color that you want! The Color Thread Chart is given for guidance and to let you know the stitching sequence. When using applique, the color selection can also be affected by the fabrics you choose for applique work. The other factor in the thread color selection is the color of the item that you are embroidering.
Adding the name or the year (or both) to the onesie is also an option. Many machines come with a font selection to use for personalization that is done before the start of the design stitching. I LOVE to use Embrillance software for personalization because it gives much more flexibility in fonts and sizes.
Any font purchased from DBJJ can be downloaded in .bx file format. The Embrillance Express software is free and utilizes the .bx file format. If you want more flexibility in combining designs, fonts, and resizing designs, then the Embrillance Essentials is a very reasonable and easy-to-use software program.
I used the Express software for about a year and then grew into the Essentials as I learned more about embroidery and modifying/combining designs.
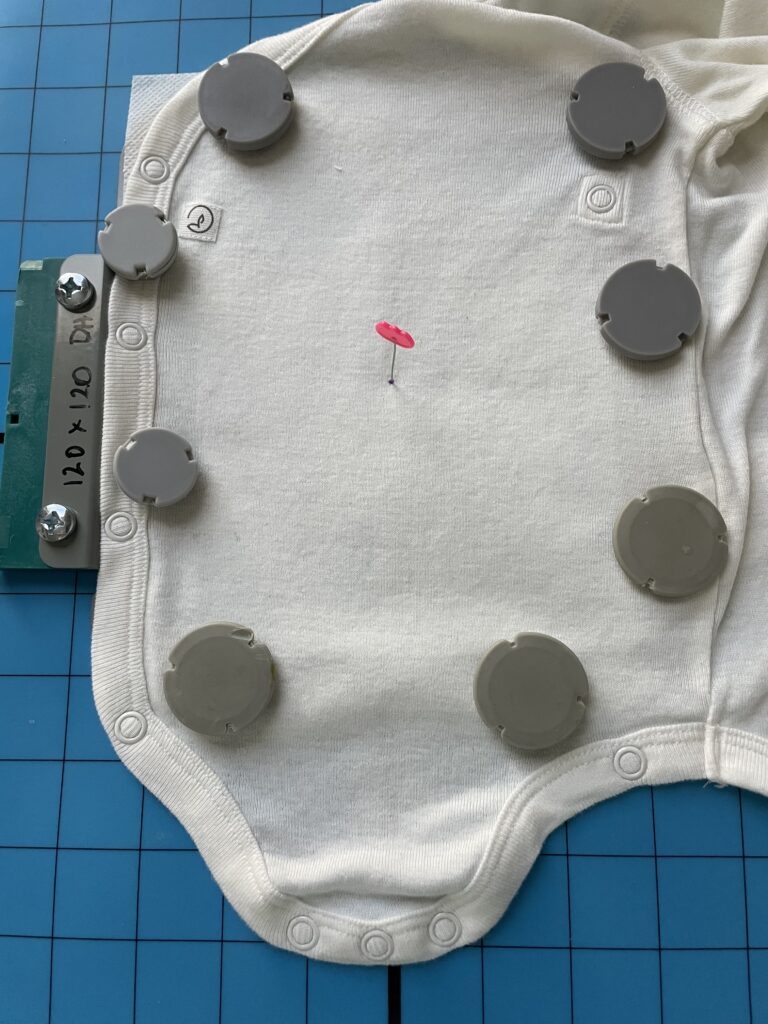
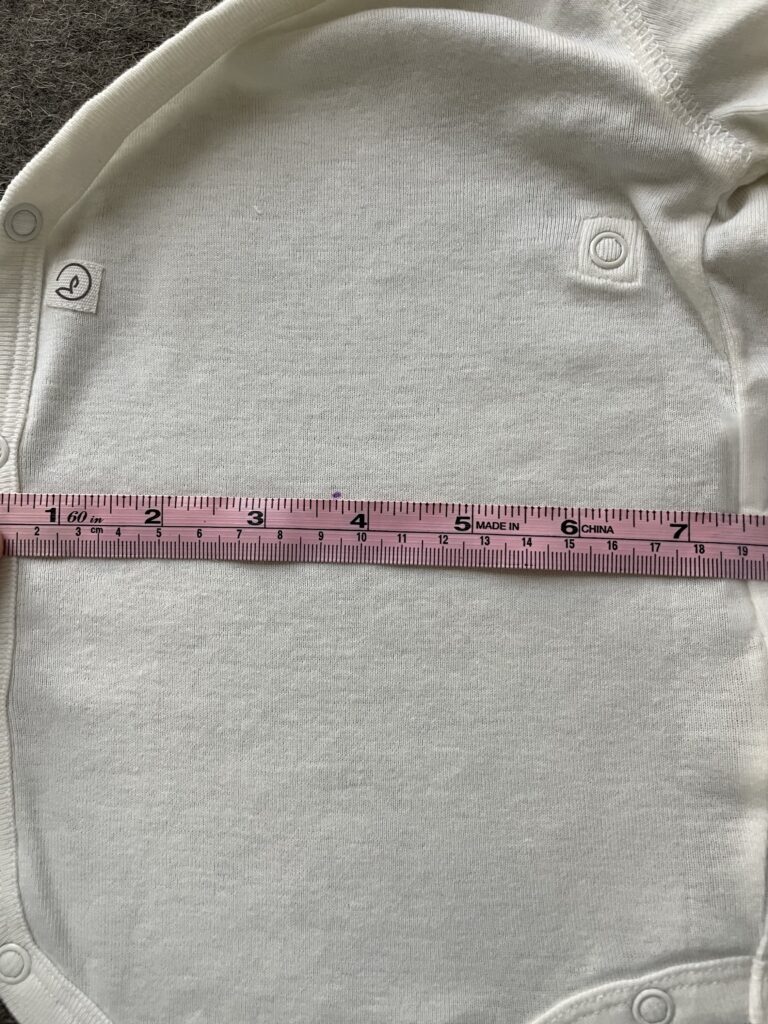
I measured the onesie across from the snap side to the seam on the opposite side and put a wash-away purple dot in the middle of the garment. I then used an iron on the stabilizer to the back of the design area (shiny side against the onesie). Place the no-show mesh cutaway in the magnetic hoop and find the center of the design space.
I use a Hoop Mat (DIME) and find that helpful instead of estimating. Once I found the center, I realized that the top of the design area would come too close to one of the snaps, so I used the center line of the Hoop Mat.
I moved the design area down about an inch while still staying on the center line of the mat. Sometimes, you need to adjust vertically or horizontally even after you have marked the garment. I use magnetic hoops and magnets primarily due to their strength and versatility.
For the My First Christmas Applique, I added the year to the design using Embrillance Essential and the DBJJ Diamonds ¾” .bx format loaded into Embrillance. With Embrillance, I audited a larger font and different font styles easily and quickly.
Put the Jersey embroidery needle (80/12) in your machine since we are working on a onesie.
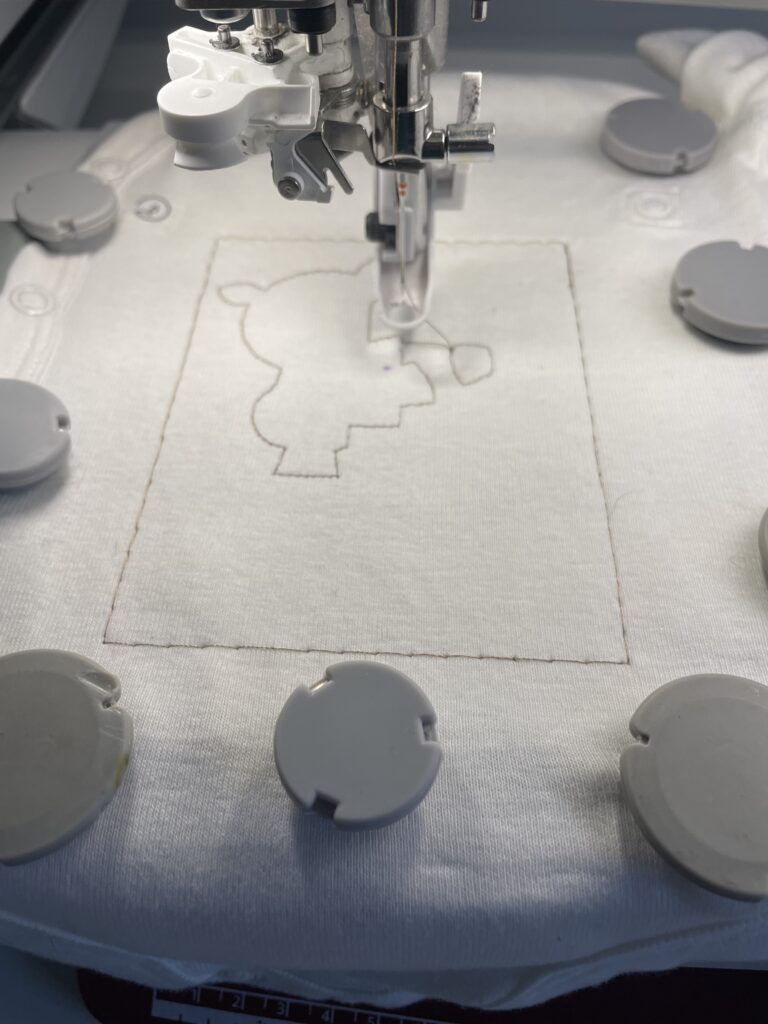
If your machine can baste a box around the design area, I suggest using it. Basting the area helps the stabilizers connect and hold the design in place as you stitch it out. It also enables you to see where the center of the design will be in case vertical or horizontal adjustments are necessary.
Basting stitches come out quickly once the project is done, but they provide stability and confidence with your project.
I always lower the machine speed when working with a jersey since it is thinner, and dense stitching can cause puckering, especially if the stabilizer isn’t tight.

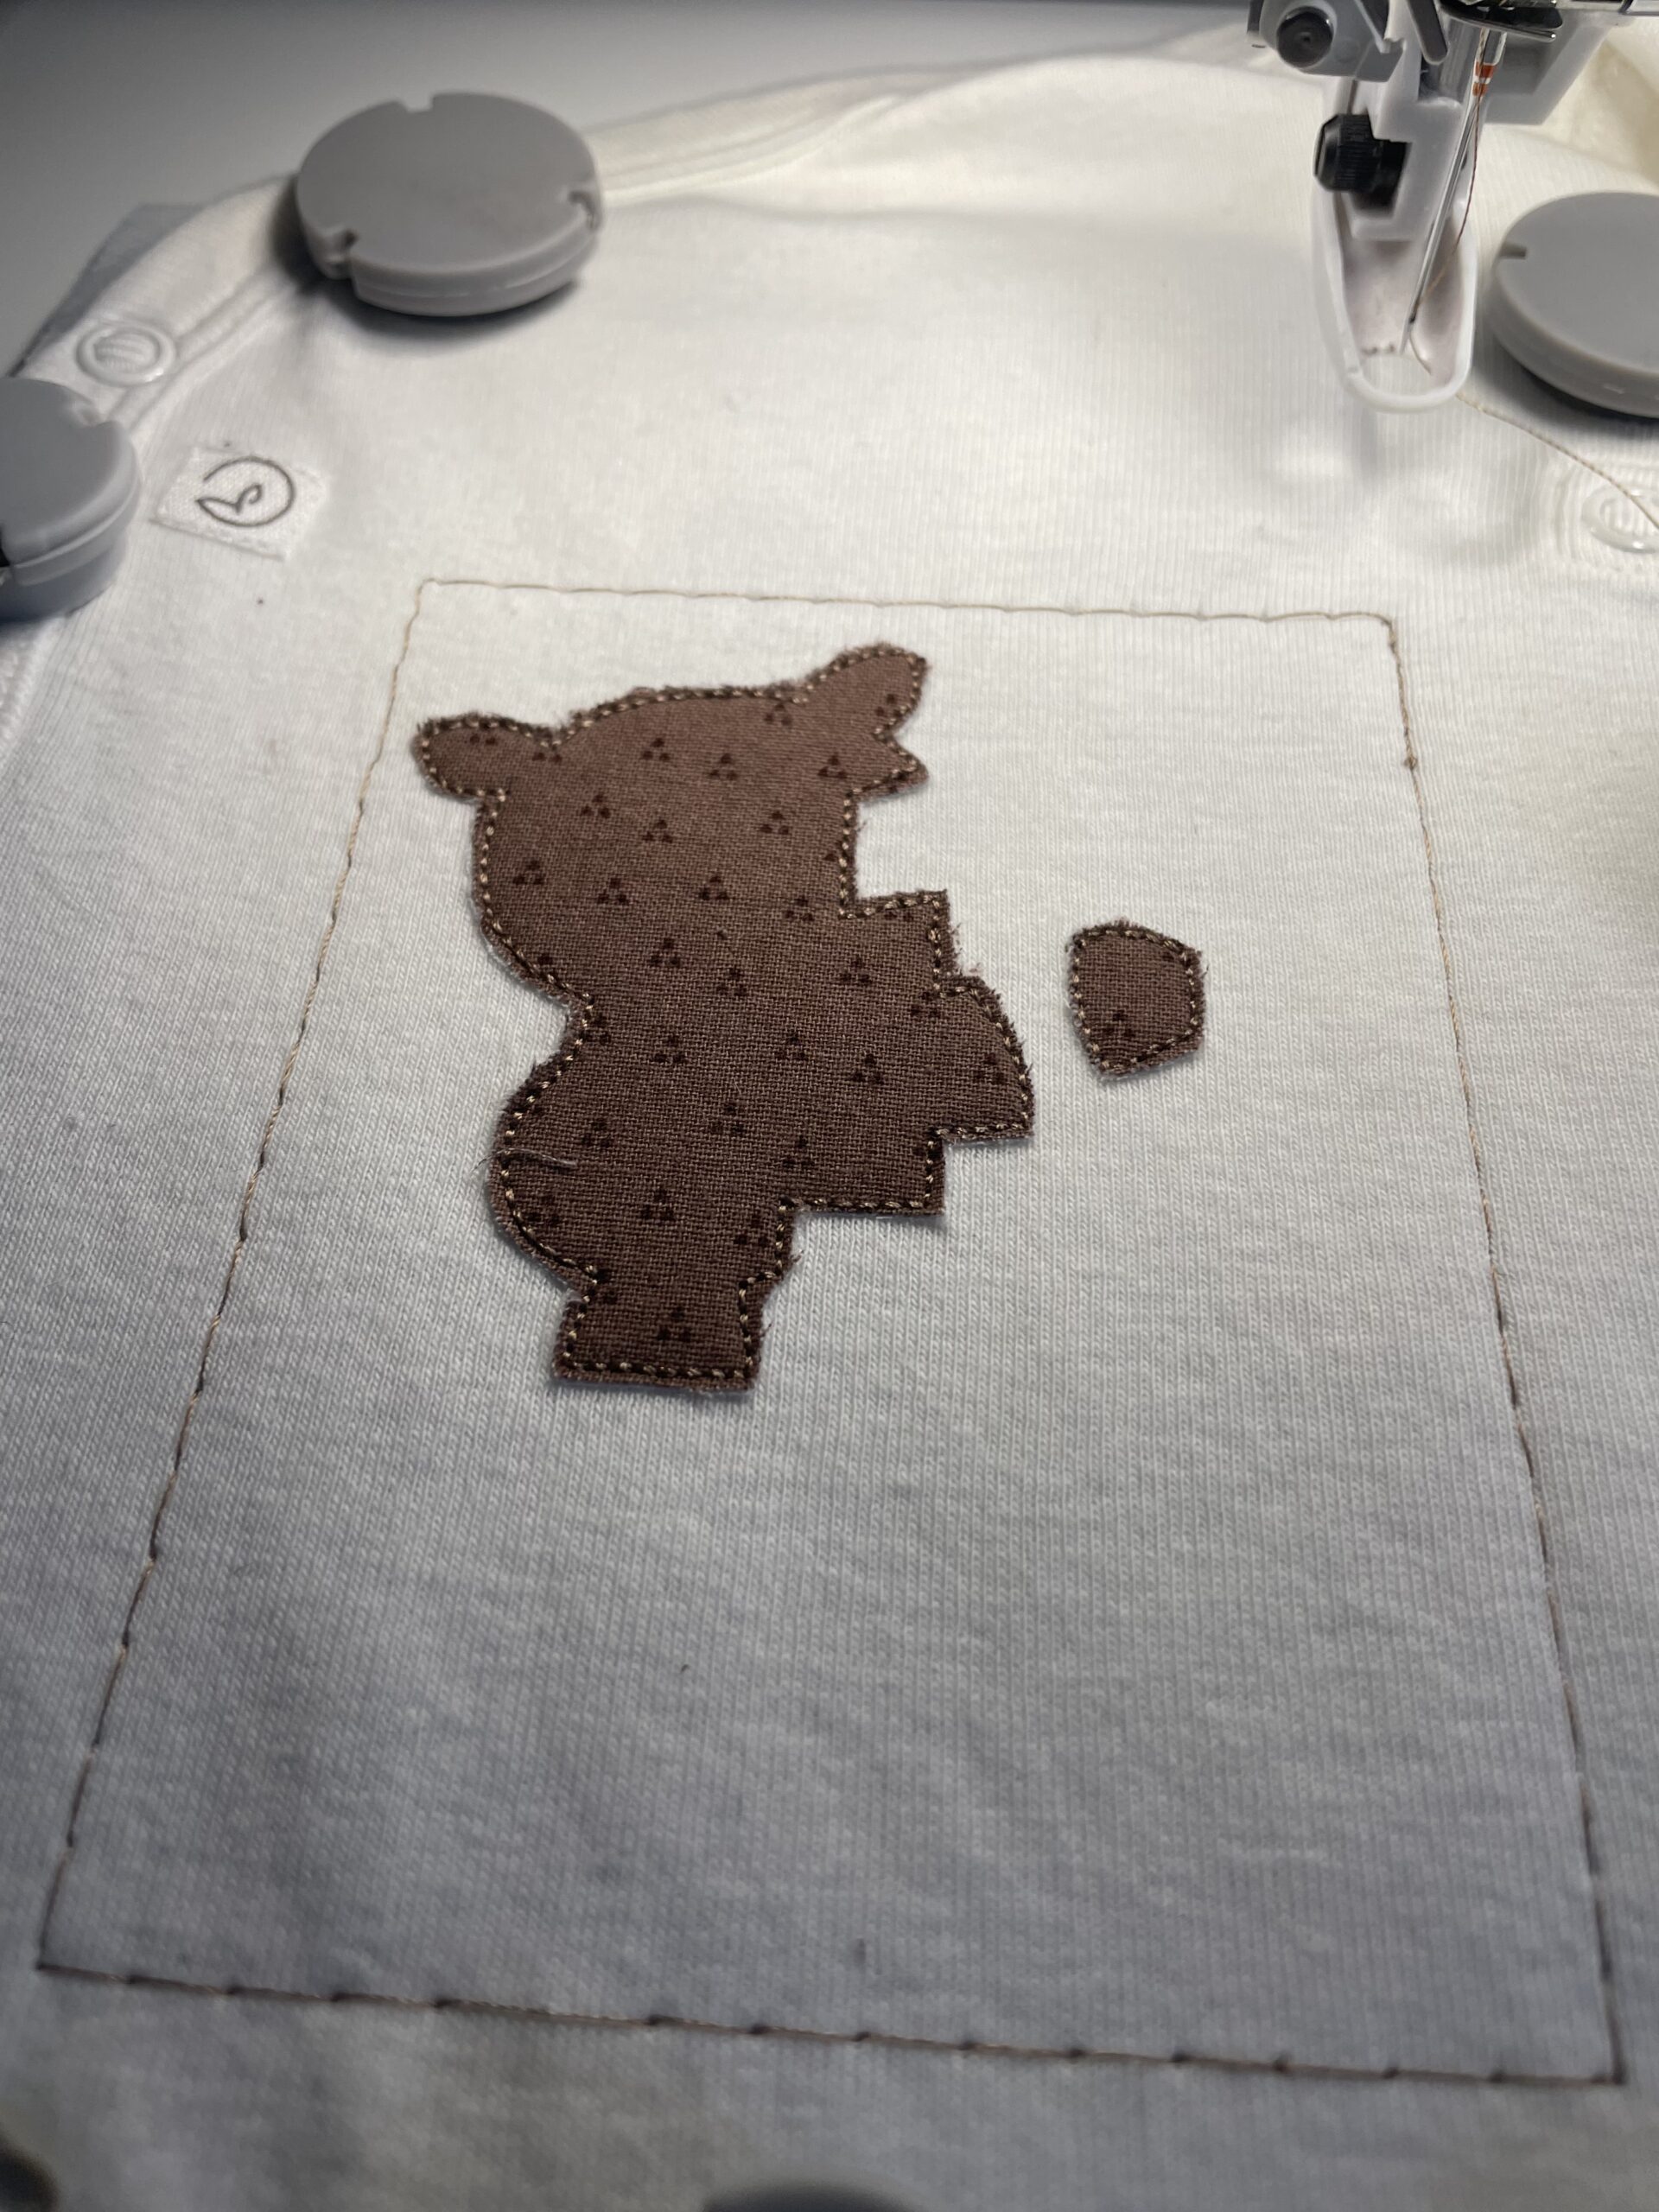
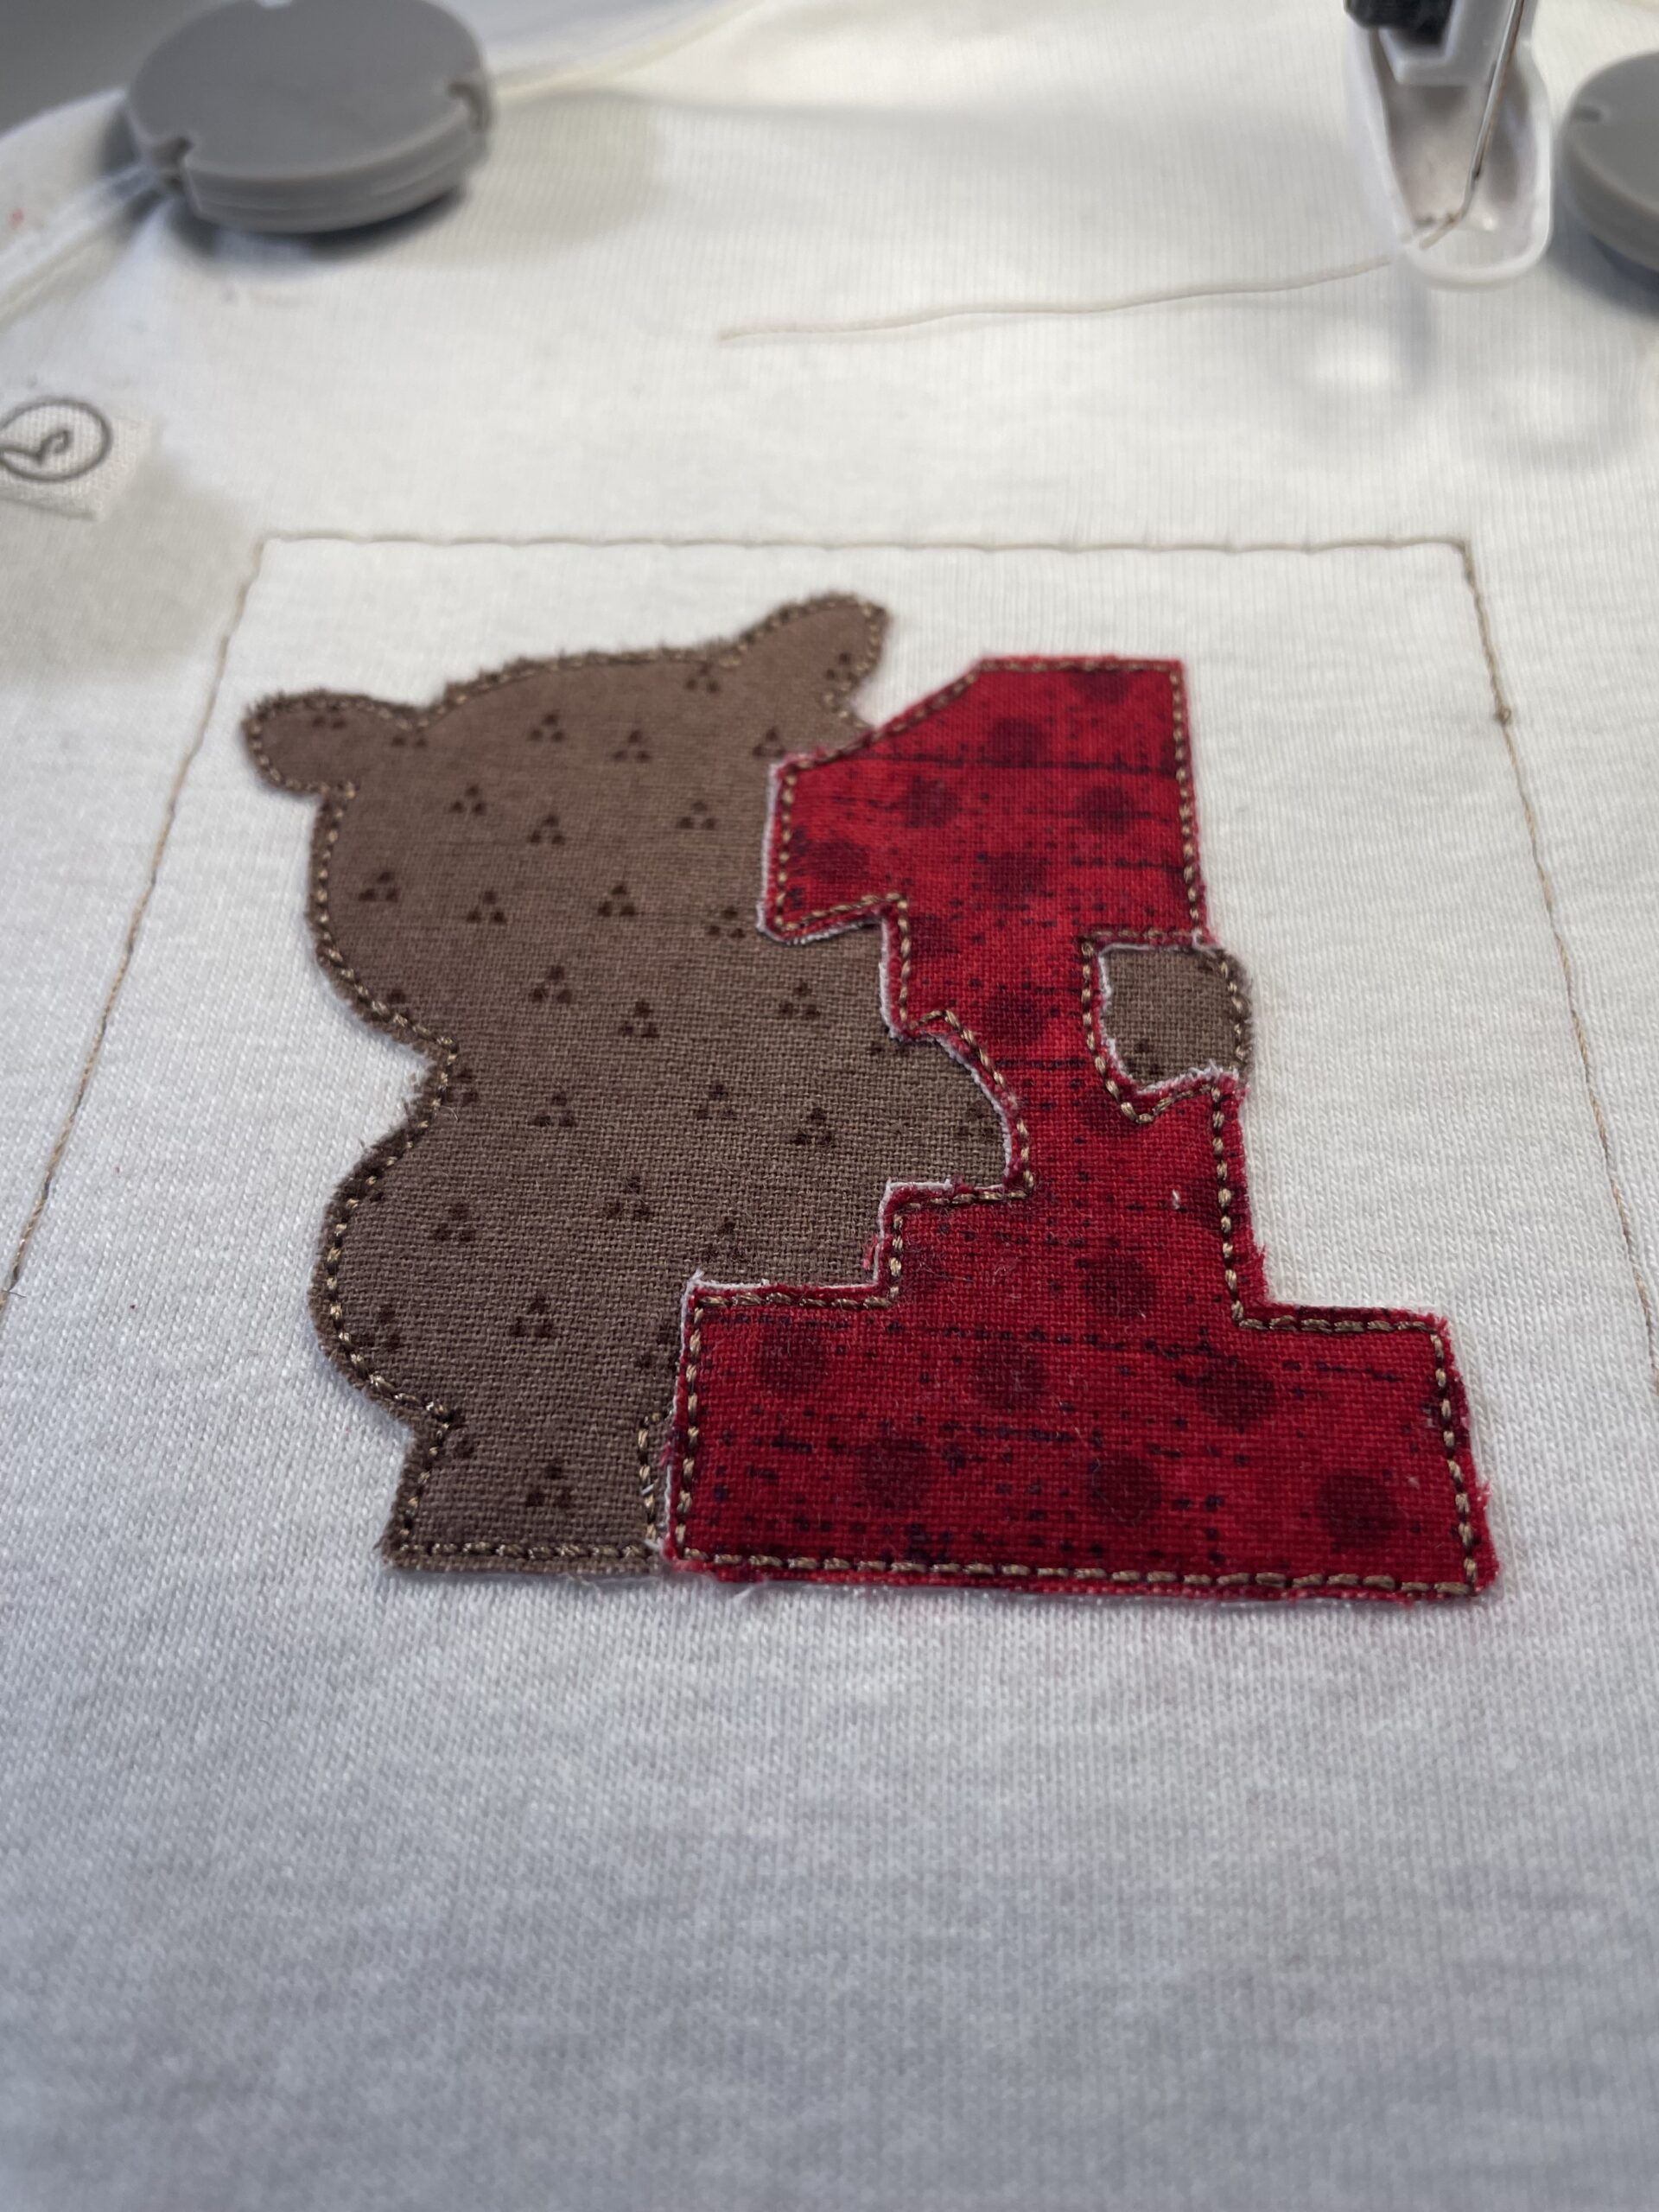
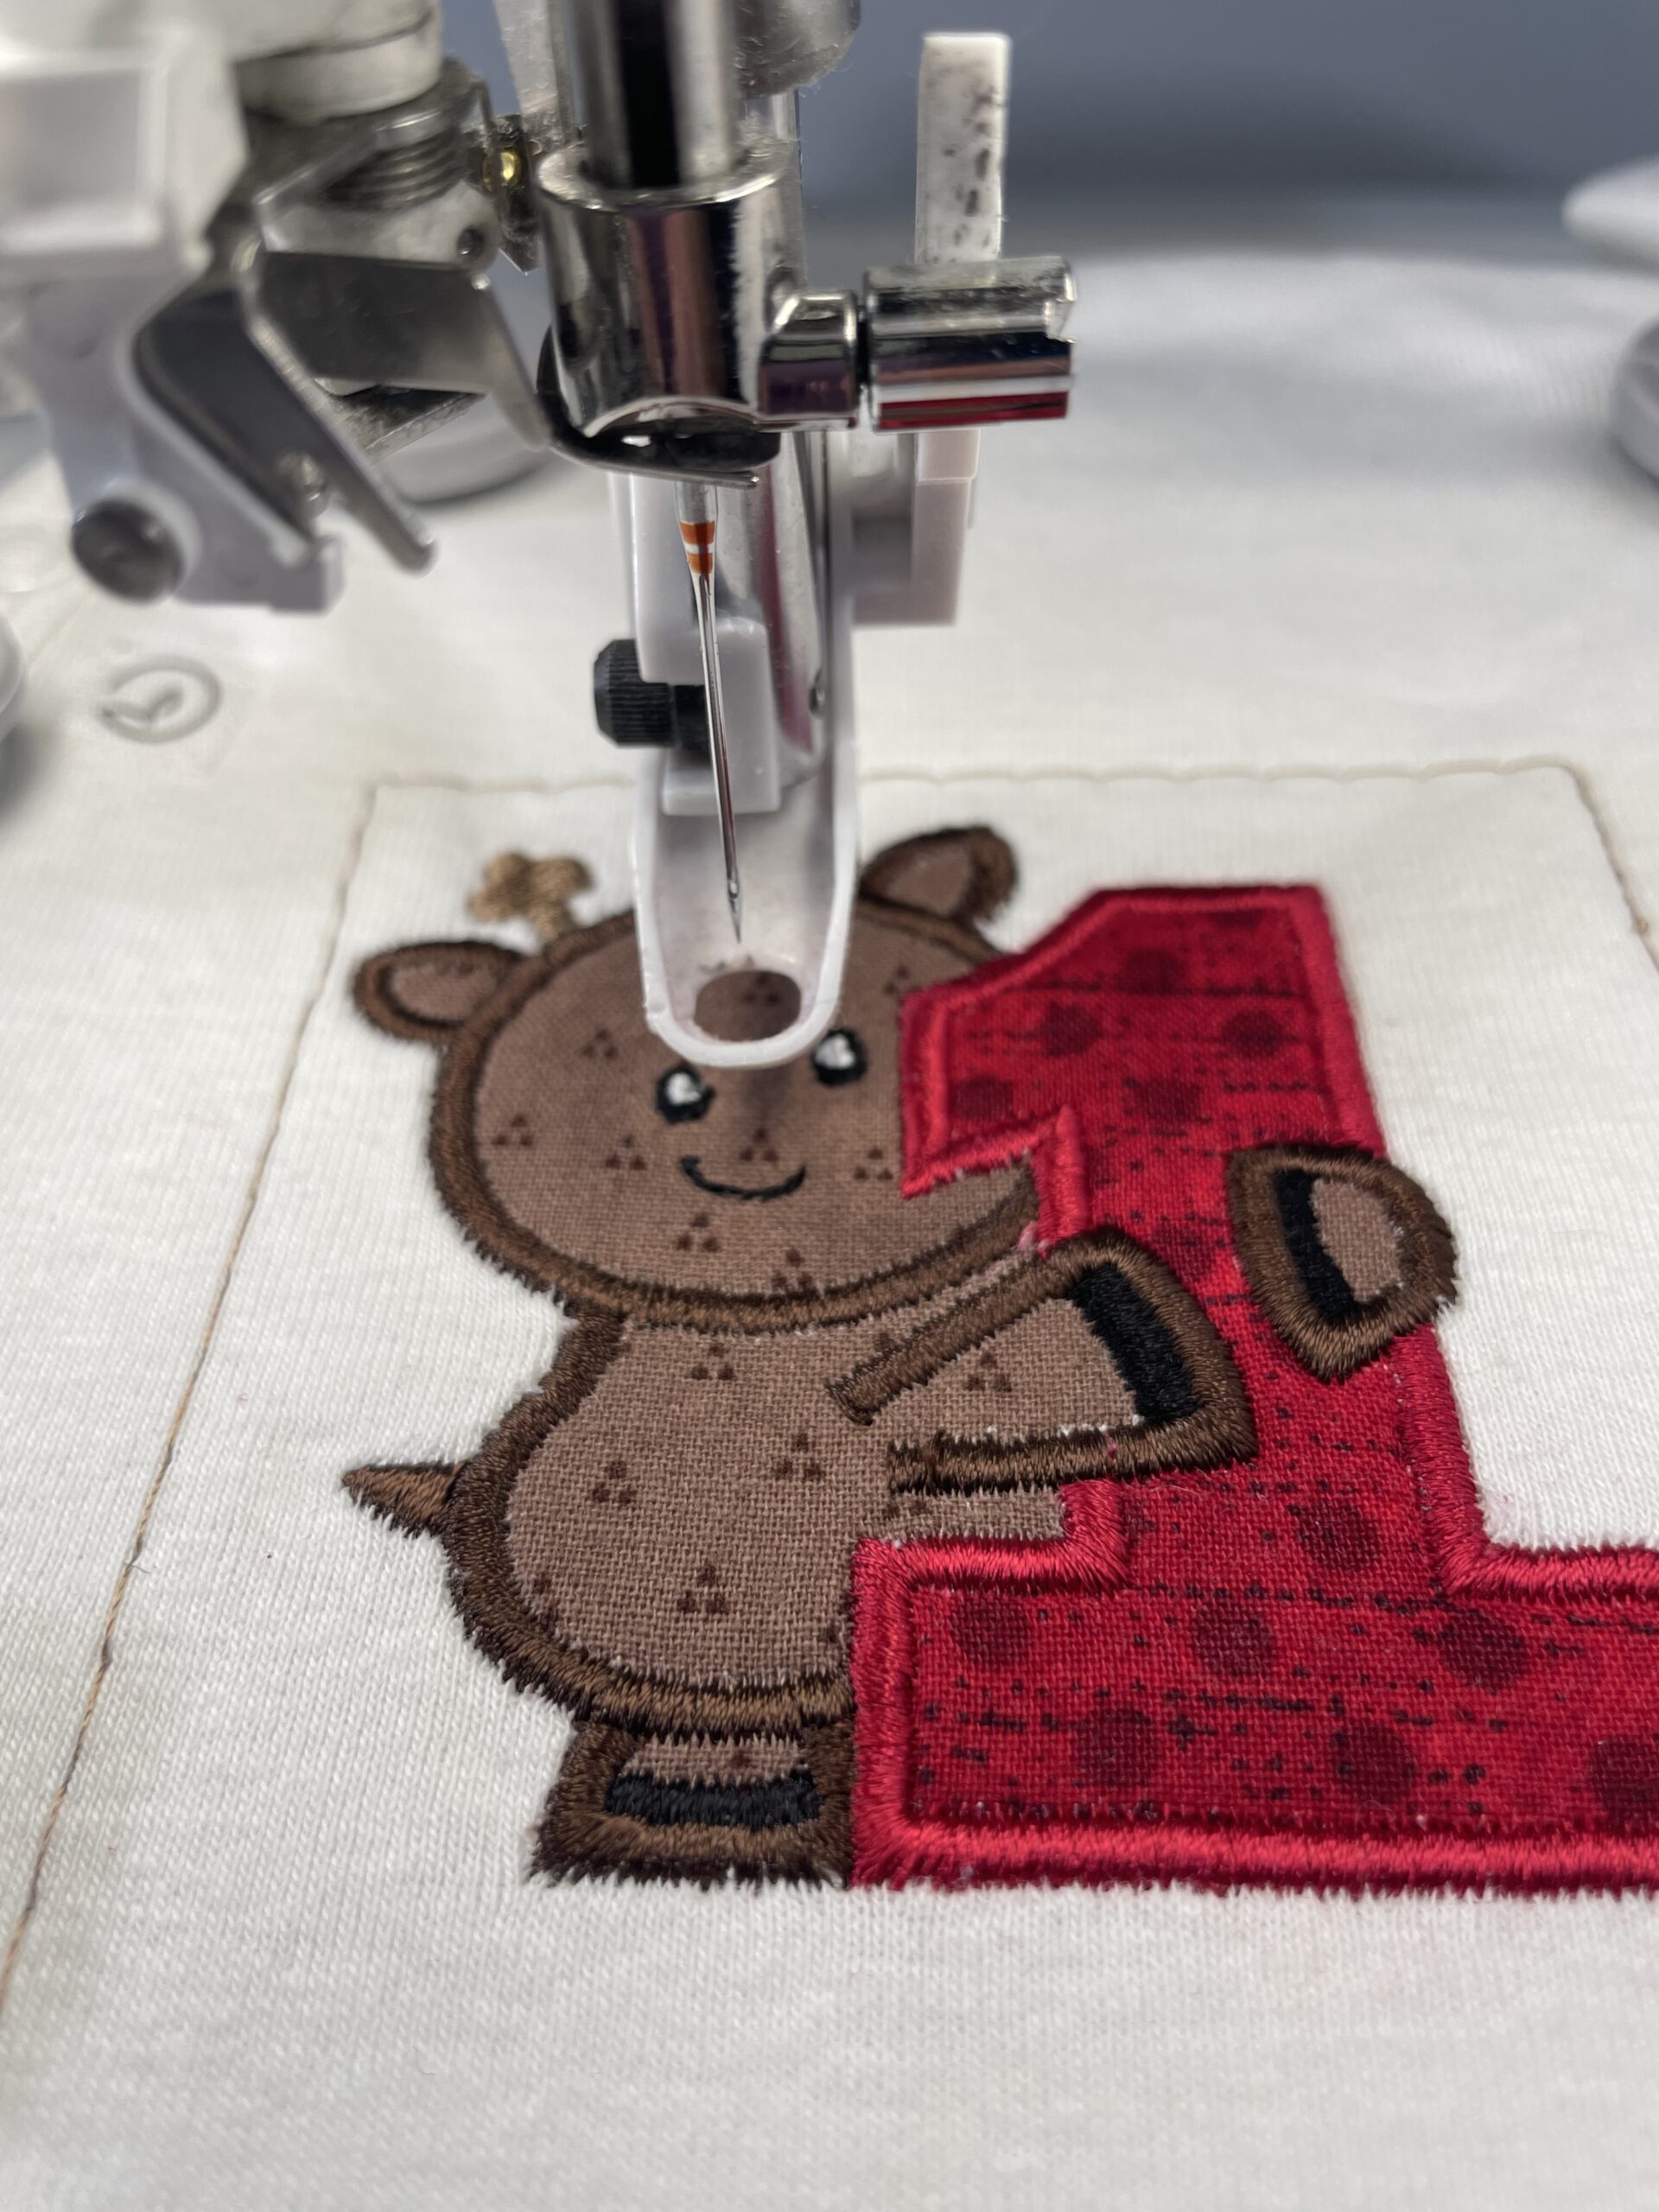
The two appliques on the My First Christmas design are sewn first, and then the satin stitches are added. The detailed instructions on machine applique are in the download file with your DBJJ purchase; they are great instructions if you haven’t done an applique project.
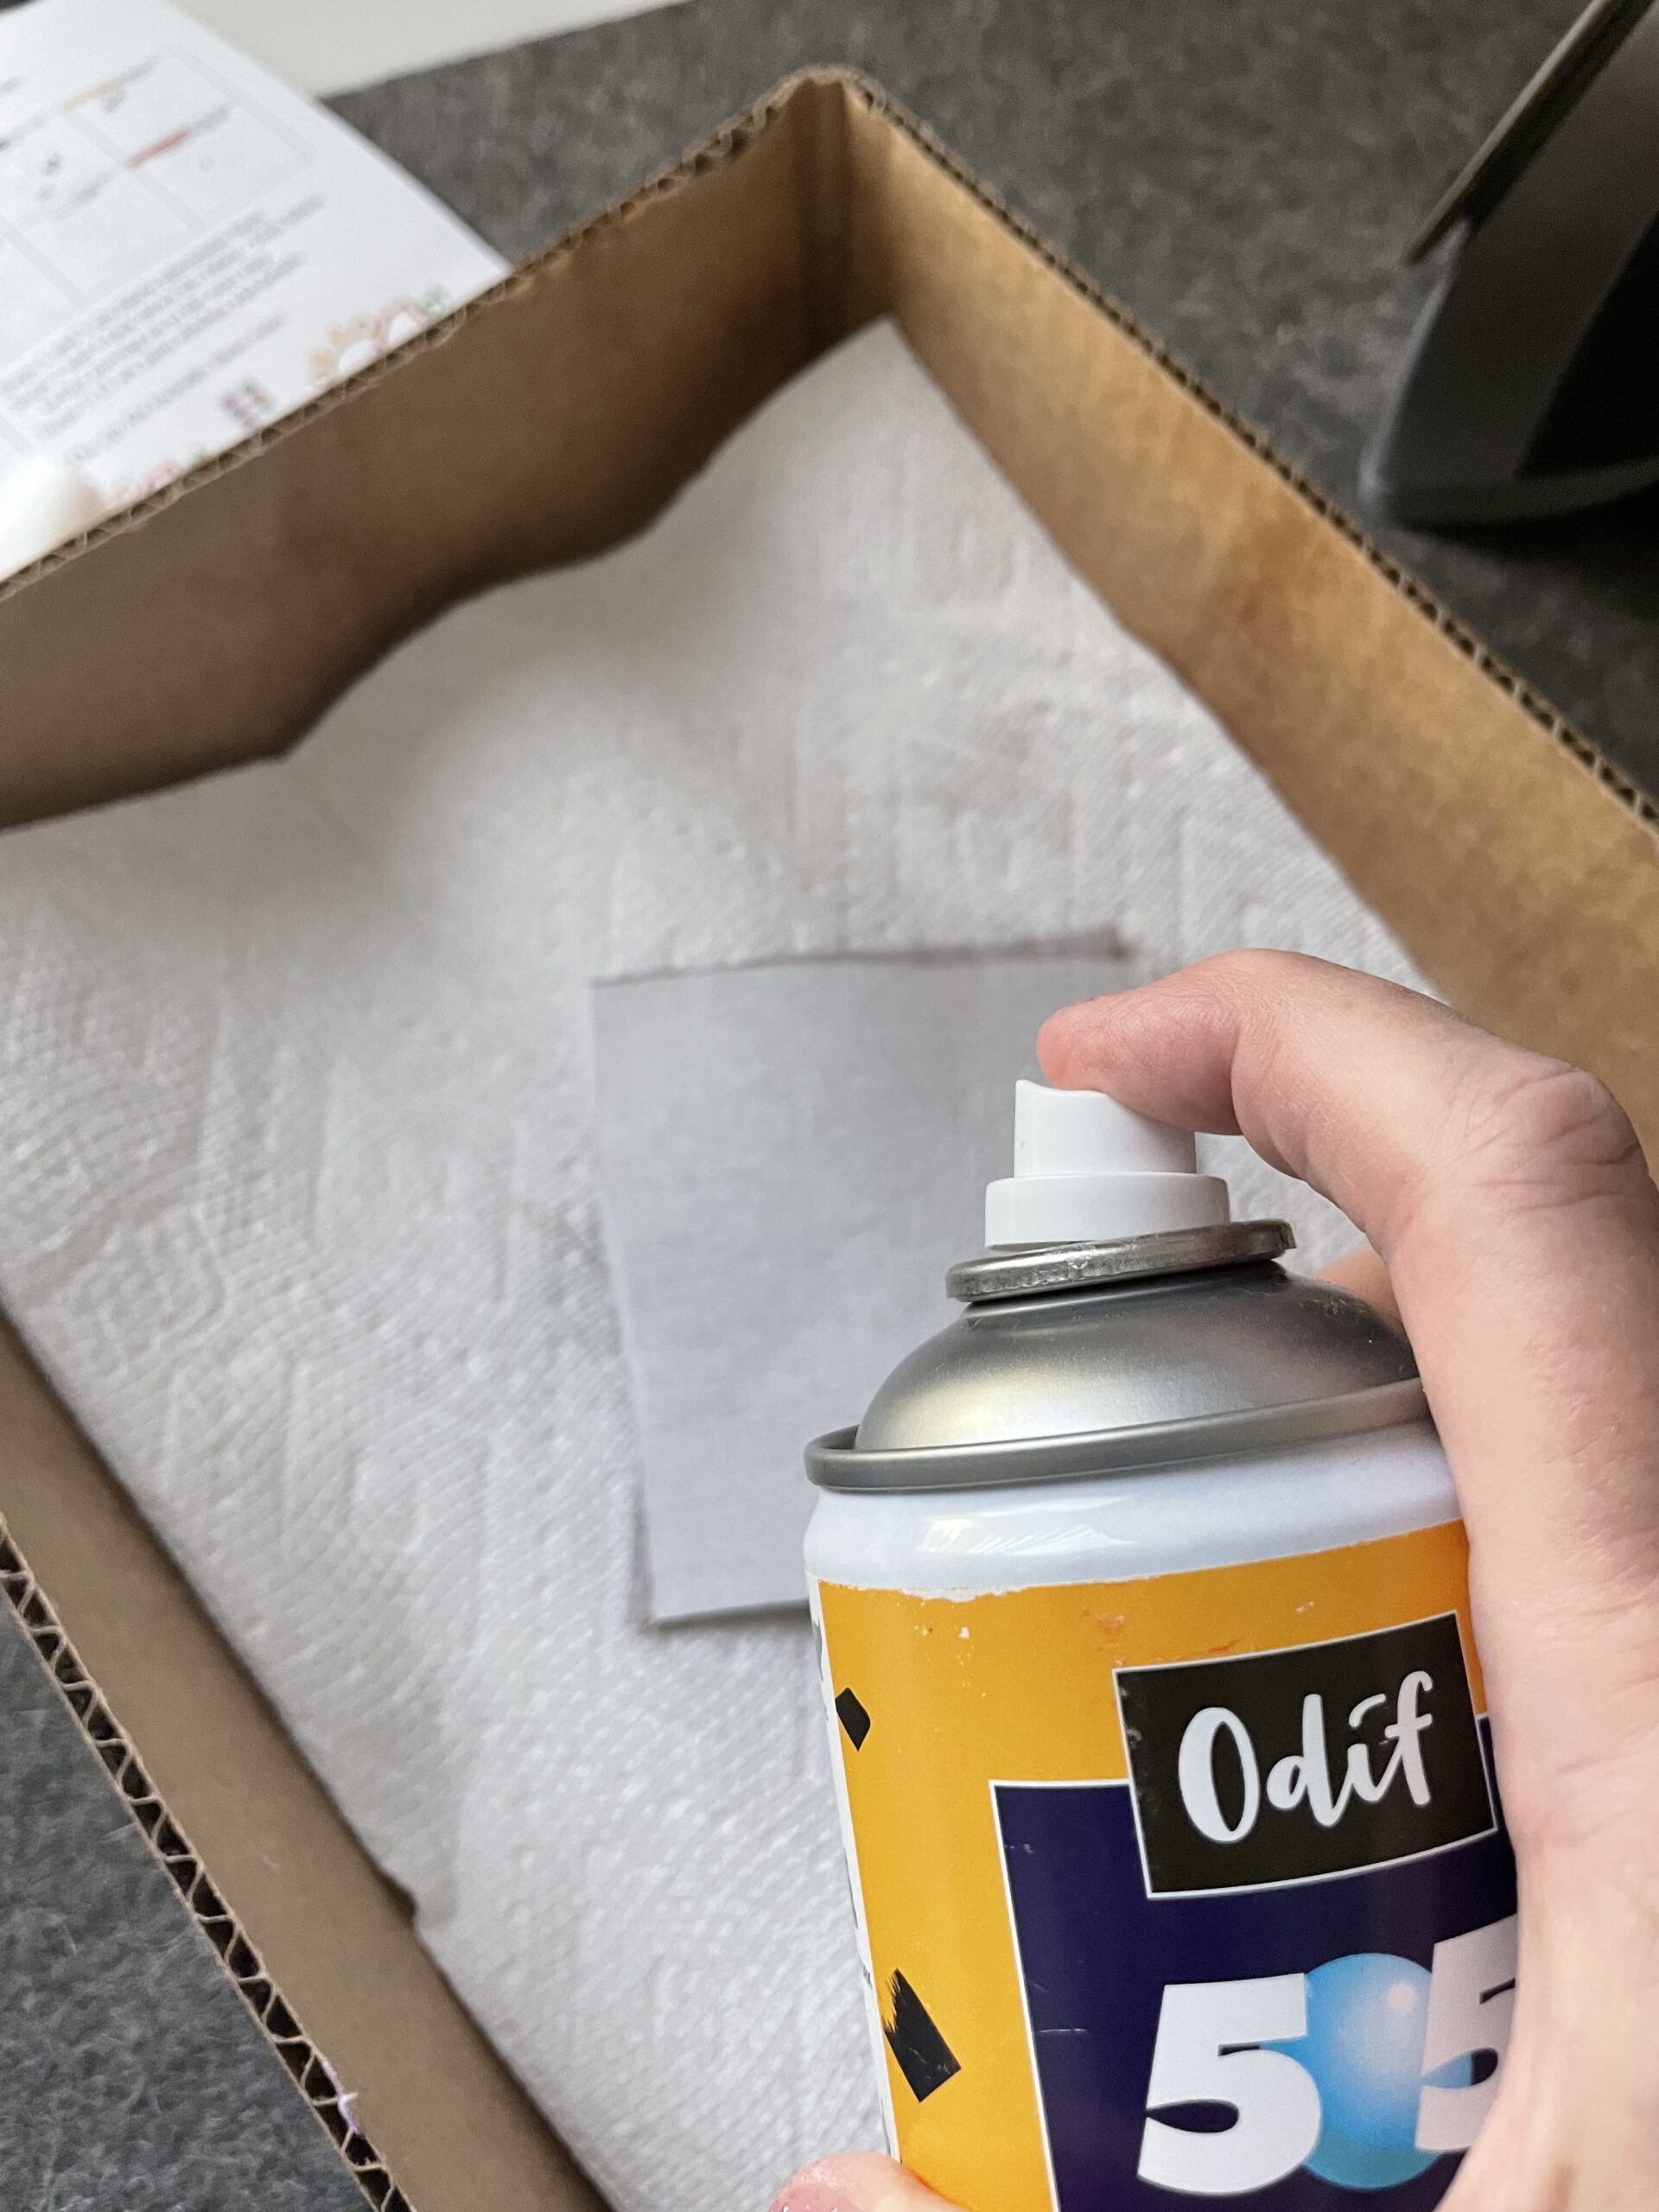
I used SF101 iron on interfacing and then sprayed lightly with 505 spray before placing fabric/interfacing over the placement lines on the onesie.
One of my favorite features on my embroidery machine (Husqvarna Ruby 90) is the “Trim Position,” which moves the hoop to a position out from under the machine, allowing easy trimming instead of removing the hoop and possibly having realignment issues when you add the hoop back to the machine.
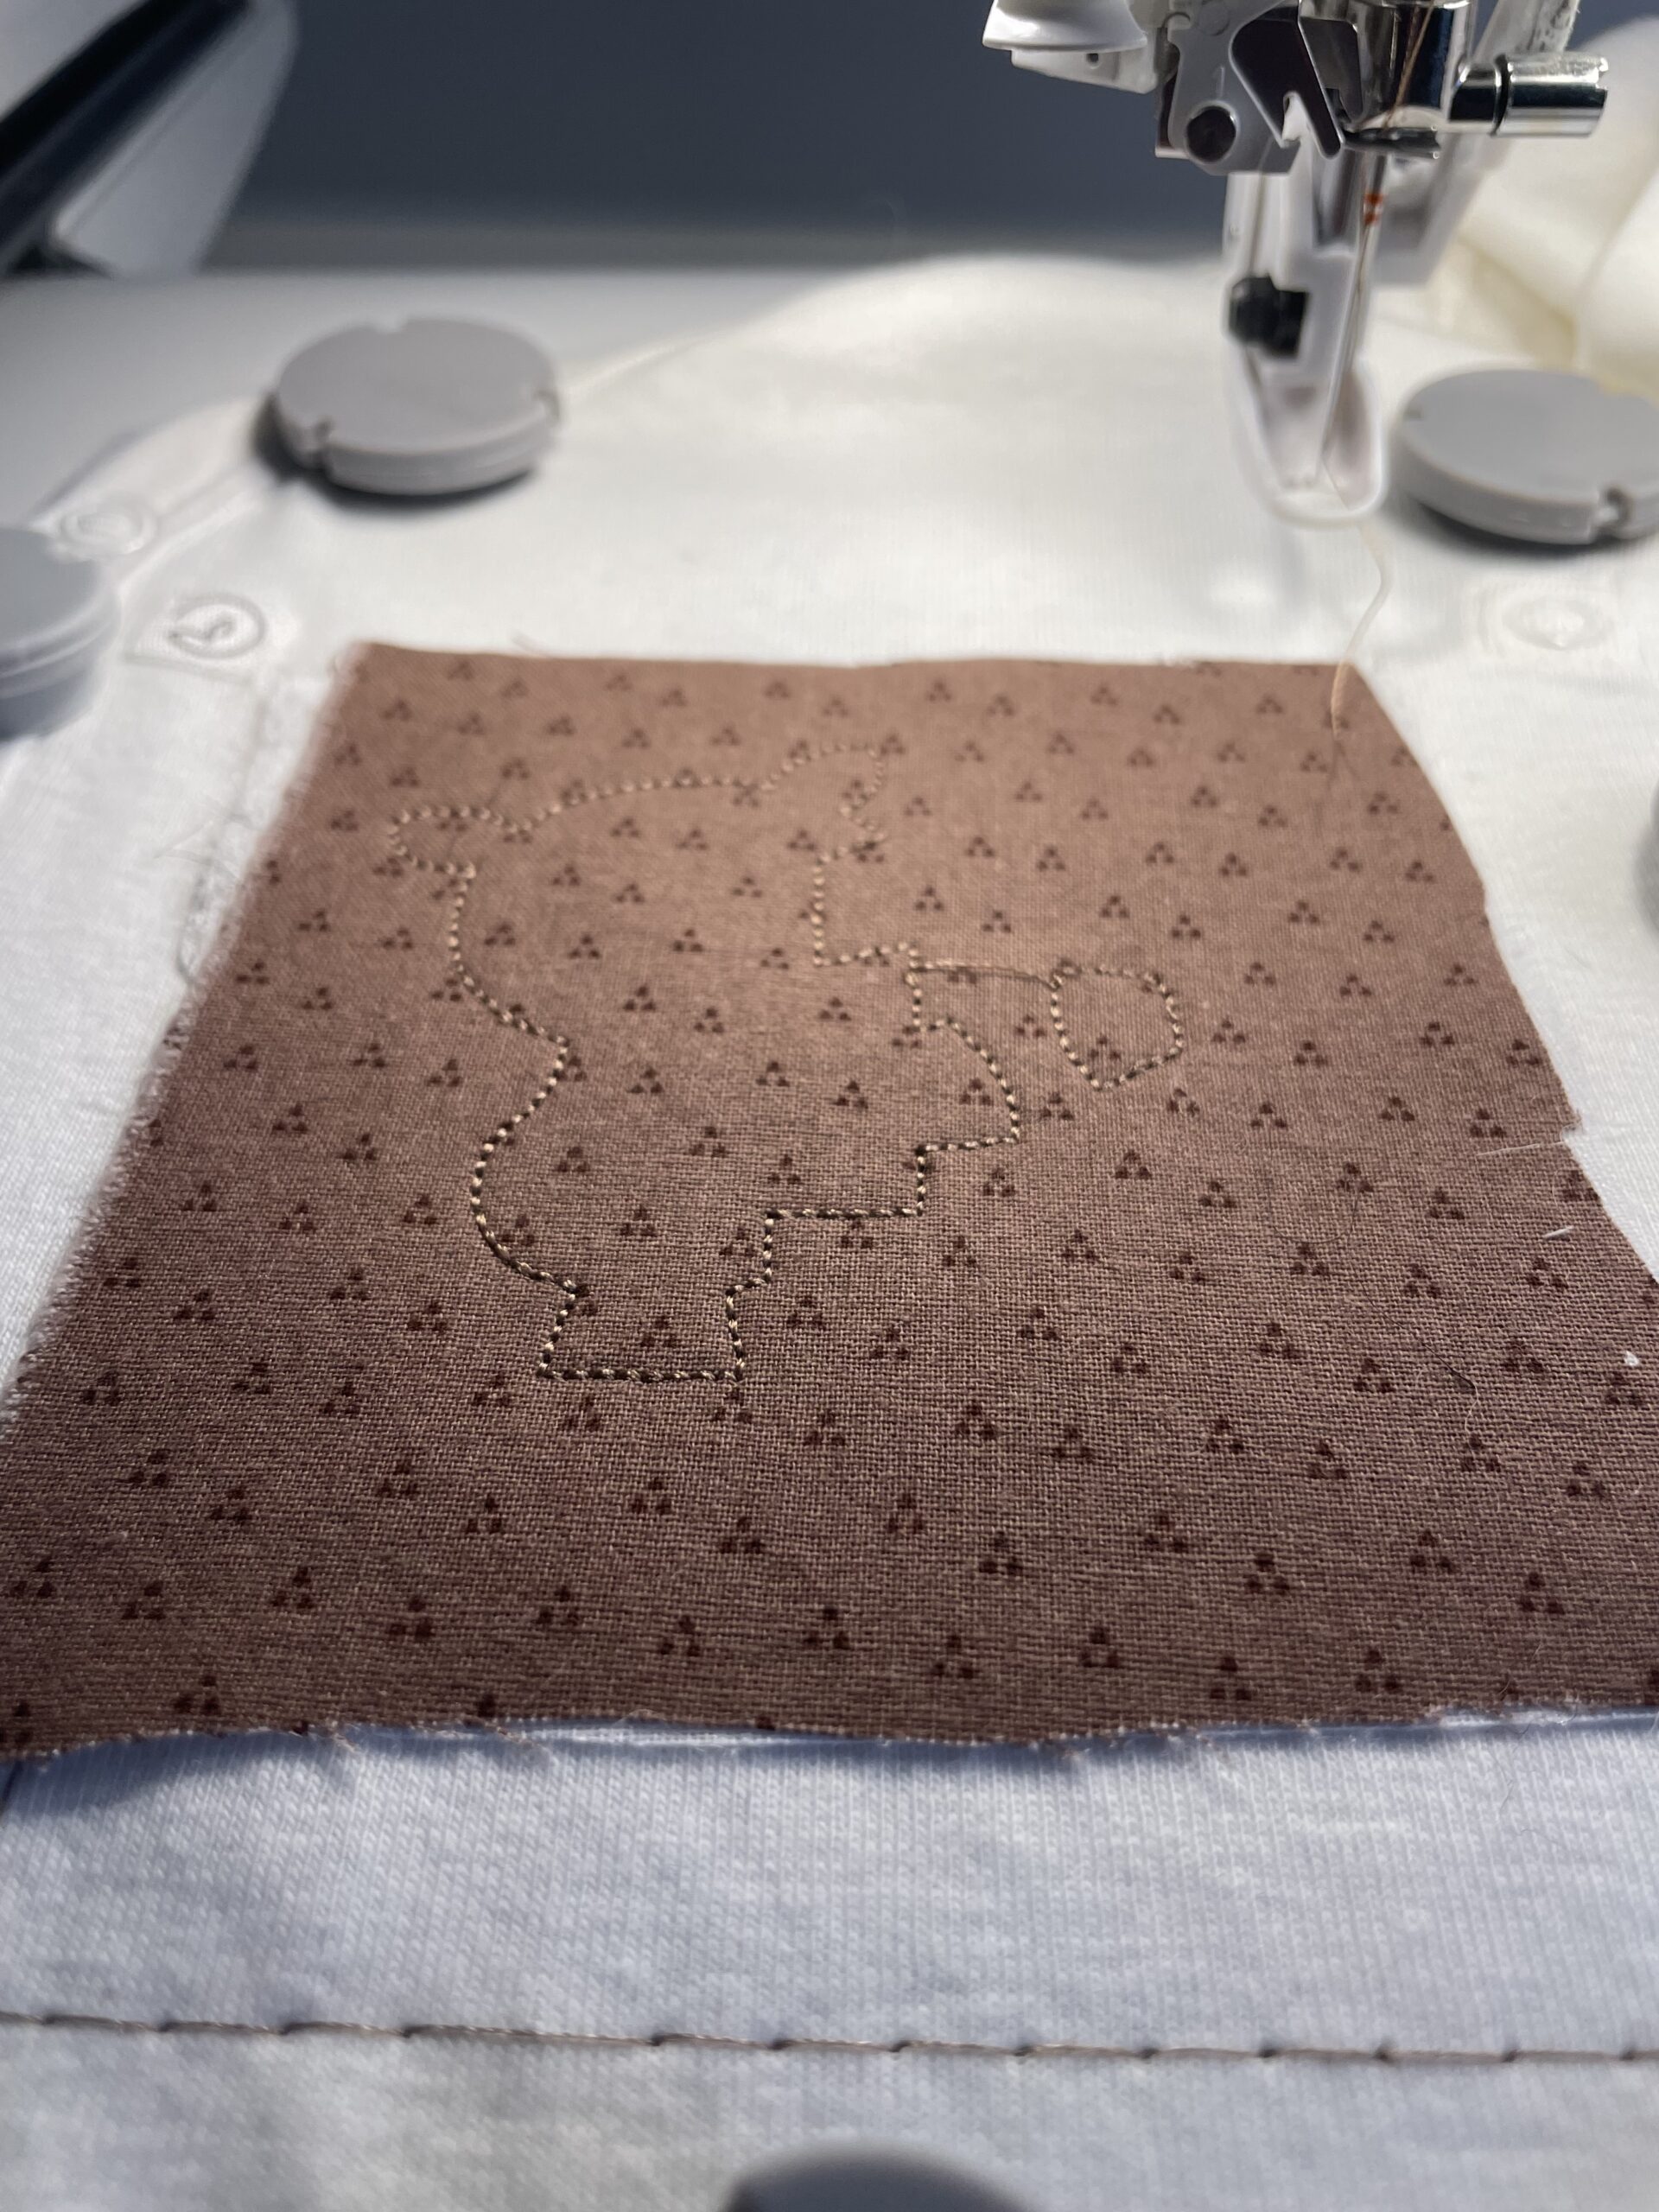
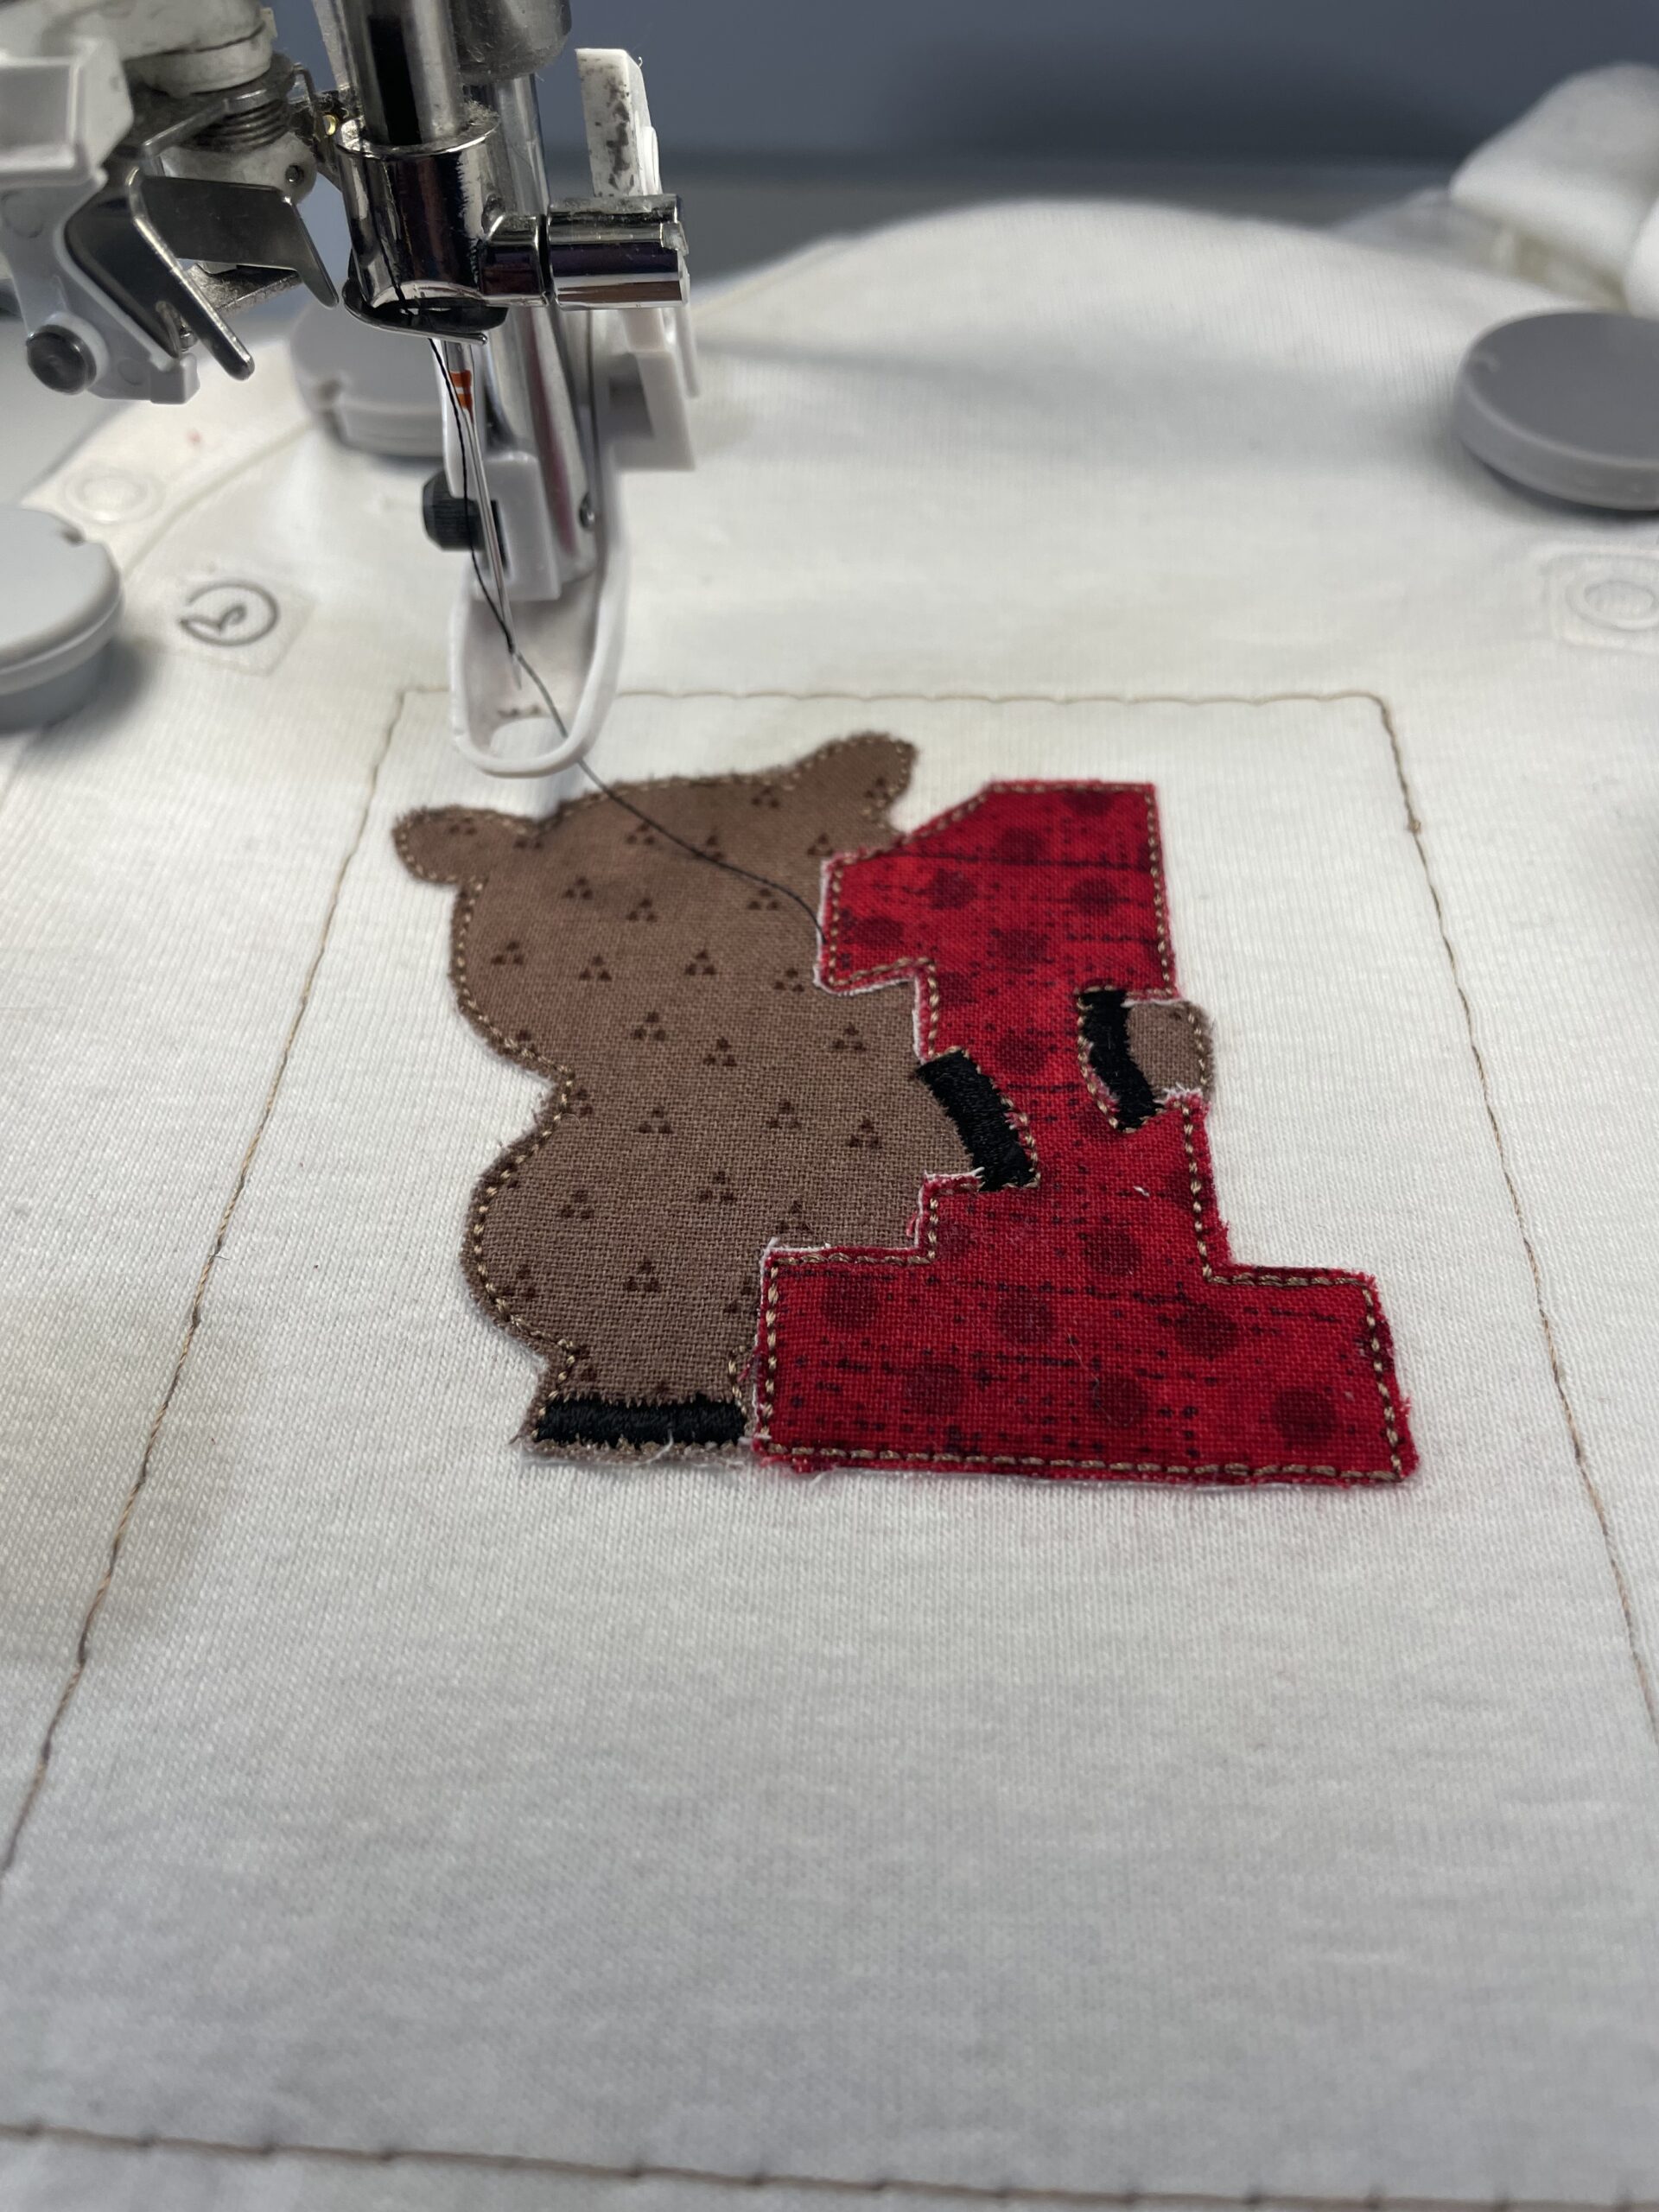
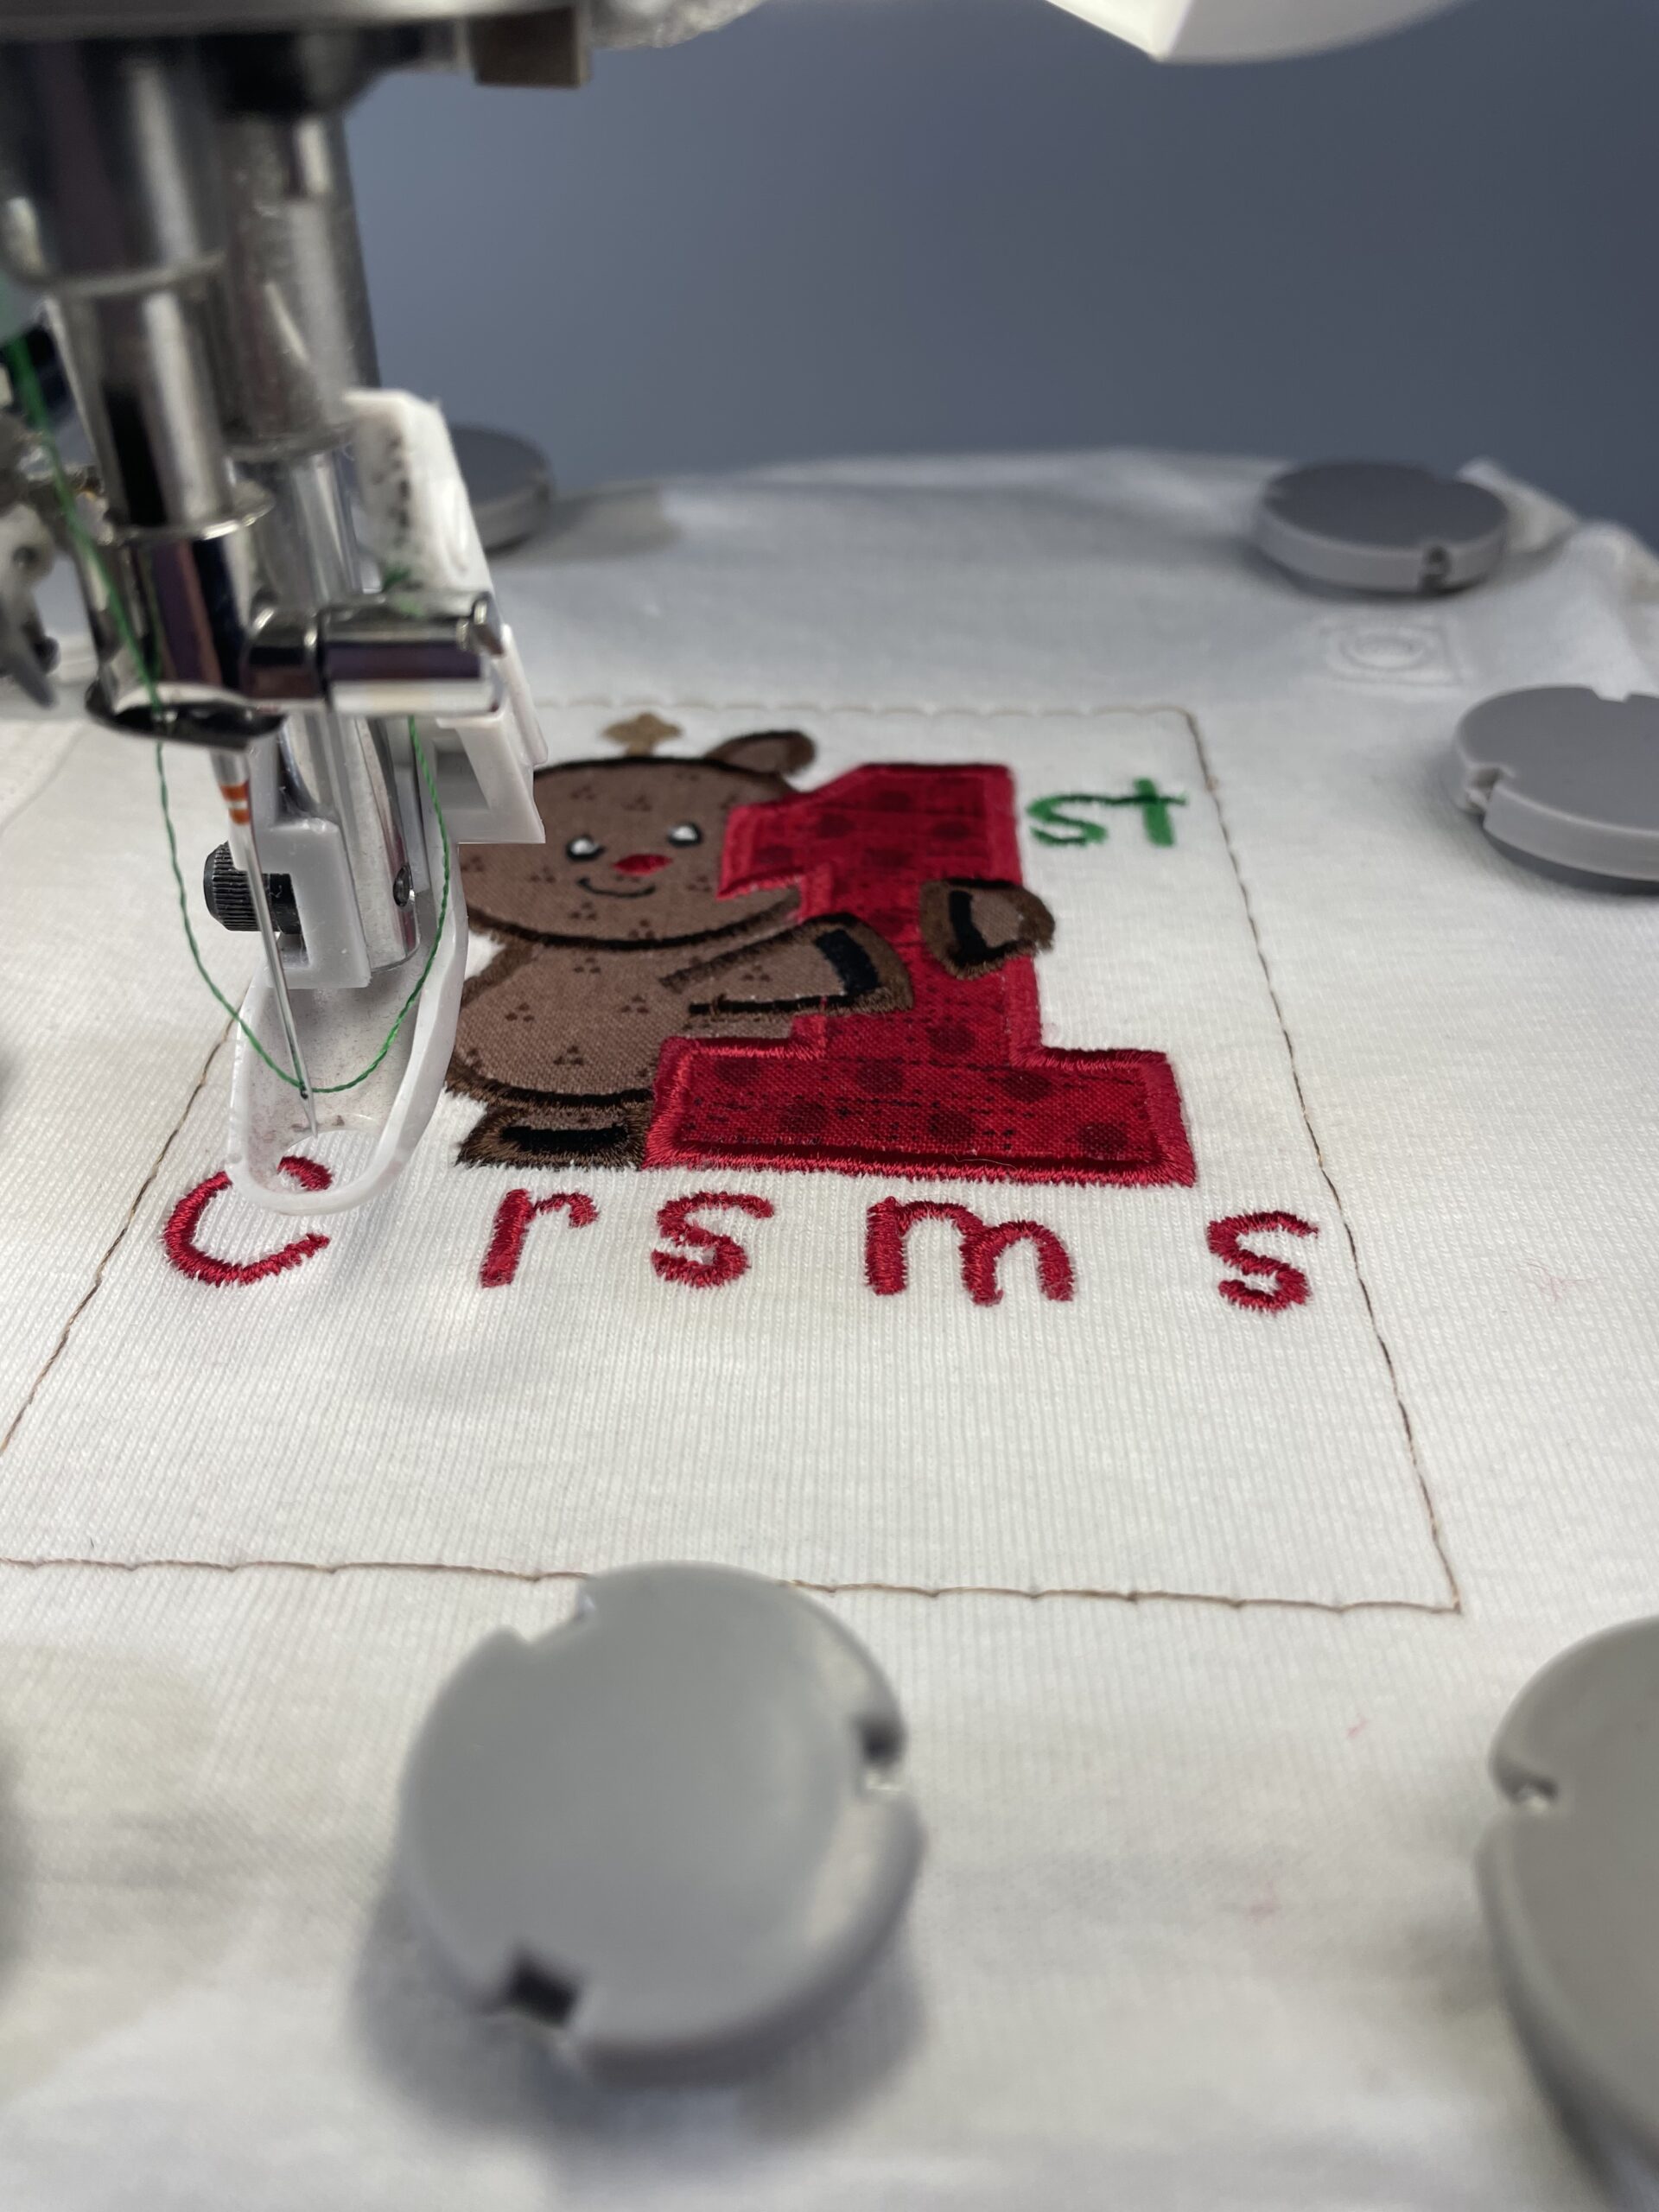
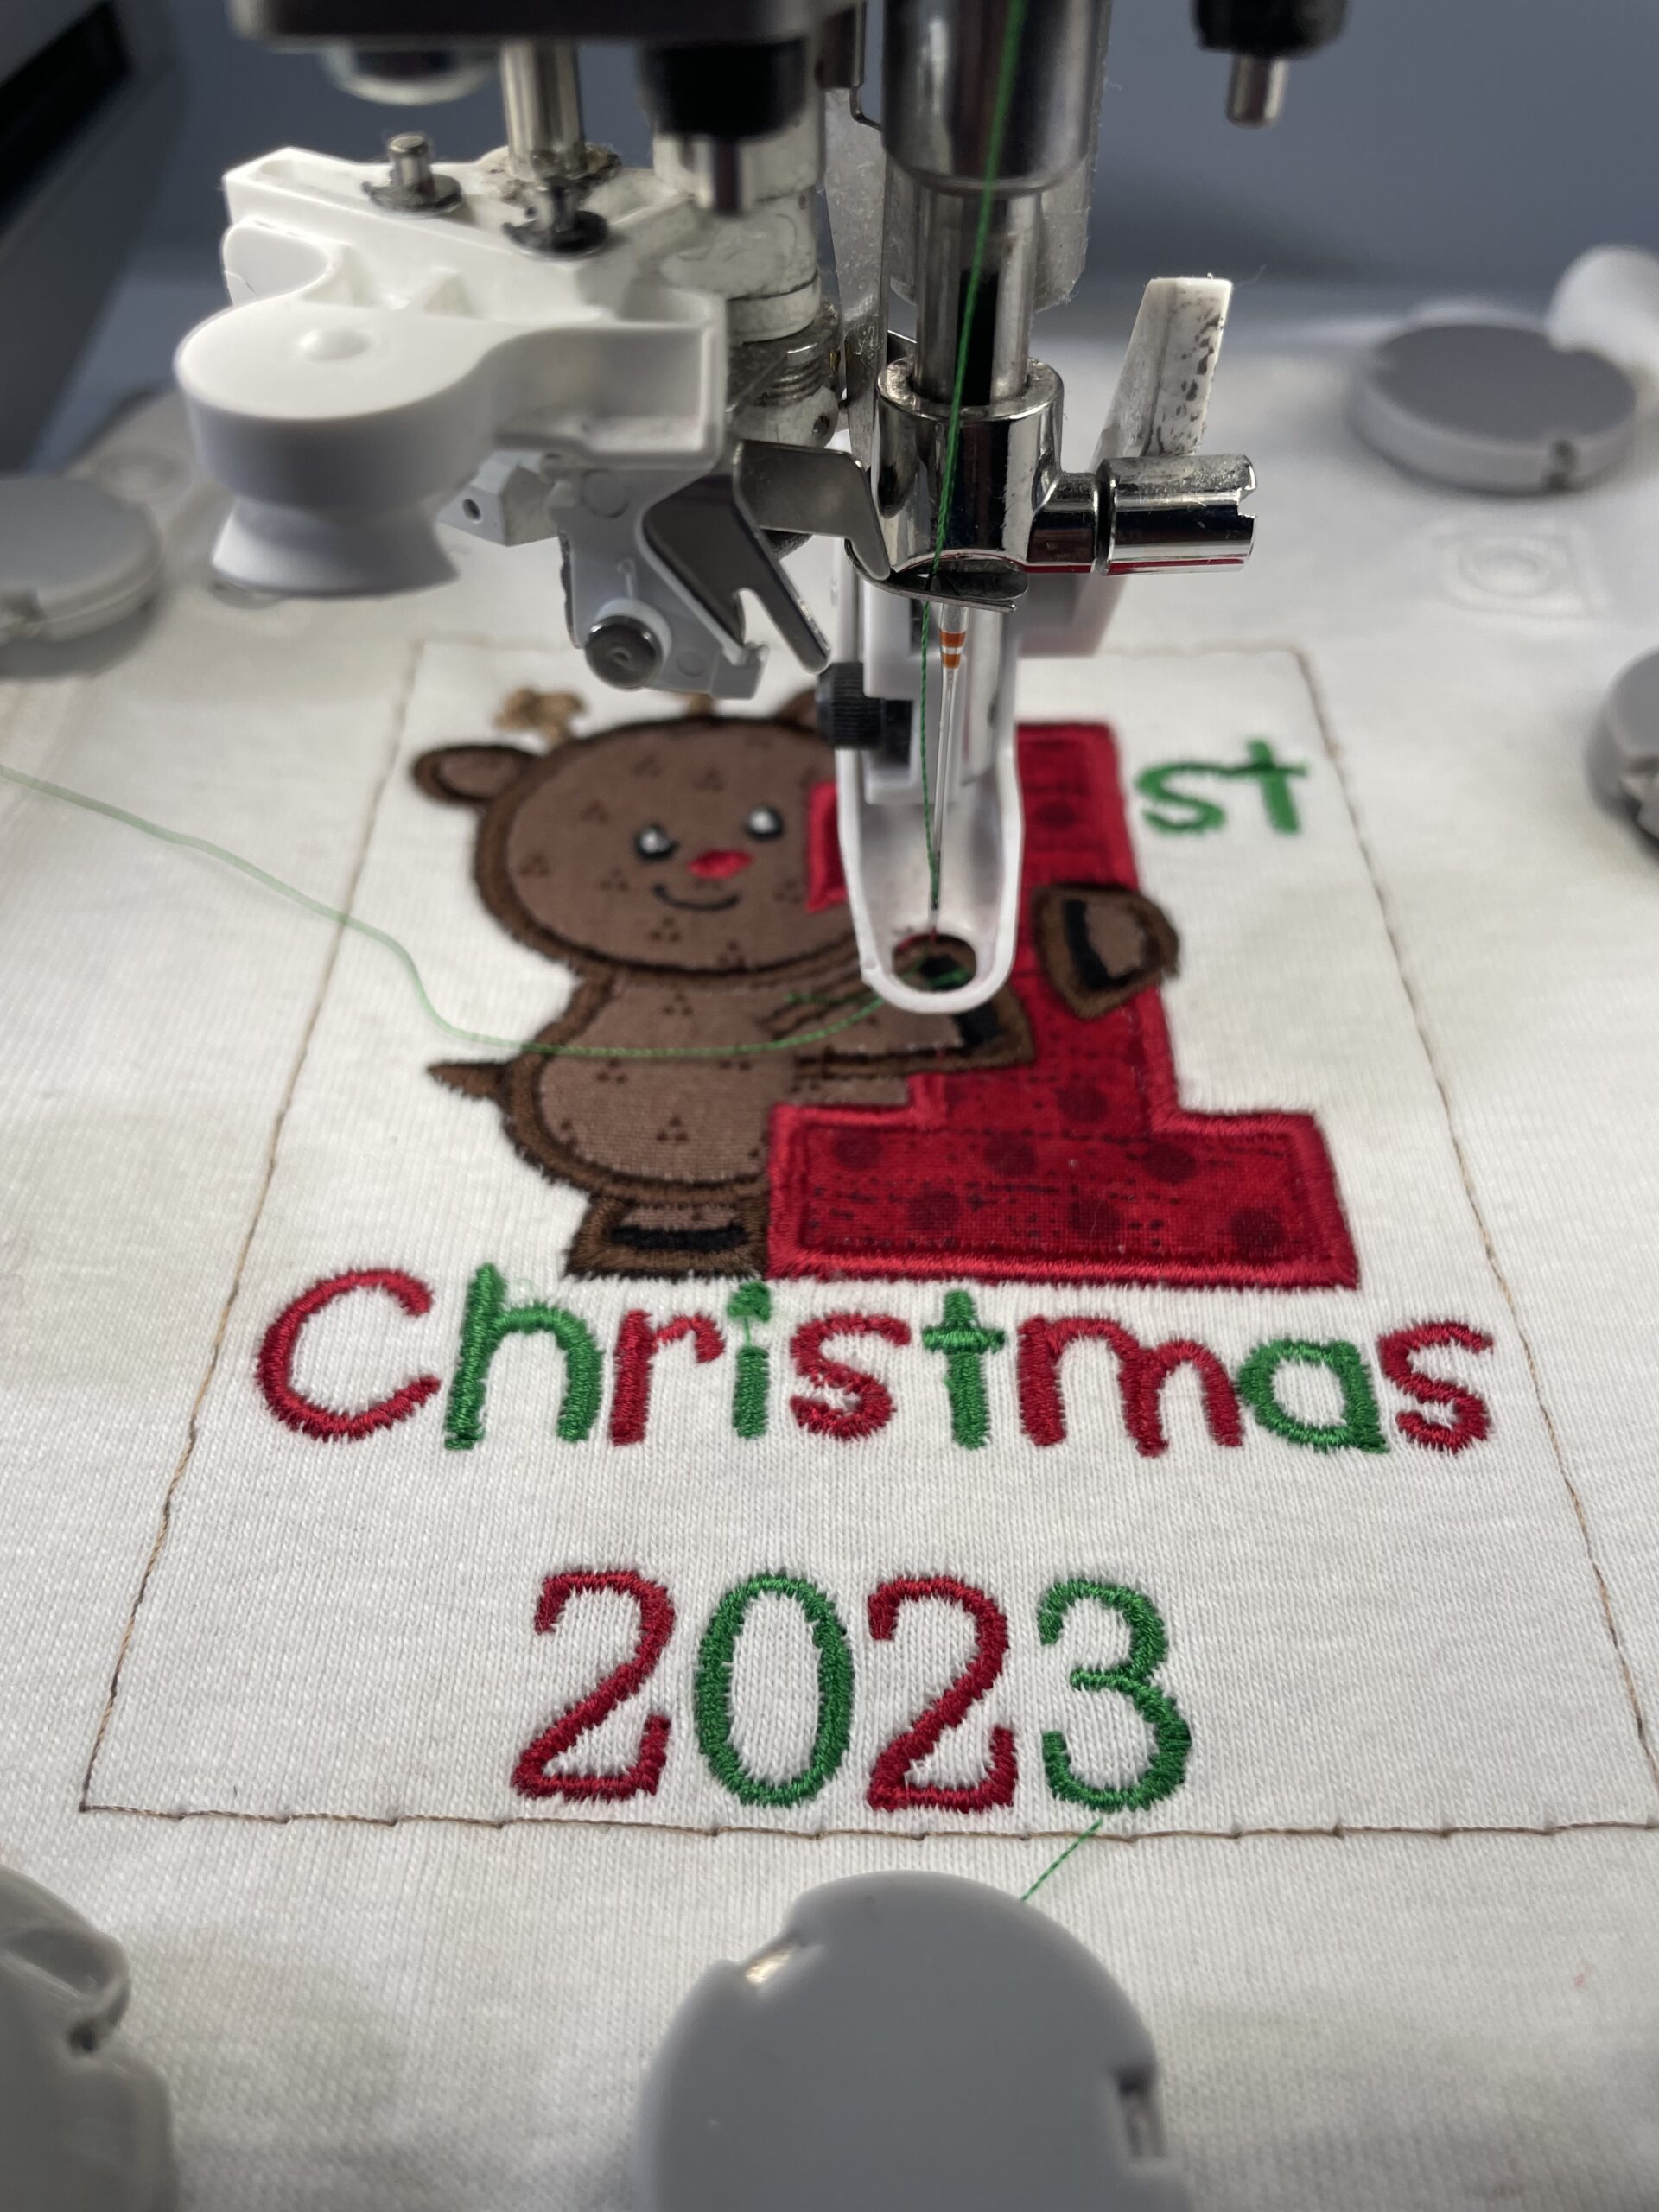
Start the satin stitches according to the stitch-out instructions from the DBJJ My First Christmas Applique design. Since I added the “2023” to the design, there are no color instructions; this gives you total freedom to make the colors you want. I opted to use every other letter, following the word “Christmas” pattern in the My First Christmas design. A few of the stitch-out steps are shown below.
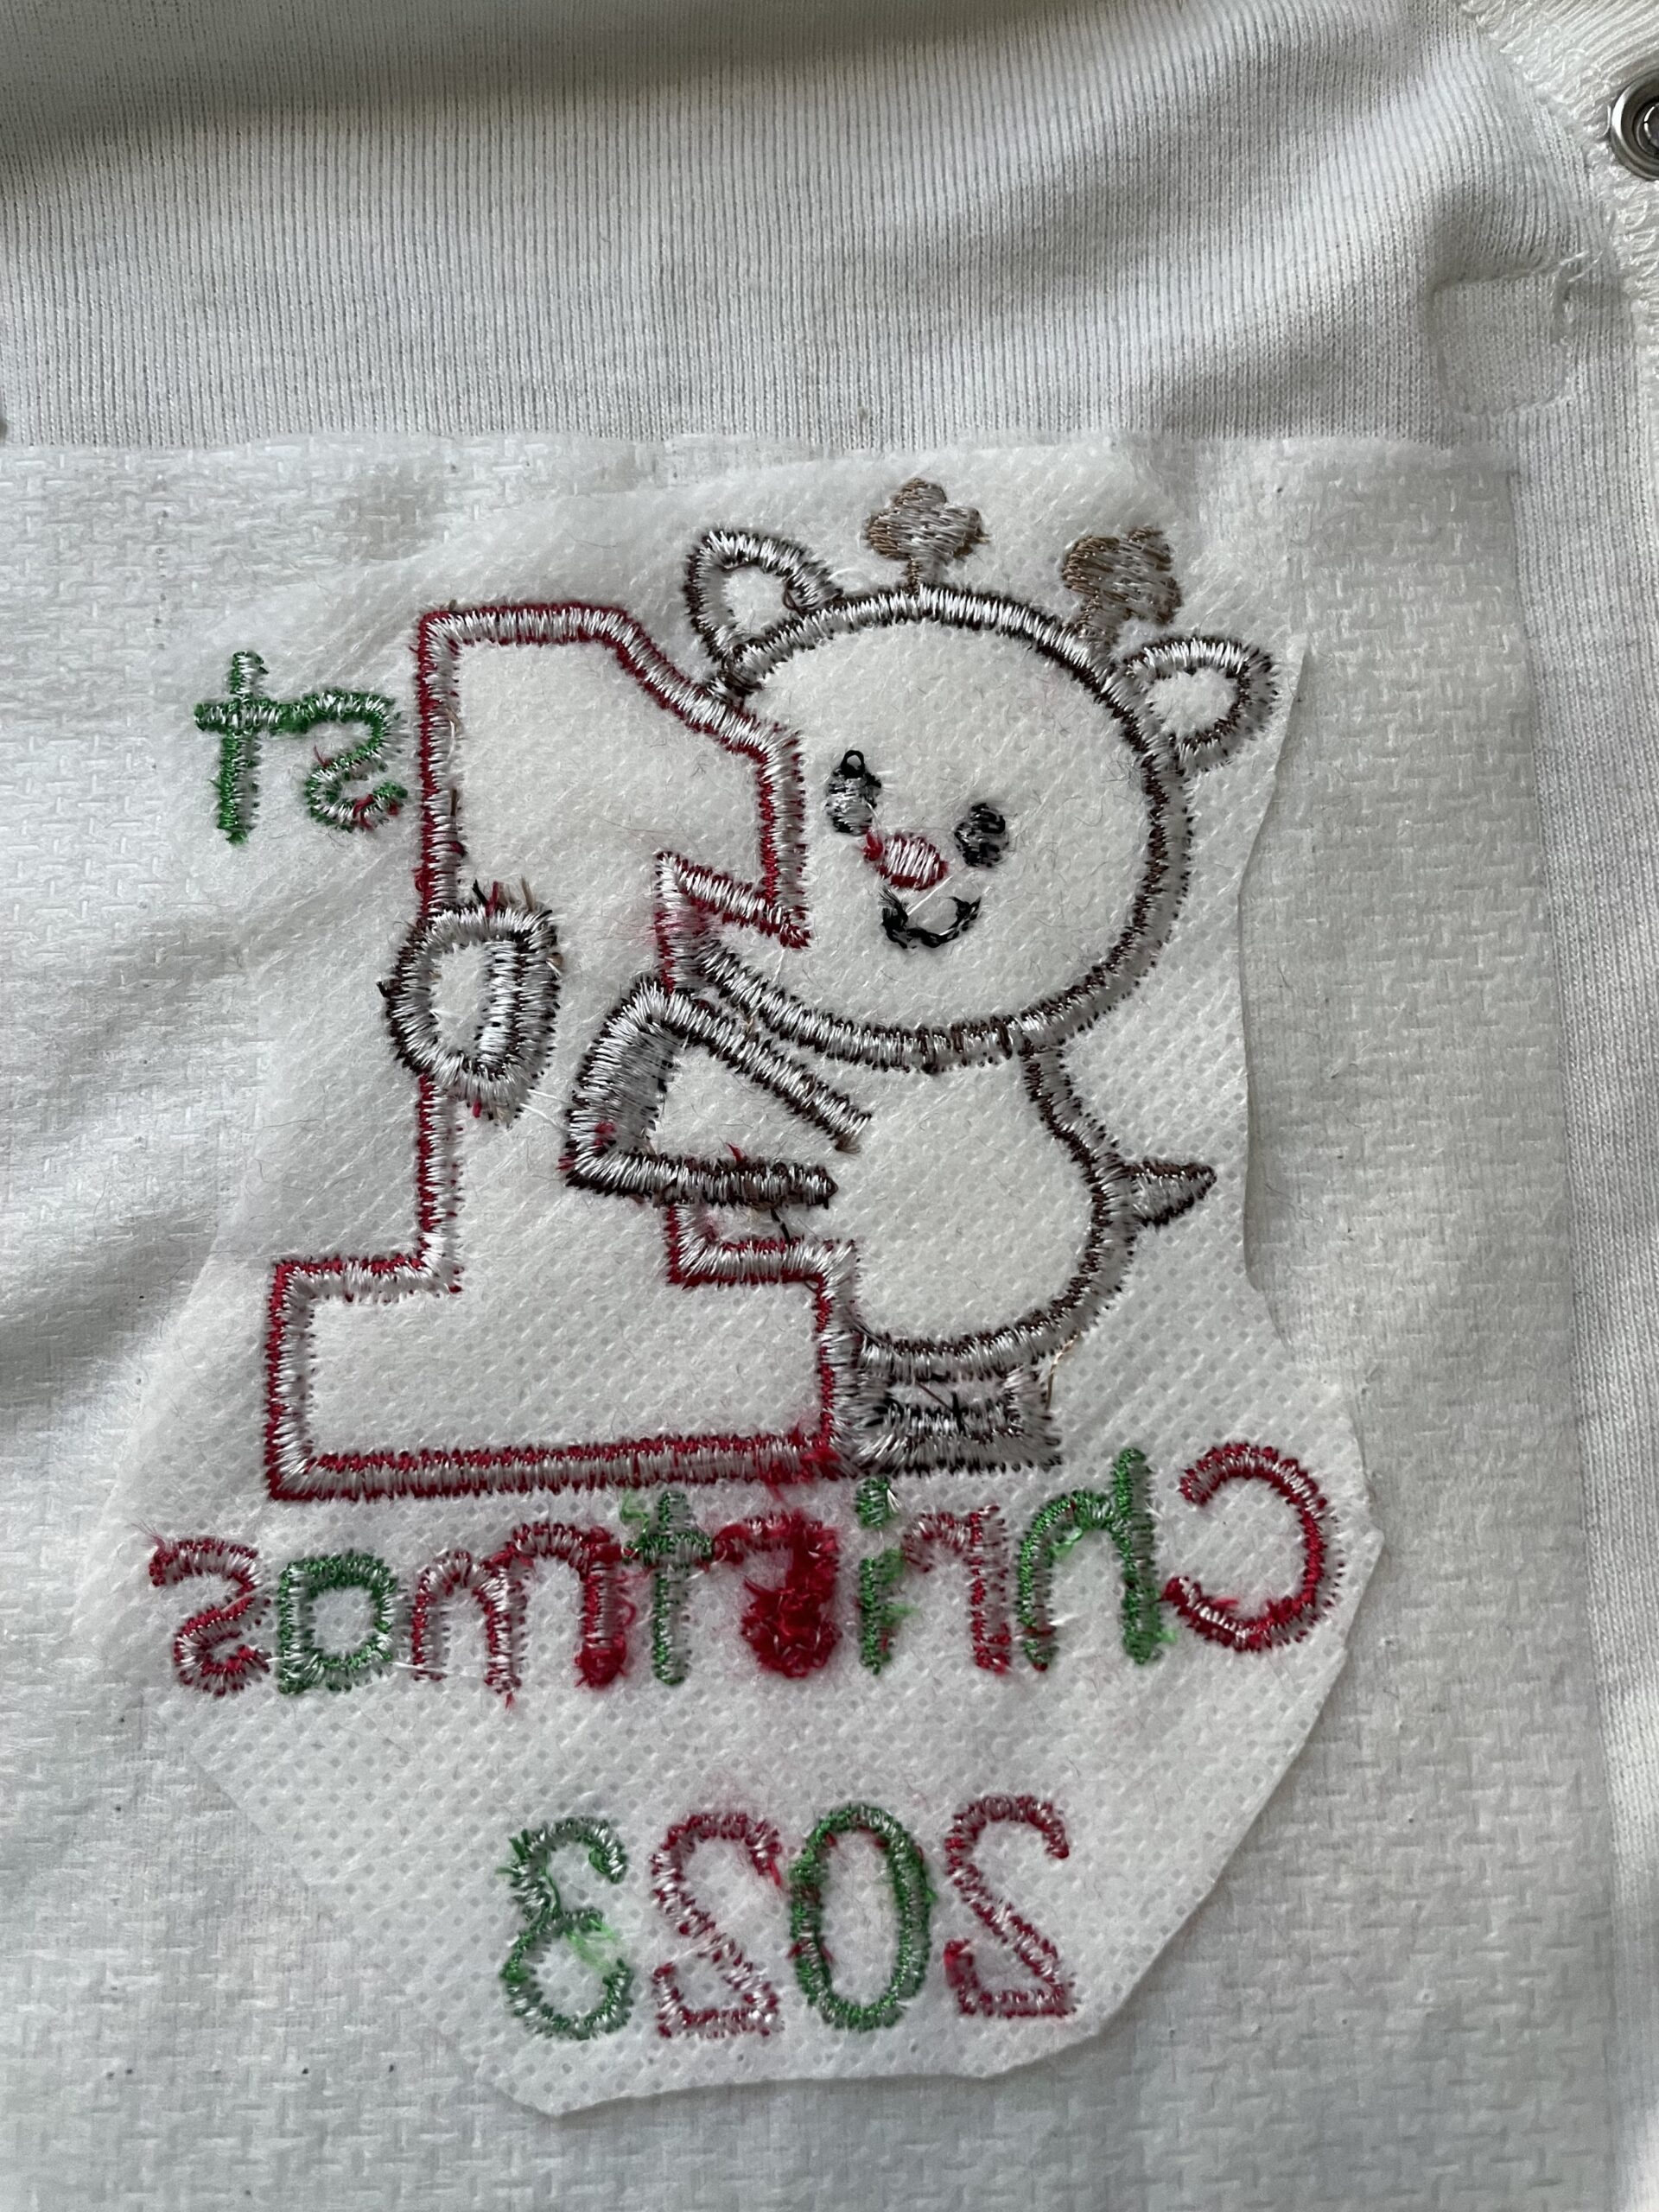

Once stitch out is complete, it is time to remove the basting box and trim back the cut-way stabilizer and the iron-on stabilizer. The iron-on stabilizer easily pulls away from the jersey material to allow for trimming. Be VERY careful when trimming to avoid catching the jersey fabric, which is incredibly easy to cut. The two layers of stabilizer will be cut along the same line, but the lines do not need to match exactly.
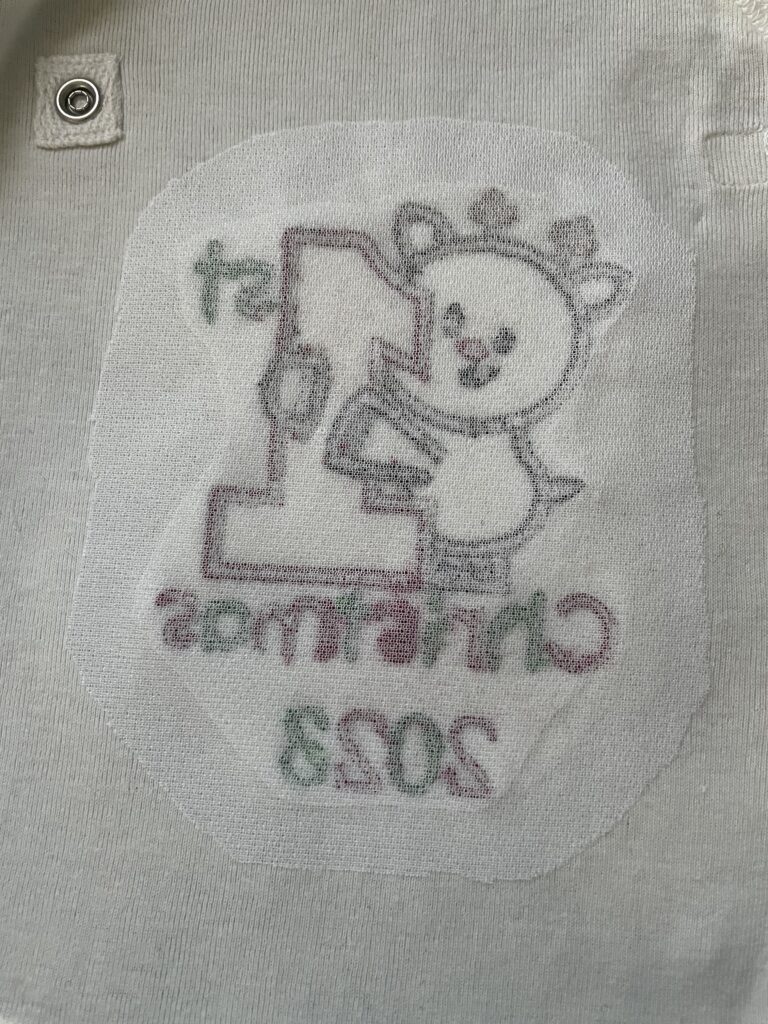
For garments that are going to touch the skin, I always add Sulky Tender Touch (or similar iron on soft covering). It is essential with the First Christmas Applique onesie since it is a baby item and will soften the stitching area on the inside of the garment.
Cut the Tender Touch LARGER than the entire design and then trim the corners to be rounded edges. Rounding the edges helps to keep it adhered longer with regular washing and wearing.
This additional softening layer also covers up some of the “nesting” in the letter “s” in Christmas. I always love it when an embroidery supply has more than one purpose!
You can also see how close the My First Christmas design came to the snaps. I am glad I adjusted the design vertically at the beginning to allow for more space from the snaps.
Your My First Christmas Applique project is now done! It is ready to be gifted and worn by this year’s special Christmas baby!