Toggle Nav
 Inspire.
Create.
Stitch.
Inspire.
Create.
Stitch.
Search
Inspire.
Create.
Stitch.
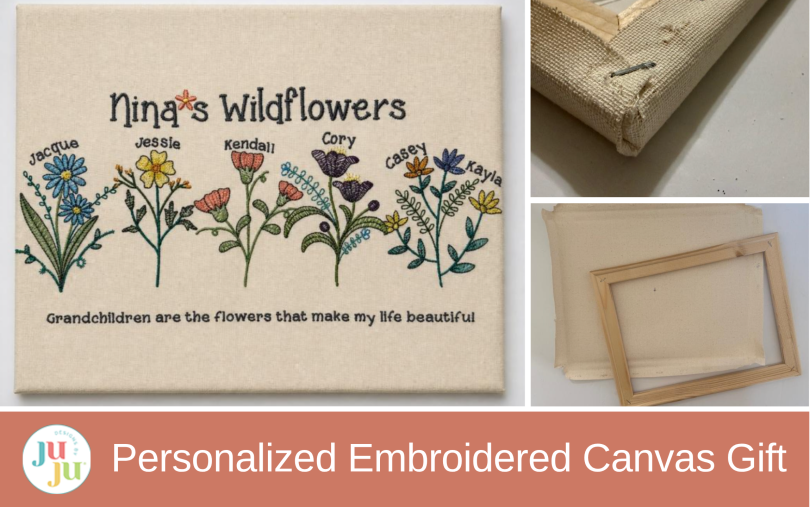
Create personalized embroidered canvas wall art for a heartfelt handmade gift. This tutorial shows how to stitch names, floral embroidery, and a meaningful message onto artist canvas, then restretch it for a beautiful keepsake for grandparents, parents, weddings, nurseries, or your own home.
Some of the most meaningful gifts are the ones that celebrate the people—and relationships—we treasure most. This embroidered canvas is a beautiful way to create a one-of-a-kind keepsake for a mother or grandmother, turning a special embroidery design into stitched art she can proudly display in her home. It would make a heartfelt gift for Mother’s Day, Christmas, a birthday, or simply a special way to remind Mom or Grandma how much she means to you.
In this project, I’ll show you how to transform an ordinary artist canvas into a personalized piece of décor by removing the canvas from its frame, stabilizing and hooping it for embroidery, and then stretching and stapling it back into place. Along the way, I’ll share tips to help you get a smooth, beautiful finish. The result is more than just home décor—it’s a handmade gift created especially for someone you love.
Please check out the Designs by JuJu Amazon store for our team’s favorite supplies. For batting, stabilizers, and threads, Designs by JuJu+ has everything you need.
I chose this project because it looks far more difficult than it is. Embroidering on an artist canvas creates a beautiful, professional-looking piece of wall art, but the process is surprisingly simple. Once you learn how to remove the canvas from the frame, stabilize it, and stitch your design, you’ll be amazed at how easily it comes together. Best of all, the finished canvas can be customized with almost any embroidery design, making it perfect for meaningful gifts.
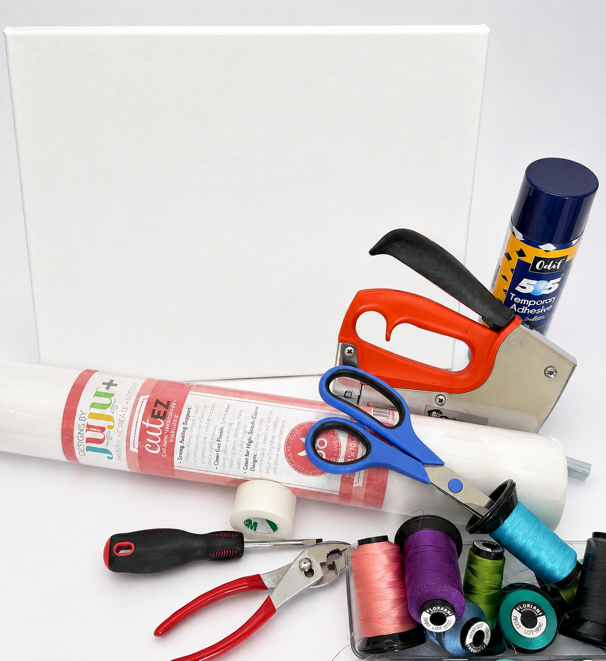
Now that you’ve gathered your supplies, it’s time for planning the project. This is where we get to decide how we’ll make our canvas unique. My inspiration came from member Kim Munoz and her creative contribution shared in the Designs by JuJu Embroidery Blessings Group.
My mom will love this project. She was supposed to be called “Nana,” but as a toddler my opinionated daughter decided “Nina” sounded much better. And just like that, “Nina” stuck. Now, all these years later, I’m giving that special name a place of honor.
Once I decided the canvas would be a gift for my mom, I started building the design around that personal message.
Choose your embroidery design(s) and an appropriate size based on your project and available hoop sizes. Since I’m working with a 12” x 14” canvas, I chose a 14” x 7” hoop to give my design plenty of room to stitch beautifully.
The Vintage Botanicals design comes in two sizes of six gorgeous botanicals; I am using the 4x4 size. I opened all flowers on a blank page in Embrilliance software. I copied by either using the tools on the toolbar or by highlighting the design and right clicking on it, then I went to the new working page and pasted by right clicking. I repeated this process for all six flowers.

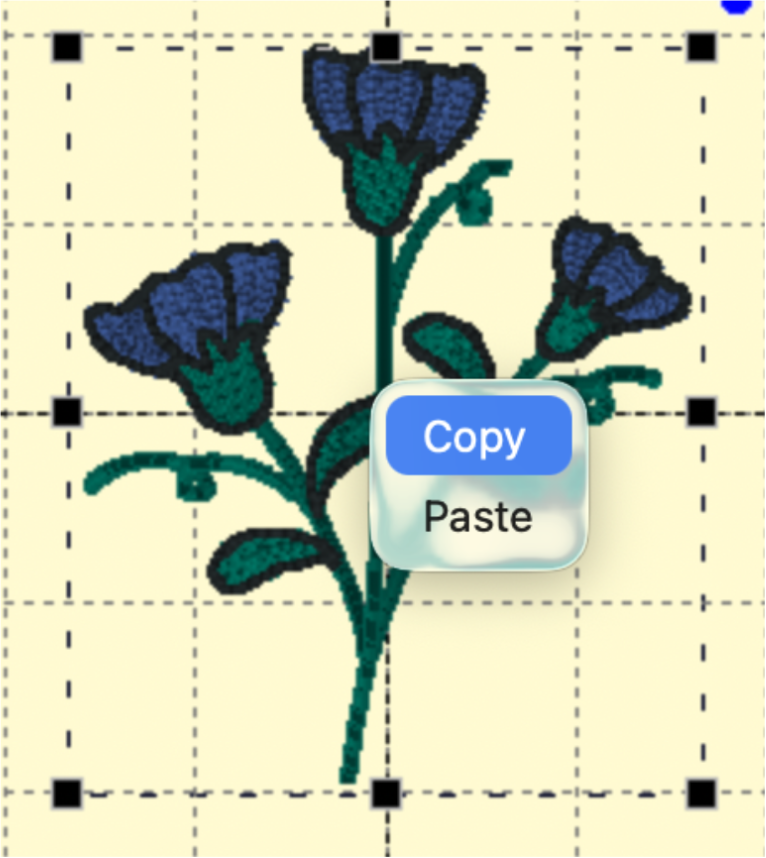
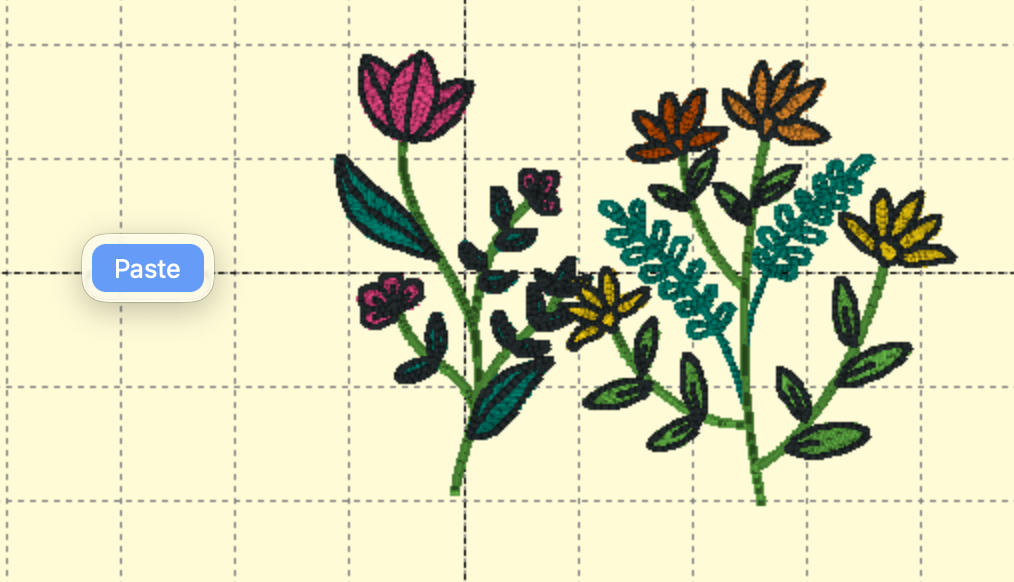
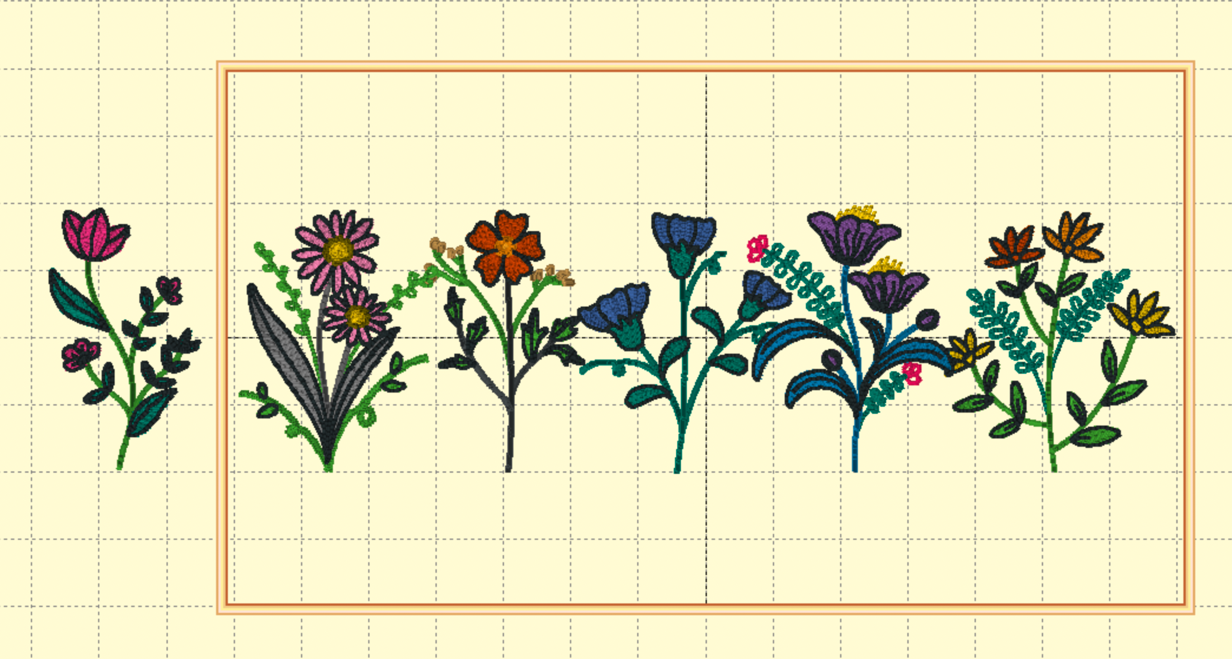
Now comes the fun part of arranging your wildflowers. You can experiment with different colors, sizes, and placements until you find an arrangement you love. Let your flowers overlap or give each one its own space. For my project, I had to remove one flower because I simply didn’t have enough room. Choosing which one to leave out was a tough decision.
I even called in a little AI assistance to help me choose my thread colors for the top. The How To Design a Cowboy Baby Quilt With Quilting Backdrops™, Embroidery Software & AI Color Planning blog post has some very helpful tips when using AI tools.
Sometimes it’s just as helpful to see what you don’t want as it is to see what you do.
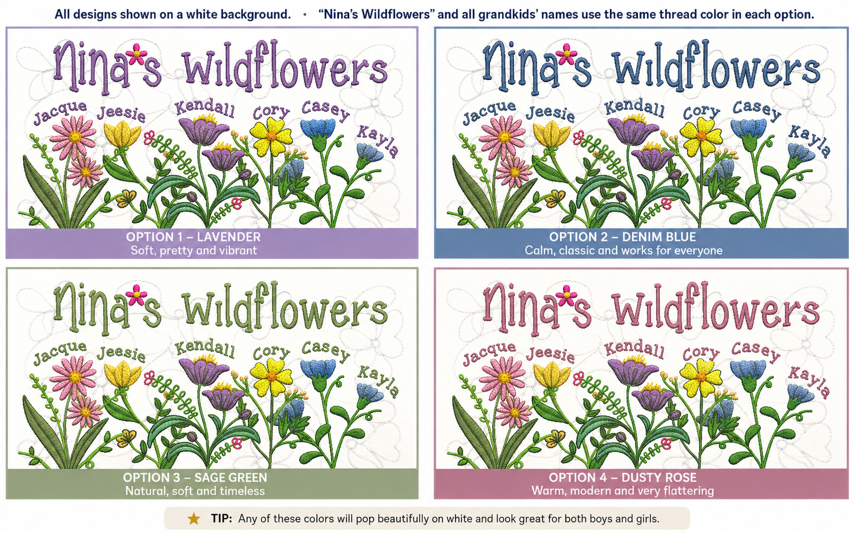
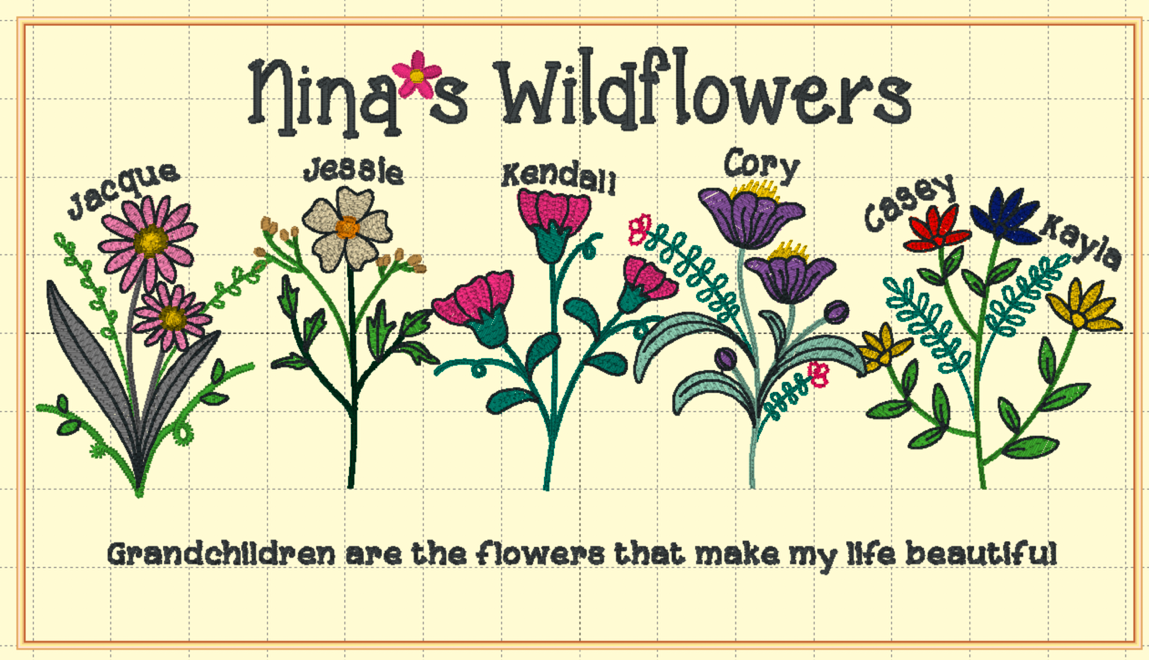
I finally settled on a dark gray for the lettering; it gives the design enough contrast to stand out. Once I had my colors figured out, I arranged all the wording and used the curve slider to give the grandchildren’s names a gentle curve. I also adjusted the color palette to what I thought I wanted. Once everything looked just right, I saved the finished design to a flash drive and transferred it to my embroidery machine, ready to stitch.
My biggest tip: Before embroidering on the final canvas, if you have a similar piece of canvas, do a small test first. The canvas texture and stiffness can affect how well it stitches.
After the design was planned digitally, the next step was preparing the canvas itself.
To remove the canvas from the frame, turn the canvas over so the back is facing you. Start at one corner. Carefully slide a small flat-head screwdriver or pick under a staple and lift the staple. Try not to tear the canvas at the holes. This may take some practice or trying different tools to see what works best.
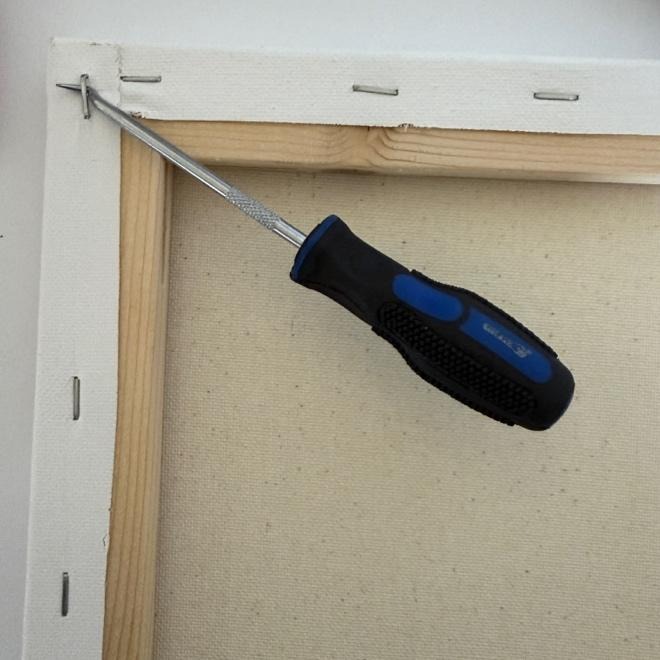
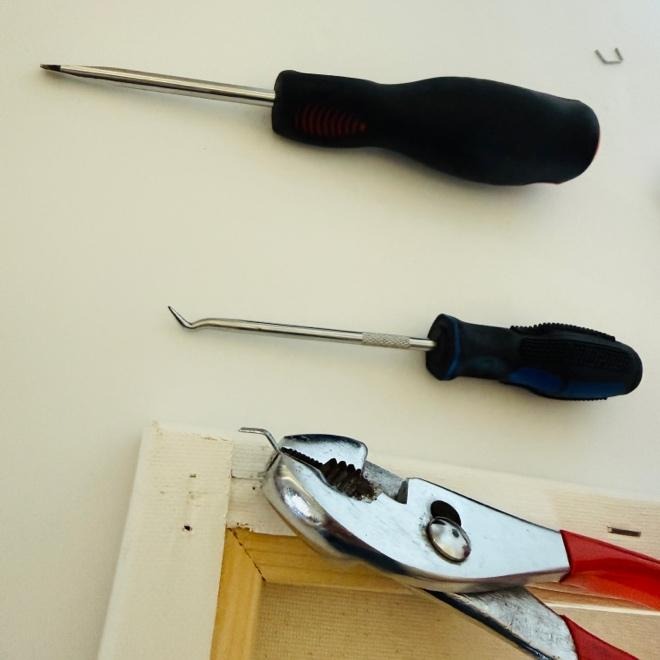
Continue around the frame until all the staples are removed. Lift the canvas away from the wooden frame. Try not to bend or distort the canvas as you remove it.
I decided to use the back side of the canvas as my stitching surface because I liked the softer, natural color. Before adding stabilizer, lay the canvas flat and decide exactly where you want your design. I used the old staple marks as a guide to see how much canvas needs to wrap around the back of the frame.
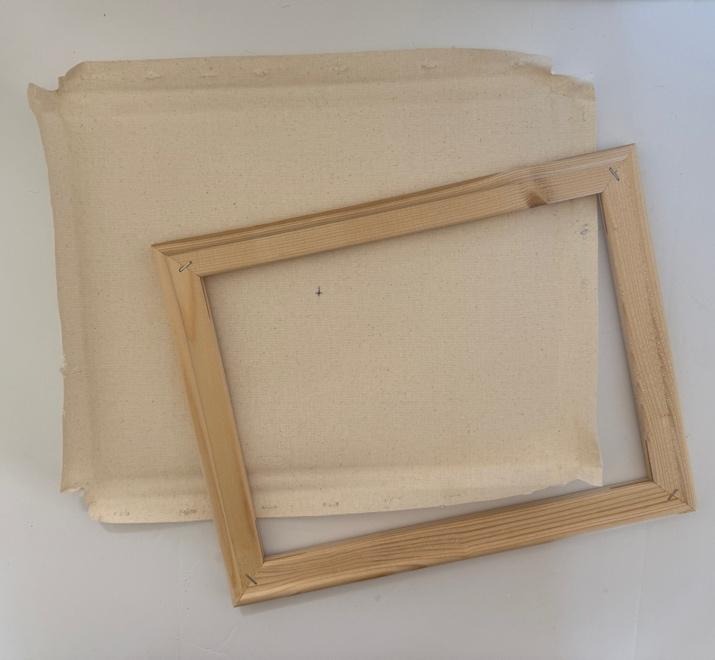
I marked the center of the canvas with a marking tool on the newly decided back, remembering that part of the canvas will wrap around the stretcher bars when you reattach it. Artist canvas can be fairly stiff, so I recommend using a medium- or heavy-weight cut-away stabilizer.
This is the part where you need to be gentle. Because artist canvas is stiff, do not force it into the hoop.
A couple of options to consider:
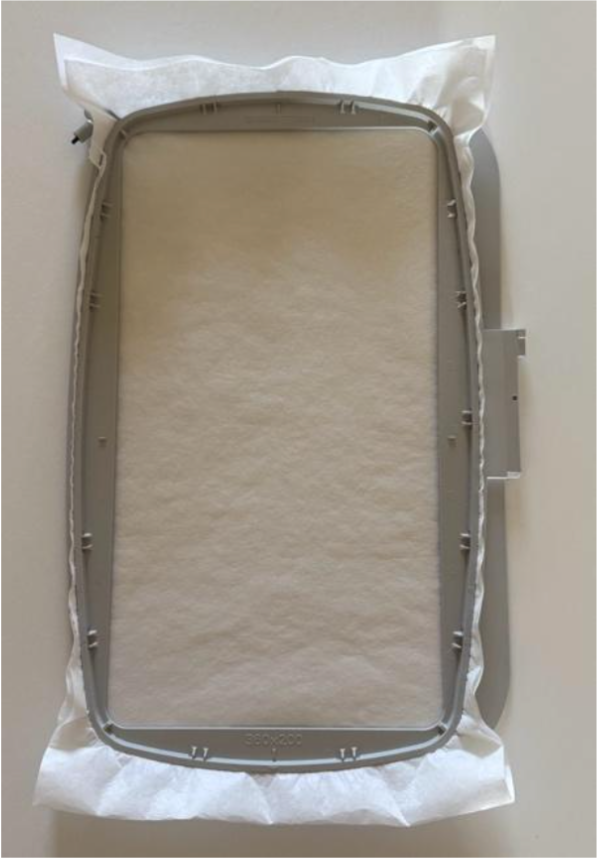
Before stitching, I had to make sure my design was centered. Check that the needle will not hit the hoop by using the embroidery machine's Trace function. I like to double-check the design orientation on my embroidery machine since it's much easier to rotate the design on the screen than to realize it's facing the wrong direction after it's stitched. Once I was happy with the placement, I placed a layer of water-soluble topper over the canvas. Watch the first few stitches carefully, follow the color chart, and let the machine do its magic.
Tip: I recommend slowing your machine down slightly, especially if the canvas is thick or stiff. If the canvas is very heavy, a 90/14 embroidery needle may work better than a smaller needle.
After the stitching was complete, I removed the hoop from the machine and the canvas from the hoop. I removed the water-soluble topper and trimmed any jump threads, then turned the canvas over and cut away the stabilizer, not cutting it right up against the embroidery design. That remaining stabilizer will continue supporting the embroidery after the canvas is stretched back onto the frame. If the canvas needs flattening, place a pressing cloth over it and iron with very light pressure.
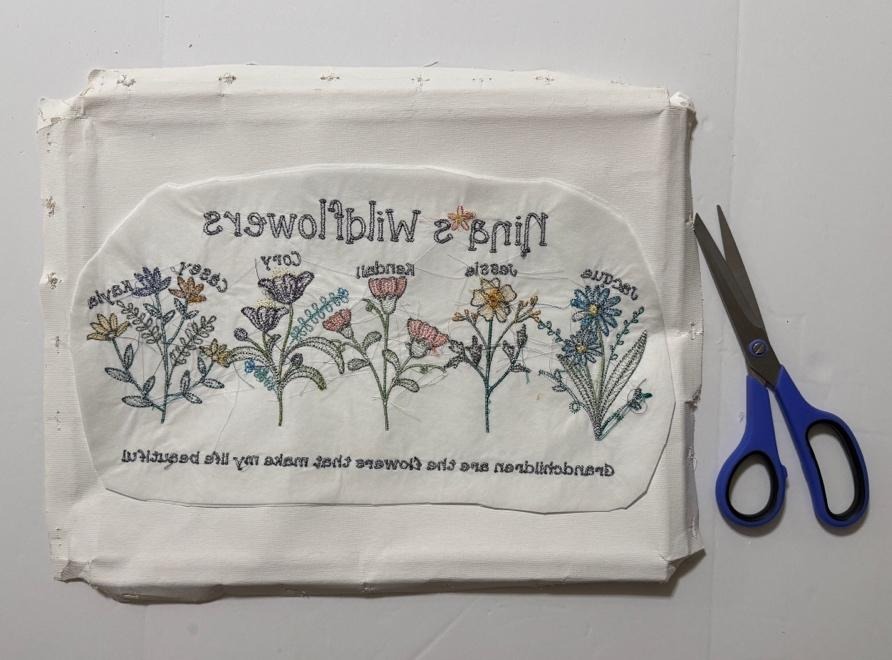
Place the embroidered canvas face down on a flat, clean surface. Position the stretcher frame on the back of the canvas. Make sure the embroidery is centered correctly before stapling. The way I double-checked this was to take a ruler and line it up with the bottom row of wording. I measured about ¾” from the row and drew a line. I placed the frame along that line to make sure it was straight and brought the edge of the design to the edge of the frame to make sure the embroidery was centered.
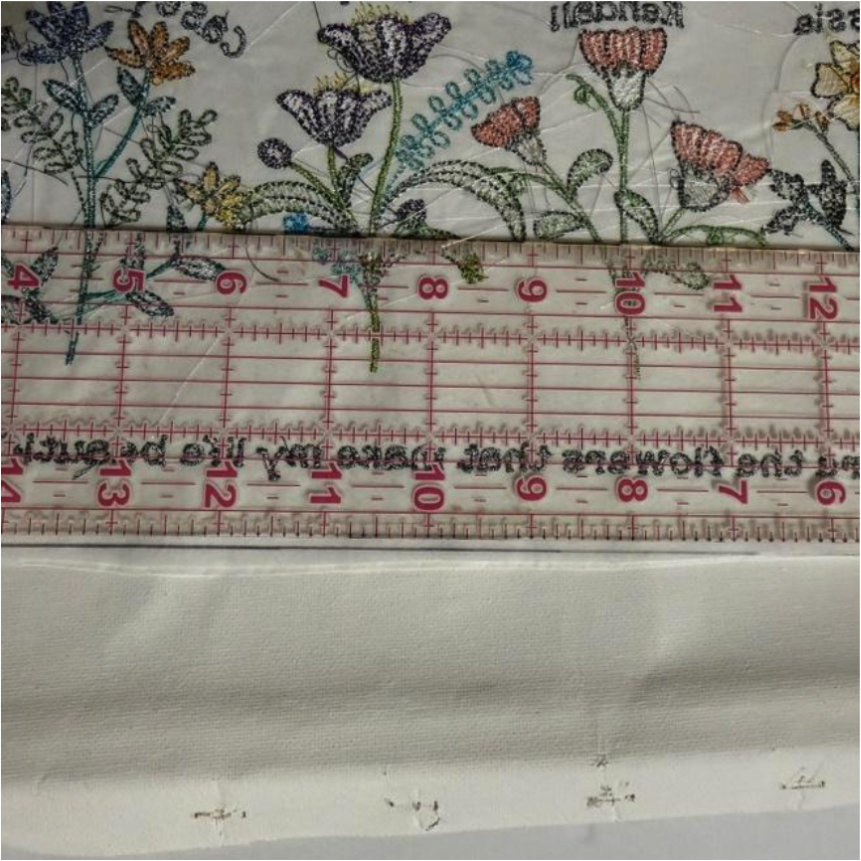
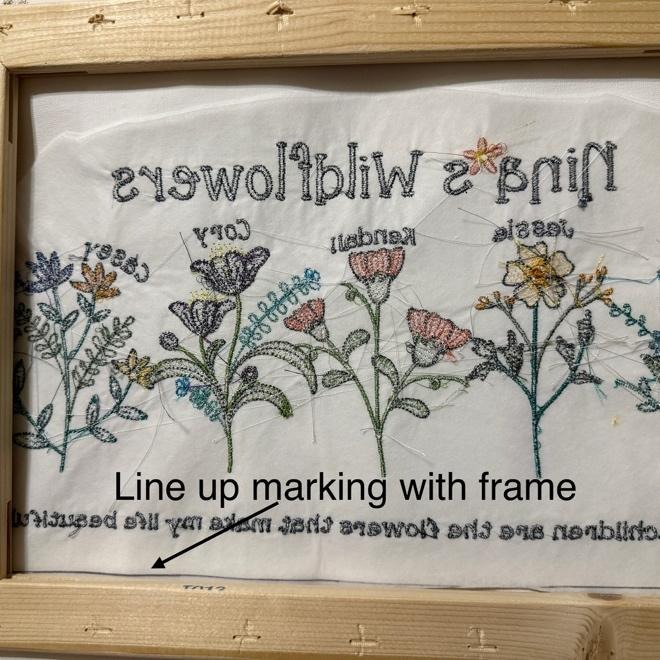
Staple the Canvas onto the Frame
Do not start stapling all the way around one side. Instead, stretch and staple from opposite sides. Start in the center of one side. Pull the canvas gently but firmly over the back edge of the frame. Place one staple in the center. Then move to the opposite side. Pull the canvas snugly across the frame. Place one staple in the center of the opposite side. Now repeat with the other two sides. Check the front to make sure the embroidery still looks straight.
Once the center staples are in place, go back to the first side and add a staple a couple of inches away from the center. Go to the opposite side and add a staple in the corresponding location. Continue alternating from side to opposite side. Keep working outward toward the corners.
You want the canvas smooth and taut but not stretched to the point that the embroidery becomes misshapen. When you reach a corner, fold the excess canvas neatly. Create a clean fold along the edge. Pull it snugly toward the back. Staple the folded corner securely. Repeat for all four corners. Trim any excessive canvas only if necessary.
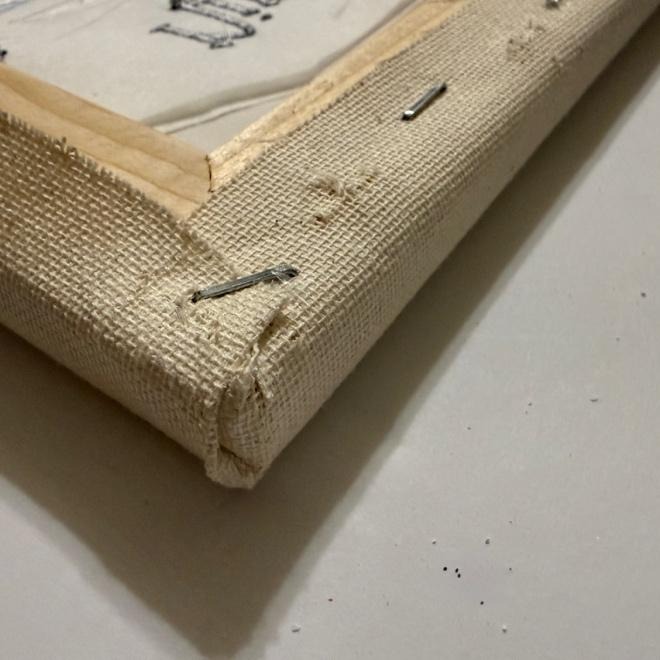
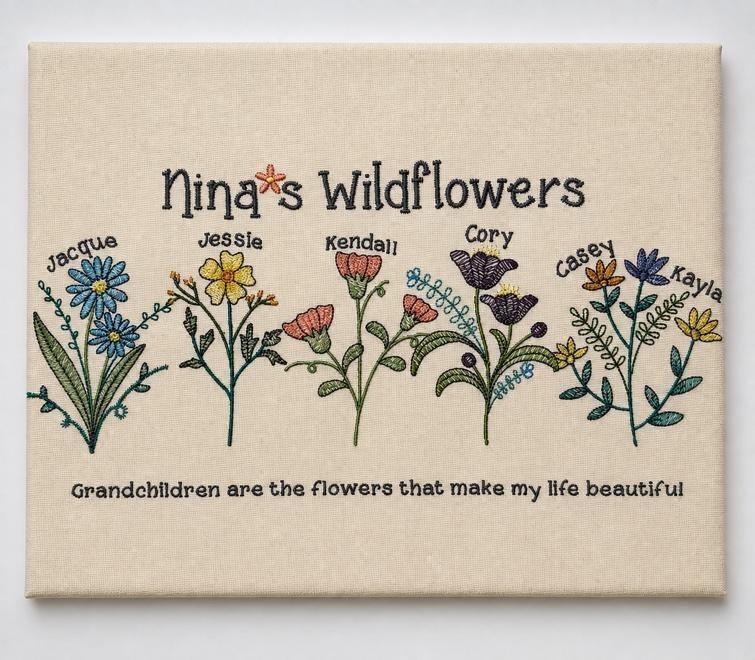
That is all there is to it!
This same technique could be used to create a treasured gift for a grandparent, a wedding or anniversary keepsake, a nursery canvas, or a special piece of handmade wall art for your own home. Once you know how to embroider on canvas and stretch it back onto the frame, you can choose designs, colors, names, dates, and other details that make each piece personal to the recipient. It’s a simple technique that can turn an embroidery design into a heartfelt gift they’ll be proud to display.
Want even more ideas for turning your embroidery into framed wall art? These projects offer plenty of inspiration:
Please share your finished wall decor with us in the Designs by JuJu Embroidery Blessings Facebook Group community or use the hashtag #designsbyjuju anywhere on social media. We love to see what you create!