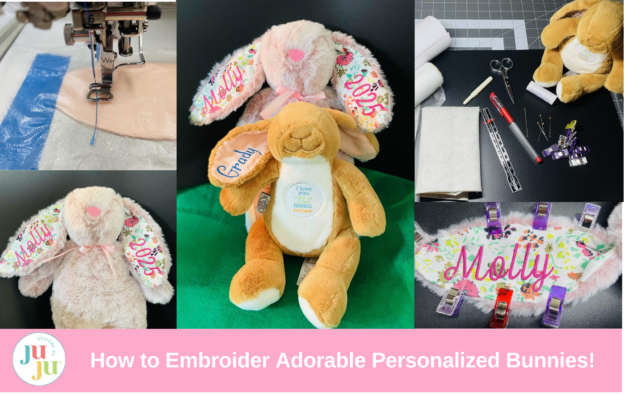
Looking for a baby shower or birthday gift? How about a special bunny for this year's Easter basket? We’ve all seen these adorable personalized bunnies, but have you ever wondered how this is done? It is not hard, and in this tutorial I will show you how, with a little patience and determination, you can make your very own personalized bunny.
Posted on February 25 2025 by Michelle Christiansen
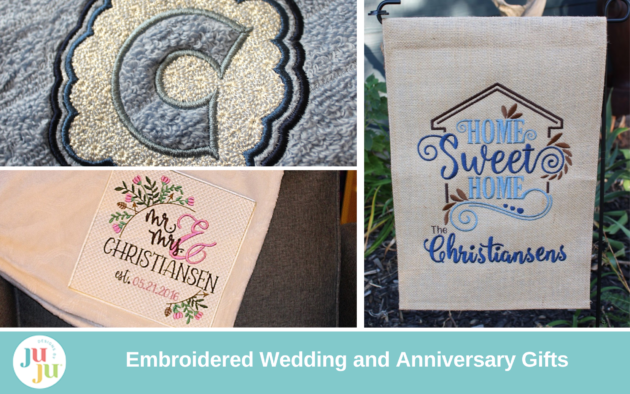
Wedding season is just around the corner, and there’s no better way to celebrate love than with heartfelt, personalized gifts! Whether you’re crafting for newlyweds, celebrating an anniversary, or creating a housewarming present for first-time homeowners, these embroidery projects are guaranteed to make a lasting impression.
Posted on February 20 2025 by Michelle Christiansen
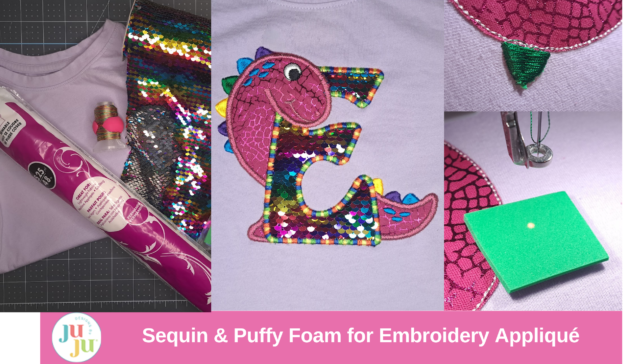
Do you love a little shimmer and shine on your embroidery projects? How about experimenting with unique textures and dimension? Well, then you've come to the right place! In today's blog post, we are going to be learning how to use sequin material and puffy foam together to create vibrant and fun applique projects!
Posted on February 18 2025 by Michelle Christiansen
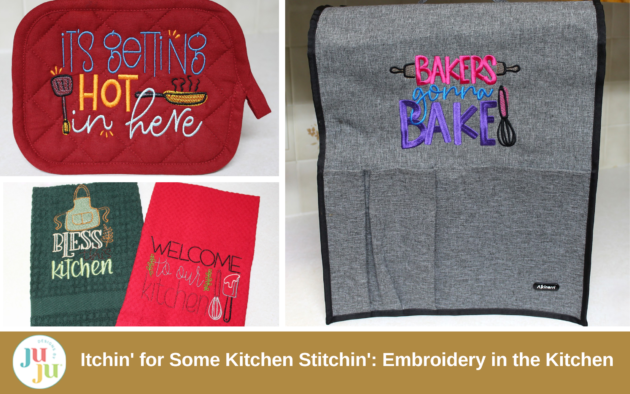
Looking to bring more creativity into your kitchen? Embroidery enthusiasts, this is your time to shine! Imagine transforming those plain aprons, kitchen towels, or even hot pads into vibrant, personalized masterpieces that add charm and personality to your home—or make heartfelt gifts for loved ones. In today’s blog post, I’m diving into four simple yet stunning embroidery projects that can elevate everyday kitchen essentials into something truly special.
Looking for a fun and festive machine embroidery project to celebrate St. Patrick's Day? This in-the-hoop (ITH) St. Patrick's Day Gnome wall hanging is the perfect addition to your holiday décor! With its charming design, customizable fabric options, and easy assembly, you’ll have a delightful wall or door decoration that will impress your family and friends.
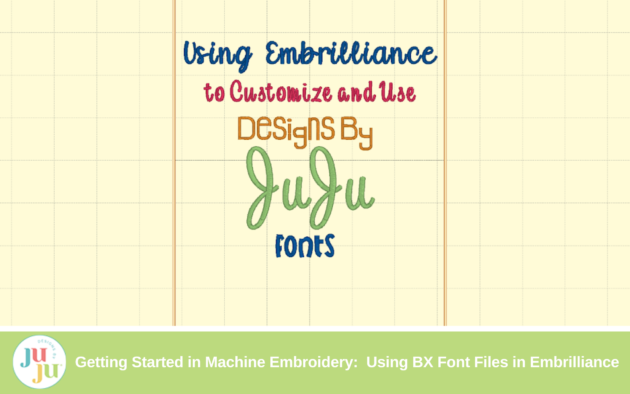
Personalized gifts have a way of touching hearts and making moments unforgettable and with Designs by JuJu fonts and designs, you can create truly unique treasures for friends and family. Pair these gorgeous fonts and designs with the power of Embrilliance software and the possibilities are endless! This guide will not only walk you through the basics of creating custom, font-based designs using Embrilliance, but will also cover pairing those with a DBJJ birth announcement design to create one-of-a-kind keepsakes. Get ready to unleash your creativity as we show you how easy it is to customize Designs by JuJu fonts using Embrilliance and turn your embroidery projects into cherished works of art. Let’s get started!
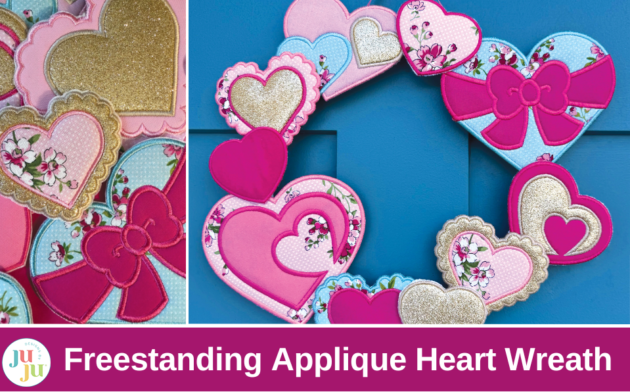
Are you ready to add a heartfelt touch to your home decor or create a personalized gift for Valentine’s Day? This Freestanding Applique Heart Wreath is the perfect project! With step-by-step instructions, you’ll create a beautiful, dimensional wreath that showcases your embroidery skills. Let’s dive in!
Embroidery is all about creativity, but the threads you choose can take your projects from beautiful to breathtaking! While most designs use standard 40-weight threads, diving into the world of specialty threads—like metallics, variegated, or even heavyweight threads—opens up endless possibilities for texture, shine, and dimension. Whether you're curious about experimenting with these threads for the first time or looking for tips to refine your technique, this guide is here to inspire and empower you. Get ready to unlock the secrets to mastering specialty threads and take your embroidery projects to dazzling new heights!
Congratulations! You have your first embroidery machine and are ready to dive into the fun! It is so exciting! But do I sense a little hesitation? Does all the terminology baffle you? Trust me when I say we all started at the beginning and had to learn. You are not alone! In this post I am going to teach you some basic terminology to get you started.
Posted on January 17 2025 by Michelle Christiansen
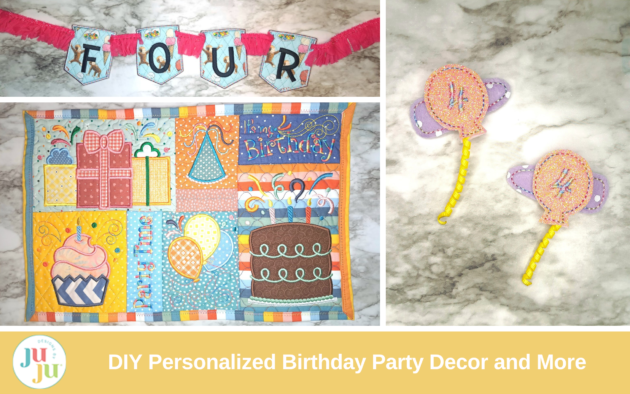
Birthdays are such a special time, especially if you have little ones to celebrate. This year, my daughter turned four. She requested a Curious George® themed birthday party. After looking for inspiration, I decided it was time to get creative and fire up my embroidery machine to make some of the decorations, favors, and even attire for the party!
 Inspire.
Create.
Stitch.
Inspire.
Create.
Stitch.