Toggle Nav
 Inspire.
Create.
Stitch.
Inspire.
Create.
Stitch.
Search
Wedding season is just around the corner, and there’s no better way to celebrate love than with heartfelt, personalized gifts! Whether you’re crafting for newlyweds, celebrating an anniversary, or creating a housewarming present for first-time homeowners, these embroidery projects are guaranteed to make a lasting impression.
In today’s post, I’ll walk you through four stunning customizable gifts, complete with step-by-step instructions and tips to bring your creative vision to life. Plus, stick around for an exciting tutorial on how to grab some amazing FREE embroidery designs from the Designs by JuJu Embroidery Blessings Facebook Group. Let’s get stitching and make this wedding season truly unforgettable!
Check out the DBJJ team’s favorite supplies in the Designs by Juju Amazon Store.
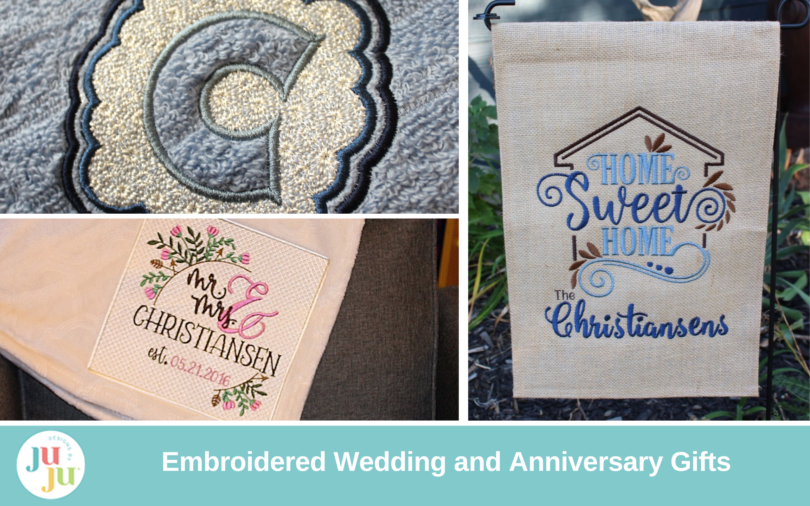
Towels make a wonderful gift for newlyweds or new homeowners, and adding a monogram or name gives them a personal touch. Complete your gift with some other bathroom essentials and you are set.
When monogramming towels, I like to use a wash-away mesh stabilizer and a water-soluble topper to help keep the nap from the towel out of my design. Both of these items are removed completely when washed, leaving a clean and professional look.


Customized pillows are so much fun to make! For ease, I purchased a blank pillow case from Amazon, but you can get creative and make your own pillowcase using Quilting Backdrops or one of the amazing ITH Pillows DBJJ has to offer.
I chose to add a simple monogram to my pillowcase using Lady Edith Monogram. I used a cut-away stabilizer and water-soluble topper to prevent the pillow nap from distorting my stitches. I have a tubular-arm embroidery machine, which made hooping my pillowcase very easy. If you have a flatbed (traditional) embroidery machine, you may want to remove the seam stitches on the side to allow for easier hooping.


A blanket makes a perfect, cozy gift for anyone. Paired with the monogrammed pillow above, you will have a complete gift in no time. Blankets can be purchased relatively inexpensively and can be customized using a variety of designs.
The blanket I embroidered was very plush and had a high nap. For this, I prefer to use a self-adhesive tear-away stabilizer. I like to use this type of stabilizer because it allows me to secure my blanket directly to the stabilizer, tears away cleanly after stitching, and doesn’t distort when washed. I used a water-soluble topper to prevent the blanket nap from distorting my stitches. If you choose to embroider a delicate design on a plush fabric, it is always a good idea to add some type of a knockdown stitch first. I used Motif Filled Knockdown Stitch Frames Set 3 and Wedding Templates 2. Since I was making this blanket for my husband and me, I used Embrilliance to add our last name and wedding date with Puma Embroidery Font.


Garden flags are another easy and fantastic gift to give, especially for new homeowners. Garden flags can be personalized with a name, address, or even with seasonal designs for a truly fun and unique gift. If you have never embroidered on a garden flag, don’t fret. In today’s tutorial, I will break down the steps so you can successfully make your own special yard art. BONUS: Stick around, because I will show you how to download some awesome FREEBIES from the Designs by JuJu Embroidery Blessings Facebook Group!
Before I ever begin stitching, I always peruse the vast library of DBJJ designs available. I also take a peek at the Designs by JuJu Embroidery Blessings Facebook Group. Nearly every month, DBJJ releases new, free designs in the Embroidery Blessings Facebook group.
If you haven’t yet joined the Facebook group, what are you waiting for? Complete the three simple questions and wait for admins to approve your request. Once you are accepted, find the files section (or search “blessings” in the group search bar) and you will see all of the blessings/freebies that have been released. Make sure to follow the directions located under Announcements for how to download your files.

Looking through all of the amazing freebies, I found exactly what I was looking for to complete my garden flag. For my personalized flag, I used the January 2022 blessing, Home Sweet Home.

Once I downloaded my freebie, I decided to further customize my garden flag. I opened Embrilliance Embroidery Software (I have Essentials) and added our last name using the Puma Embroidery Font and Danielle Embroidery Font to complete my design.

I purchased my burlap garden flags from Amazon. They have a laminated back, making them weather resistant and durable.
Step 1: Hoop self-adhesive tear-away stabilizer.

Step 2: Float your garden flag directly to the adhesive on the stabilizer, making sure it is smooth and secure.

Step 3: Select your design and begin stitching. If your garden flag has a lot of texture, you may want to use a water-soluble topper to prevent any fibers from peeking through in the design.


Step 4: Once your design is complete, remove the flag from the hoop and carefully tear away all excess stabilizer (and topper).
Step 5: Display your customized garden flag outside!

Each of the gift ideas shared in today’s blog post is quick, easy, and affordable! I hope you have been inspired to create your own gifts for the special loved ones in your life. The gifts you make will mean so much more than anything you could ever buy.
For more ideas and to share your own creations, be sure to join the Designs by JuJu Embroidery Blessings Facebook Group and tag us anywhere on social media using the hashtag #designsbyjuju. Don’t forget to grab your freebies while you are there! We can’t wait to see what you create!