Toggle Nav
 Inspire.
Create.
Stitch.
Inspire.
Create.
Stitch.
Search
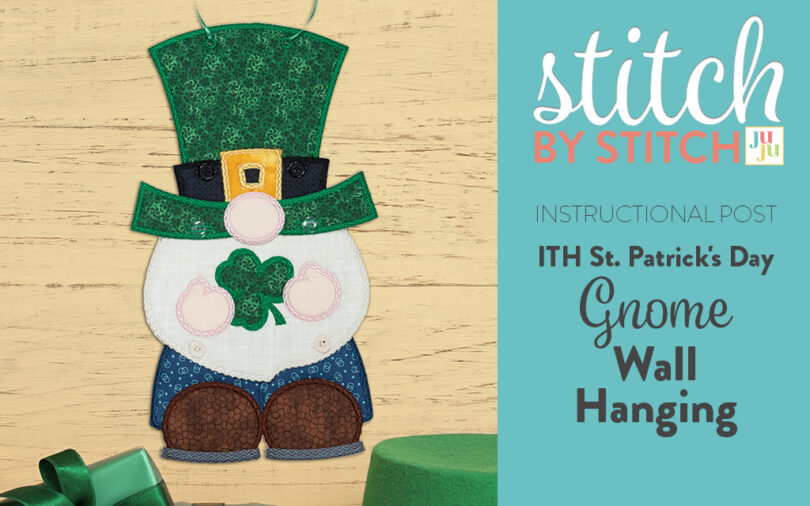
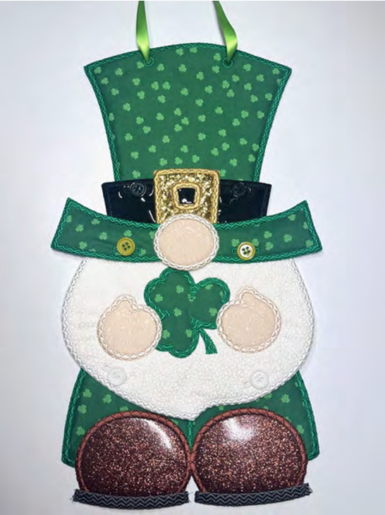
Looking for a fun and festive machine embroidery project to celebrate St. Patrick's Day? This in-the-hoop (ITH) St. Patrick's Day Gnome wall hanging is the perfect addition to your holiday décor! With its charming design, customizable fabric options, and easy assembly, you’ll have a delightful wall or door decoration that will impress your family and friends.
This project is designed to make the process simple and enjoyable, even if you're new to in-the-hoop embroidery. You'll stitch the gnome’s hat, hat band with nose, beard with shamrock, and pants entirely in the hoop, requiring just a bit of hand sewing to attach buttons at the end. With four hoop size options and a detailed PDF photo tutorial included, you’ll have everything you need to bring this adorable gnome to life.
Let’s dive into the details and get started on your festive St. Patrick's Day gnome wall hanging!
5x7 Approximate Finished Size 7.1”x13.26”
6x10 Approximate Finished Size 8.92”x 15.66”
8x12 Approximate Finished Size 11.51”x 20.28”
9.5x14 Approximate Finished Size 14.11”x 24.9”
Check out Embroidery Supplies JuJu Uses for our favorite supplies!
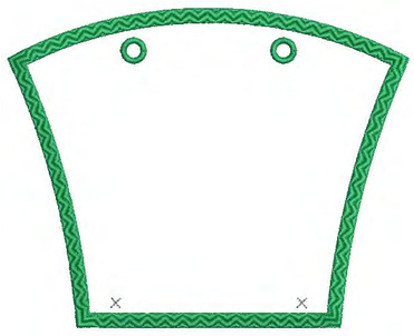
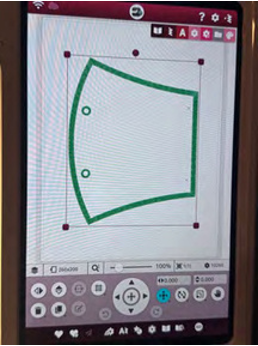
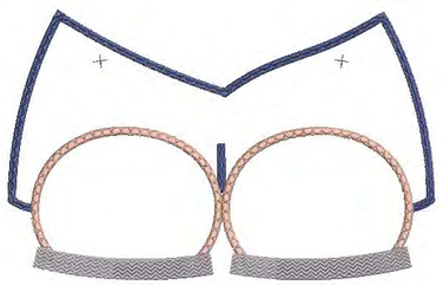
STEP 1: Choose the Hat Top design to begin.
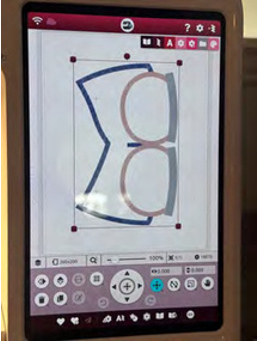
STEP 2: Load design into machine.
Before starting please double check that
you have loaded the correct design size.
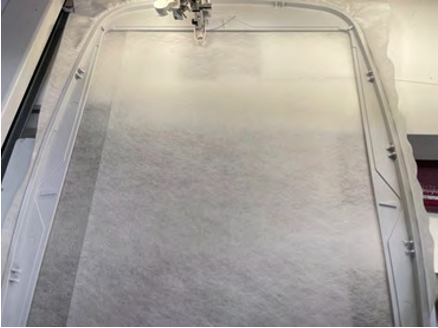
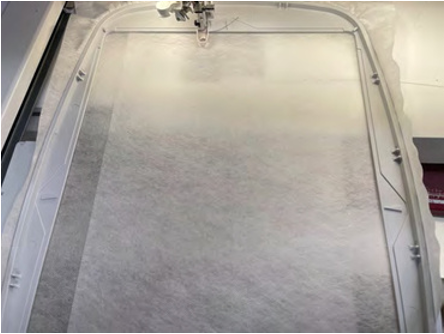
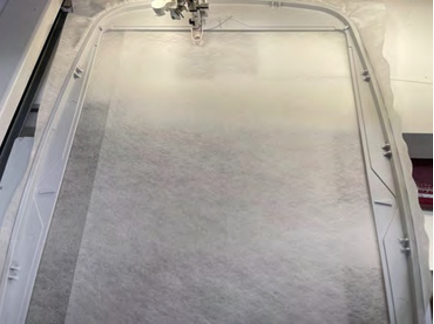
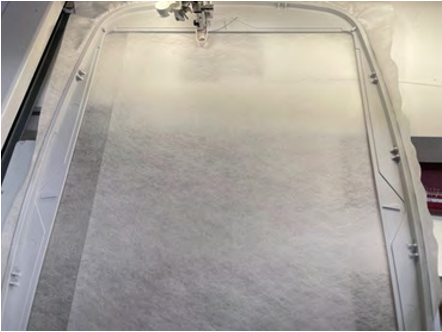
STEP 3: Hoop 2 layers of water soluble stabilizer.
Using 2 layers will make sure it doesn’t rip through while stitching.
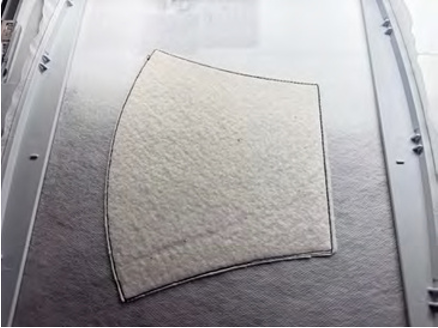
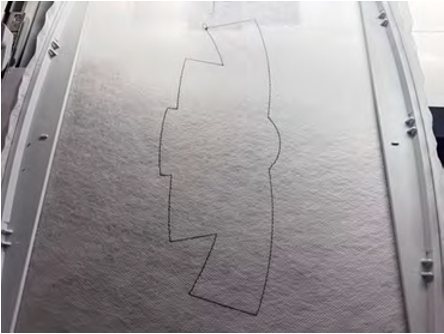
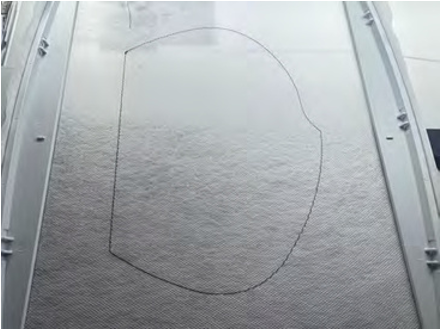
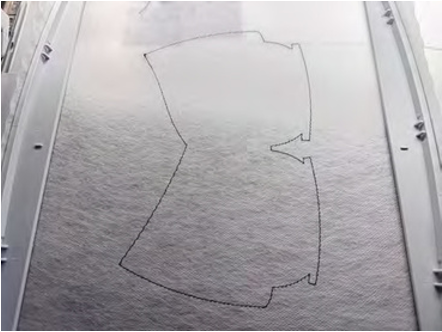
STEP 4: Stitch the placement line for the batting.
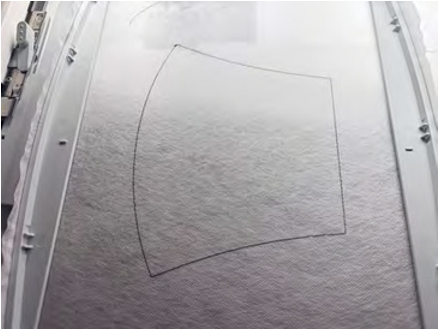
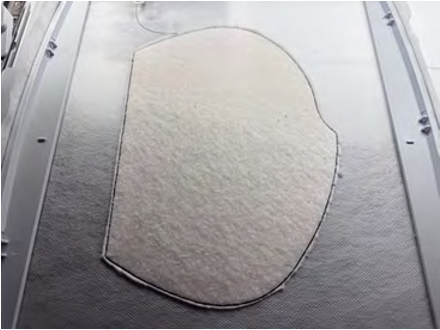
STEP 5: Cover placement line with batting, making sure all sides are completely covered.
Stitch tack down line.
Trim the batting as shown.
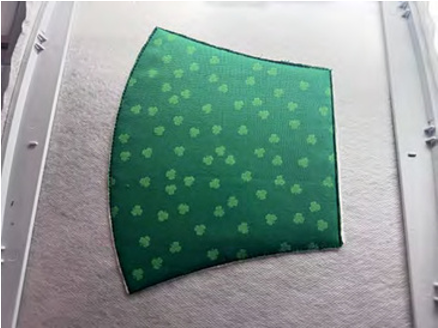
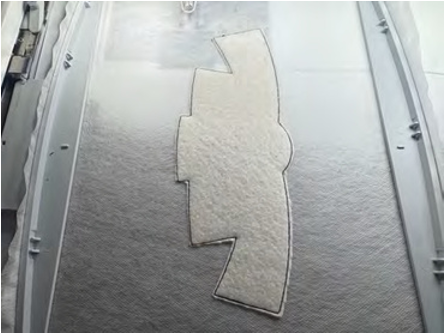
STEP 6: Add front and back of hat. Take the hoop off of the machine and turn to the back side. Place hat backing fabric over the placement lines. Secure in place with tape. Turn hoop to the right side and return hoop to machine. Cover batting with front fabric. Stitch the tack down line. Take the hoop back off of the machine and trim fabric.
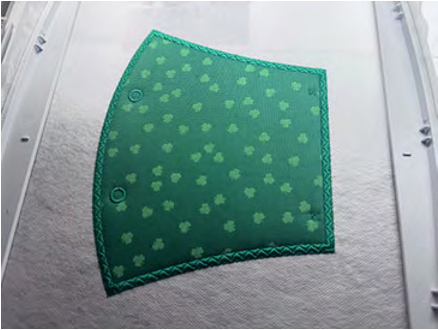
STEP 7: The next few stitching steps are the satin stitches for the hat.
Refer to color chart, included with
download, for satin and design stitching
sequence.
STEP 8: Take the hat out of the hoop.
Trim away as much stabilizer as possible without cutting the satin stitching.
STEP 9: Use a wet cotton swab to remove the left over stabilizer around the outer edge.

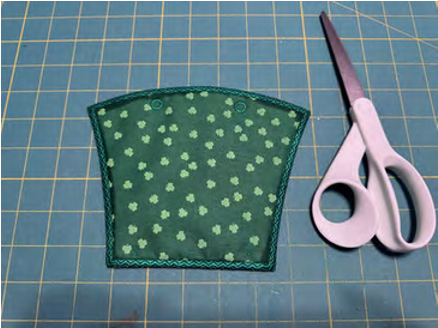
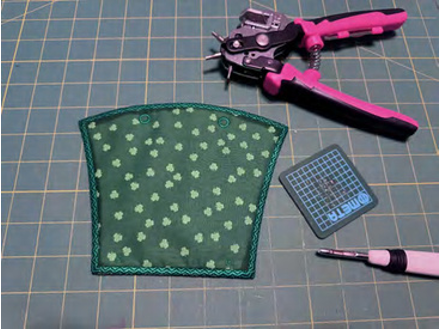
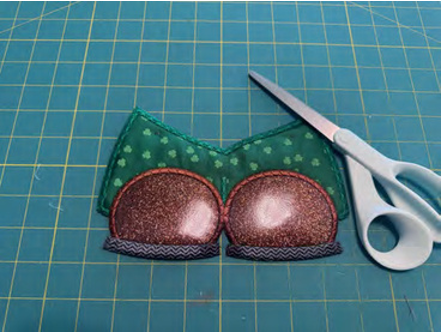
STEP 10: Use cutting tool to open the button and ribbon hole on the hat.
YOU ARE FINISHED
WITH THE HAT
STEP 11: Choose the Hat Band/Nose design.
STEP 12: Load design into machine.
STEP 13: Hoop 2 layers of water soluble stabilizer.
STEP 14: Stitch the placement line for the batting.
STEP 15: Cover placement line with batting, making sure all sides are completely covered.
Stitch tack down line. Trim the batting as shown.
STEP 16: Use the applique method to complete the band. For additional assistance with applique, please see applique tutorial included with the download (DBJJAppliqueTutorial.pdf).
STEP 17: Take the hoop off of the machine and turn to the back side. Place backing fabric over the placement lines. Secure in place with tape. Turn hoop to the right side and return hoop to machine. Stitch the tack down line. Take the hoop back off of the machine. Trim the fabric on the back side of the hoop.

STEP 18: The next few stitching steps are the satin stitches for the band and nose.
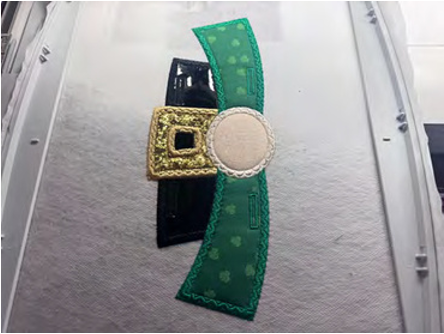
STEP 19: Take the band out of the hoop.
Trim away as much stabilizer as possible without cutting the satin stitching.
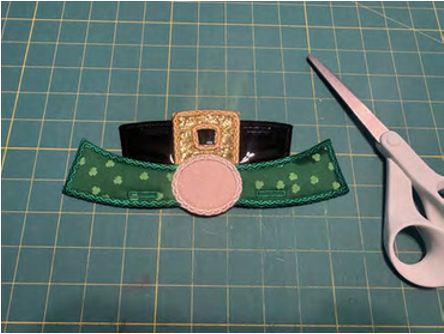
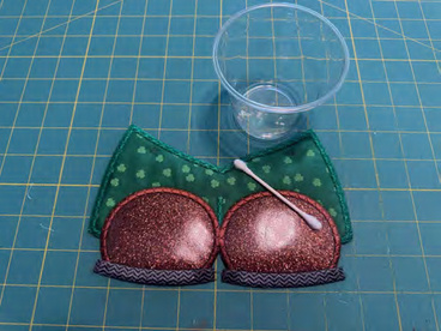
STEP 20: Use a wet cotton swab to remove the left over stabilizer around the outer edge.
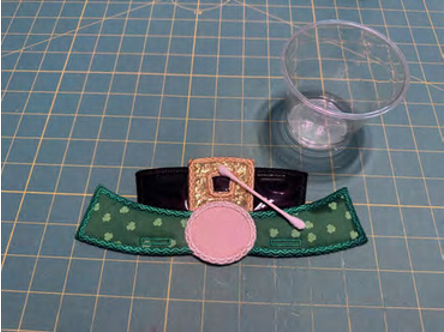
STEP 21: Use cutting tool to open the button holes.
YOU ARE FINISHED
WITH THE BAND

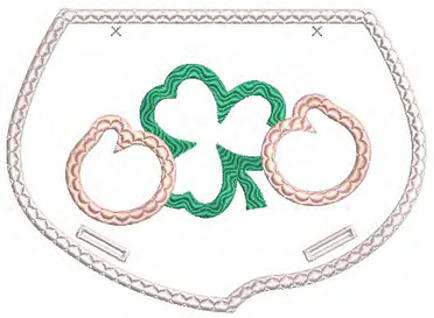
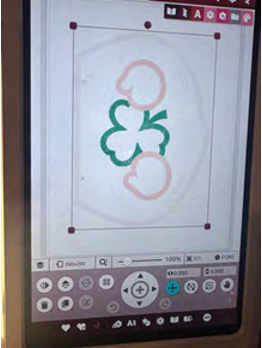
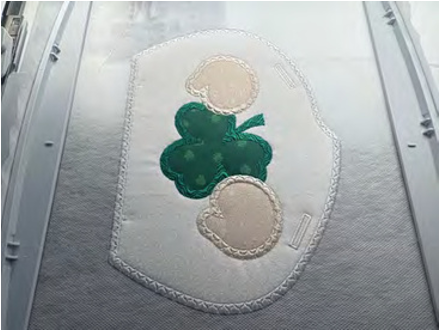
STEP 22: Choose the Beard/Shamrock design.
STEP 23: Load design into machine.
STEP 24: Hoop 2 layers of water soluble stabilizer.
STEP 25: Stitch the placement line for the batting.
STEP 26: Cover placement line with batting, making sure all sides are completely covered.
Stitch tack down line. Trim the batting as shown.
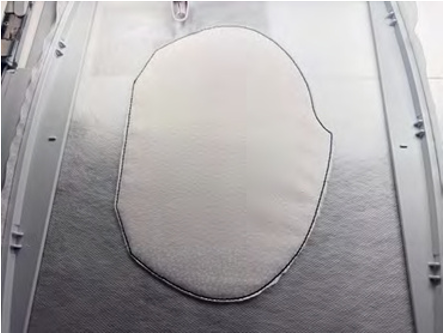
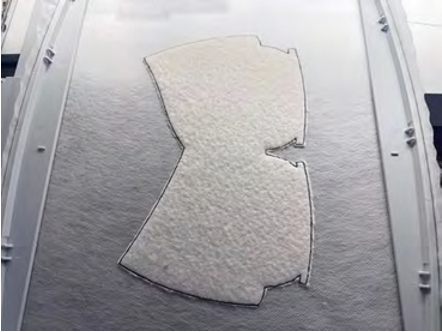
STEP 27: Use the batting tackdown line for the beard placement line. Cover placement line with beard fabric, making sure all sides are completely covered. Stitch tack down line.
Trim the batting as shown.
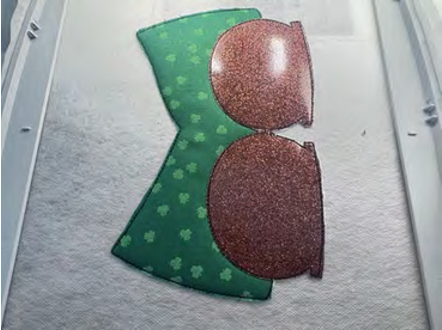
STEP 28: Use the applique method to add the applique shamrock and hands.
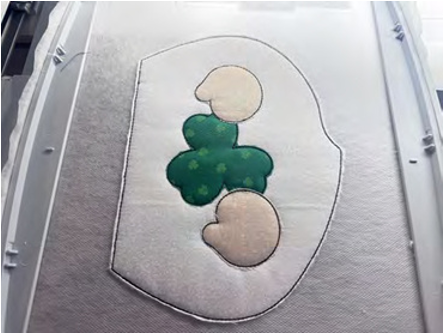
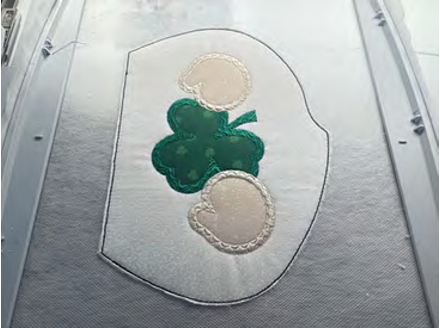
STEP 29: The next few stitching steps are the
satin stitches for the shamrock and hands.
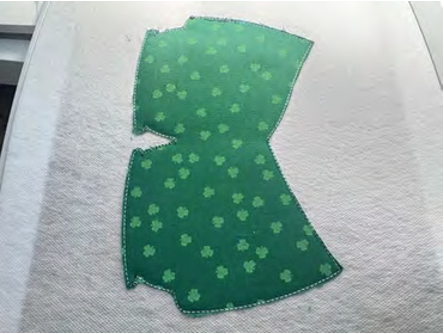
STEP 30: Take the hoop off of the machine and turn to the back side. Place backing fabric over the placement lines. Secure in place with tape. Turn hoop to the right side and return hoop to machine. Stitch the tack down line. Take the hoop back off of the machine. Trim the fabric on the back side of the hoop.
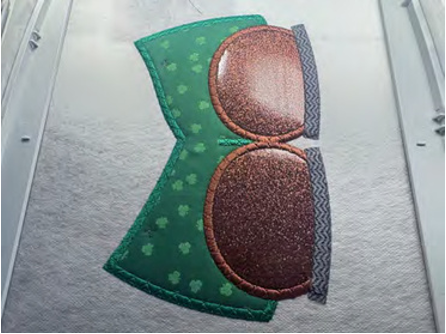
STEP 31: The next stitching step is the satin stitches for the beard.
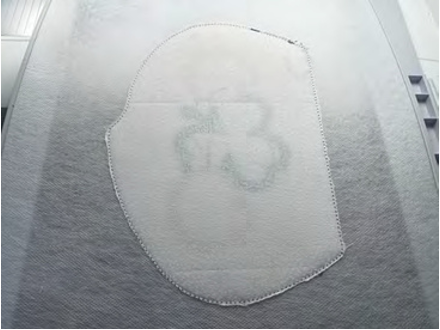
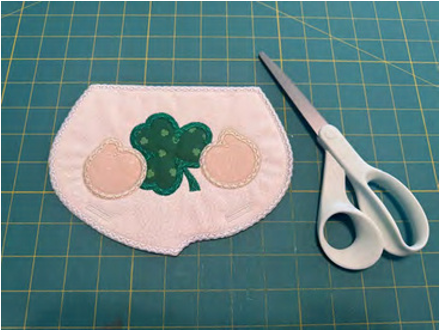
STEP 32: Take the beard out of the hoop.
Trim away as much stabilizer as possible without cutting the satin stitching.
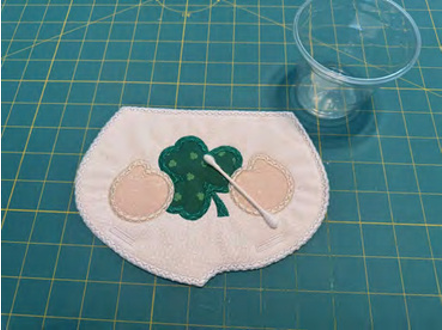
STEP 33: Use a wet cotton swab to remove the left over stabilizer around the outer edge.
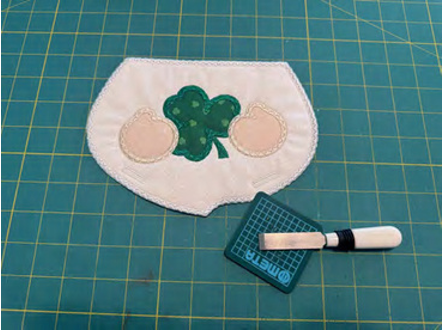
STEP 34: Use cutting tool to open the button holes the middle.
YOU ARE FINISHED
WITH THE BEARD
STEP 35: Choose the Pants/Shoes design.
STEP 36: Load design into machine.
STEP 37: Hoop 2 layers of water soluble stabilizer.
STEP 38: Stitch the placement line for the batting.
STEP 39: Cover placement line with batting, making sure all sides are completely covered.
Stitch tack down line. Trim the batting as shown.
STEP 40: Use the applique method to complete the pants and shoes.
STEP 41: Take the hoop off of the machine and turn to the back side. Place backing fabric over the placement lines. Secure in place with tape. Turn hoop to the right side and return hoop to machine. Stitch the tack down line. Take the hoop back off of the machine. Trim the fabric on the back side of the hoop.
STEP 42: The next few stitching steps are the satin stitches for the pants and shoes.
STEP 43: Take the pants out of the hoop.
Trim away as much stabilizer as possible without cutting the satin stitching.
STEP 44: Use a wet cotton swab to remove the left over stabilizer around the outer edge.
YOU ARE FINISHED
WITH THE PANTS/SHOES
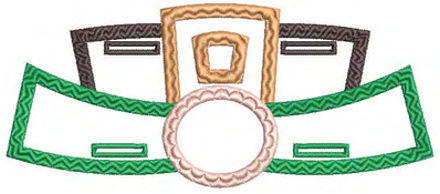
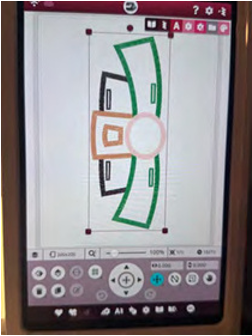
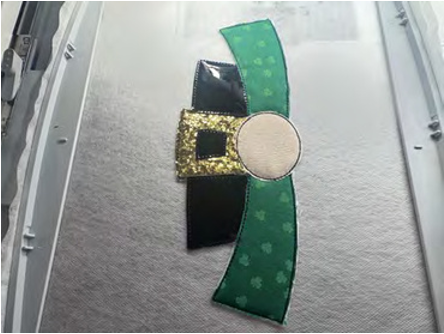
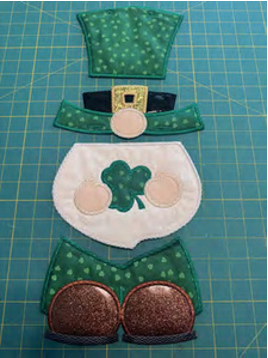
STEP 45: Lay out the gnome parts to form the body.
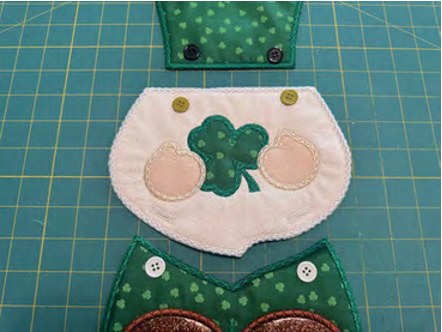
STEP 46: Sew buttons over all of the stitched Xs.
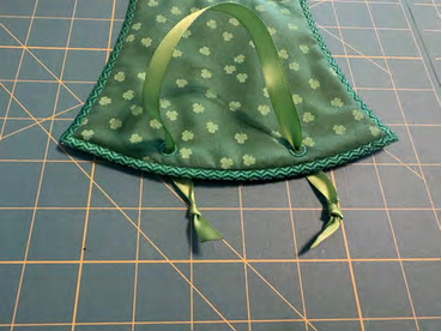
STEP 47: To hang the gnome there are 2 round holes on the top of the hat. Cut through the holes. Use tape on the ends of the string or ribbon to thread it through the holes. Then tie the ends on the back side of the hat.
STEP 48: Assemble the gnome by inserting all the
buttons through coordinating button holes.
THE GNOME IS COMPLETE!!!!
If you loved this project, you’ll find plenty more just like it in our Home Hub—a curated collection of quick, creative, and practical projects perfect for gifting (or keeping!)
If you make this project, please share it with us in the Designs by JuJu Embroidery Blessings Facebook group or anywhere on social media using the hashtag #designsbyjuju. We can't wait to see what you create!