Toggle Nav
 Inspire.
Create.
Stitch.
Inspire.
Create.
Stitch.
Search
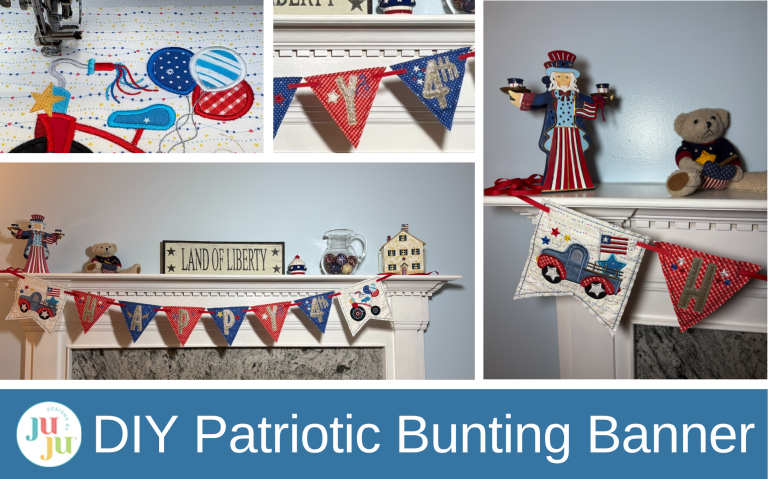
Create a festive patriotic bunting with embroidery! Learn how to stitch “Happy 4th” pennants, add embellishments, and craft a charming parade-inspired decoration for your home.
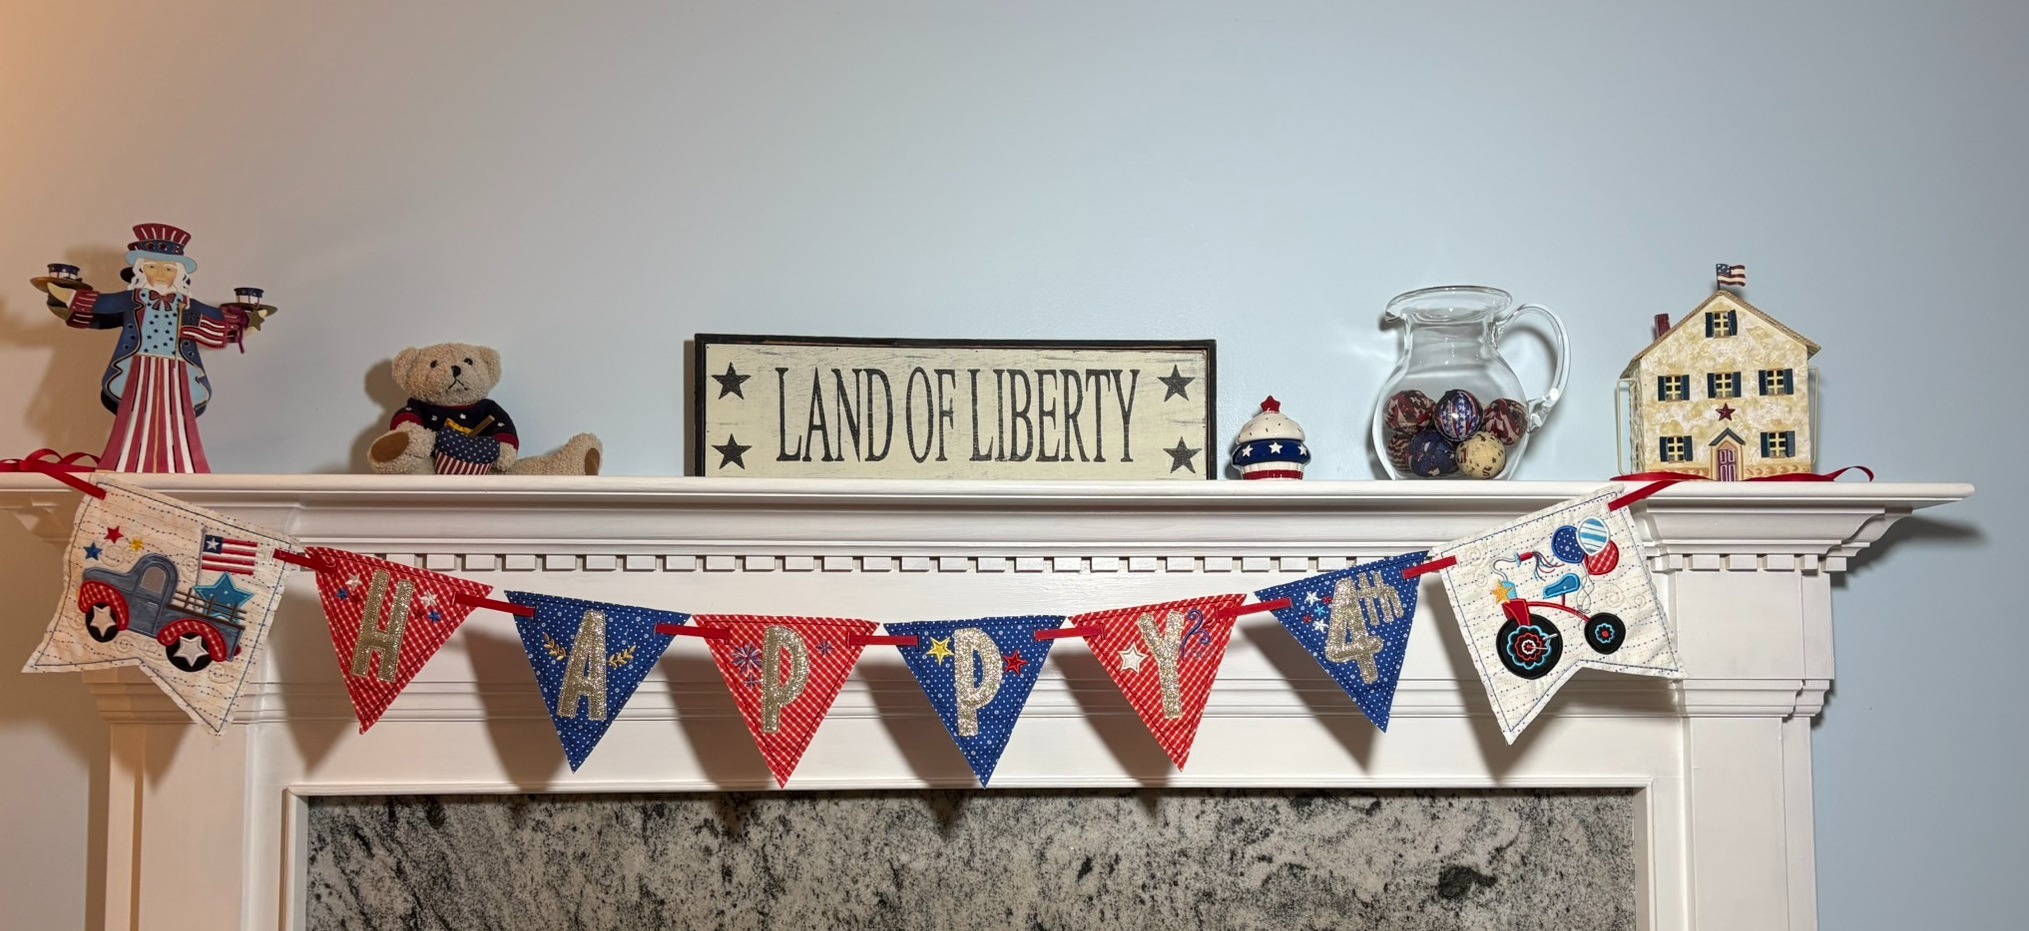
What is more patriotic than a parade and bunting? Make this cute bunting that’s bordered at each end by a truck and tricycle decked out for the 4th as though they are in a parade. Hang this in your home for a party or outside on your deck for a barbecue!
Check out the DBJJ team’s favorite supplies in the Designs by JuJu Amazon store. For stabilizers and batting, Designs by JuJu+ has everything you need.
I used Embrilliance Essentials and Enthusiast modules to copy, paste, and resize some of the embellishments from the Star Spangled Stitches sets.
I played around quite a bit deciding what my bunting should look like, and I can happily say that DBJJ’s web page inspired me! Below is a snippet of the page that convinced me triangle bunting was the way to go.
I wanted to make the bunting look like it was part of a 4th of July parade, with the truck leading the parade and the tricycle bringing up the rear. I played around with shapes in Word and found that to get the effect I wanted, the truck and tricycle needed to be on differently shaped and slightly larger pennants to stand out.
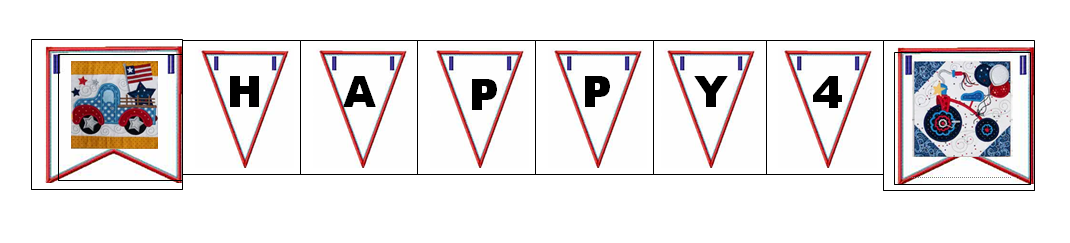
I knew from the start that this project was destined to hang on my fireplace mantel. Last year I made an Eagles banner, as shown in the Project Guide: Make Your Own Embroidered Banner blog post, using 7” pennants, which fit perfectly. This bunting will have more letters so I chose the 6” triangle pennants
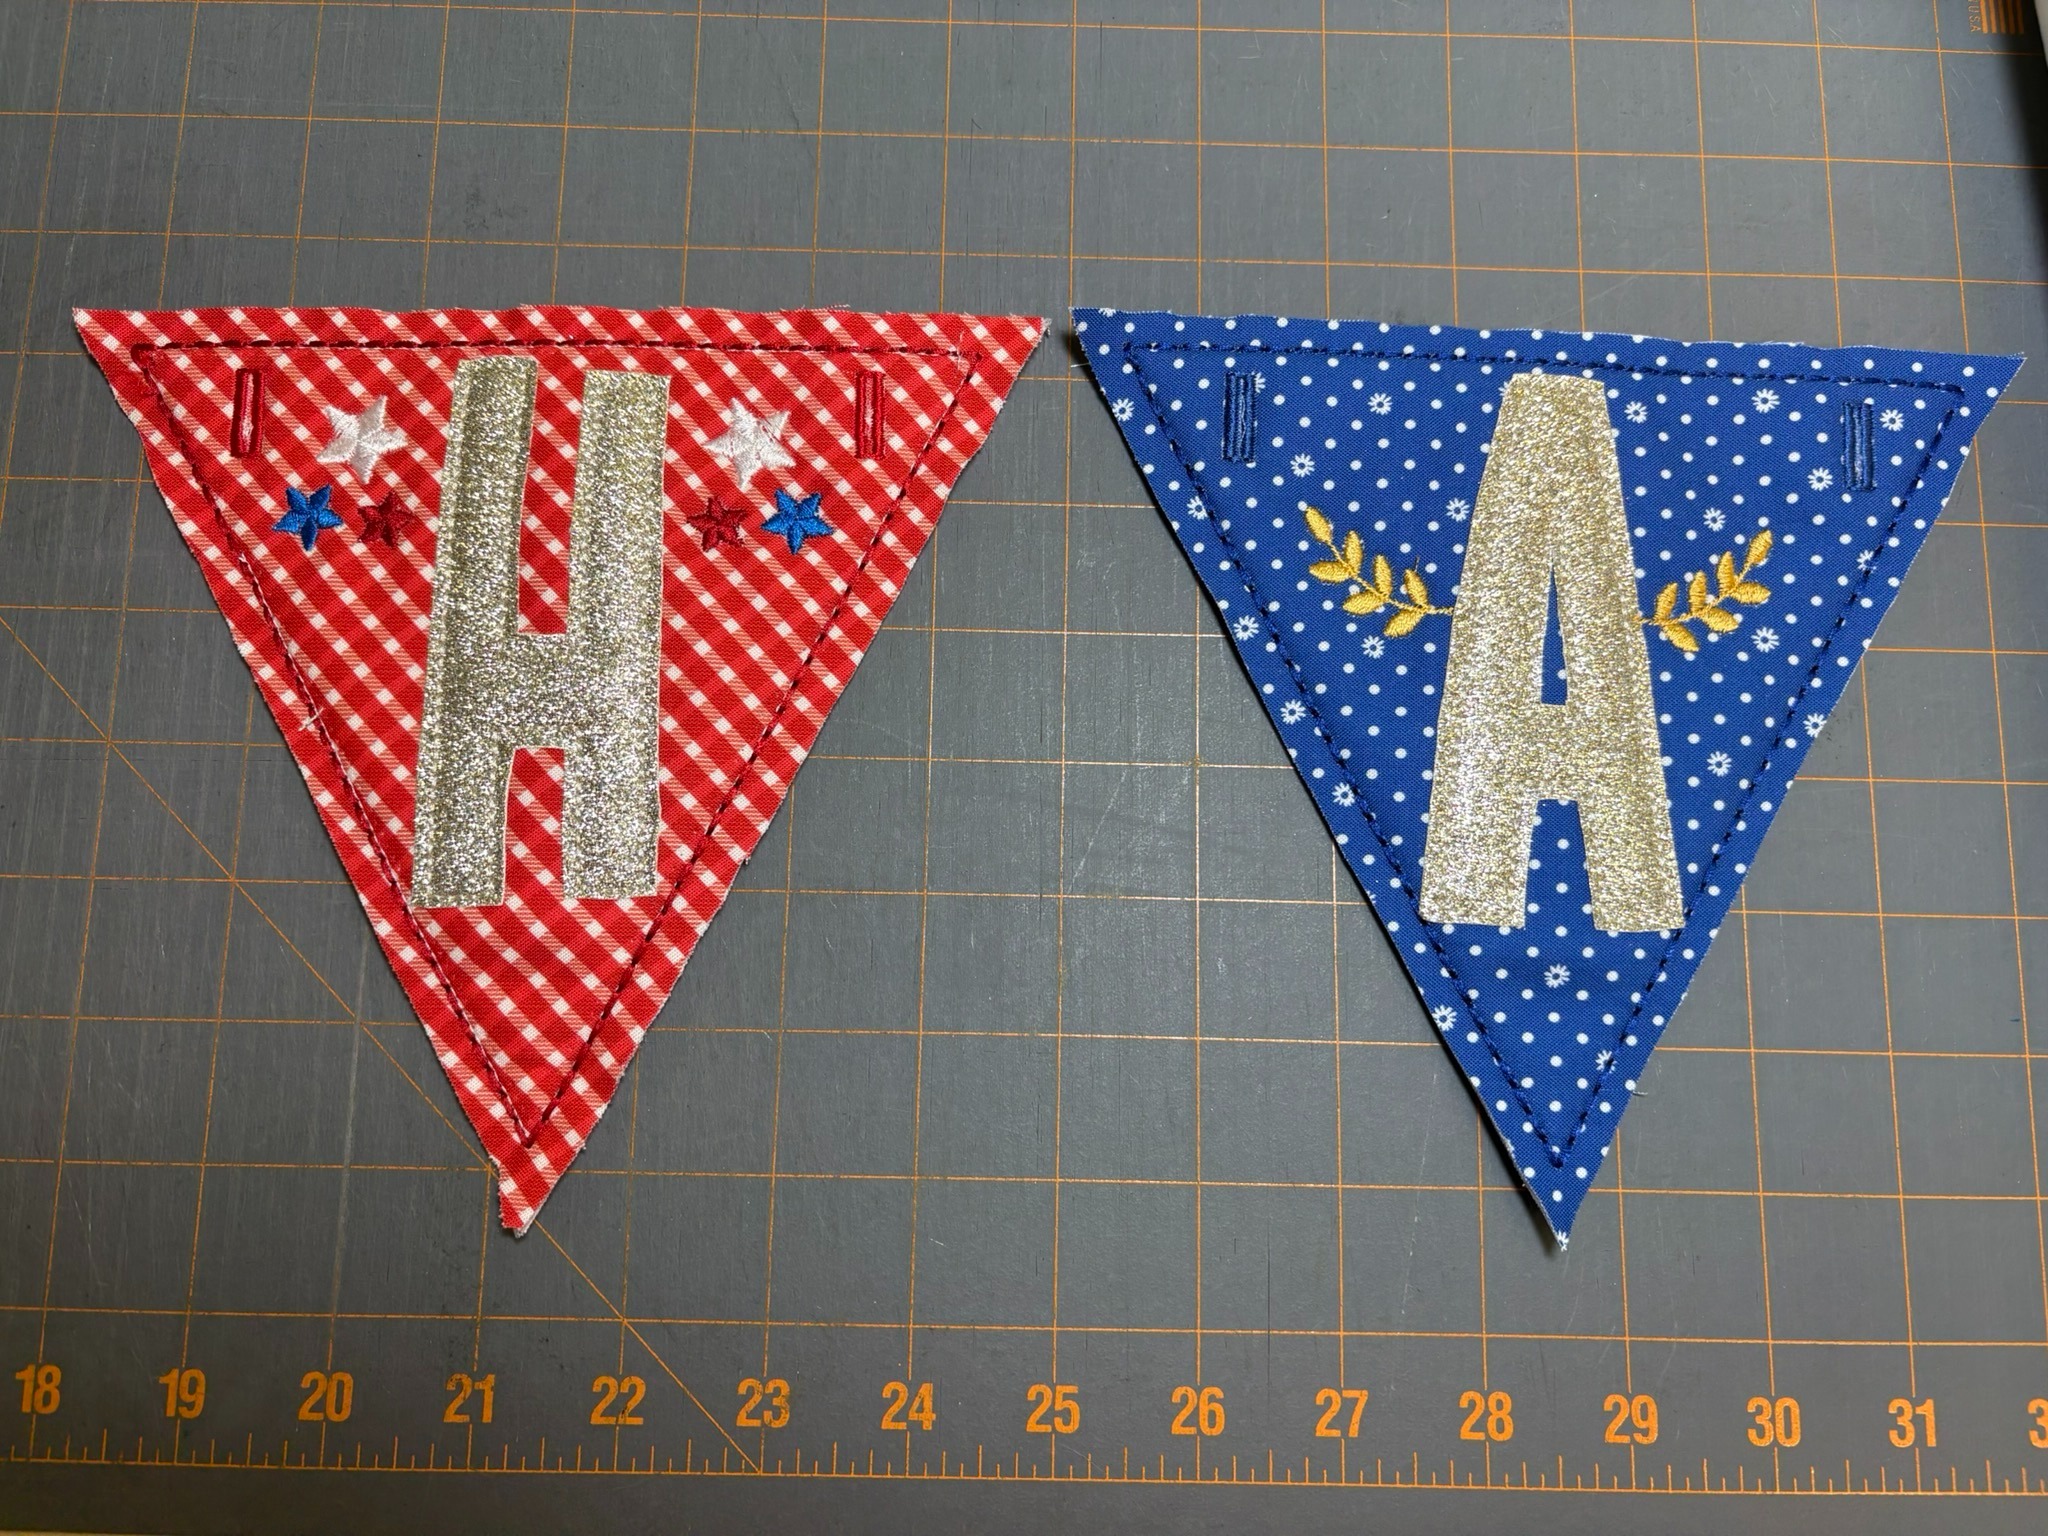
Using Embrilliance, I opened a 6” Raggy Bean Plain triangle with buttonholes, from In The Hoop Big Set of Pennant and Bunting Shapes Set 2. The next step was adding the lettering. I found the 4” Daisy Doodle was the best size when I started with the letter H.
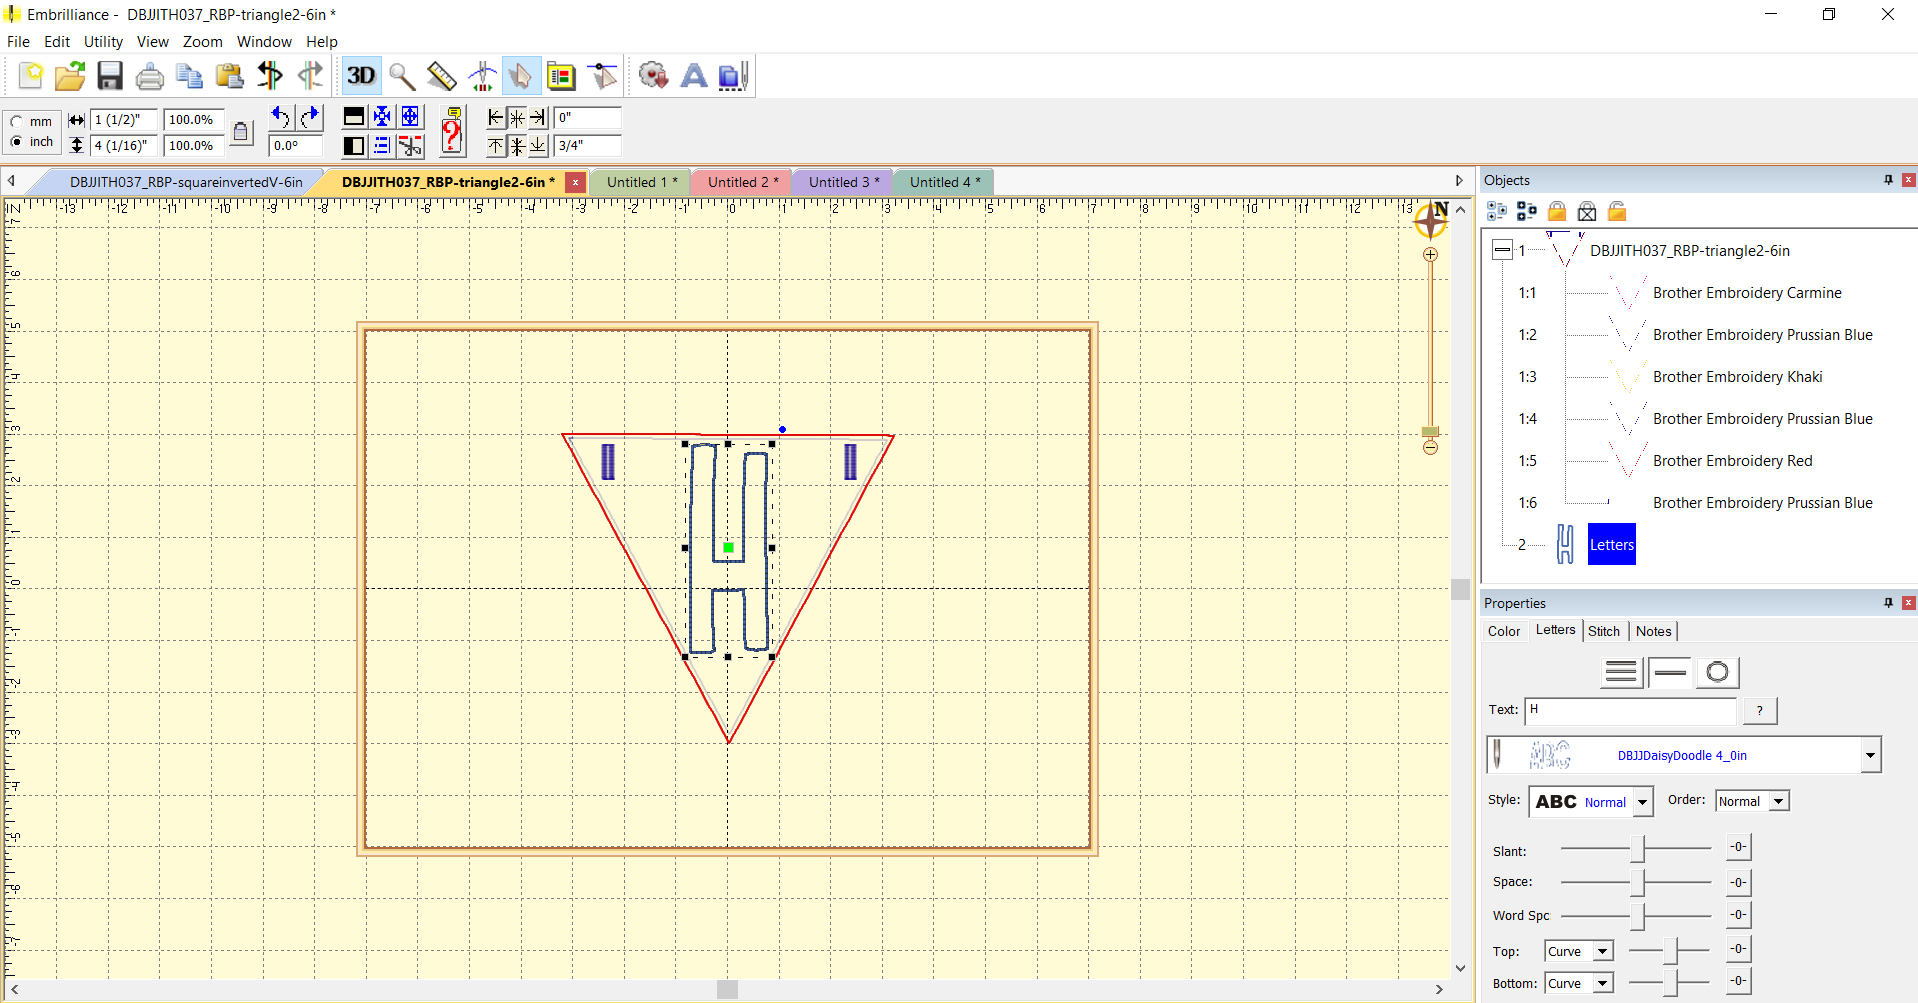
Embrilliance made the rest of the lettering very easy. I copied this page and opened four new Embrilliance pages and pasted the design on each. Then I changed the H to the other letters needed on each page, until I had five pages, one each for H, A, P, Y, and the 4th. By doing this, each letter will stitch out on its pennant in the exact same size and location. For the 4th, I made the “th” with the 2.5” size and shrank it down, then centered the “4th” in the pennant.
Once the letters were set, I added some design embellishments from the Star Spangled Stitches sets.
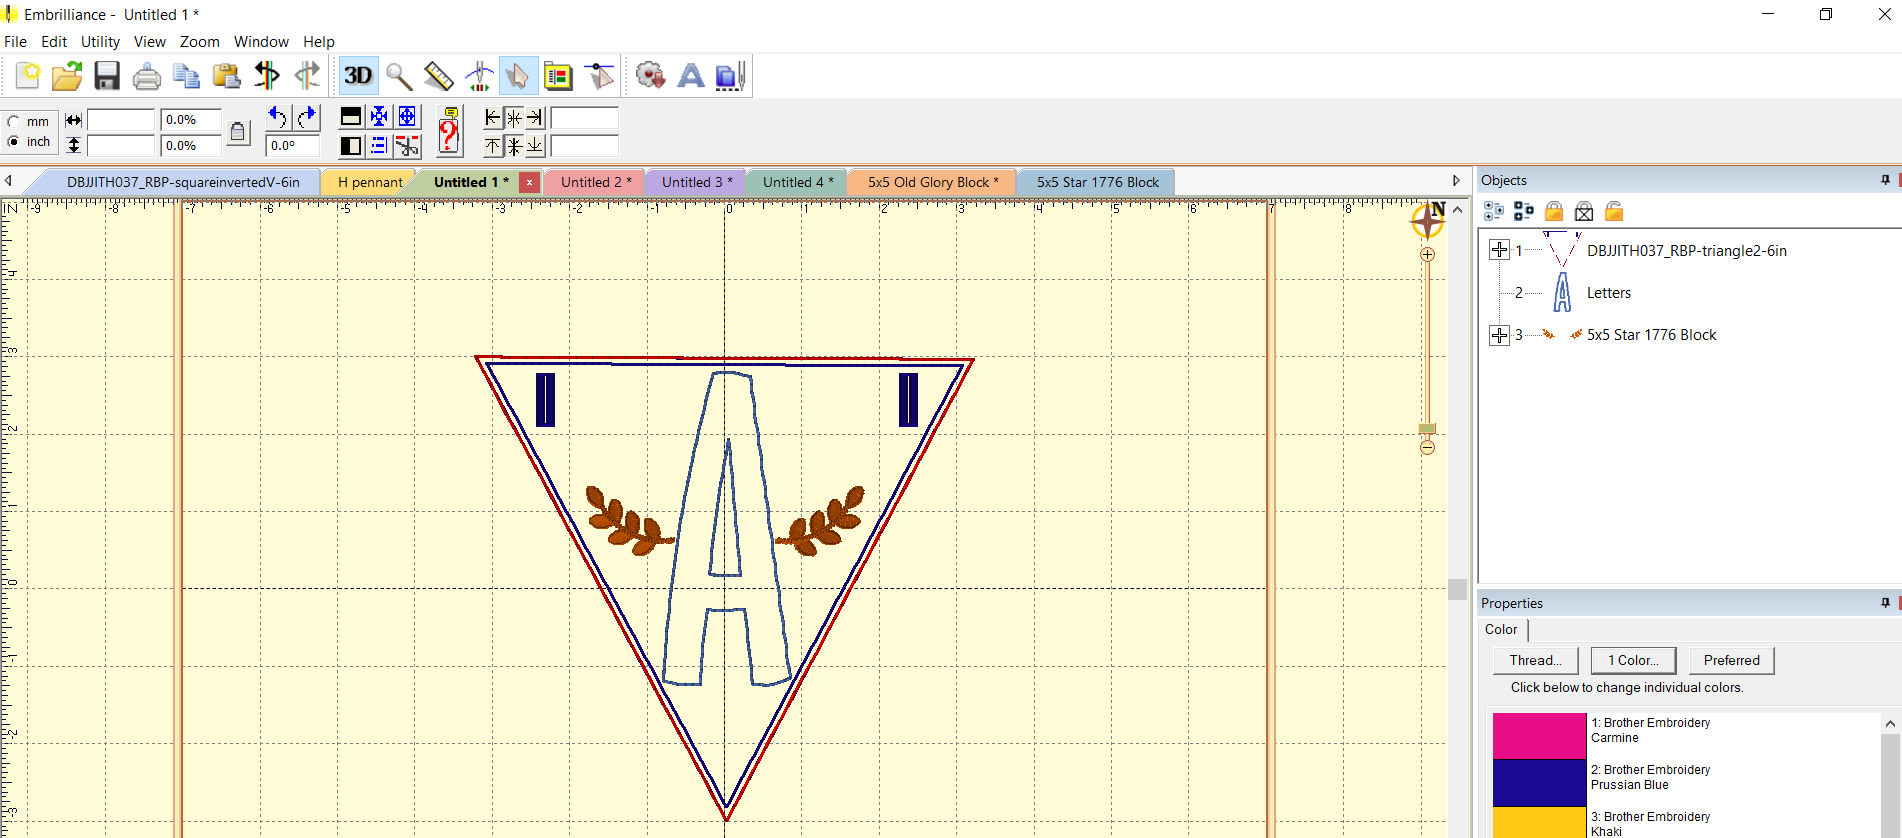
For the letter H, I copied the three stars from the Old Glory Block in Set 4, turned them slightly, and placed them on the left-hand side. Then I copied them, pasted them on the right-hand side, and flipped them to be a mirror image. I added the same stars to the 4th pennant.
I added the gold wheat sheaves from the 1776 Block from Set 2 to the letter A, making them a little smaller and moving them until they nicely hugged the A on each side.
Here’s a brief video in which I demonstrate how I used Essentials and Enthusiast to copy and edit some of the Star Spangled Stitches embellishments. The video starts with how to copy, paste, rotate, and resize. Other key moments:
There are probably other ways to accomplish this but I found these steps quick and easy.
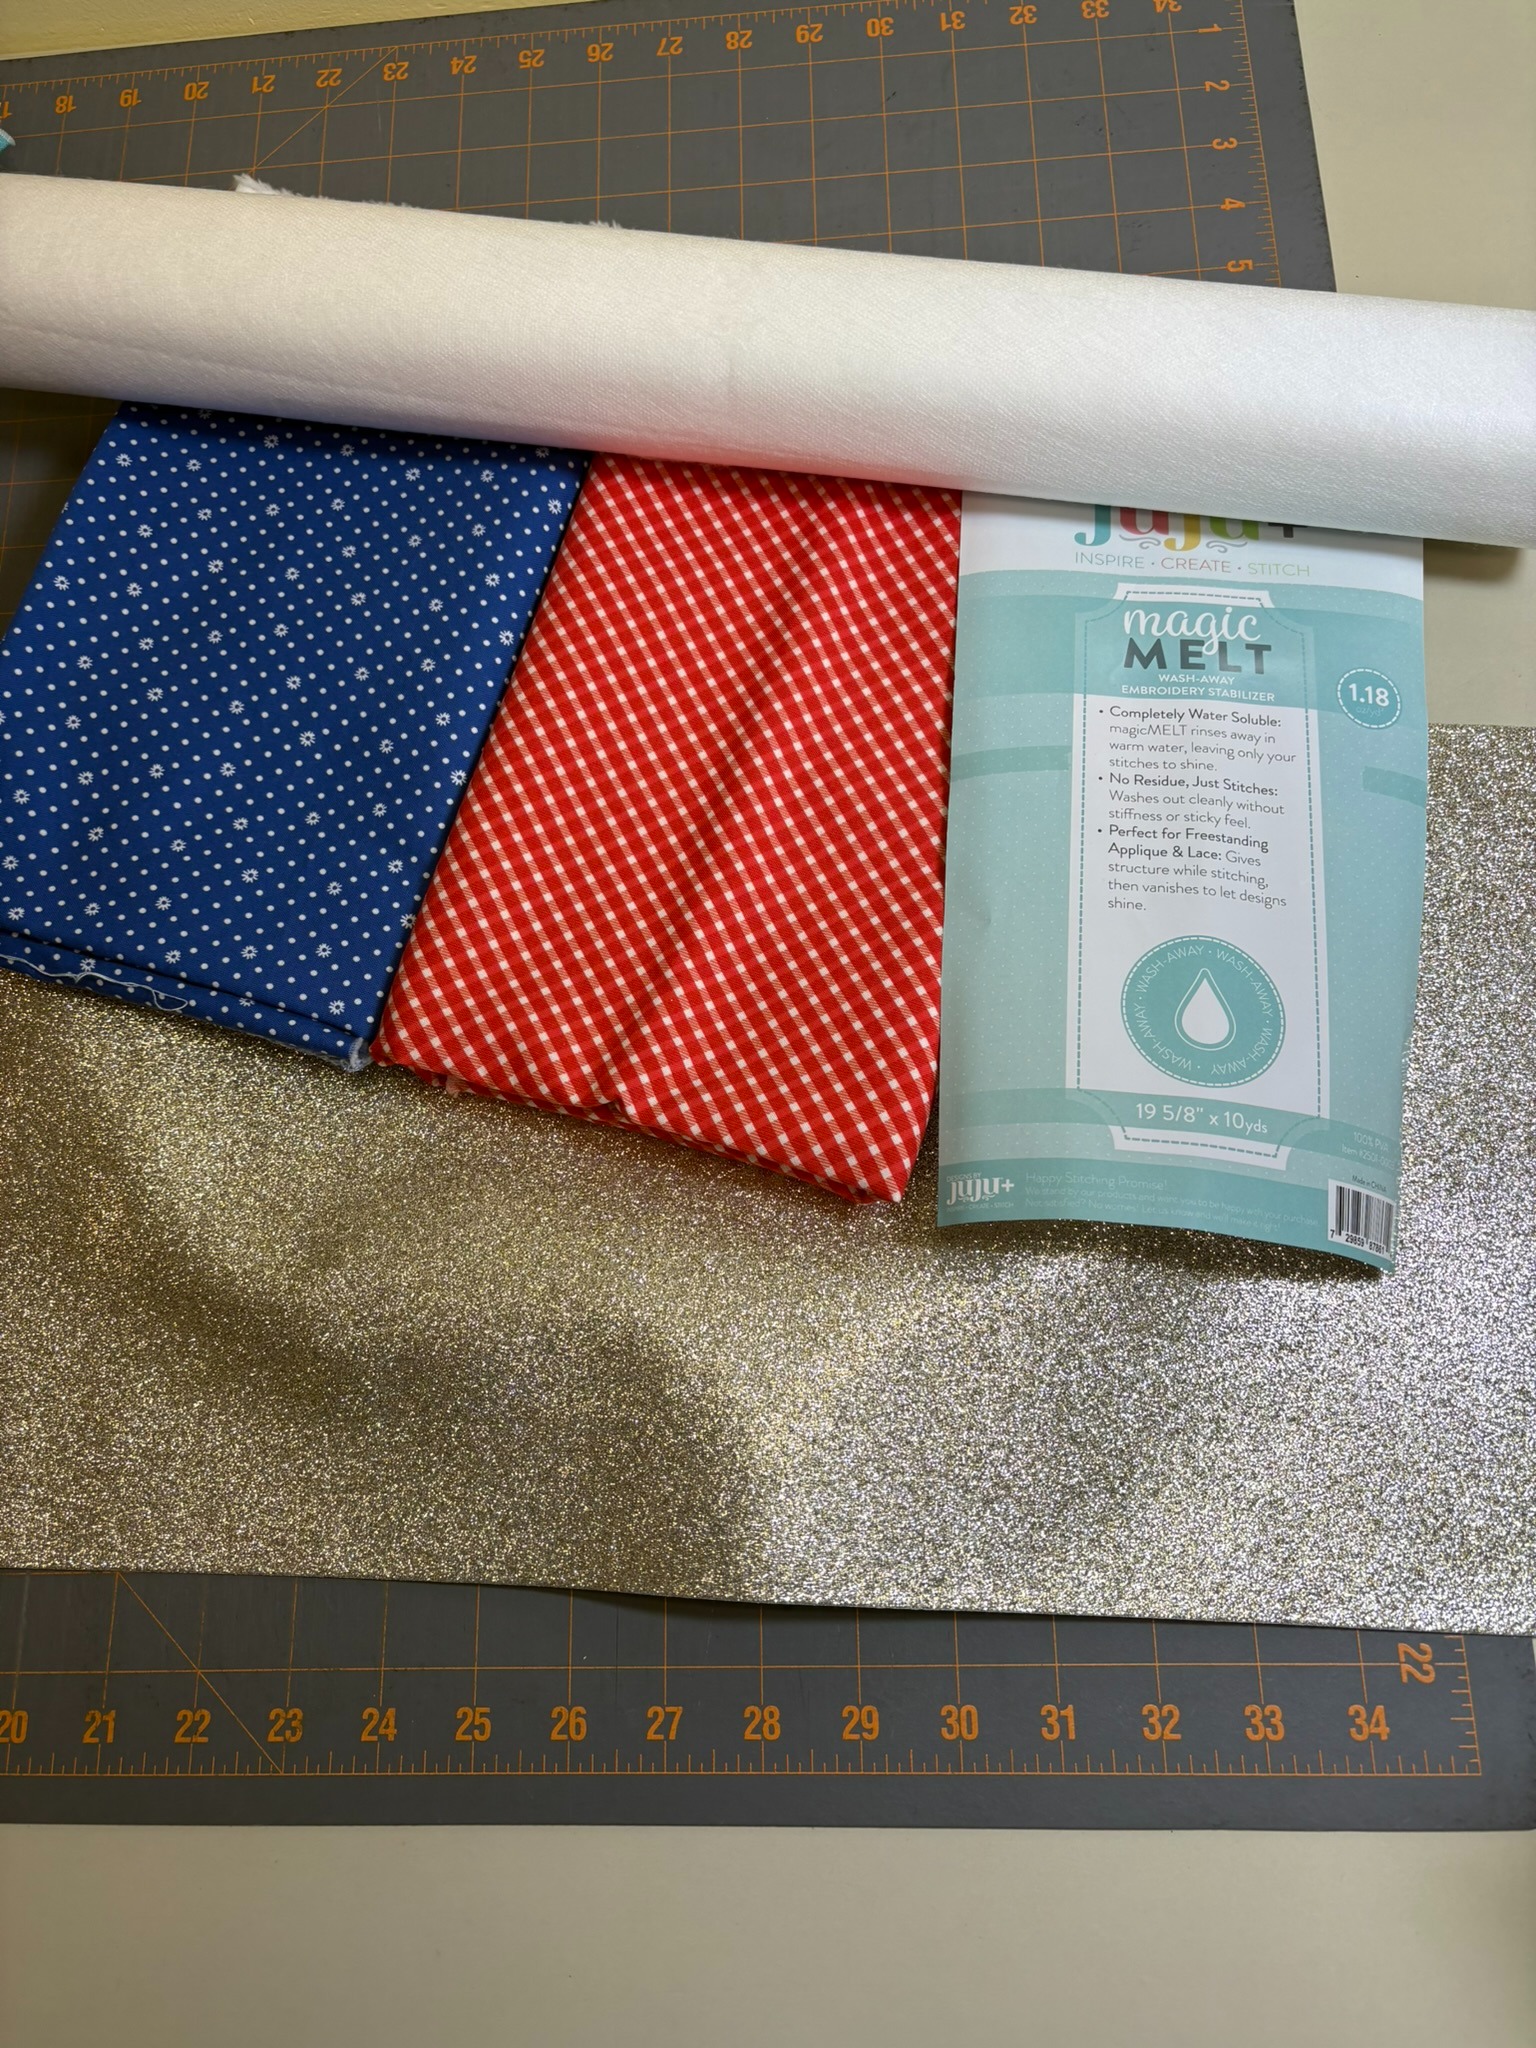
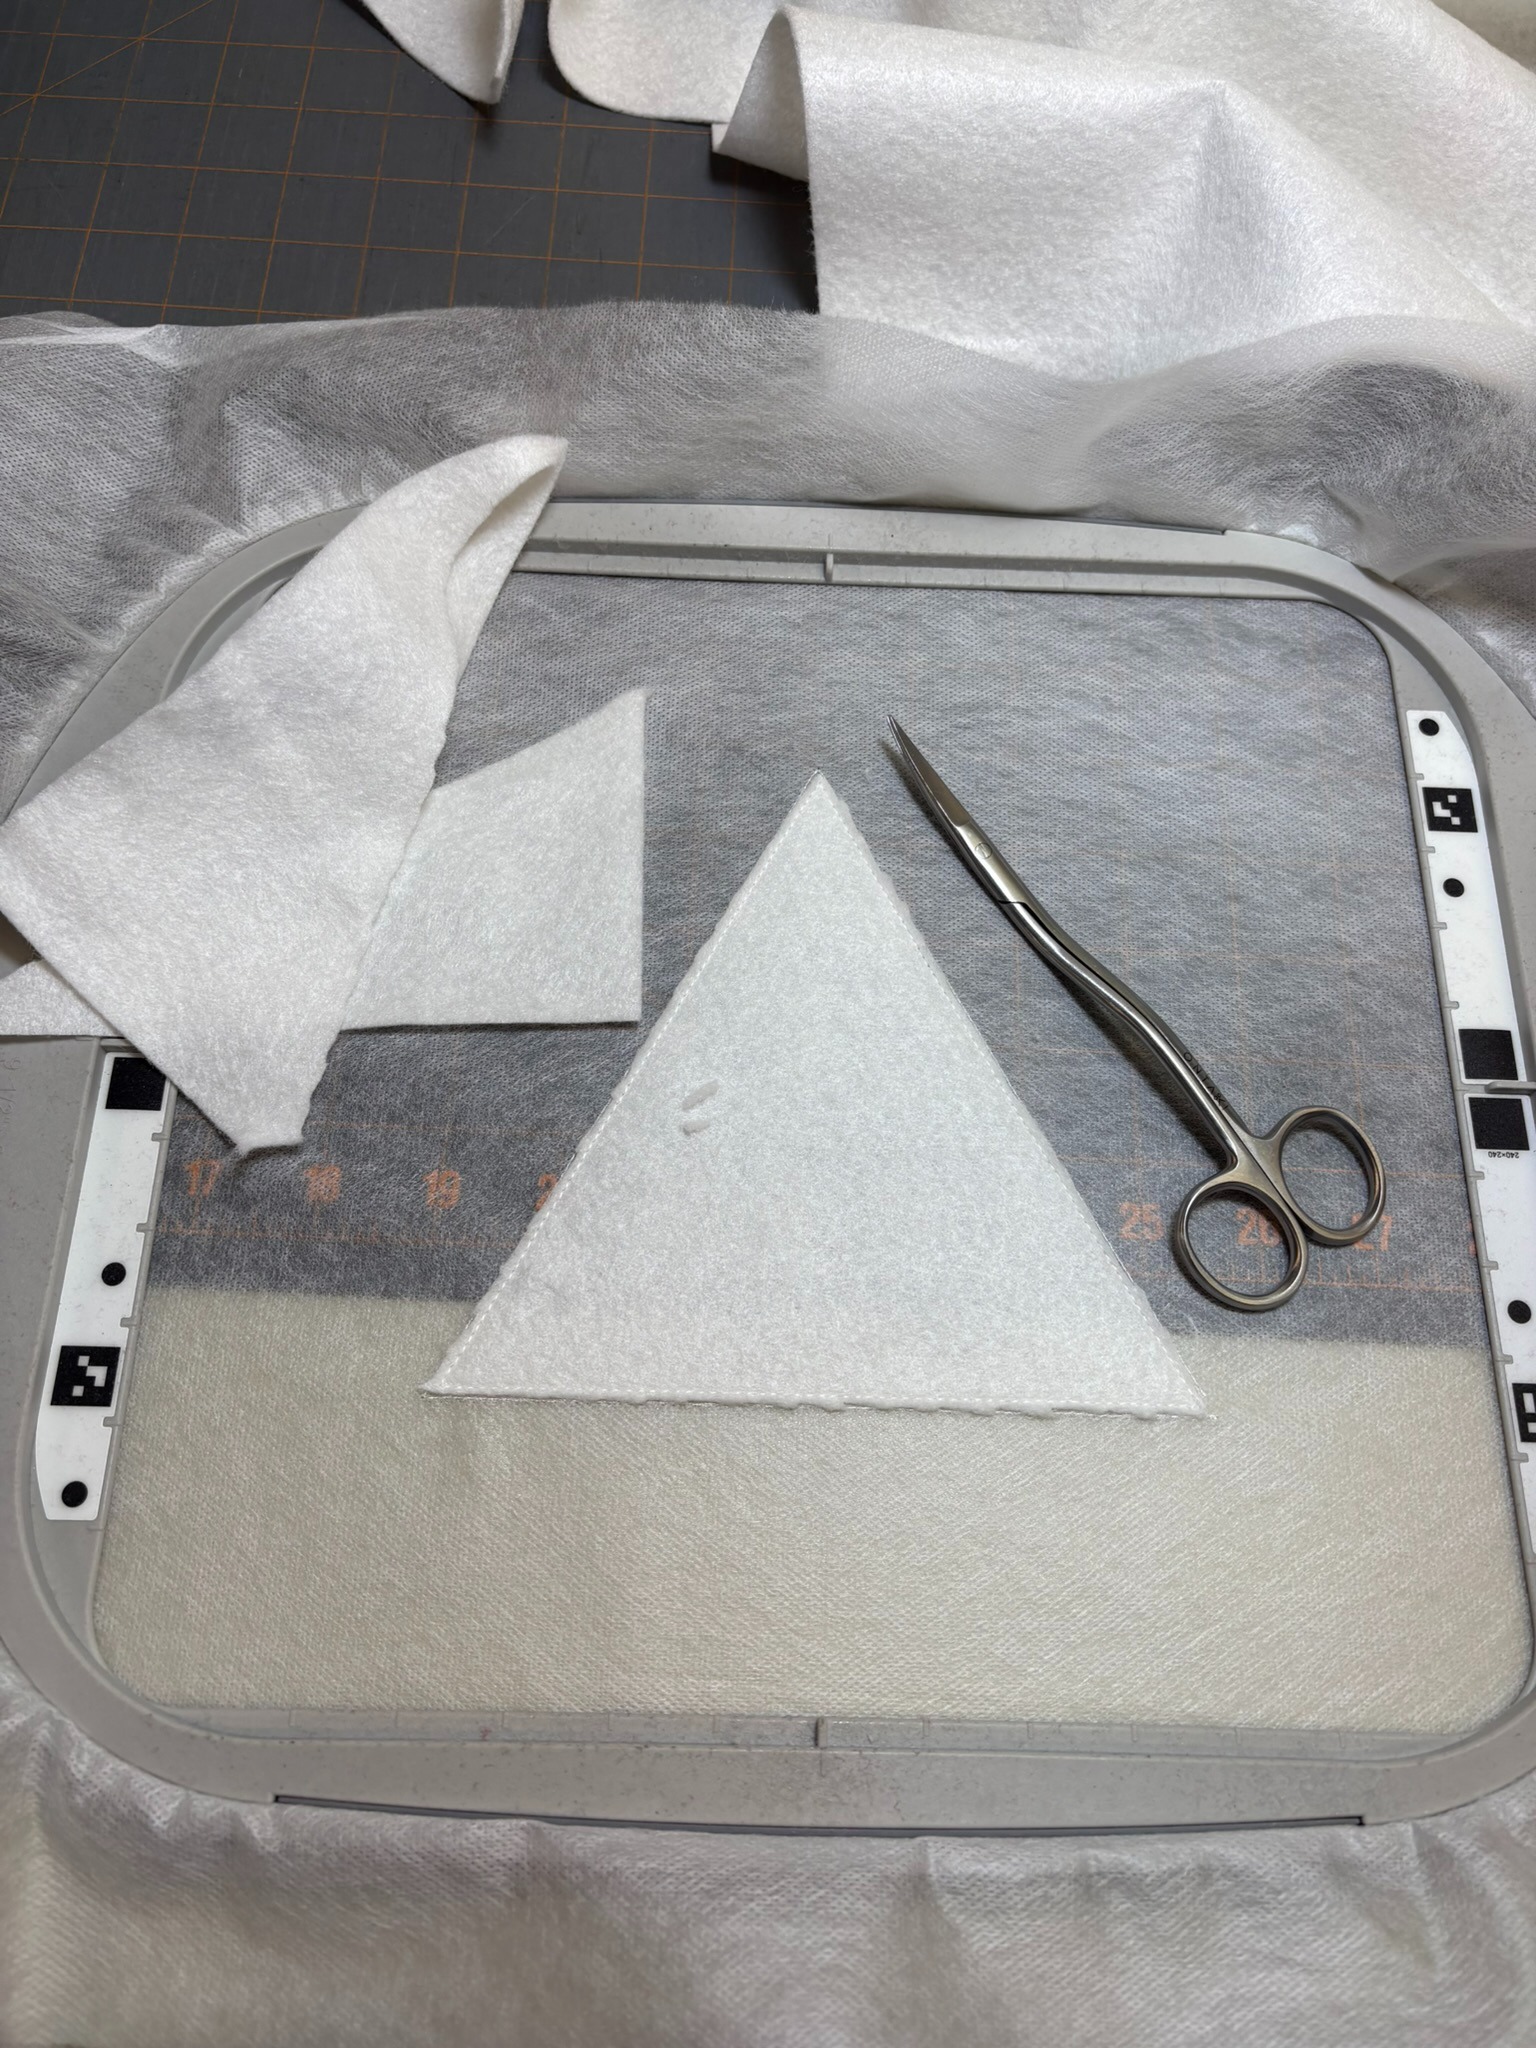
I hooped the wash-away stabilizer into my 8x8 hoop and stitched the placement line. I measured the area that needed to be covered by the loftySoft batting and cut a 7” square. That gave me enough to cover the area. Now that I knew what size batting was needed, I could save some time by cutting out the other five squares needed for the other pennants.
Returning to the H pennant, I sprayed the batting with fabric adhesive and put it on top of the placement stitches. After sewing the tack-down lines, I trimmed the batting close to the stitches.
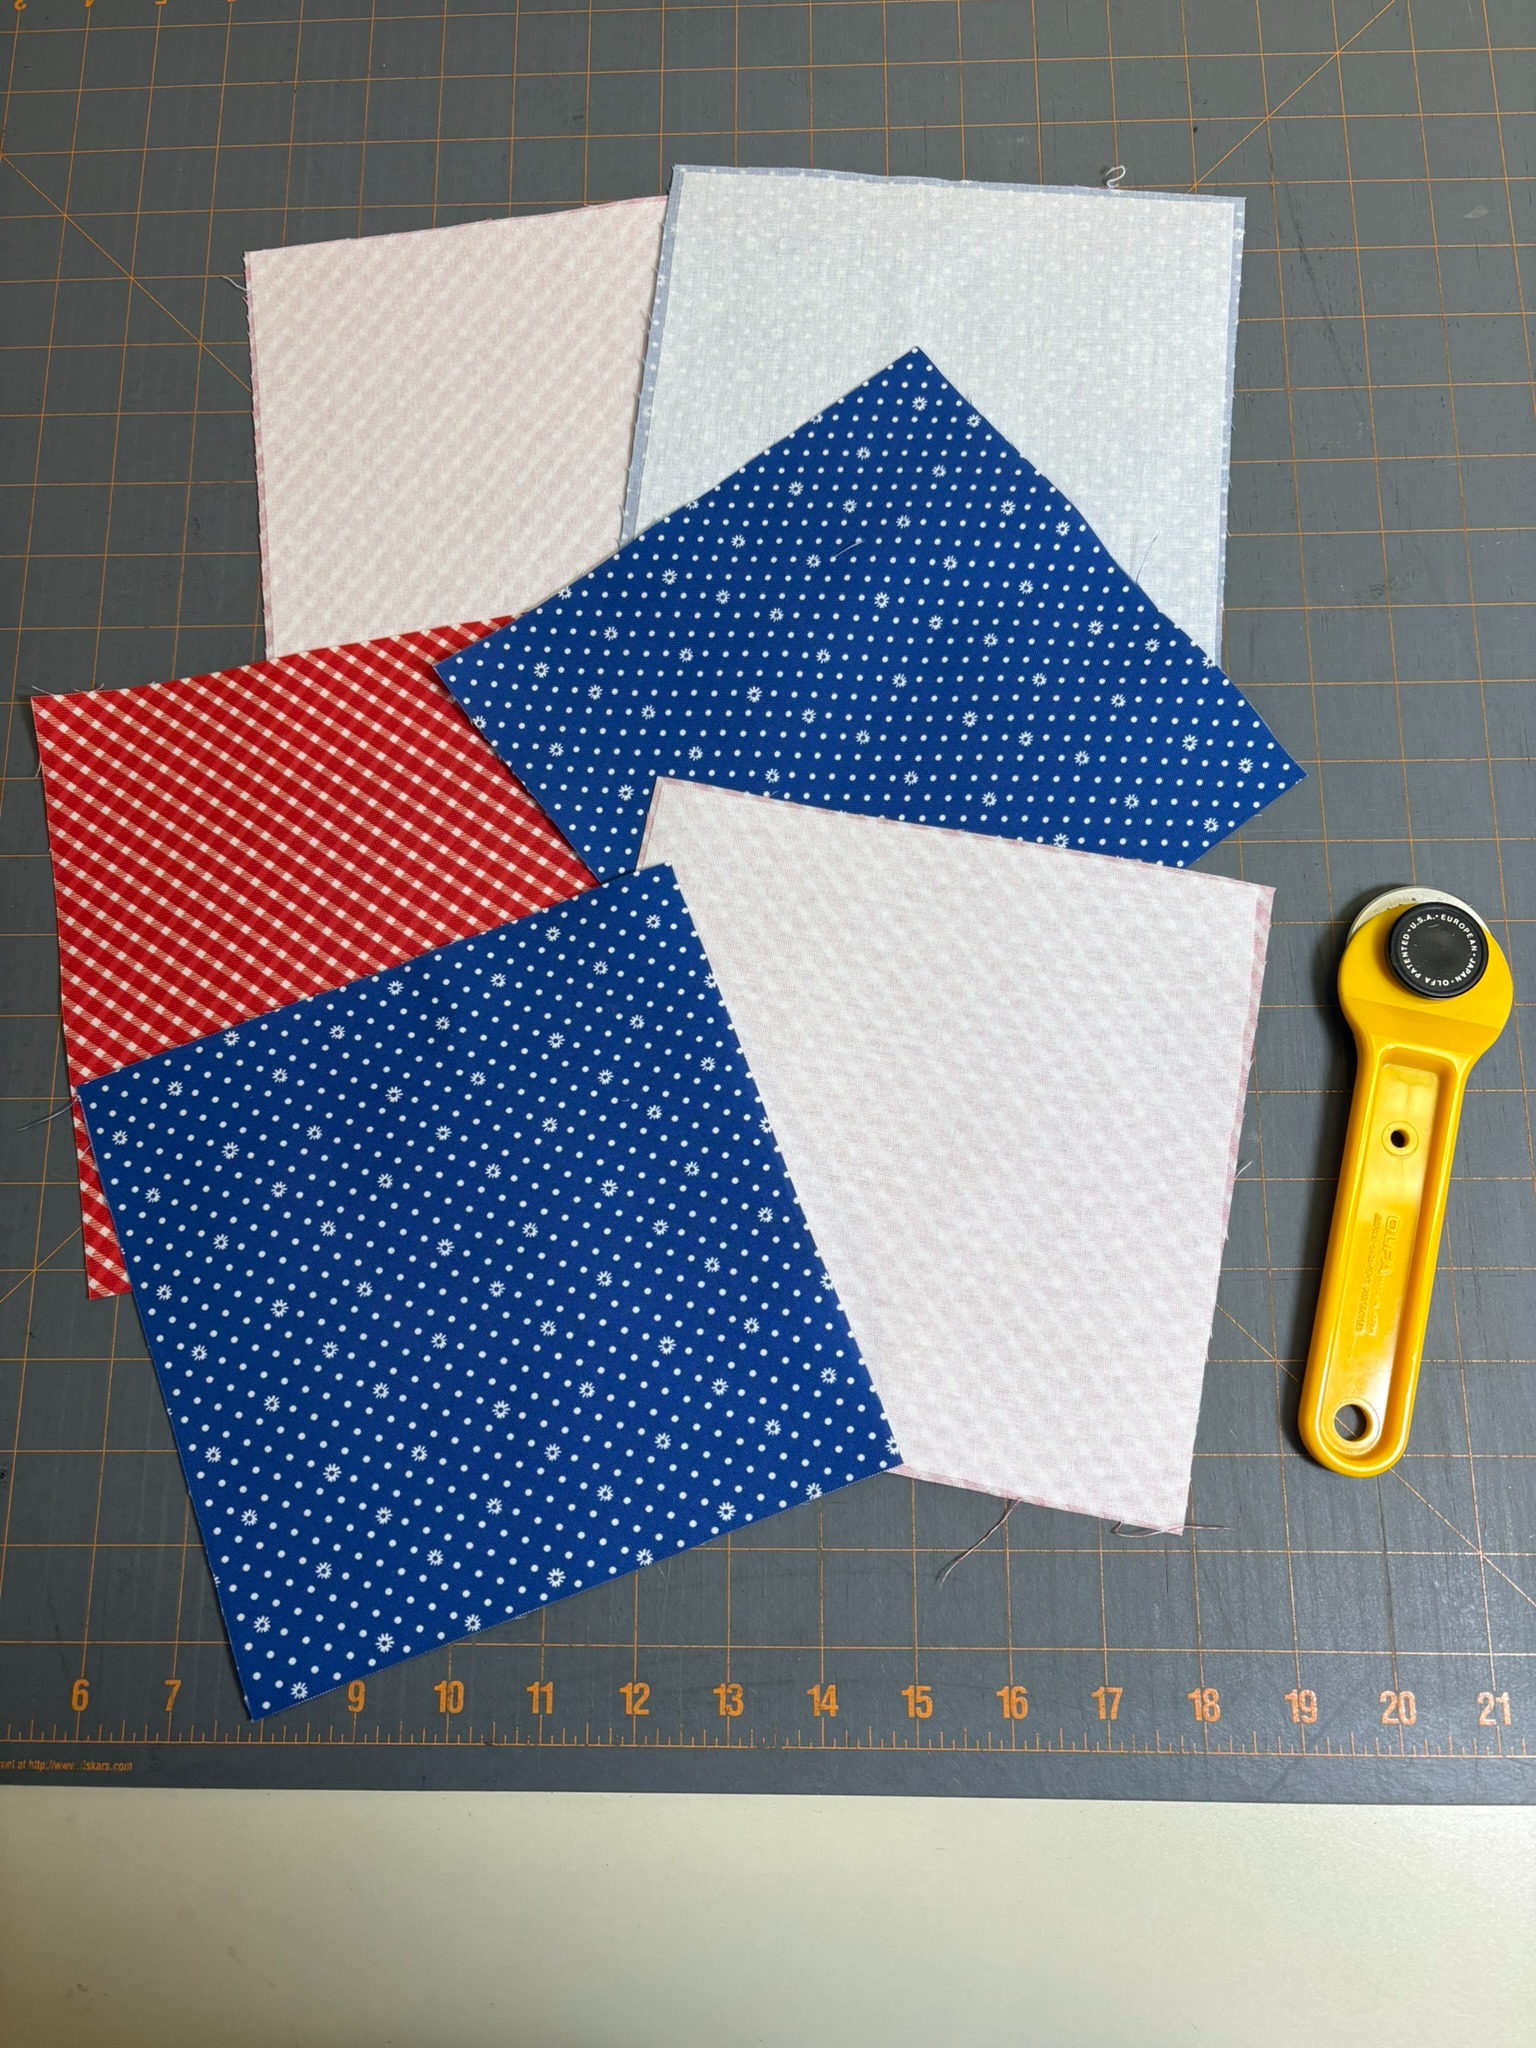
Knowing the size of the squares needed for the batting helped me decide the size of the background fabrics for all the pennants. I cut three 7½” squares from the blue background and three 7½” squares from the red. To prevent puckering and fraying, I added fuseEZ Fusible Interfacing to the backs.
I took one of the red background fabrics, sprayed the back with temporary adhesive spray, and placed it making sure it was perfectly centered over the batting. Before sewing the tack-down stitching, change the thread to match the background as this line will show through the bean stitch later on. I learned this the hard way.
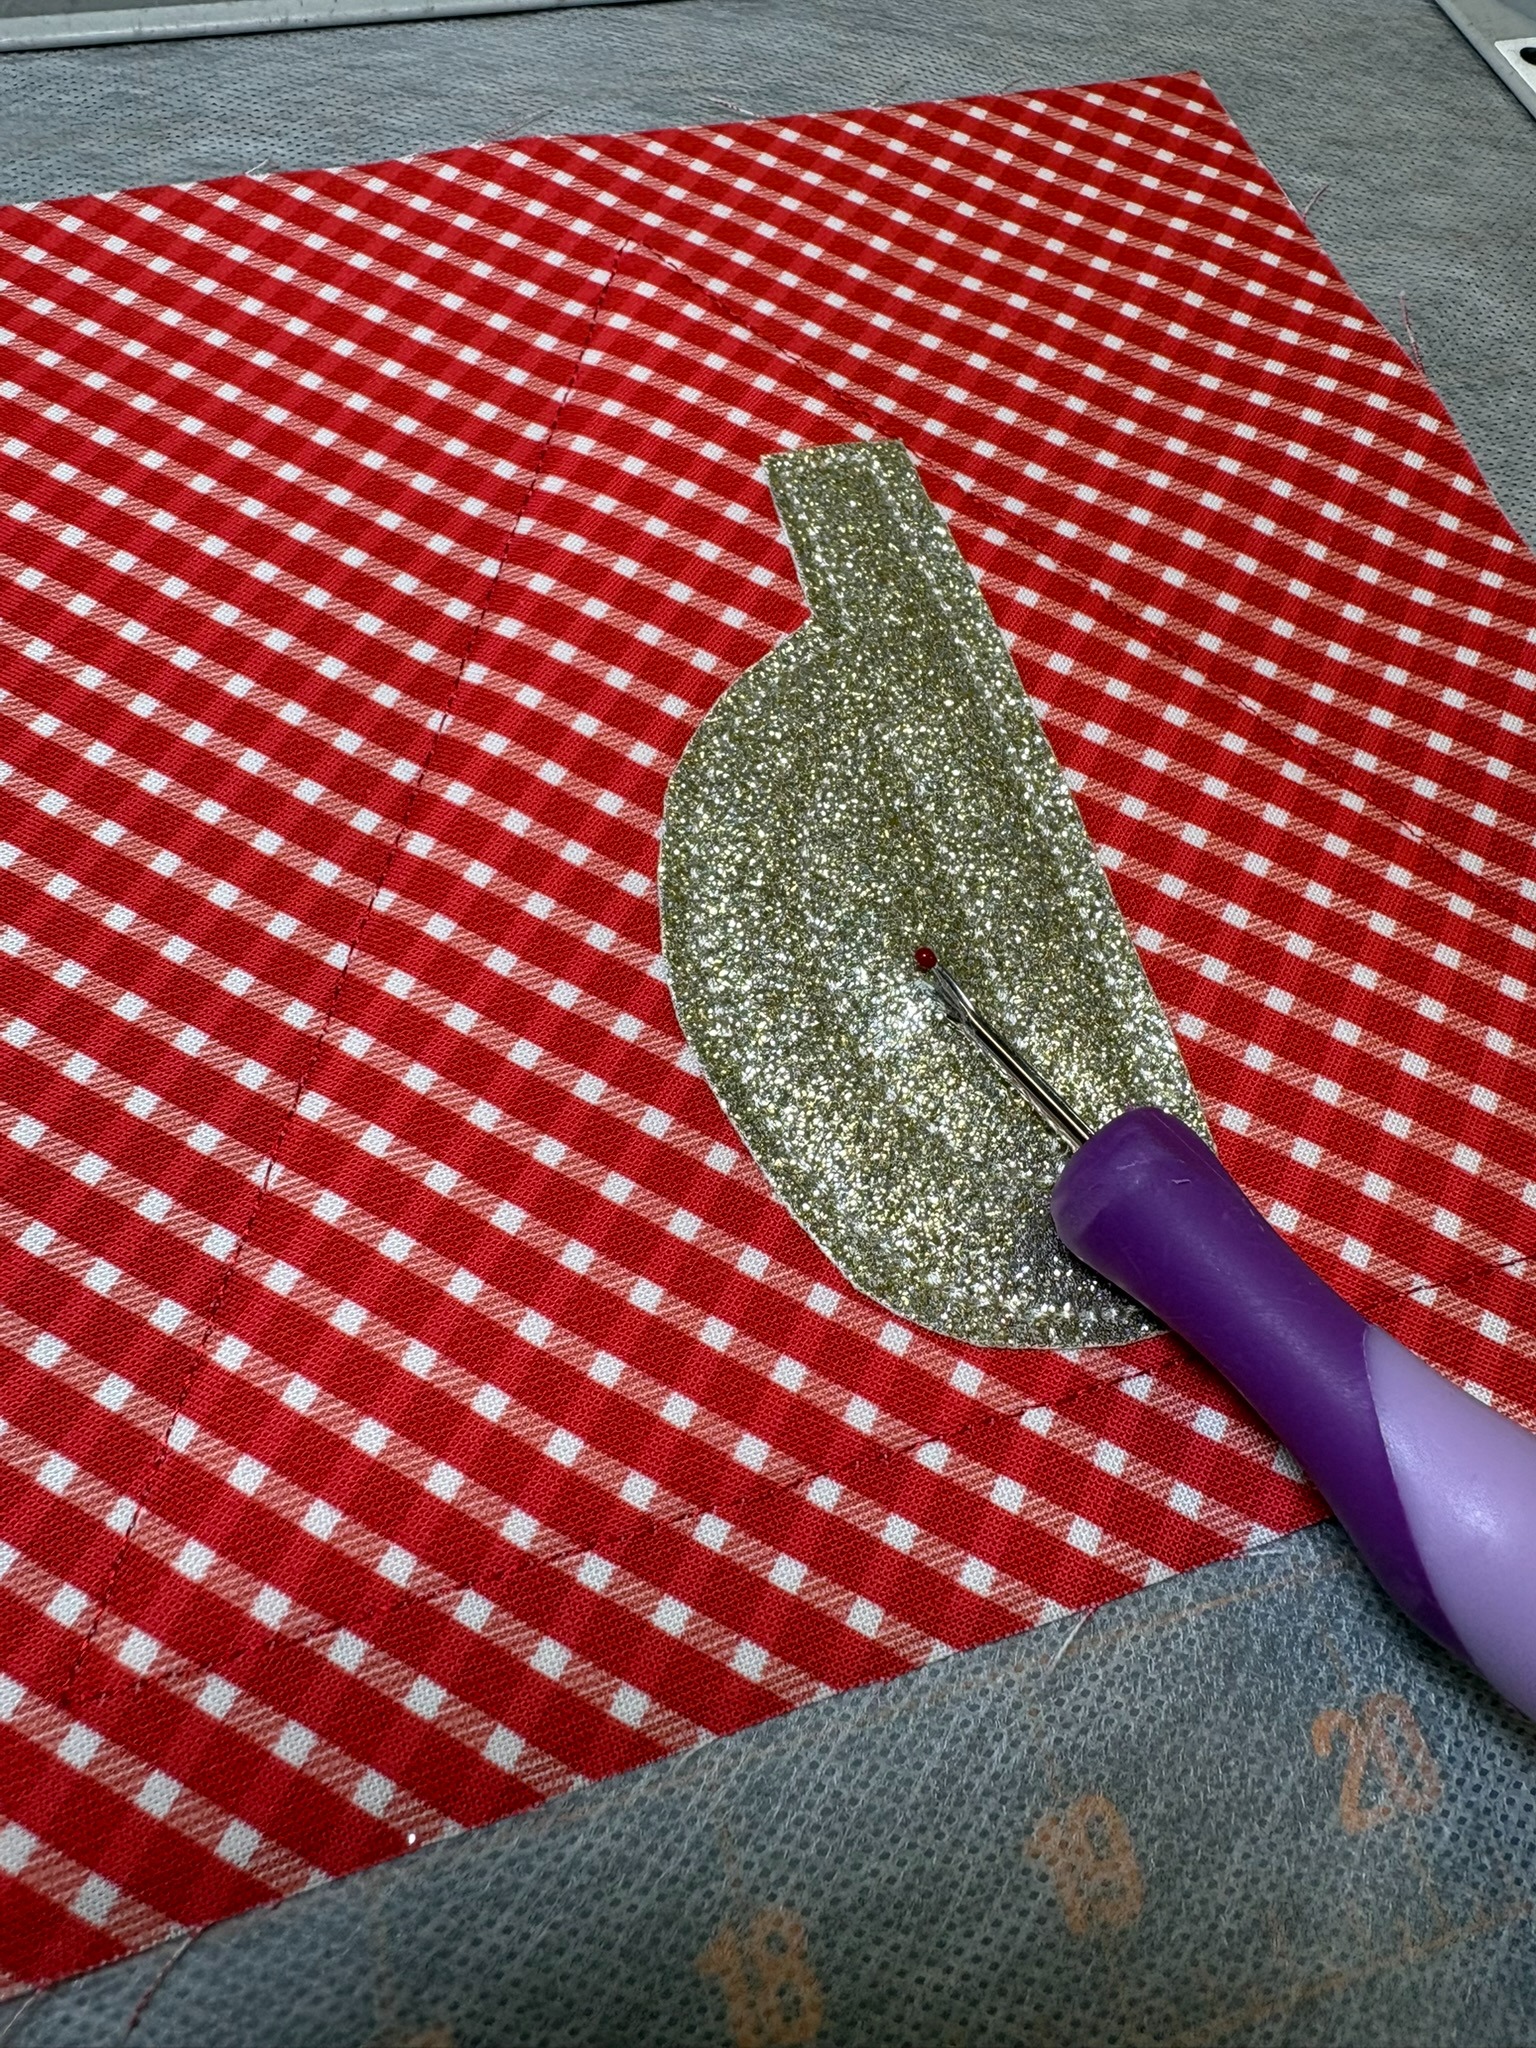
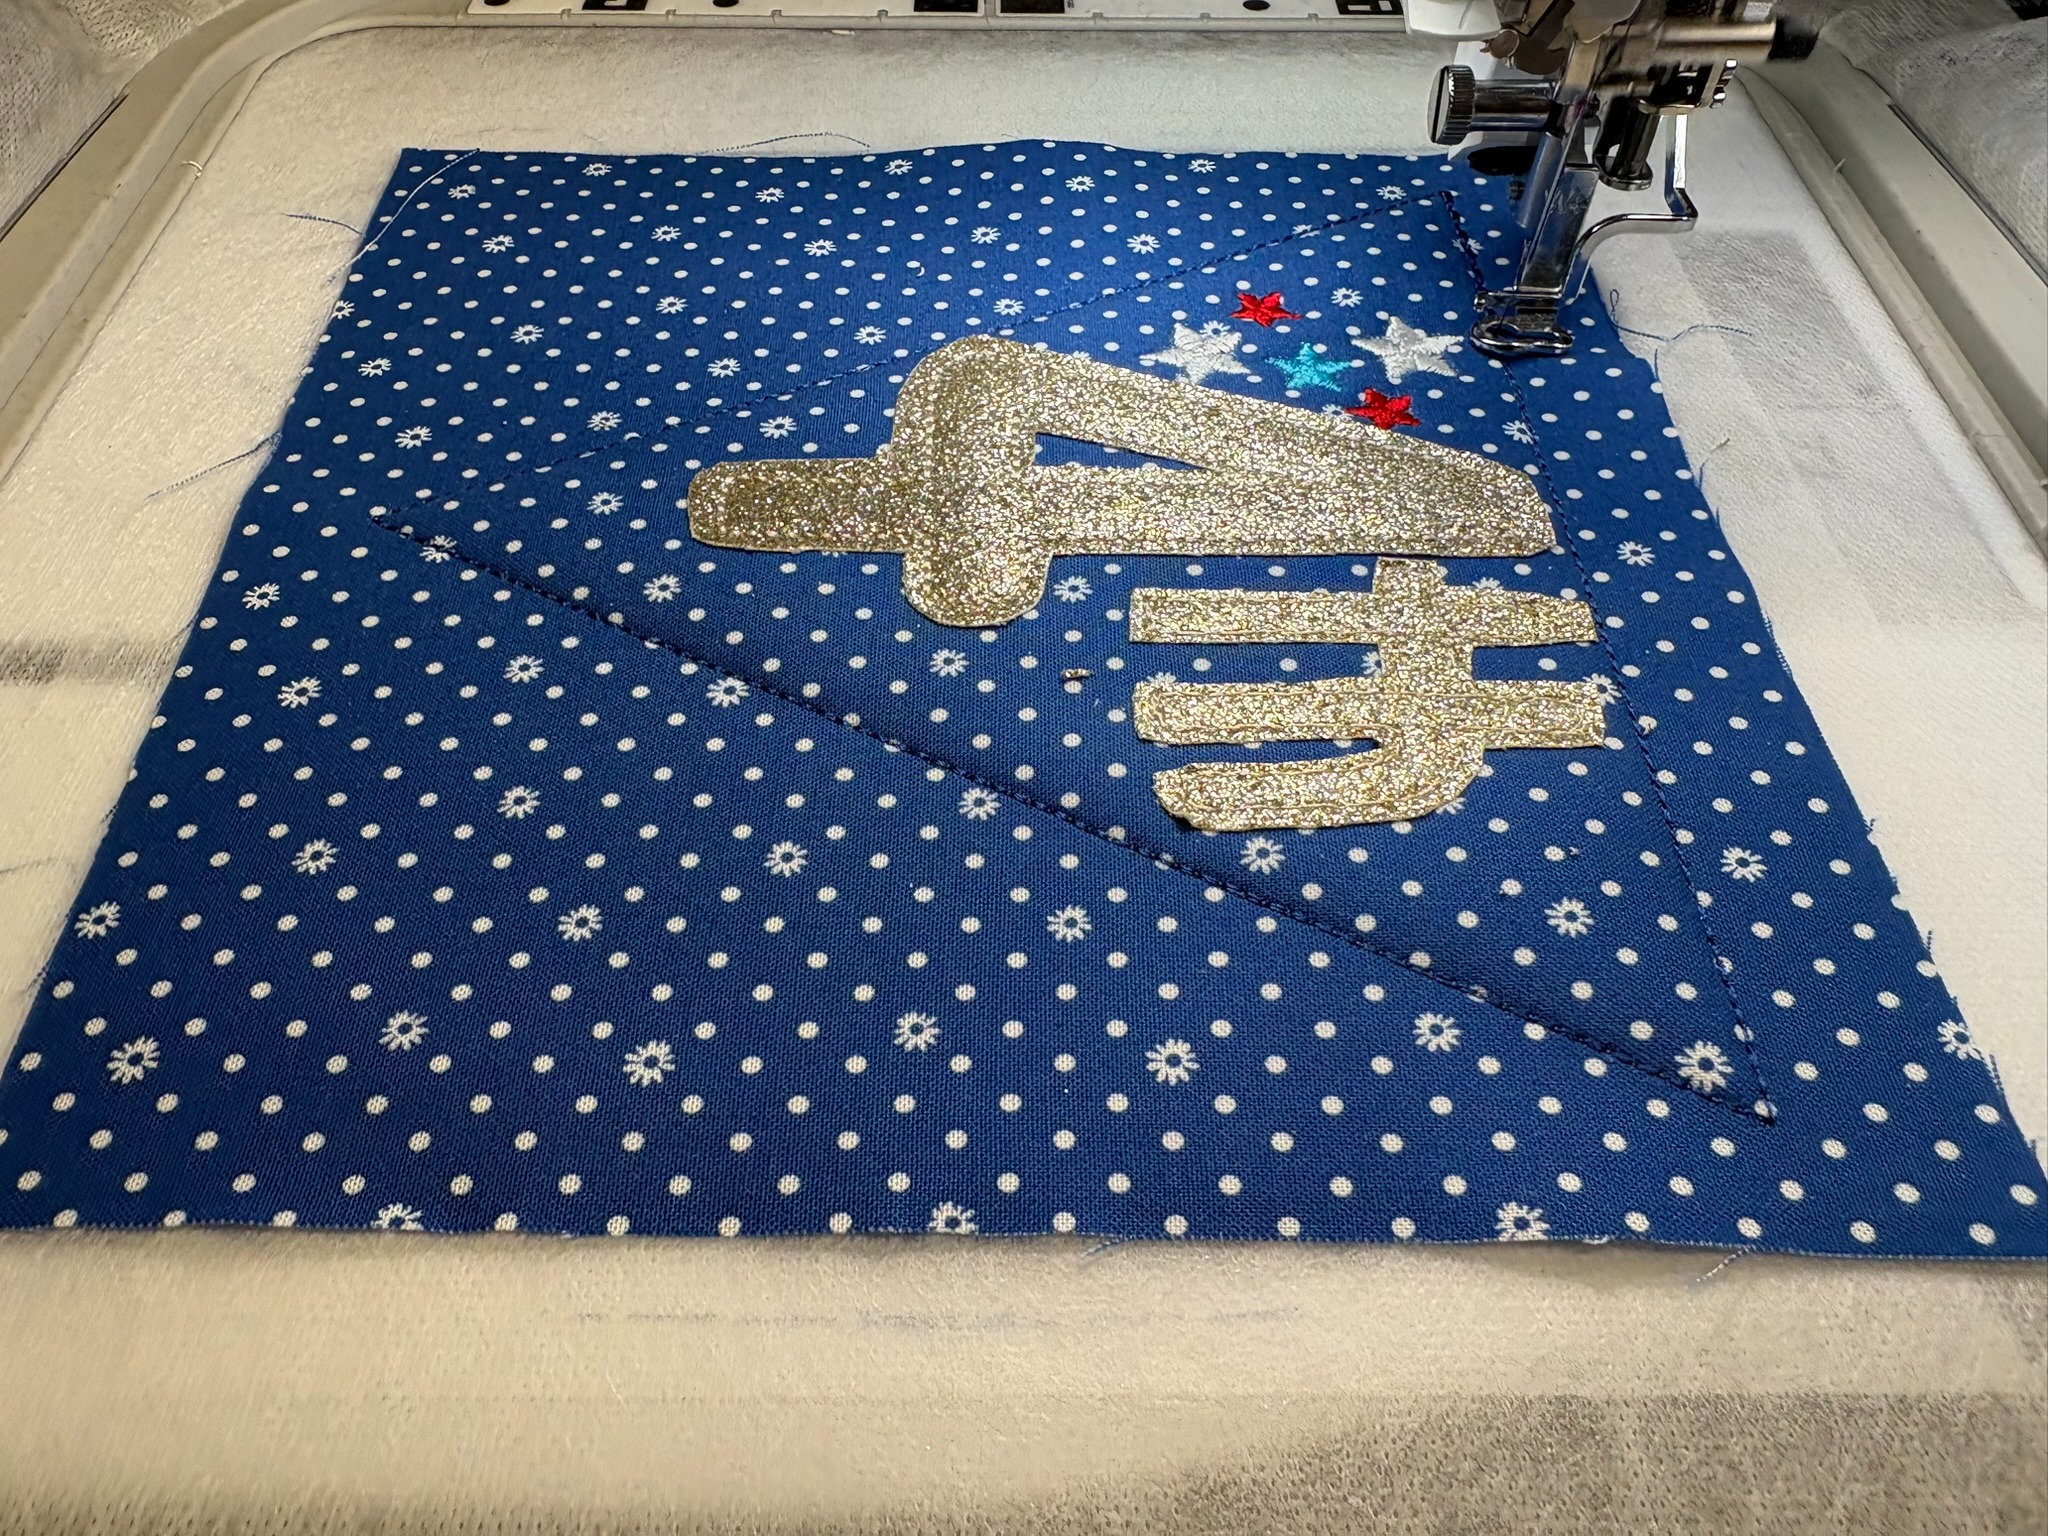
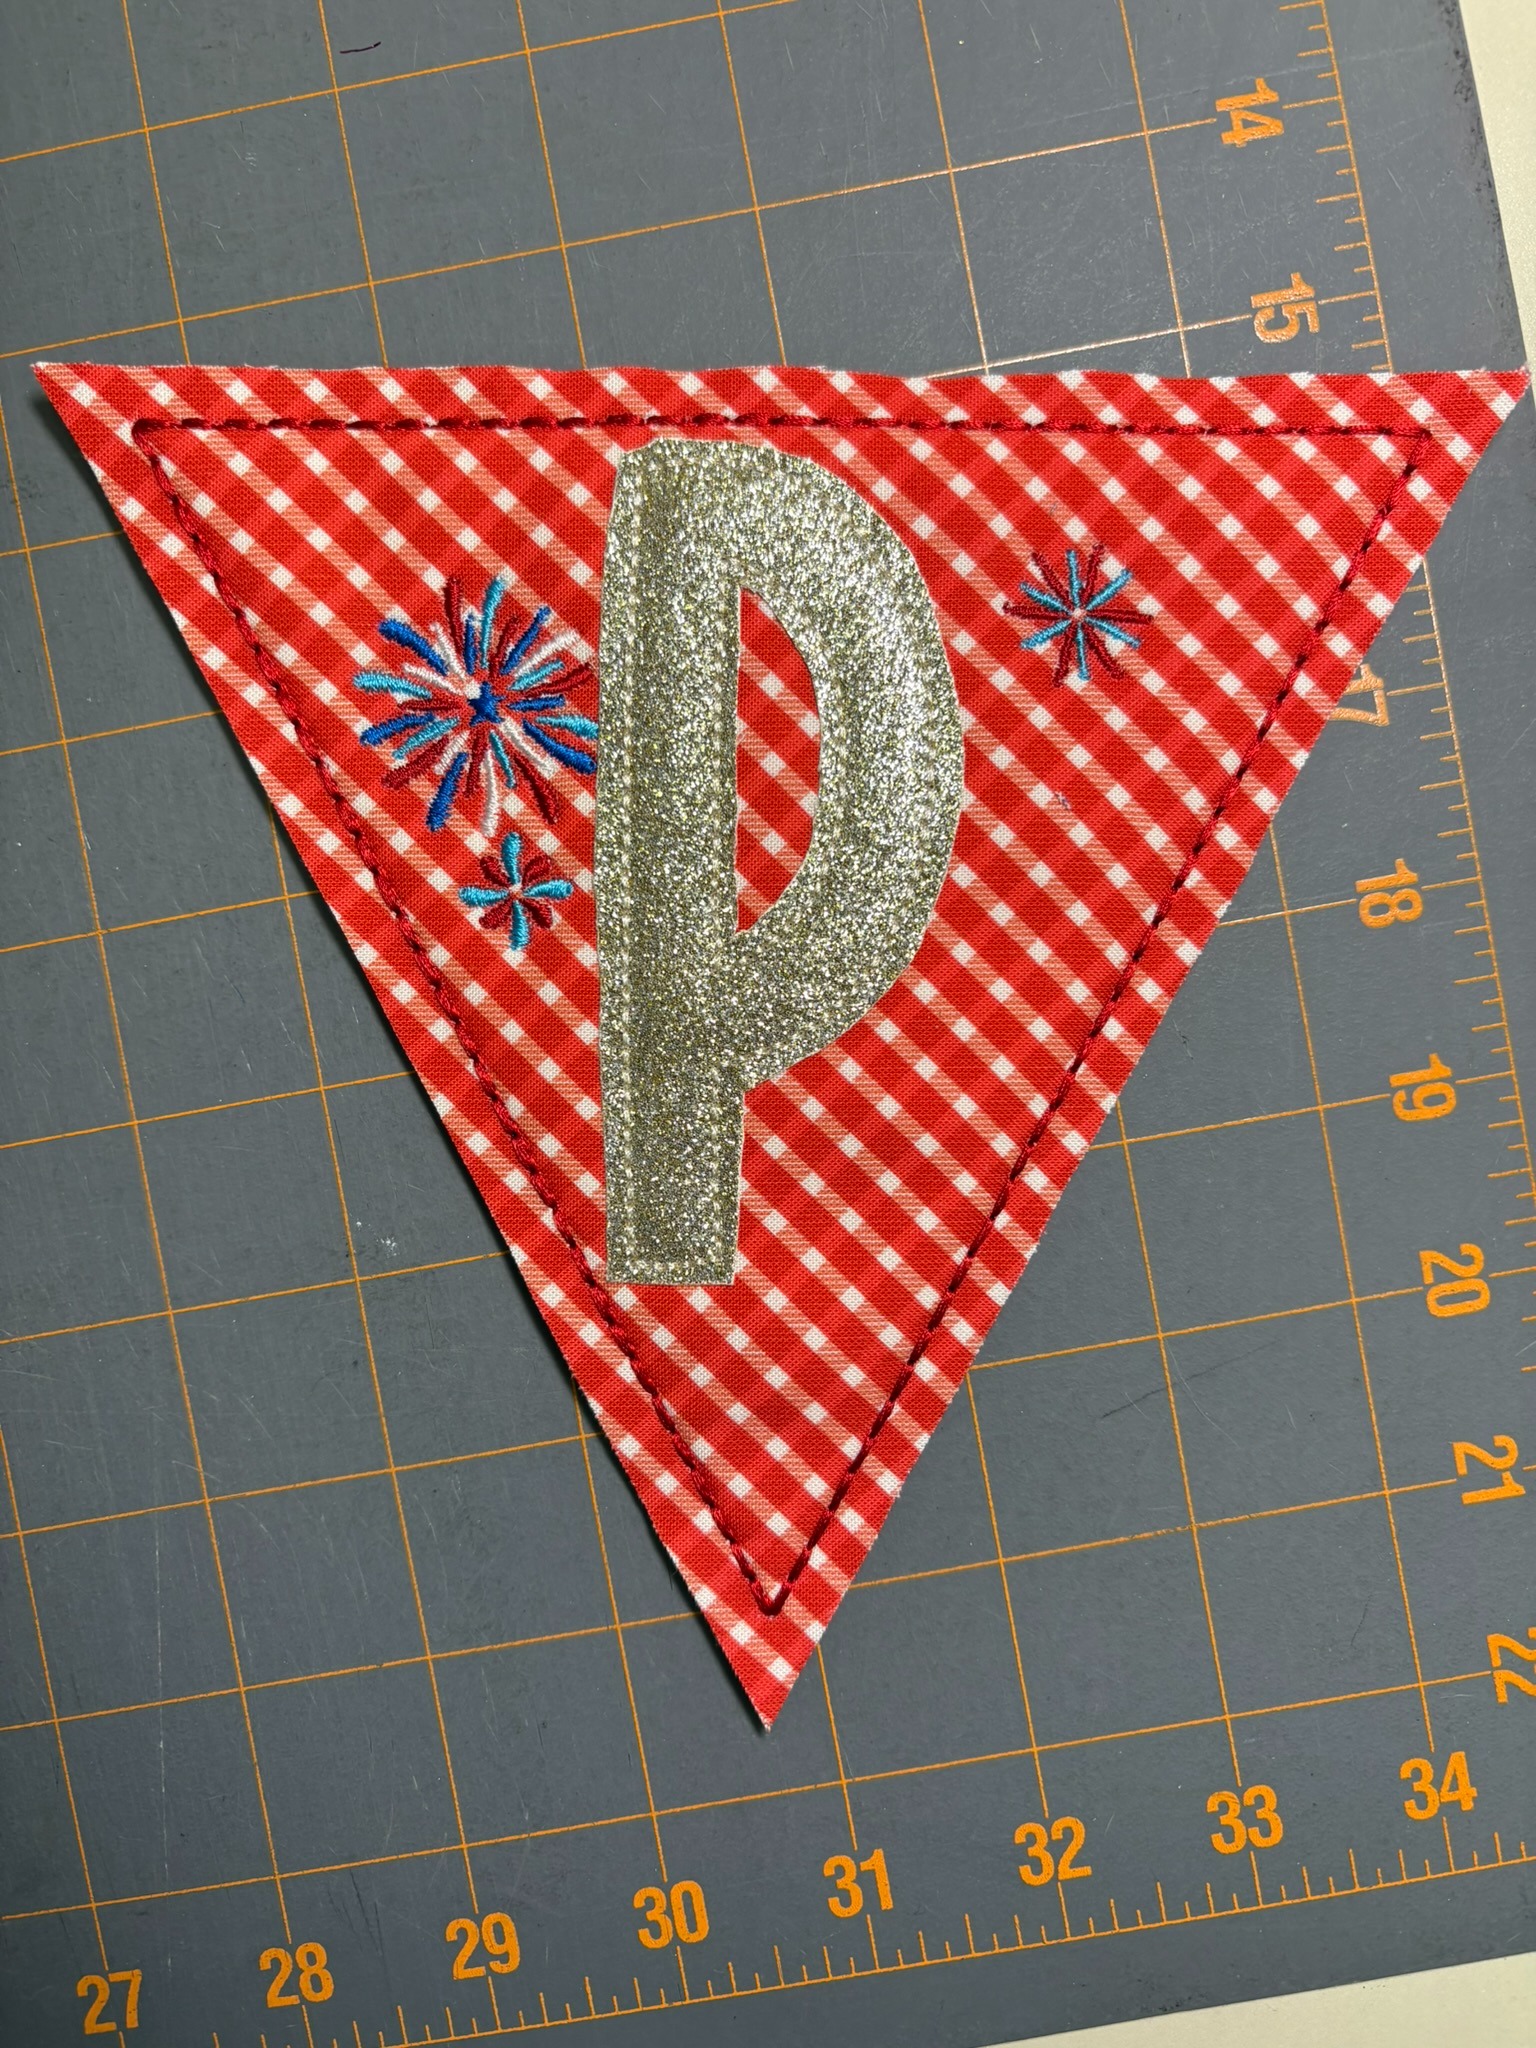
From here I advanced the machine to the steps for adding the letter and the embellishments. I’ve been looking for a project to use glitter sheets I purchased from a quilt show recently, so all my letters will be made from these. After tacking down the H, I trimmed ⅛” from the bean stitch. It was a little difficult to see as I’d used coordinating thread because I don’t want the bean stitching to show up, contrary to how we usually use the Daisy Doodle font. Using a stitch ripper I carefully started a hole in the center of the P until I could get little scissors in to cut the fabric away. Be sure you don’t poke all the way through the background fabric—only the letter fabric.
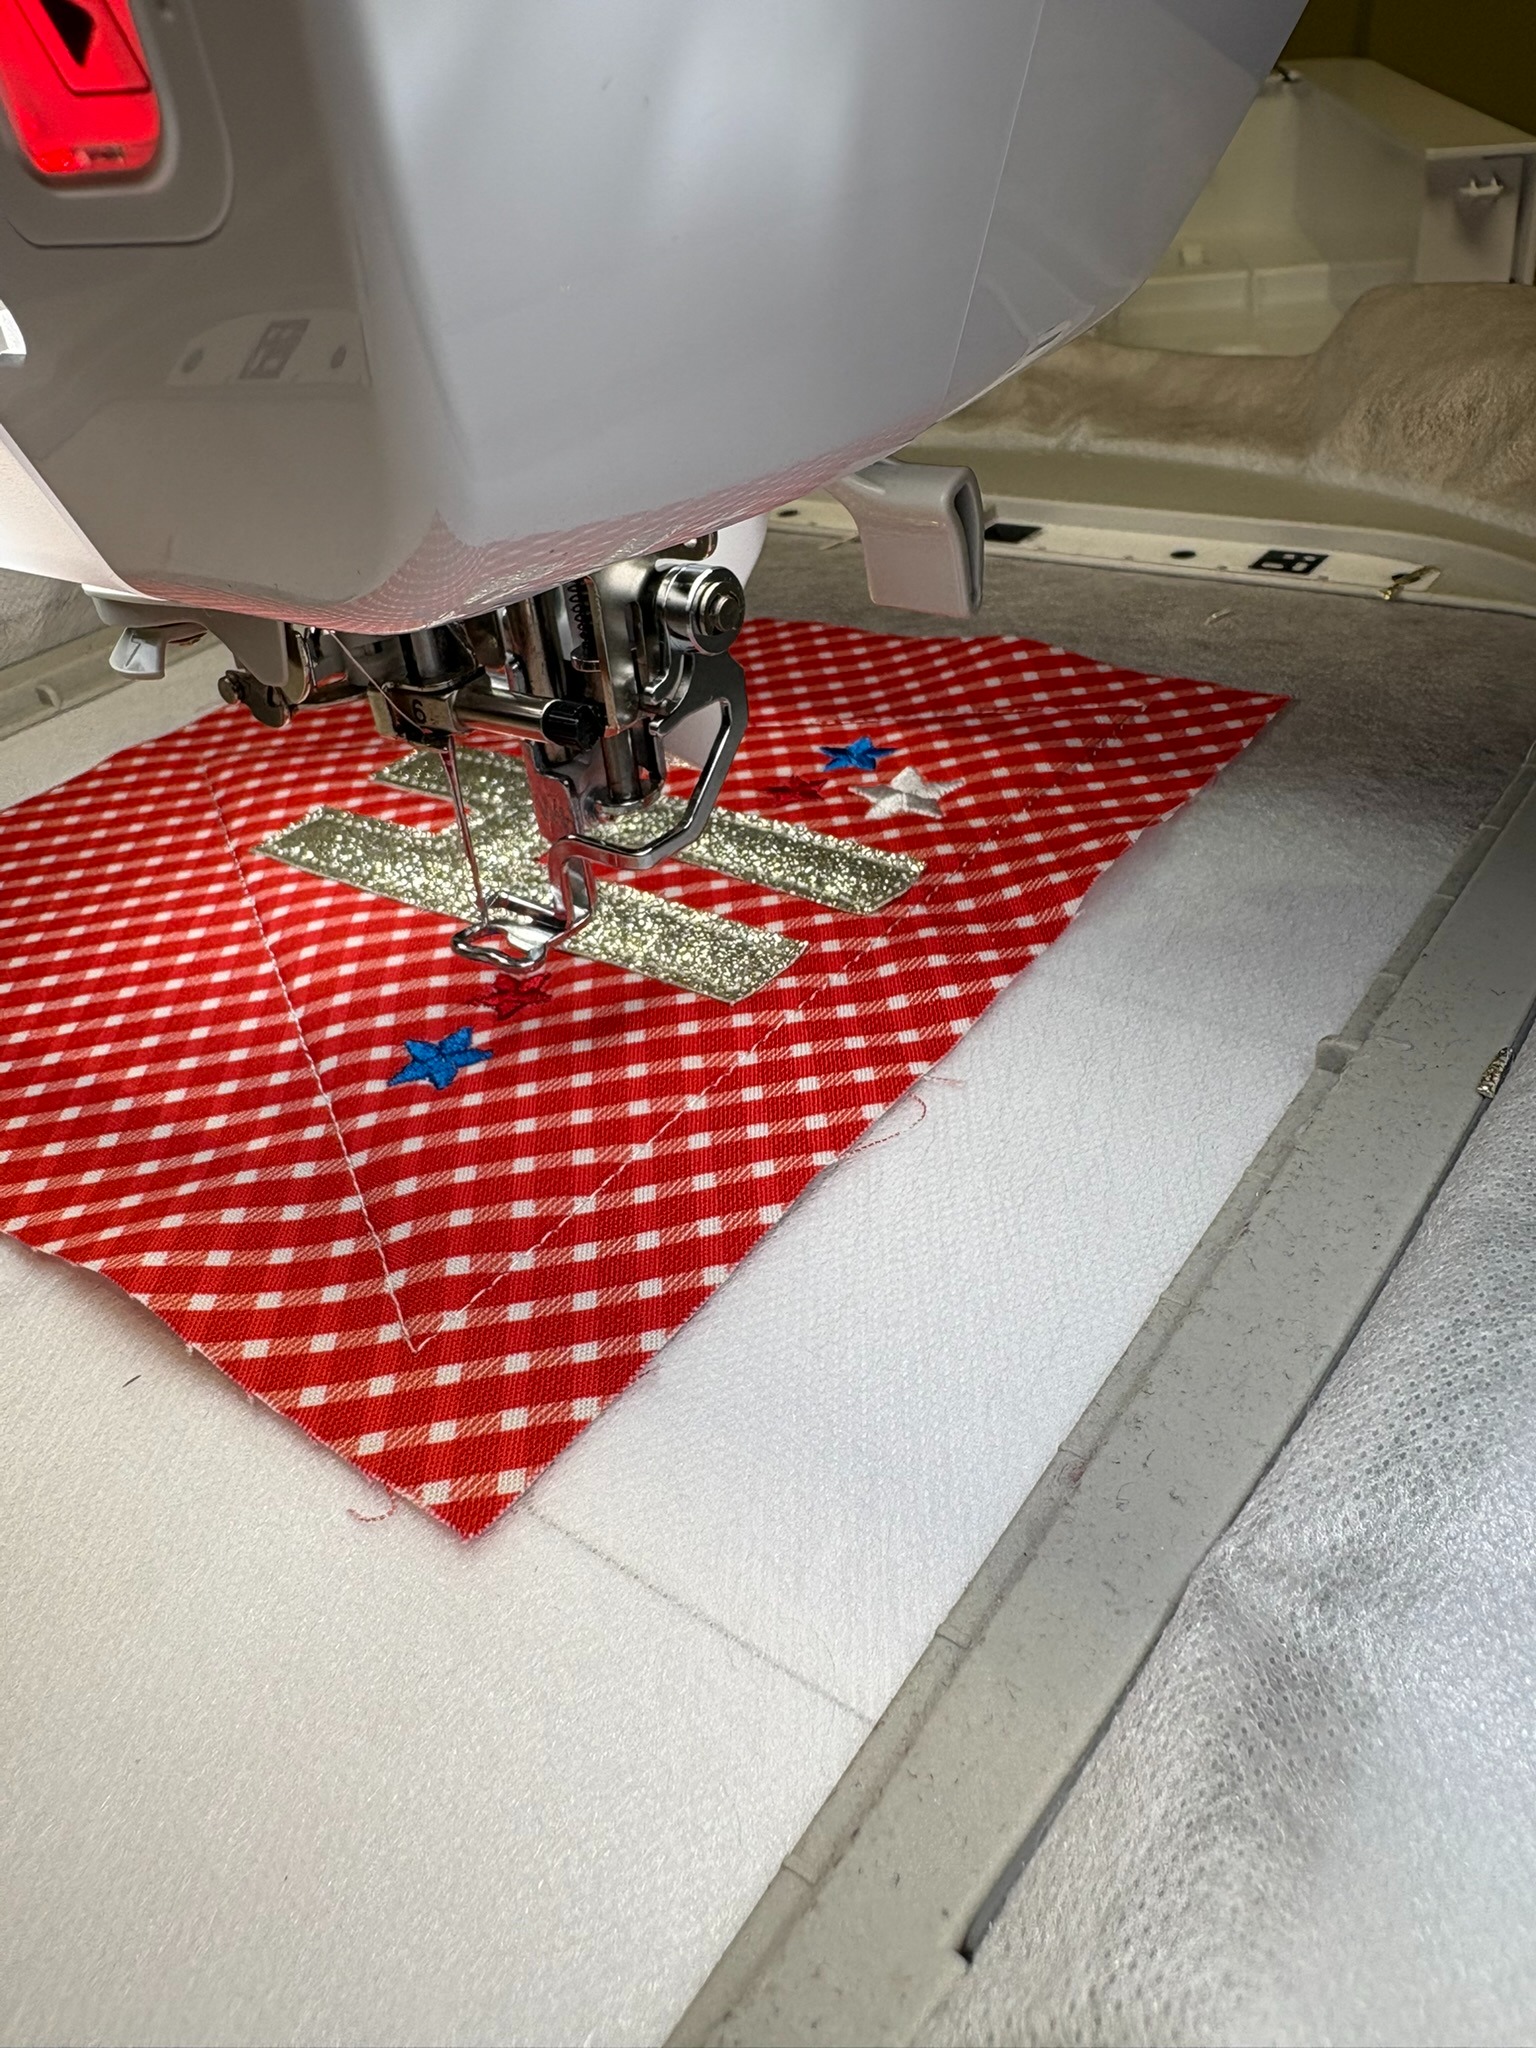
Once my letter and embellishments were stitched, I removed the hoop from the machine and placed the back fabric onto the back of the hoop with painters tape. I made sure the right side of the fabric showed on top. Then I replaced the hoop into the machine and went back in the steps to where the back tack-down, bean stitch, and buttonholes are added. If you think the back of your banner will show when you display it, use a coordinating thread in the bobbin. The last step was stitching the buttonholes.
Once all the machine stitching was complete I removed the project from the hoop. Since I’m not fraying any material, I trimmed ¼” away from the bean stitching. If you want to fray these pennants, you’ll need to cut the background and backing squares at 8” and trim them at ½”.
I made the rest of the pennants using a variety of designs copied from various blocks. Some of the embellishments I used were the embroidered stars from the Old Glory Block (Set 4), appliqued stars from Bomb Pop (Set 2), the wheat from the 1776 Block (Set 2), fireworks from the House Block (Set 3), and the loops from the America the Beautiful Block (Set 3).
Initially I was going to make the 7” square inverted pennant for these two. But after laying a piece of paper cut to 7” square alongside the Happy 4th pennants, I decided that 8” would look better.
I opened the 8” pennant file in Embrilliance and then added the 7” Truck Block from Set 3. Next I deleted the steps I didn’t want to use. I’m just using the truck and the swirls. Luckily I took a screenshot of the two designs combined to show you, because I caught a mistake I’d made! I accidentally chose the pennant with the round eyelets instead of the buttonholes. I fixed that mistake, saved the design as a Stitch and Working file and put it on my thumbdrive for transferring the designs to my embroidery machine.
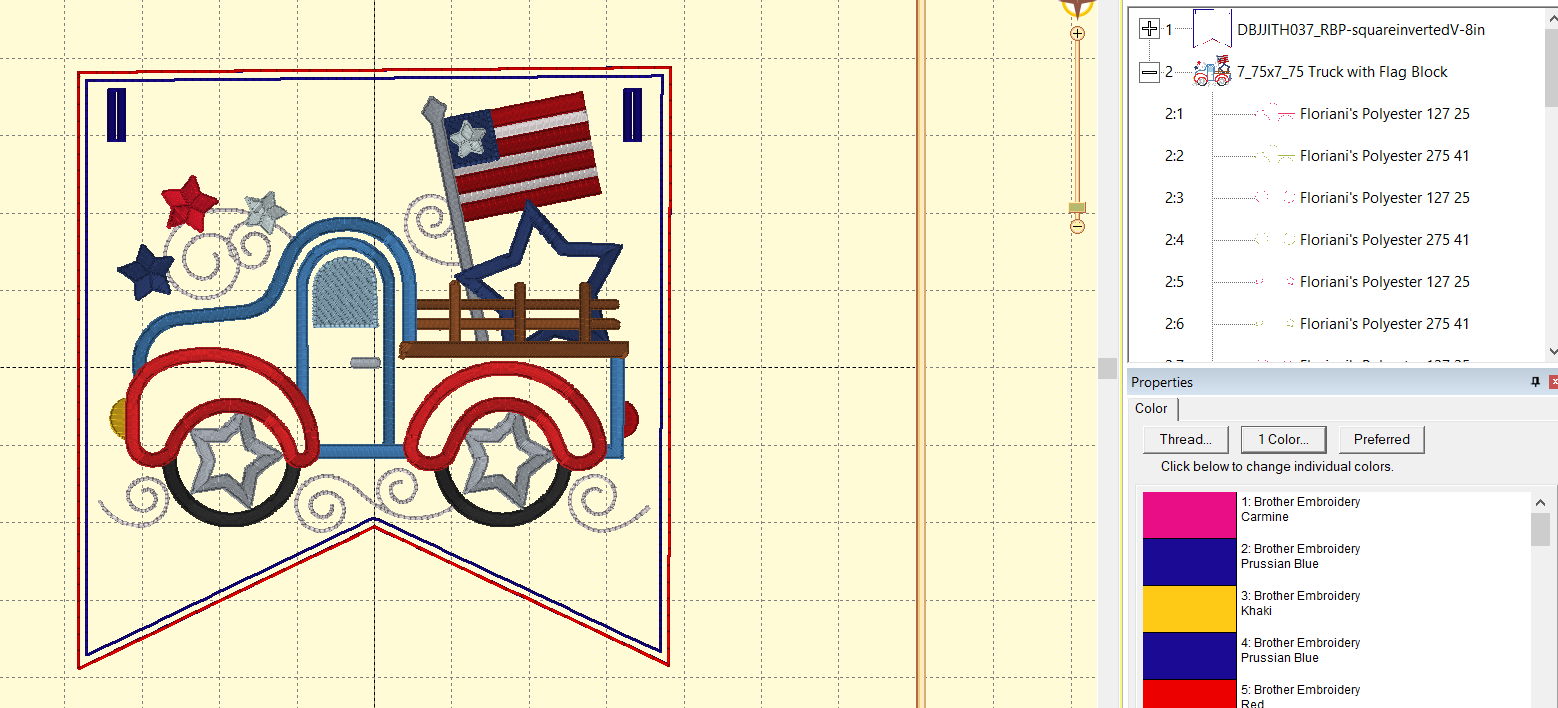
I used some of the red letter pennant fabric in the truck pennant and both the red and blue pennant fabrics in the tricycle pennant to tie all the pennants together.
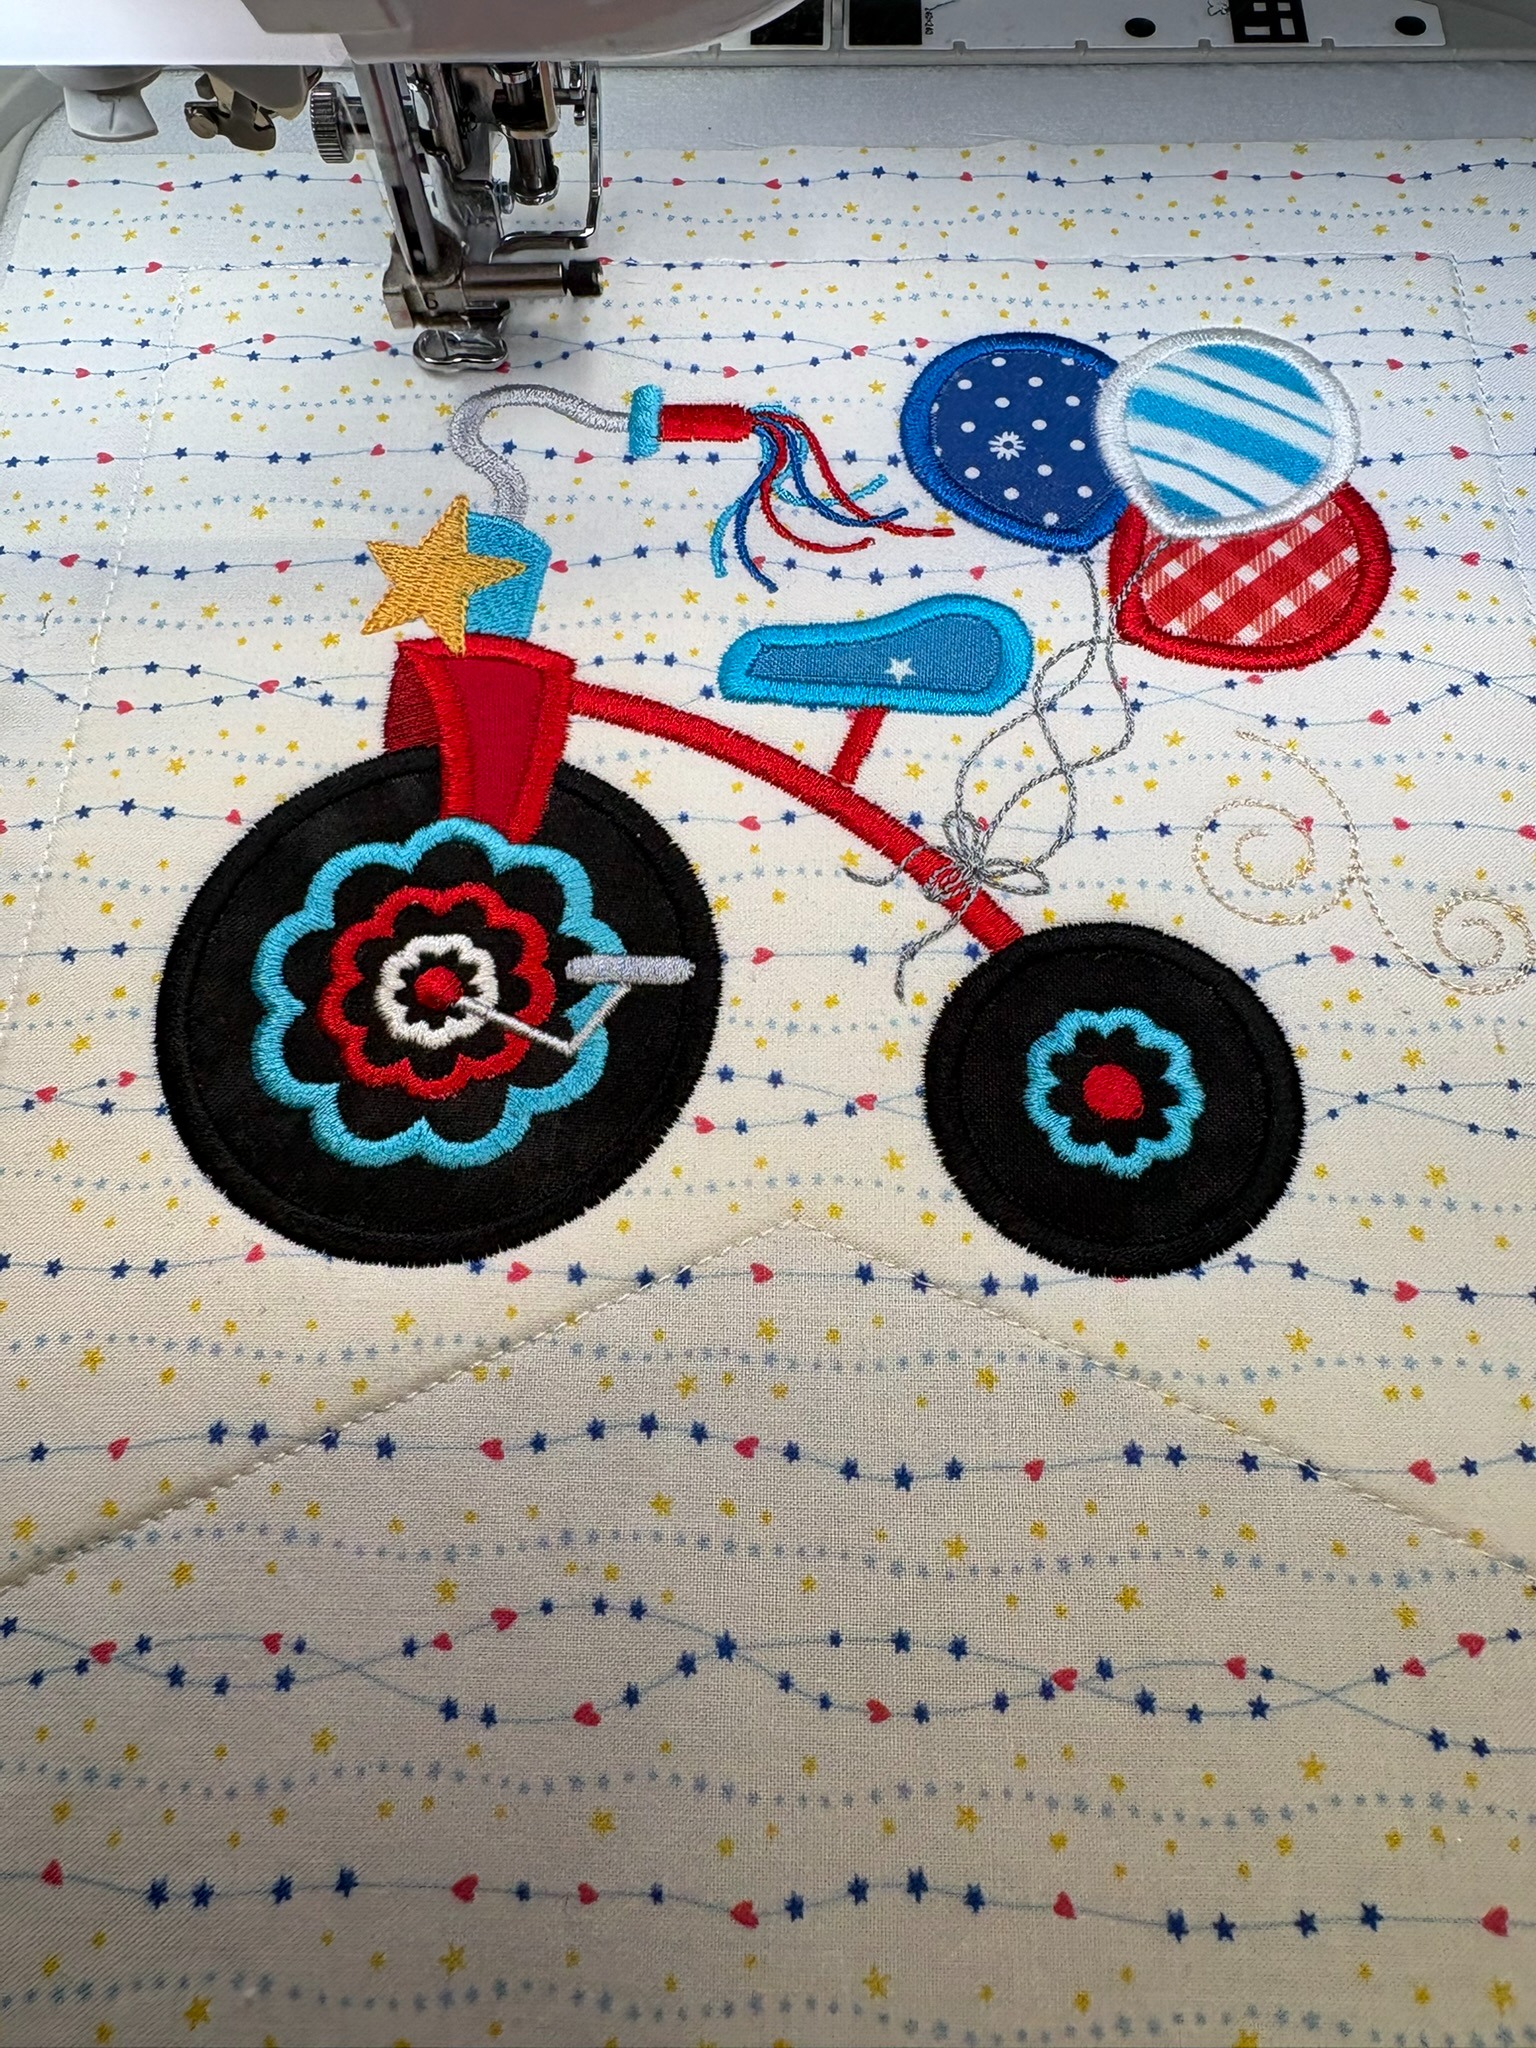
When the tricycle design was in Embrilliance, I deleted steps until I could isolate the swirls in the design. Then I copied and pasted them to the side. Next I copied one of the individual swirls and pasted that a couple of times around the tricycle. It gives more depth to the pennant and coordinates it with the truck pennant’s swirls.
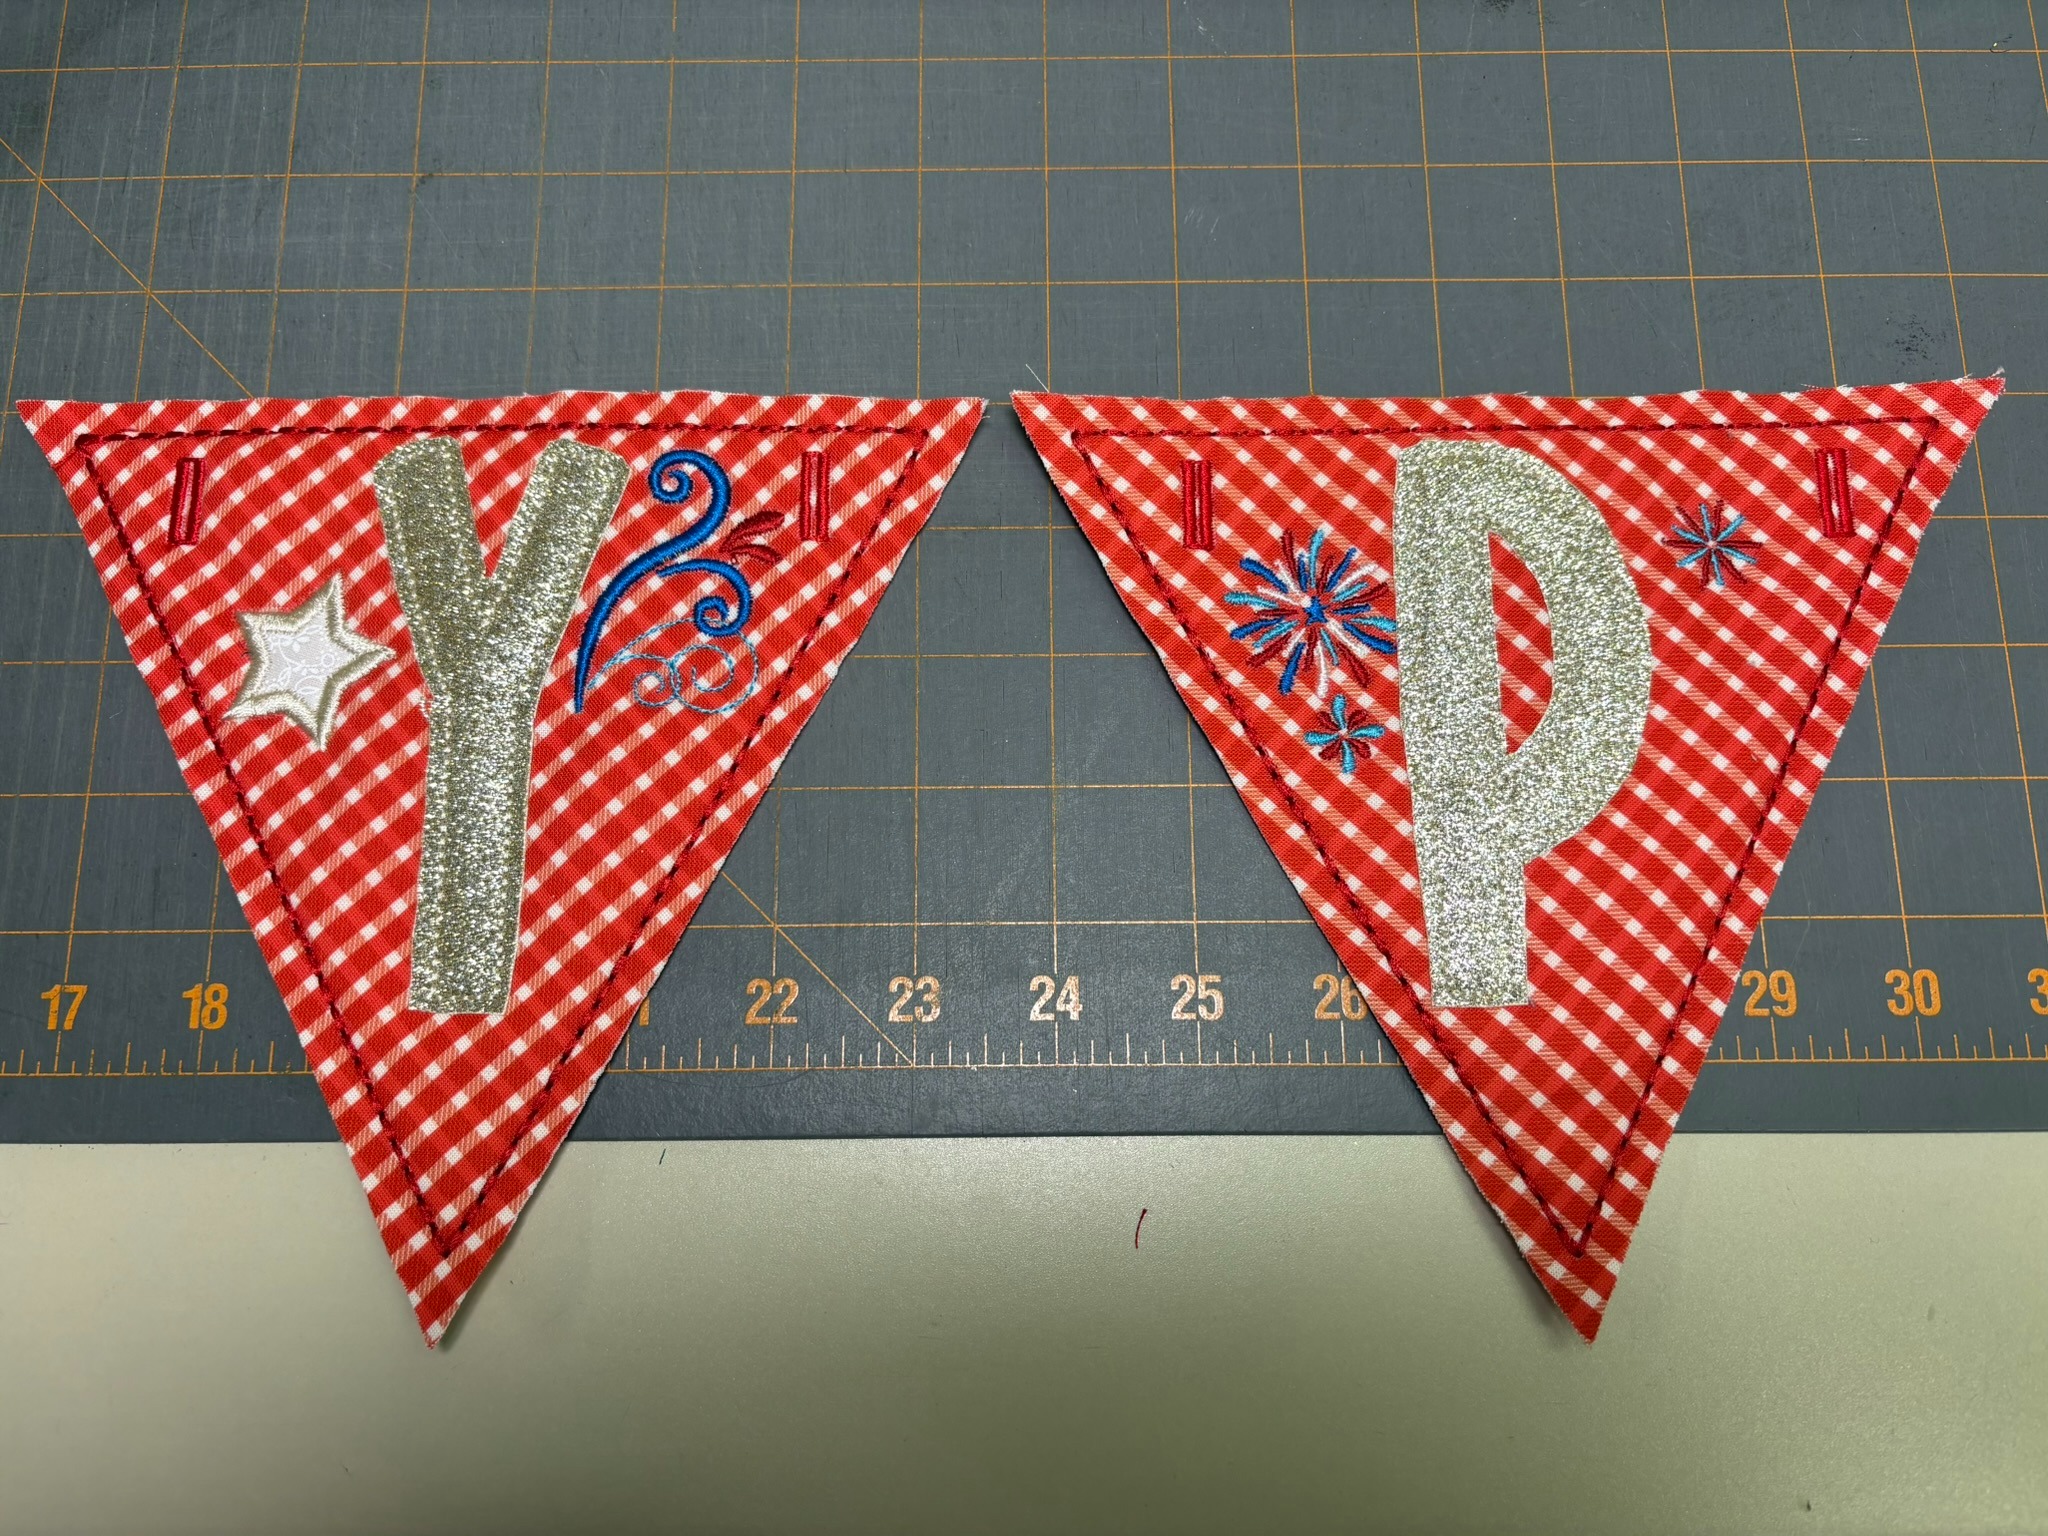
I think I’m the blogger who makes the most mistakes. I try to eke out anywhere from 10–30 minutes embroidering in the mornings before going to work. The letter pennants were stitching up quickly, so one morning I figured I could knock another one out. I had the letter P one finished before I needed to head off—yay, me! As I was patting myself on the back, I realized I forgot to stitch out the buttonholes. And yes, I had already removed it from the hoop and trimmed it. Oops!!
I know my sewing machine has a buttonholer but I haven’t used it and didn’t feel like learning now. Here’s how I fixed my mistake: I hooped tearEZ Tear-Away Stabilizer into the hoop and stitched step 4 from the Letter P design, which is the tack-down for the backing. It’s also the exact place where the bean stitch border will be stitched. I then moved to step 5, the buttonholes, and playing around with advancing the stitching, stitched a few marks to show me where the buttonholes go.
Next, I carefully matched the bean stitch of the pennant to the tack-down line on the stabilizer. I checked where the buttonholes were going to stitch out and all seemed good. I then thoroughly taped the pennant to make sure it wouldn’t shift during stitching. Once the buttonholes were stitched I removed the tear-away from the back. You can see the fixed pennant next to another pennant. It was a fast and easy fix!

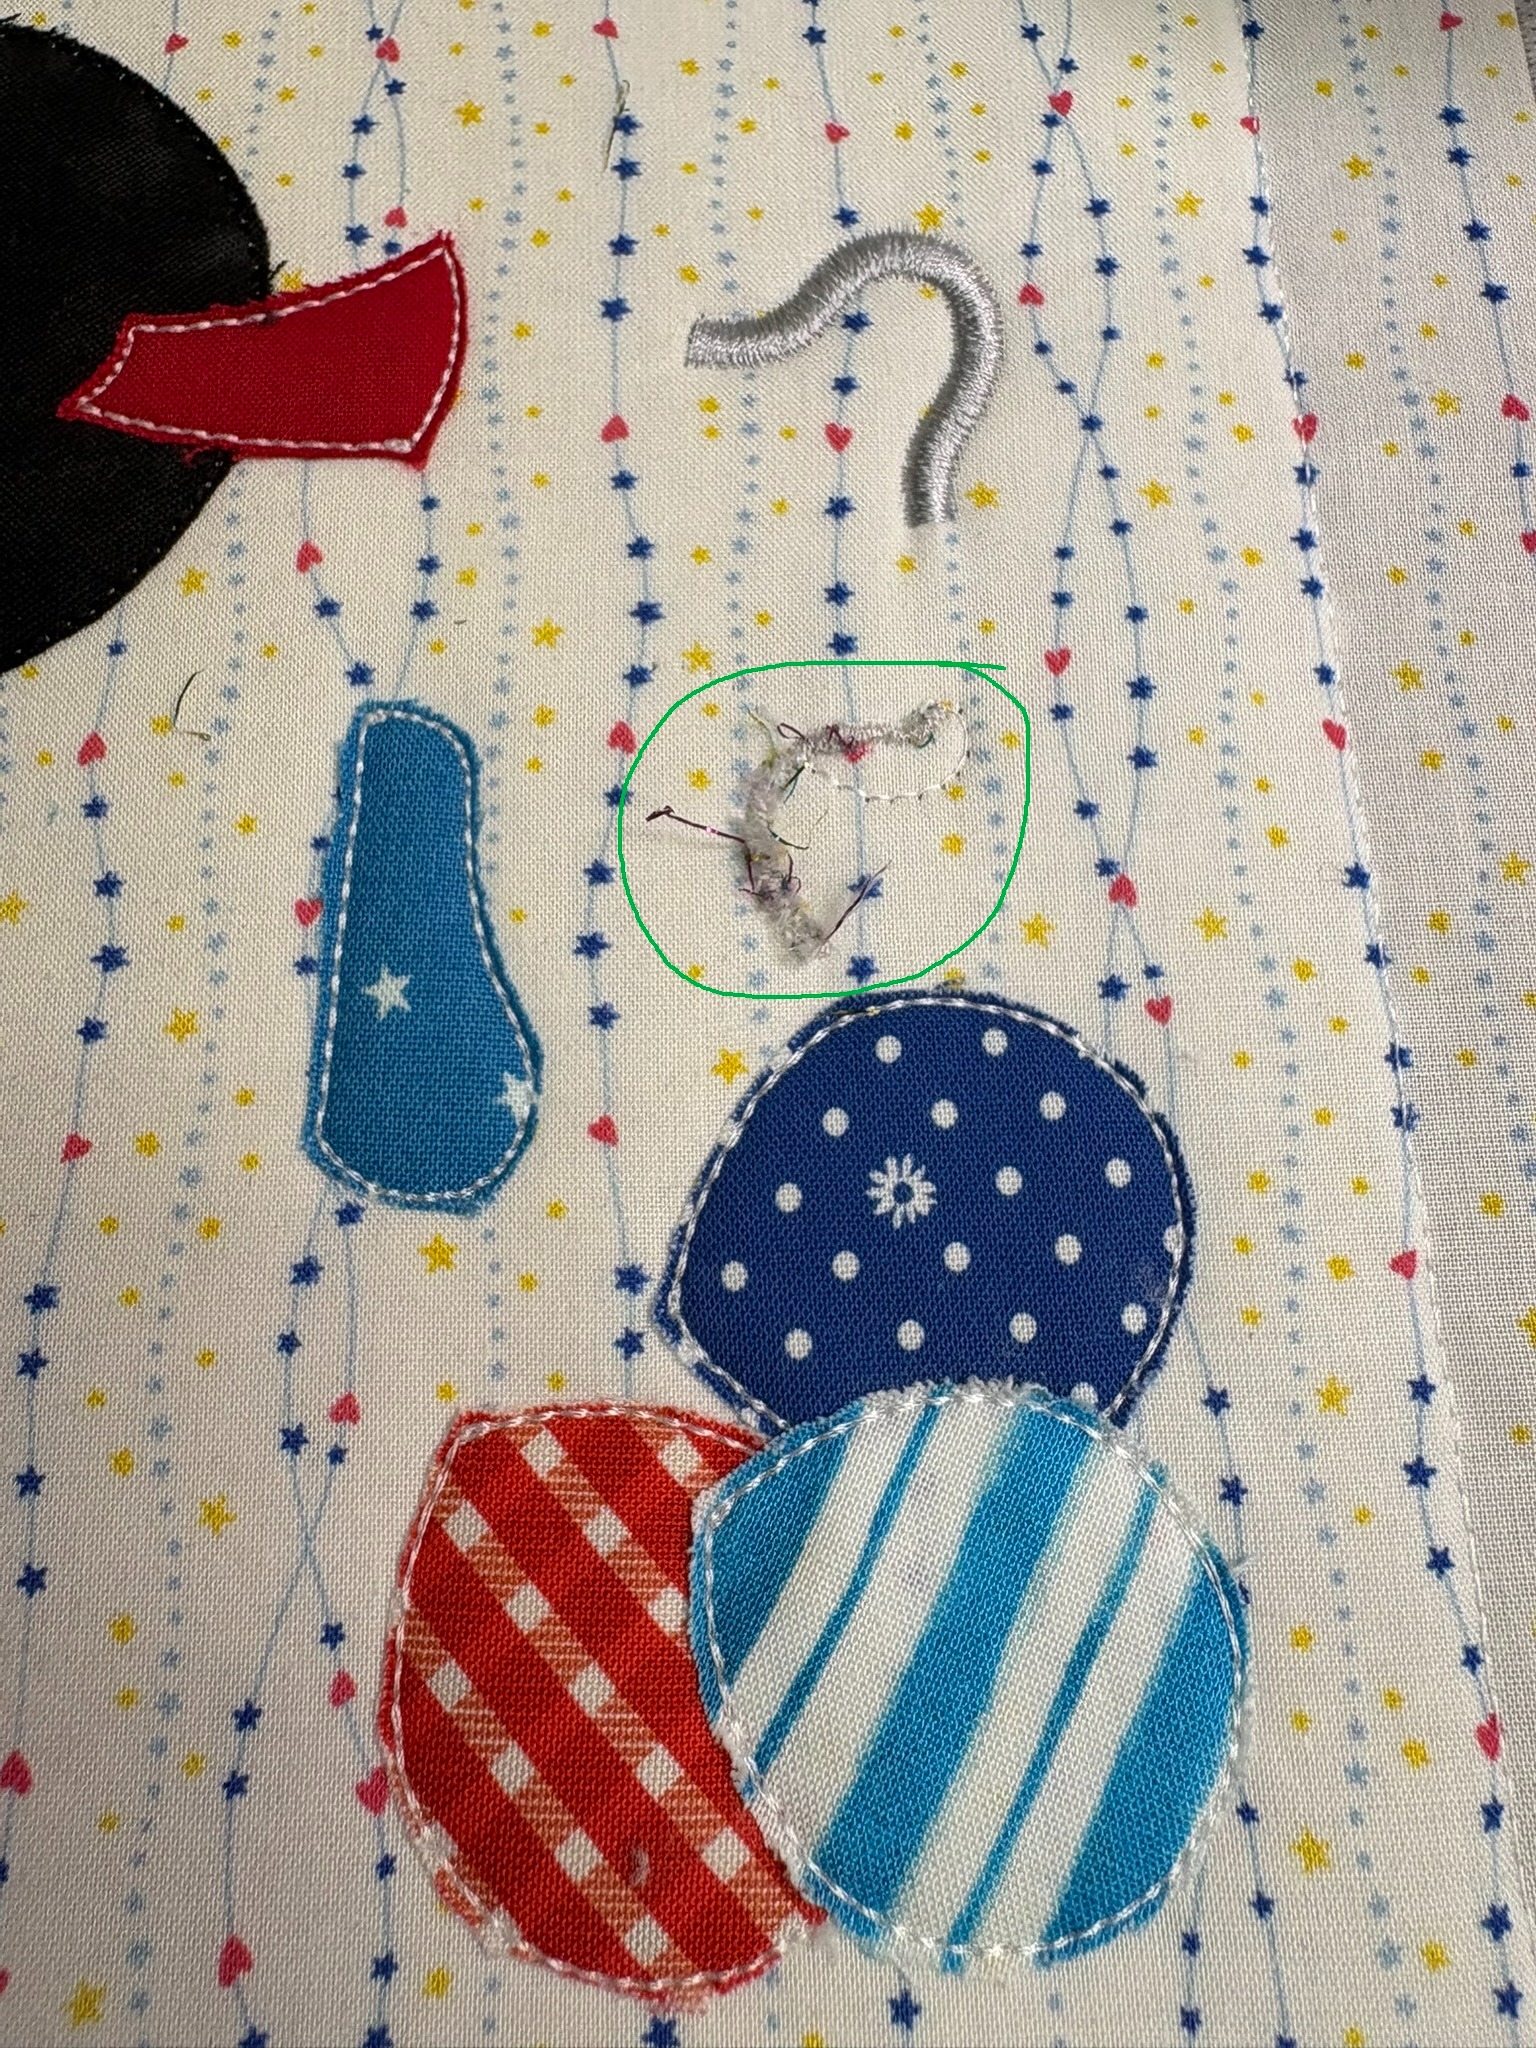
Also, don’t try a new thread when you’re halfway through your design. This new-to-me metallic thread was not cooperative.
When it came time to string my banner together, I started with a ⅝” ribbon, but it was too large for the Happy 4th pennants and started fraying the buttonholes. The ⅜” grosgrain ribbon was perfect. I put painters tape on the end so it was easier to thread the pennants on.

This was a super fun project! Using the Star Spangled Stitches designs and the patriotic colors put me in a happy mood. The pennants were very quick to make with the raggy finish. I think our family is going to get a baseball pennant next since it’s the season!


Please be sure to share your projects in the Designs by JuJu Embroidery Blessings Facebook Group, or use the hashtag #designsbyjuju anywhere on social media. We all love to see what you create!