Toggle Nav
 Inspire.
Create.
Stitch.
Inspire.
Create.
Stitch.
Search

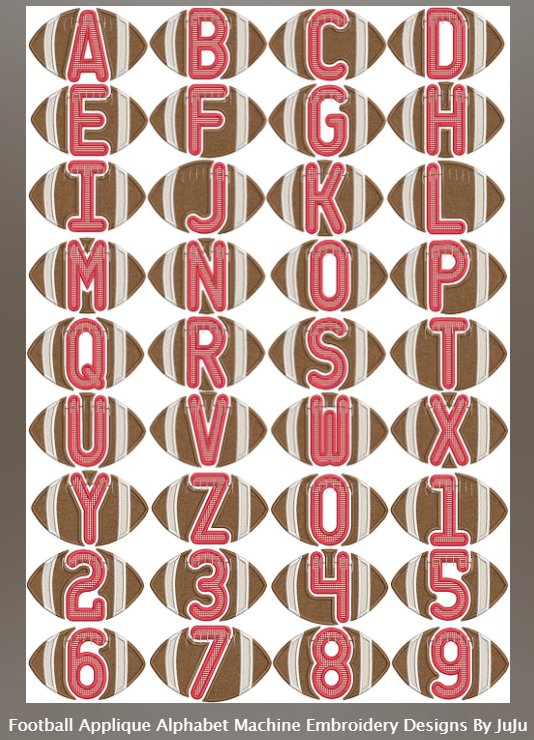
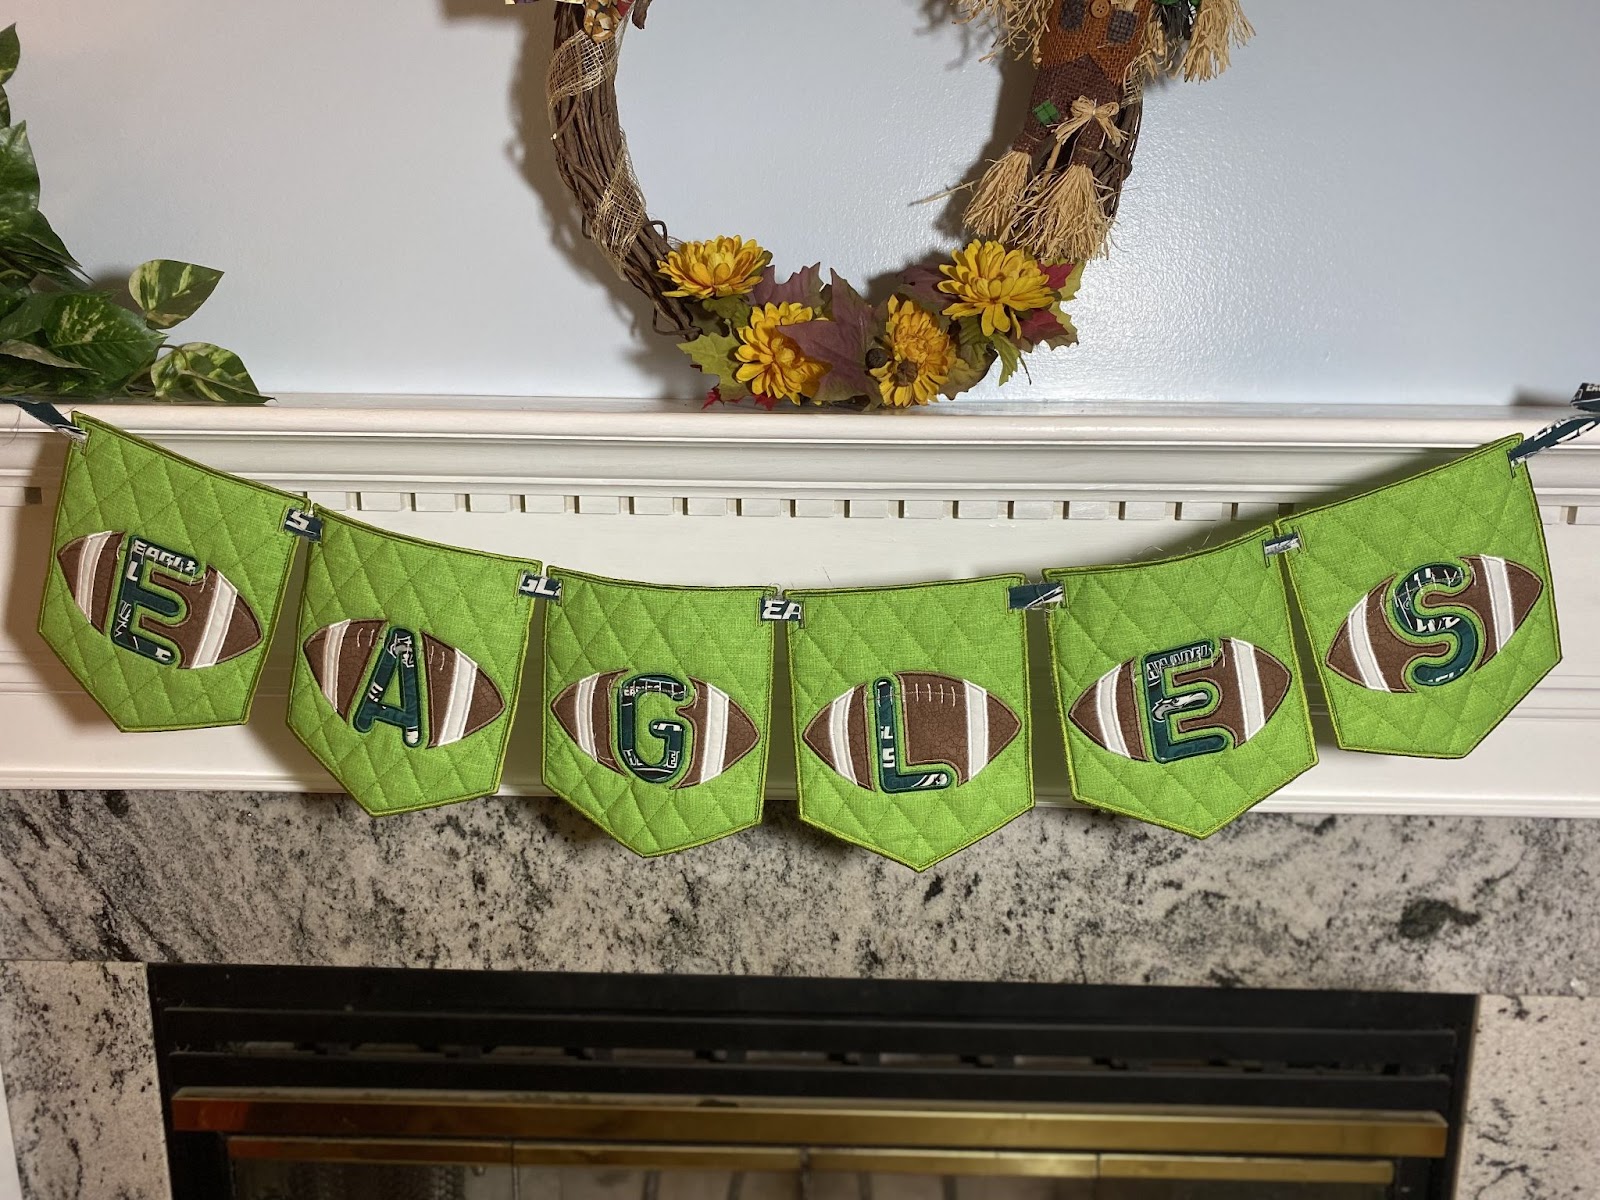
What could be more fun than showing your team spirit with a football pennant for your game day gatherings? It’s easy with JuJu’s In the Hoop Pennant and Bunting Shapes and Football Applique Alphabet designs. Use official NFL logo fabrics to make a banner for your favorite NFL team. Or make one in the colors of your children’s or grandchildren’s school teams. They’re so easy to do!
Be sure to check out the DBJJ team’s favorite supplies in the Designs by Juju Amazon Store.
There are lots of options in the pennant designs. I chose the bottom-pointed shape with the crosshatch quilting in the satin stitch finish. Because I wanted to make sure the football applique letters showed up, I couldn’t use too small a pennant size. I decided on the 7” pennant using the 6” football alphabet. I put the two different designs on a thumb drive and plugged it into my computer.
I did not use any additional software to do this project. I recently purchased Embrilliance, but I wanted to illustrate how to make this team football pennant with just your embroidery machine if that’s what you have at this time. I opened up the pennant design first and then added the football design. The order is important. This way the machine will start out with the steps for the pennant first. When I take you through the steps of making the pennants, you’ll have a better understanding of why this is important.
My embroidery machine told me I’d need the 8” x 8” hoop. Because I wanted to make sure the size was right, I made a test pennant out of scrap fabrics. I didn’t worry about thread colors or fabric choices.
While I don’t usually stitch out a test sample for projects, I’m really glad I did this time. I wasn’t happy with the 7” size. I could see I would be able to play up the special NFL fabric if I went a little bigger. So I deleted the designs from my thumb drive and loaded the 8” pennant design and the 7” football alphabet letters I needed. (Delete what you don’t want so you don’t accidentally tell your embroidery machine the incorrect size.)
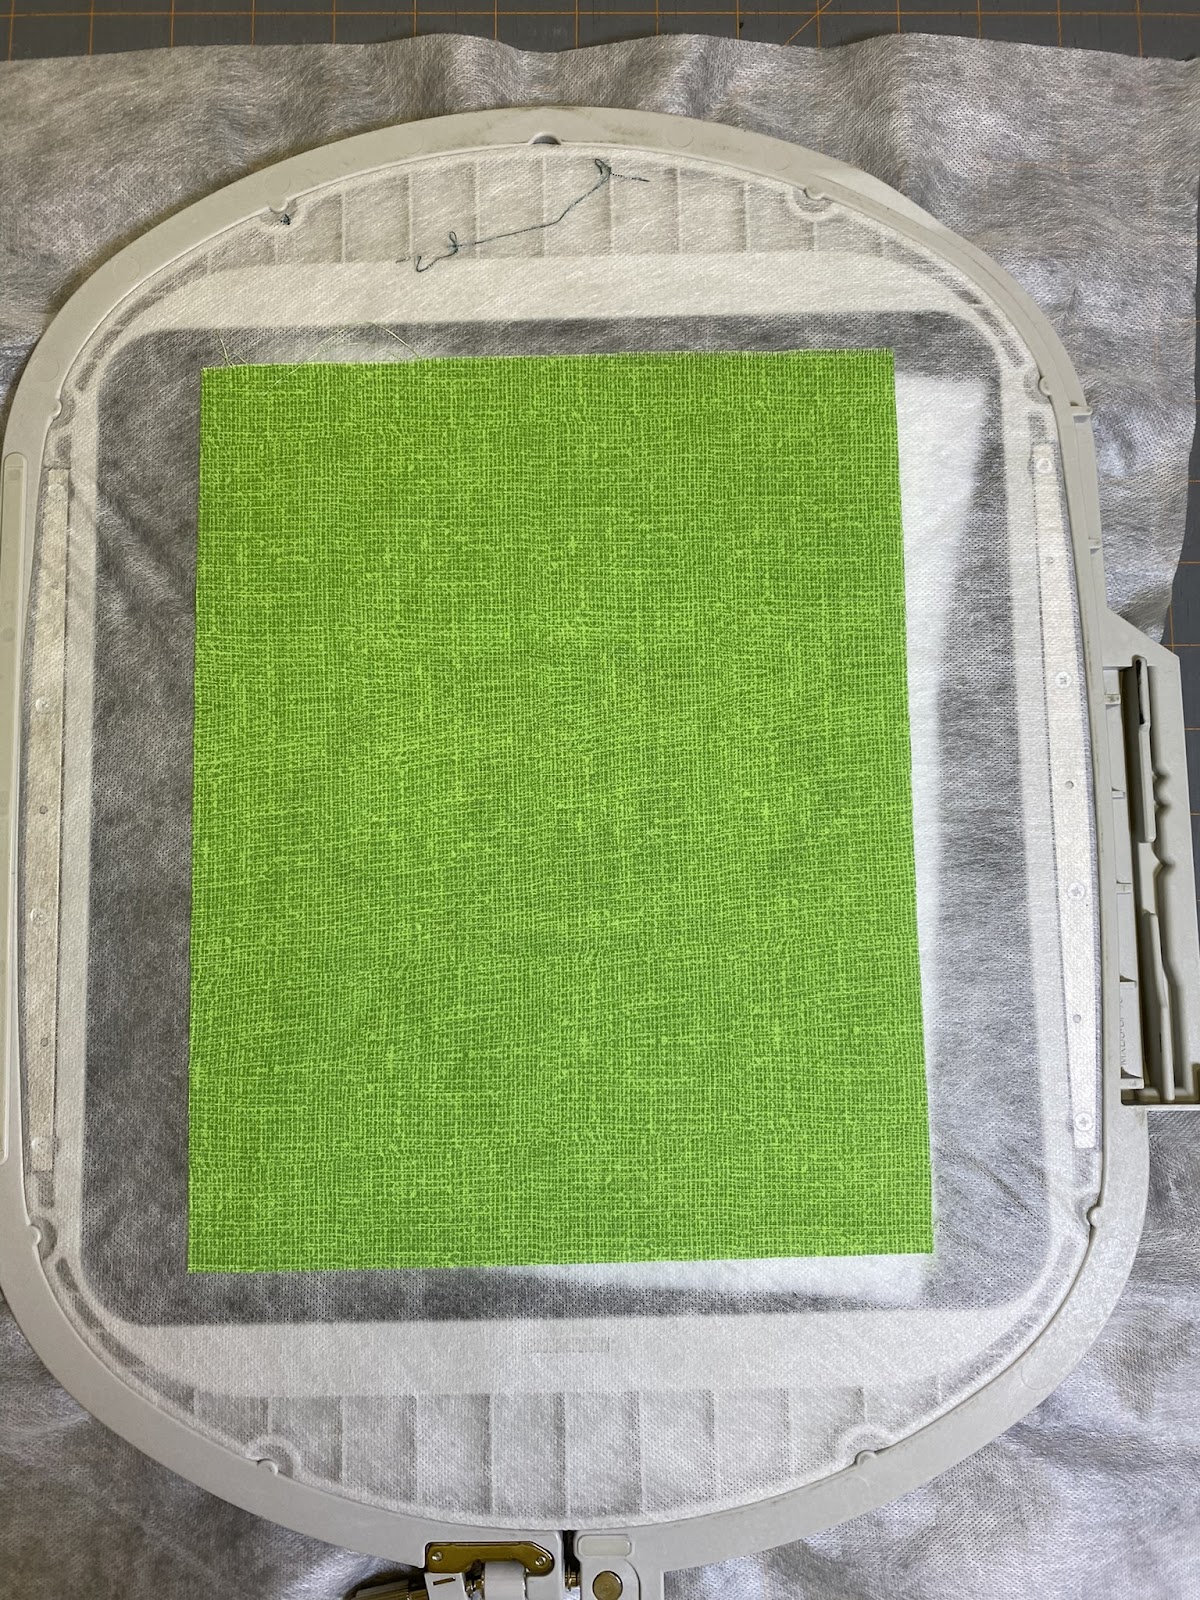
Now that I had the sizes right, I could be more efficient with both my time and my supplies. I measured the amount of wash-away stabilizer I put into the hoop and cut out 5 more pieces while my embroidery machine started our new adventure. I did the same for all the other pieces of fabric as I went along, cutting out the other 5 pieces once I knew the measurements needed for the background, football, etc.
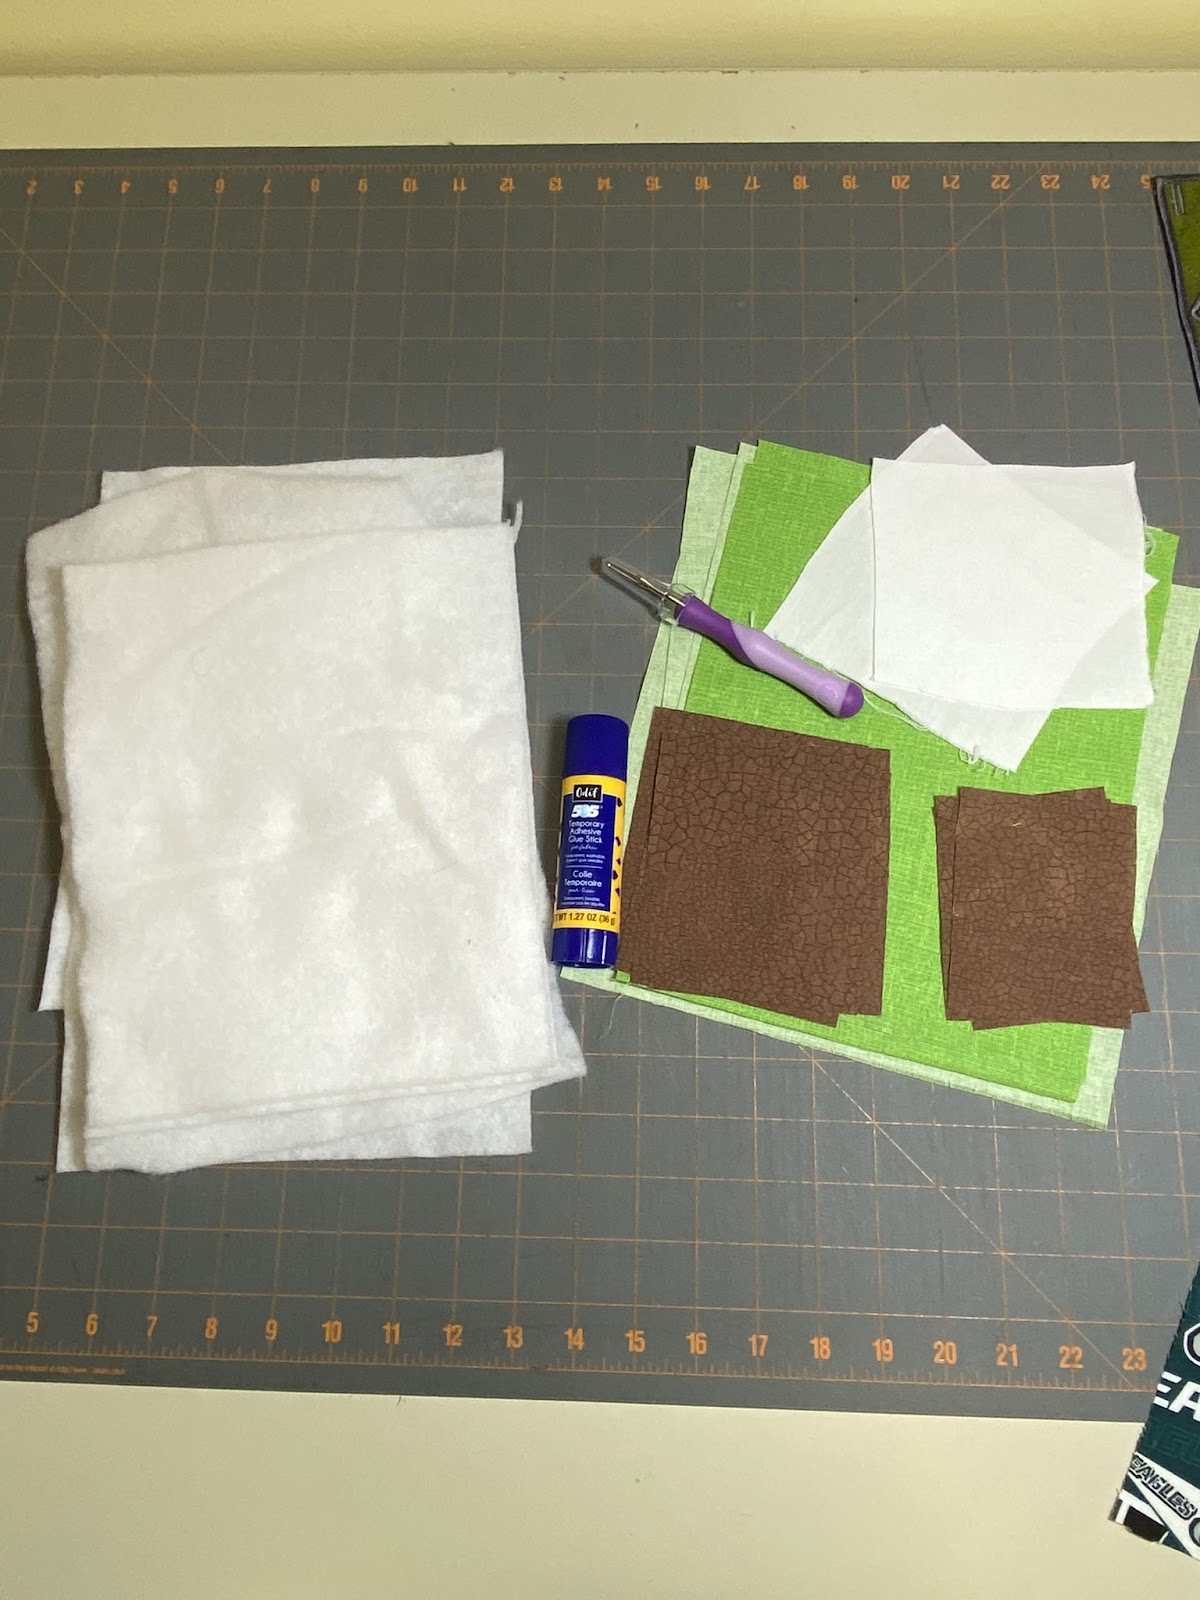
For those who might also use the 8” x 8” hoop, here are the fabric measurements I used. They could have been just a tad smaller:
I cut the white pieces used for the football trim using my scissors, since they were so small.
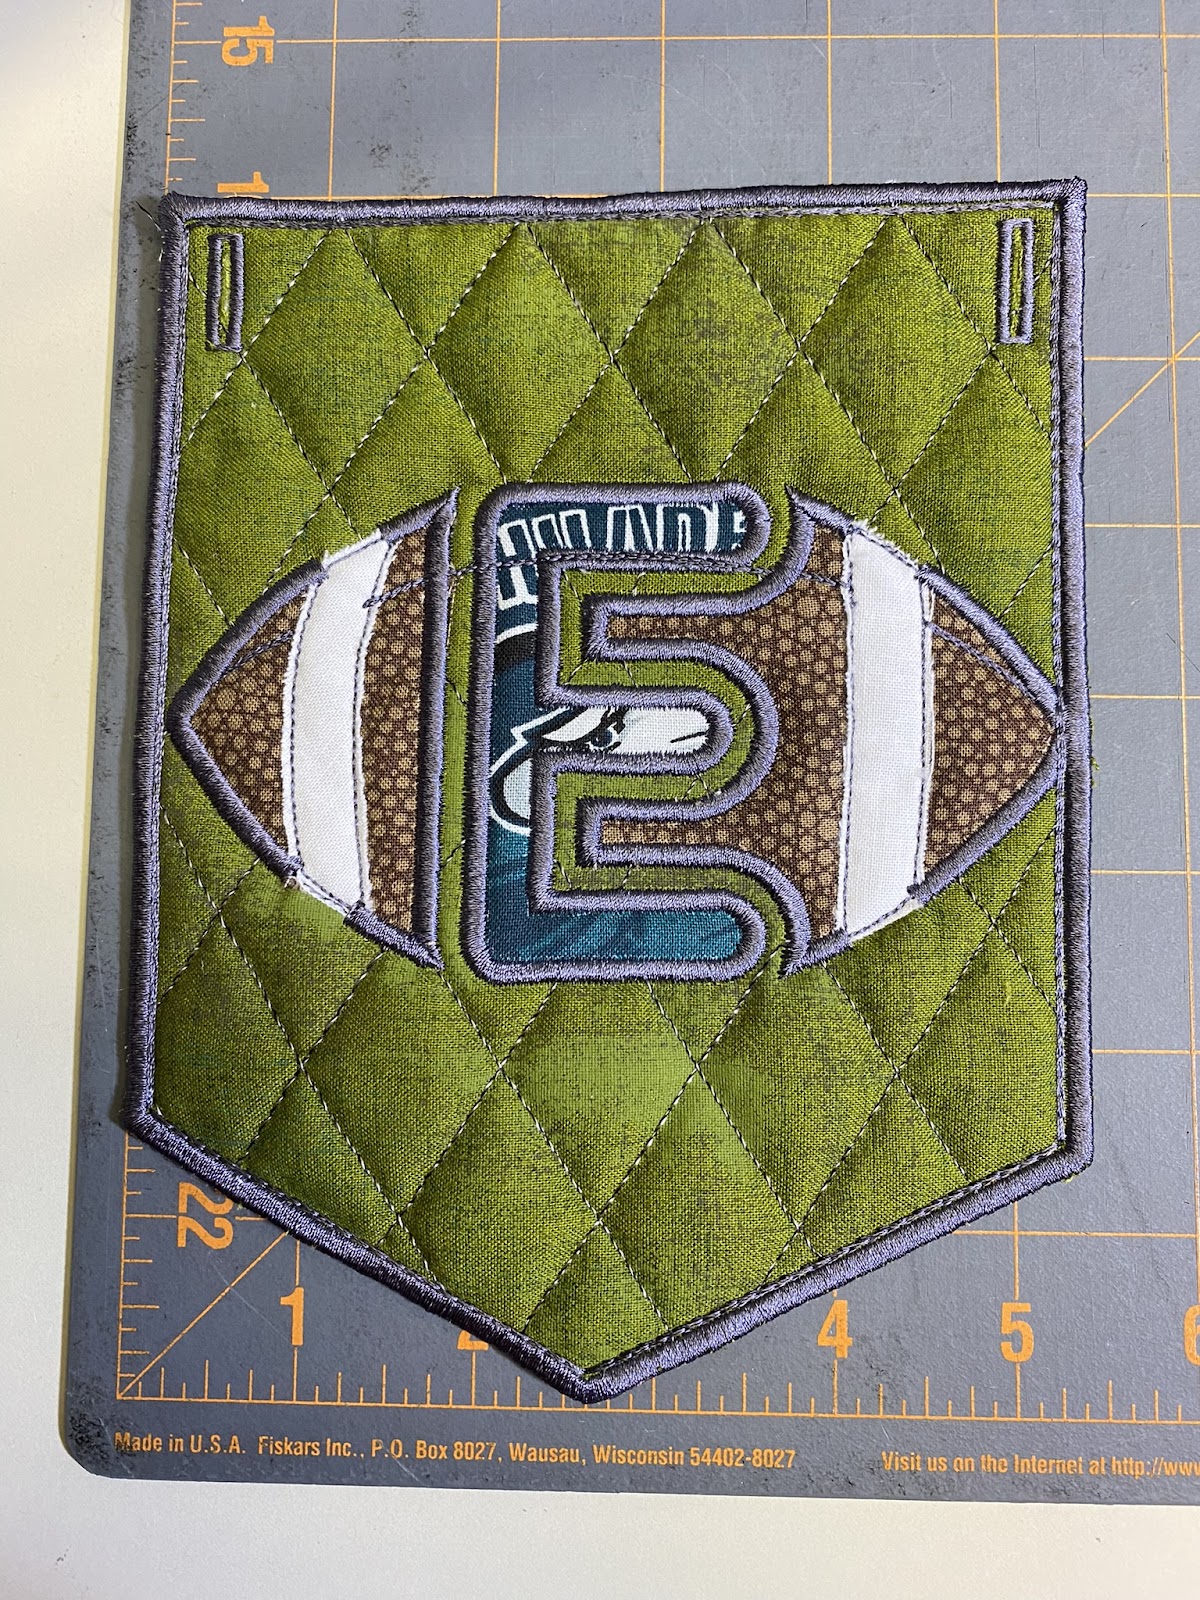
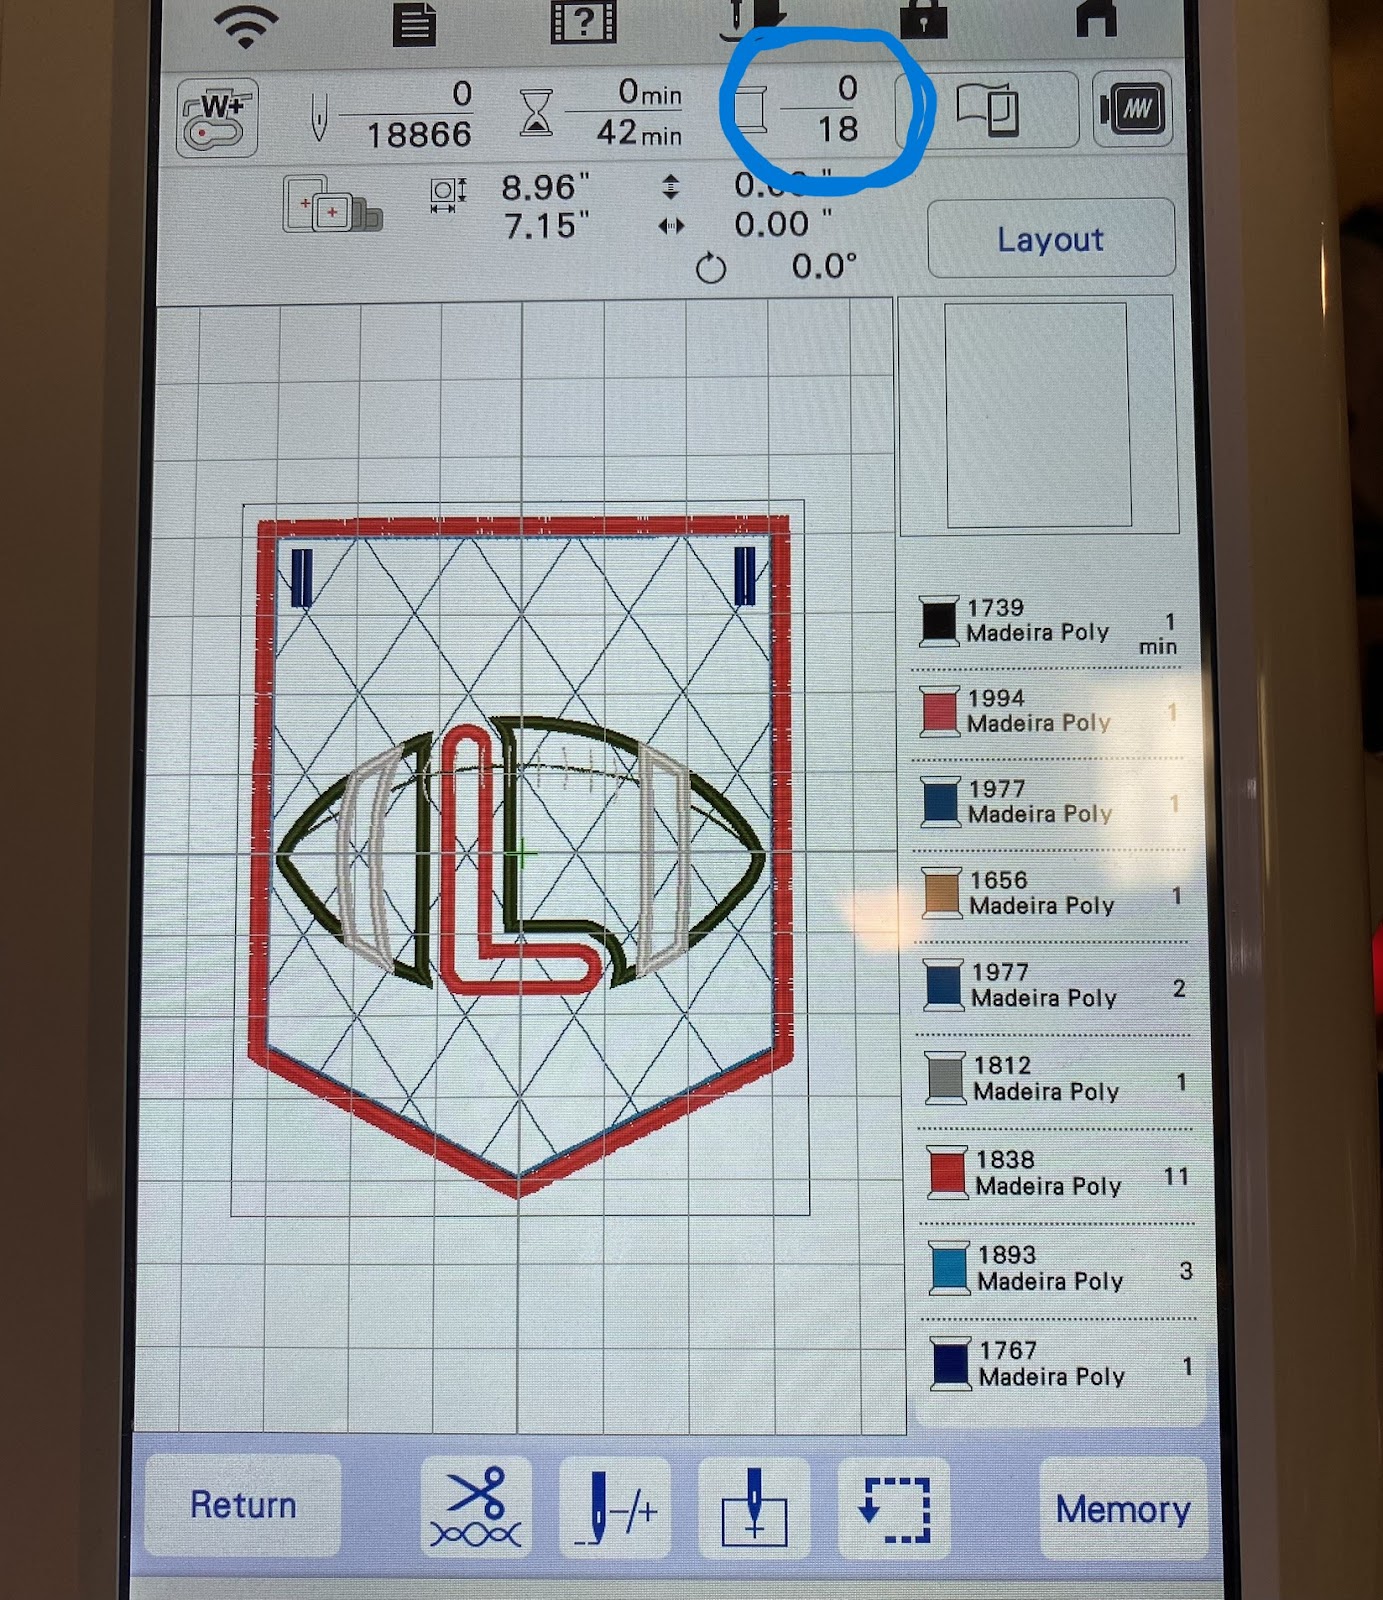
First, I loaded the pennant design on my embroidery machine. That’s because, at least for my machine, the first design loaded will be listed first in the steps. I enlarged the pennant to 6.78” x 8.57”. Then I added the football applique letter, shrinking it to 3.40” x 6.14”.
Because of an earlier pleat mishap, I added a basting box which shows up as the first step. However, I won’t sew the basting box until I get to the step with the background fabric. Take a look at the photo of my machine’s display. See how I have 18 steps? I’m going to match my tutorial steps with my machine steps even though that means I’ll start with Step 2.
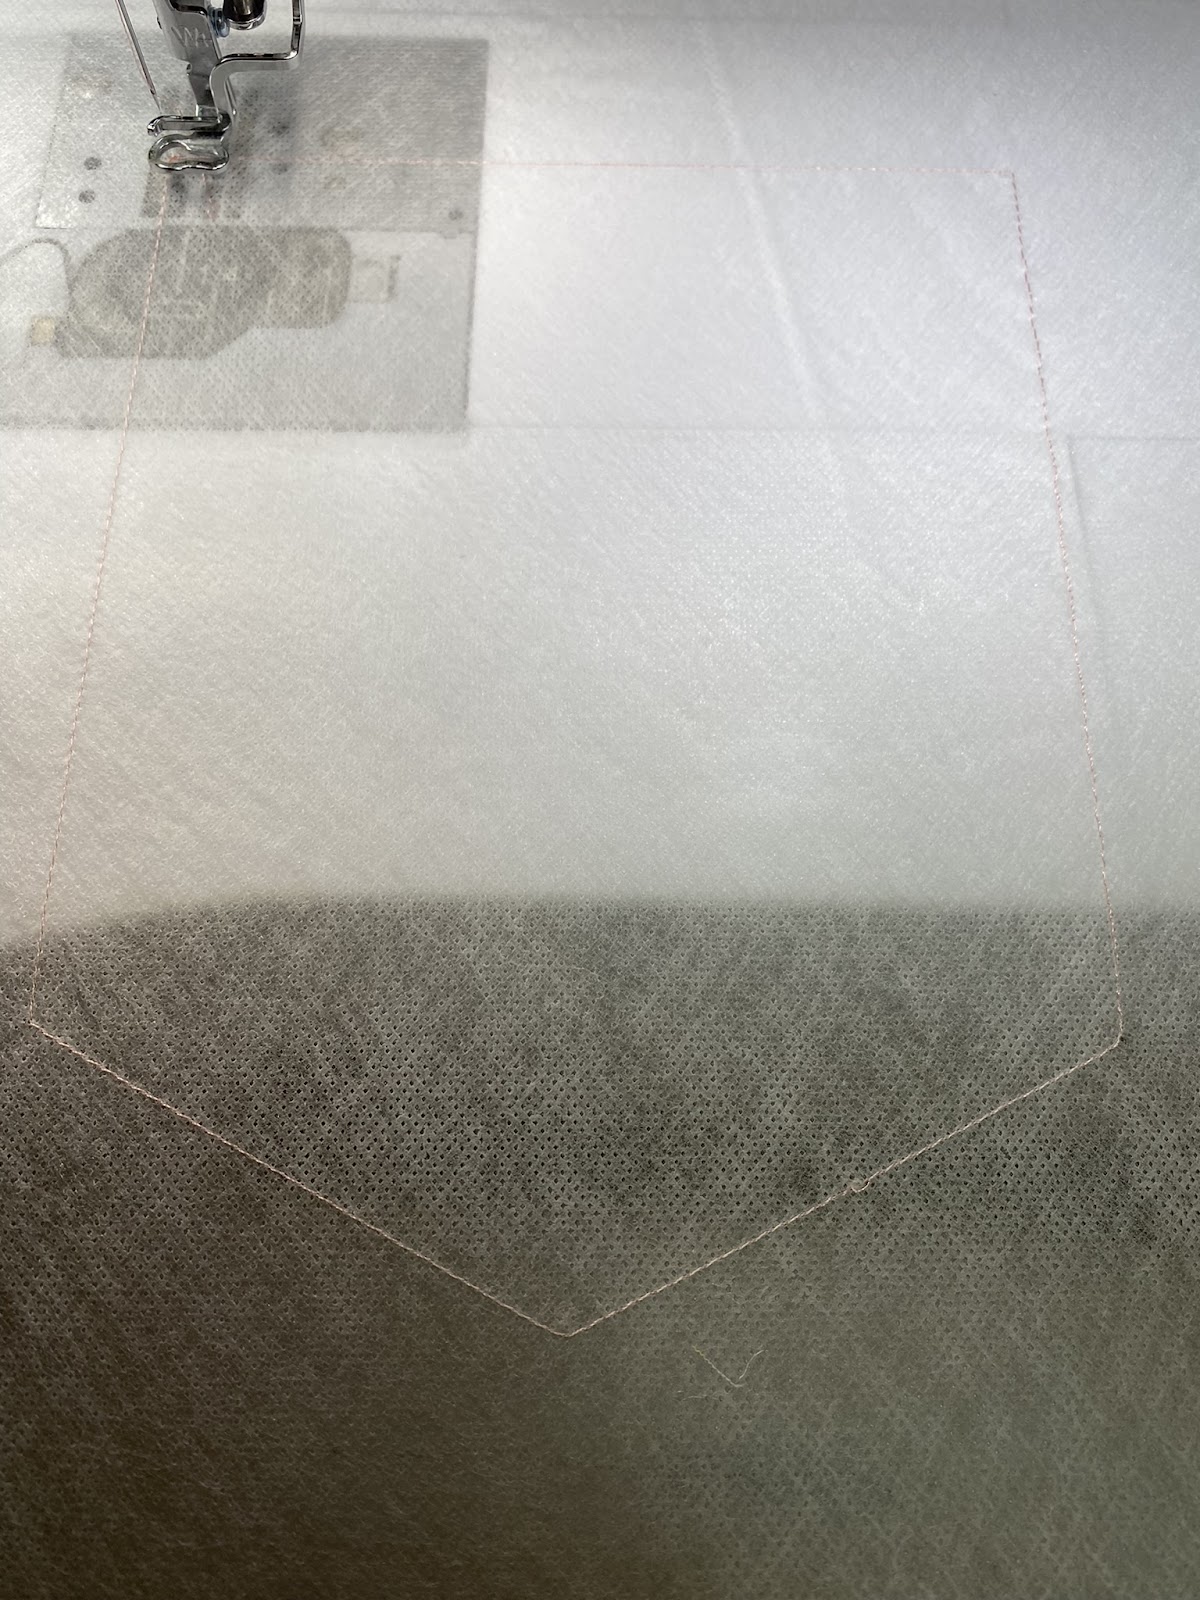
Step 2: Hoop the wash-away stabilizer and stitch the batting placement line. (Remember, I’m skipping the basting box here until the fabric is laid down.)
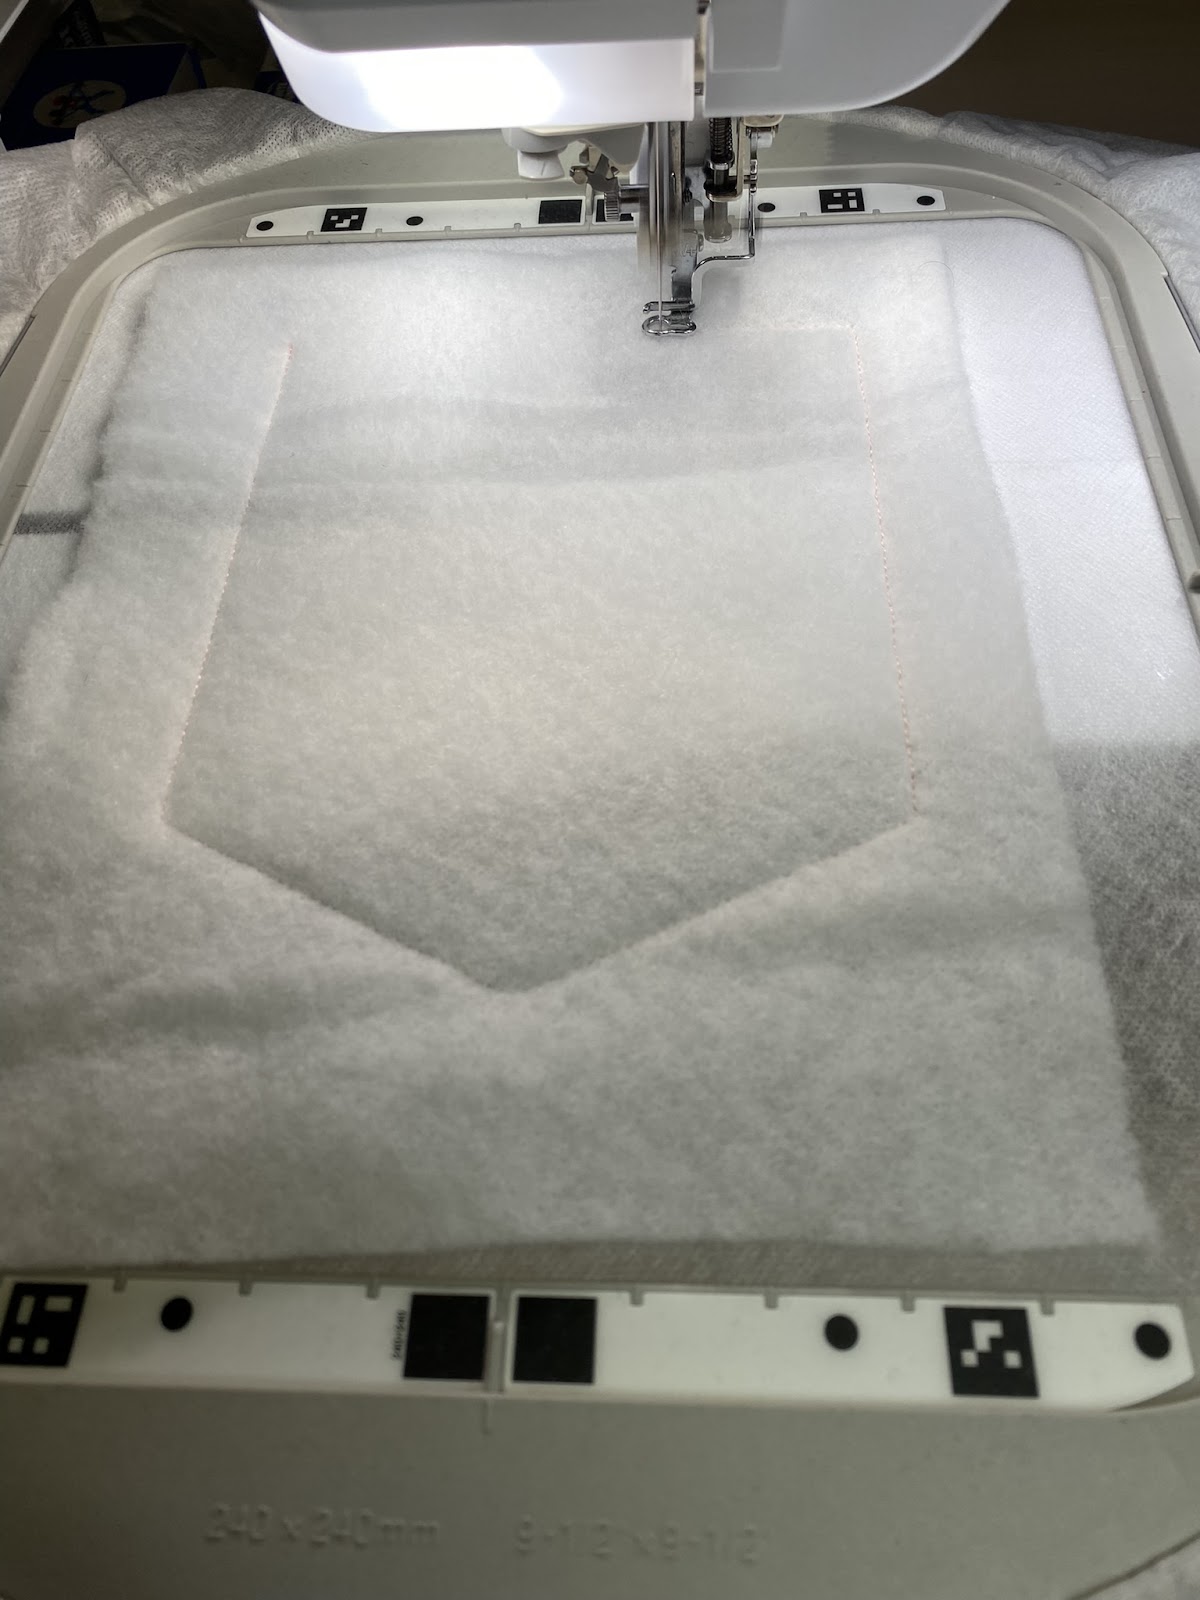
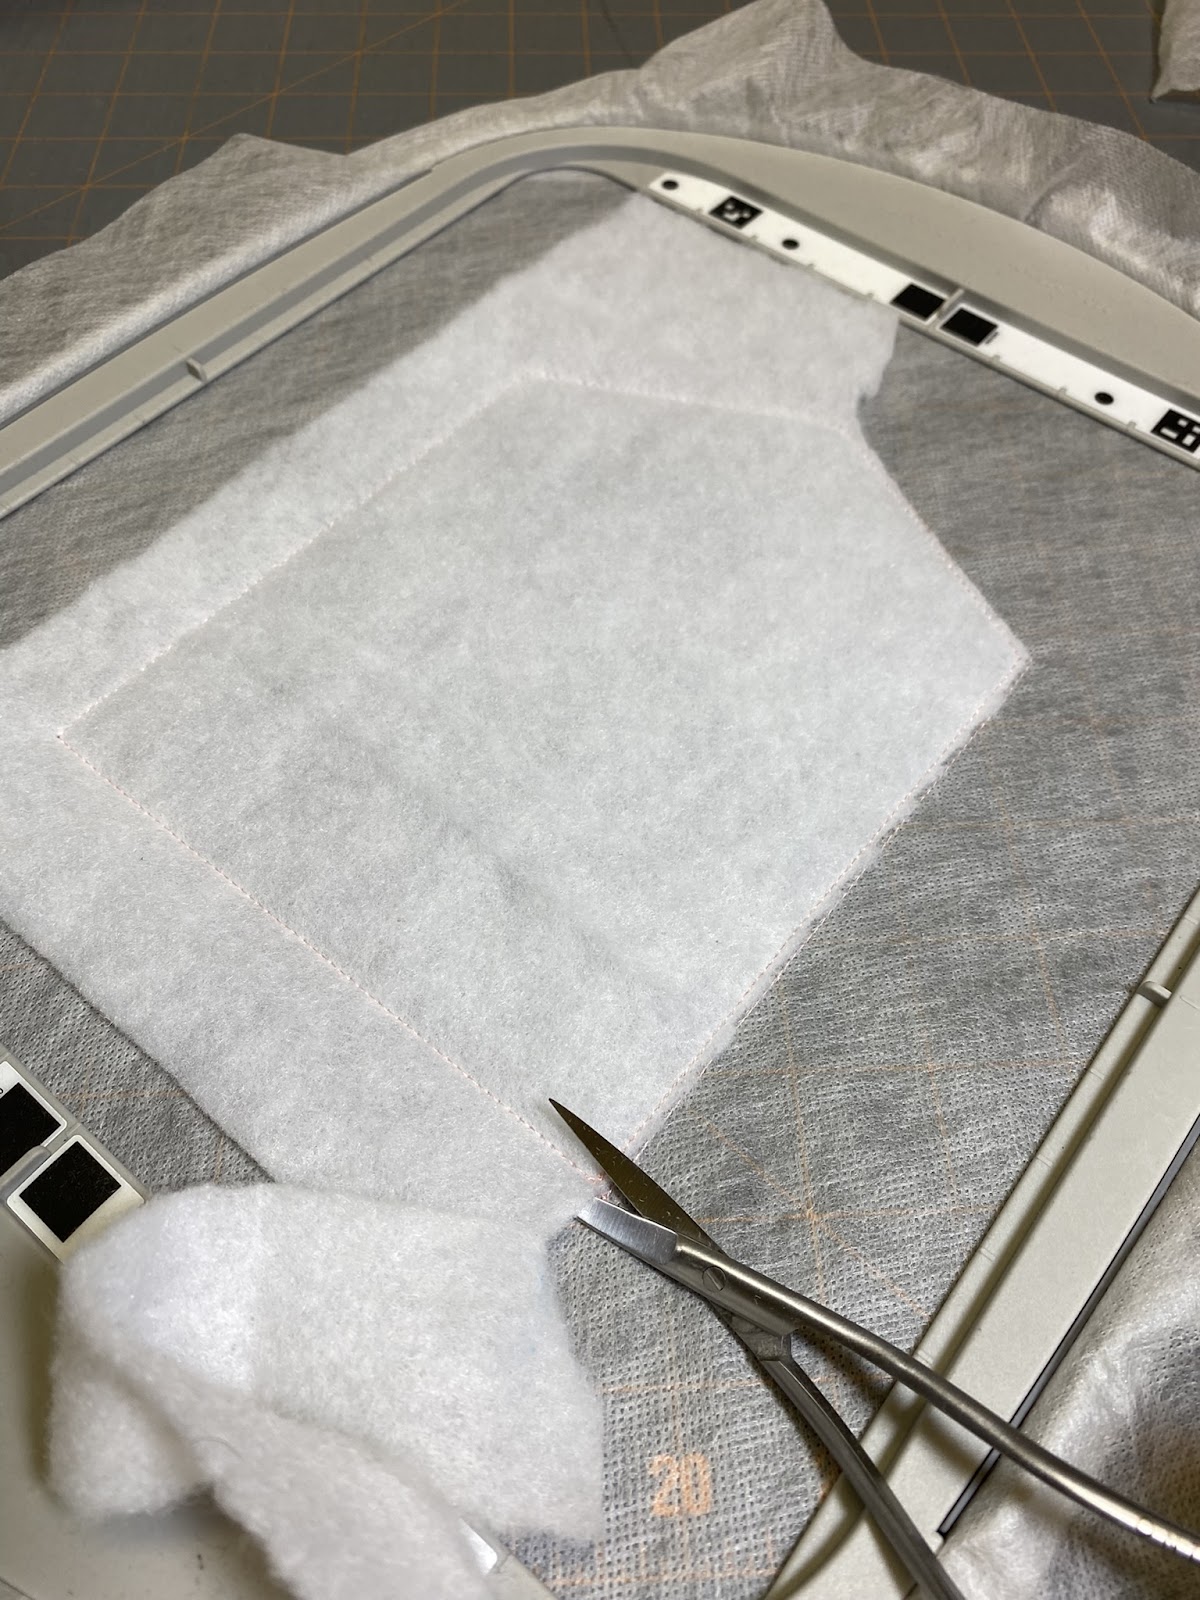
Step 3: Lightly spray the batting with temporary adhesive spray, lay it over the placement lines and sew the tack-down stitches. Trim batting close to the stitched line.
Steps 1 & 4: After spraying the background fabric, lay it over the batting, making sure it extends beyond the batting. Stitch the basting box from Step 1, then skip to Step 4 and sew the fabric tack down.
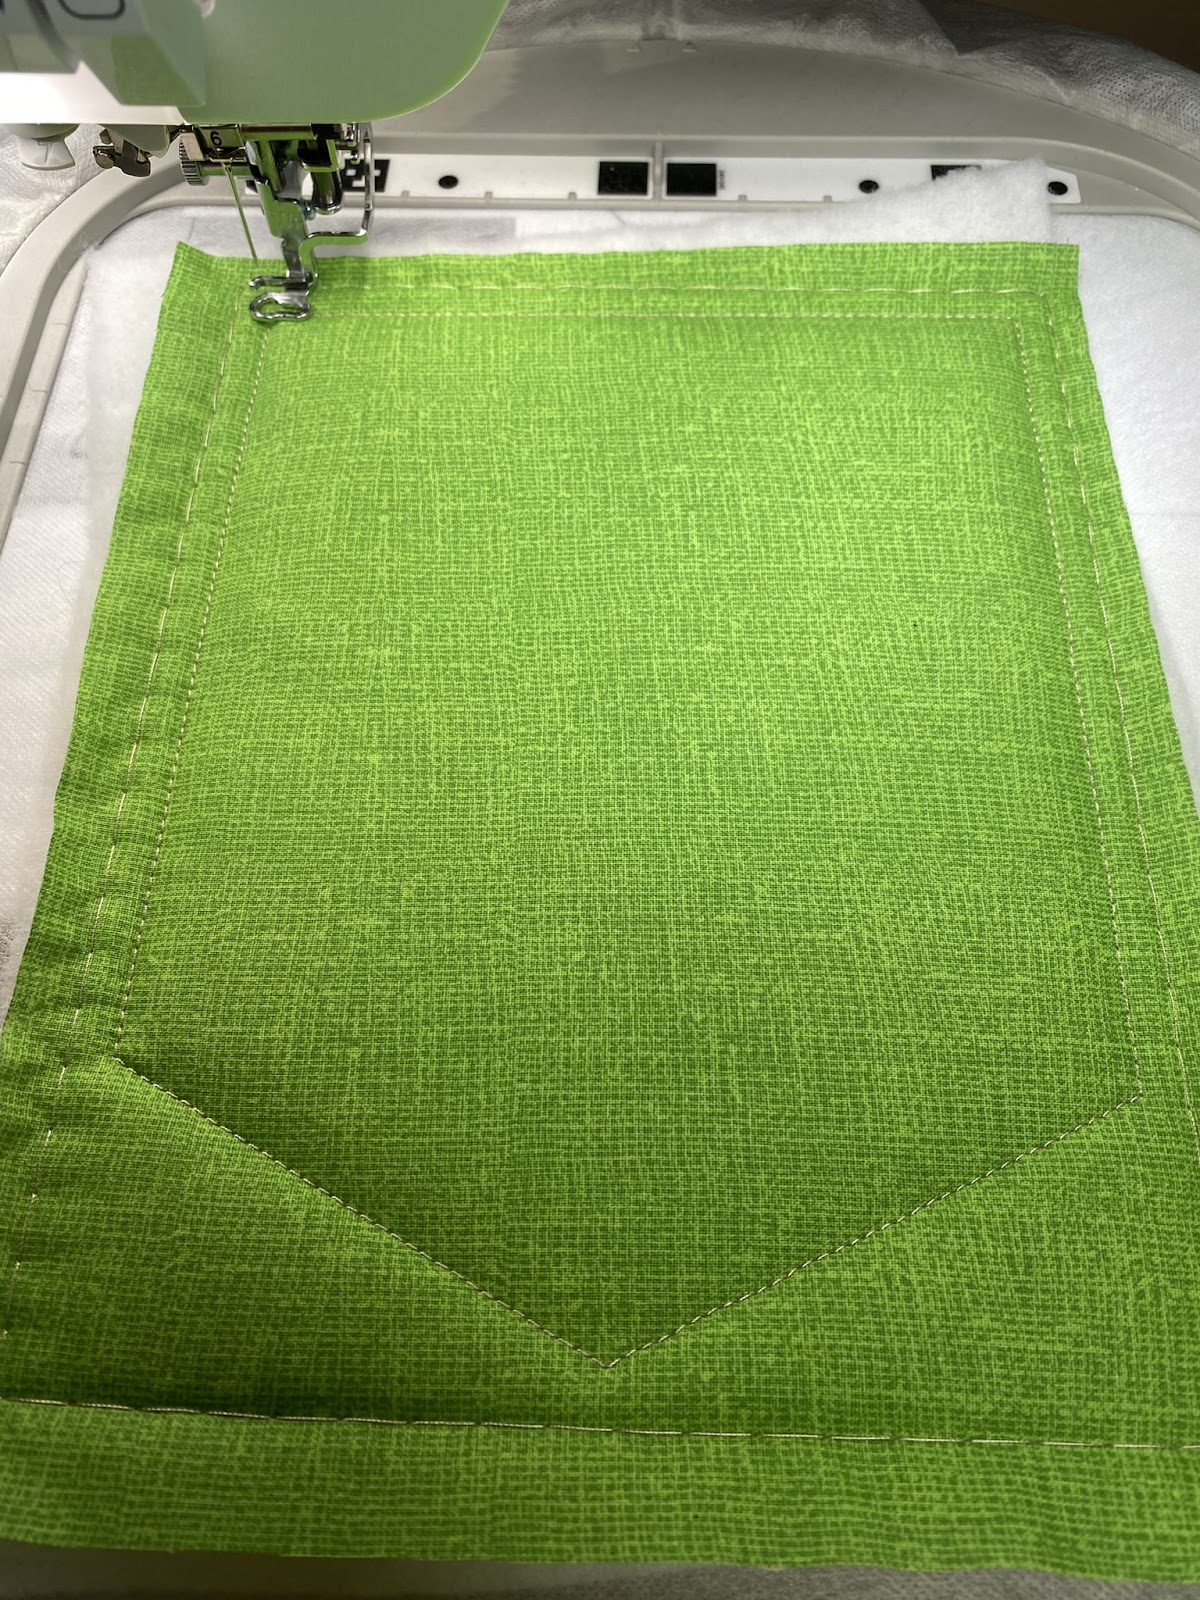
Notice the basting box and the stitch down.
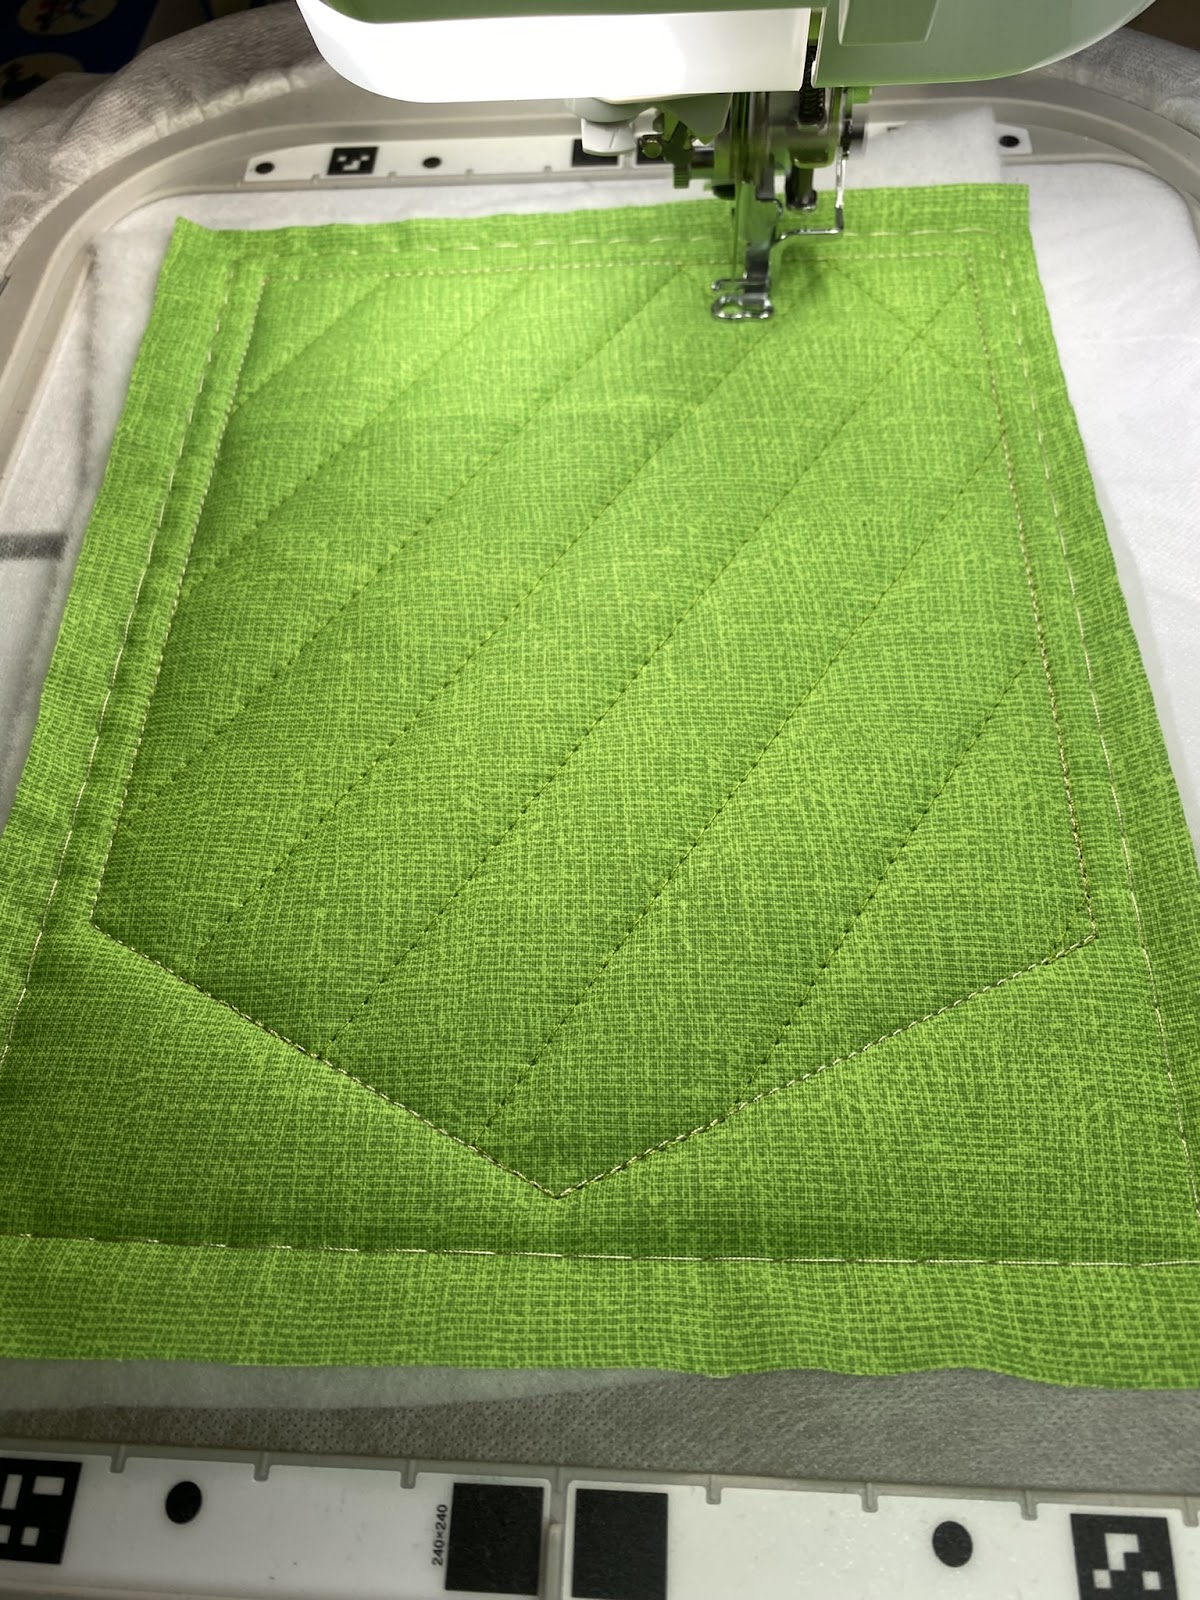
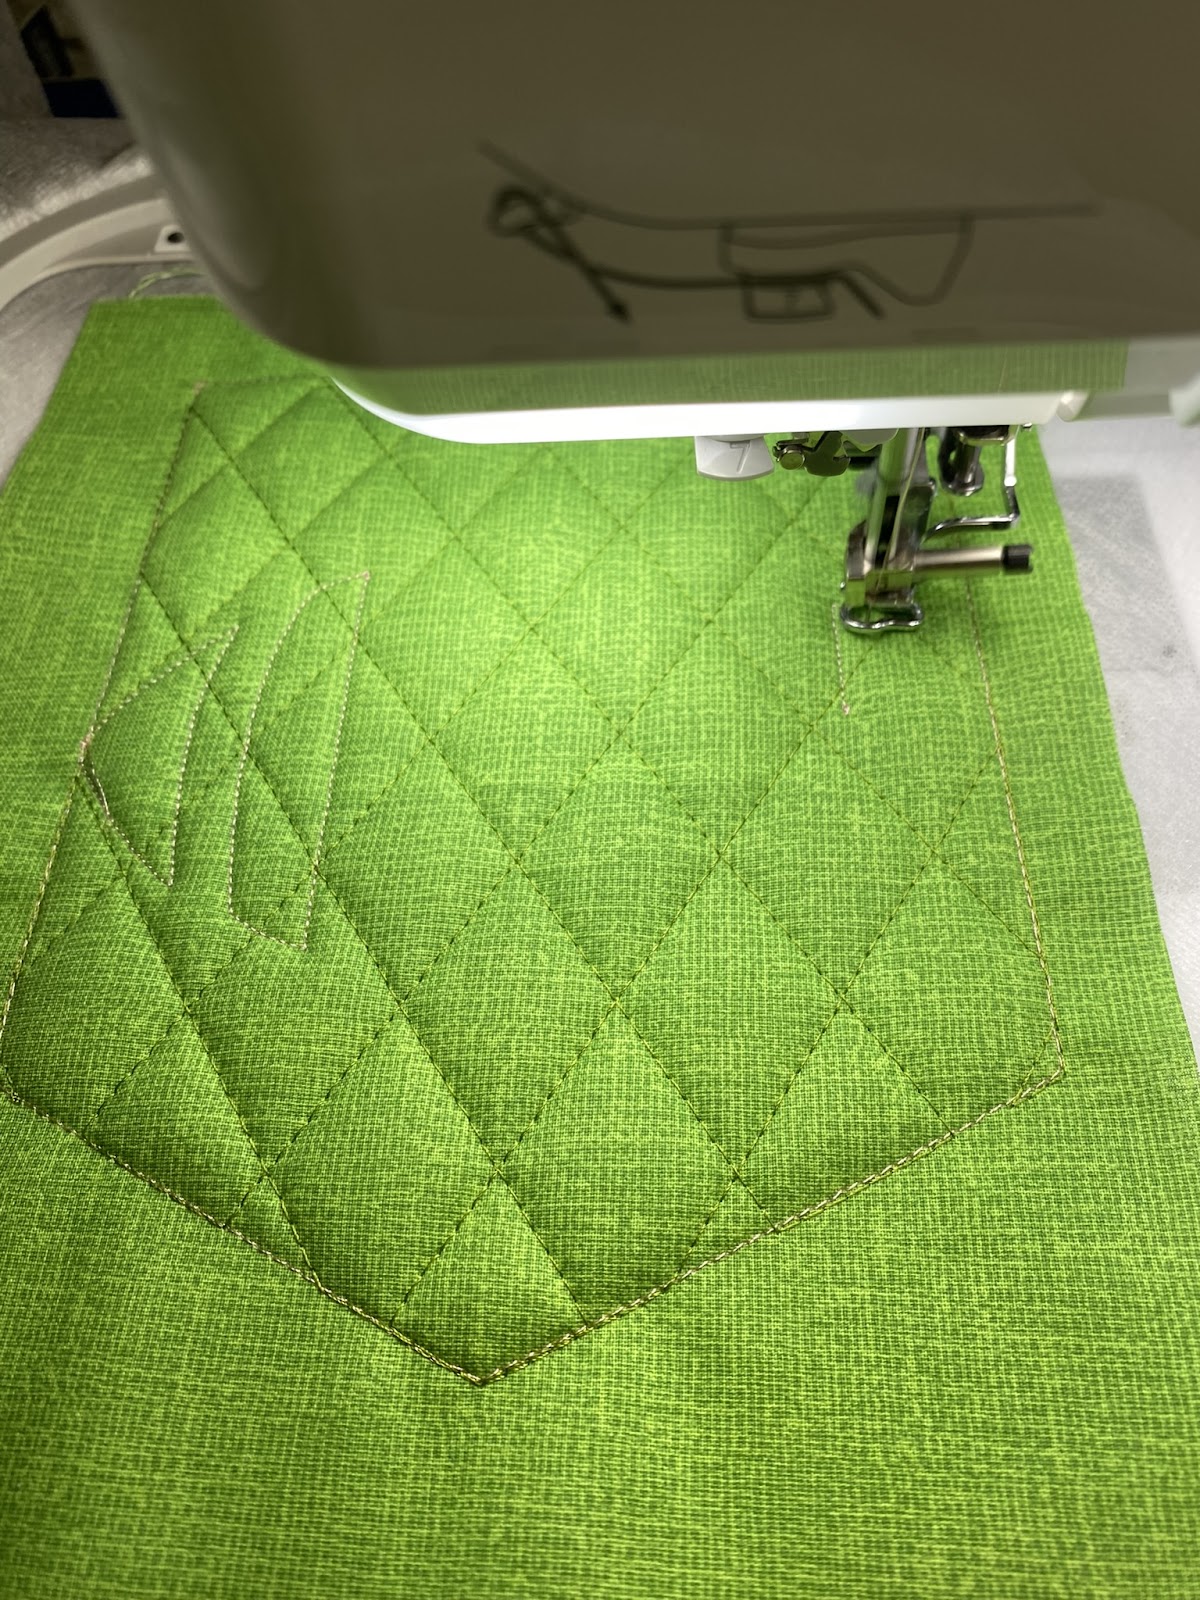
Step 5: Quilt the crosshatch stitches. I’m using a matching thread color because the quilting gives more interest to the pennant but shouldn’t distract from the applique design.
>>>> IMPORTANT: I’m going to manually jump to Step 10 on my machine and work on my appliqued football letter. <<<<
Step 10: Stitch the brown football placement lines.
Step 11: Lightly spray the brown football fabric with adhesive spray and lay over the placement lines, making sure the fabric extends a bit in each direction. Sew the stitch-down lines. Remove the hoop from the machine and trim close to the stitched lines.

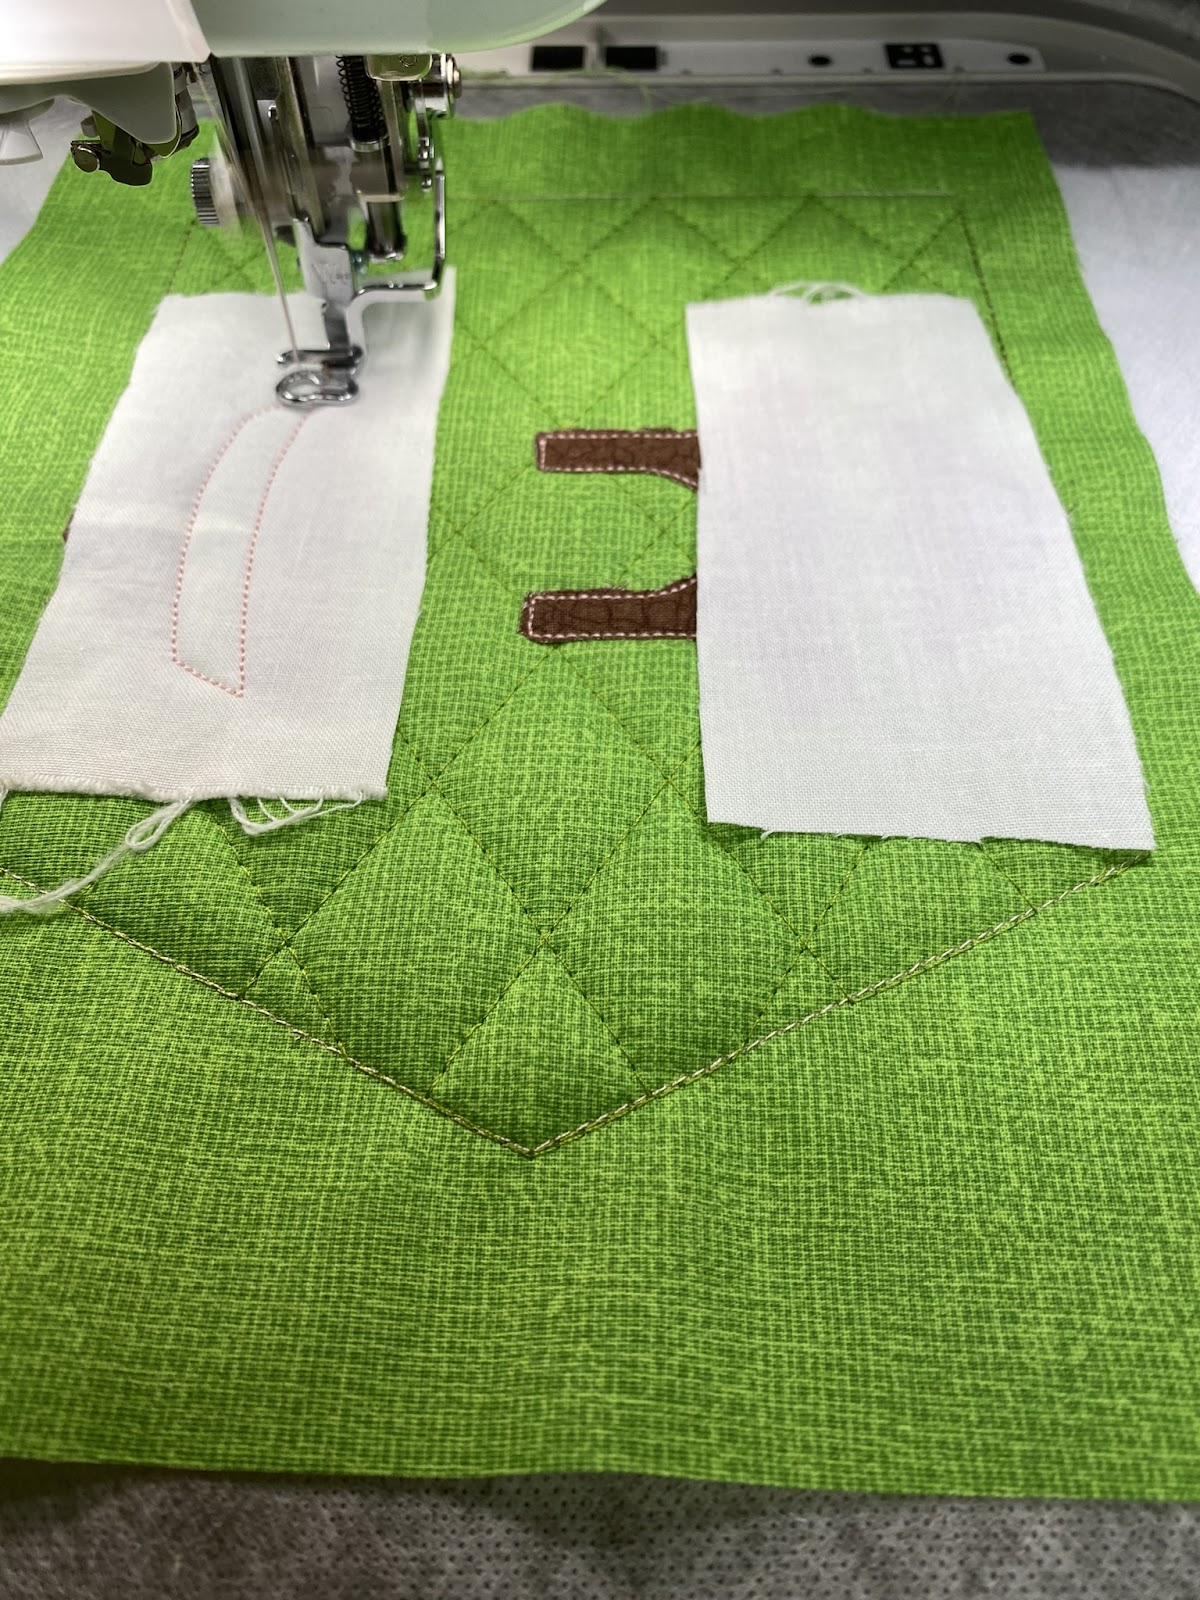
Step 12: Stitch the placement lines for the white trim on the football.
Step 13: Lightly spray the white fabric with adhesive and lay the pieces over the placement lines. Sew the stitch down, remove the hoop from the machine, and trim.
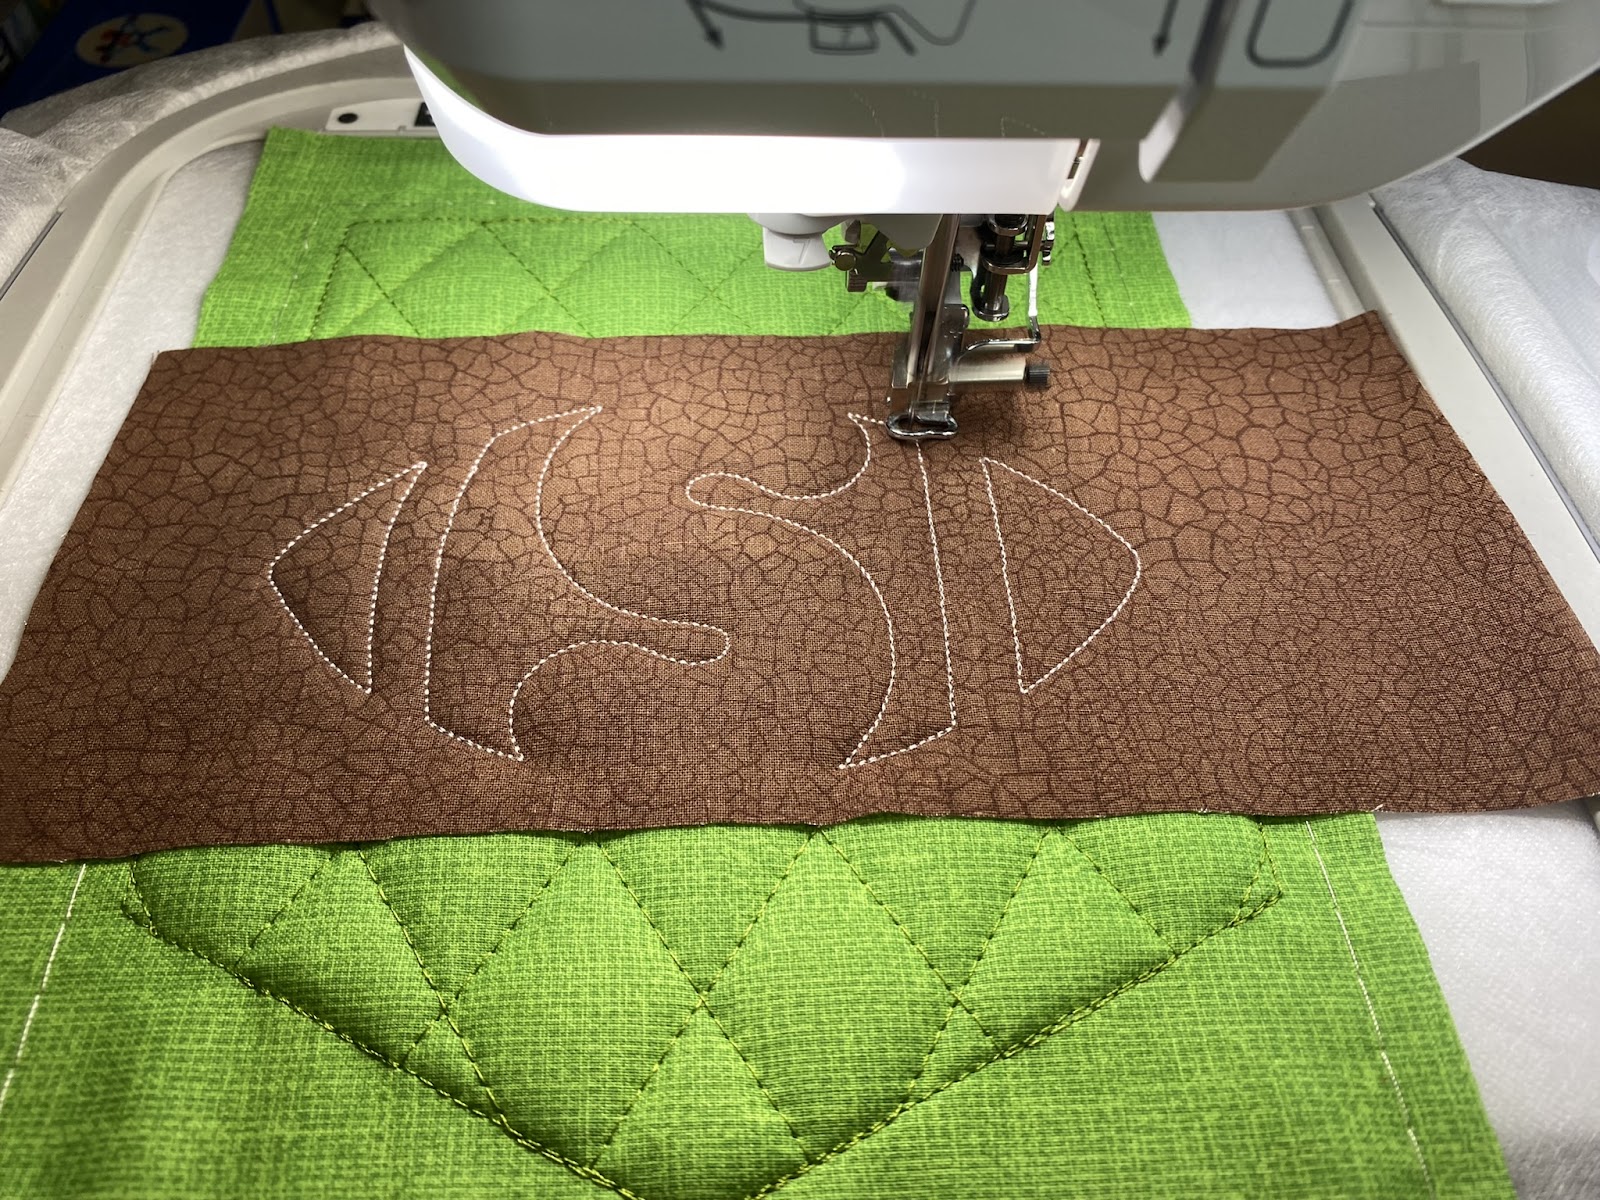
Step 14: Stitch the letter placement stitch.
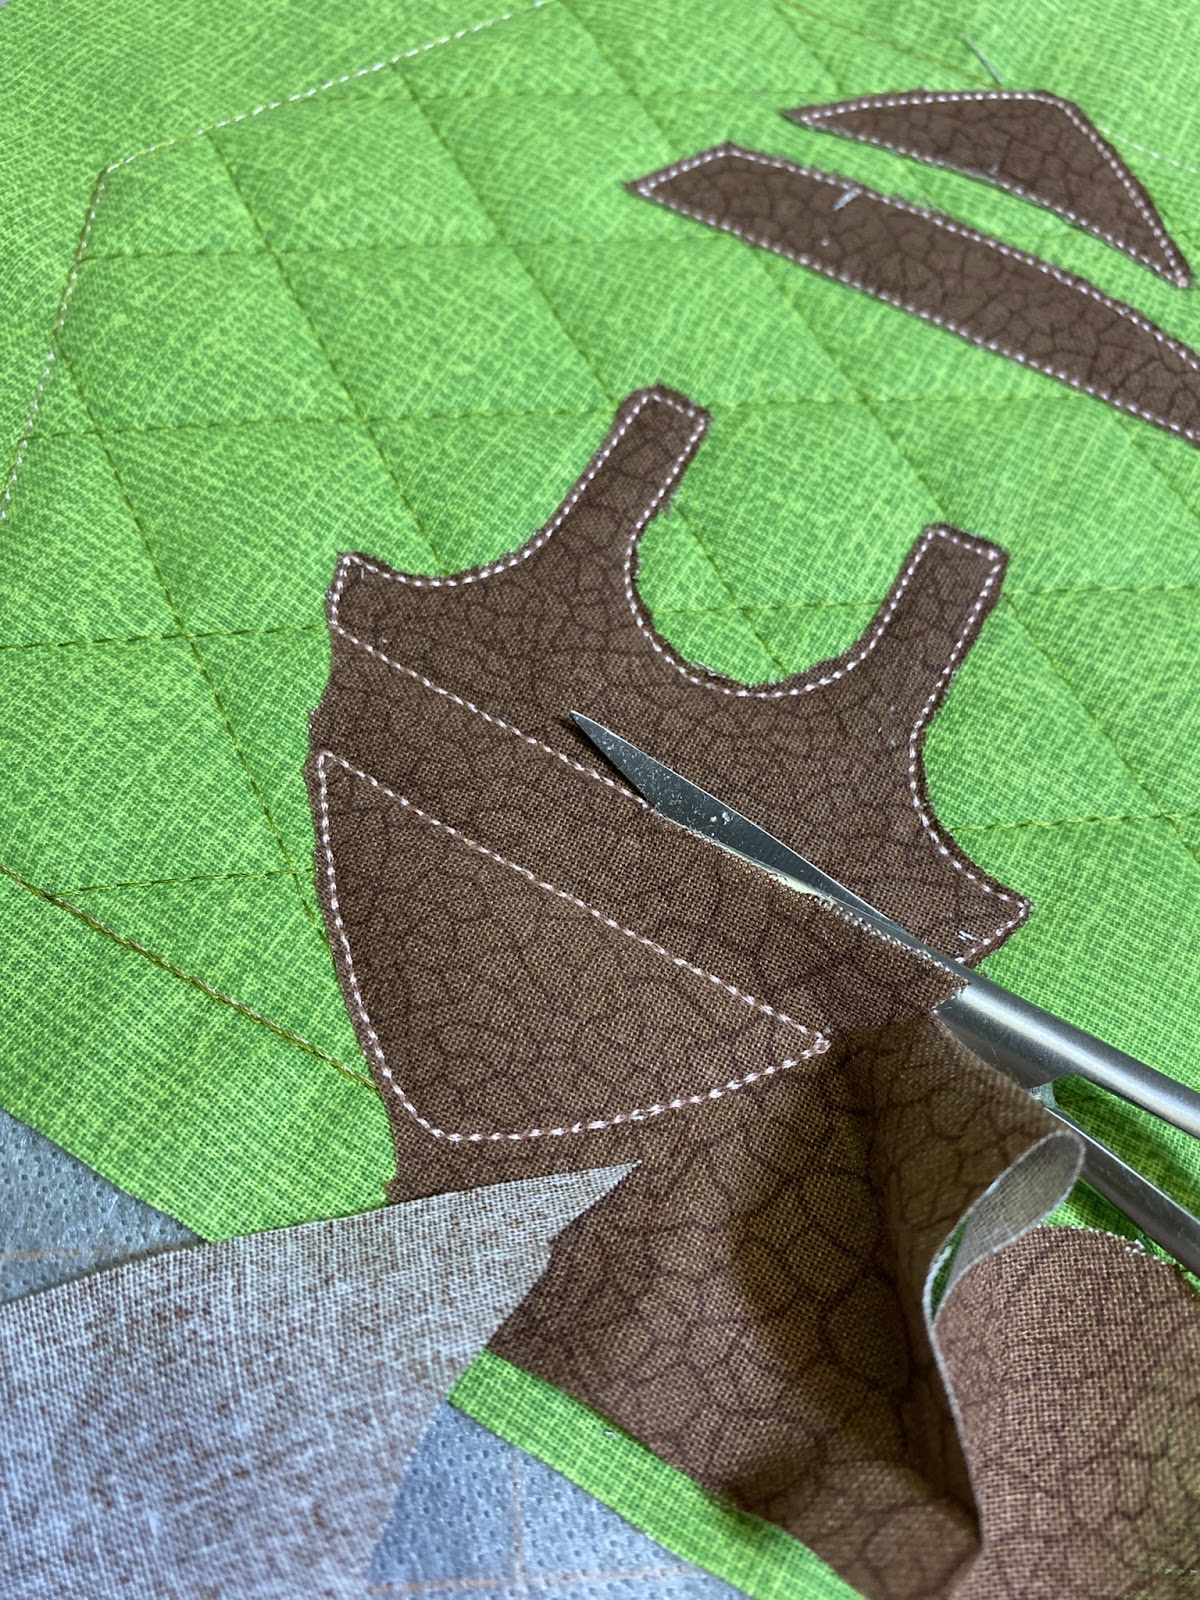
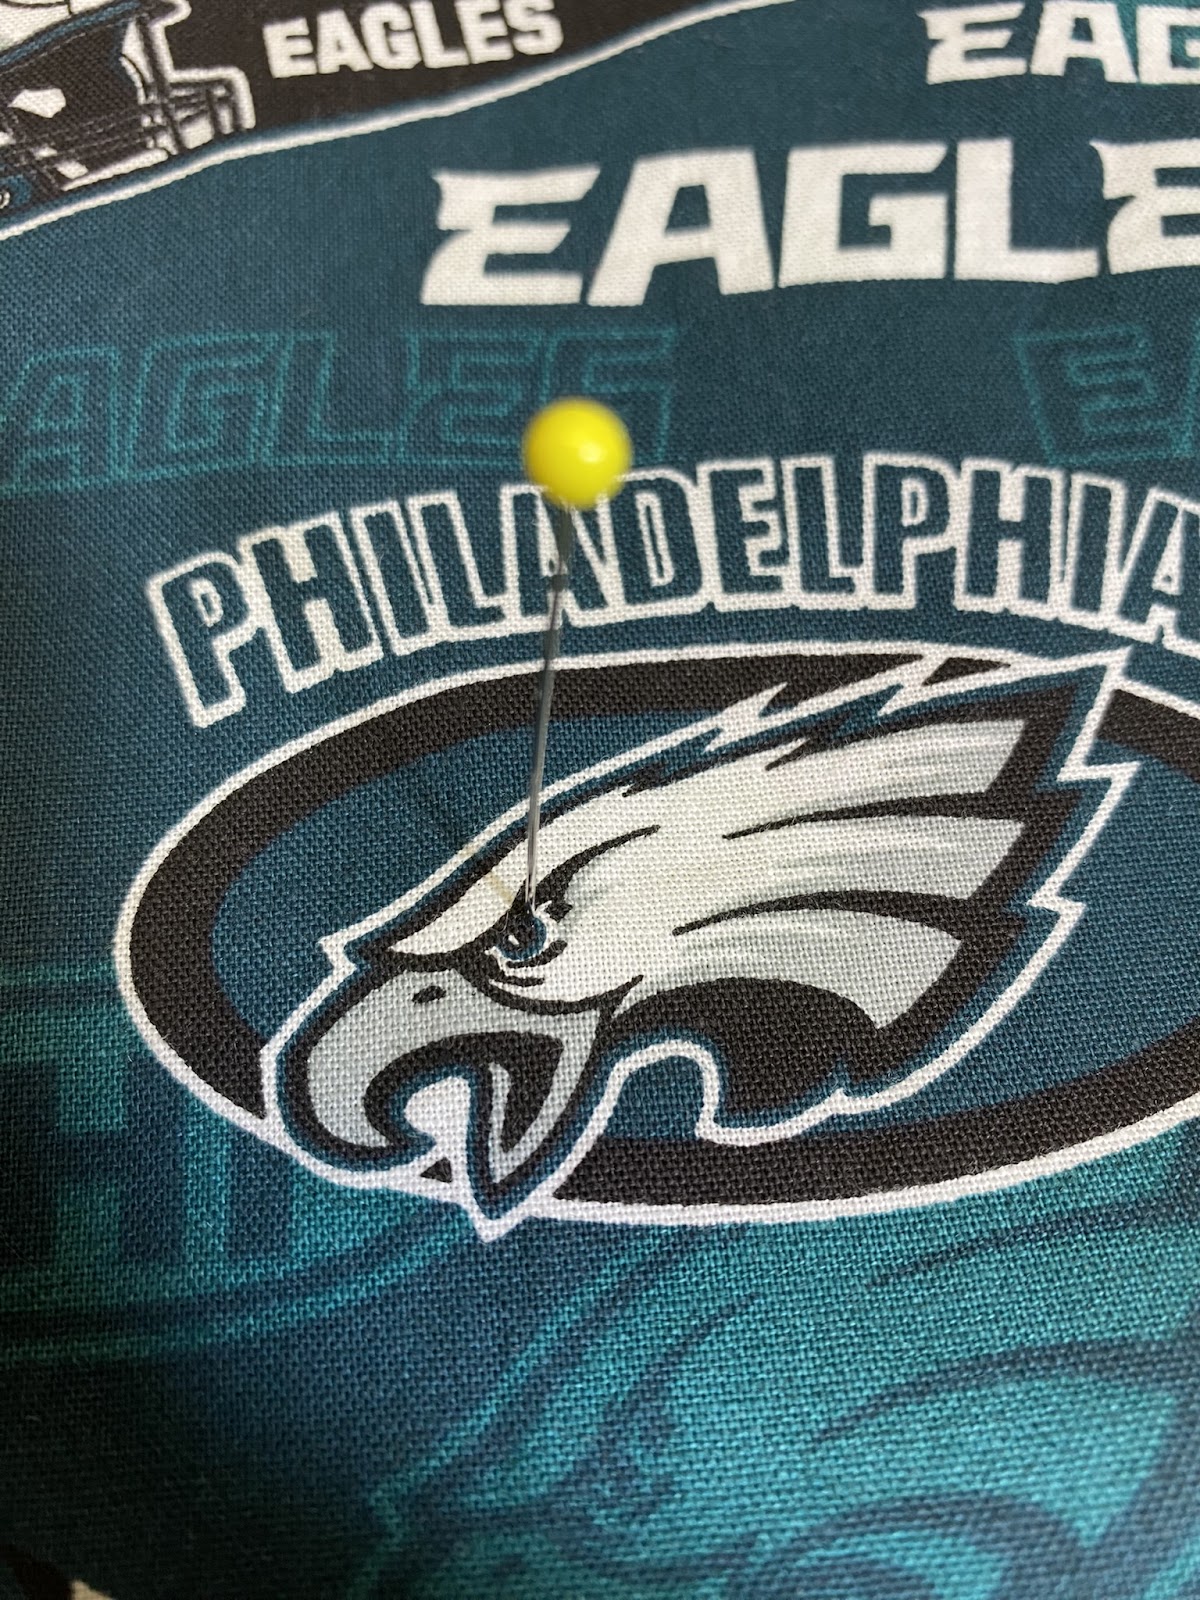
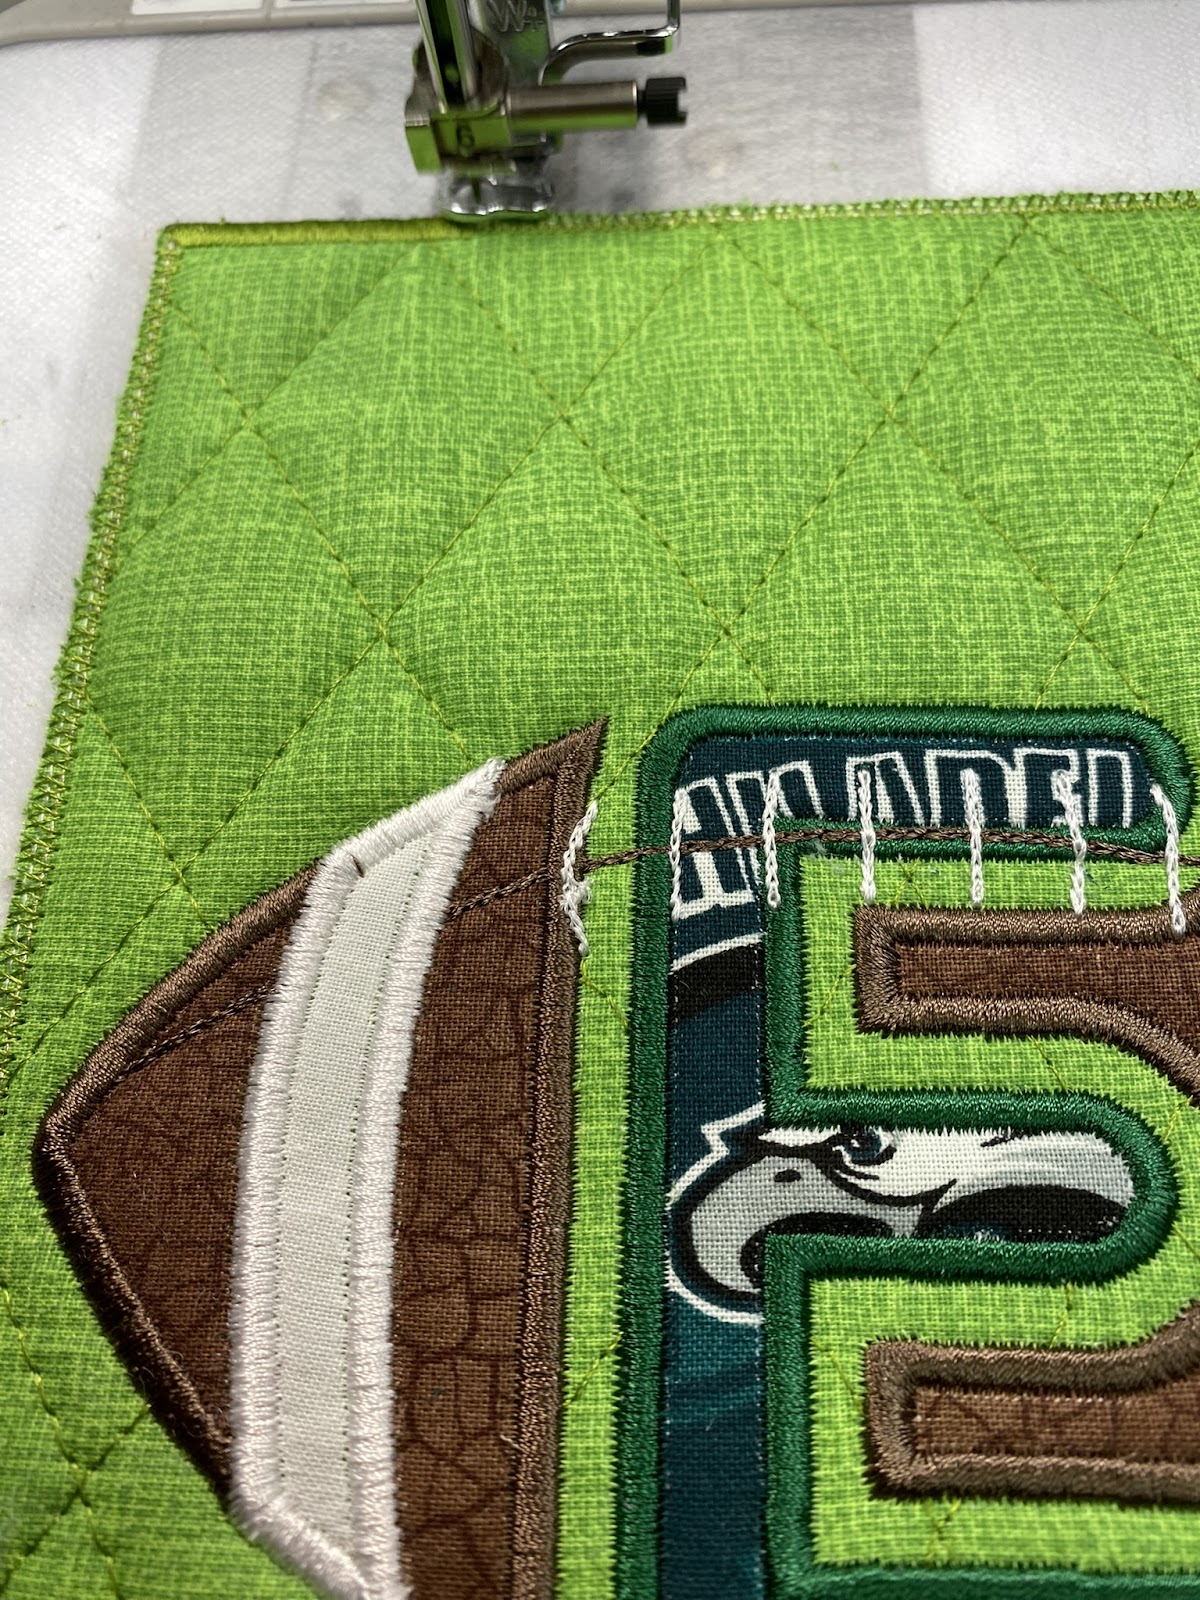
Step 15: Here’s the step you can really have fun with if you’re using an NFL fabric or a print with graphics you’d like to feature. You get to do some fussy cutting and placing.
I loved the way the eagle’s eye showed up on my test piece, so I wanted to repeat that. I cut that graphic out of my fabric with enough extra to allow me to move it around. Then I stuck a pin from the front to the letter and looked to see where the pin was showing between the stitch-out lines. I used the glue stick to apply small amounts of adhesive so the fabric wouldn’t shift and removed the pin.
Stitch, remove the hoop from the machine, and trim the excess fabric. I’m really excited with the way this first E came out!
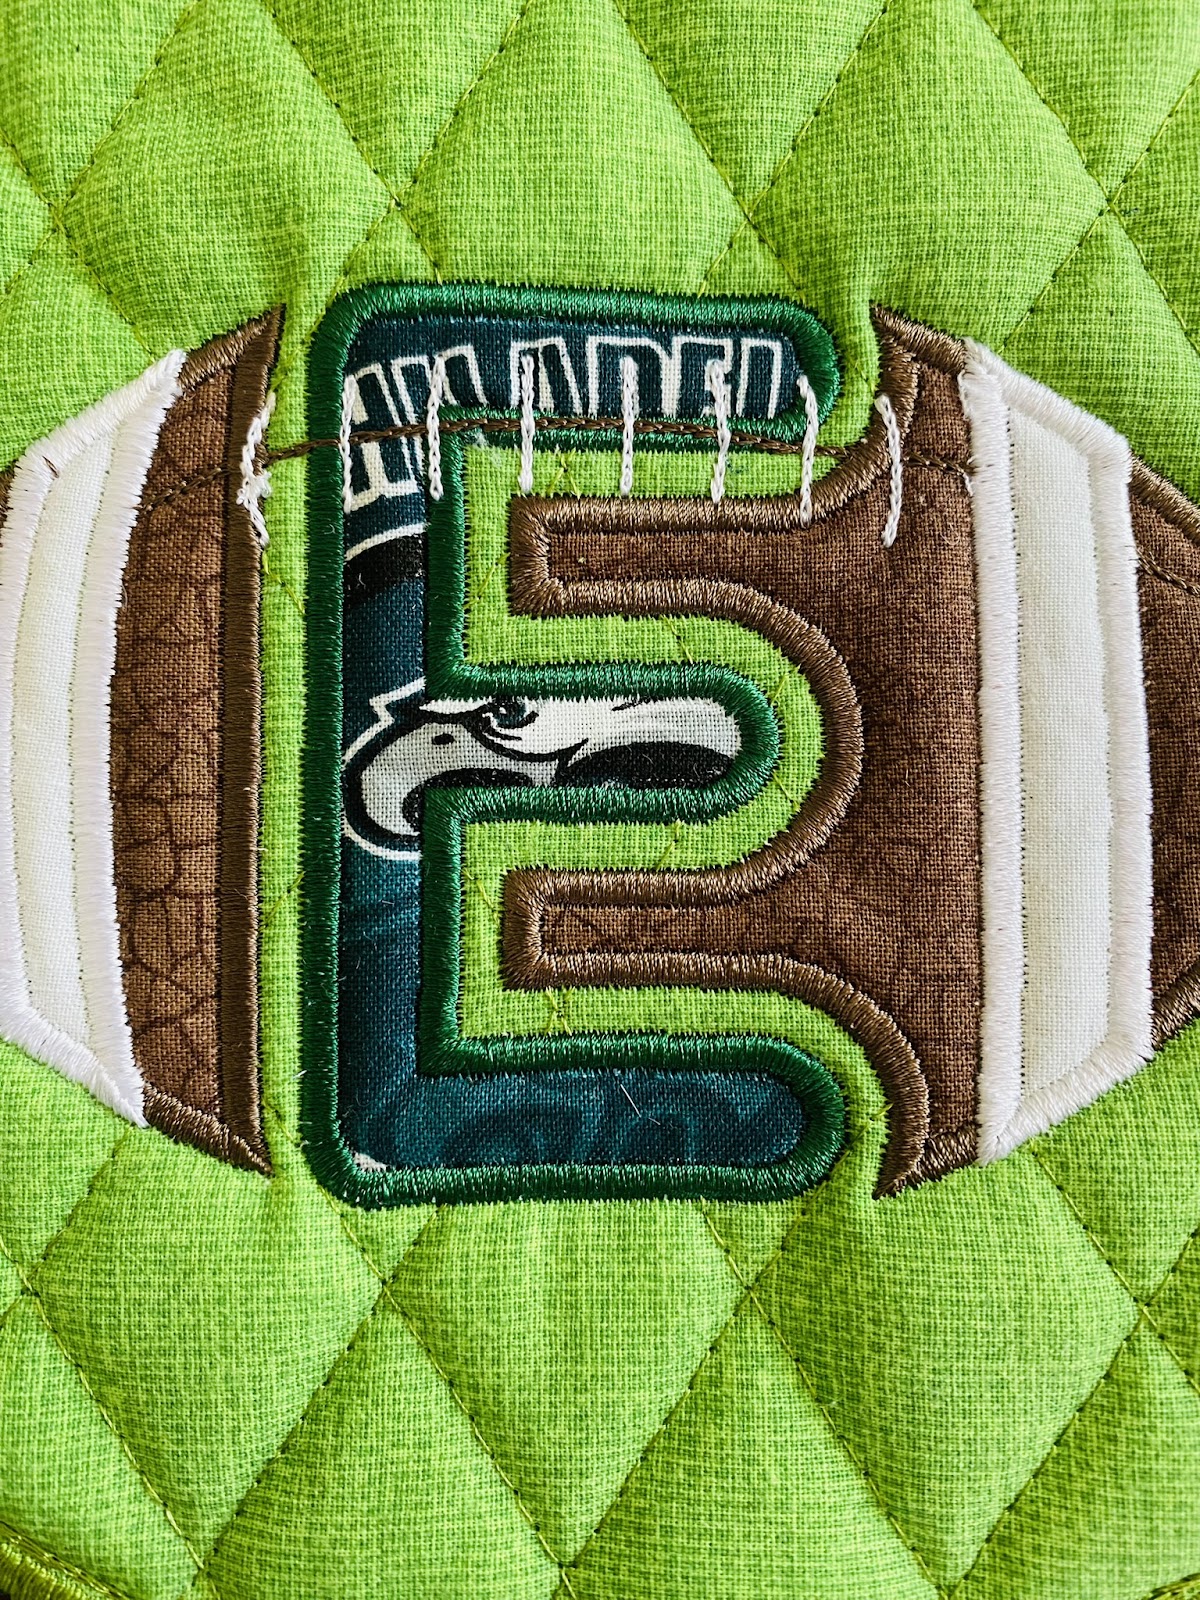
If you have a letter with a center like my A, carefully take a seam ripper and make a hole through just the letter-fabric layer. For this step I used a sharp seam ripper so I wouldn’t push too hard while everything was still in the hoop. Once you have an opening big enough, take a small, sharp pair of scissors and trim away the excess fabric.
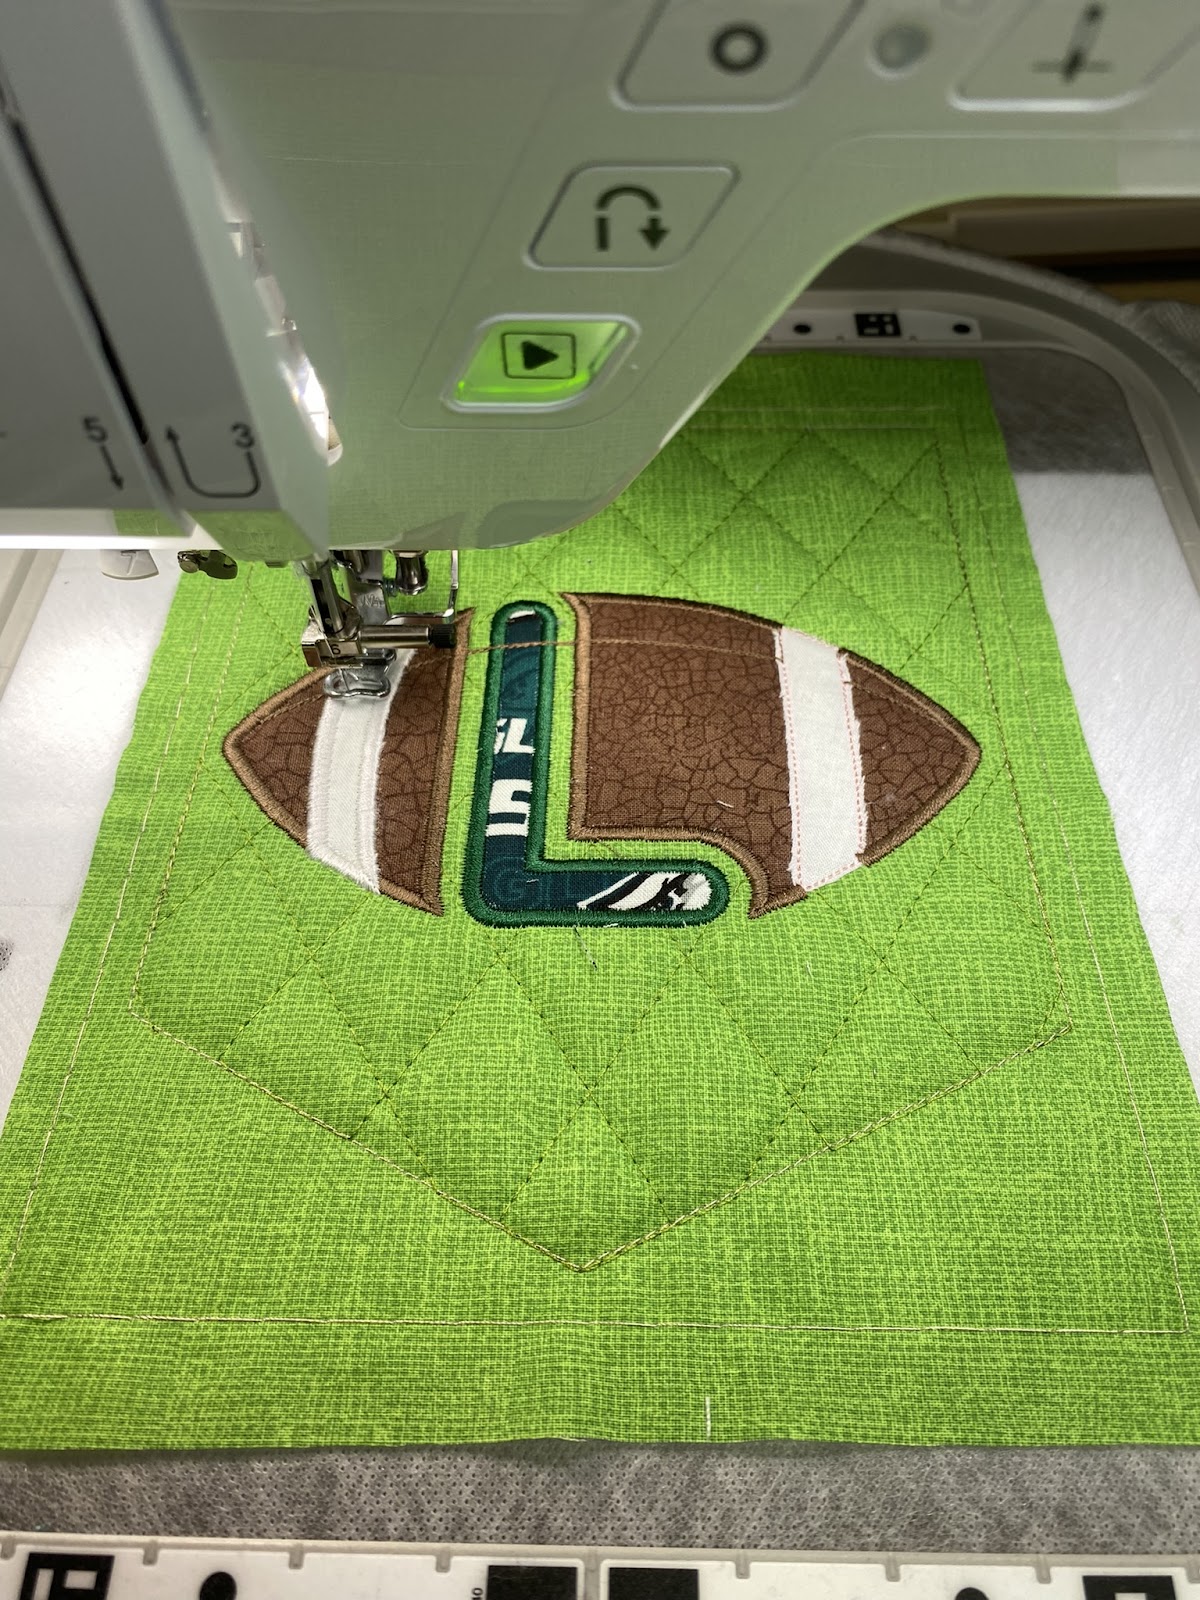
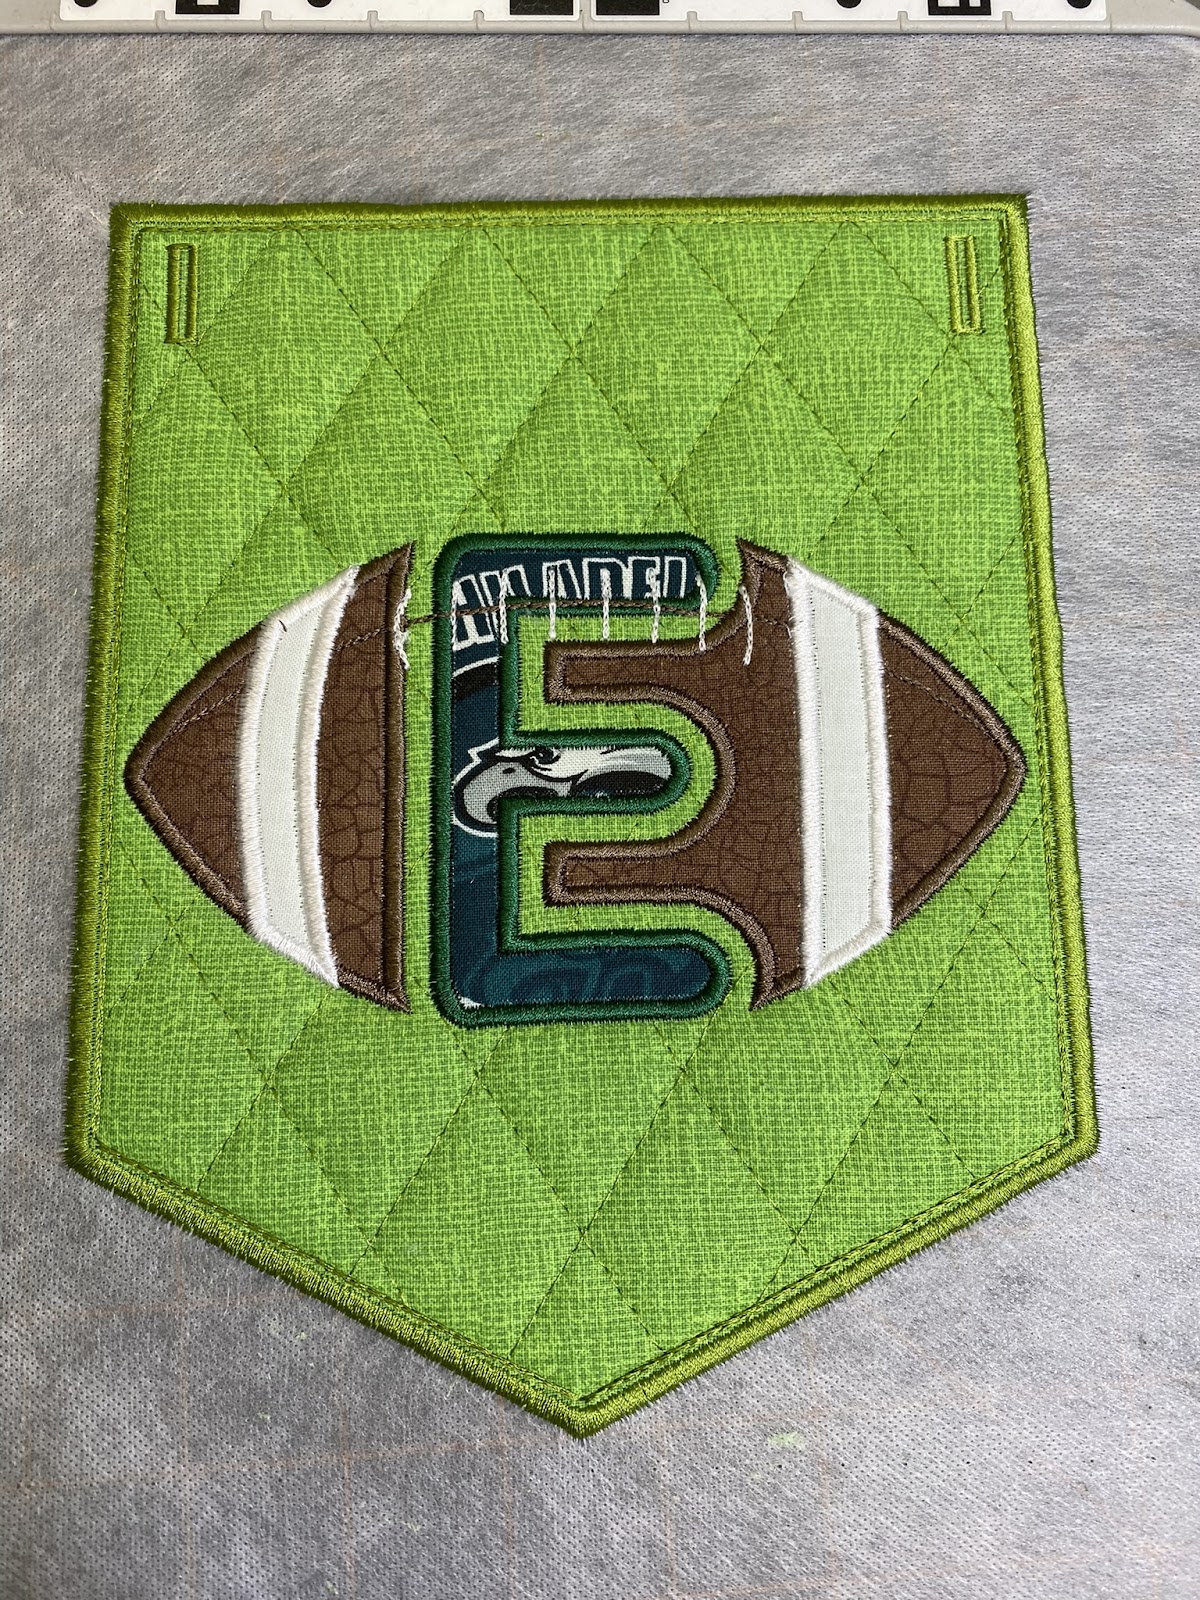
Step 16: Sew the satin stitch around the letter.
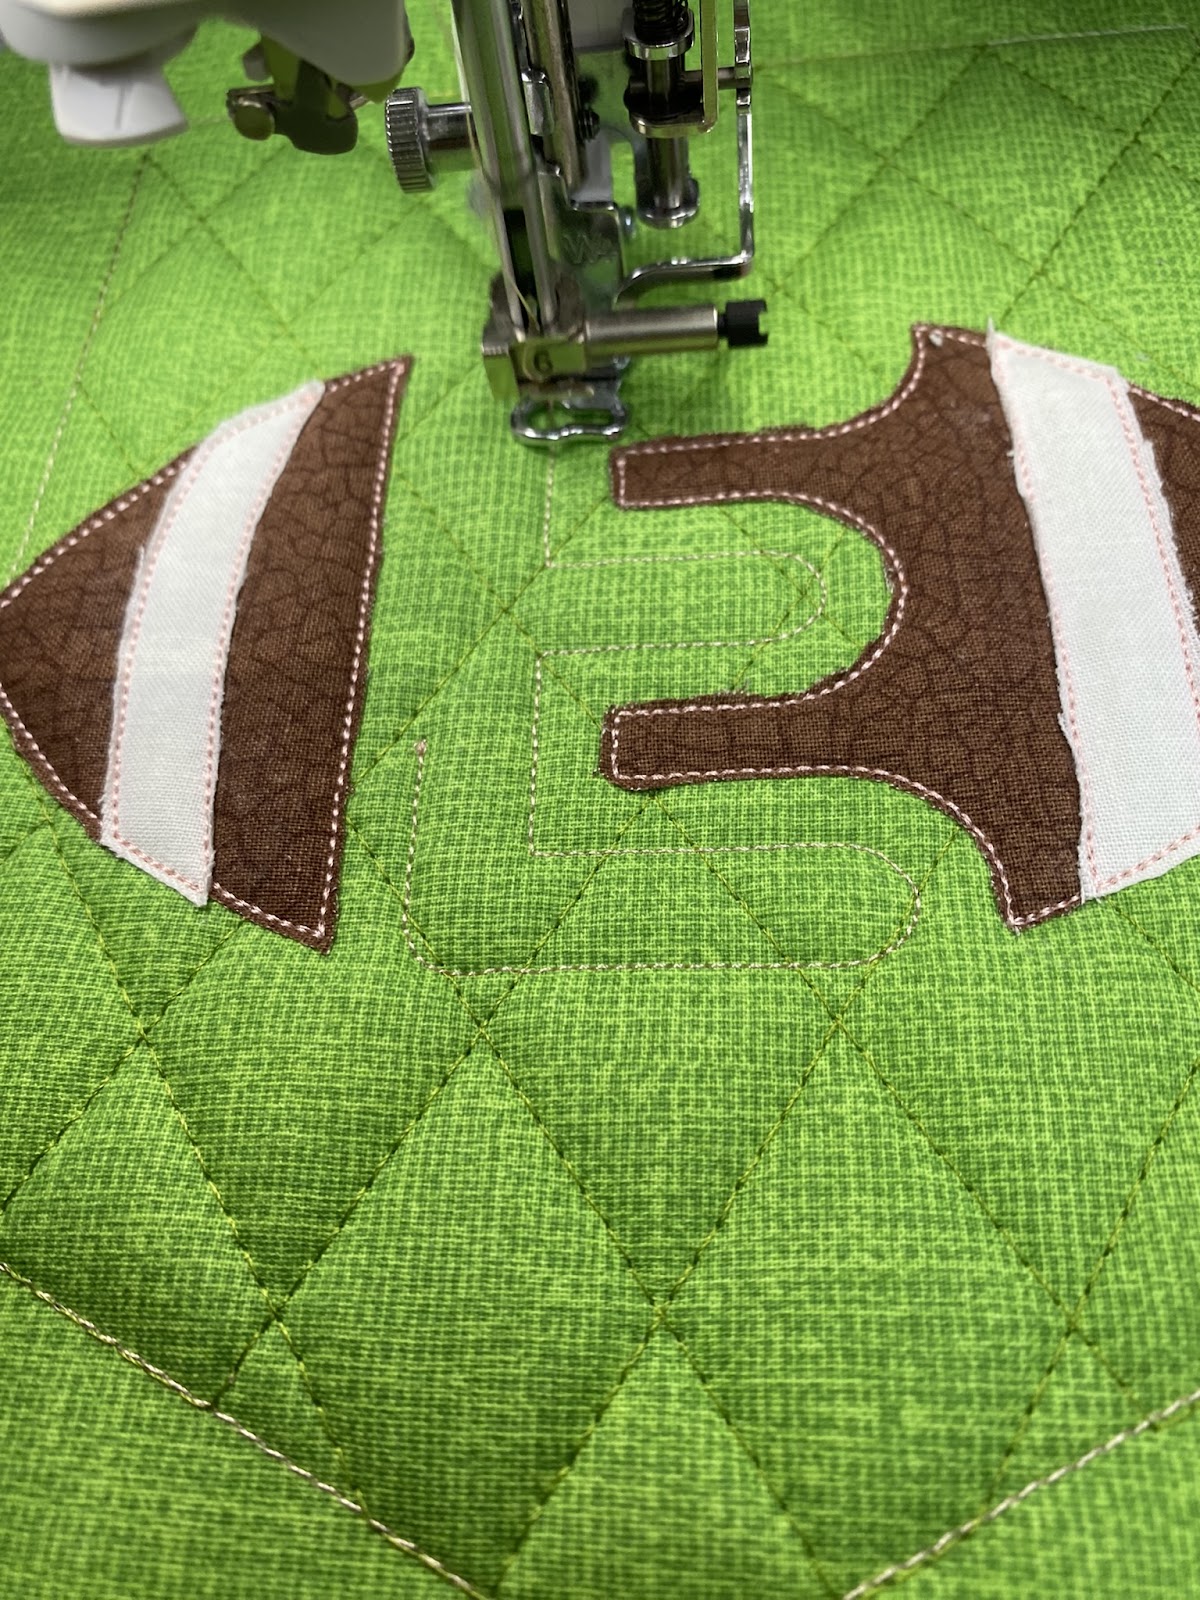
Step 17: Now it’s the football’s turn to get the satin stitch.
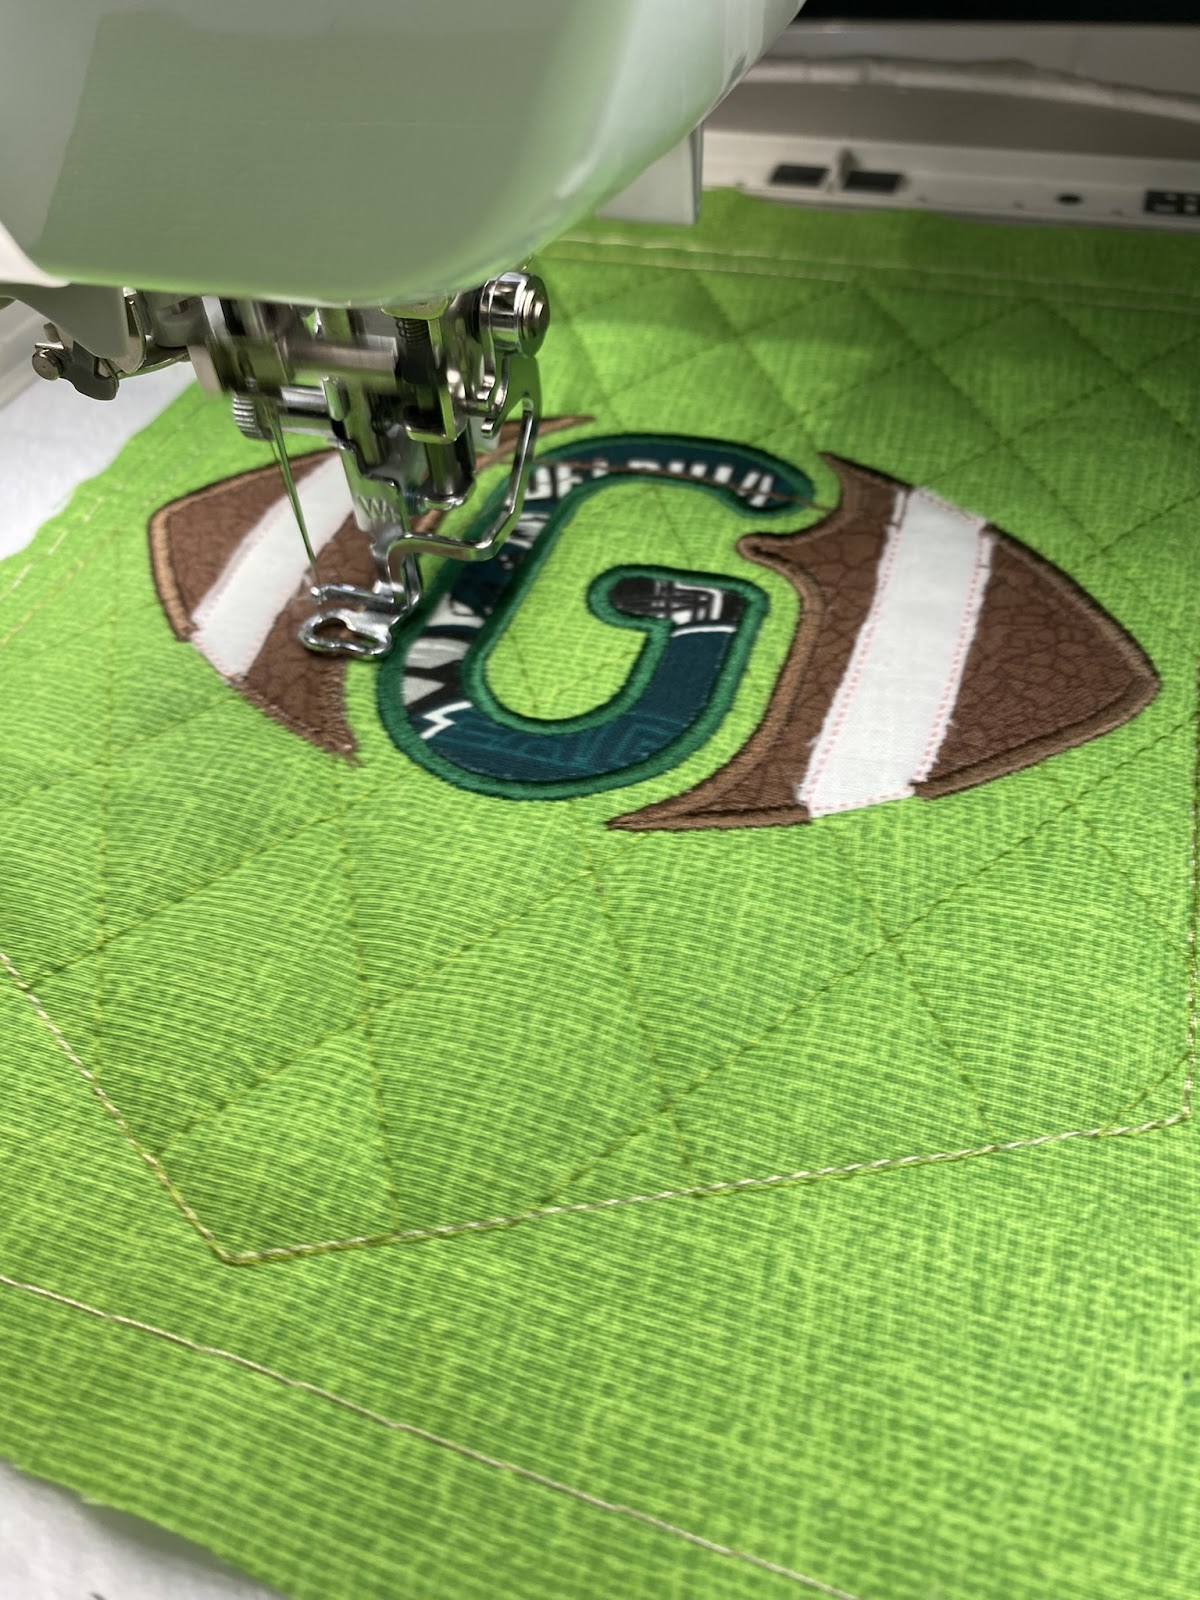
Step 18: Stitch the white around the football trim.
Now that we're done with the football applique, let’s go back to Step 6 and pick up where we left off making the pennant.
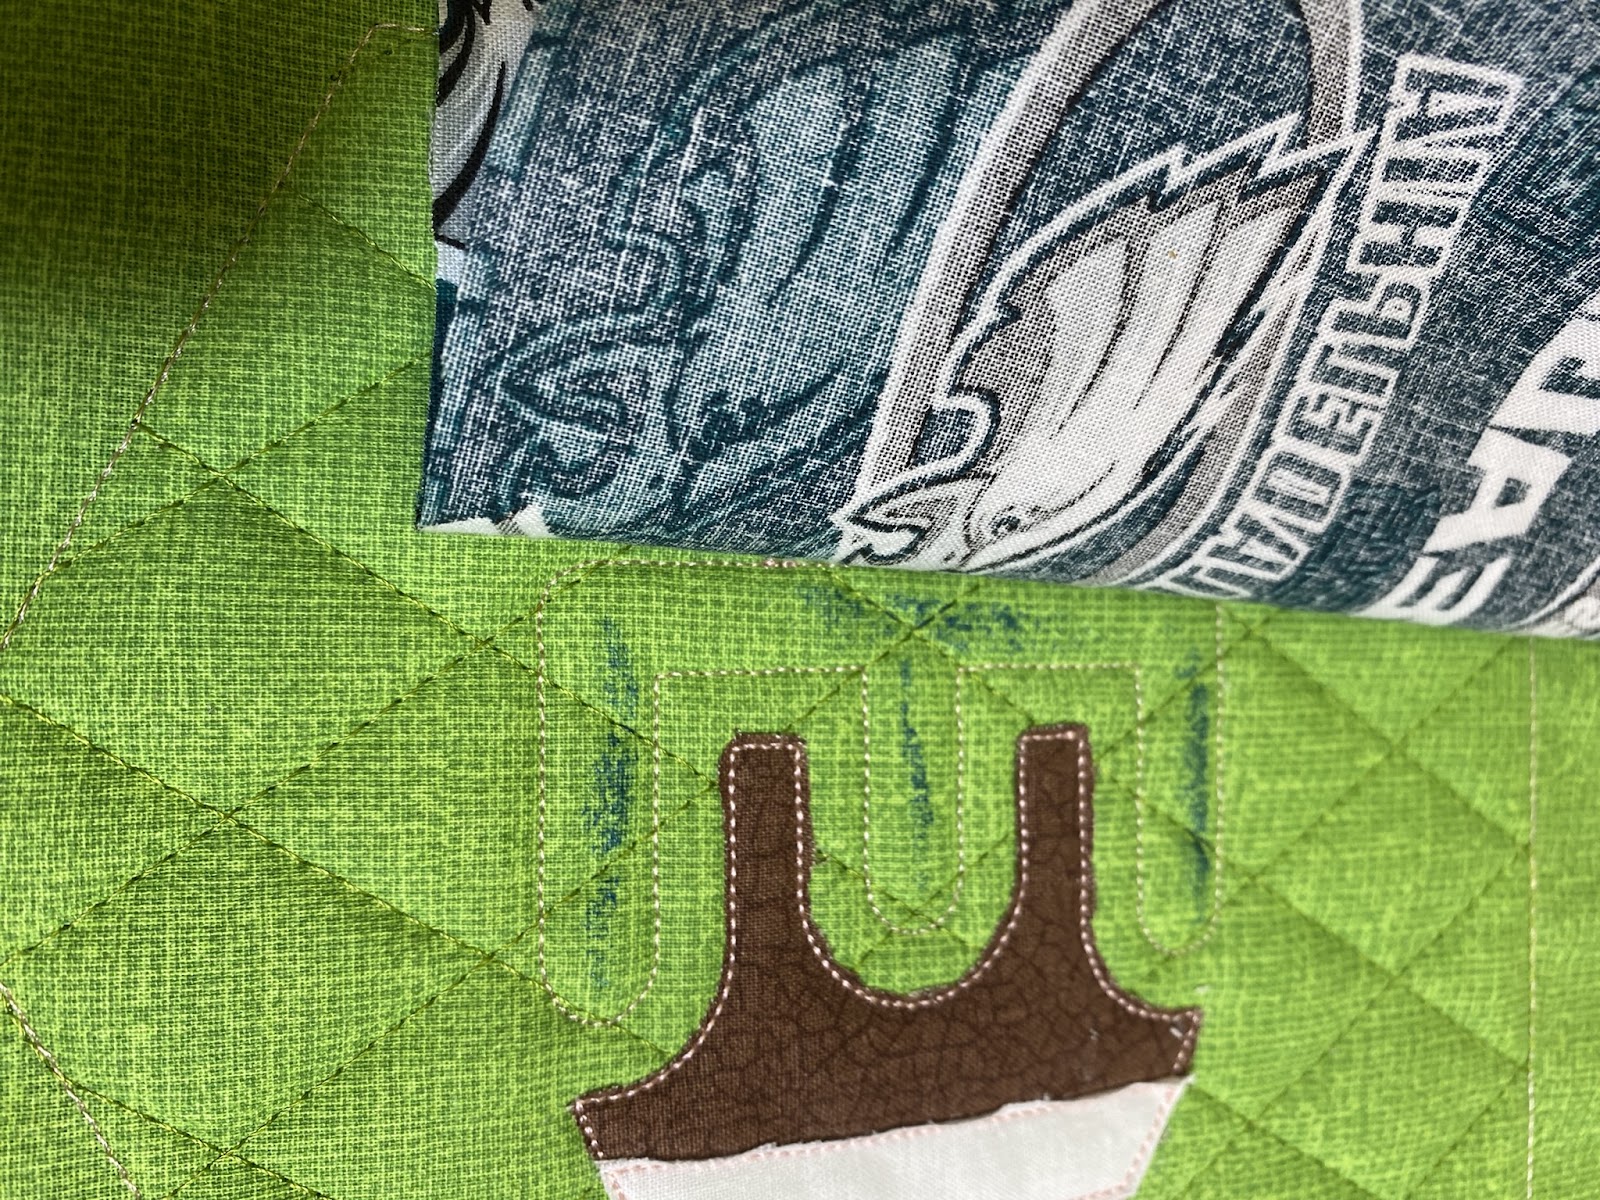
Step 6: Remove the hoop from the embroidery machine. Turn it over and lay the backing fabric right side up (wrong side against the stabilizer). I use adhesive spray for this step; when I used painter’s tape it stuck to my machine. Stitch the back down. Remove the hoop from the machine and carefully trim away the excess front and then the back. If you used a basting box as I did, you’ll need to remove those stitches before trimming.
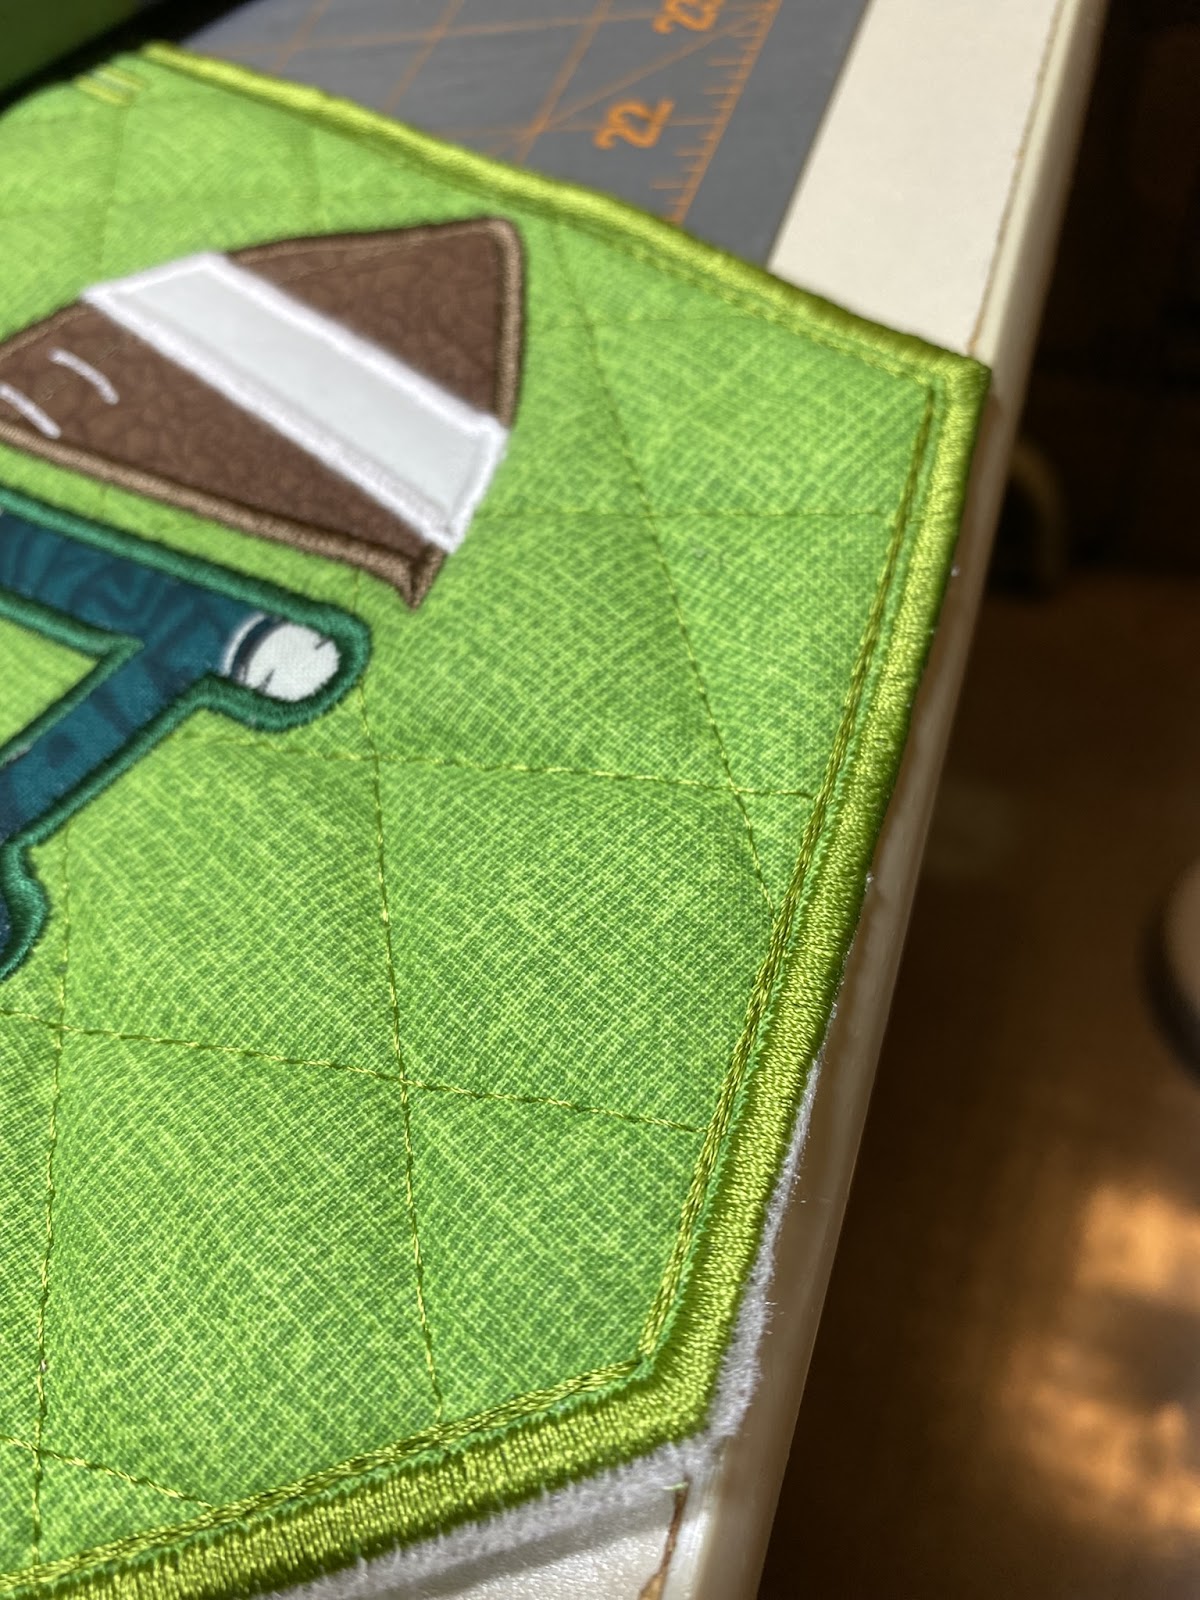
Step 7: Sew the satin stitch all around the pennant edge.
Step 8: Stitch the accent line around the pennant.
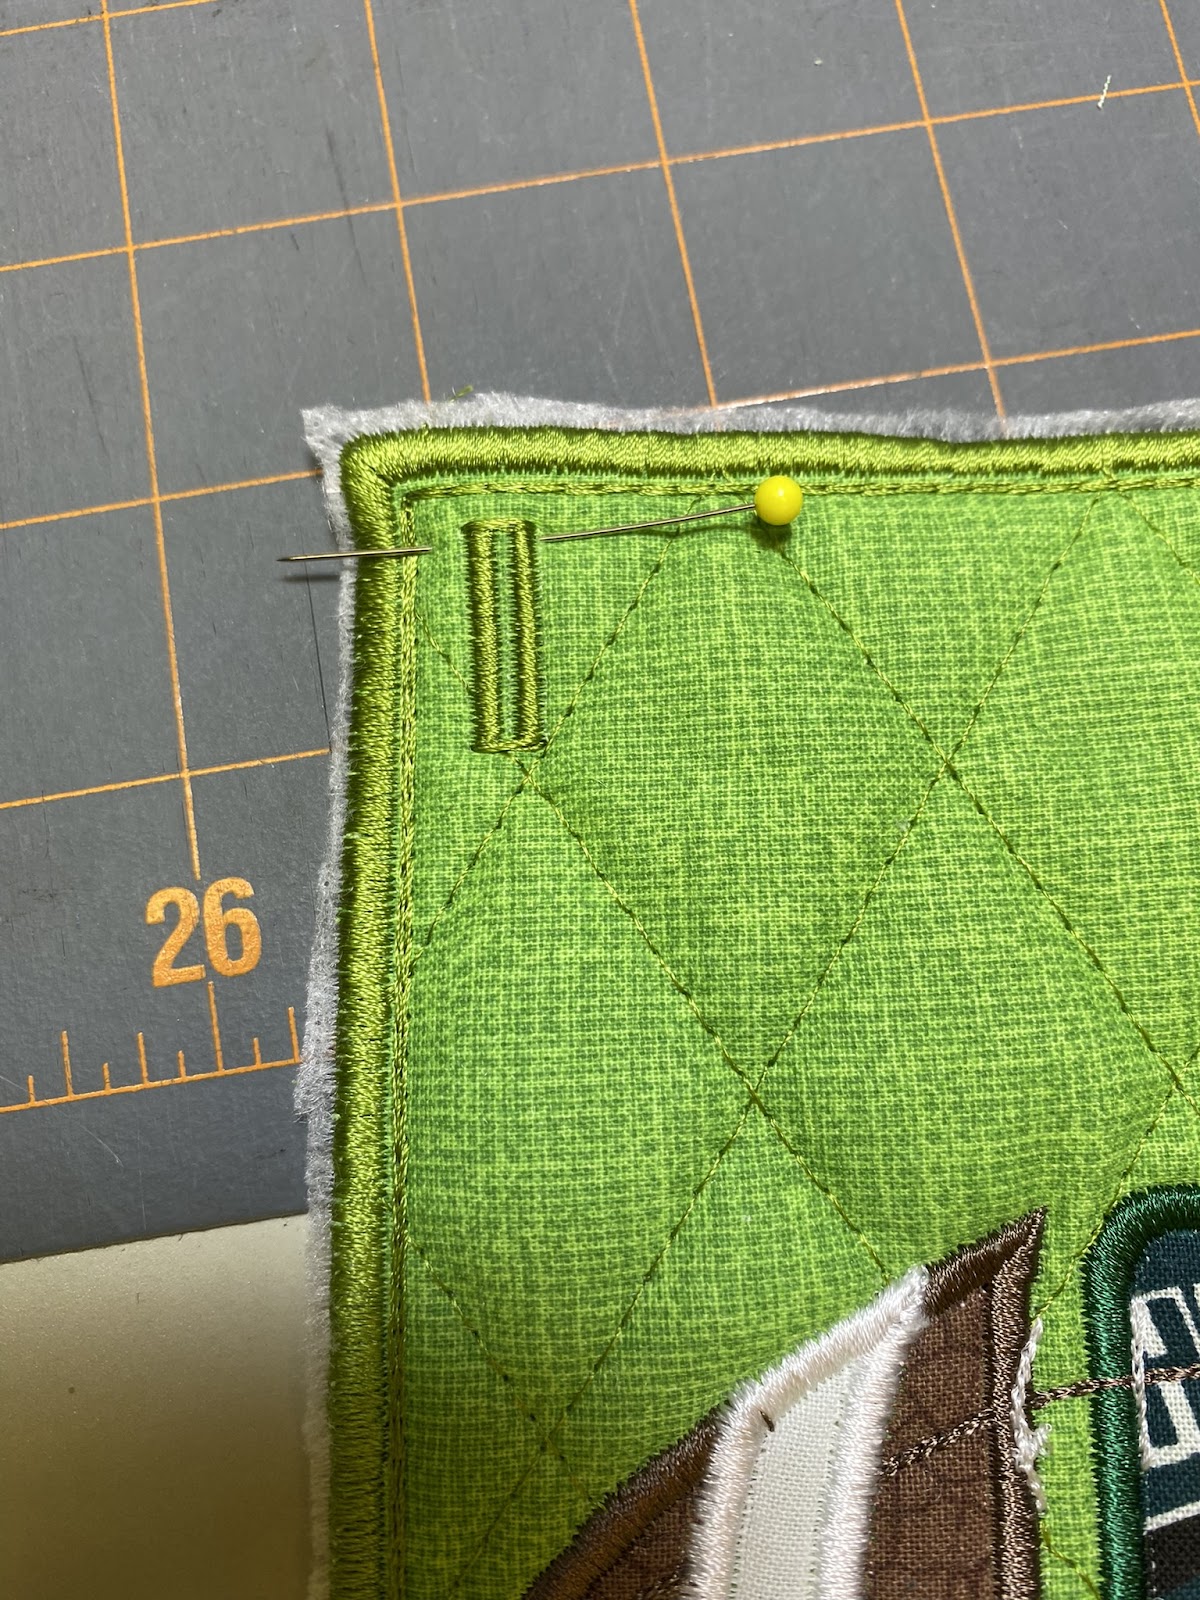
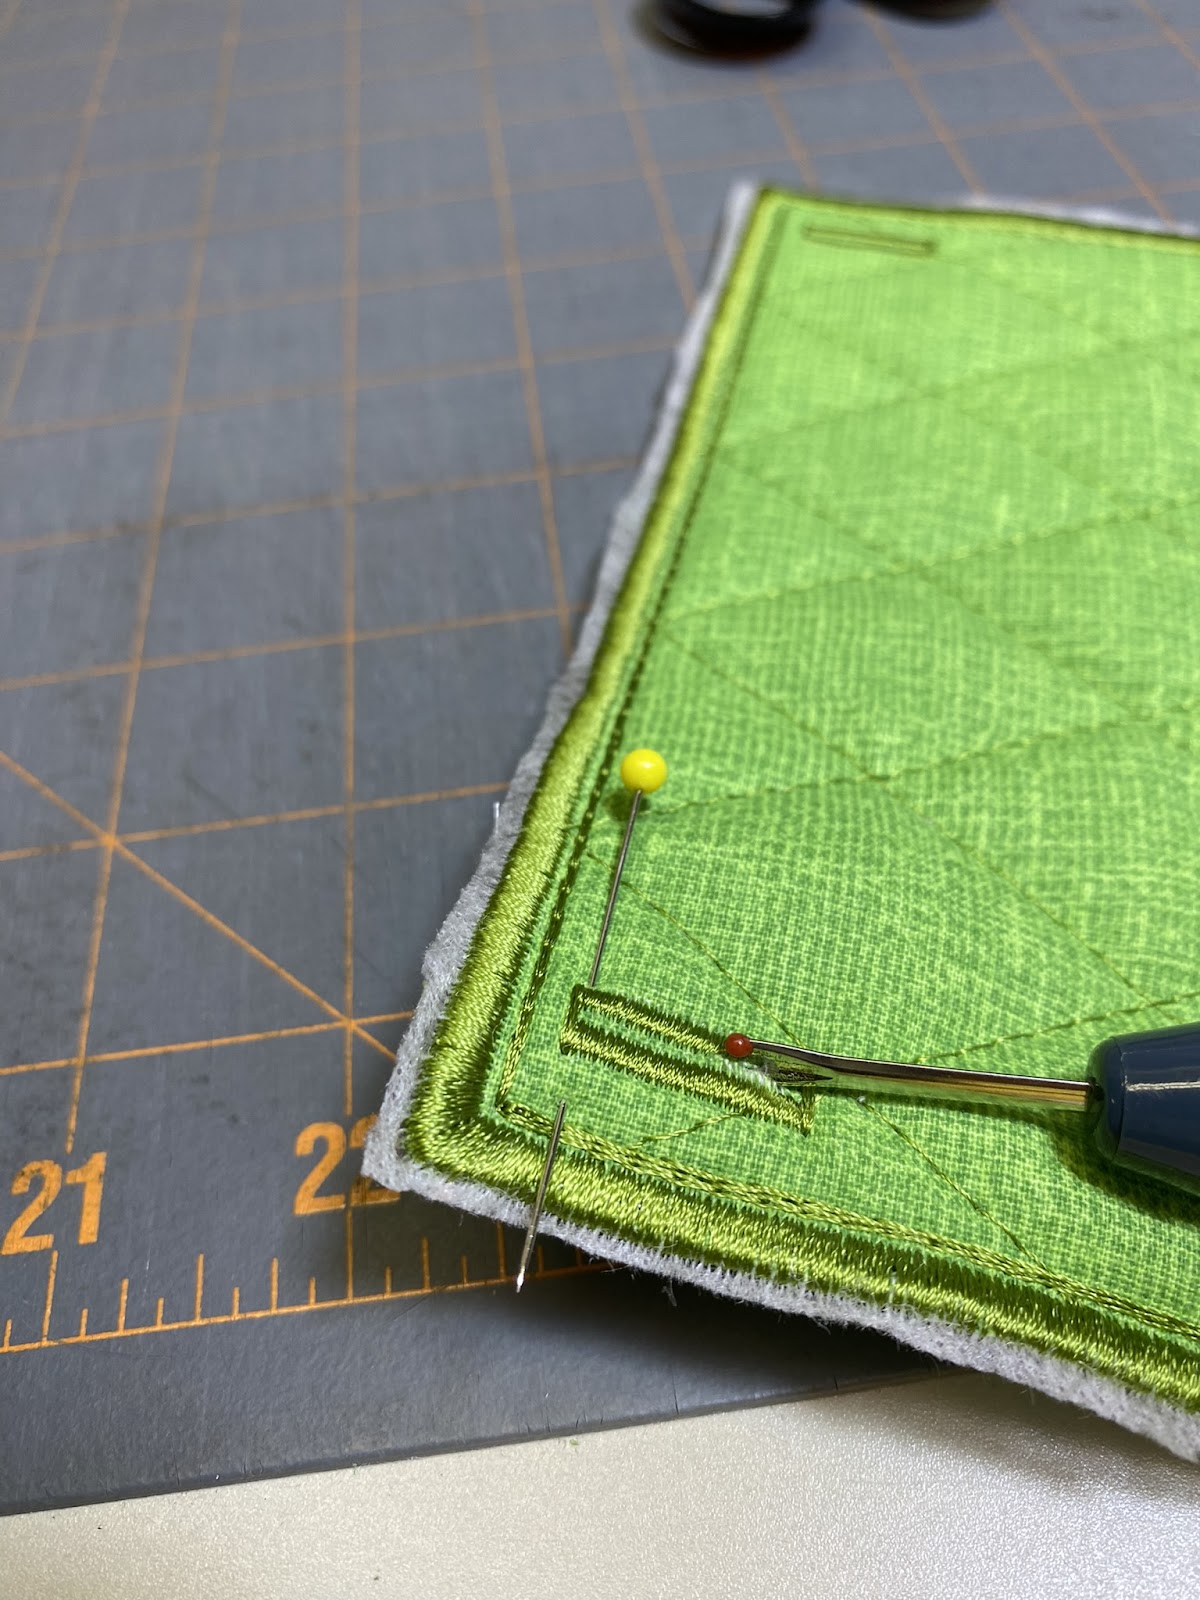
Step 9: Stitch the buttonholes.
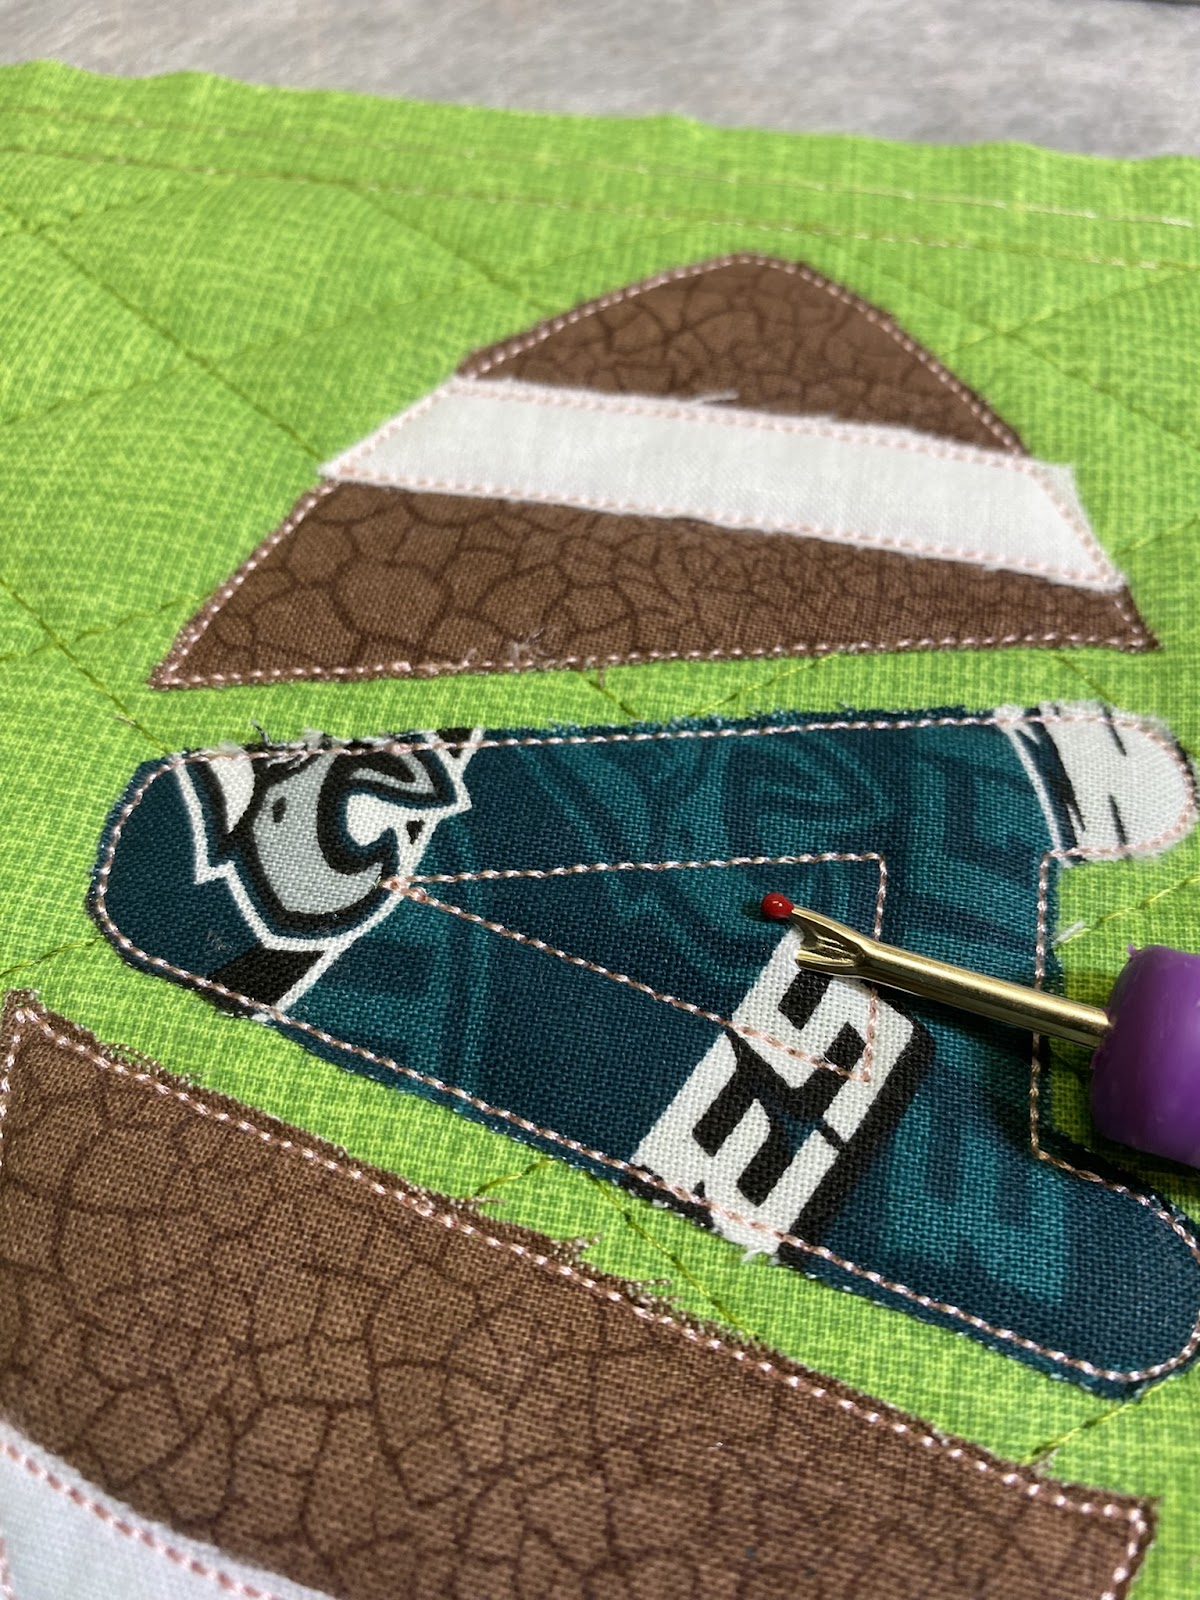
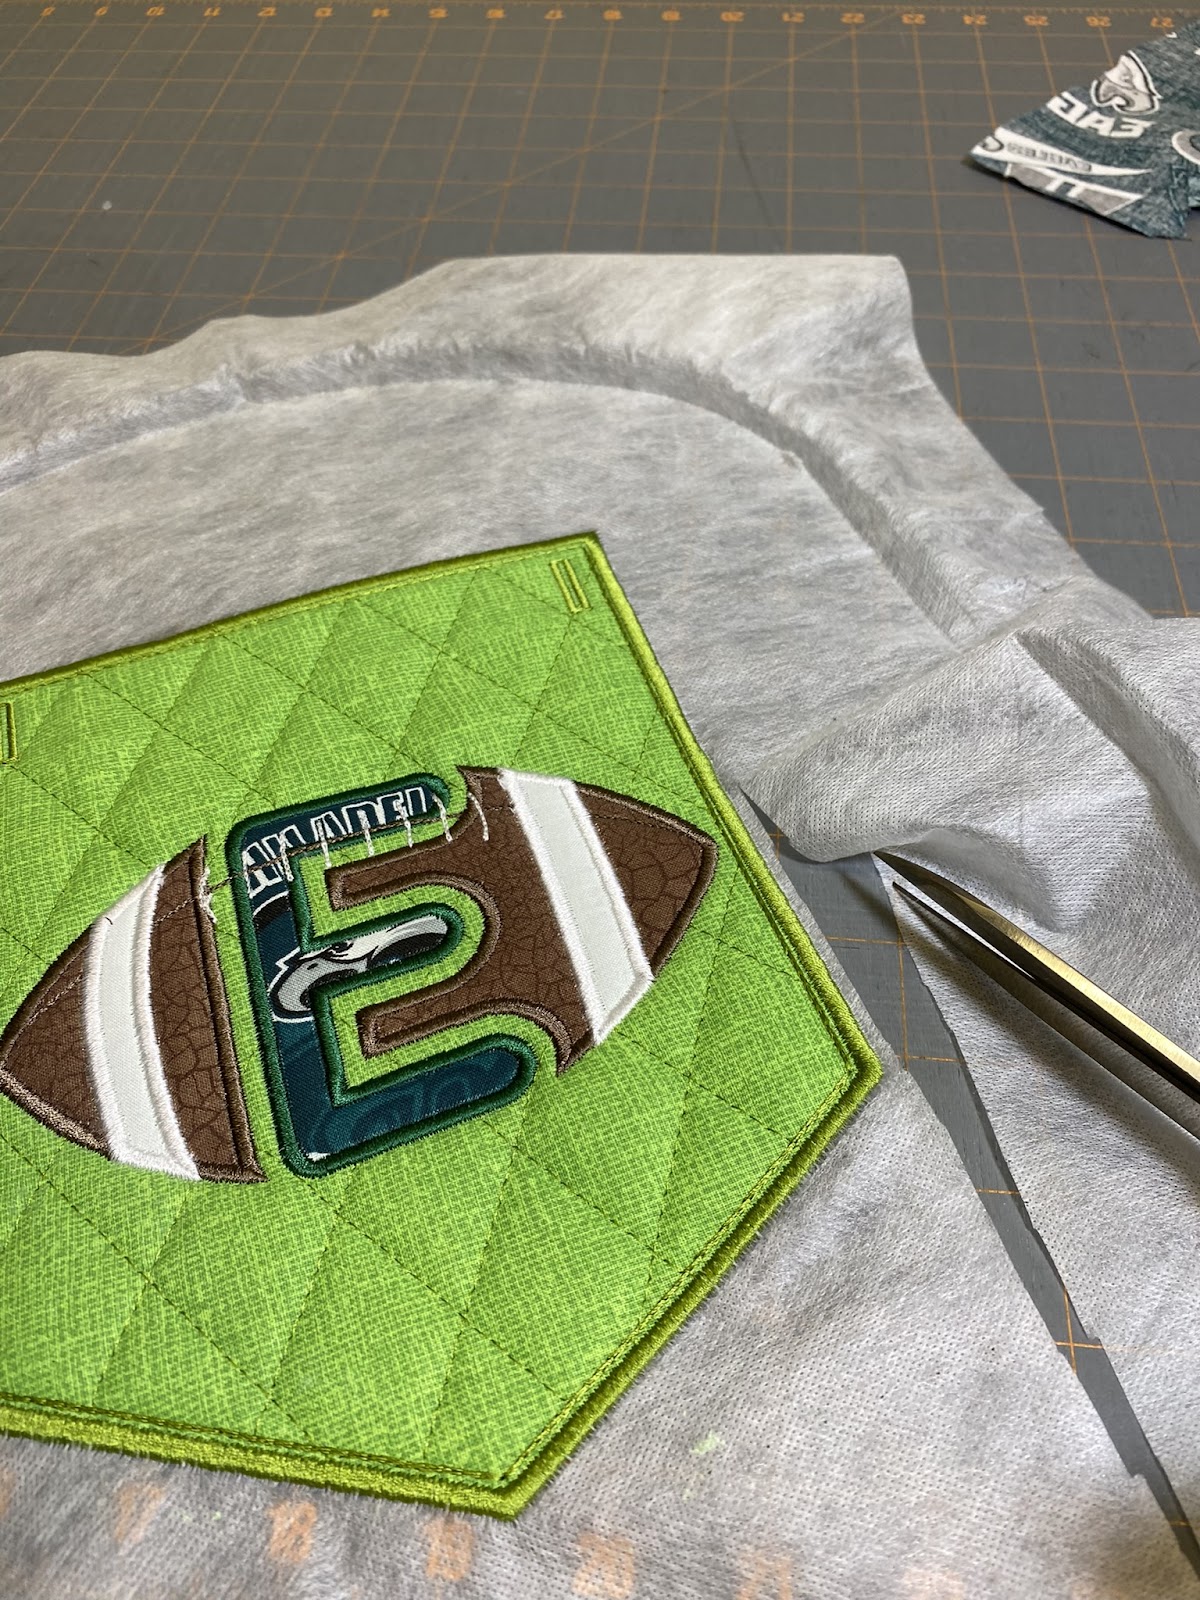
Remove the hoop from the embroidery machine and remove the pennant from the hoop. Cut away the excess stabilizer but don’t cut the satin stitches.
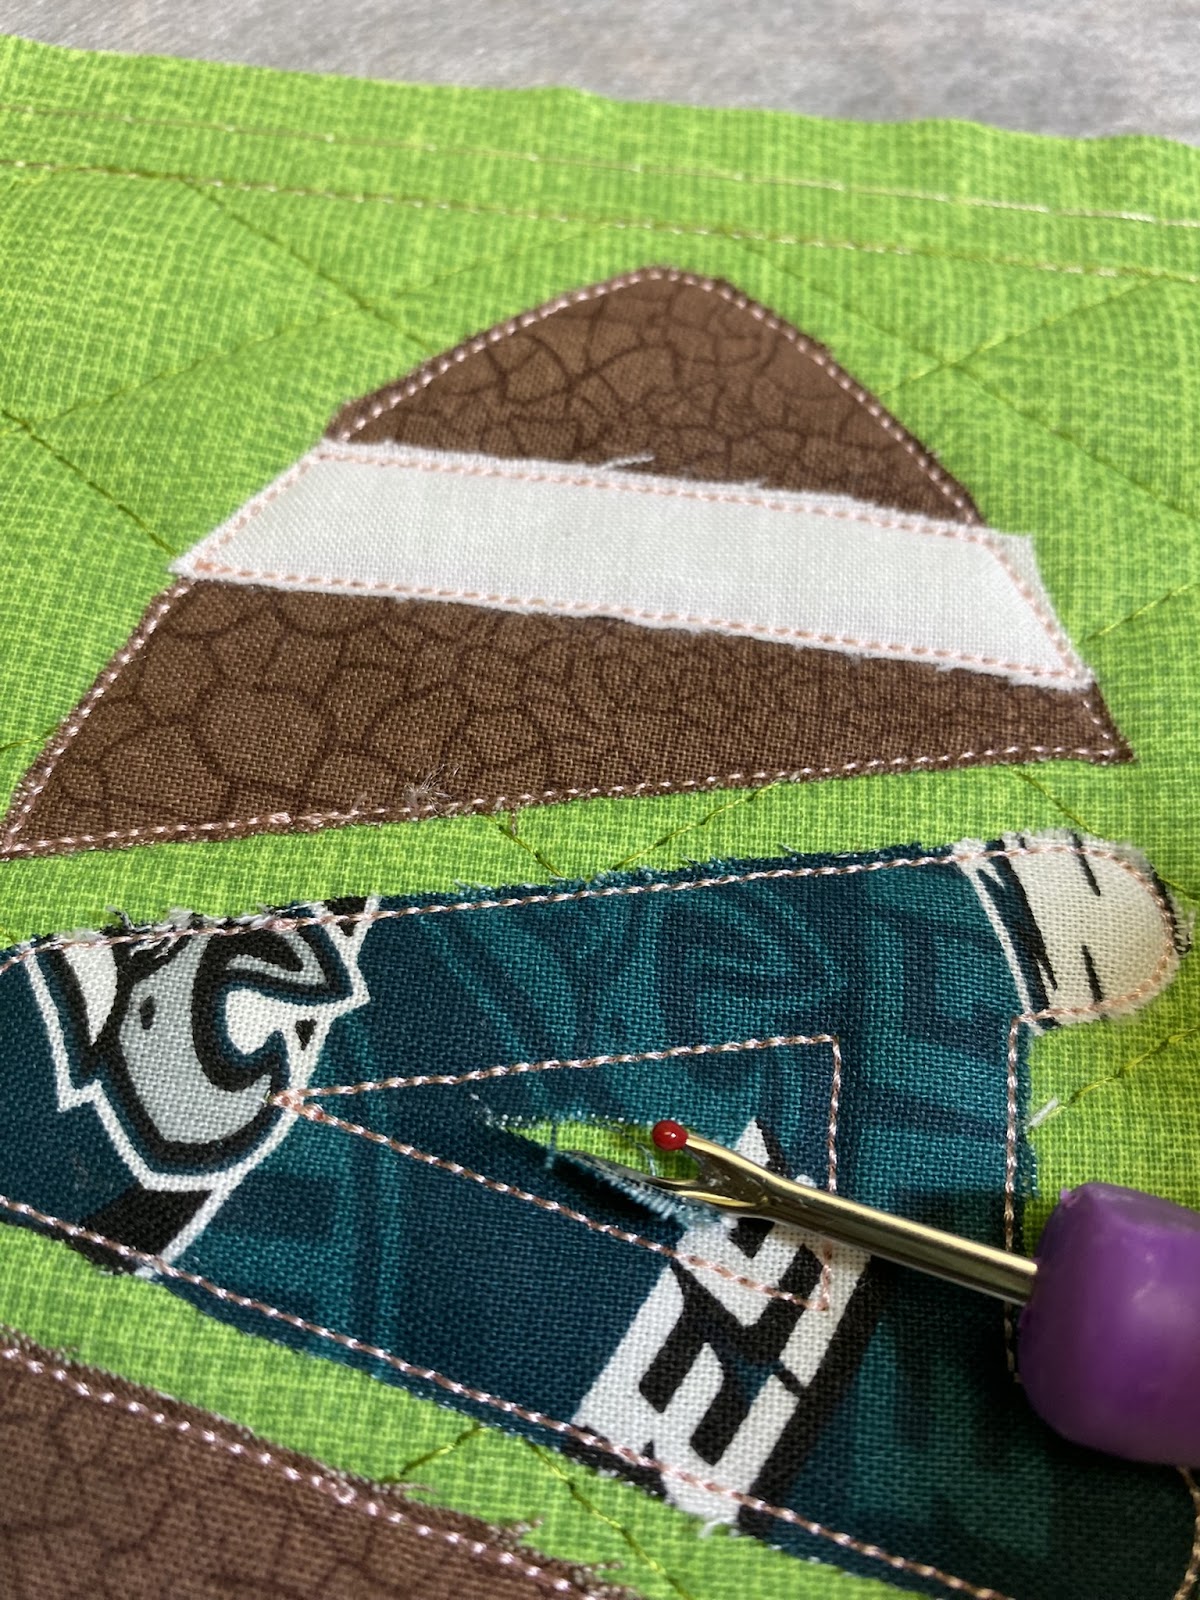
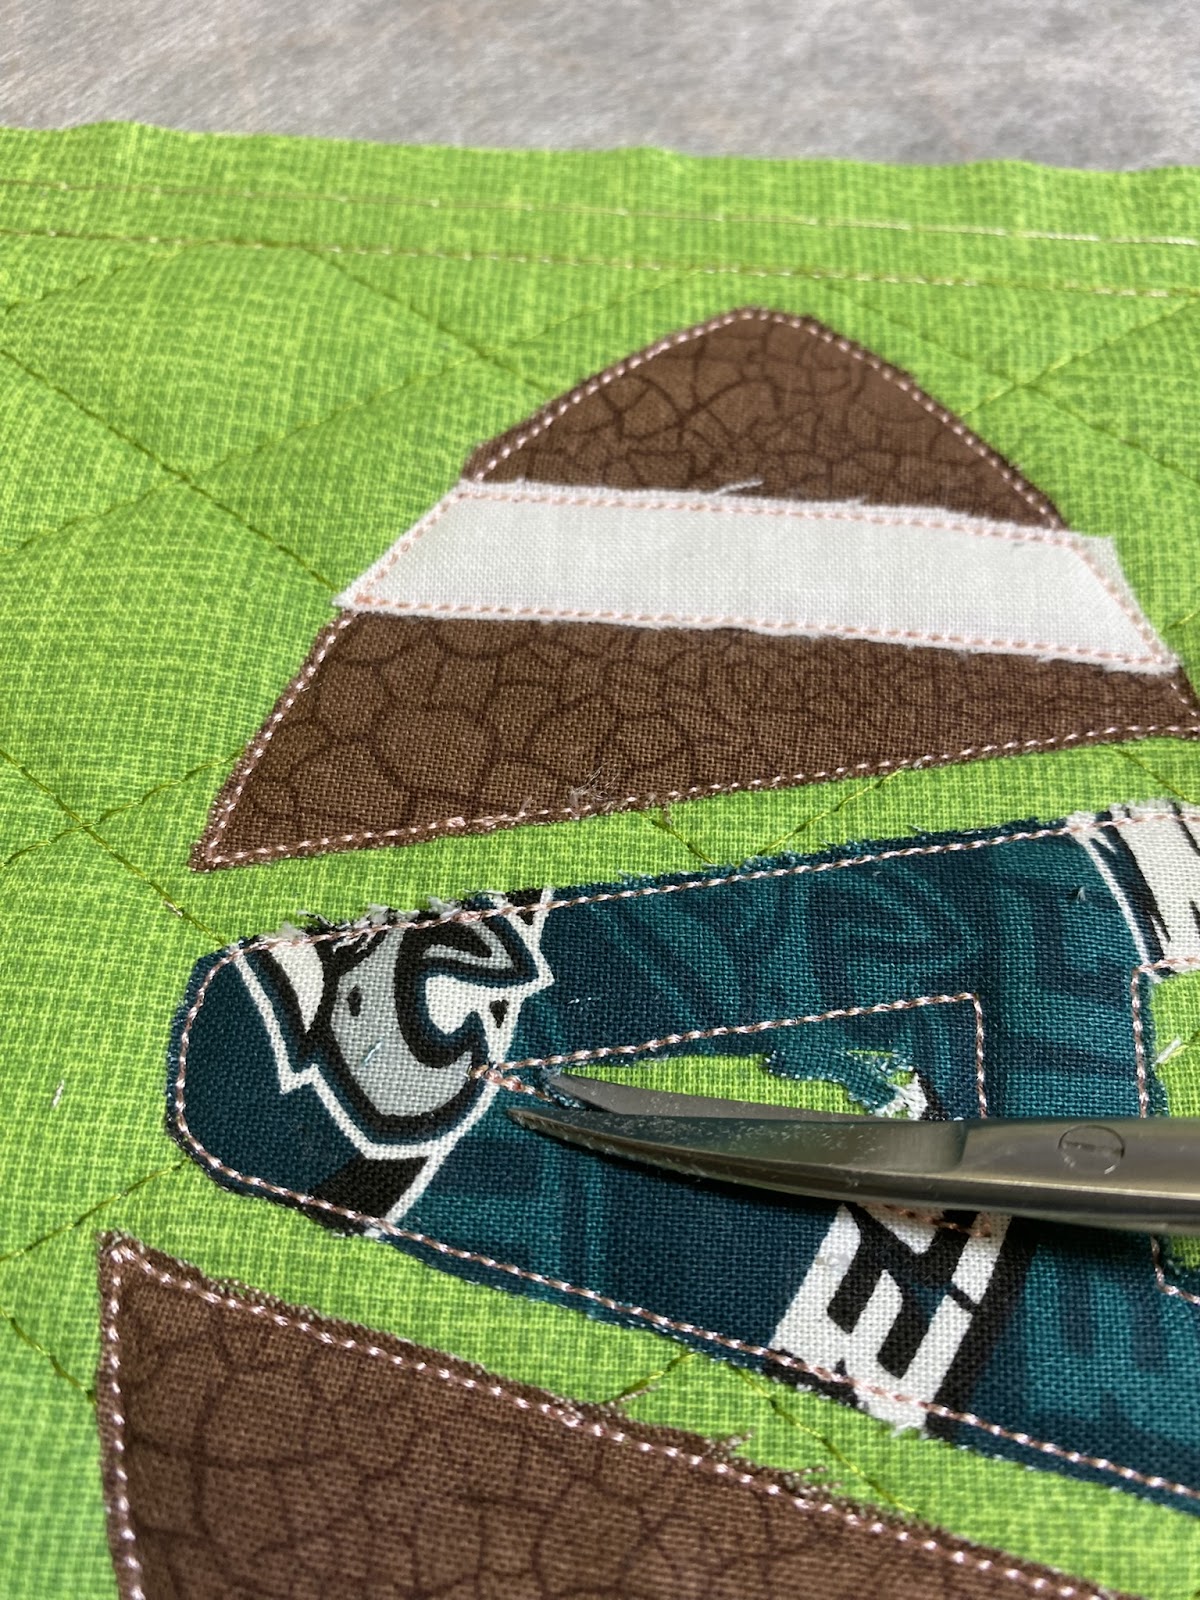
Becky’s idea (from the video mentioned previously) of using a pin at the point where you should not cut the buttonhole stitches is brilliant. I also suggest using one of your duller seam rippers to cut open the buttonhole so you don’t accidentally cut up further than you meant to go. Take a look at my photo that shows the pin placement blocking the path of the seam ripper.
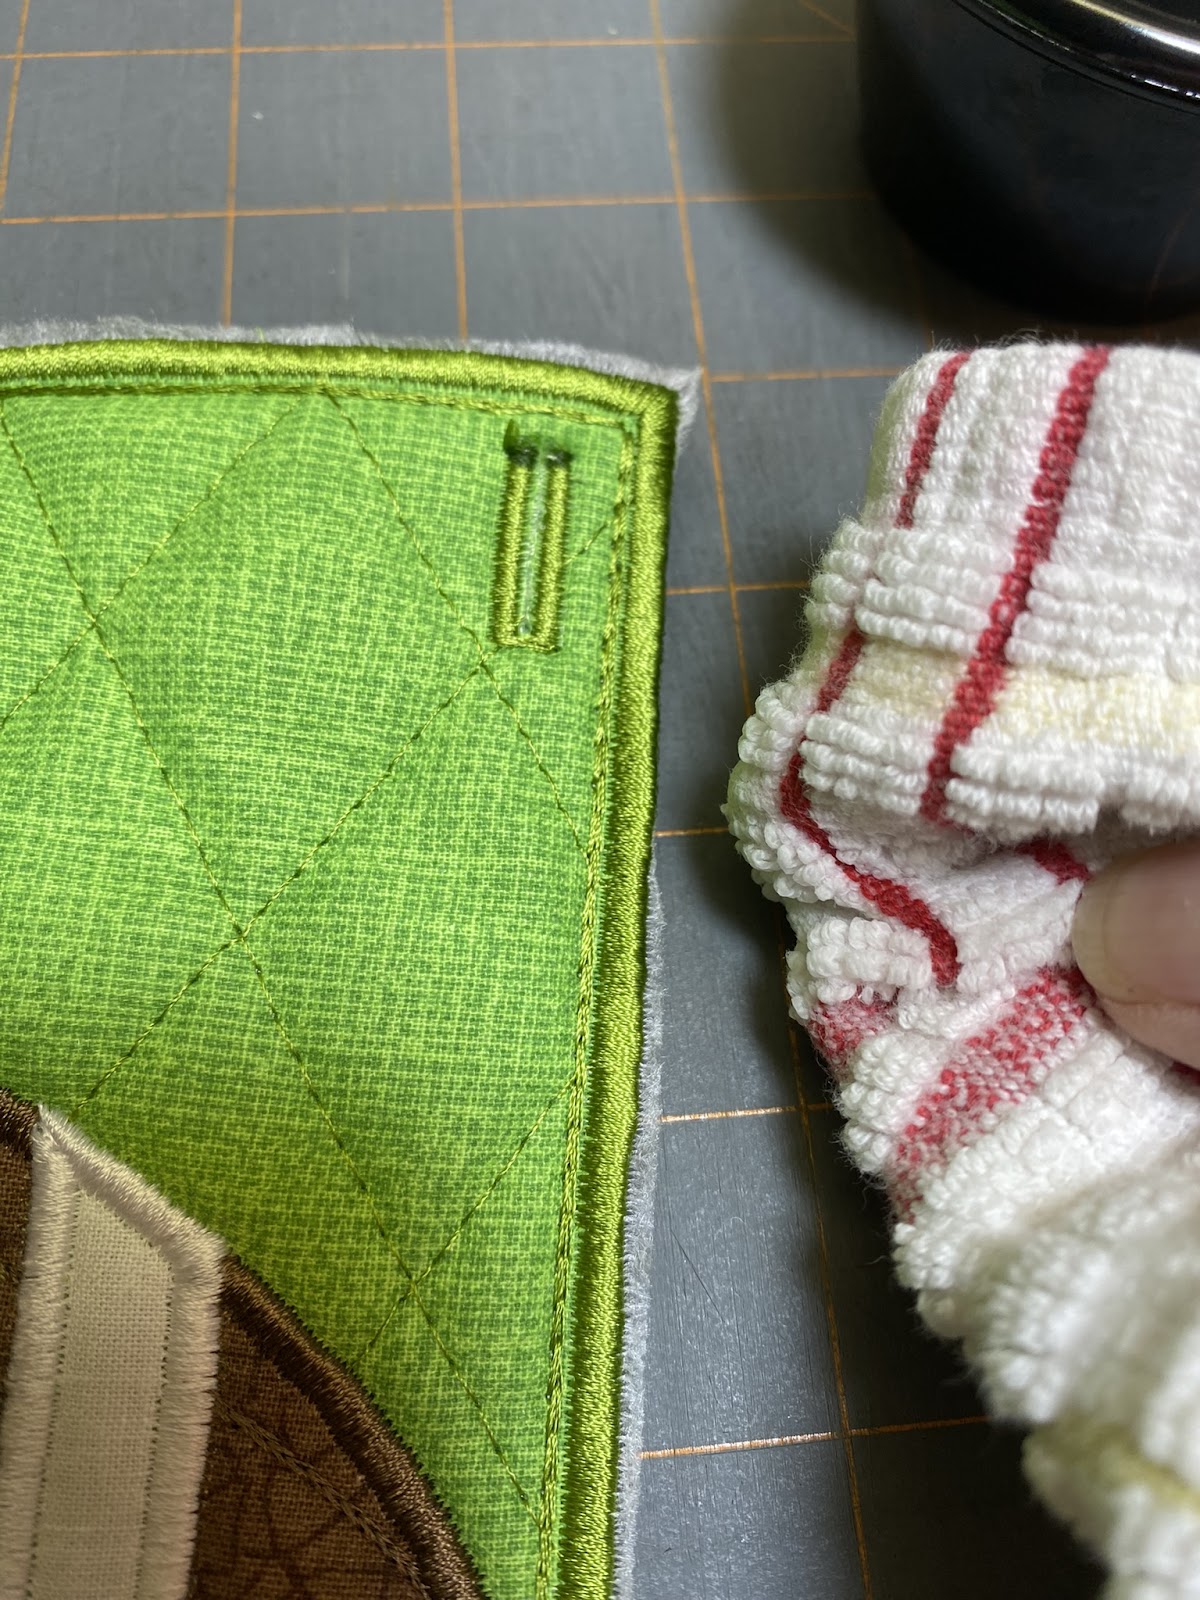
Remove the little bit of wash-away stabilizer with a cup of water and a towel. Dip the towel into the water and then carefully dab at the stabilizer. I found it easier to hold the pennant right at my table edge.
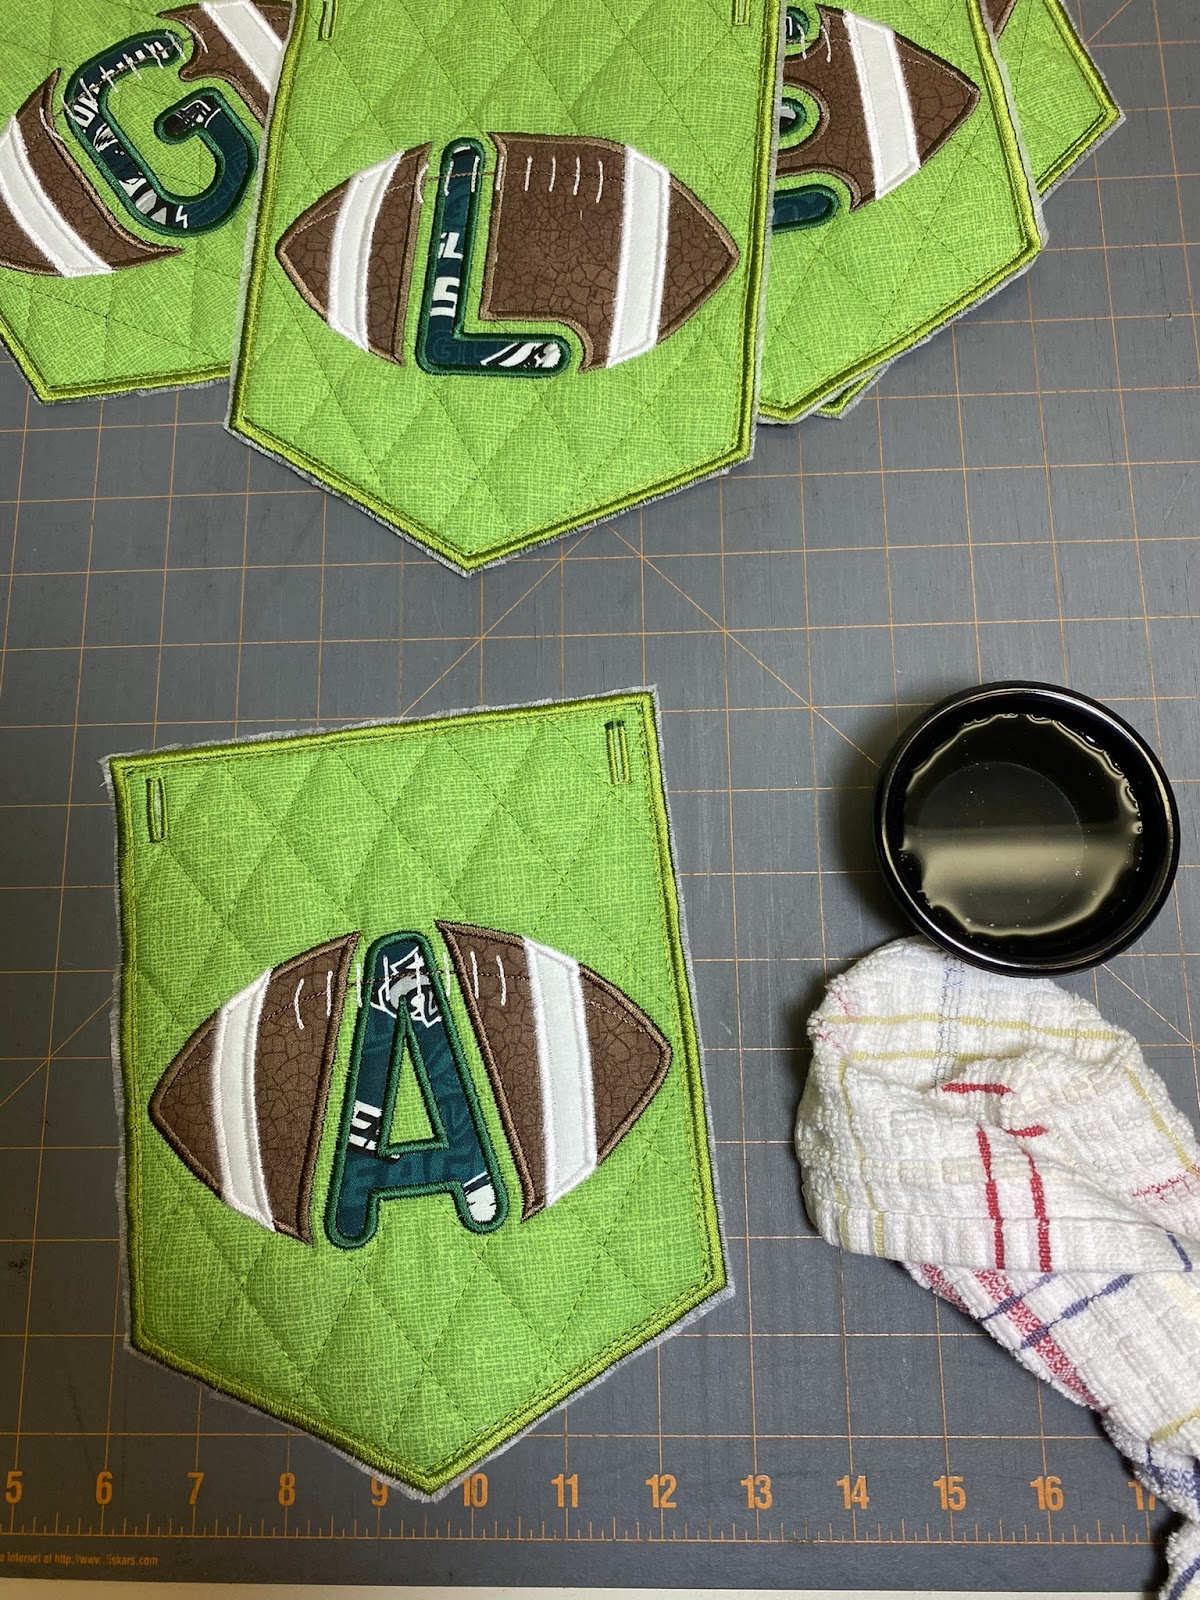
I used ⅝” strips of the Eagles fabric to make my hanging ribbon. If you don’t want any loose threads showing, you can cut yours wider and fold and sew, or buy ribbon. Thread the ribbon through each pennant's button holes to ready your banner for hanging.
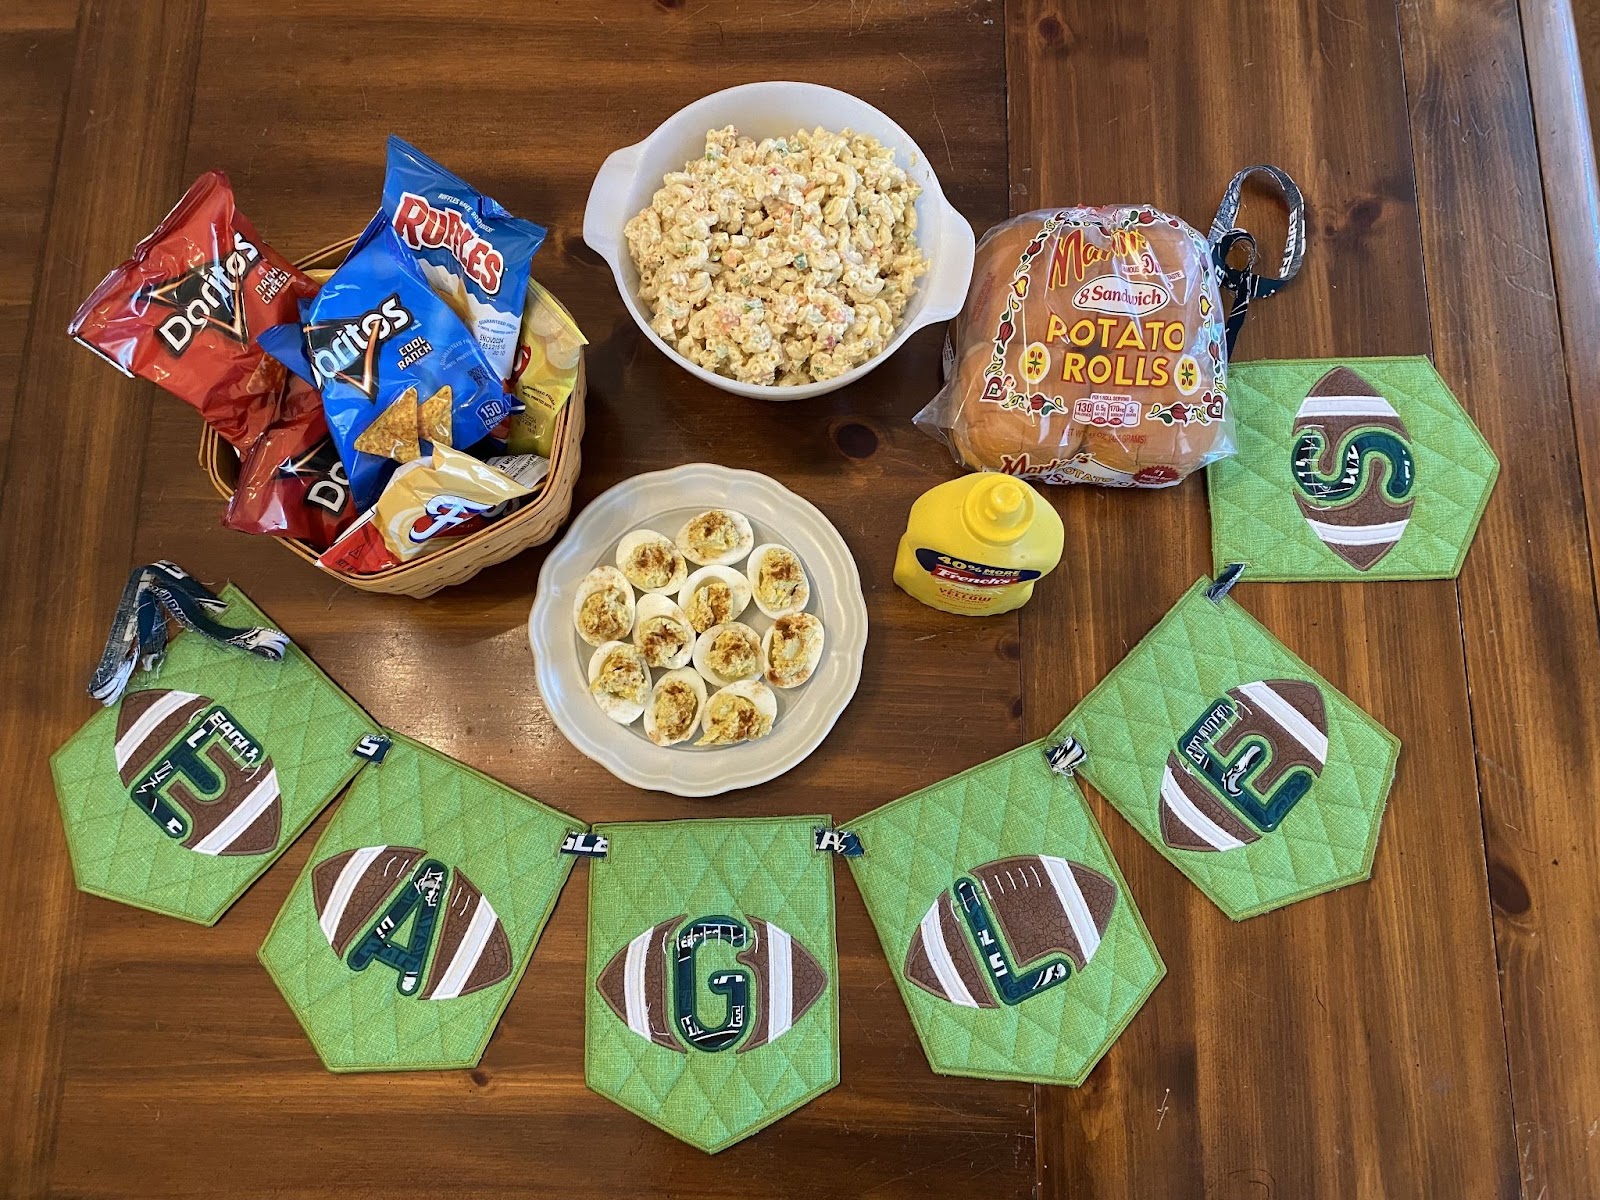
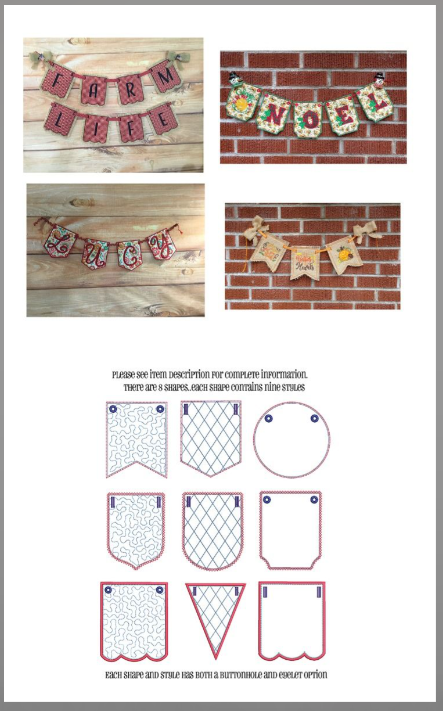
While I featured the Football Applique Alphabet in this project, I want to point out the versatility of the In The Hoop Big Set of Pennant and Bunting Shapes Set 1 designs. Search for "banner," "bunting," or "pennant" in the Designs by JuJu Embroidery Blessings Facebook Group to see how creative DBJJ fans get with these shapes. You'll find HS graduation banners, Christmas banners, baby banners/bunting, and much more. Also, check out the cute classroom sign tutorial on this blog.
Now it’s your turn. Grab that football font (or whatever DBJJ design suits your occasion) and score! Touchdown!
Please share your projects on the Designs by JuJu Embroidery Blessings Facebook Group or anywhere on social media using the hashtag #designsbyjuju. We’d love to see what you create!