Toggle Nav
 Inspire.
Create.
Stitch.
Inspire.
Create.
Stitch.
Inspire.
Create.
Stitch.
Search
Inspire.
Create.
Stitch.
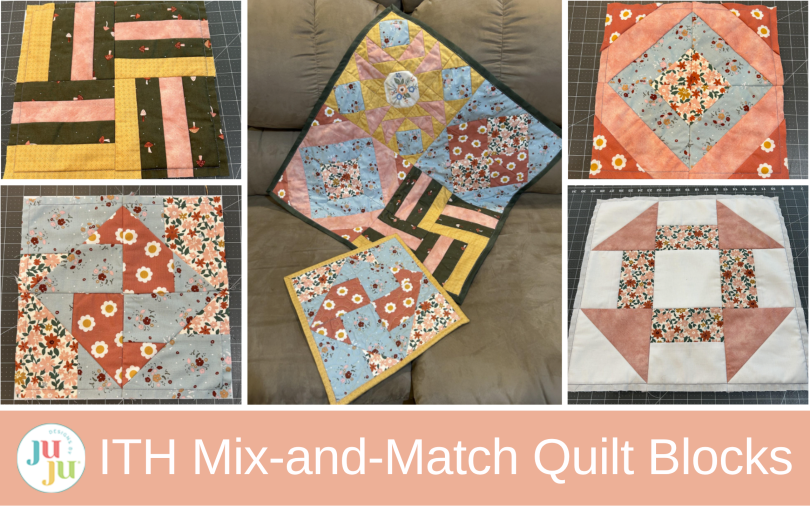
Learn how to stitch DBJJ ITH Mix-and-Match Quilt Blocks with and without batting, then explore easy quilt layout ideas including rail fence, half square triangles, flying geese, pinwheels, diamonds, and chevrons.
If your quilt points don't always line up perfectly, these ITH Mix-and-Match Quilt Blocks are going to become a favorite. They're easy to stitch, interchangeable with Quilting Backdrops™, and make creating beautiful quilt designs surprisingly simple. Today I'll show you how to stitch them and share lots of layout ideas to inspire your next quilt. Before you know it you’ll be finishing your own quilt!
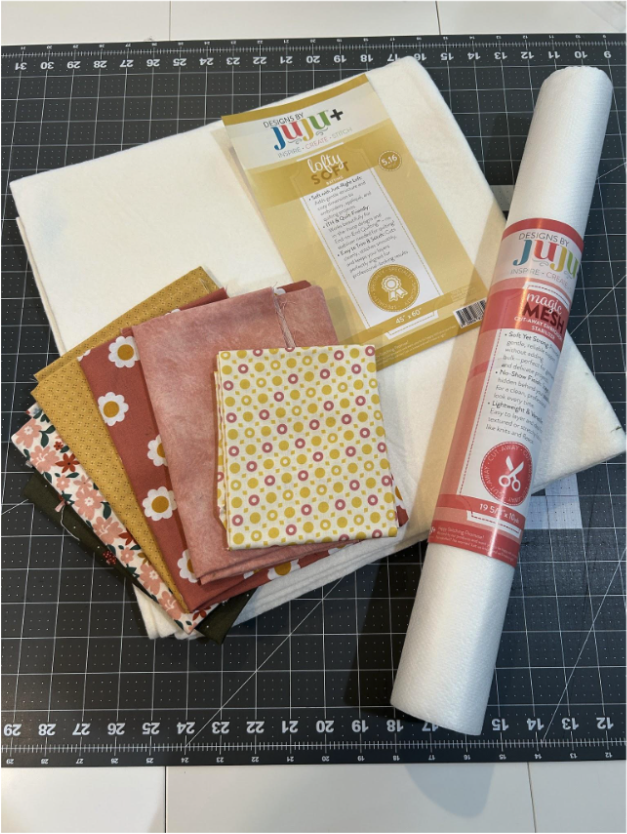
Don’t forget to check out the Designs by JuJu Amazon store for our design team’s favorite supplies. And for stabilizers, batting, and threads, Designs by JuJu+ has everything you need.
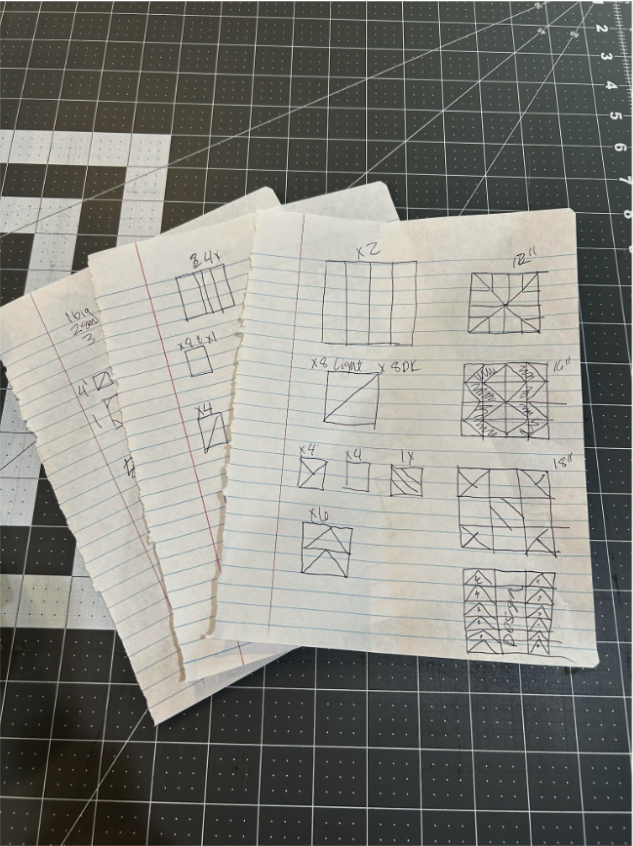
The fun thing about these quilt blocks is that there are so many ways to use them. Your imagination is the limit! I started by just sketching out some quilt blocks that I would like to make with them. I used inspiration from quilts I saw online, in books, or even just what my head was coming up with.
The ITH Mix-and-Match Quilt Blocks are interchangeable with the DBJJ Quilting Backdrops. So if you want to add a decorative sashing to your quilt you can use them, but alternatively we can make the quilt blocks without batting and then they are ready to be finished out more like a traditional quilt top. I’ll show you both ways to make them.
Let’s start making the Four Stripe block like we would a Quilting Backdrop. If you’re new to QBs, check out the Mini Quilt using Quilting Backdrops blog post.
Hoop some magicMESH Stabilizer.
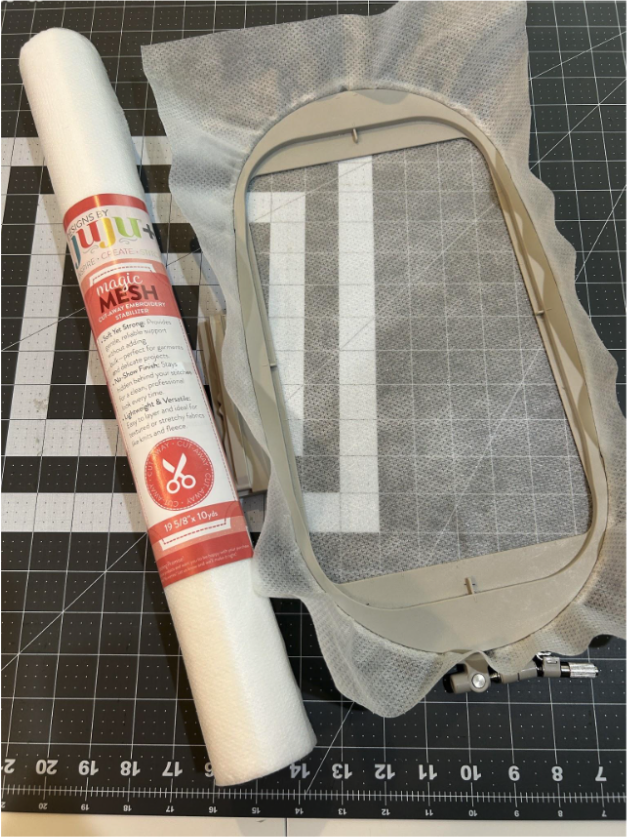
Stitch out your placement stitch for the batting.
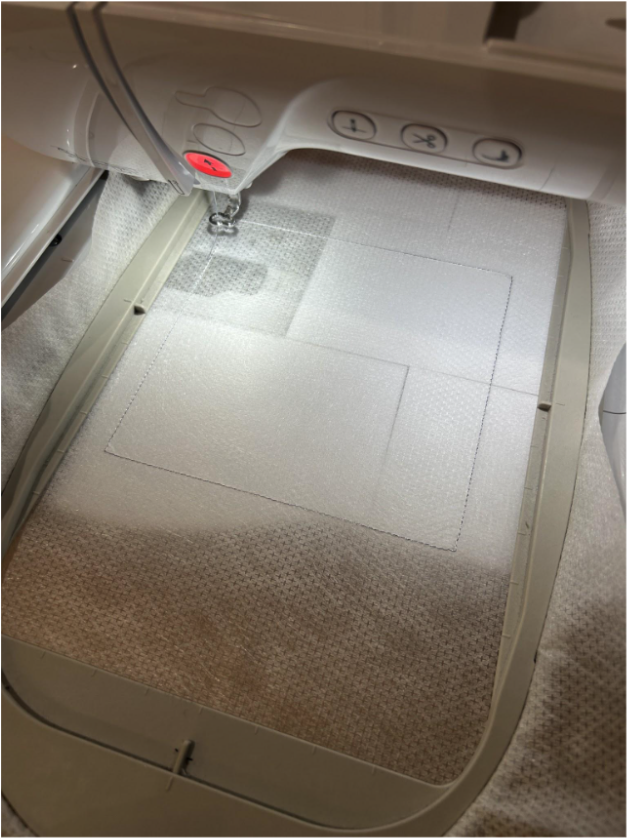
Cover your stitches with the batting, tack it down, and trim close to the stitches.
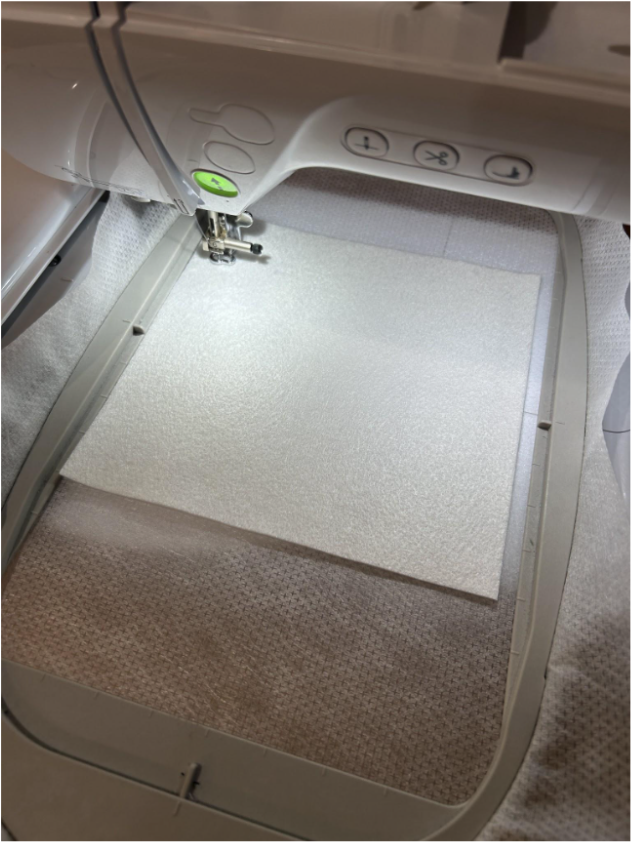
Stitch the placement stitches for your first fabric.
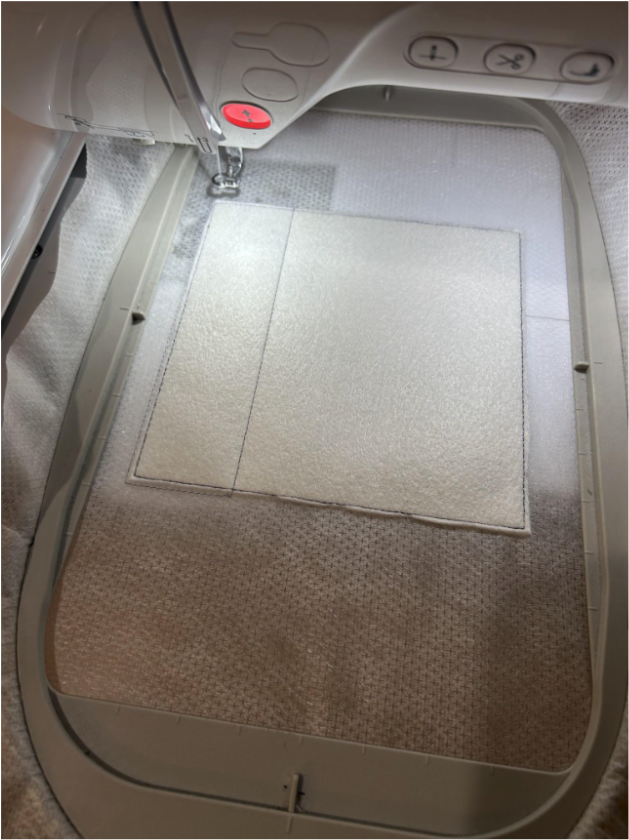
Cover the stitches with fabric and make sure you have at least ½” around the outside of the block. Then run the tack-down stitches.
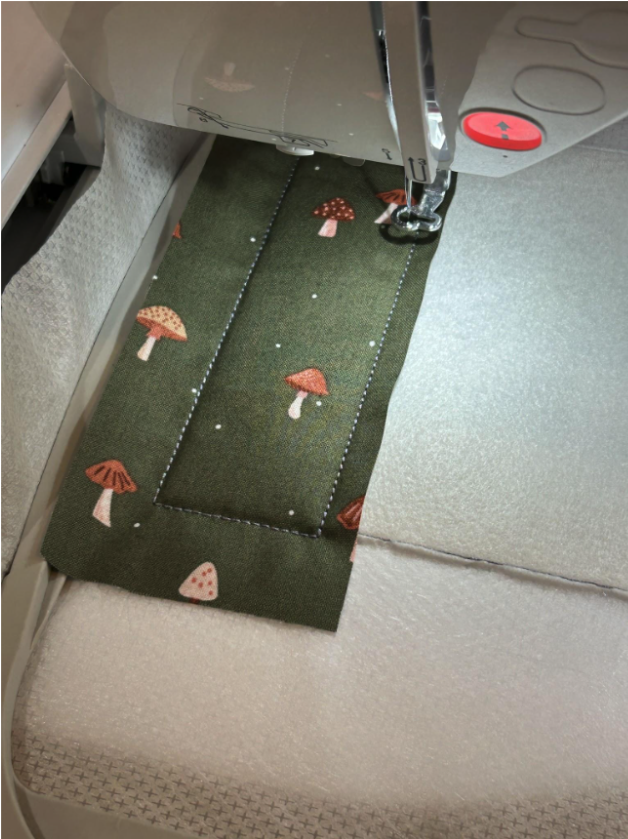
Trim close to the inside edge. I angle in the seam allowance so that it will overlap well with the next fabrics.
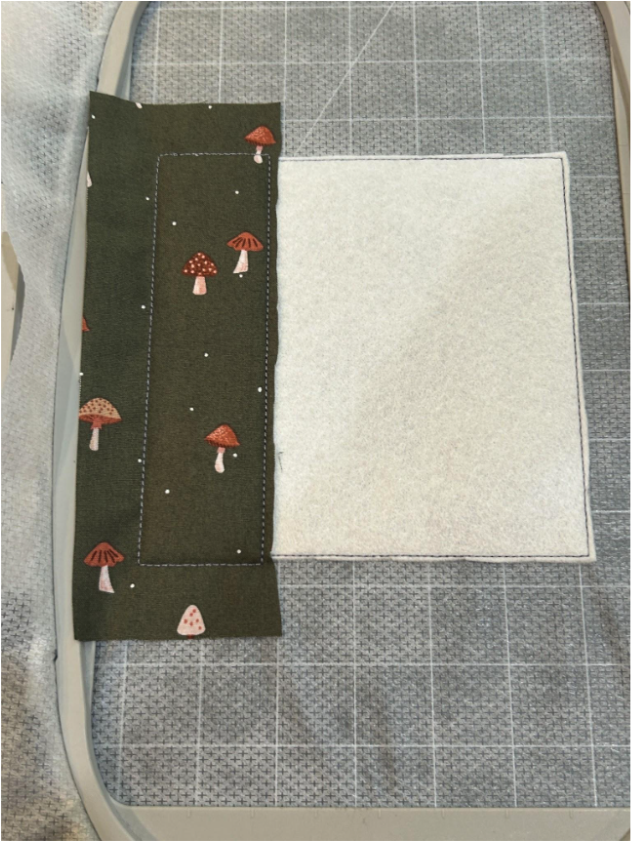
Stitch a placement stitch for the next fabric. Lay the next fabric, right side down, with the edge of the fabric overlapping the line by at least ¼”. Stitch the tack-down stitch.
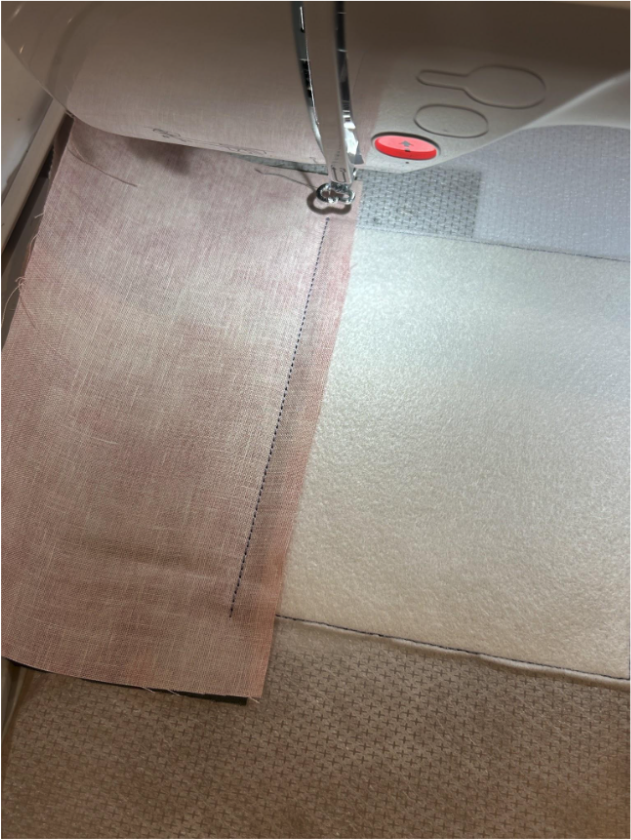
Fold the fabric along the stitches. Then run the tack-down stitches for the fabric.
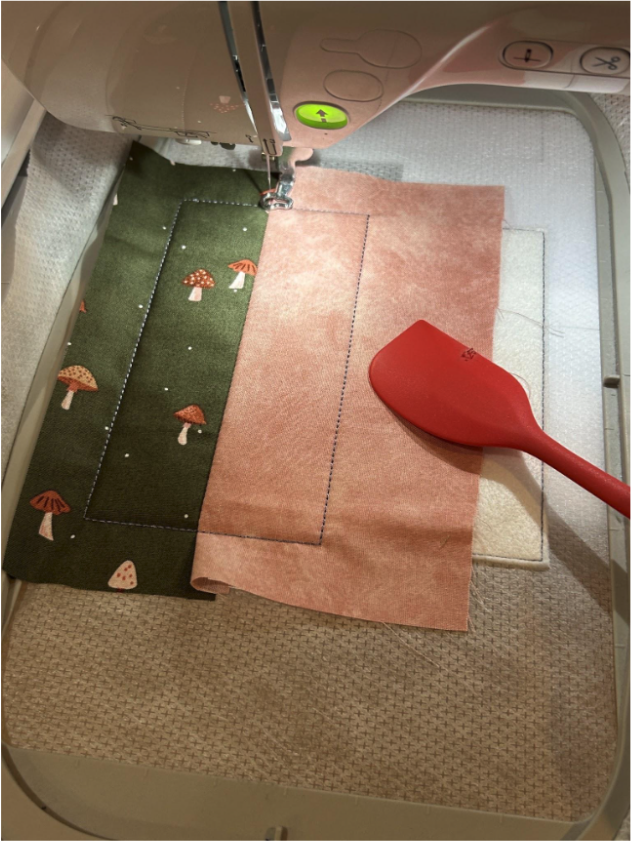
Trim the fabric and continue doing the rest of the block the same way.
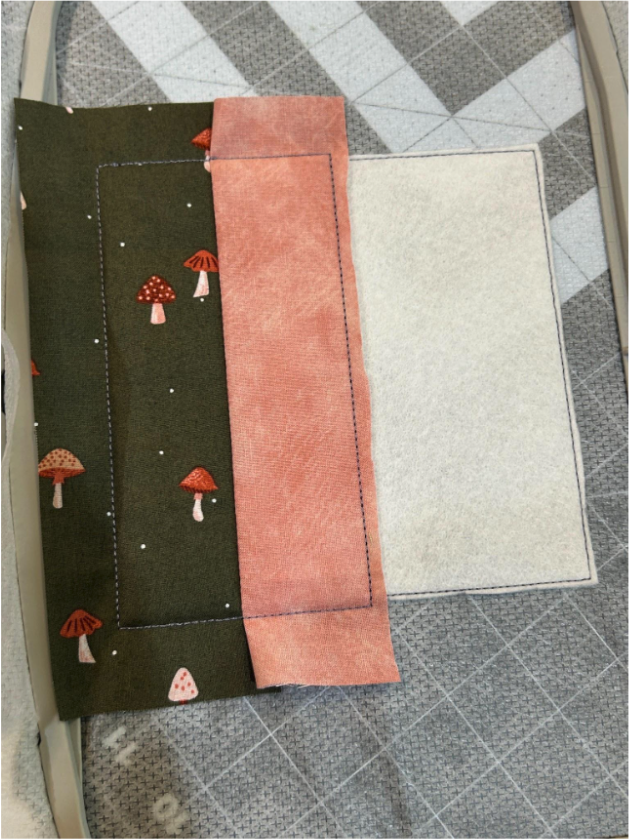
Remove your block from the hoop, trim your stabilizer close to the stitches, and trim your block ½” from the outer stitching line.
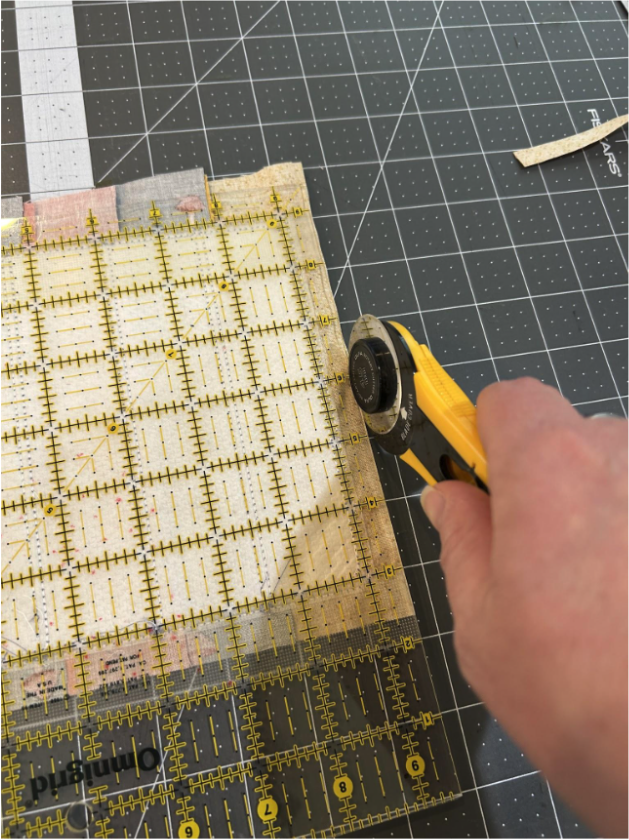
Your block is finished. Repeat and make as many as you need for your design.
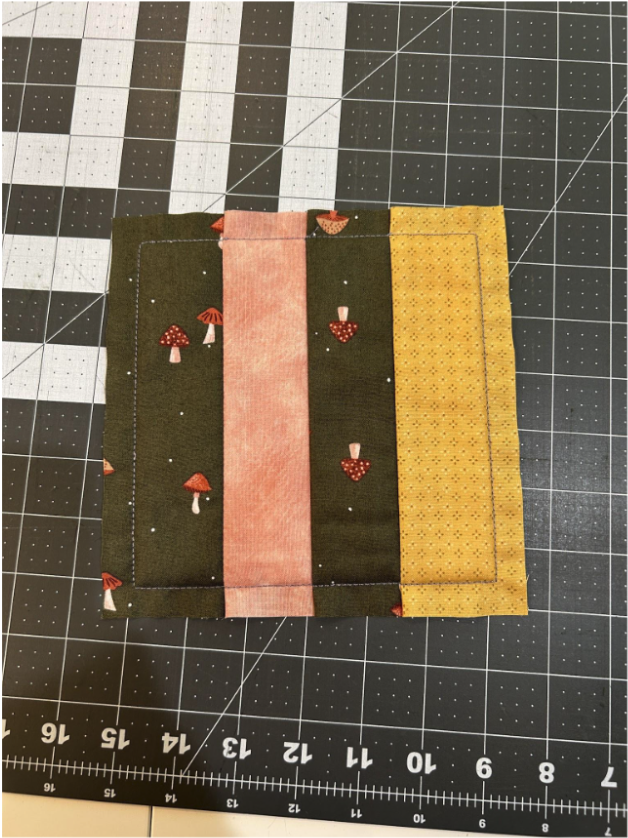
Now let’s make the Diamond Center block without the batting. We will follow the same basic steps, just skipping a few. These blocks will end up being more like a traditional quilt top that you will piece together, then make a quilt sandwich with batting and backing and quilt at the end. I’ll show you how to finish them later, but first let’s make the blocks. Hoop your magicMESH Stabilizer.
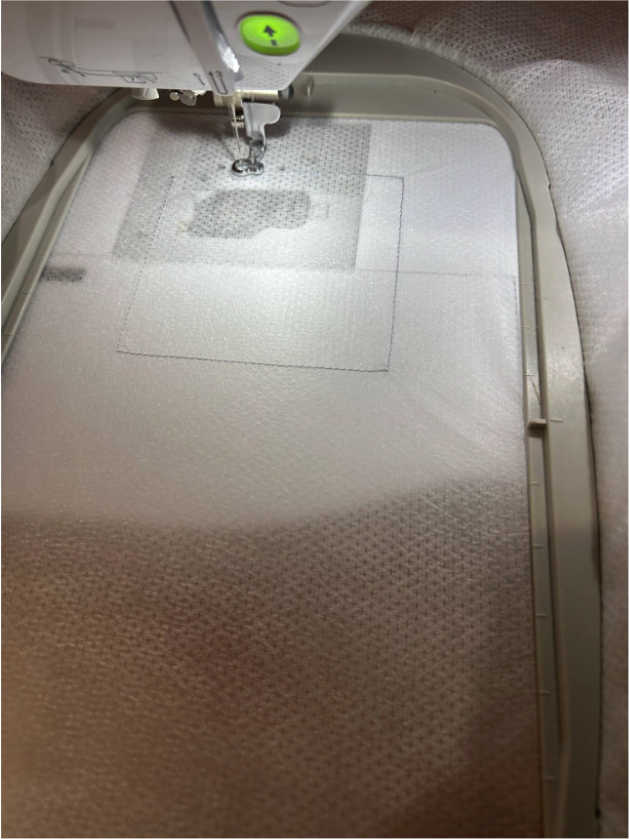
Stitch out your placement line for the batting. We won’t be using the batting but this is what will show us our “racing lines” to stitch in between later, so we want to see it on the stabilizer.
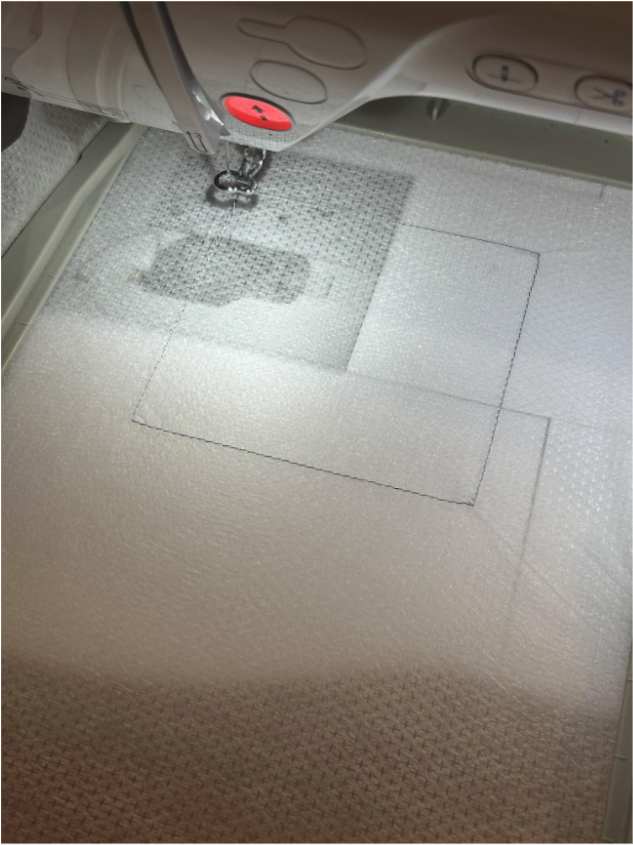
Skip the tack-down line for the batting and stitch the placement line for your fabric. Cover the placement lines with fabric and run the tack-down stitches.
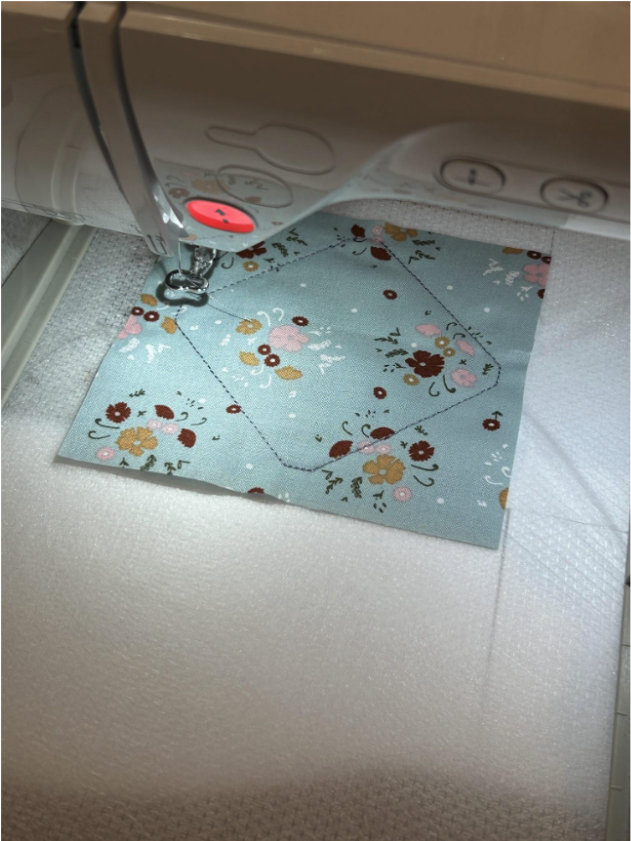
Trim around the stitches, stitch the placement line, place your next fabric face down, and tack down the fabric. Fold it right side up and stitch the tack down for the fabric.
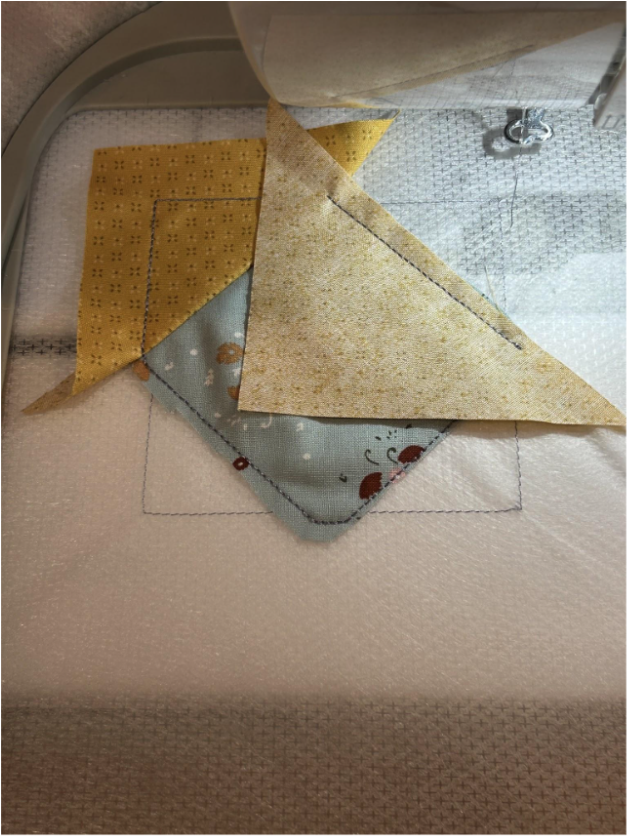
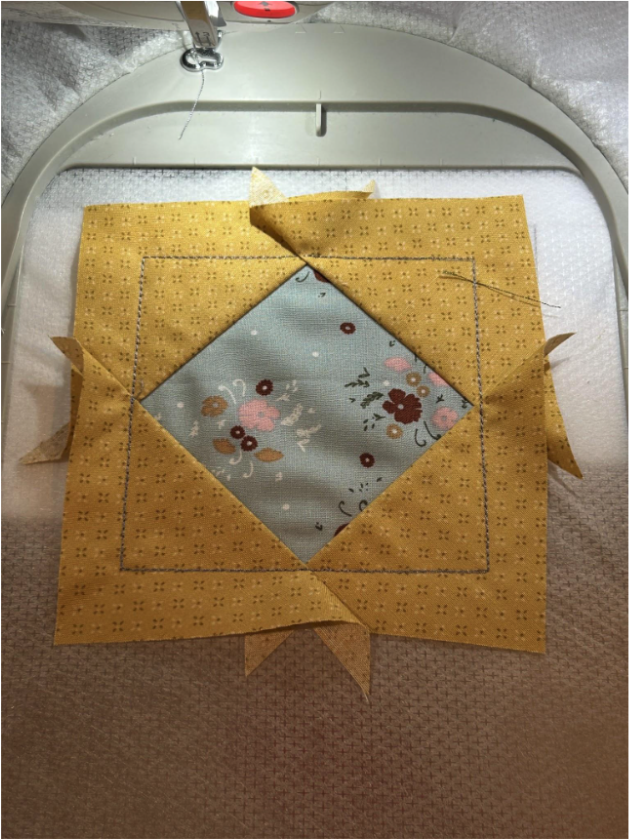
Once your block is finished, remove it from the hoop, trim the stabilizer, and trim the block ½” from the outer stitching line. Continue making the block as many friends as you need to finish your design.
This is the fun part for me. I made four identical Four Stripe blocks. Now it’s time to arrange them into a big block. I like to lay them out and decide how I want them.
This is a vertical pattern that repeats over and over. It’s nice for an easy striped quilt.
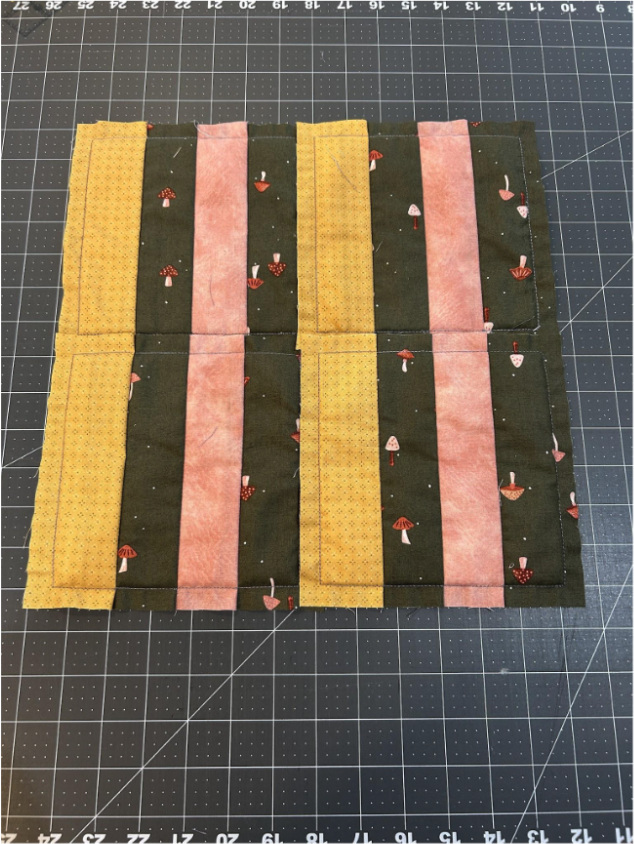
I used the vertical stripe pattern but rotated two of the blocks so now we have both thick and thin stripes that don’t continue through the design.
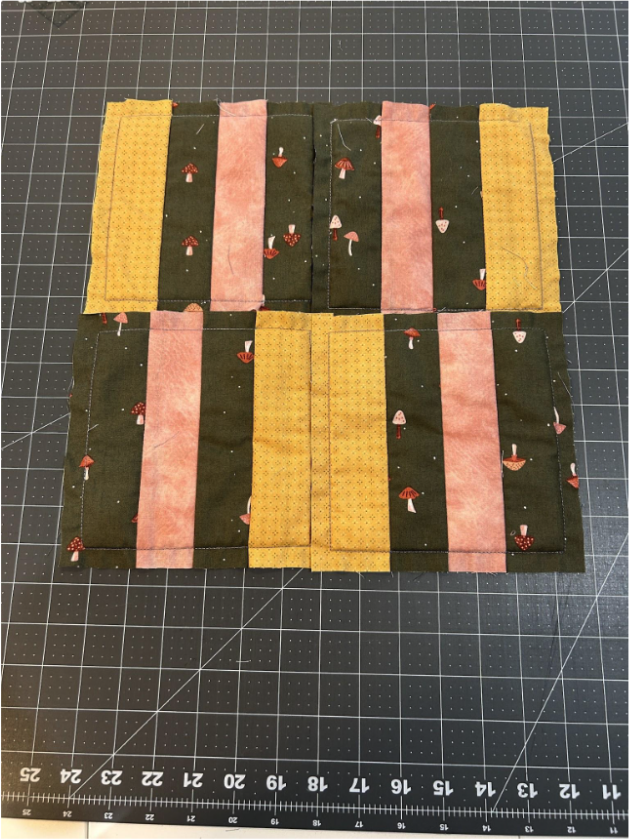
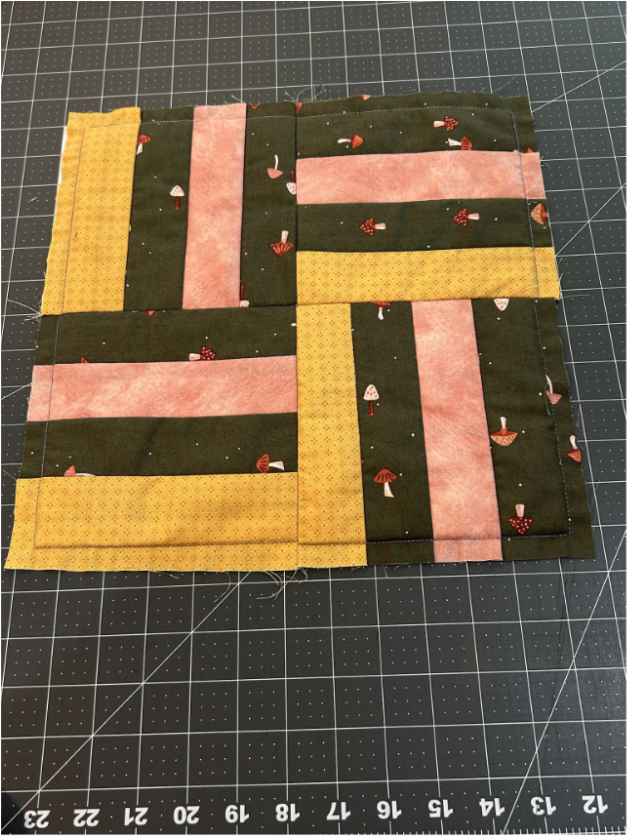
And then the design I decided on is kind of like a Rail Fence block. The Rail Fence is traditionally made with three stripes, but it worked and looked nice with four too. I know the quilt police have never shown up on my doorstep, so do what you like and what makes your heart happy.
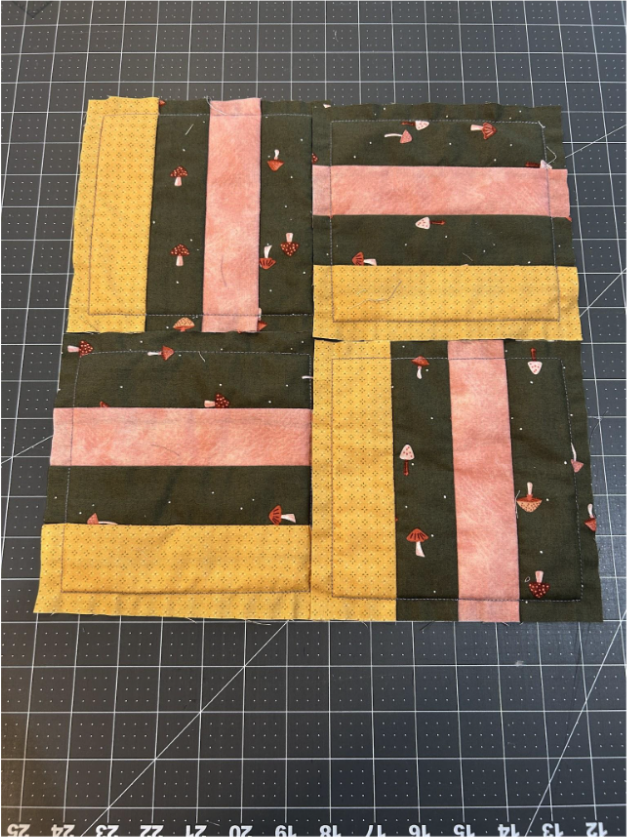
To stitch the blocks together I stitch the top blocks together along the center seam and the bottom two blocks the same way. We line up the edges and stitches and stitch between the racing lines. I love that this makes them all square and finished so nicely.
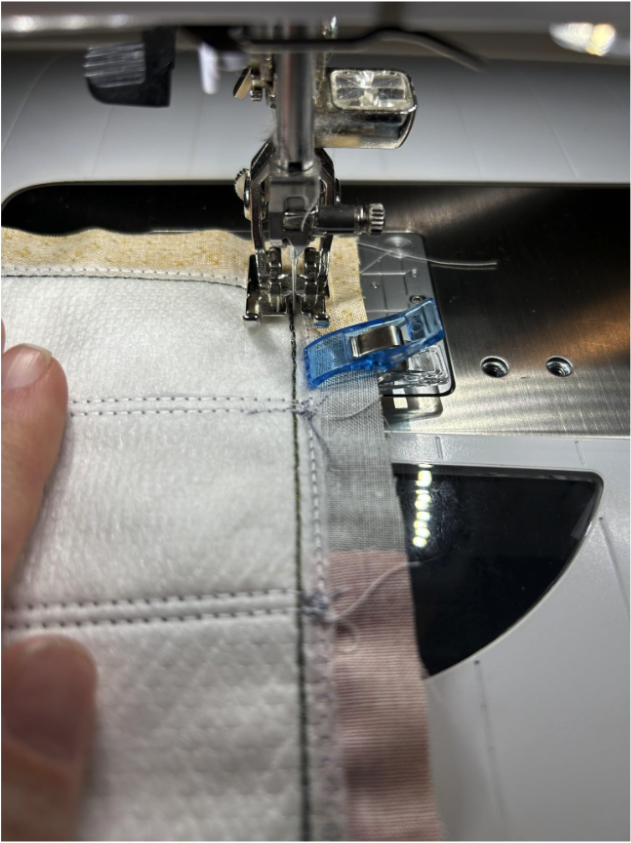
When it’s time to press the blocks, I press the rows in different directions. This helps the seams “nest” and lie flat when it comes time to sew them. So I pressed the top row with the seam to the left, and the bottom row with the seam to the right. Use a pressing cloth so your hot iron doesn’t come in direct contact with your stabilizer.
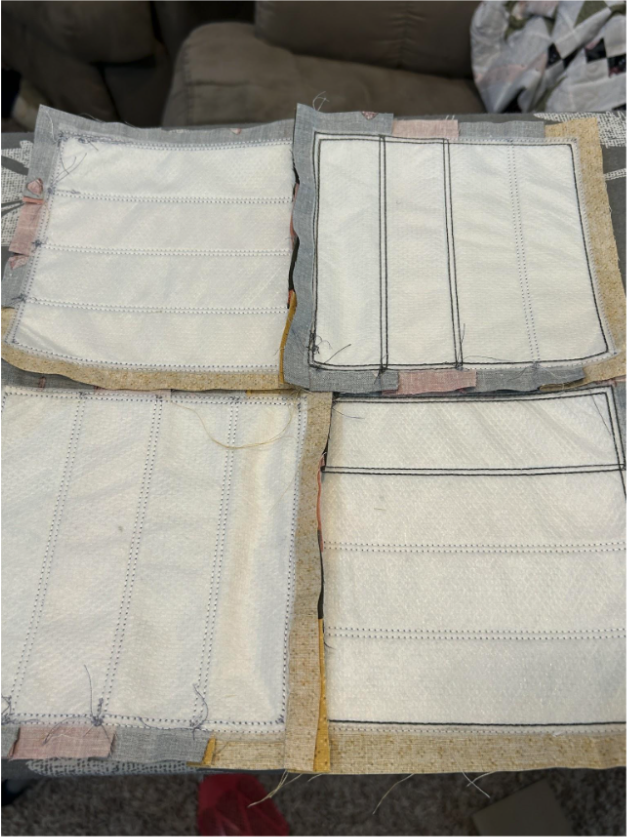
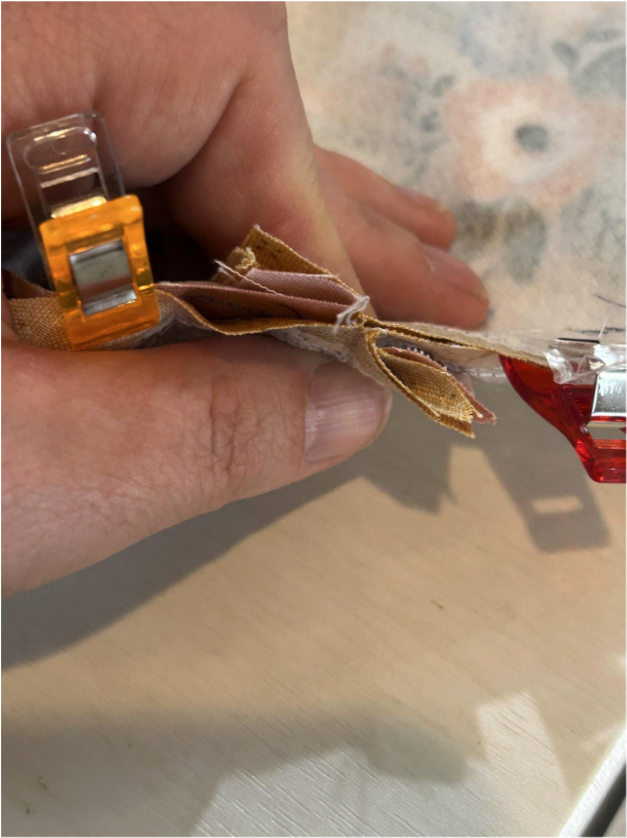
Line up the rows. Make sure your edges line up and your center seam is nesting. Here’s a photo of how the center nests. The bulk of each side sits right next to the other side. This makes it so the center seam will be continuous through the block.
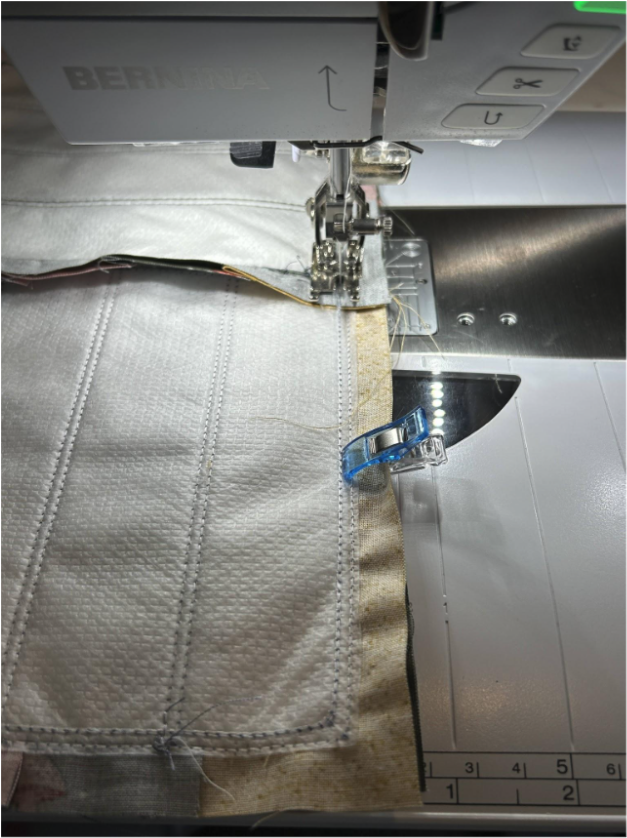
Now that the rows are lined up, we will stitch them together through the racing lines.
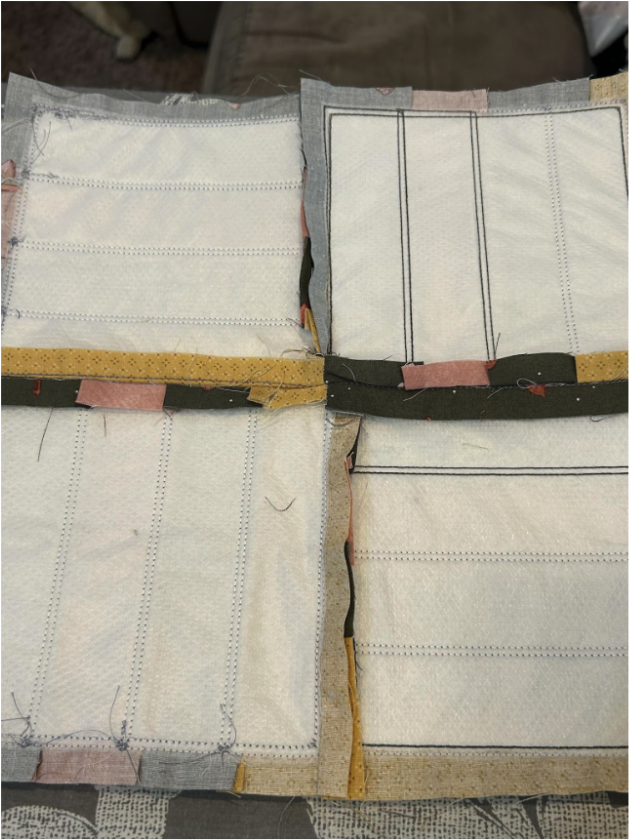
For the rows, I like to press the seam open so the bulk of the seam is spread between both sides.
And here is your finished block. I love how easy it is for the lines to stay straight and the corners to be nice and crisp. Now it’s ready to be sewn to some other blocks, so let’s see a few more options.
Half Square Triangles are some of the most versatile blocks out there. Here I made 16 blocks, 8 in one color and 8 in another.
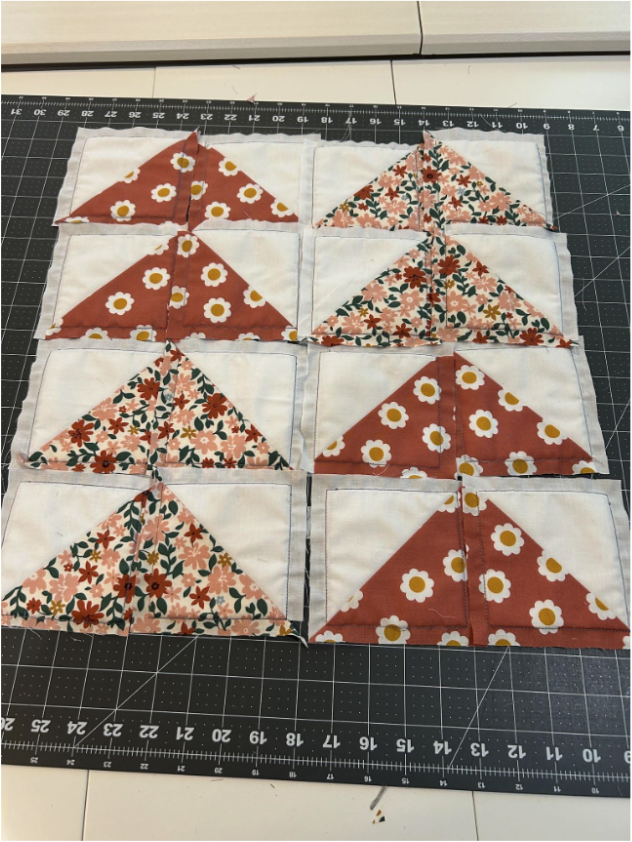
We can make them into Flying Geese.
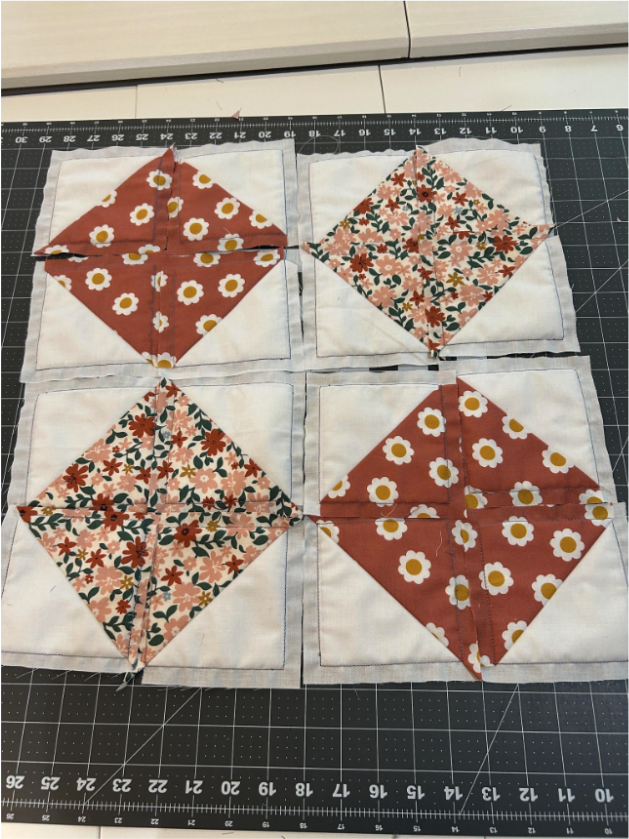
A diamond pattern with alternating colors can be fun.
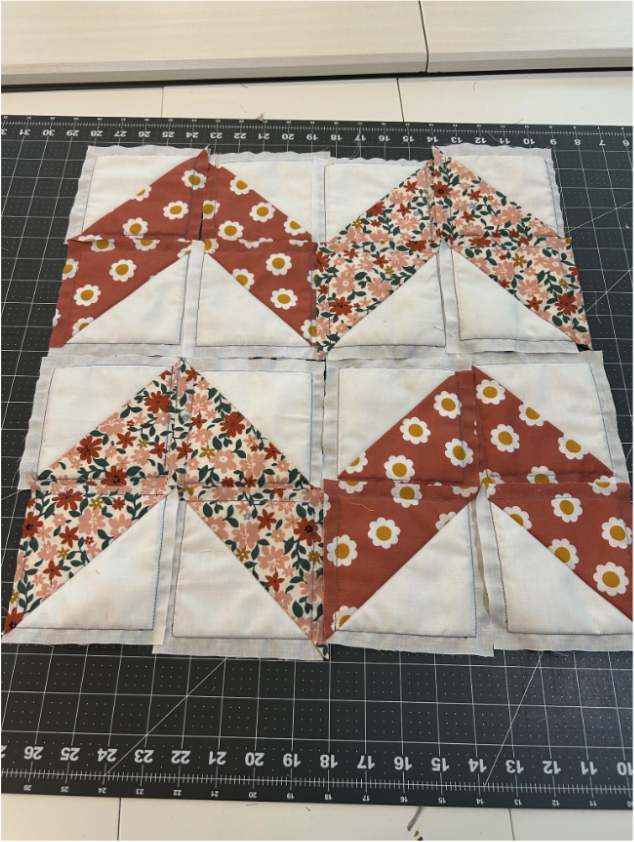
A chevron pattern always looks impressive—you could alternate squares or rows.
Pinwheels are a favorite of mine. They always look so classic.
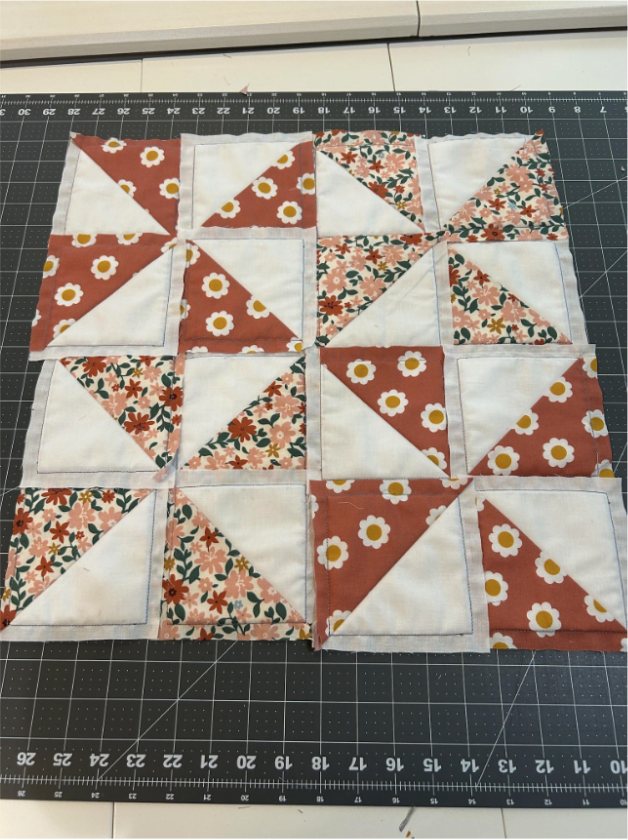
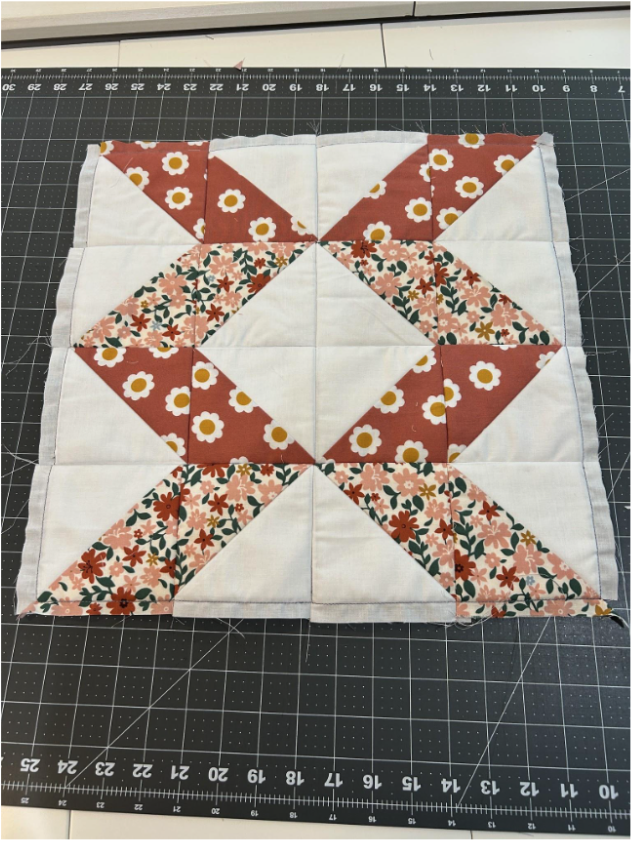
Or a ribbon pattern.
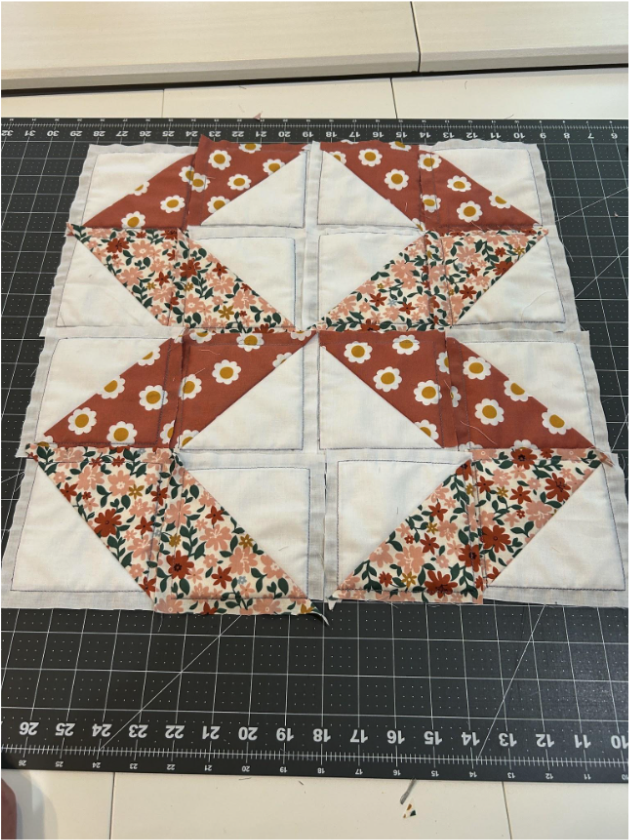
I actually ended up sewing it into an inverted ribbon type pattern. I was happy with how the movement of the block kept your eyes traveling up the block. When I have done Half Square Triangle blocks in the past, I would find myself clipping my points or having points that didn’t quite line up, but with the DBJJ ITH Mix-and-Match Basic Quilt Blocks and the racing lines to sew through, my points always looked, well, on point!
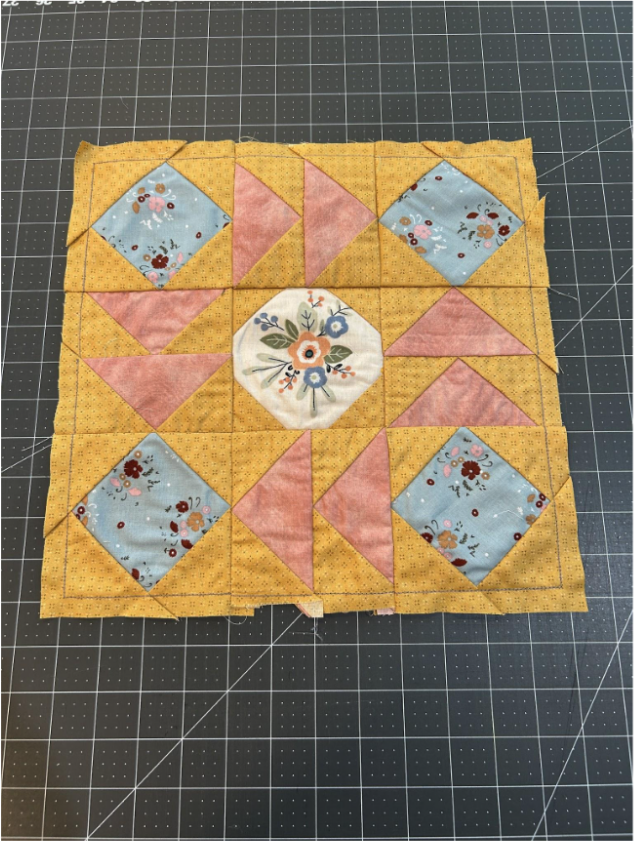
For this block I used the Flying Geese layout and Diamond Center blocks for the edges. For the middle I used the Four Corner Triangles block and used a piece of fabric where I could center the floral design. By using the same yellow for the backdrop of every piece, the colors stand out more.
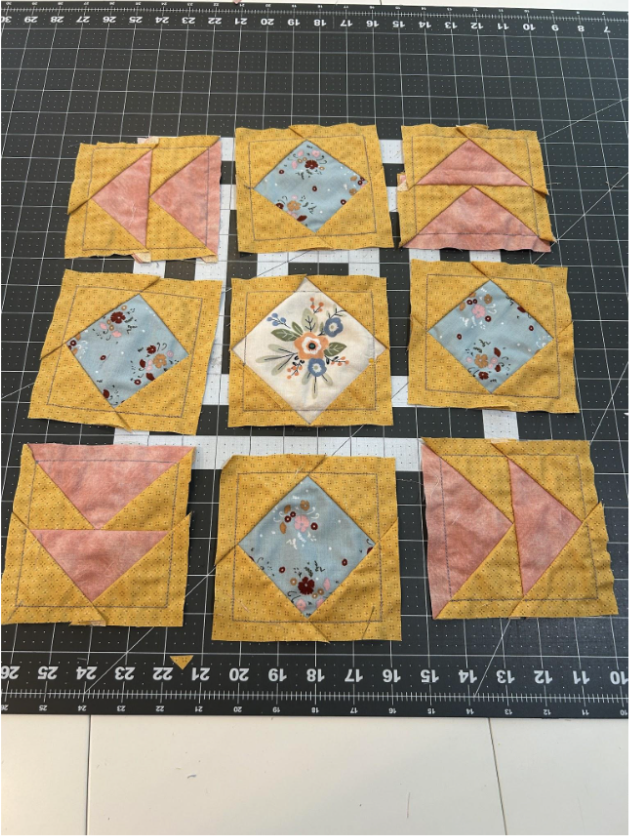
I shifted the outer blocks one space clockwise and decided I liked that arrangement better.
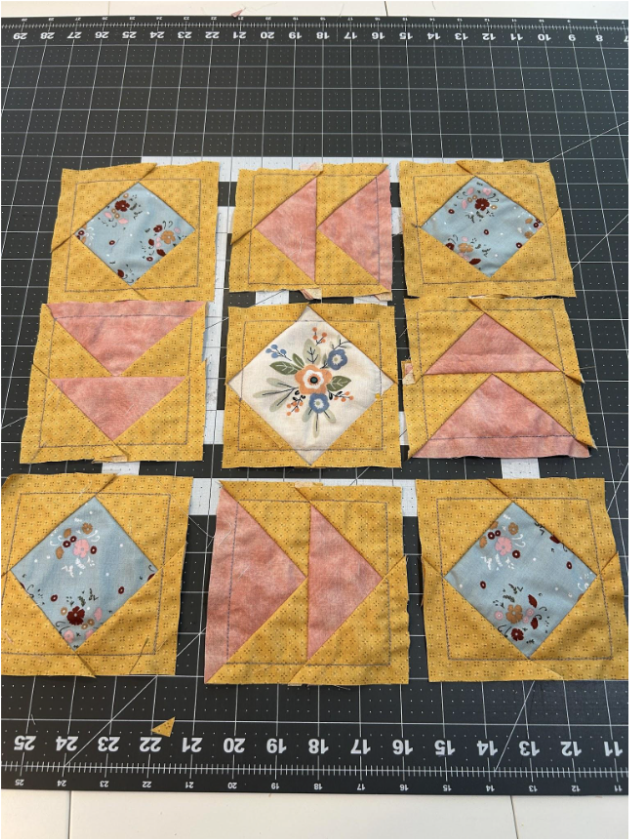
Sew the rows together using the racing lines as a guide.
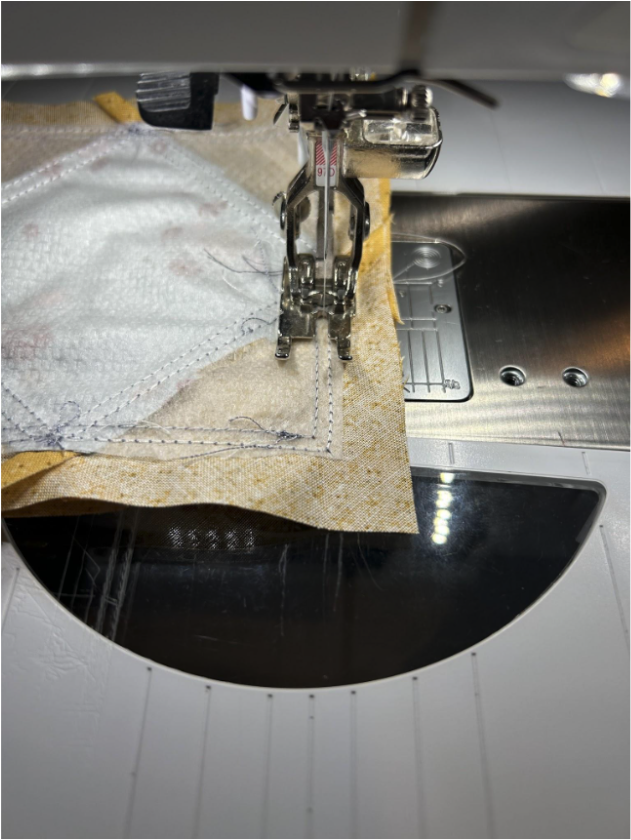
Press the seams so they will nest nicely. Where this block is a 3x3 configuration, I pressed the top and bottom rows toward the center and the center row to the outside. It would still work to press them just one direction alternating each row, but this is another way it can be done.
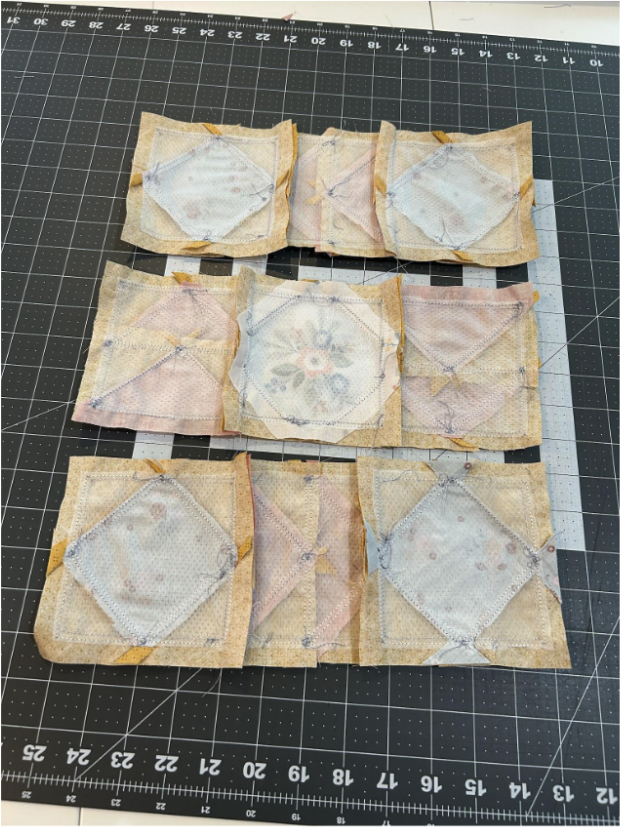
Here it is finished. I love how the center Four Corner Triangle block looked similar to the blue blocks before we sewed them up but finished out looking more like a frame for the flower fabric I put in the center.
When we stitch up the Four Diagonal Stripes block, we again have options where we can make an alternating chevron pattern.
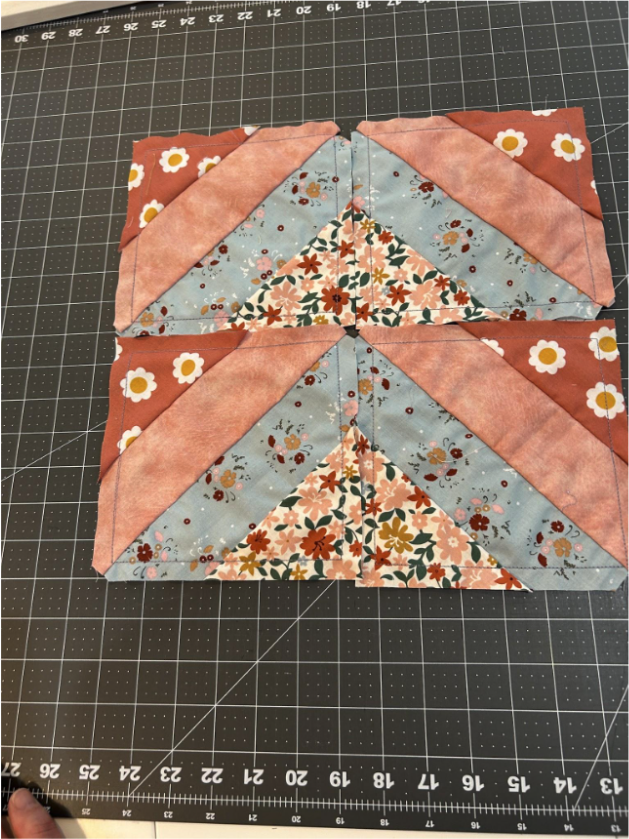
But by rotating the bottom two blocks 180 degrees, we get a similar but different-looking block. I enjoy rotating things and moving them around to see what designs I can get.
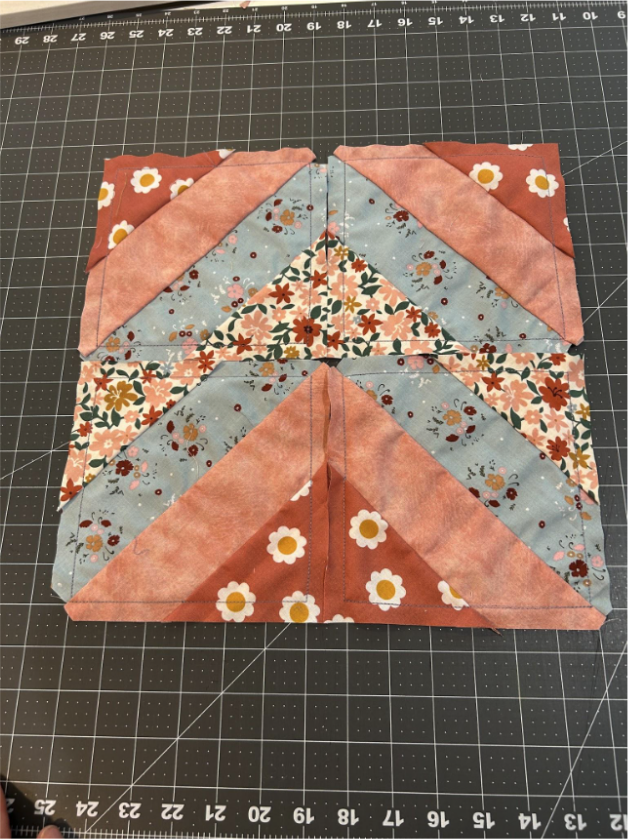
I finished this one as a framed diamond pattern. I was so happy with how all the points lined up!
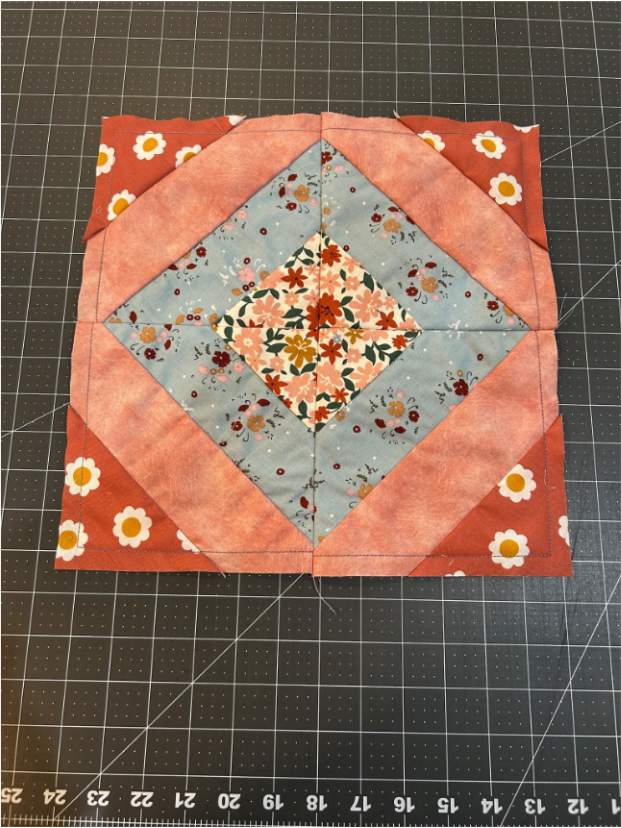
The Half Triangle and Quarter Triangles block was one of my favorites. I stitched two blocks with the dark fabric on the top small triangle, and for the other two blocks I switched so the dark fabric is in the bottom triangle.
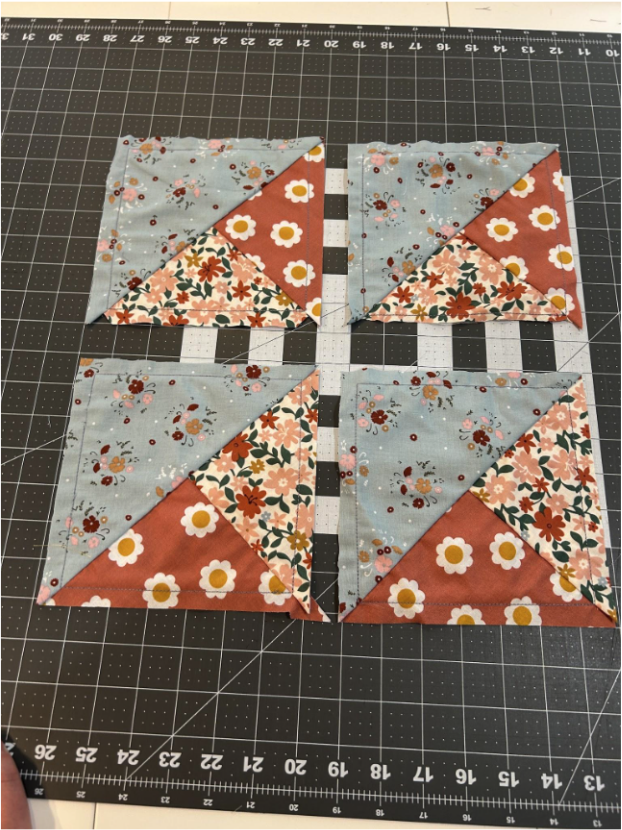
By rotating blocks and matching fabrics we come up with a block that’s a framed diamond made of four squares.
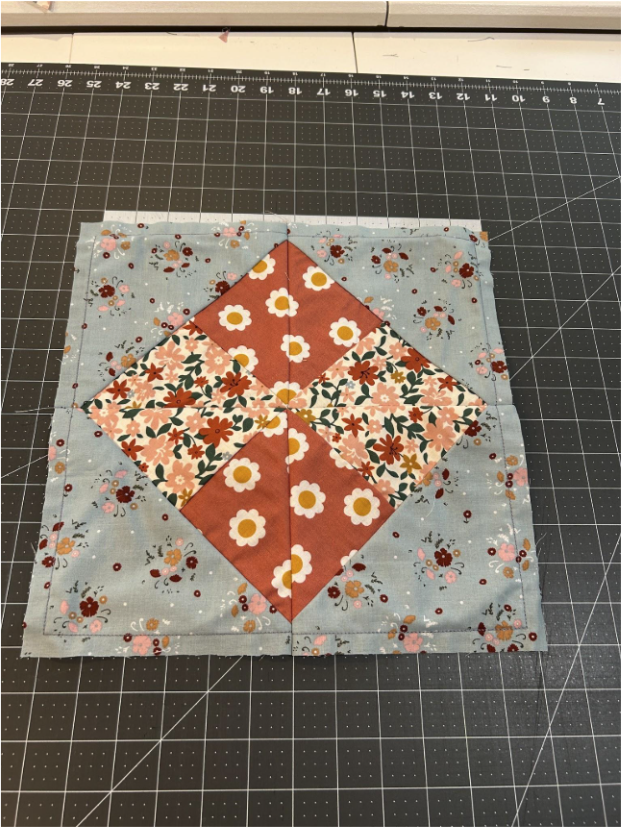
This block also looks beautiful turned 45 degrees and set on point in your quilt.
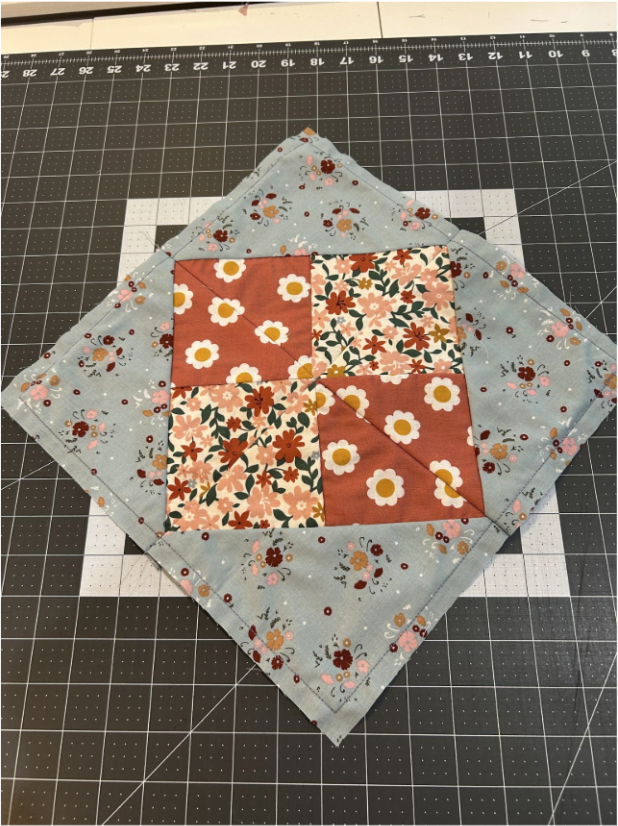
I wanted to make the traditional Churn Dash block and I had all the elements to do so with the Half Triangle block and the Half Square Rectangle block. But I needed a center block that was just plain. This is where it’s so easy because I just loaded in a 6” Quilting Backdrop and stitched it out, but when I got to the decorative stitches, I just didn’t stitch them. So I ended up with a plain square for the center of my block.
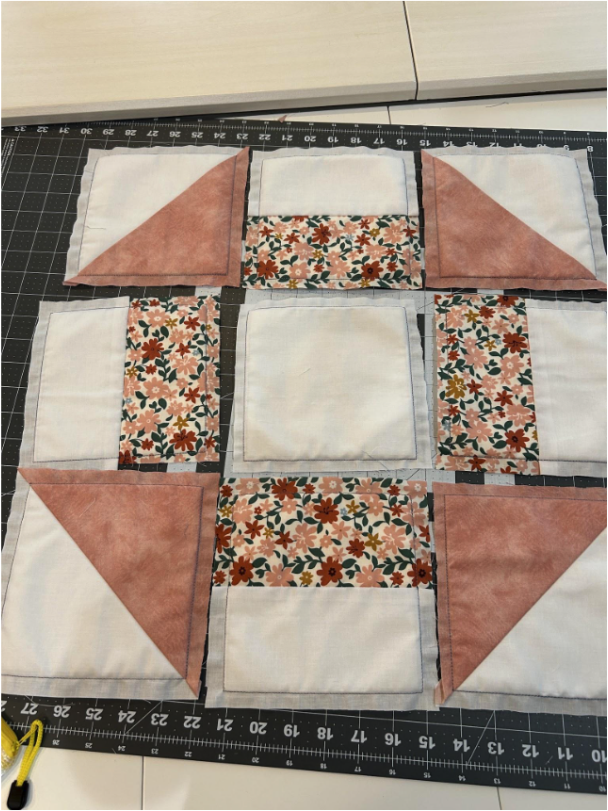
And all stitched together it is a beautiful Churn Dash block.
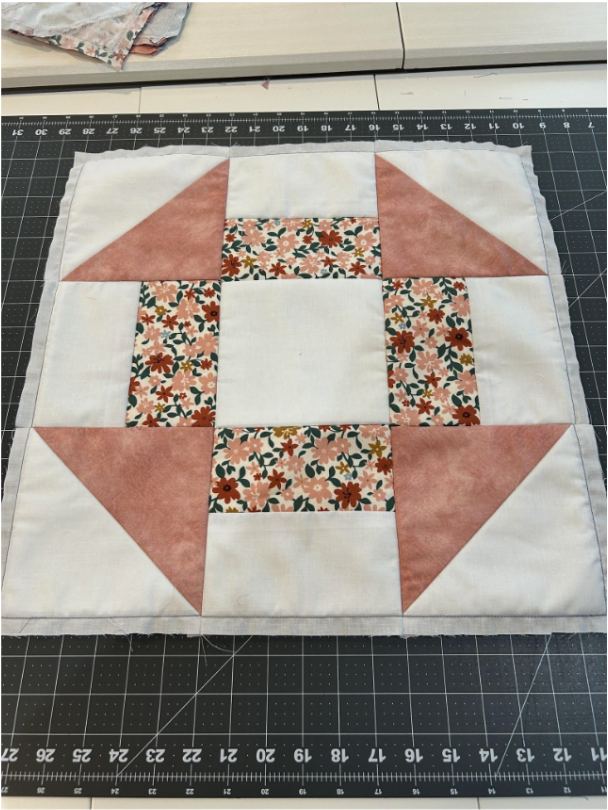
I also wanted to make a Basket block. But this time I added some decorative embroidery and used different sizes for the finished block. I made an 8” Half Square Triangle. I stitched only the flowers from a butterfly design from the Splendid Springs designs in the top part of the basket.
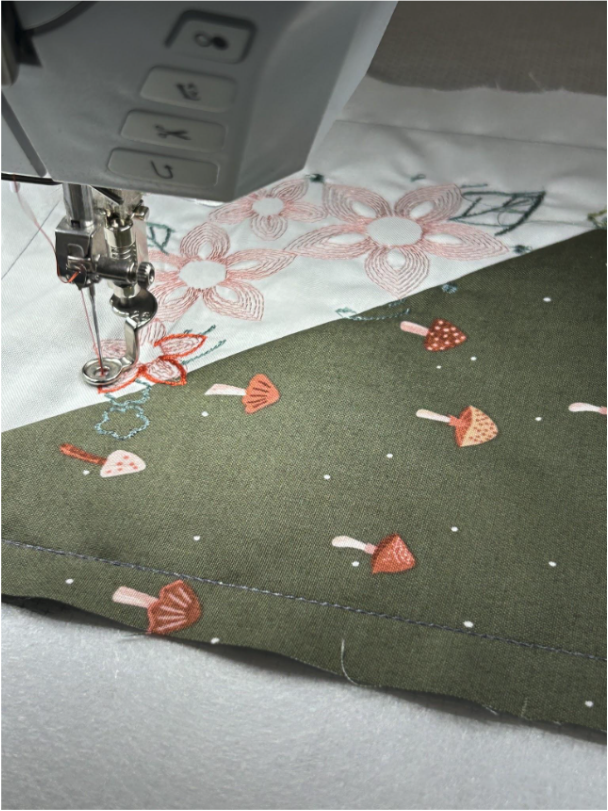
Now we will take our 8” top of the basket and pair it with some 4” plain blocks, and 4” Half Triangle blocks.
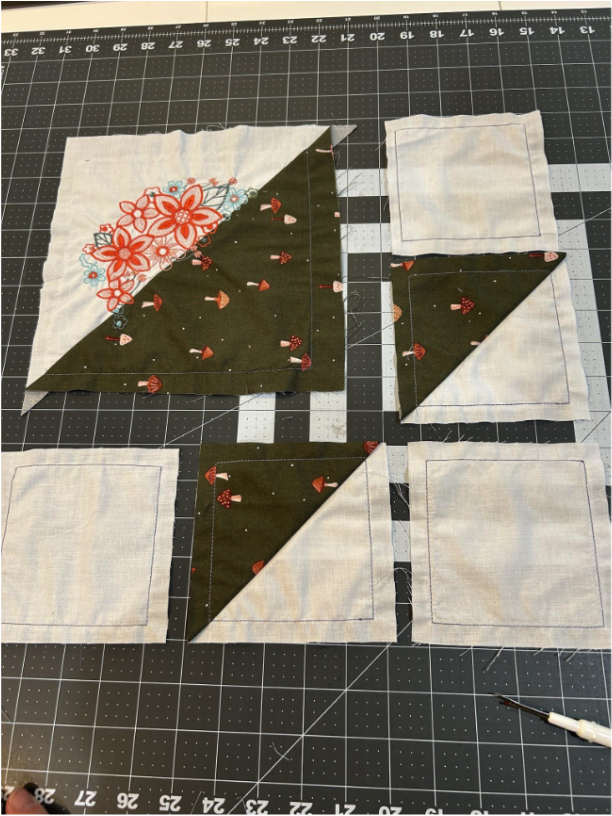
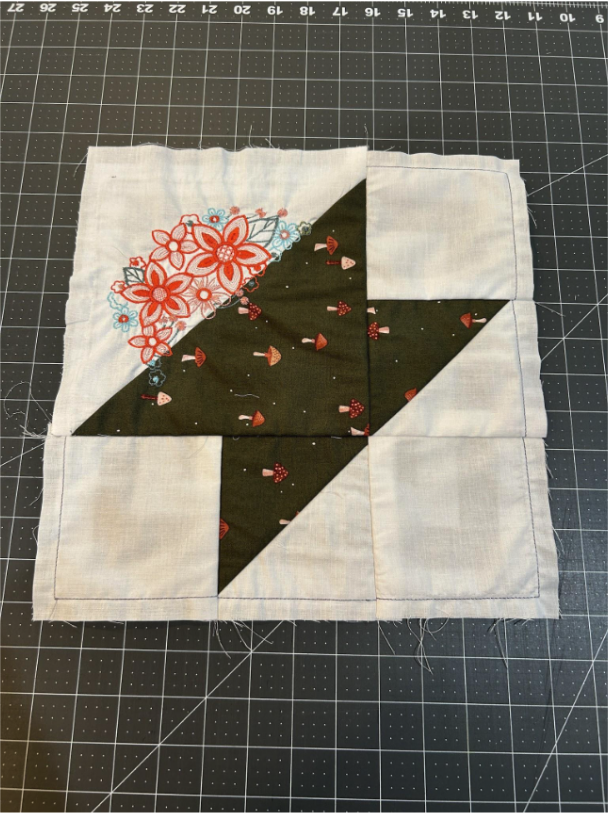
Once stitched together, our basket looks wonderful. I’d love a whole quilt of different colors of baskets and flowers!
And finally, I decided to have some fun with my Half Square Rectangle blocks. I made two blocks with the orange and blue fabric and two blocks with the floral and blue fabrics.
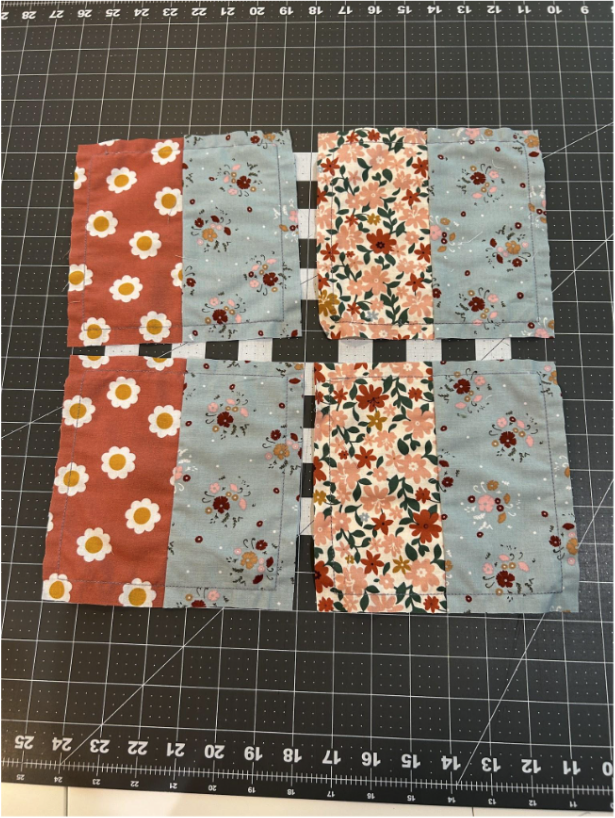
Making sure the blue fabric is on the right side I sliced each block from the lower right corner to the upper left corner.
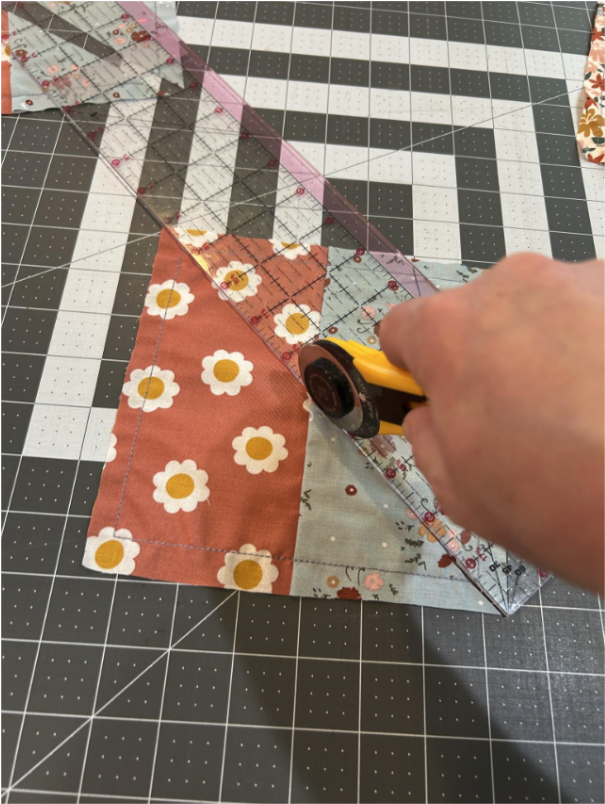
So now we have a bunch of triangles. We can mix and match them to see how we want them to be sewn back together.
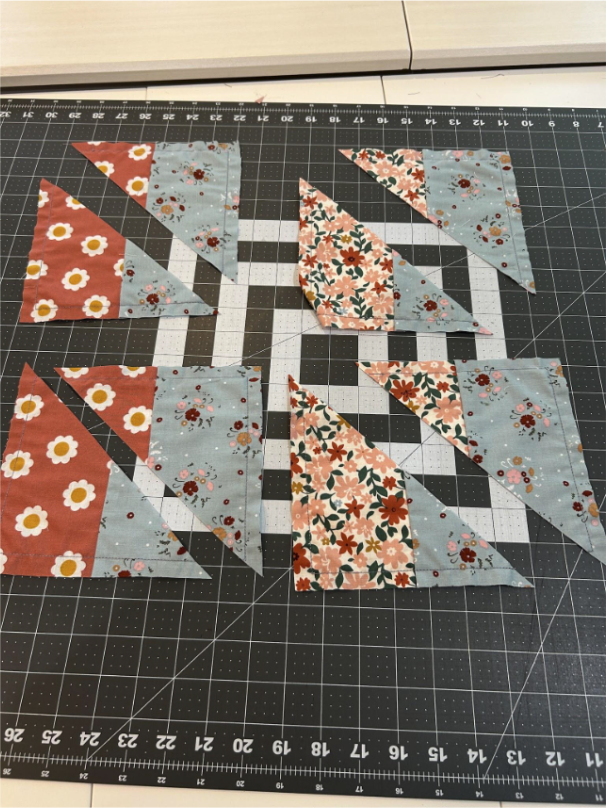
I rotated some of the triangles and made each block have all of the fabrics, and I alternated the side the blue fabric is on.
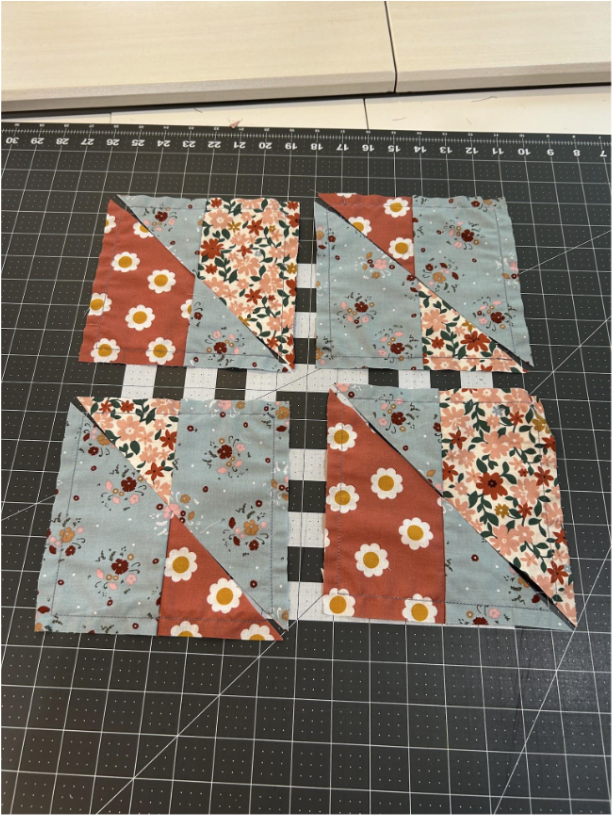
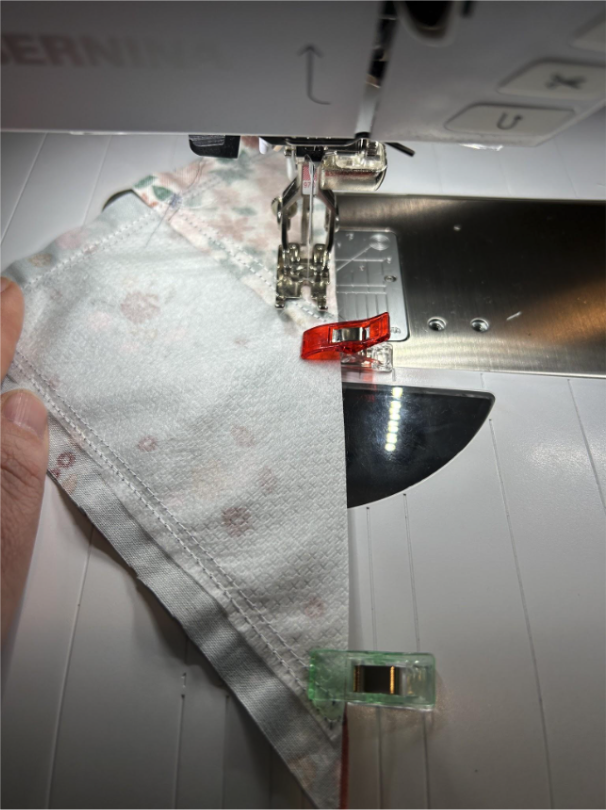
Sew the blocks together along the diagonal with a ¼” seam. This will make it so your block is smaller than it originally was, so keep that in mind if you’re planning on using Quilting Backdrops with your design.
Now we have our “frankenblocks” and we can play with them to see how we want them laid out.
I just rotated and switched them around until I found the way I liked them. We had a tall rhombus design.
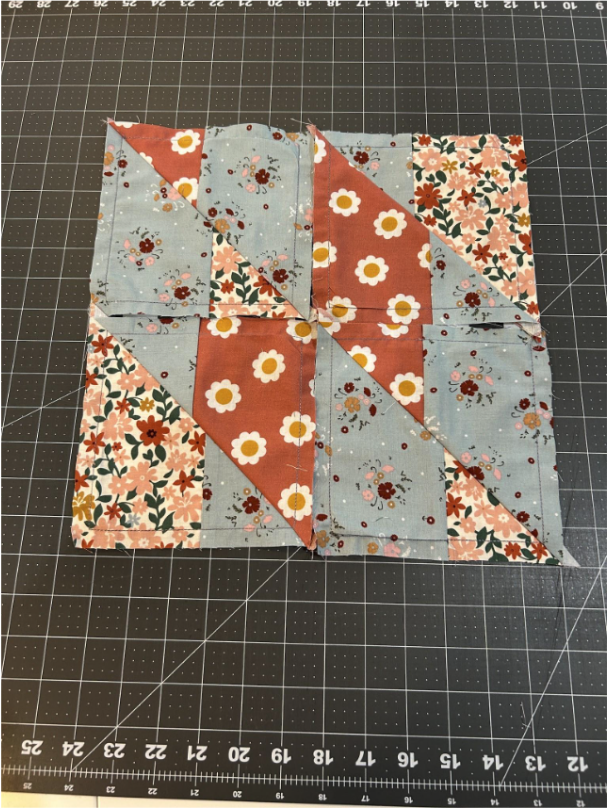
Or a side-by-side rhombus design.
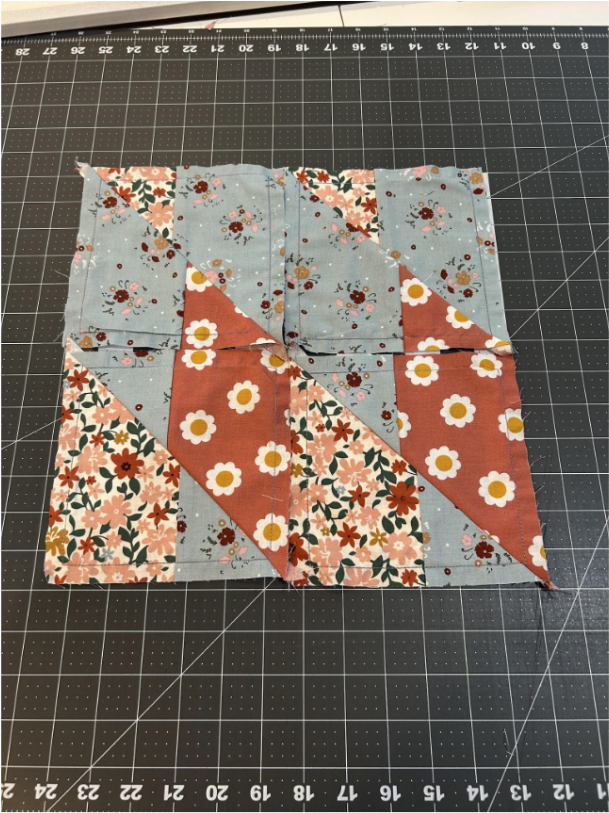
This one was just randomly put together, but I liked the center points.
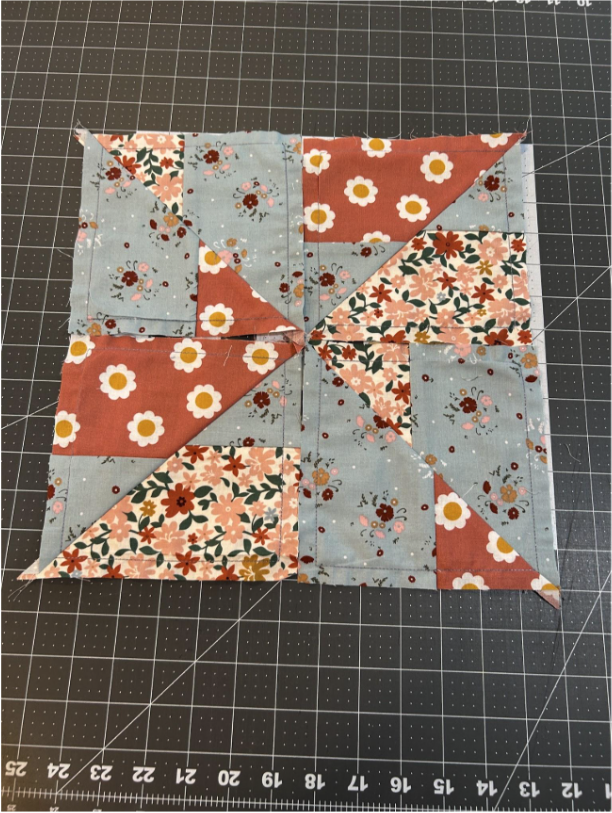
And then I chose one that I thought looked like arrows.
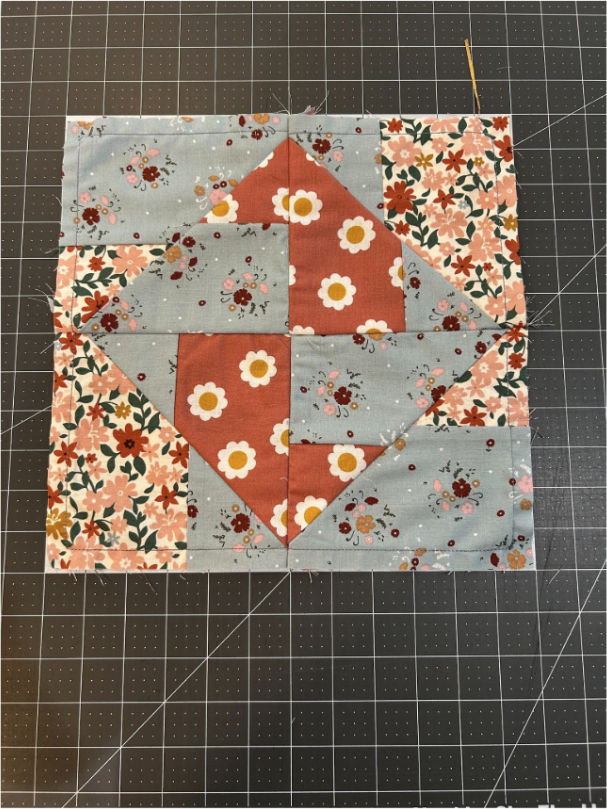
For my small quilt I sewed together four quilt blocks, made with batting, and decided to quilt it by stitching in the ditch. I centered my quilt top over my backing, wrong sides together, and pinned it in place.
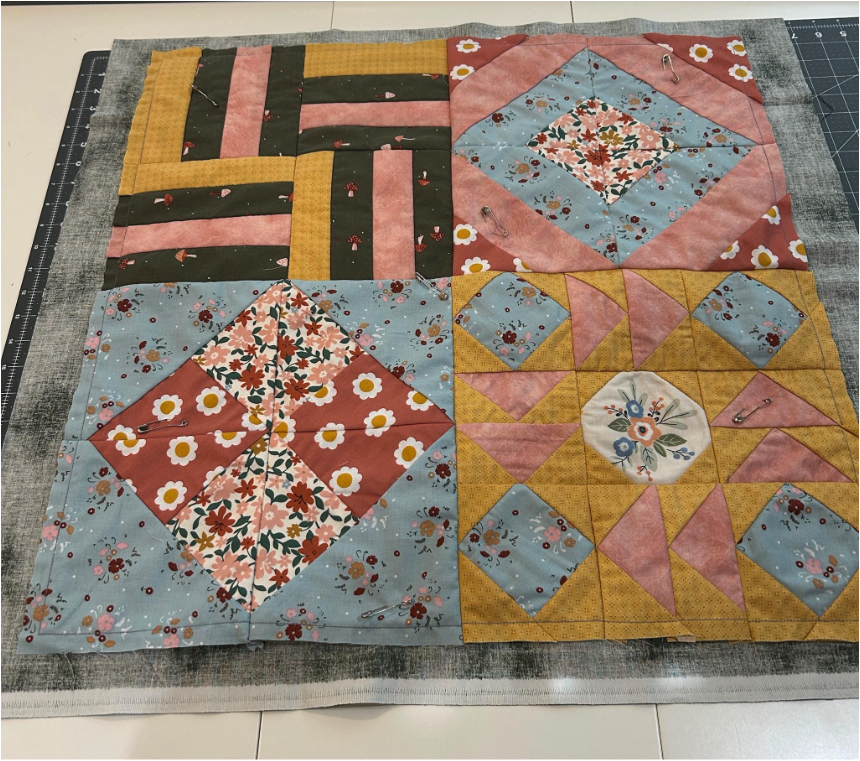
I took the quilt to my sewing machine and stitched down the center seams. Depending on the look you want, you can choose to sew around more or fewer of the design seams. I chose a main element in each block and stitched that also.
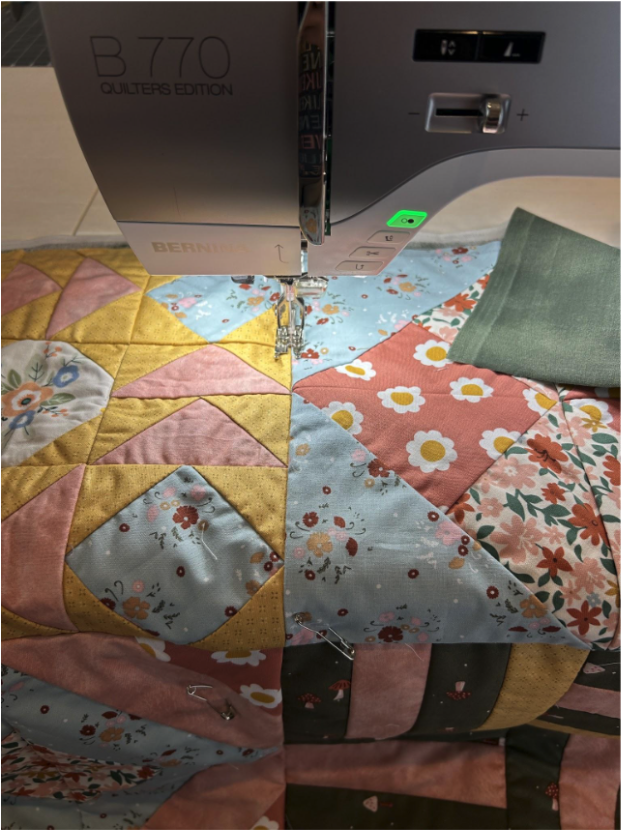
And when you’re finished, bind it anyway you’d like. Our binding tutorial shows you a few different options so you can choose the one that works best for you. I chose to do the method where I used the backing as the binding, and it turned out so cute when it was finished.
For my mini quilt I decided to do an end-to-end design. Our End-to-End blog post is a great starting point if you’ve never used these designs before. My hoop is a little smaller than my block, so I’ll need to do multiple hoopings. I like to cut my backing piece larger than my top so that no matter where my quilt top ends up in the hoop, there’s always fabric to hold it all in place.
Cut the batting just a little bit larger than the quilt. Then make your quilt sandwich with the backing wrong side up, batting, and quilt top right side up. For a larger quilt sandwich I may use a bit of spray adhesive to hold the layers together, but this one is just a little under 12” square so I felt okay to just float it.
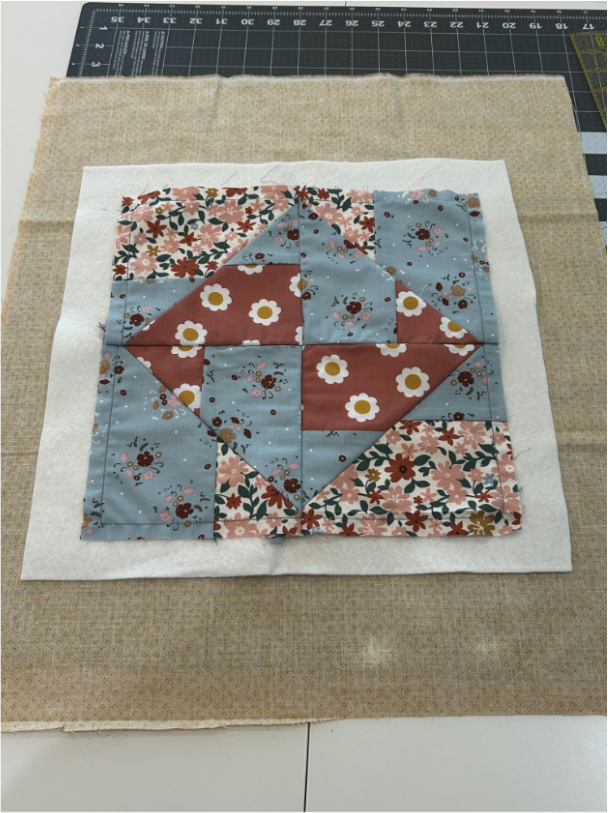
Hoop your quilt sandwich without stabilizer. I like to use my magnetic hoop for this project.
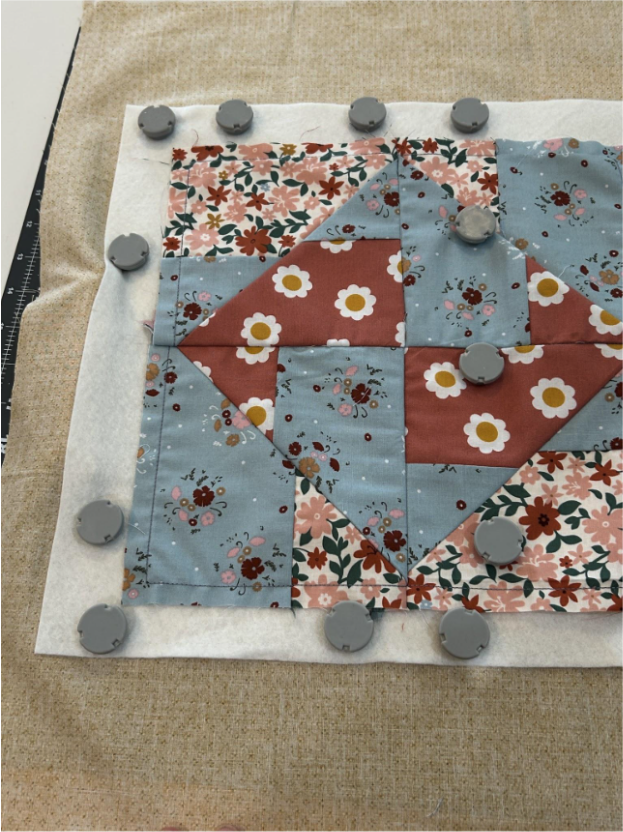
Stitch out your end-to-end design, adjusting the quilt sandwich and running the design again until all of your quilt is stitched.
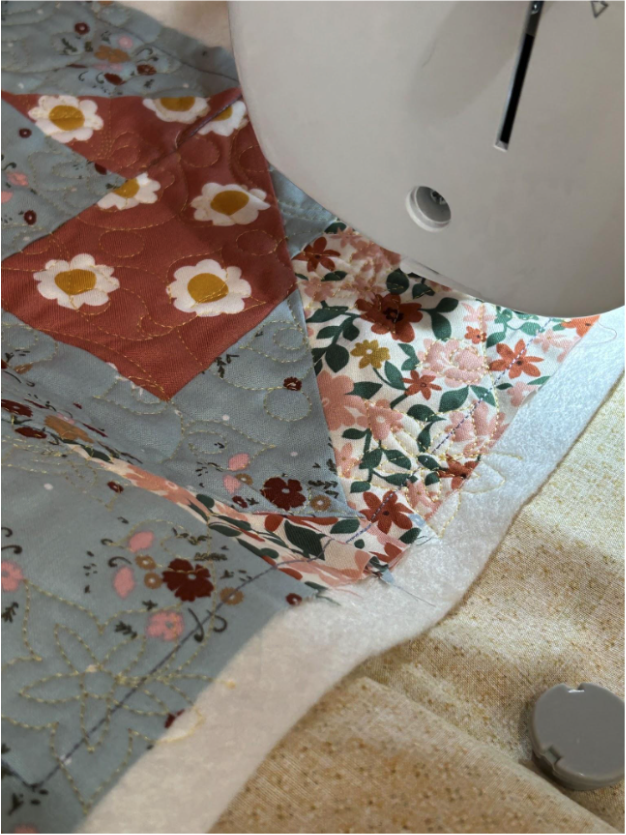
Remove it from the hoop and bind it the way you’d like. Since my end-to-end designs usually come off the edge a bit, I cut off all the backing and batting to get it ready for traditional binding.
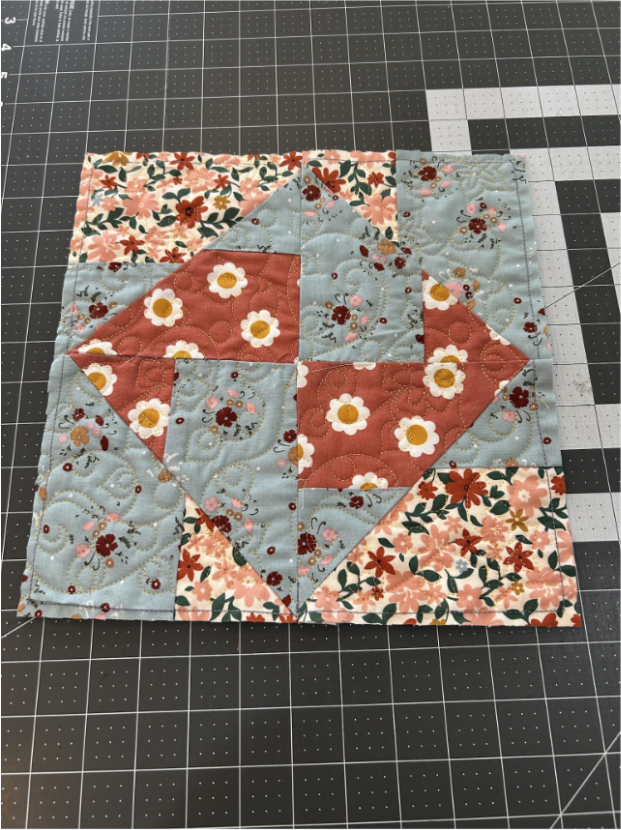
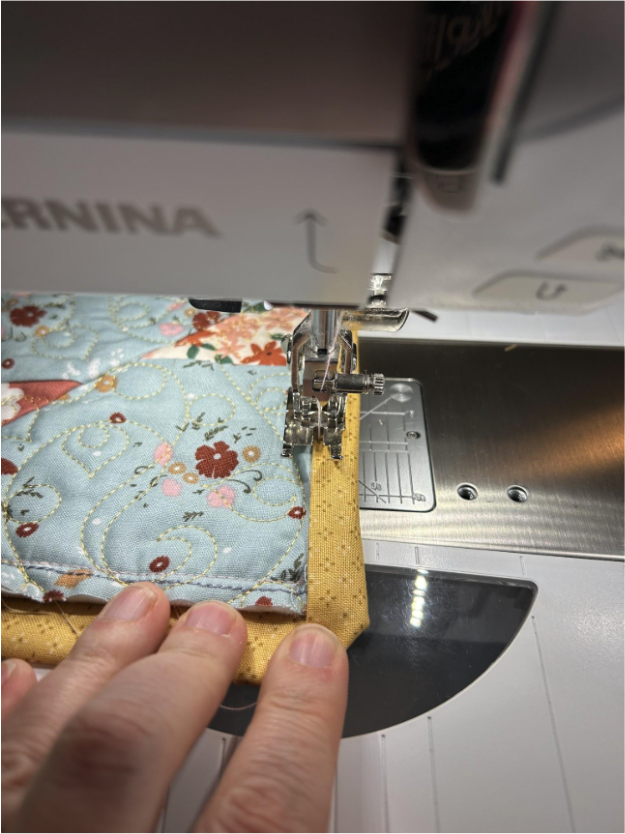
And then I bind it the traditional way with 2½” strips.
The finished quilts look great. I’m so happy with how they turned out!
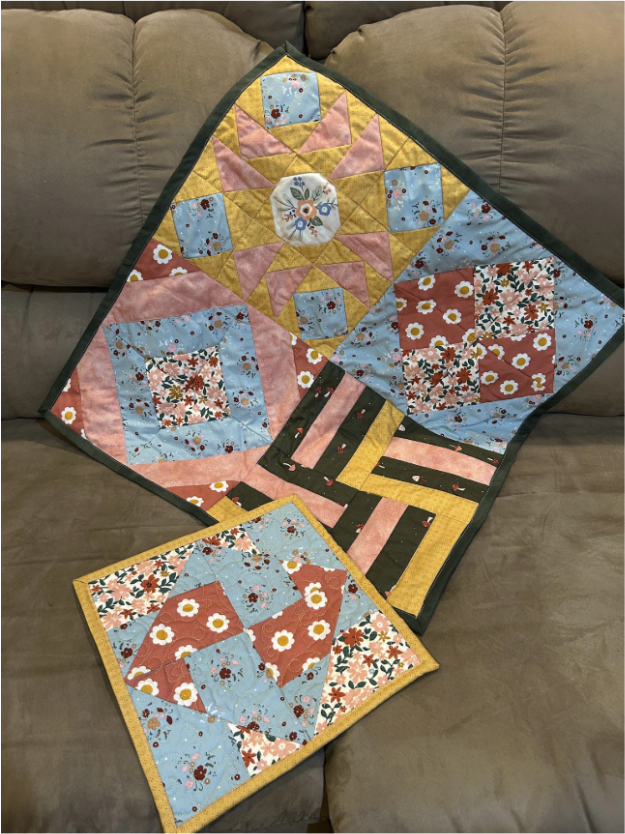
One of my favorite things about these ITH Mix-and-Match Quilt Blocks is how many different quilts you can create from the same set of designs. Simply rotating a block can completely change the look! I hope these ideas inspire you to experiment, play with layouts, and create a quilt that's uniquely yours. I can't wait to see what you make!
Head on over to the Designs by JuJu Embroidery Blessings Facebook Group and post your quilts there, or tag us with #designsbyjuju on all your social media! Happy quilting!