Toggle Nav
 Inspire.
Create.
Stitch.
Inspire.
Create.
Stitch.
Search
Inspire.
Create.
Stitch.
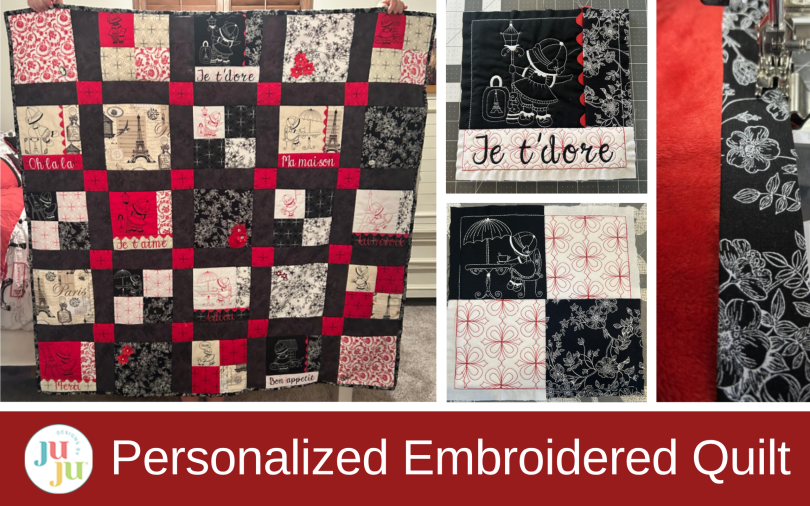
Take your quilting skills further with a personalized machine embroidered quilt using Quilting Backdrops™, custom word blocks, embellishments, and an easy quilt-as-you-go method.
In this post we will continue our Beginner to Bold series with an intermediate project. We will build upon the beginning steps we learned in Beginner to Bold: How to Make an Embroidered Pillow with an Envelope Back. Today we will personalize designs with the help of Embrilliance, piece together blocks of different sizes, add embellishments to the quilt top, and then we will finish the quilt off with a quilt-as-you-go technique and bind it.
In this tutorial, you'll learn how to:
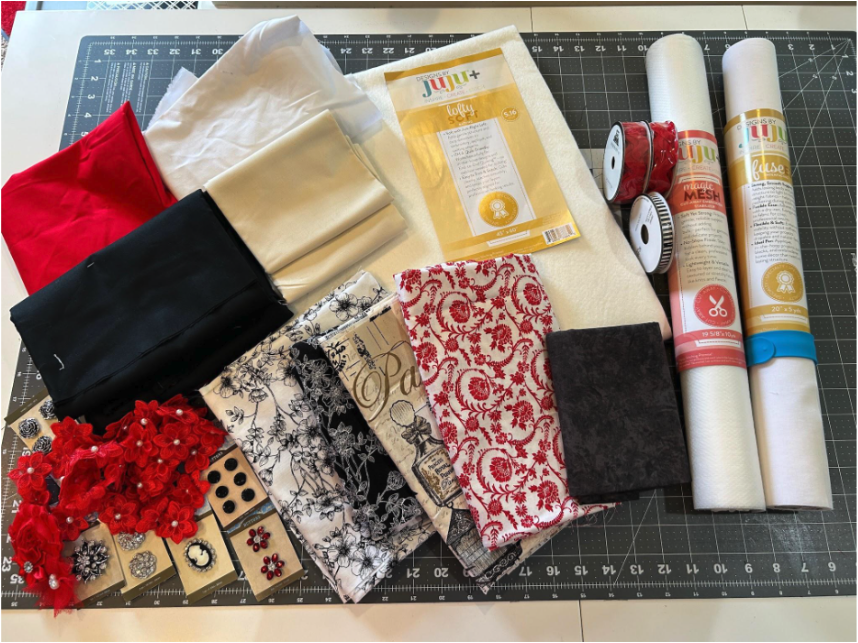
Don’t forget to check out the Designs by JuJu Amazon store for our design team’s favorite supplies. And for stabilizers, batting, and threads, Designs by JuJu+ has everything you need.
I love quilting because your imagination is the only limit. The possibilities are infinite. You can sew blocks together, you can cut them in all different ways and sew them back up, and you can rotate things until you like how it looks. I know there are the “right” ways to do it all, but I haven’t had the quilting police show up yet, so I’m going with what I like as I quilt.
I started in Photoshop on my computer, deciding what kind of blocks I’d like for my quilt. I wanted this quilt to be a bit more traditional, so I went with some basic arrangements.
I had found some fabrics that I loved. One of them had a Paris theme that I thought would go well with this quilt, and the other three were florals that just seemed Paris-like. So I wanted to showcase these fabrics all on their own with just an 8” square block.
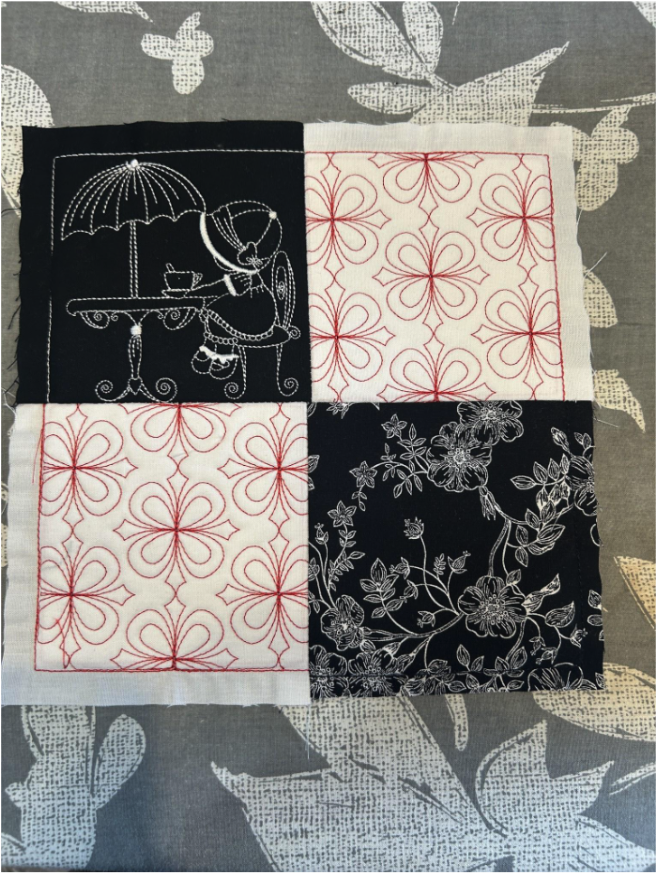
I wanted to use a lot of the Paris Sunbonnets in my quilt, so to get as many of them as possible I decided to do some four-patch blocks. I wanted to do a Sunbonnet design on the solid fabric and diagonally from it, I would use a fabric piece that matched. The opposing corners I would do as a square in a contrasting color embroidered with the Modern Flower Quilting Backdrops.
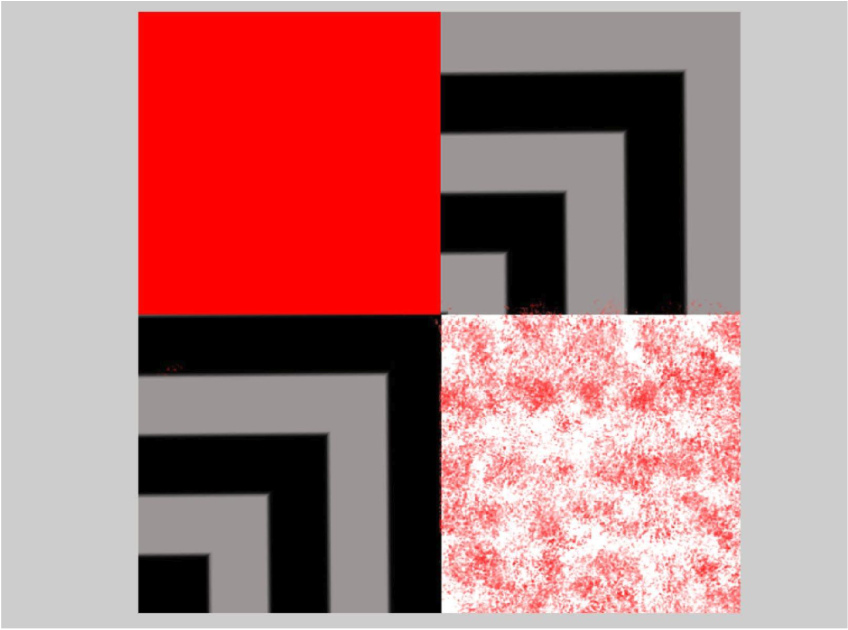
Since I couldn’t figure out how to get all the designs into Photoshop, here is a finished picture of one of the blocks for you to visualize.
In my last block I wanted to have a bigger Sunbonnet design, but I wanted to add something that was more personalized. So I thought it would be fun to add some french words that are easily recognizable even if you don’t speak French, which I do not. So I decided to stitch a Sunbonnet on the 6” x 6” square, then add a coordinating 2” x 6” fabric rectangle to the side of it, and use Quilting Backdrops with a word along the bottom 2” x 8” piece.

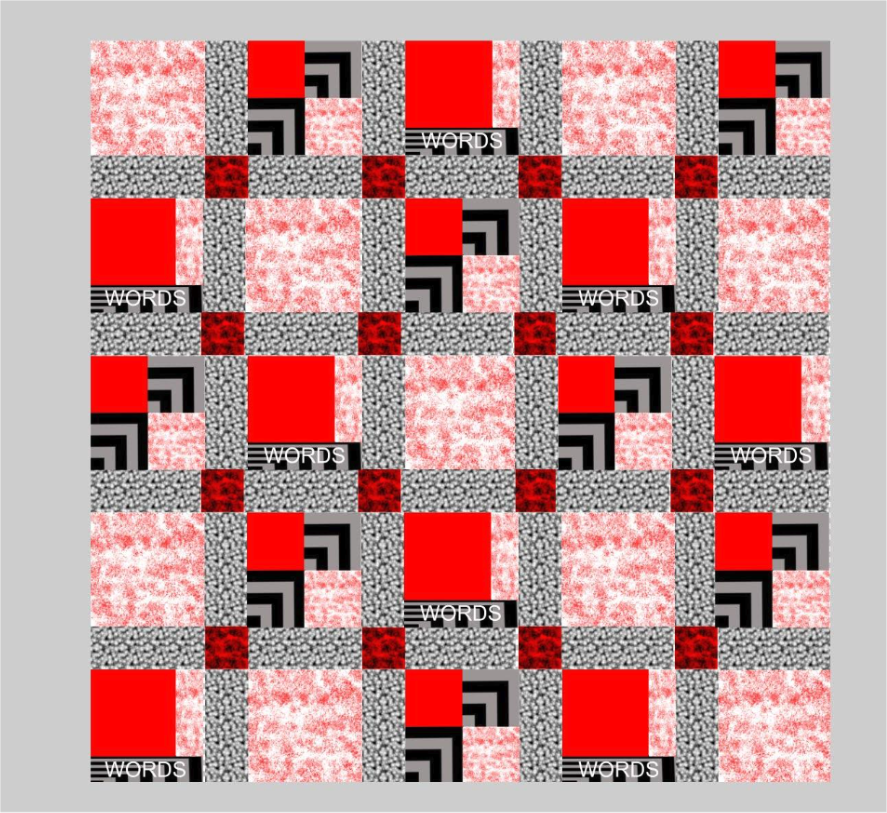
Then I took all the blocks and figured out how I wanted to arrange them. I like a bit of an order so I created a pattern starting on the top row with the fabric block, the four-patch block, and the word block. I repeated it until I had five across and kept the pattern going until I got to the bottom. I decided to sash an 8” x 3” piece between each of the blocks and to use a 3” x 3” corner block where the sashes meet up. Once I was done I was really excited about my layout. So now it’s time to get to the machines!
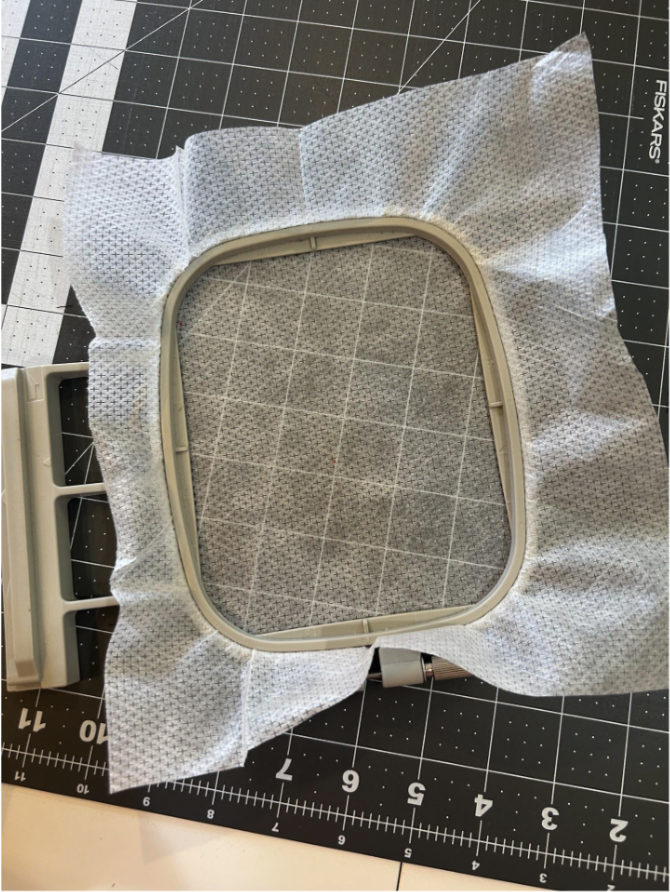
Stitching the corner blocks is easy. We will start with them because it’s a good reminder of how to make the blocks. We start by hooping magicMESH Stabilizer.
Stitch out the placement stitch for the batting.
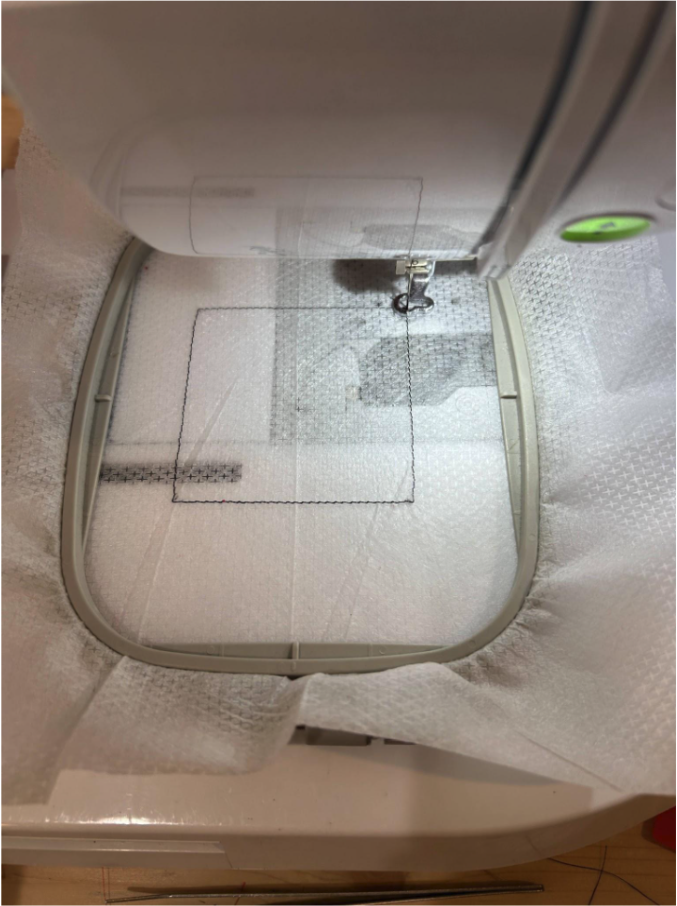
Cover the stitches with loftySOFT Batting and stitch the tack-down stitches.
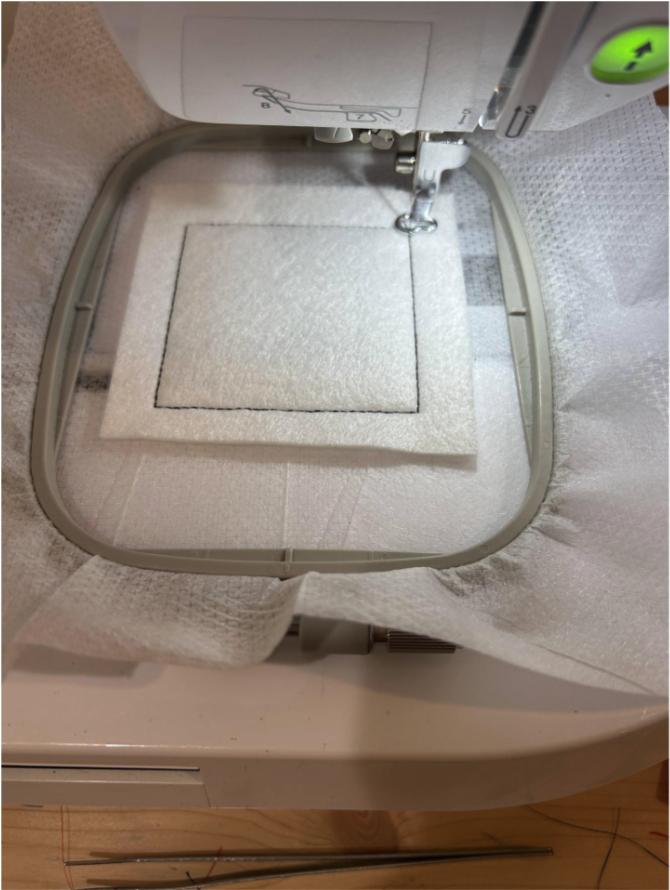
Trim the batting close to the stitches.
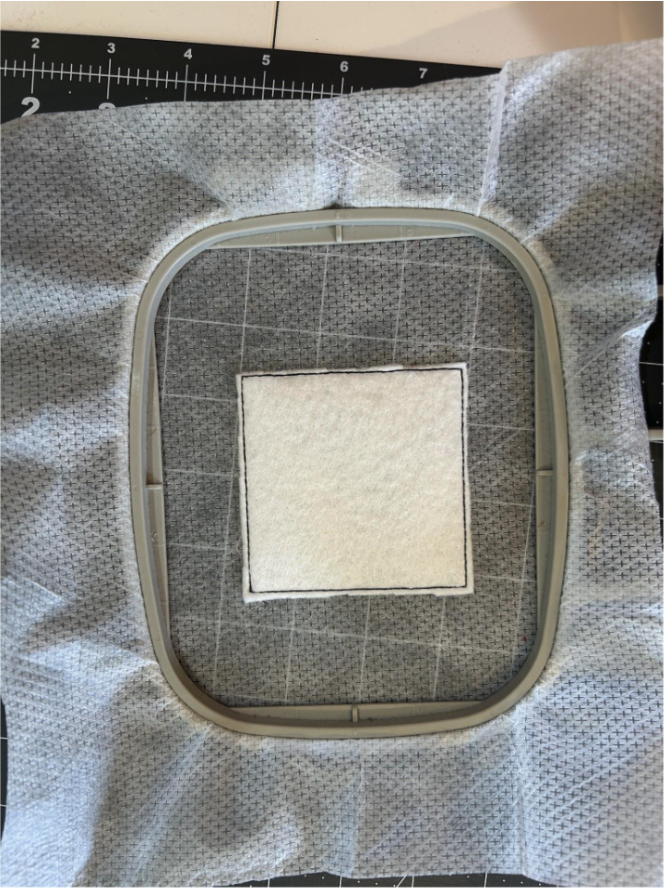
Cover the batting with your corner fabric. Make sure the edges of the fabric extend at least ½” beyond the batting. Stitch the tack-down step.
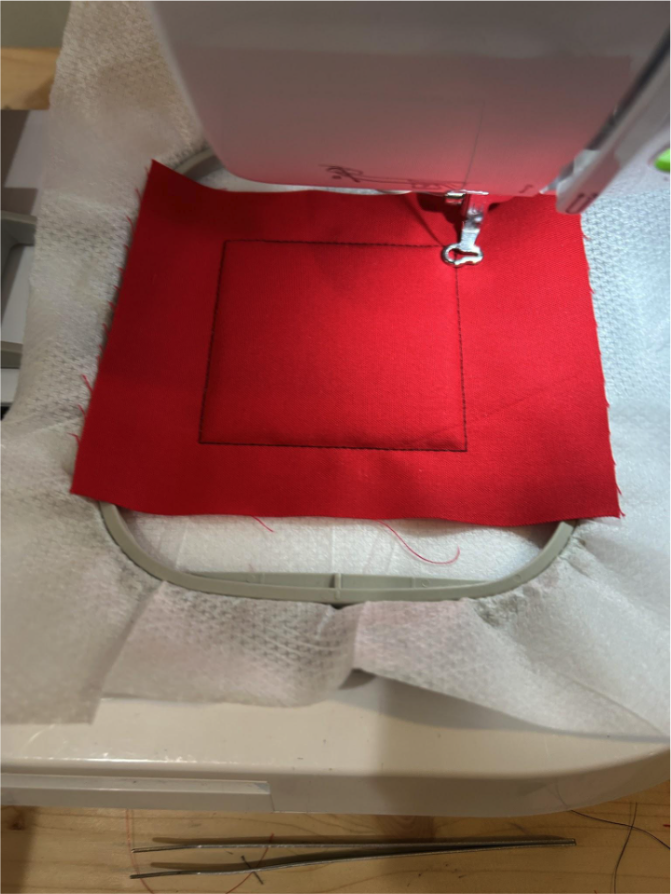
Now stitch the Quilting Backdrops design.
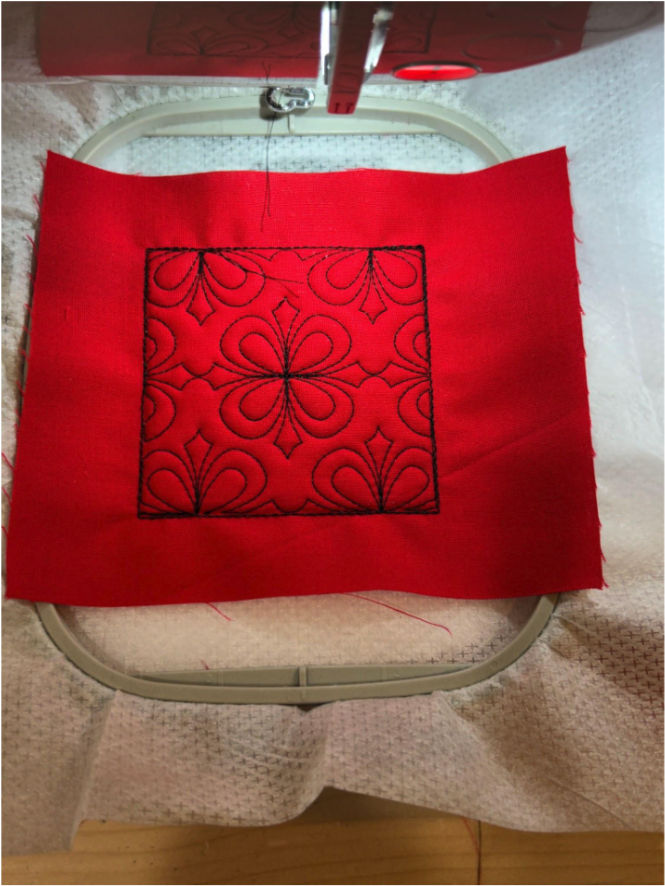
When the design is finished running, remove it from the hoop and trim the stabilizer close to the stitches.
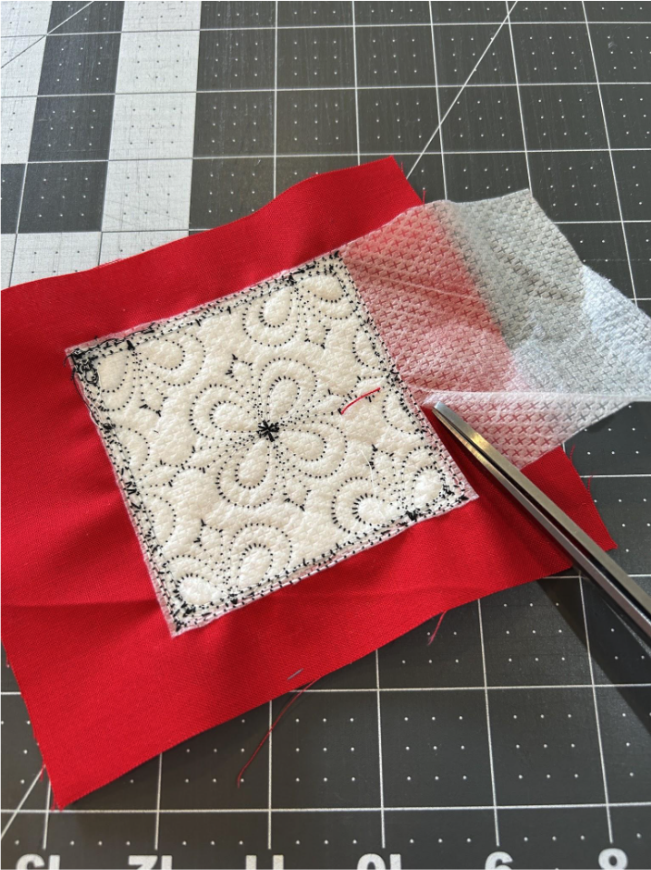
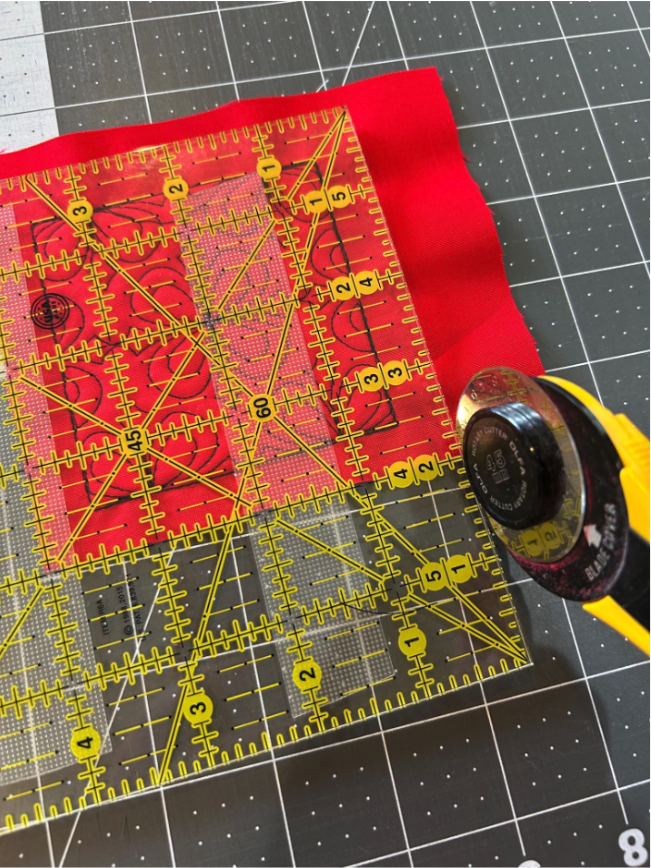
Trim the block ½” from the outside stitching line.
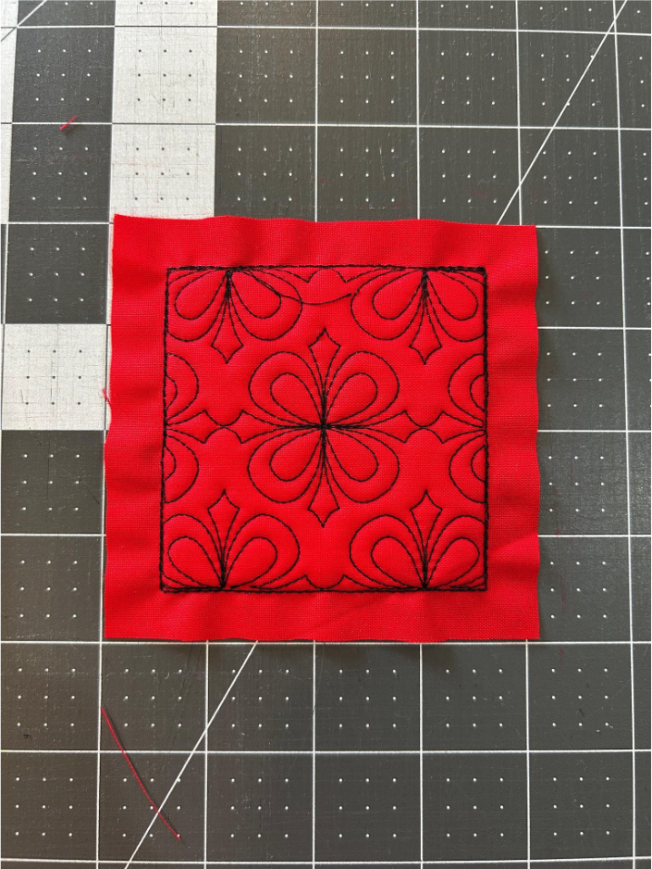
And you have your finished corner block! We will need 16 of these for our quilt so repeat, repeat, repeat!
For my large 8” blocks I wanted to showcase the fabric that I had purchased. I also wanted to make them with the Quilting Backdrops design so they would sew together nicely with the rest of the quilt top. There are a couple ways we can achieve this. If you have software like Embrilliance that allows you to adjust your designs, you can go in and delete the design stitches. If you don’t, you can just skip that step as you stitch out.
Note: check out How to Get Started with Embrilliance if you’ve never used it before.
The steps are just like the corner block we already did. We will first stitch the placement stitch for the batting, cover the placement line completely, and stitch the tack-down.
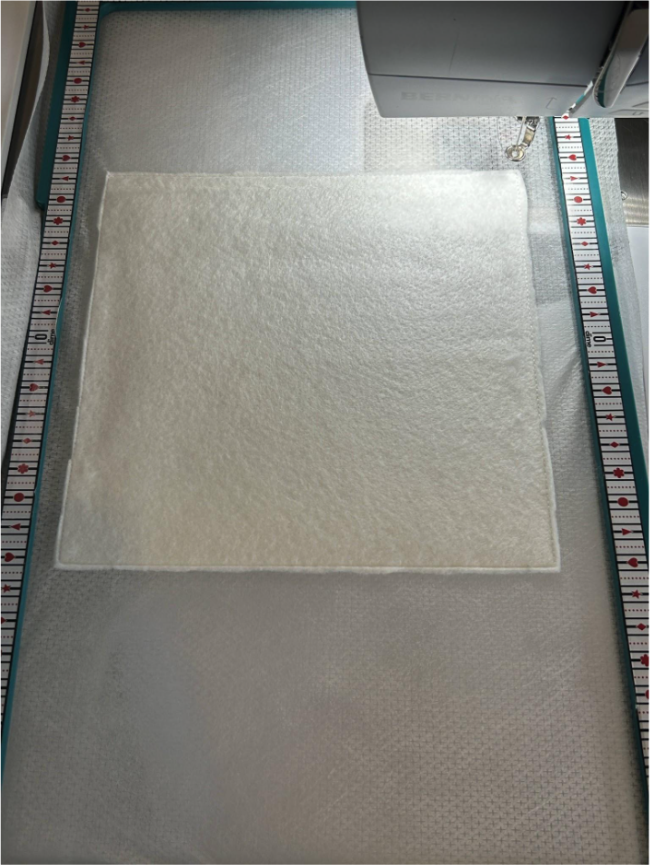
Trim the batting close to the stitches and cover with the fabric, making sure you have at least ½” on each side.
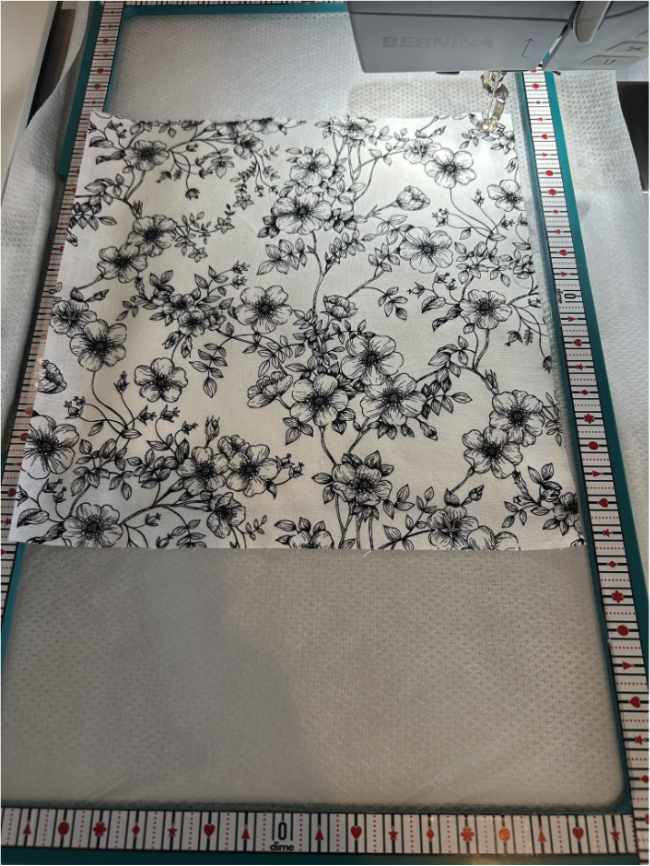
Stitch the tack-down, remove from the hoop, and trim your fabric and stabilizer. That’s it! Super easy!
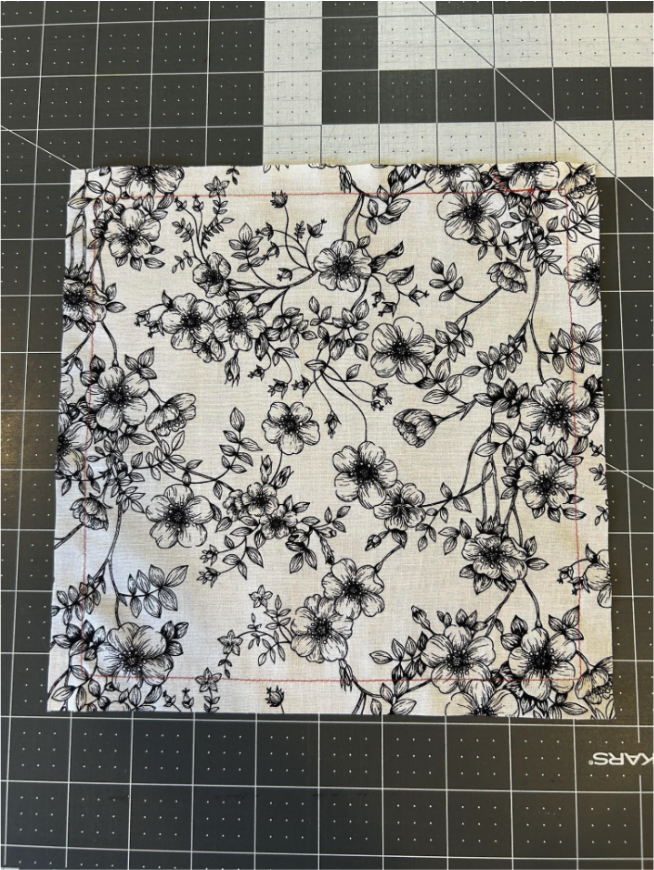
We will need nine of these blocks, but they stitch up quickly.
For our four-patch block, each 8” block will consist of four 4” squares. We will make one fabric square, two squares with the Quilting Backdrop design (like our corner squares), and one square with our Paris Sunbonnet stitched on it. Since we have already shown how to do the fabric square and the Quilting Backdrop squares, let’s learn how to stitch the Sunbonnet Girl on a square.
If you have a paid version of Embrilliance you can easily combine your designs there. Open your program and load a 4” square Quilting Backdrop. Highlight the decorative stitches and delete them. You are left with an empty square.
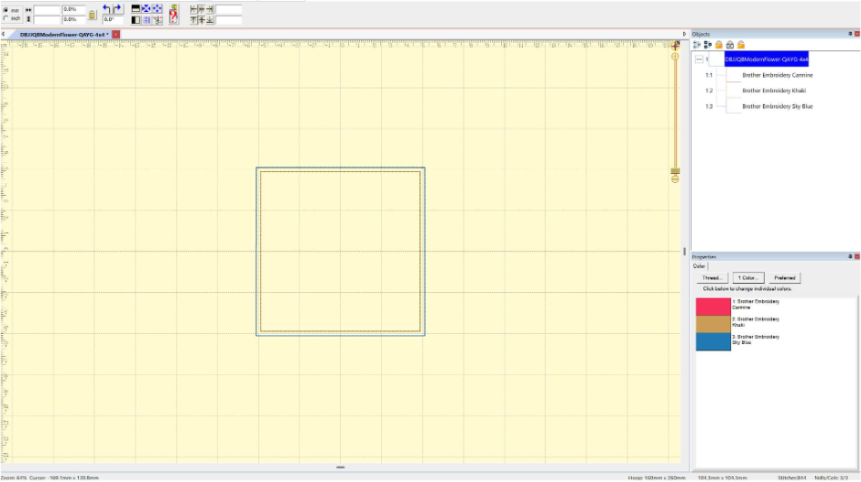
Open the design you want to stitch in another window. Copy it and paste it in your empty square. Save it and take the design to your machine.
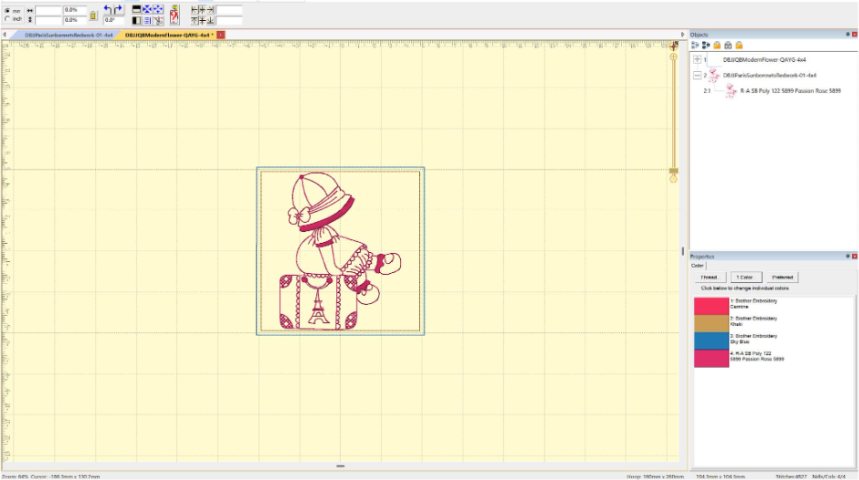
If you don’t have a paid version of Embrilliance, you can do this at your machine. Open the 4” square first, and open the design you like. Make sure their centers are matched up. When you stitch them out you will skip the decorative stitches of the block and just stitch your chosen design’s stitches.
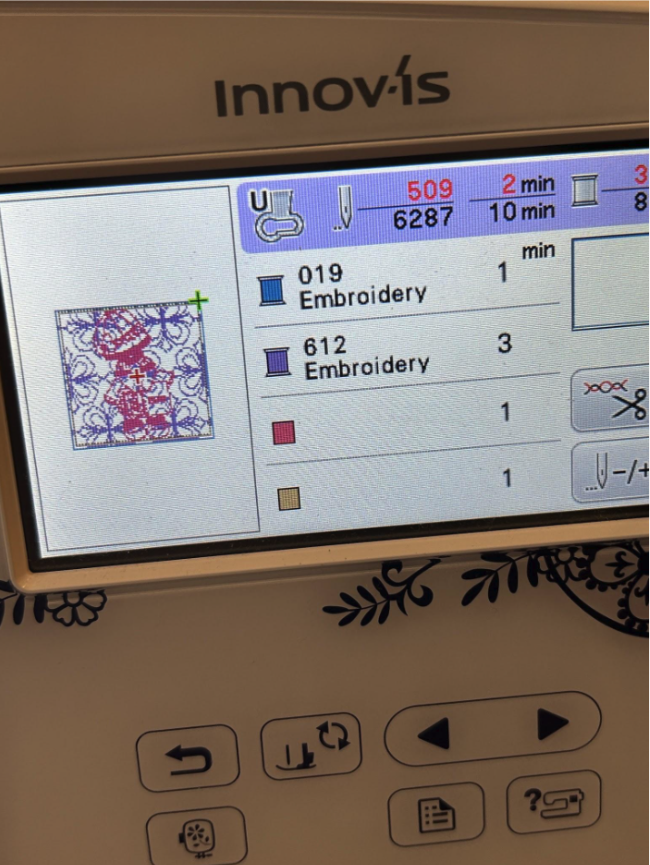
I was able to fit two of these blocks in my hoop. We start like every other block and stitch the placement stitches for the batting, cover them with the batting, stitch the tack-down, and trim close to the stitches.
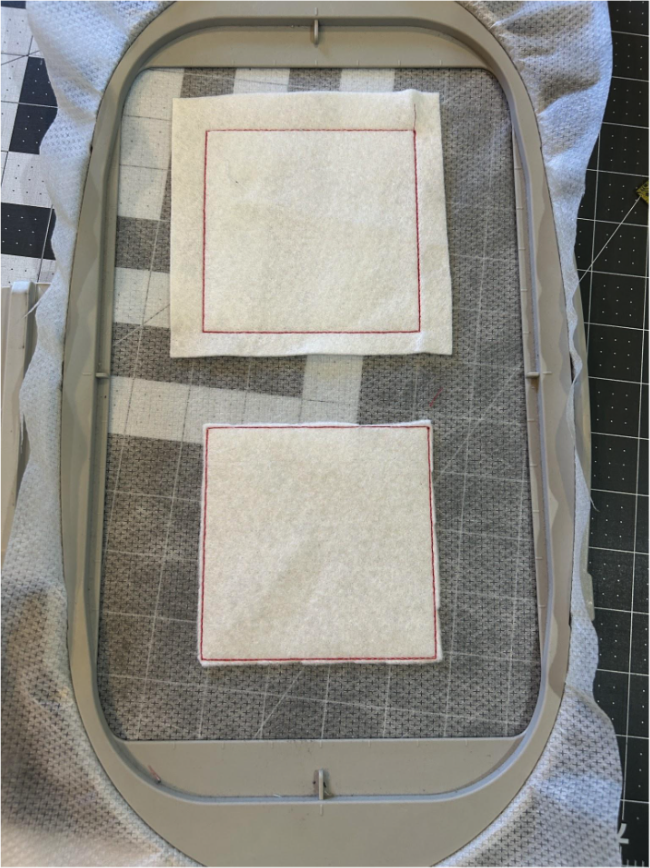
Place the fabric over the batting with at least ½” on each side. Stitch your tack-down stitches.
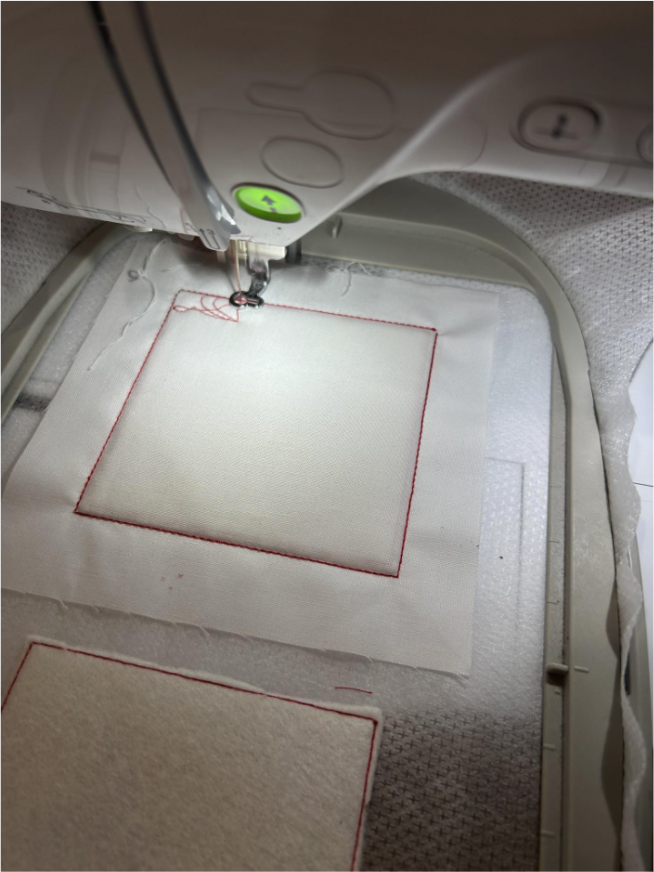
Then stitch your chosen design. You may have to skip the steps for the Quilting Backdrops design if you combined them on your machine.
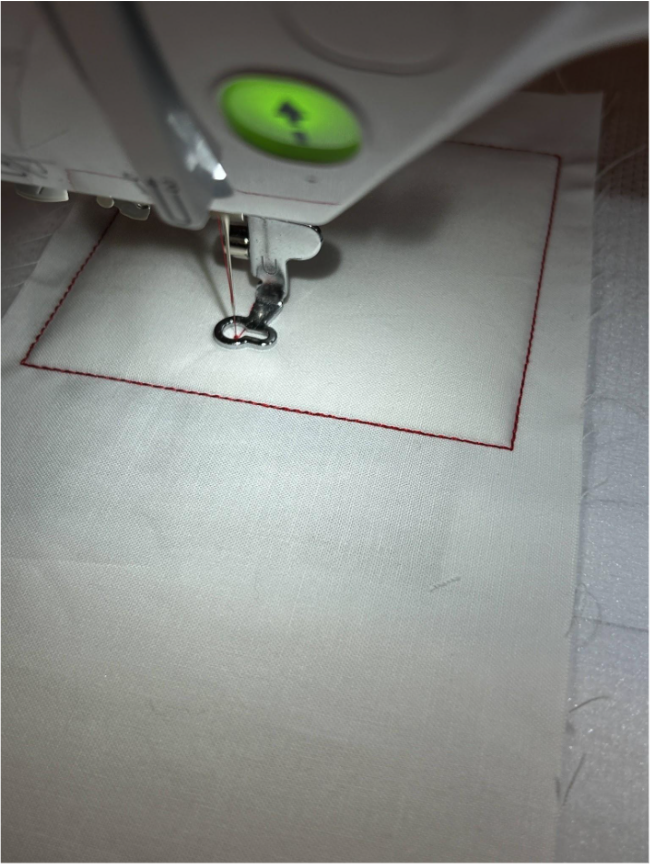
Remove it from your hoop and trim your stabilizer and fabric.
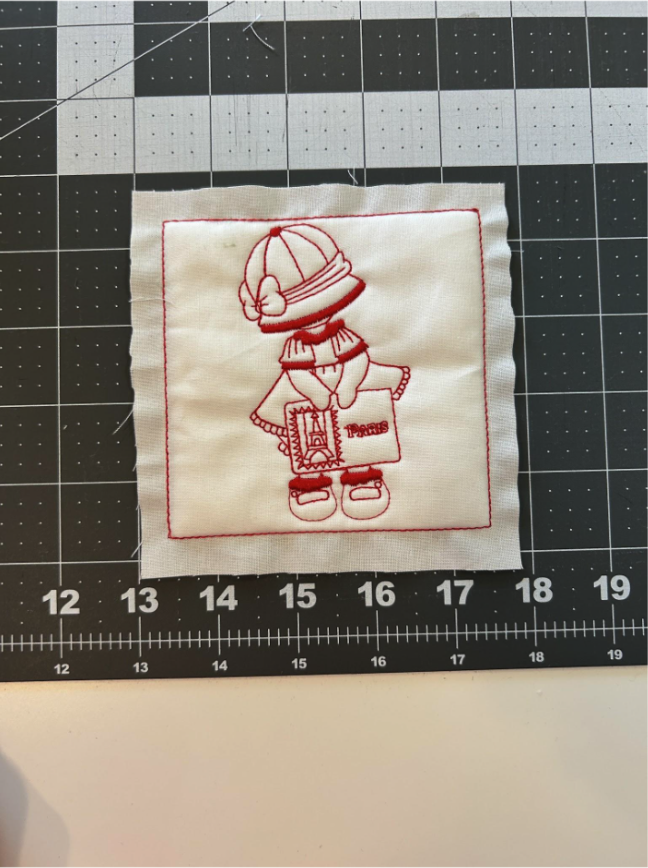
After your four Sunbonnet blocks are finished, it’s time to assemble the block. I used the Quilting Backdrops blocks diagonally from each other and the Sunbonnet block and the fabric block in the other two spots. I used all my fabrics and designs to try to find the way I liked them arranged the best.
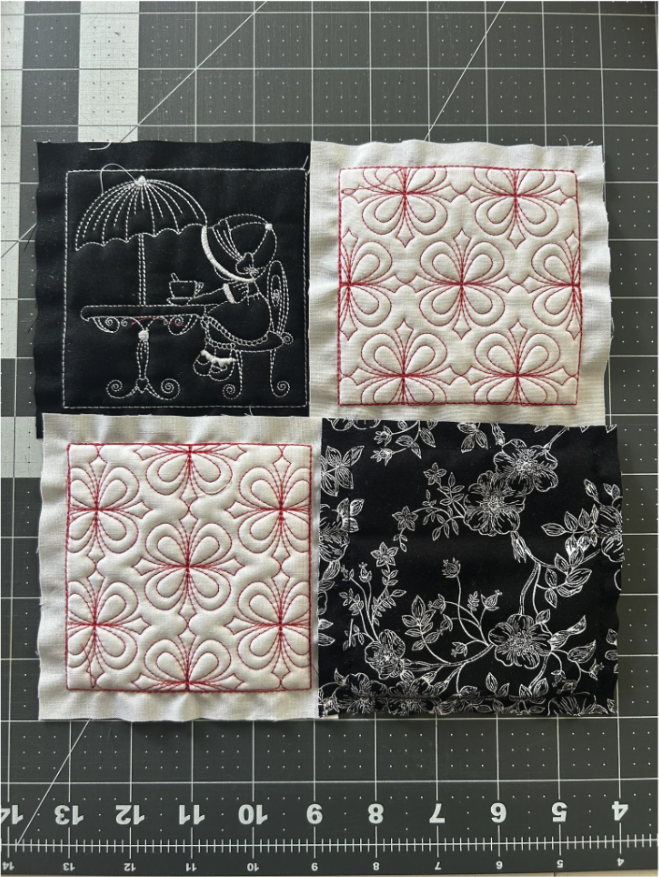
Once you have your designs figured out, sew the four-patch block together. I like to sew in rows, so the two top blocks together first and then the two bottom blocks together next.
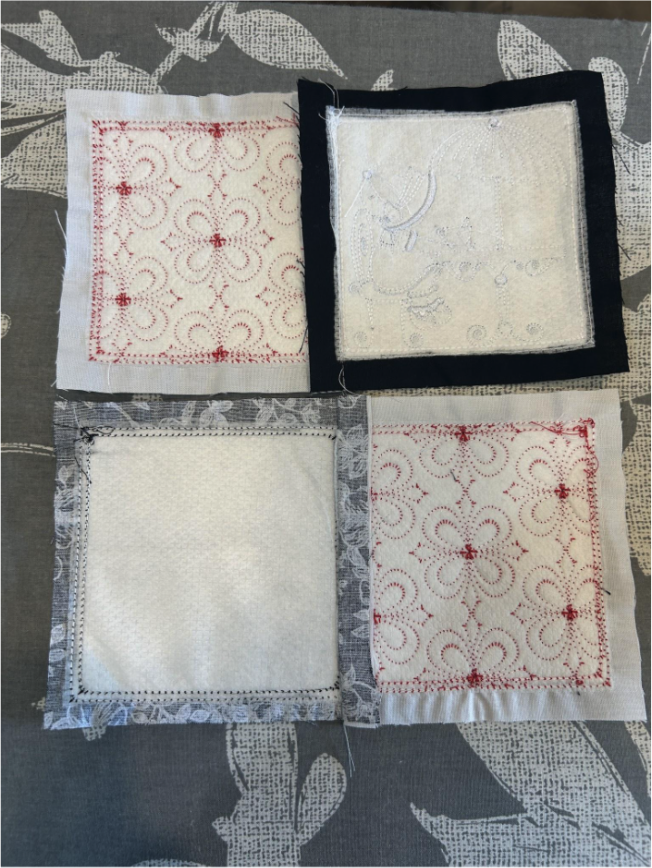
Line up your block’s edges and outer stitching lines to make sure they are aligned. Sew them together between the racing lines.
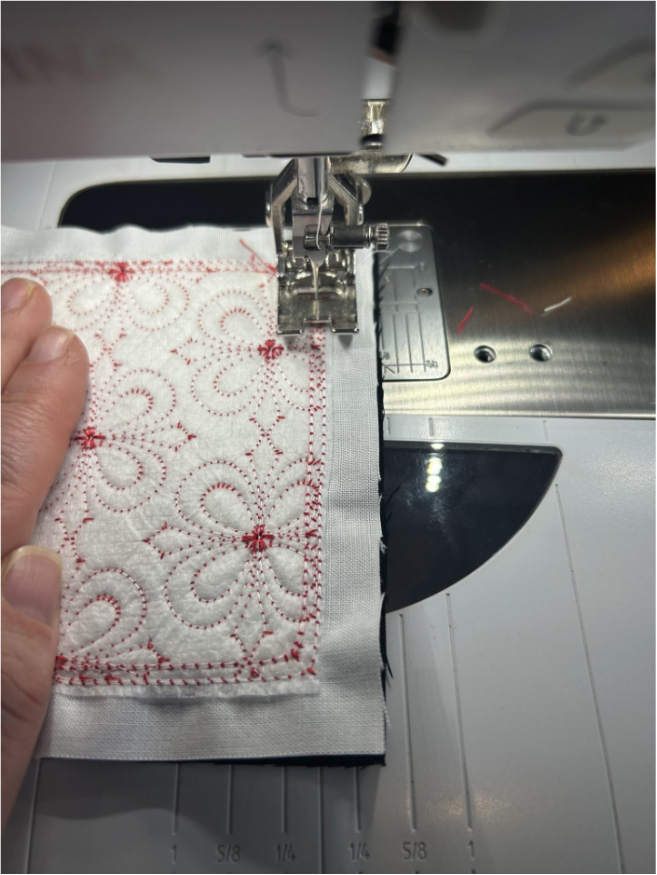
After they are sewn, press the seam toward the block with the Quilting Backdrops. This will help seams nest together.
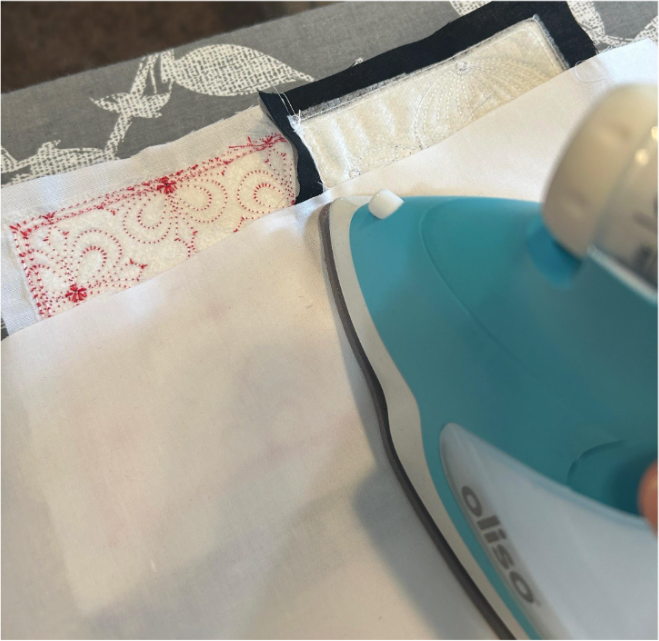
Now we will sew the two rows together, making sure the edges and seams are aligned.
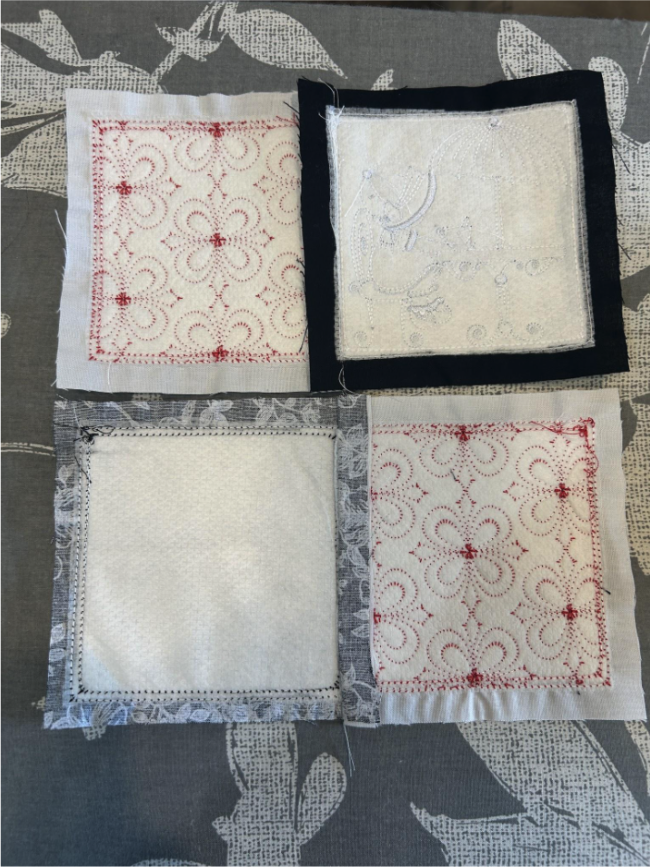
This is how your seams nest.
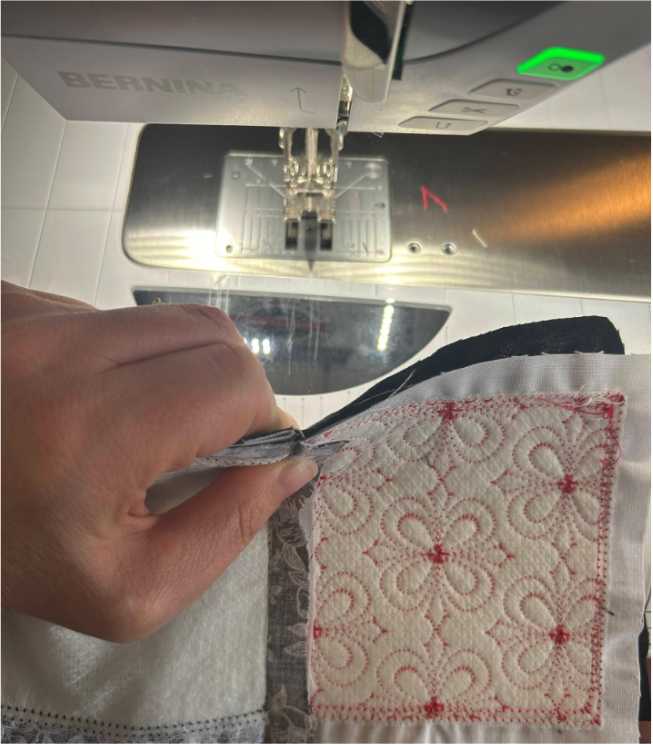
After it is sewn, press the seam open and you have a finished four-patch.
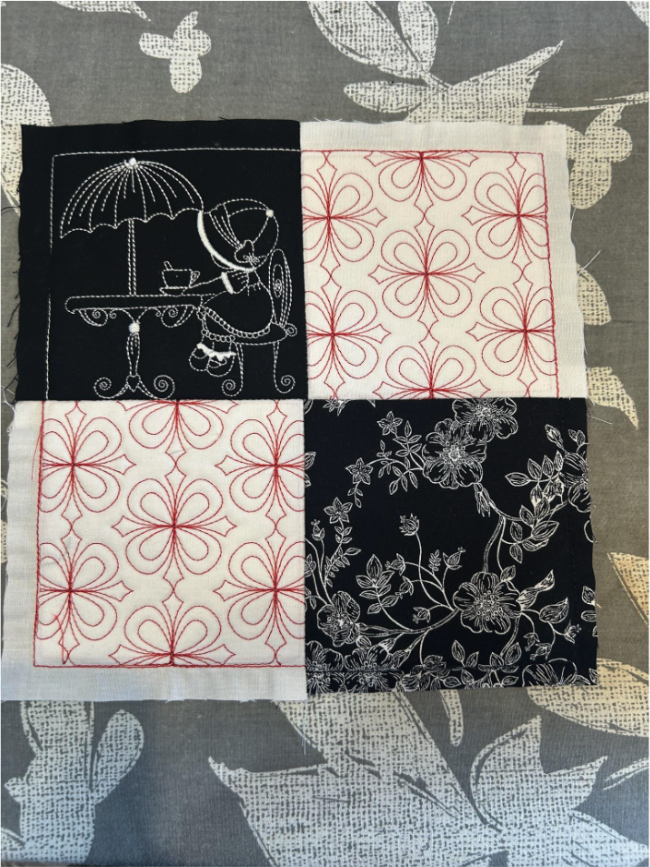
We will need eight of these. I enjoyed playing with the color combinations on these blocks.
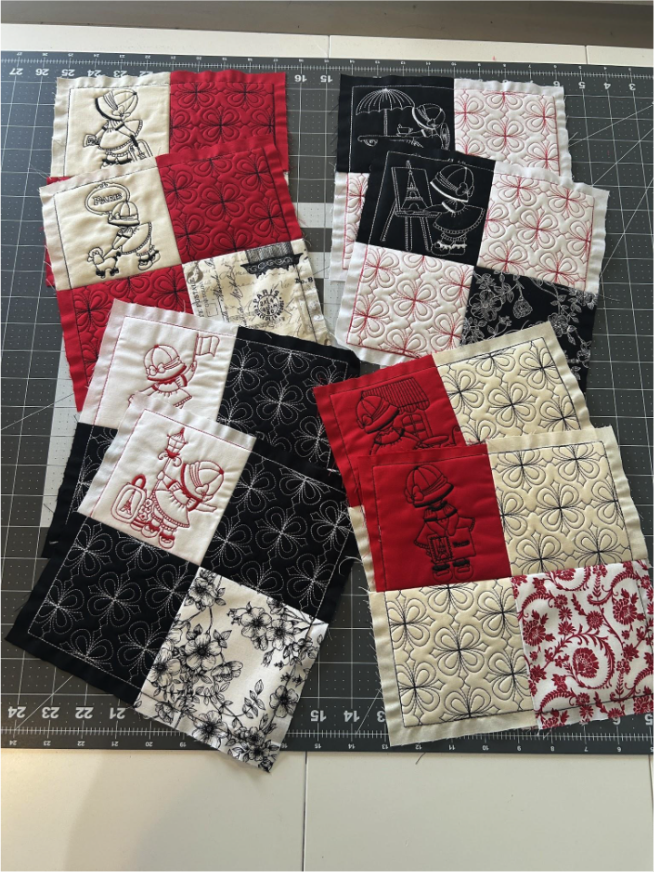
To make our word blocks, we will stitch out a 6” square with a Sunbonnet Belle on it, and we will make a vertical piece that’s 6” x 2”, fabric only. For the word block, we will use a 2” x 8” horizontal piece with our Quilting Backdrops design. On this horizontal piece we will add our words for the quilt. To do that we will use Embrilliance (Embrilliance Express, the free version, is all you need for this step).
We will start by opening our designs in Embrilliance. I am able to fit two of the designs in my hoop. If you're using Quilting Backdrops that are directional, make sure you’re choosing the horizontal design.
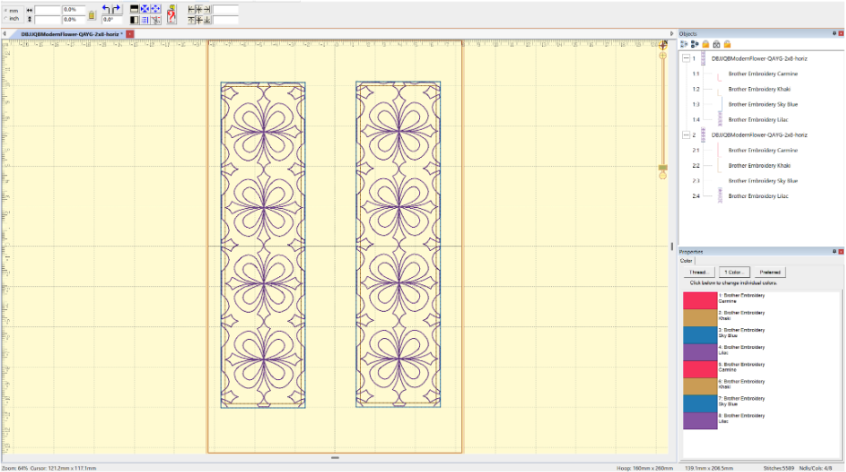
Choose the font you want for your quilt, and type in the words you want. I tried to choose words that even non-French speakers would recognize. I used the Paris Font (of course) and typed it in to see how it looked.
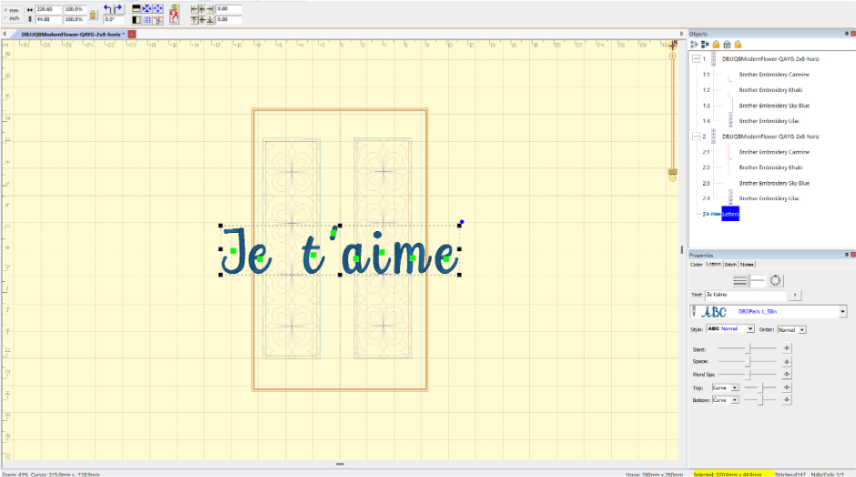
Rotate your word and make sure it fits on your block. You can squish the letters together if you want them connected. I used the 1.5” size font for my text and it fit perfectly.
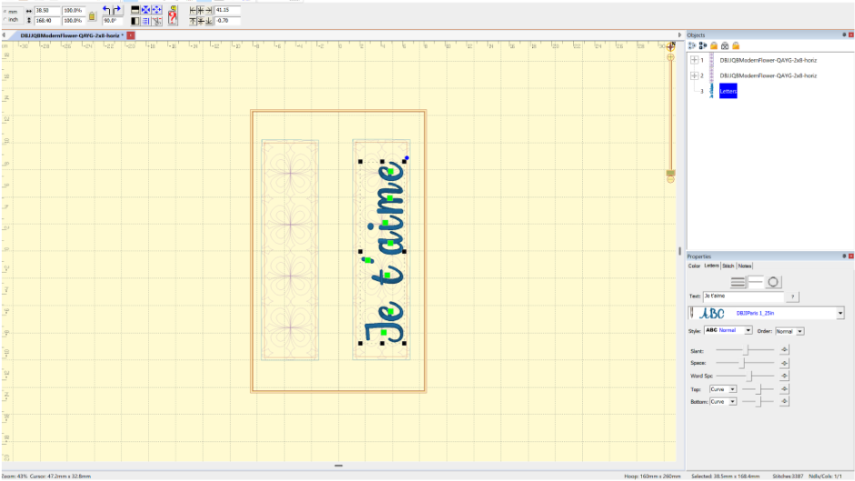
If you have a paid version of Embrilliance, you can save the design and the words as one file to transfer to your embroidery machine. If you’re using the free version, you’ll have to delete the blocks and just save the words, then combine the designs on your machine. Stitch them out like the other blocks we have done, with the words as the last step.
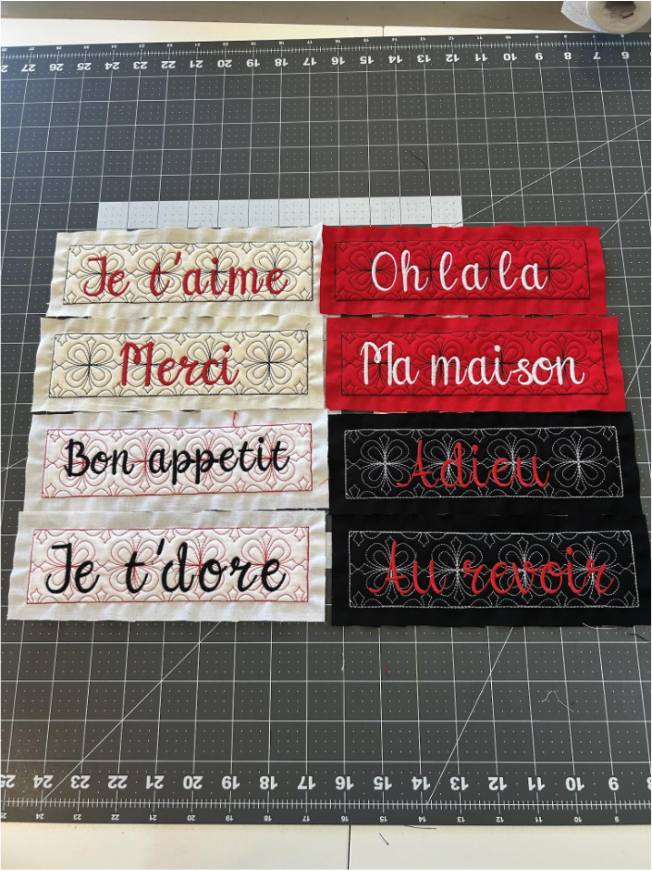
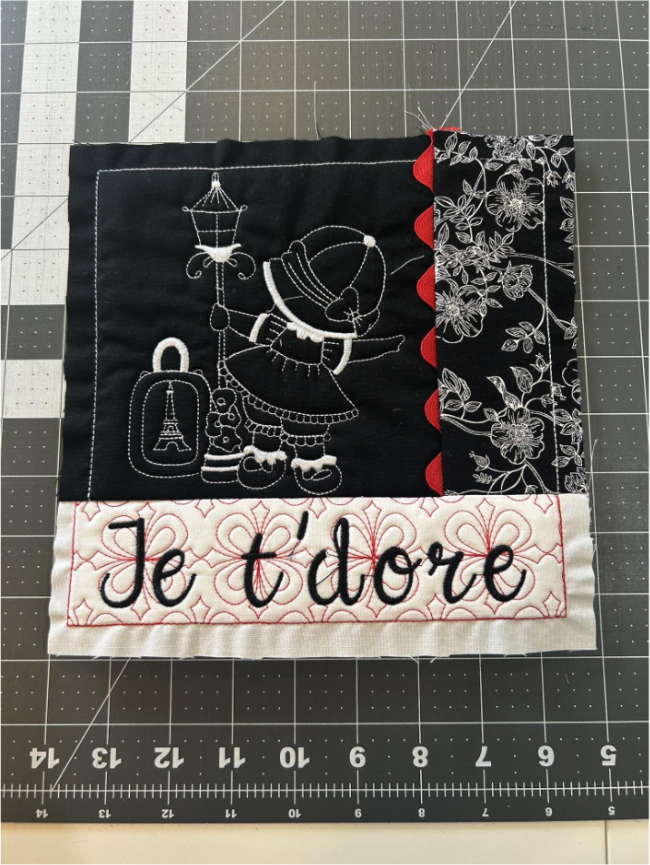
To arrange this block, I placed the Sunbonnet Belle in the upper left, the fabric block to the right of it, and the word block along the bottom.
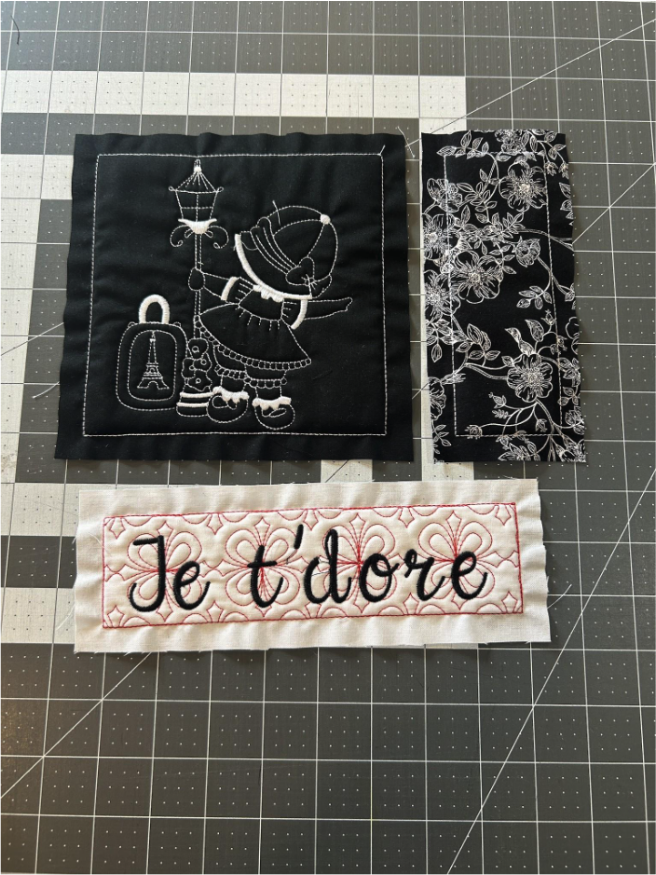
But to fancy this block up a bit I decided to add a bit of rickrack to the seam between the top two blocks. I just lined the rickrack up along the seam between the two blocks.
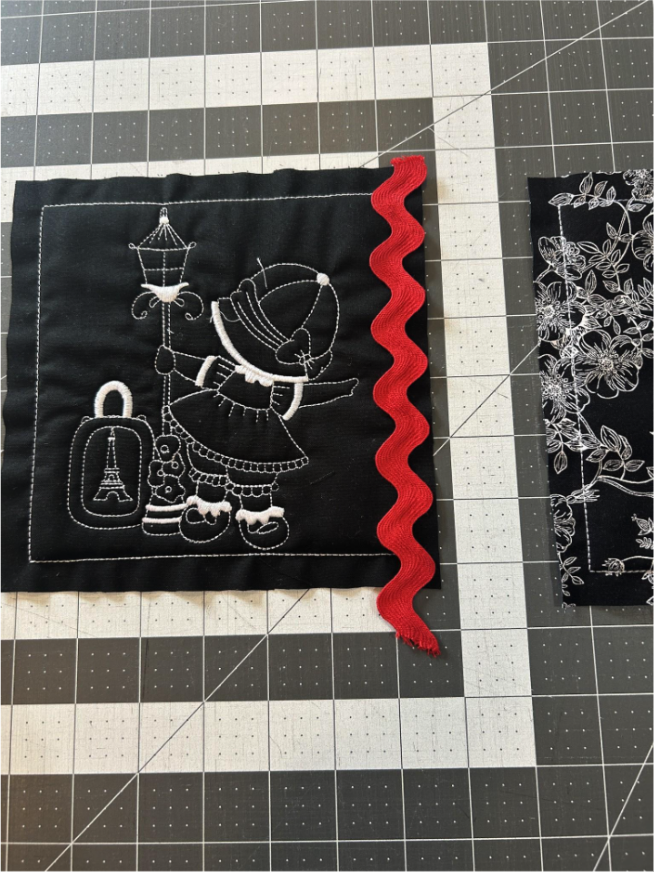
Line everything up and stitch down the racing lines.
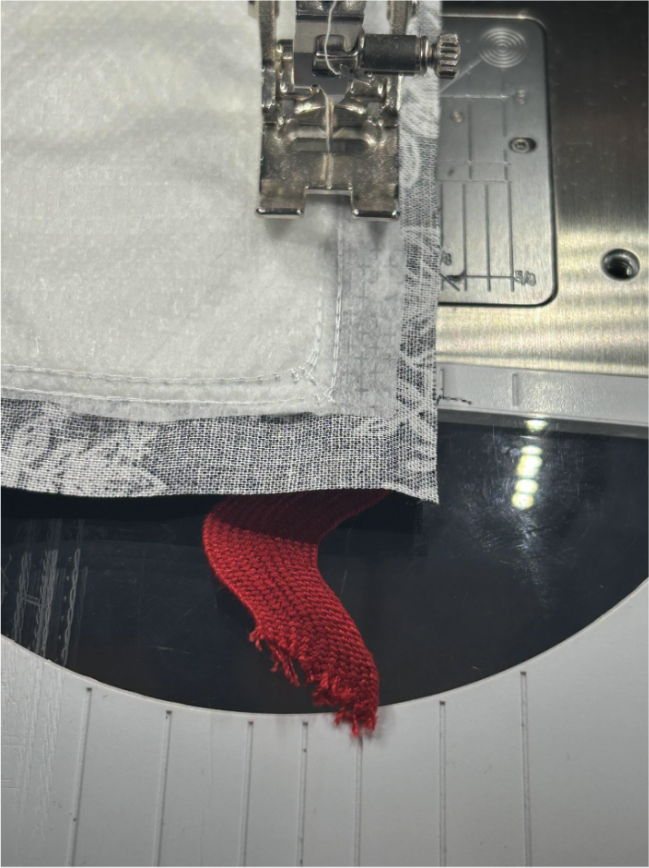
Press the rickrack to the side, and press your seam open.
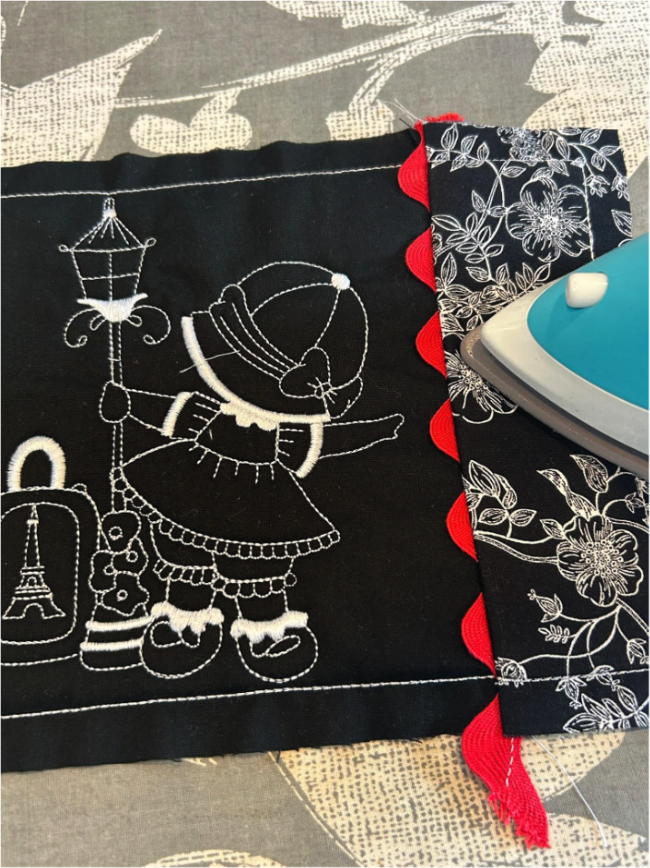
Then we will line our word blocks up along the bottom. Make sure when you do this your word will be the right orientation after you're done sewing. I had to take more than one apart when I went to press them and the word was upside down! Sew the blocks together like we have done the others.
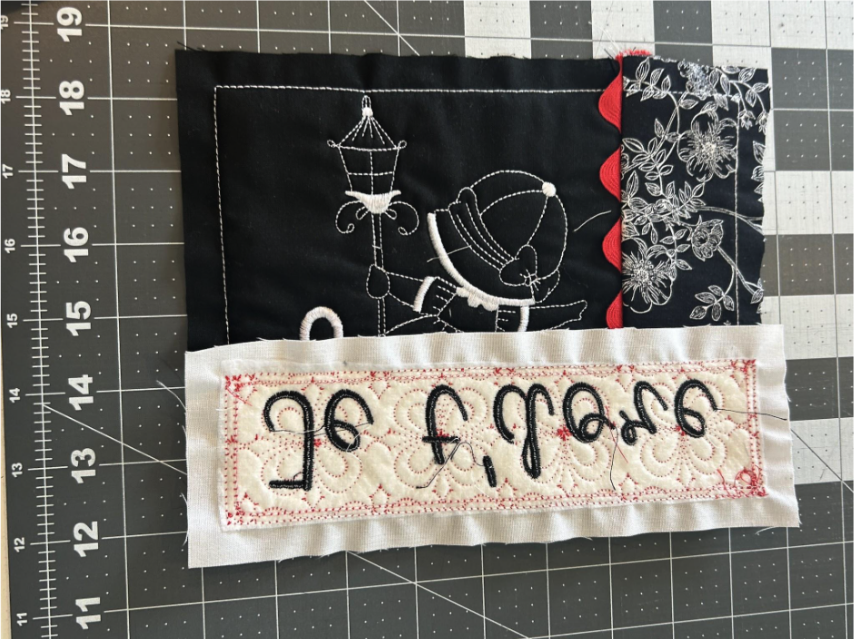
Press the seams open and trim the rickrack.
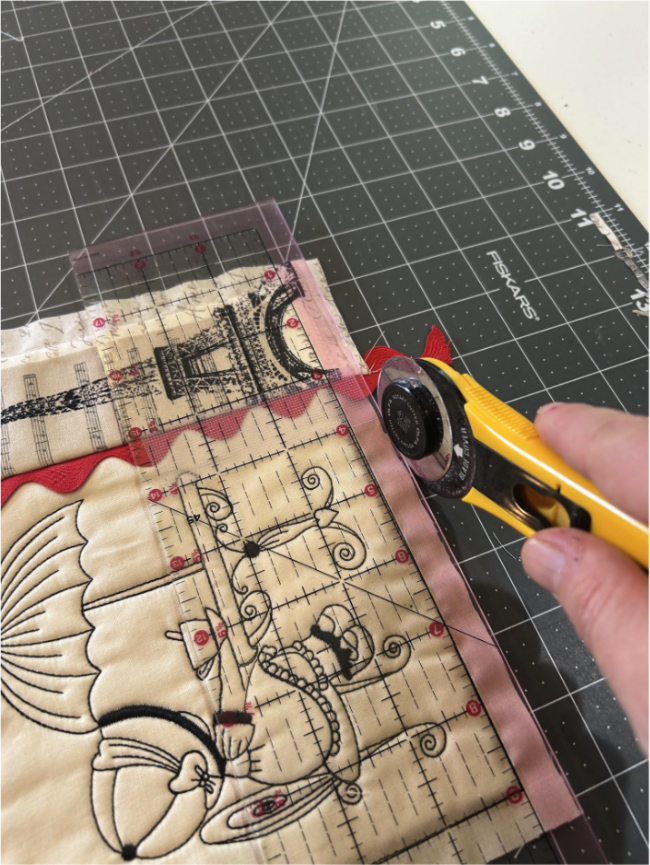
For variety on half the blocks, I waited until I was sewing on the word block and added the rickrack to the long horizontal seam.
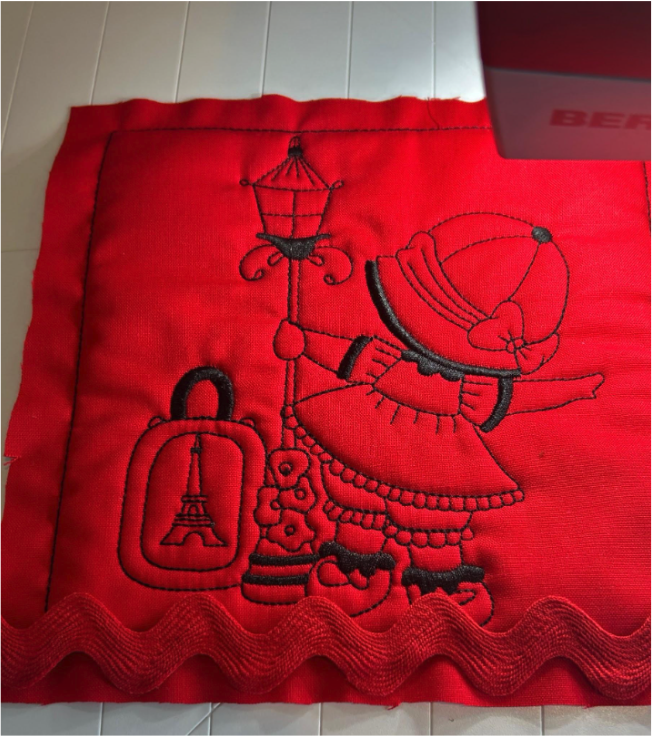
Here is your finished word block.
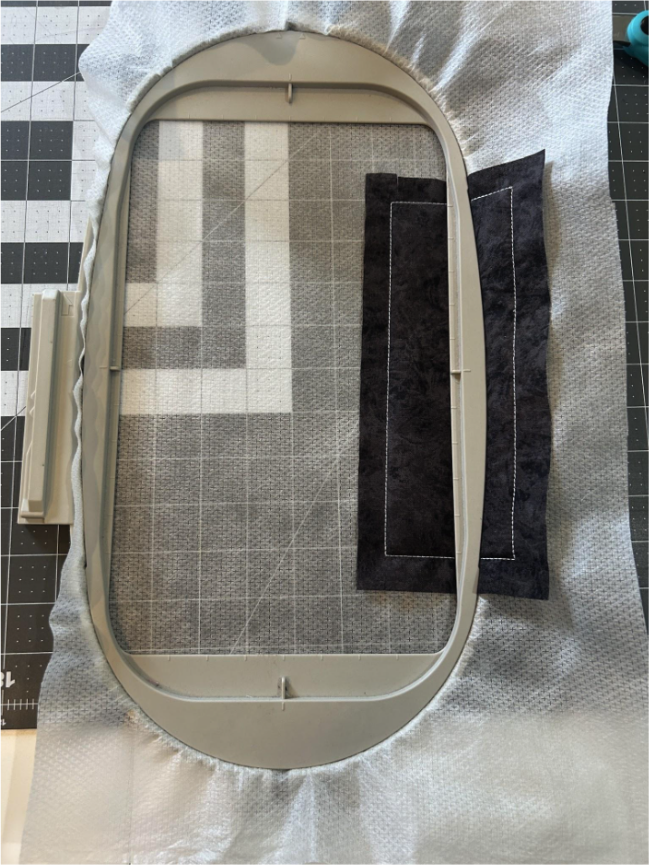
For my sashing blocks I wanted to do a simple block with no design. I thought this would help the blocks and the corner squares to pop a bit more. So we will stitch out 3” x 8” blocks with no design in them. I have a 6” x 10” hoop, so I will cut my stabilizer a little wide, and put the bulk of the stabilizer to the left of my hoop, stitch out one block, unhoop the design and slide the bulk of the stabilizer to the right of the hoop and stitch out my next block. This saves a little bit of stabilizer.
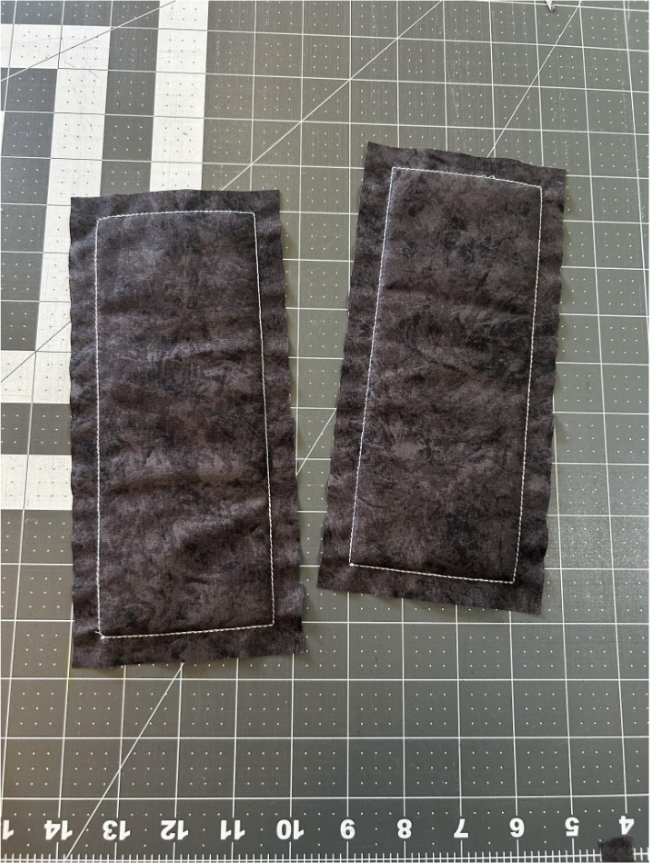
We will need 40 of these sashing blocks.
It’s time to decide how to arrange our blocks. Usually I just throw them out on my floor (I really need to get a design wall!) and see what I think. I’ll rearrange if I see too much of one color in one spot or if it looks boring in another spot. I don’t worry about laying out my sashing and corners with the blocks at this point.
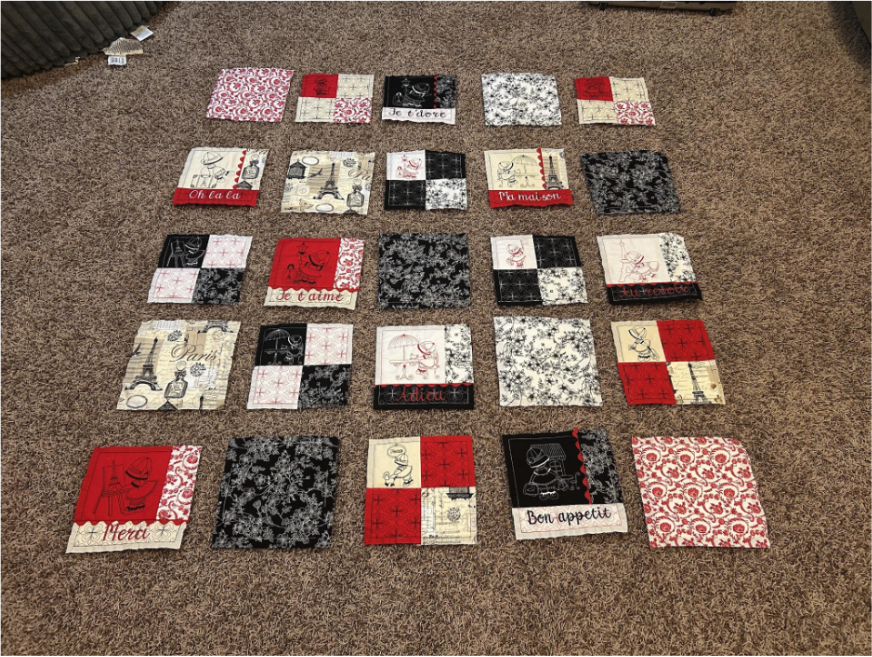
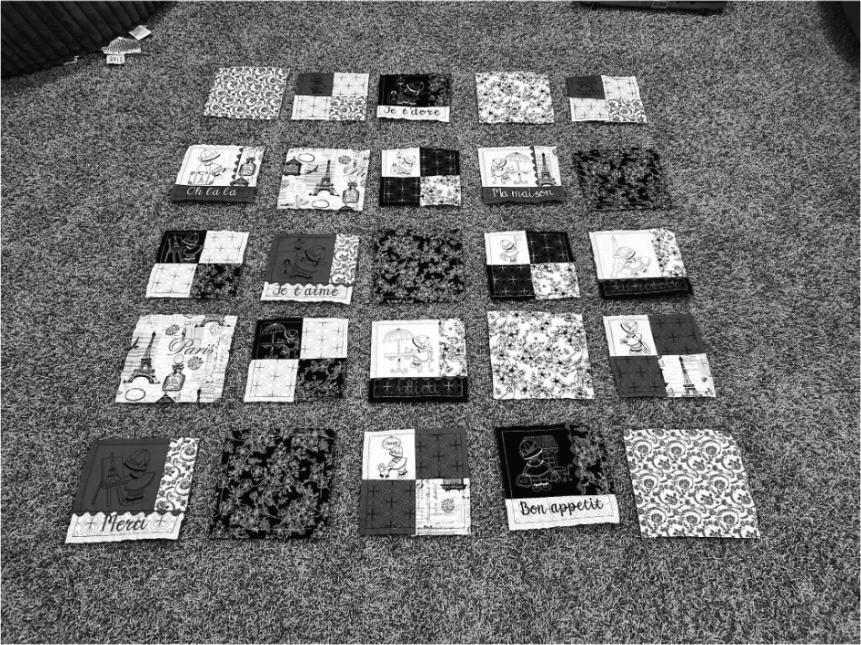
Another trick is to turn your photo black and white. This will help you gauge the darks and lights in your quilt so you can make sure they are balanced too.
Once you're happy with your layout, it’s time to start sewing things together. Make sure to take a picture of your layout to help you keep things in order while stitching. For this quilt we will be sewing the rows together first. So I lay out a couple rows at a time with the sashing and corners.
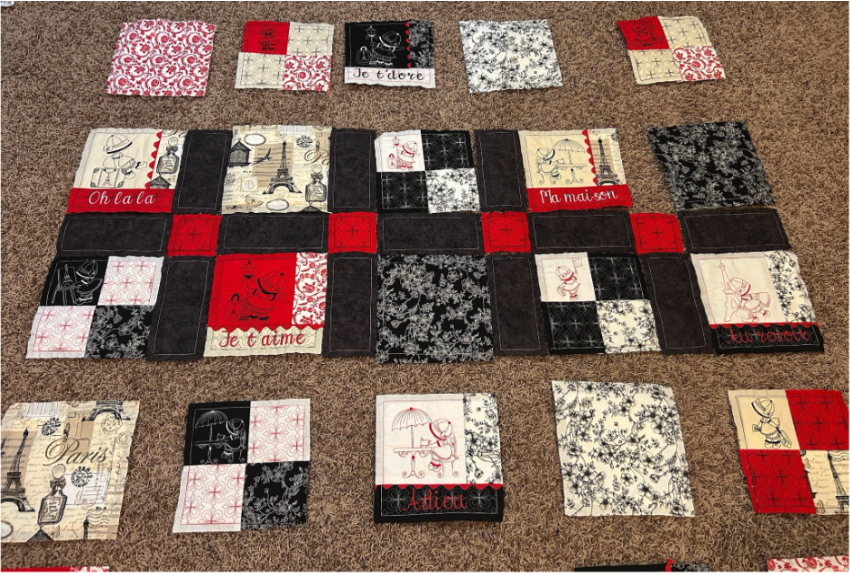
Then we sew the blocks together through the racing lines to make one long row.
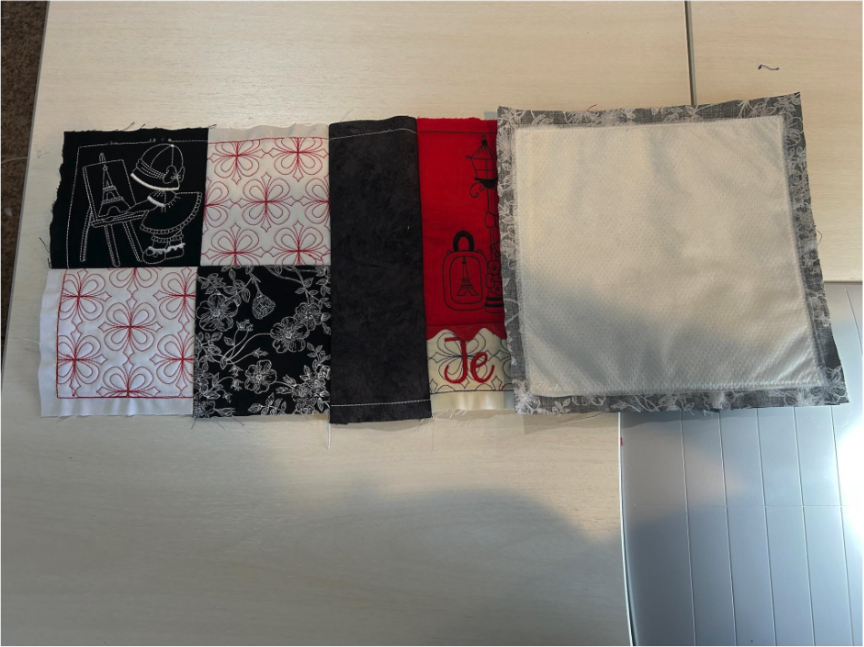
And press your seams toward the sashing for all of the rows.
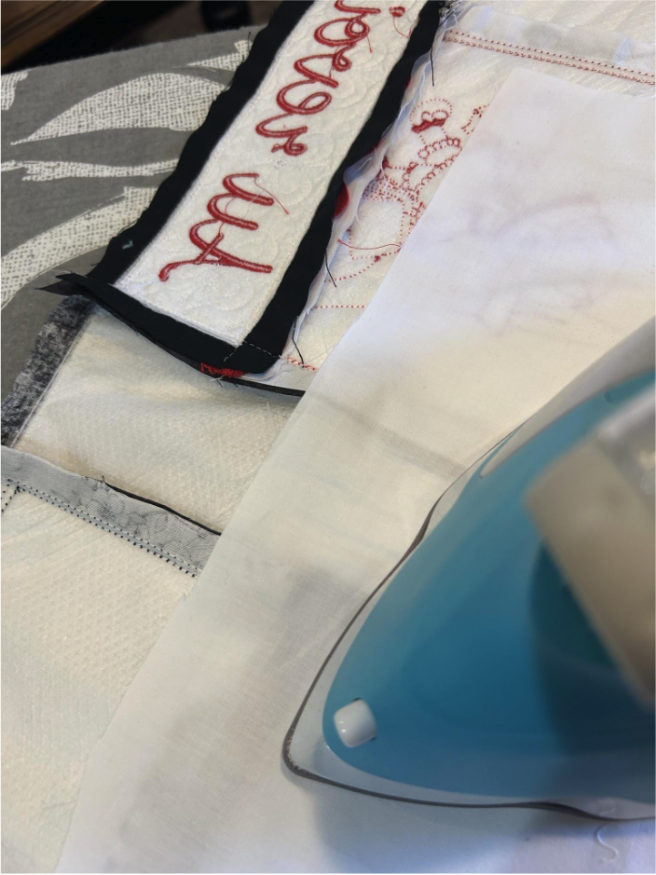
Stitch together the rest of your rows.
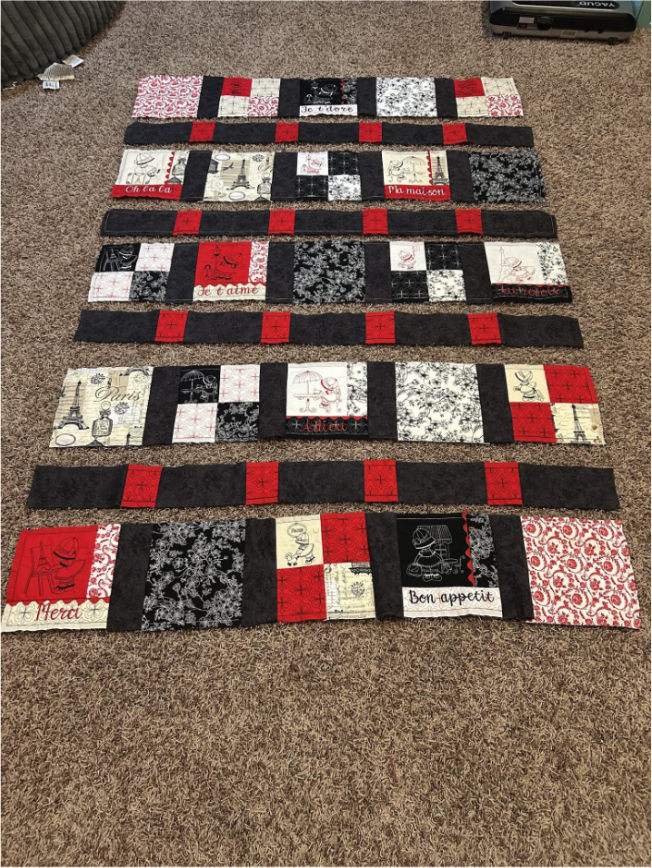
Now we can embellish the quilt. I found some buttons, flowers and ribbons that looked like flowers that I liked. I used these to add to my big fabric blocks. I laid them out so I could make sure I liked their placements. You can embellish any of your blocks the you want to!
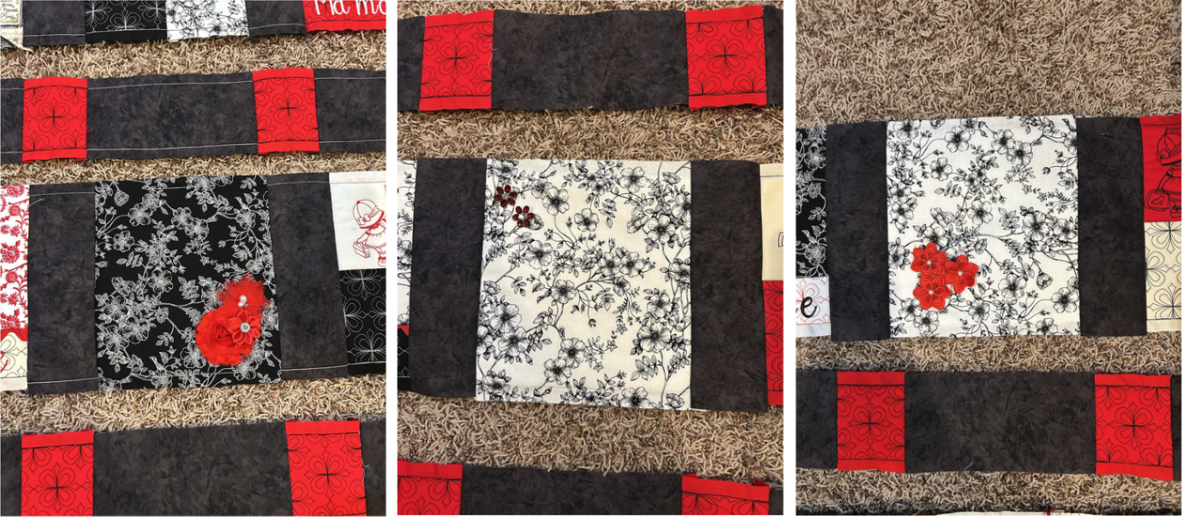
And then hand sew them to the block. Make sure they’re far enough away from the edge that they won’t get caught in your seam allowance when you sew the rows together.
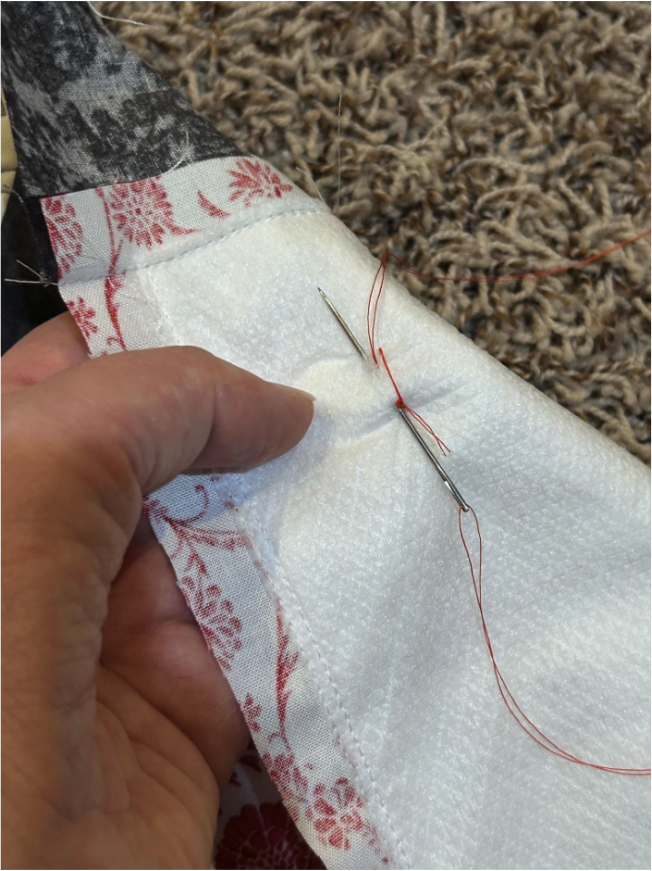
It’s time to sew the rows together and quilt the front to the back. We will do this all in one step. This quilt-as-you-go method lets you piece and quilt your quilt at the same time. Instead of assembling the entire quilt top and then quilting through all the layers at the end, each row is sewn directly through the quilt top, batting, and backing as you assemble it.
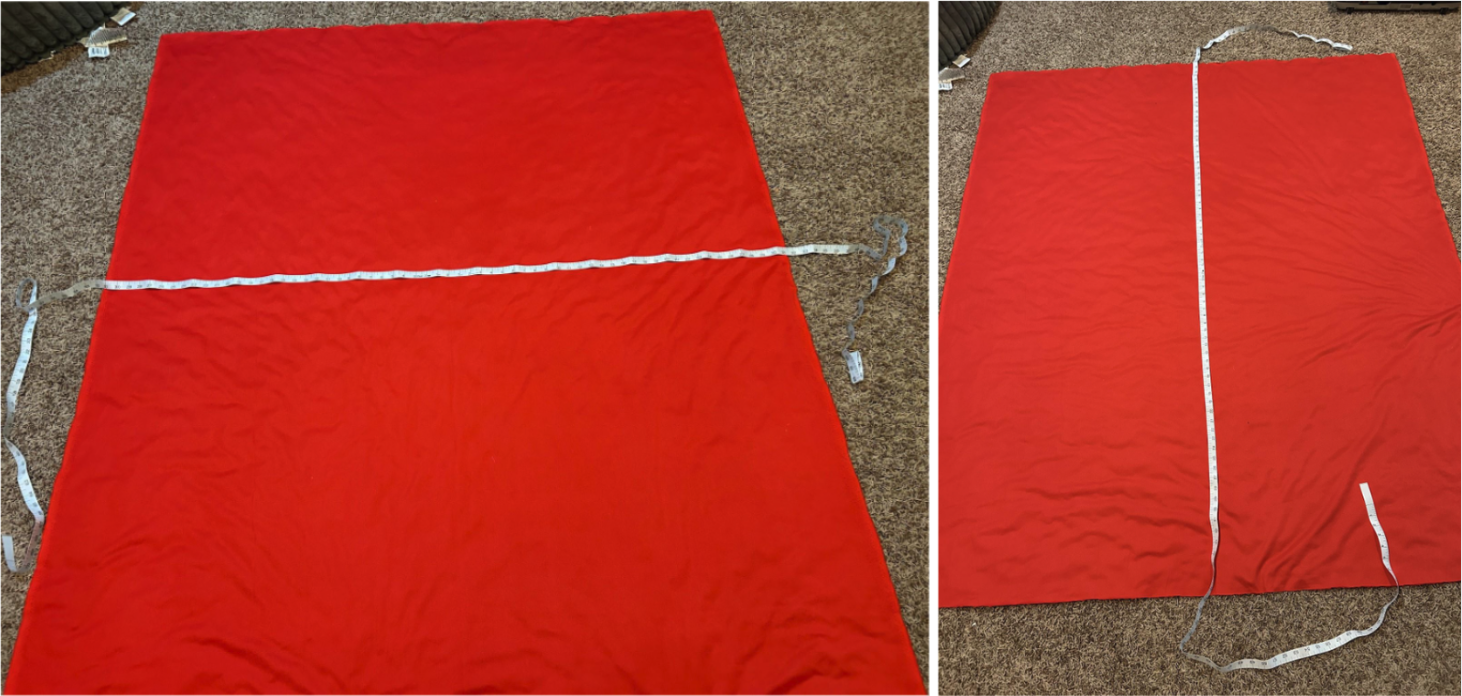
Place your backing fabric face down on the floor and find the center of the fabric both horizontally and vertically.
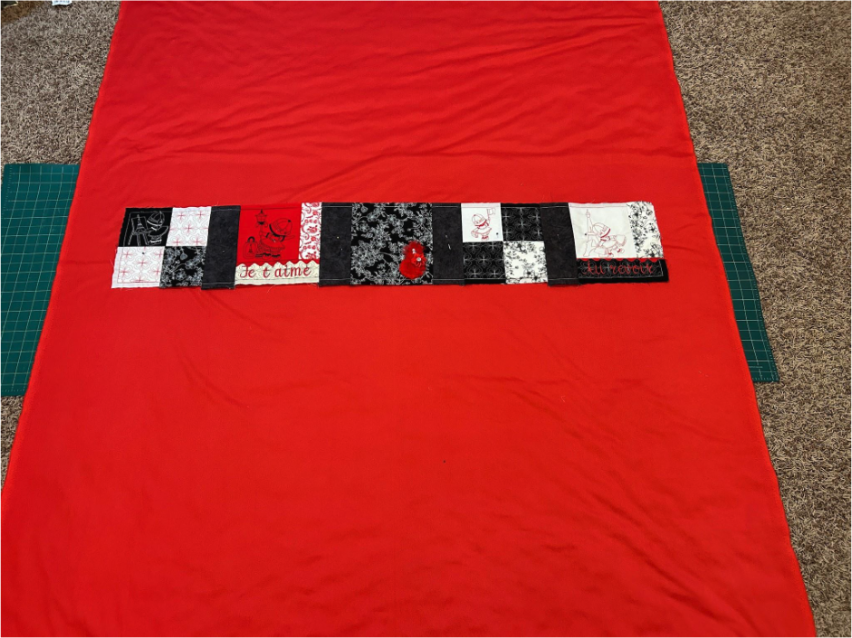
Then lay the center row, one with the big squares, face up with the centers matching.
Take the next row—a sashing row—and lay it face down on the bigger blocks. Line up as best as you can the edges of the fabrics and nest your seams. Pin these in place. Since I’m using a minky type fabric for the back of my quilt, I’m using a lot of pins! If you are laying your quilt out on the floor like I am, I find it nice to slide my cutting mat underneath the backing so I don’t pin the quilt to the carpet.
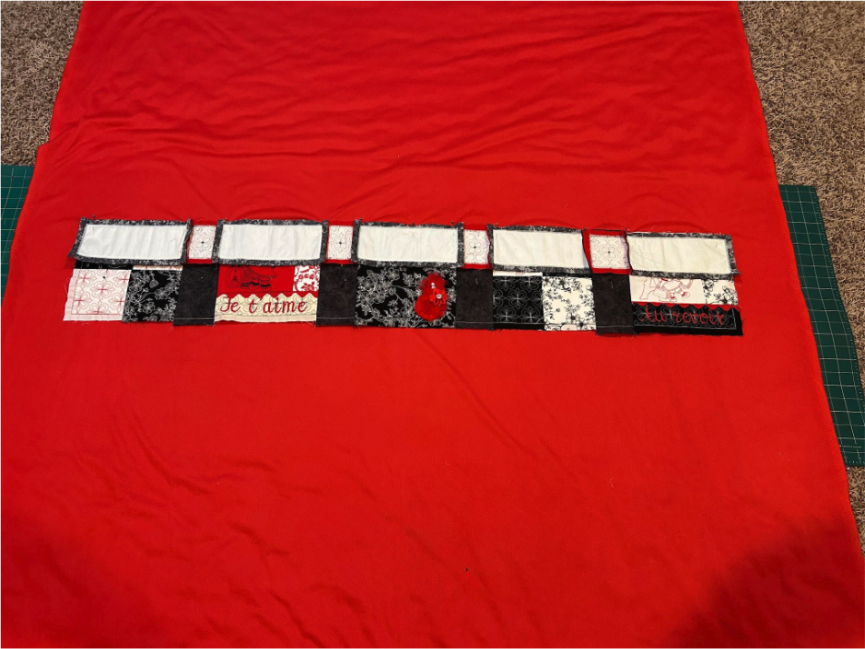
I find it helpful to start in the middle and pin to the edges so I can fold it over as I go and make sure things are lined up.
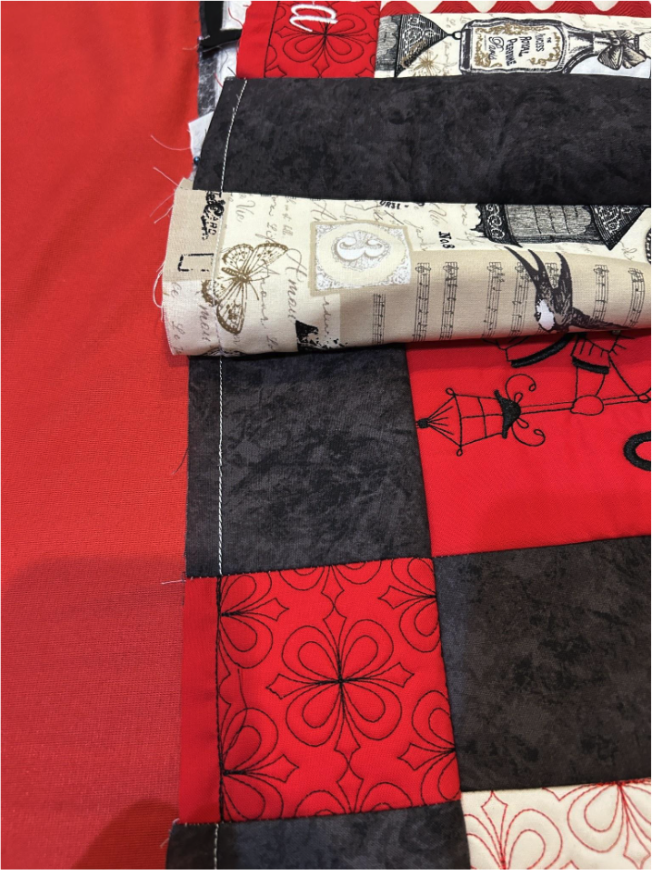
Now we will carry the whole quilt sandwich over to our sewing machine and we will sew through three layers—the sashing, the blocks, and the backing. This will sew our rows together and attach it to the back of the quilt. I like this technique for when the front of my quilt has a lot of decorative stitches so that quilting on top isn’t as necessary.
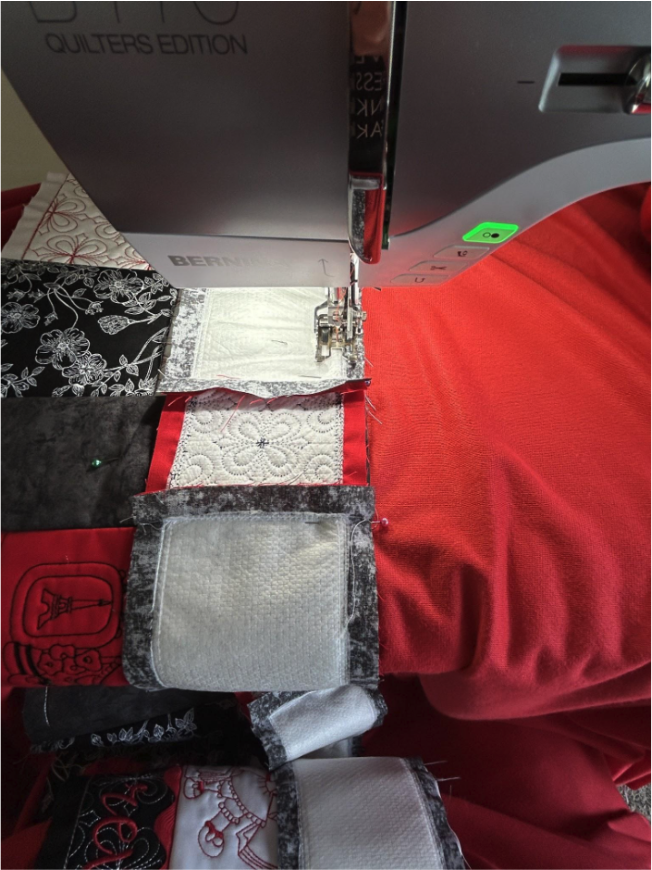
Once you're finished sewing, press the rows open.
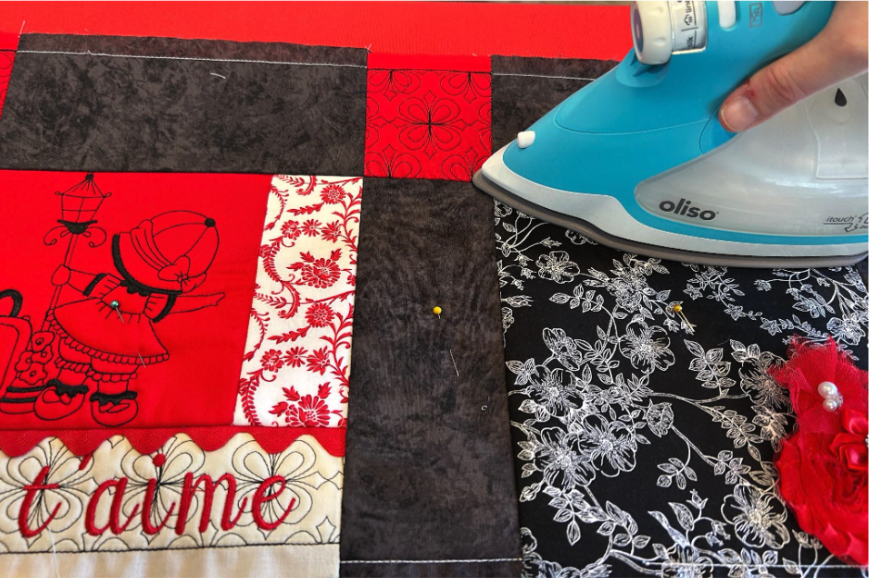
Then repeat with the next row, a big-block row next to the sashing.
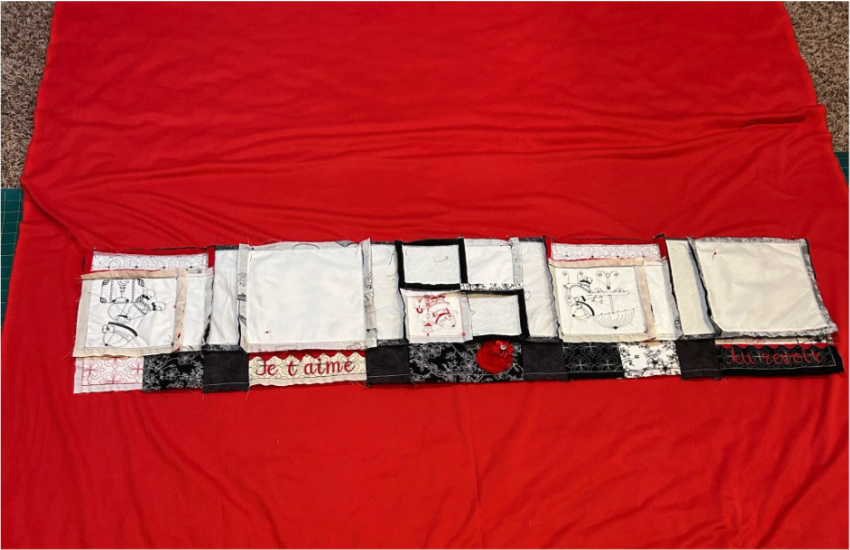
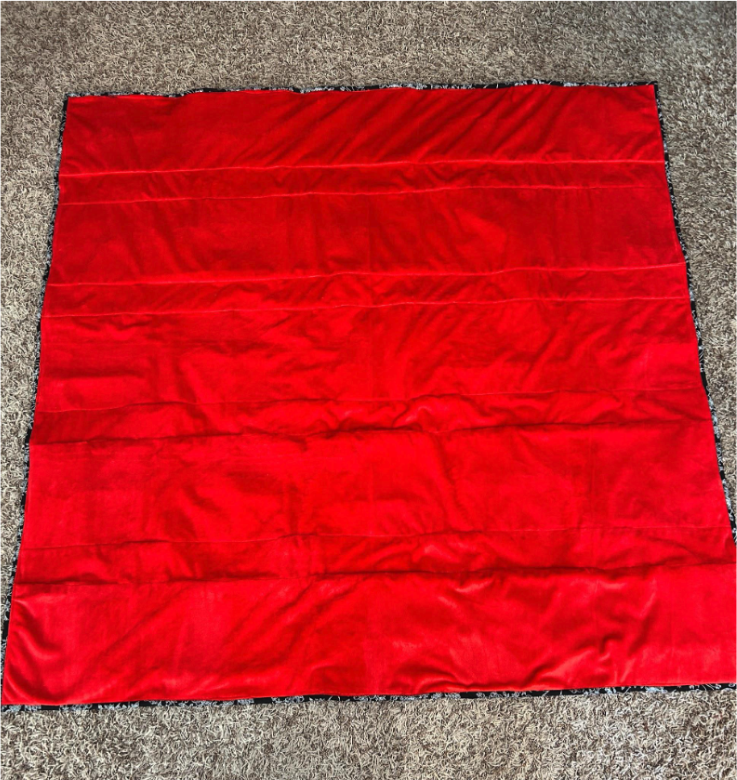
As you stitch the rows, you can see how it quilts it on the back.
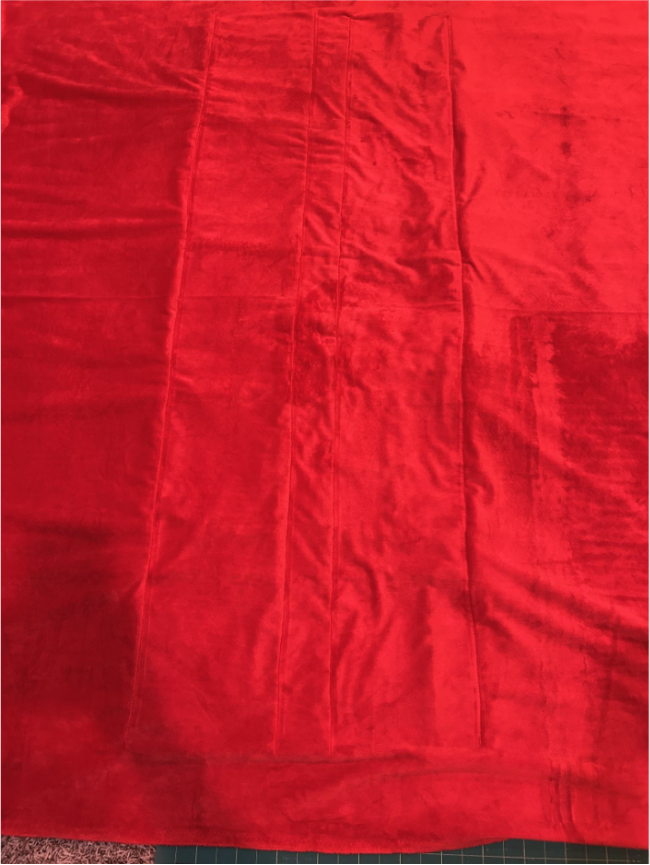
When you’ve finished your rows, I like to sew just outside the outside stitching lines all the way around the quilt. This makes binding the quilt a little easier for me.
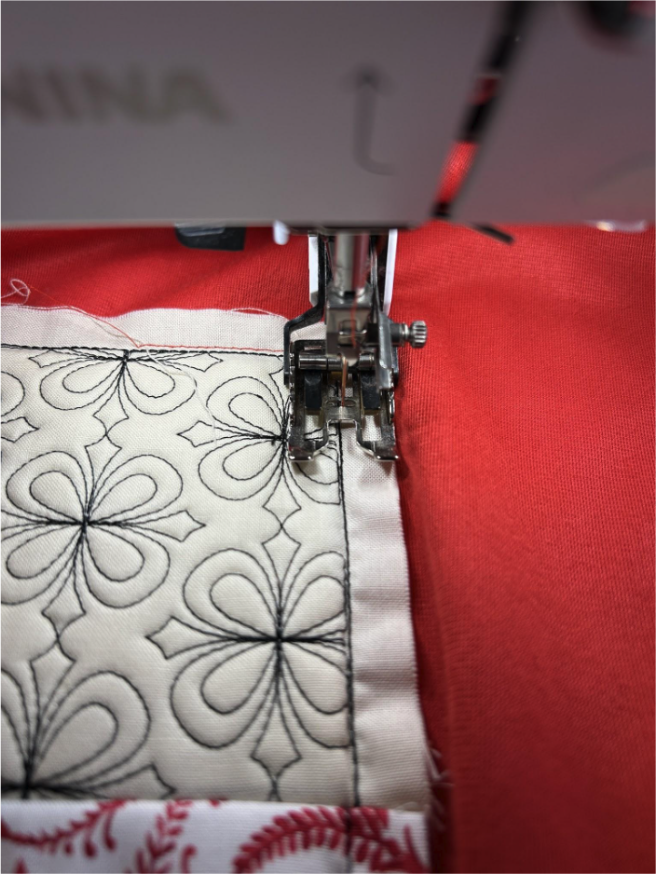
I always get excited to bind because that means I am almost finished with my quilt. I’ll be doing a basic binding here, but check out the Binding 101 blog post for other techniques.
Start by trimming your quilt ¼” from the stitching edges.
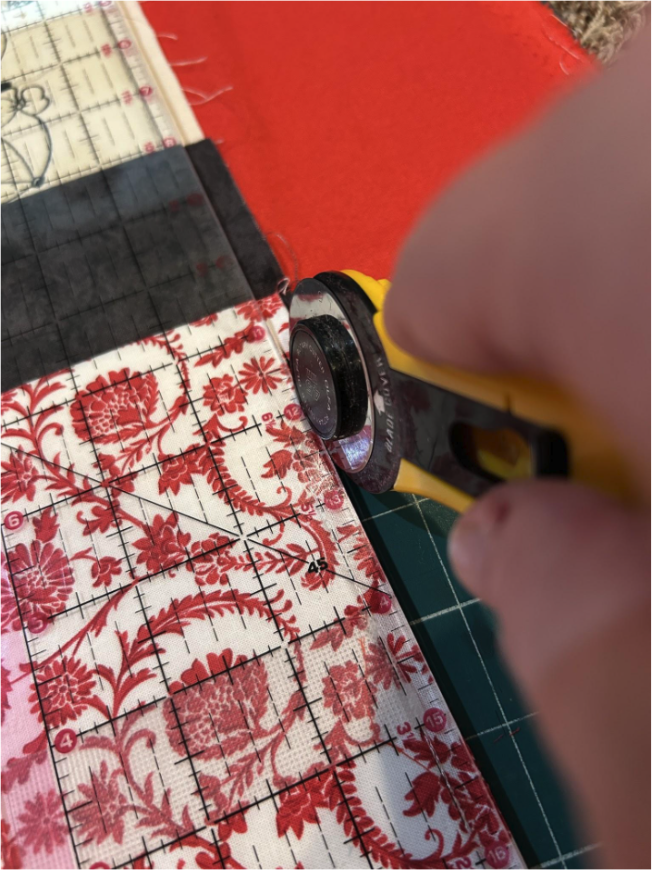
Measure the outside edges of your quilt and add about 10”. Cut enough 2½” strips to get to that measurement. For example, my quilt is 52” on each side, so for four sides that’s 208”. I’ll add 10” to that, so I need 218” of strips. My strips are each 42” long, so I need 5.19 strips, but I’ll just cut 6 and show you what to do with the extra.
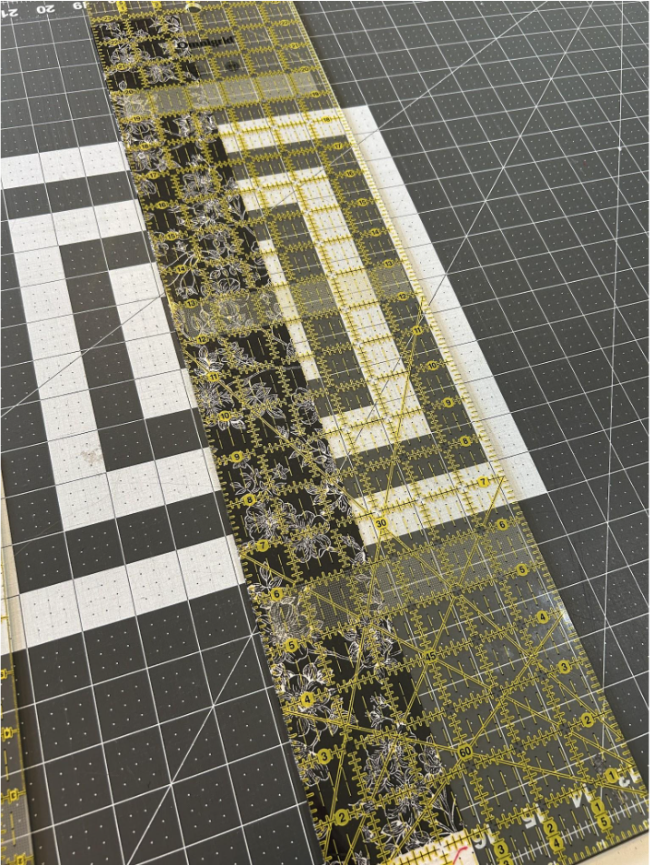
Lay the ends of your strips at a perpendicular angle to each other and sew from one intersection of the fabrics to the other.
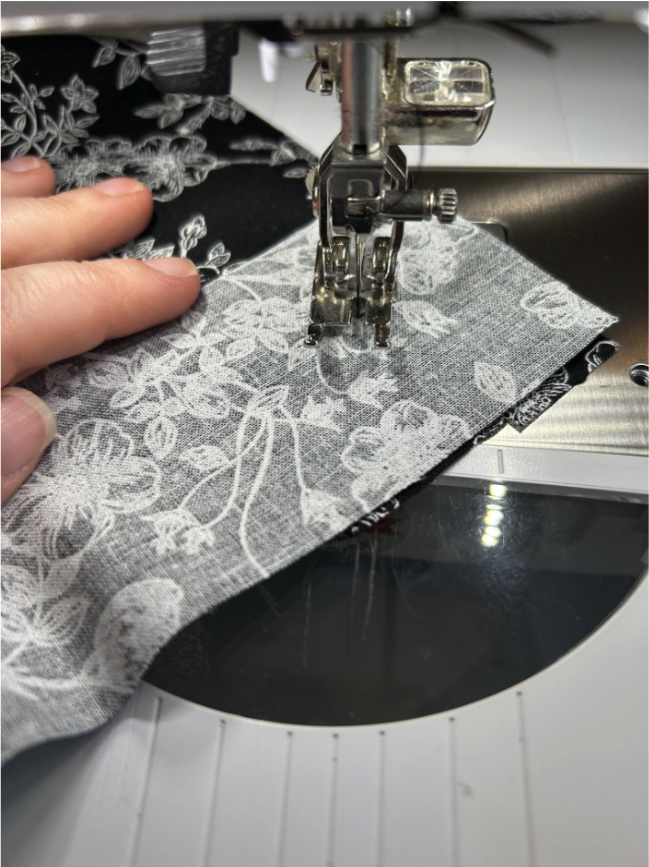
Trim away the excess fabric.
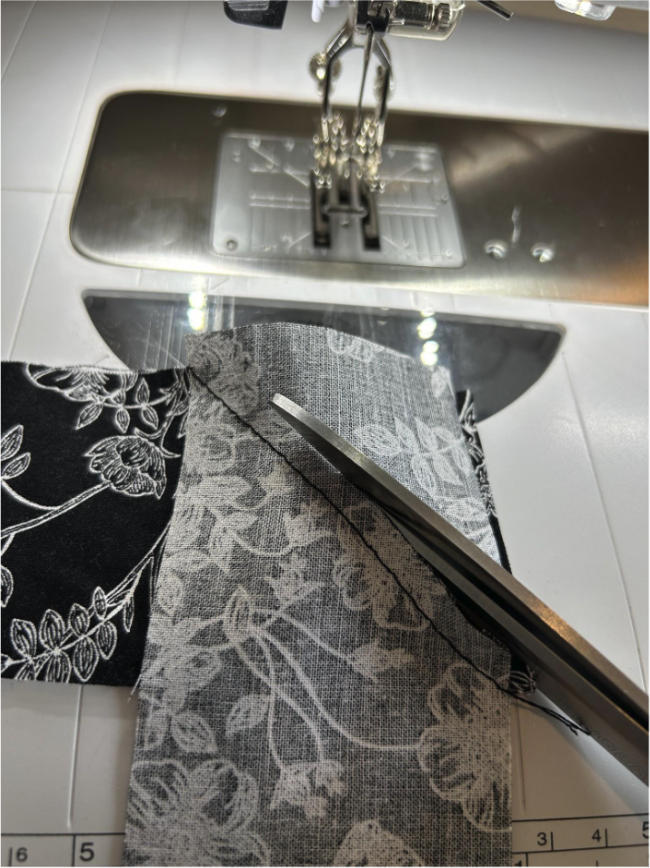
And press the seams in one direction. Continue until all your strips are connected.
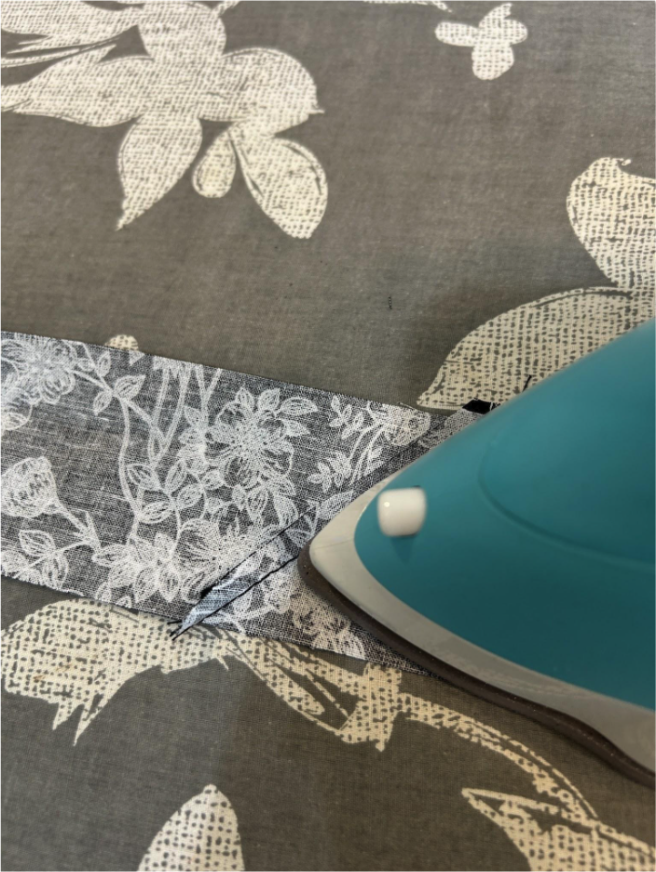
Now press the long strip in half “hot dog style,” which means we will bring the long edges together with the right side out, and press along the whole length.
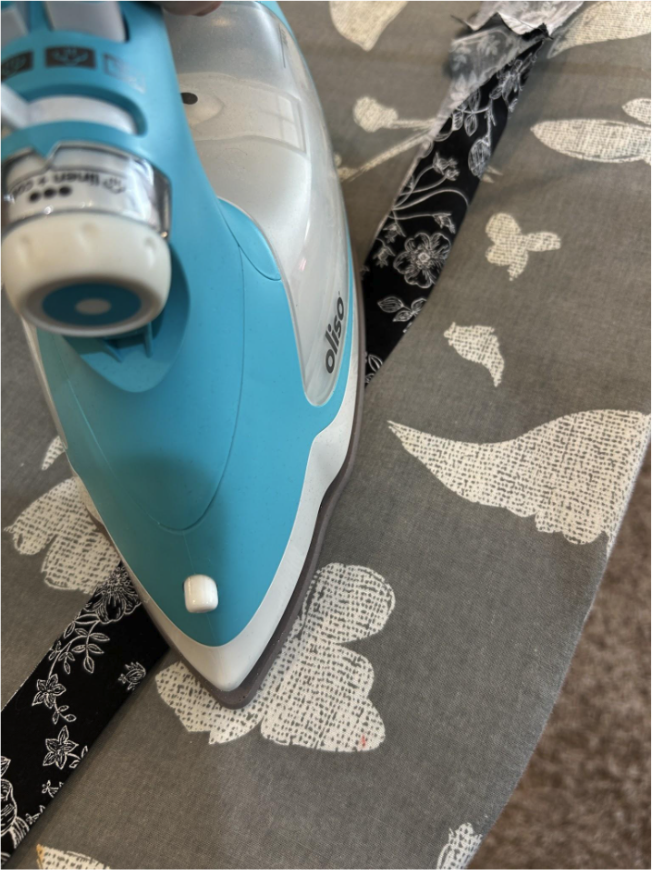
I like to make sure the front of my quilt looks nice so I sew to the back first (like the Flange Binding in the Binding 101 blog post) and flip so the front is sewn second. Some people like to sew to the front first and then flip to the back. It's a personal preference.
Take your binding strip and, leaving a tail of about 8–10 inches, start in the center of one of the sides and line up the raw edge of the binding with the raw edge of the quilt. (I usually start on the bottom, but it doesn’t matter because you won’t be able to tell when we are finished.) Sew with a ¼” seam allowance to the corner.
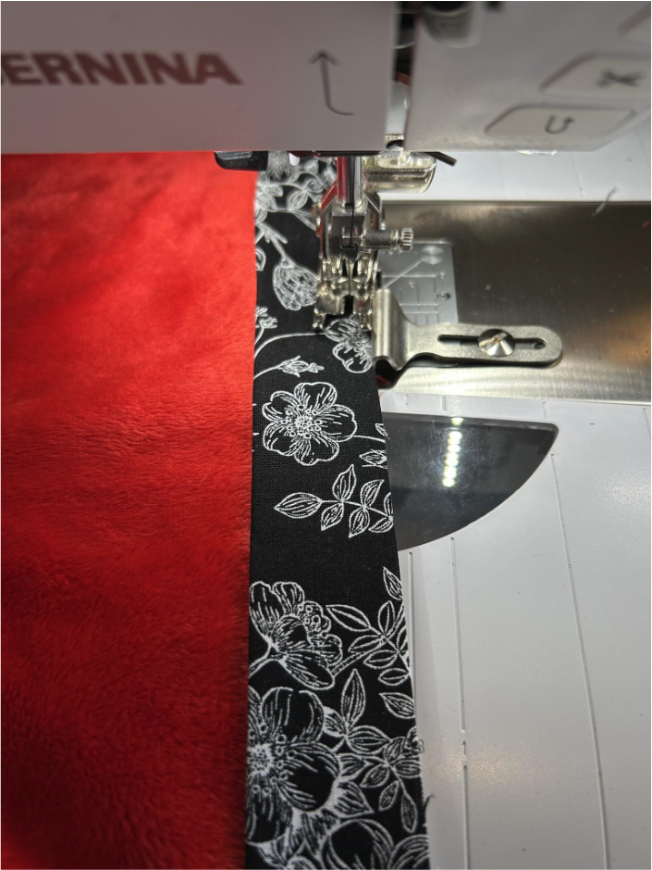
When you get ¼” from the corner, stop with your needle down.
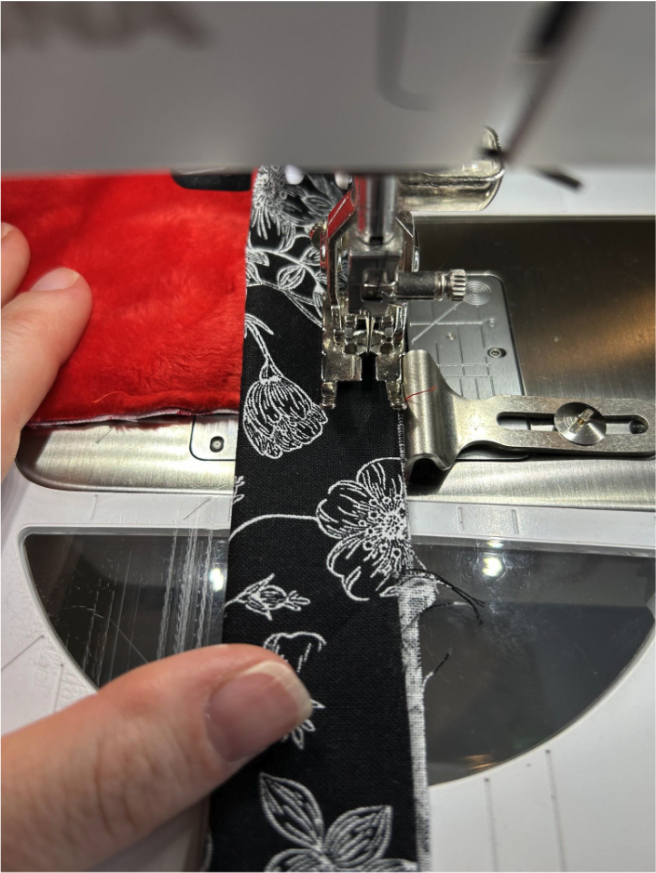
Turn your project 45 degrees and stitch off the edge.
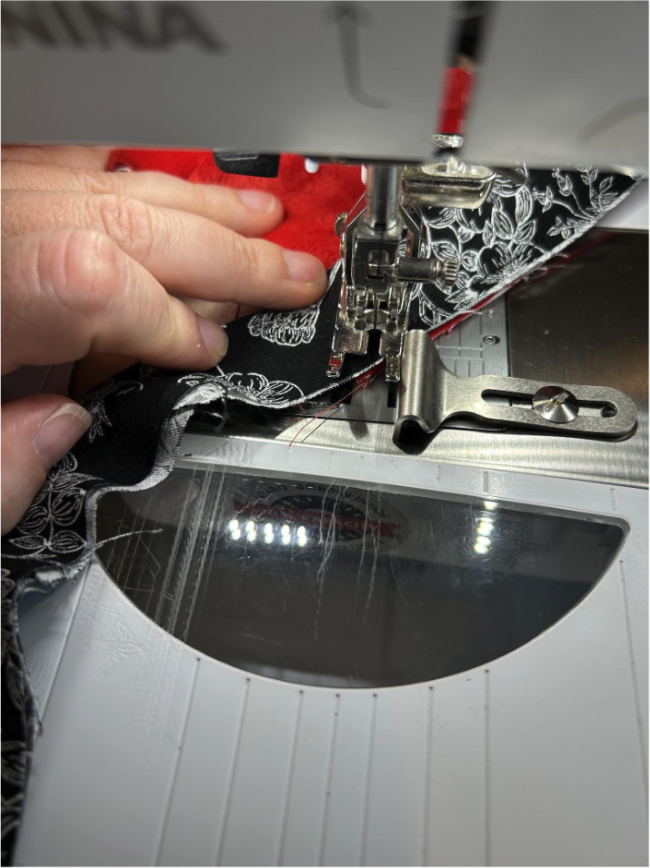
Now fold the binding against that 45-degree-angle stitch so that the binding is off the edge of the quilt. I put a pin in to hold it in place.
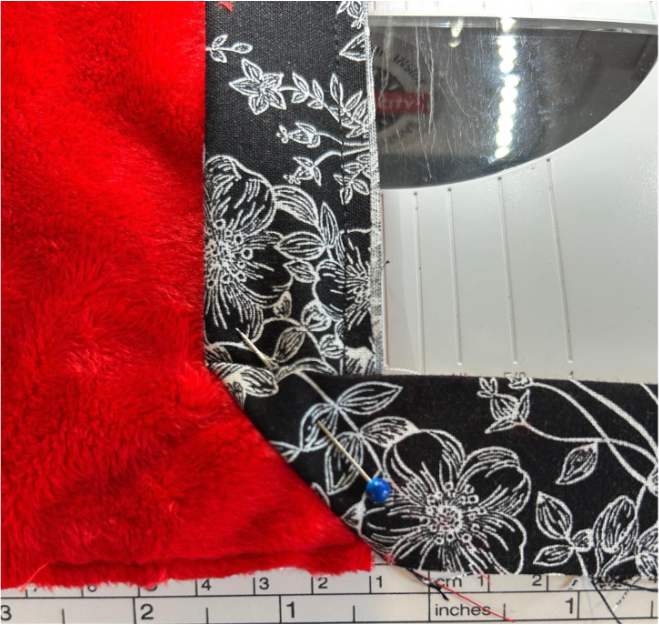
Using the edge of the quilt as a guide, fold the binding along that edge over so the binding now lines up with the edge of the quilt.
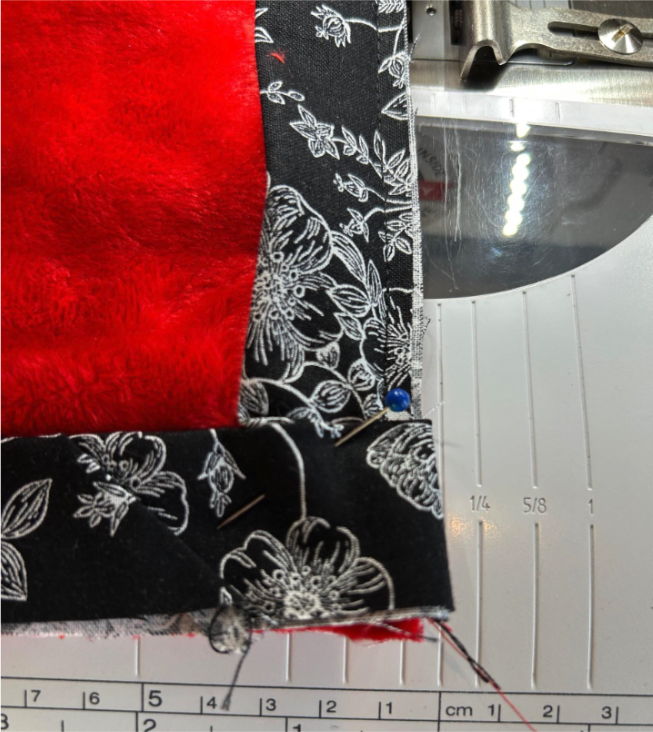
Now we will sew along the edge starting ¼” from the corner.
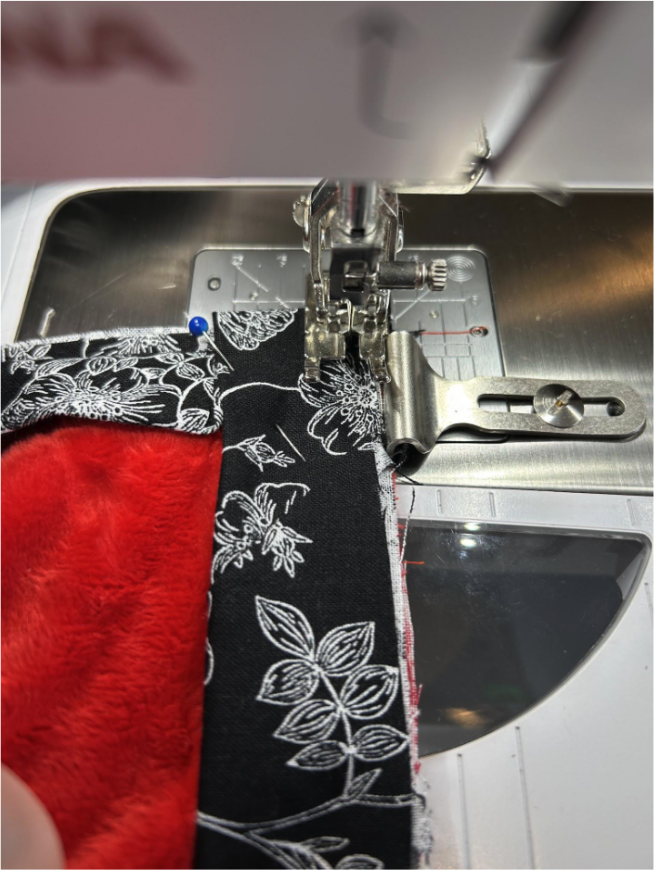
Repeat this for the other three corners. When you get to the side where you started, you are going to trim your two binding fabrics so they overlap 2½” (the same as the width of the strip you started out with).
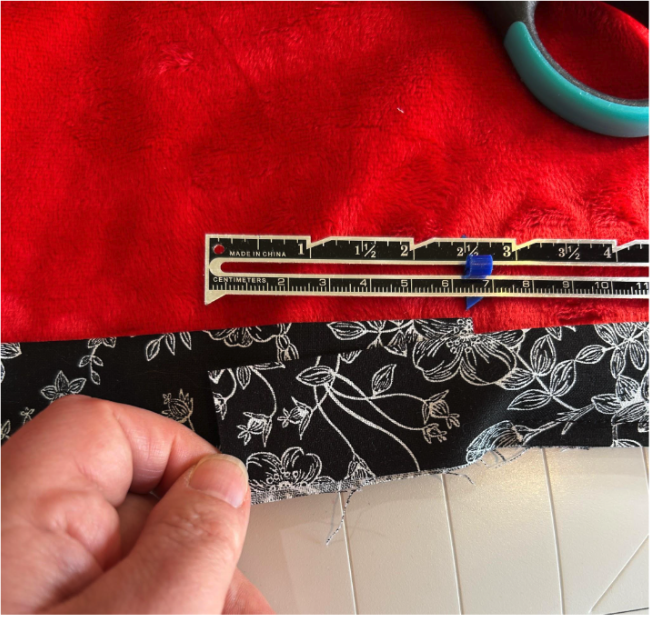
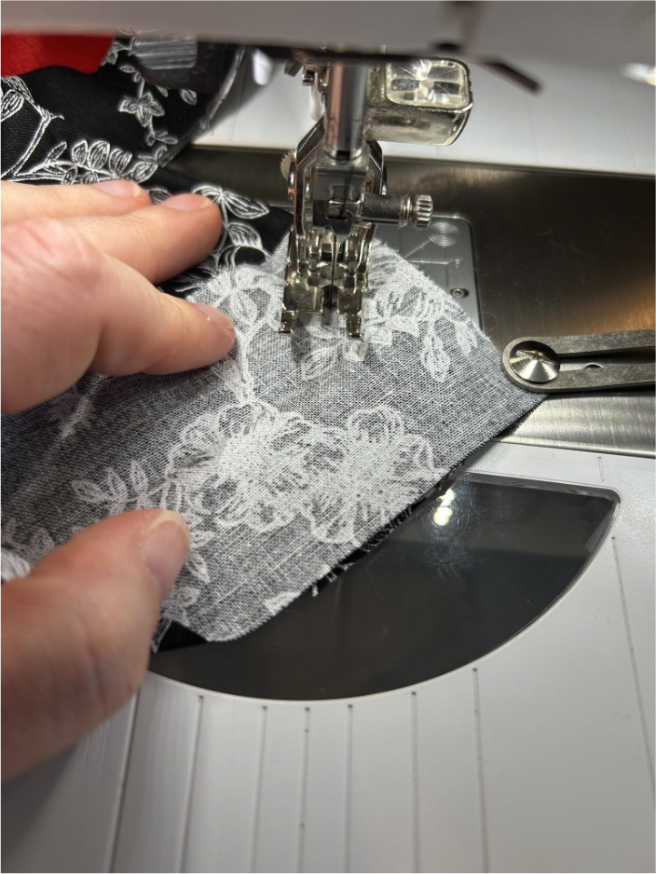
Carefully open them both up and overlap them (make sure you don’t twist!) like we did the strips in the beginning and sew them together with a 45-degree angle.
Then fold them in half and test them against the quilt. They should lie flat and match perfectly, not being too short or having extra fabric. You can make any adjustments you need to at this point.
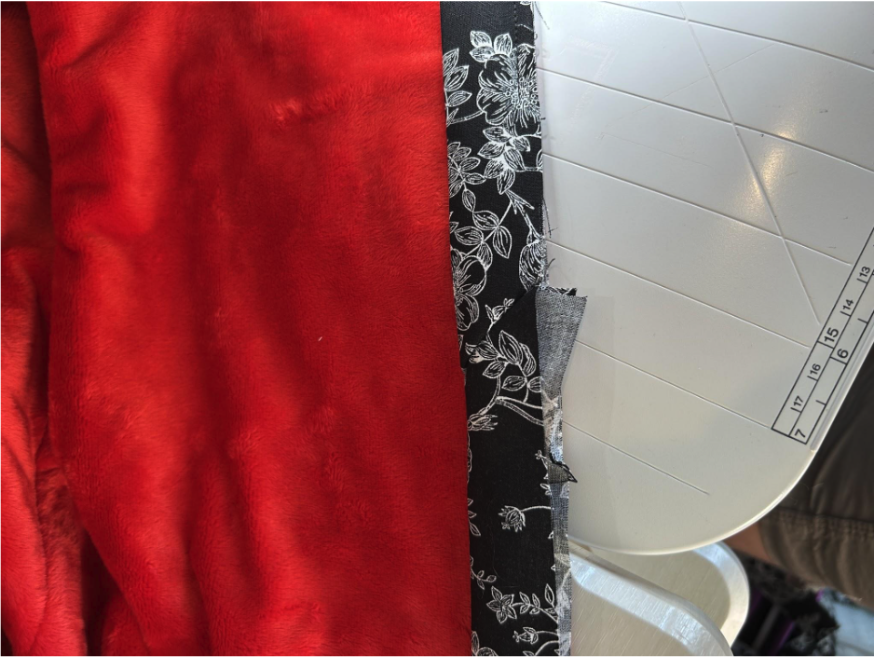
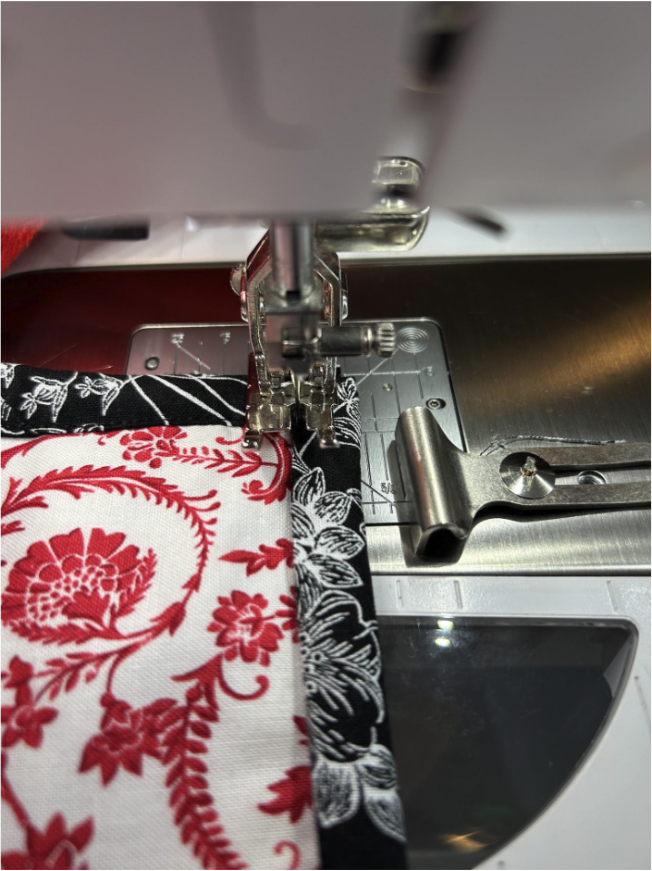
When you are happy with the length of your binding, trim the seam allowance to ¼” and finger press them in place. Finish sewing the strip in place.
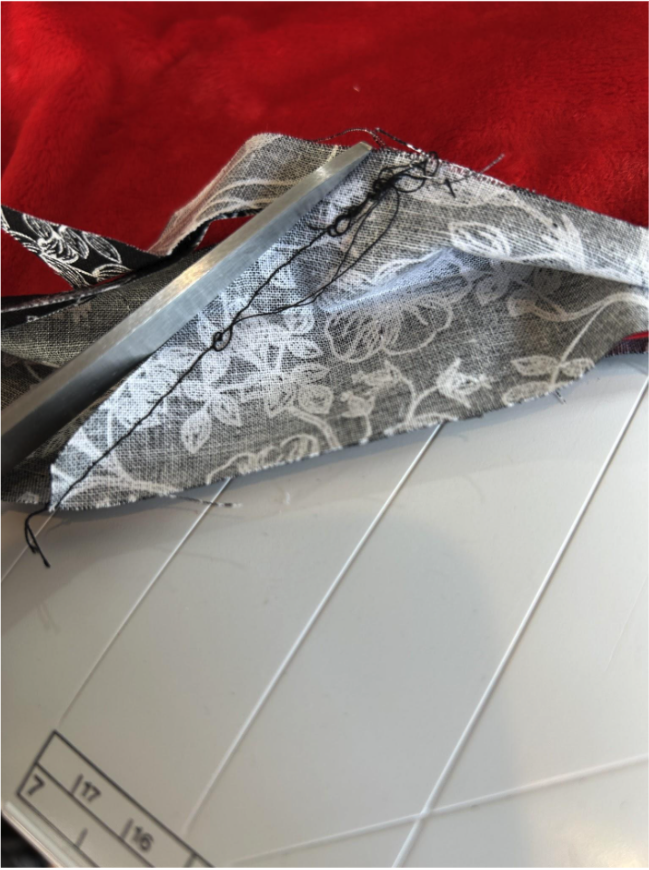
Now we will flip the binding to the front. I again start in the middle of a side and stitch ⅛” (or as close as I feel like I can get) from the edge on the binding.
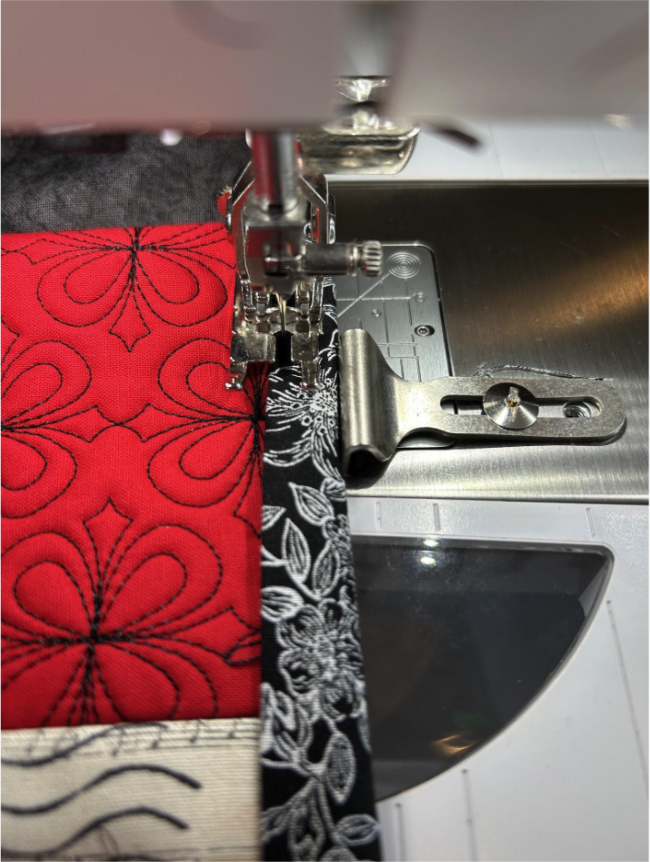
When you get to the corner, stop a couple inches before it with your needle down.
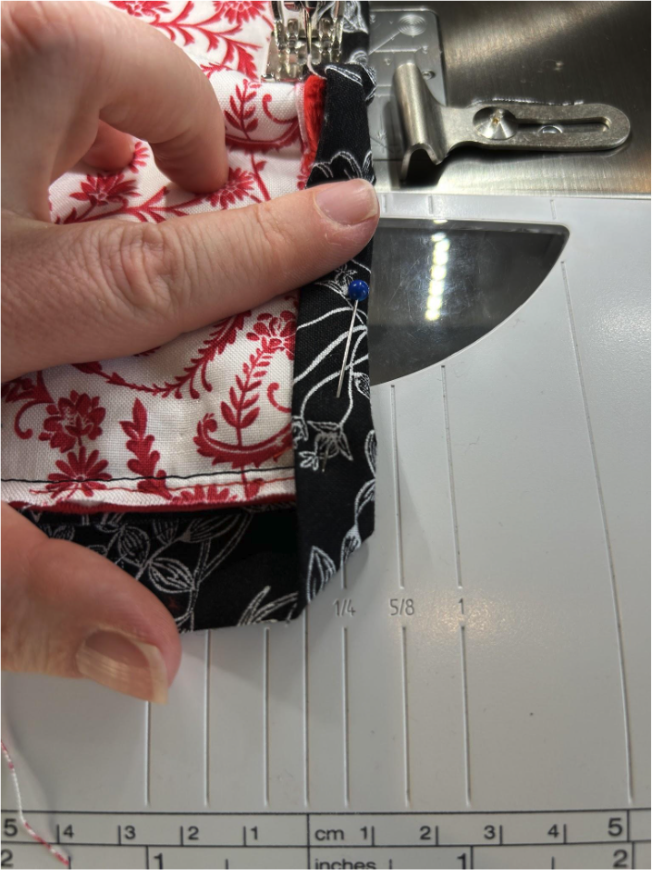
Fold the bottom edge of the binding up and over the bottom edge. The corner will make a miter there. I like to place a clip on the miter.
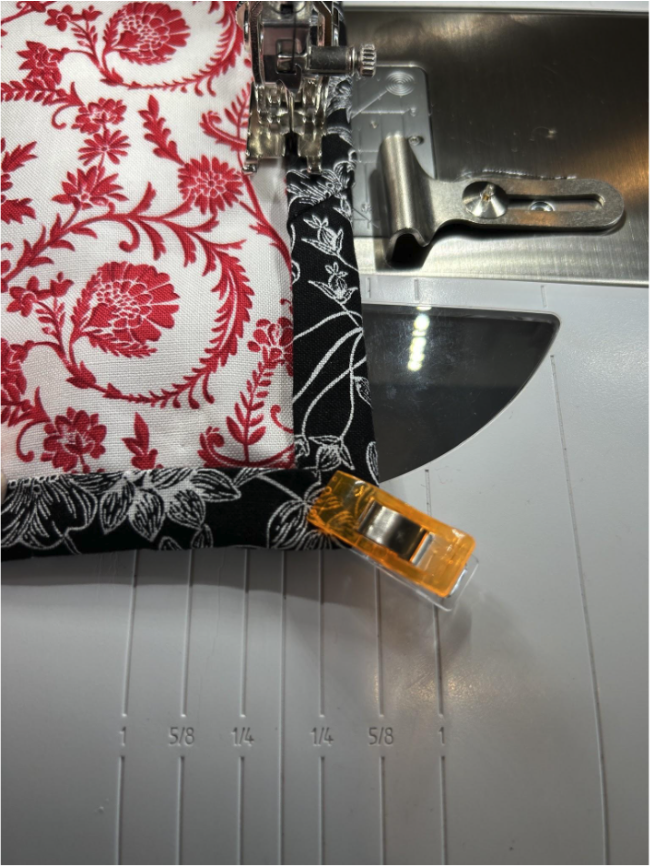
Sew until your needle takes its first stitch in the other side’s binding. Stop with your needle down and turn your quilt 90 degrees. You can then continue stitching, doing the same with the other corners, until you come to the place you started.
And your quilt is finished! Your hard work has now paid off. This is how the back looks with the binding and this quilt-as-you-go method.
And here’s the front of the quilt.
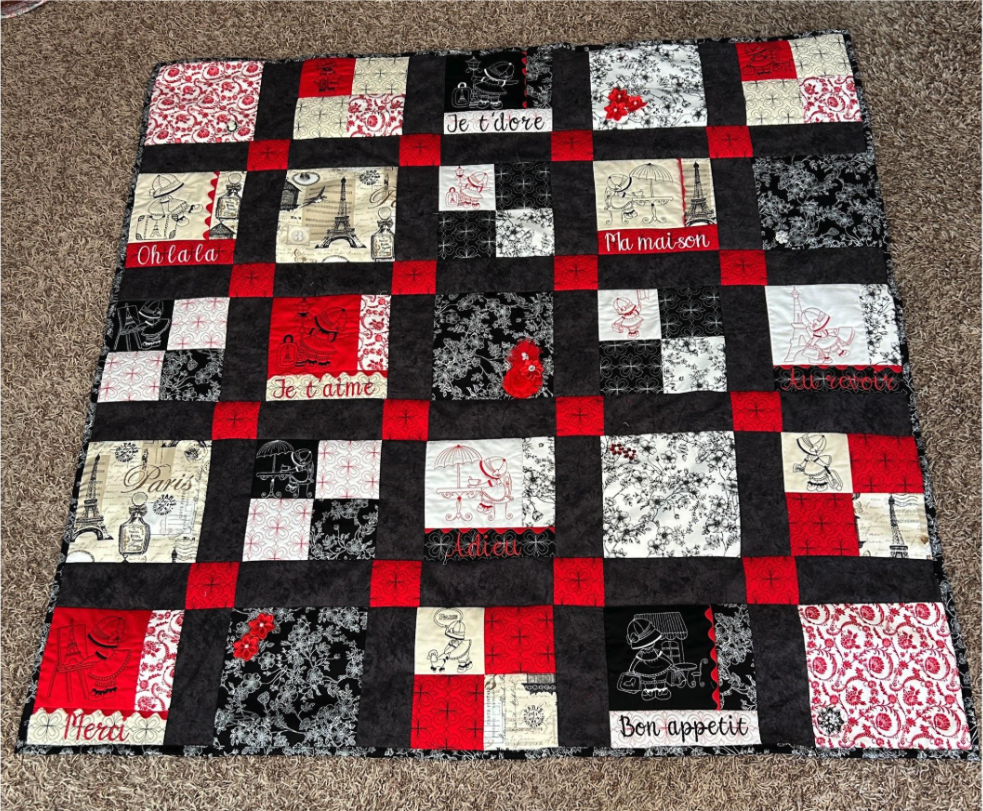
Throw it over your bed or couch or wherever you want to have your quilt reside. Everyone will think your quilting skills are awesome. The finished top with the delicate stitching and the embellishments makes it look much more complicated than it was.
If you use these methods to make a quilt of your own, I’d love to see what you create. I am always inspired by your fabric choices, the colors you use, and the Designs by JuJu designs you choose for your projects. Share with us in the Designs by JuJu Embroidery Blessings Group on Facebook or use the hashtag #designsbyjuju anywhere on social media!