Toggle Nav
 Inspire.
Create.
Stitch.
Inspire.
Create.
Stitch.
Search
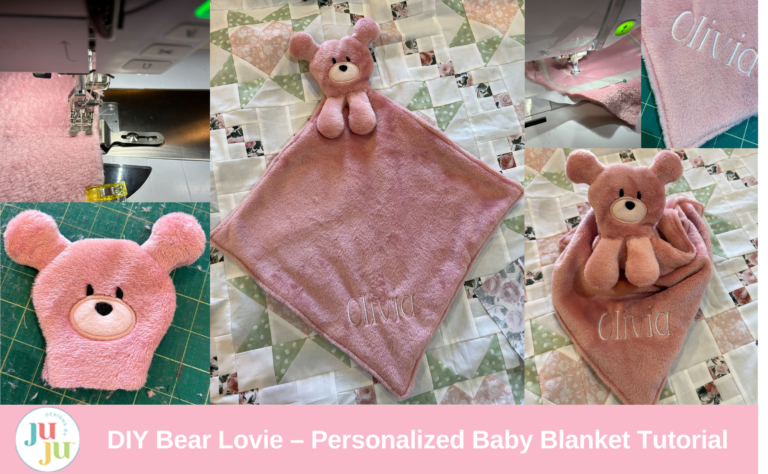
Looking for the perfect personalized baby gift? This DIY In-the-Hoop Bear Blanket Lovie is a sweet and snuggly project that’s as meaningful as it is adorable! With easy-to-follow steps and room for custom touches like a baby’s name or birth announcement, this machine embroidery baby lovie is a heartfelt keepsake parents will treasure.
Some of my favorite things to make are gifts for babies. I like to check with the parents and coordinate with their nursery theme so that my gift will be used and loved. Today I am going to show you how to make the Bear Baby Blanket Lovie and I will add a name to the design. Follow along to make one for your new addition. There is also a Power Tools with Thread video that you can watch by Becky Thompson.
Check out the DBJJ team’s favorite supplies in the Designs by JuJu Amazon Store.
I am going to personalize the blanket, so I will do that first. You can put anything on the blanket you’d like. I like to use a name, but birth statistics or a cute shape would work great too. Since I’ll be stitching a name, I’ll use Embrilliance to customize it. Check out this blog post for a detailed lesson on how to use Embrilliance software with your favorite fonts.
Open Embrilliance and type in the name you want on your blanket. Choose the font and size you like.

Save the design and transfer it to your embroidery machine. I like to place the name in the bottom corner of the lovie.

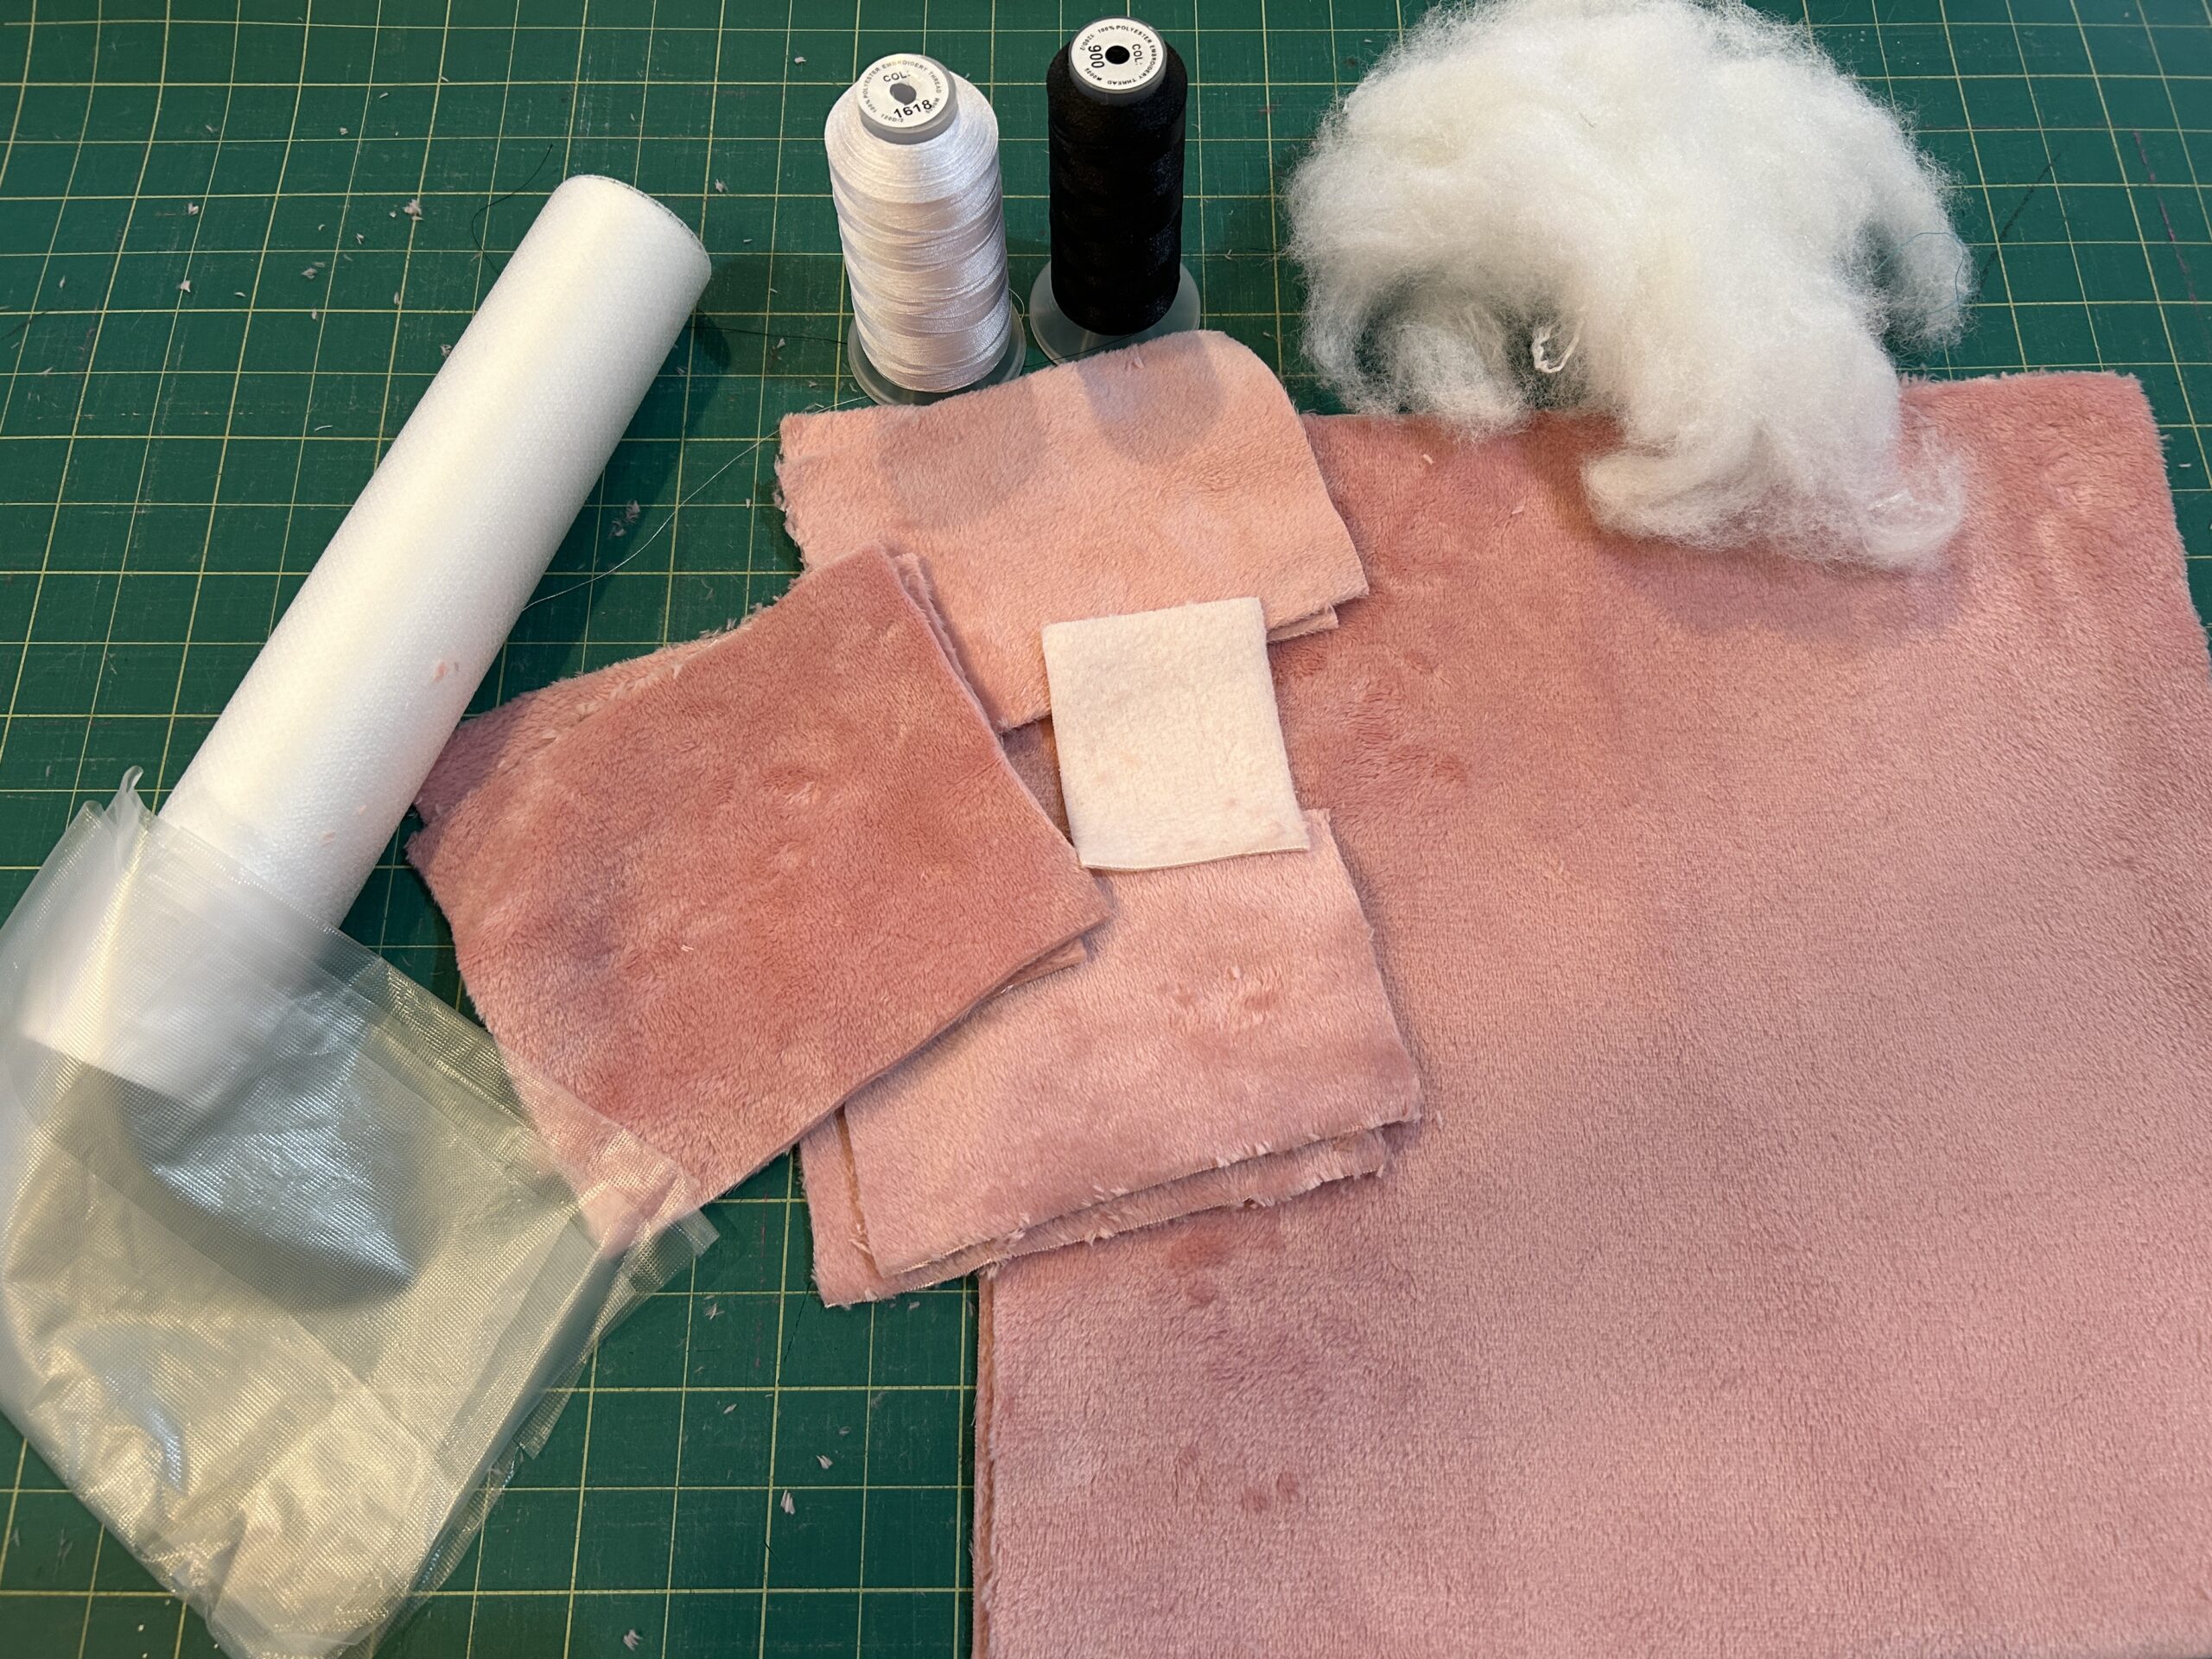
Hoop no-show mesh stabilizer and the fabric. Because my fabric is a mink-type fabric, I will also top it with a water-soluble topper so the design doesn’t get lost in the high nap.

Then load it into your machine and stitch the design.

Once it’s done, remove it from the machine.

Remove the topper.

Trim the no-show mesh stabilizer.

Layer front and back of blanket with right sides together.

Pin or clip the edges together. I’m making the 14” x14” version so I will leave a 2”–2.5” gap at the edge where the head will attach. This is the opposite corner from where I stitched the name.

Now stitch around the edges with a ½” seam, making sure to leave one corner open for the bear.


Once you’ve finished sewing the edges, trim the three sewn corners so that you'll have sharp corners once turned right side out. Don’t trim the open corner.

Turn the blanket right side out.

Once it’s right side out, top stitch the blanket ⅛”–¼” from the edge.

The blanket part is done!

Hoop your stabilizer.

Load the file for the arms and ears to your machine.

Stitch the placement stitch for the ears.

There are two tack-down stitches next. If you are using the same fabric for the front and back of the ears, you can sandwich the right sides together and place them covering the placement stitches. Run the first tack-down stitch and skip the second one.
If you are using different fabrics, place the back ear fabric first, right side up, and run the tack-down stitch; then place the front fabric, right side down, and run the second tack-down stitch.

Once the ears are done, fold the excess fabric up and tape it out of the way.

Run the placement stitches for the arms.

Place your arm fabrics with right sides together, covering the placement lines, and run the tack-down stitch for the arms.

Once they are all stitched out, remove the hoop from the machine.

Remove the arms and ears from the hoop and trim the stabilizer around the stitches.

Trim around the ears and arms about ¼” away from stitching.

Turn the arms and ears right side out.

Stuff them lightly with Poly-fil.

Set them aside while we work on the face.
Hoop another piece of no-show mesh stabilizer and run the placement stitch for the front of the head.

Cover the placement stitches with the front fabric for the head. Make sure all the edges are covered and stitch the tack-down stitch.

If your fabric is plush, cover it with water-soluble topper while stitching the eyes.

Run the stitch for the eyes.

Remove the topper and run the placement stitch for the muzzle.

Cover the placement stitches with the muzzle fabric and run that tack-down stitch.

Trim the muzzle fabric close to the tack-down stitches.

Use water-soluble topper again for the finishing stitches.

Stitch out the edges of the muzzle.

Stitch the nose and then remove the topper.

I love stitching faces, it just brings such a fun personality to the projects!
Once the bear’s face is done, we are going to stitch the placement line for the ears. I did mine in black and highlighted it because they were a little hidden in the fluffy fabric.

We need to slow our machine down to its slowest speed at this point.

Place the ears over the placement lines, right side down if applicable.

Secure them with tape and load them in your machine. Run the tack-down stitch and the zig-zag stitch. I watch closely to make sure everything is stitching smoothly at the slowed down speed.

Once they are attached, remove the tape and place the fabric for the back of the bear’s head over the top of the face and ears, right side down. Secure it with tape, pins, or clips outside the stitching area.

Run the tack-down stitch for the head.
There will be one last step with one stitch: do not stitch it. It is in the design to keep the machine from returning to the center of the hoop where the bulk of the ears is.

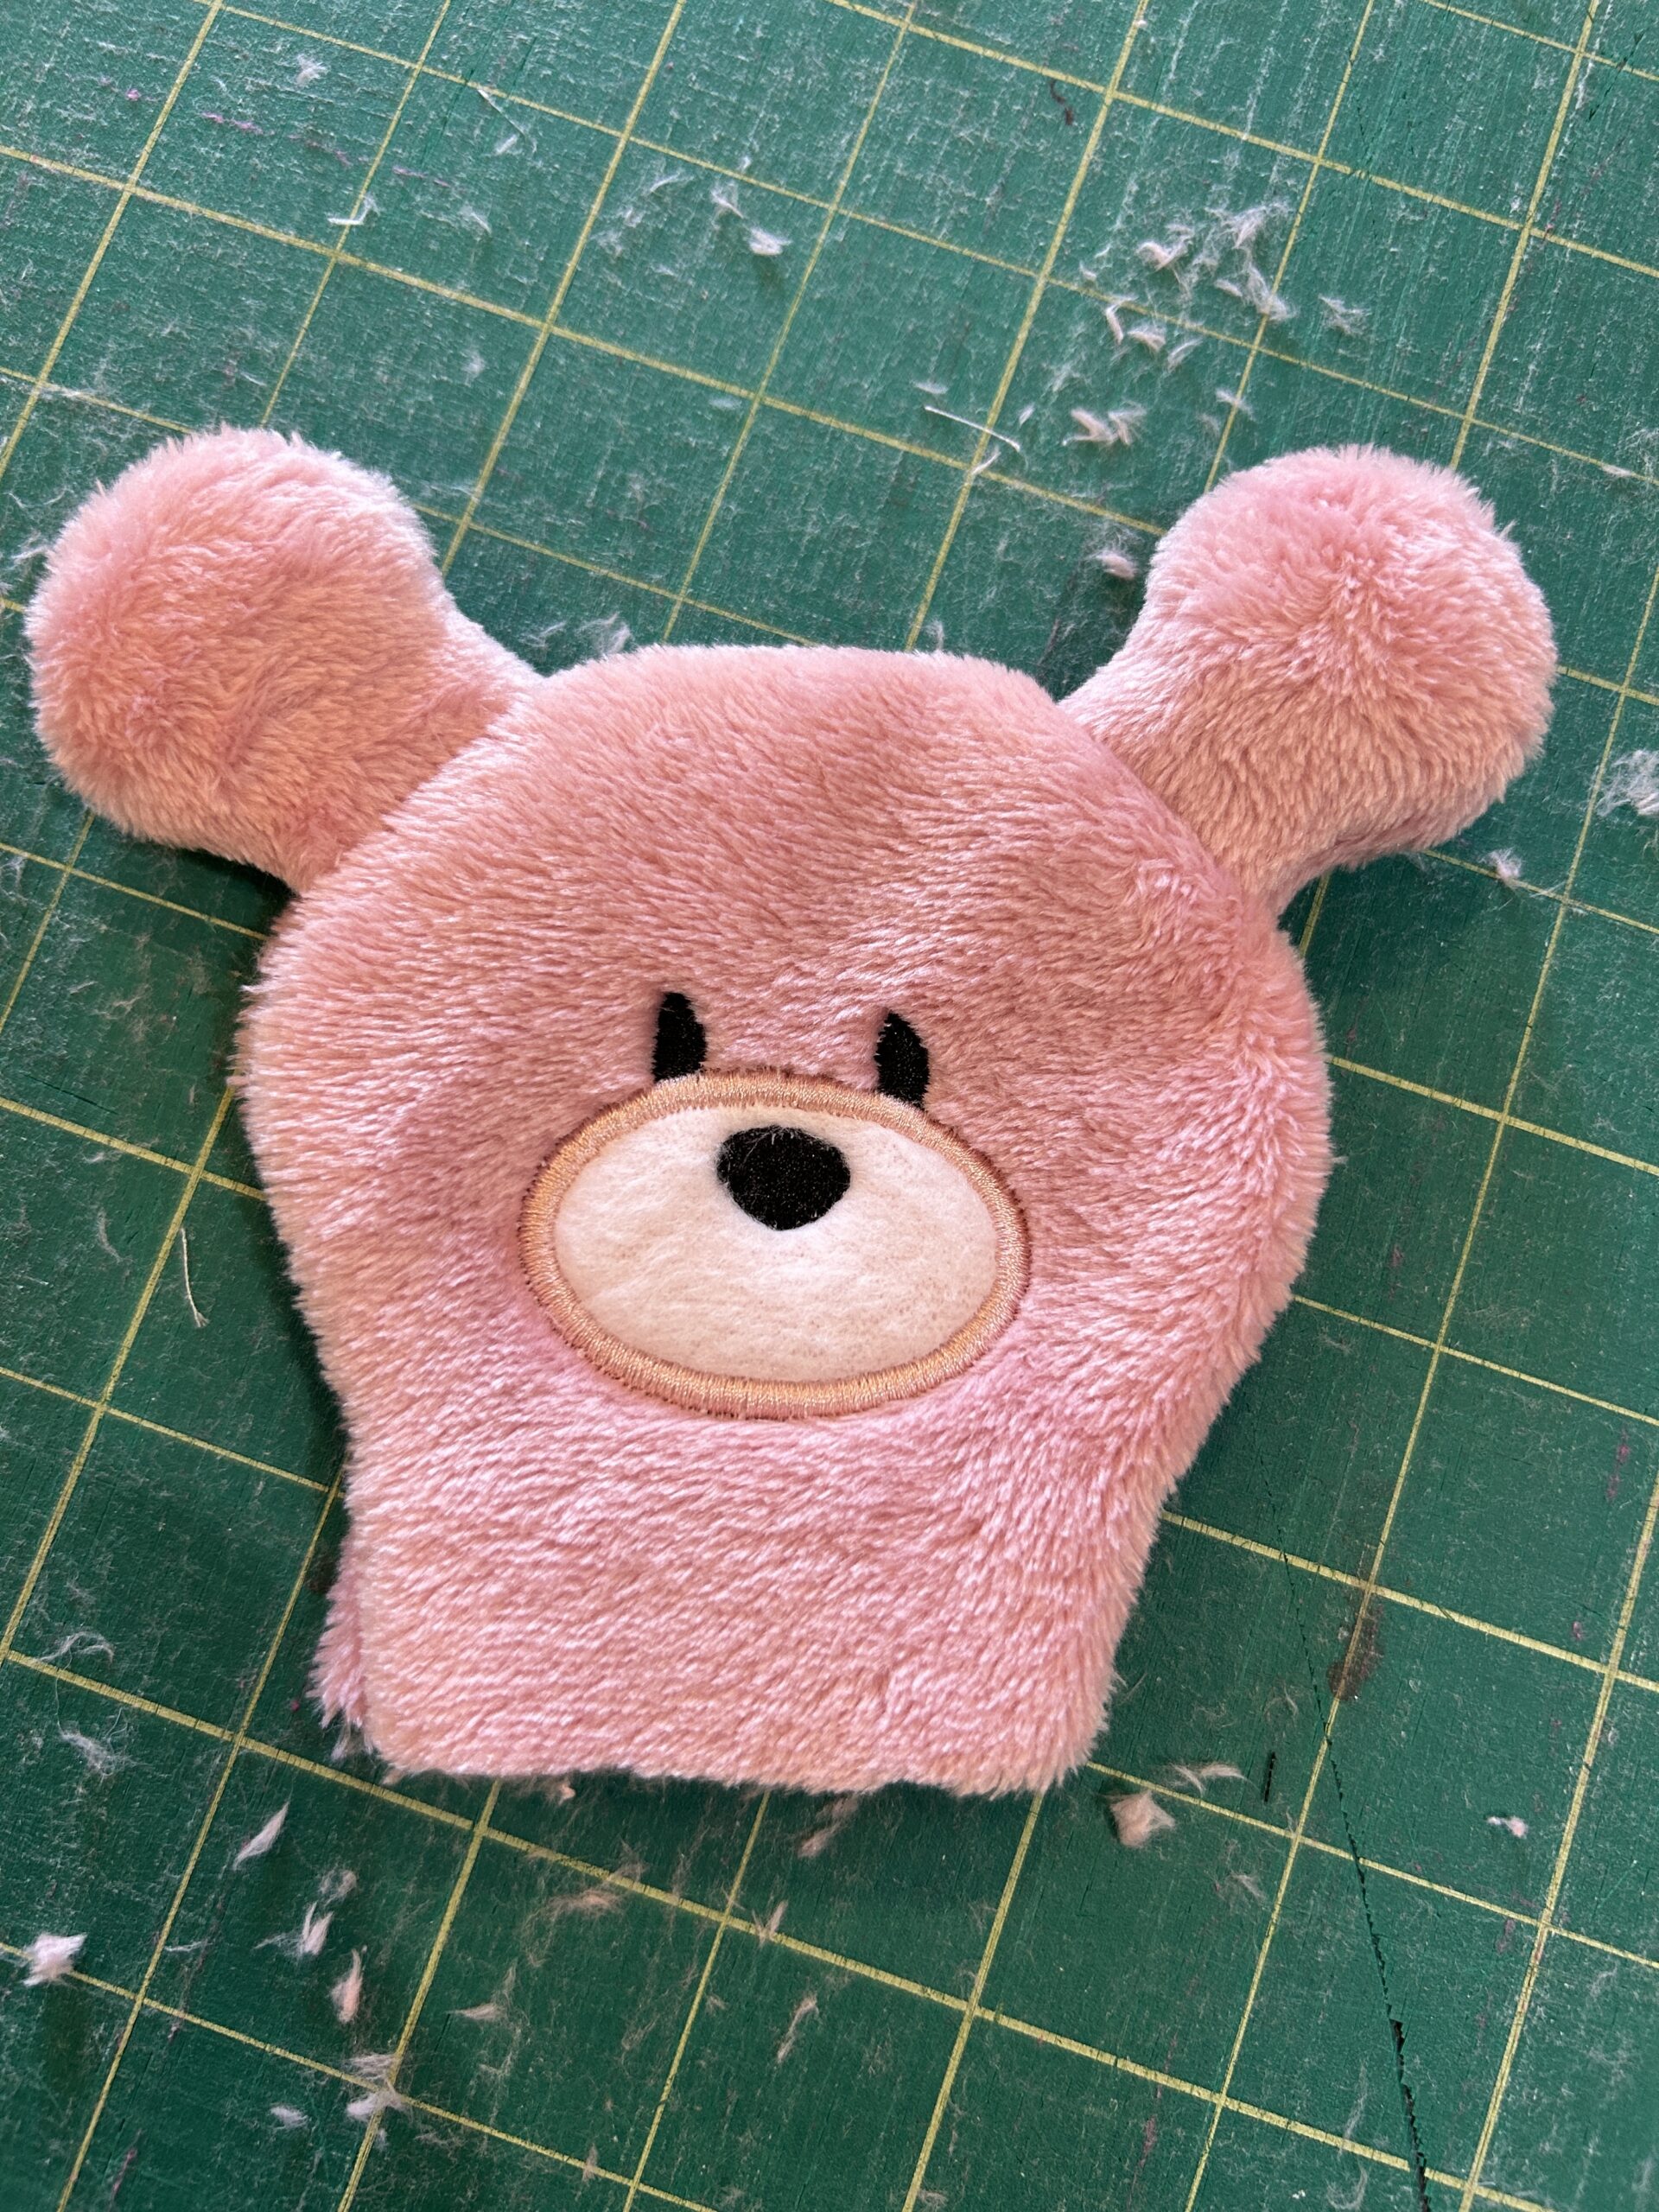
Now remove the head from the hoop and trim the stabilizer close to the stitches. Cut the head out about ¼” away from the stitches.

Turn the head right side out and marvel at that cute face.
I like to stuff the head at this point, but you could wait to stuff it after we have attached it to the blanket. Whatever you prefer.

NOTE: The following steps are done either at a sewing machine or by hand.
Now we will attach the arms to the blanket. Place them on the corner where the opening is. I line them up over the start/stop lines so they can be held in place.

Stitch through that line. You’ll be sewing through both layers of the blanket and the arms.

Now we are going to attach the head. We will attach the front of the head to the blanket at the same spot where the arms are attached. This time, though, we will only be sewing through the front side of the head. Hold or pin the back of the head out of the way.

Sew through the front of the head, the arms, and both layers of the blanket.

Take the unfinished corner of the blanket and stuff it up inside the head of the bear.

Lay it as neatly as you can and fold under the back side of the head.

Using a needle and thread, stitch the back of the head to the blanket. I like to use a ladder stitch.


Tie off your ends and it’s ready to give to the little one in your life!
If you make this, please share it with us in the Designs by JuJu Embroidery Blessings Group on Facebook or anywhere on social media using the hashtag #designsbyjuju. We can’t wait to see what you create!
