Toggle Nav
 Inspire.
Create.
Stitch.
Inspire.
Create.
Stitch.
Search
Do you want to build a snowman without being cold and wet? Well, you’re in luck! Designs by JuJu has once again blown me away with the sheer talent and creativity in their latest ITH release. Let me introduce you to the revolutionary, open-ended ITH Build a Snowman Project!
The Build a Snowman Project is available in four hoop sizes (5” x 7”, 150” x 240”, 6” x 10”, and 8” x 12”). Within each hoop size, you will receive 20 different snowman blocks, 4 different horizontal sashings, 5 different vertical sashings, and 1 cornerstone block. There are also 3 different long horizontal sashings for the 6” x 10” and 8” x 12” hoop sizes.
As an added bonus, the 6” x 10” components are sized to match the Quilting Backdrops, opening up a wide range of added design capabilities! Note: The 5” x 7”, 150” x 240”, and 8” x 12” will not fit with Quilting Backdrops. These sizes are scaled to coordinate with the snowman blocks/sashings included with your purchase.
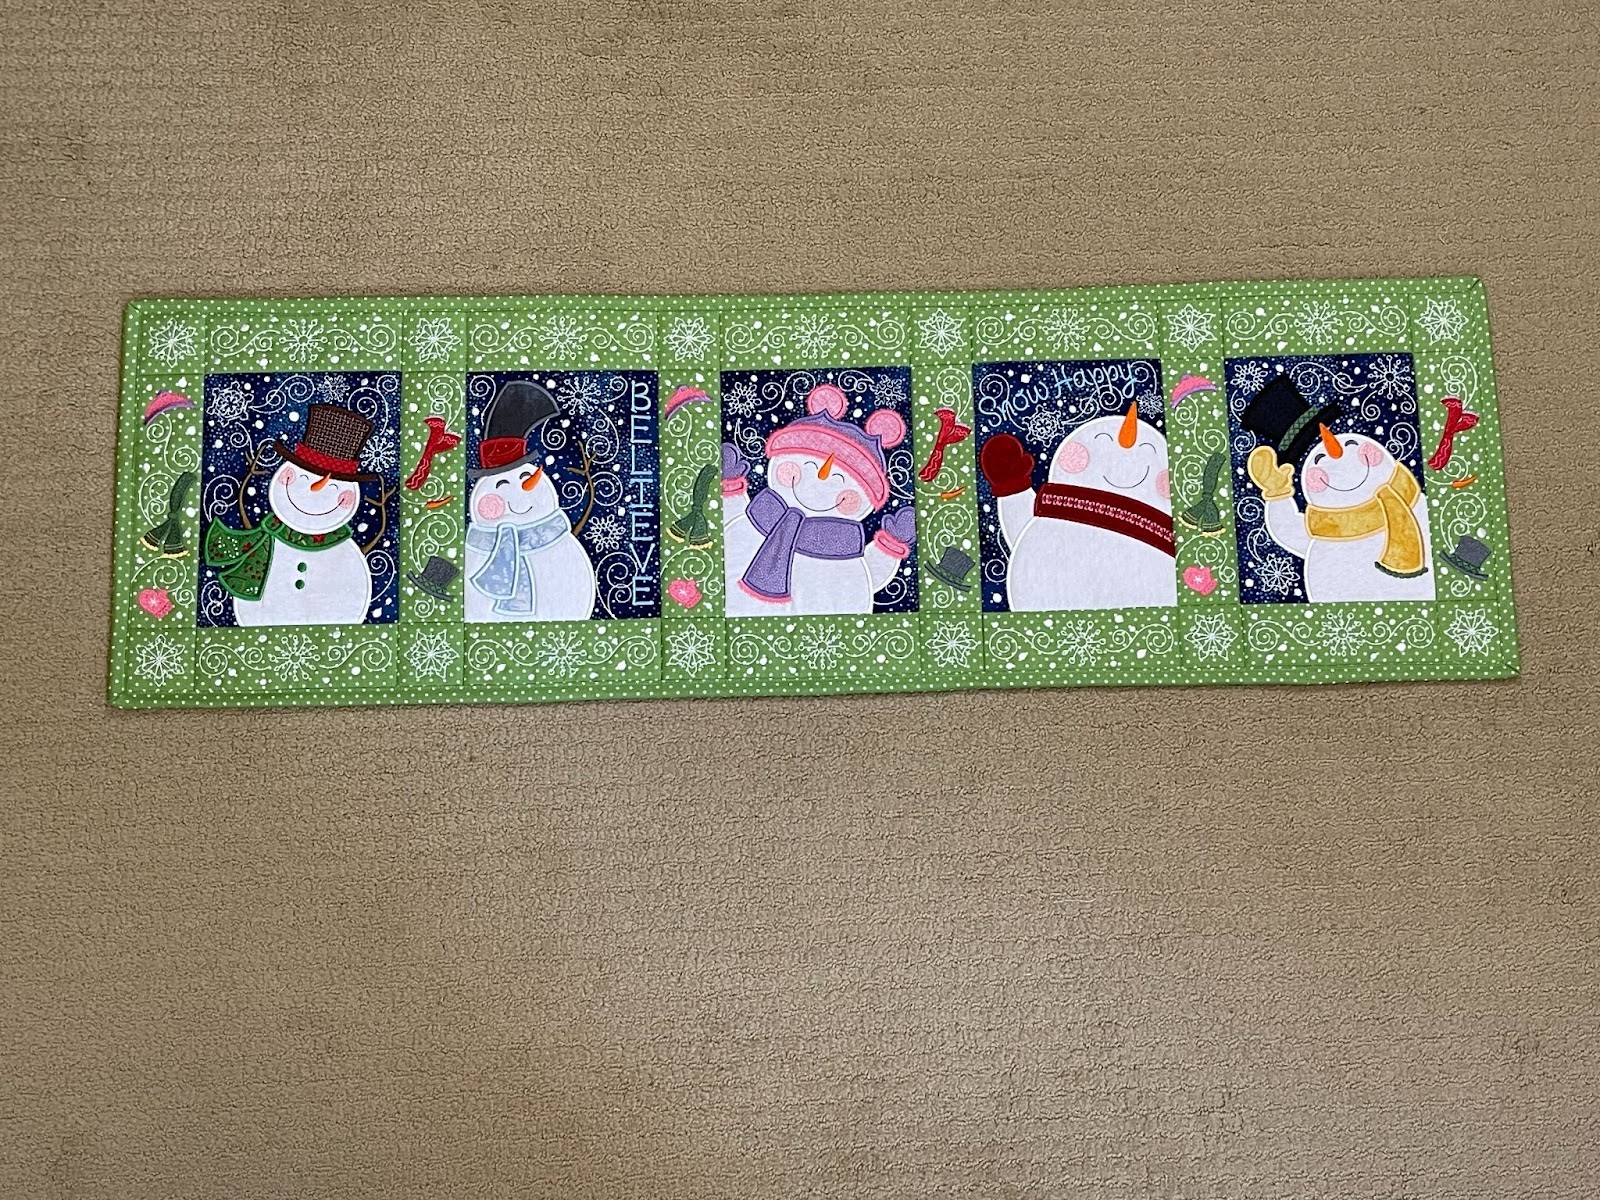
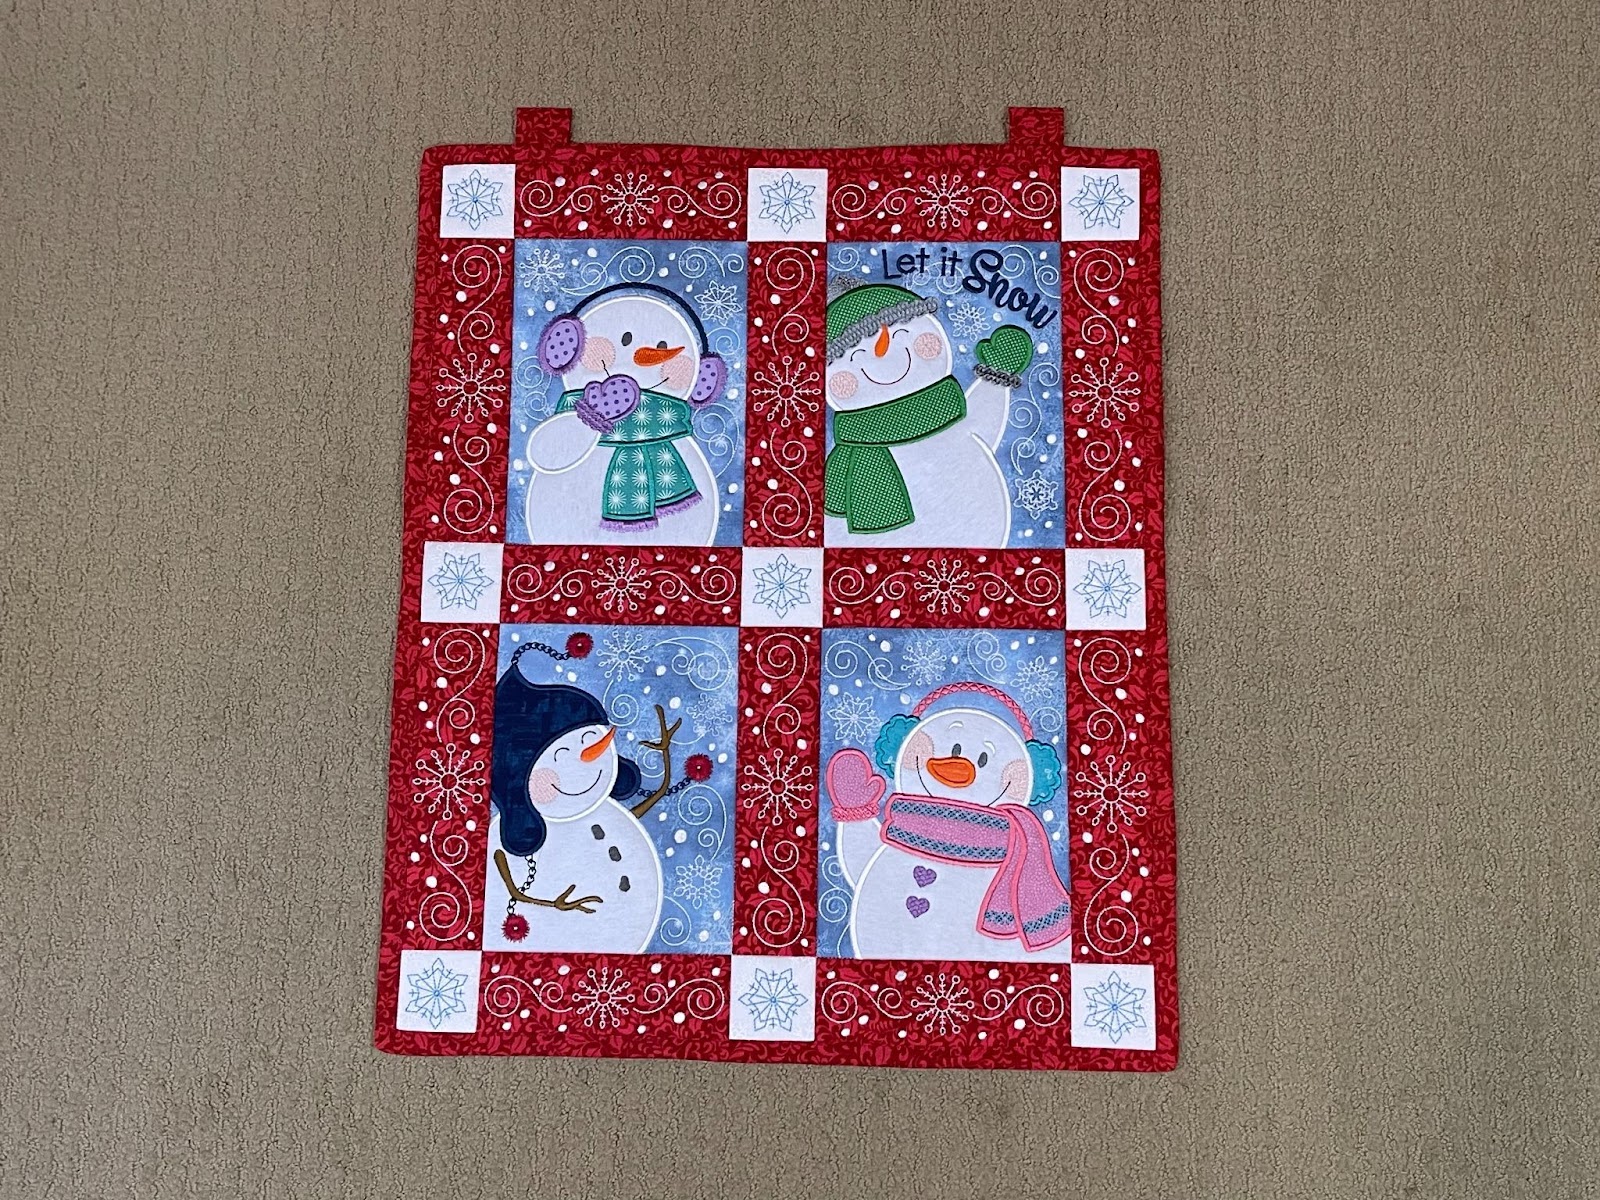
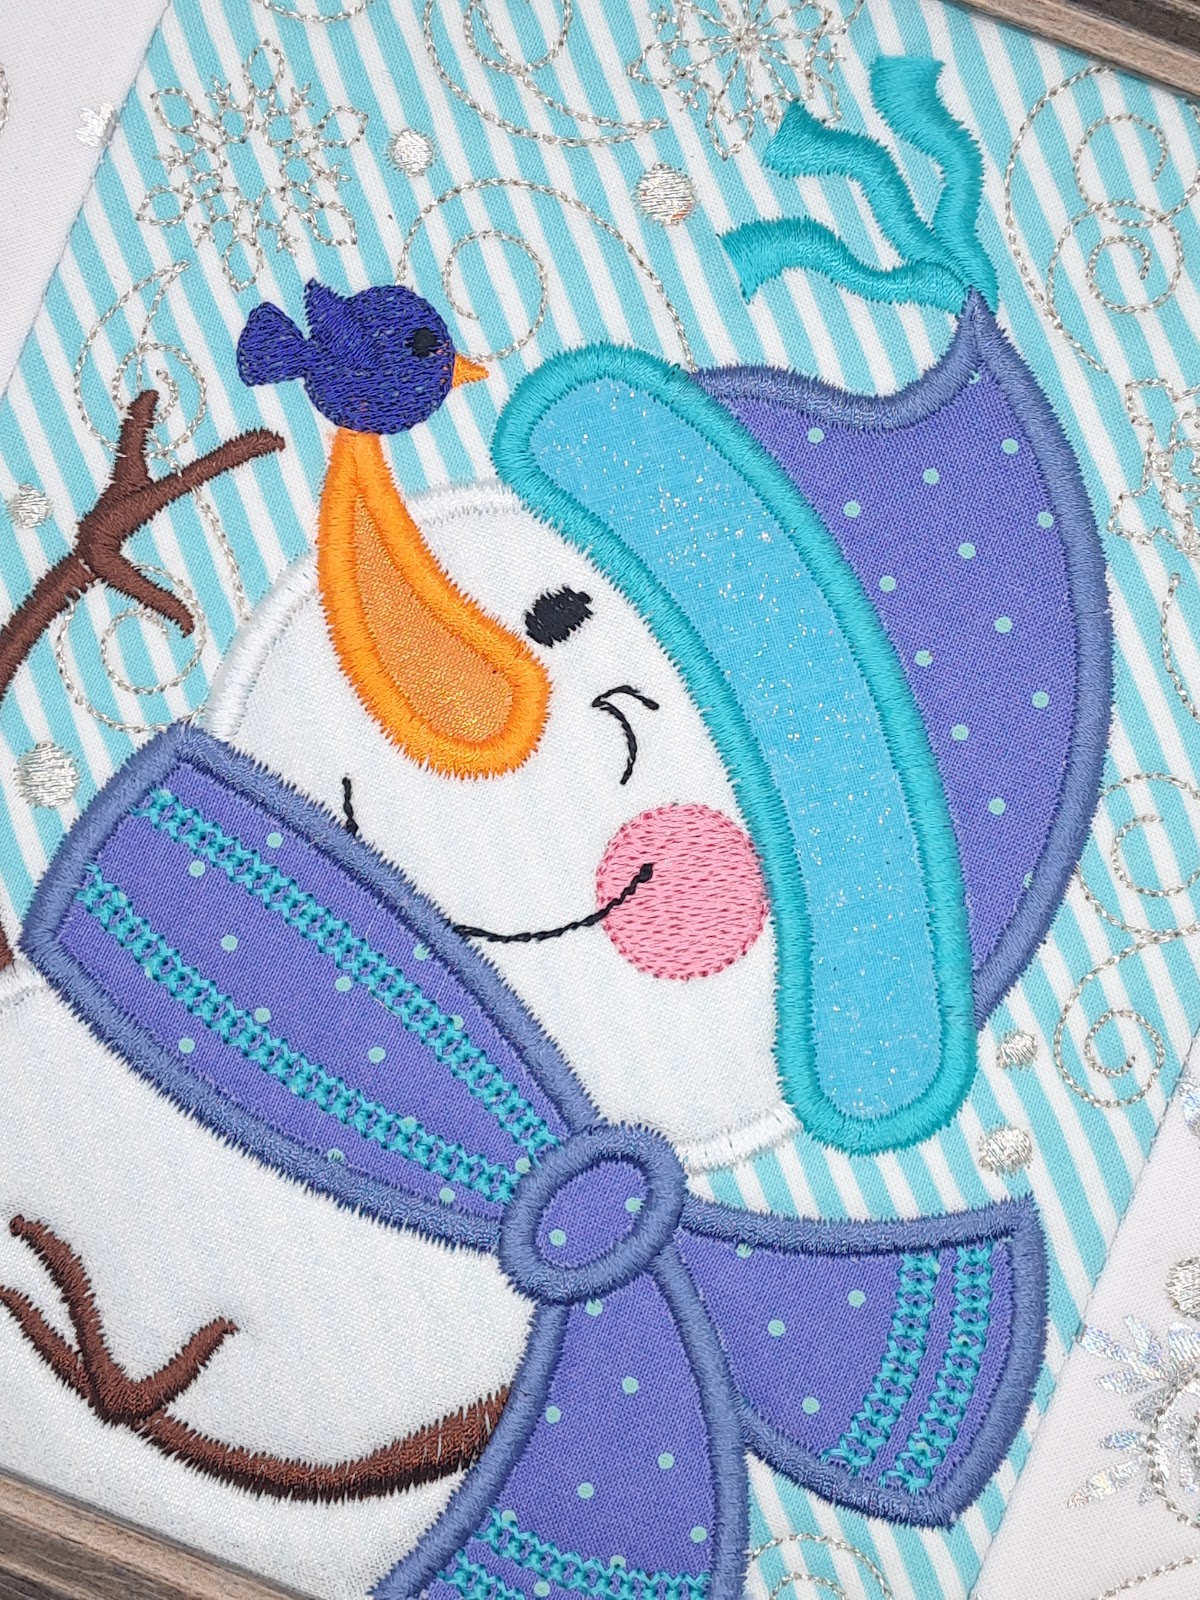
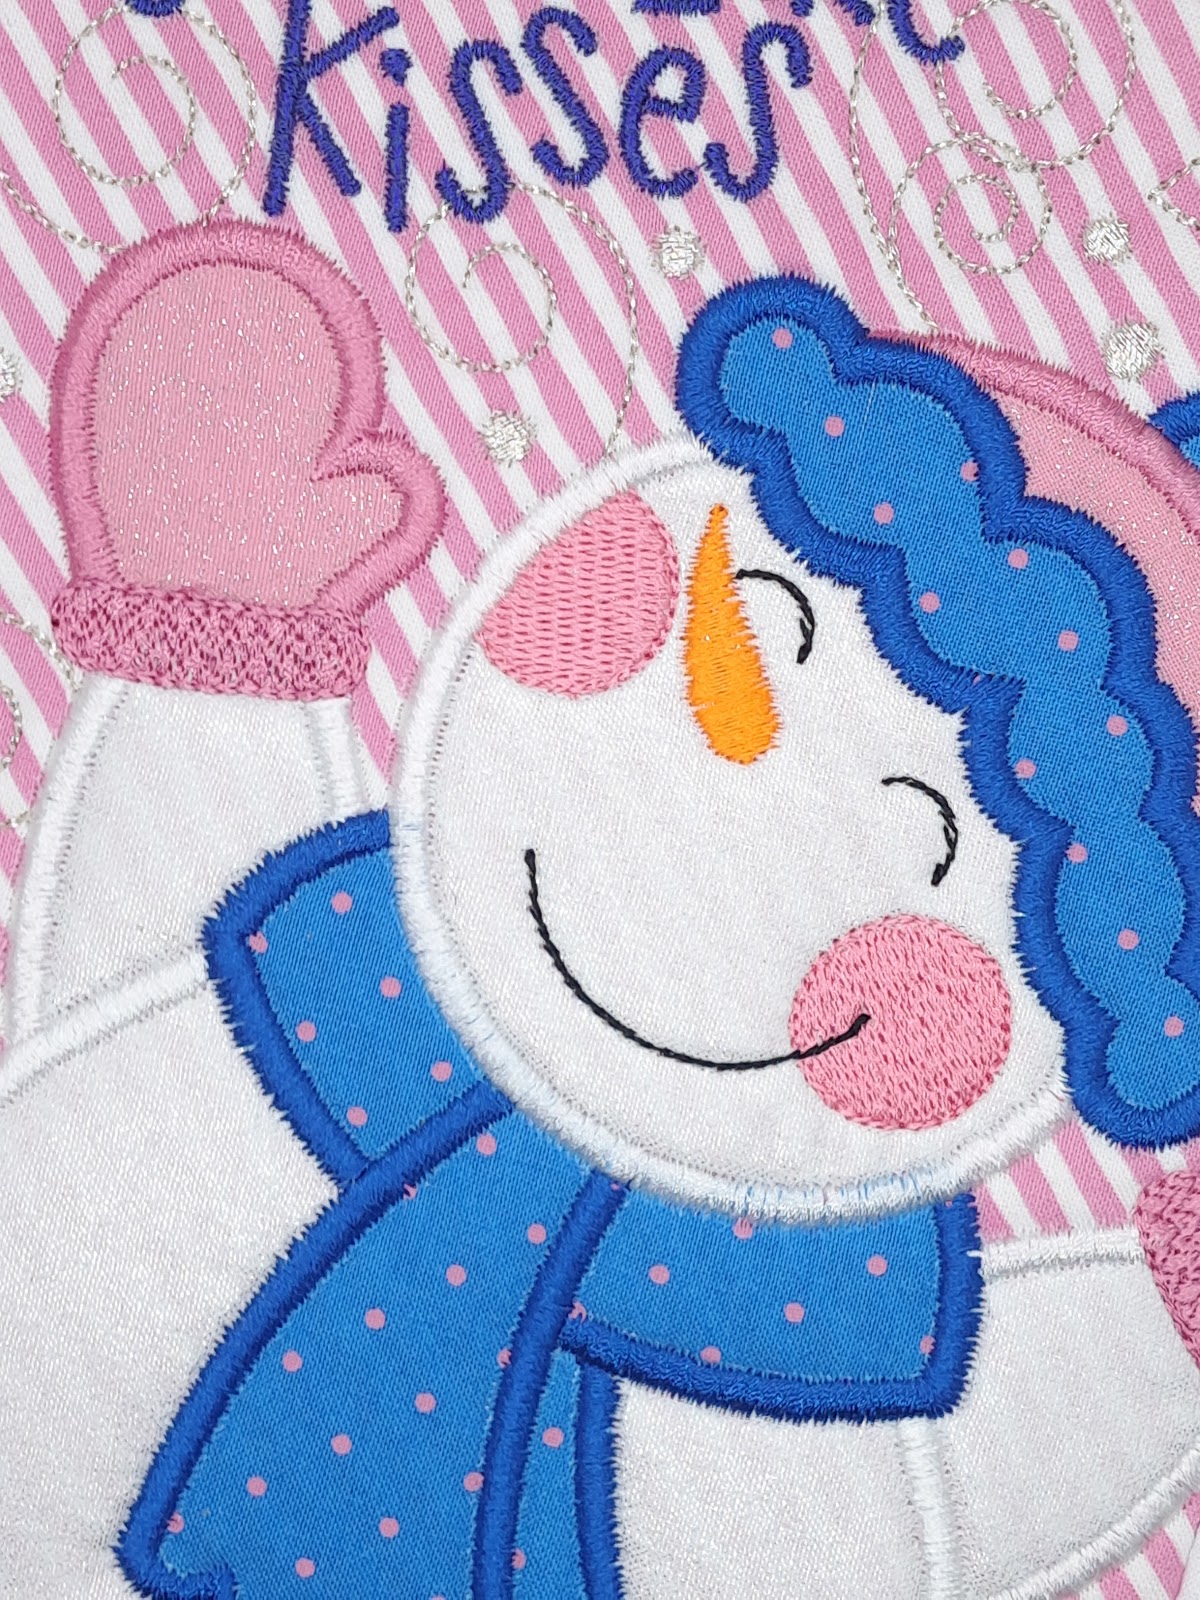
The design capabilities for the ITH Build a Snowman Project are as unique as the snowflakes that fall on your sleeve. Have fun mixing and matching the snowman blocks with the sashings and cornerstone pieces to create a wide range of projects: pillows, placemats, table runners, wall hangings, and so much more!
Our design team has been busy creating a variety of projects to inspire you. I know, friends. I was shocked with how adorable and fabulous they are too!

*Connie's table runner also used: DBJJ936 Snowman Applique Alphabet and DBJJQB30 Santa Hats Mittens Snowflakes Quilting Backdrops Design.
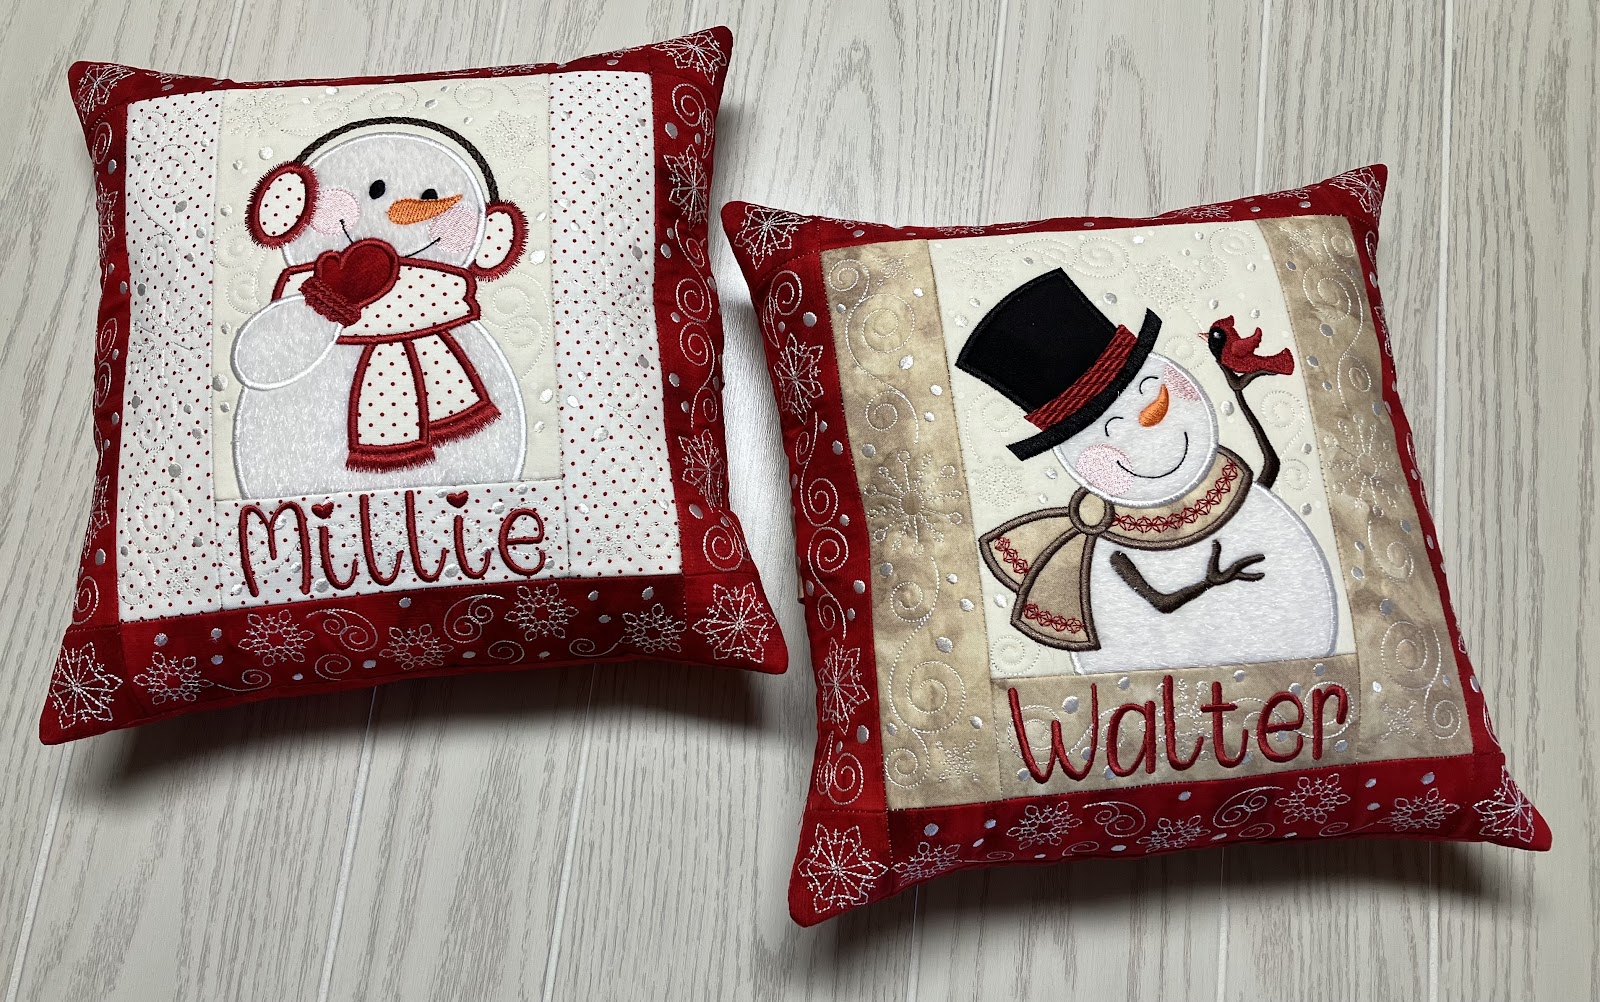
*Halcie's pillows also used: DBJJ3072 Soft Serve Embroidery Font.
Check out the DBJJ team’s favorite supplies in the Designs by JuJu Amazon store.
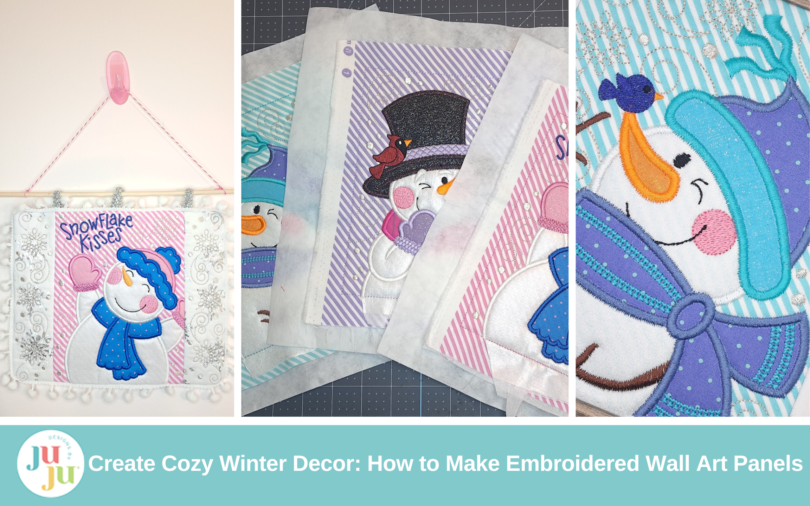
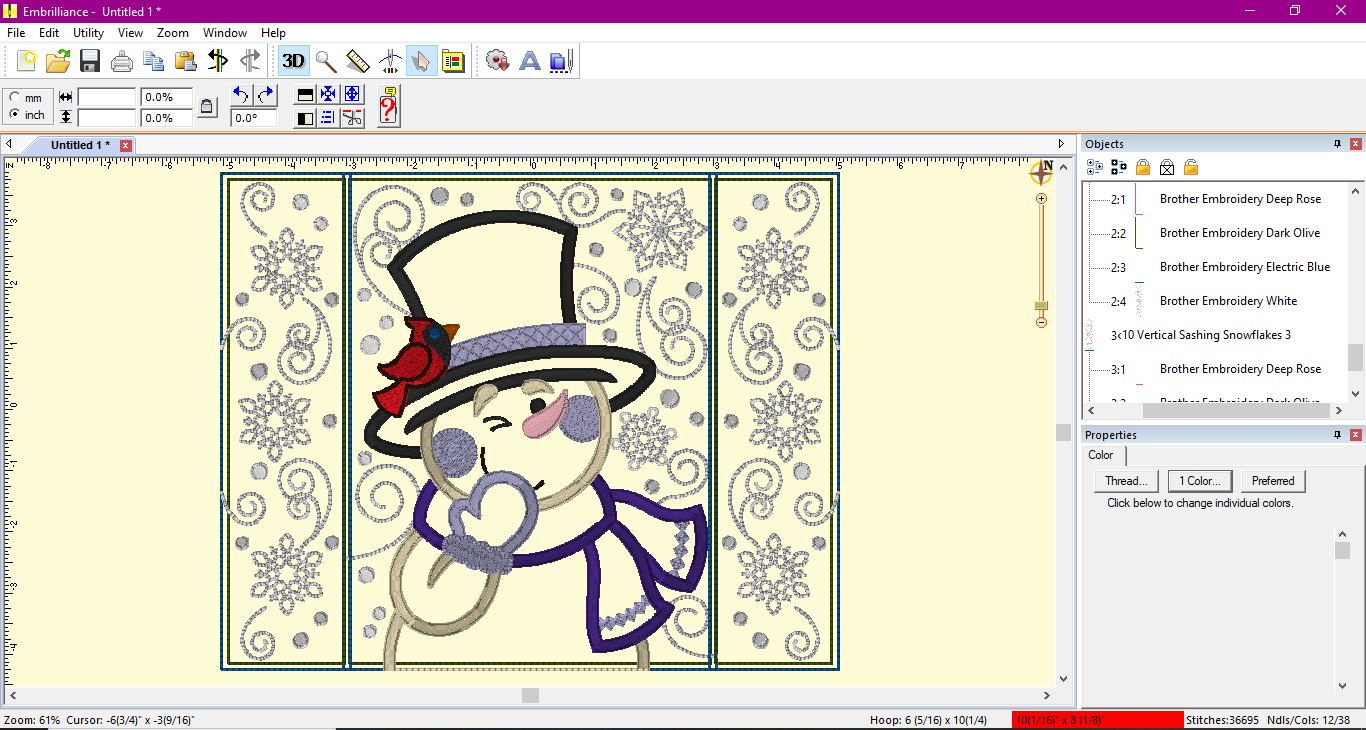
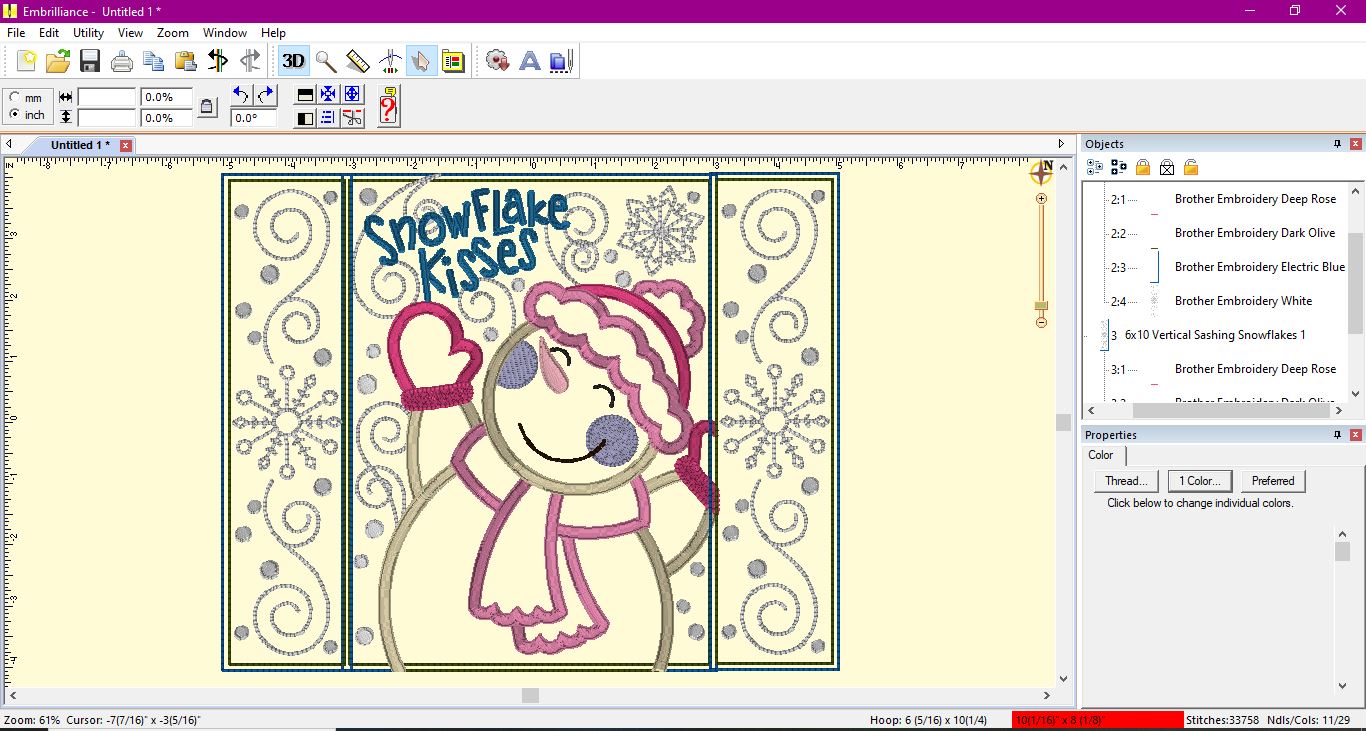
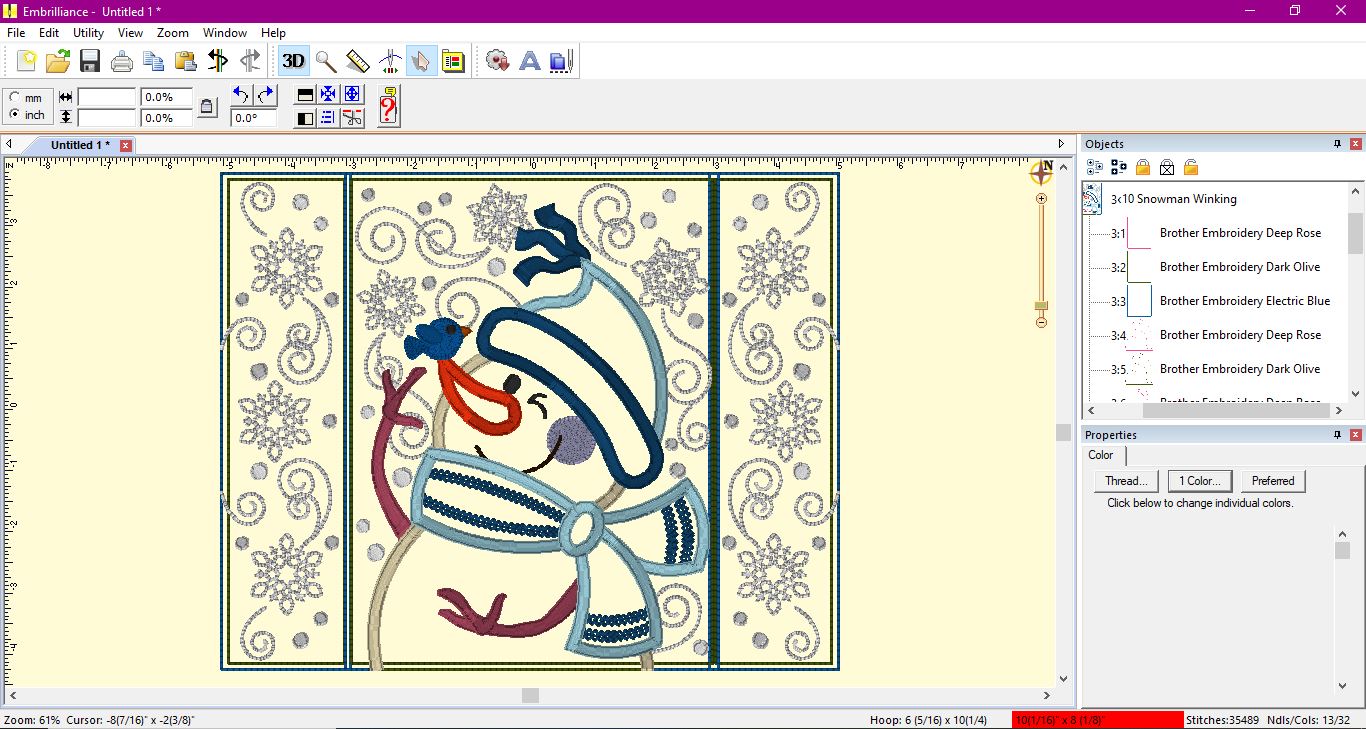
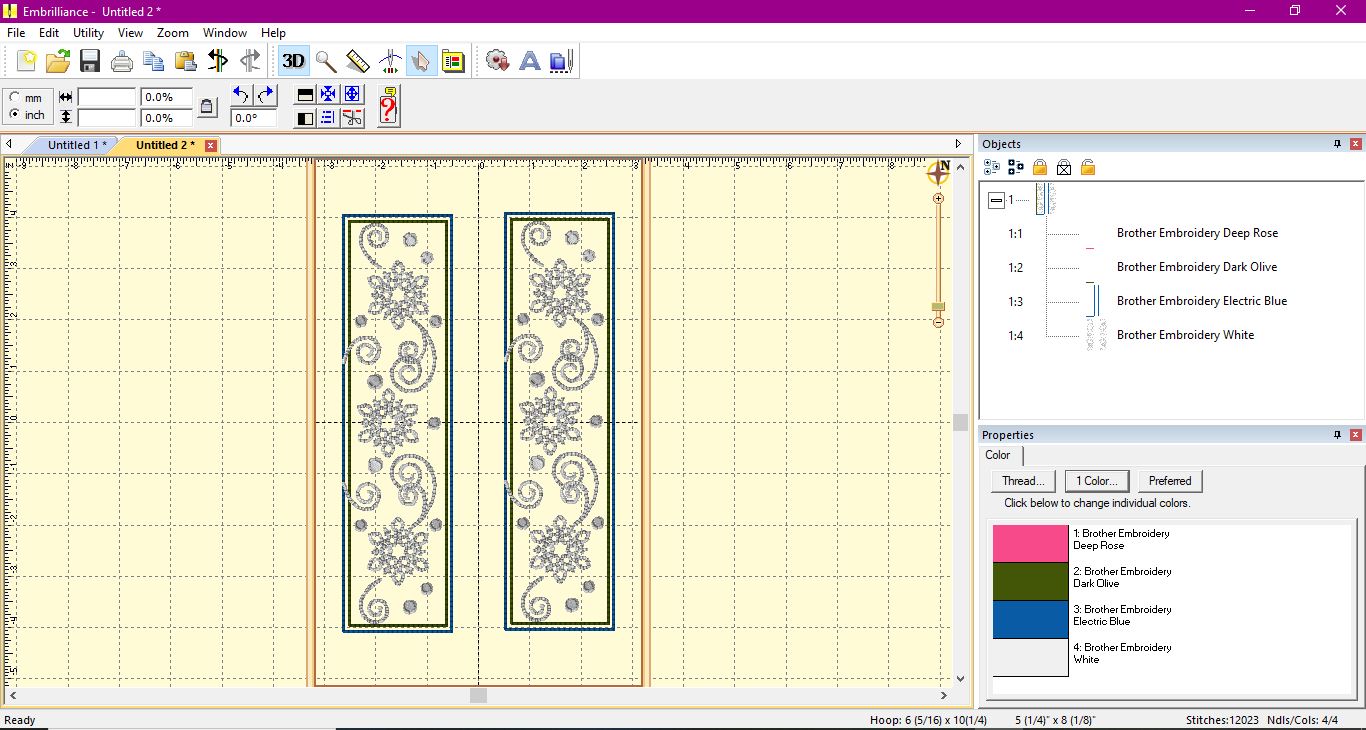
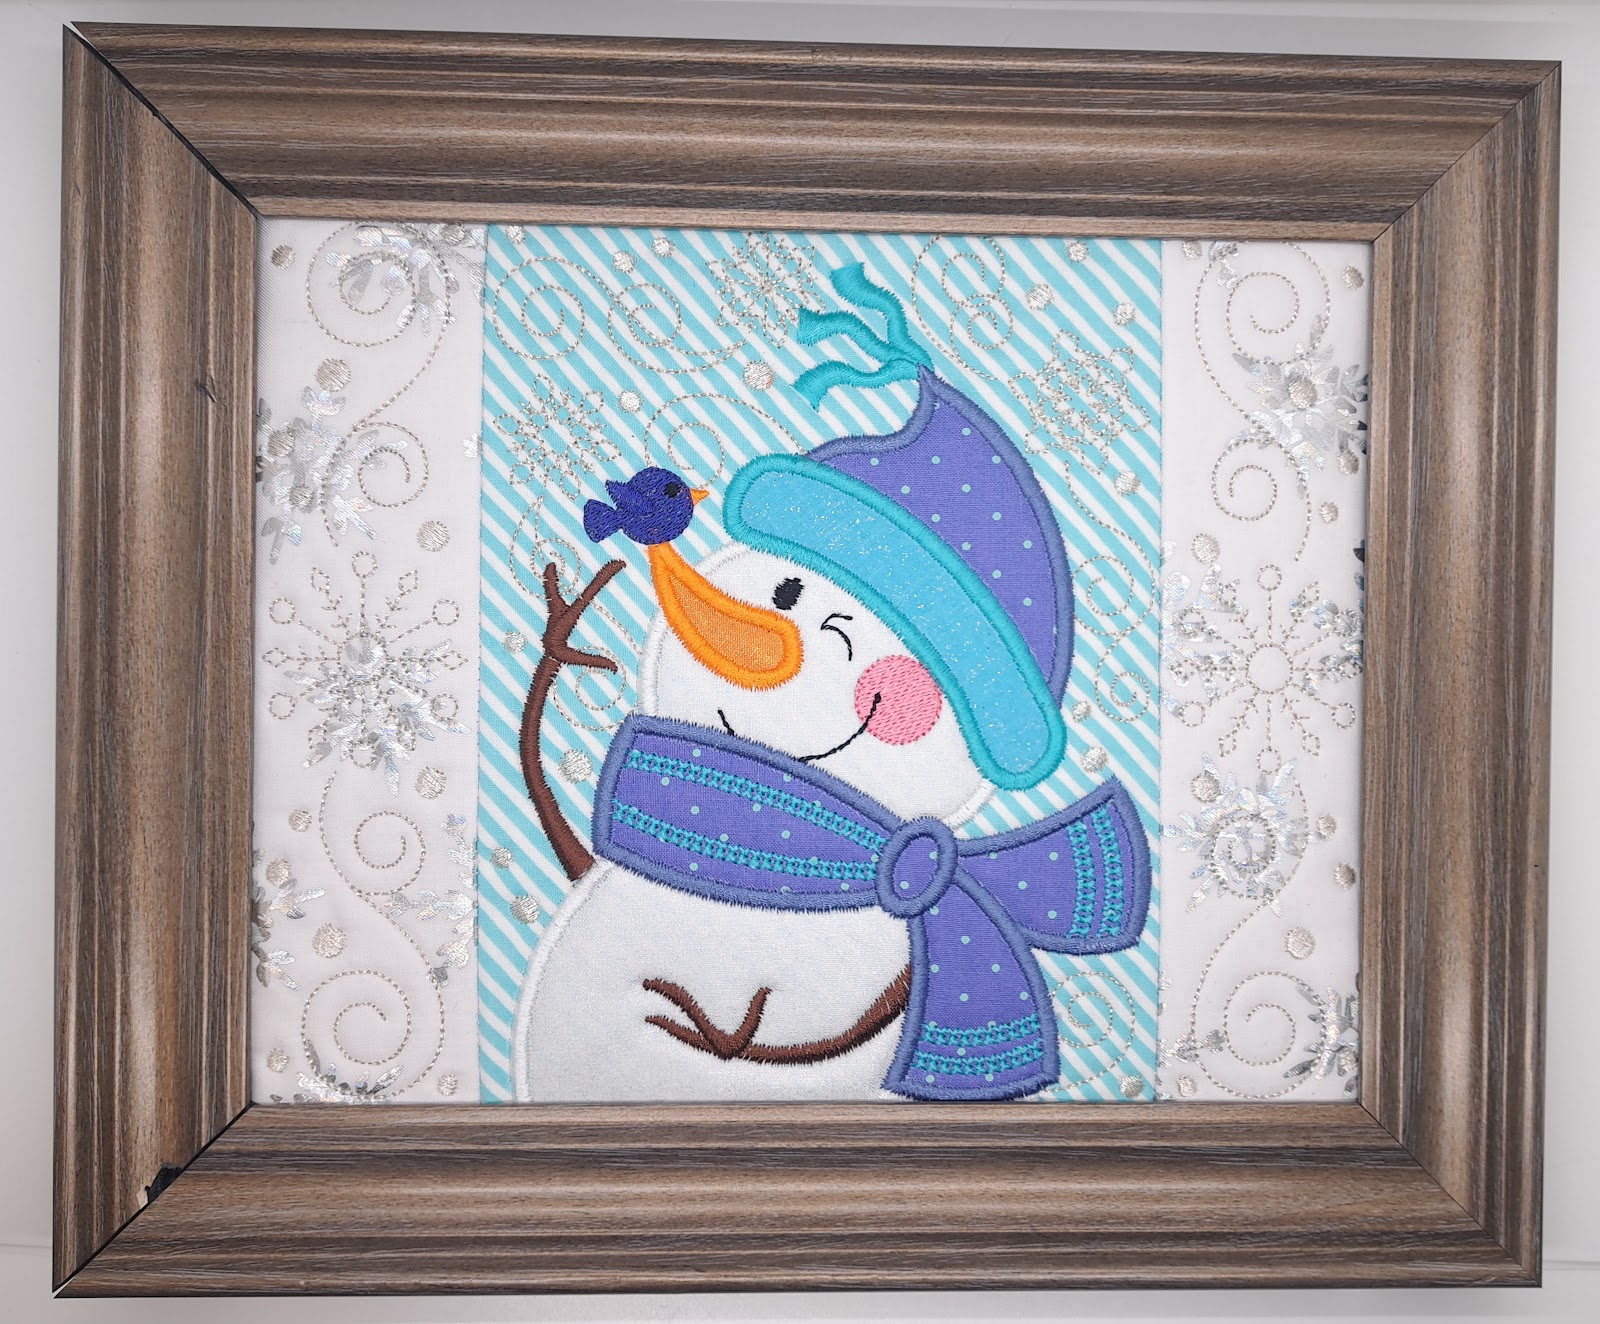
Before I ever began stitching, I designed my embroidered triptych (a fancy word for something composed or presented in three parts) panels using Embrilliance Embroidery Software. Software is not required to use the ITH Build a Snowman Project, but it does allow you to play around with the various blocks and create a layout that works best for you. I found it very helpful for the design process.
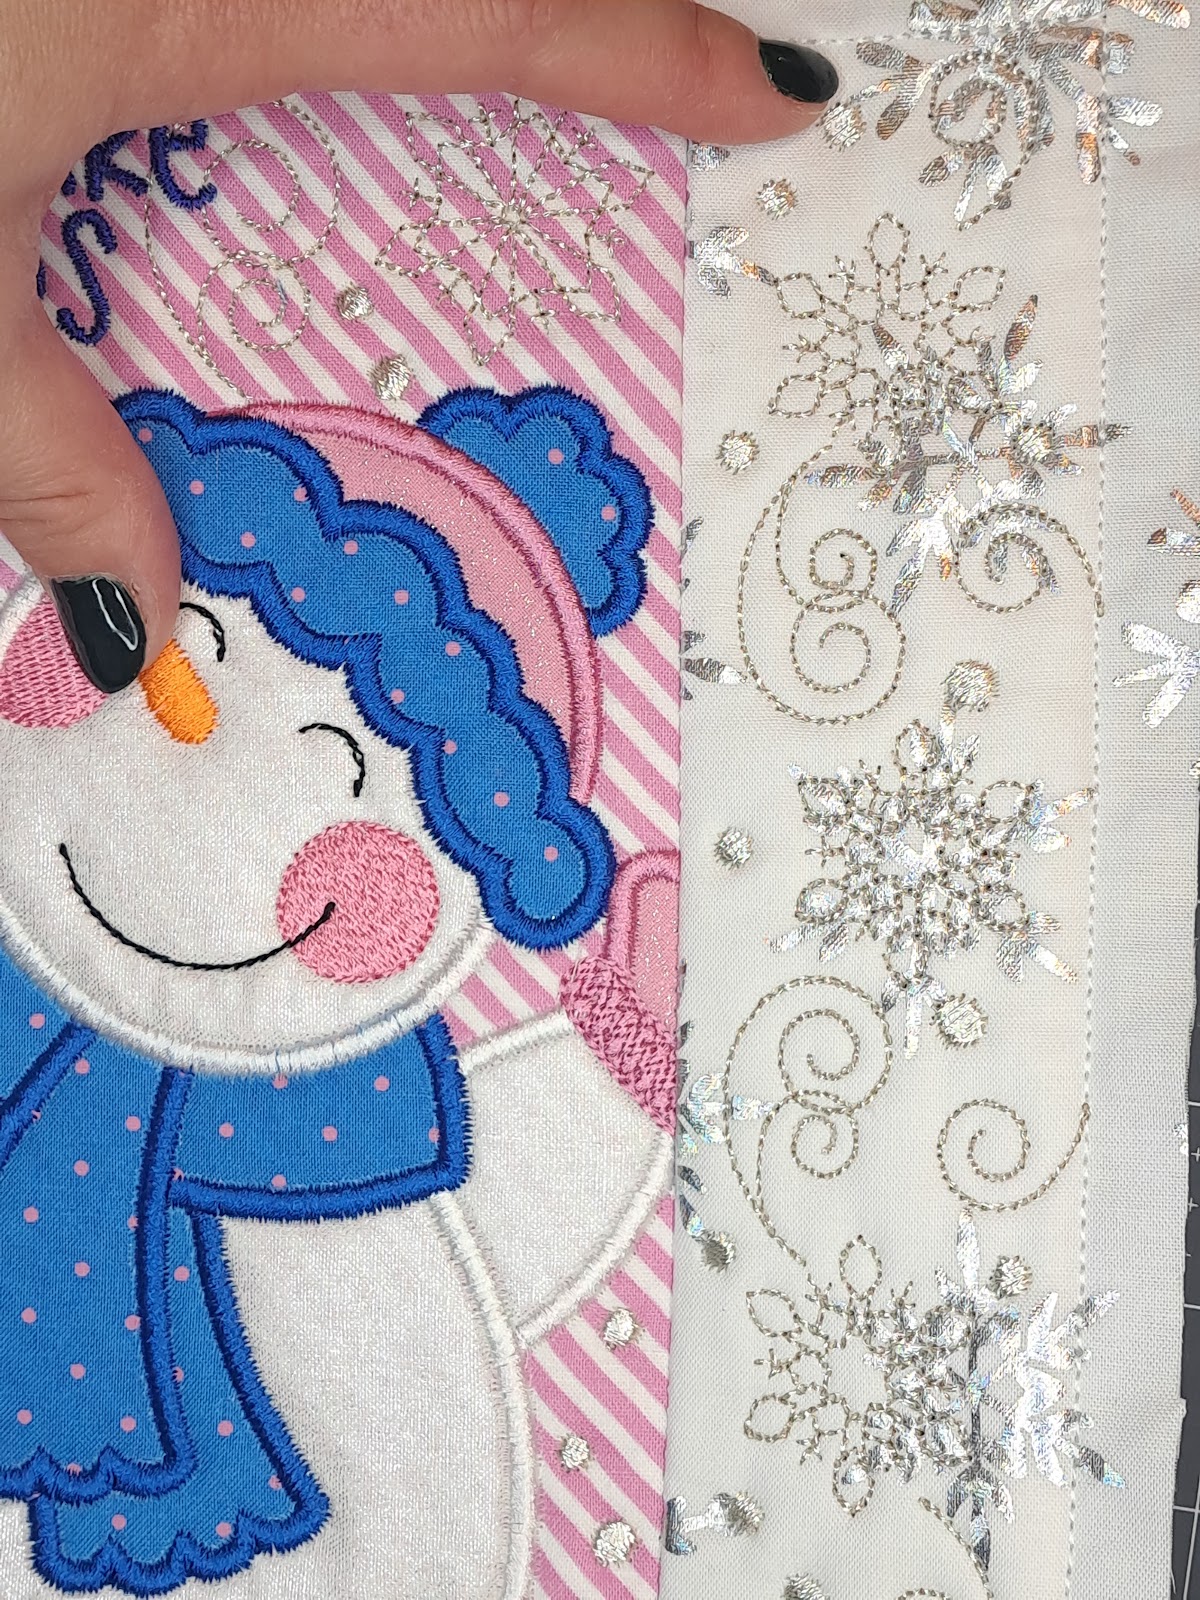
For my three panels, I chose one focal 6” x 10” snowman block and added two 6” x 10” vertical sashing blocks on each side of the main snowman block. Based on these dimensions, my completed panels would measure about 8” x 10” when assembled, the perfect size for an 8” x 10” frame.
An added benefit to using Embrilliance is the capability to place multiple cornerstone blocks and sashings together for stitching. If you are going to be using the same fabric and thread on many sashing/cornerstone pieces, you can save time by using the Color Sort feature (I have Embrilliance Essentials).
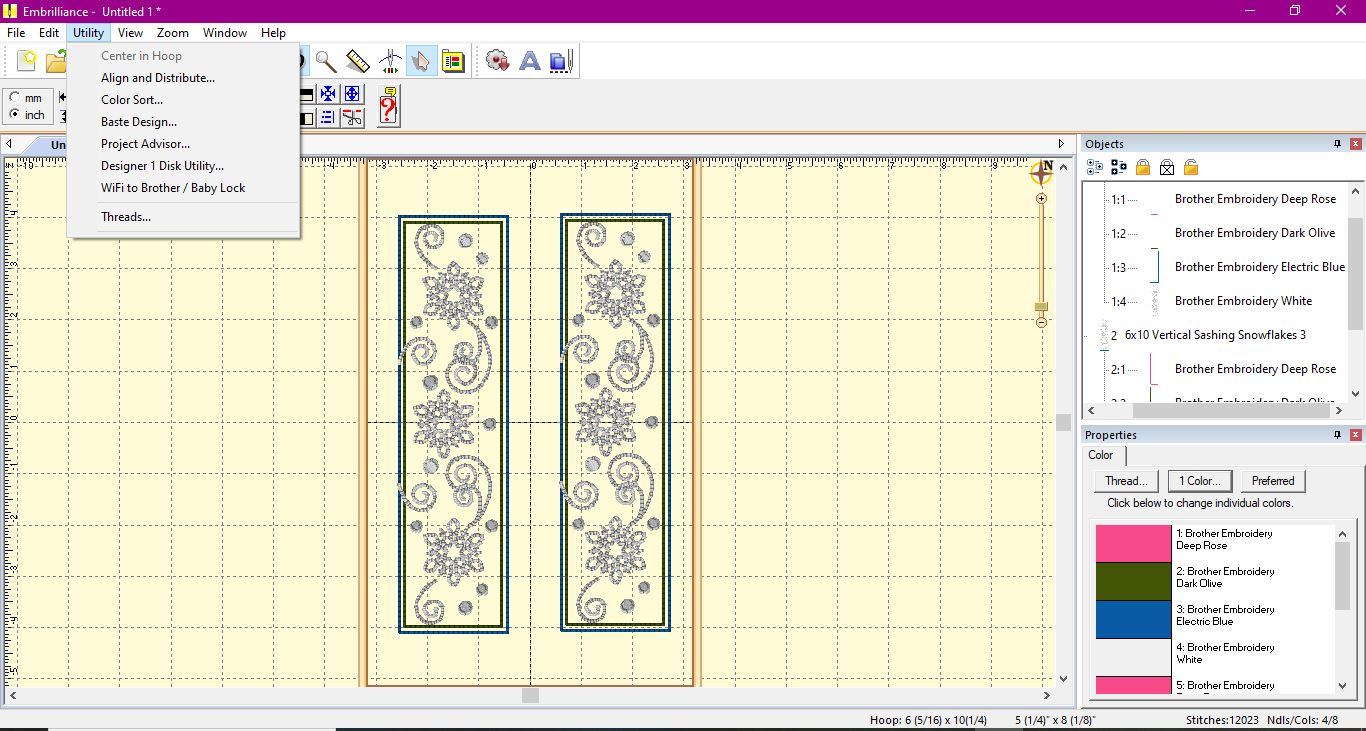
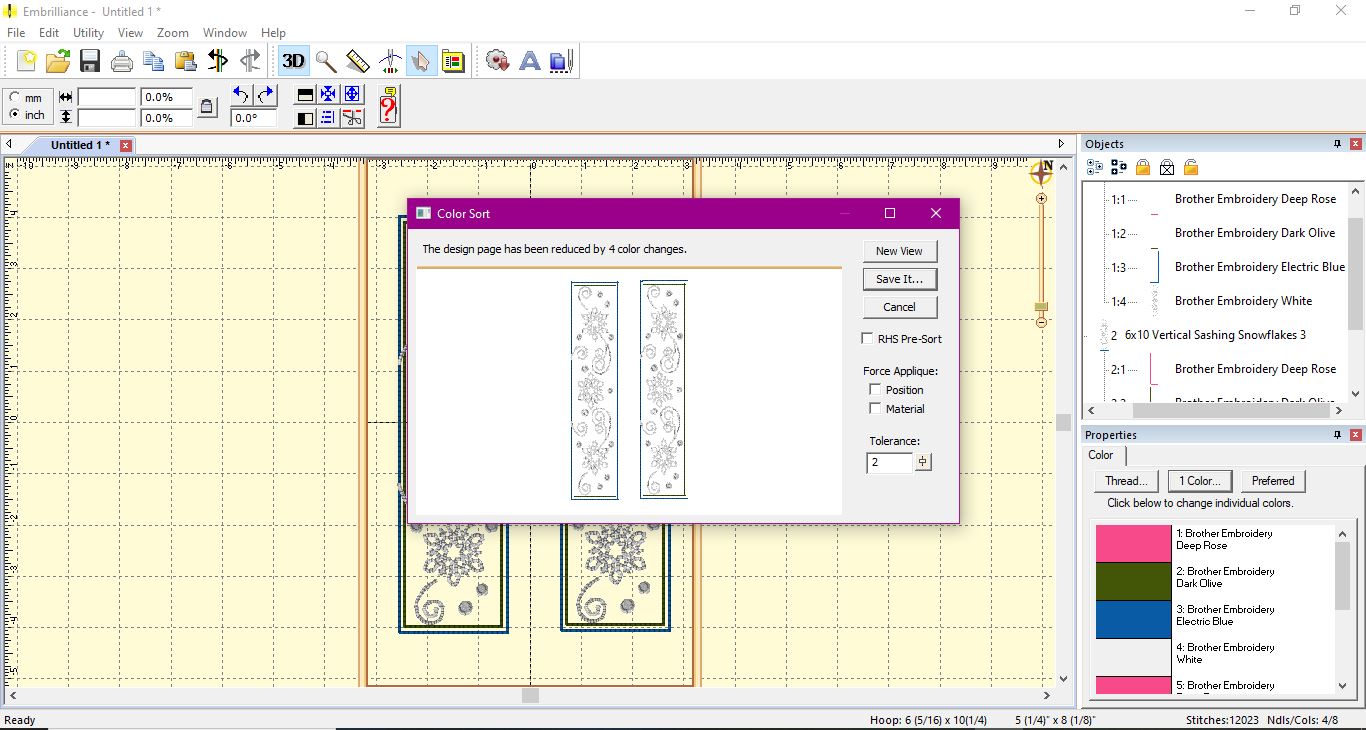
Embrilliance will color sort the steps, saving you time and materials! Make sure to save this color sorted design to your USB.
Pro Tip: Run the Stitch Simulator to ensure everything has sorted as you expect.
Once you have designed your ITH Build a Snowman Project panels, you are ready to get stitching!
Step 1: Select your cotton fabric and apply SF101 to provide added stability (optional). Iron all applique fabric and adhere Heat-n-Bond® Lite as necessary.
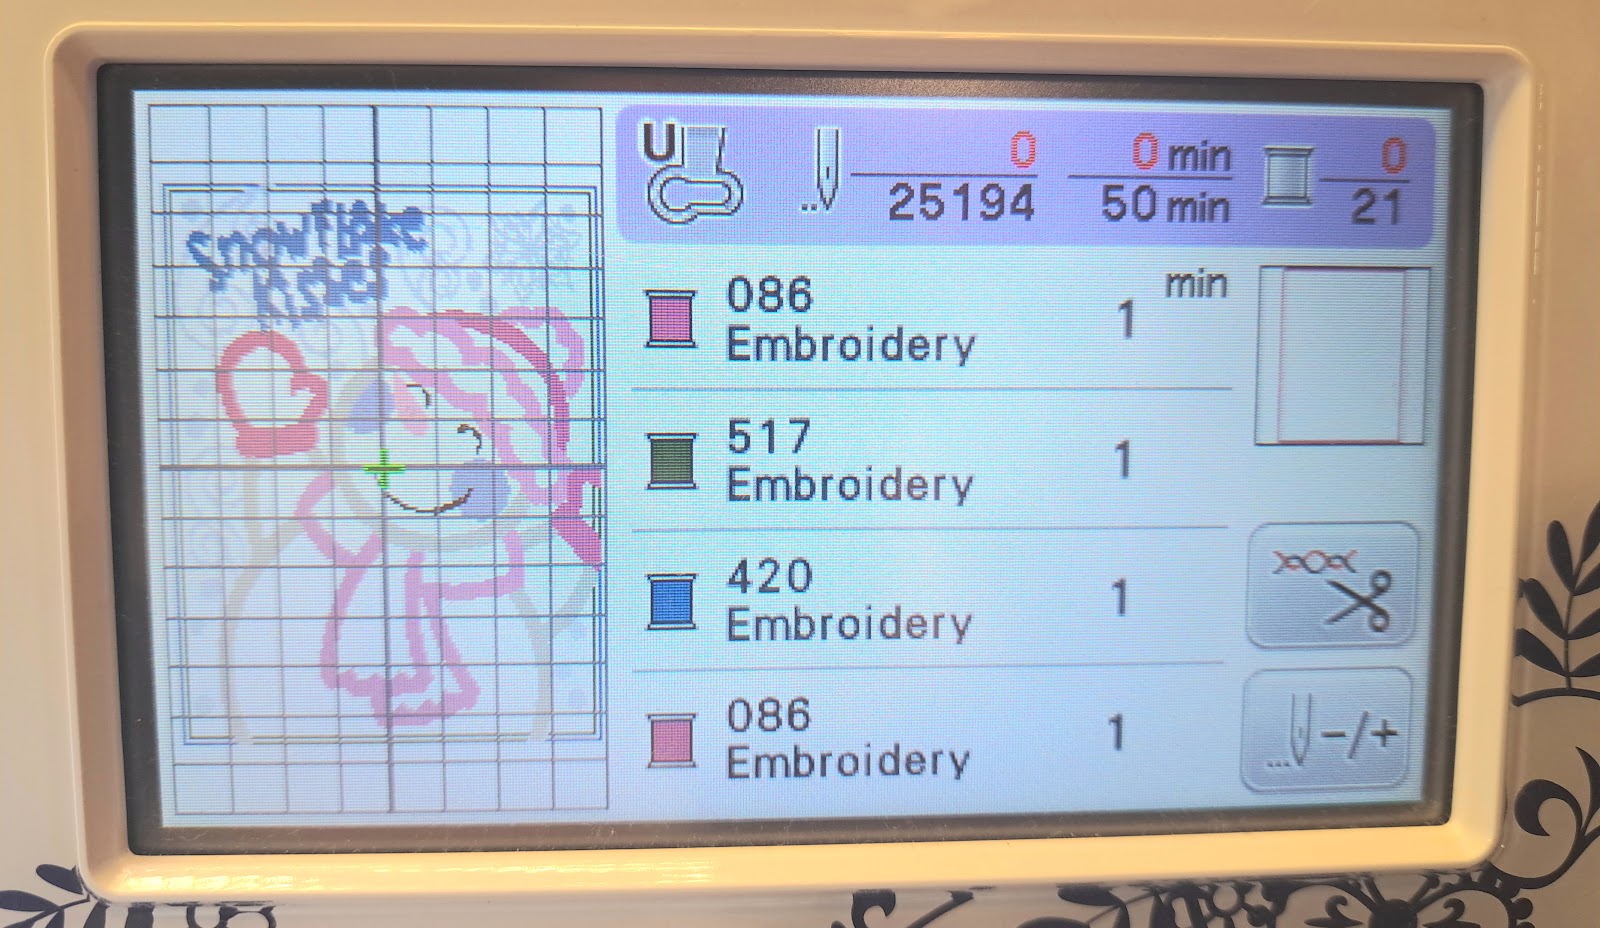
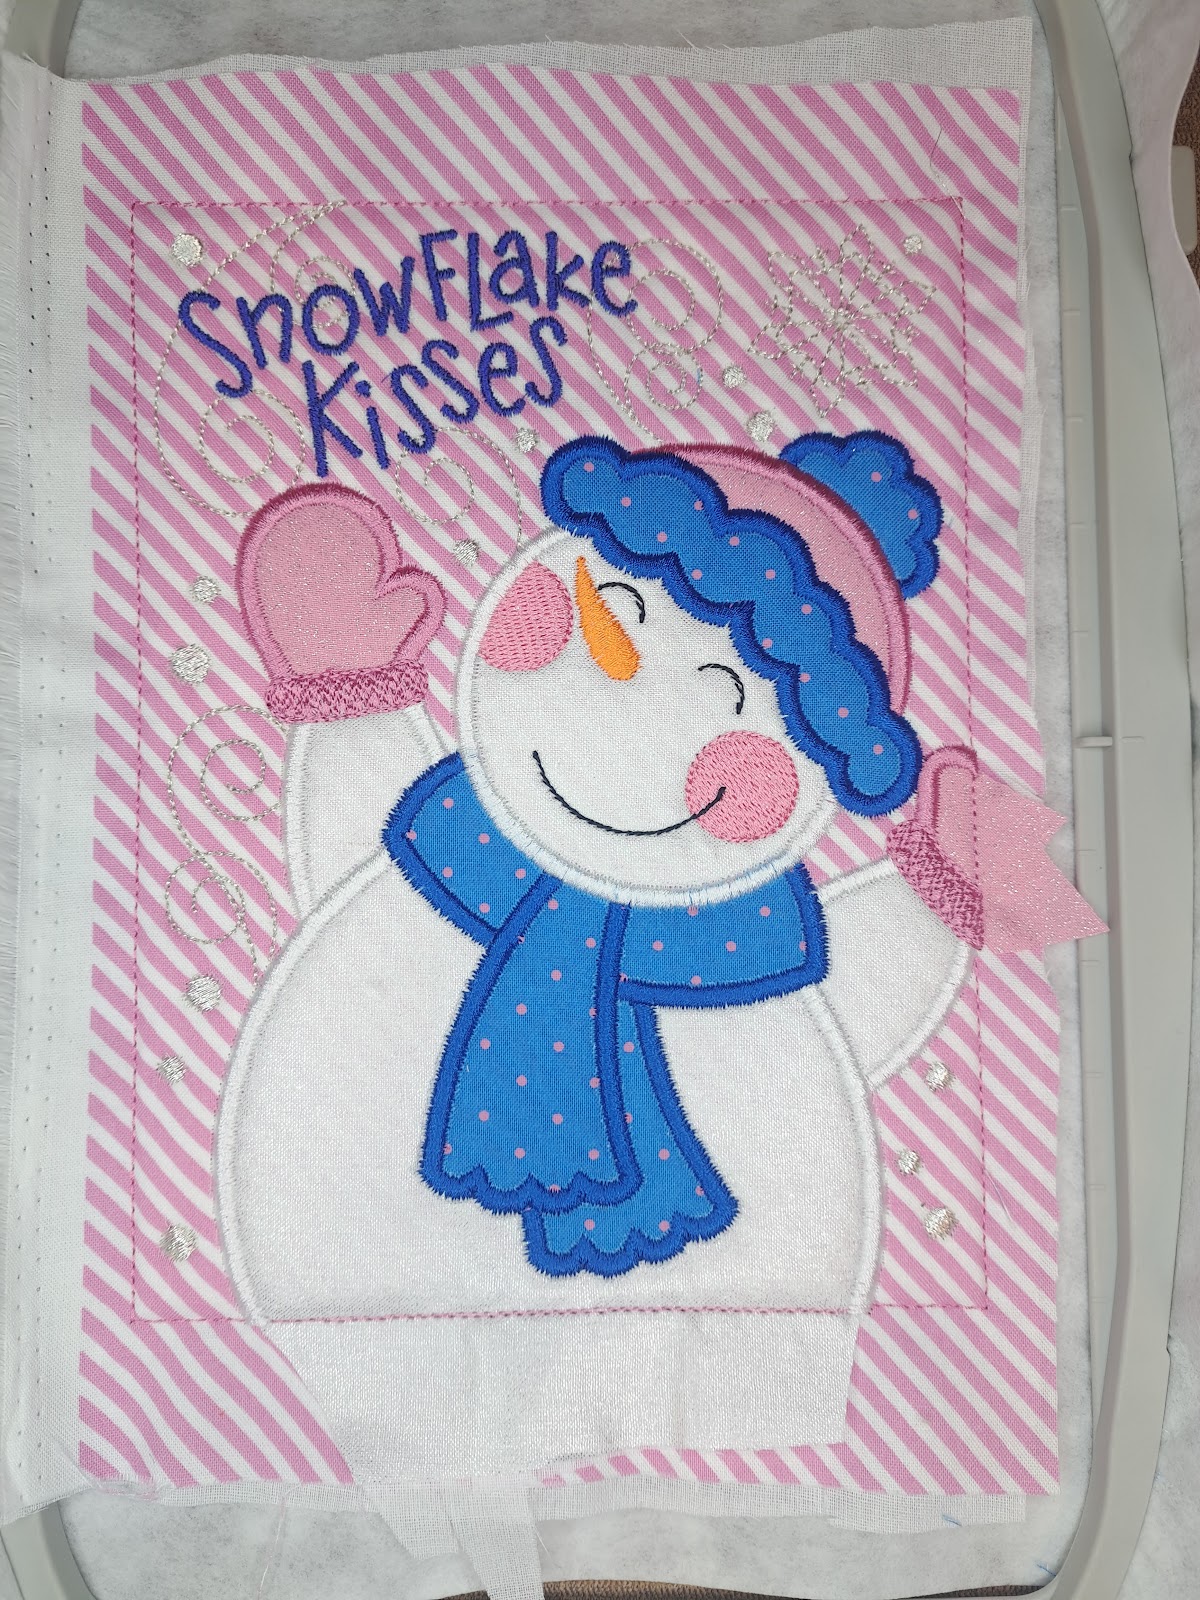
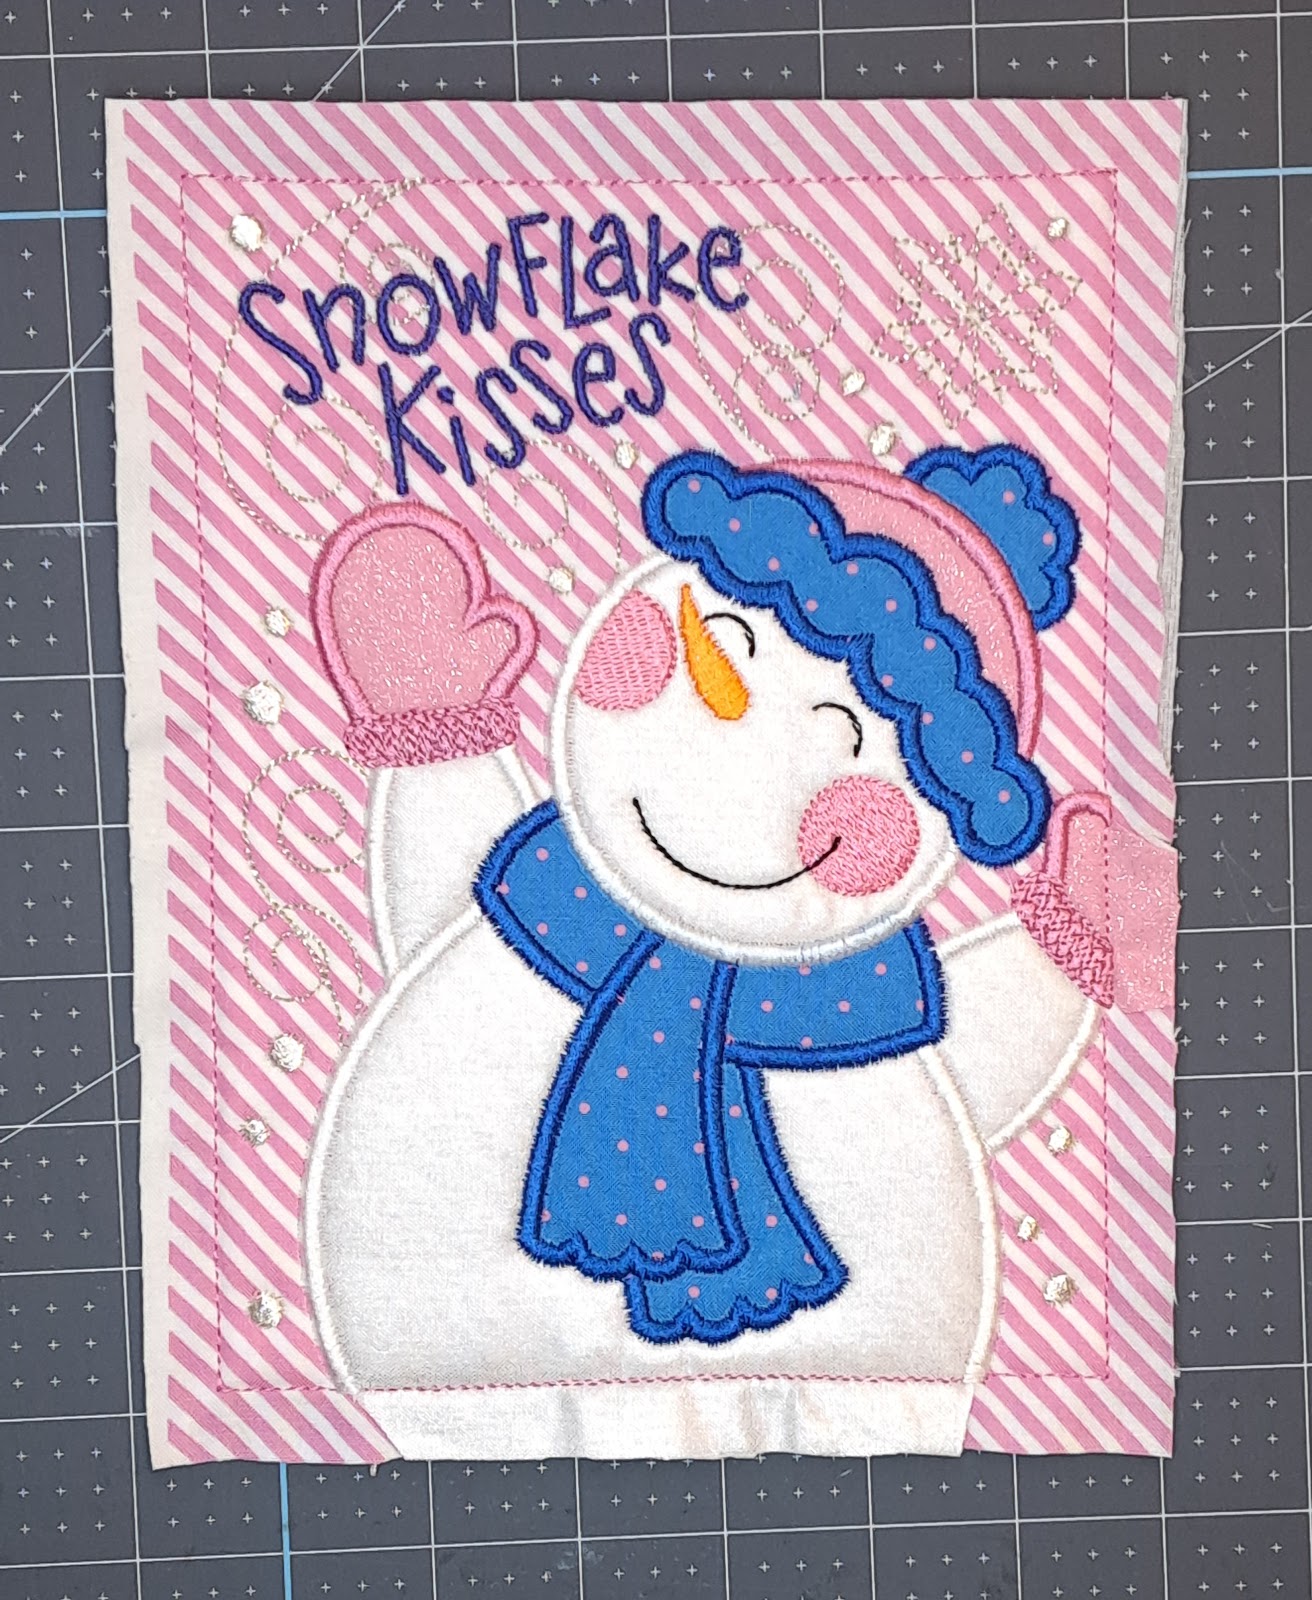
Step 2: Load your first snowman block onto your machine. I am stitching the Snowflake Kisses snowman block first.
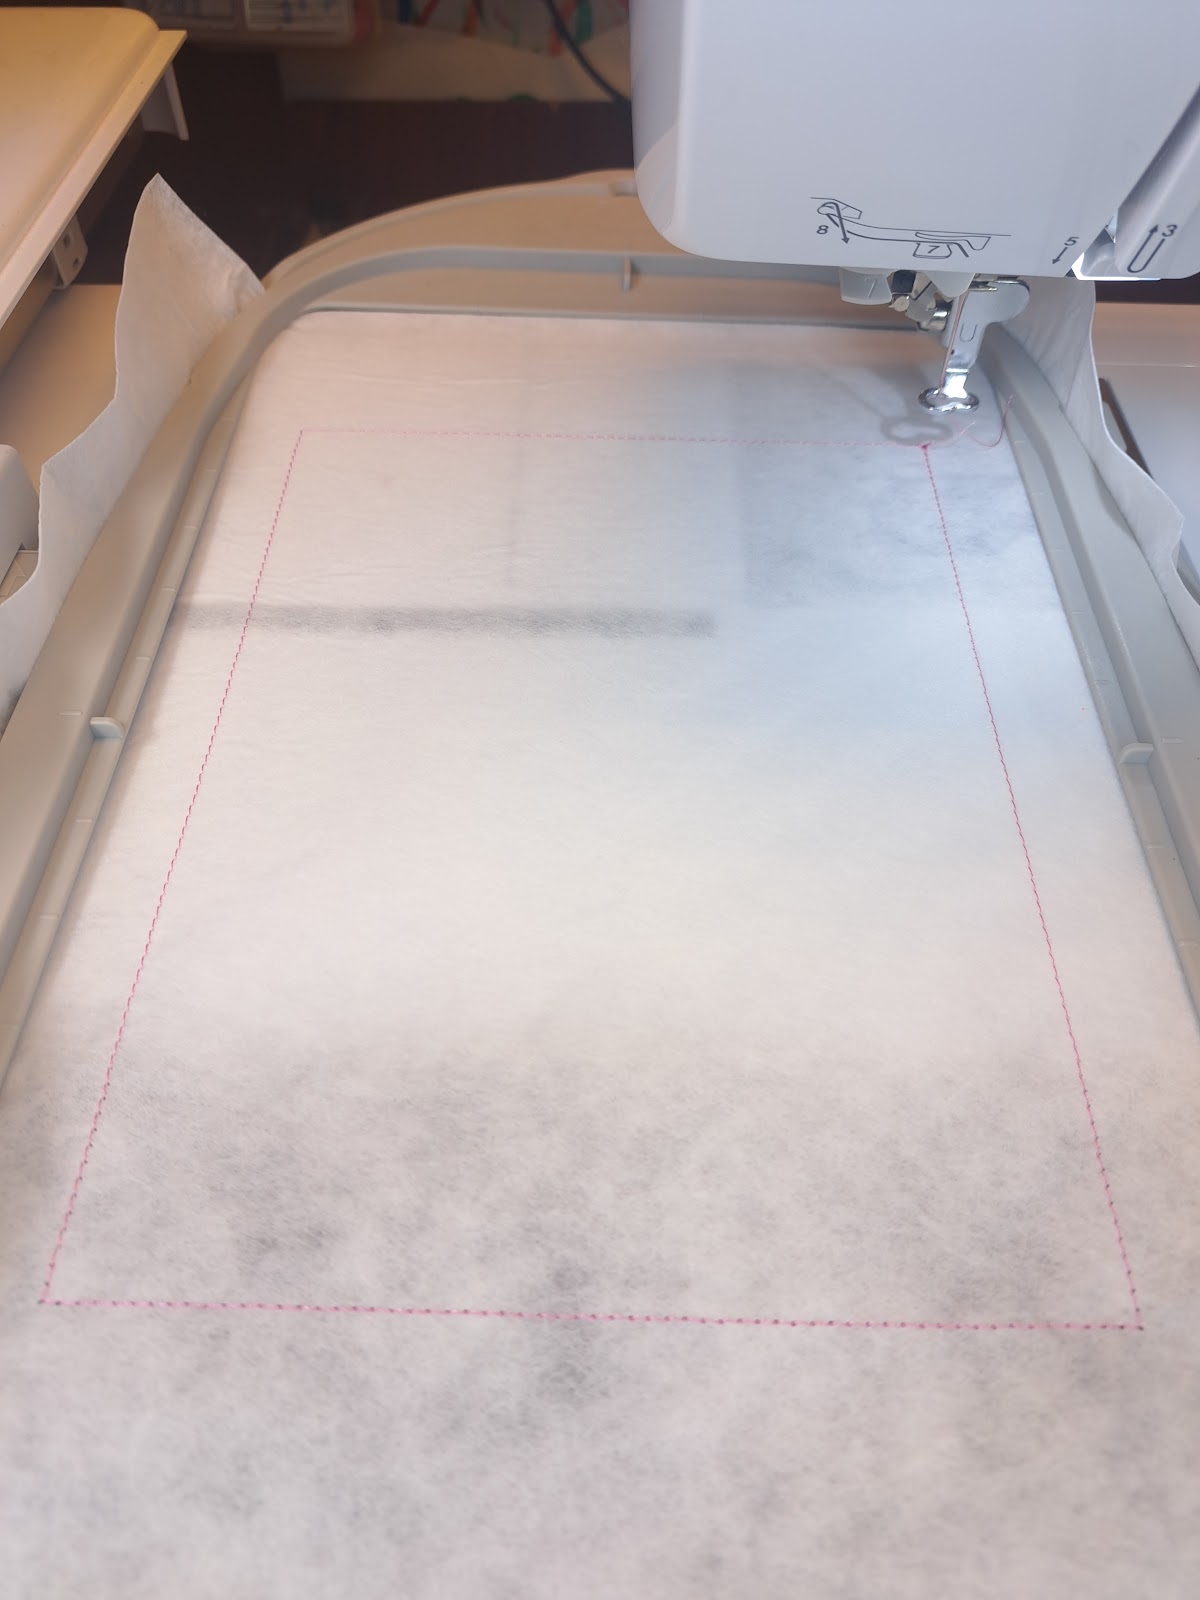
Step 3: Hoop cut-away stabilizer.
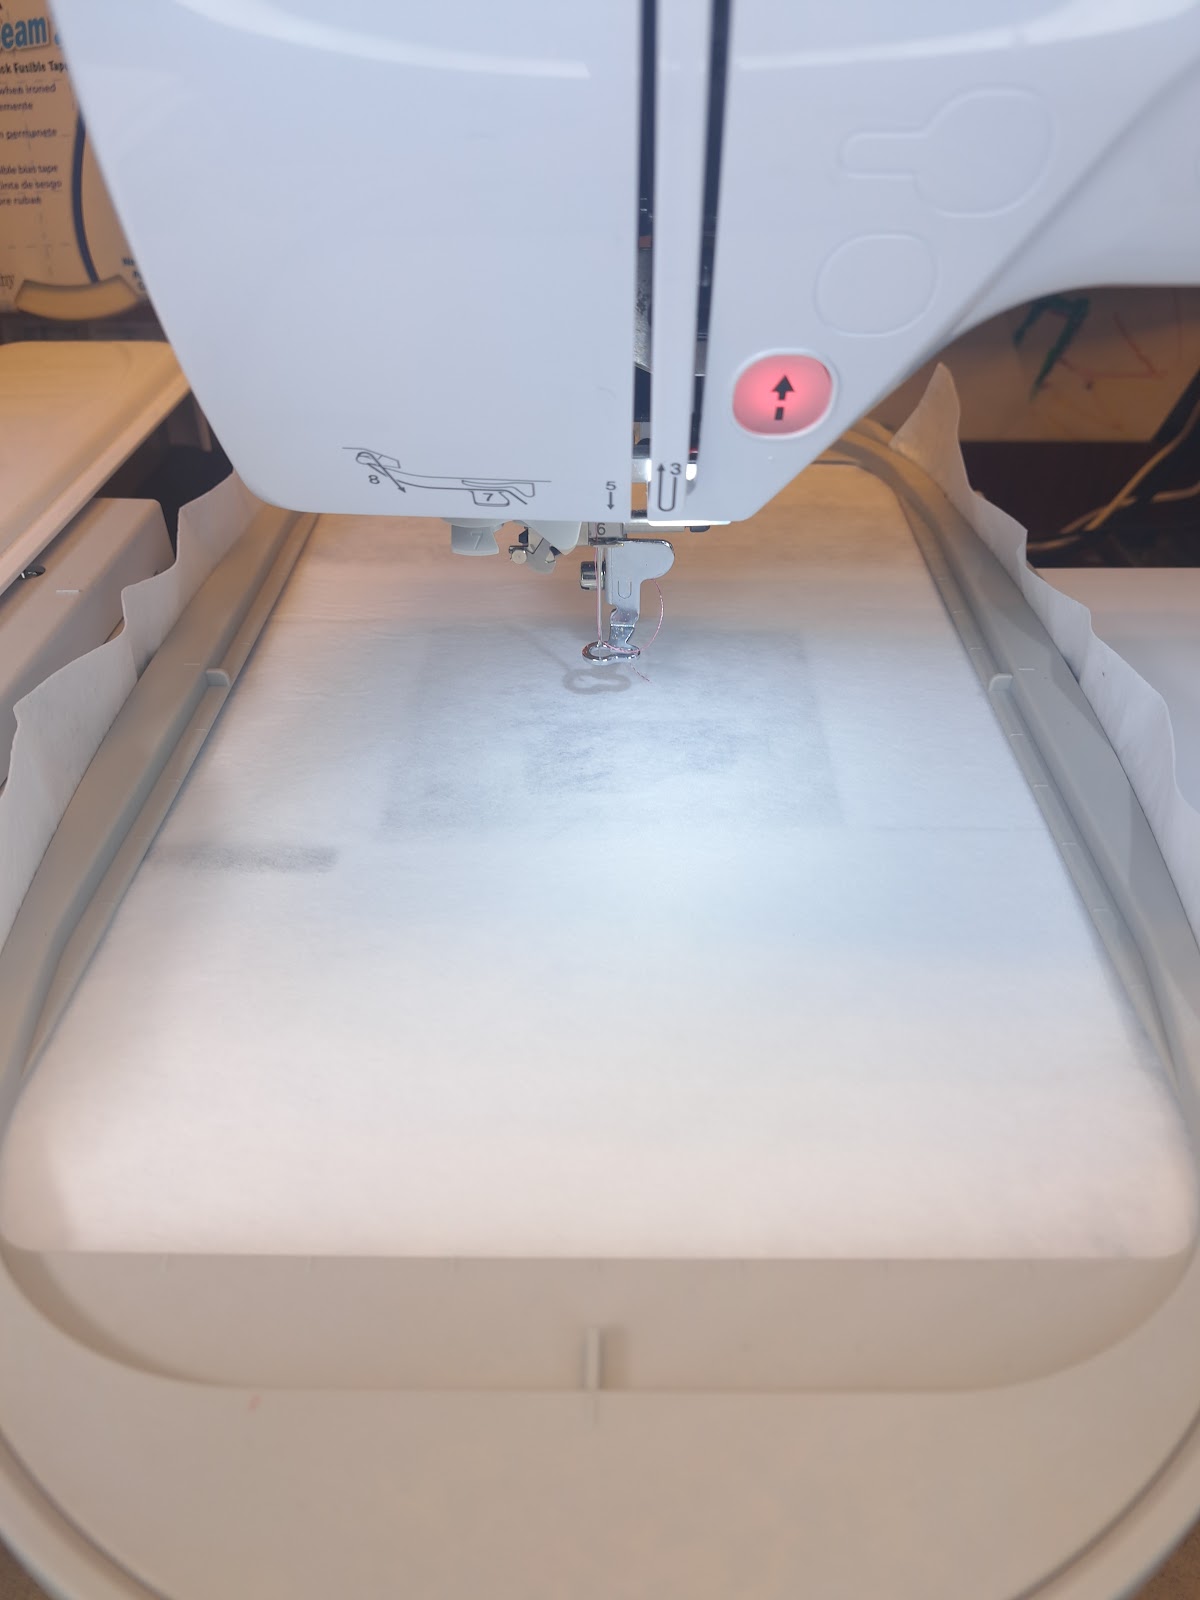
Step 4: Stitch the placement line for your batting.
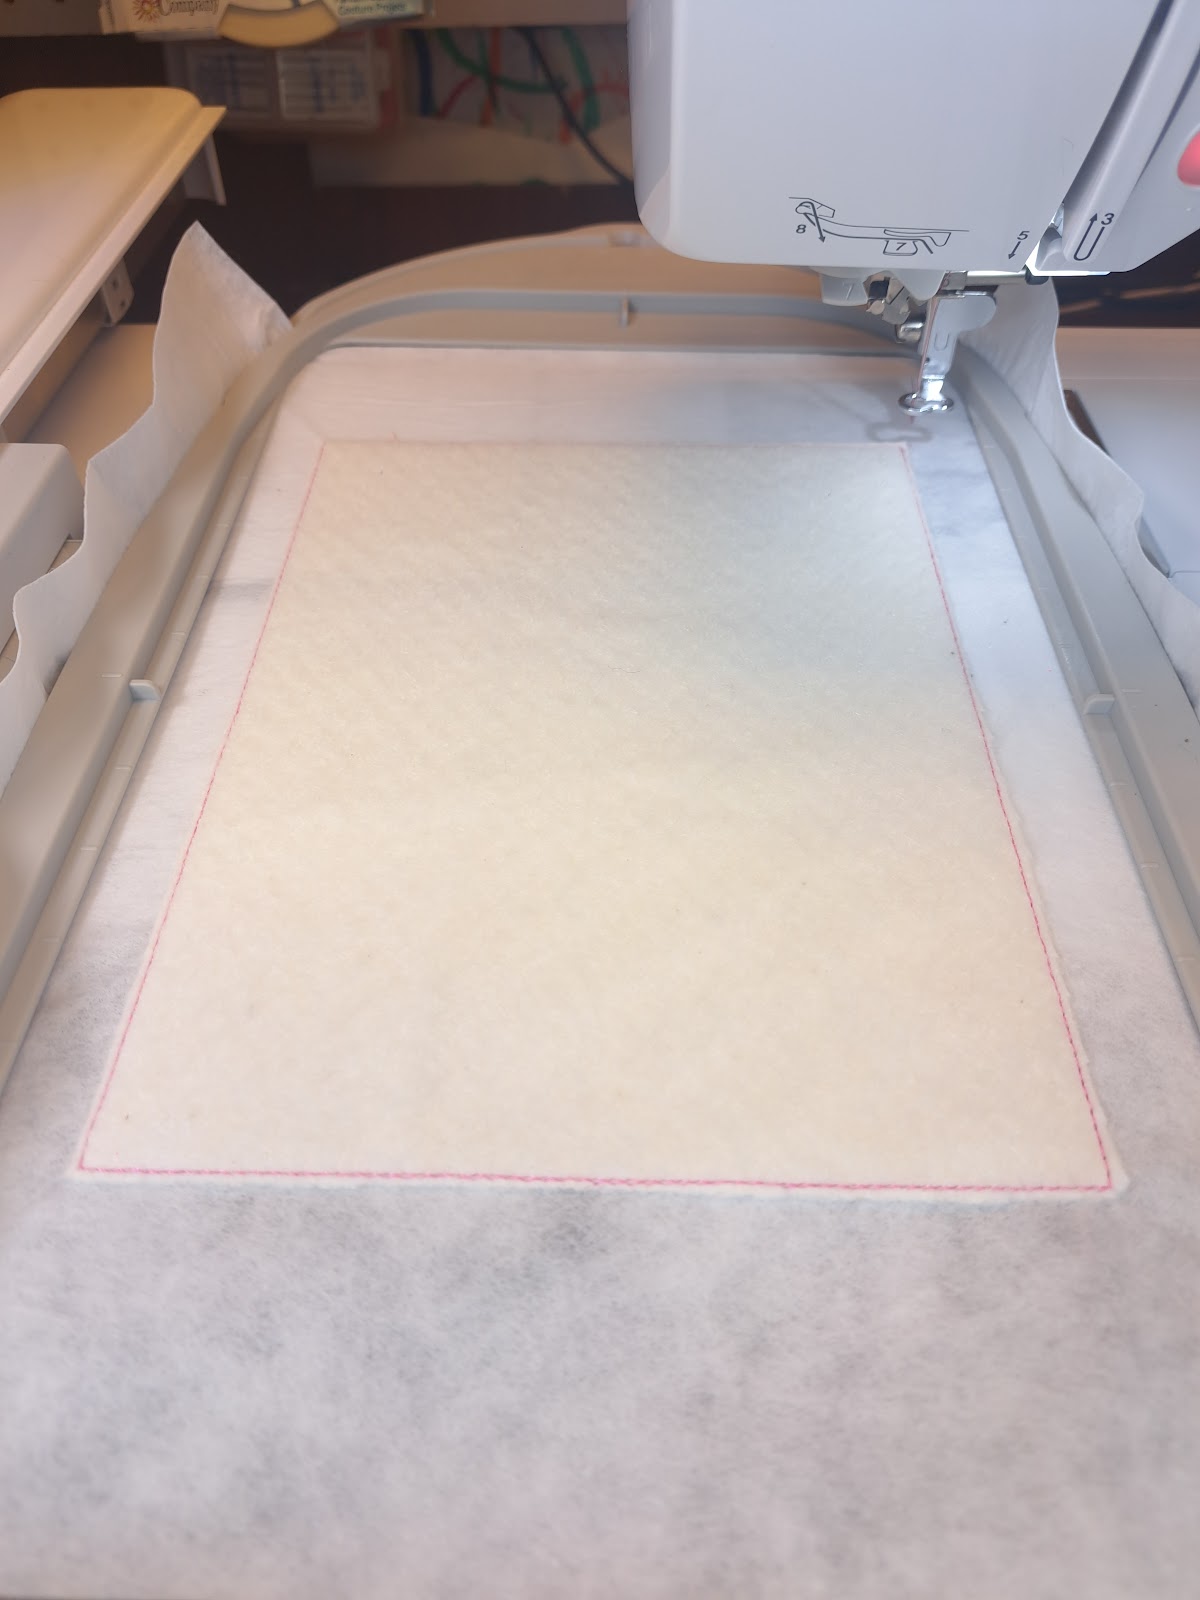
Step 5: Tack down your batting and trim around it, being careful not to cut any stitches.
Step 6: Lay your fabric on top of the batting and tack it down. It should extend beyond the batting line by at least ½” on all sides.
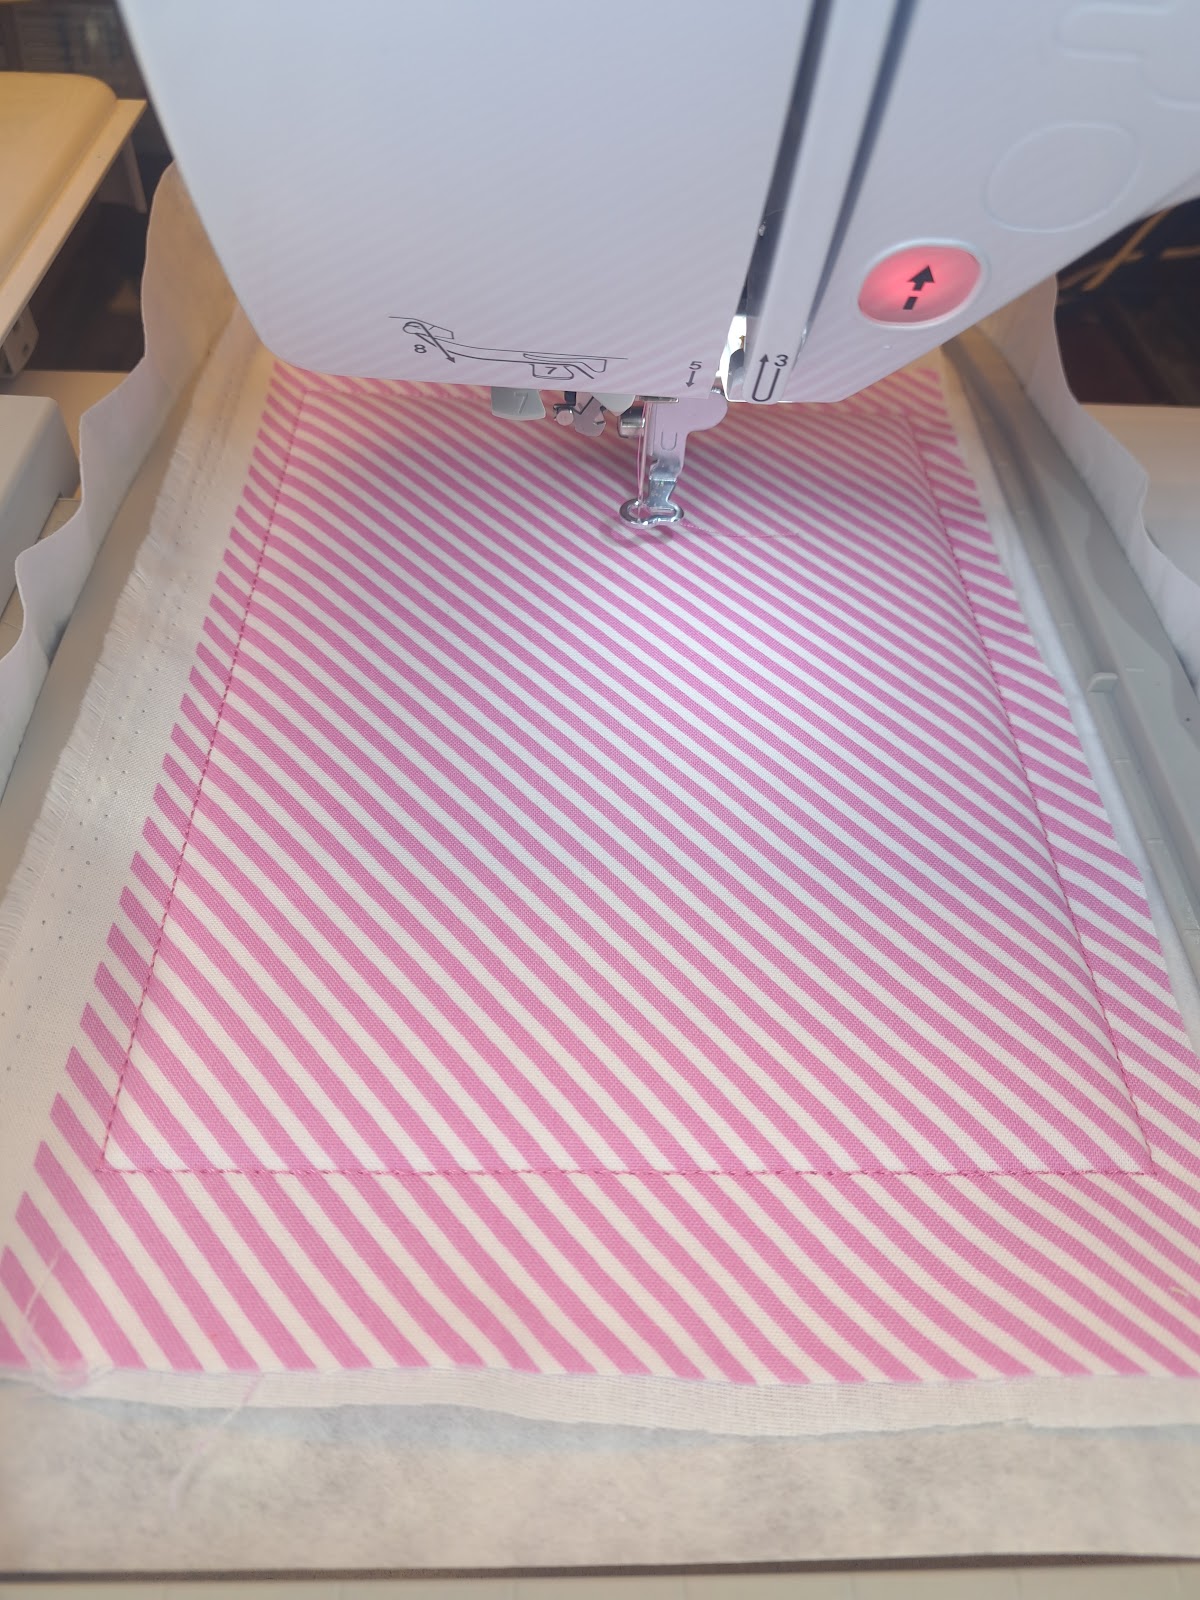
Step 7: Stitch the applique pieces and all design elements (text, snowflakes, satin stitches, etc.).
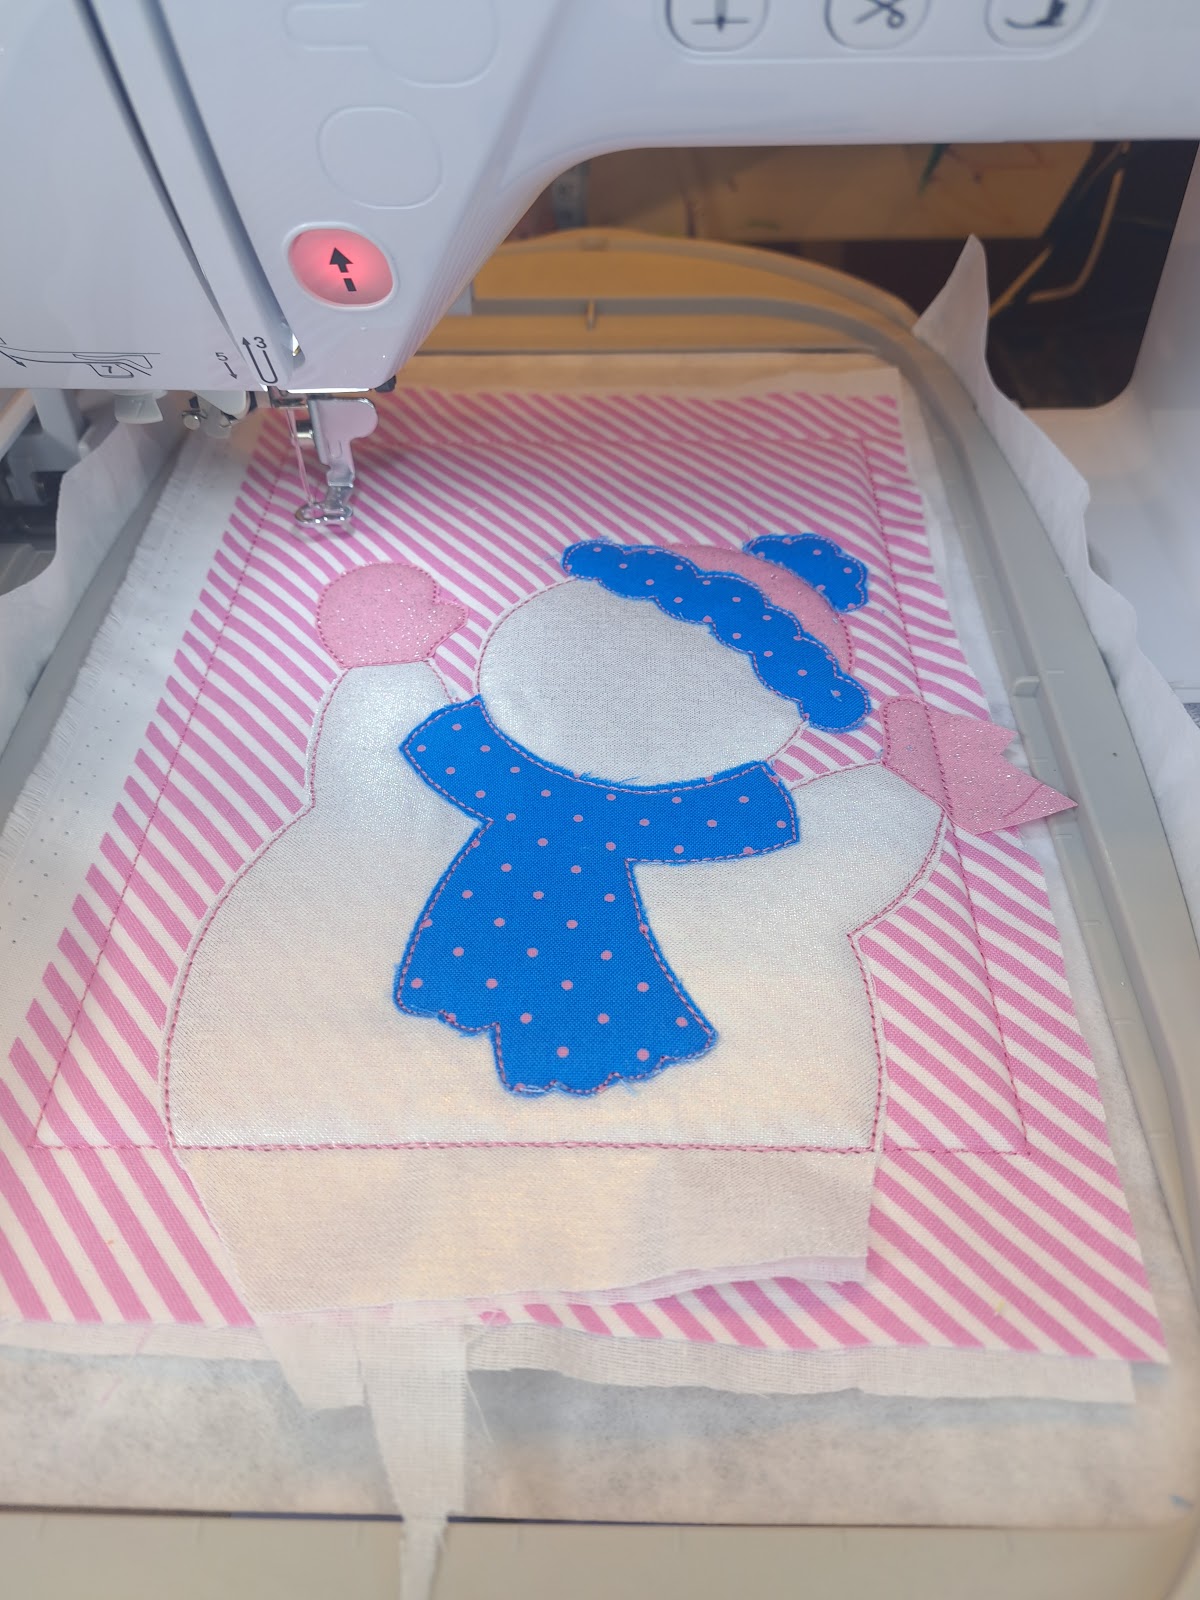
Make sure to not trim the applique fabric along the outer edges of the block. This will help to keep your applique fabric secure and prevent fraying.
Step 8: Remove the block from the hoop and set aside.
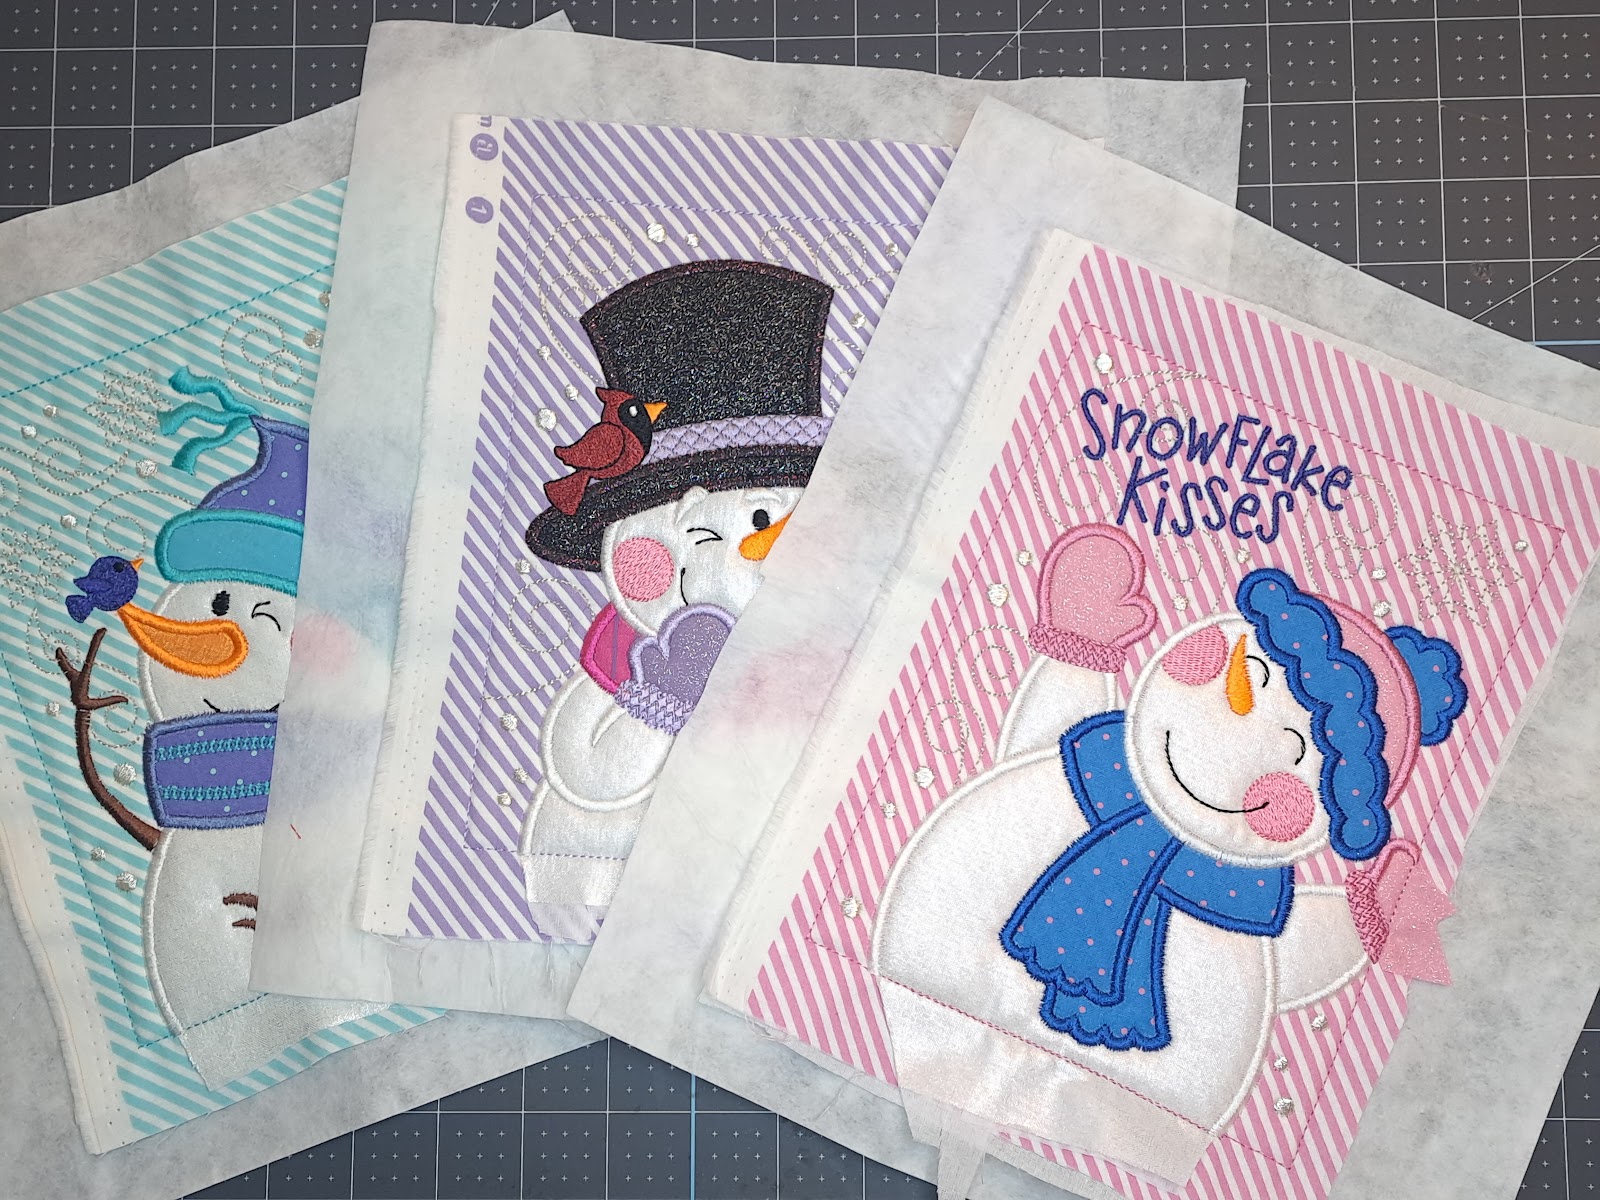
Step 9: Repeat steps 1–8 for any remaining blocks (snowmen, sashing, cornerstone blocks, etc.).
Step 10: Cut away excess stabilizer from the blocks.
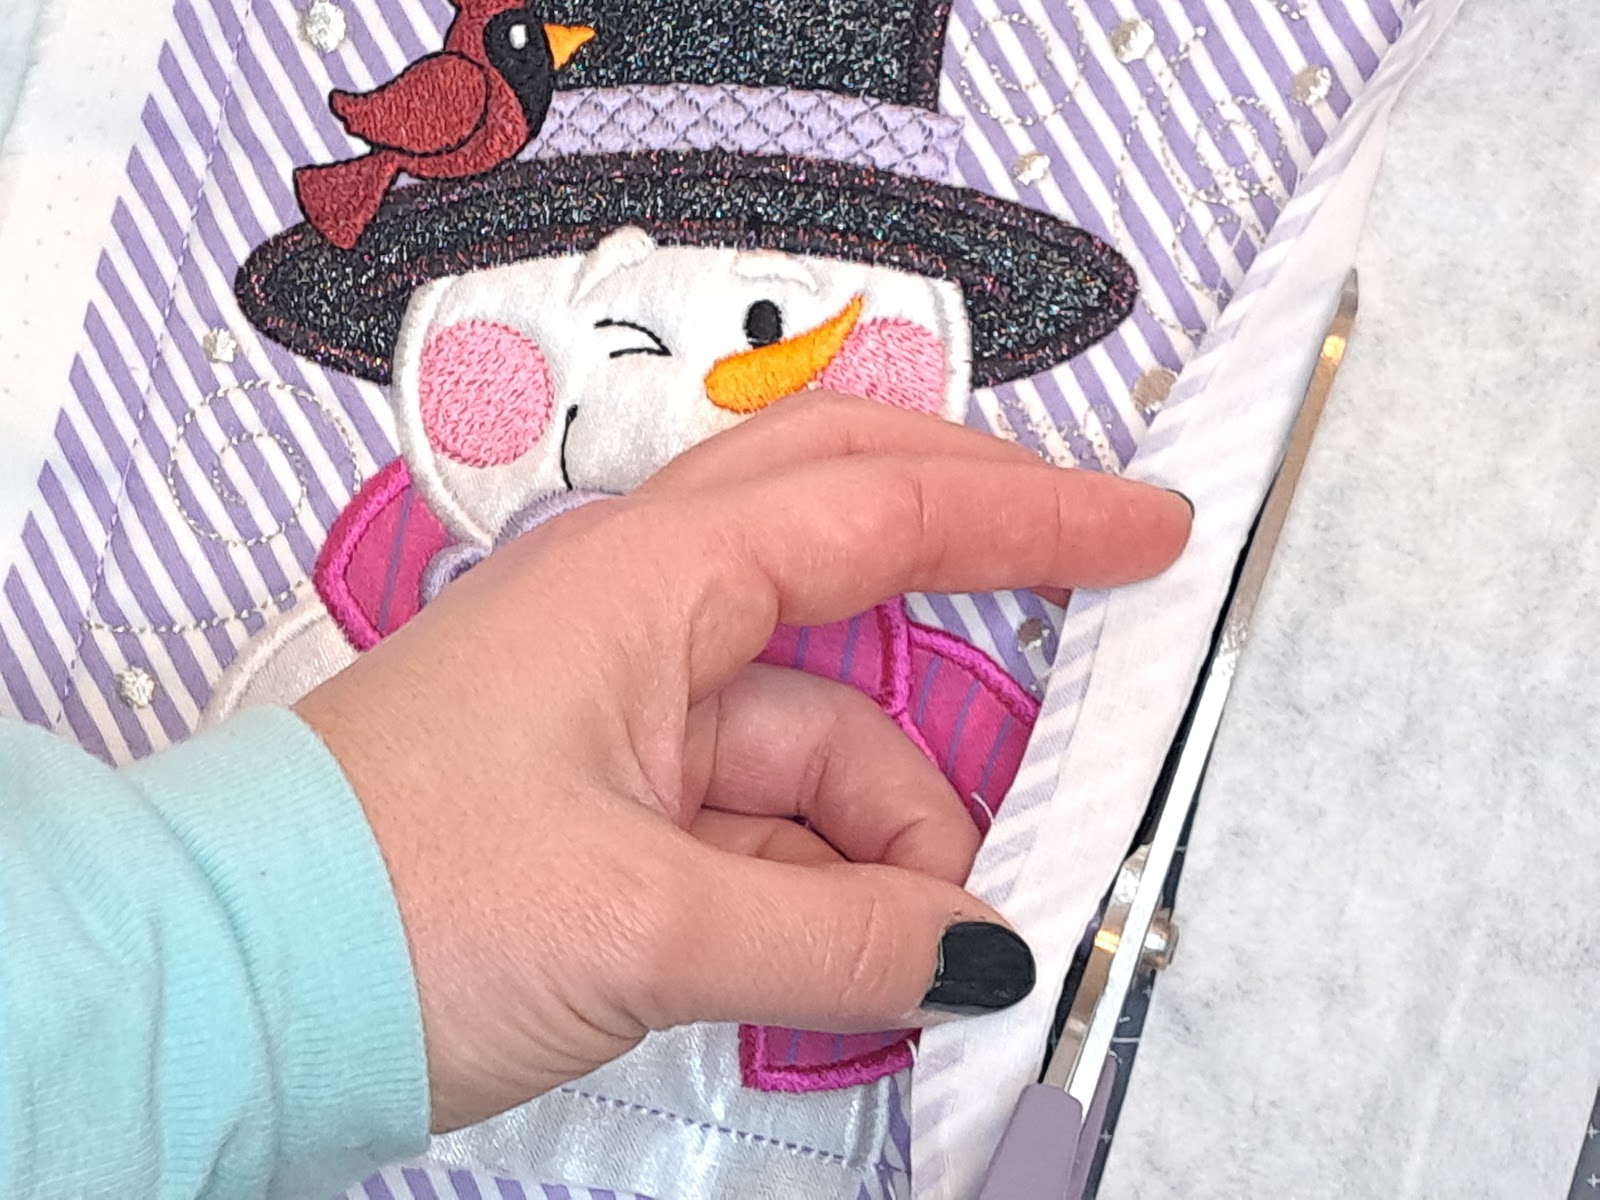
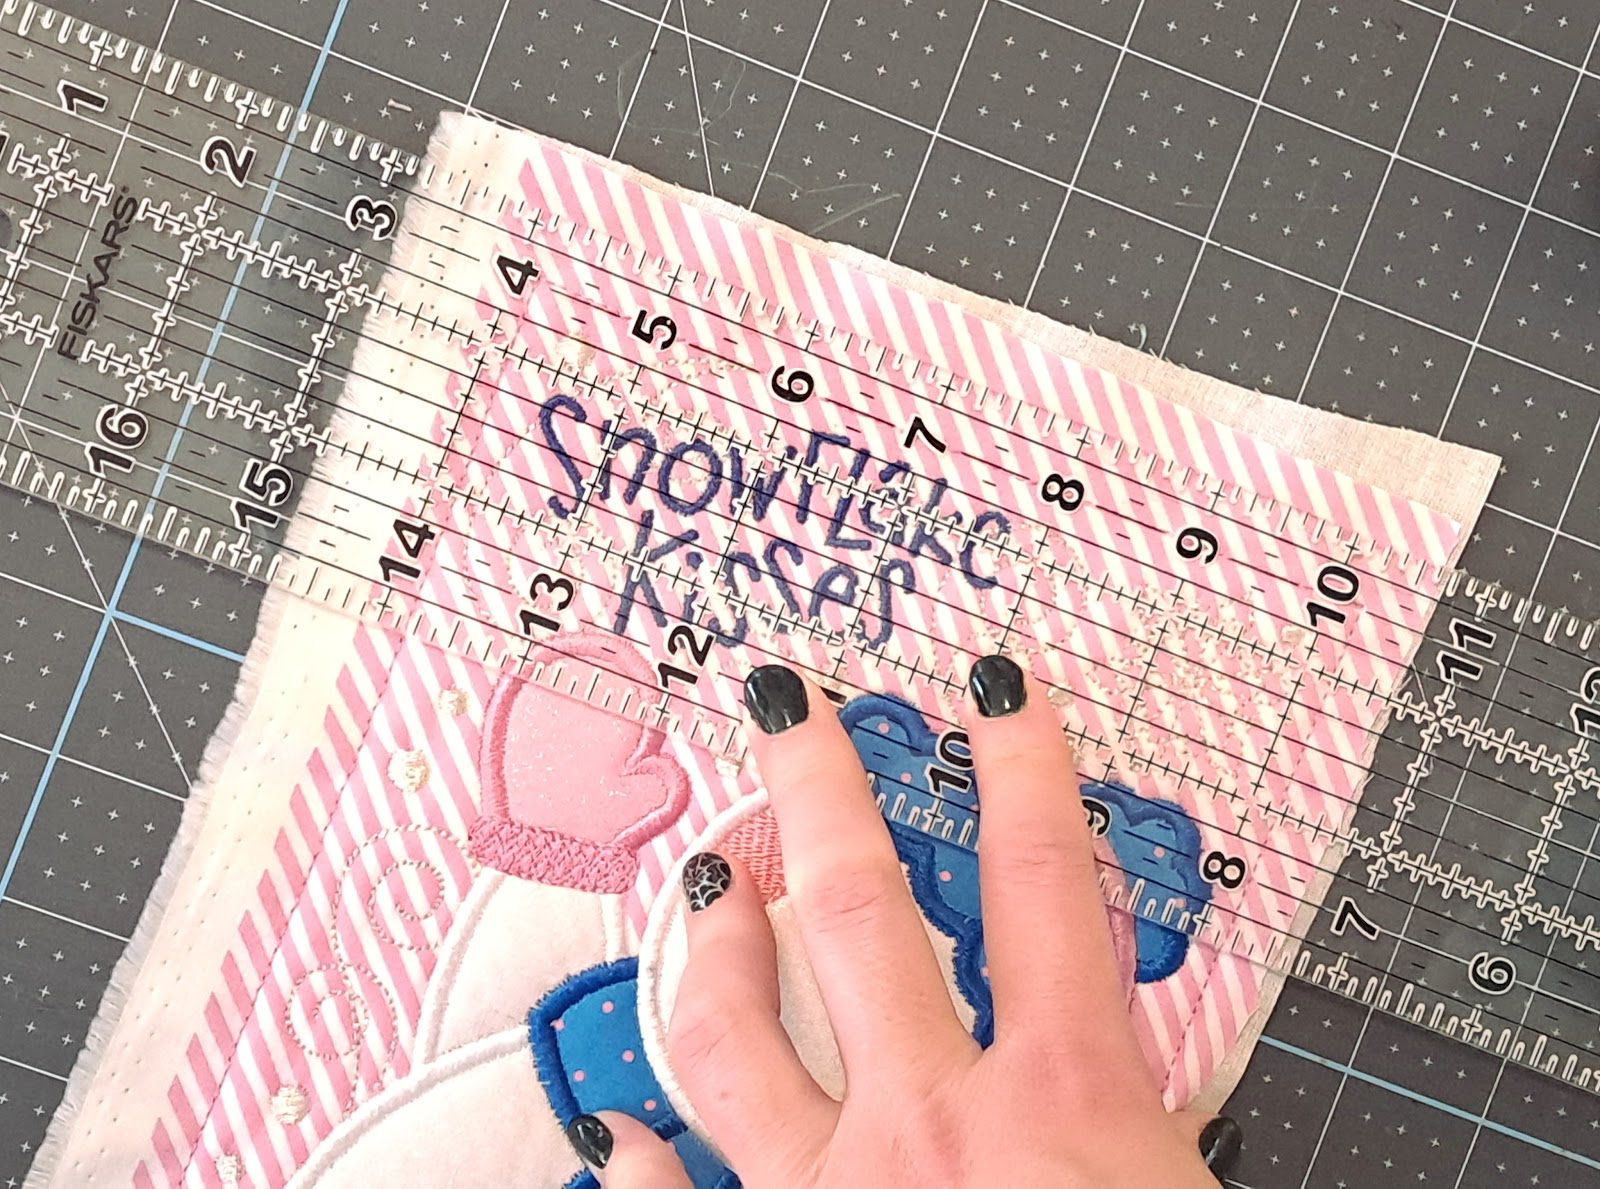
Step 11: Using scissors or a rotary cutter, trim each block, leaving ½” excess fabric around the outer stitch line. I prefer to use a rotary cutter and a straight-edge ruler for this step.
Step 12: Lay out your snowman blocks according to your original design.

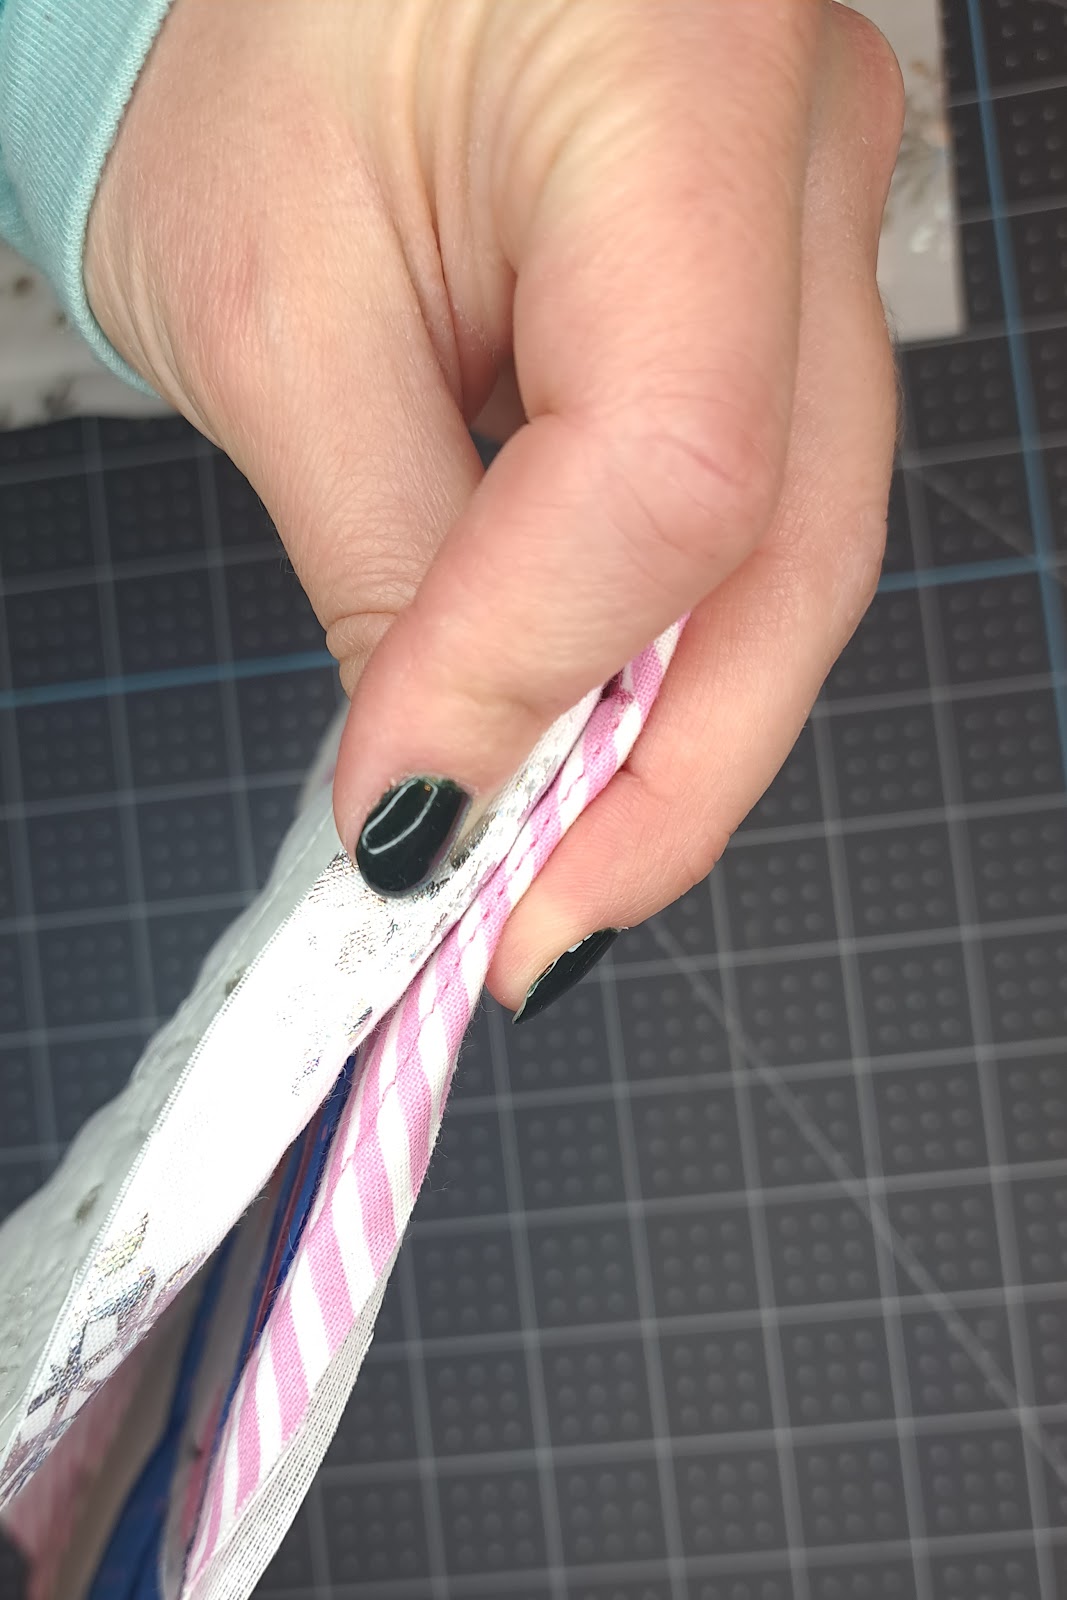
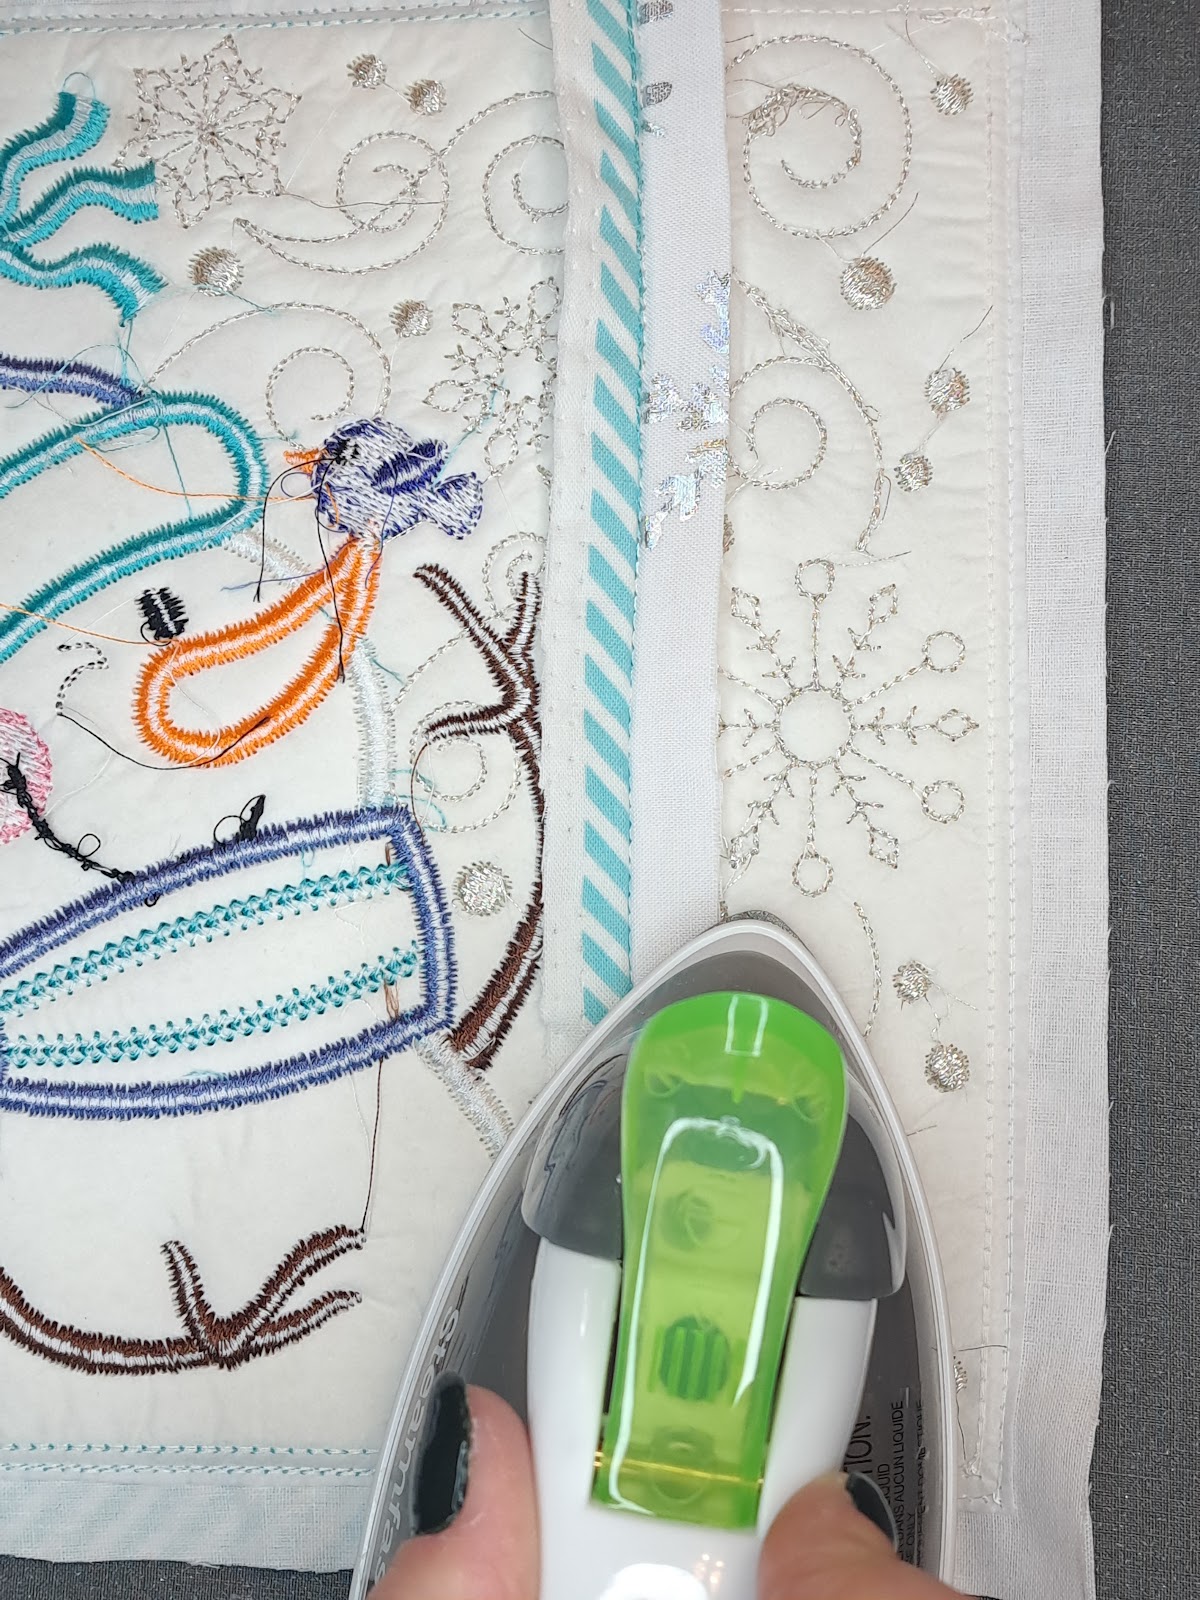
Step 13: To stitch your blocks together, align the outermost tack-down stitches of two blocks (right sides together) and secure using pins or clips.
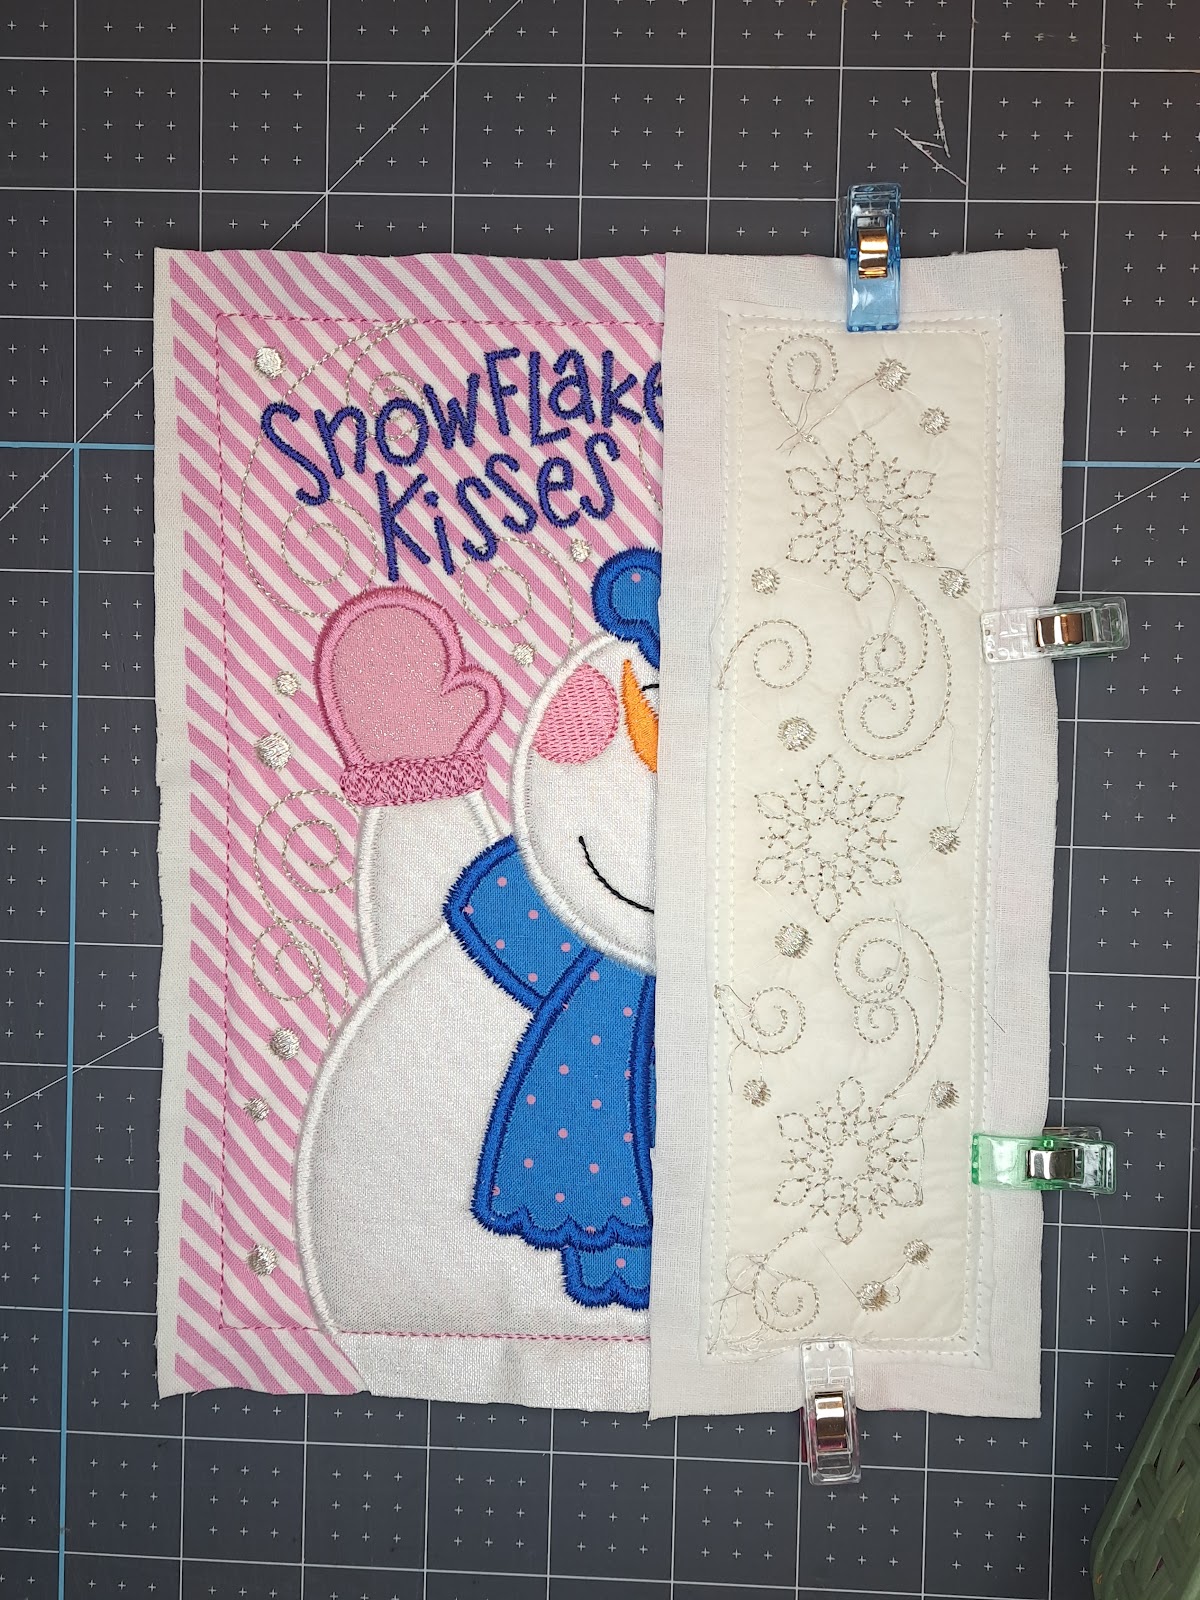
Step 14: Stitch the sashing blocks and snowmen together using a sewing machine to make one panel of the triptych wall art.
You will want to position your needle to stitch between the batting placement line and the fabric placement line.

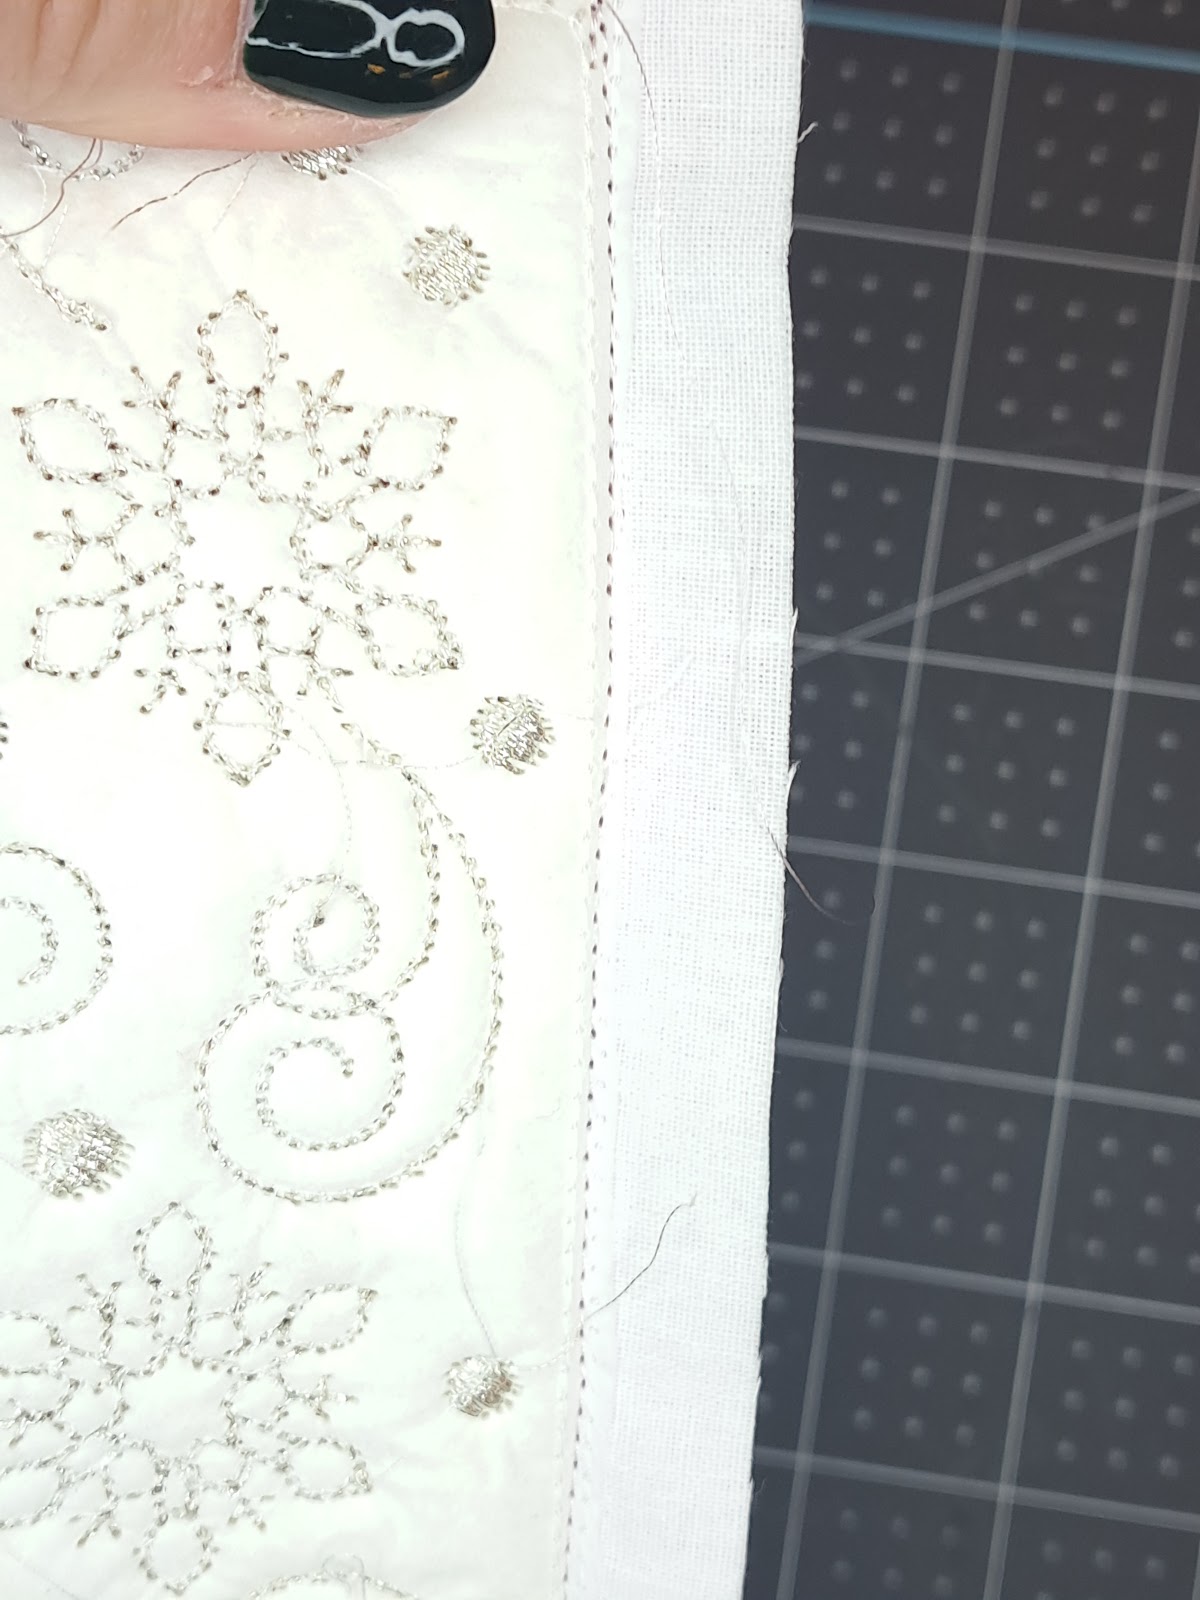
If you have done this step correctly, the only stitches you should see from the front of your project are the decorative stitches, no outline/tack-down stitches.
Repeat this step for remaining snowmen/sashing blocks. You will have three separate panels when finished.
Step 15: Press open the seams once stitched. This will help your project lay flat, especially for framing/displaying.
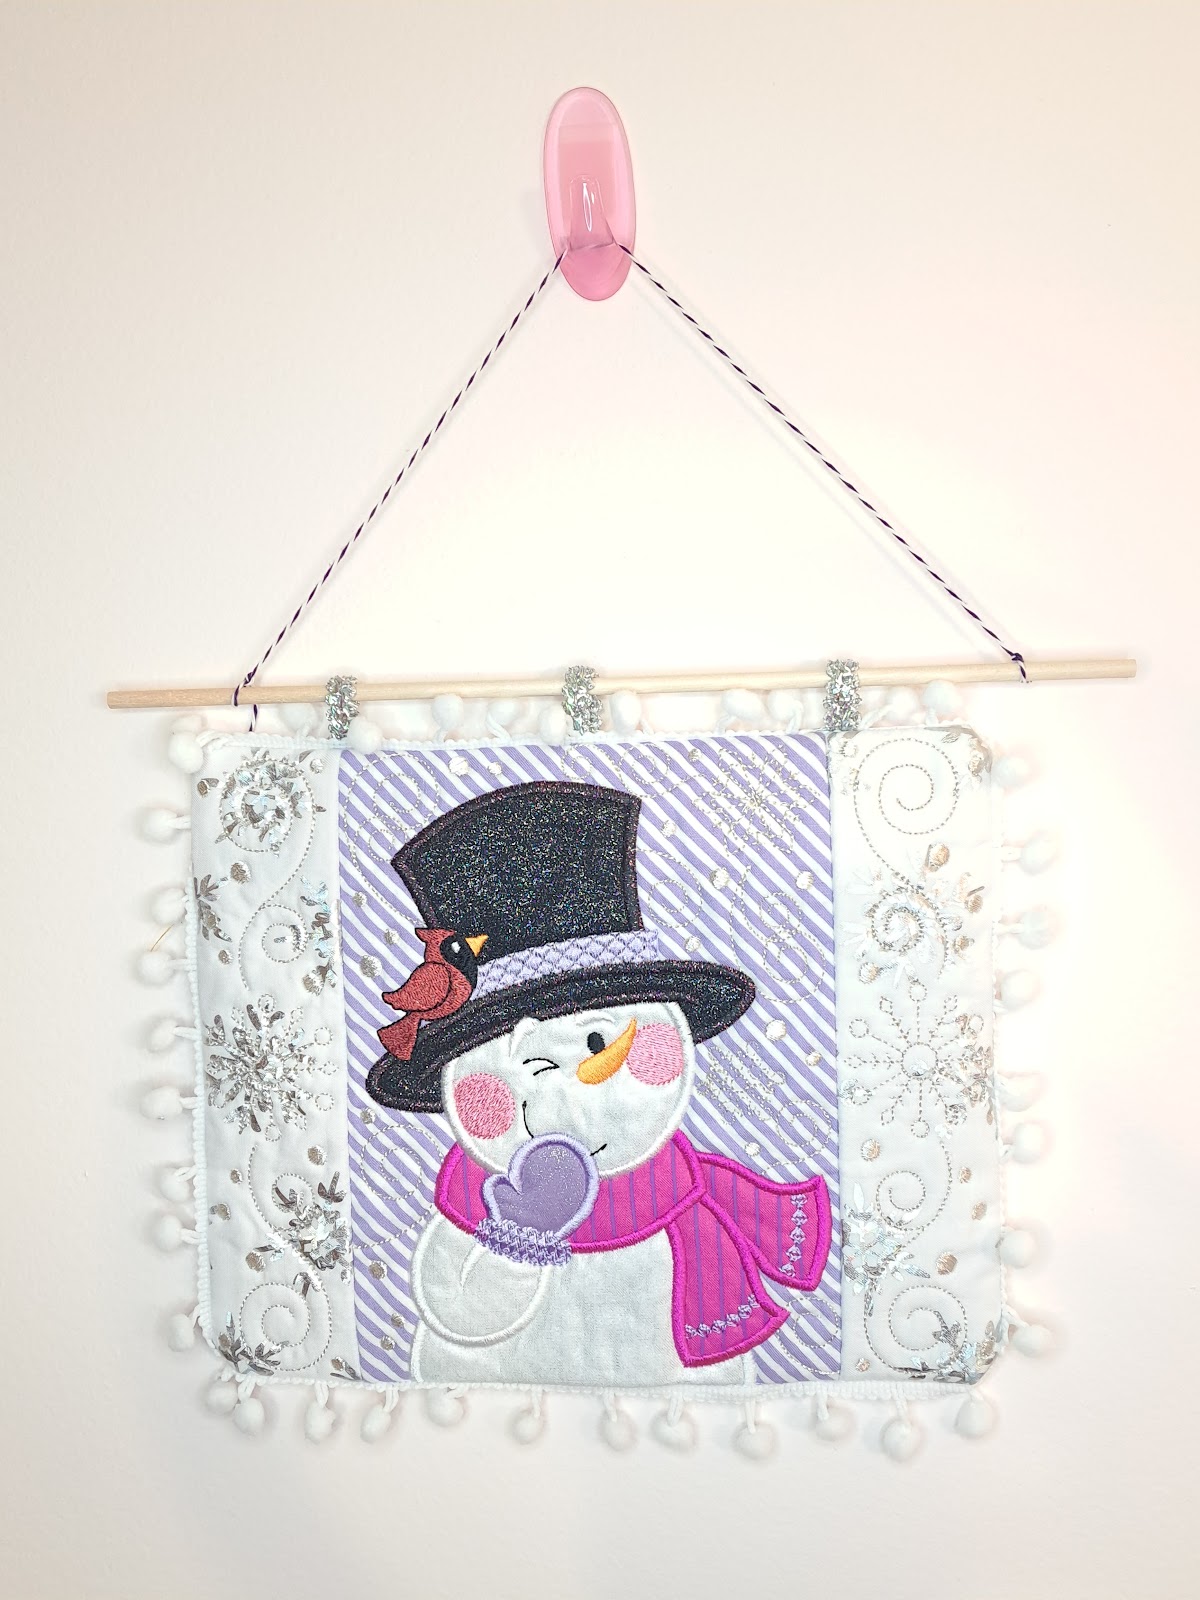
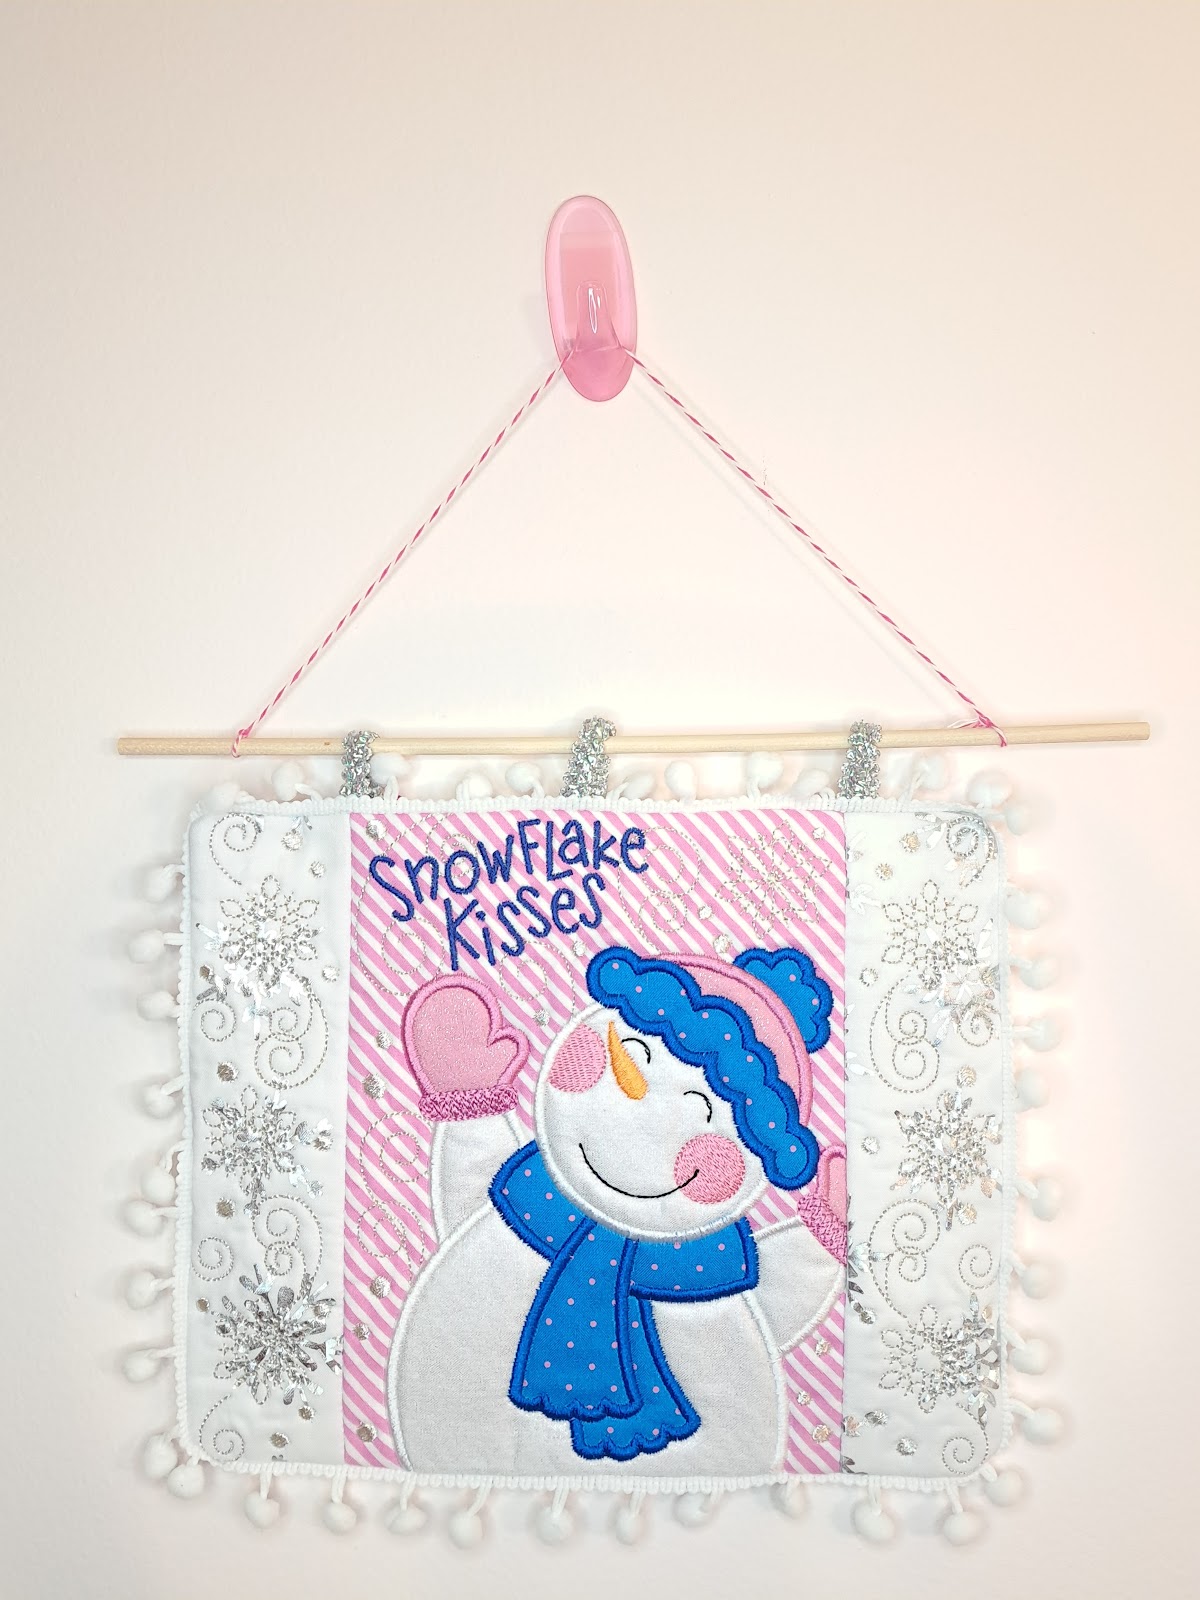
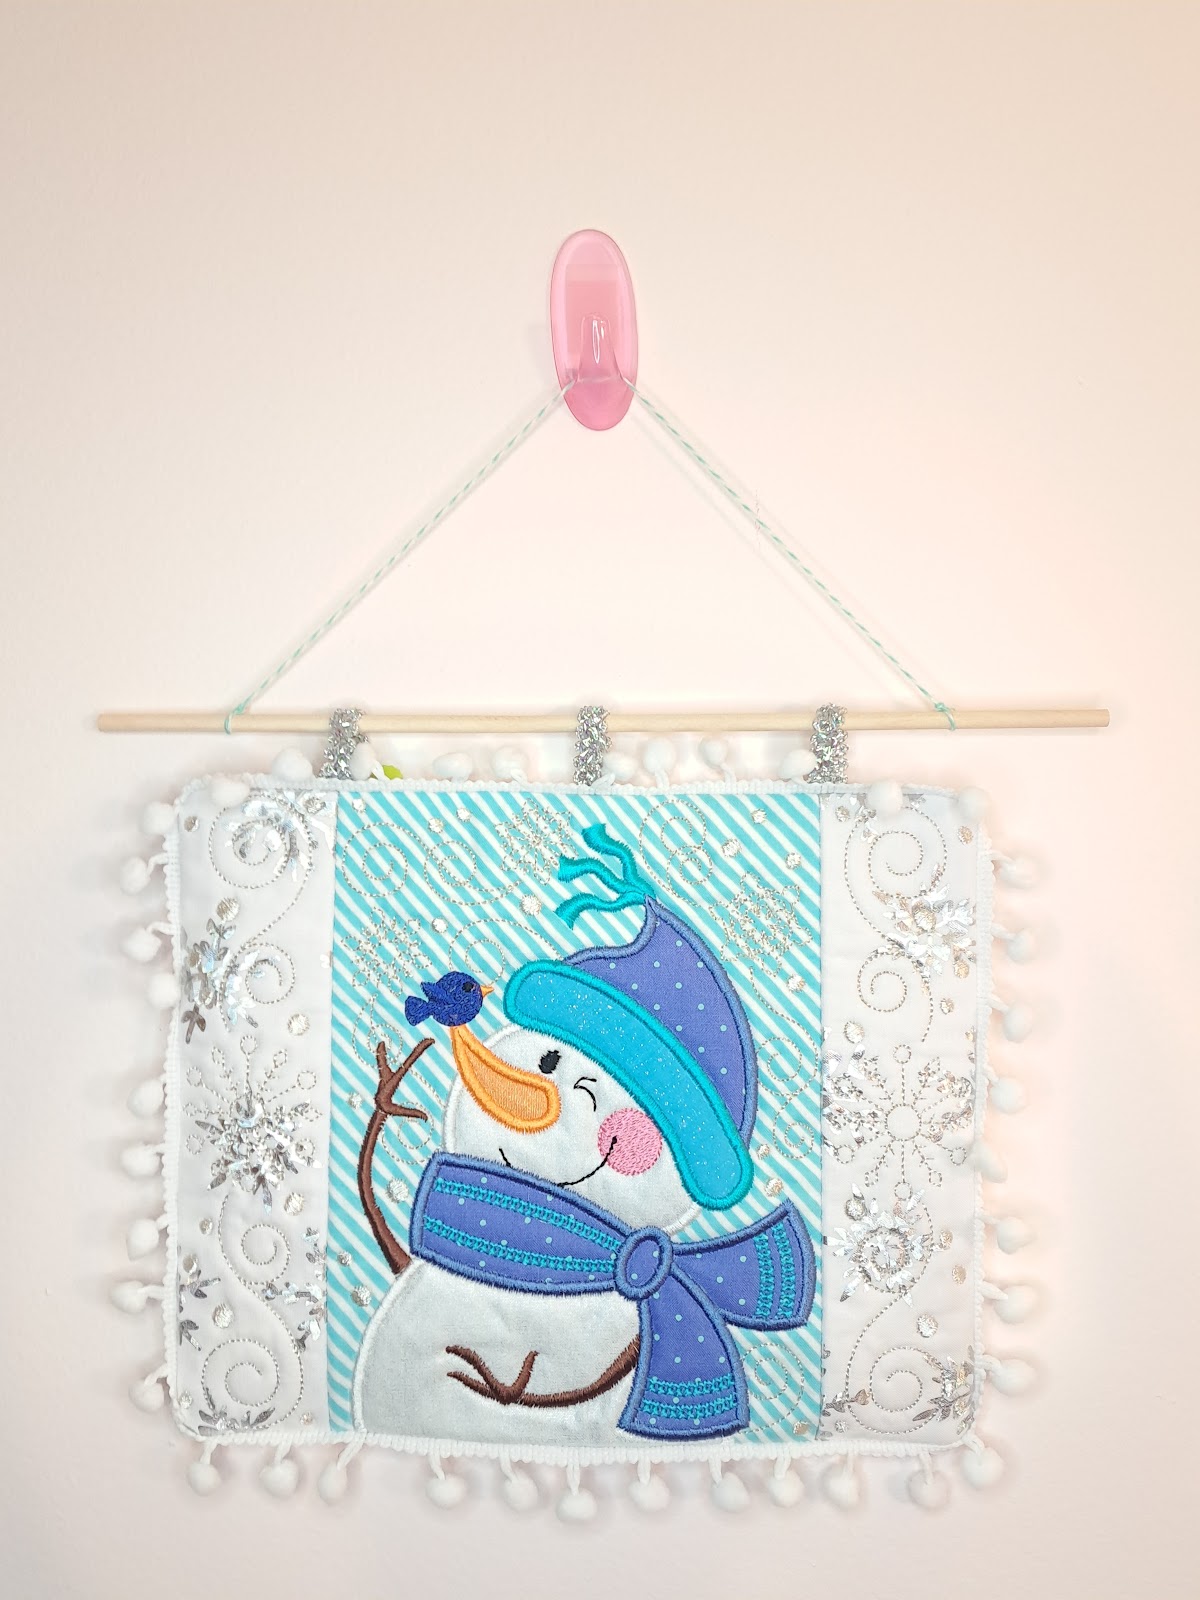
Once your snowman blocks are stitched and pressed, you are ready to display them. There are multiple ways to do this. You can frame them, bind the edges and hang them (check out this blog post on how to make a mini wall hanging using Quilting Backdrops for a step-by-step tutorial), or choose another method that fits into your decor.
I decided to add some fringe trim and a backing to mine. I also added some ribbon loops at the top before stitching my backing so I could hang them using a dowel rod and some ribbon. These will be so cute in my daughter’s bedroom this winter!

If you loved this project, you’ll find plenty more just like it in our Home Hub—a curated collection of quick, creative, and practical projects perfect for gifting (or keeping!)
I hope you are excited about the new ITH Build a Snowman Project! Make sure to join the Designs by JuJu Embroidery Blessings Facebook Group for more inspiration and to share your own creations using the hashtag #designsbyjuju. We can’t wait to see what you make!