Toggle Nav
 Inspire.
Create.
Stitch.
Inspire.
Create.
Stitch.
Search
New to applique or just curious about how it works? You’re in the right place! In this beginner-friendly guide, I’ll walk you through exactly what applique is, how it’s stitched, and what makes it such a fun and versatile technique for your embroidery projects. With just a few materials and easy-to-follow steps, you’ll be layering fabric like a pro in no time—no fancy skills required. Let’s dive in and create something beautiful together!
Are you curious about applique projects? Applique by definition means “to lay upon, or overlay,” so to make an applique project, we will be laying fabric over our backing fabric and trimming away the excess. We will finish the edges with a finishing stitch and that’s all there is to it. If you can follow directions, change thread, and trim fabric, you can do applique!
Every applique design consists of five primary procedures: placement, tack-down, trim, embellishment, and finishing stitches. Some designs only have one set of placement/tack-down/trim color stops; other designs have several sets, one for each area of applique. Color stops are placed in the design sequence so you are able to stop stitching long enough to place or trim applique fabrics.
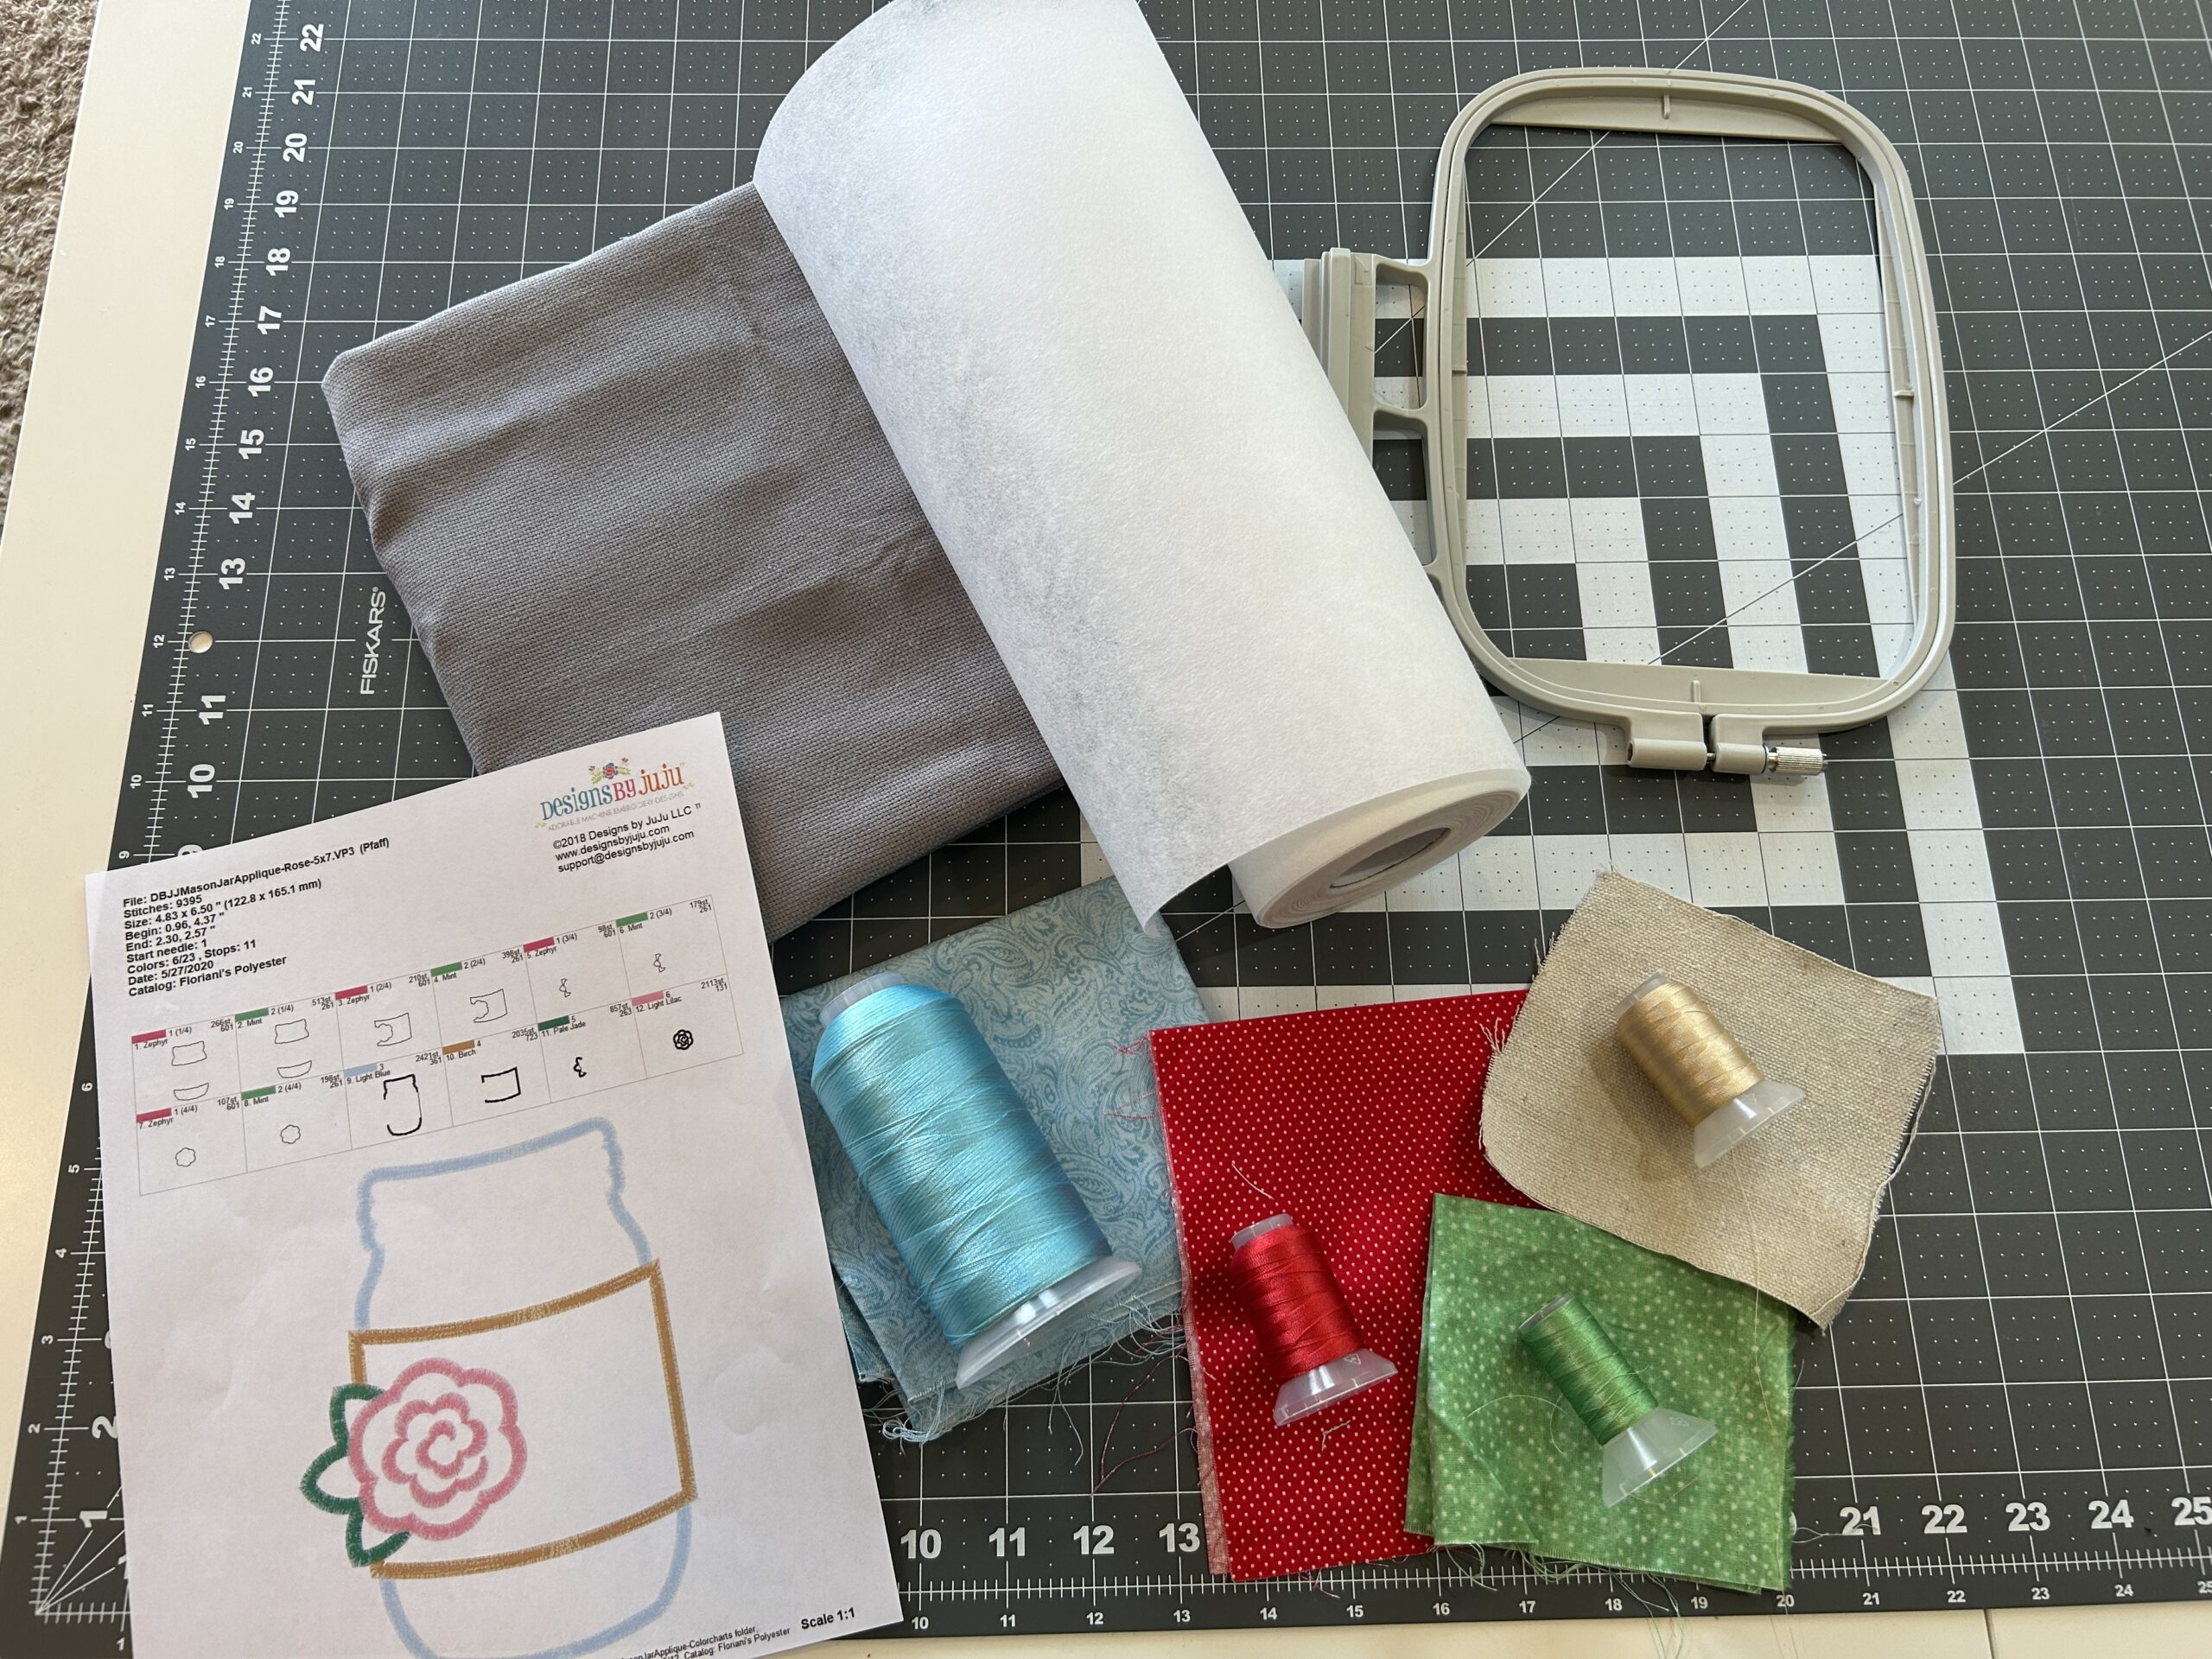
Each pattern has a stitch chart that is included for you to print. This is kind of our road map for the design, showing you what comes next so you can use the right type of thread for each step.
Designs by JuJu has so many cute applique designs. Choosing one for your project may be the hardest part! So go ahead and choose one, and let’s get stitching!
Check out the DBJJ team’s favorite supplies in the Designs by JuJu Amazon store.
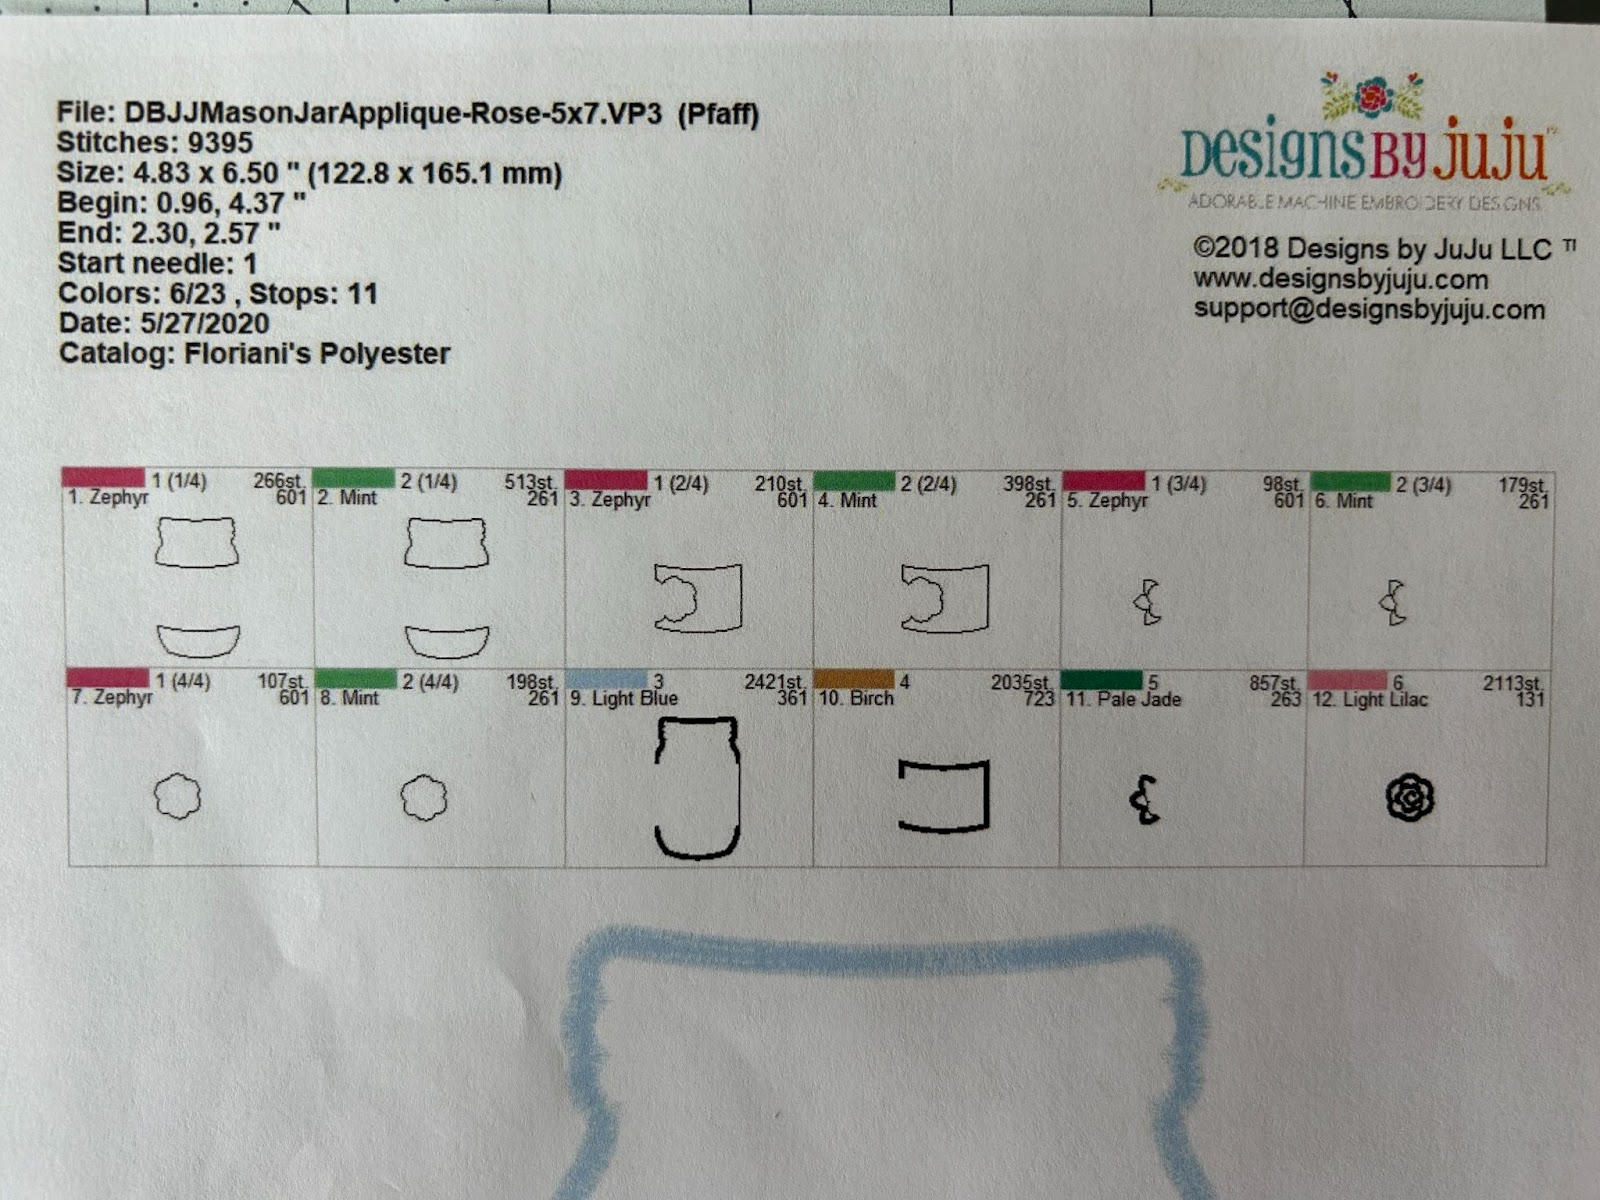
The stitch chart shows each step that will be stitched in order. In this stitch chart, the placement stitches, which the applique fabric covers, are shown in pink. The tack-down stitches, which sew the applique fabric to the backing, are shown in green. You do not need to use these colors, or even change them between steps. I choose a thread that will work for my project and the fabrics, usually white, and just use that for all the steps. The colors are just so that we, and our machines, recognize the next step.
So in steps 1, 3, 5, and 7 you will be stitching a placement stitch on the fabric. You will then cover the placement stitches with your chosen applique fabric and then stitch the tack-down stitches, which are steps 2, 4, 6, and 8. After each of these steps you will trim the fabric that you just tacked down. Then you finish with the embellishment and finishing stitches in steps 9, 10, 11, and 12.
This is a fairly straightforward pattern, but it’s important to pay attention to your stitch file to make sure that you’re going in the order that is provided and you do not skip any steps.
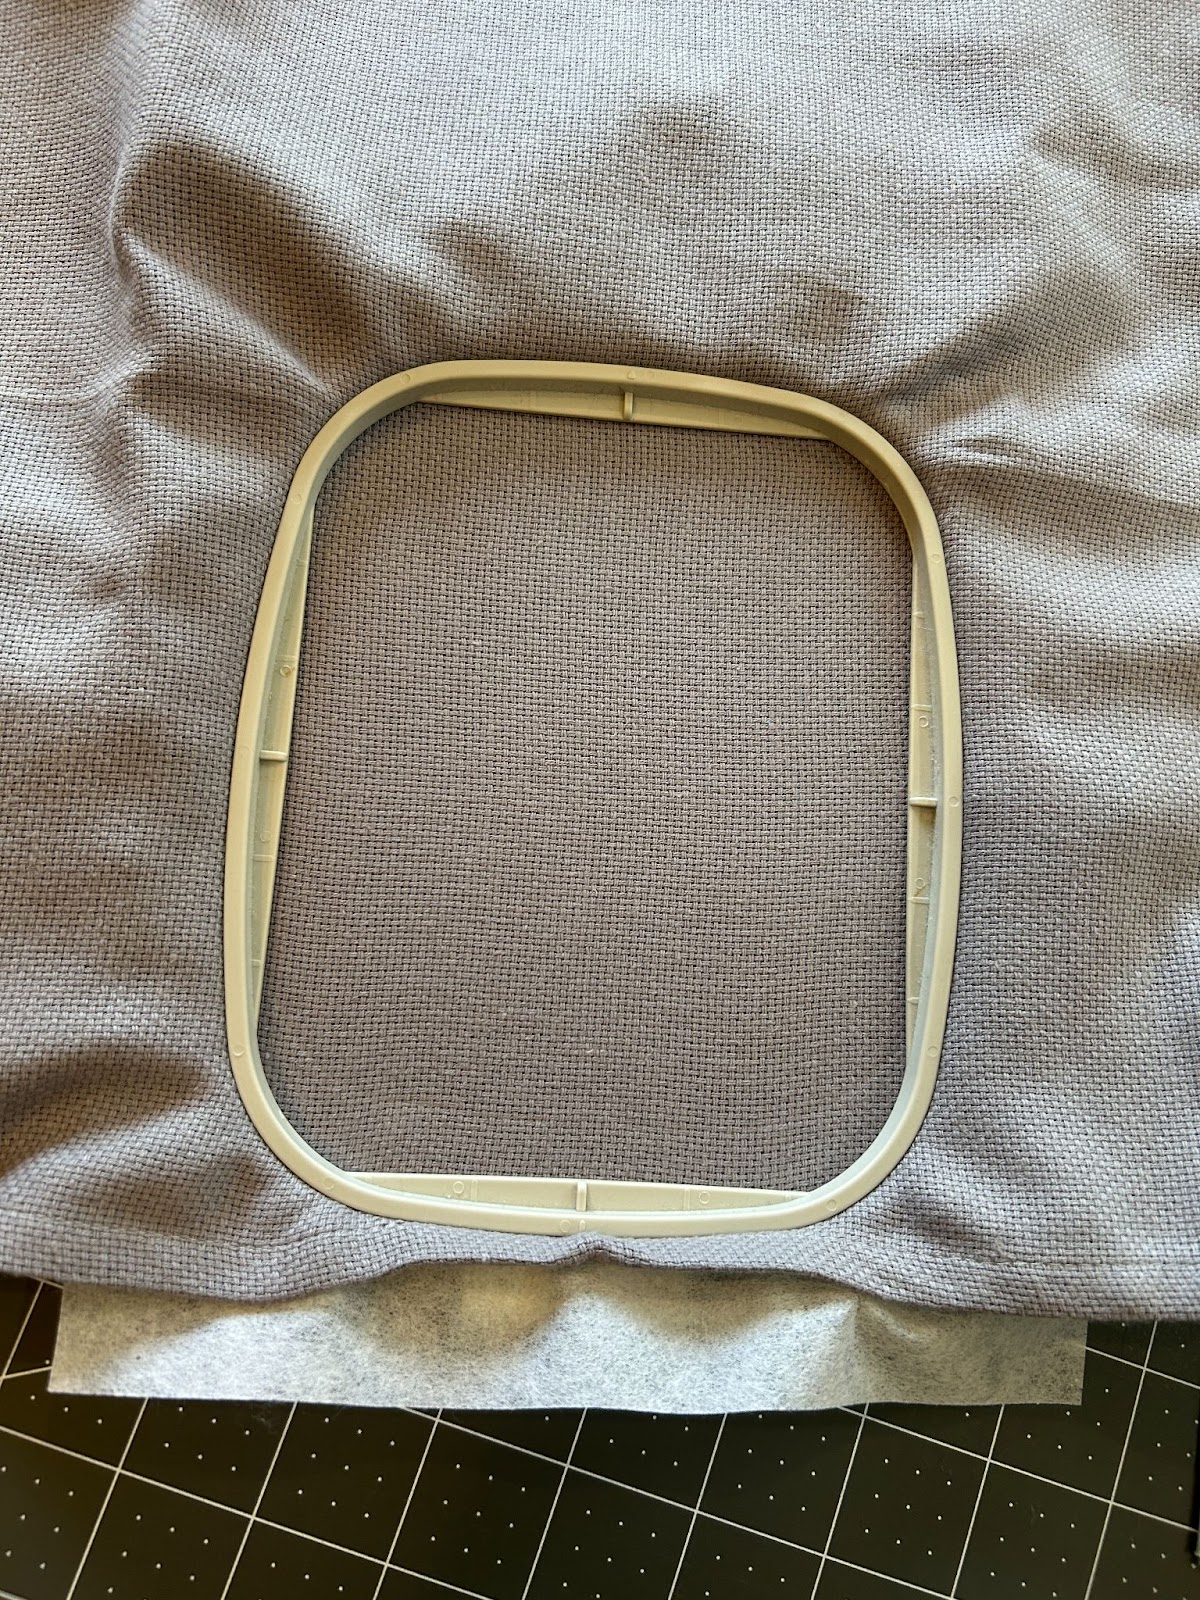
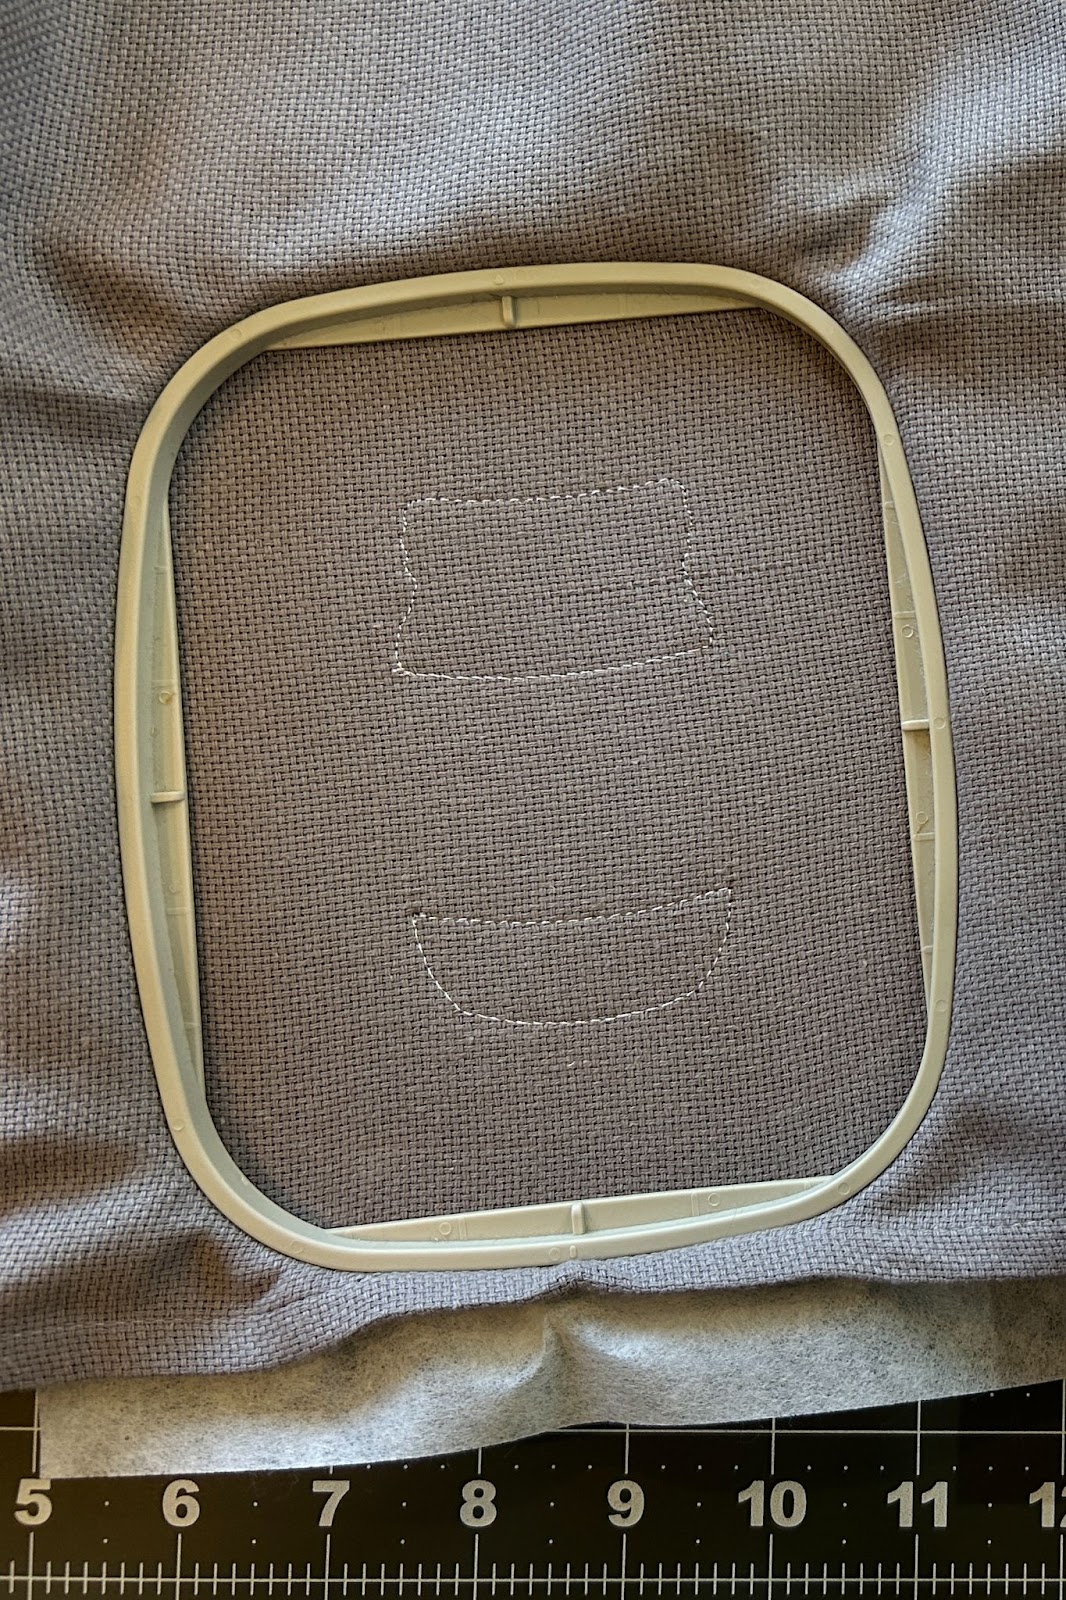
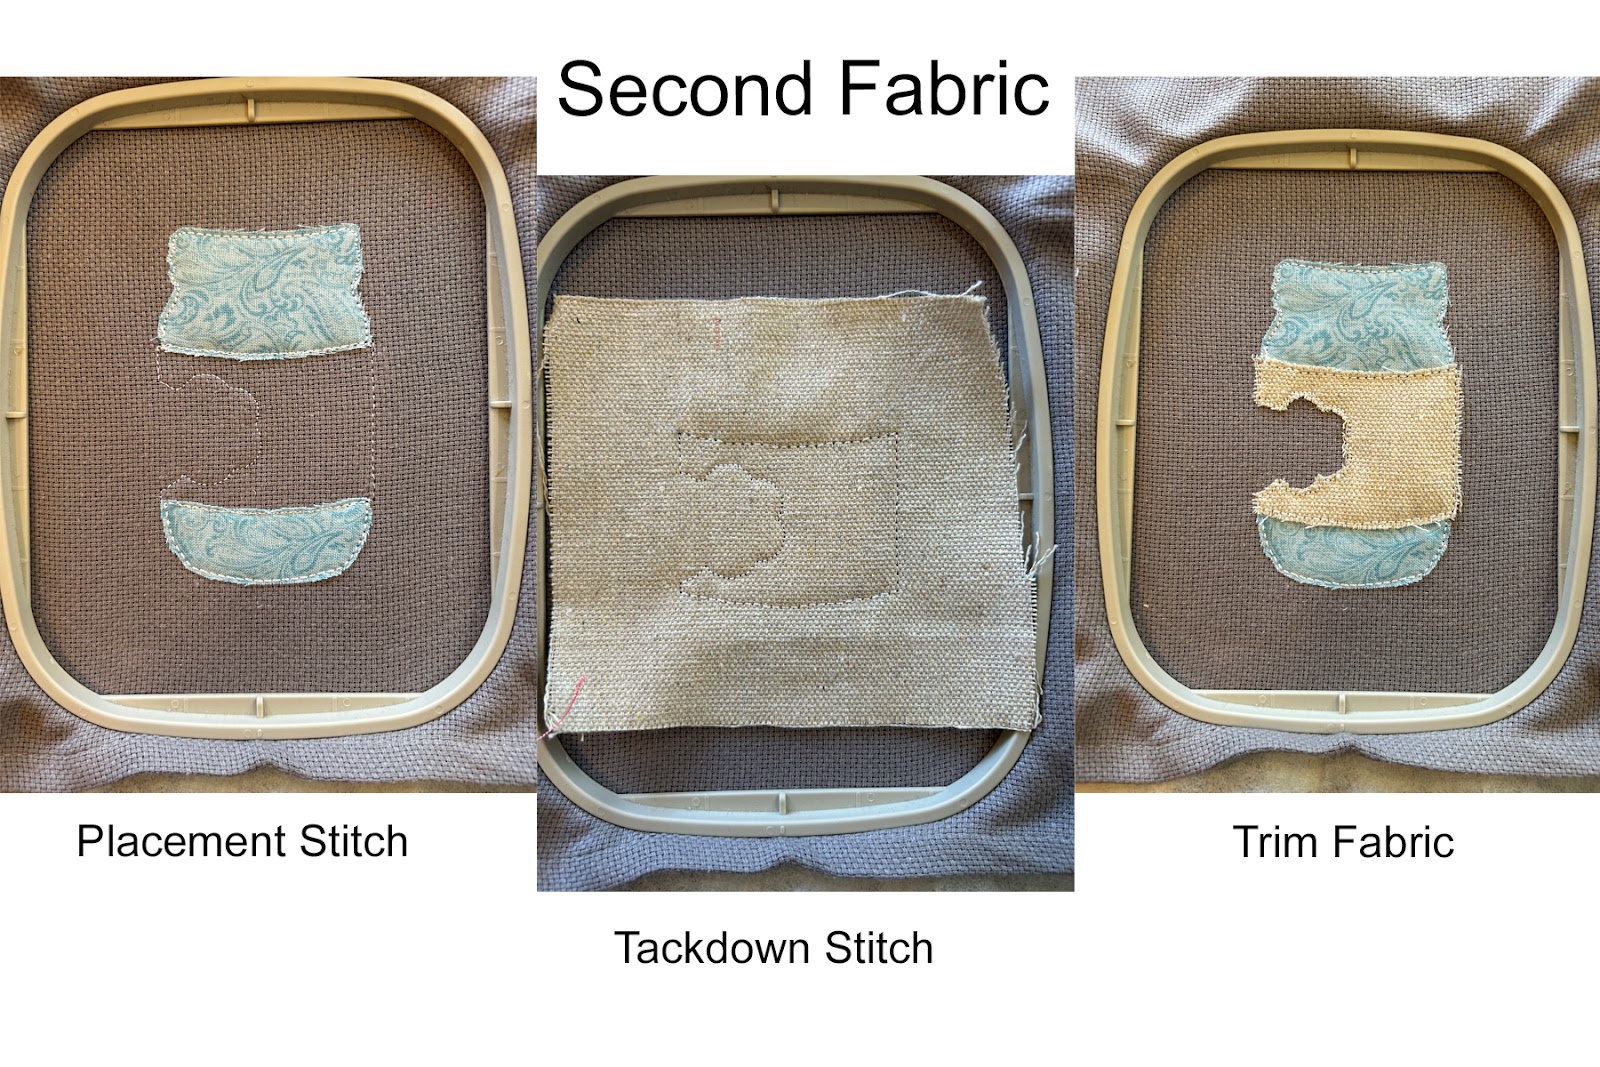
Let’s see how this is done. Hoop your background fabric (in my case, a tea towel) and stabilizer together.
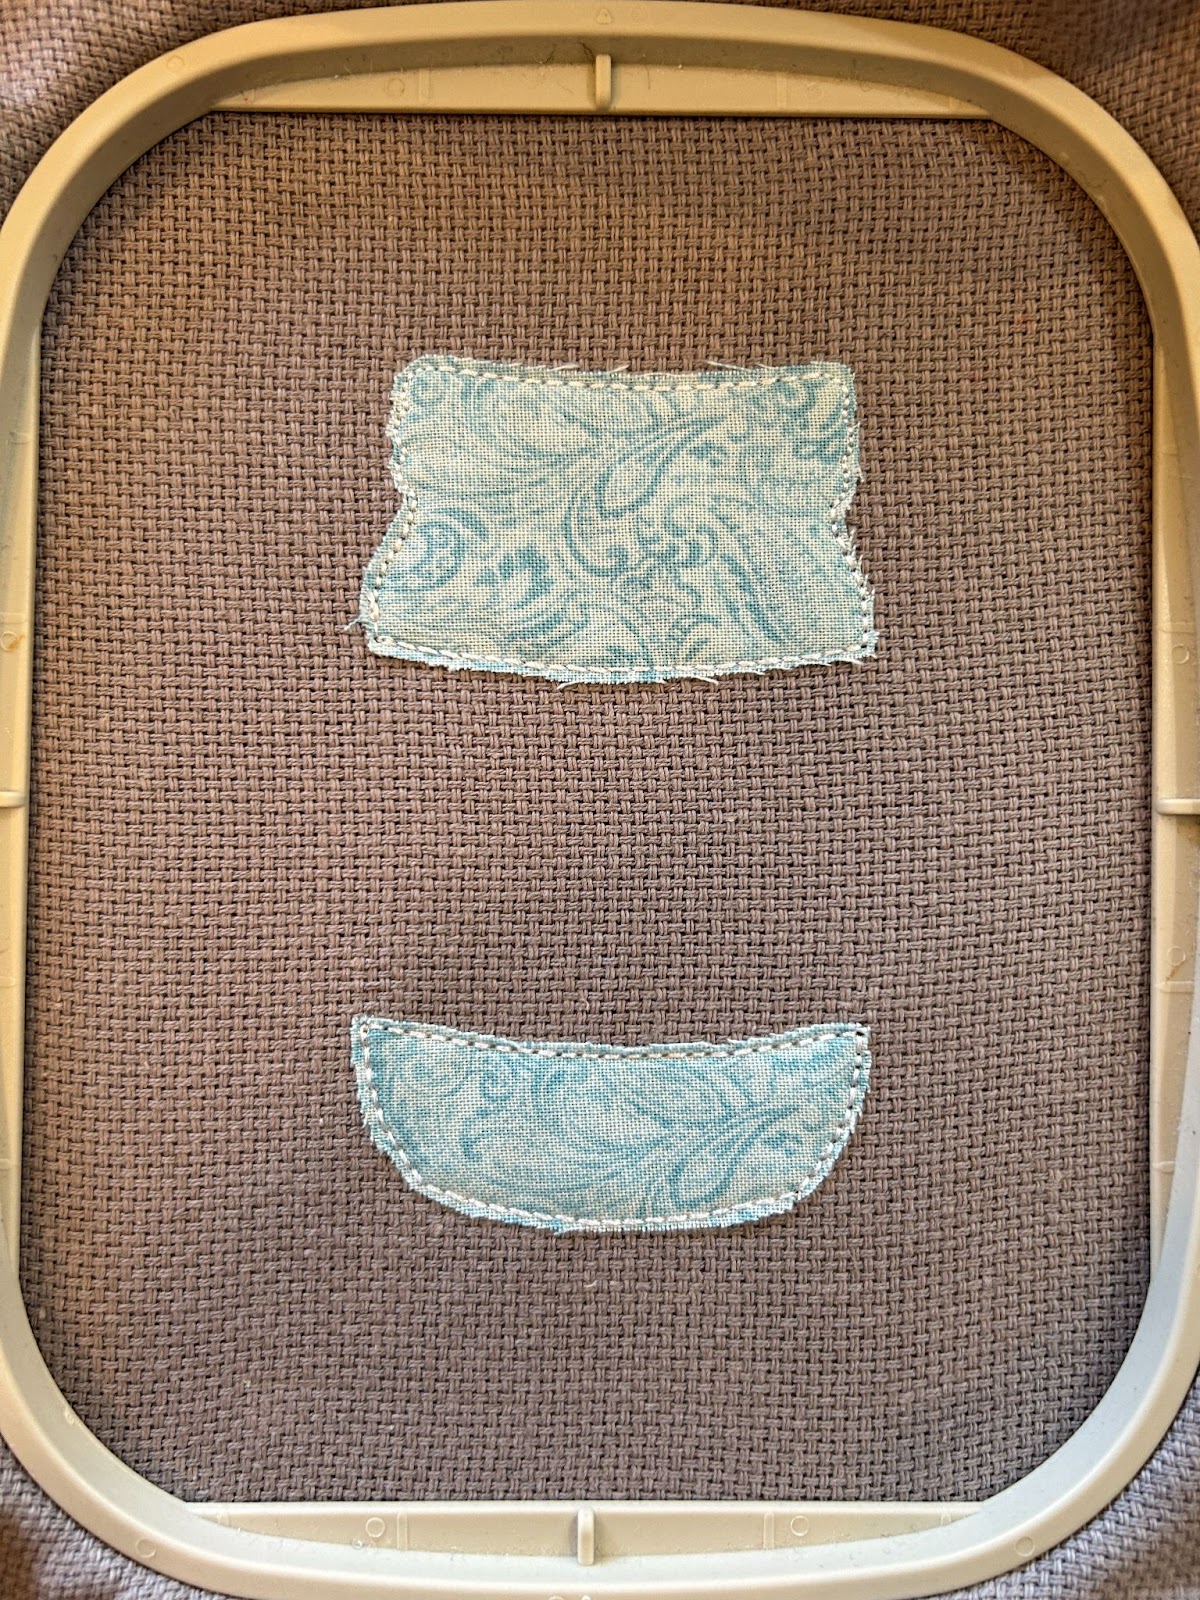
Then stitch out your first placement stitch.
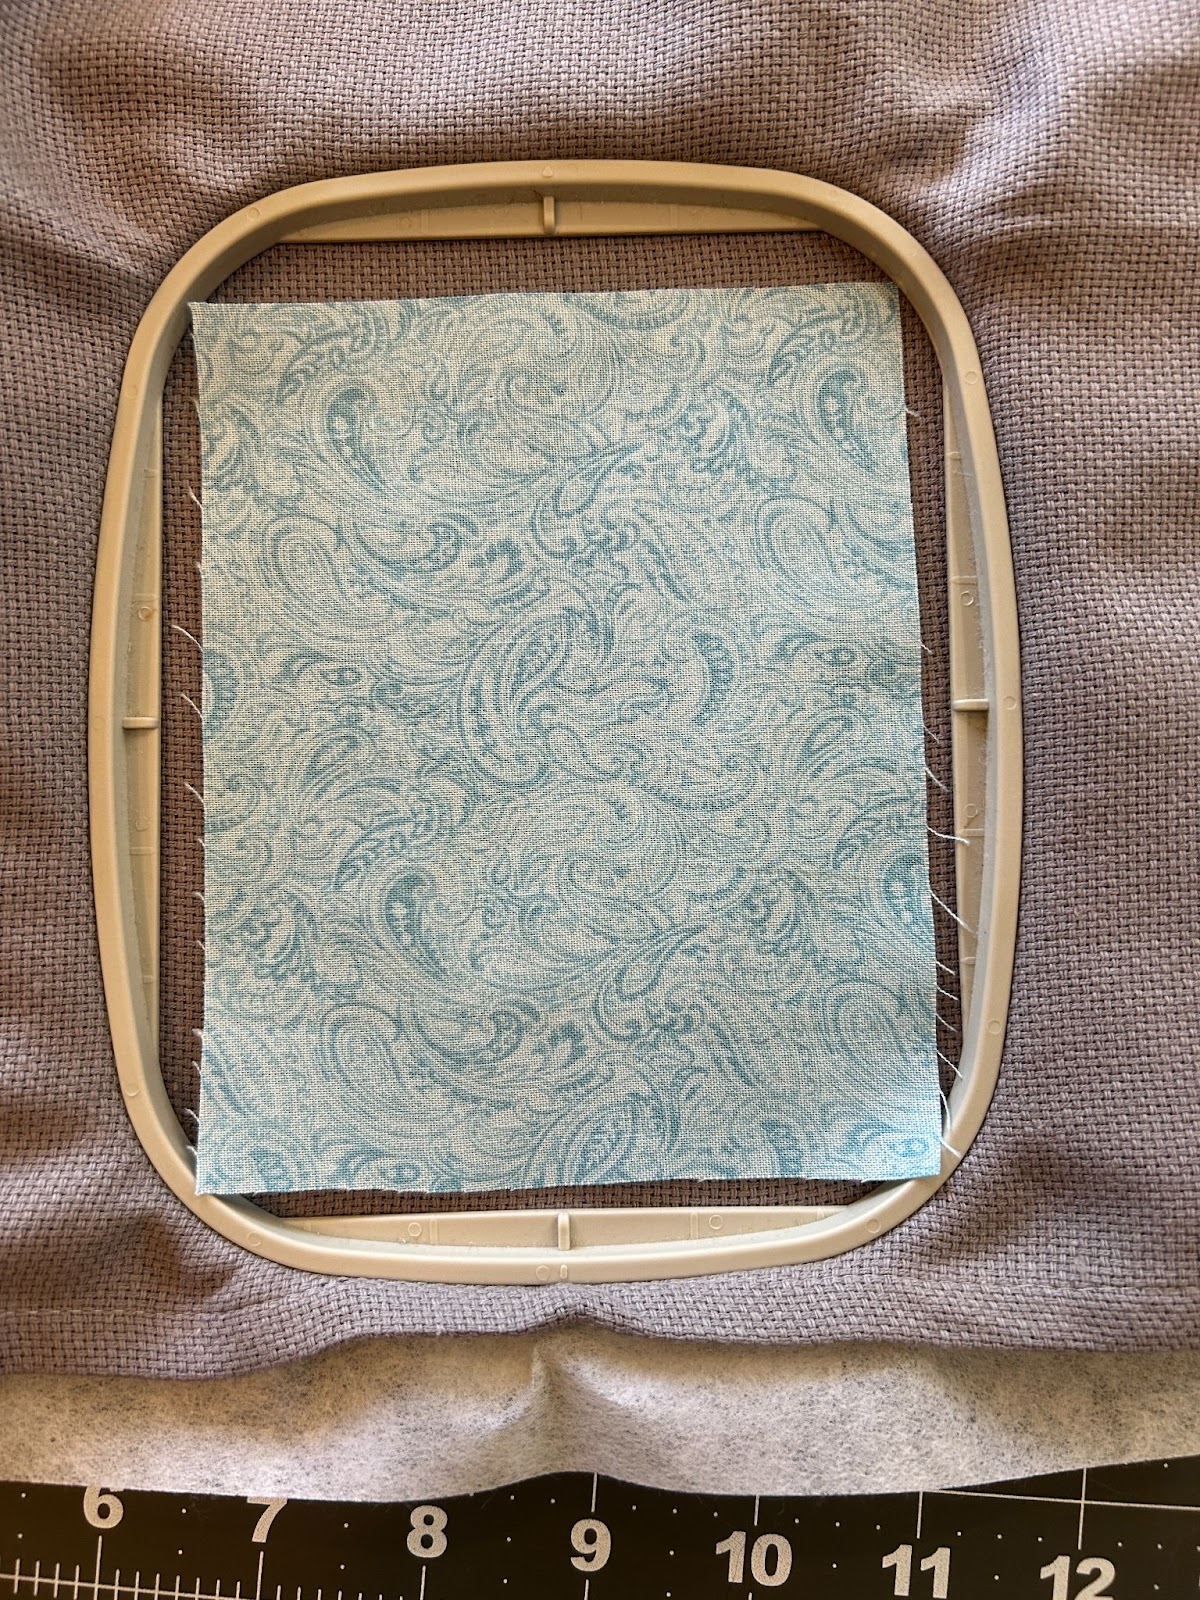
After stitching the placement stitch, cover the stitches completely with the fabric you want to use for this step.
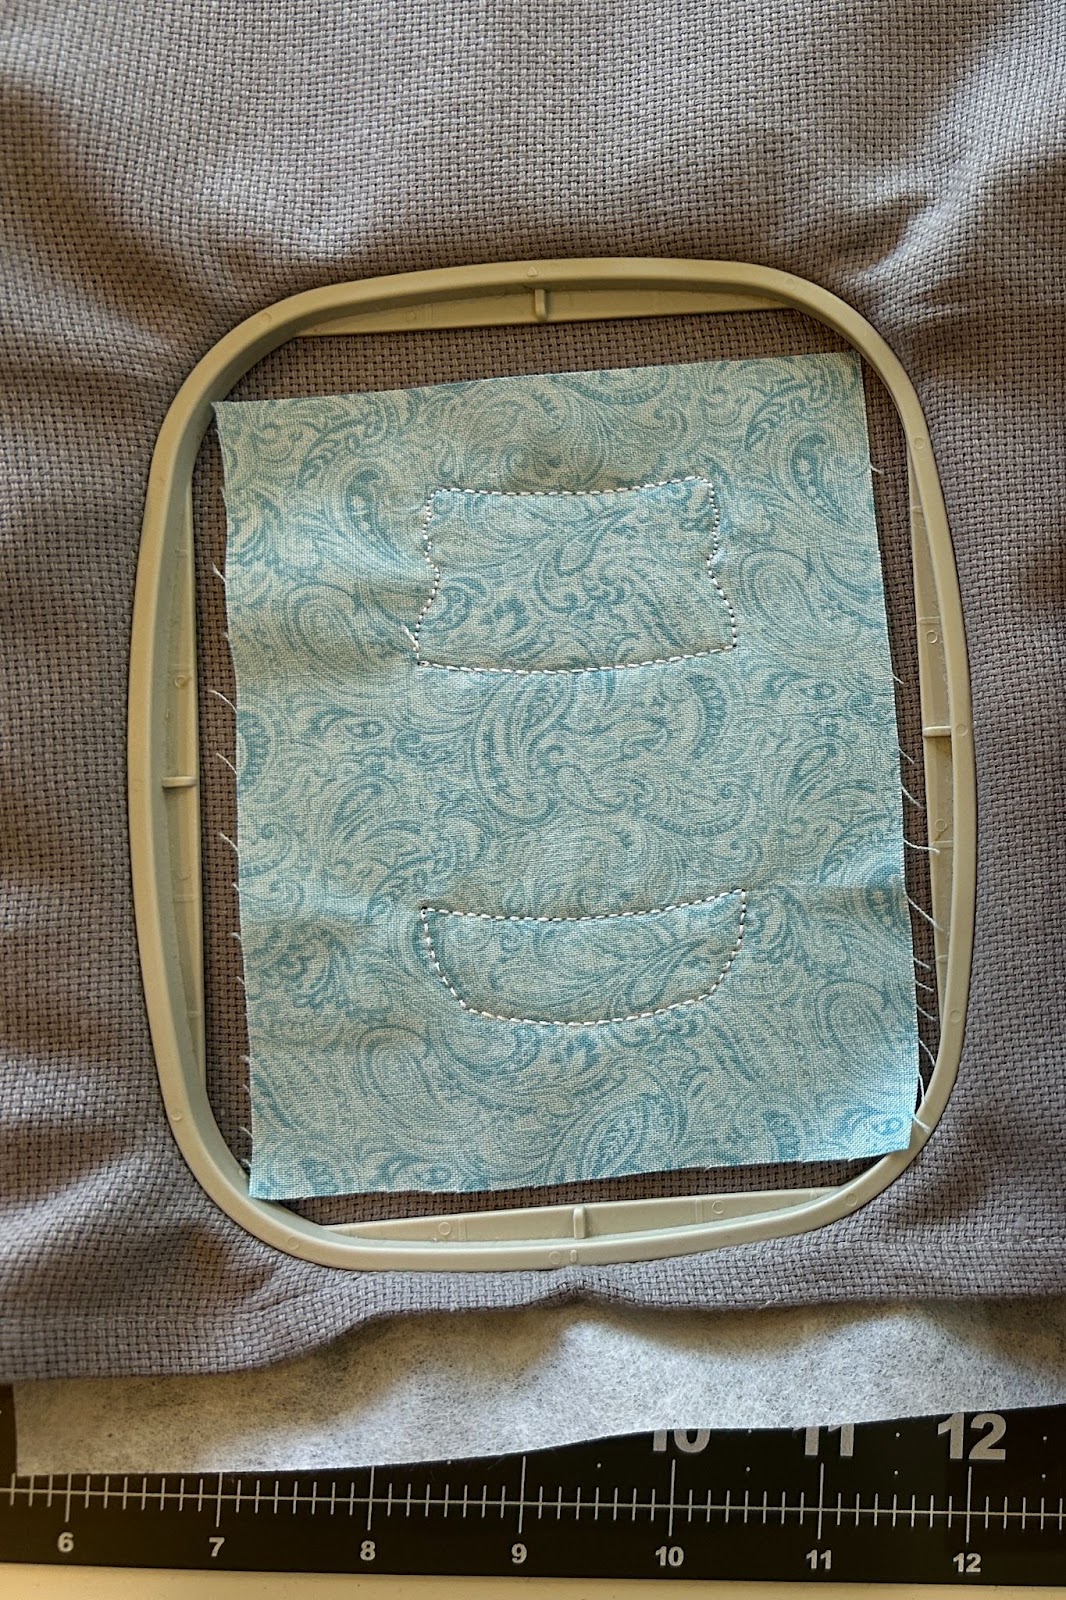
Then stitch the tack-down stitches.
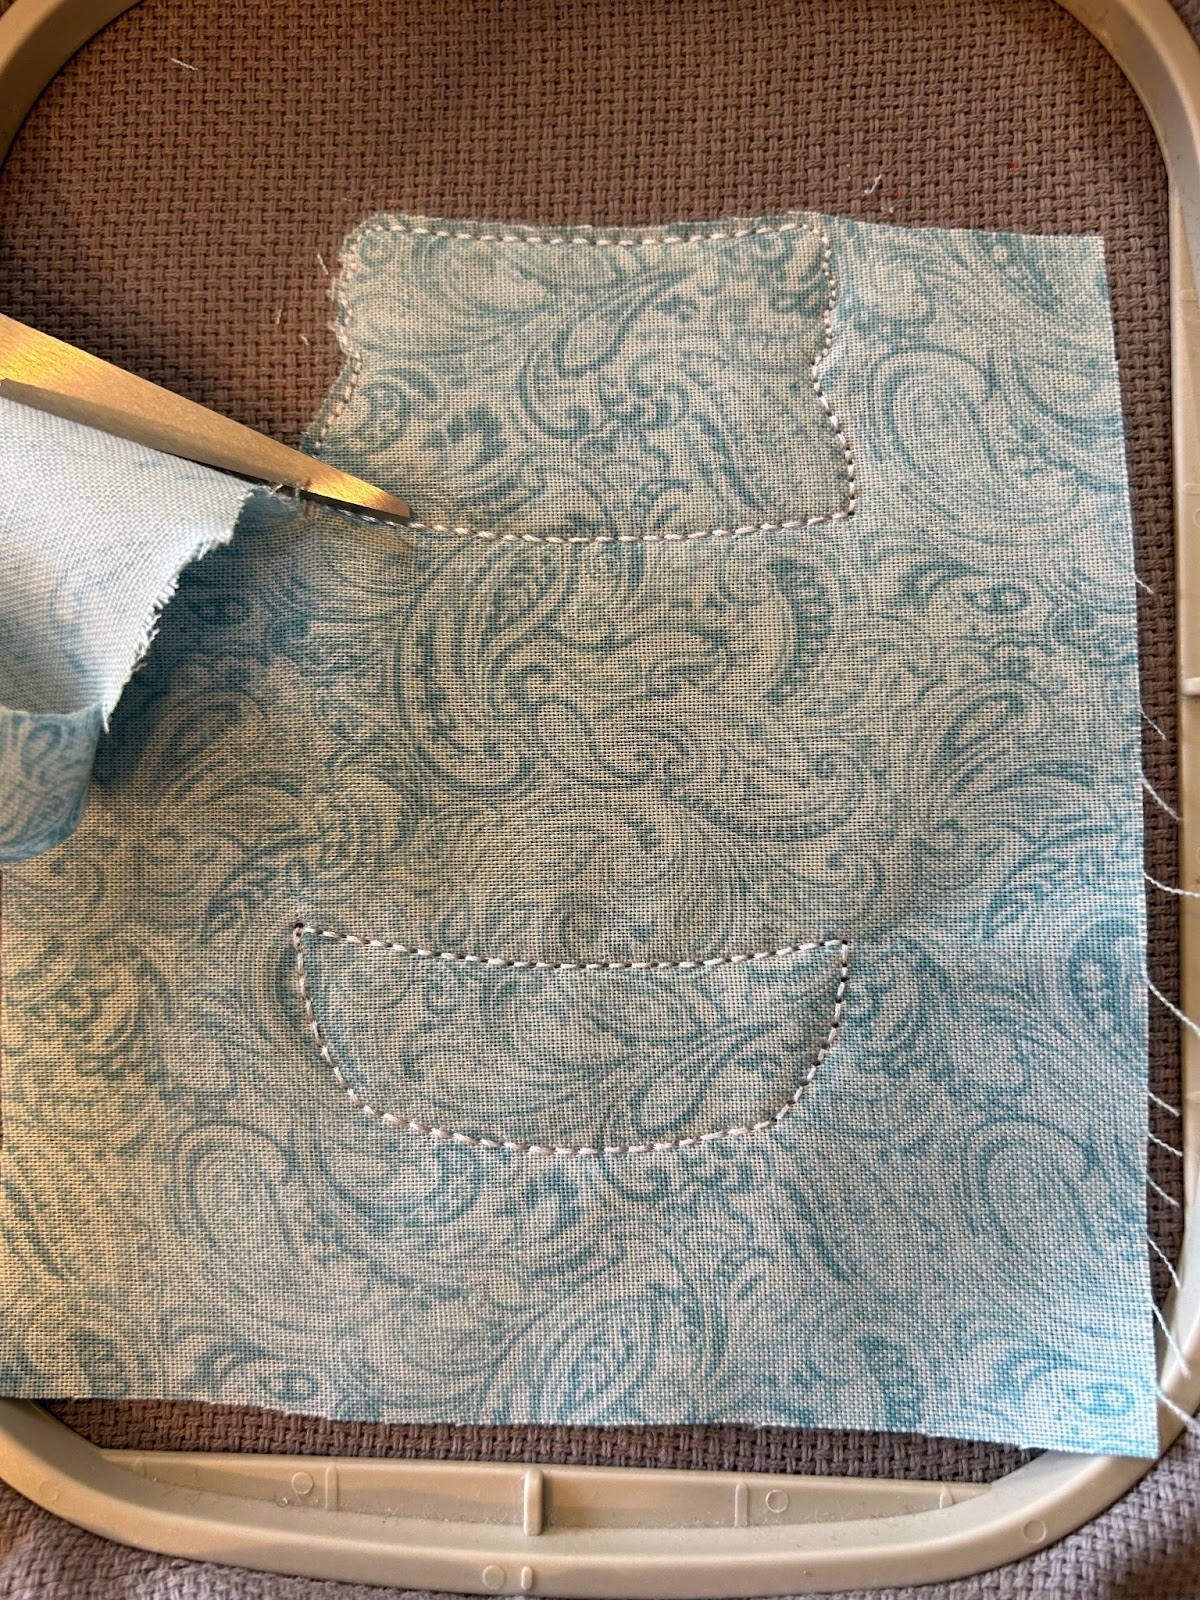
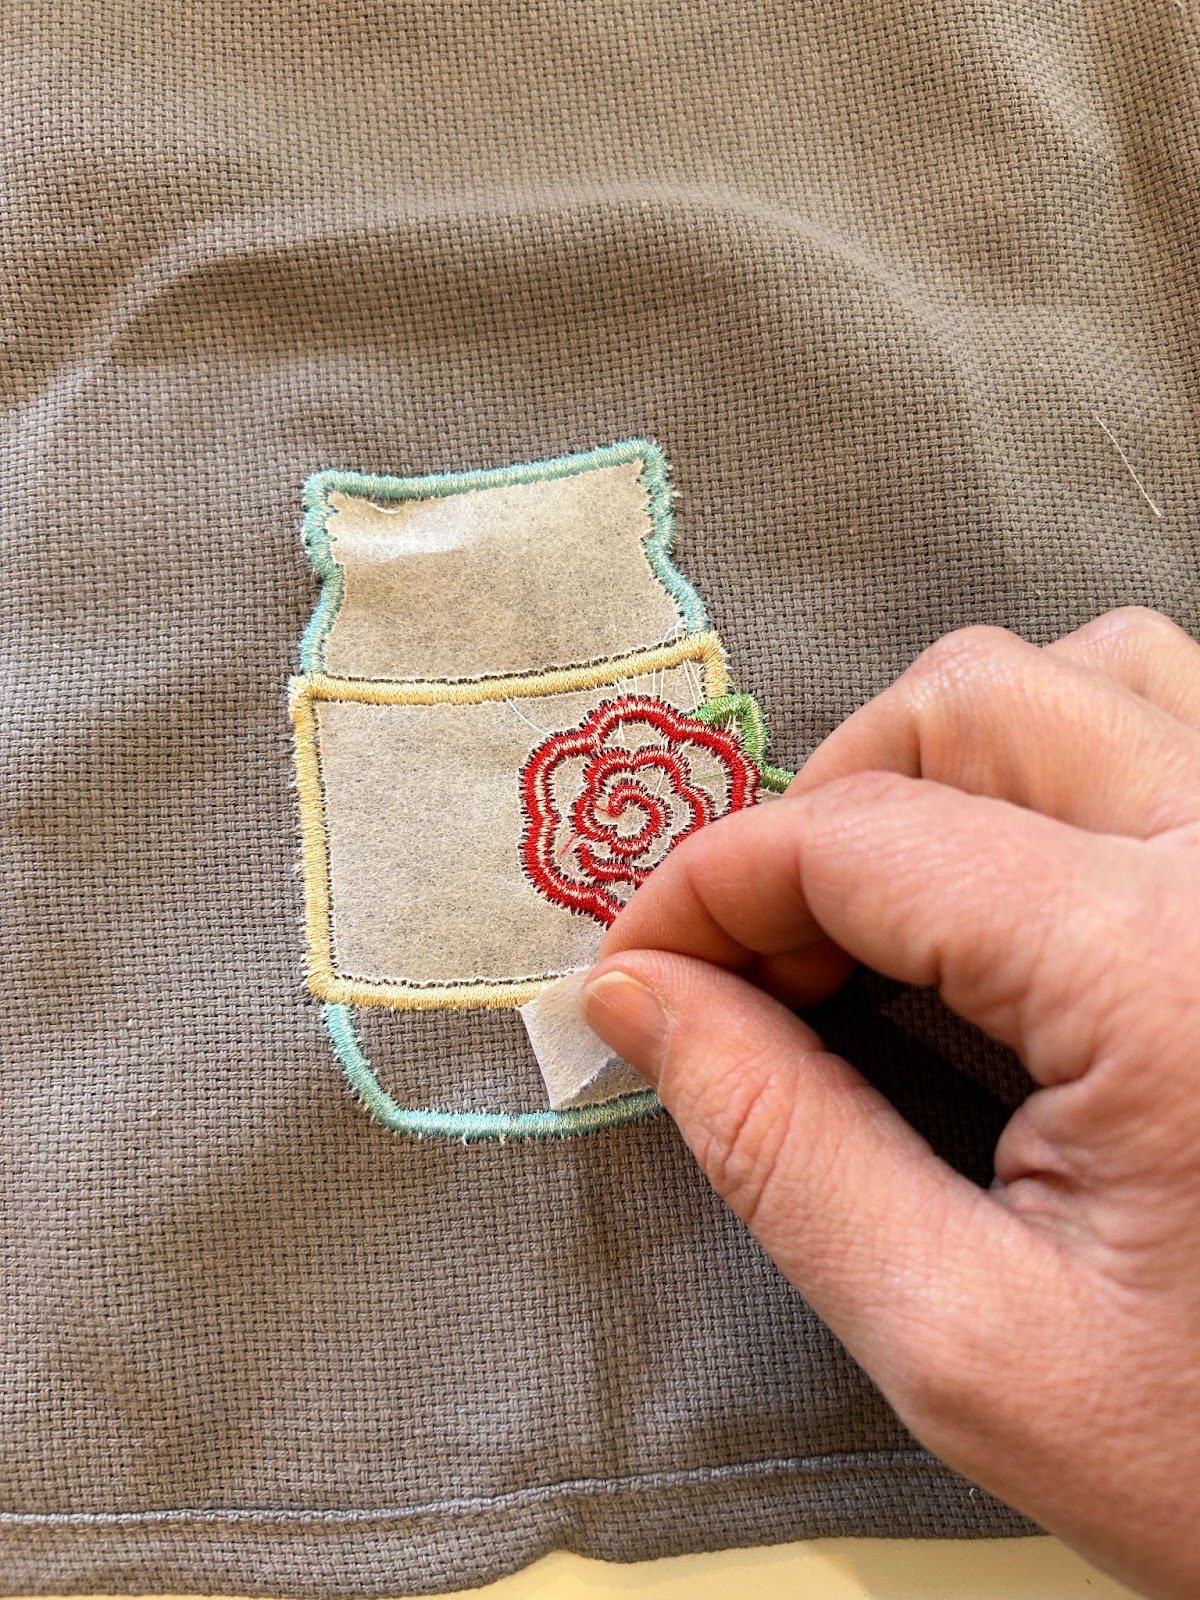
Now you will trim the excess fabric. You want to clip close to the stitches without cutting the stitches. I like to use a small pair of scissors that are sharp to the tip. Some people like duckbill scissors to help make sure they aren’t cutting their background fabric.
Once it’s all trimmed up, you are ready to continue with the next steps.
Continue doing placement stitches, tack-down stitches, and trimming the fabric through the steps.
And finish out the fabric placement, tack-down, and trimming steps.
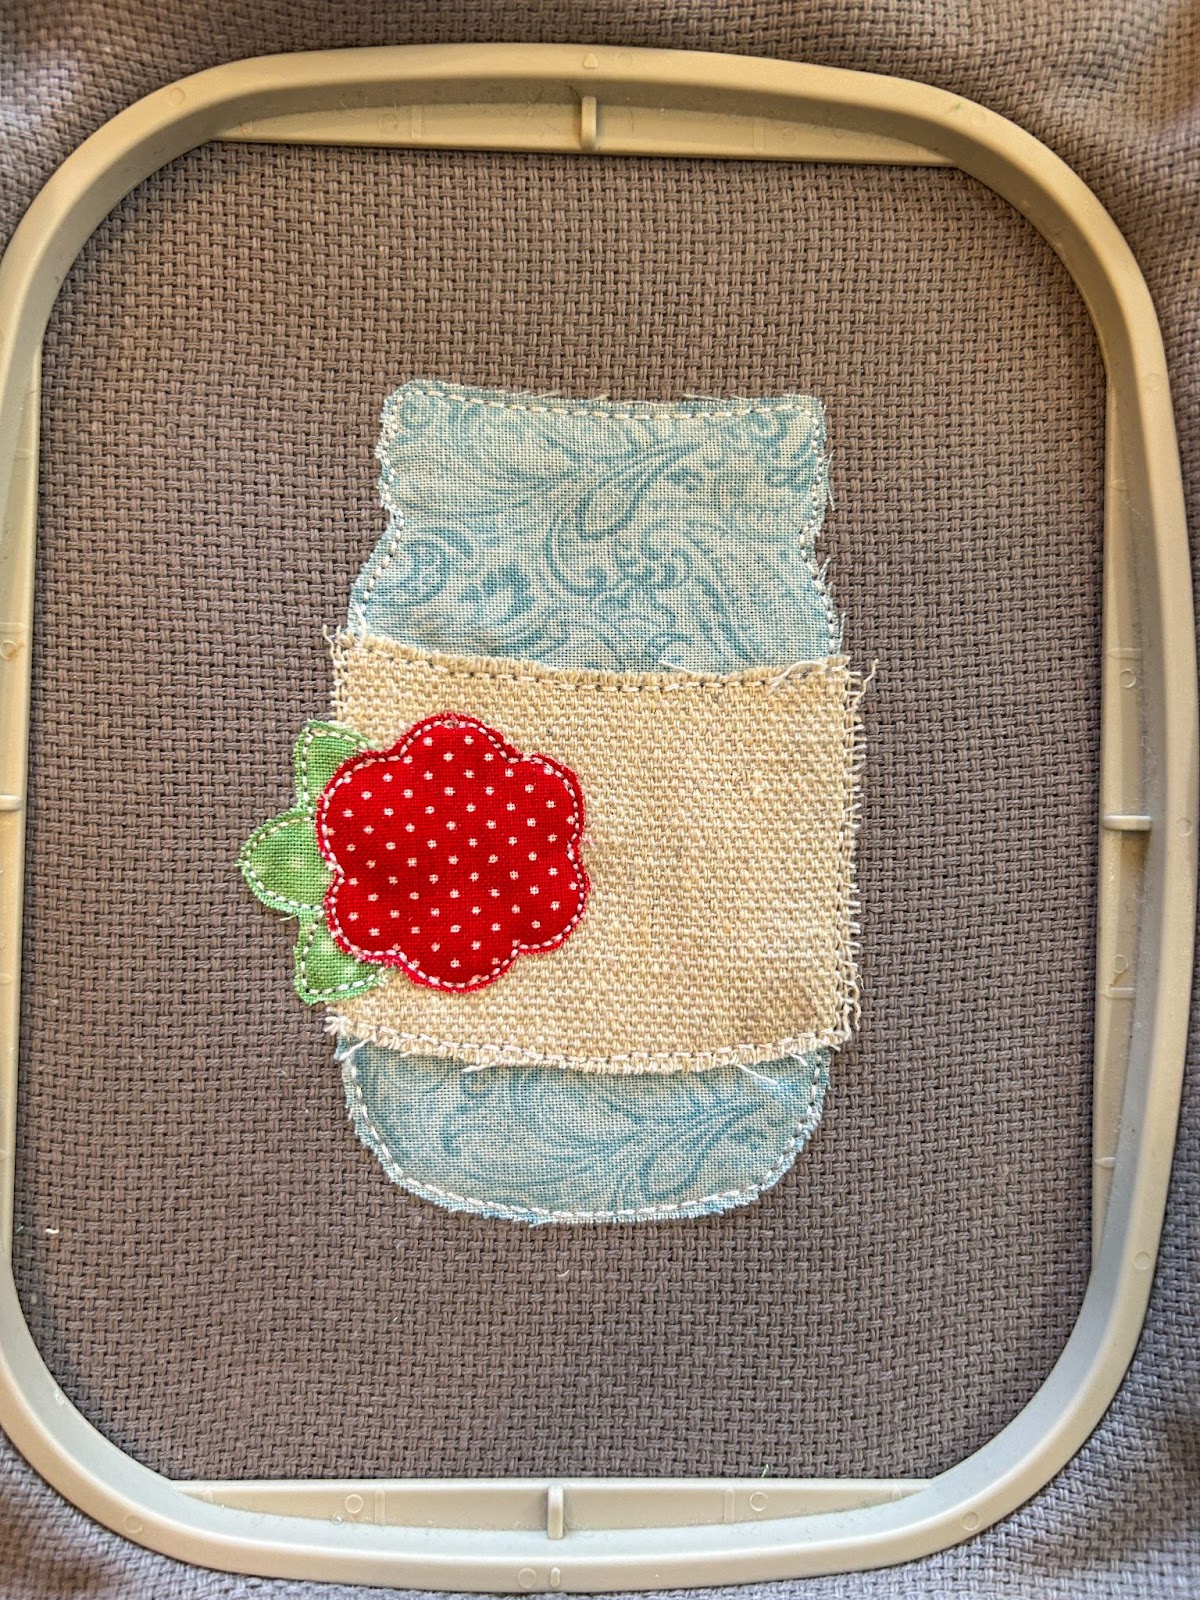
Now it's time to do the finishing and embellishment stitches. Following your color chart, you will see where you are stitching next and change the thread to match. Designs by JuJu’s applique designs finish with generous satin stitch widths. That makes these designs ideal for applique beginners (and those of us who are in a hurry most of the time) since you don’t have to trim perfectly for the satin stitches to cover the trimmed edges quite beautifully. Run the first finishing stitch.

And finish going through the steps until you are done.

Remove your hoop from the machine and trim the threads on the back.
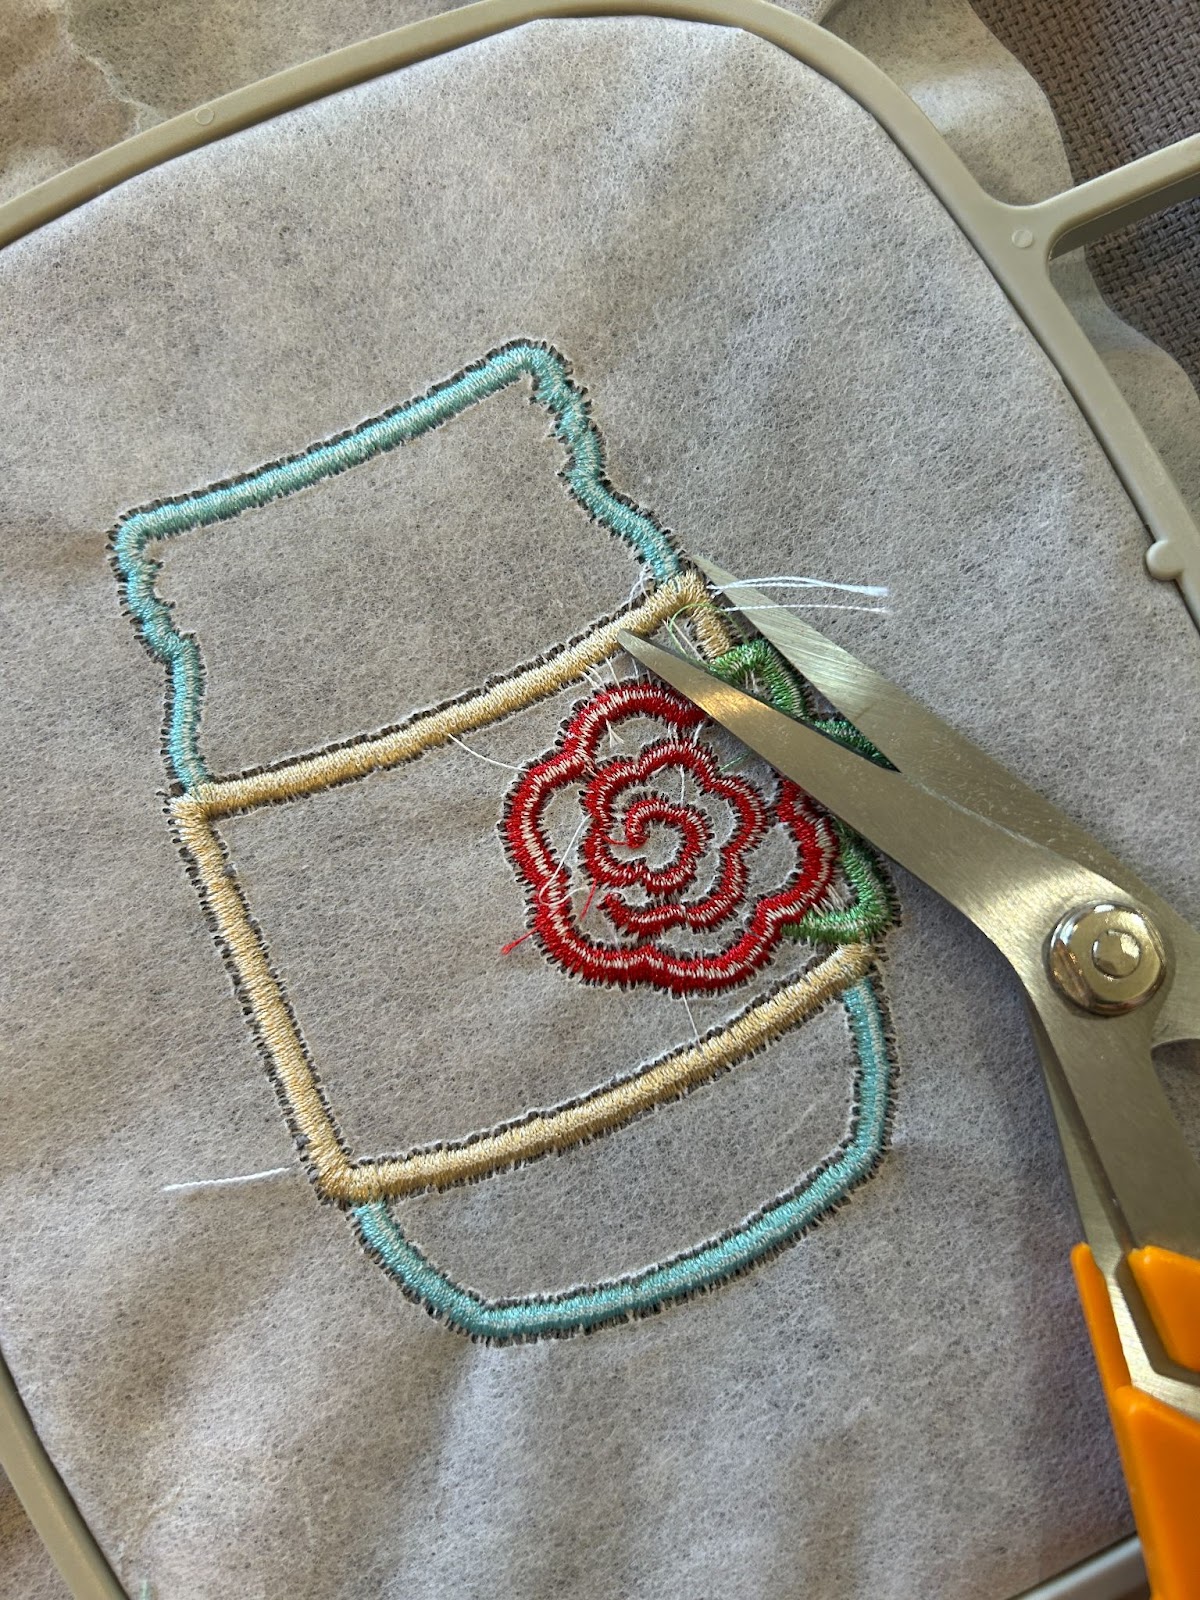
Remove the stabilizer. I used a tear-away so I am just peeling it off.
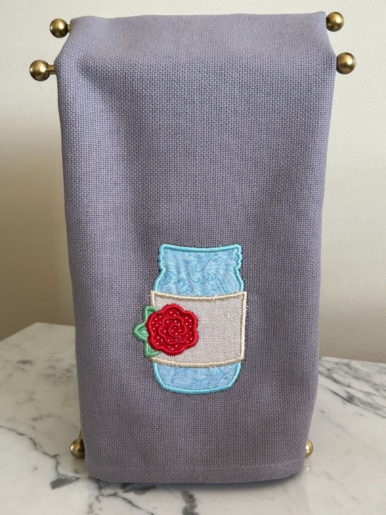
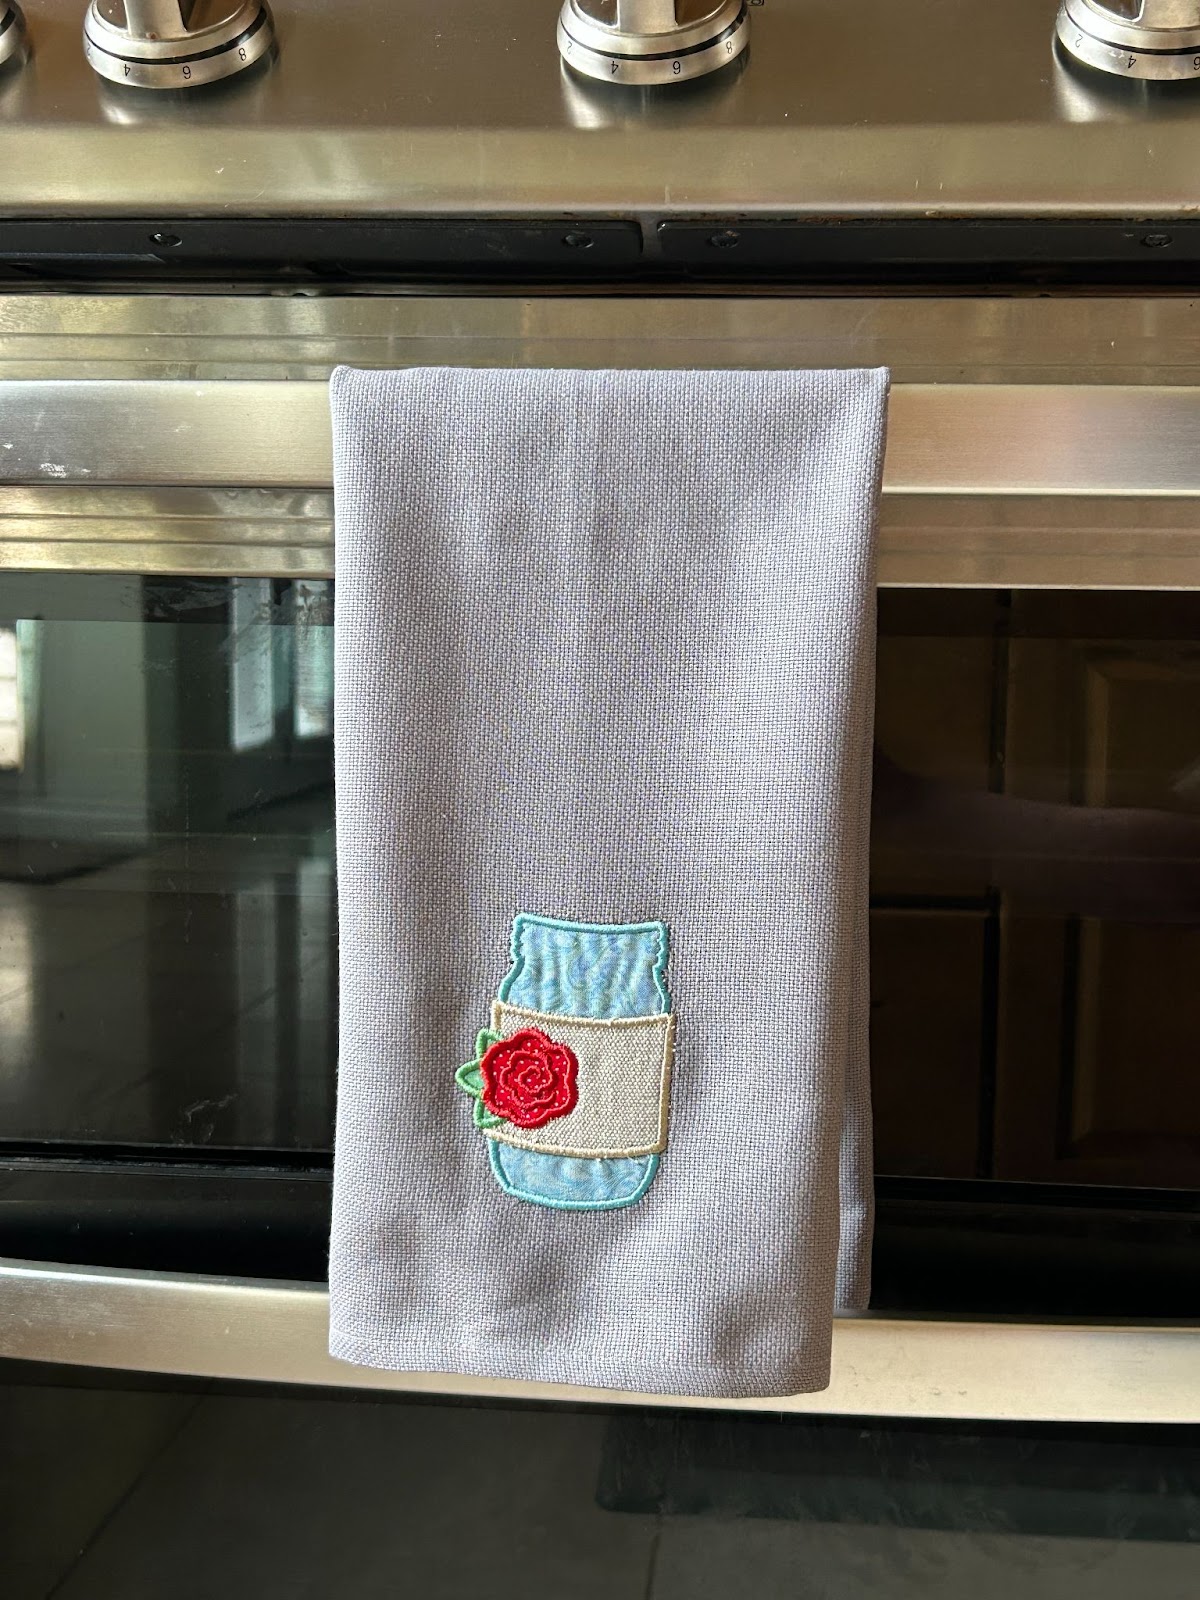
And your applique is ready for you to display or use in a project!
We love to see what you make so join us in the Designs by JuJu Embroidery Blessings Facebook Group, or use the hashtag #designsbyjuju anywhere on social media. Come share your projects with us!
