Toggle Nav
 Inspire.
Create.
Stitch.
Inspire.
Create.
Stitch.
Search
If you're looking to add a touch of personalized charm to your dining experience, embroidered placemats are a delightful and versatile project to consider. Whether you're hosting a festive holiday dinner, celebrating a special occasion, or simply enjoying a cozy meal with loved ones, these handcrafted beauties can elevate any table setting with a unique flair.
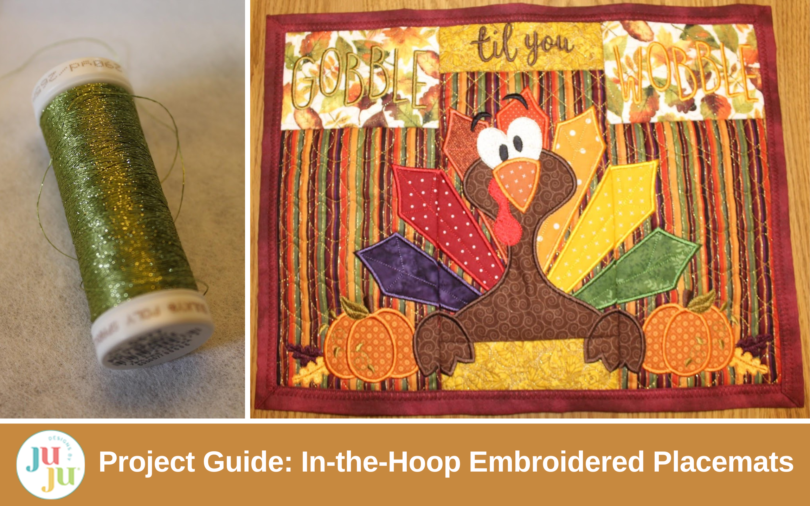
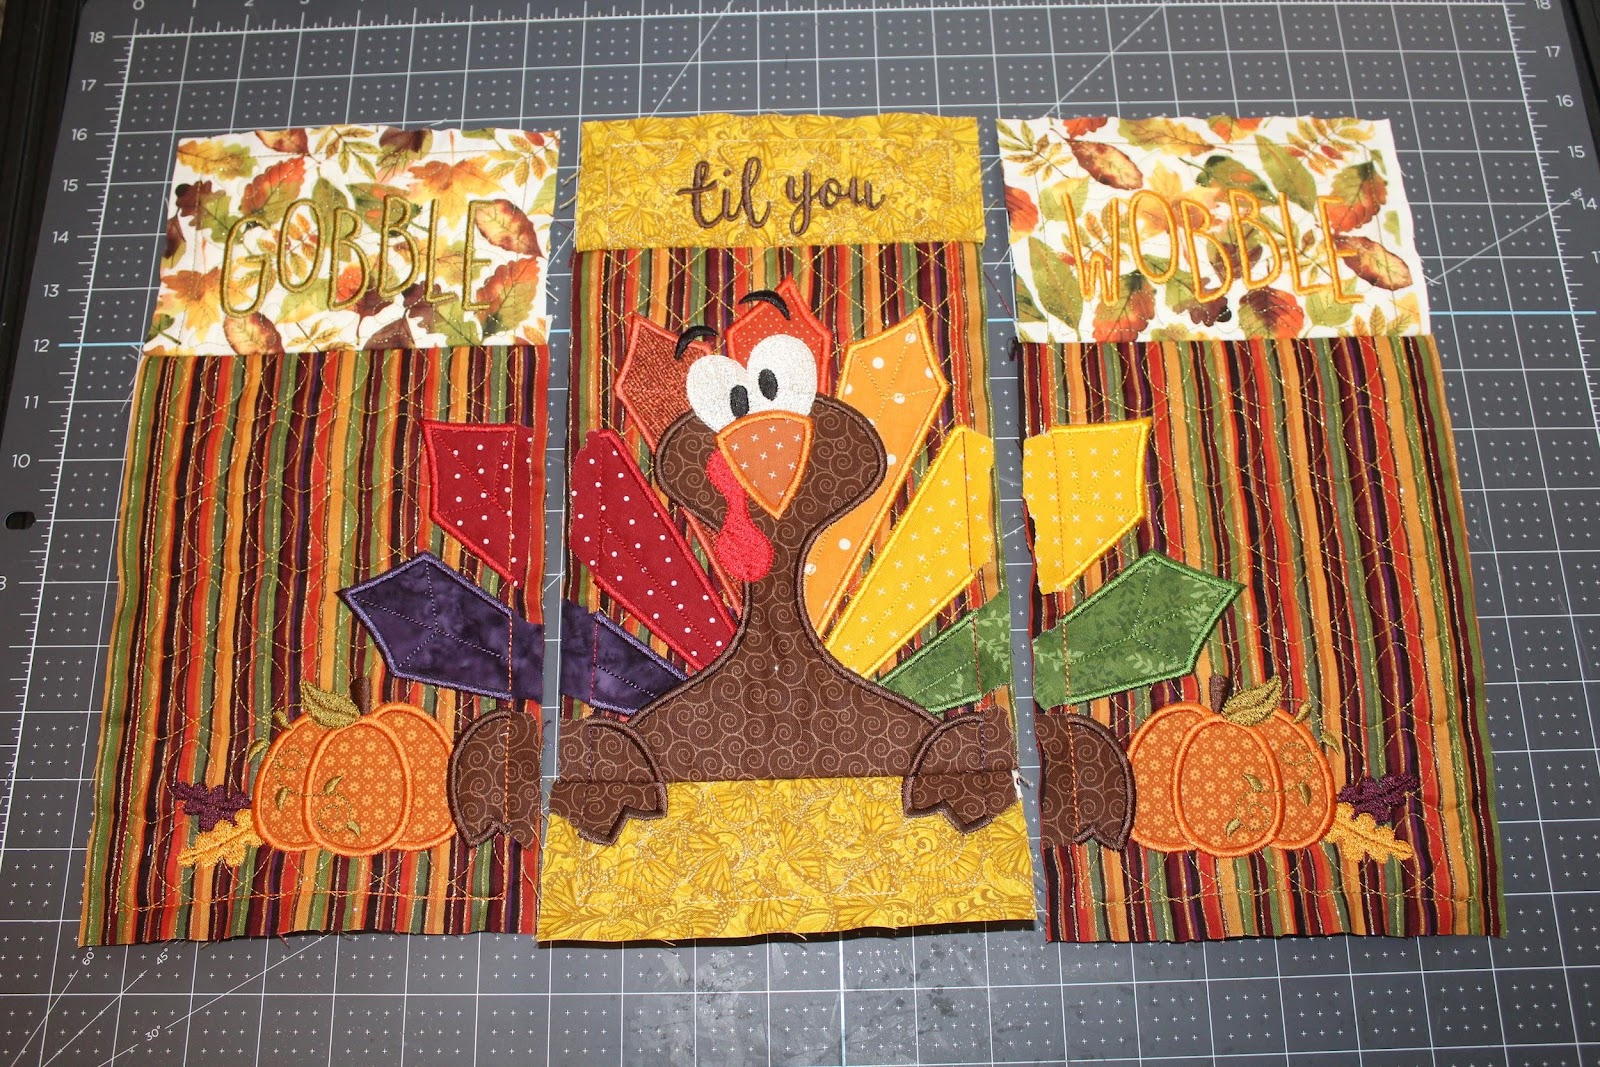
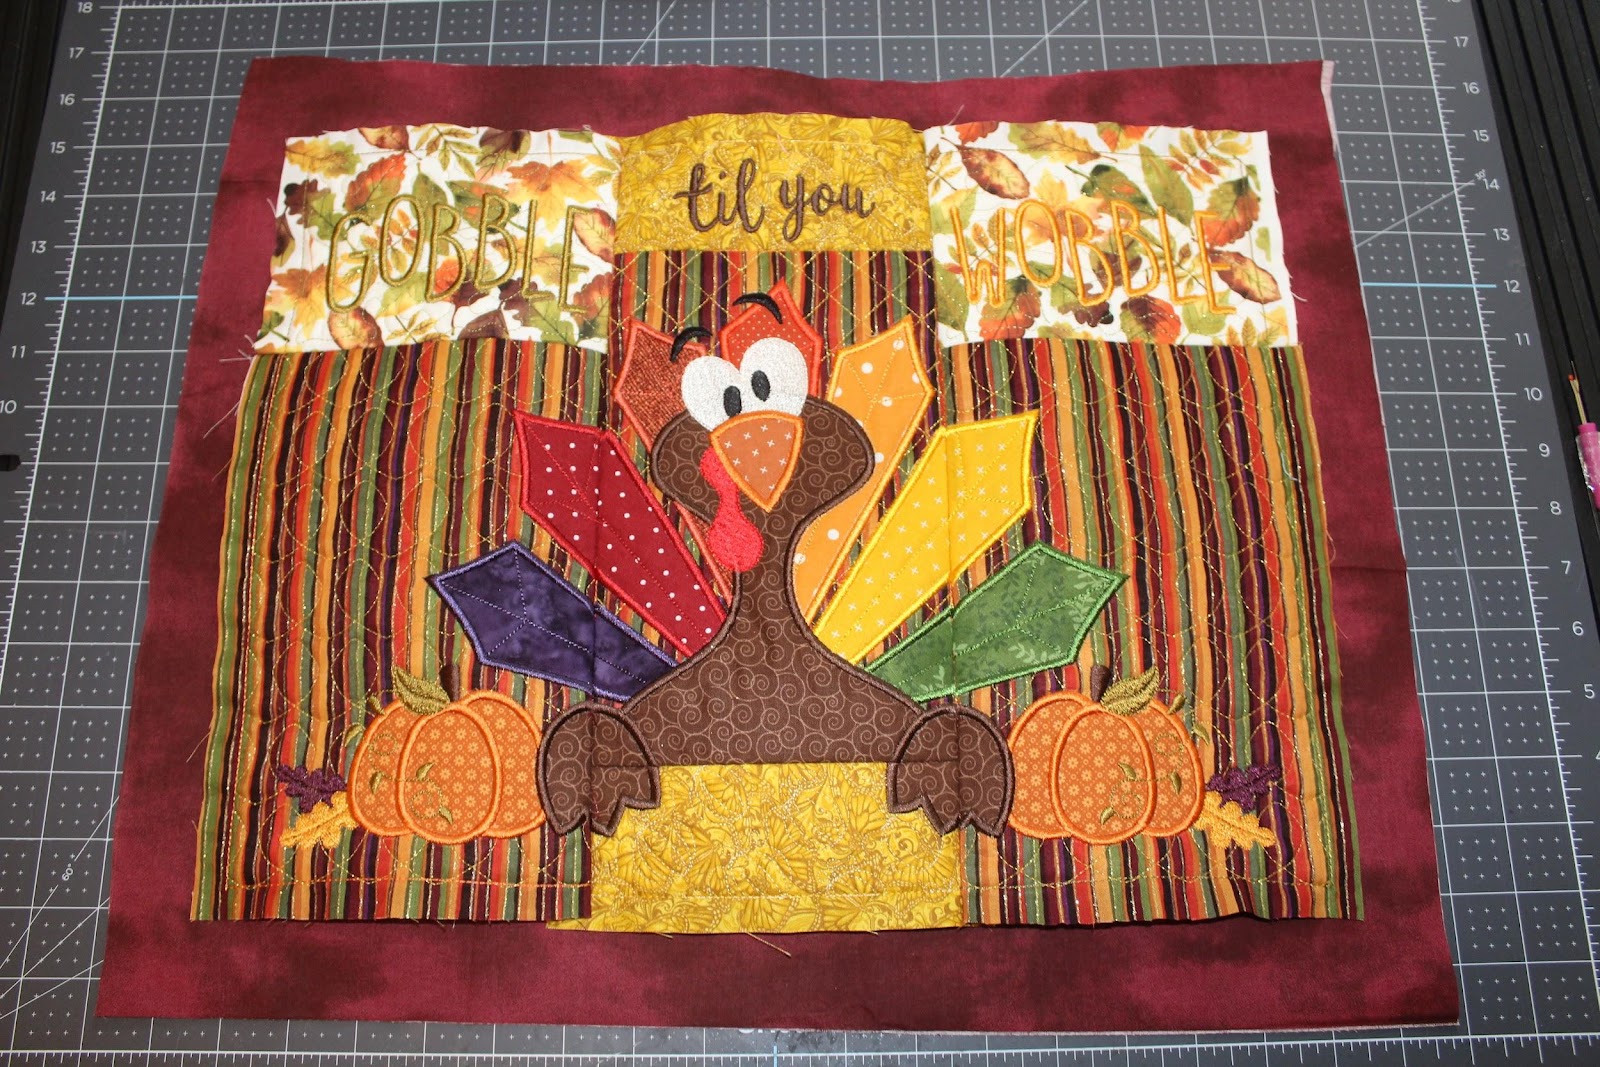
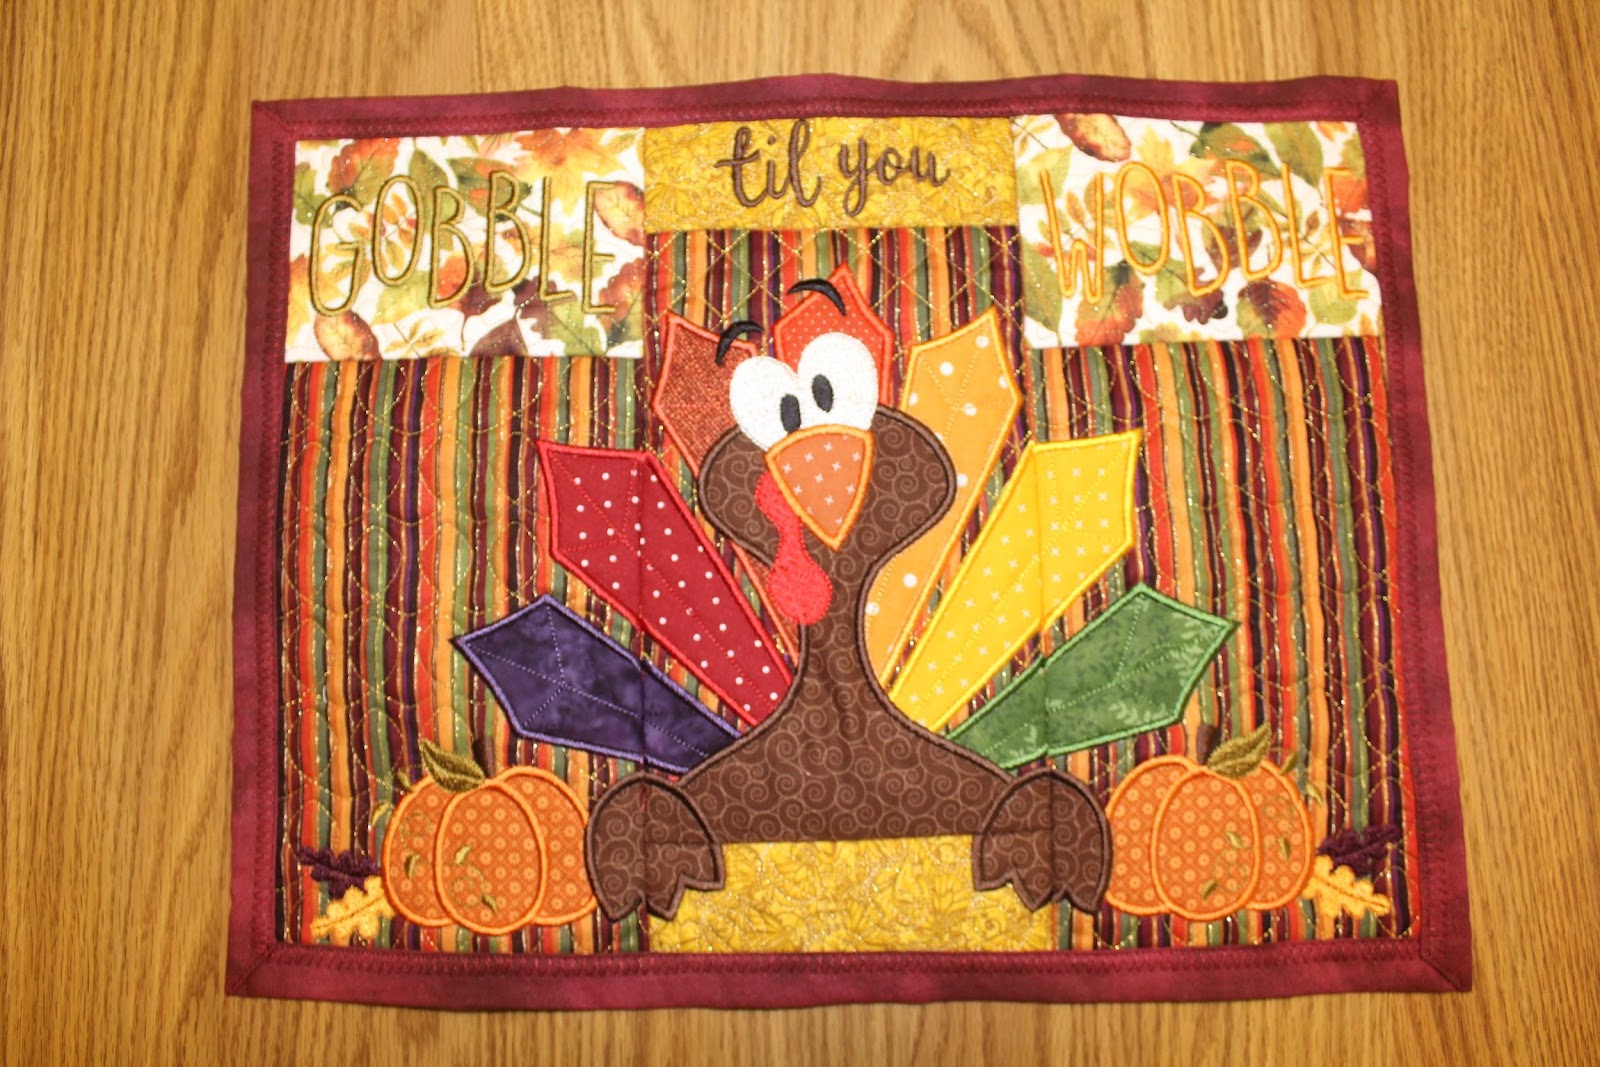
In today’s project guide, we are going to be learning how to make DIY placements using Designs by JuJu’s In-the-Hoop Embroidered Placemats. DBJJ has over 30 DIY placemat ideas and designs currently available for purchase. Each placemat is made in the hoop (ITH) with the backing and binding finishing details completed with a sewing machine. Both the 5” x 7” and 6” x 10” sizes are included with your purchase, making this a great project for machines with limited larger hoops. For this tutorial, I will be creating the 6” x 10” ITH Whimsical Turkey Placemat. As with every DBJJ purchase, color charts and amazingly detailed instructions are included with your download. I will reference the PDF instructions many times throughout today’s tutorial because they are crucial when completing this multi-hoop project.
Check out the DBJJ team’s favorite supplies in the Designs by JuJu Amazon store.
How Do I Make My Own Placemats?
Before I ever begin stitching, I enjoy laying out my material and deciding what fabrics and thread are going to coordinate best. Once I have selected my fabrics, I measure and cut everything according to the fabric cutting chart found in the PDF instructions.

Becky Thompson from Power Tools with Thread has a four-part video series I will link throughout this blog post that you can reference as well. Part 1 explains choosing your fabric and fabric preparation.
During this step, I also cut my batting and stabilizer. JuJu recommends using a no-show mesh cut-away stabilizer for placemats. For my placemats, I prefer to use a non-mesh cut-away stabilizer. Both stabilizers are appropriate and will work; this is merely personal preference.
Once you have prepared your stabilizer, fabric, and batting, you are ready to begin stitching your placemat blocks.
Double check that you have selected the correct size block (either 5x7 or 6x10) for your placemat. The blocks for the 5x7 placemat will not fit with the 6x10 placemat blocks, and vice versa.

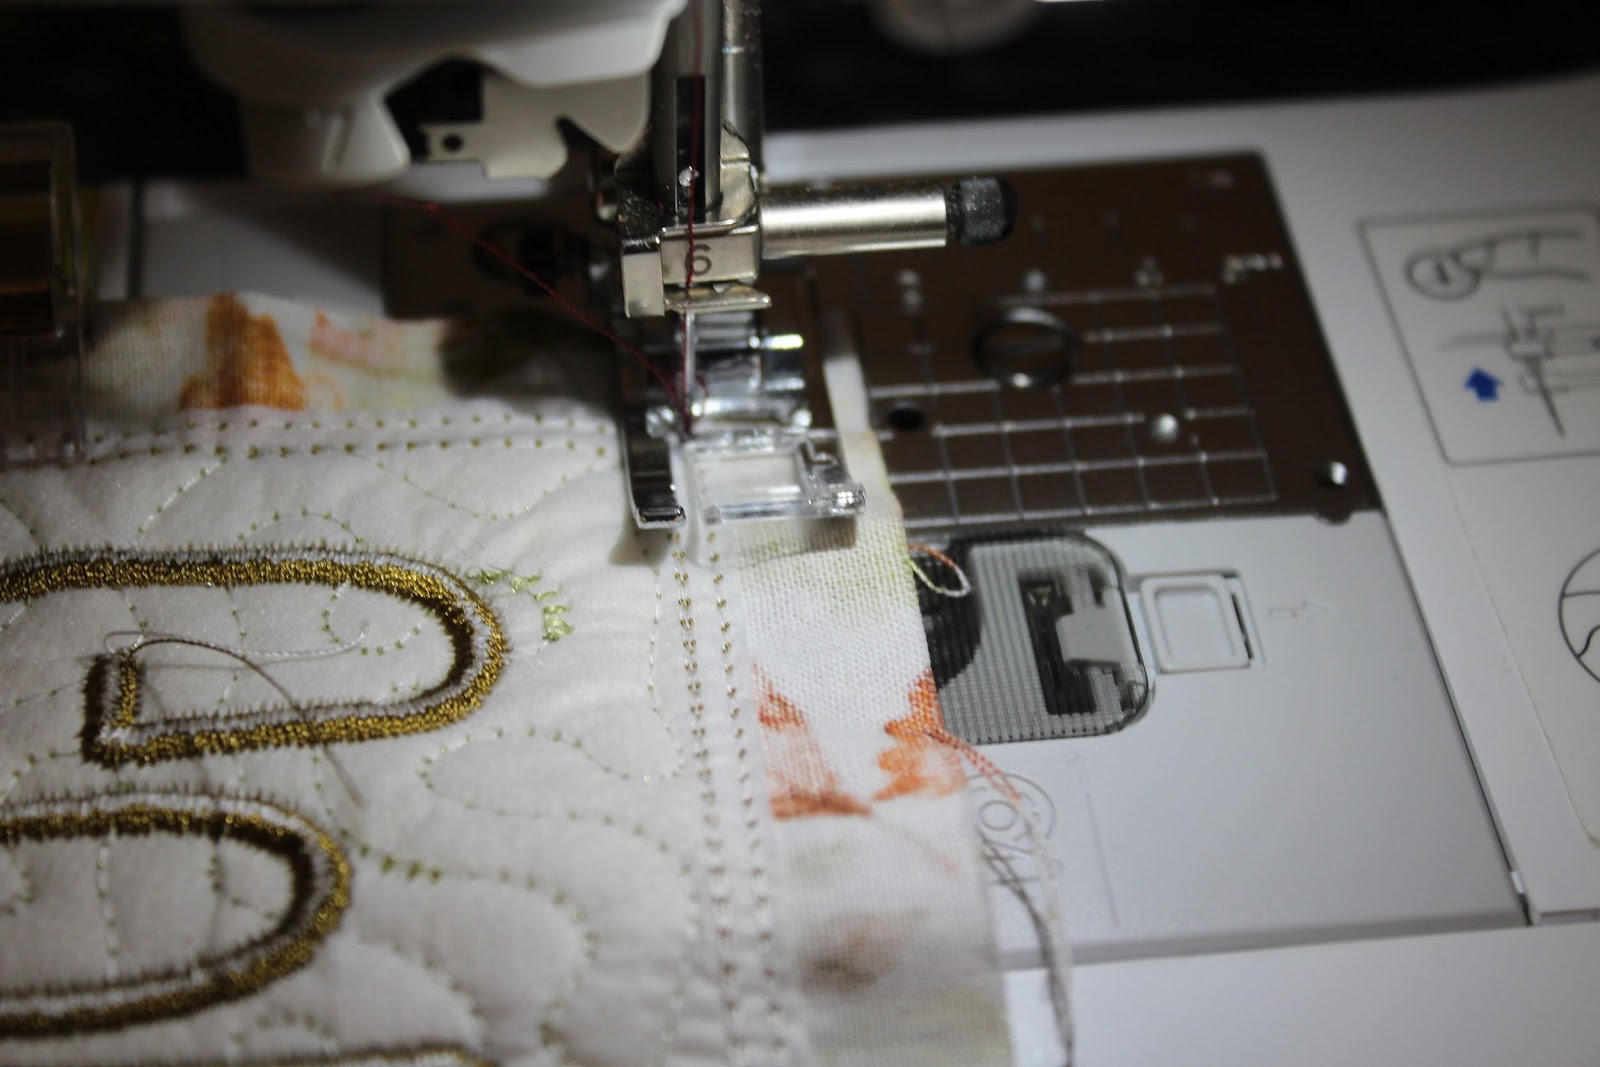
Now you are ready to get stitching! The general steps for stitching and completing a DBJJ embroidered placemat are the same. Make sure you reference your PDF instructions for specific design steps and details. Becky has two videos showing steps 1–8 below using both a single needle and a multi-needle machine.
Step 1: Hoop cut-away stabilizer.
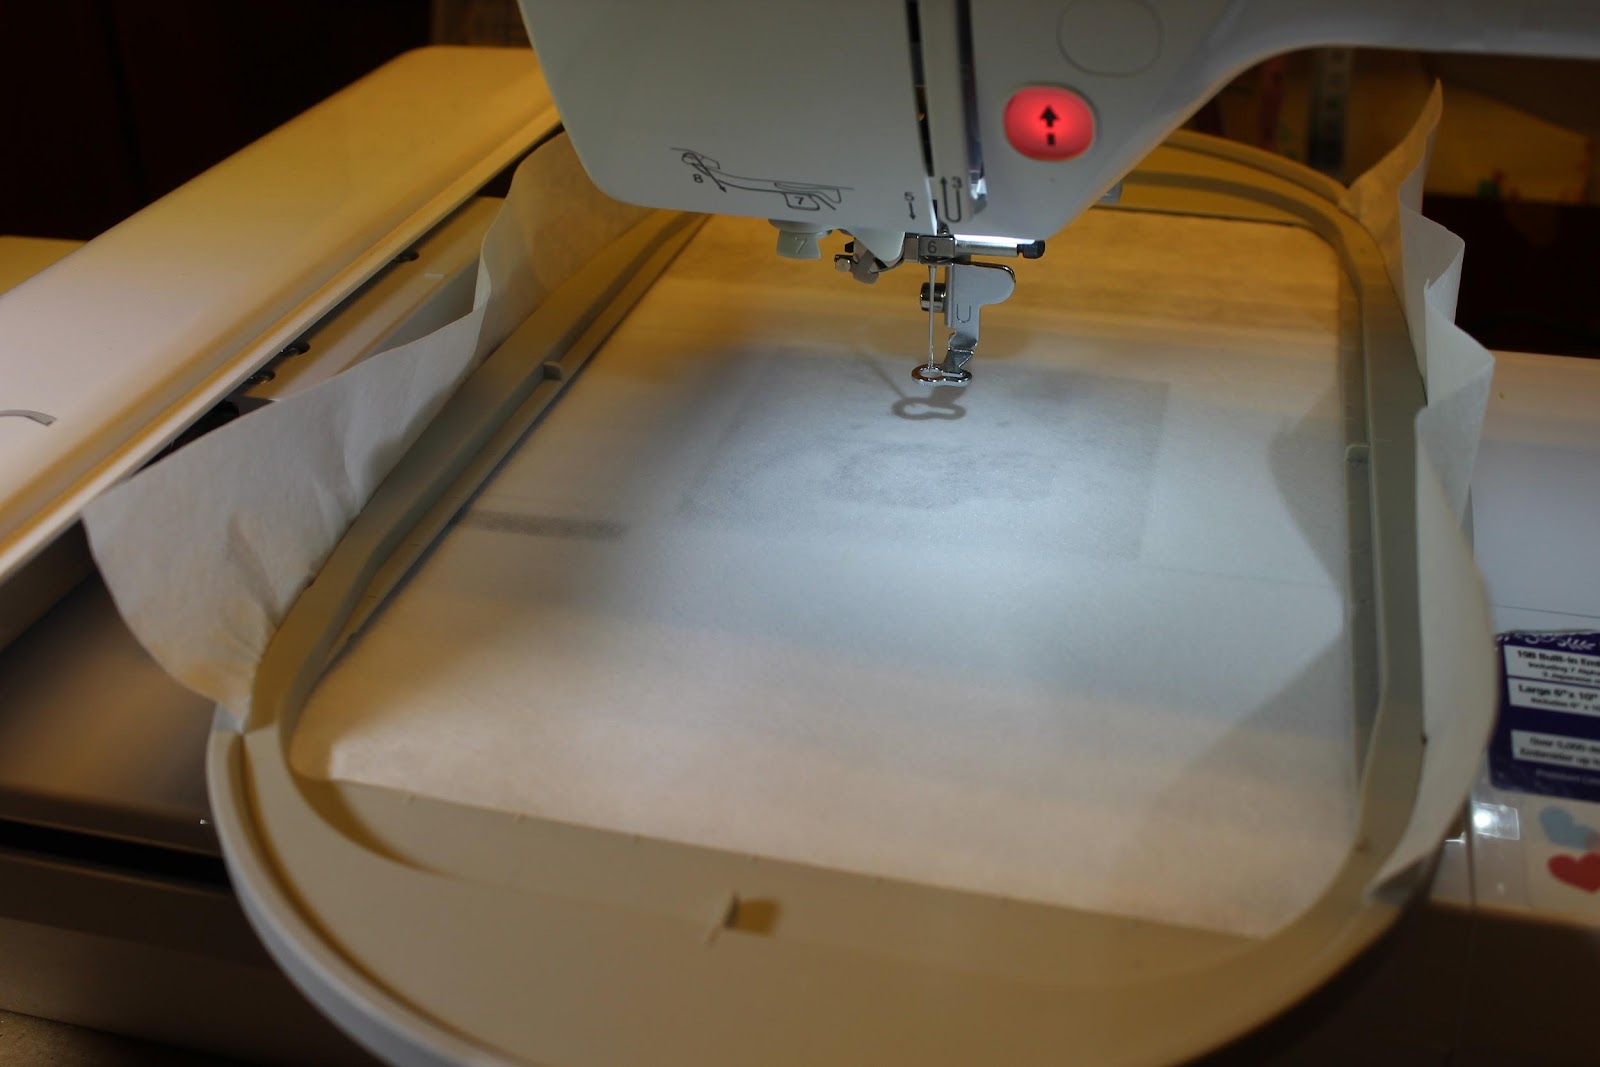
Step 2: Stitch placement line for batting.
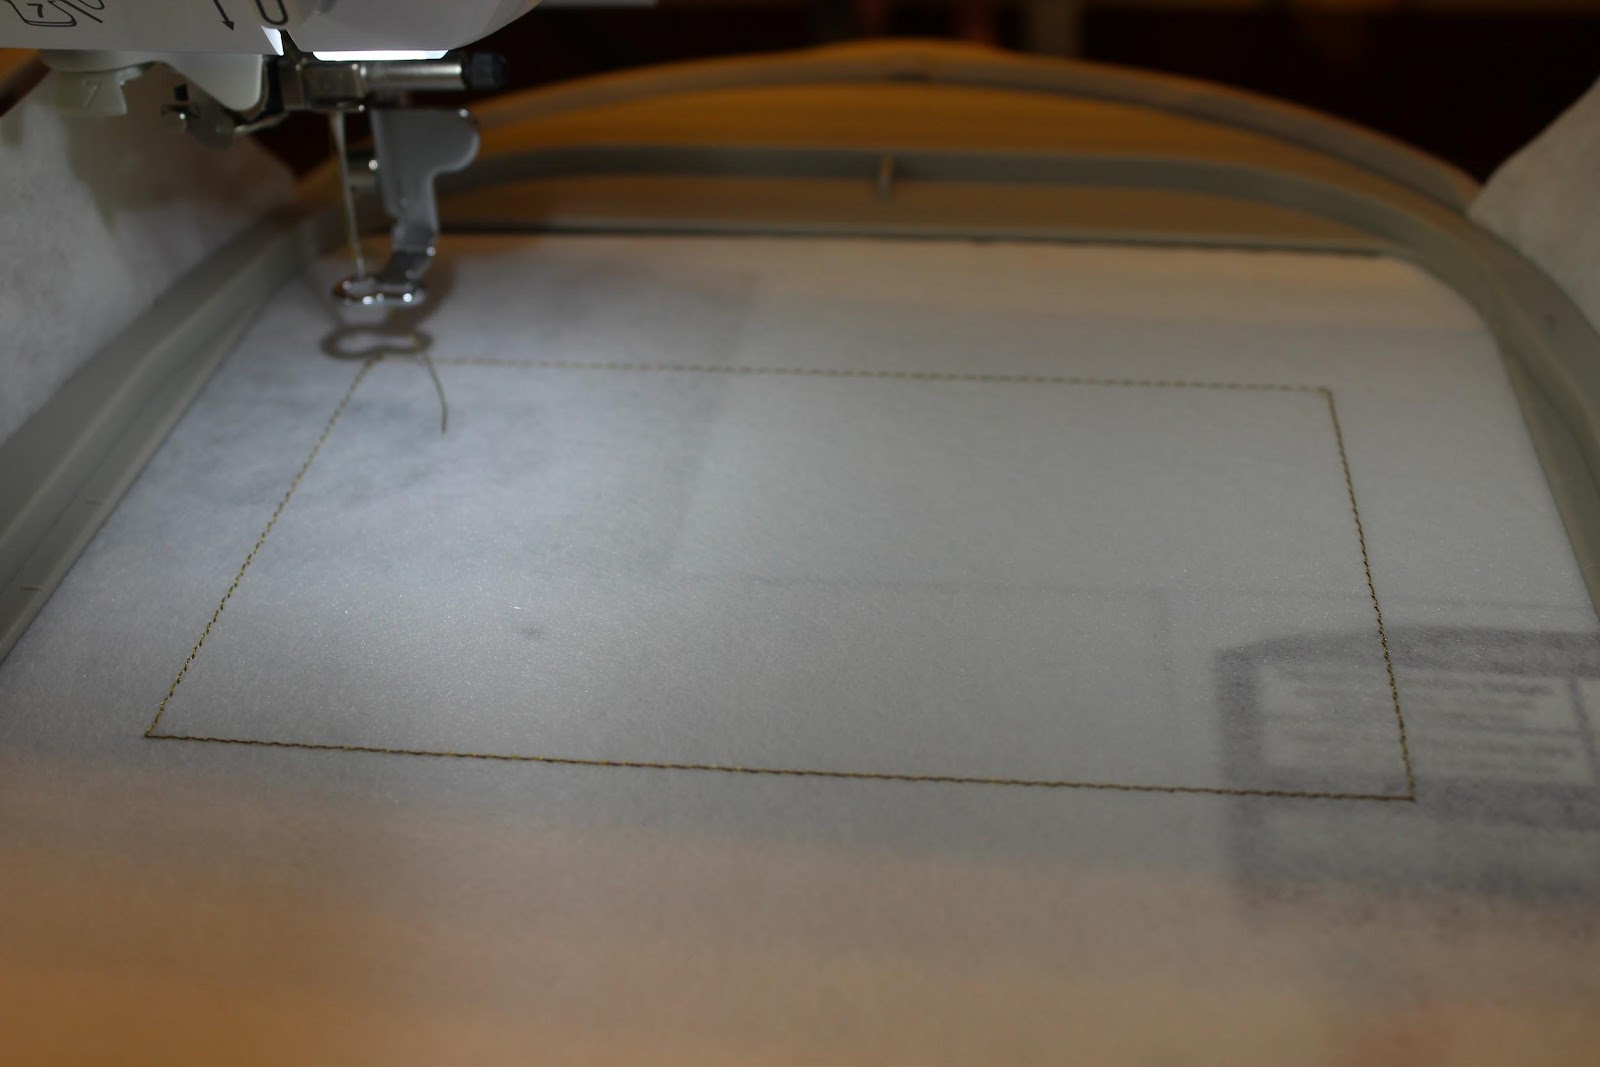
Step 3: Lay batting on top of placement line and stitch the tack down; trim batting once completed.
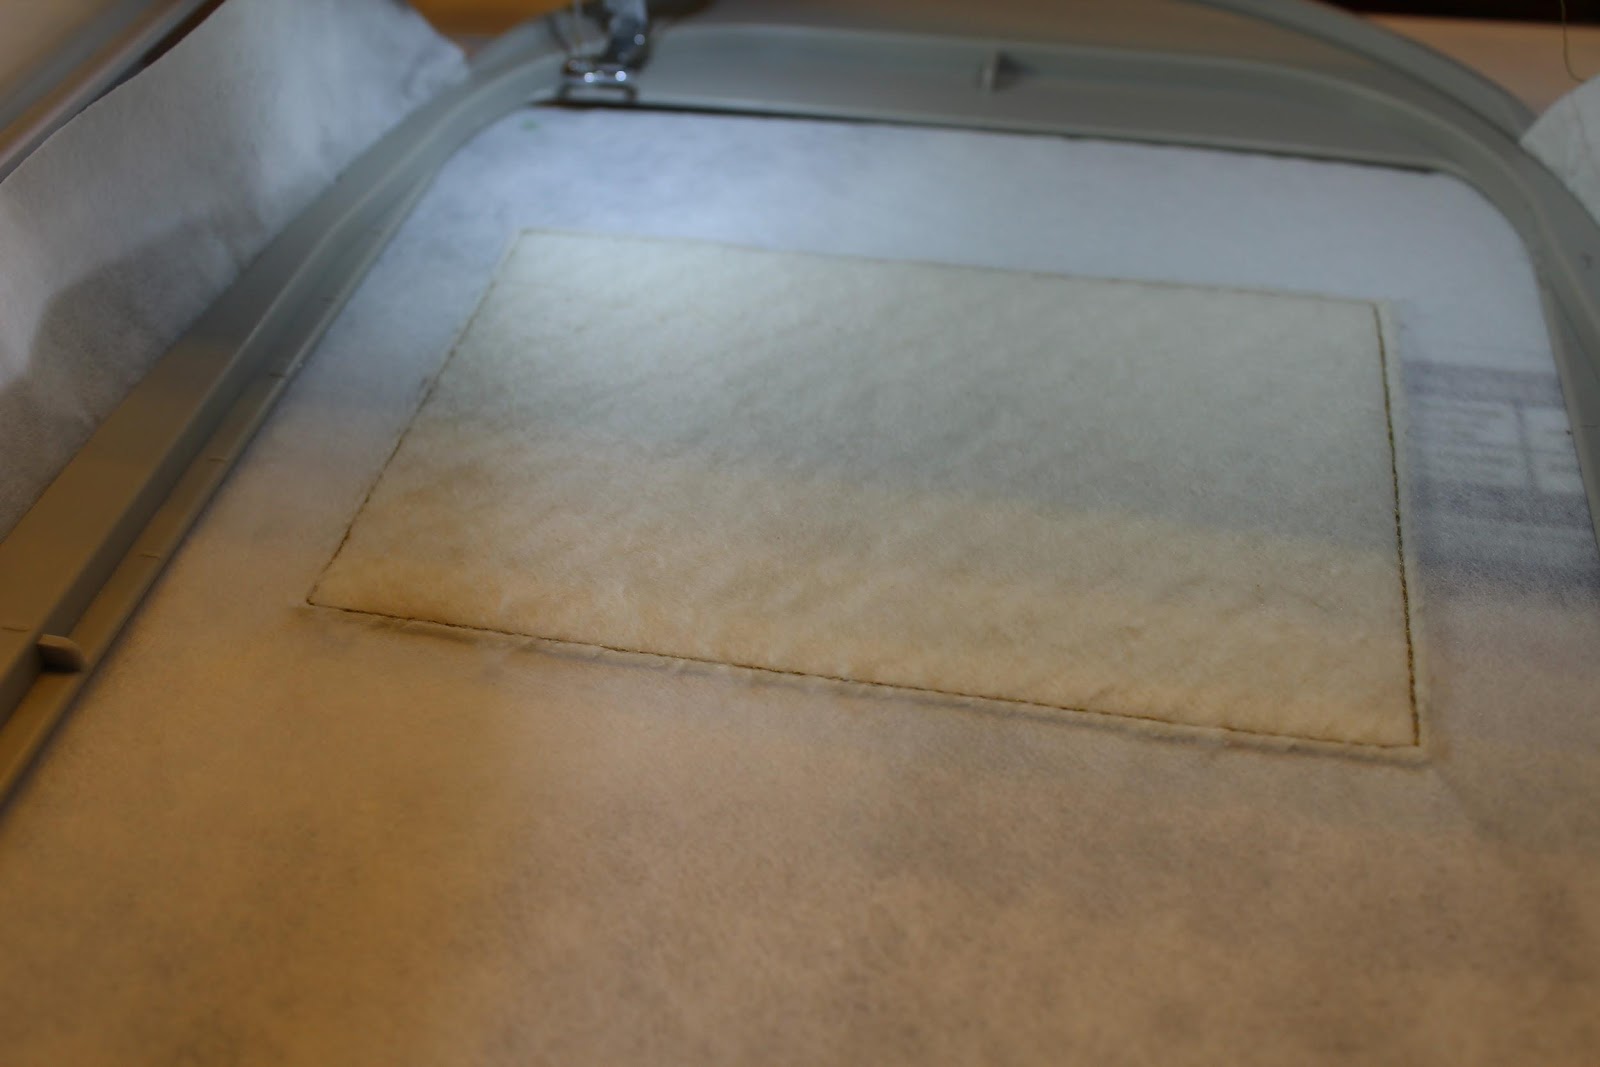
Step 4: Lay fabric on top of trimmed batting and stitch the tack down.
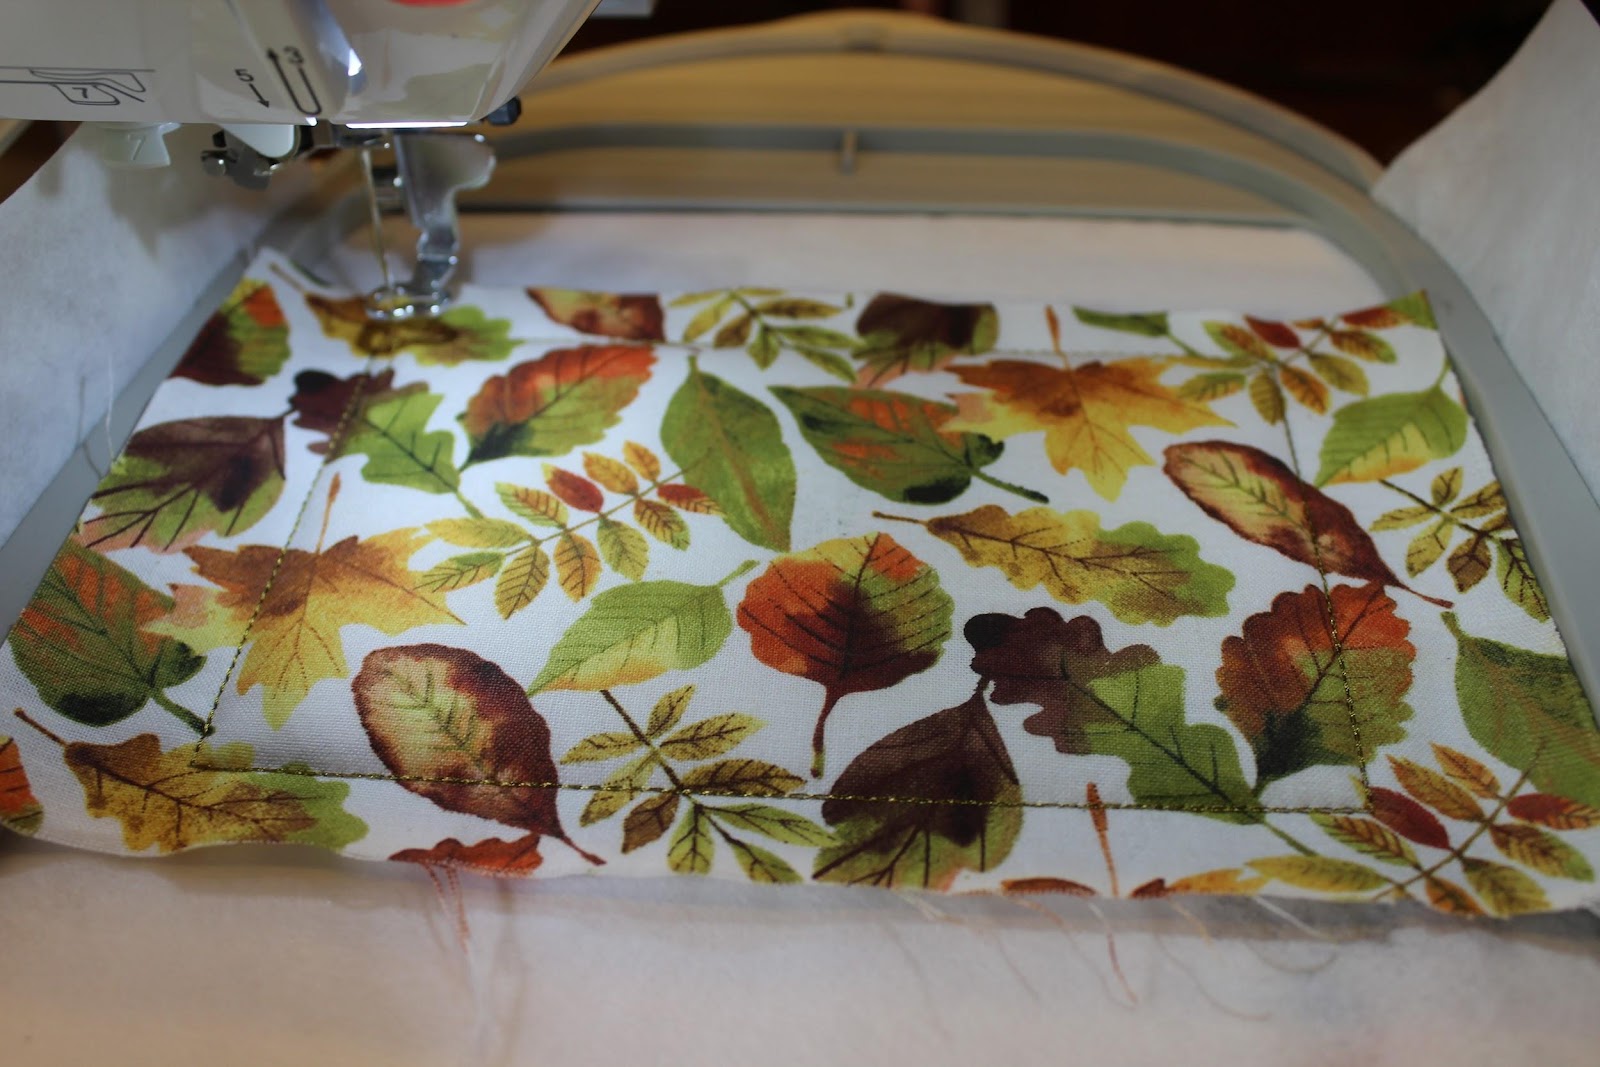
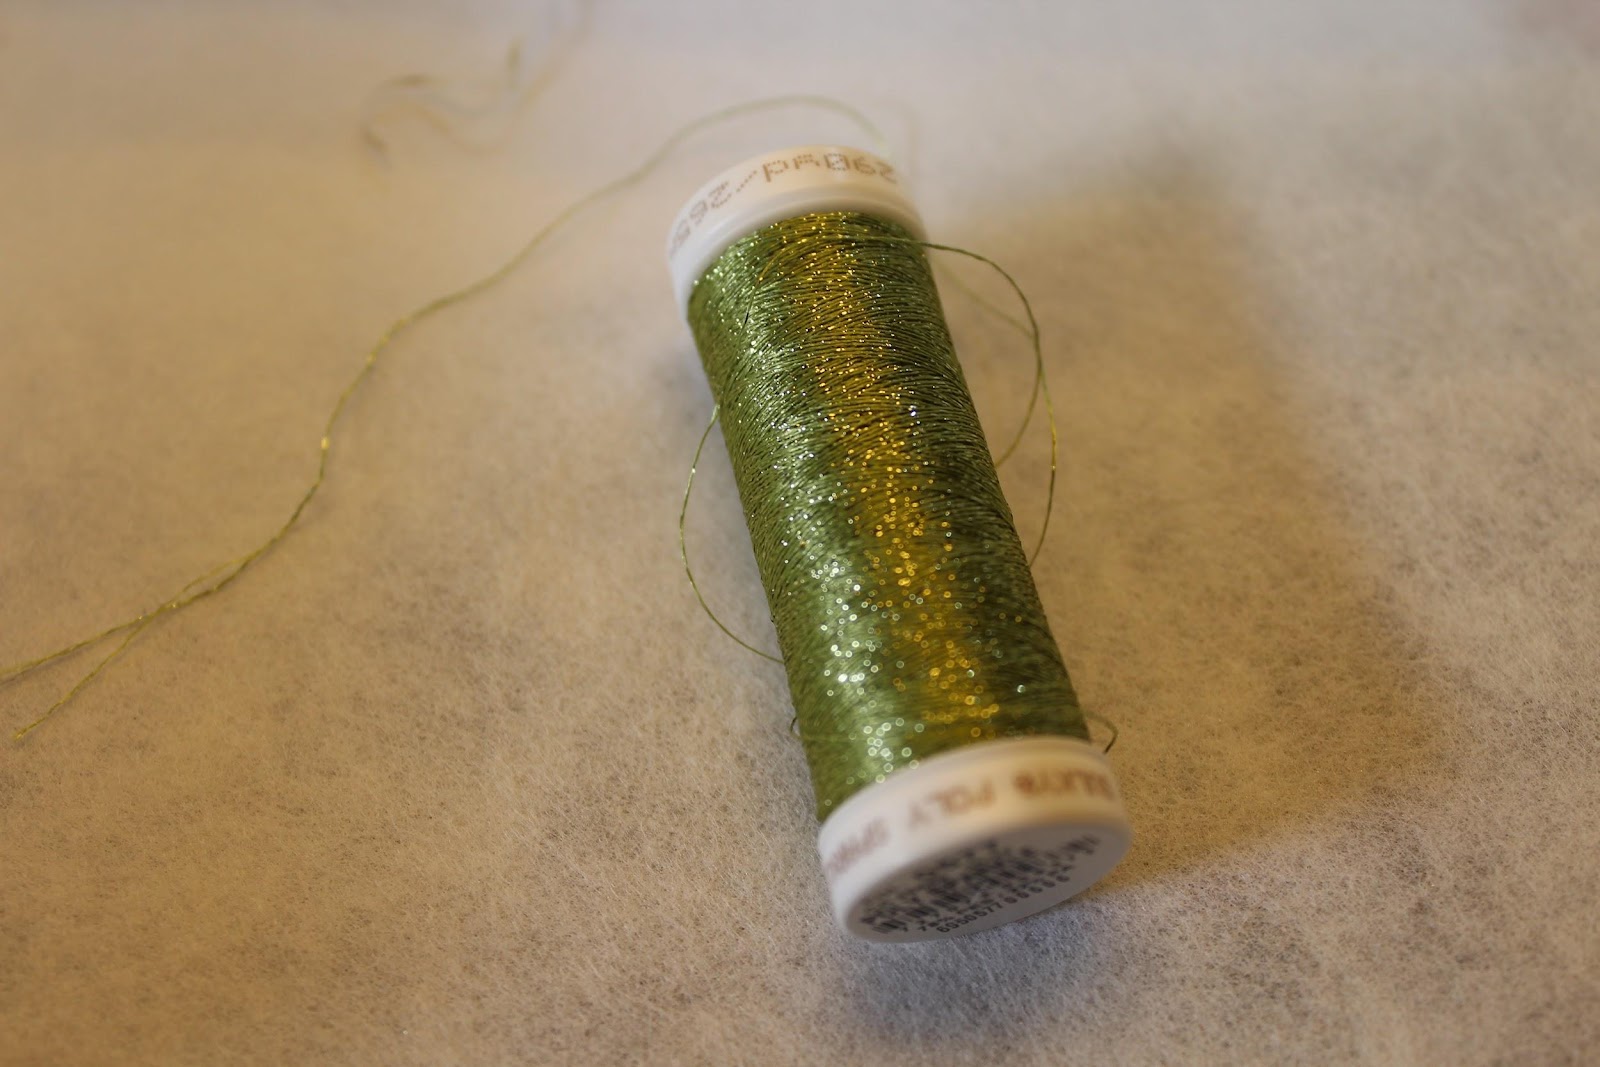
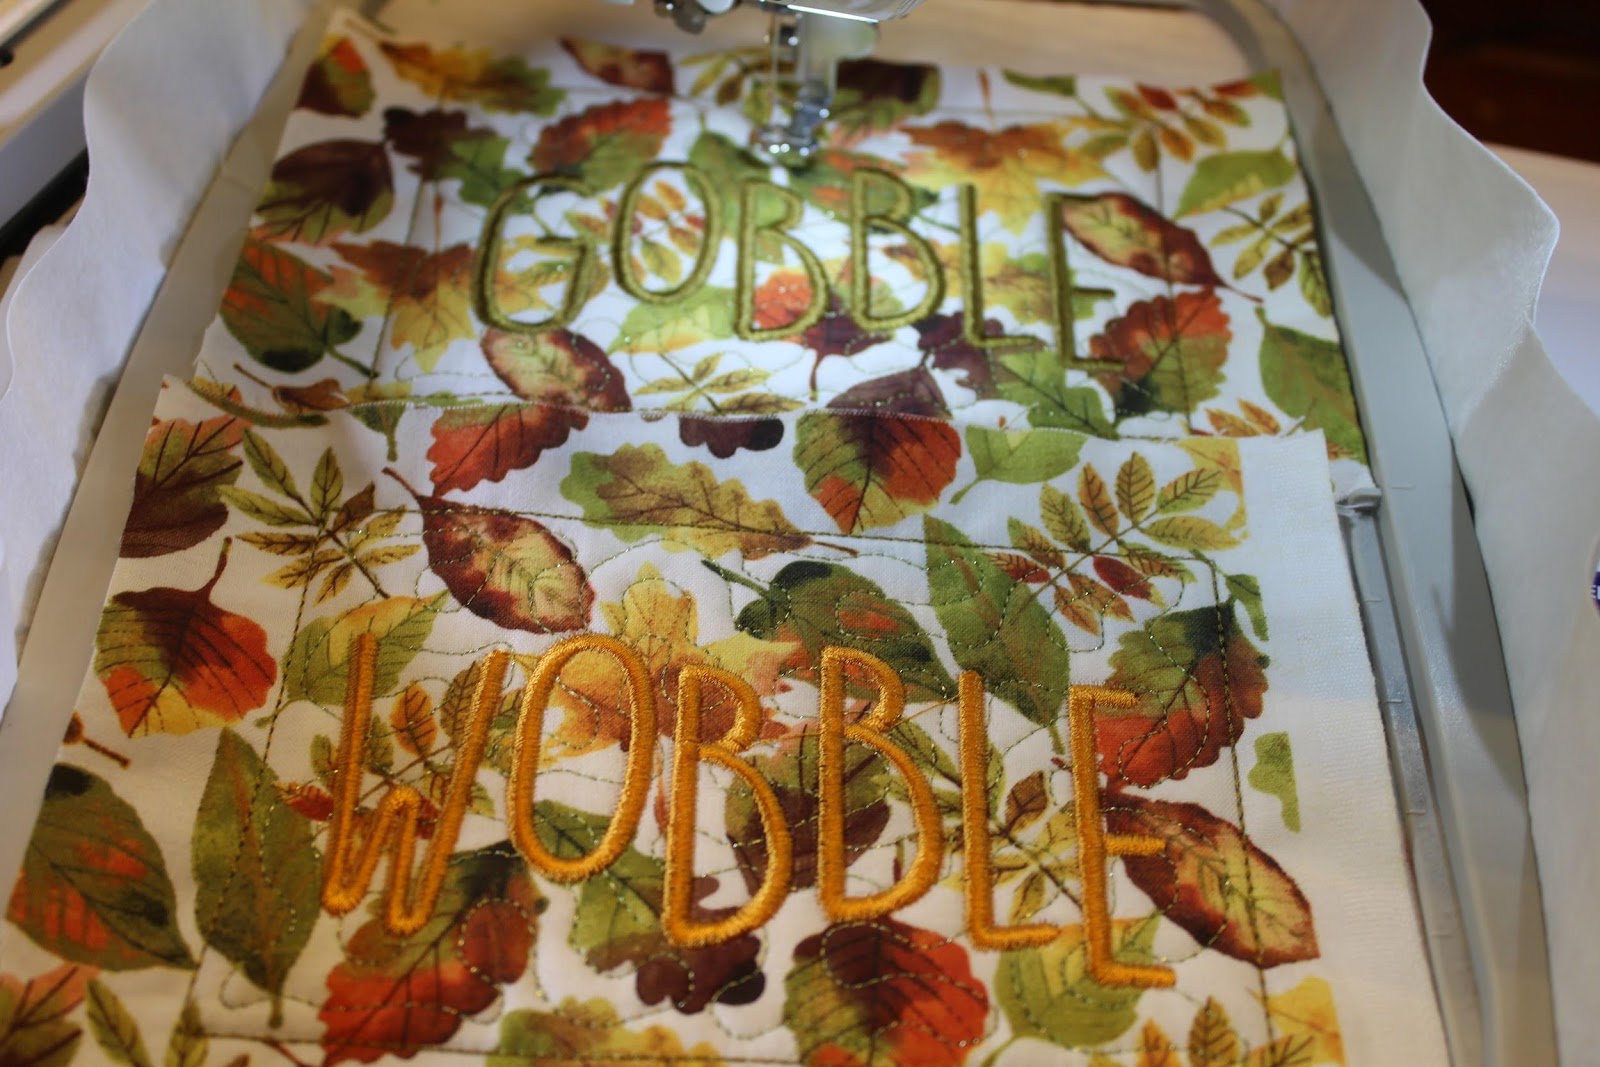
Step 5: Stitch quilting stitches (if applicable). I LOVE using metallic/specialty thread for this step! It really makes the design pop.
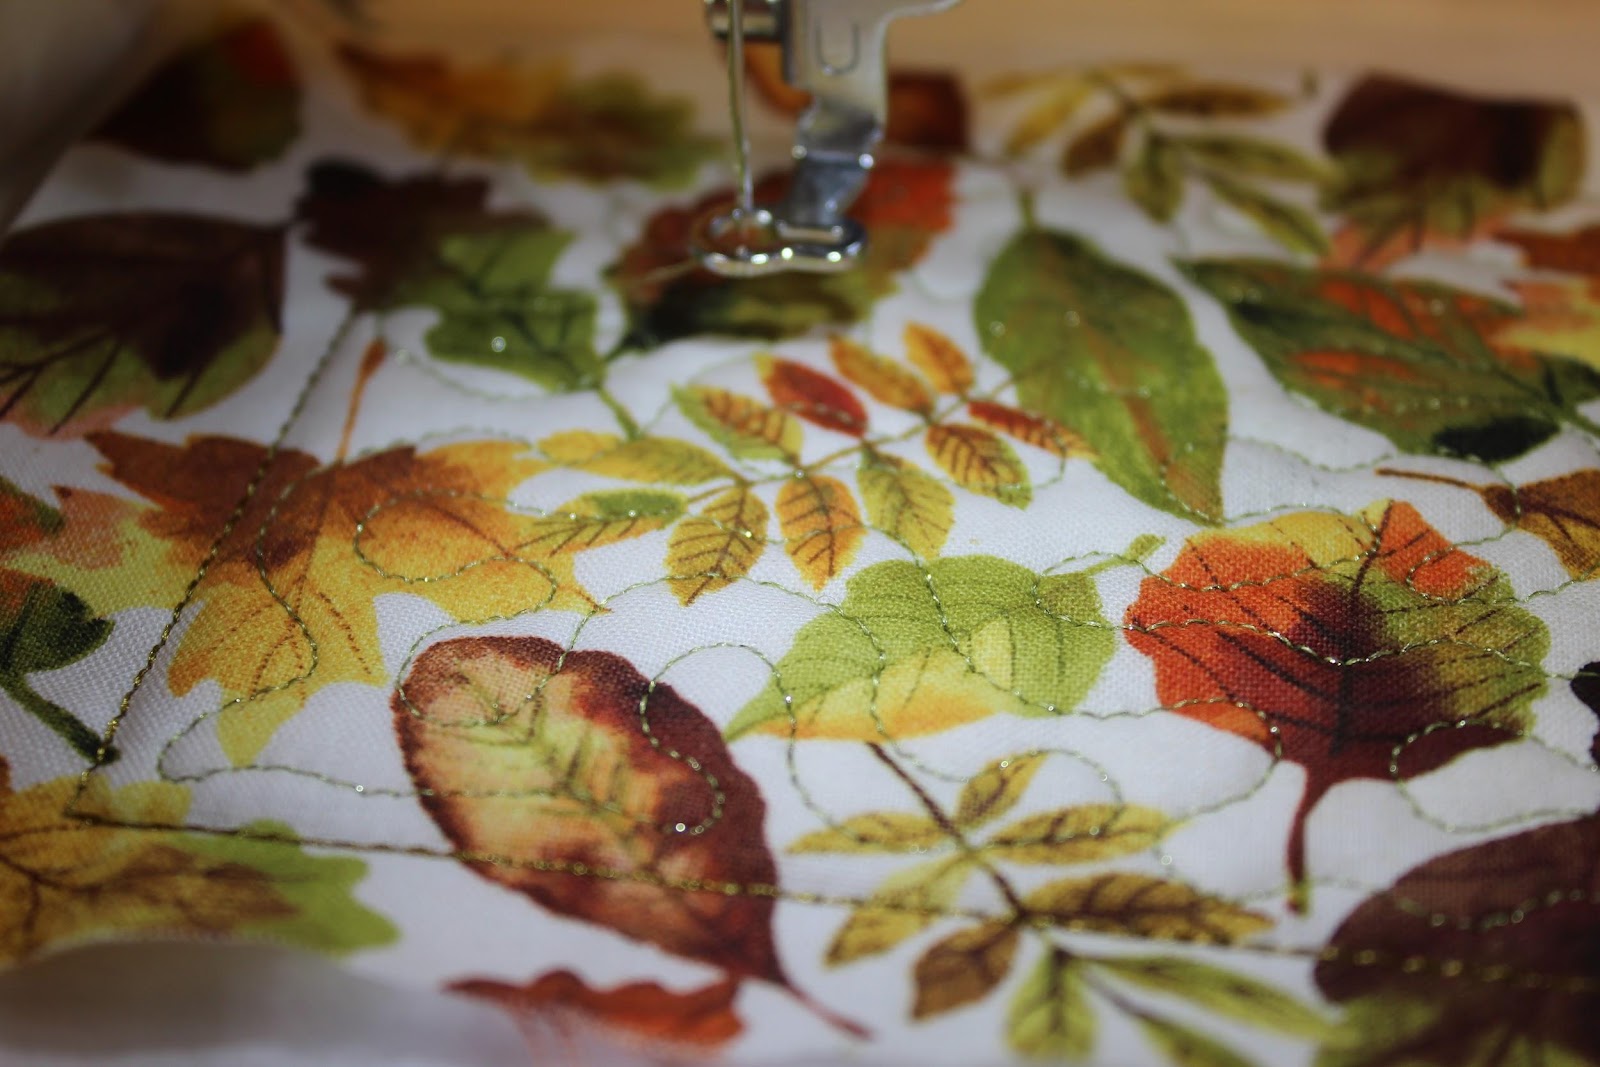
Step 6: Follow PDF instructions for applique stitches and design elements.
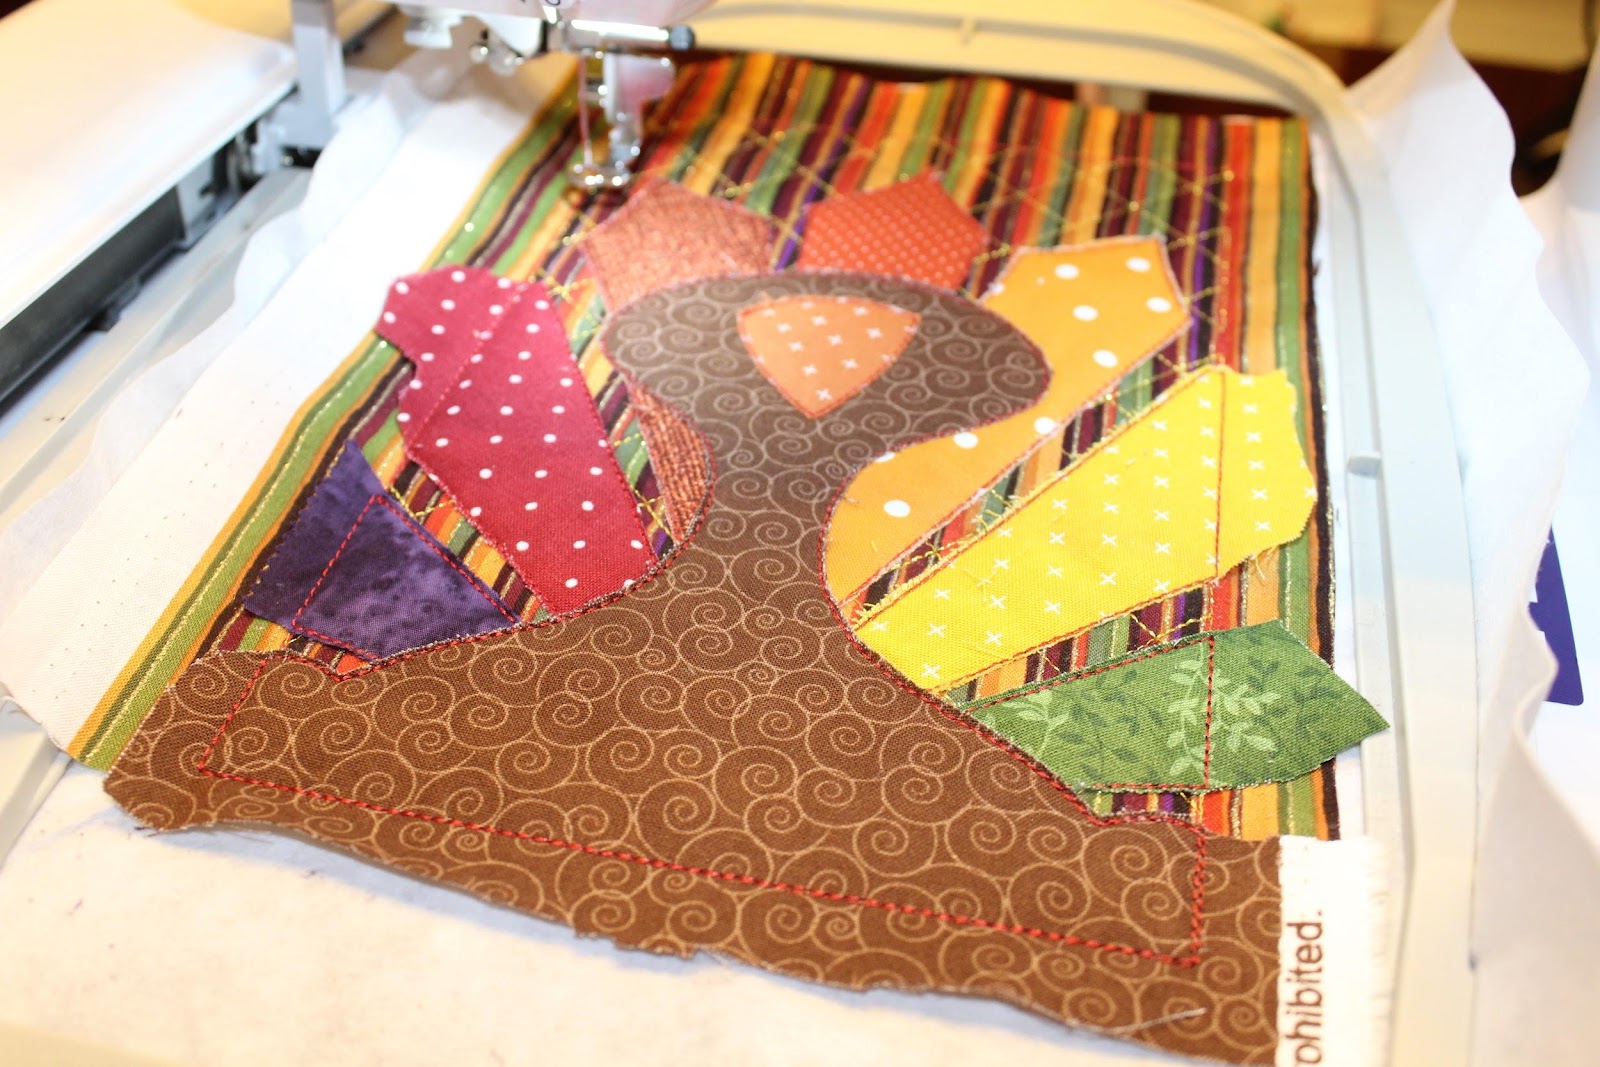
Step 7: Once all stitches are complete, remove the block from the hoop and set aside.
Step 8: Repeat steps 1–7, completing remaining placemat blocks following the PDF instructions.
After you have successfully stitched all of the blocks needed for your embroidered DIY placemats, you are ready to move on to the finishing and binding. Do not let this part intimidate you! I am very much a beginner seamstress when it comes to machine sewing, but I am able to successfully complete the binding process every time. Becky has two wonderful tutorials (here and here) on how to finish your embroidered placemats, and you can reference the included PDF instructions.
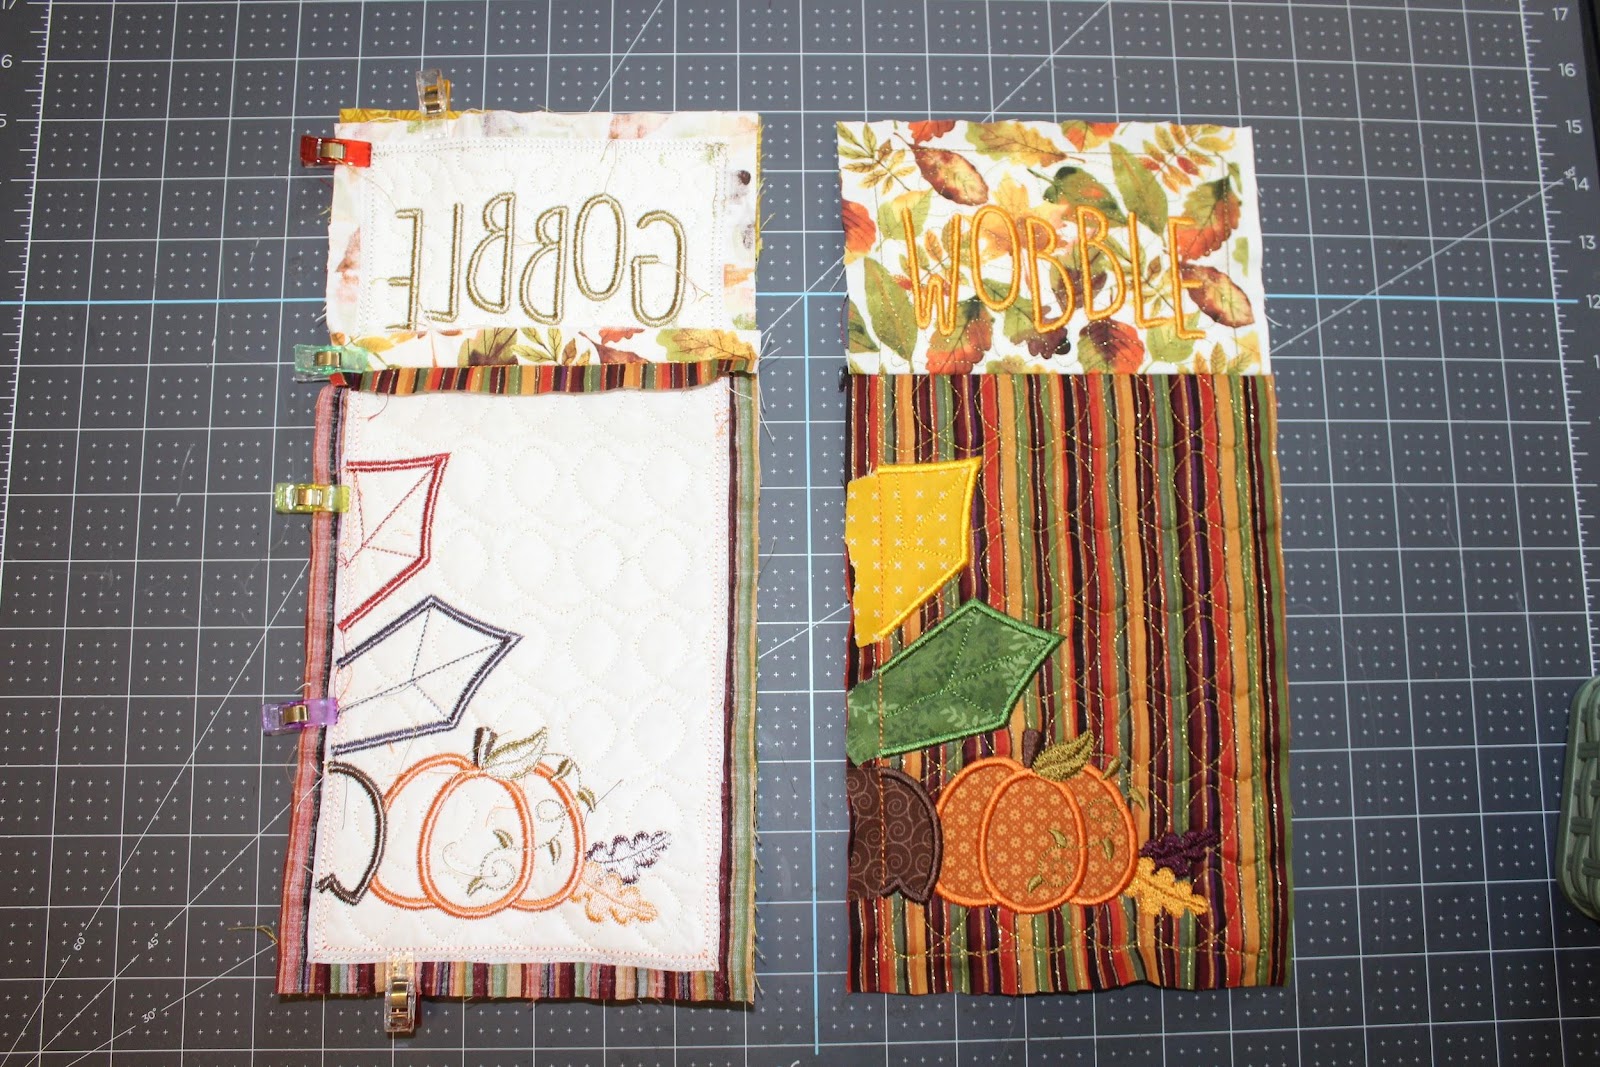
Step 9: Cut away excess stabilizer from your placemat blocks and trim the edges of the blocks ½” from the outer stitching line.
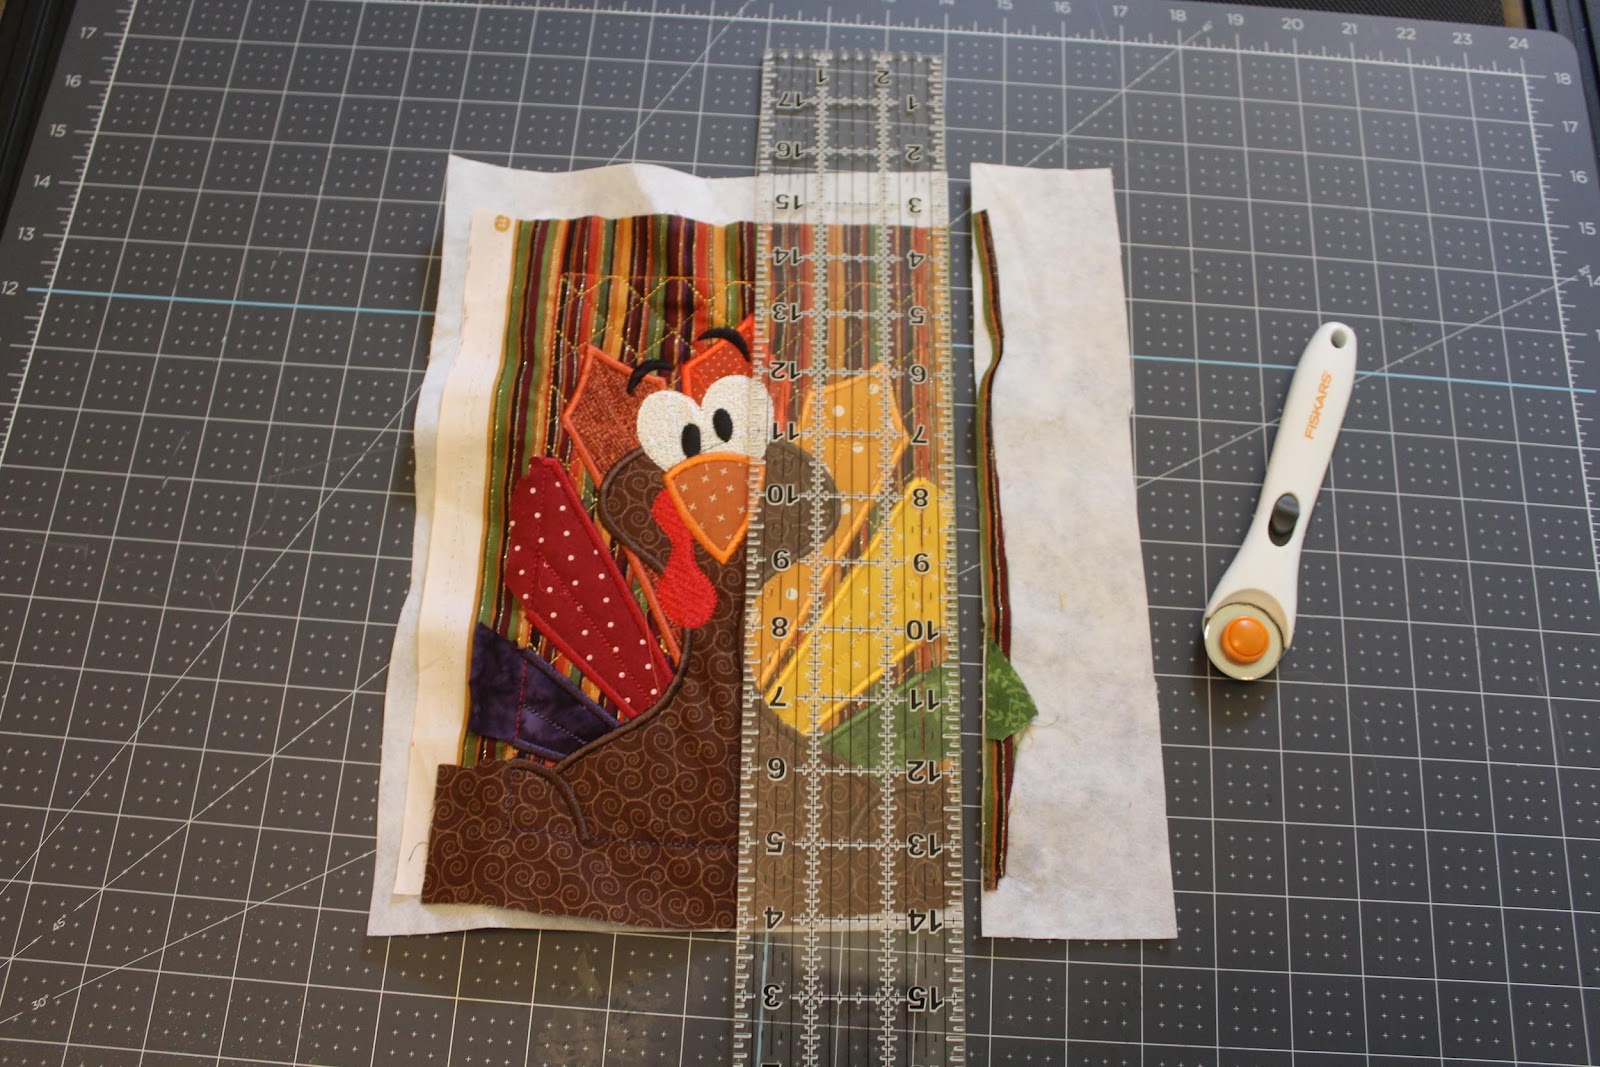
Step 10: Lay out your placemat blocks according to your PDF instructions.
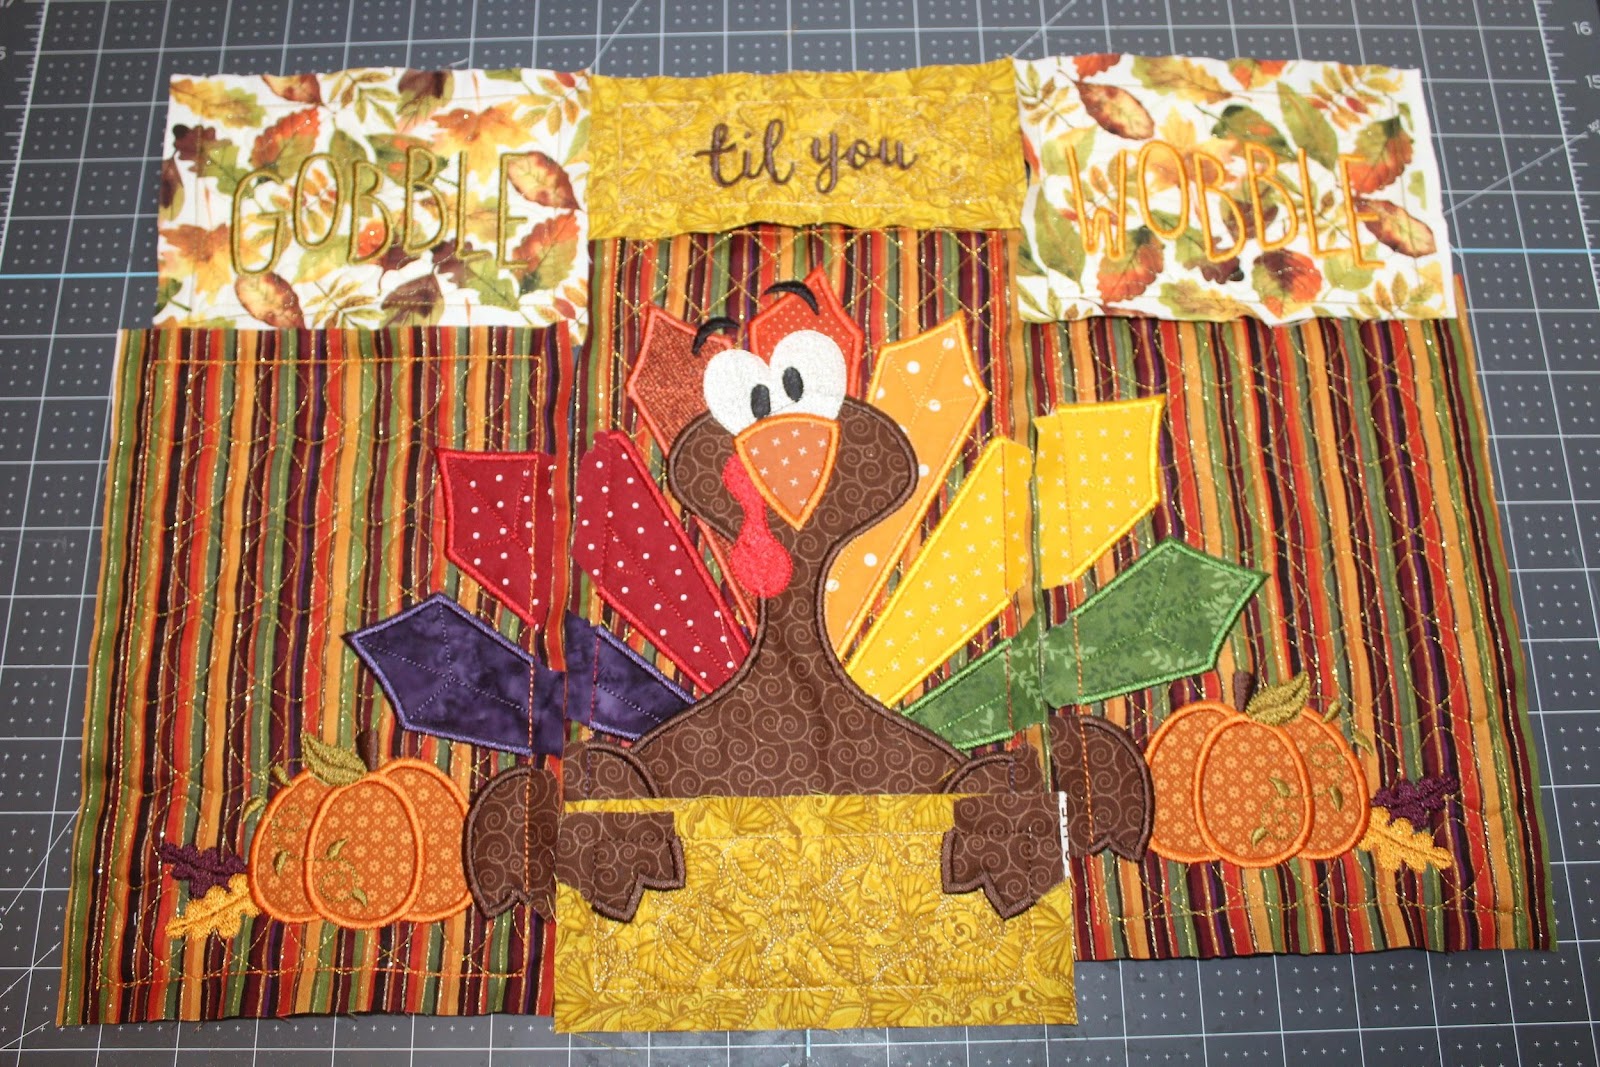
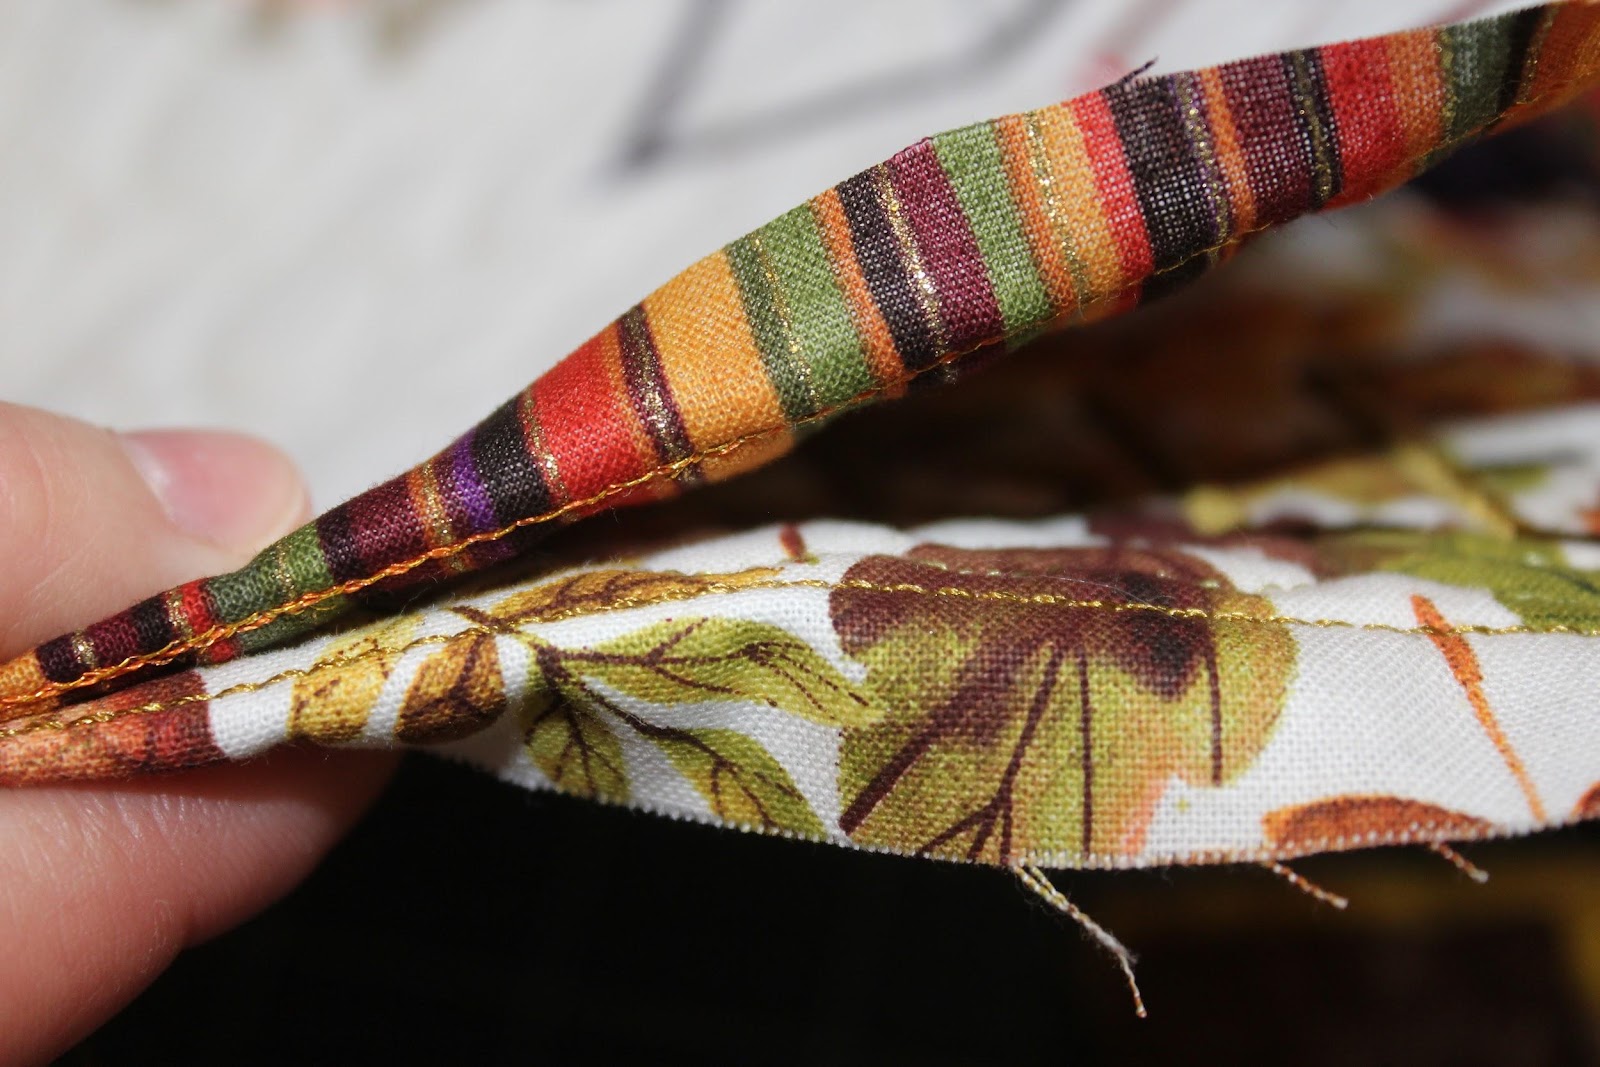
Step 11: Following the directions in your PDF, you will begin stitching the placemat blocks together by lining up the outermost stitching lines, securing using pins and clips. It is very important that you follow the directions included with your specific design’s PDF so your placemat blocks align correctly! Each placemat has its own unique layout, so your alignment will likely be different depending on the design you select, the number of blocks, etc.
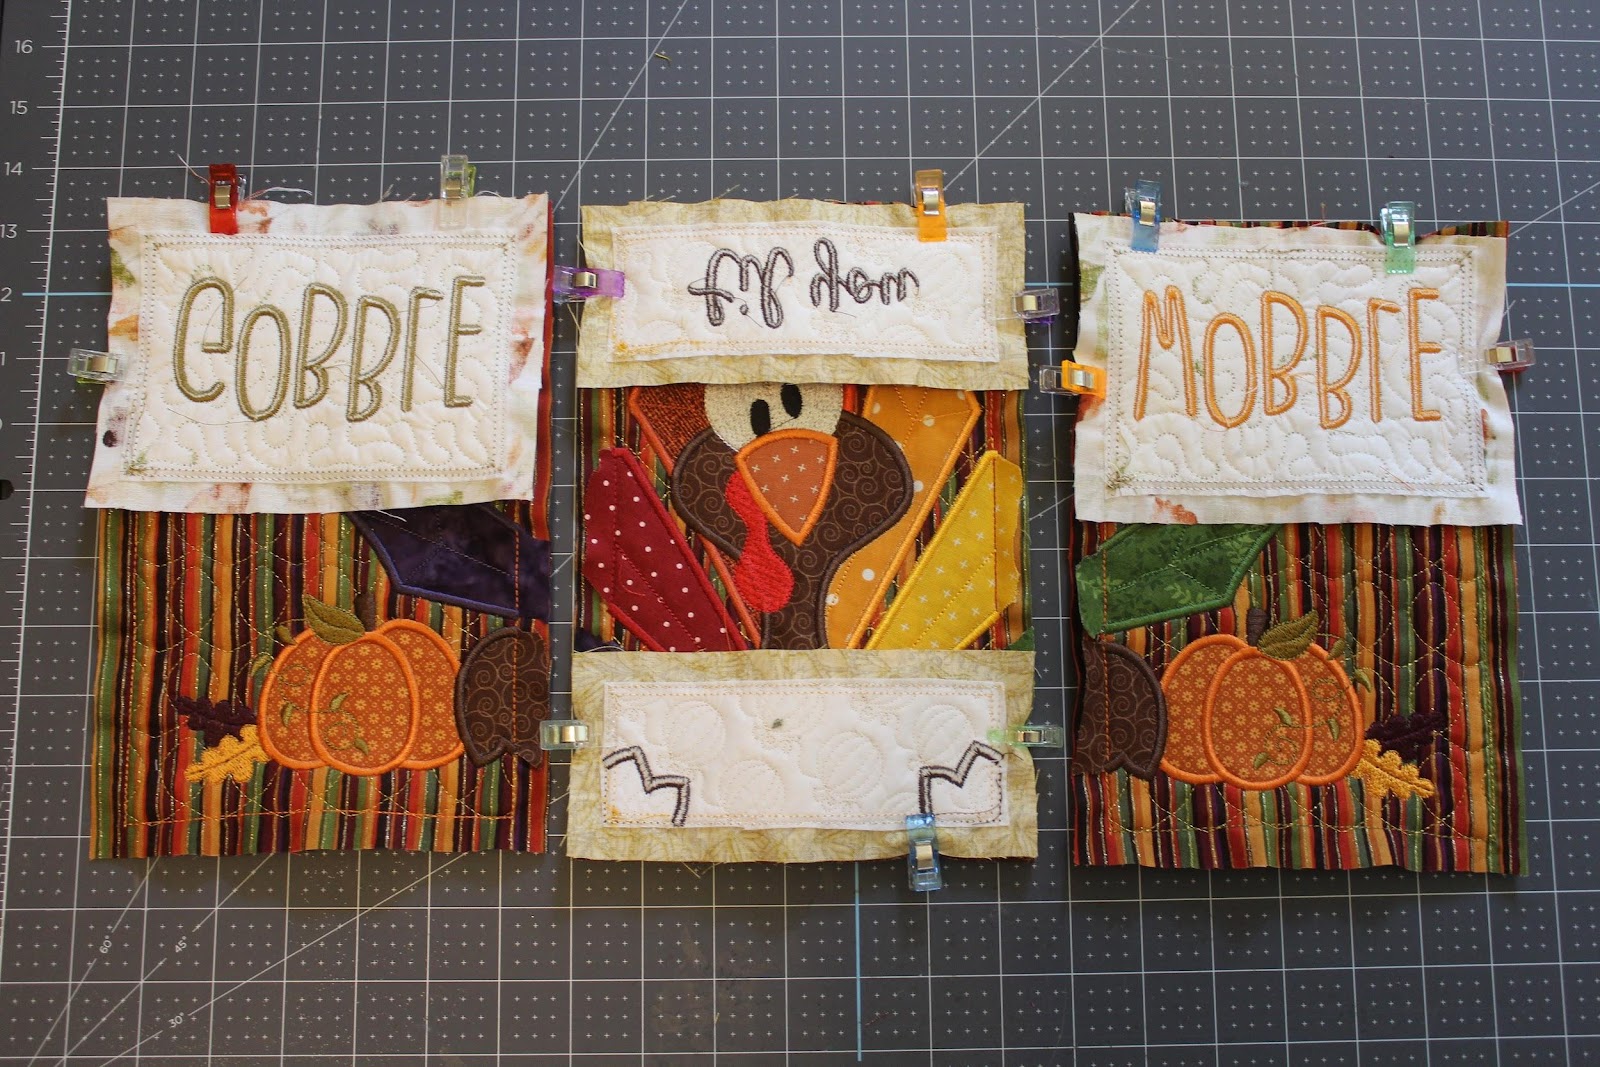
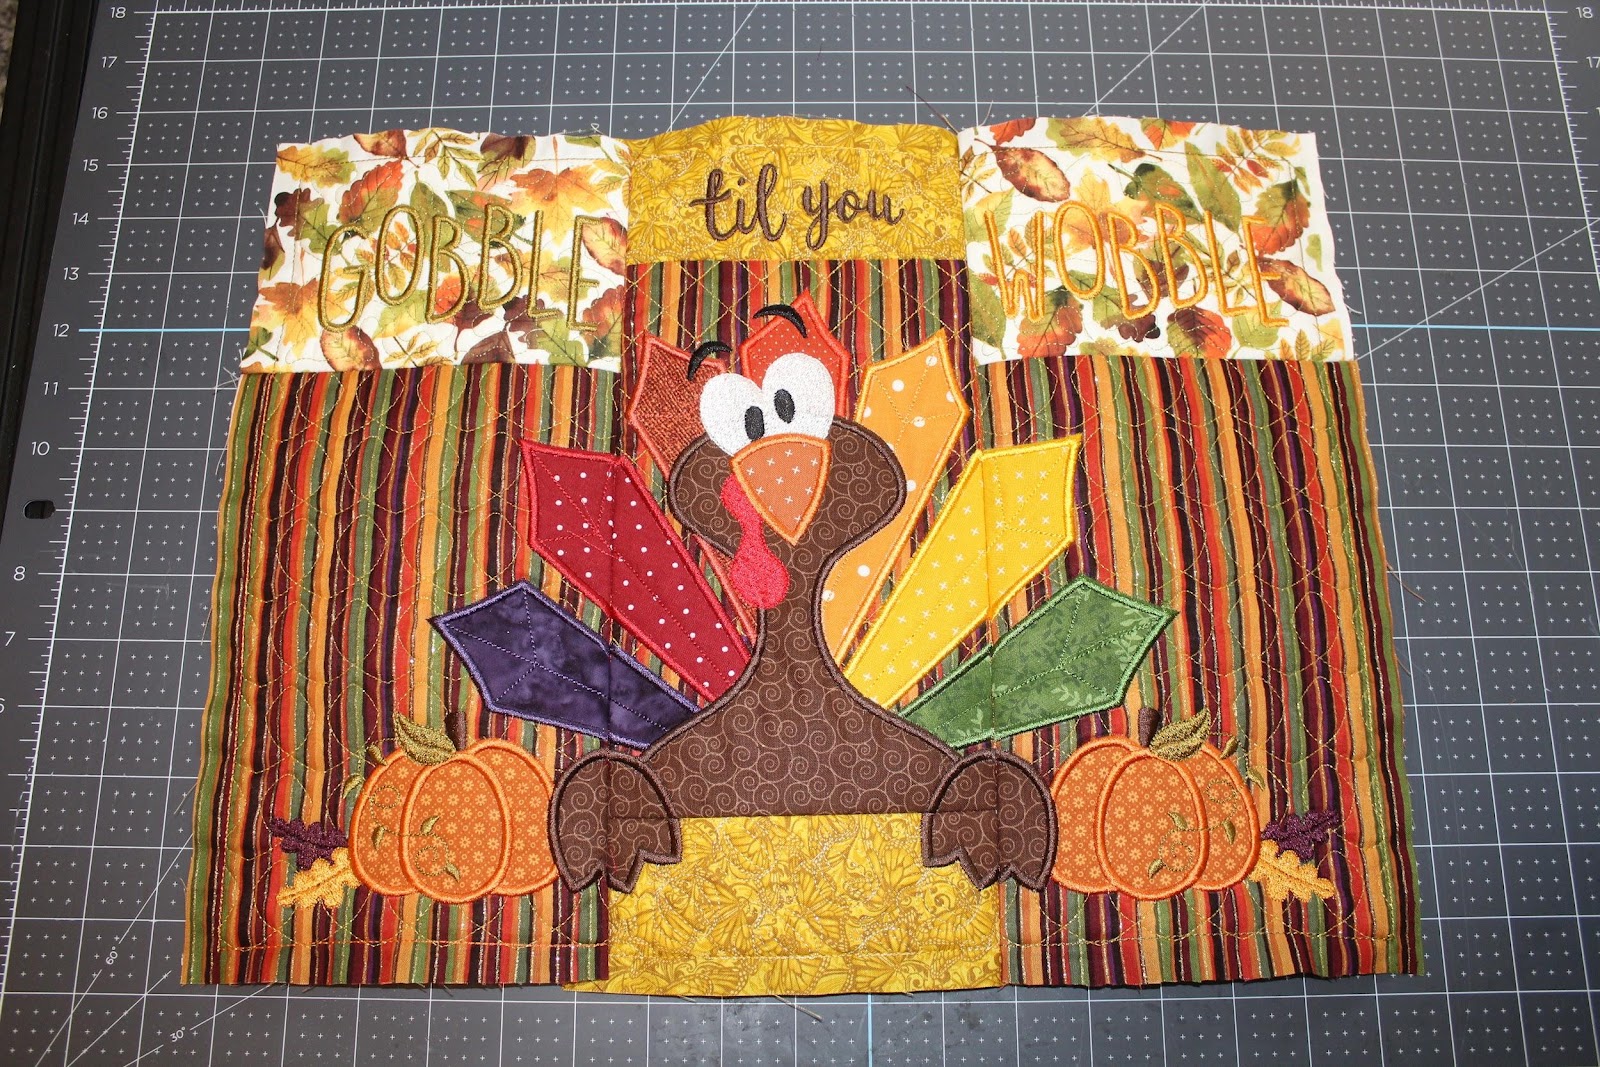
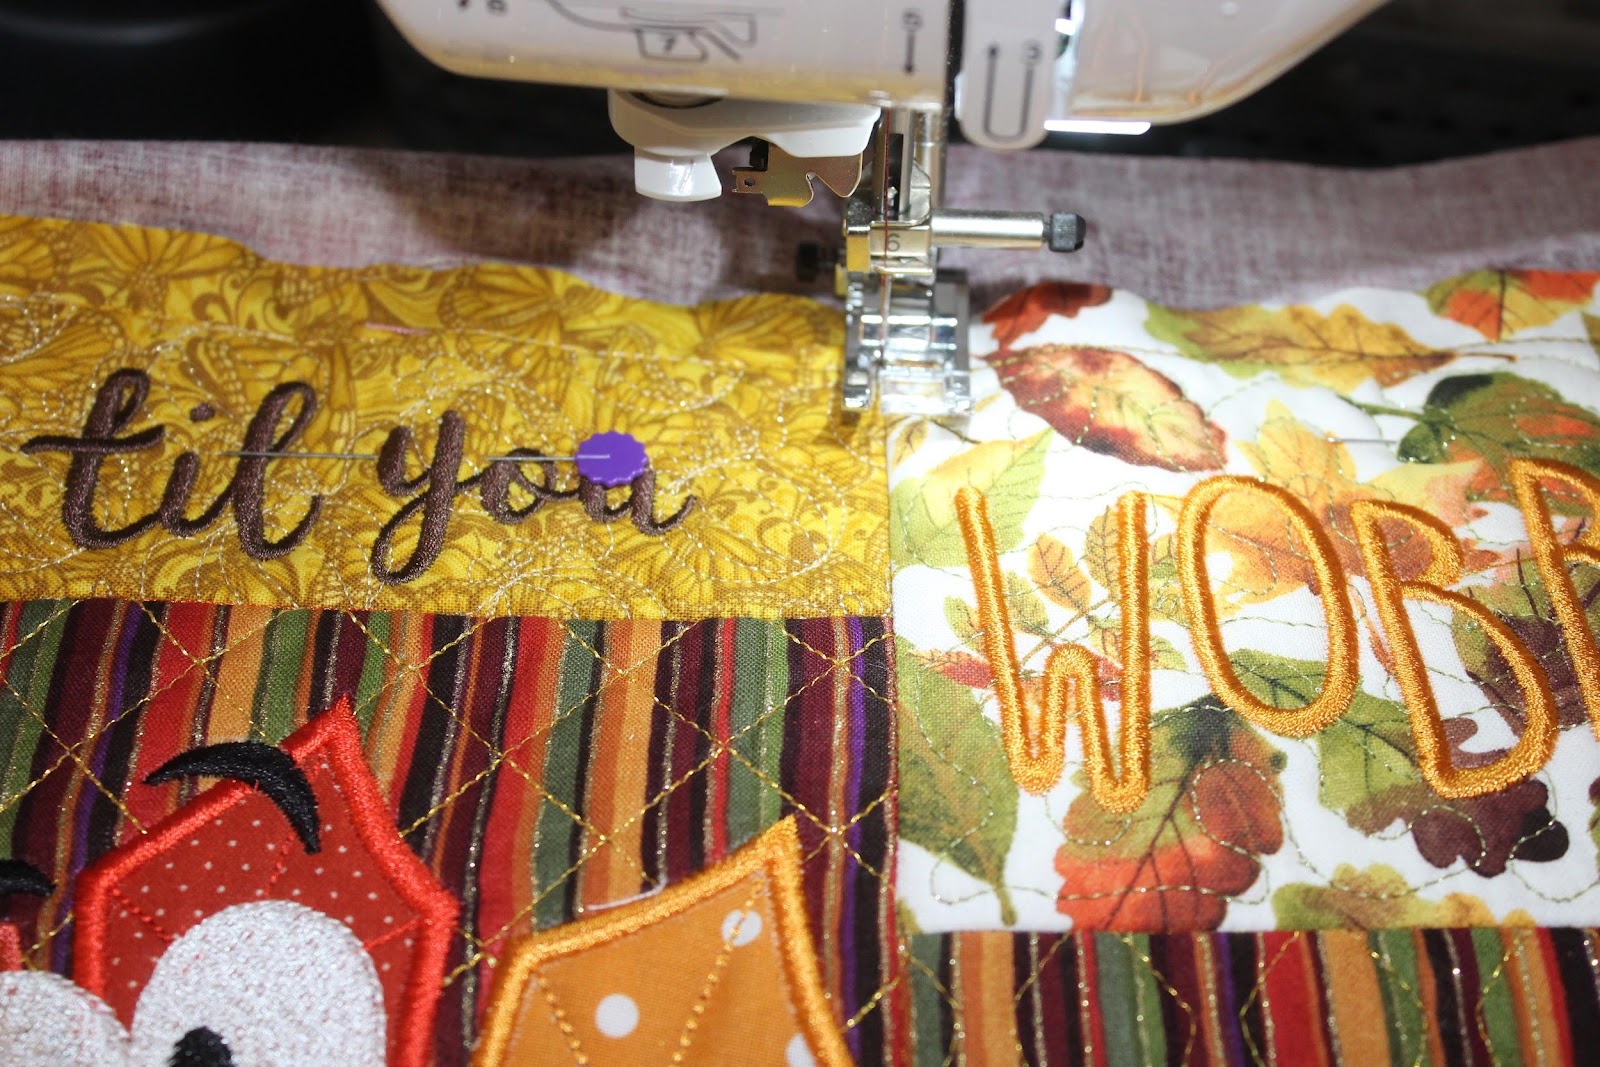
Step 12: Once the front of your placemat is completely stitched together, you are ready to add your backing. Cut the backing according to the sizing on the fabric cutting chart from your PDF instructions, making sure to leave at least 1.25” excess around each edge. Lay your placemat on top of the backing, wrong sides together, and pin around the edges and seams of the placemat.

Step 13: Using the stitch in the ditch method, sew each seam line to the backing. This secures the front of your placemat to your backing. You will see the bobbin thread on the back of your placemat. If you do not want your bobbin thread to show on the back of your placemat, you can choose a coordinating bobbin/fabric color combination.
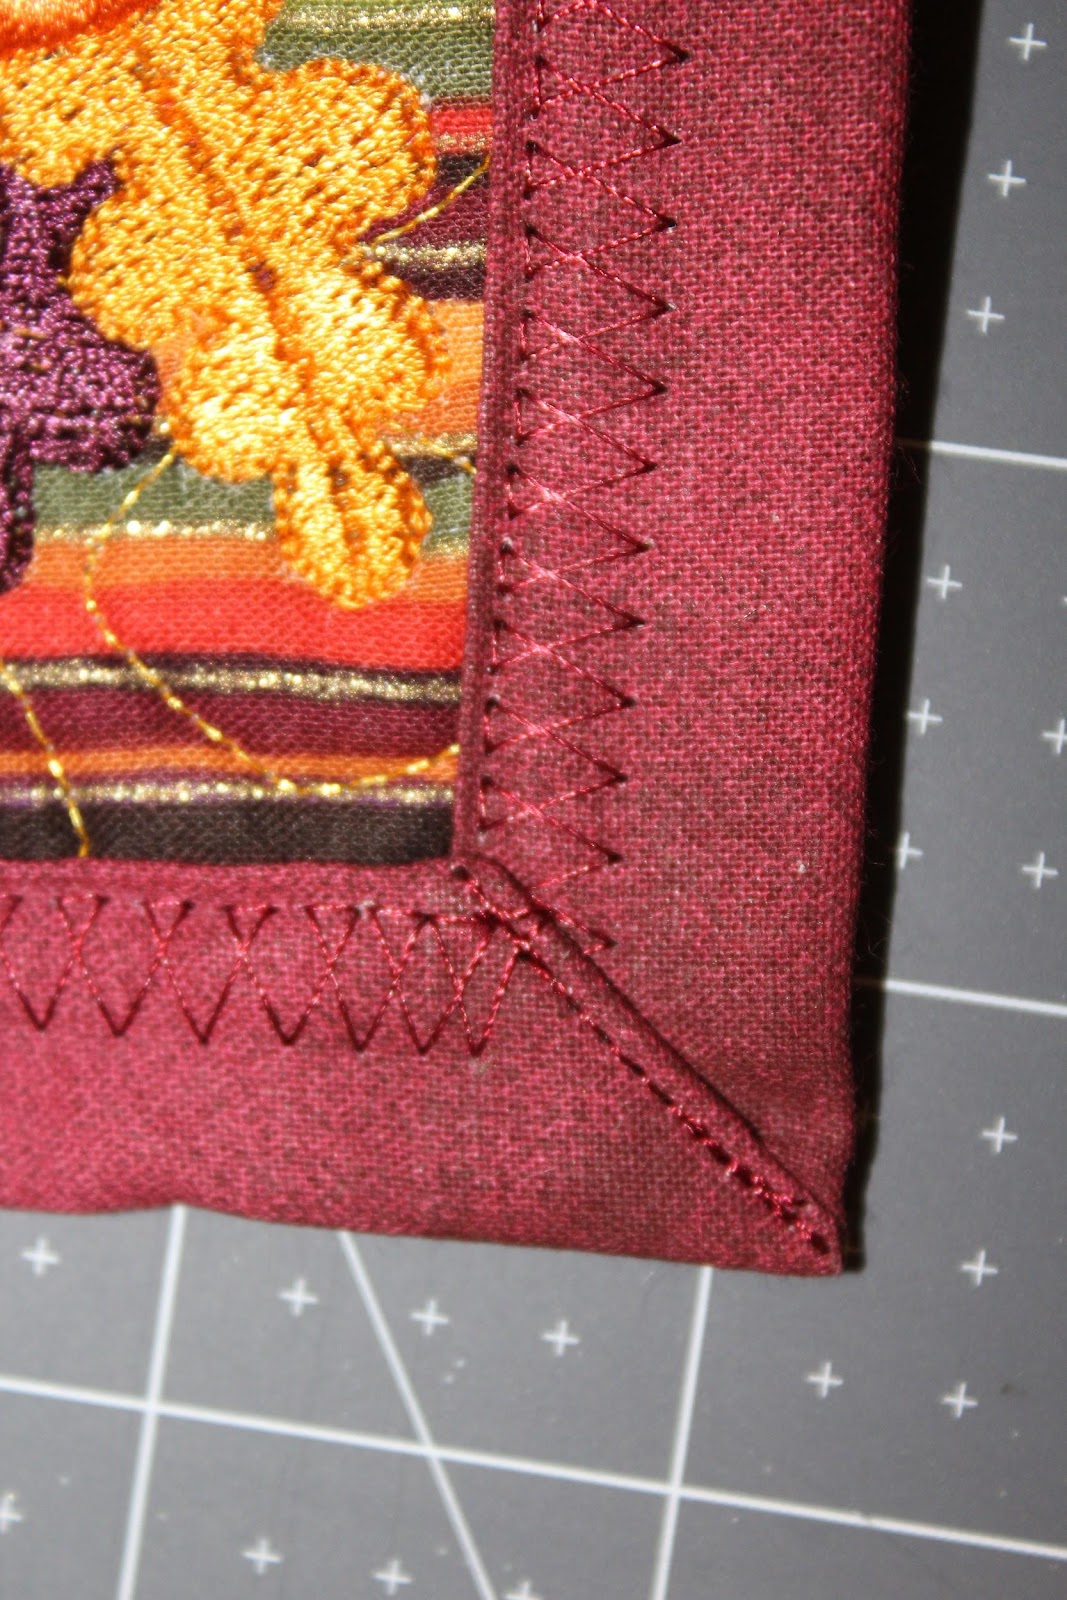
Step 14: The final step for your embroidered placemat is to bind the edges. There are many ways you can complete the binding. JuJu recommends this tutorial for sewing mitered corners. Experiment with what works best for you and complete your final stitches. Trim any long threads, iron your placemats, and you are ready to set the table!
DIY Placemat Ideas
Embroidered placements from DBJJ truly are one of my favorite projects to make! Once you make one set, you will be hooked! Additionally, I have enjoyed experimenting with personalization and customization over the years by adding my daughter’s name and some of my favorite seasonal DBJJ designs. This step is relatively easy but can take your placemats to the next level.
Furthermore, by using cut-away stabilizer, cotton fabric, and durable batting, I have frequently washed my placemats in my washing machine with no issues. We use our placemats daily (with a toddler, I might add), and I rotate my tablescapes out seasonally. Guests always compliment the beautiful stitch work and fun designs found on the placemats. They look as beautiful today as when I stitched my first set nearly three years ago!
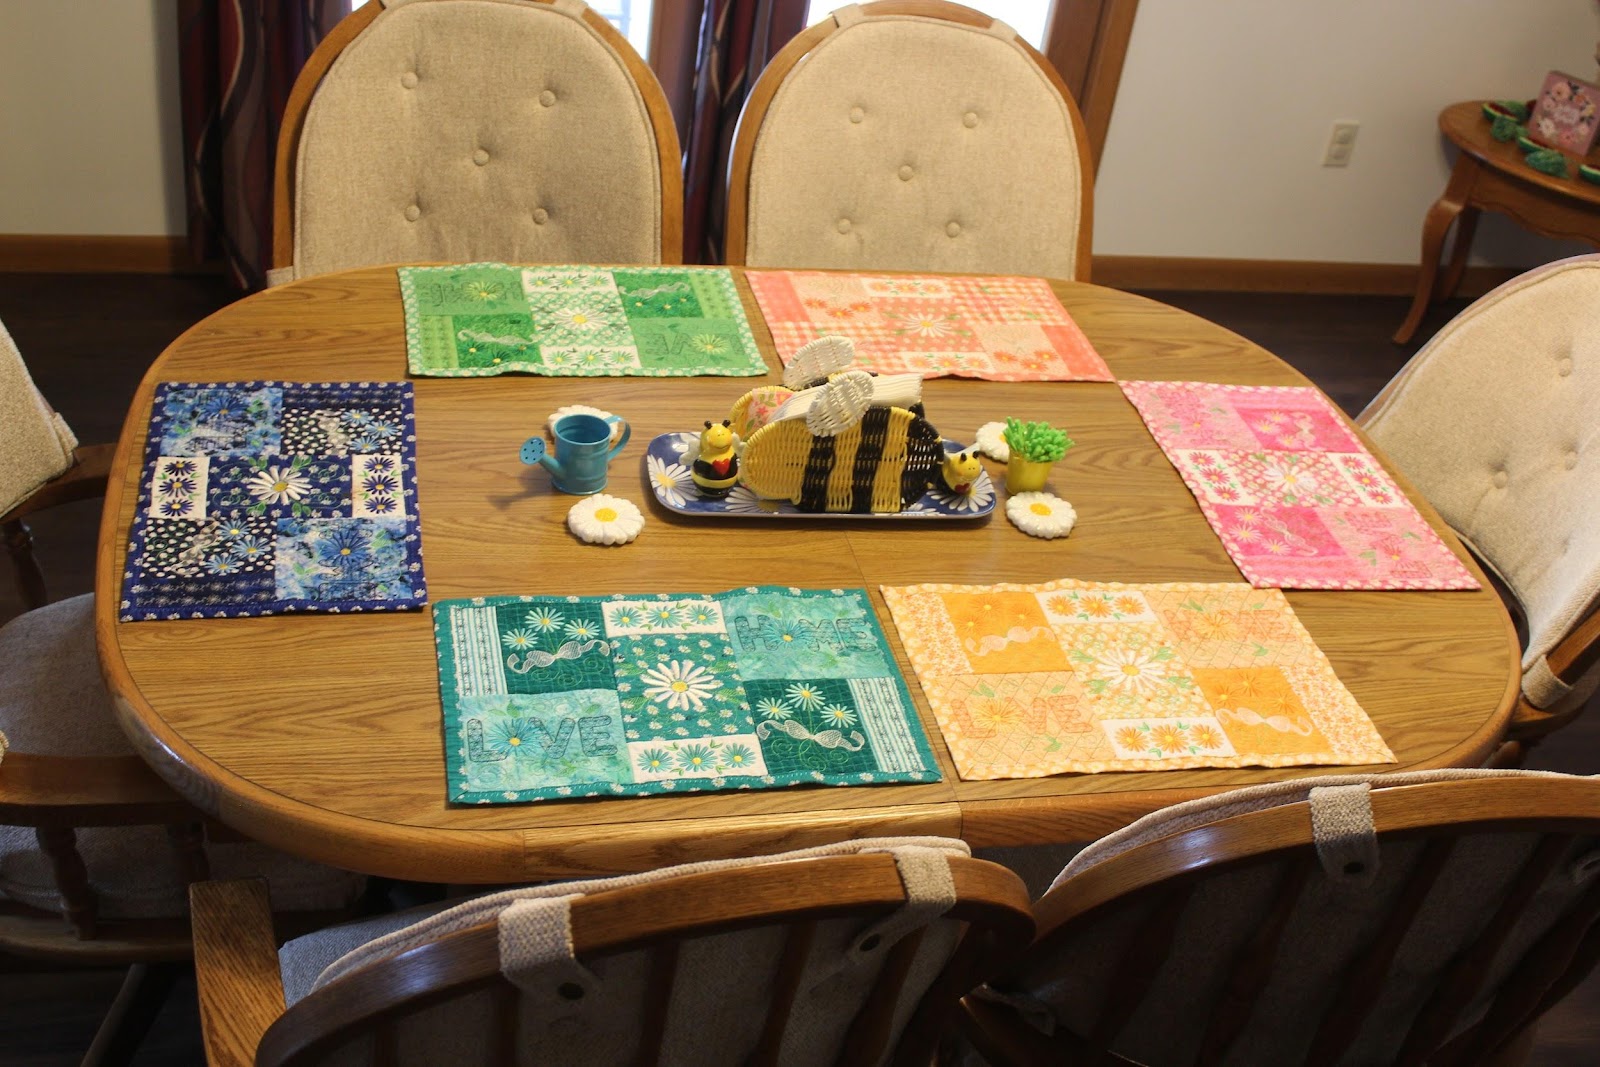
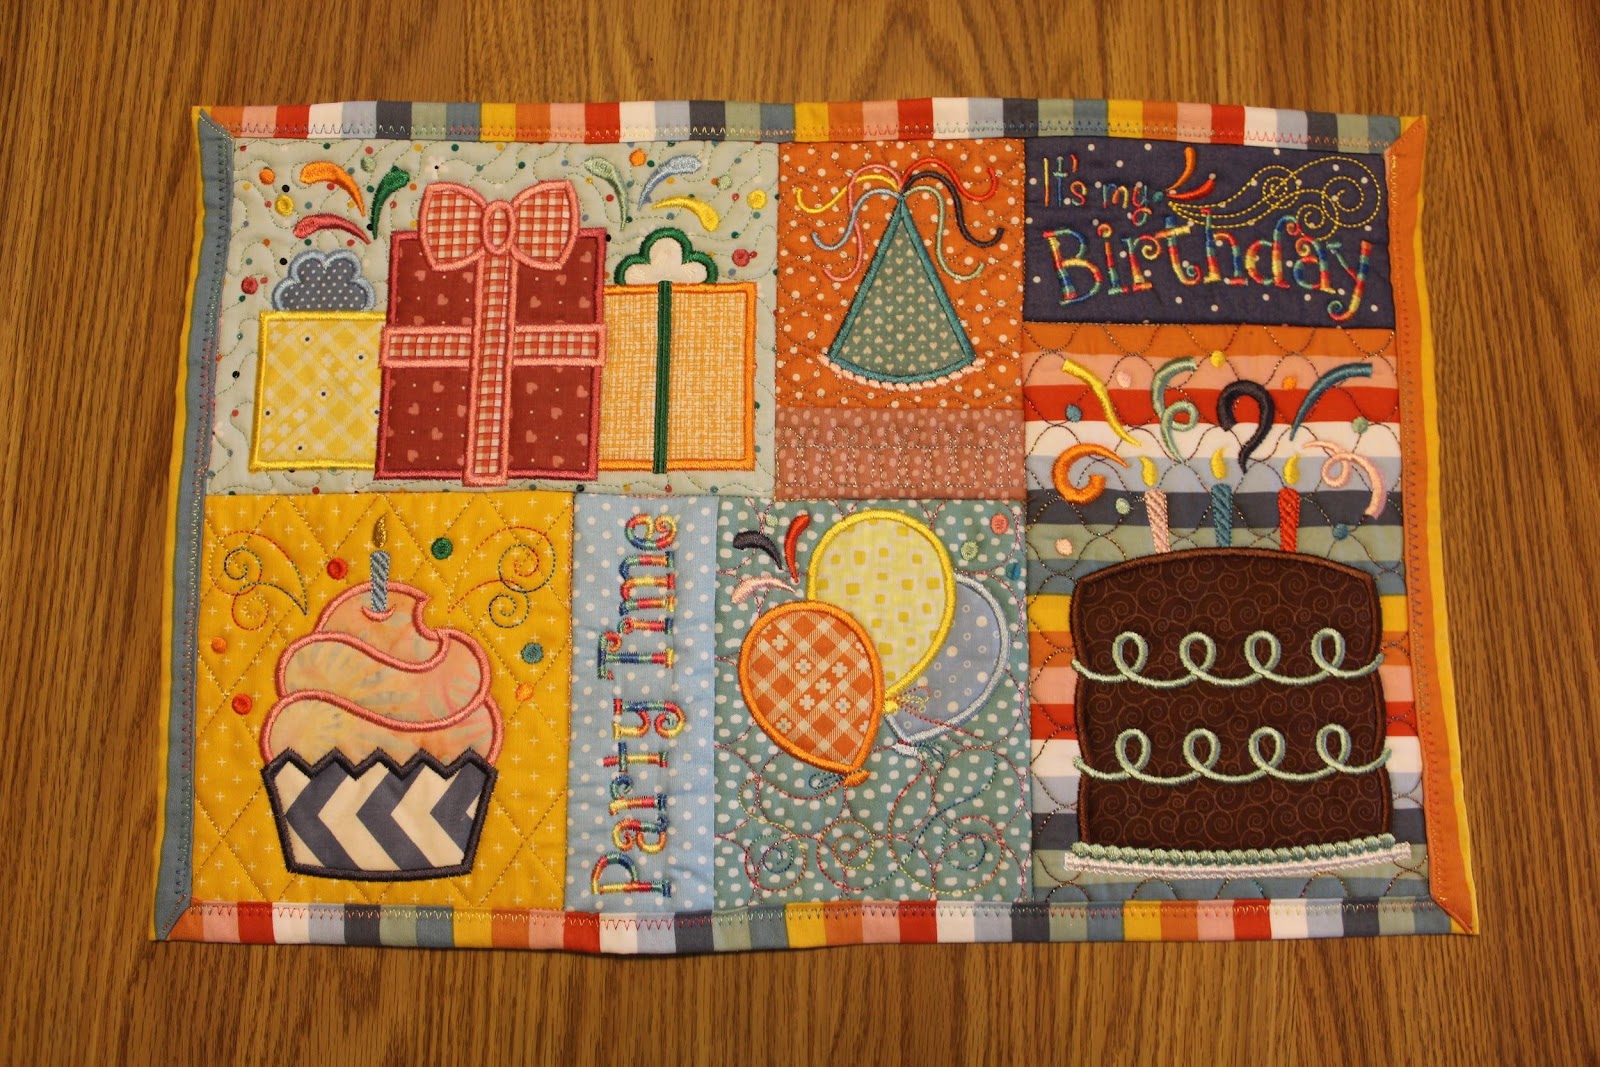
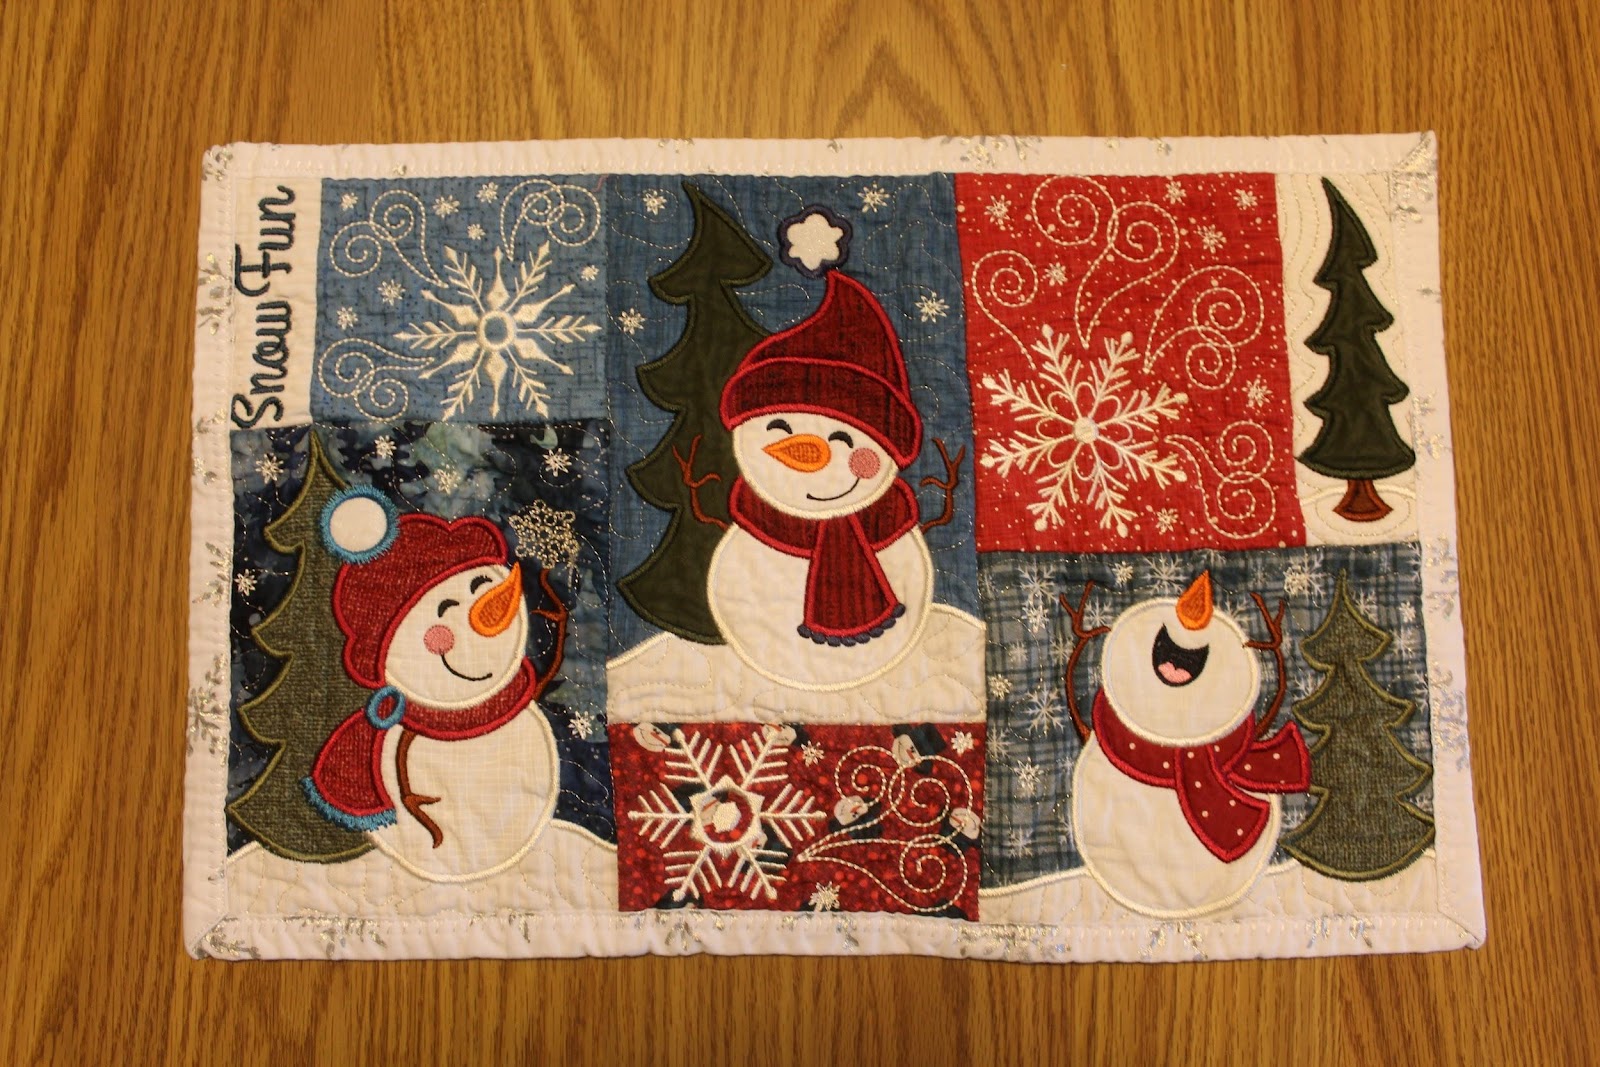
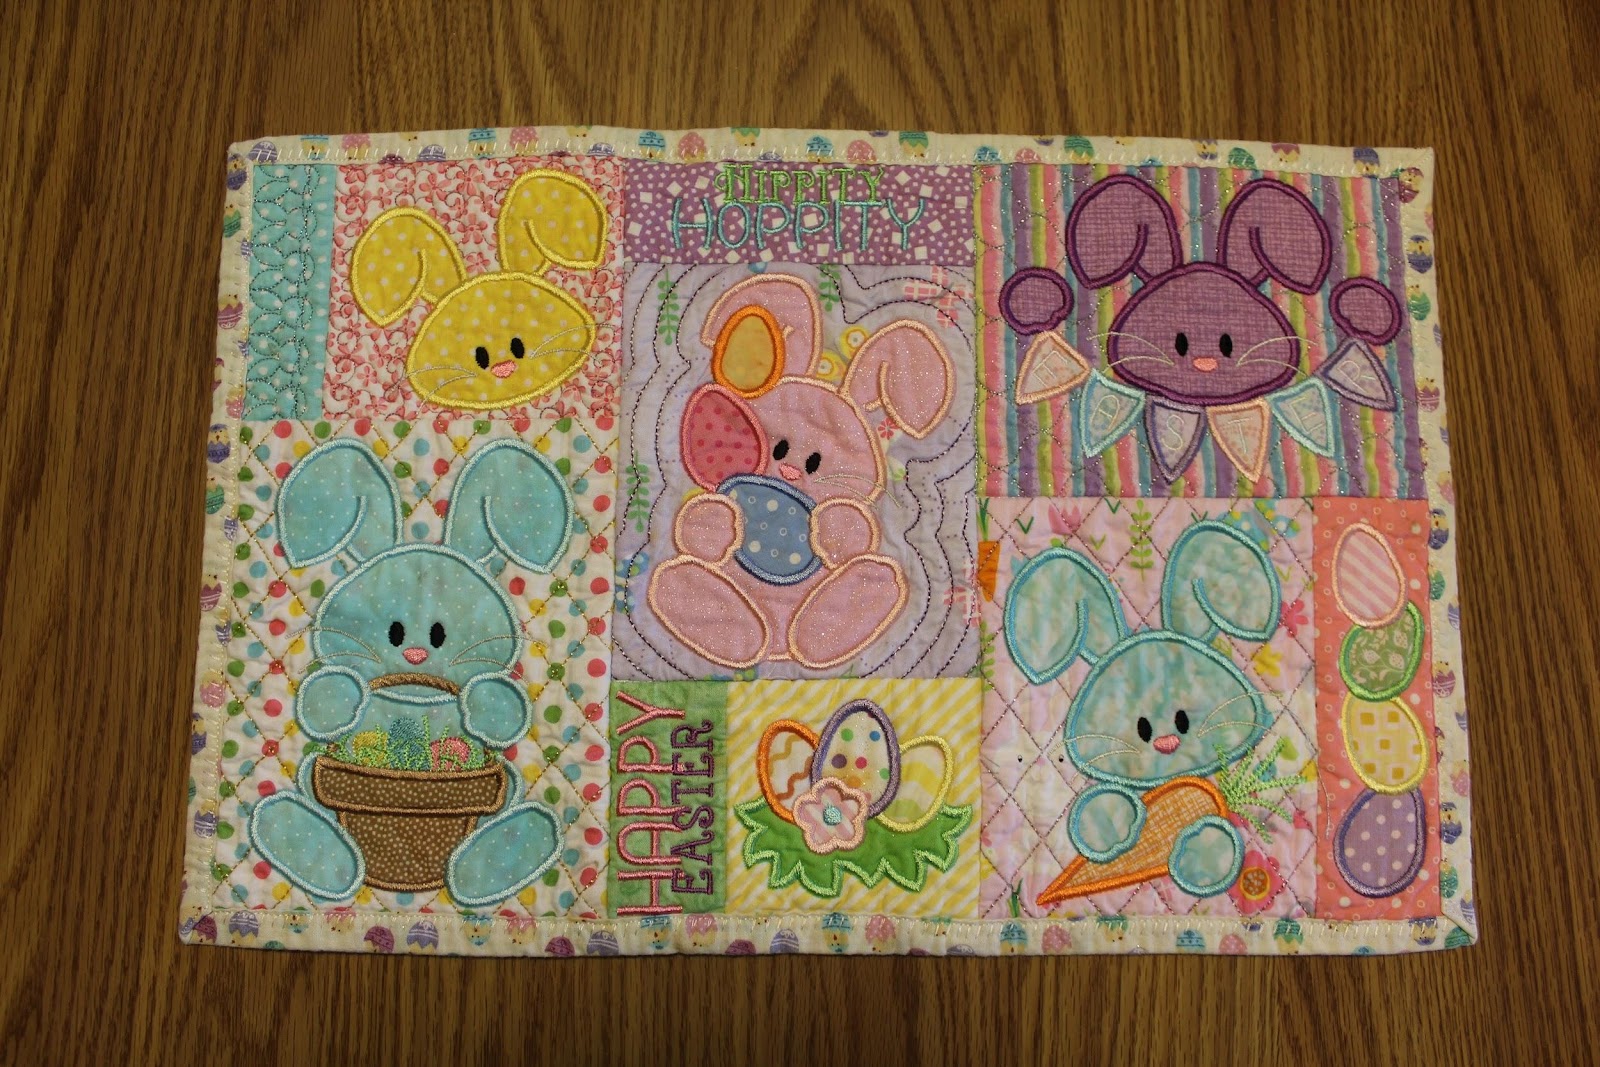
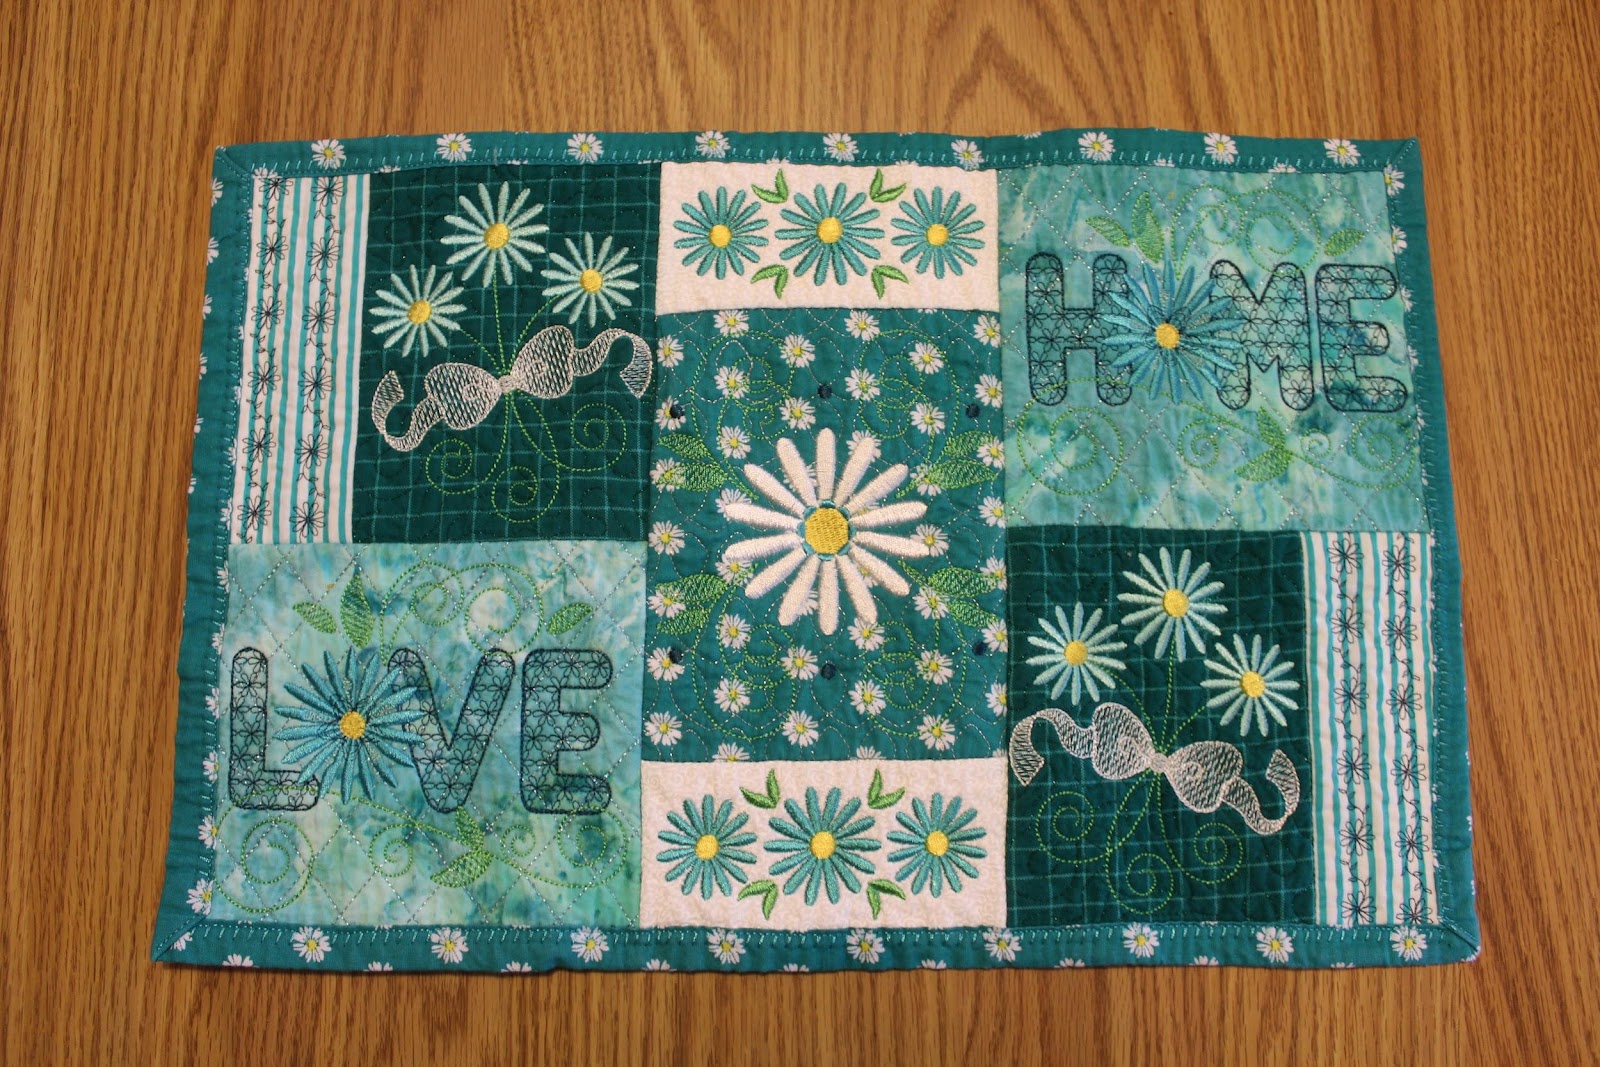
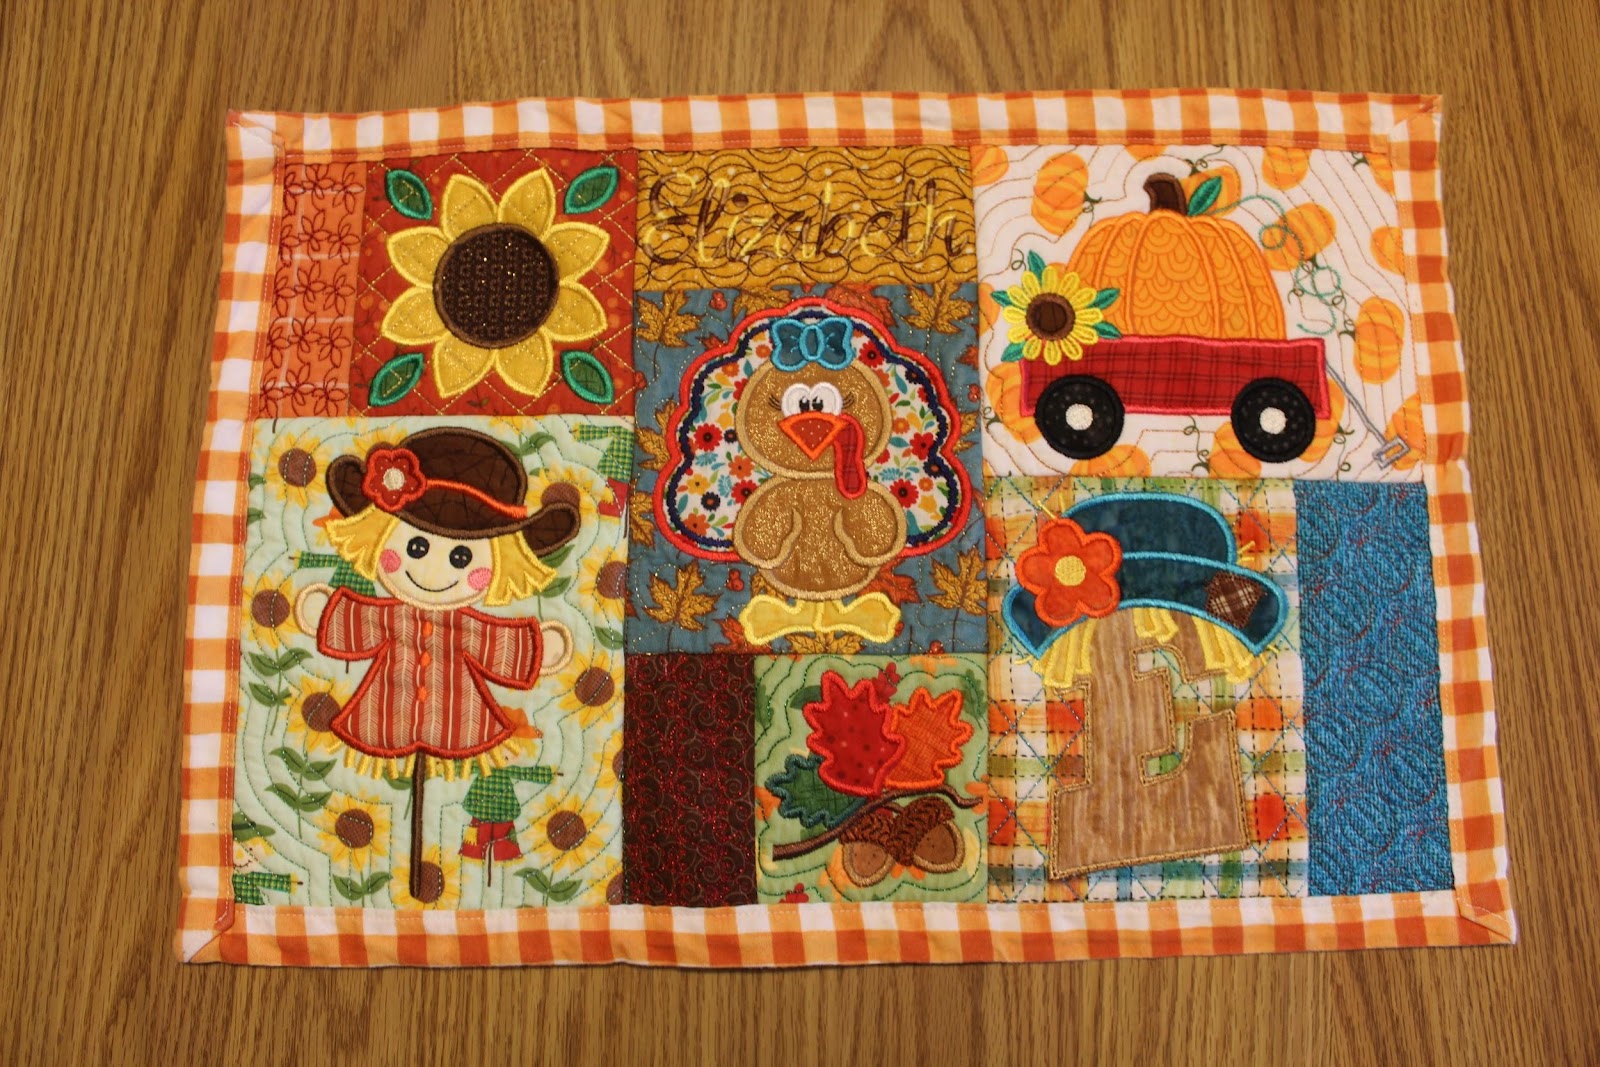
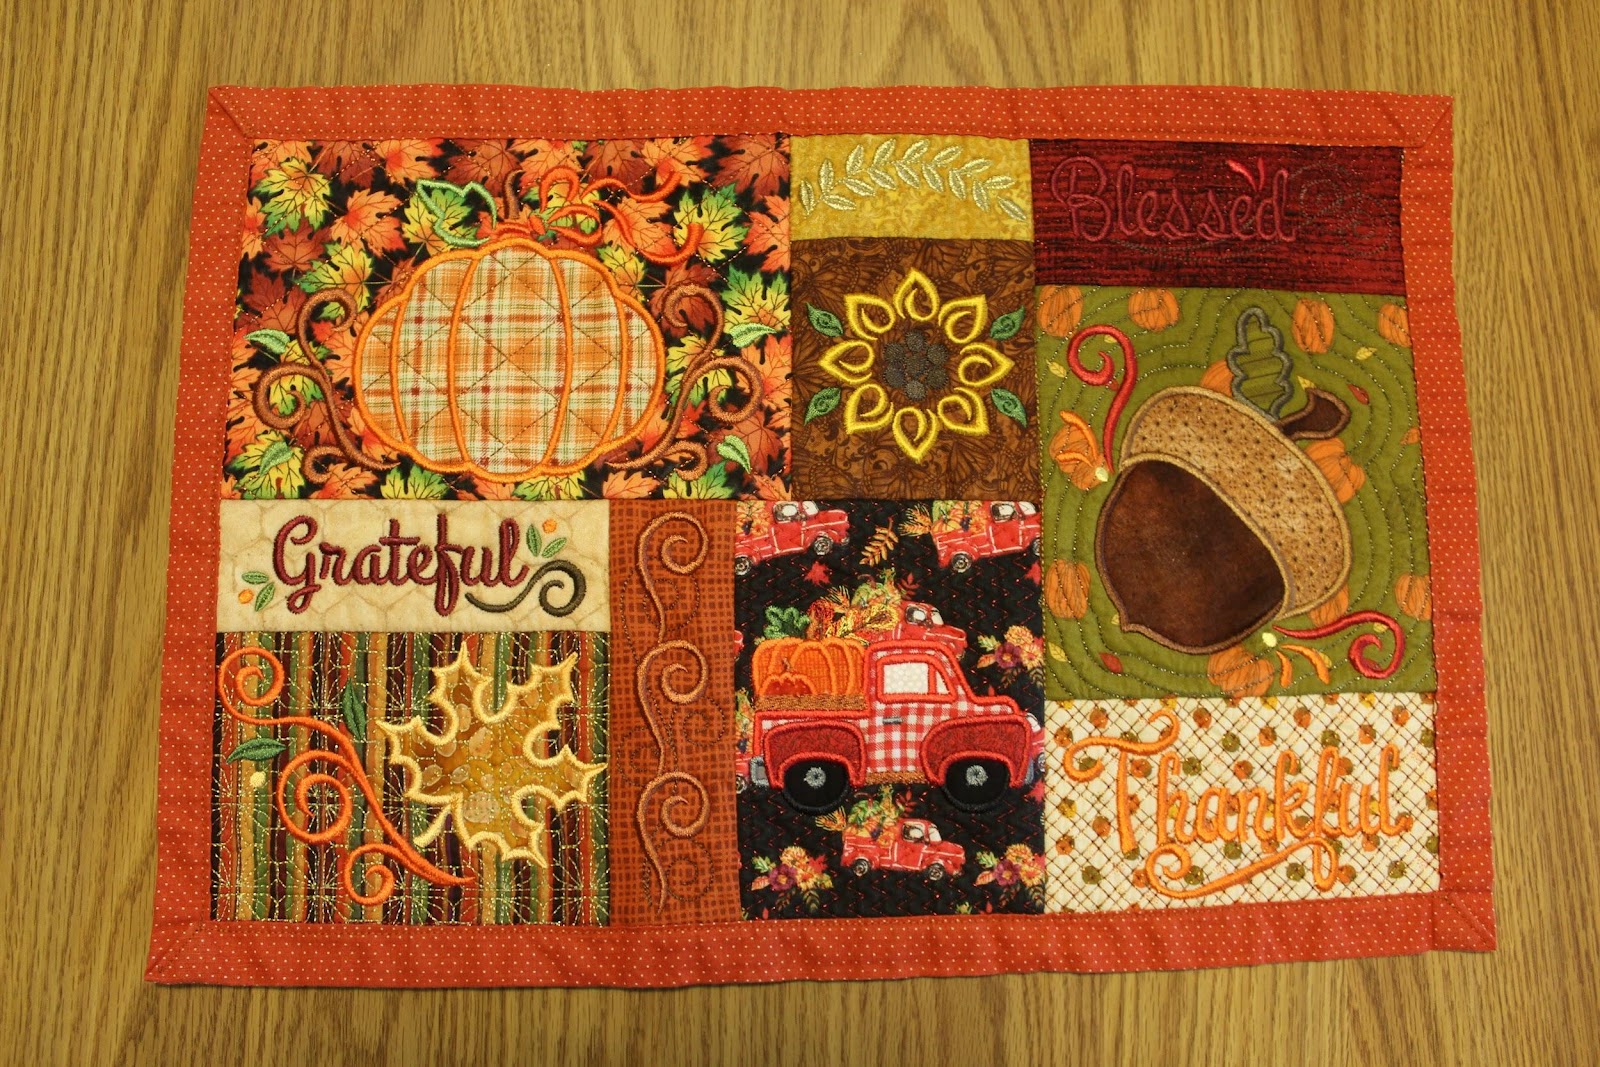
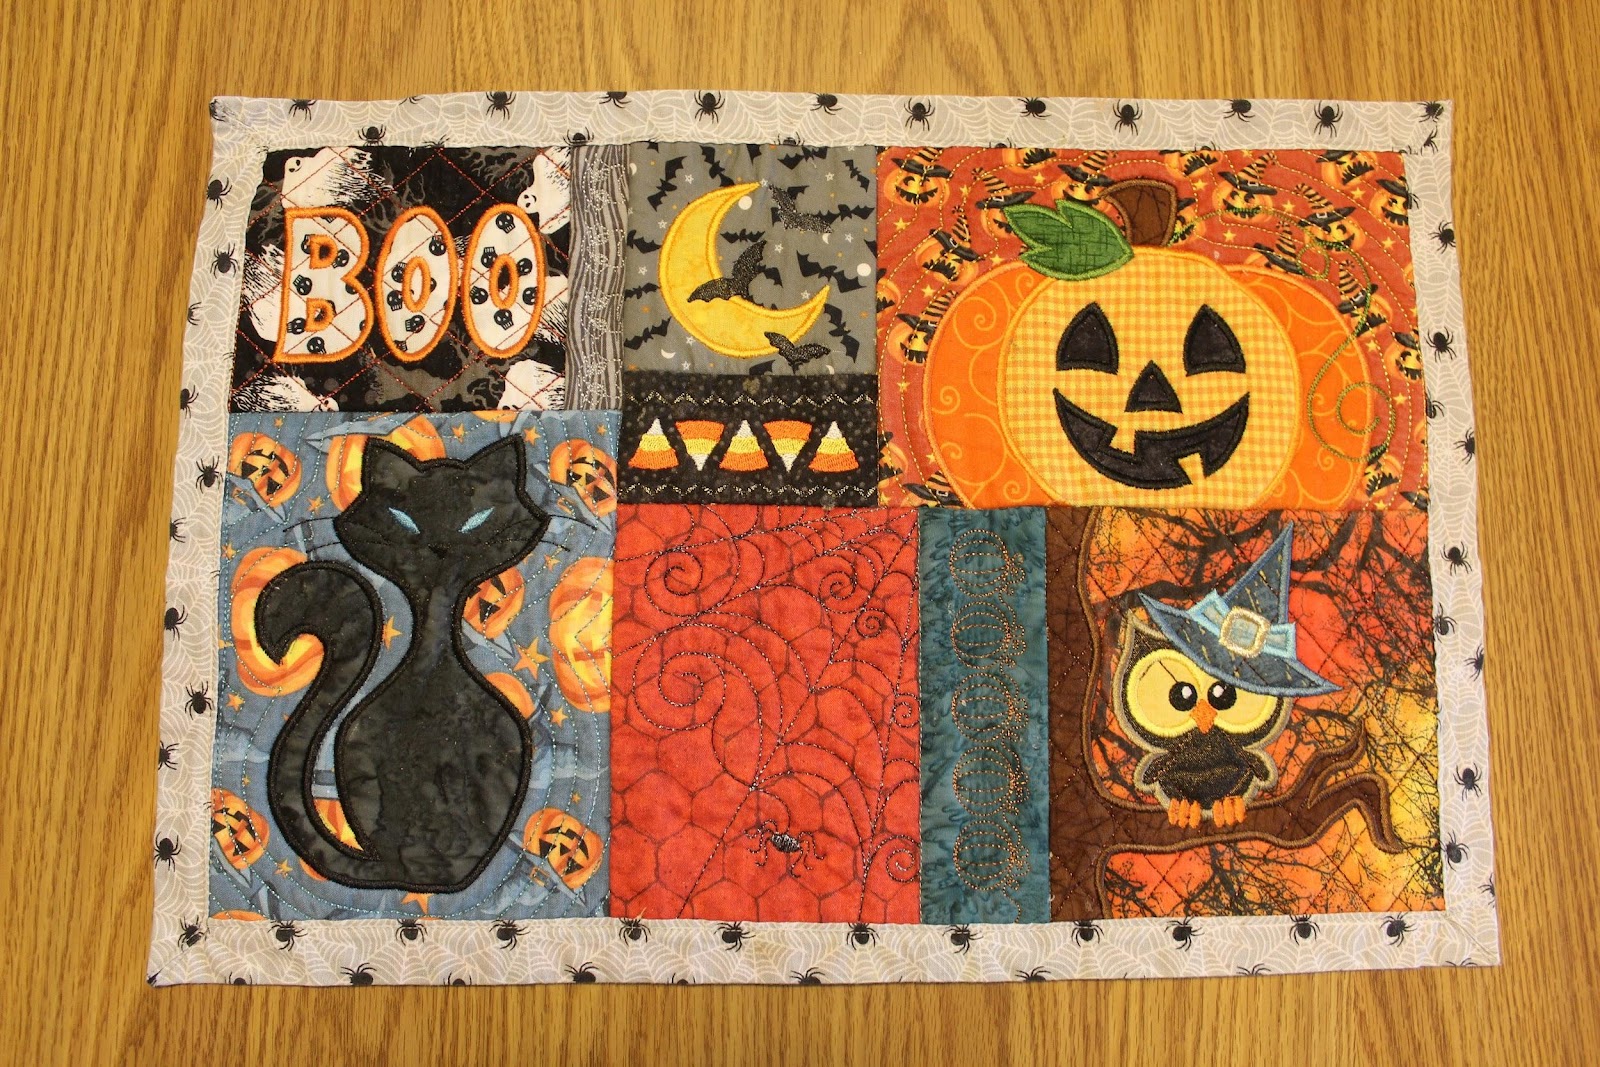
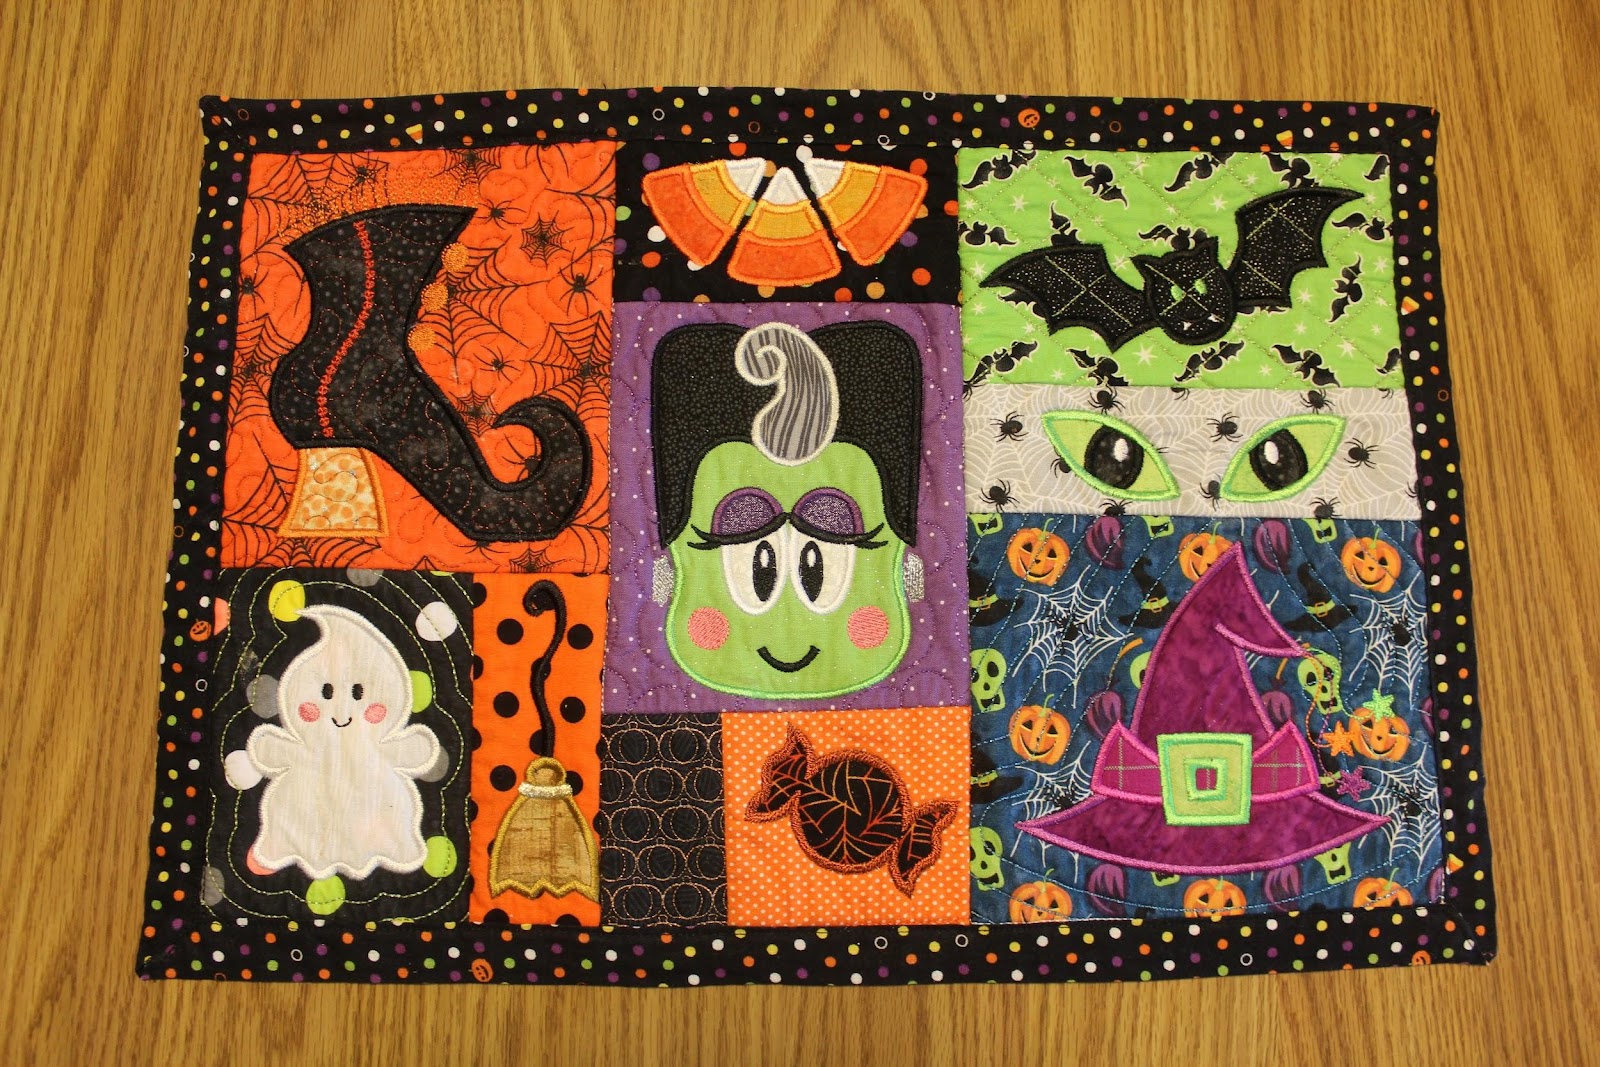
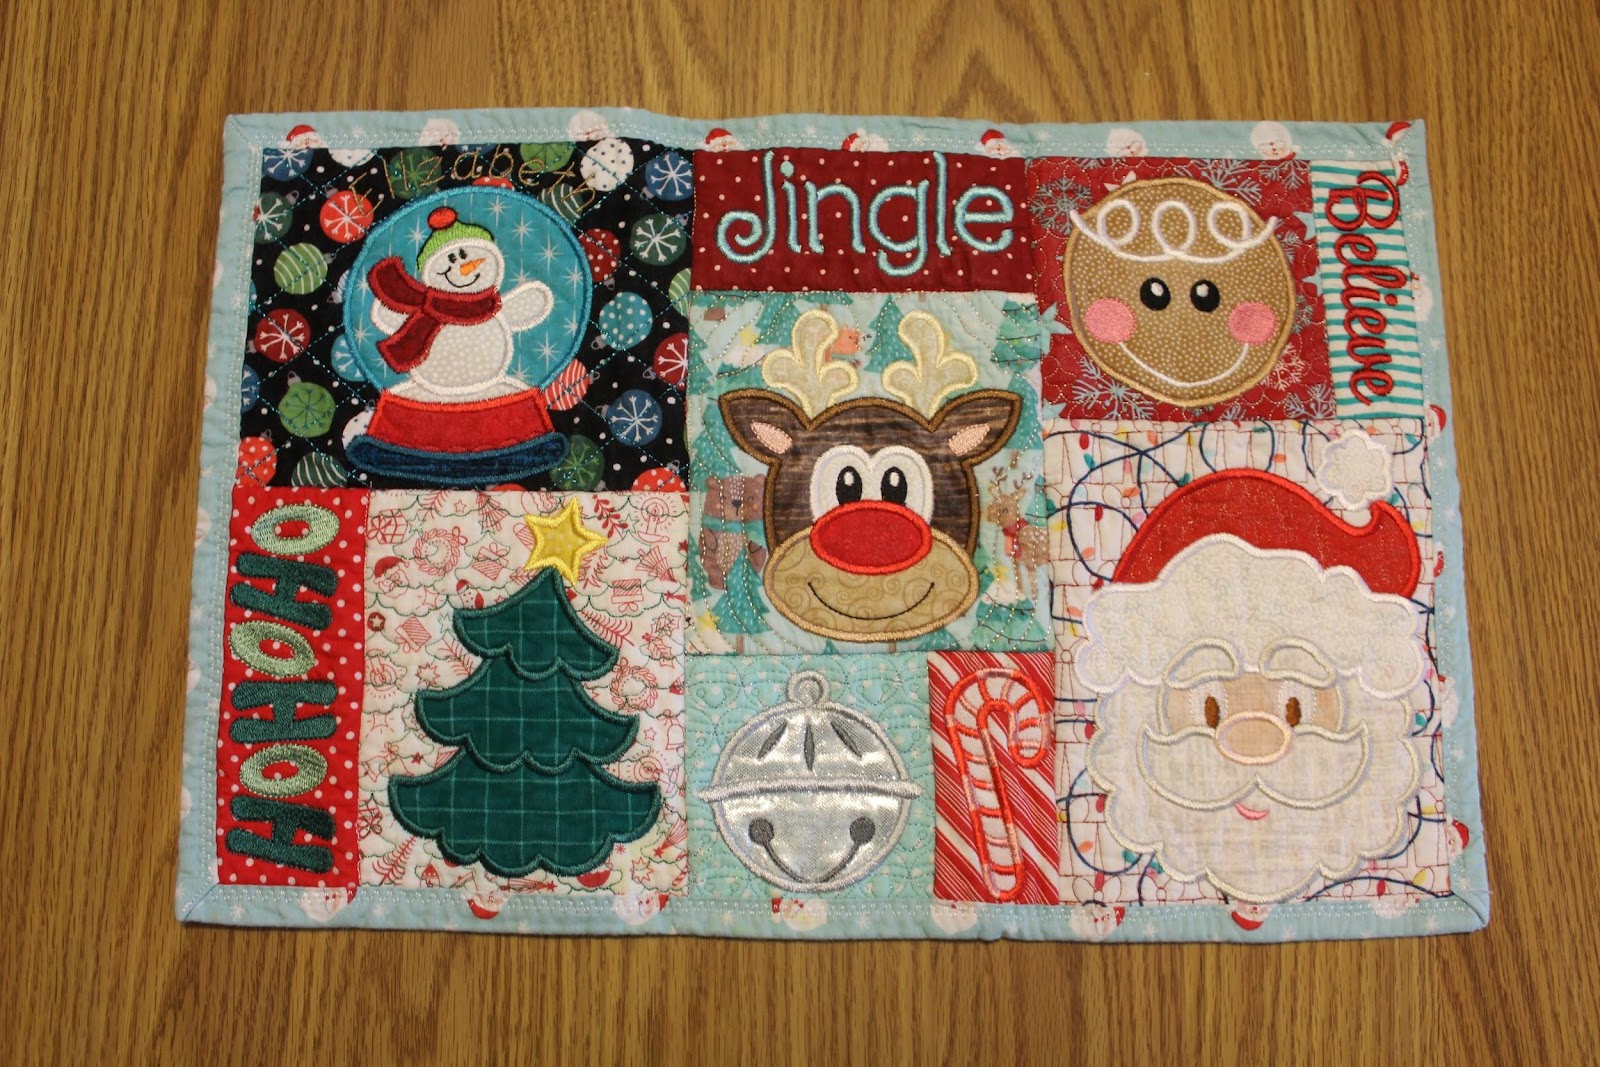
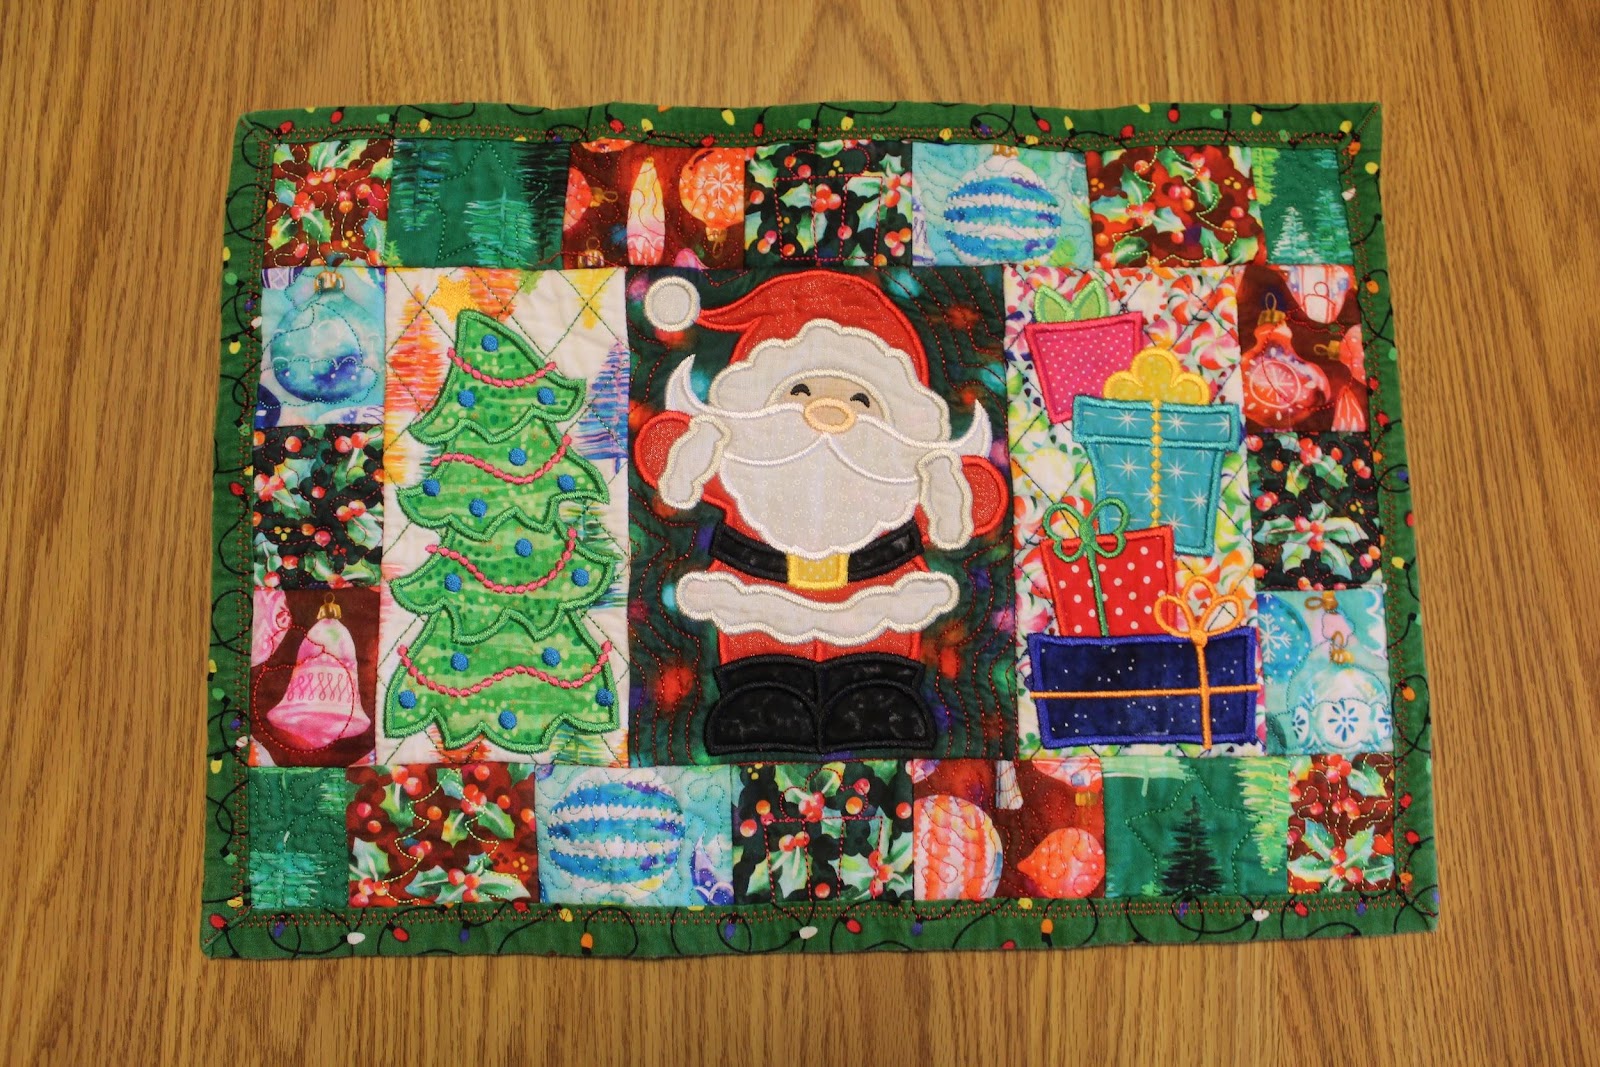
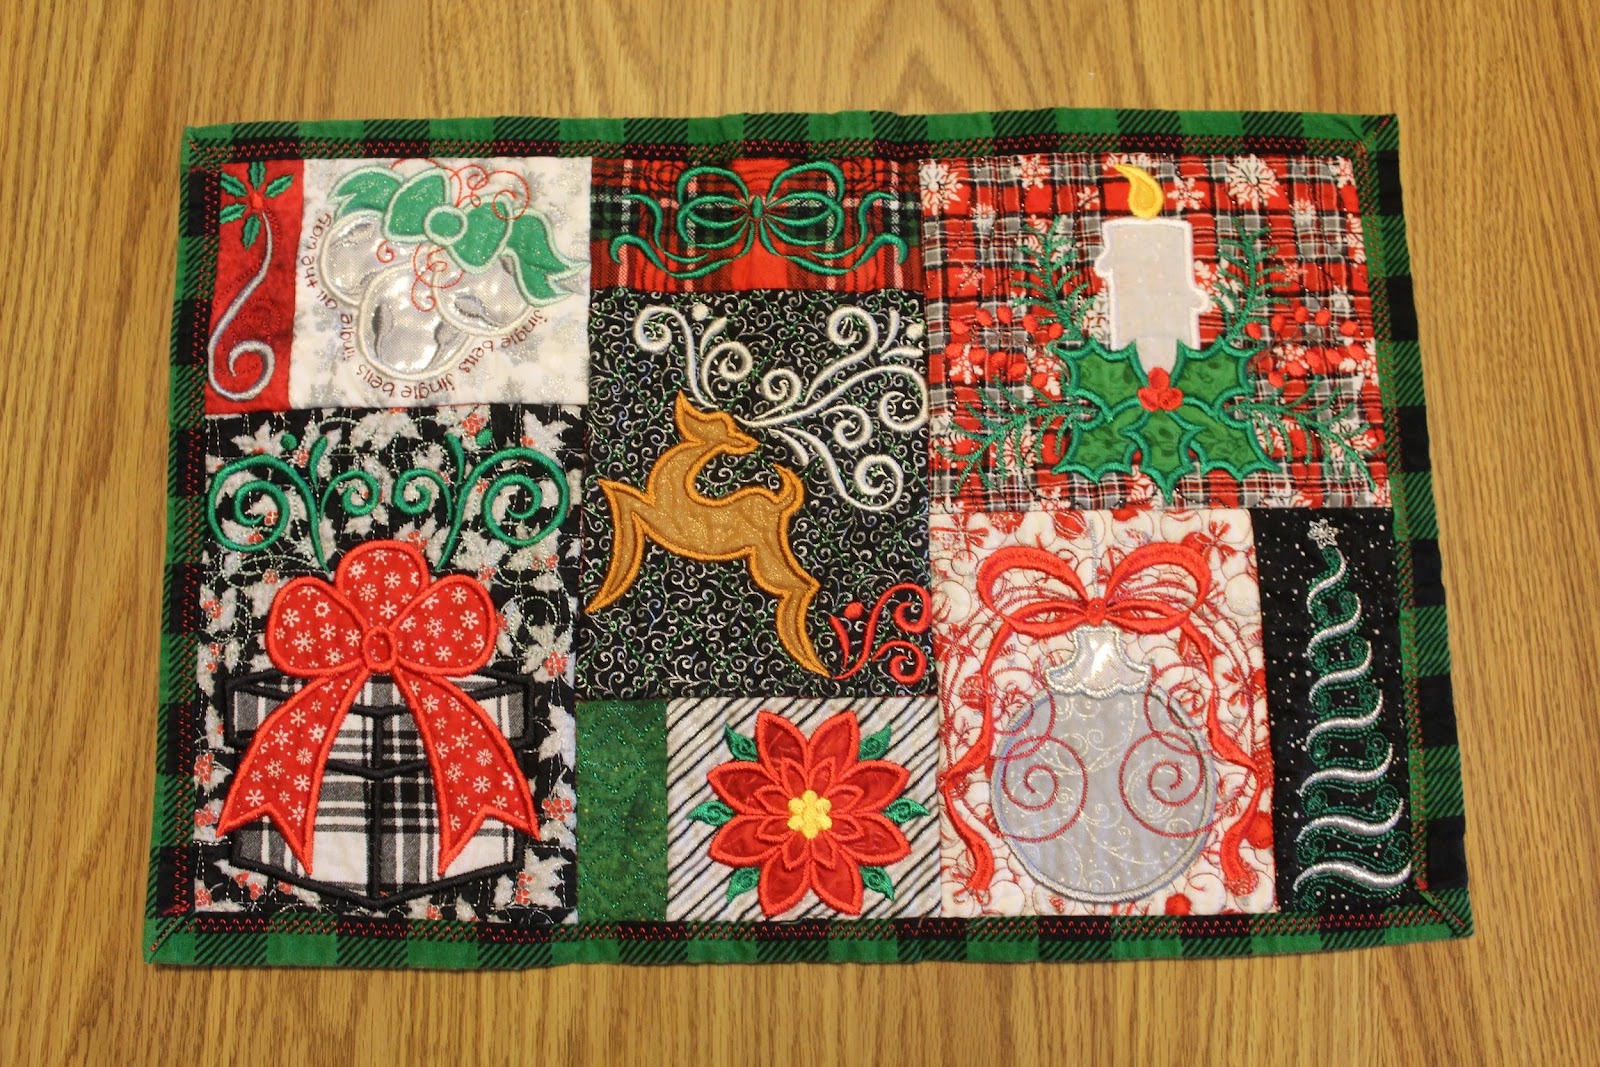
Below, I have included pictures of the numerous sets of placemats I have made over the years. Each set has been a labor of love, but truly worth the time and dedication. Choose a design that will fit your style and get stitching! Don't forget to share your creations with us on social media using the hashtag #designsbyjuju!
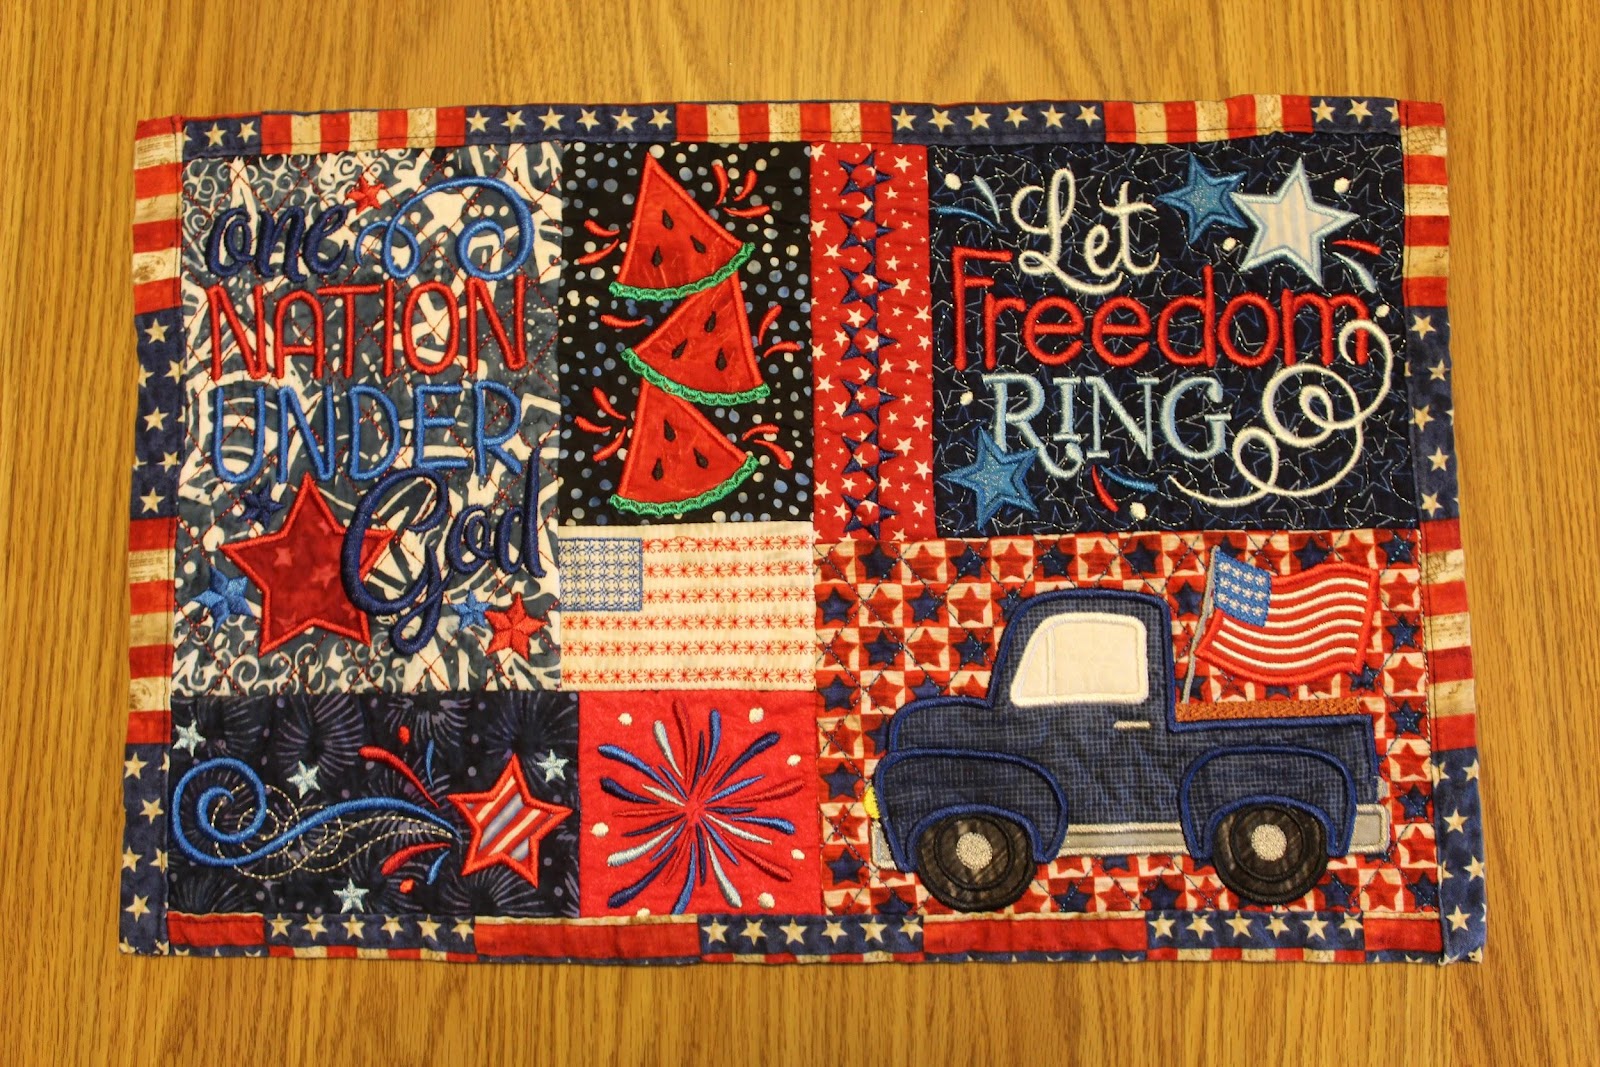
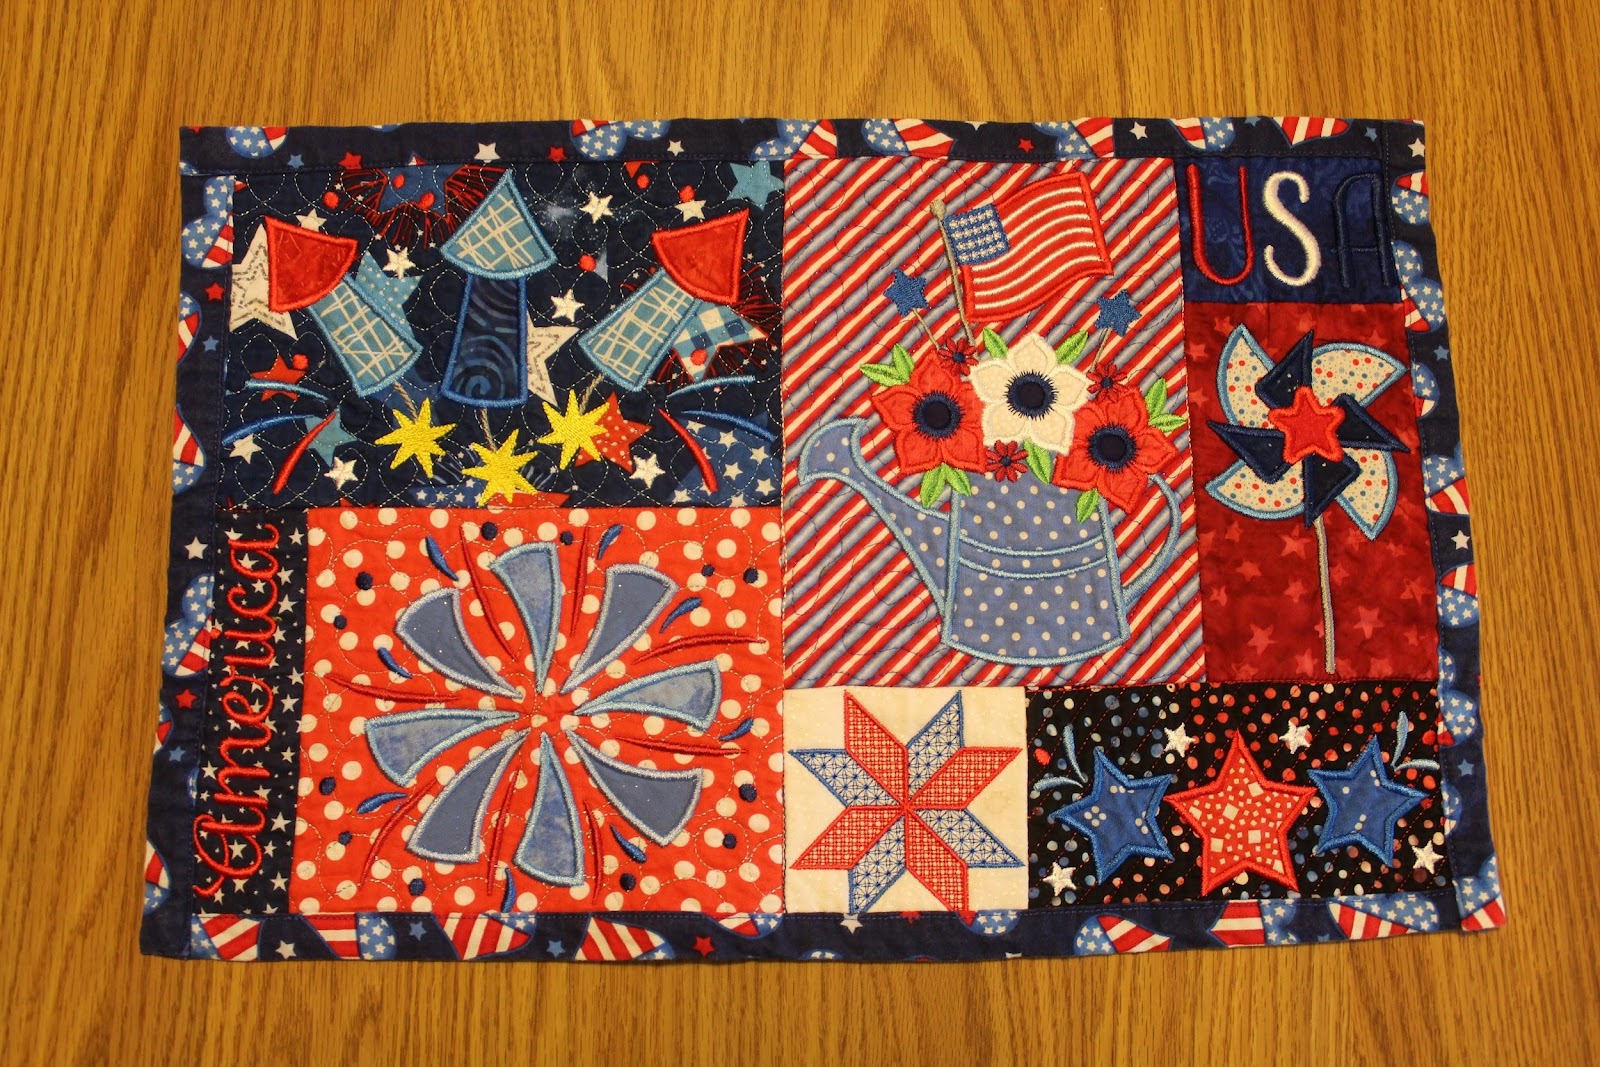
*I utilized the blocks in the ITH Patriotic Table Runner to make these placemats. I had made many sets of placemats previously and could see this ITH table runner would work perfectly to modify for placemat blocks. JuJu also offers ITH Patriotic Placemat.
If you loved this project, you’ll find plenty more just like it in our Home Hub—a curated collection of quick, creative, and practical projects perfect for gifting (or keeping!)