Toggle Nav
 Inspire.
Create.
Stitch.
Inspire.
Create.
Stitch.
Inspire.
Create.
Stitch.
Search
Inspire.
Create.
Stitch.
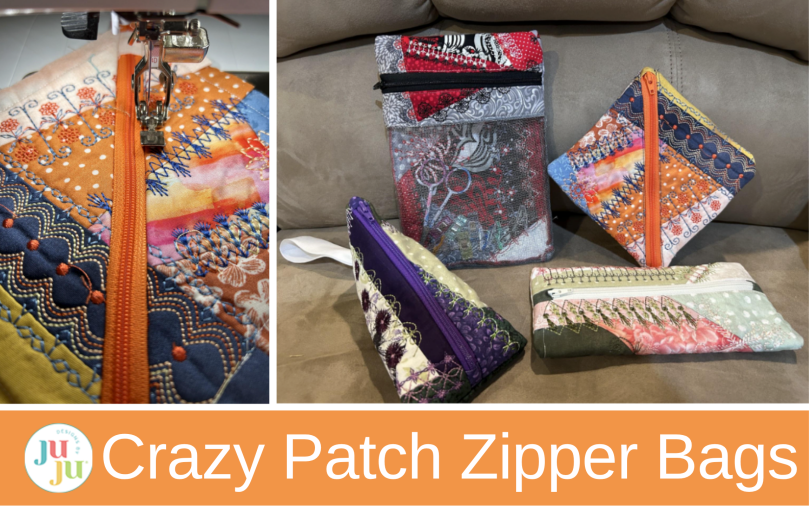
Turn finished Crazy Patch embroidery blocks into four easy lined zipper bags. This step-by-step tutorial includes a narrow pouch, asymmetrical bag, diagonal zipper bag, and mesh window bag using fabric scraps, zippers, stabilizer, and batting.
If you've been looking for creative ways to use your finished crazy patch embroidery blocks, these zipper bags are the perfect project!
In this tutorial, I'll show you how to turn your embroidered blocks into four, different, lined zipper bags from a simple narrow pouch to a fun mesh bag with a window. These projects stitch up quickly, make wonderful handmade gifts, and are a great way to use fabric scraps. Whether you're new to sewing zipper bags or you've made dozens before, you'll find plenty of inspiration in these easy step-by-step instructions.
Don’t forget to check out the Designs by JuJu Amazon store for our design team’s favorite supplies. And for stabilizers, batting, and threads, Designs by JuJu+ has everything you need.
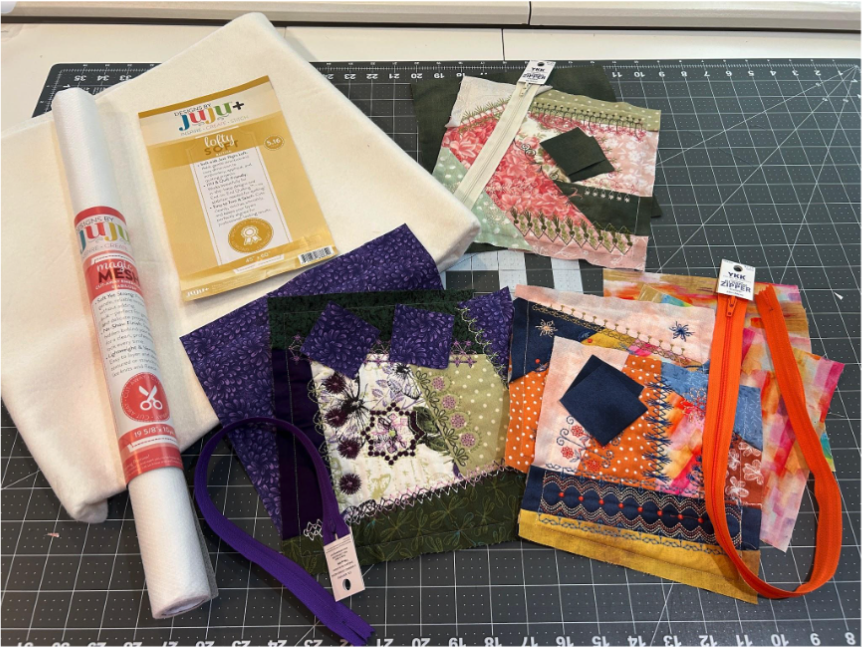
Making crazy patch blocks uses the stitch-and-flip method. We have a Youtube video you can watch to see the technique if you’ve never done it before. But we will also go quickly through the steps here. The blocks all follow the same steps even if the designs are different.
Hoop the magicMesh Stabilizer in your hoop and run your placement line.

Cover the line with batting and stitch the tack-down stitches. Trim the batting close to your stitches.
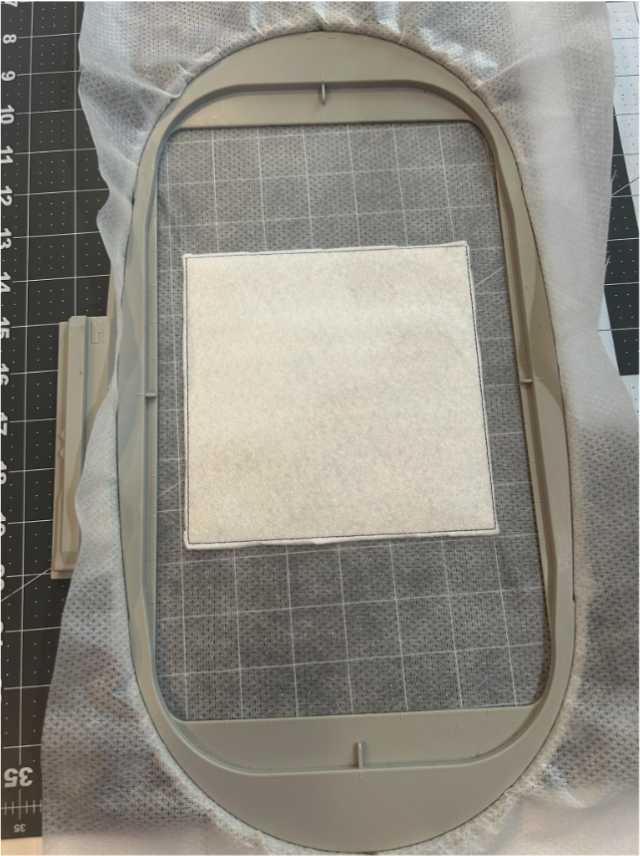
Next you will stitch the placement lines for your fabrics.

I like to lay my fabrics out over the pieces to make sure they are big enough. If your fabric is an edge piece you will need at least ½” to extend over the outer edge. This will help all the blocks be the same size and allow us to square them up.
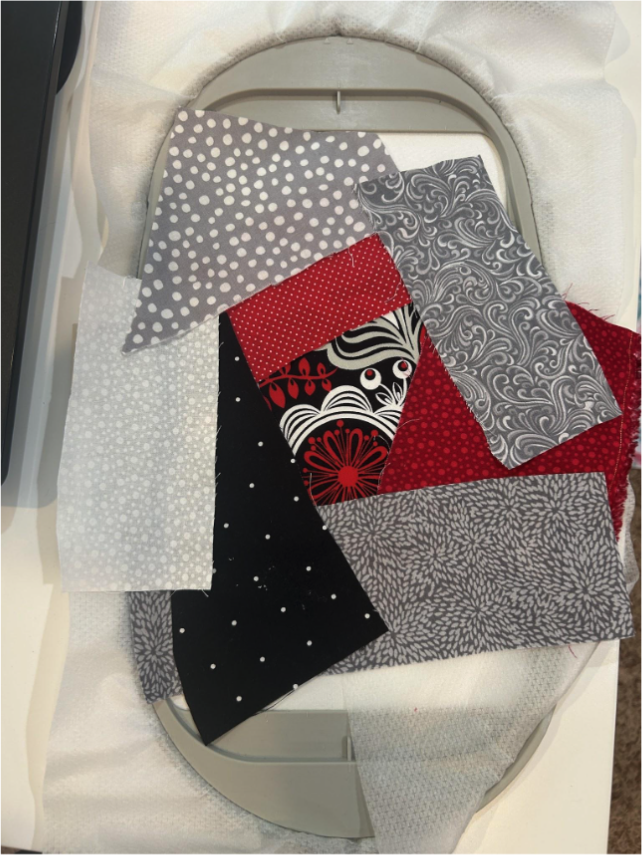
Your needle will move to the first place you will stitch. Place your fabric right side up over the stitches. Make sure you’re leaving at least ½” on the outer edge. Stitch the tack-down stitches. Trim close to the inside stitches.
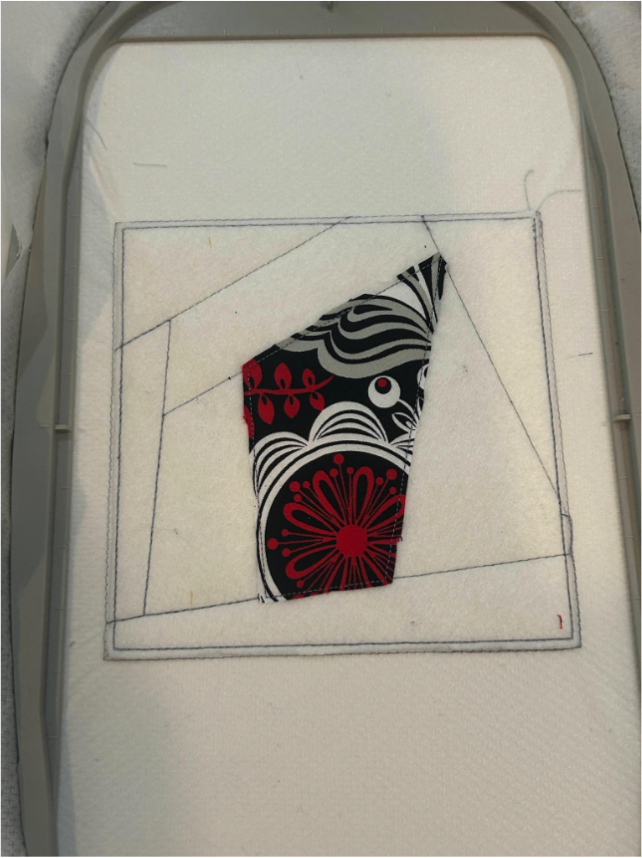
Next, you’ll run a tack-down stitch for the next fabric. Your needle will move to where this line will stitch. Place your fabric, right side down along the seam so after the seam is stitched you can flip the fabric to hide the seam. Make sure your piece is big enough to cover the whole space when it’s flipped. Stitch the tack-down line.

Flip the fabric on that line and finger press it in place. Stitch the tack-down stitches for that piece and trim close to the inside stitches.

Continue doing this until all your fabrics are stitched in place and the foundation is completely covered. Make sure you’re leaving that ½” all around the outside edge of the block.
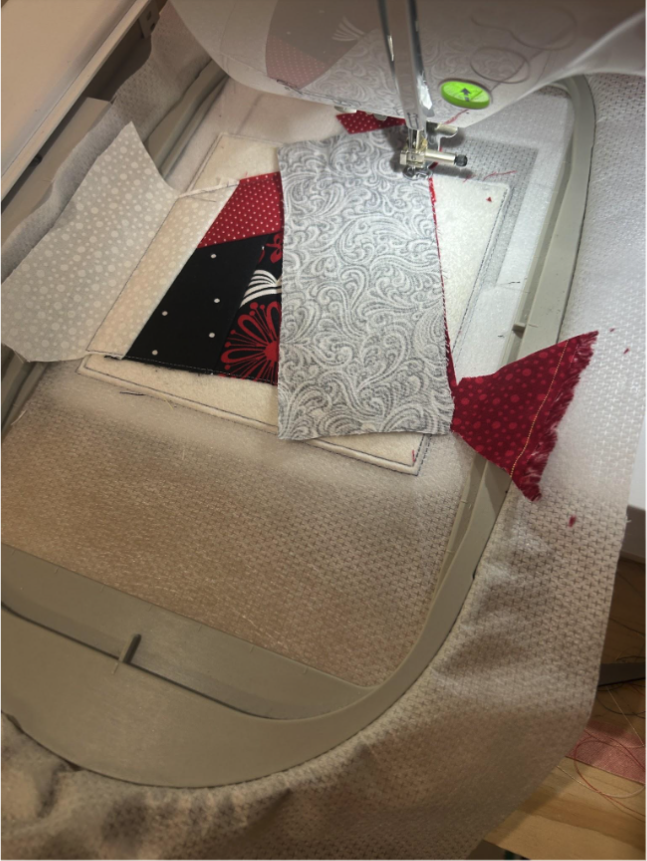
Next, run the decorative stitches. I love to use some variegated colors to add some texture and contrasting colors to help the stitches pop out.

When you’re finished stitching, remove it from the hoop and trim the stabilizer close to the stitches.

Trim the edge ½” from the outer stitching line. I usually do this from the front side so I’m not mixing up which line to cut from.
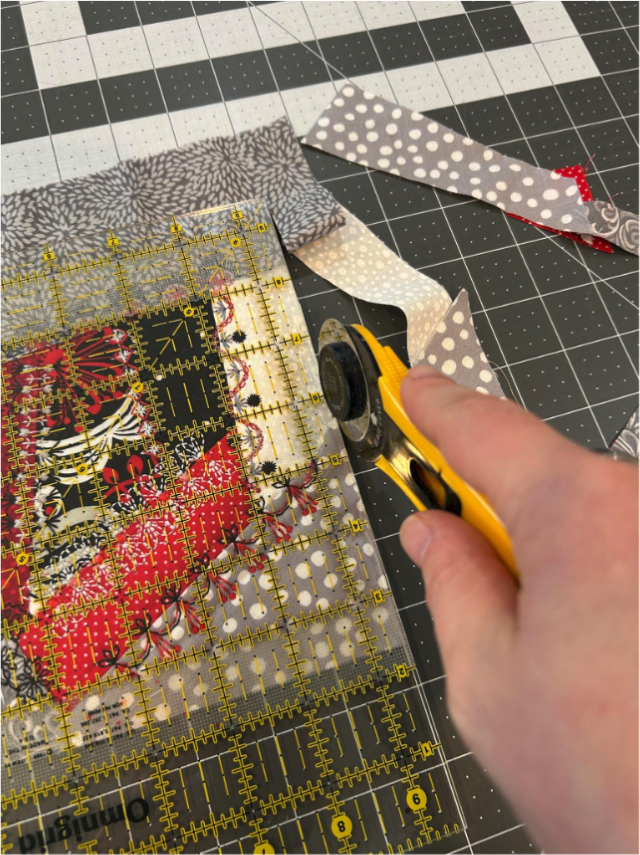
And your crazy patch block is finished! Now let’s get ready to make some zipper bags.
To start, we will fold both of the small squares in half and press them.
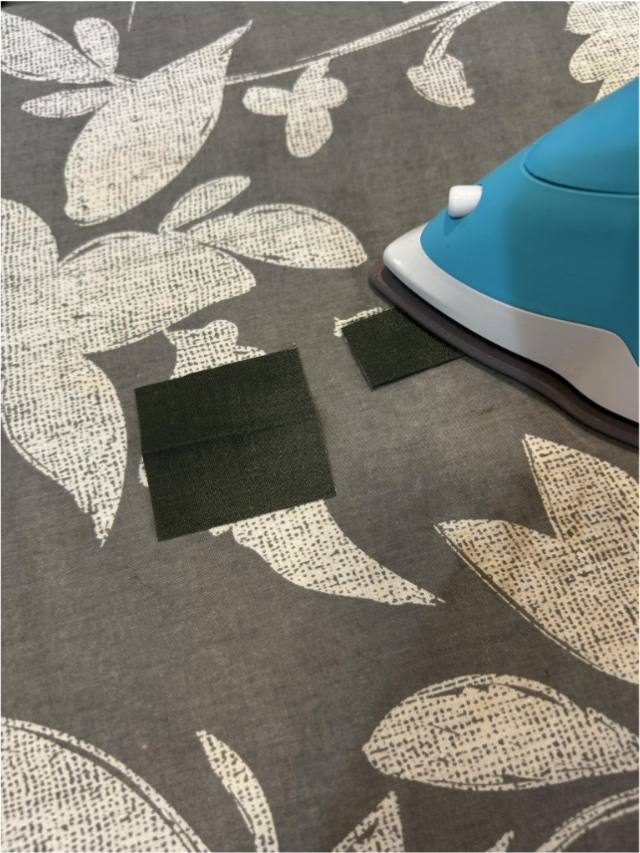
Take your crazy patch block and trim it ⅛” from the stitching line on all four sides. Cut your lining piece to be the same size as your crazy patch block.
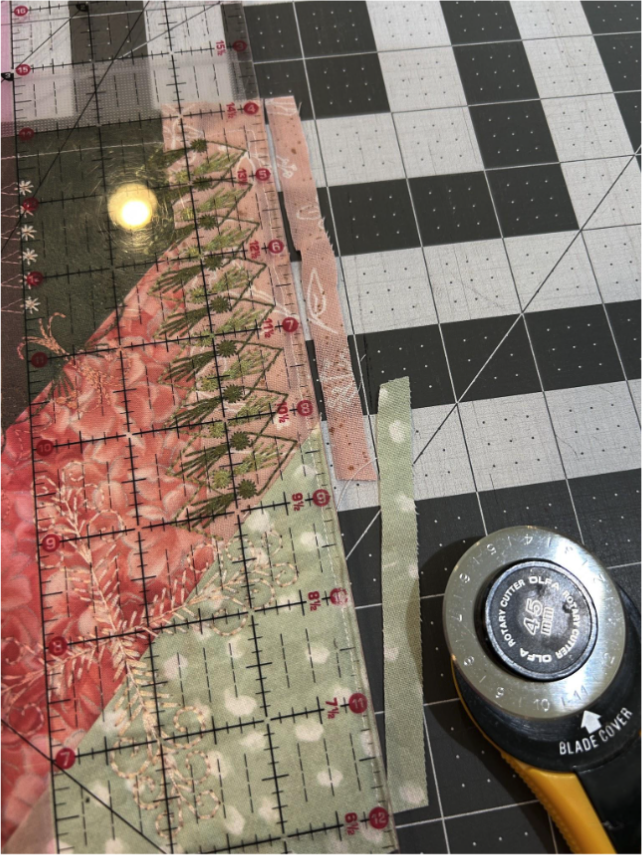
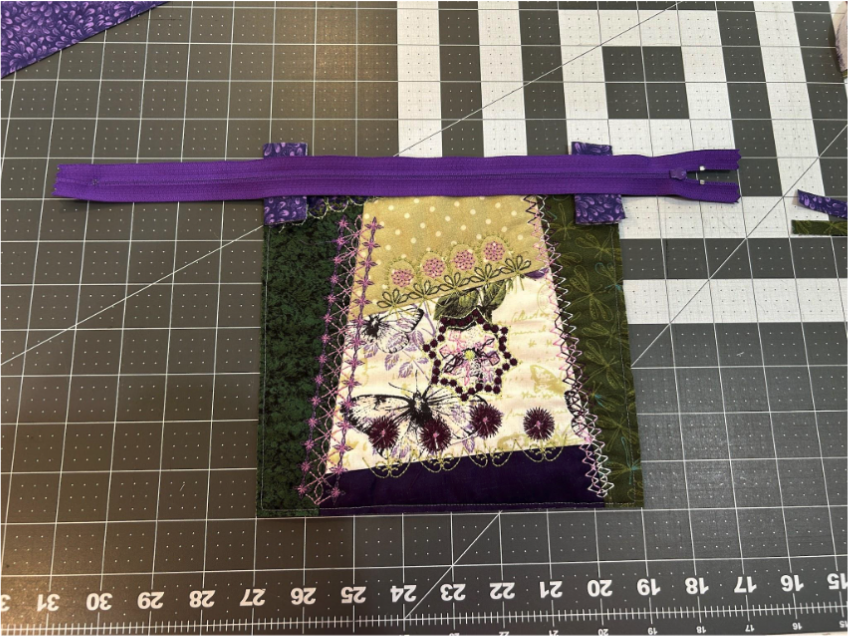
Now you are going to make a zipper sandwich. Place your crazy patch block face up. Place your folded squares, with the folds toward the center, lining up on the side and extending ½” above the patch.

Then place the right side of the zipper face down on the crazy patch, lining up the edge of the zipper with the edge of the crazy patch block. (And excuse the varying blocks, I forgot a picture of this step with this block!) If your zipper is longer than your patch as seen here, you can use any part of it for the block. I like to move it down so I have excess on each side.
Place the lining piece face down, lining up the edges of the crazy patch block, the zipper, and the lining.
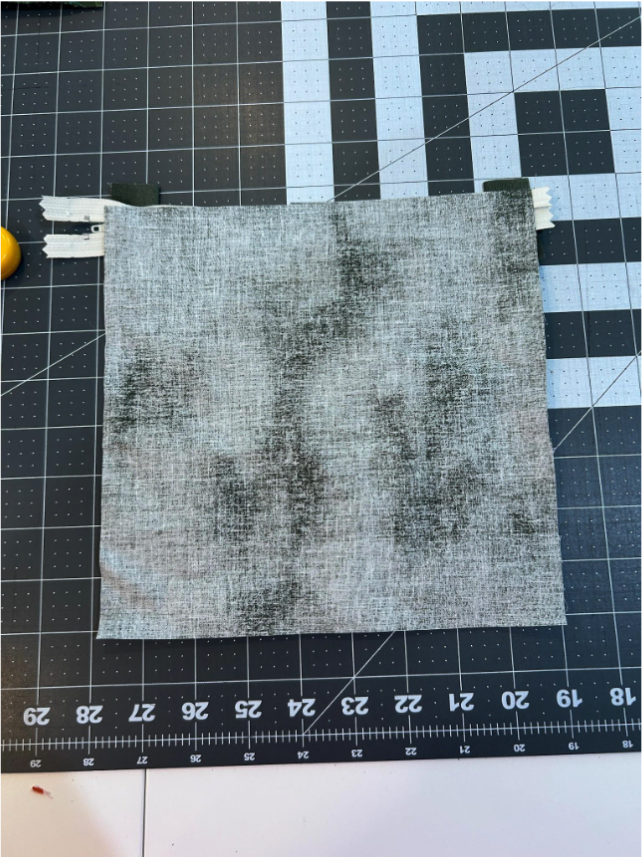
Using a zipper foot, stitch close to the teeth of the zipper. If your zipper is long enough, you can move the teeth completely out of the way, but if it’s shorter you can stop your machine and move the zipper past your foot so you don’t have to stitch around it.
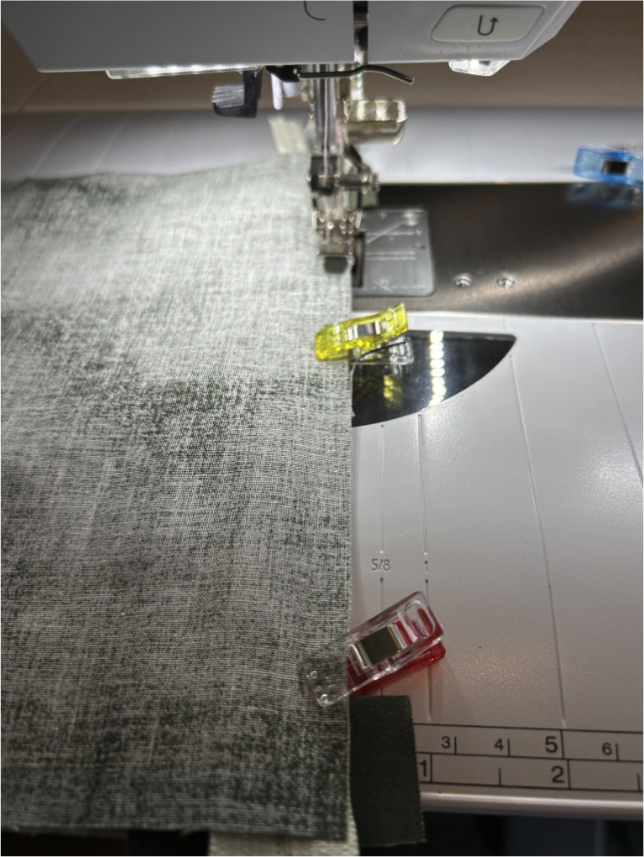
Press the zipper and the fabric tabs up from the crazy patch block.

To get ready to sew the other side of the zipper, open your zipper halfway. Keep the zipper pull between the two fabric tabs.
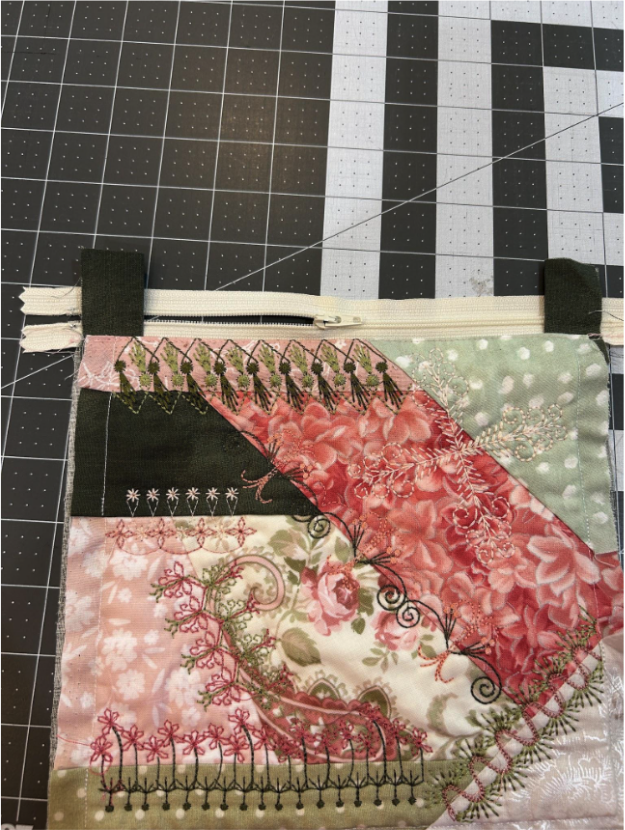
Bring the open end of your zipper close to the other side of the zipper. Clip the end to the fabric tab to hold it in place. You want the teeth to be really close to each other like they will be when the zipper is zipped up.
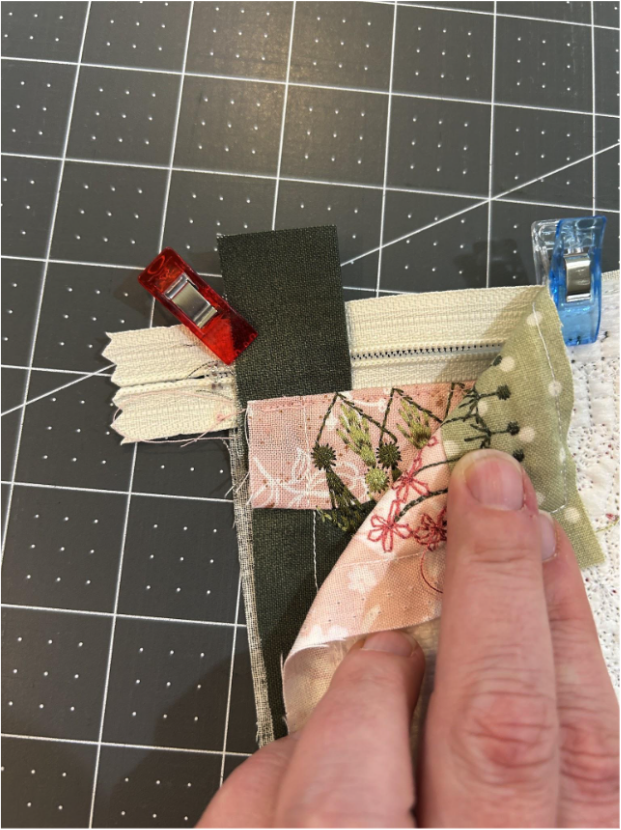
Now with the crazy patch block facing up, bring the bottom of the crazy patch block up to align with the top edge of the zipper.
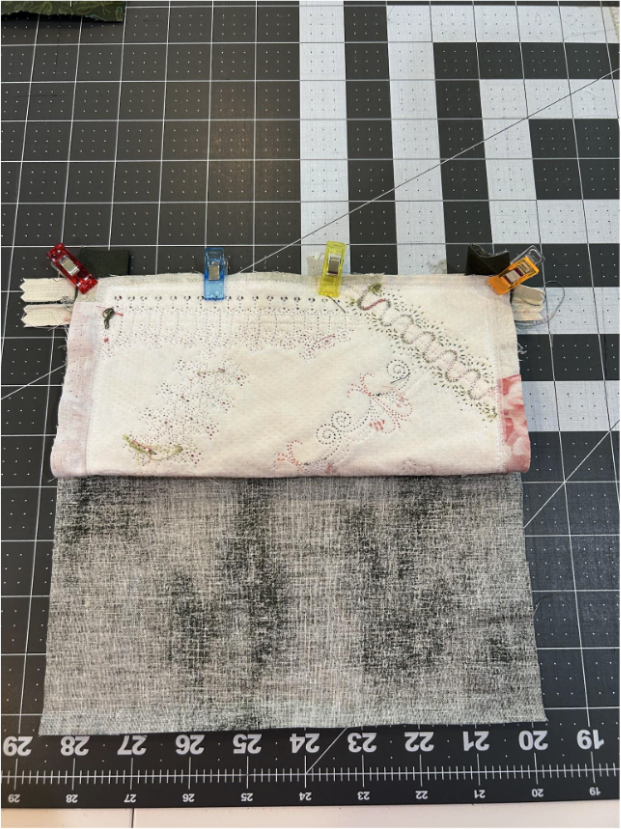
Flip the blocks over so the lining is now up, and fold it up the same way you did the crazy patch block. Align the bottom of the lining with the top edge of the zipper and clip it in place.

This is what it looks like from the side. We have two loops and a zipper at the top.

Now stitch close to the zipper teeth like you did on the other side. You will most likely need to stop and open the zipper more as you come close to it so you can stitch smoothly along the edge.
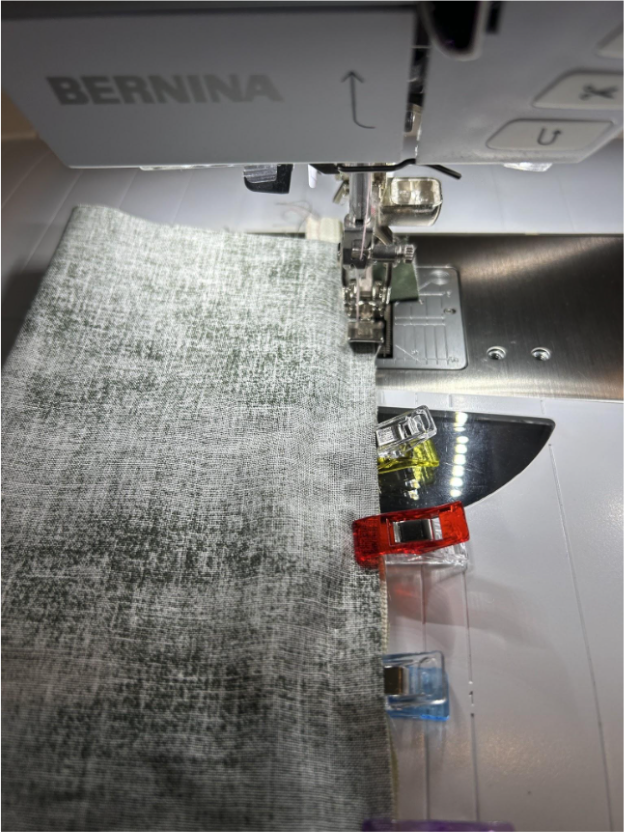
When you’re finished, it will look like this.

Reach through the end of the tube made out of the crazy patch block and turn your project right side out.
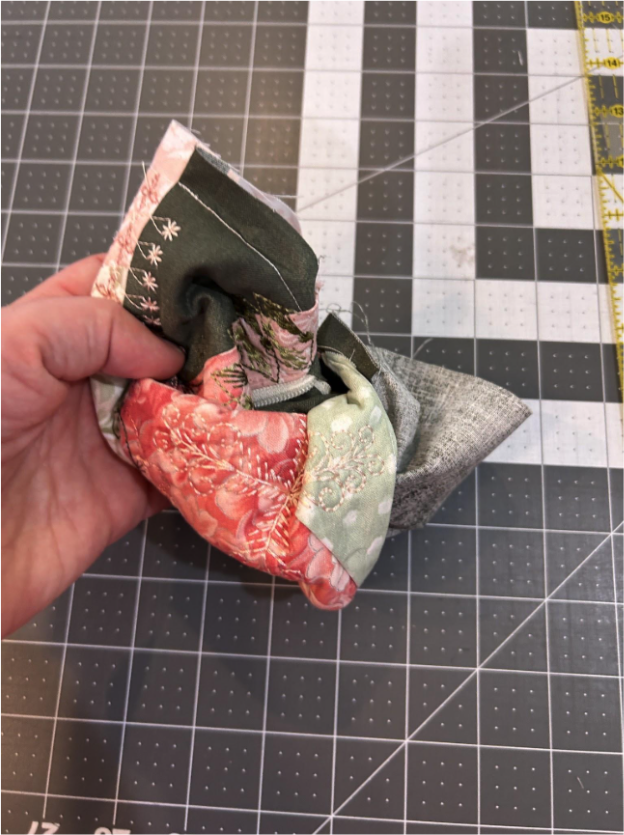
If your bag is small, it might be a little tight, but it will turn. It will look like this.
NOTE - If making the Asymmetrical Bag, continue with those instructions now.

Now you will decide where you want your zipper placement on your bag. You can choose to have it in the middle of the bag,

at the top of your bag,

or offset to one side.
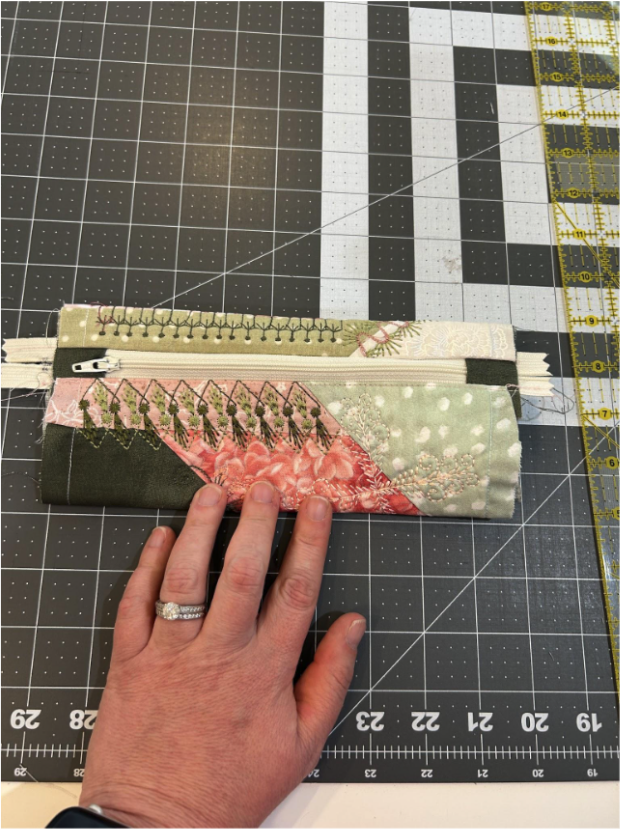
I chose to use the offset position. Once you choose your position, press the edges.
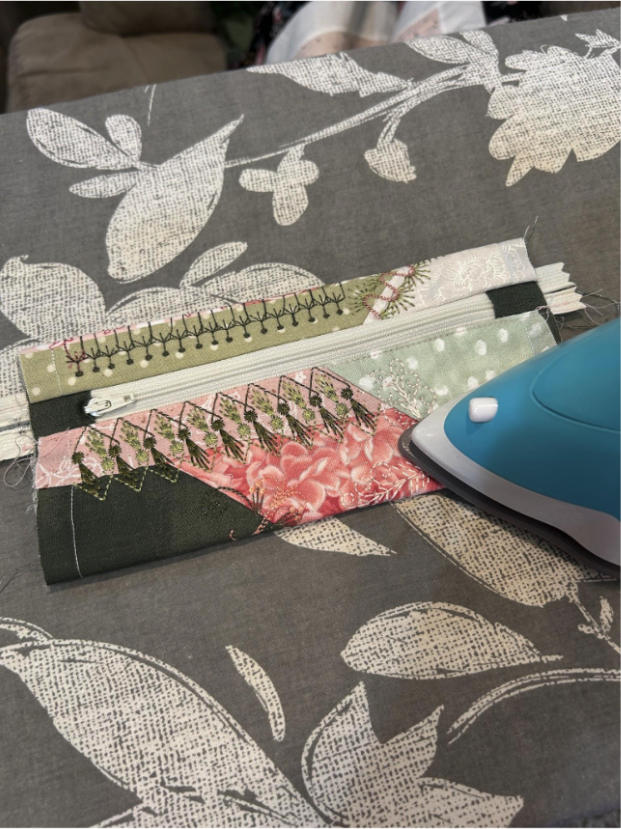
Open the zipper completely and turn it inside out.
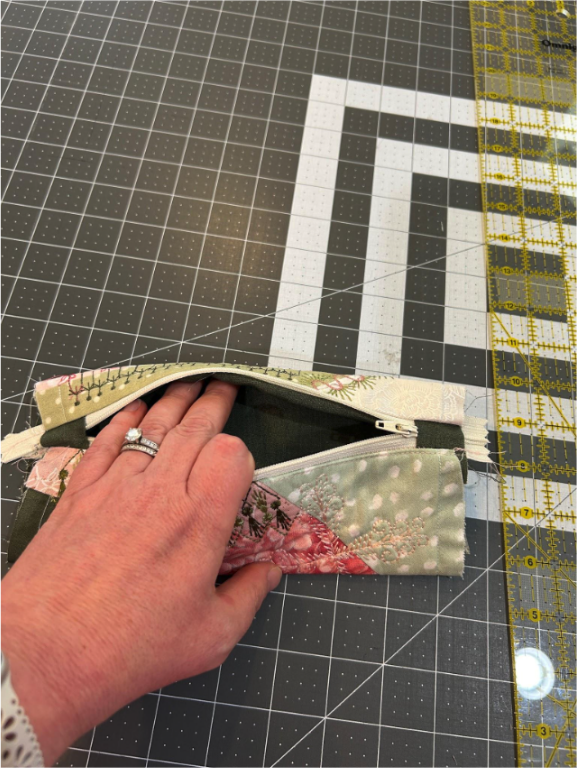
Using the pressed lines, position your bag so that the zipper is where you wanted it. Clip or pin it in place.
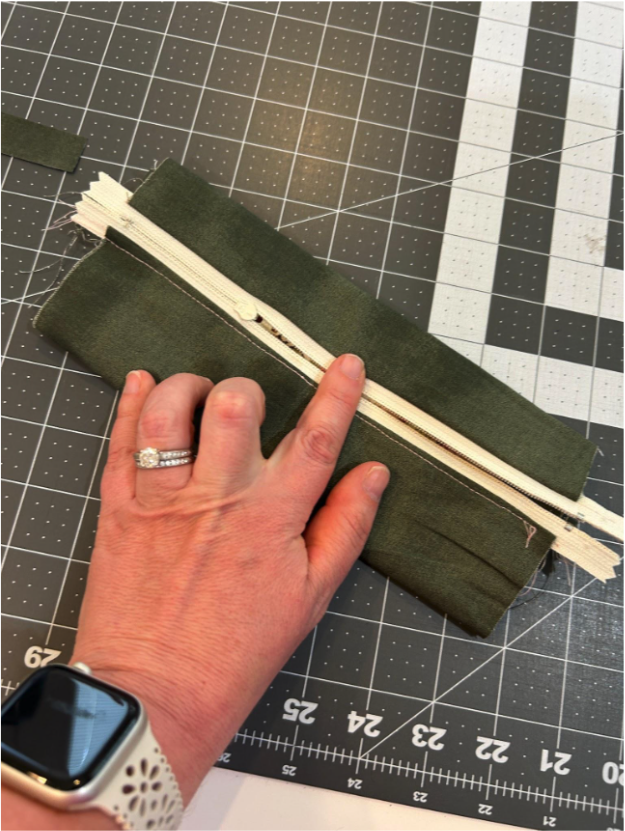
Trim the edges of your zipper so they are even with the bag.

Stitch along the short edges using a ¼” seam allowance.
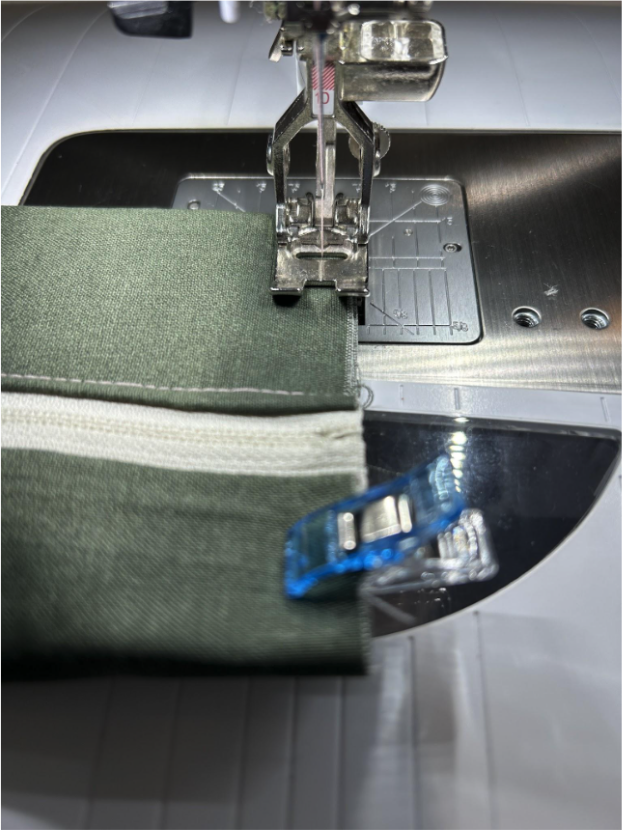
To finish the edge, I stitched with a tight zigzag stitch over the edge. I try to make it so the outer edge of the stitch comes just off the fabric. I trim up any fabric or strings along the edge after I’m done.
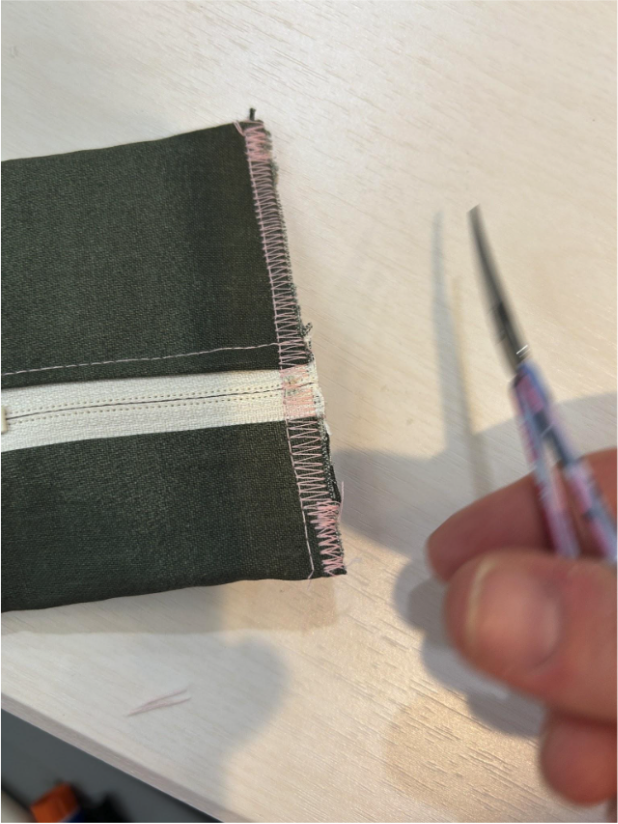
Reach through the opening and turn the pouch to the right side. Push out your corners and give it a press when you’re finished.

We will start this bag the same way we did the Narrow Bag. Go through the steps until you have turned the bag to the right side. Clip off the ends of your zipper and open the zipper all the way.
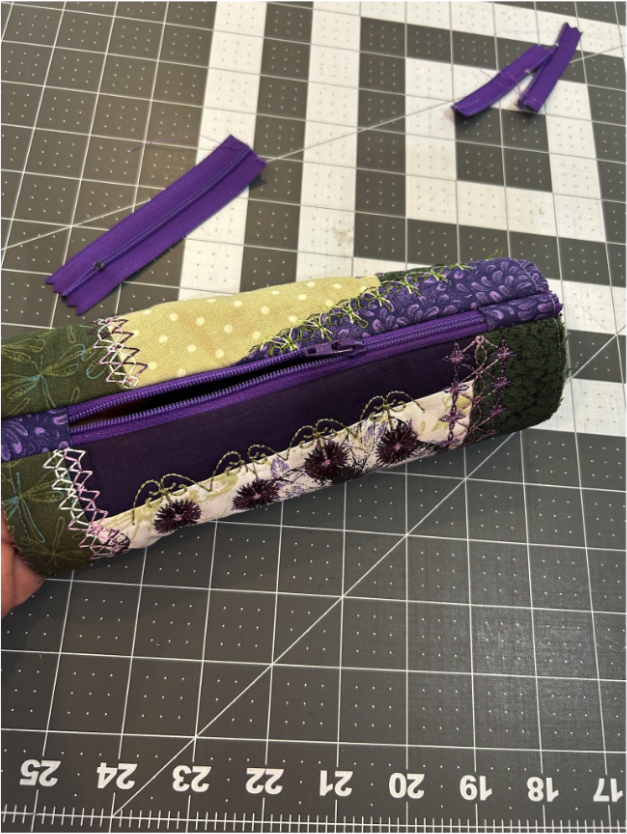
Turn the pouch inside out. Line the zipper up the middle of the pouch. Make sure your zipper is open.

Clip the bottom of the pouch closed with the zipper in the middle.

If you want a ribbon handle for your bag, fold your ribbon in half.

At the raw edges. I fold it in half sideways so that it becomes more narrow. When I place it in the bag, I will place the fold toward the front of the bag.

On the other edge of the bag, opposite where you clipped, clip the edges together with the zipper on the right side. If you're using ribbon, place it down in the bag between the crazy patch layers with the fold toward the center. Line up the raw edges and clip everything in place.

It will look like this with the edges clipped in opposite directions.
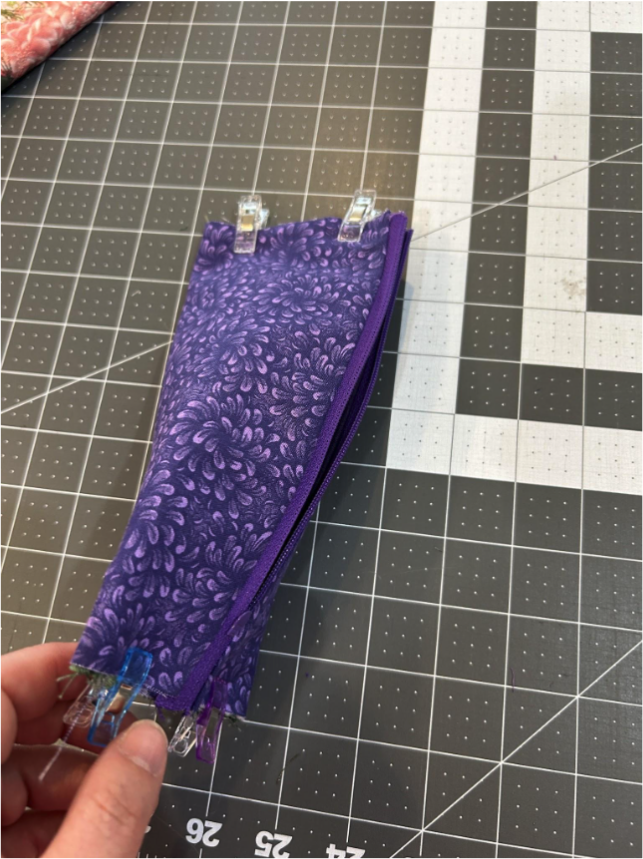
Stitch across the ends of the bag with a ¼” seam allowance.

Stitch across the ends with a tight zigzag stitch. Trim any remaining threads after you’re finished stitching.
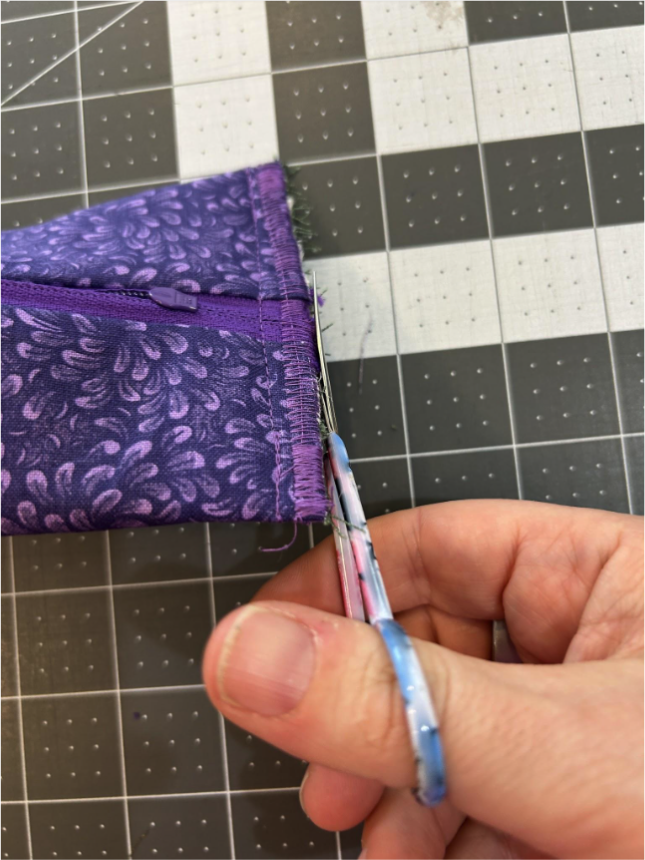
Turn the bag right side out and push out your corners.

And there you have your Asymmetrical Bag, ready to use!

This bag is put together a little differently than the others. You will be using a crazy patch block for the front and the back of this bag. Choose the one you want for the front to begin with. Sandwich the crazy patch block together with the lining piece, wrong sides together.

Lay a straight edge from corner to corner.
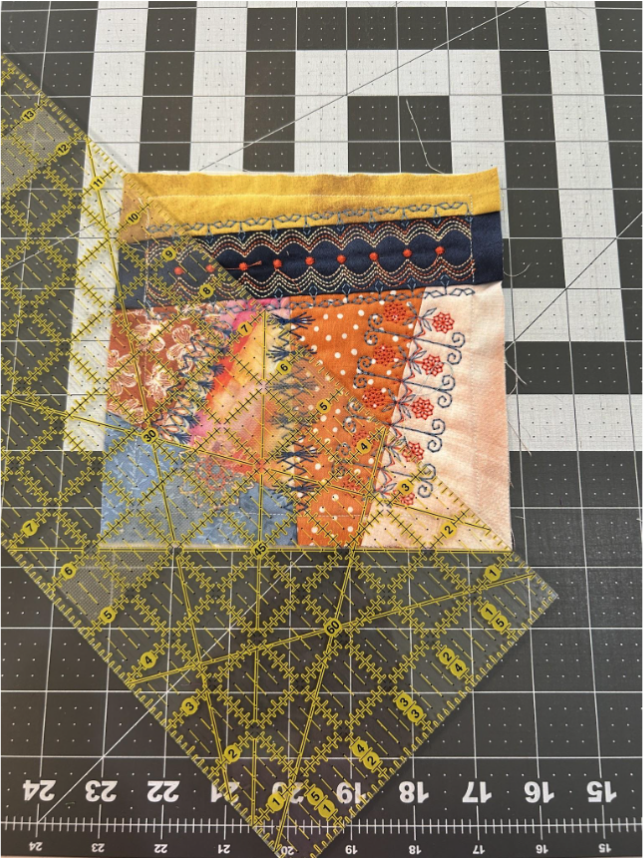
And cut through both layers.
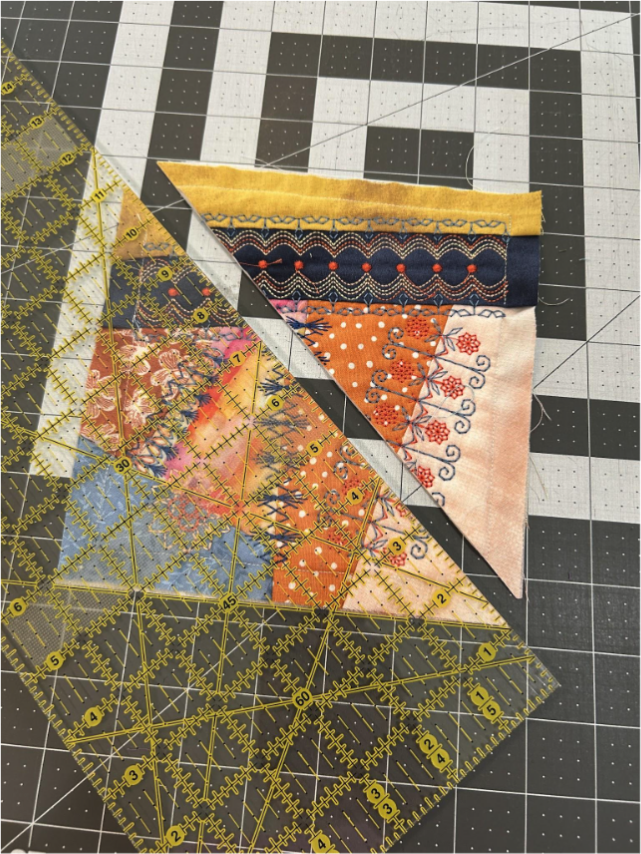
Press your small squares in half. With the right side of the lining facing up, line up the zipper with the right side up, and cover the ends of the zipper with the folded squares, with ½” of the tab overlapping the zipper.
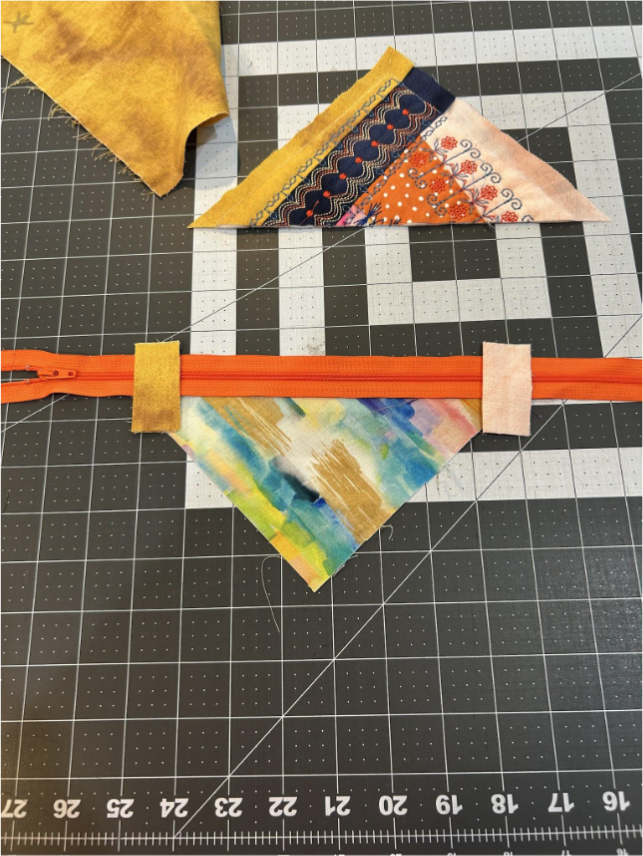
Sandwich the zipper with the crazy patch piece, aligning the long edge with the zipper.

Sew close to the zipper teeth.

Fold the lining and the crazy patch piece so their wrong sides are together and press in place.
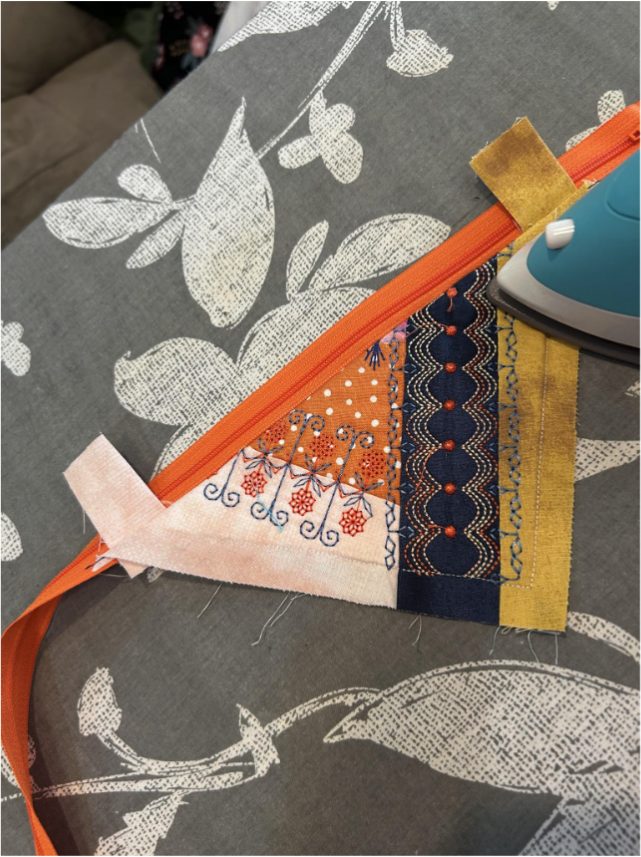
Move your zipper pull to be between the two fabric tabs covering the zipper.
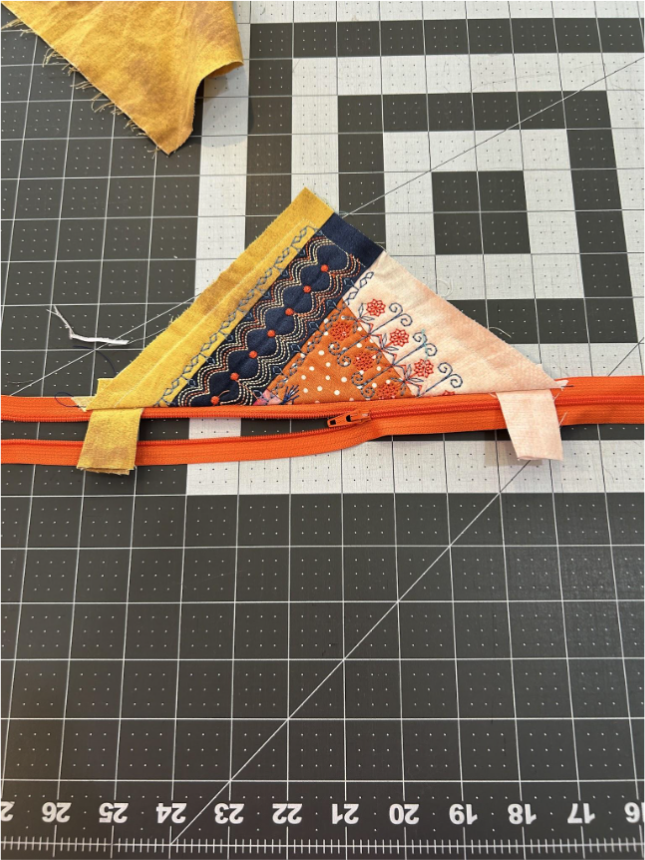
Sandwich the zipper with the remaining crazy patch and lining pieces. Line up your points of the triangles horizontally with the points of the already sewn piece.

Stitch close to the zipper. Feel free to pause and move the zipper pull out of the way if you need to.

Open the fabrics and turn them so their wrong sides are together. Press the fabric. It may be a bit bulky where there were decorative stitches, but just press the best you can.
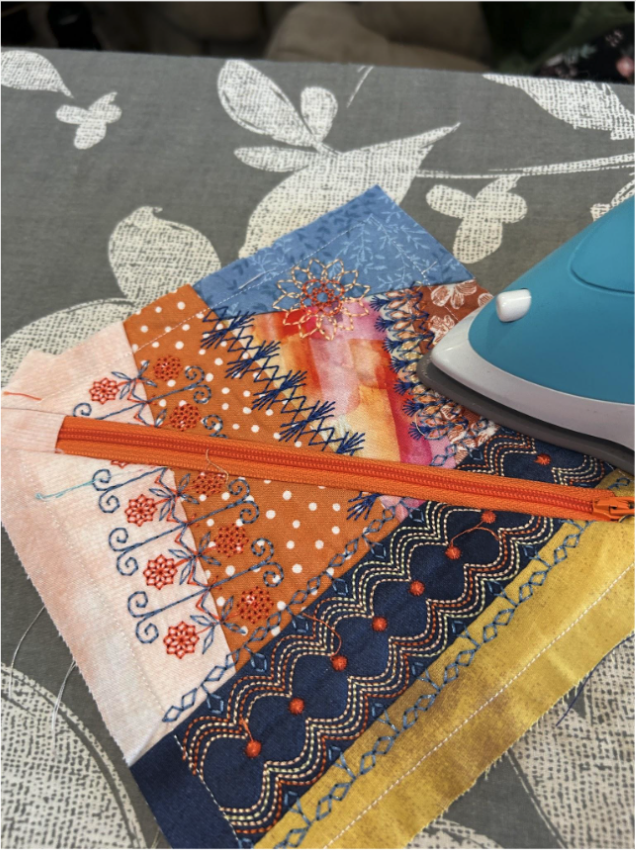
If you’d like to add an optional decorative stitch along the fabric by the zipper, you can do that now.
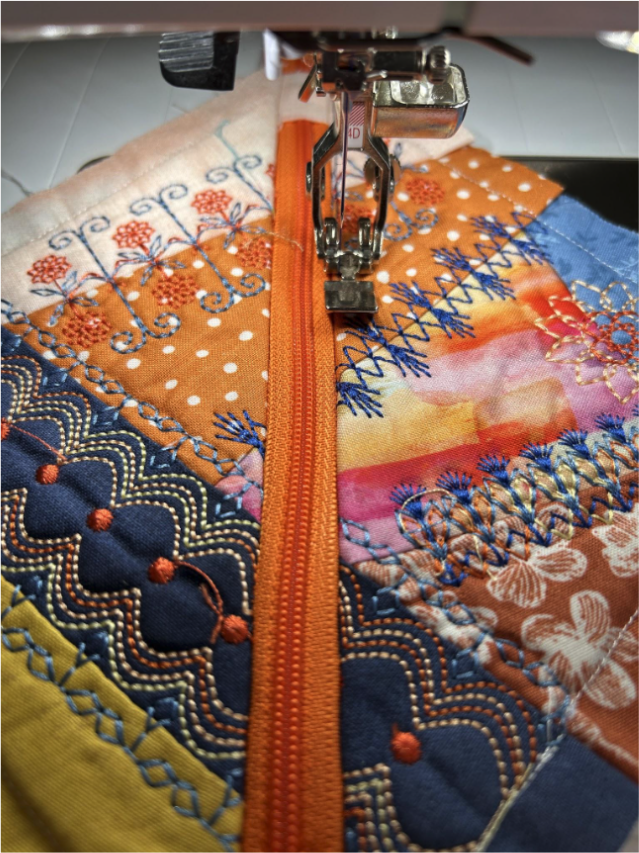
Trim the ends of your zipper.

Open your zipper at least halfway.
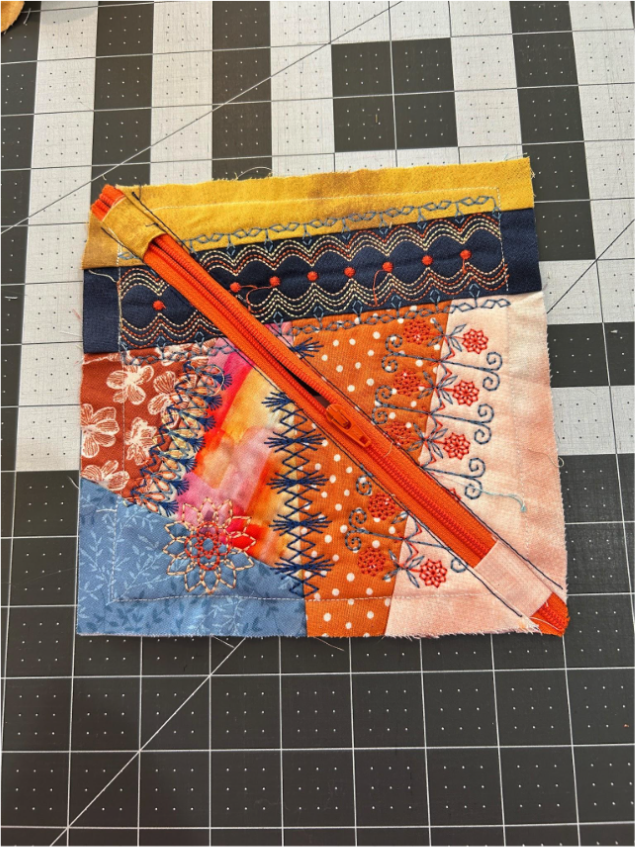
Place the remaining crazy patch block right side down on the patch with the zipper, lining up edges.

Place the lining piece, right side up, lining up edges.
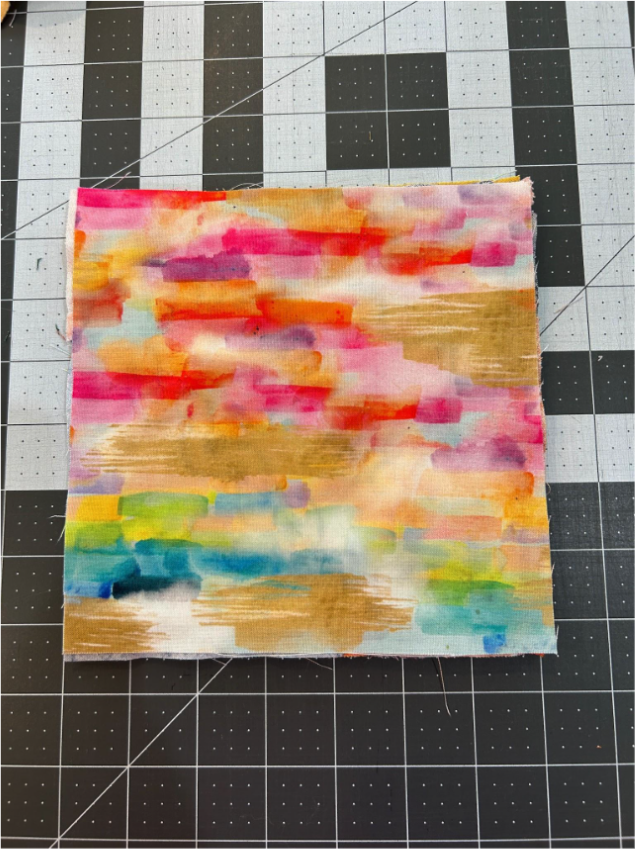
Take it to your machine and, using a ⅝” seam allowance, stitch all around the square. I flip the bag so the zipper is up and so I can see the zipper and ease my needle around the teeth while I stitch.

When you are done sewing, clip your corners and trim the seam allowance to ¼”.

And stitch a tight zigzag stitch around all four sides to finish the edges.
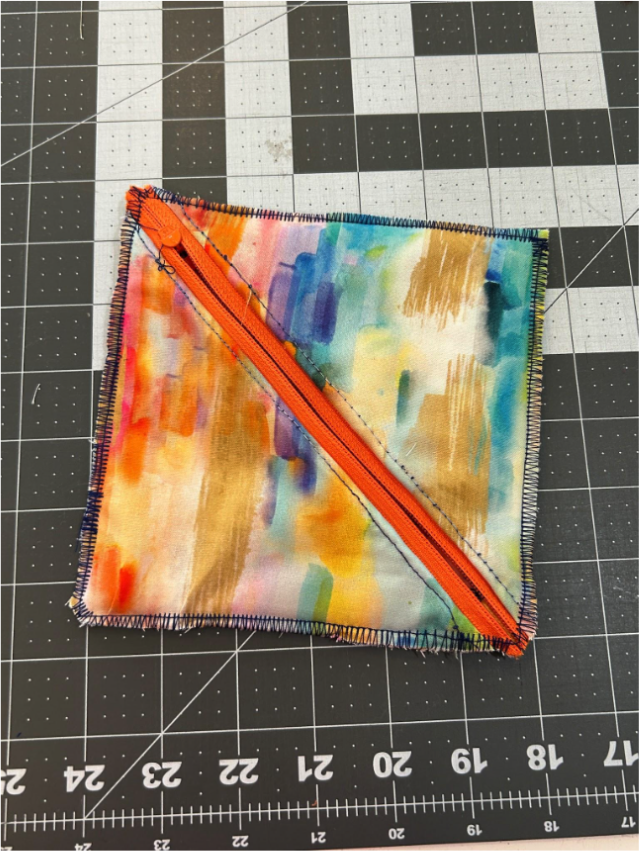
Reach inside the open zipper and turn it right side out. Push out your corners and press the edges of the bag in place.
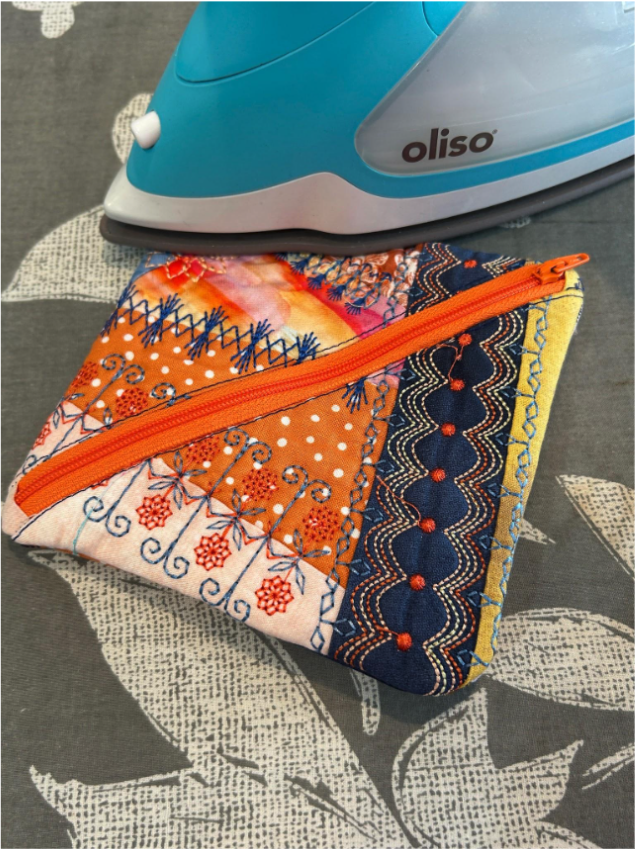
For this bag we will need three crazy patch squares; one of them will be the top piece where the zipper is. I find this piece to be better if it doesn’t have as many large embroidered shapes in it as it will be cut and folded a couple times. The other two pieces will be the main body back and the main body front.
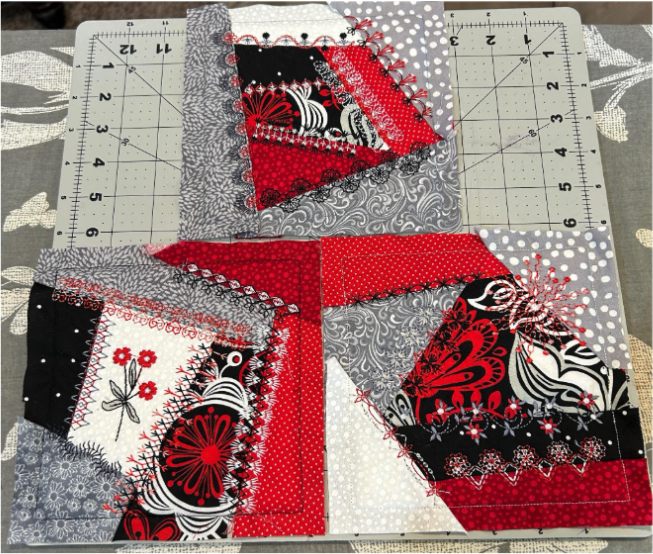
When I choose the piece for the front, I like to cover it with my piece of mesh to see how it’s going to look finished. Blocks with delicate pieces may not be seen as much through the mesh.

You are going to cut the top piece for the zipper. You want to cut your line a quarter of the way from the bottom of the finished block. In my case, my block was finished out at 6”, so my cut line is 1½” from the stitching line and 2” from the bottom of the fabric (adding in the ½” seam allowance). Do the same with your lining fabric.
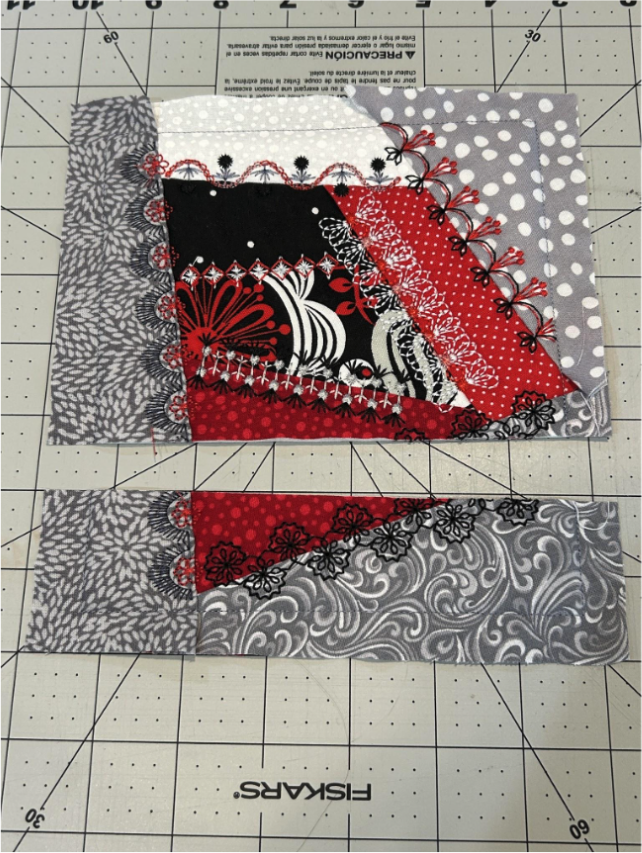
Sandwich the zipper between the small pieces with the pull facing the crazy patch block. Stitch along the edge with your zipper foot.

Turn the fabrics so the right sides are out and press in place.

Topstitch ⅛” from the edge on the crazy patch piece.

Now we will stitch the bigger crazy patch piece and lining on the other side of the zipper the same way we did with the smaller pieces.
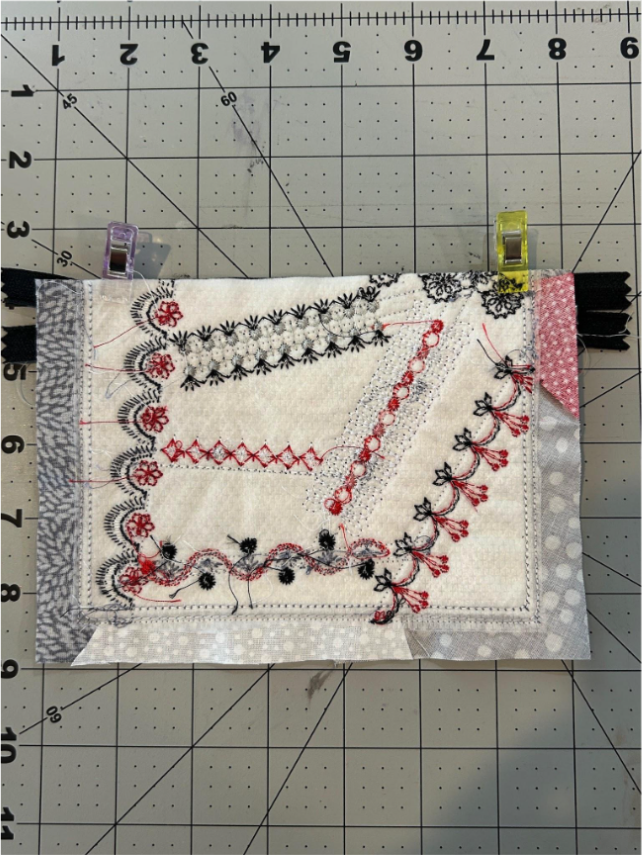
Make sure you’re aligning your edges with the edges of the smaller pieces and stitch in place.
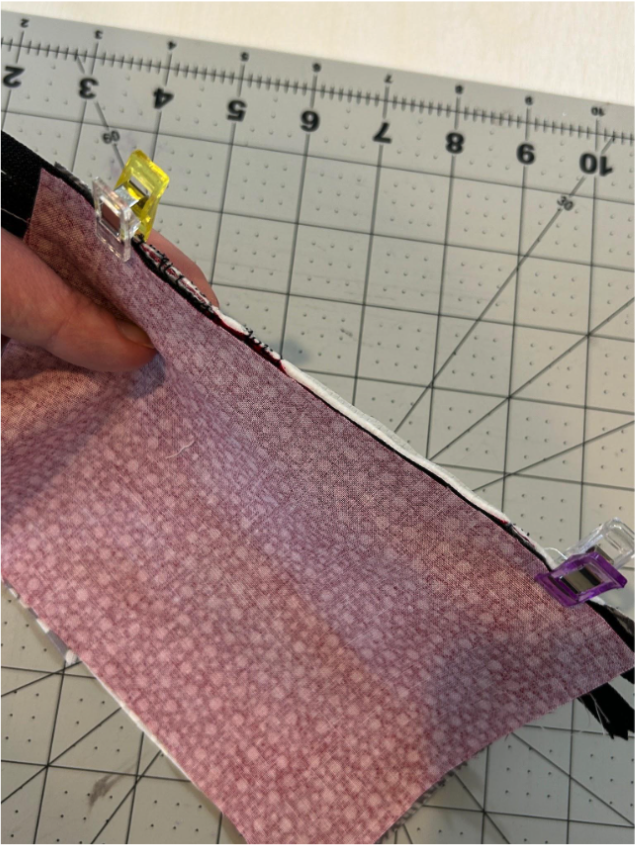
Turn your fabric so the right sides are out and press in place. Top stitch the edge to match your other side. This is the top panel for your bag.
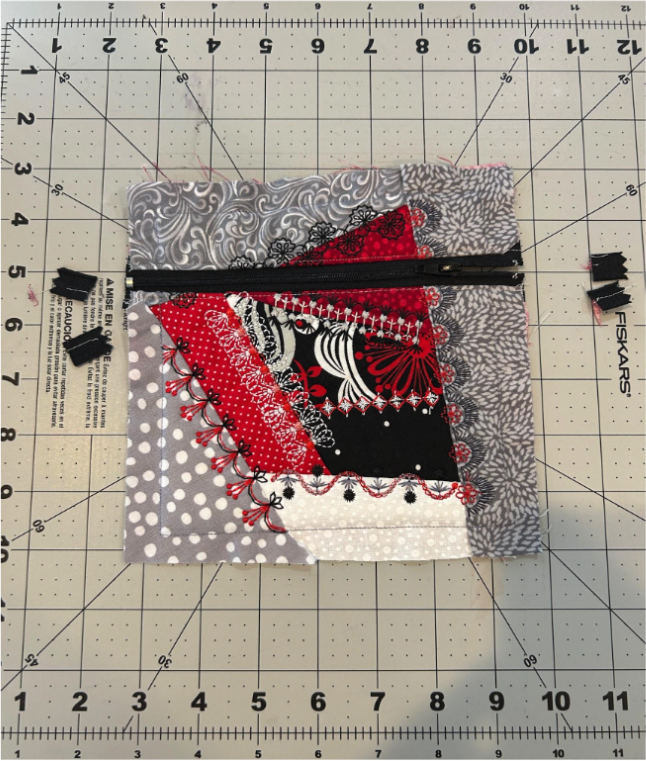
Lift the lining from the large portion of the top panel. We don’t want to sew this part right now so we will only be working with the crazy patch part.
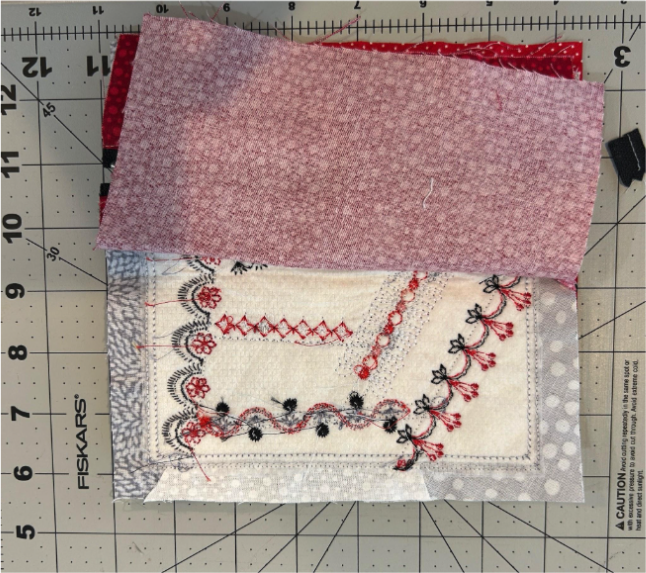
Sandwich the front and back crazy patch panels, wrong sides together. Try to line up their stitching lines. I like to clip them all around so they stay together.
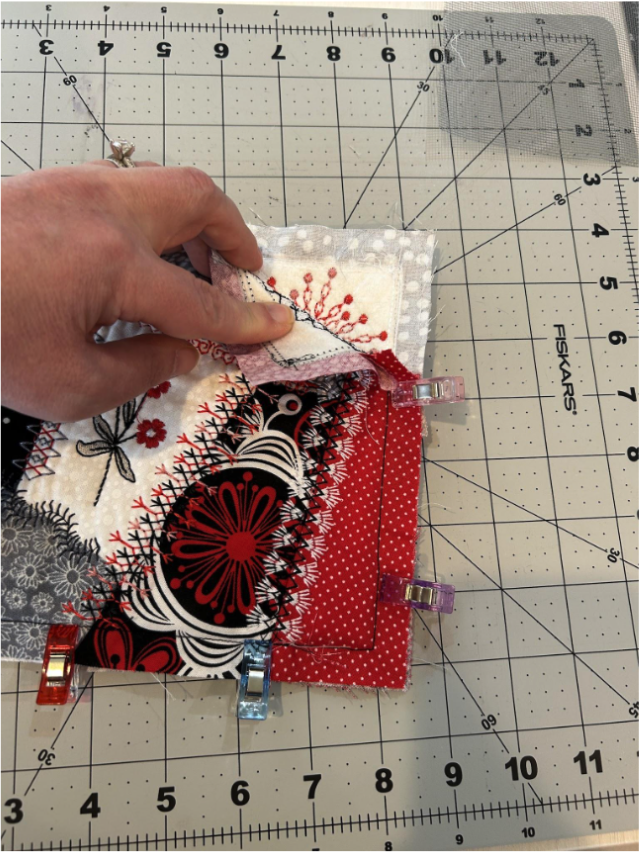
Then line up the sandwiched crazy patch blocks with the top panel’s large crazy patch piece and clip it all together.

Stitch the sandwich and top panel together through the racing lines.

After it’s stitched, press the seam allowance toward the top panel.

Bring down the lining, and fold the end under so that it covers the seam allowance and extends past the stitching line by ⅛”. My fold was just a little under ½”. Press it in place.

On the right side of your project, stitch in the ditch, or the seam allowance between the top panel and the body panel of the bag. This should catch the lining fabric in the seam to finish the back.
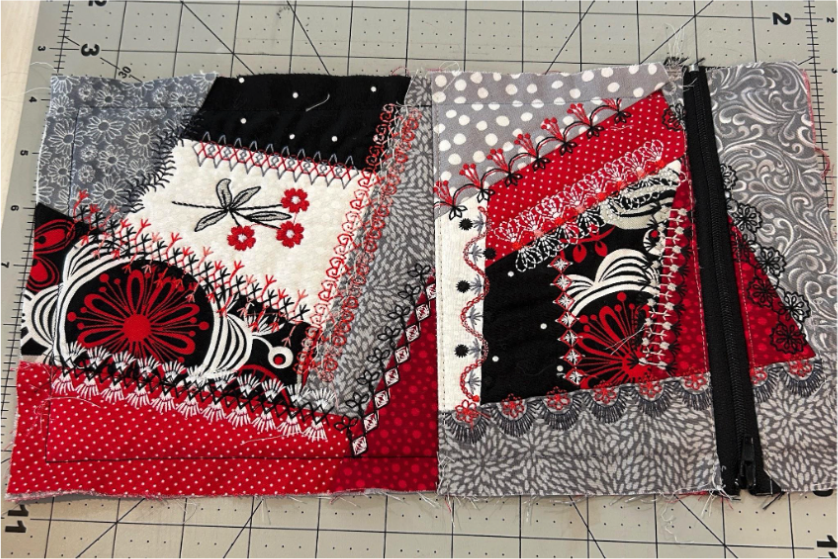
Now we will repeat the same thing for the short piece on the top panel. Fold back the lining.

Clip the mesh piece to the right side of the crazy patch piece.
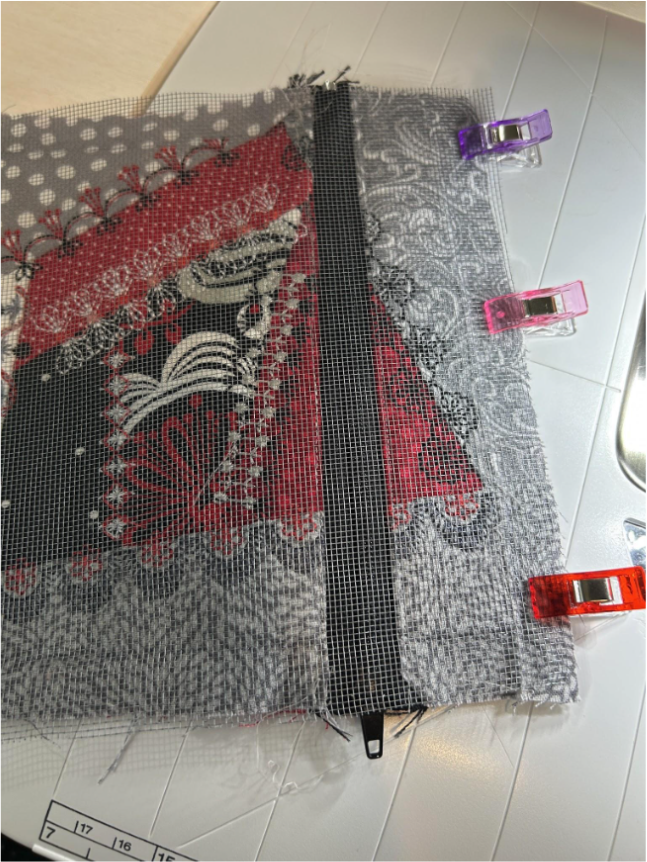
And sew it in place through the racing lines.

Finish this like we did the other piece by folding the lining down, pressing, and stitching in the seamline.
NOTE: My mesh was a plastic mesh. If you’re using too high a heat it can melt, so test your iron on a scrap piece first to ensure you use the right temperature, or press the lining away from the mesh.

Let’s finish the bag. Fold it so the wrong sides are together. This means your lining is showing on top. I like to flip the bottom piece of my top panel first near the zipper pull.
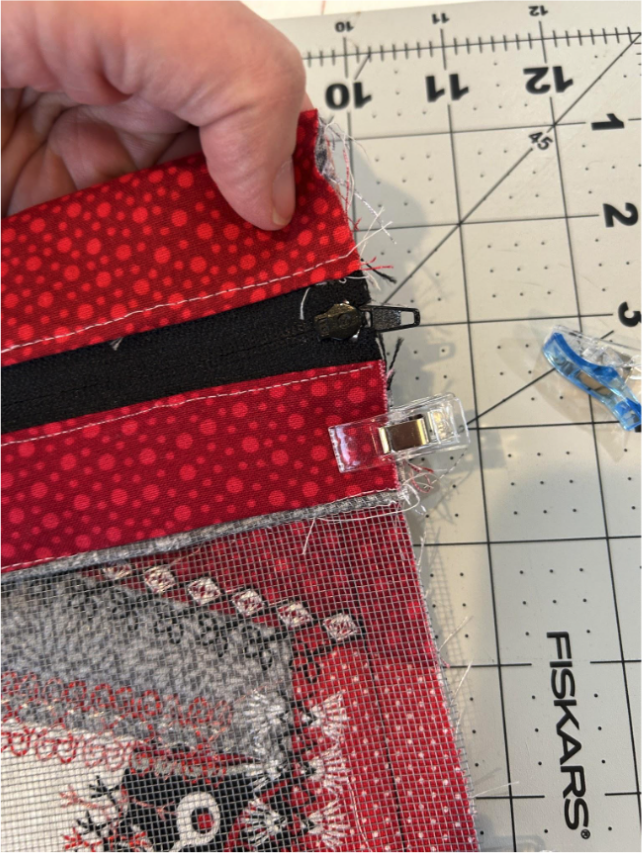
Open your zipper at least halfway and clip the rest of the way around.

Now it’s time to stitch the bag together. We will be stitching the two sides and the bottom of the bag. We don’t have our “racing lines” to follow this time, so I stitched ⅛” in (not in the seam allowance) from the outside stitching line on the panels. This also measured as a ⅝” seam allowance for me up on the top lining panel.

This is what it looks like at this point.
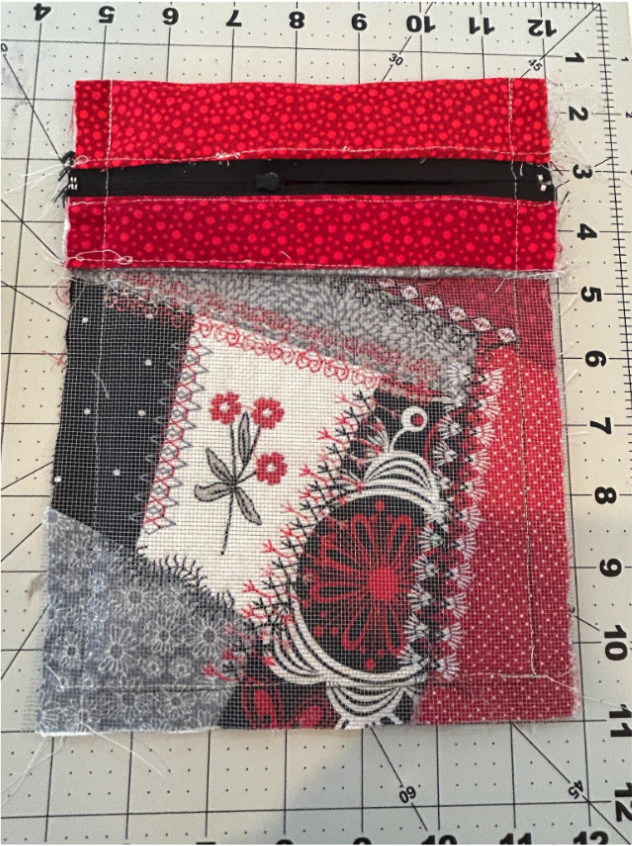
Clip your corners.
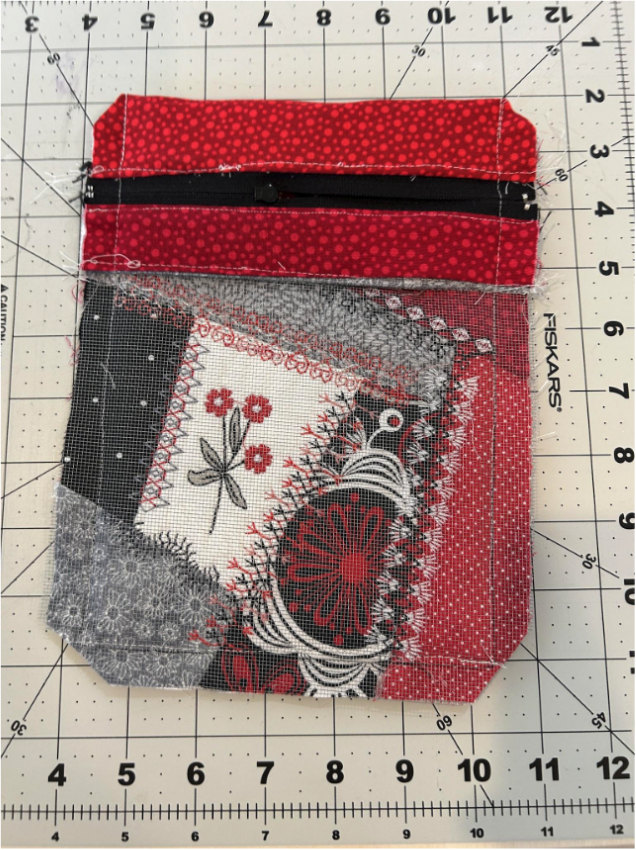
Trim the seam allowances to ¼” and stitch with a tight zigzag around the two sides and bottom of the bag.
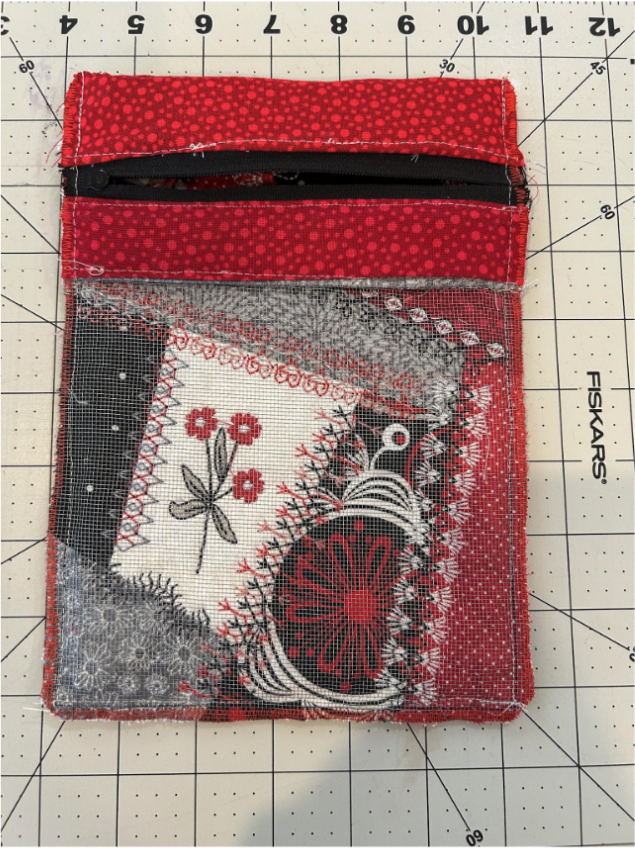
Now reach through the opening and turn it right side out, pushing out your corners. Press it with heat that’s appropriate for your mesh, fill it with stuff, and enjoy your bag!
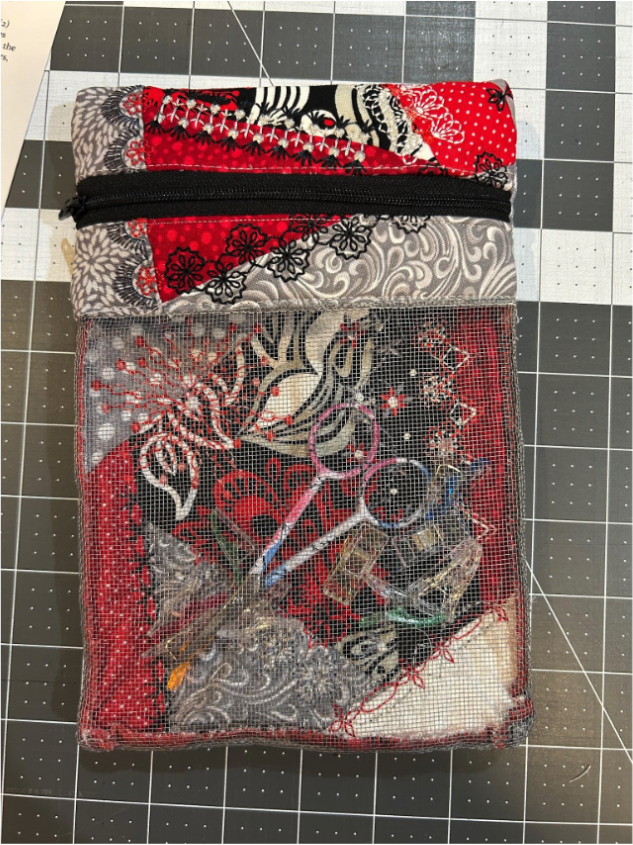
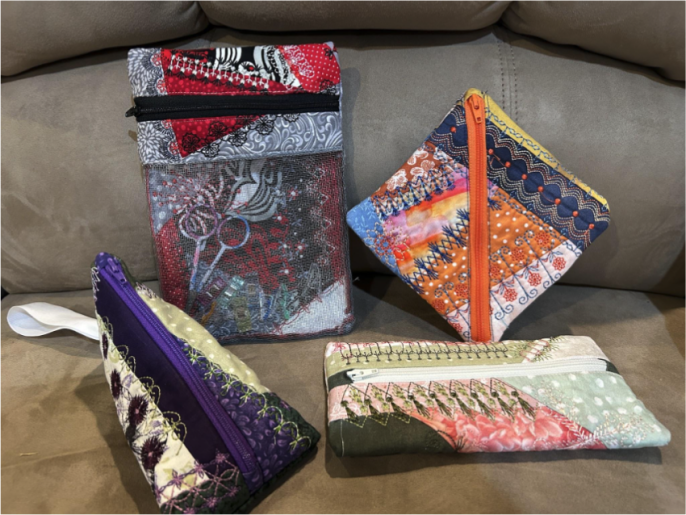
Crazy patch zipper bags are one of my favorite ways to turn embroidered quilt blocks into practical handmade gifts. Whether you choose the Narrow Pouch, Asymmetrical Bag, Diagonal Zipper Bag, or Mesh version, you'll have a unique project that's both beautiful and functional.
If you loved this project, you’ll find plenty more just like it in our In-the-Hoop Bags & Pouches You’ll Actually Use (Zipper Bags, Totes & More) blog post—a curated collection of quick, creative, and practical projects perfect for gifting (or keeping!).
Share your finished projects with us in the Designs by JuJu Embroidery Blessings Facebook Group or use the hashtag #designsbyjuju anywhere on social media. We love to see what you create!