Toggle Nav
 Inspire.
Create.
Stitch.
Inspire.
Create.
Stitch.
Search
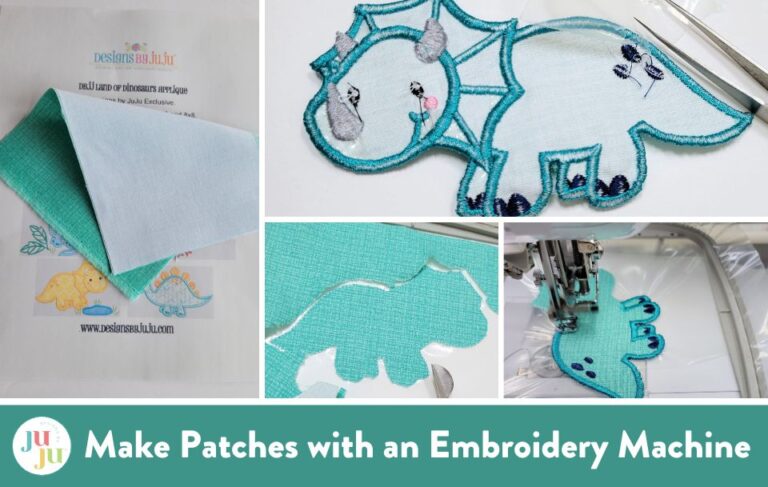

Making patches with your embroidery machine is an easy and fun way to decorate clothing and accessories. There are two distinctly different types of embroidered patches. Those consist mainly of lettering like a business name, logo, or school seal. Next, there are appliqued patches, smaller designs that can be adhered to things you can’t get into an embroidery hoop or you don’t want all the embroidery stitching to show on the back. We are going to explore applique patches in this tutorial.
Applique designs are ideal for patches. The best designs have a satin stitch around all the outside edges. They also cannot have any stitched ‘arms’ or ‘skinny threads’ coming off of them (such as snowman arms or wild hair that is only embroidery stitches and no stabilizing applique fabric) unless you have the experience of stitching down these bits onto your finished project.
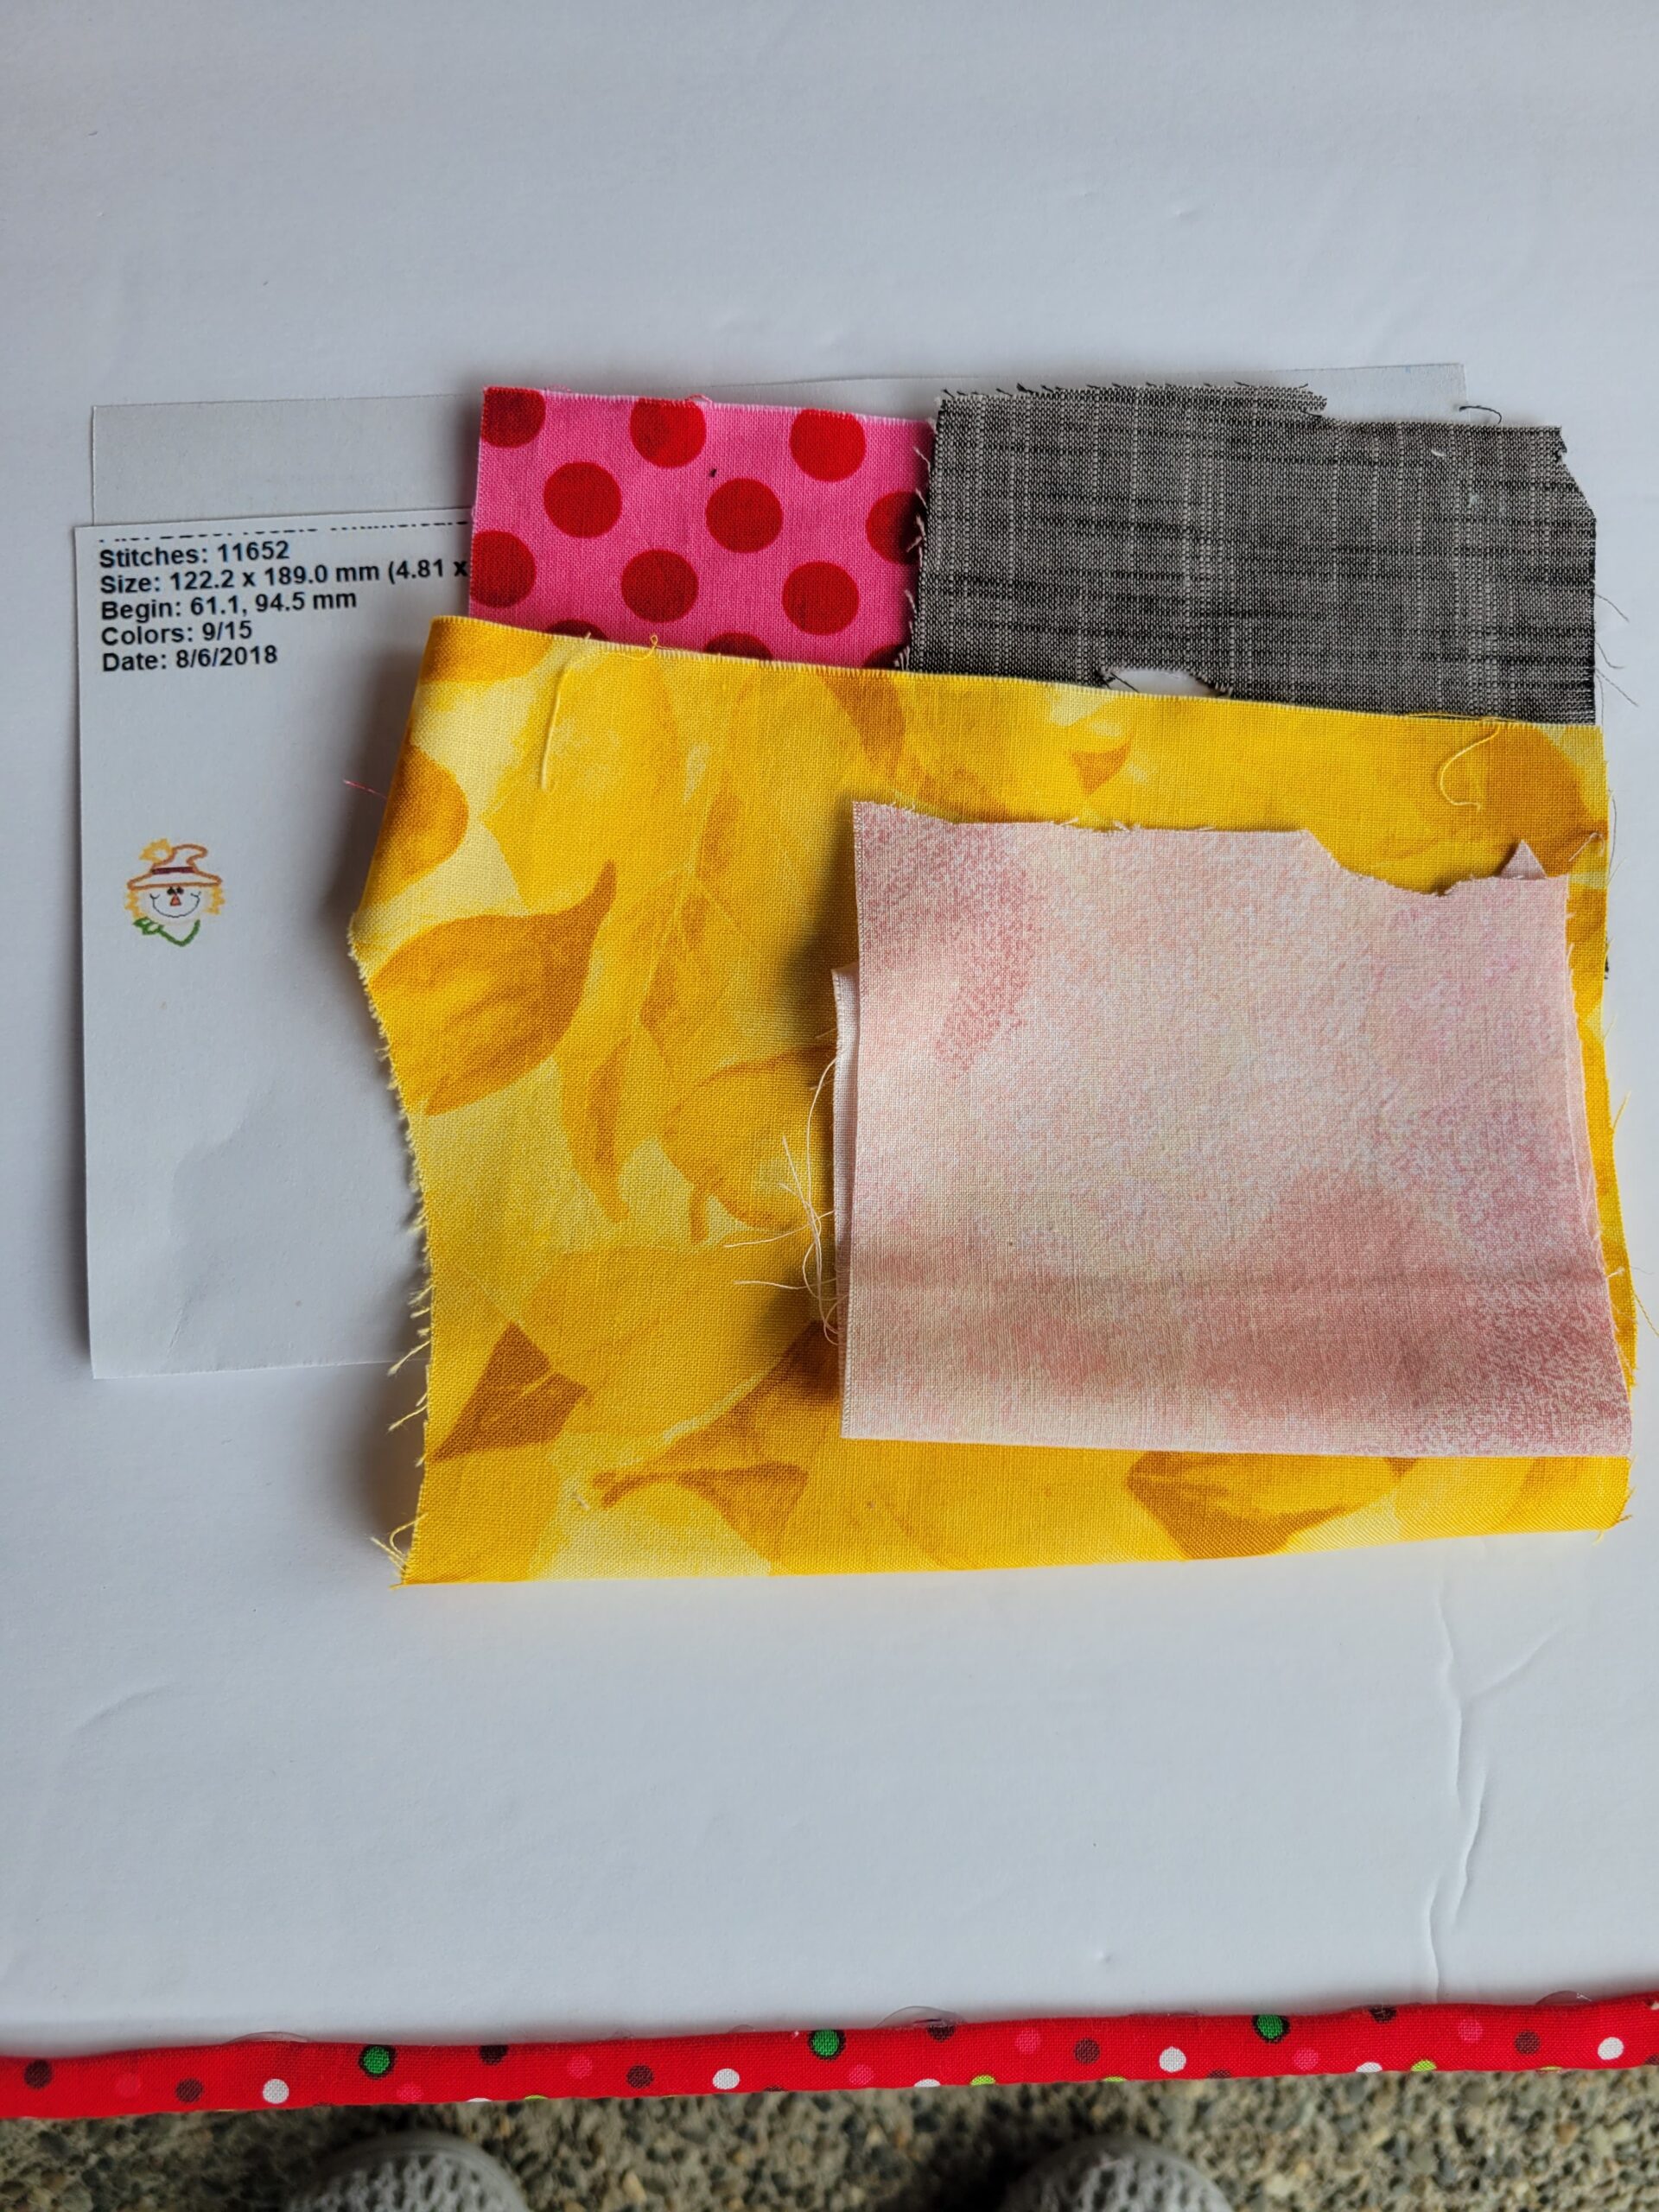
For this tutorial, I have chosen two designs from Designs by Juju.
The Scarecrow is a free design on the website.
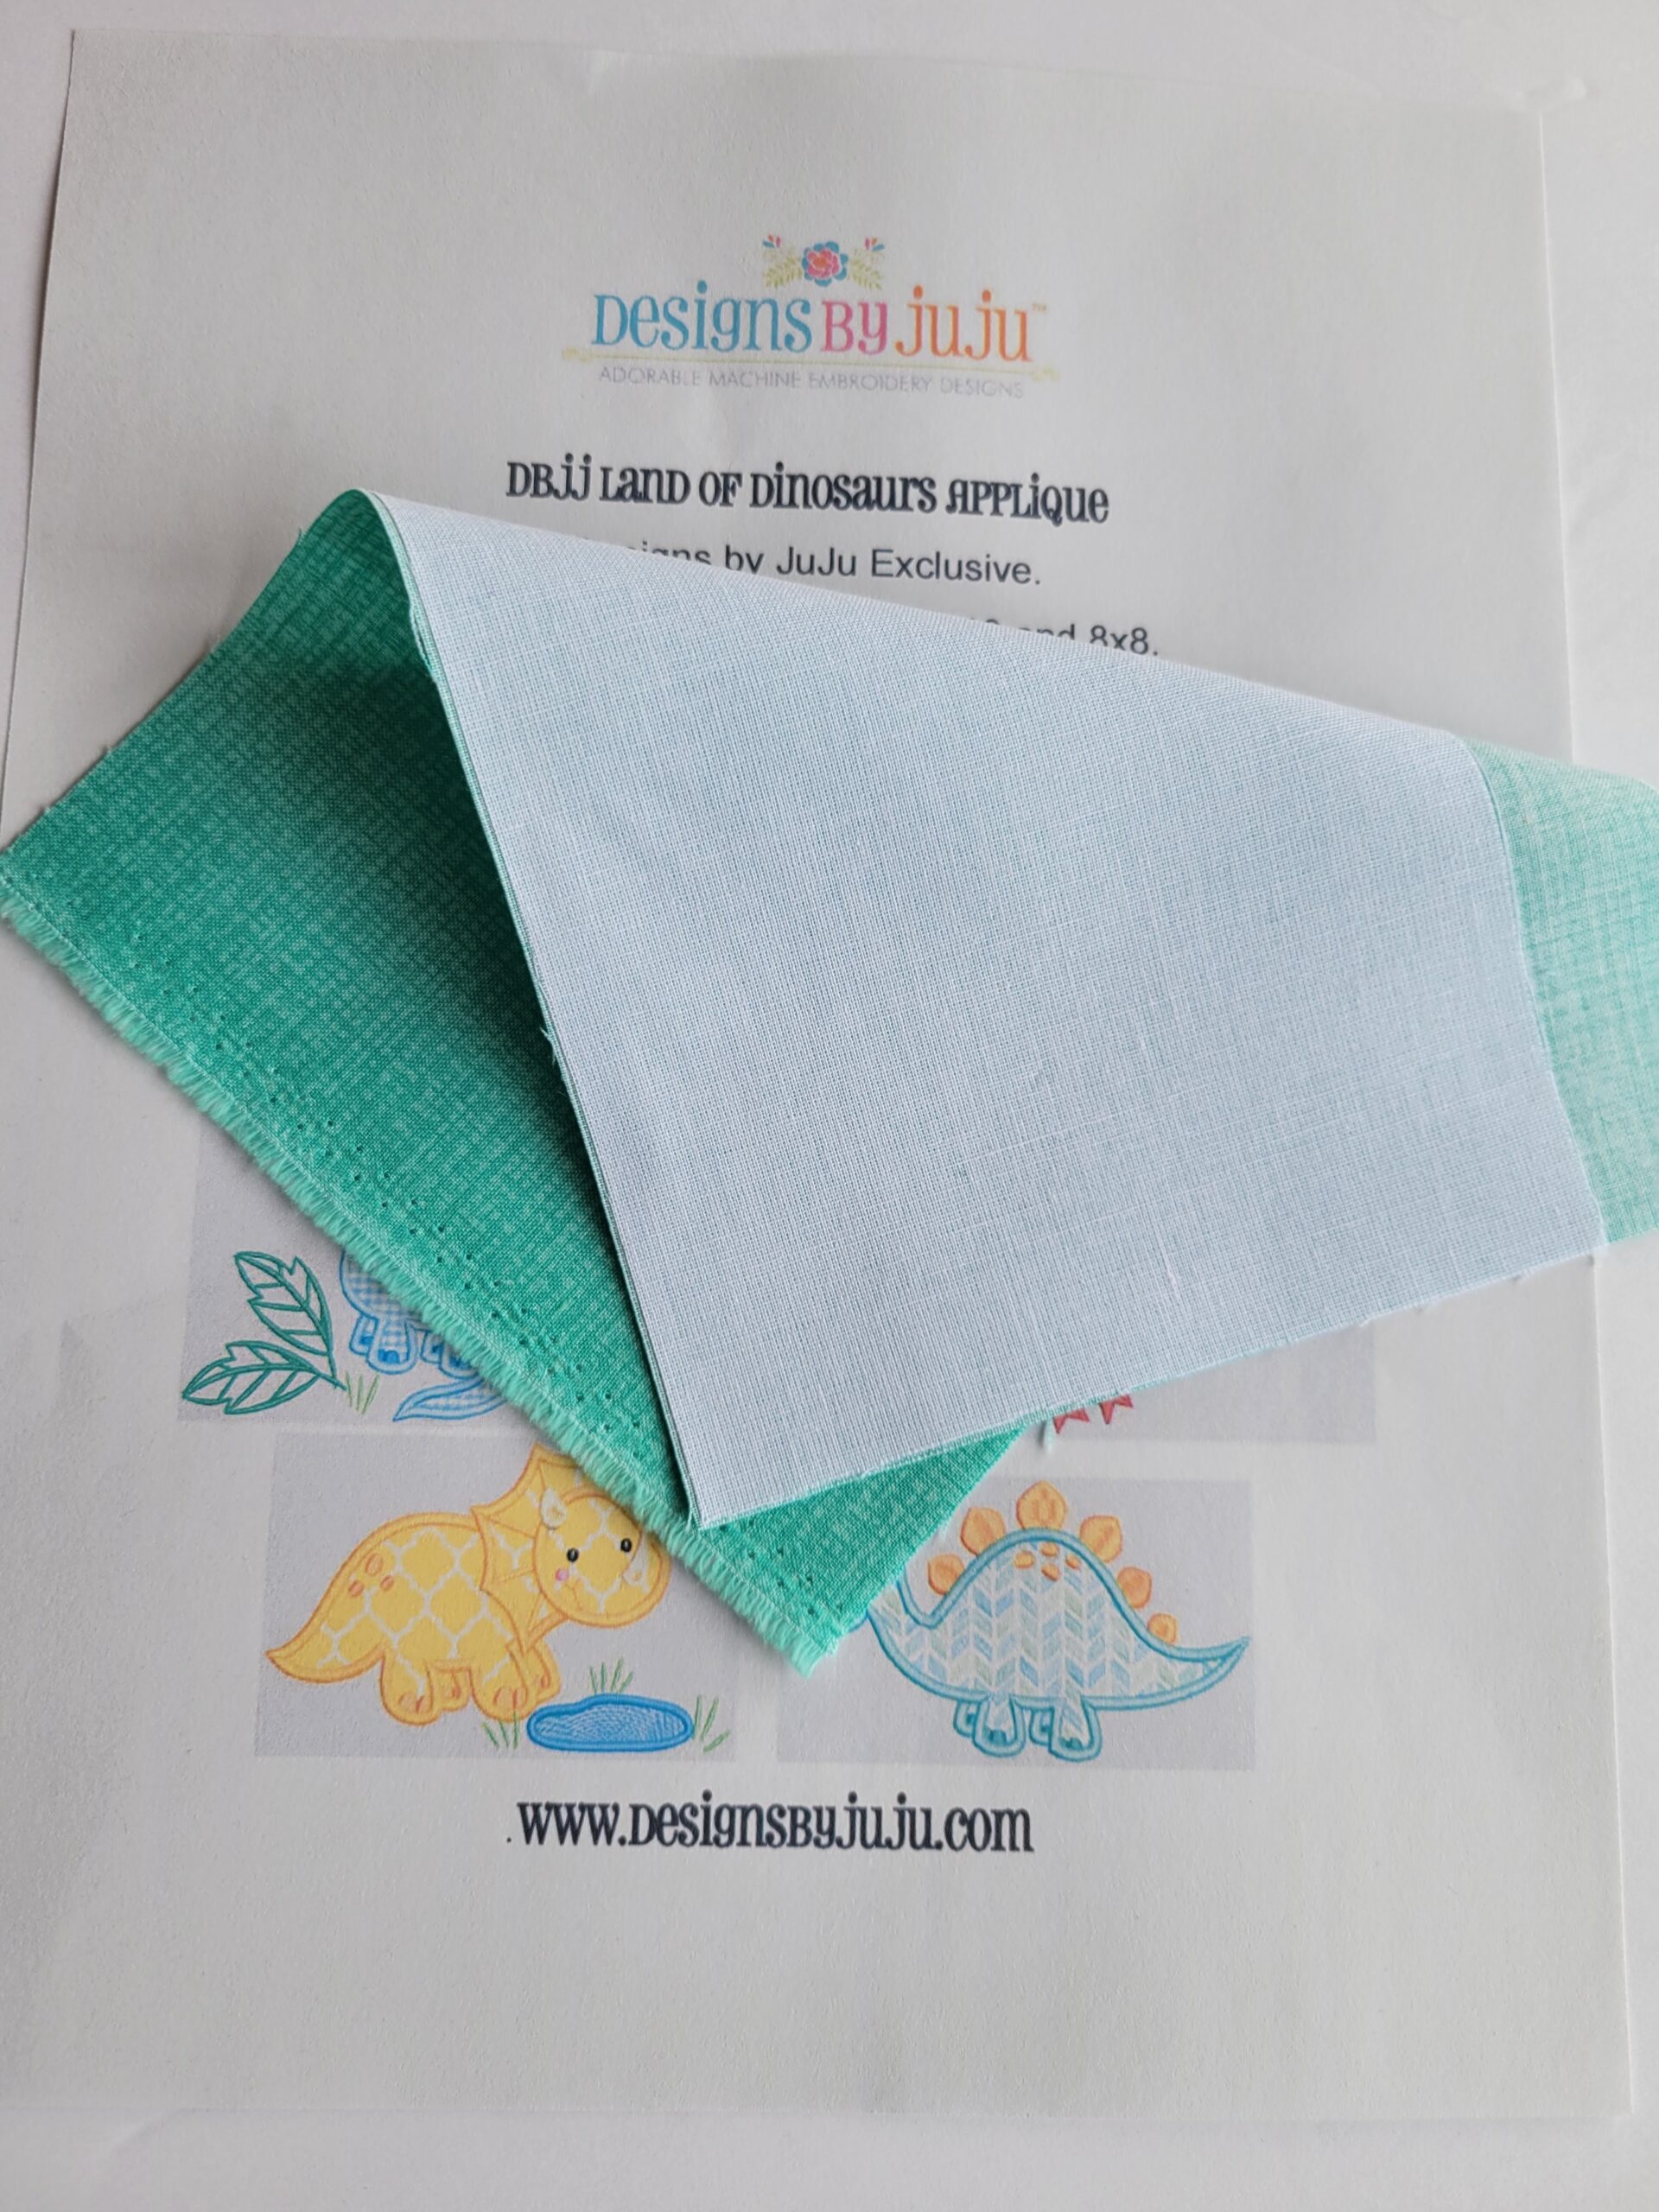
The Dinosaurs are from Designs by JuJu (DBJJ 2138 Land of Dinosaurs).
Once you have your design, download your format to your USB stick and print any instruction pages you need; you are ready to gather your supplies and get started!
These are the products I used:
Sulky Ultra Solvy this is a firm, water-soluble stabilizer. I like it because it gives an excellent foundation to your embroidered design and doesn’t tear away from your project as you do the final satin stitch. It is heavy enough that, generally, you only need one layer. But there are always exceptions! If you have chosen a project that has a lot of satin stitching, like the toes of the triceratops, you may want to float a scrap of the Ultra Solvy under your hoop as well. I will touch on this later. One more point - I like the Ultra Solvy over any tearaway stabilizer because it tears clean, no fuzzy little fibers sticking out!

Pellon Shape Flex 101 - this is woven fusible interfacing. It’s used to provide structure and body to embroidery patches.I cut small squares and press them to the back of my fabrics to give the patch more stability.
Fabric Scraps – mine are all 100% cotton pieces for this tutorial.
Embroidery threads to match or coordinate with your fabrics.
Hoop size matters. Choose a hoop that is the size you need without being too large.
Hoop one layer of your Ultra Solvy, making it drum-tight in your hoop. I always use a small screwdriver tool to tighten hoops because hand tightening is never tight enough. See the photo above. (Mine came with my machine.)
Following the steps for your chosen design, stitch and trim each fabric, and then do the satin stitch.
*For the dinosaurs, I skipped over the steps for grass and water because I did not want them in my finished project.

I also slid a scrap of Ultra Solvy under my hoop and secured it with tape (between the bottom of your hoop and the bed of your machine) to give the toe area more stabilization.

Remove your patch from the hoop when the design has finished embroidering. Use your fingers and small tweezers to gently pull the stabilizer from the stitches. You may have to use some elbow grease, but not much to remove the stabilizer. Support the stitches with your fingers. I don’t get into every nook and cranny to get the stabilizer out, just the majority. Pieces less than a quarter inch are tough to get out, and you run the risk of damaging your embroidery. They will eventually wash out without any damage to your patch. Where you have two layers of stabilizer, remove one at a time with your tweezers.
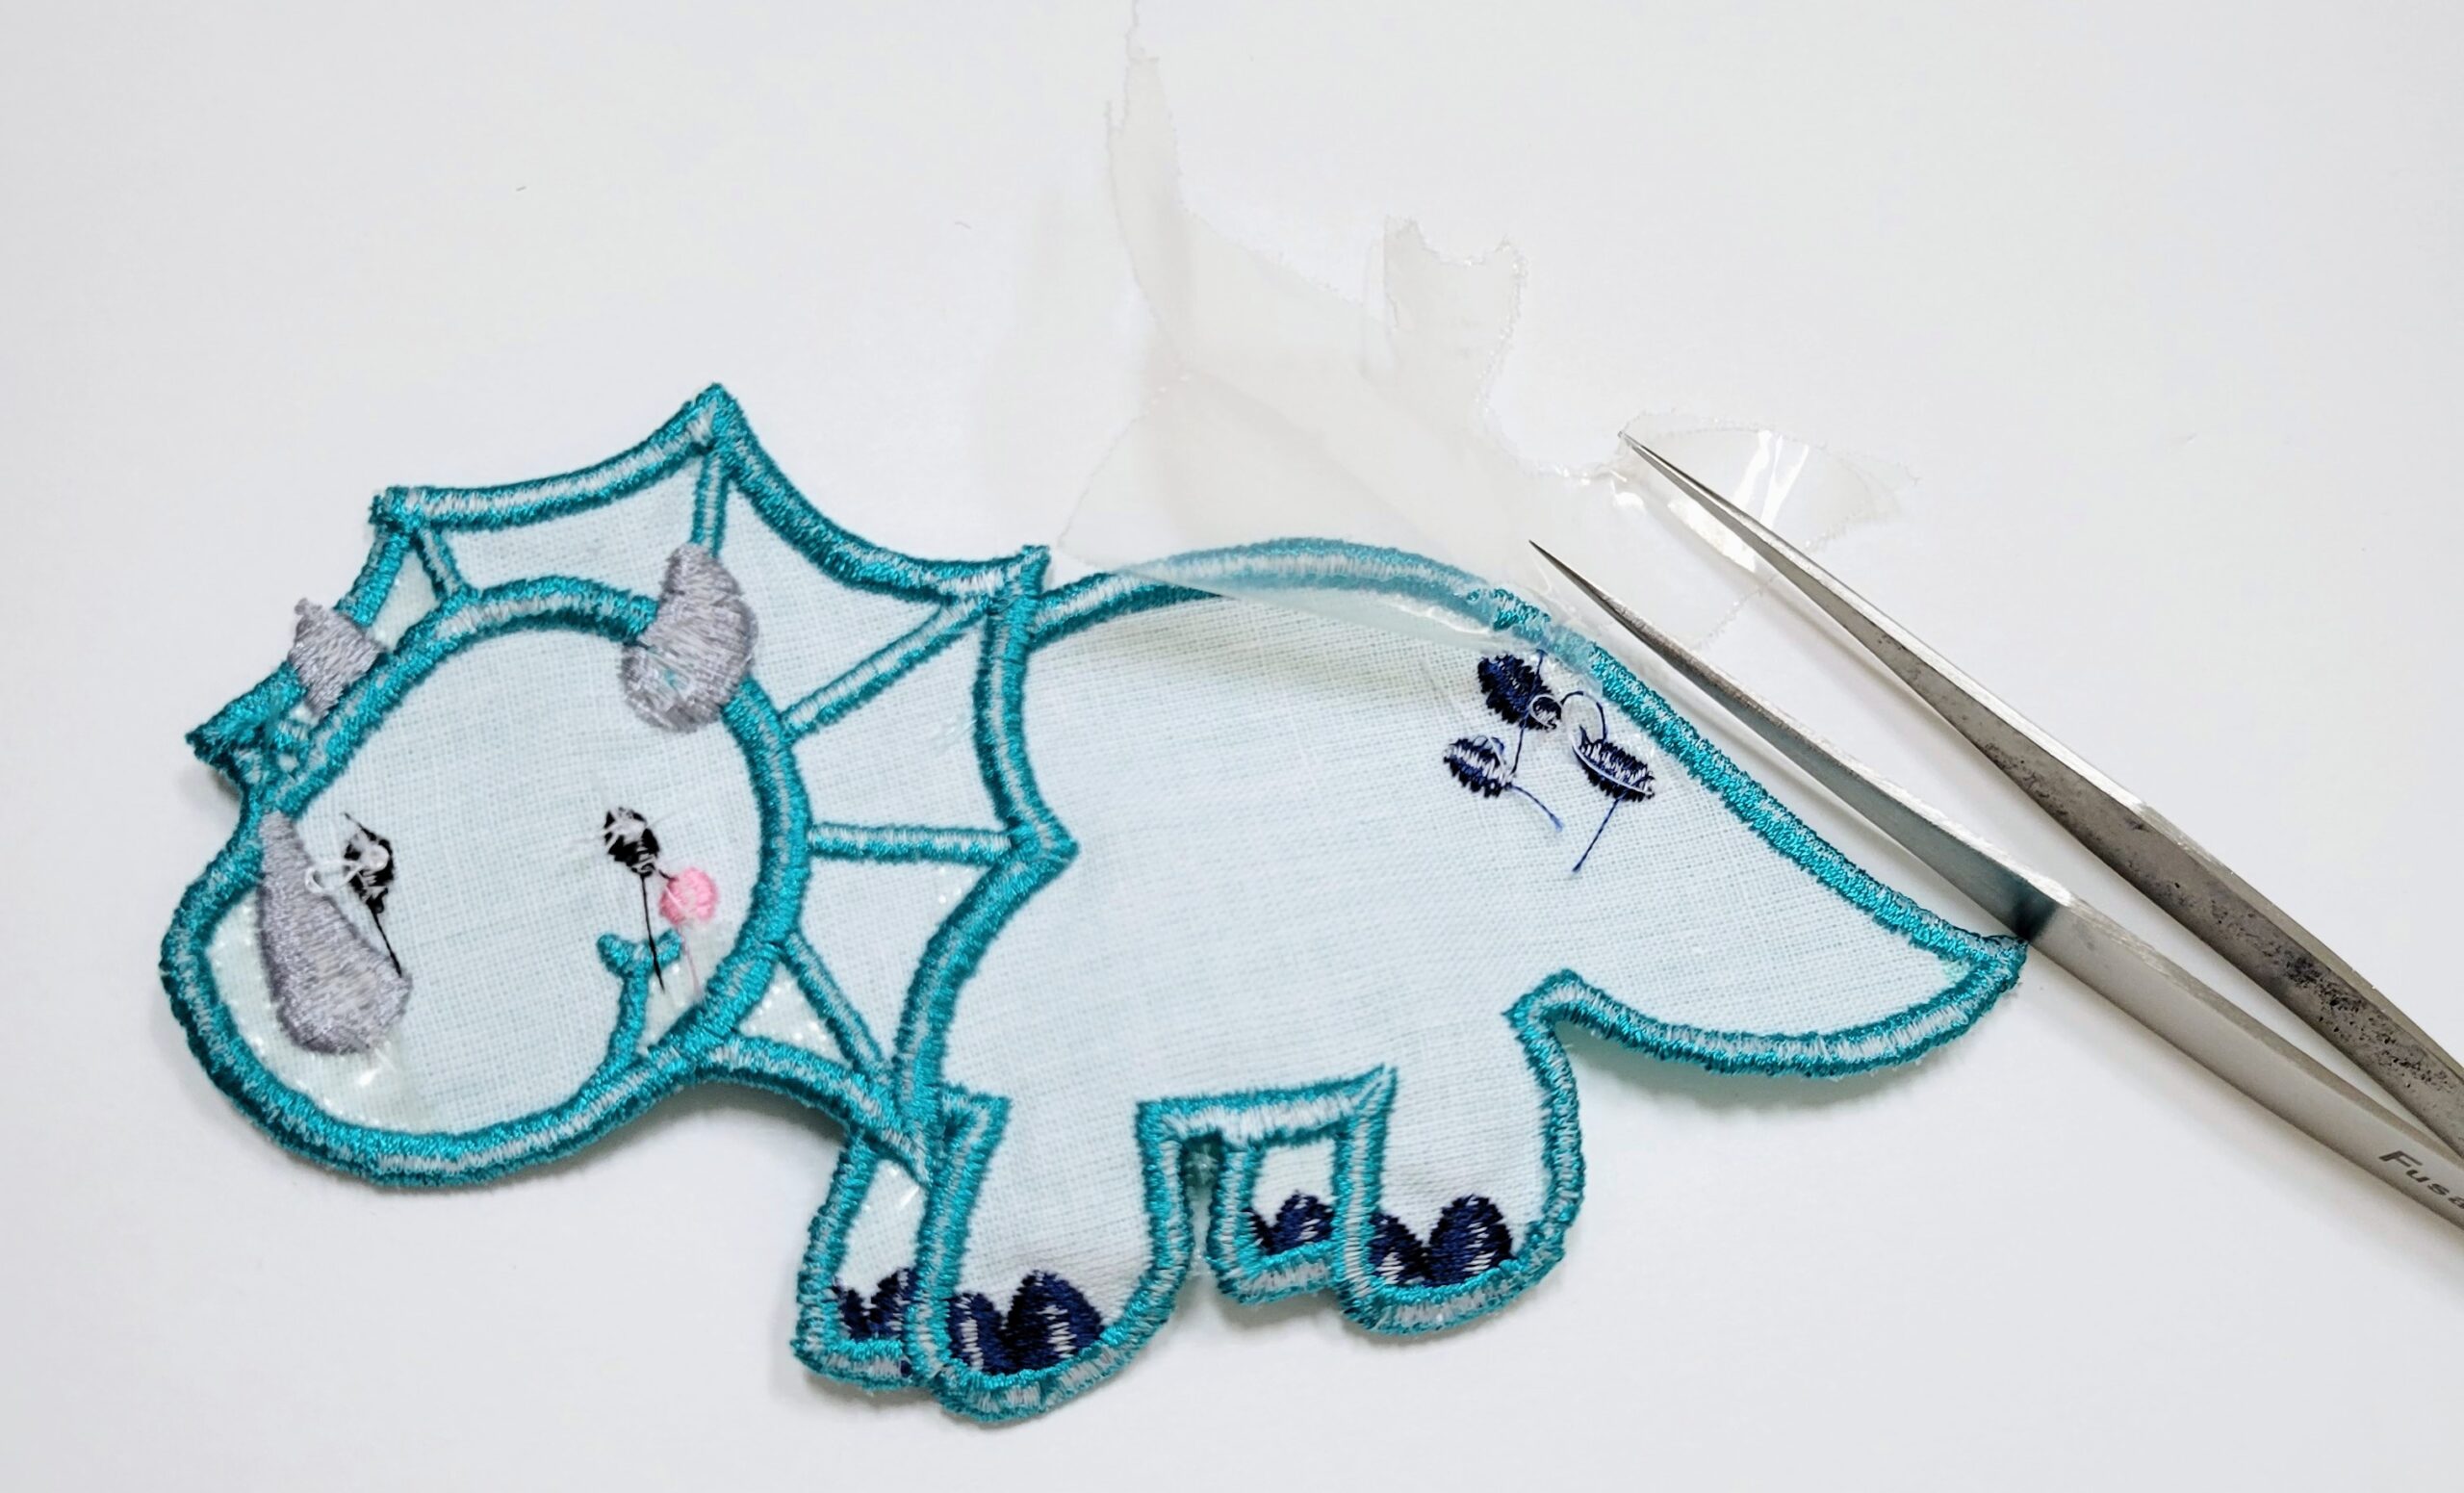
Pull the stabilizer from the front and the back of the design.
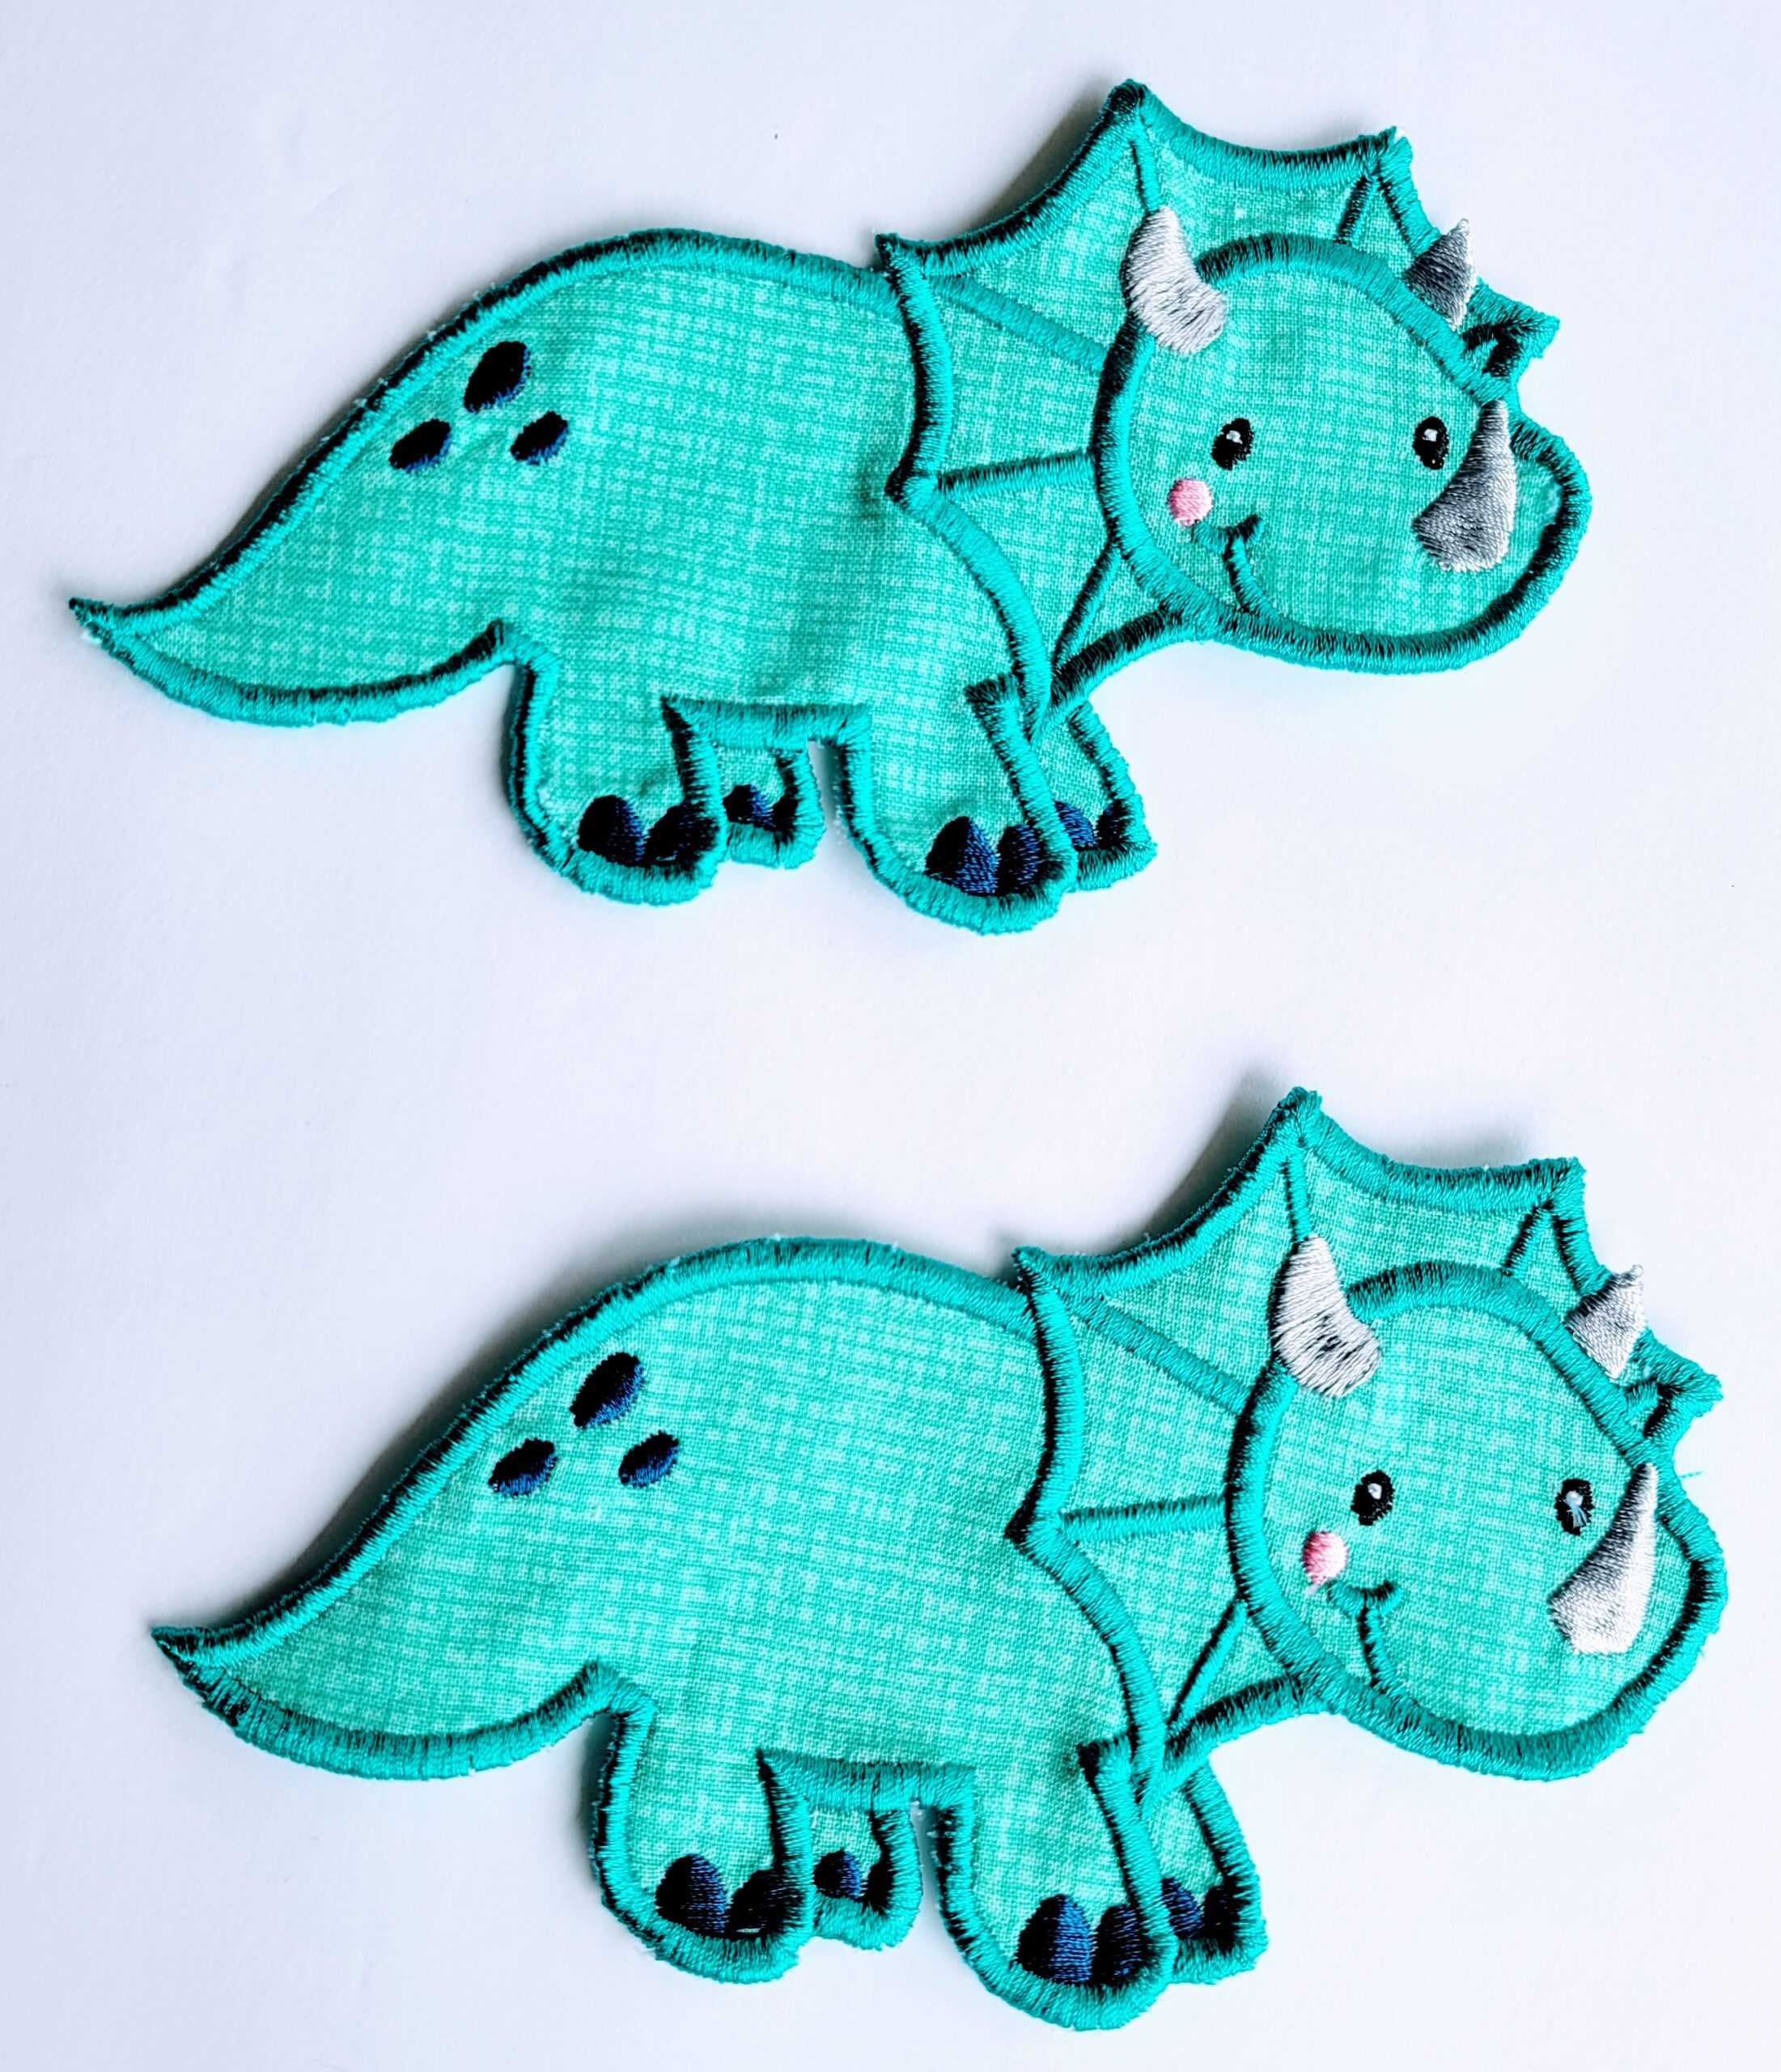
Above is an example of the difference when choosing how many layers of Ultra Solvy to use. The top dinosaur is the one layer of Ultra Solvy; the bottom dinosaur has the added stabilization of a second layer around her toes. The satin stitches are smoother.
Here is my little Scarecrow. I followed all the above steps, using just one layer of the Ultra Solvy. I plan to add him to a postcard and send it to a friend.

I usually sew my patch onto whatever I intended to attach it to using a monofilament thread and a longer stitch length. A longer stitch 3.5 on my machine - check your user manual to see what is recommended. Sewing around the edges secures it snugly through many washings. I have had the most success with this method.
Good luck, and have fun making patches!

