Toggle Nav
 Inspire.
Create.
Stitch.
Inspire.
Create.
Stitch.
Search
Inspire.
Create.
Stitch.
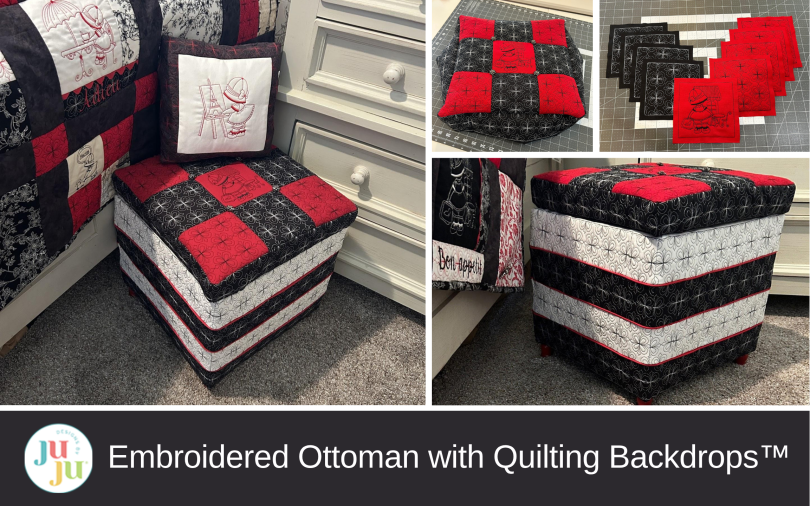
Give an old ottoman new life with Quilting Backdrops™ and machine embroidery, learning how to fit the cover, sew corners, add piping, and finish the upholstery.
Welcome to Part 3 of Beginner to Bold, our three-part series of progressively more challenging projects using Quilting Backdrops™ and Paris Sunbonnets Redwork!
We started with Part 1: Make an Embroidered Pillow with an Envelope Back, learning to stitch and join embroidered panels. In Part 2: Make a Personalized Machine Embroidery Quilt with Quilt-As-You-Go, we added personalization, combined different block sizes, and assembled and bound a quilt.
Now we’re taking those skills beyond pillows and quilts to give an old ottoman new life! We’ll fit our embroidered cover to an existing ottoman, sew boxed corners, add piping, and attach the finished cover. Joining the series here? Start with the pillow for foundational practice, explore the quilt for an intermediate challenge, or follow along below if you’re ready to make something bold!
In this article you will learn:
Check out the DBJJ team’s favorite supplies in the Designs by JuJu Amazon store. And for stabilizers, batting, and threads, Designs by JuJu+ has everything you need.
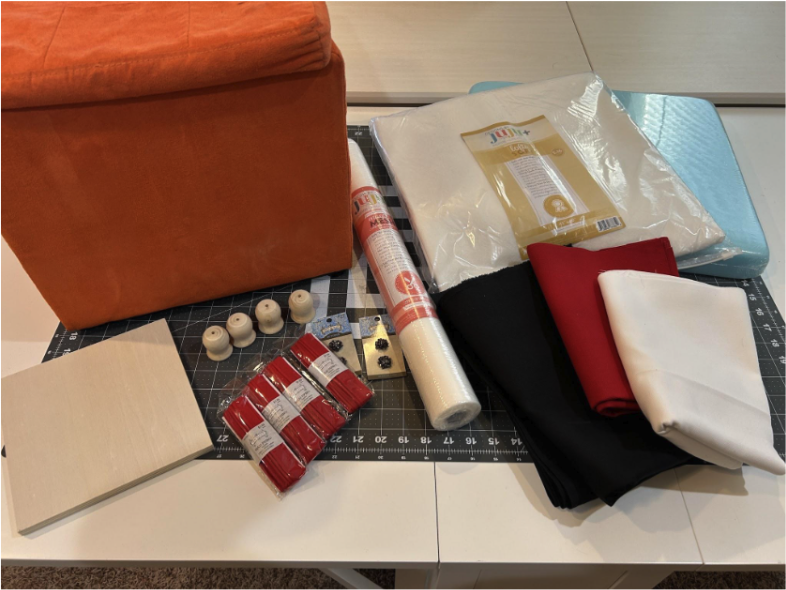
Finished Quilting Backdrop sizes used in the project:
You will start by making the Quilting Backdrops blocks for your cover. My ottoman measures 14¼” square, but because I know the duck cloth’s seam allowances will take up more room than quilting cotton would, I’m going to sew my cover out at 15” square. I’m not worried that it will end up too big, because at the end I’ll show you how to make sure it’s nice and snug around your piece. The top of mine will be a 3x3 checkerboard pattern of 5” squares, and the side of the lid and the side of the body will be five alternating 3” stripes.
I’ll give a quick review of the Quilting Backdrops process here. If this is your first project in the series, visit Part 1’s Pillow Front section for a more detailed walkthrough of stitching and trimming the panels before joining them.
Hoop your stabilizer.
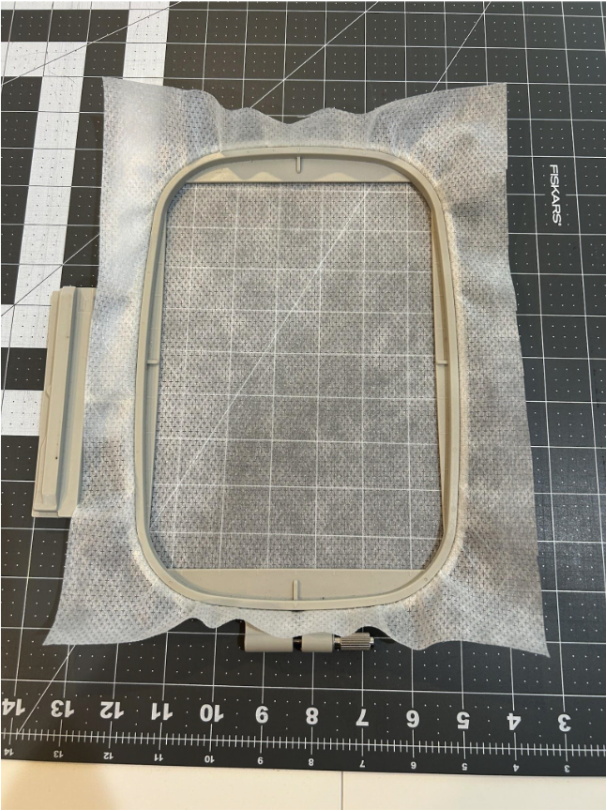
Stitch the placement stitch for the batting, cover the stitches with the batting, and stitch the tack-down.
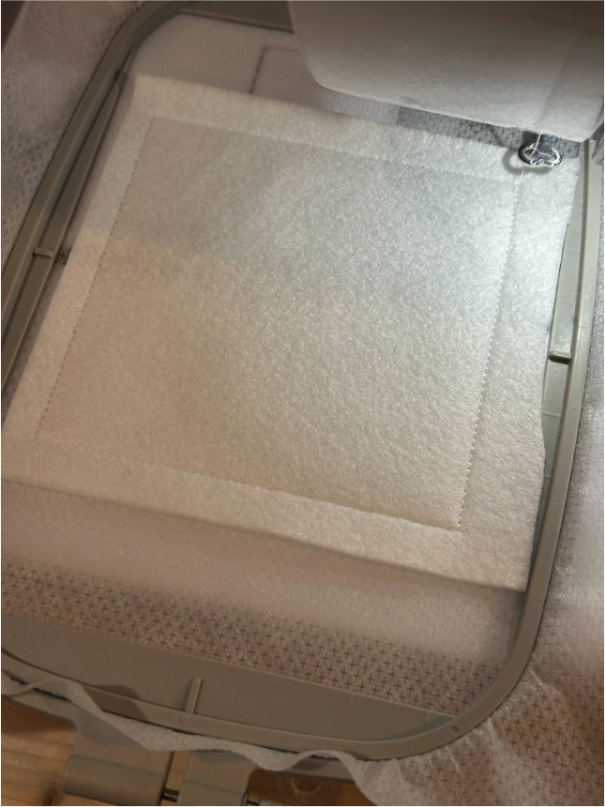
Trim the batting close to the stitches.
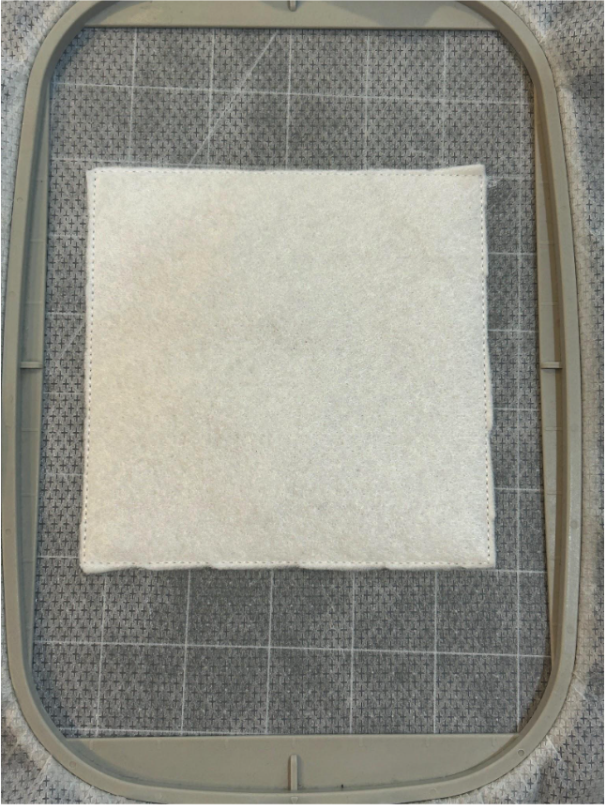
Cover the batting with your fabric, leaving at least ½” extra on each side.
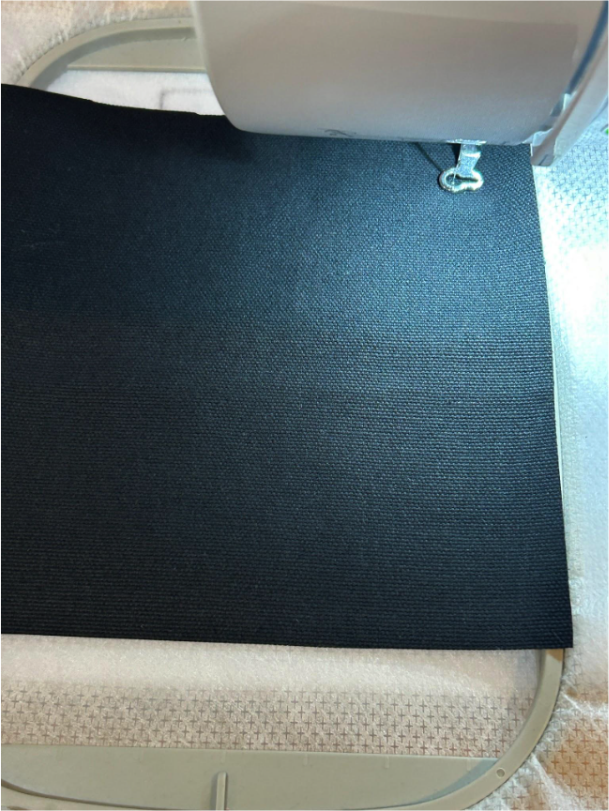
Stitch your tack-down.
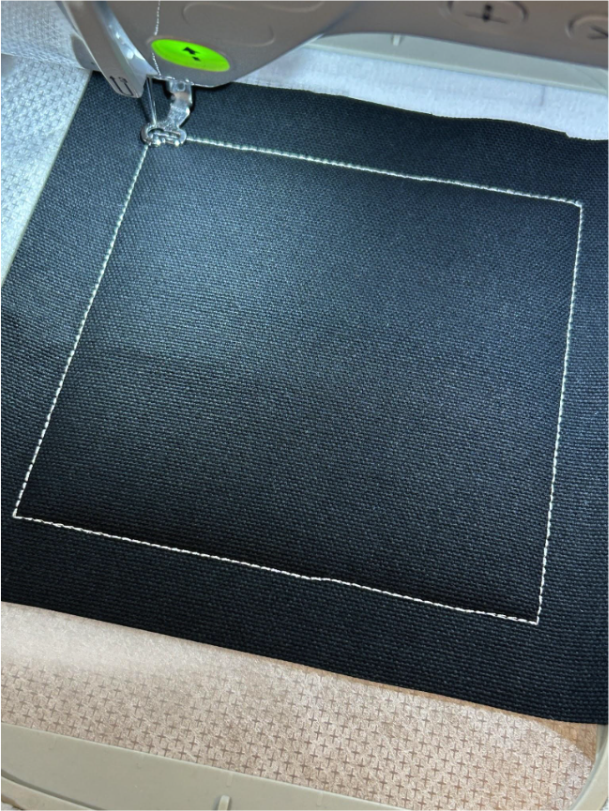
And stitch your Quilting Backdrops design.
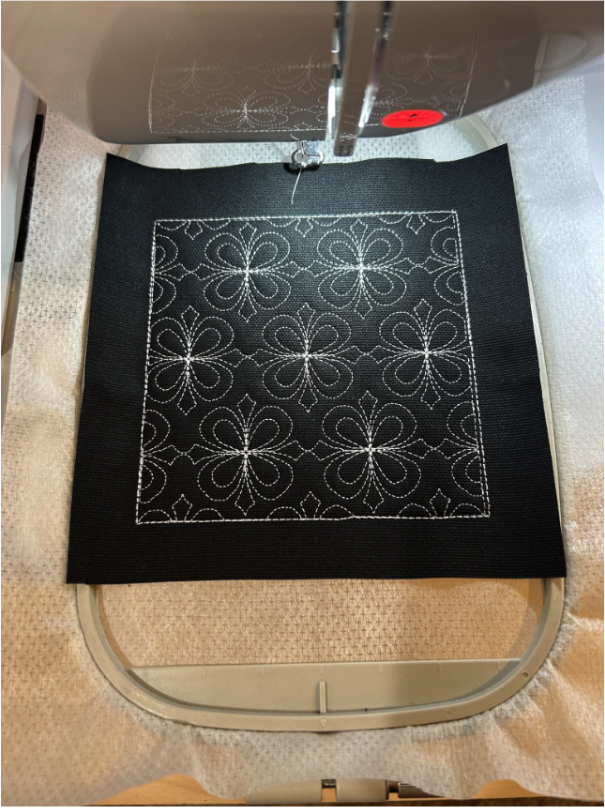
Remove it from the hoop and trim the stabilizer.
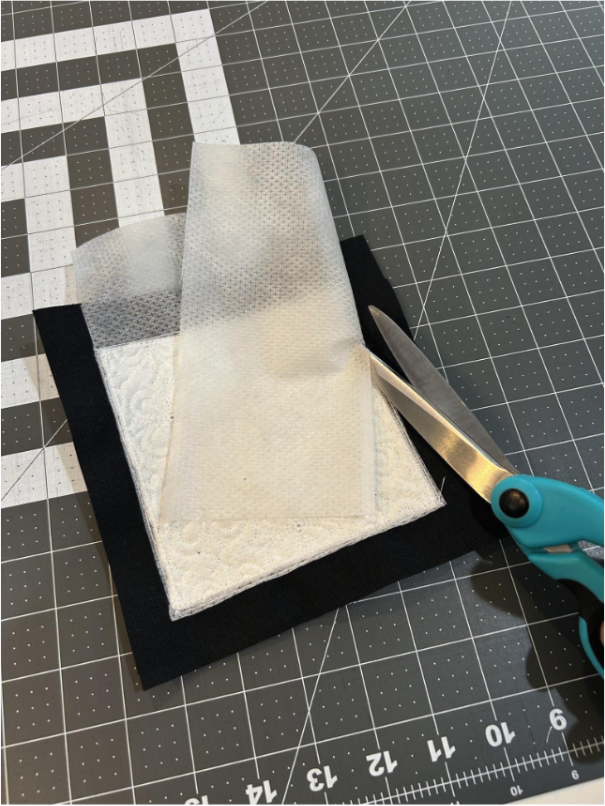
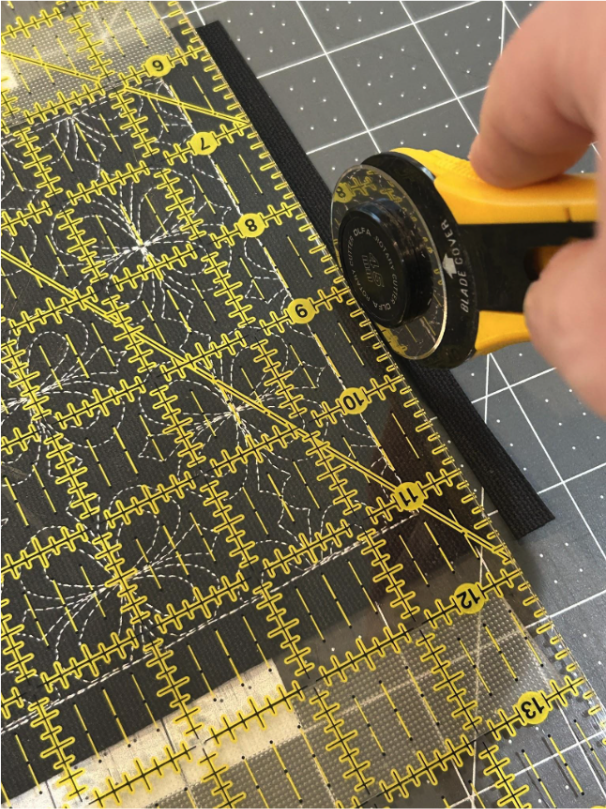
Trim your edges to ½” from the tack-down stitches.
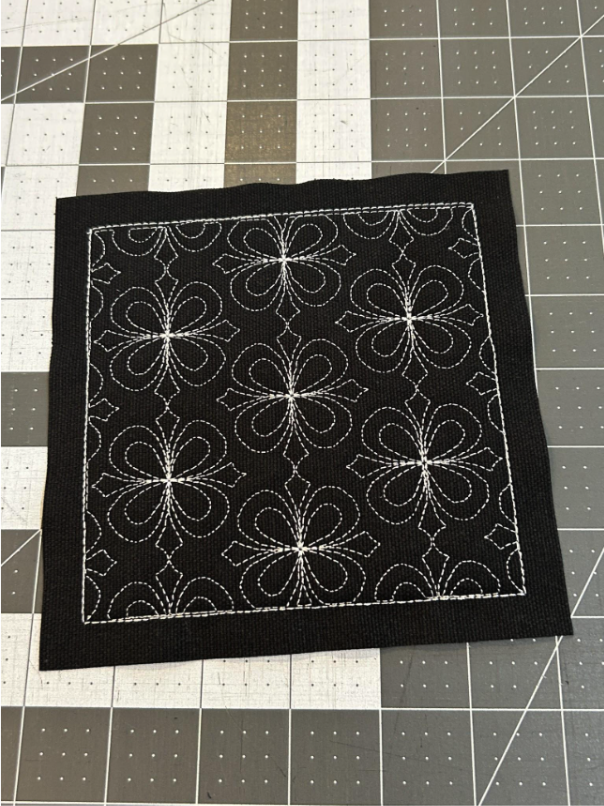
And here is your finished block.
For the top, I made a center design with the Paris Sunbonnets, and then the rest were the Quilting Backdrops designs. You’ll need nine 5” squares for the top.
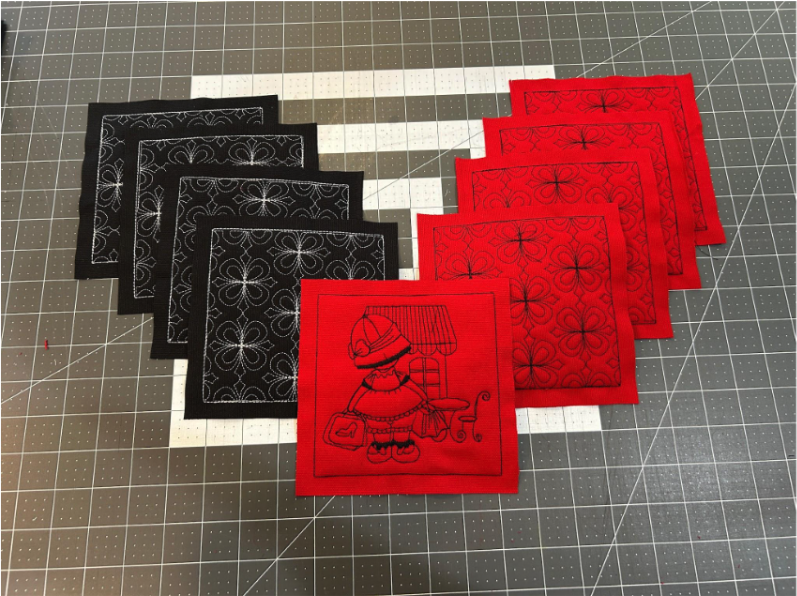
Now you will stitch the stripes to go around the sides of the ottoman. My machine’s biggest hoop is 6x10, but my sides are 15”, so I decided to make two 3” x 10” designs for each side and I’ll sew them together and trim them to make them work.
You will need five stripes, one for the edge of the lid of the box, and then four that alternate down the side of the box. The stripe at the top and the bottom of the box will need to be wider than the others so that they can wrap around the top and bottom to be stapled in place. Each stripe will consist of eight of the 3” x 10” pieces, two for each of the sides.
For the wider stripes, I cut my fabric to be 12” x 5½” inches. Stitch out your placement line, tack down your batting, and trim it.
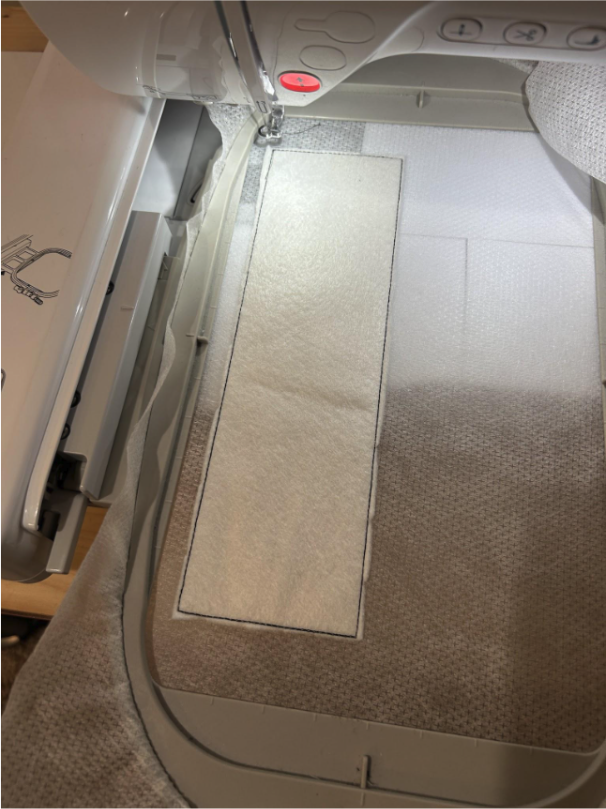
Now it’s time to lay down the fabric over the batting. Lay it off center so that the bulk of the fabric hangs over the left side of the design. I would measure and leave just a little bit more than ½” past the right side of the design, with the rest on the left. Stitch the tack-down.
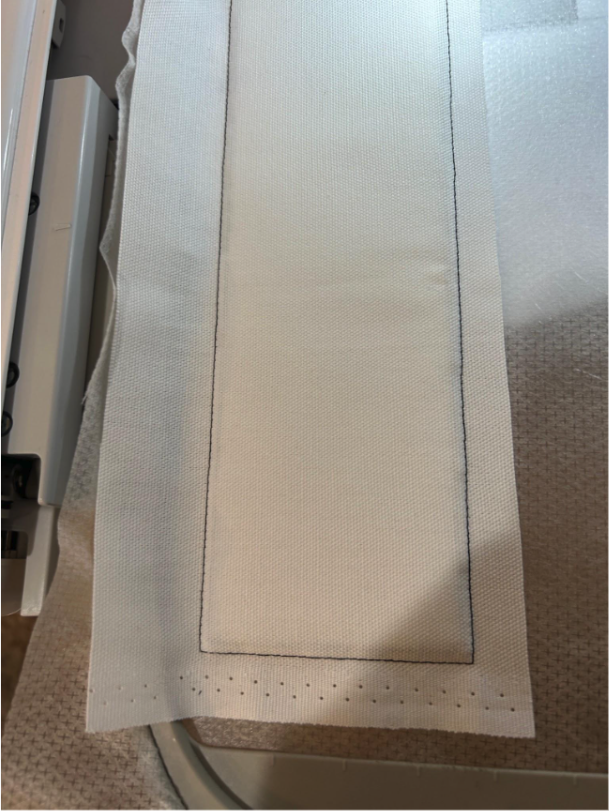
Stitch your design and then remove it from the hoop and trim the stabilizer.
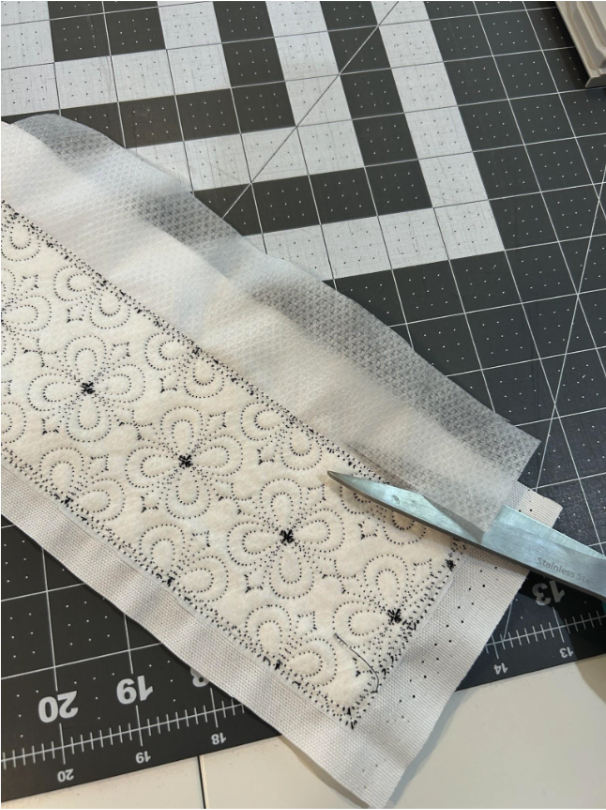
Trim the right side of your strip and the two short ends with ½” seam allowances. Don’t trim the edge with the excess fabric.
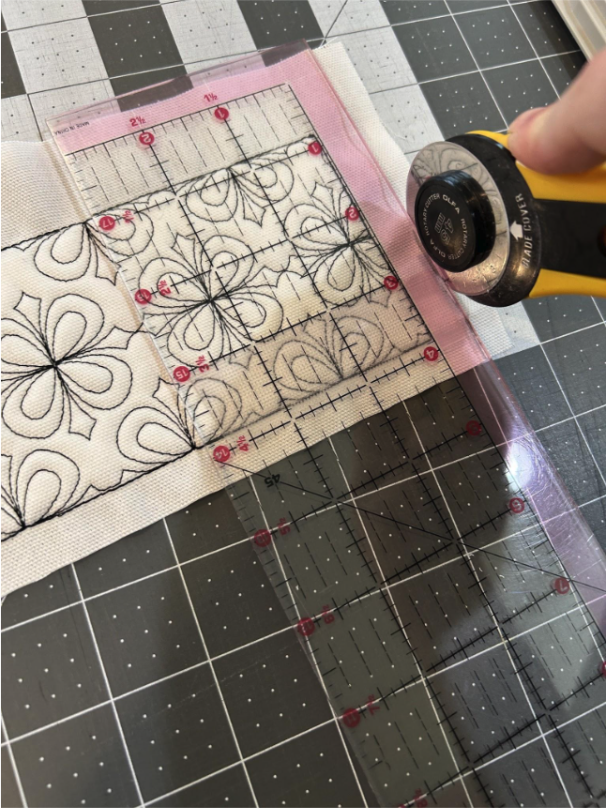
This is how your wide strips finish out.
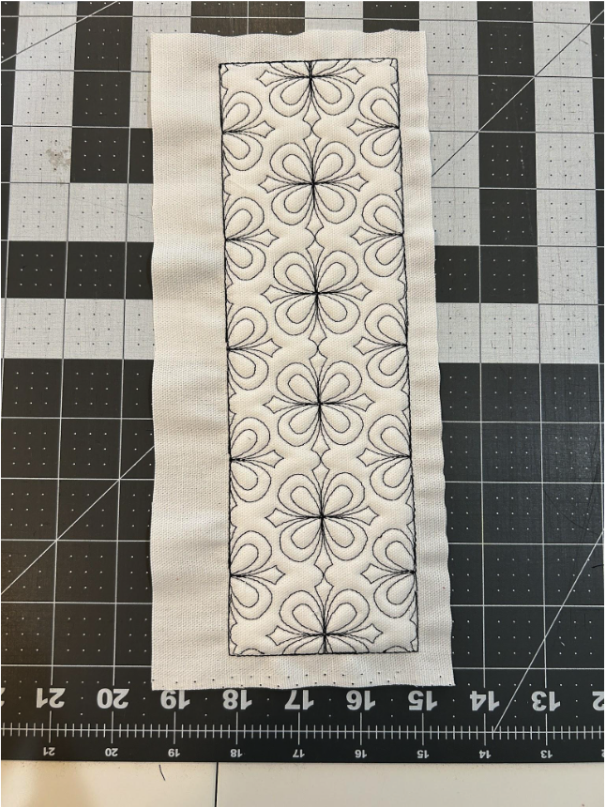
When I made mine, I did both of the wide strips as 3” x 10” and it worked. But if I did it again I would make the strip that will be at the top of the box (for me the white ones) a 4” x 10” design because there are a couple spots where I can see the edge of the design. No one will notice it but me (and now all of you because I pointed it out) but that’s how you can remedy it on your ottoman. If you go with the wider design, still keep some excess fabric on the edge. You’ll need eight wide strips of each color.
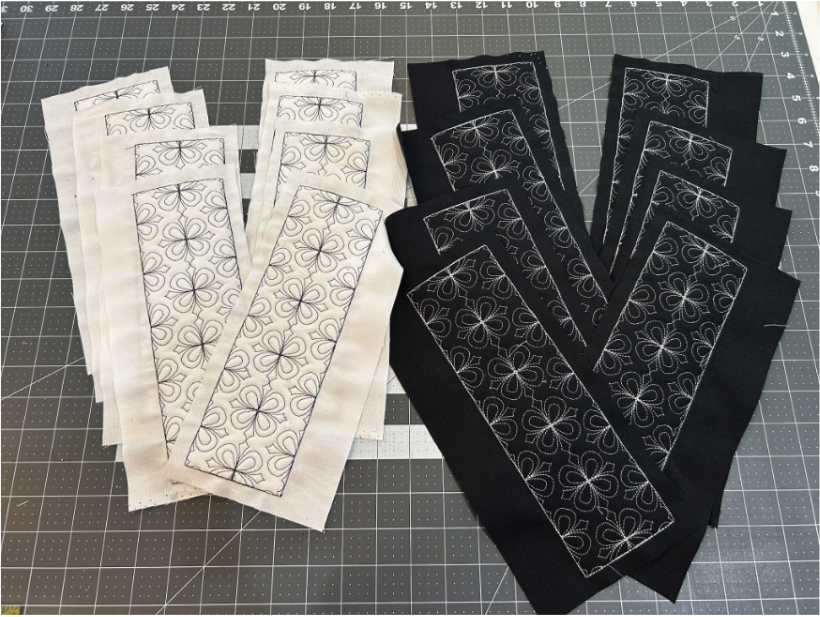
Now we need three stripes of regular Quilting Backdrops that will all be trimmed like normal. I needed two black stripes, and one white stripe around my ottoman, so I made eight white 3” x 10” strips and sixteen black 3” x 10” strips.
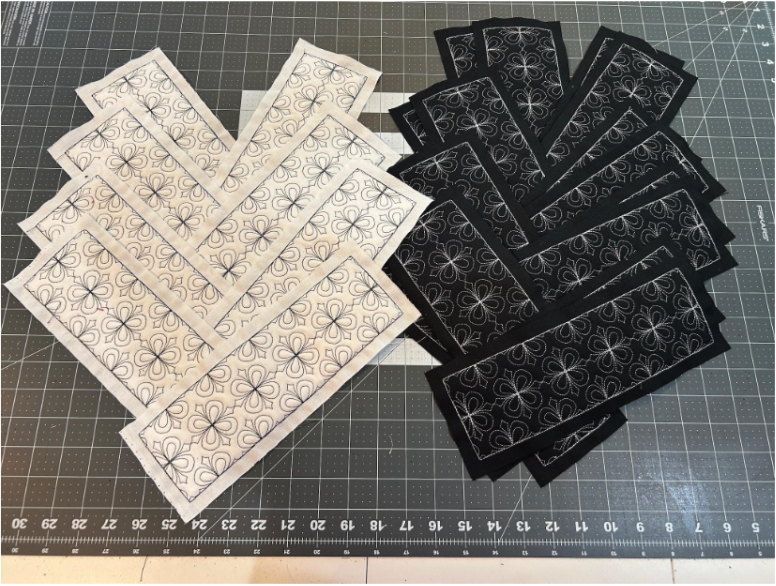
Lay out your blocks so they are in the arrangement you like.
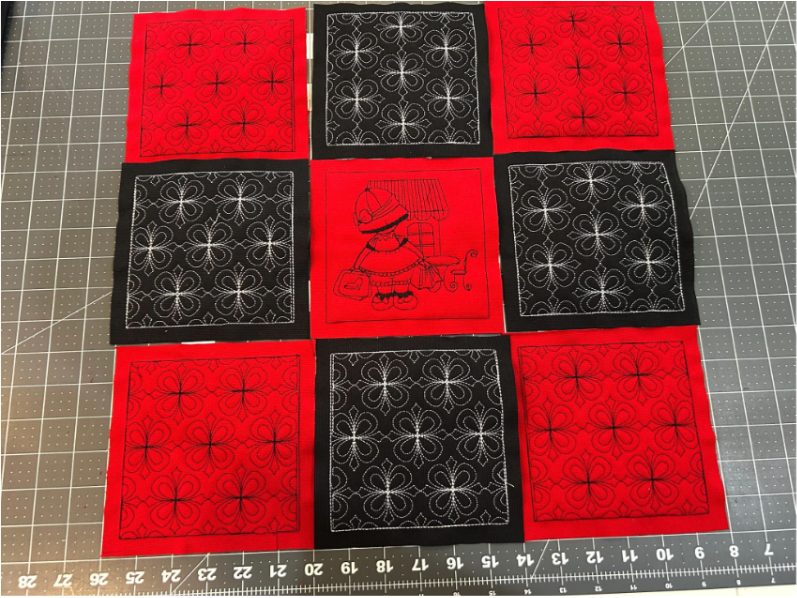
Like you did for the quilt, sew the blocks together in rows, and then sew the rows together. I pressed my seams toward the black squares to make sure they would nest.
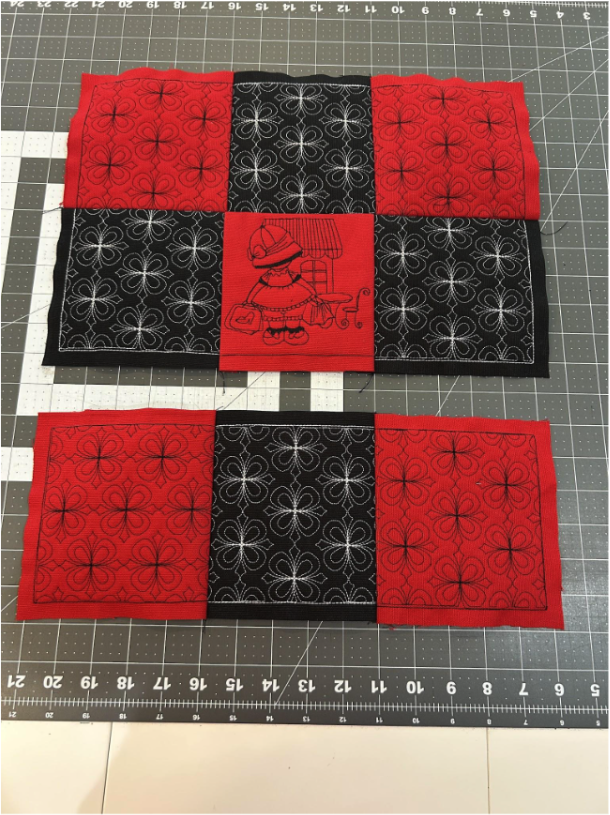
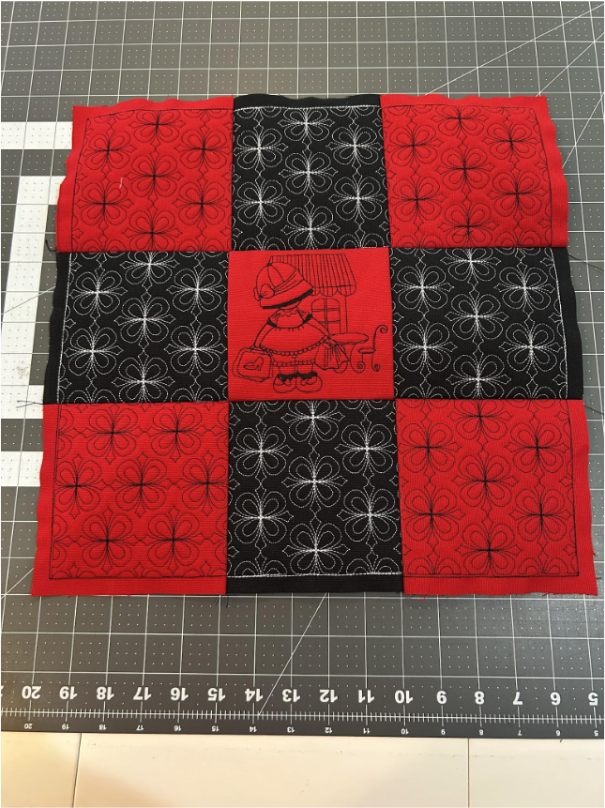
When your rows are sewn together, press your row seams open and set aside the top for later.
My 10” strips needed to be longer because the sides of my ottoman are 15”. I was afraid if I just added 5” to the end of each stripe it might look a little off balance. So I decided to take one of the 3” x 10” blocks and cut it across the middle.
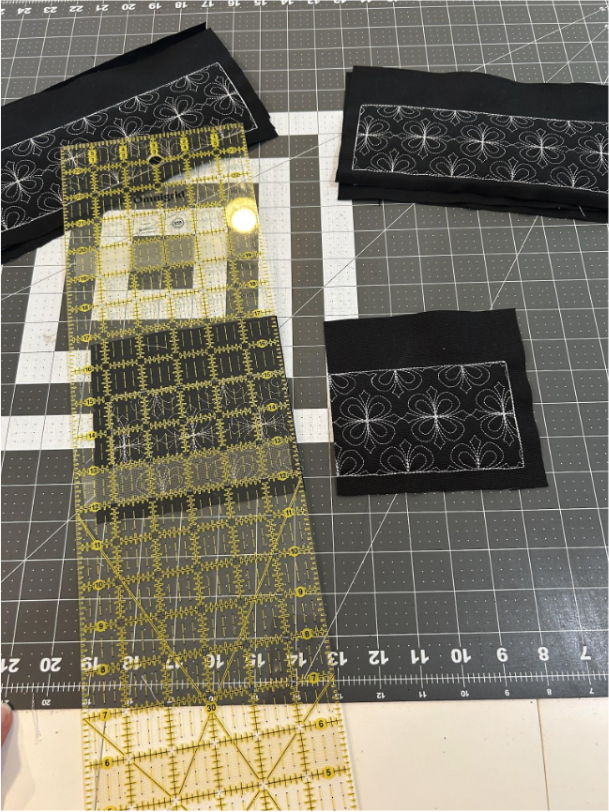
Take the finished ends of each cut block and sew them to the ends of another 3” x 10” block. This makes it so I can sew down the racing lanes and everything will line up.
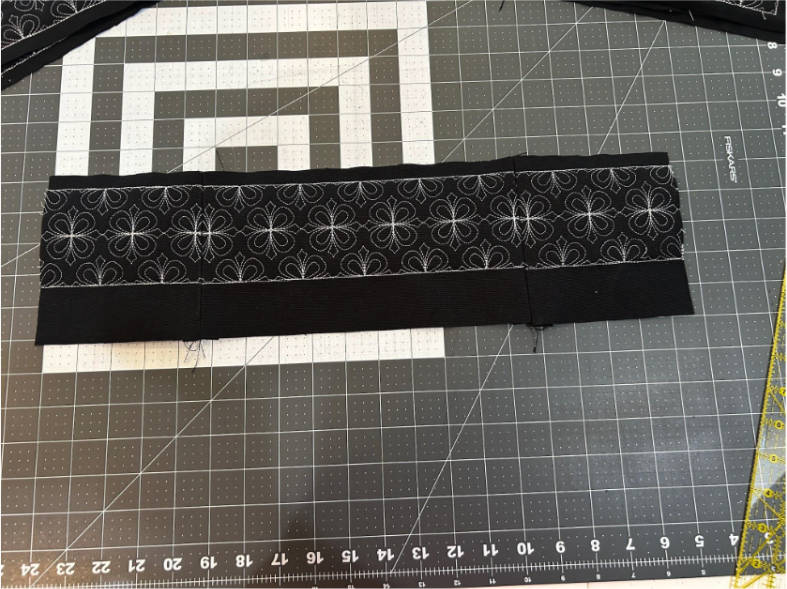
I now have a long strip. I need it to be 15” for my ottoman plus ½” of a seam allowance on each end. So I cut my long strip at 16”. But I want to find the center of my strip and cut each side 8” from the center.
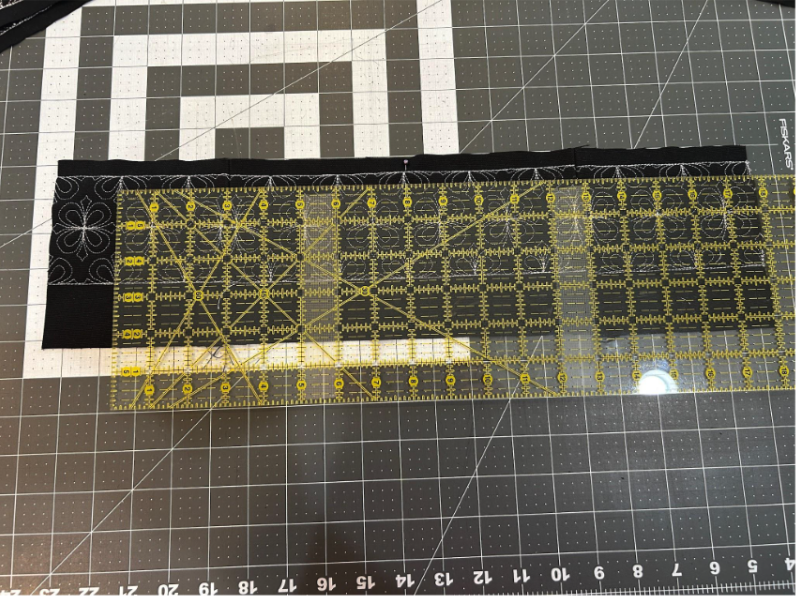
This is what your strip looks like now. You can discard the little pieces from the end.
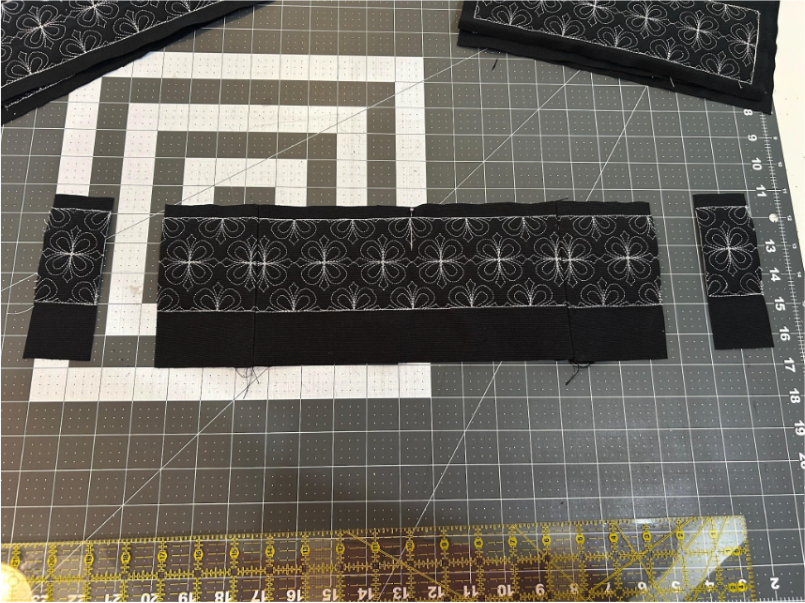
You’ll repeat this for all your strips, the wide ones and the regular ones. Arrange them so that you have four of each strip to sew together for your stripes.
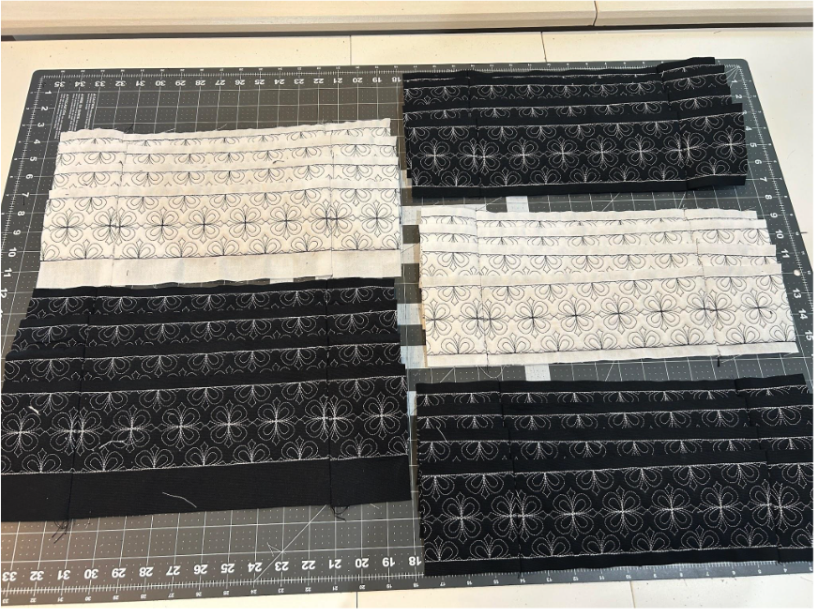
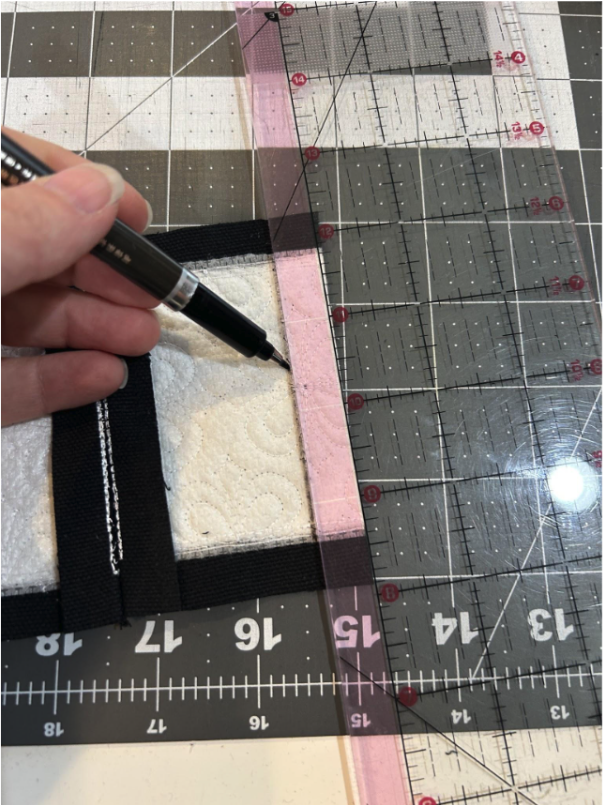
It’s time to sew the strips together into a long piece for your stripes. You can go through and mark a stitching line at ½” on the cut edge of each piece because you no longer have the helpful racing lanes.
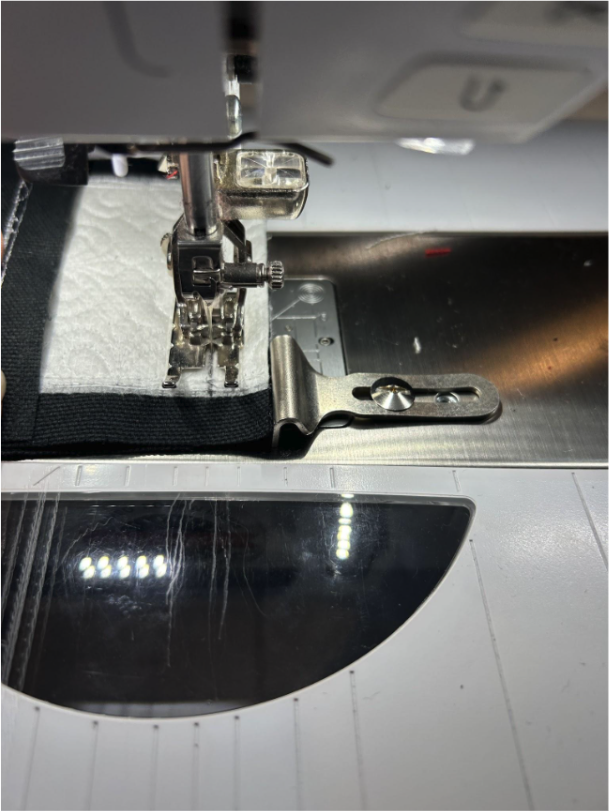
Or if your machine has a seam guide that you like, you can set that up at ½” to sew them together.
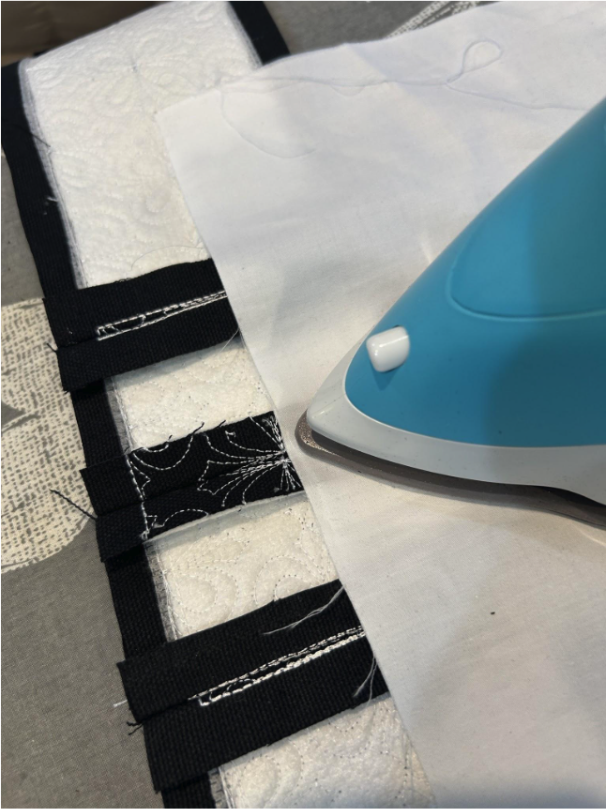
Sew four strips together into one long piece. Press the seams open.
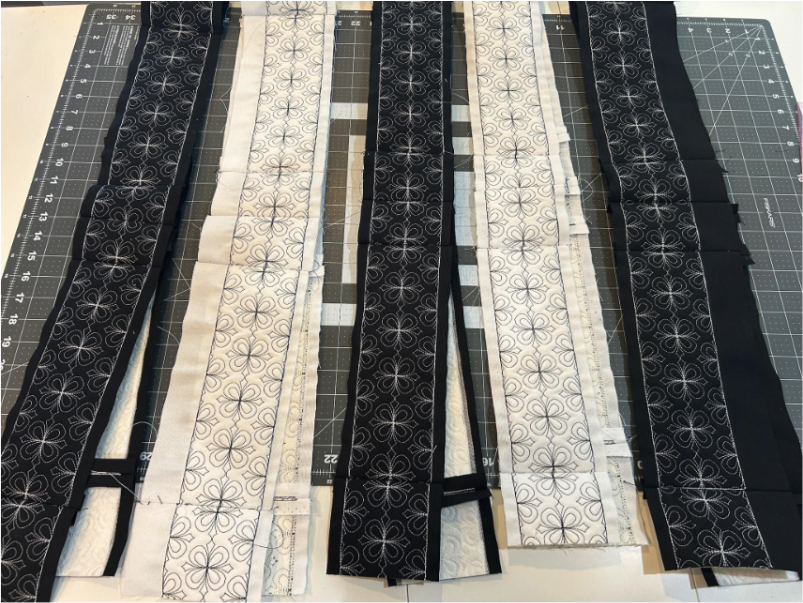
Here are your finished long strips. You have a regular strip to be the edge of the lid. A wide white strip for the top of the ottoman, a regular black and white for the middle, and a wide black strip for the bottom. You can set them aside while you prepare the old ottoman for its new cover.
My ottoman is older than I like to think about and is definitely worse for the wear, but she has good bones. The bottom of it fared better than the top. So I left the bottom alone and will just make a cover that will hide all of the orange fabric.
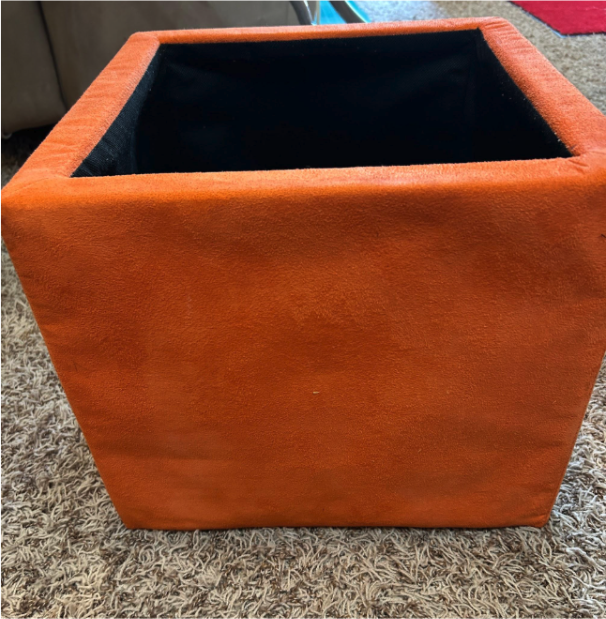
But the top was in bad shape, so I pulled off all of the fabric and untied the old foam and threw it all away.
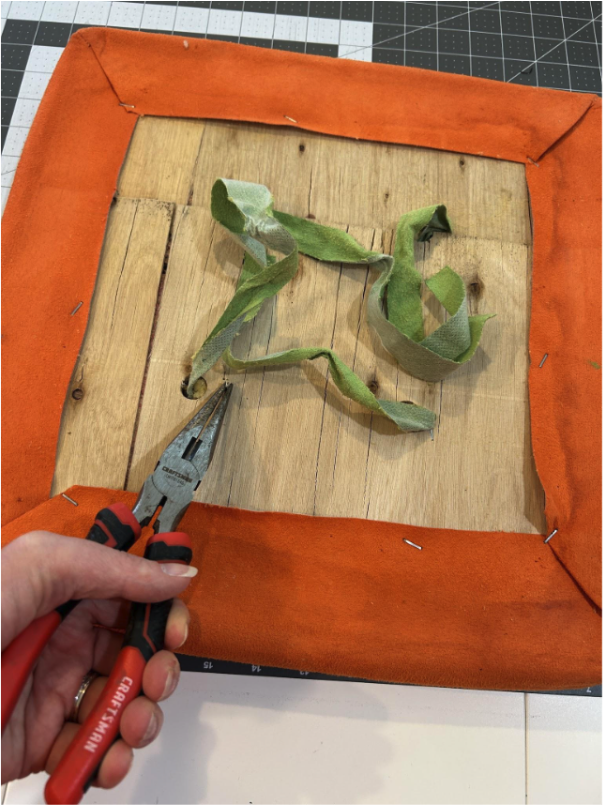
The foam piece I had was a little bigger than the top so I traced the edges of the board onto my foam and cut away the excess.
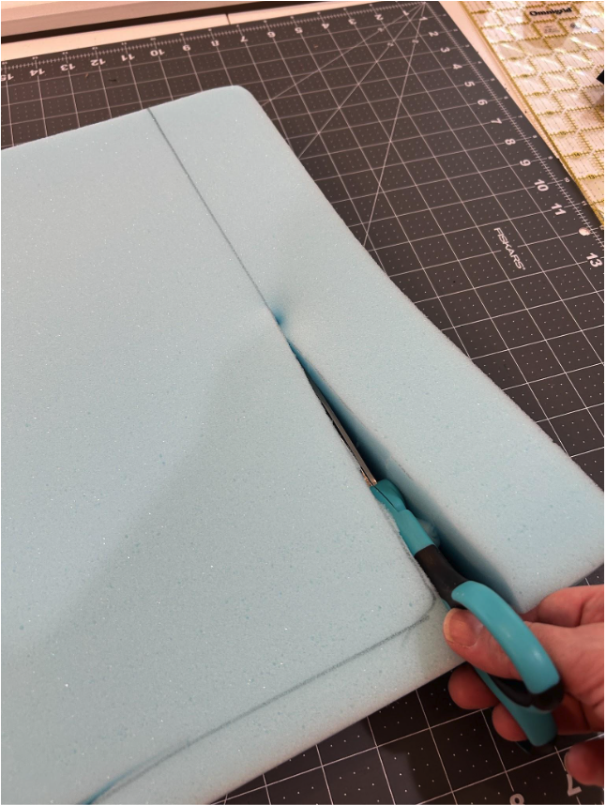
My board had holes in it to help secure the foam in place. If your board doesn’t, you could use hot glue to hold it in place, or you could drill holes like this. I just made marks on my foam through the holes.
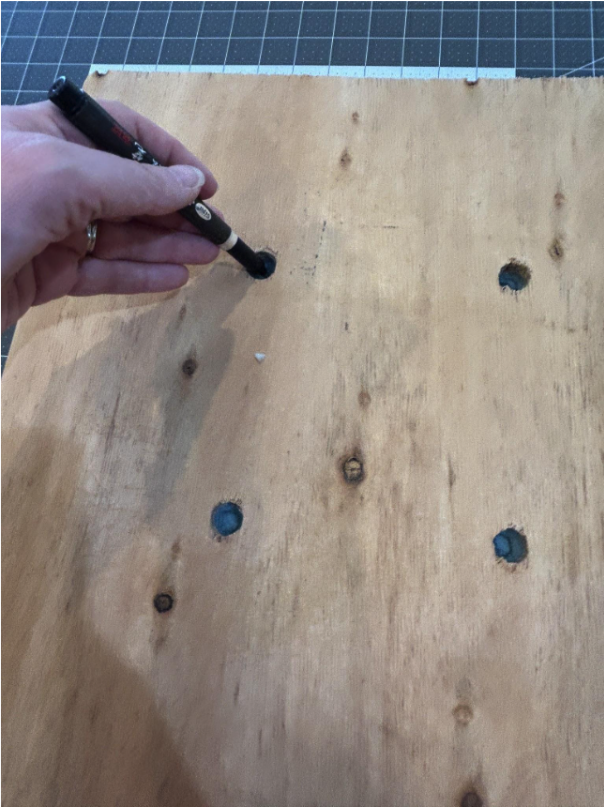
Flip the foam upside down so you can see the marks on the foam top.
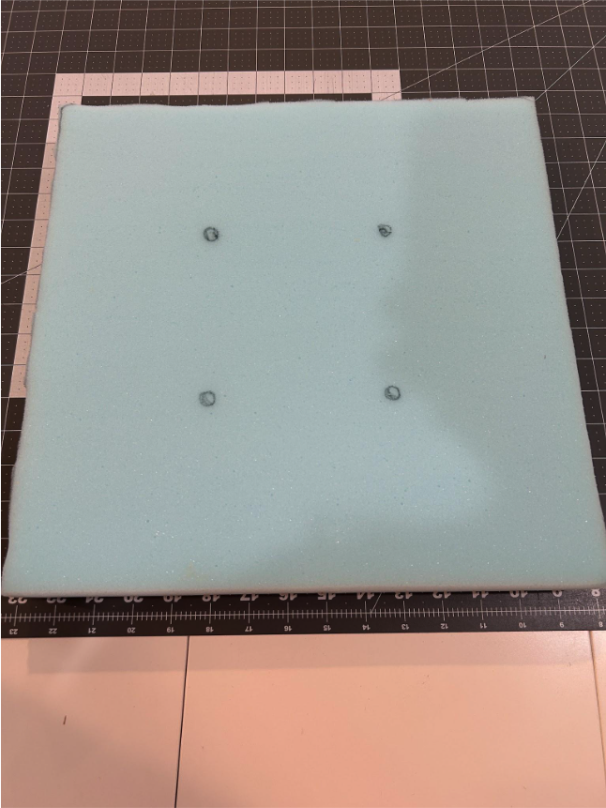
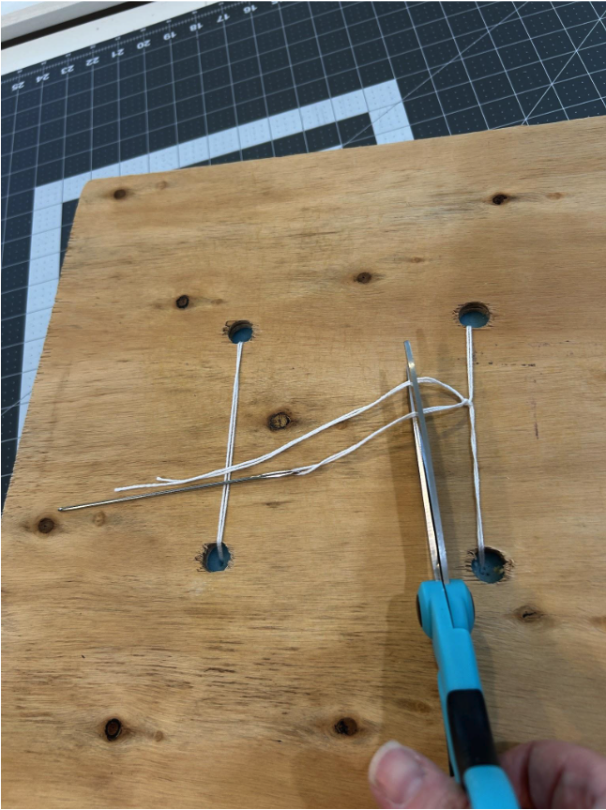
Then, using an upholstery needle and some long, thick thread, I just stitched it together. I didn’t pull it super tight because I didn’t want tuft marks in my foam. I just pulled tight enough that it would hold.
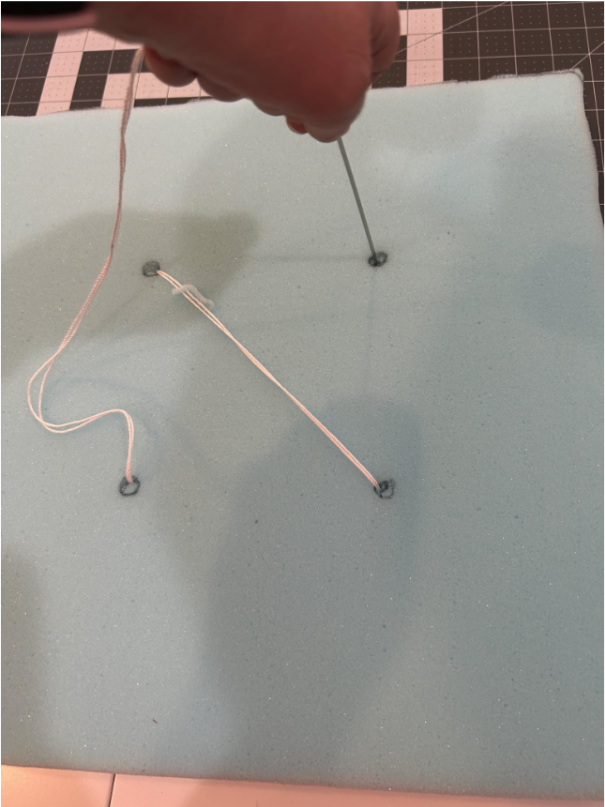
I ended by tying the string in a knot on the board side and trimmed my ends.
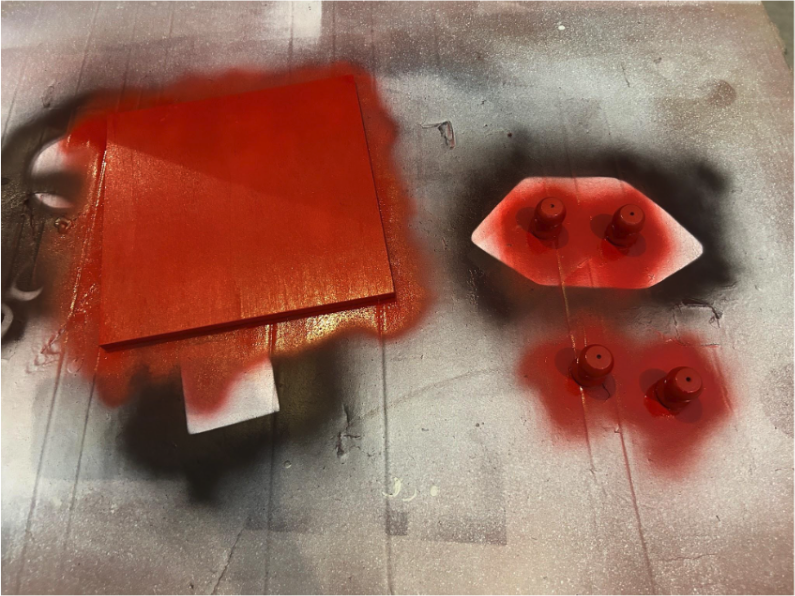
I wanted the feet of my ottoman and the board that I’ll attach to the underside of the lid so it doesn’t slide off, to be red, so I spray painted them with two coats of a glossy spray paint. These are both optional steps you can add to your ottoman.
While your paint is drying, sew your cover together. Start by taking one of the regular black stripe pieces and sew the ends together to make a continuous stripe.
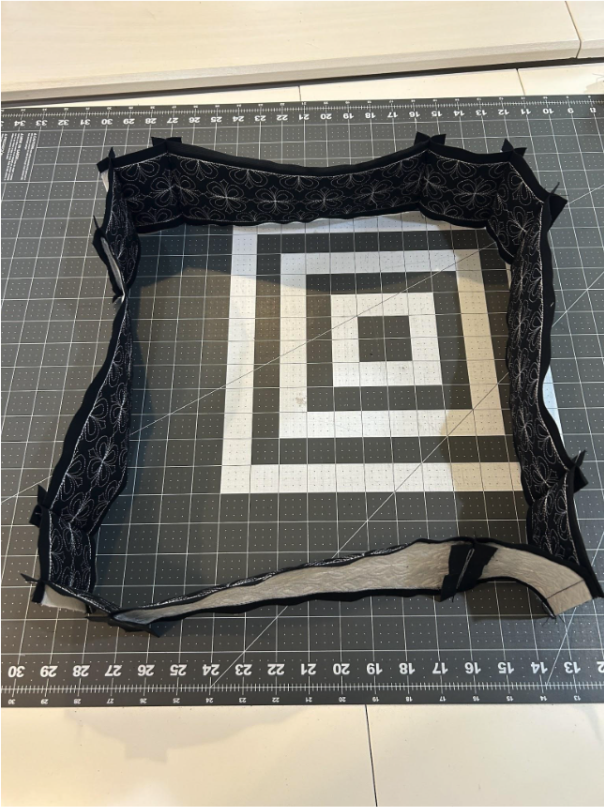
NOTE: If your ottoman doesn’t have a removable top (lucky you) sew this stripe together with the rest of the stripes in the next section and then add the top to the five-stripe piece.
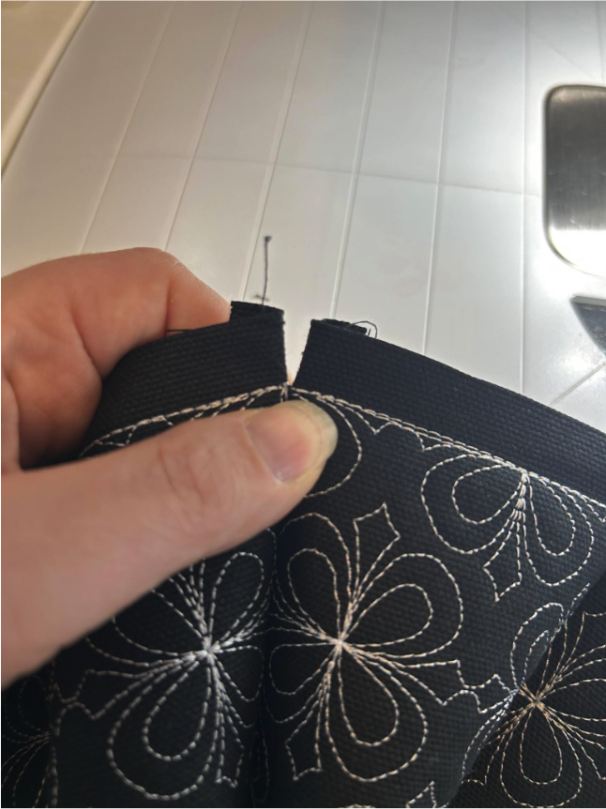
Find where you sewed the strips together, and on one side, open the seam allowance ½”. Do this four times.
Lay the top piece right side up on your work surface. Match the centers of the top to the centers of the sewn stripe; the side with the opened seam allowances should be next to the top. Your raw edges should line up.
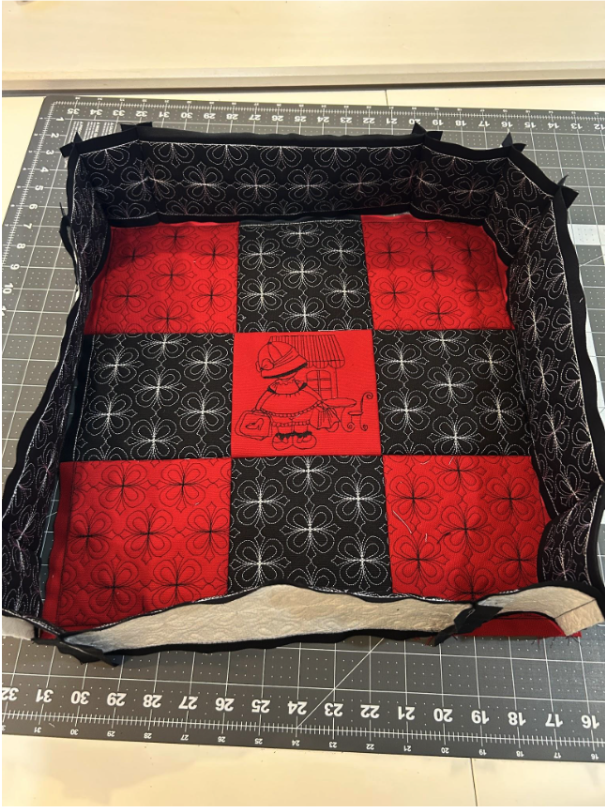
Clip the sides in place.
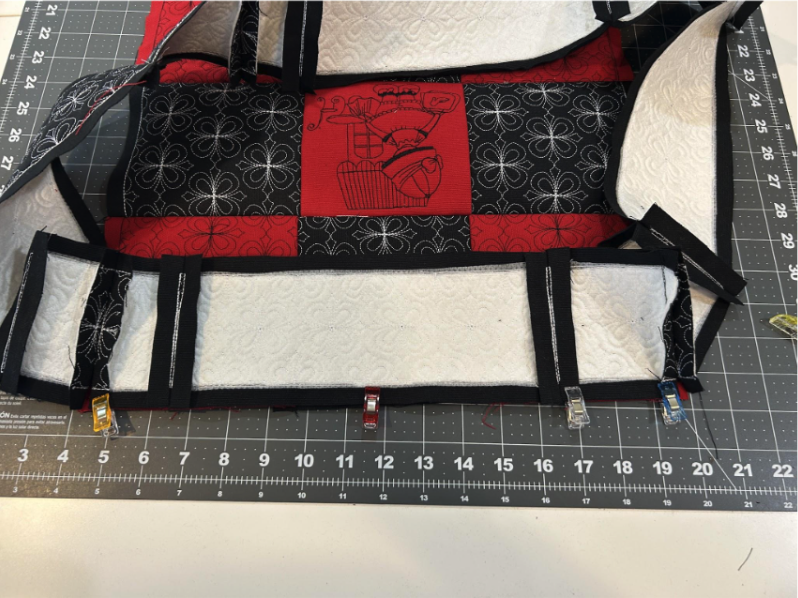
When you get to the corners, clip the seam allowances open.
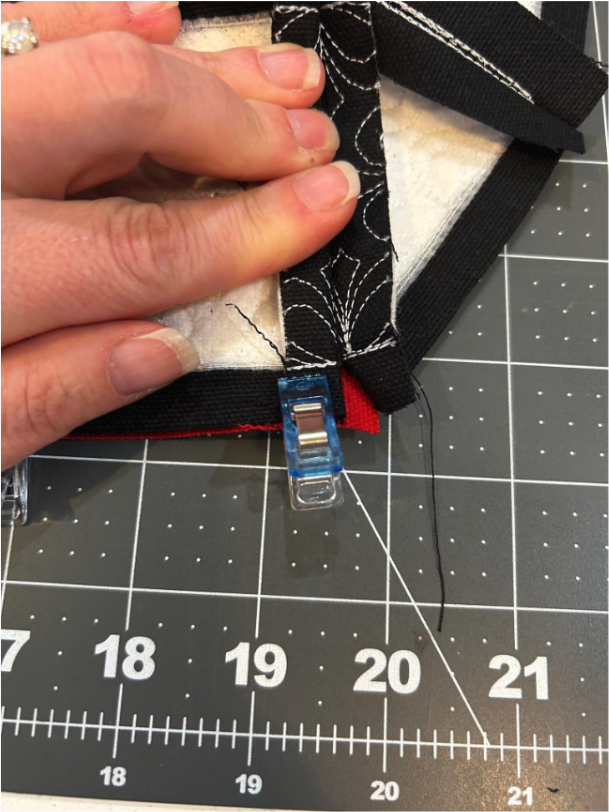
When all the sides are clipped, you are ready to sew!
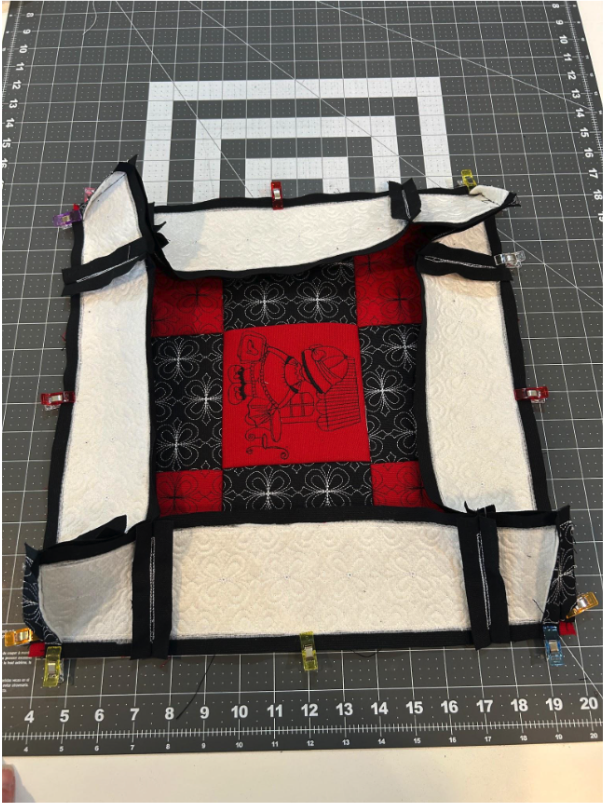
I like to start in the middle of one side. Stitch through the racing lanes to the corner.
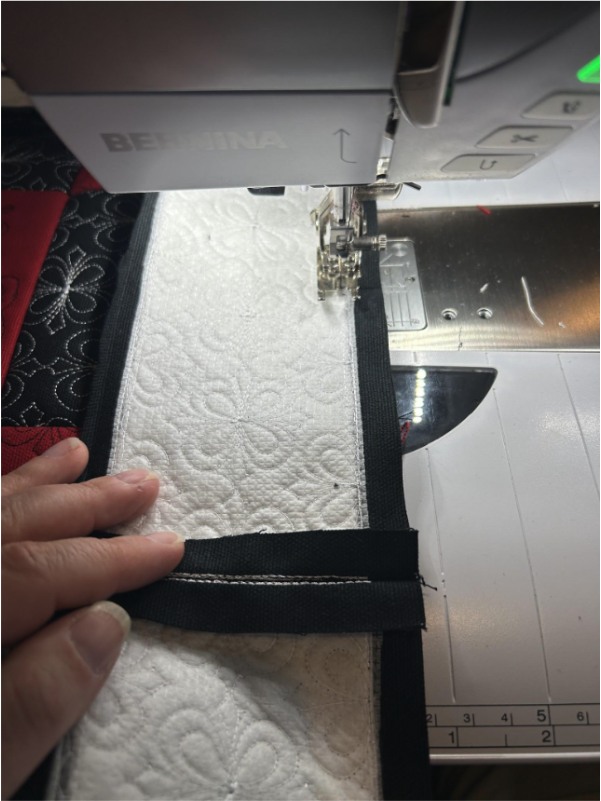
Stop right at the edge of the fabric with your needle down.
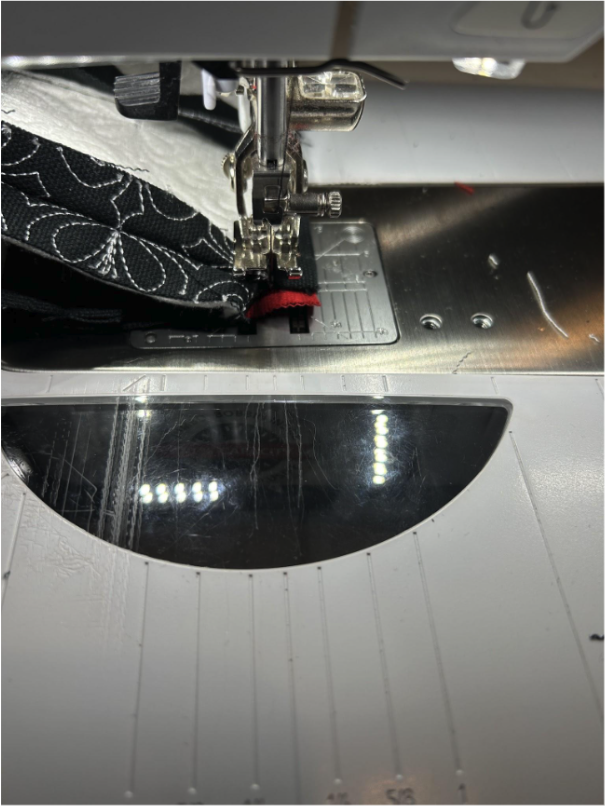
Turn your design 90 degrees and line everything up. Your next stitch should be into the seam allowance of the next side. Then continue stitching to the next corner and repeat until you get to the starting point.
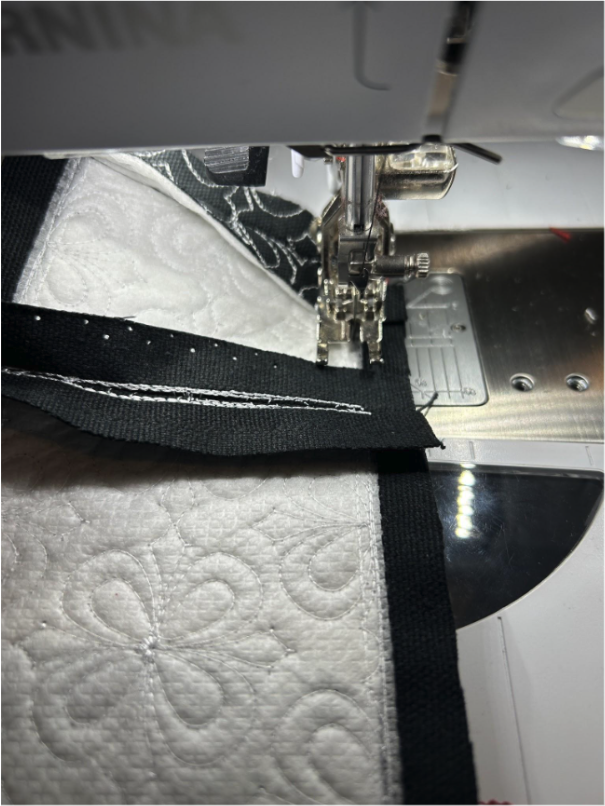
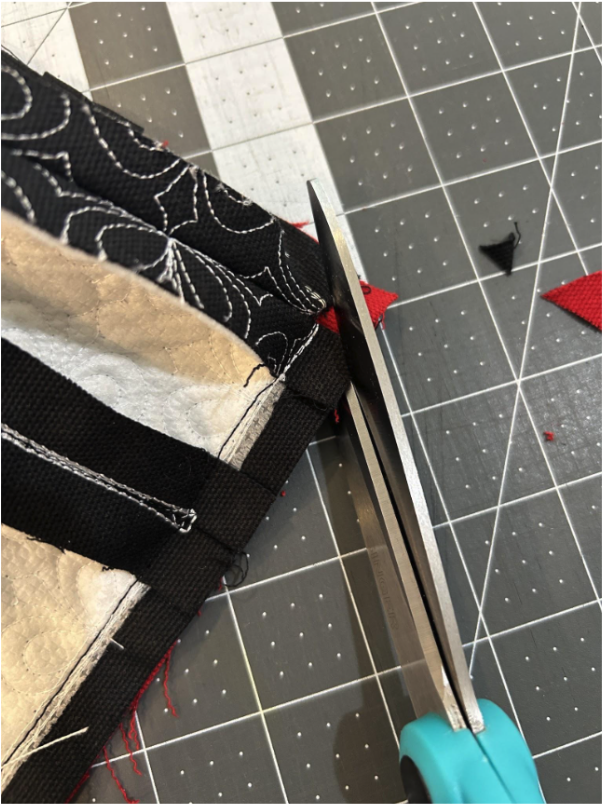
Trim your corners.
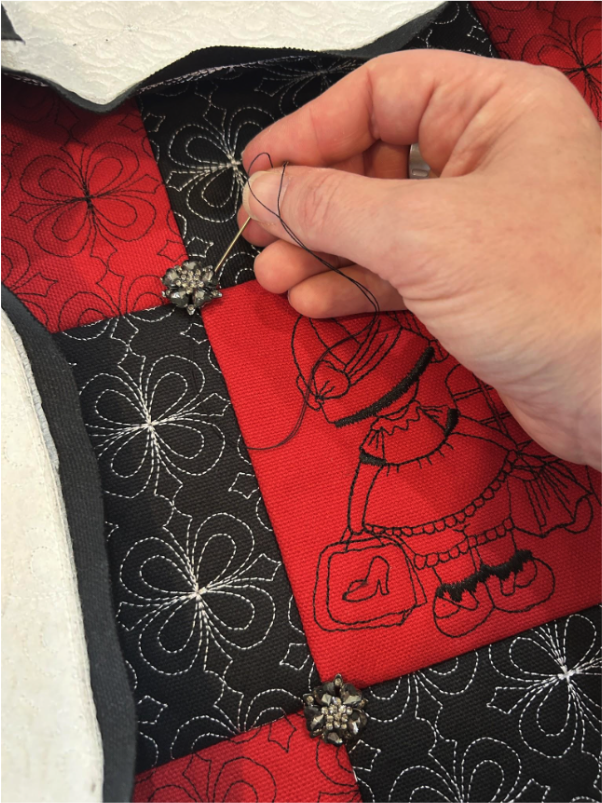
If you want to sew any embellishments to the top of your ottoman like you did with the quilt, now is a great time to do it. I added four buttons to the intersections around the center block.
Flip the edge so the right sides are out.
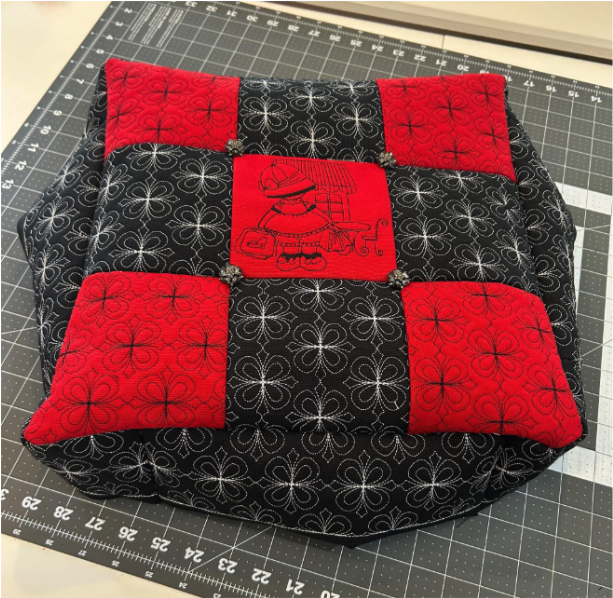
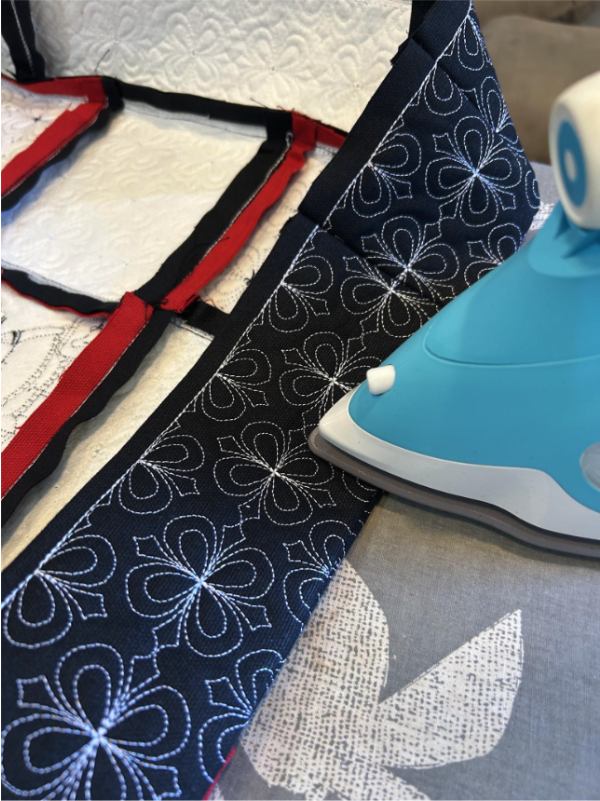
Press the edges so you get a nice, crisp finish. Set the top aside for a bit.
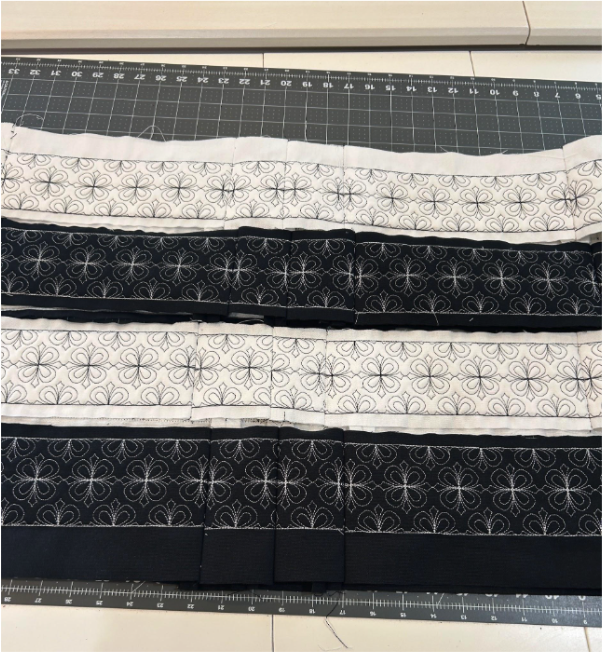
Lay out your stripes. Since the black stripe is on the top of the ottoman, you want white to be your next color, and you want to use the wide white so you can attach it over the top edge of the ottoman. Then you’ll have a regular black, a regular white, and then the wide black at the bottom. The extra fabric on the wide pieces faces the top and bottom edges.
I wanted to add a little hint of red between the stripes and thought a piece of piping would be perfect to add a little color that peeks out. To help align it correctly I threaded my sewing machine with red thread. This will contrast my stripes and match my piping. I started with the wide white stripe and, down the edge where it will sew to the black stripe, I stitched a line of red thread through the racing lines.
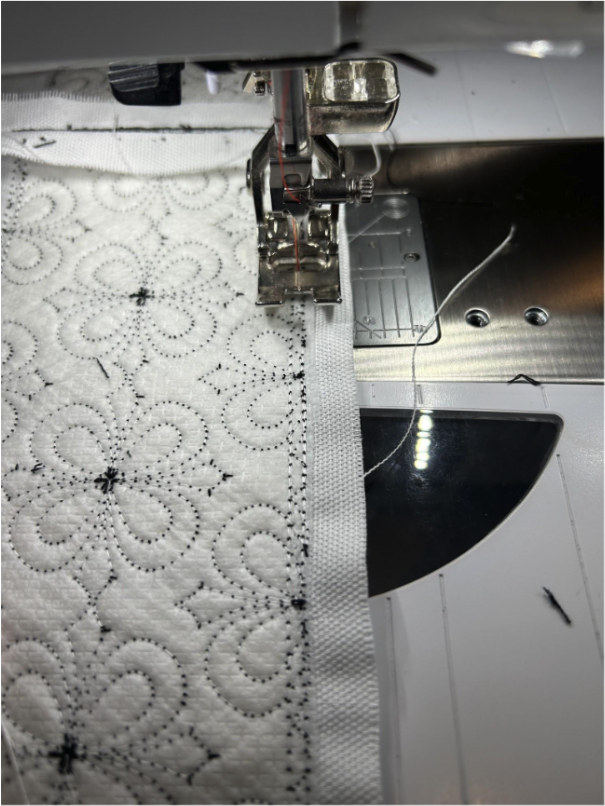
Now on the right side of the stripe, line up the red stitching line with the stitching on the piping.
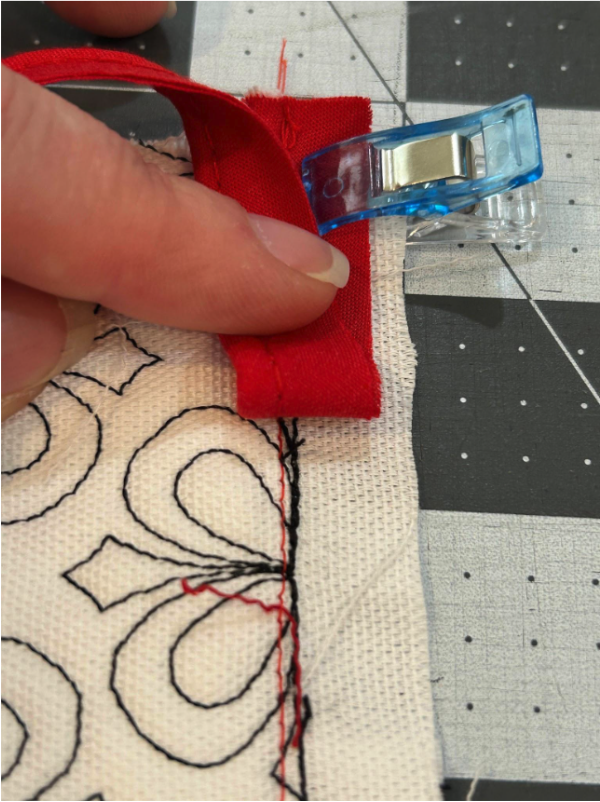
Continue lining up and clipping all the way down the stripe.
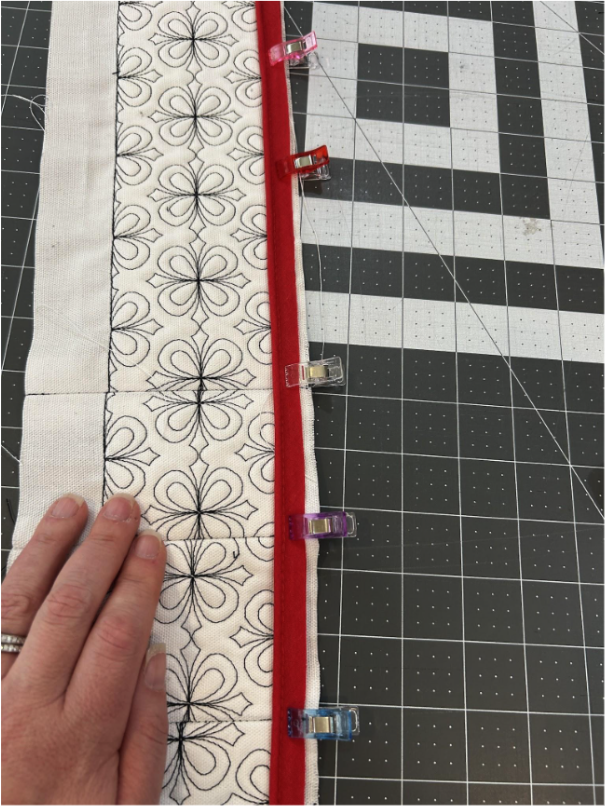
Then line up the raw edges of your next stripe (black) and clip in place. This all works so well because of how precise our Quilting Backdrops are!
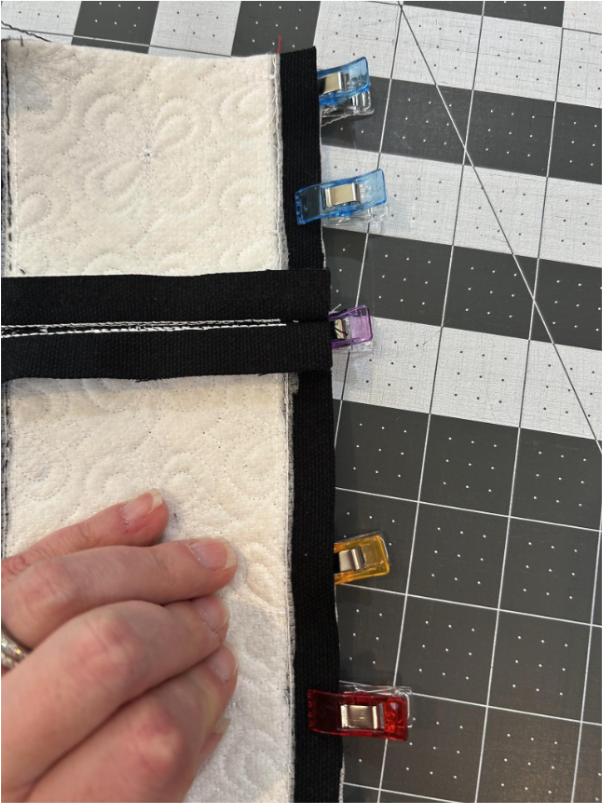
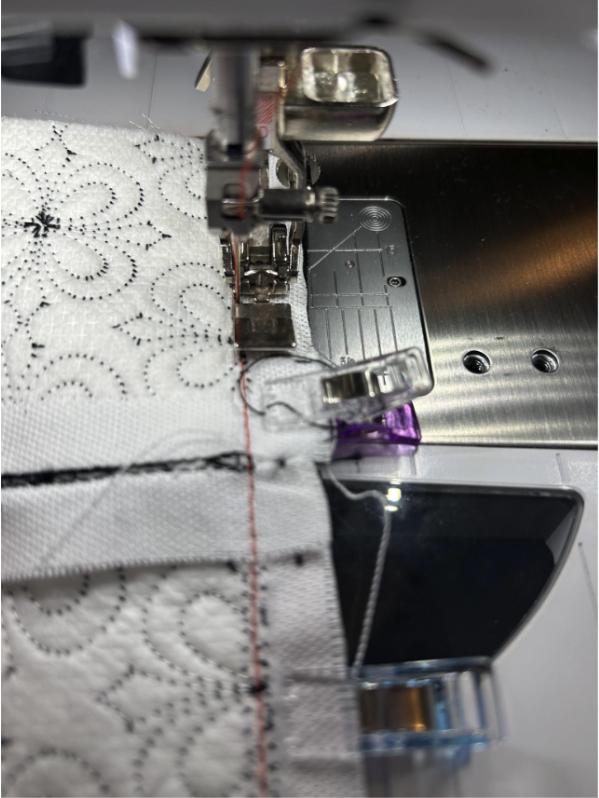
Then using a zipper foot or a piping foot, sew down the racing lane. I like to sew with the fabric that has the contrasting thread up so I can make sure to stitch right on it. Go slow. You can feel that your piping hasn’t moved as you stitch.
And when you open it up, you see the nice little piping line in between the stripes.
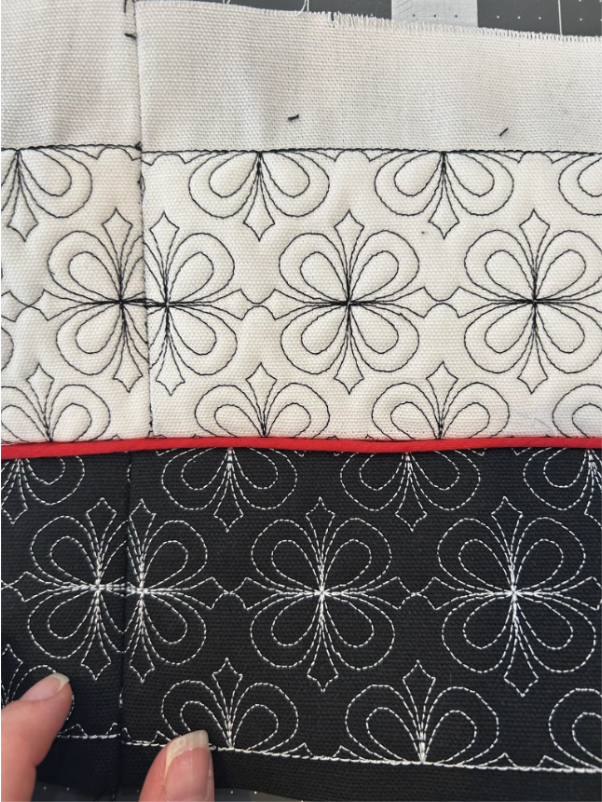
Occasionally I will open it up and see the piping disappeared a bit! If this happens I just remove stitches where it’s disappeared, line it all up again (which is easier this time because it’s tacked down correctly on each end) and sew it back up.
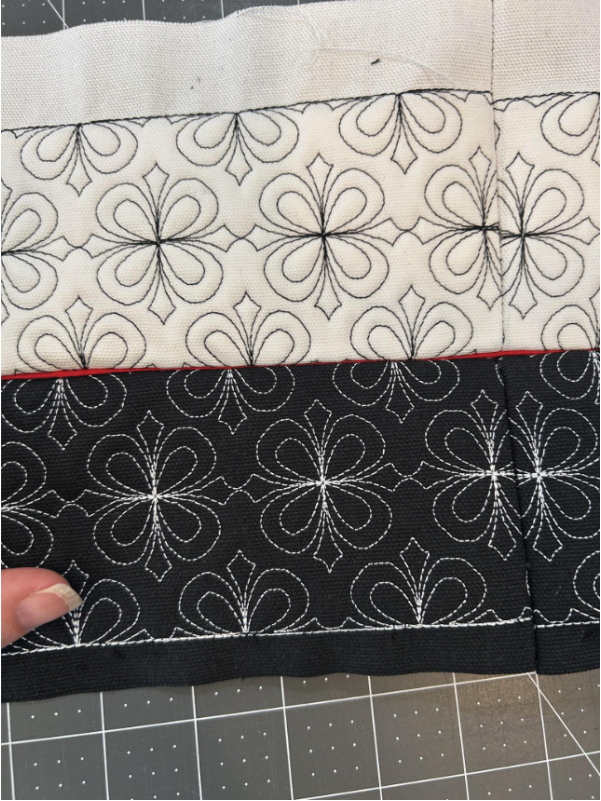
Press your seam allowance open.
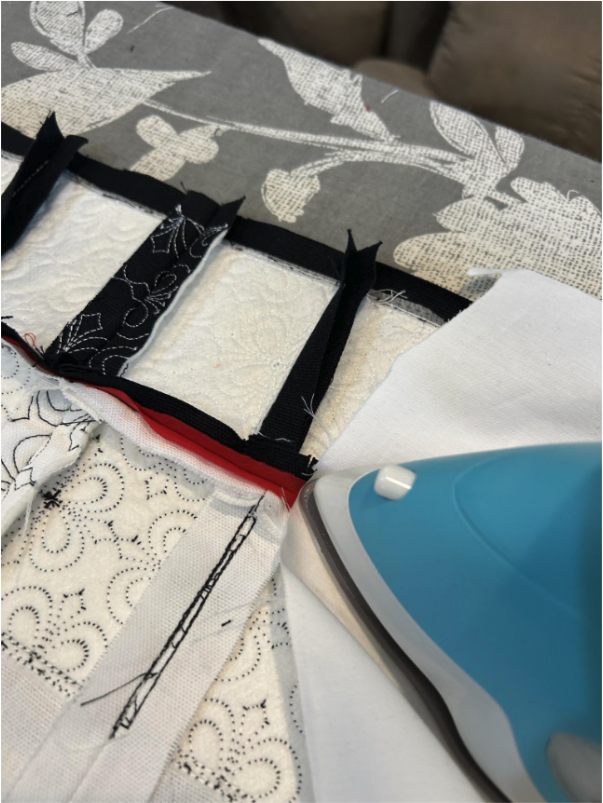
Then repeat those steps for the next stripe.
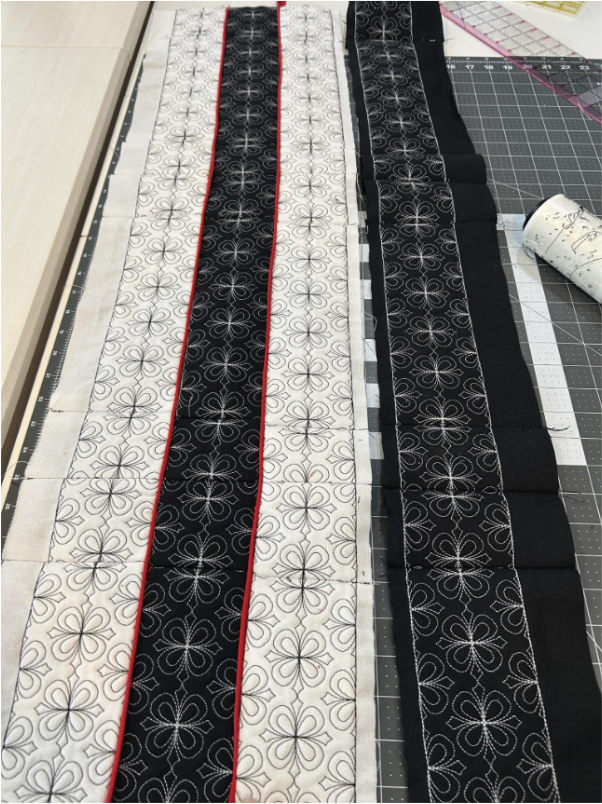
Repeat for the last stripe. You can set them aside, because now it’s time to assemble everything and get out the tools!
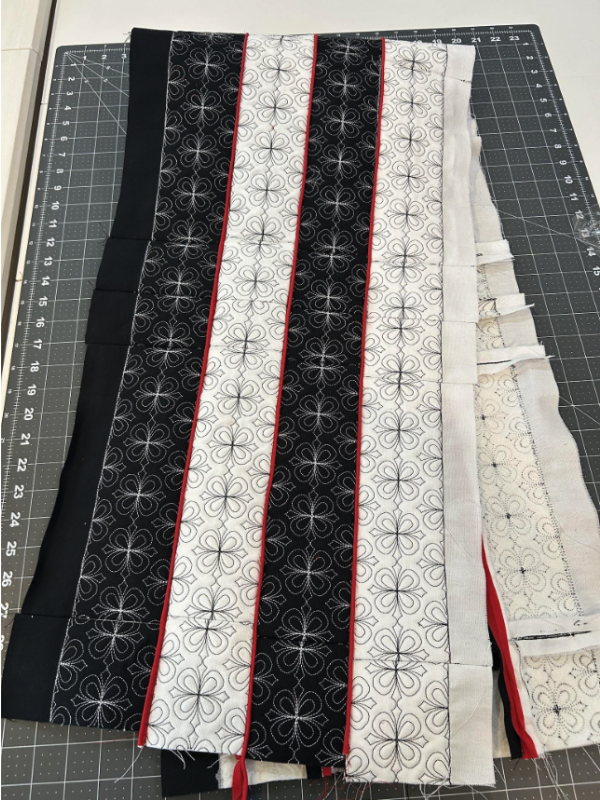
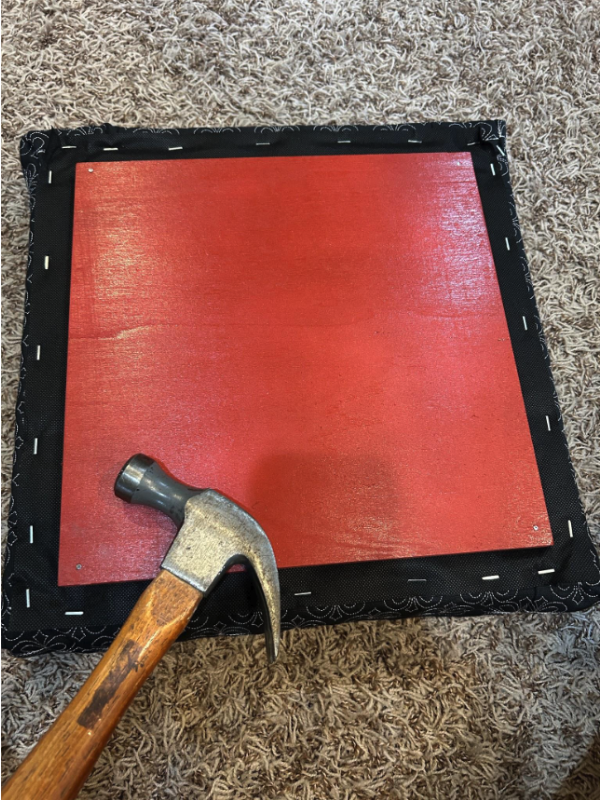
To finish the cover, take your wood-and-foam piece and set it inside the top fabric piece. Line up your centers and corners.
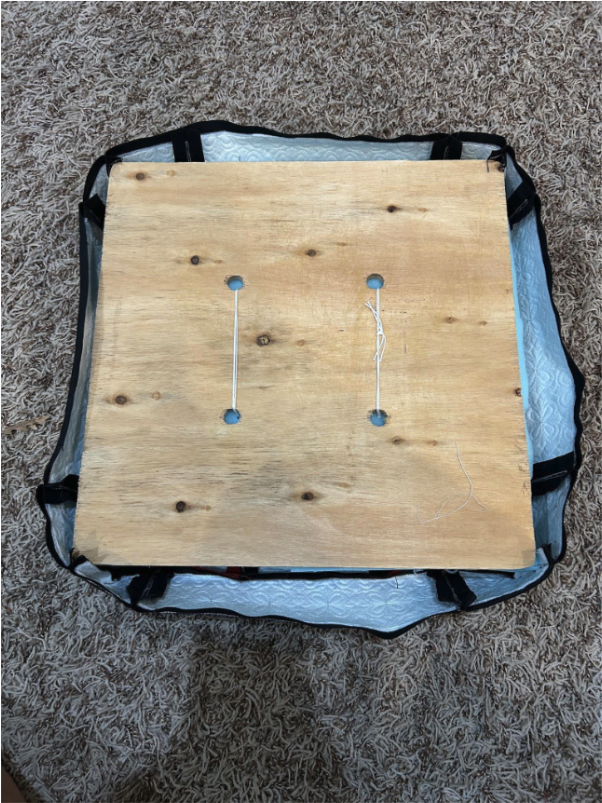
I like to start in the center, pull the fabric taut across the foam, and staple the edge into the wood. It works best if the next staple is directly across from the first one you did. This helps keep the fabric straight.
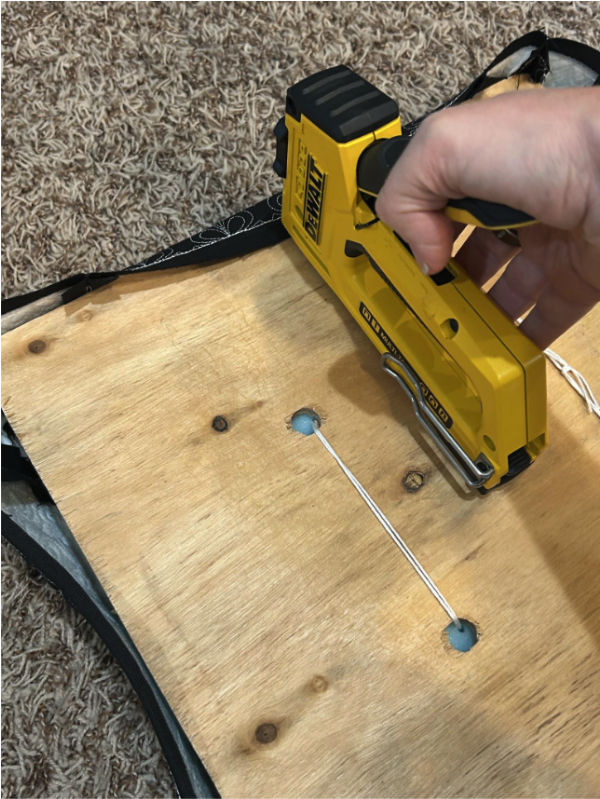
Once your centers are done, staple out to the corners. When I get to the corners, I try to miter them like I would a quilt corner (I have pictures of that on the base below).
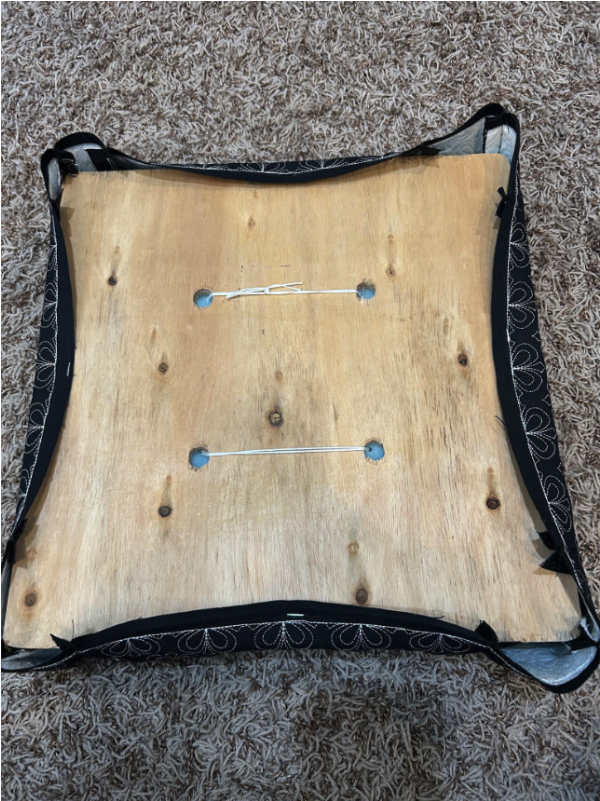
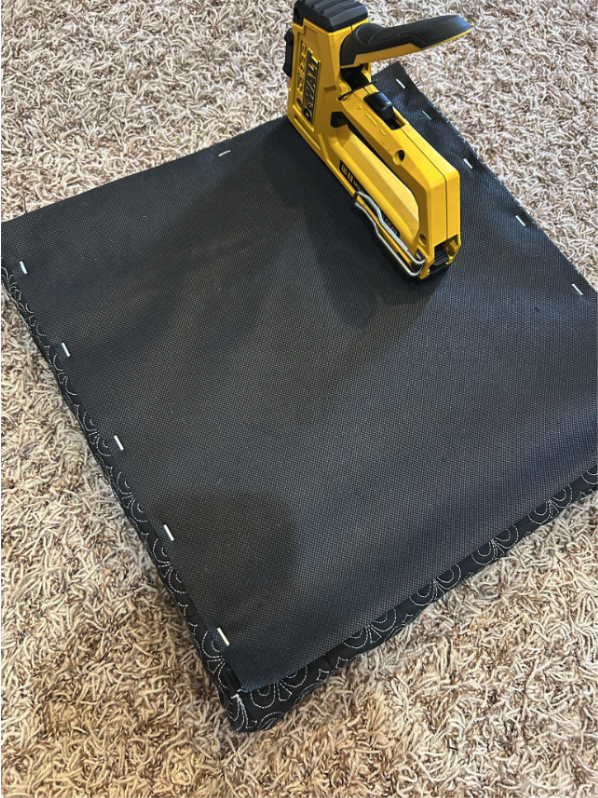
Once the fabric top is stapled in place, you can cut a square of the cambric fabric that is just a little bit less than the top of your ottoman and staple around the edges for a finished look.
If you're using an extra wooden square to keep the top from sliding off, measure so that it’s centered on the top and using small nails, hammer it in place.
For the main part of the ottoman, lay the side stripes on the floor and line up the bottom of the ottoman with the bottom stitching of the stripes, the corner with a corner seam, and the top stitching line with the top edge of the ottoman. Wrap the fabric around your ottoman and pull it so that it’s snug.
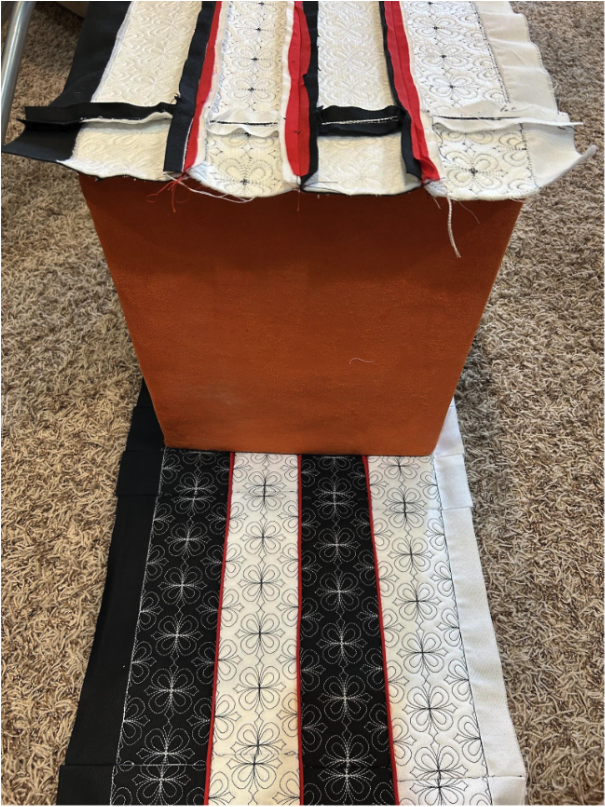
Where your raw edges meet, pin the fabric as close to the ottoman edge as you can. Draw a line down one side so you can see where you want to stitch, take it to your machine, and stitch down that line.
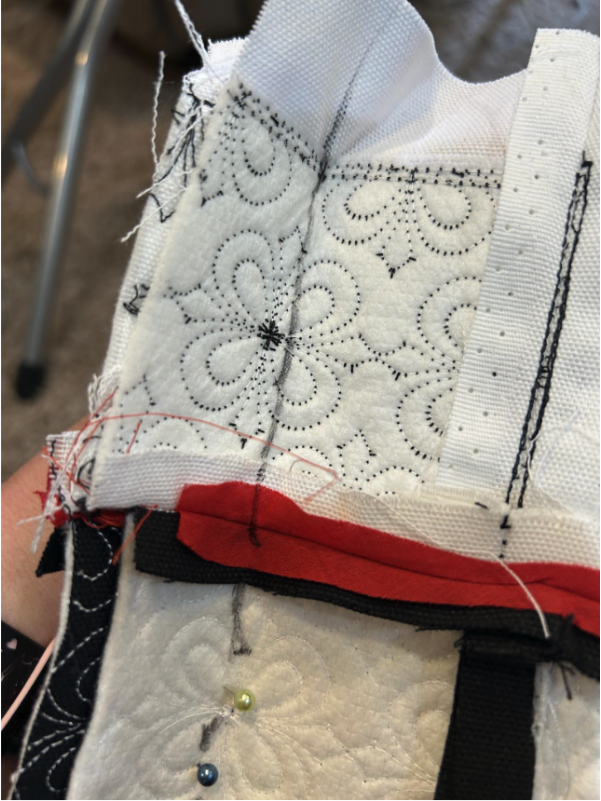
Bring it back to the ottoman and try it out. If it’s too tight you can let the seam out a bit; if it’s too loose you can stitch it a little tighter. When you’re happy with it, trim the seam allowance, press it open, and slide it back on the ottoman.
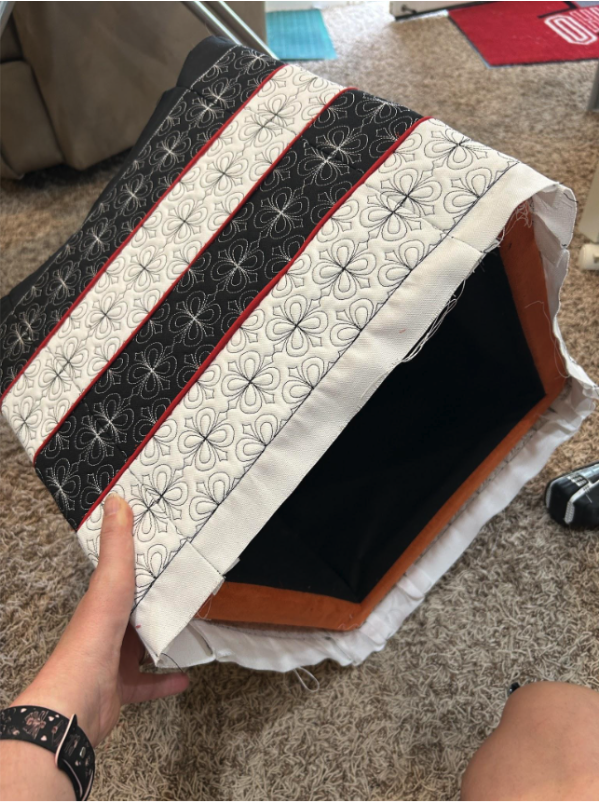
Line up the edge of your top stripe with the top edge of the ottoman. This is where you can see that the stitching line of my stripe shows (so make yours wider!) Start in the centers and fold the stripe over the edge and staple it in place.
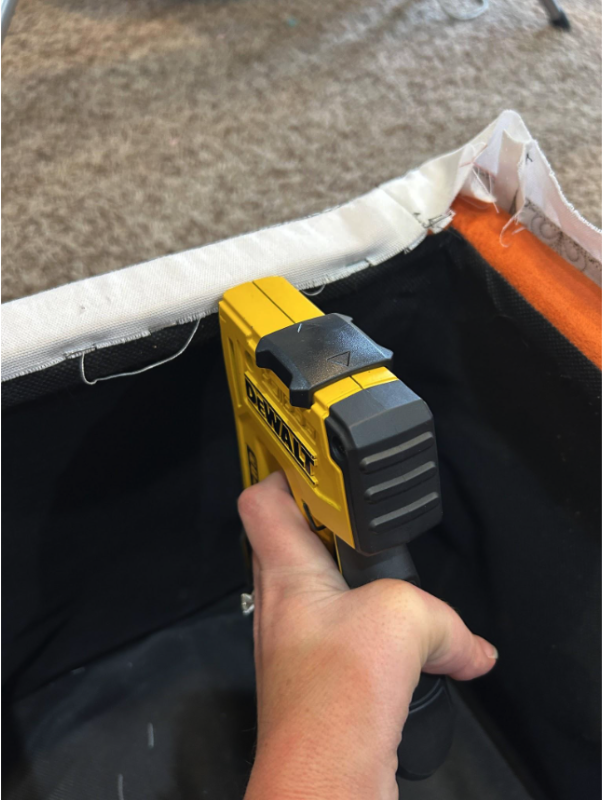
At the corners, make a miter by folding the side out until it forms a 45-degree angle, and then folding it back on itself to make that mitered corner.
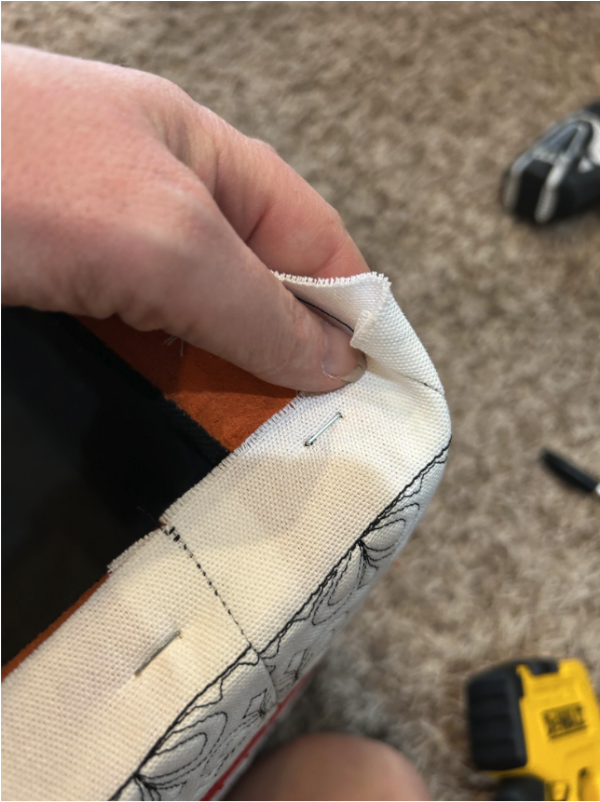
Staple the miter in place.
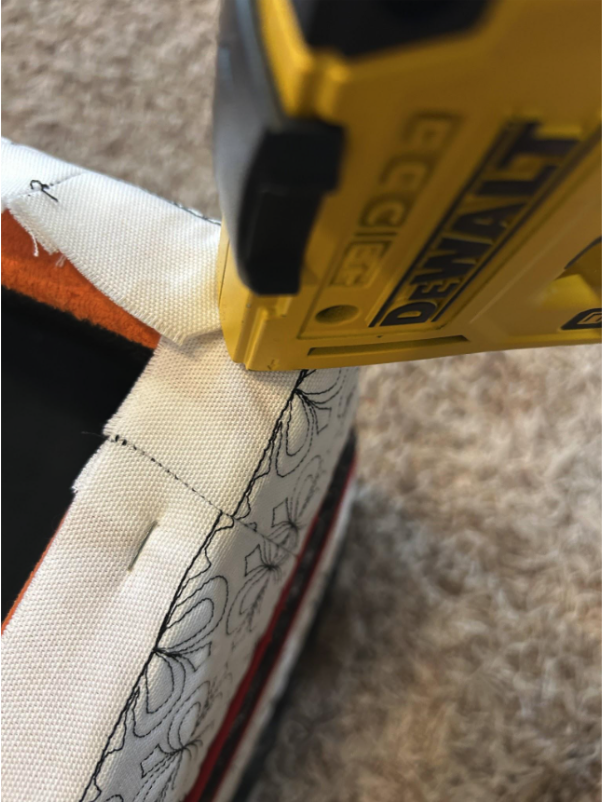
Repeat for the bottom of your ottoman. You can cover the bottom with cambric fabric too if you want. The bottom of my ottoman has the cambric fabric already so I didn’t add more. If you want to add feet to the bottom of your ottoman, you can screw them in place at each corner.
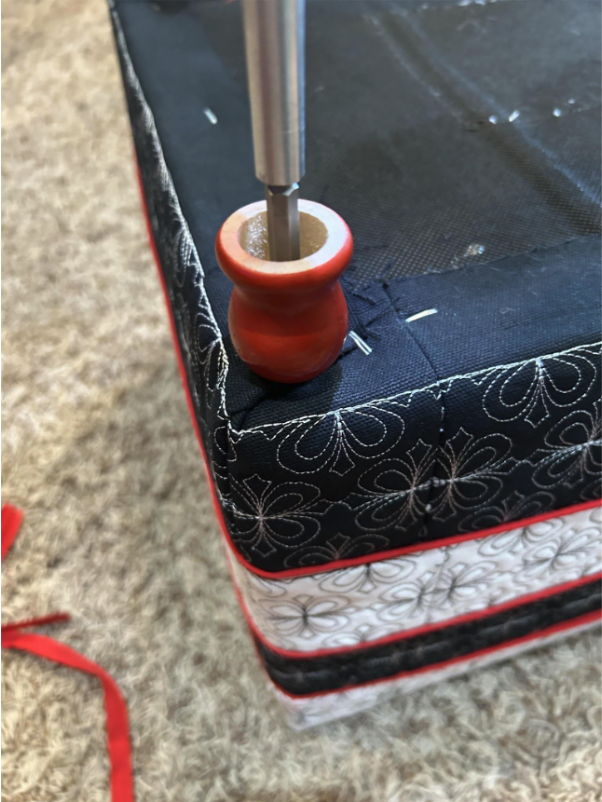
Put your lid on the ottoman and stand back and marvel that you created a customized piece of furniture! People are going to be so impressed with you!
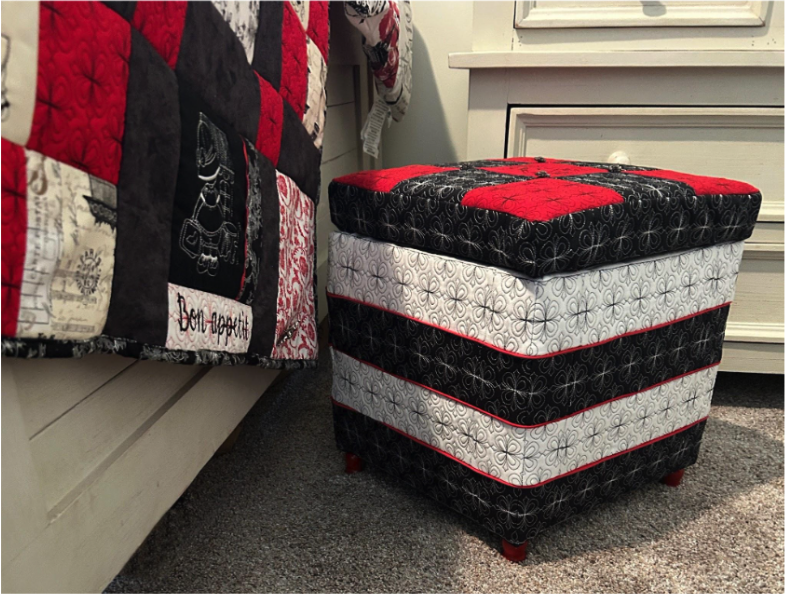
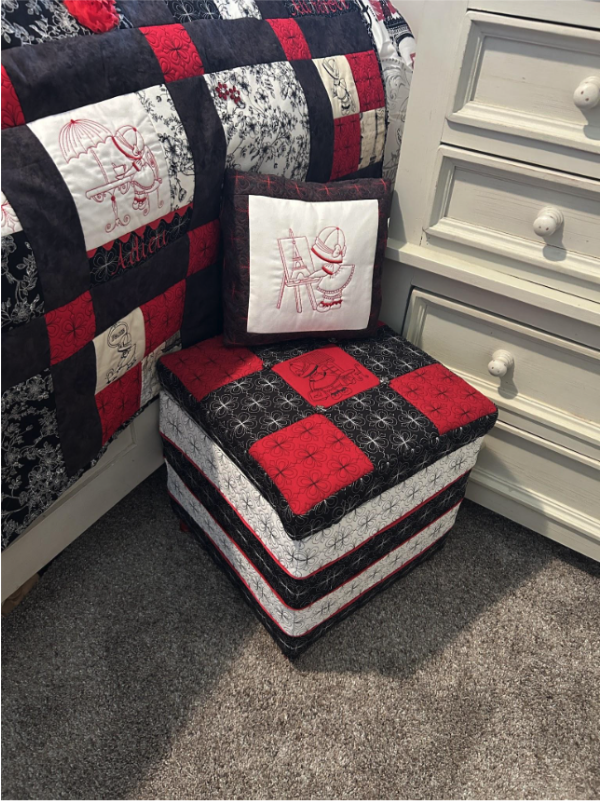
I have enjoyed putting this series together and I hope that you’ve learned a few things and feel more confident making projects using Quilting Backdrops. Your imagination is the limit here. I have lofty dreams of making an embroidered headboard one day, but that would be a whole other post.
Did you discover Beginner to Bold through this ottoman makeover? There are two more projects to explore! Try the Part 1 embroidered pillow for a smaller project with an envelope back or the Part 2 personalized quilt to practice combining blocks, adding words and embellishments, and finishing with quilt-as-you-go.
I would love to see what you come up with to decorate your home and how you use designs and colors to make one-of-a-kind projects! Share with us in the Designs by JuJu Embroidery Blessings Facebook Group or use the hashtag #designsbyjuju anywhere on social media to inspire us all.