Toggle Nav
 Inspire.
Create.
Stitch.
Inspire.
Create.
Stitch.
Search
Inspire.
Create.
Stitch.
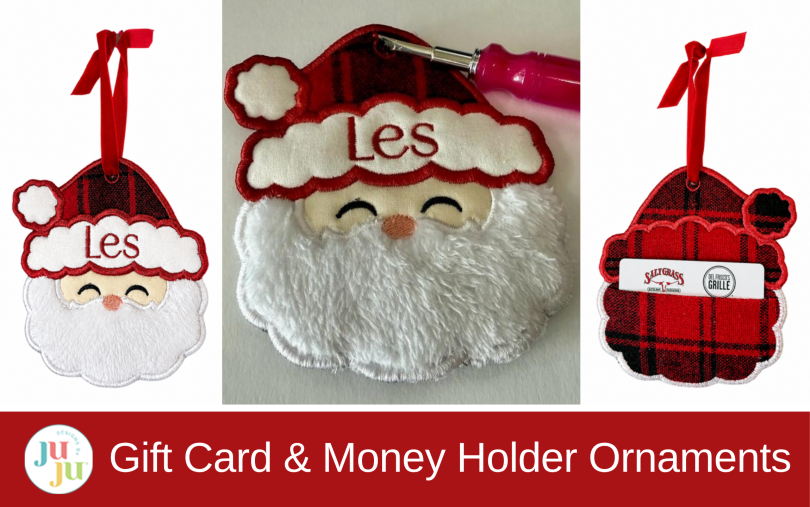
Turn an in-the-hoop Christmas ornament into a personalized gift card or money holder with a fabric pocket, with easy placement tips.
For this project, I’m making six cheerful ornaments: Sweet Santa Face, Mrs. Claus Face, Crazy Patch Santa Hat, Snowflake, Christmas Applique, and Animal Ornaments, each with its own personality and style. These ornaments are not only delightful to make, but they also add extra excitement to the gift inside. Instead of simply handing someone a gift card or envelope, you can tuck it inside a keepsake ornament they can enjoy year after year. It’s a gift within a gift, and who doesn’t love that?
Check out the Designs by JuJu Amazon store for our team’s favorite supplies. For batting, stabilizers, and threads, Designs by JuJu+ has everything you need.
I love this project because it takes something as simple as a gift card or cash and turns it into a personal and memorable memento. Best of all, the ornament doesn’t get tossed aside once the gift is opened. It becomes a keepsake that can be enjoyed and hung on the Christmas tree for years to come. It’s creative, useful, and just plain fun to make, which is exactly the kind of project I love!
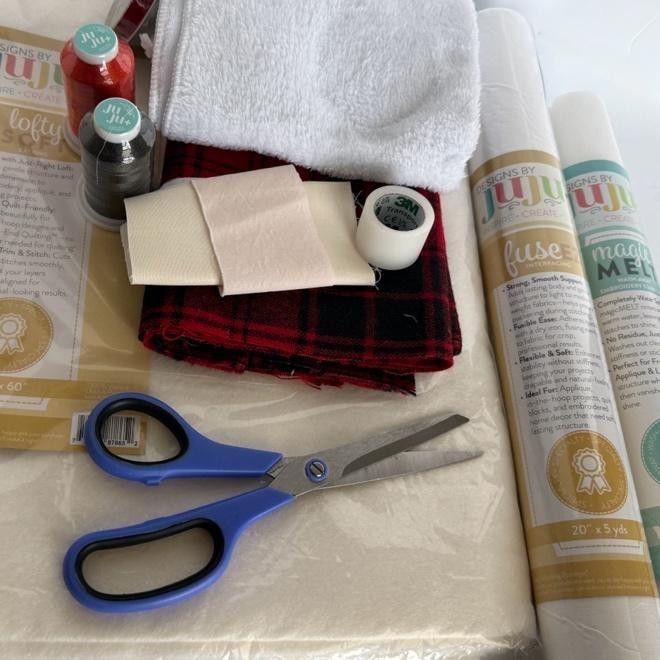
Note: I wanted Santa to have a soft, fluffy beard, so I headed to the dollar store and found a super-soft microfiber cloth in the Auto Care and Maintenance section. It works beautifully for Santa’s beard and comes in a generous size, so there’s plenty of cloth to make several more bearded Santas. Of course, you have other options: cotton, Minky, or terry cloth would all make great choices.
Now that you've gathered your supplies, take a few minutes to plan your embroidery before you start stitching. I decided to make four ornaments for my niece, her husband, and their children, and I think they are absolutely going to love them. For this tutorial, I’m showing you how I made Santa, but don’t worry, the process is the same for all the ornaments.
Open your chosen design in Embrilliance and start by personalizing each ornament. I chose the .75” Fashionista Satin Stitch Embroidery Font because “Les” is only three letters, and I felt this size fit nicely. You could embroider it on Santa’s beard, his hat, or even on the pocket on the back. I decided to leave the year off this ornament, but it would make a wonderful addition if you’re making these as keepsakes or gifts.
If you are new to personalizing ornaments, here is a great tutorial: How to Customize a Christmas Gift Card Holder—DIY Personalized Ornament Tutorial.
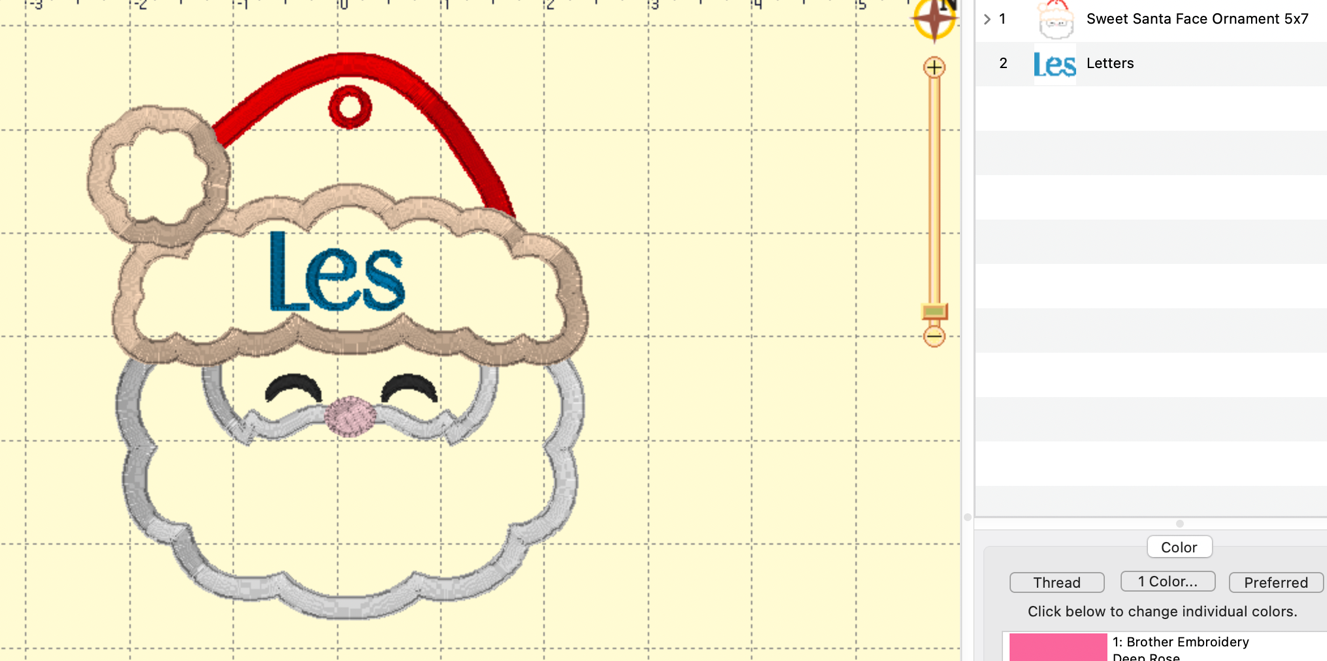
We’ll need to add placement lines to our design so the gift card or money pocket will be straight and positioned exactly where we want it. You have a couple of options: either add the placement lines during the stitching process, which I’ll show you in the steps below, or you can add them to your design now. If you’d like to add them now, here’s how.
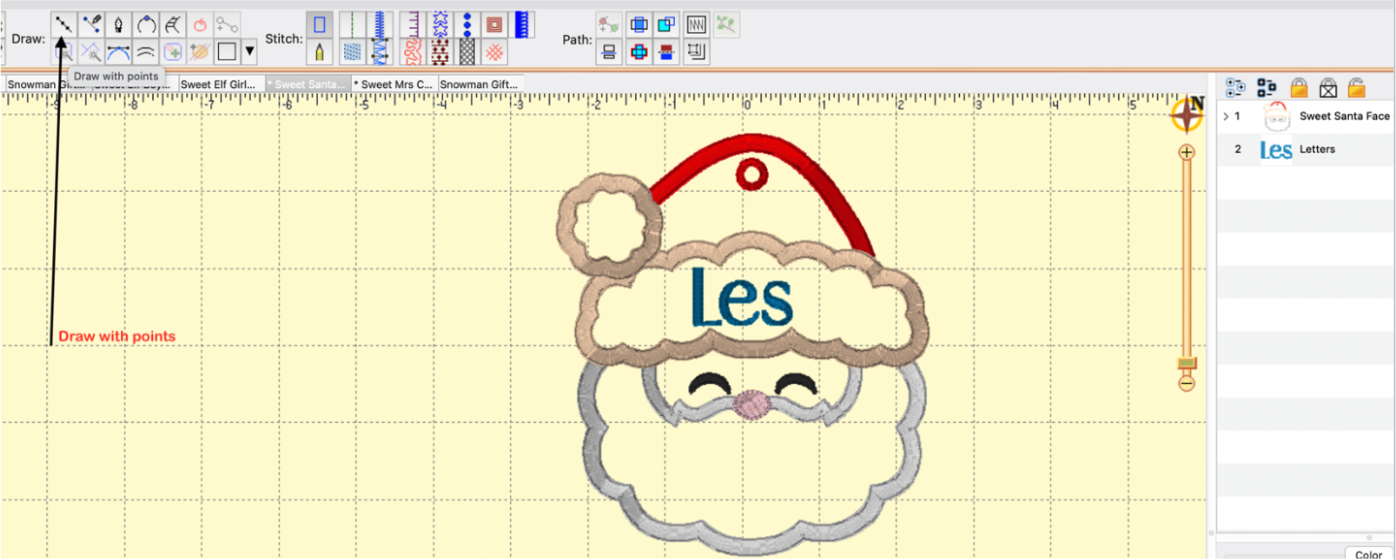
Click Create>Draw with Points. A crosshair will appear, showing you where your stitching will begin. Click on your starting point, and a green dot will appear. I used the grid to help me line up the exact starting and ending points of my placement line. When you click your ending point, a red dot will appear. Press Enter, then select Run for the stitch type. And just like that, your placement line is ready to go.
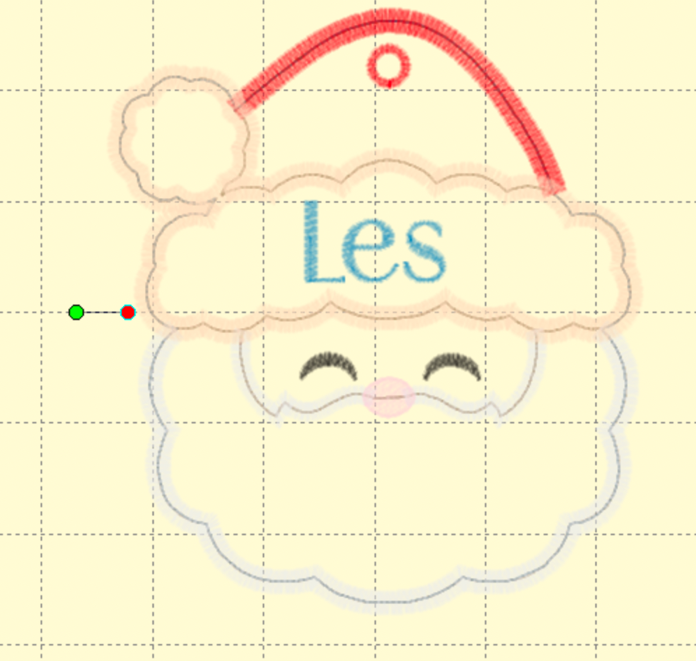
Repeat the same process on the opposite side, using the same grid line as a guide. This will help ensure both placement lines are perfectly even, and your pocket will sit straight when it’s stitched in place.
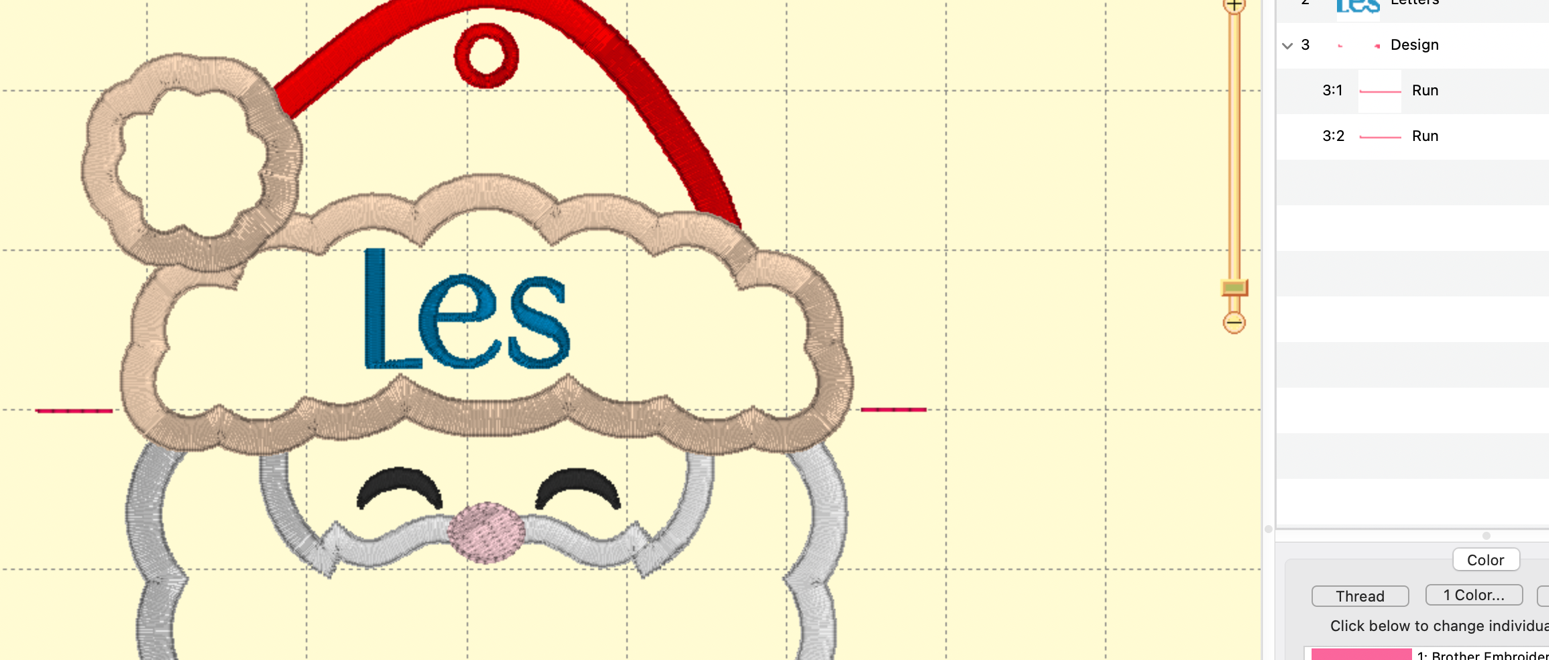
Also, make sure the placement lines are below the satin edge on the front of the Santa’s hat. You don’t want any of the stitching to cross into the pocket opening and accidentally stitch the pocket closed on the back of the ornament. Double-check this before stitching. I learned this one from experience and had to start over.
With the placement lines still in place on the grid, highlight the rest of your design and use the Up Arrow key to move it upward. This keeps your placement lines exactly where you need them while giving you room to position the rest of the design.
Now we just need to make sure the placement lines for the gift card/money holder stitch before we add the back fabric. To change the stitch sequence, right-click on the placement-line stitch and select Move Earlier, or click and drag it to the position you want in the sequence. I found it easier to simply highlight the color stop and drag it to where I needed it.
You can use this same process to move the personalized name. I moved mine so it stitches after the final tack-down of all the applique fabric.
Before saving the design, I always like to run one final Stitch Simulator. This gives me a chance to make sure every color stop is in the correct order before sending the design to my embroidery machine.
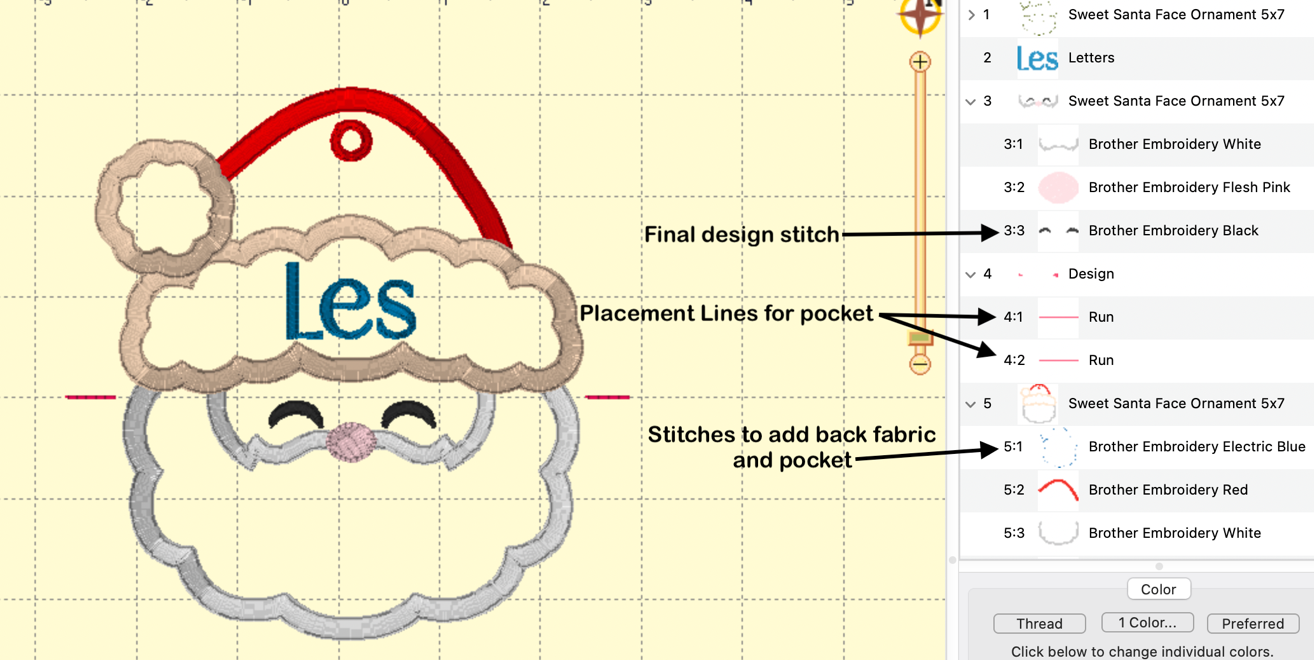
Once everything looks good and you’ve completed your final stitch simulation, save your finished design. You can either send it directly to your embroidery machine using Wi-Fi or save the design to a flash drive and transfer it to your machine. I like having the completed design saved so it’s easy to use again if I decide to make more Santa ornaments later.
For each design, cut all of your fabric pieces according to the fabric cutting chart in the instructions. In addition, you’ll need one extra 6” x 6” piece of fabric for the gift card or money holder pocket. This size may vary according to the size of your ornament. Fold this piece in half with wrong sides together, press it to create a crisp fold, and set it aside until we’re ready to attach the pocket.
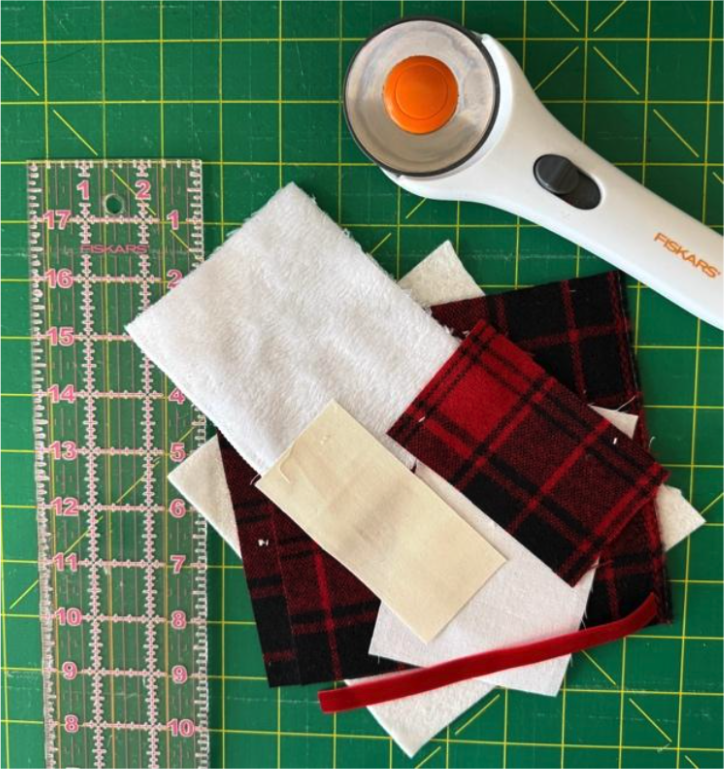
Fuse fusible interfacing onto the wrong side of each fabric piece following the packaging instructions. The interfacing adds stability to the fabric and helps prevent puckering while embroidering, giving your finished ornament a smoother, more polished look.
For this project, I used a 6x10 hoop because adding the placement stitches made the design too large to fit within the 5x7 hoop specified in the original instructions. But don’t worry-there’s another option for adding the placement lines without having to move up to a larger hoop, and I’ll show you that method later. But if you want to skip ahead, it is under Stitch the Design.
I hooped two layers of DBJJ+ magicMELT Water-Soluble Stabilizer, which provides plenty of support during embroidery while also giving the finished ornaments a little extra stability. Before stitching, make sure the stabilizer is smooth, taut, and securely hooped with no wrinkles or loose areas. This will help ensure your embroidery stitches smoothly and ornaments lie flat and look their best.
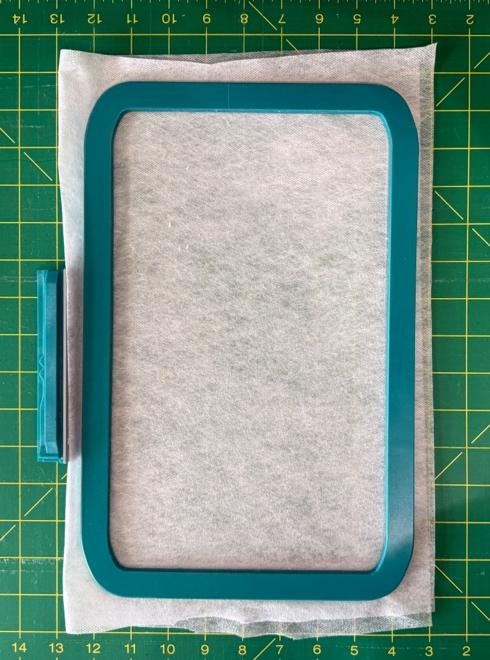
With everything hooped and ready to go, it is finally time to watch the design come to life. Follow the instructions included with your purchase for each step until you reach the placement stitches for the gift card or money holder.
This helpful video demonstrates the steps: How to Make a Sweet Santa Face Ornament | Designs by JuJu.
Before continuing, I like to trim Santa’s beard around the edges for a cleaner, more polished look and, of course, to make sure he’s in top shape for the big night. When trimming any applique, always place your hoop on a flat surface with nothing underneath it. This gives you better control of your scissors and helps prevent accidentally cutting the stabilizer or stitches.
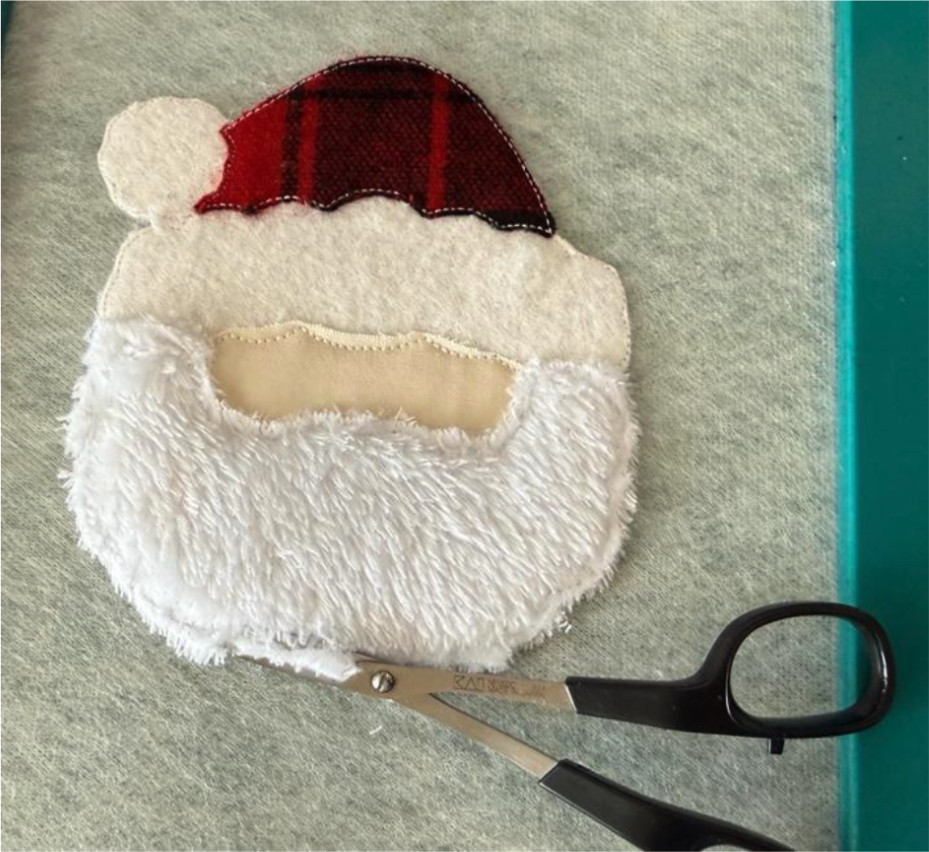
When you reach the step for adding the back fabric and the gift card or money holder pocket, there’s another option if you haven't already added the placement lines to your design.
Remove the hoop from the machine and, using a ruler and marker, draw a straight line, left to right, below the existing stitched lines at about the vertical midpoint of the design. This line will serve as your guide for positioning the pocket.
Important: Remember that the final satin edge of the hat trim has not been stitched yet, so be sure to leave plenty of room for those stitches. Double-check your placement —you want to make sure the pocket opening remains clear and doesn’t get accidentally stitched closed.
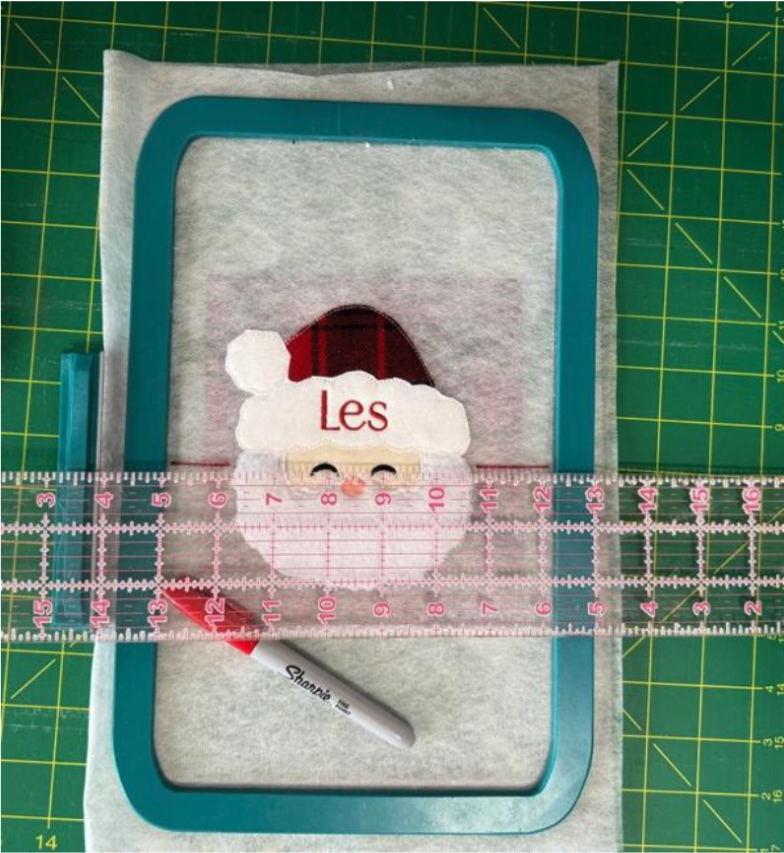
Turn the hoop over, and you should be able to see the marked line through the water-soluble stabilizer. I like to trace the line again on the stabilizer so there’s no question about where to position the pocket.
Use temporary adhesive spray or tape to secure the back fabric, making sure it completely covers all of the stitched areas then place the folded pocket just below the placement line, making sure the raw edges of the pocket are positioned at the bottom of the design.
Once the pocket is positioned, secure it well so it doesn’t shift during stitching. I taped each corner and added a strip of tape across the pocket for extra security.
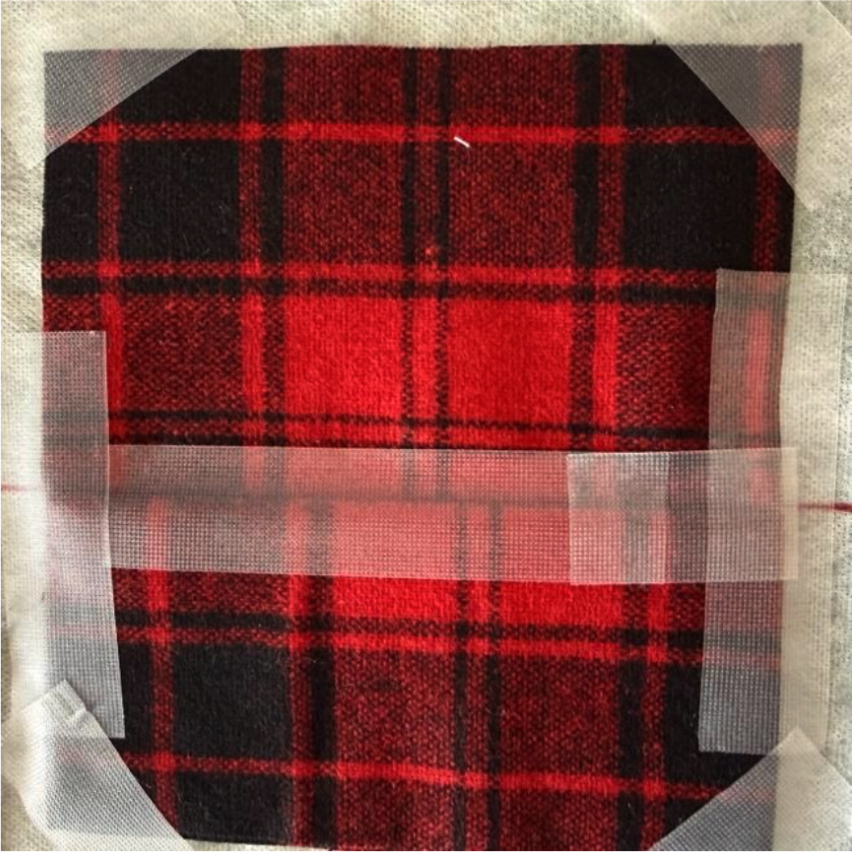
Stitch the tack-down line to attach the back fabric and pocket to the front. Remove the hoop from the machine and turn it over. Carefully remove the tape and trim fabric around the Santa on the backside of the hoop.
This is also the perfect time to change your bobbin thread to match your top thread. Since these final stitches will be visible on both sides of the ornament, matching the bobbin thread will give your finished project a more professional appearance.
Stitch the satin edge.
The final stitch is an eyelet for hanging the ornament or using it as a gift tag. This step is completely optional, so you can skip it if you prefer another way to hang or display your finished ornament.
Now for the finishing touches. Remove the completed design from the hoop and carefully trim the water-soluble stabilizer as close to the stitching as possible without cutting into the stitches. Next, use a cotton swab lightly moistened with water; you only need enough to soften and remove the stabilizer without soaking the ornament.
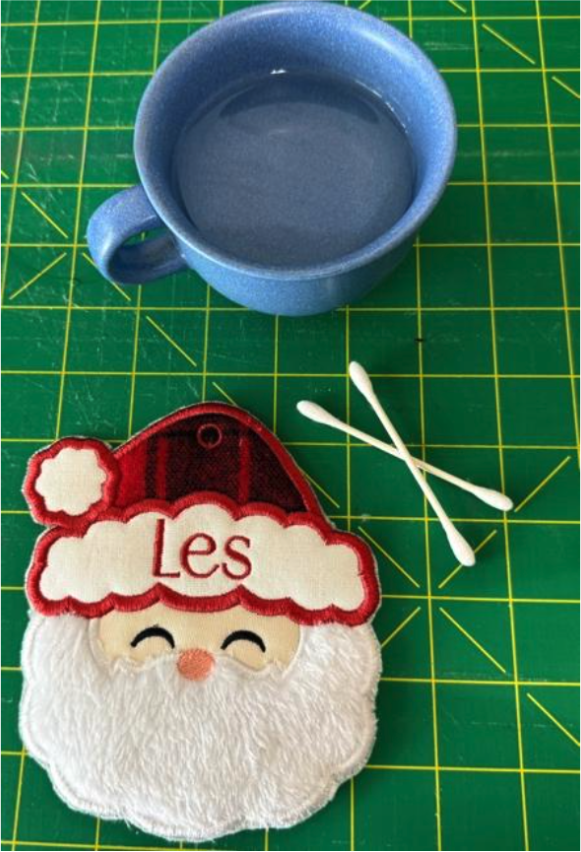
If you stitched the eyelet, the next step is to gently use a seam ripper to open the center of the eyelet. Another option would be to use a leather hole punch. Be careful not to cut the surrounding stitches. Once the opening is ready, you can add your ribbon. I cut mine approximately 12” long, but the length is completely up to you depending on how you plan to hang the ornament.
For a finished look, I angled the ends of my ribbon and barely ran a lighter over the cut edges to heat-seal them and prevent fraying. Use caution with the lighter and keep it away from the other materials.
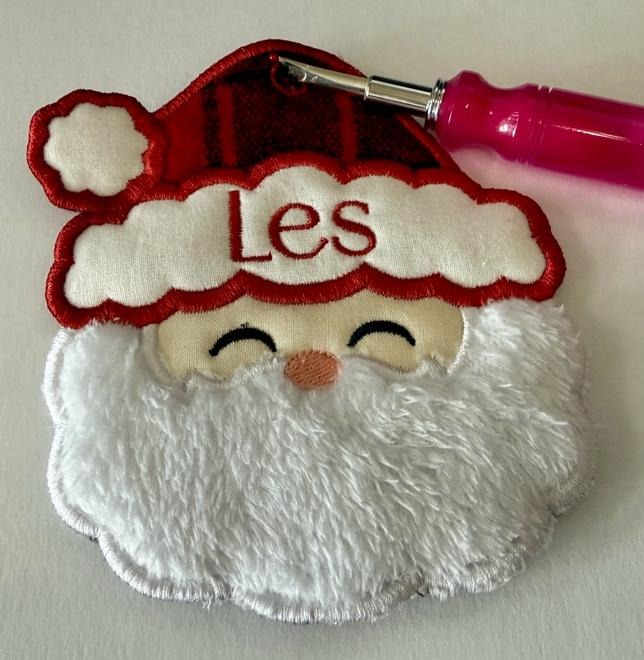
And just like that, your Santa ornament is finished and ready to hold a gift card or a little holiday spending money. It’s a fun way to turn a simple gift into something special and long lasting for years to come.
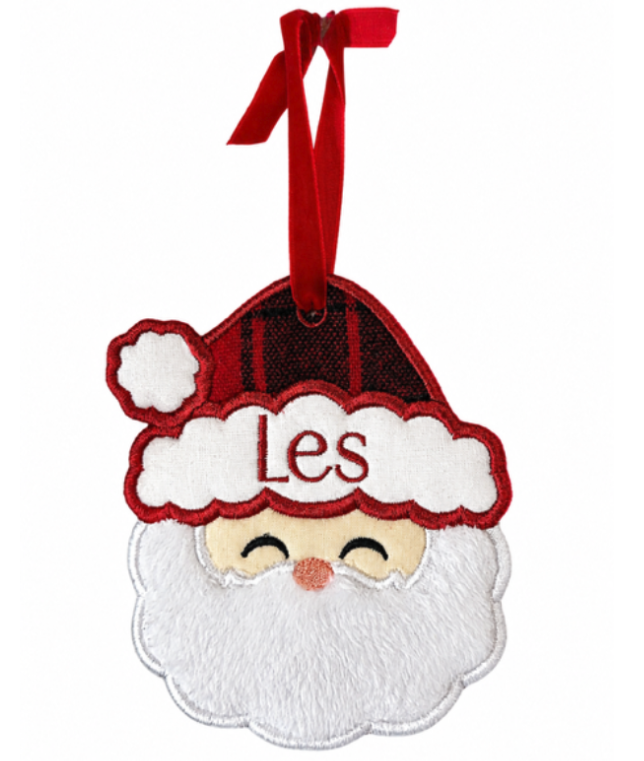
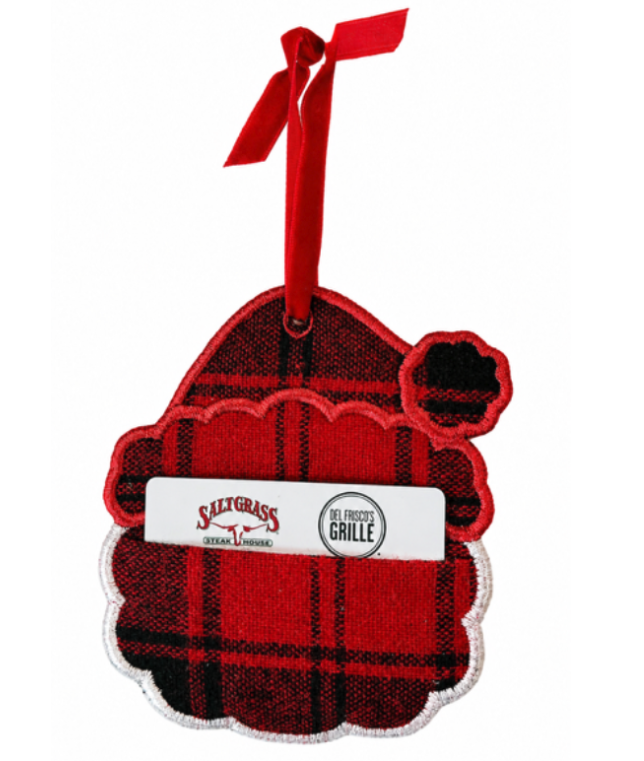
Important: When choosing your design, pay close attention to where the outer satin edge will stitch. If the satin edge crosses the design too low, there may not be enough room to insert a gift card or money.
For example, the Sweet Elf Face Girl and Boy Ornaments were not suitable for this project. The ears form part of the outer satin edge needed to attach the back, but the satin stitching also crosses the chin area on the front of the design. This leaves too little room to easily insert a gift card or money. A quick look at the design’s stitch path before you begin can save you from finishing an ornament that doesn’t work well as a gift card holder.
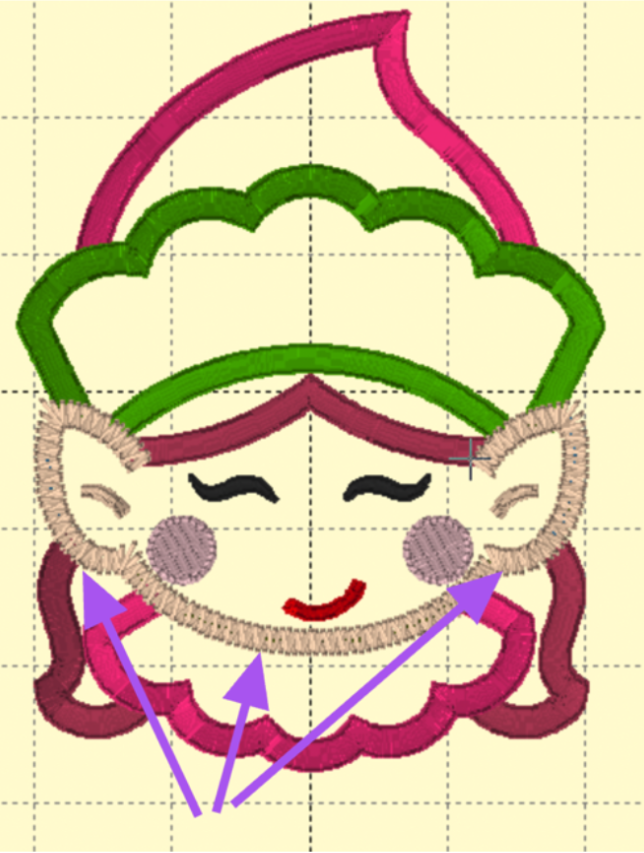
But I loved the design so much, I stitched it anyway!
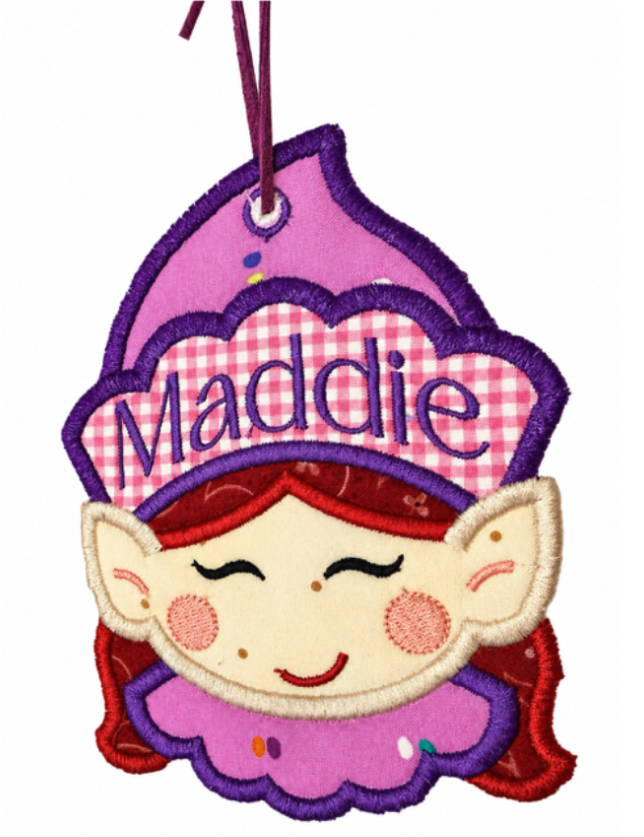
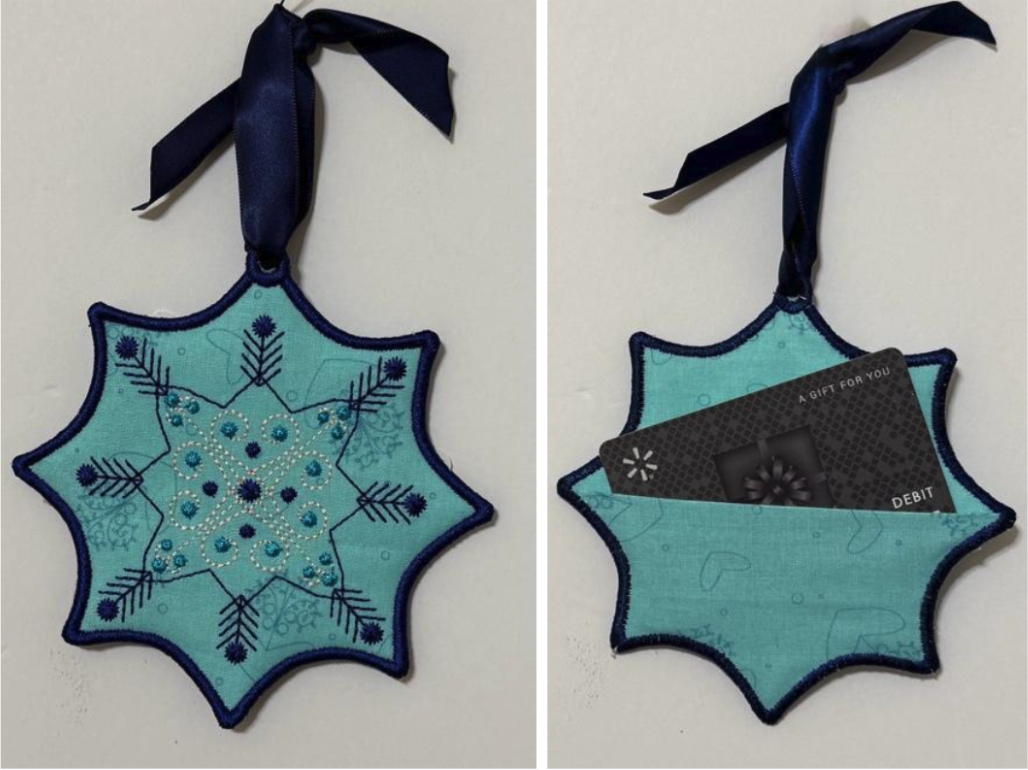
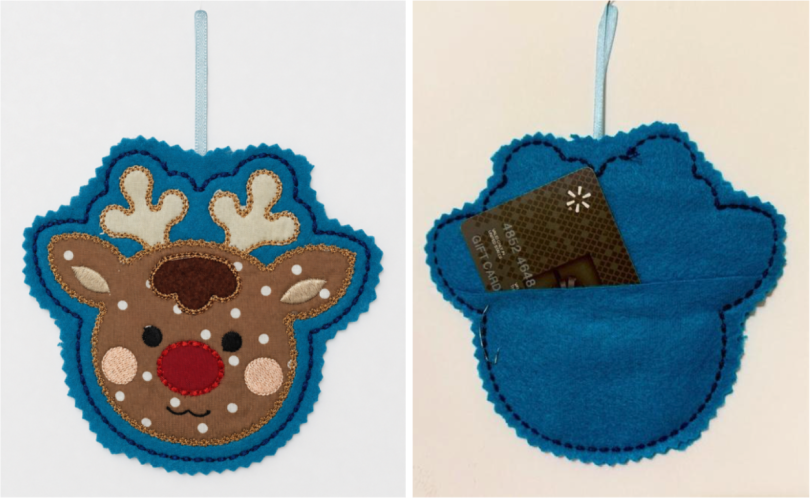
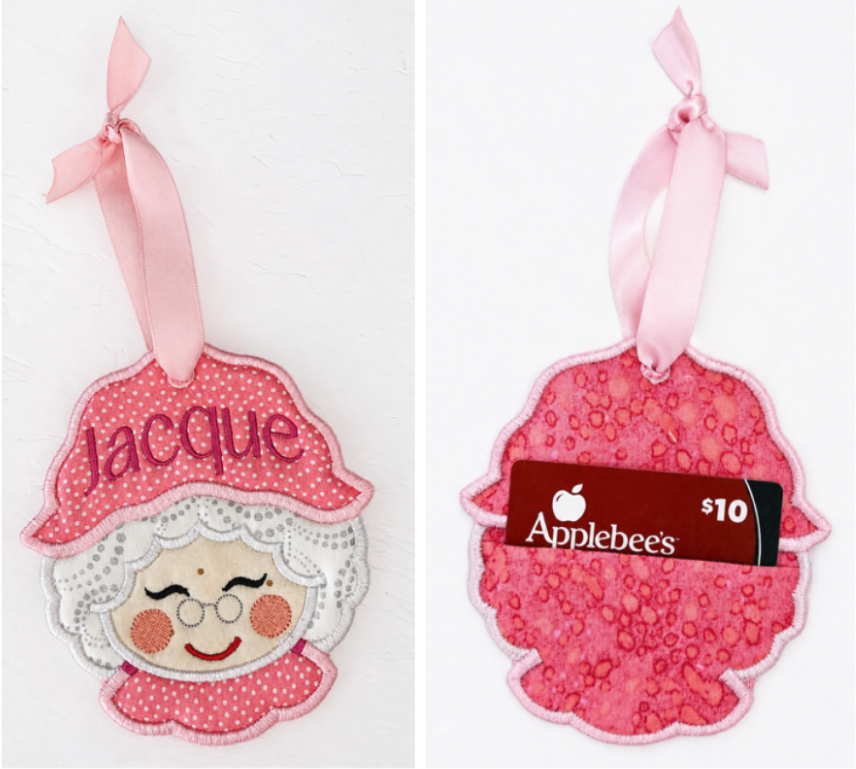
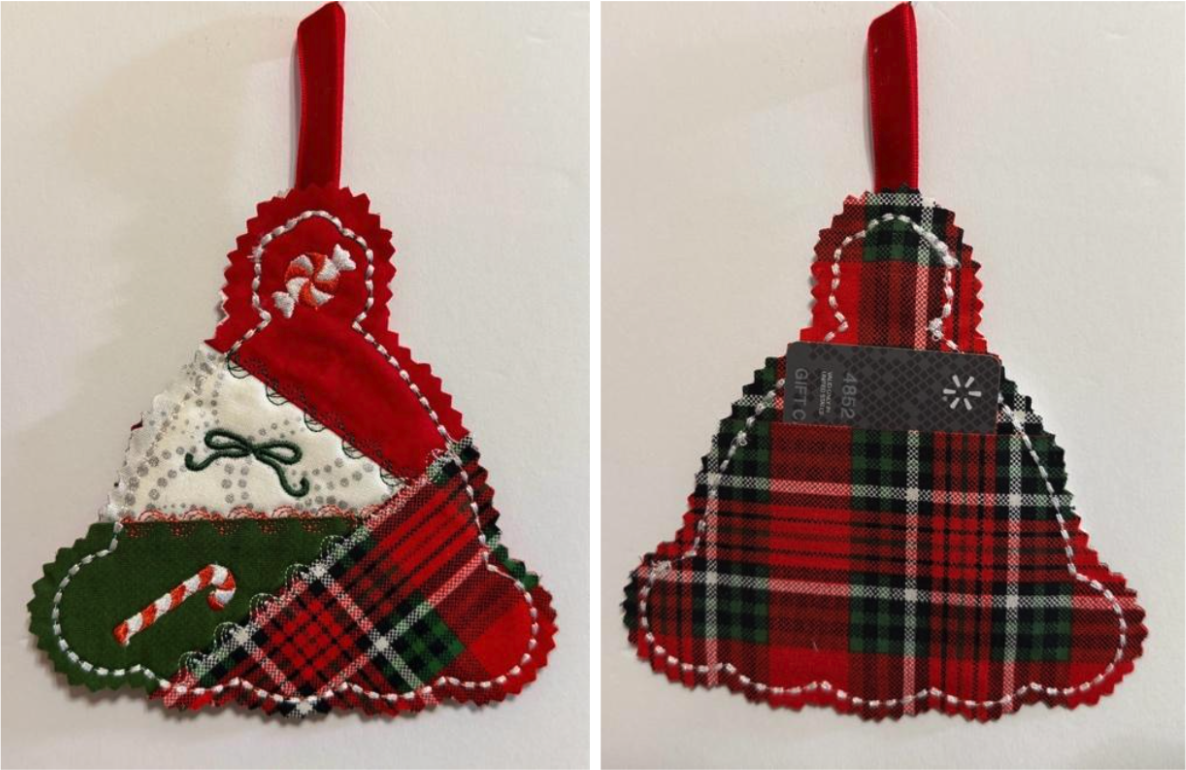
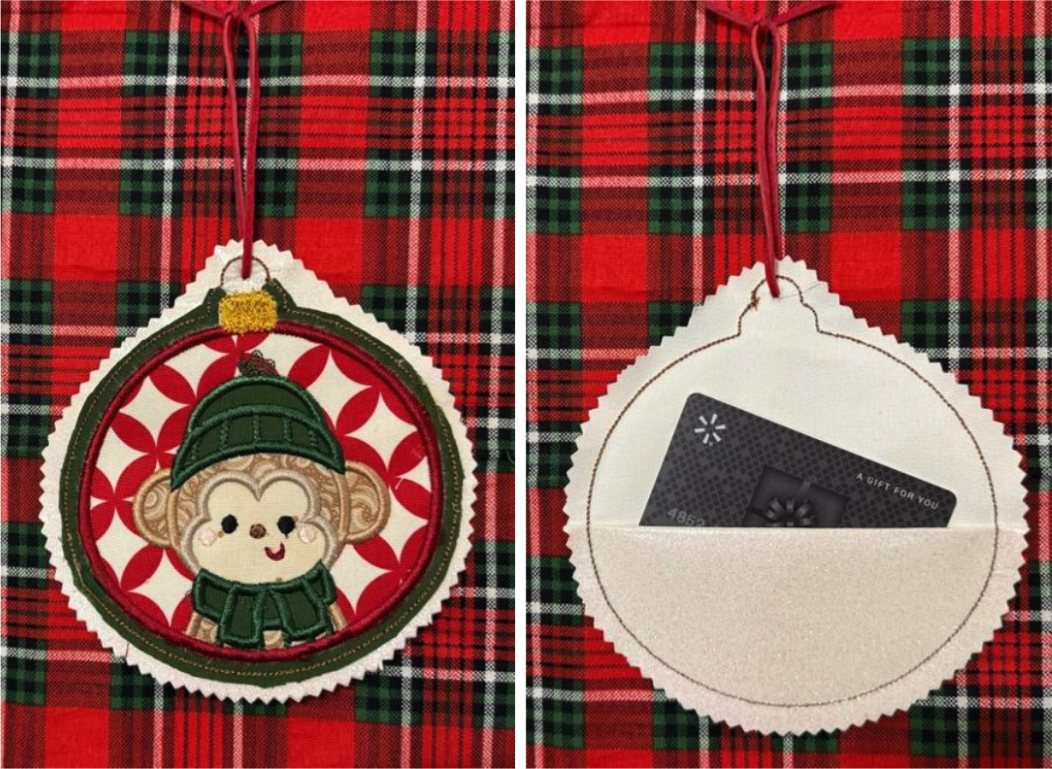
Here are a few more gift card or money holder ornaments to inspire your next creation.
I love polka dots but had no idea it would give the look that my reindeer has chicken pox. I’m not sure this one will be utilized but it taught me a lesson—to double check my fabric before using it.
I hope this tutorial inspires you to create something that's unique and special.
Please share your finished ornaments with us in the Designs by JuJu Embroidery Blessings Facebook Group community, or use the hashtag #designsbyjuju anywhere on social media. We love to see what you create!