Toggle Nav
 Inspire.
Create.
Stitch.
Inspire.
Create.
Stitch.
Search
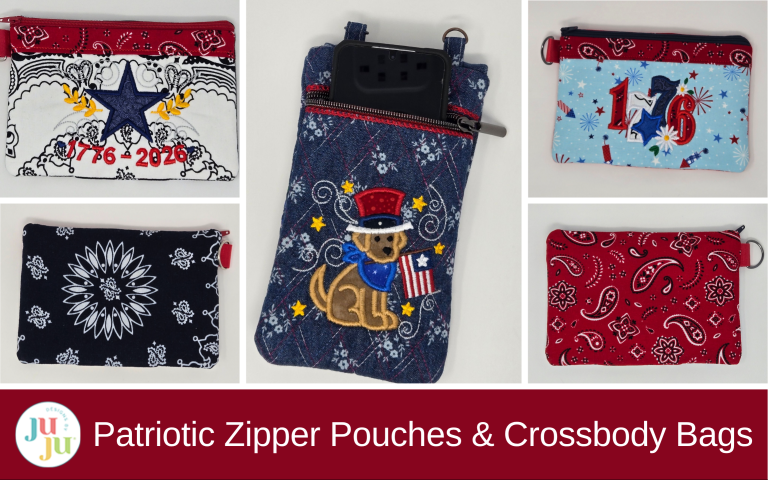
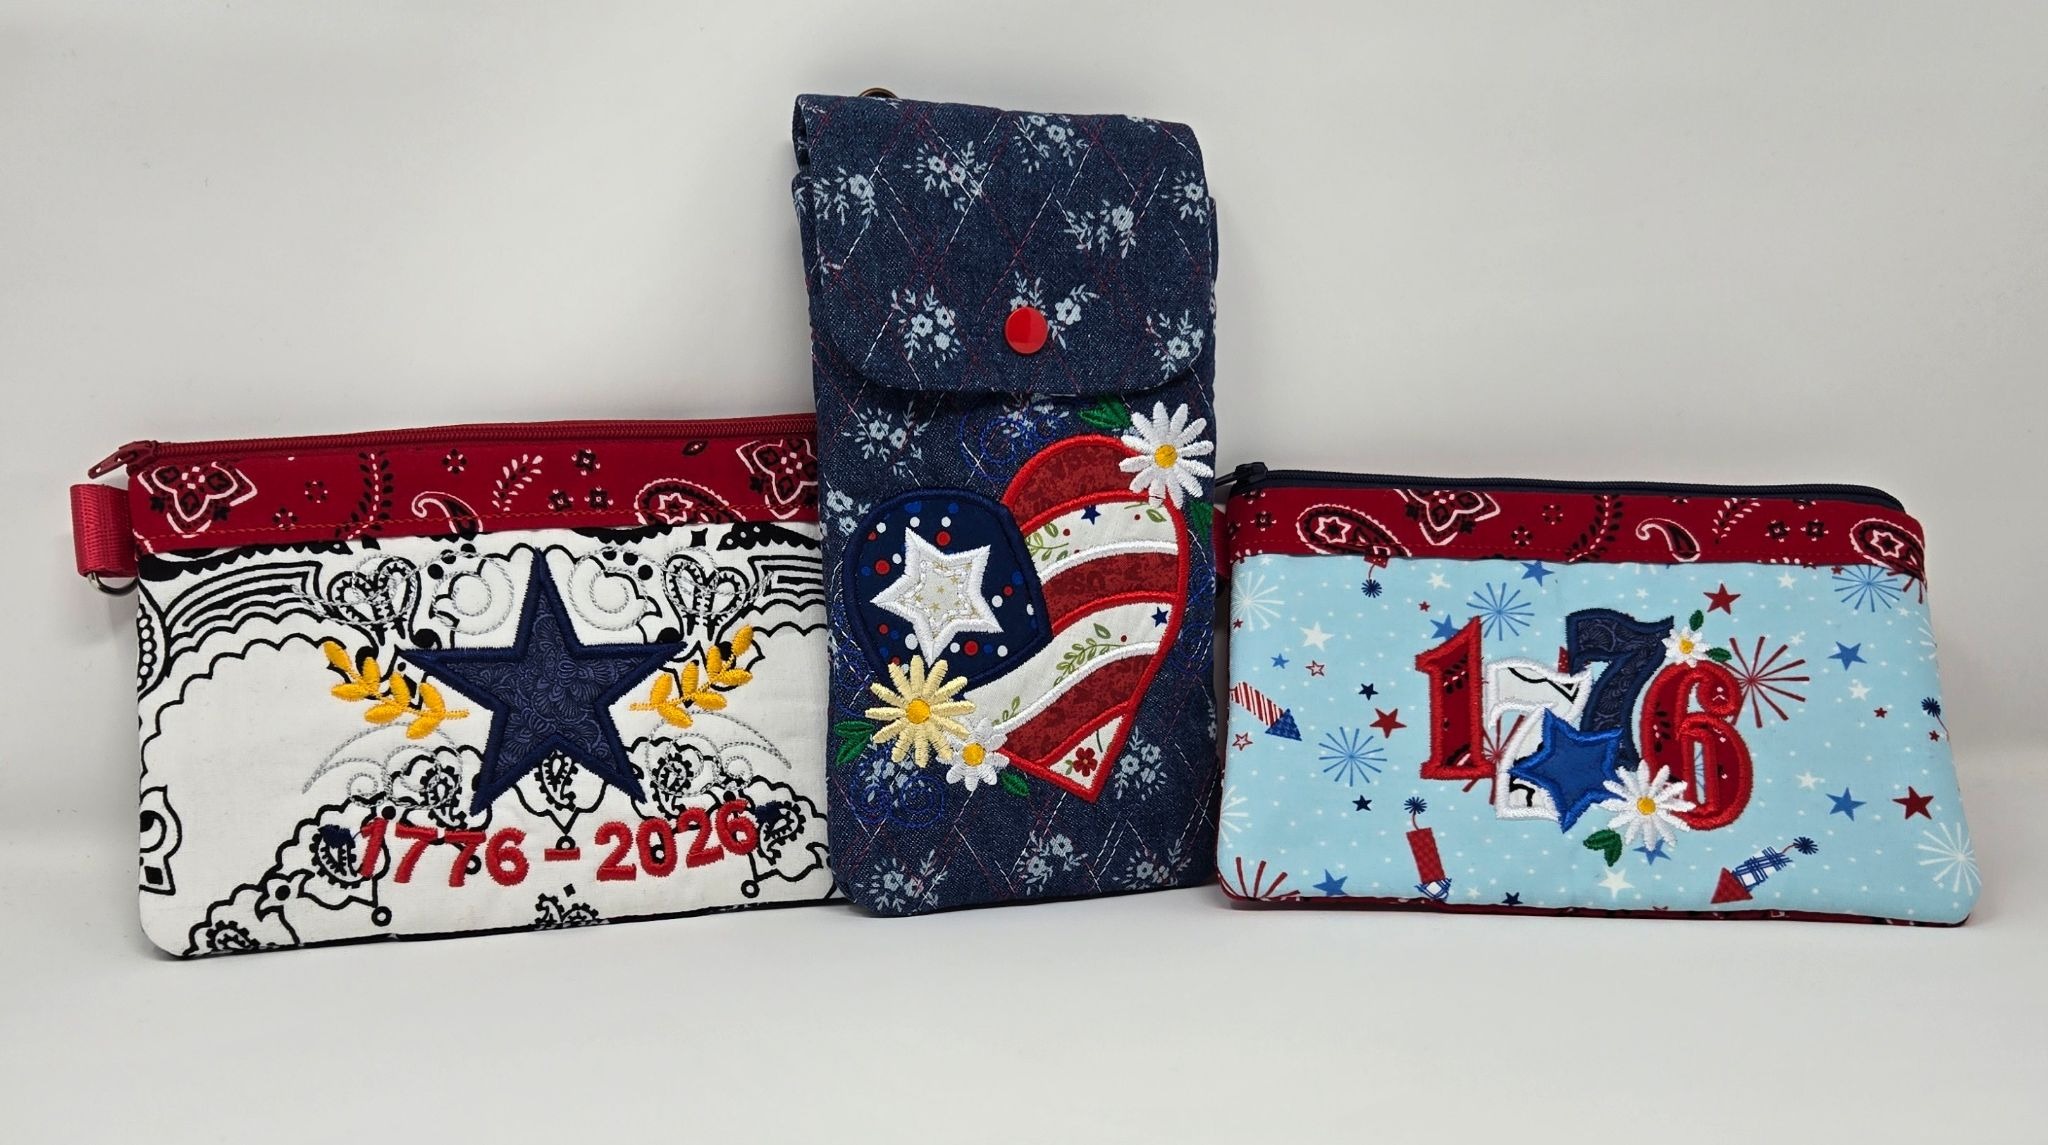
Create festive patriotic zipper pouches and crossbody bags with Star Spangled Stitches embroidery designs. These fun in-the-hoop projects are perfect for parades, fireworks, and summer celebrations.
Need a fun patriotic look with a place to hold your cell phone for the parade? Gotcha covered! Designs by JuJu has some really fun zipper pouches and cross body bag projects. Let’s fancy them up for the Fourth using some of the Star Spangled Stitches designs!
Approximate size of project: two pouches 8.3” x 5.8”; cell phone bag 4.5” x 7.7”
Please be sure to check out the DBJJ team’s favorite supplies in the Designs by JuJu Amazon store, and for all your stabilizer, batting, and thread needs, head to Designs by JuJu+.
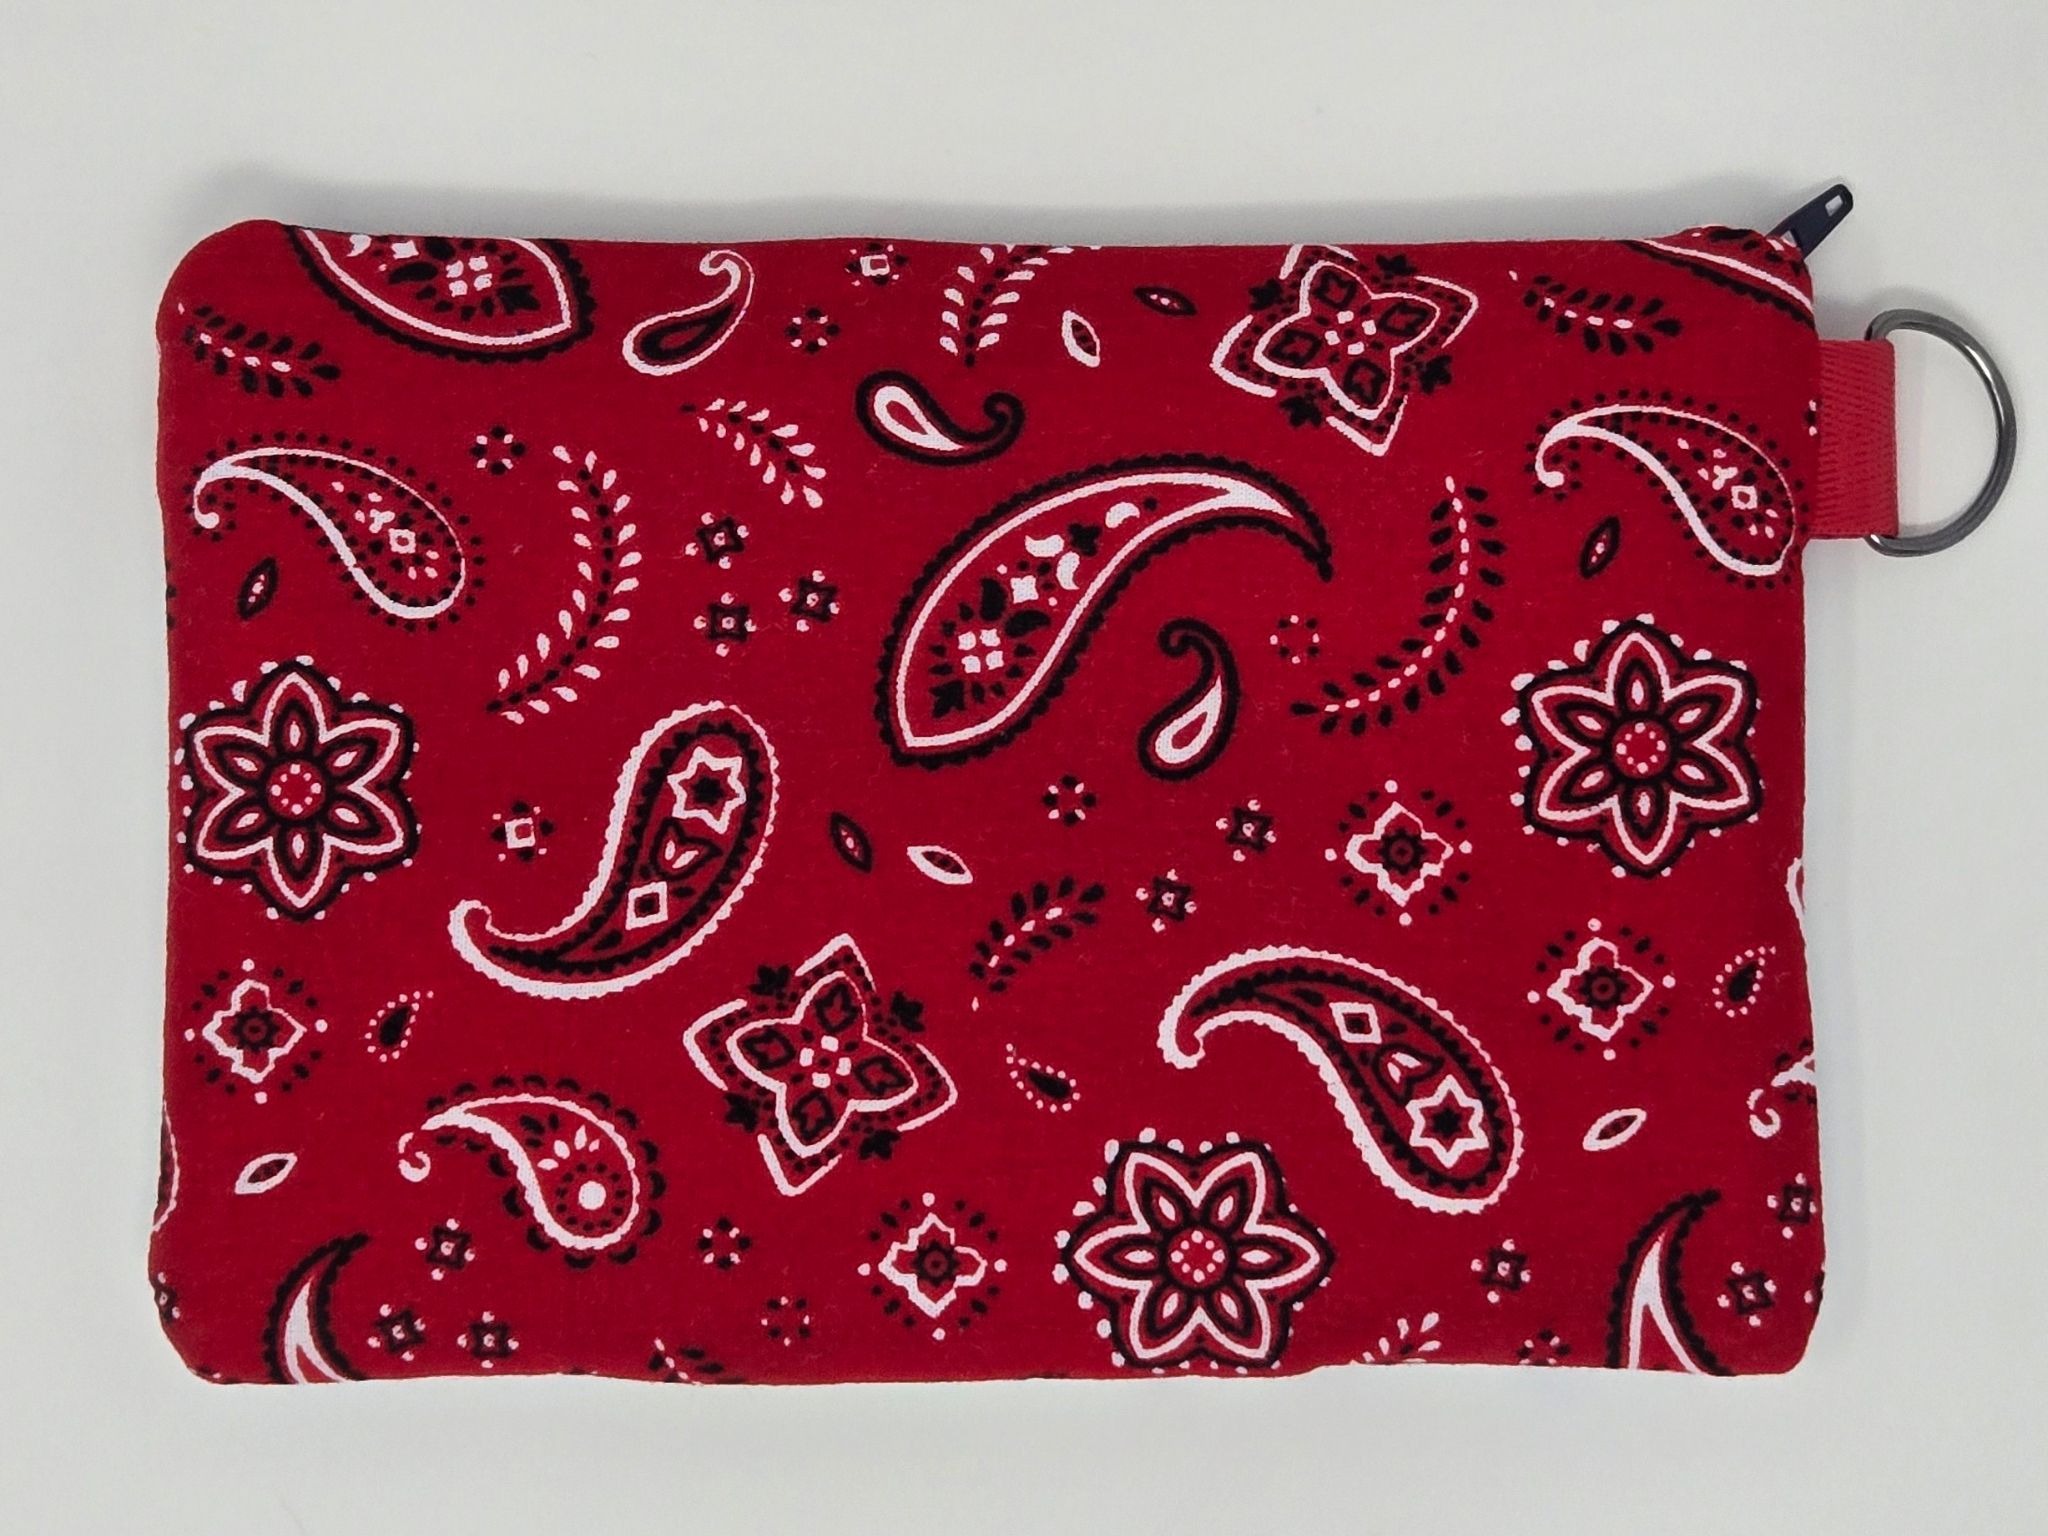
Bandanas—I love them! If you decide to use bandanas like I did, wash them first. They are not made of the best quality fabric and they will shrink. I also backed every bandana piece with fuseEZ interfacing, the outside pieces, lining pieces, and a half piece of fuseEZ (1¼” x 11”) for the band (6x10 size).
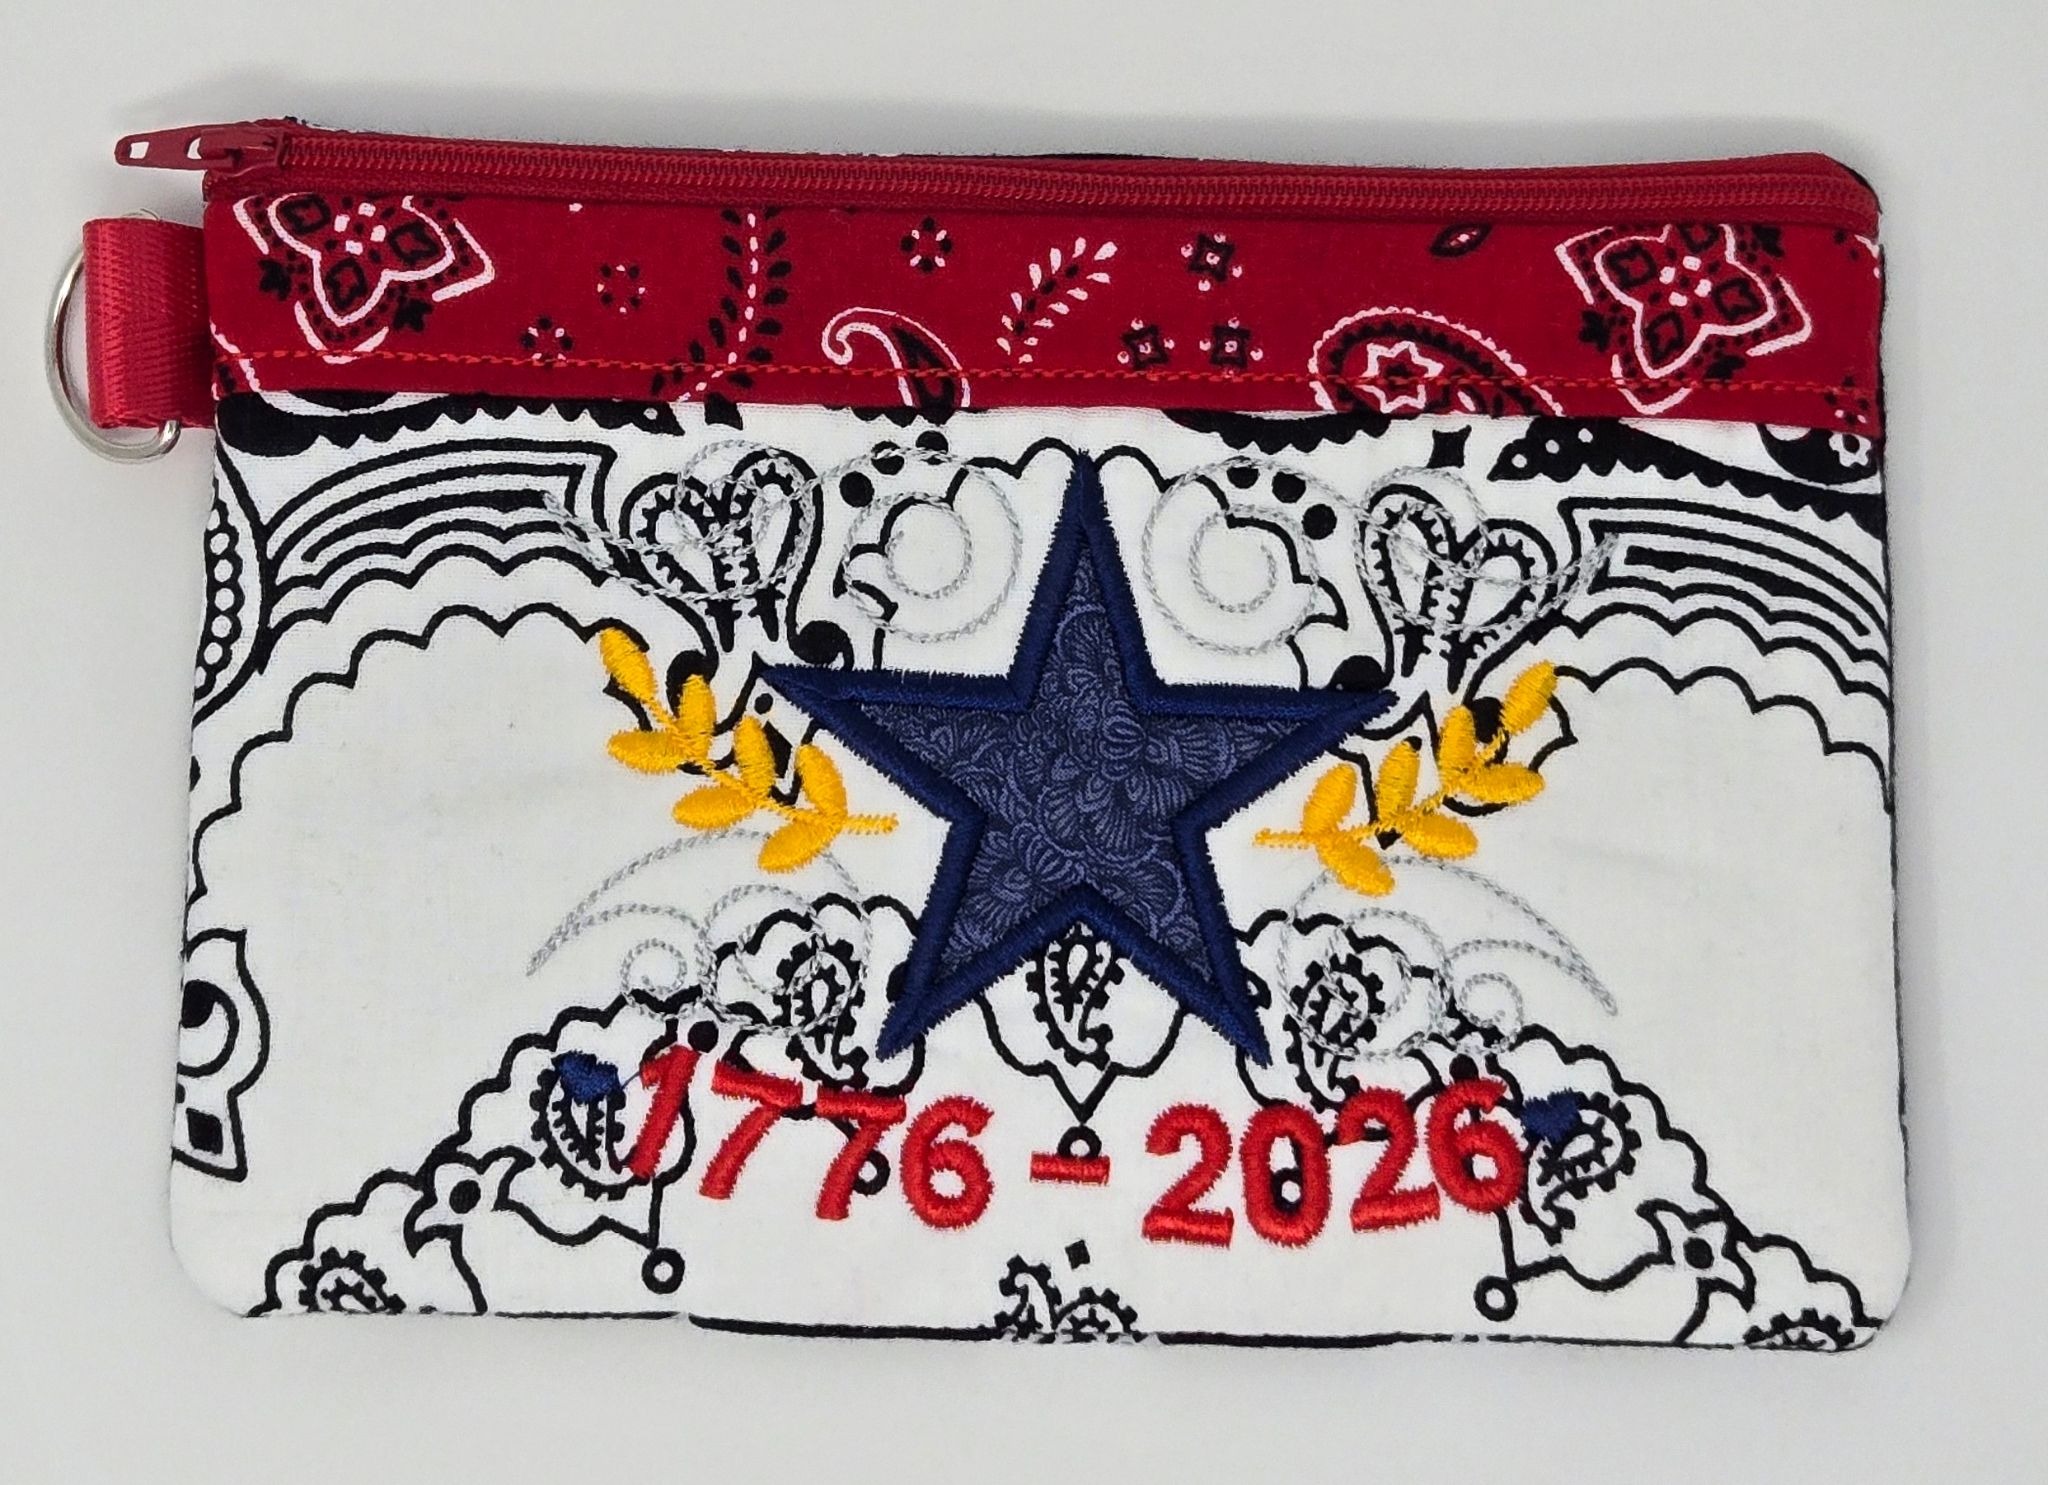
I started with the 1776 design from Set 1 in the 5x5 size and the Ruffle Zipper Bag for the 6x10 hoop size. But I could not stop at one! On my second pouch I used the Star 1776–2026 in the same 5x5 size, and the same Zipper Bag size.
The first thing I did was embroider the Star Spangled Stitches (SSS) block for the front of the pouch. I hooped magicMESH stabilizer and floated a piece of loftySOFT batting the same size as the front bottom piece. I fused a piece of fuseEZ interfacing to the back of my fabric. The instructions do not tell you to use loftySOFT for this pouch, but I wanted a little more structure behind my SSS design.
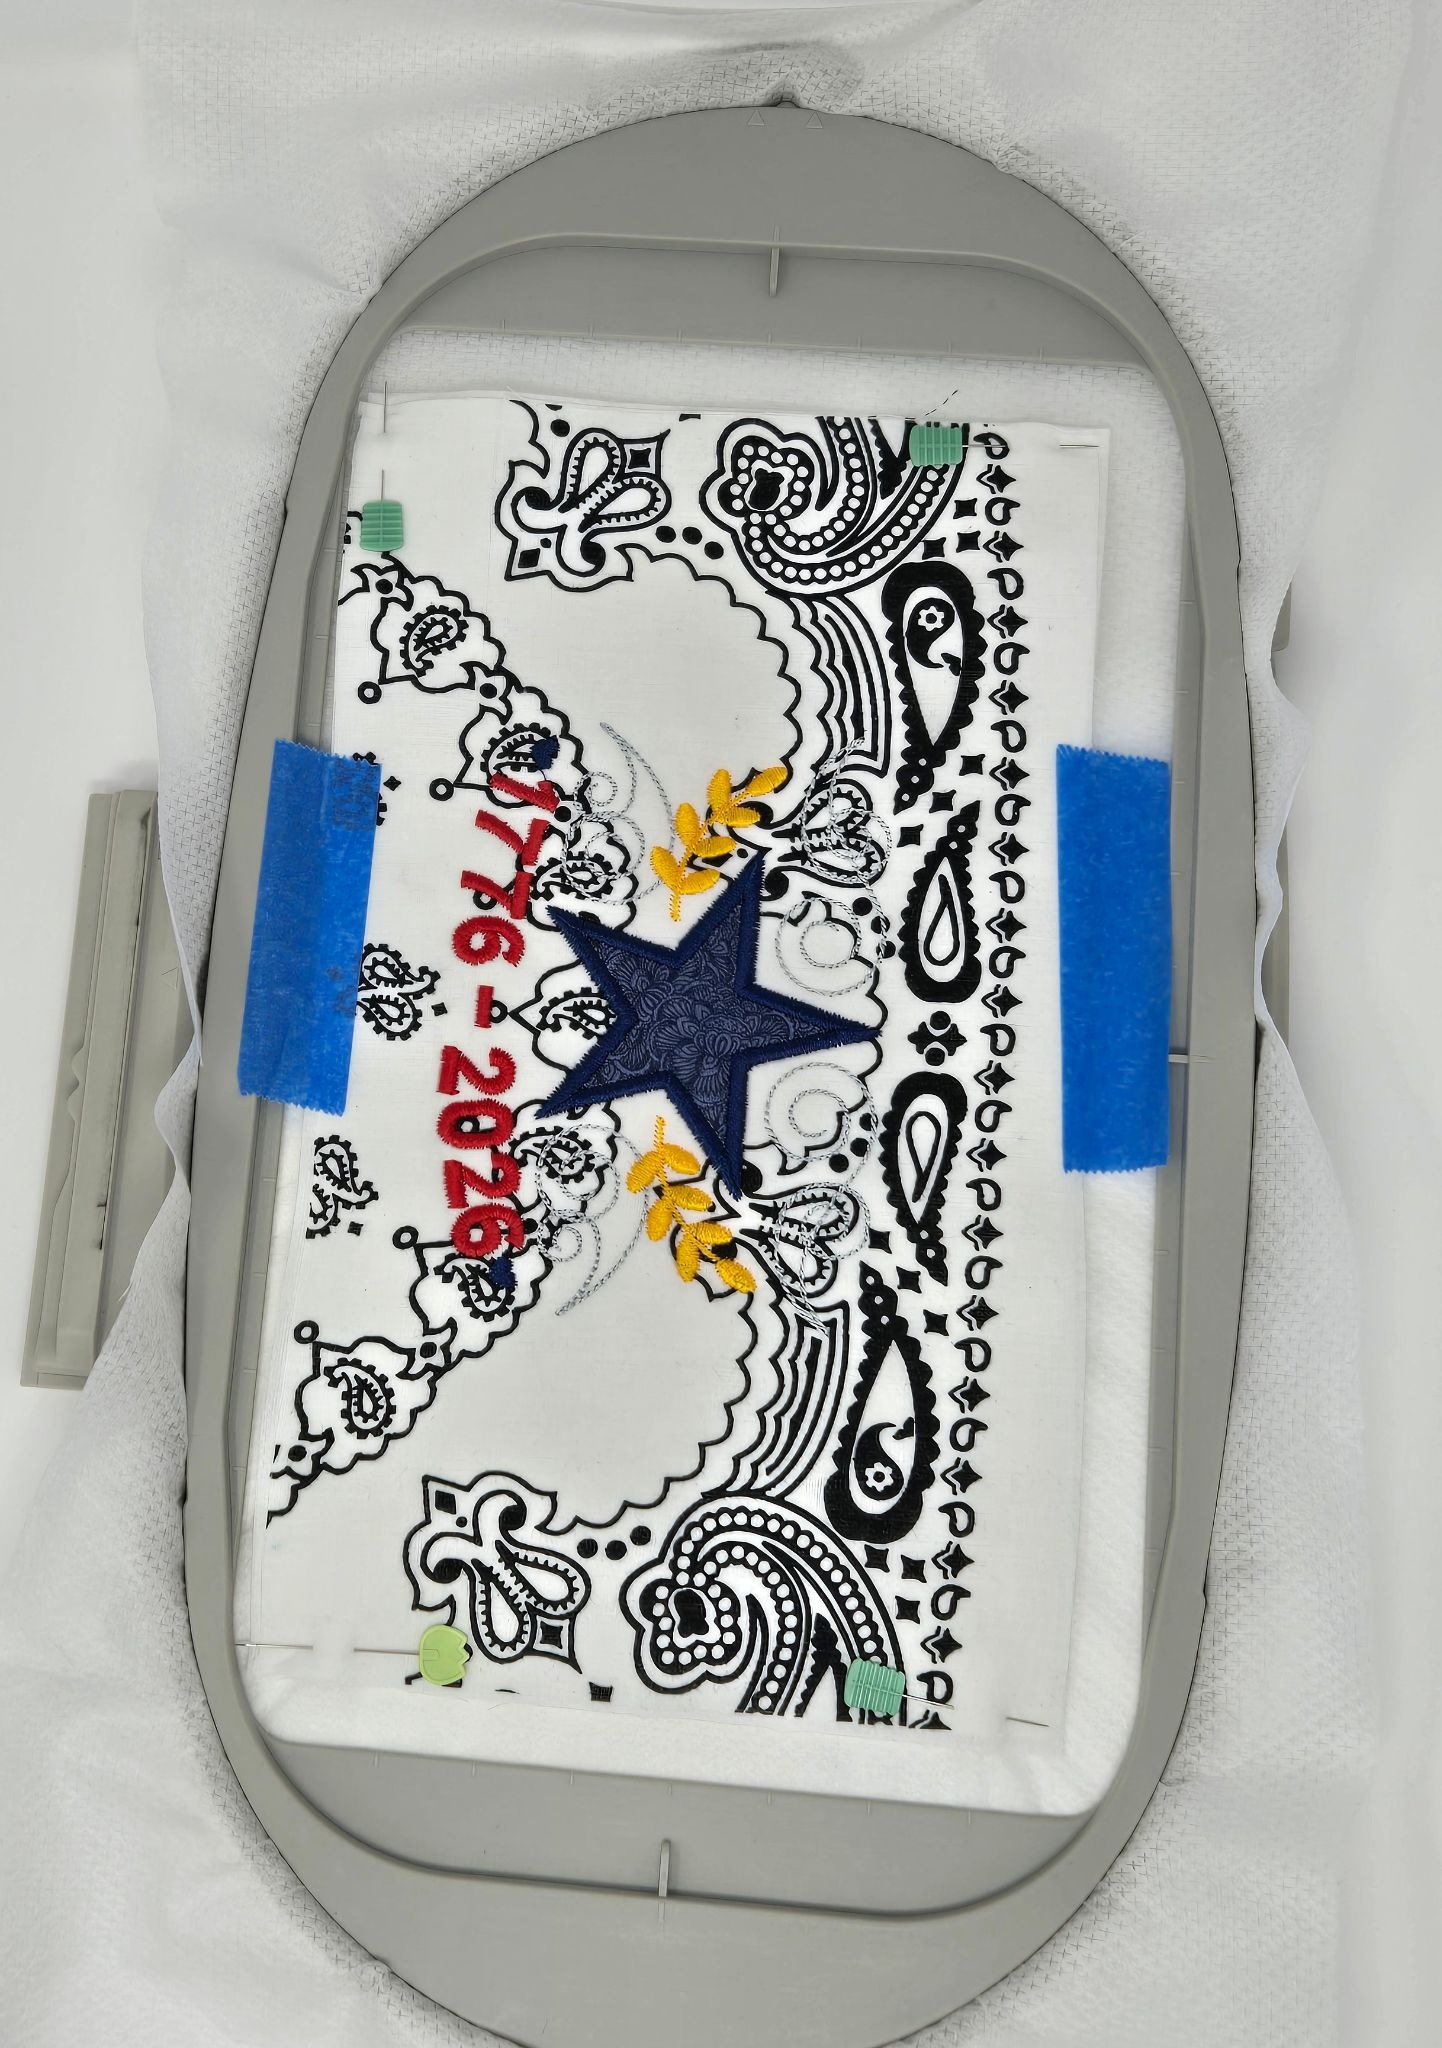
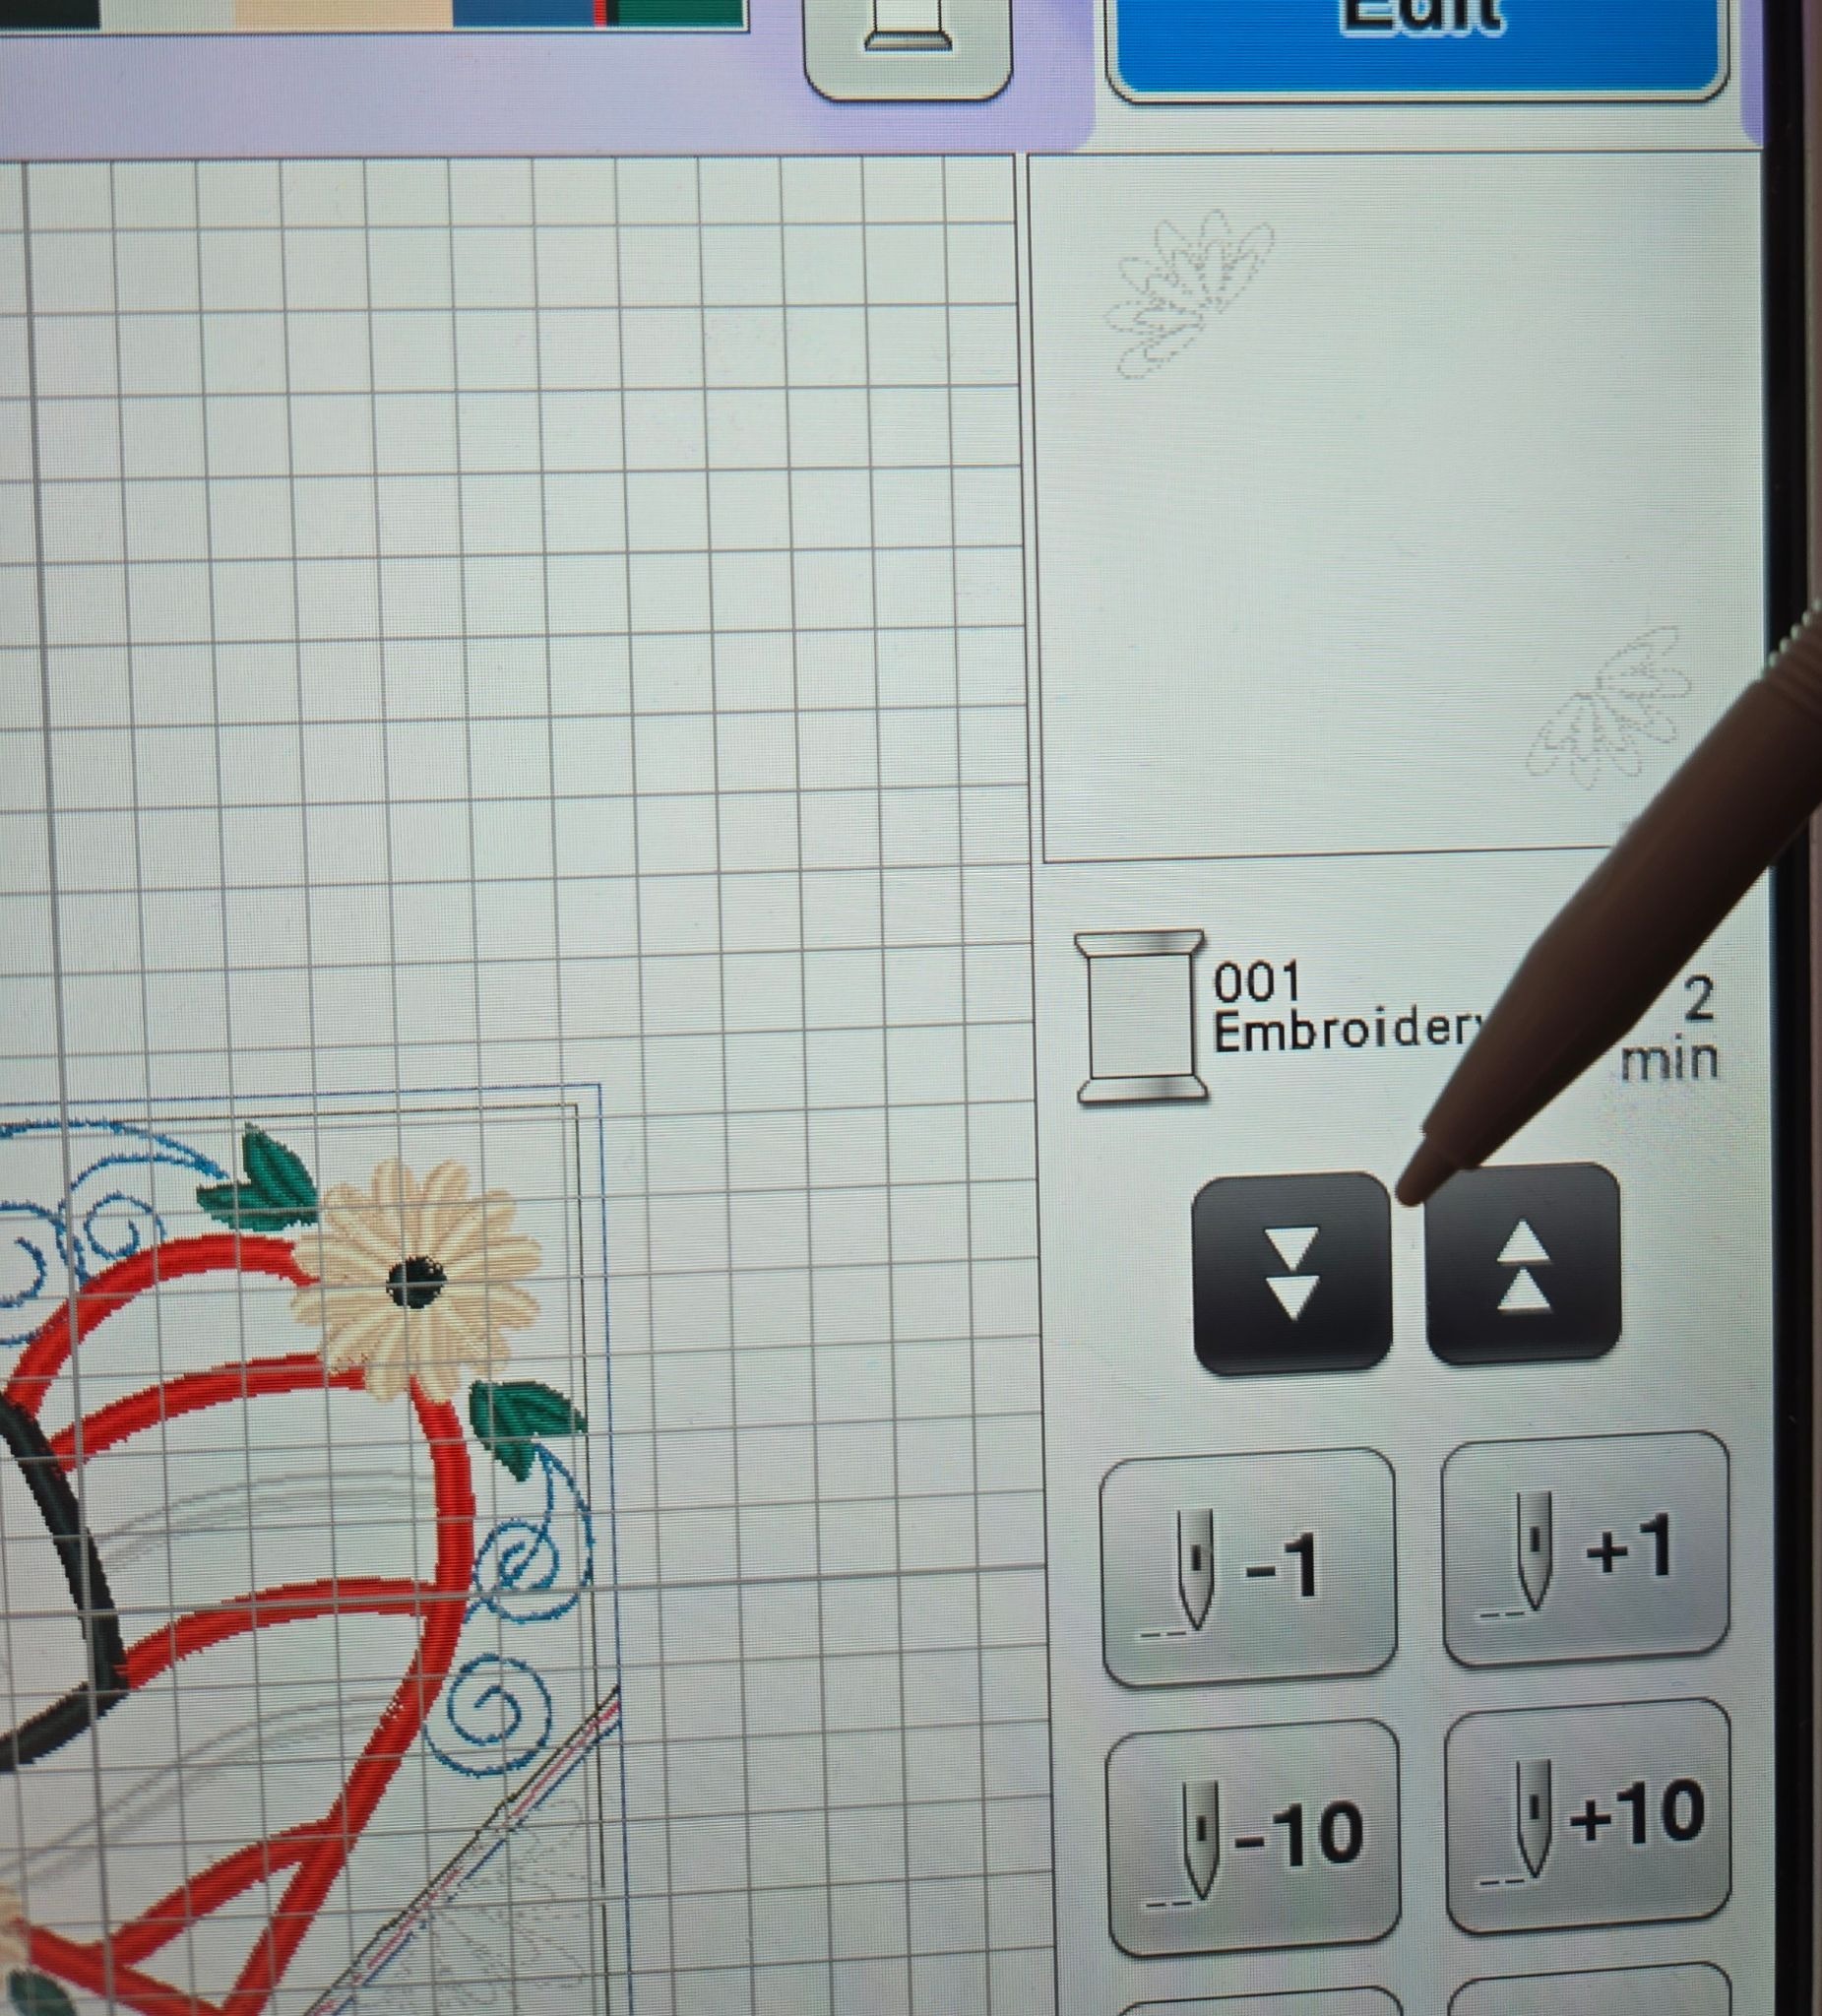
I used the up/down buttons on my machine to skip the placement and tack-down stitches at the beginning of the block and any other design elements I didn’t need.

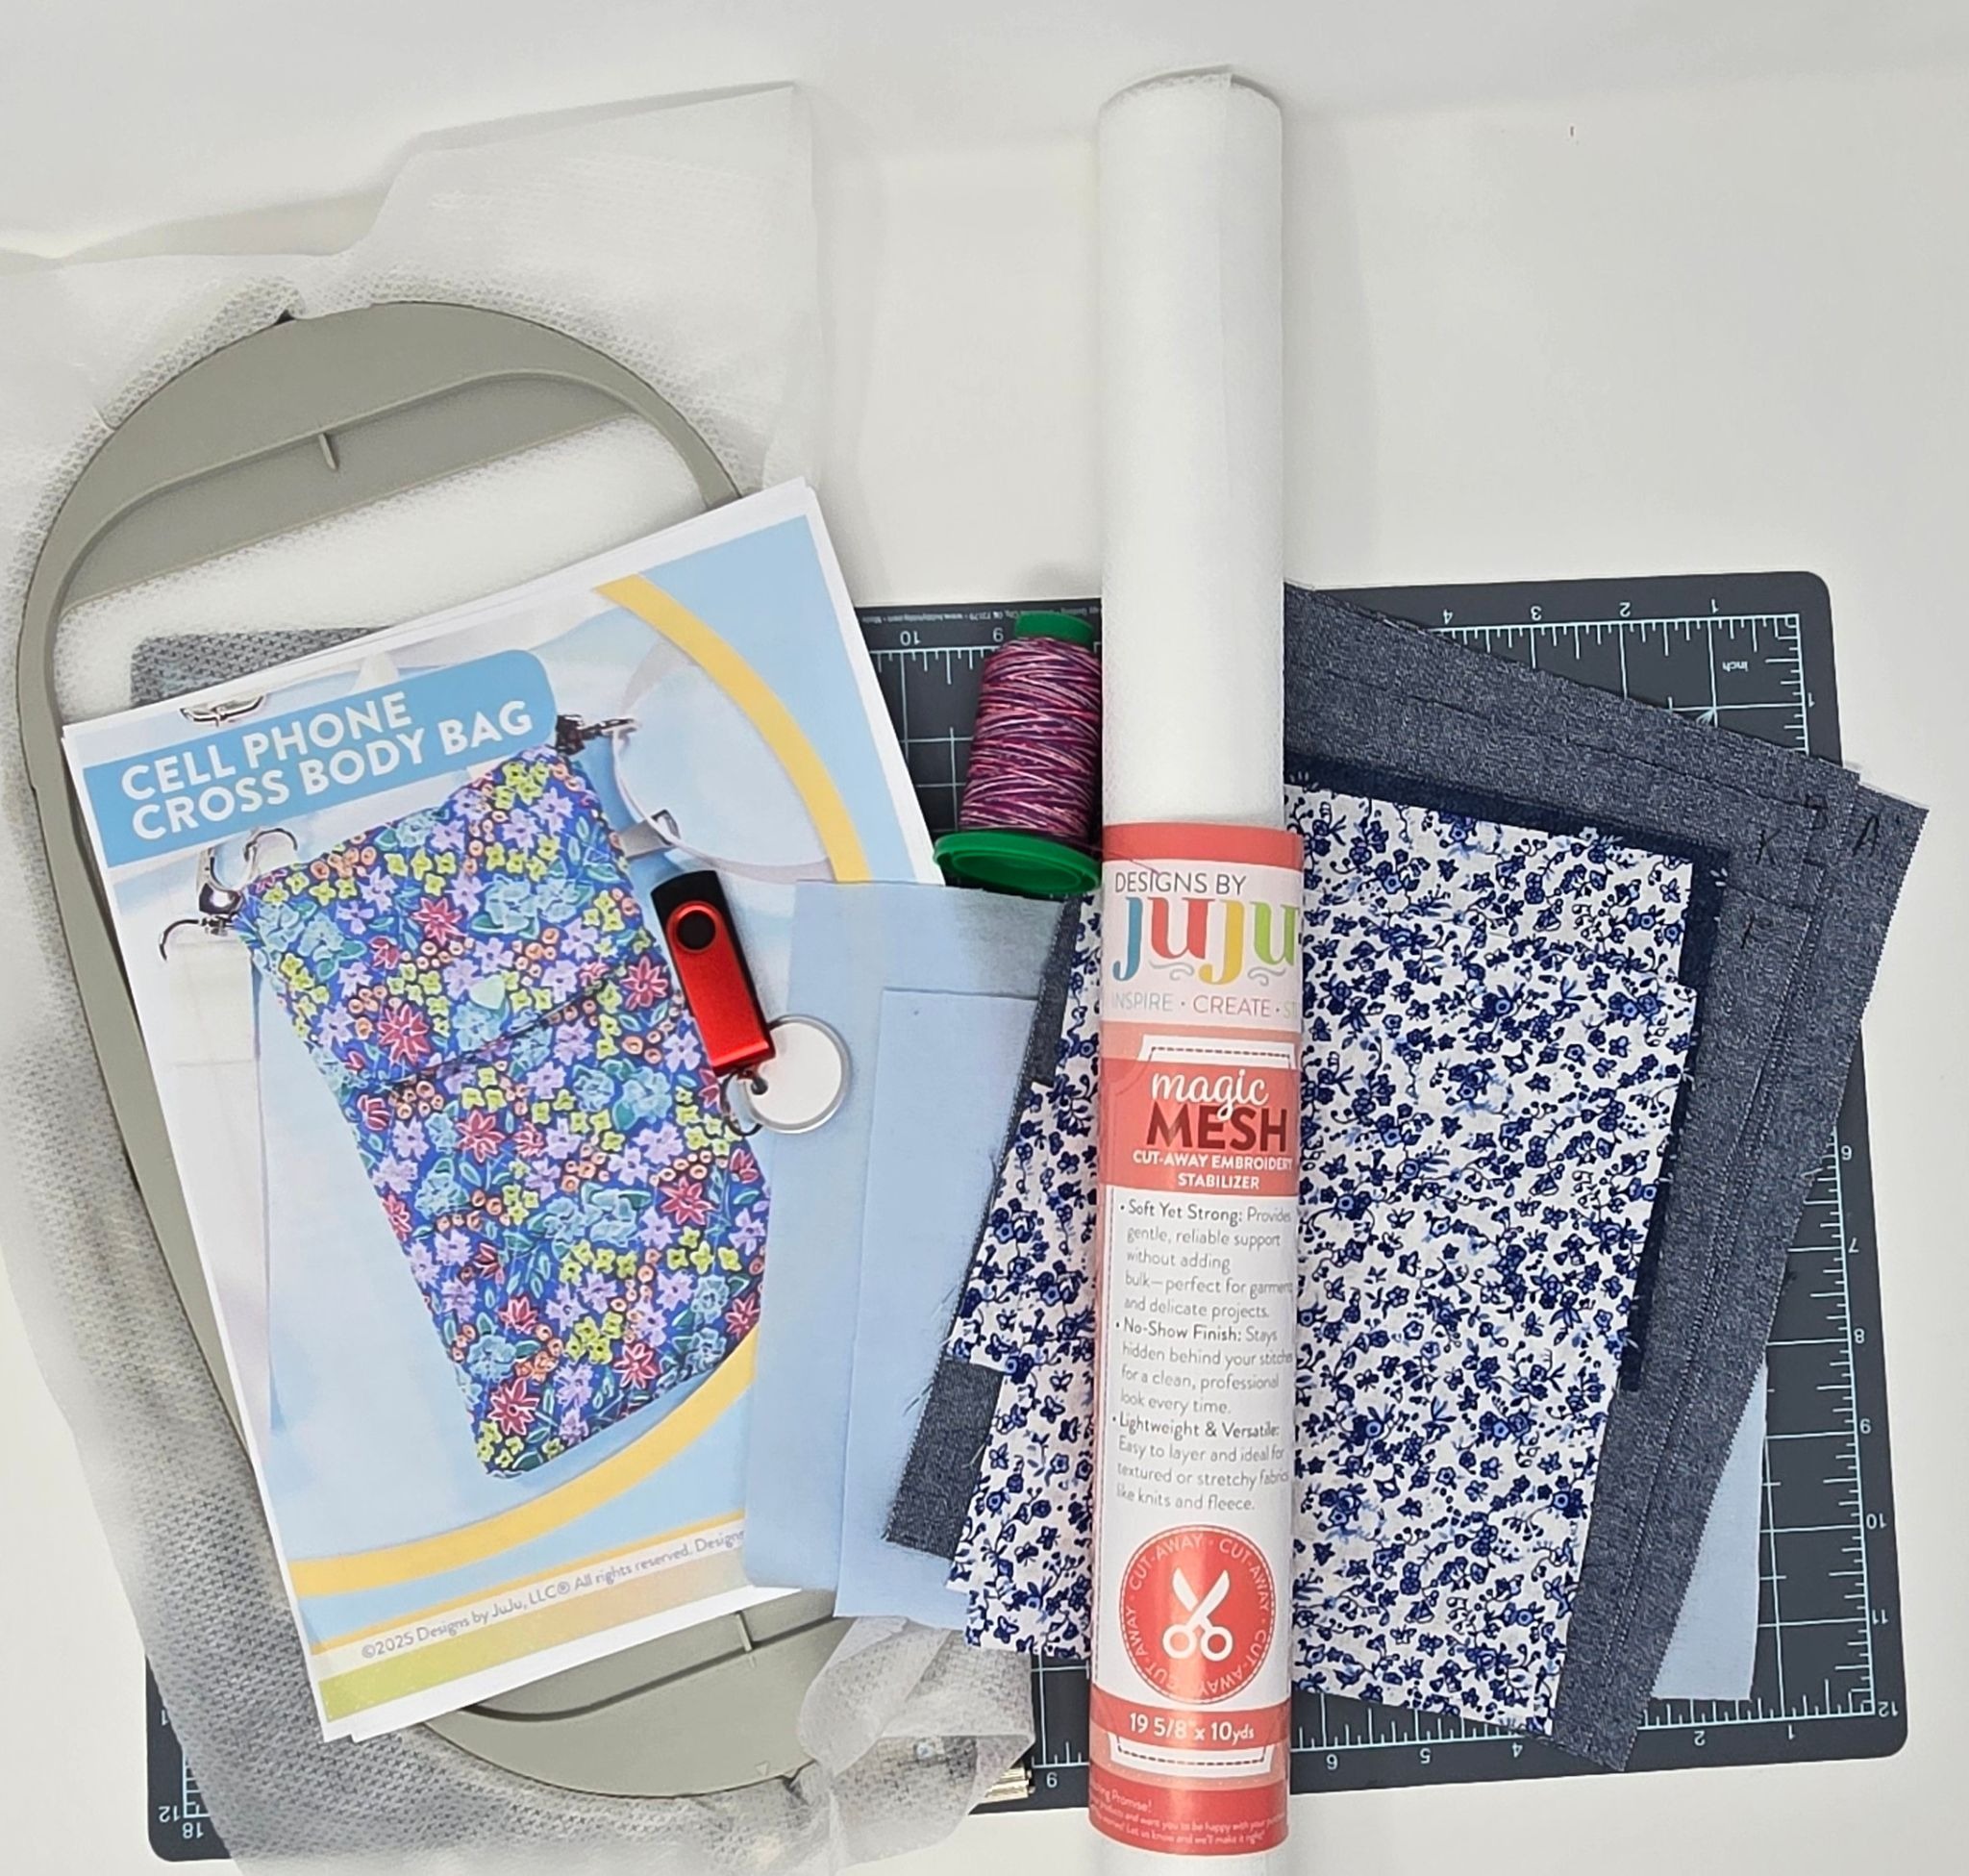
The most difficult part of these projects was choosing what design to use! Prepare your fabrics with fuseEZ if using bandanas as mentioned above, and cut everything to the size pouch you are making. Remember, mine is for the 6x10 hoop. Load your designs on a USB drive, gather your fabrics and stabilizers, and let's get started!
Hoop a piece of magicMESH. This is a one-hooping project!


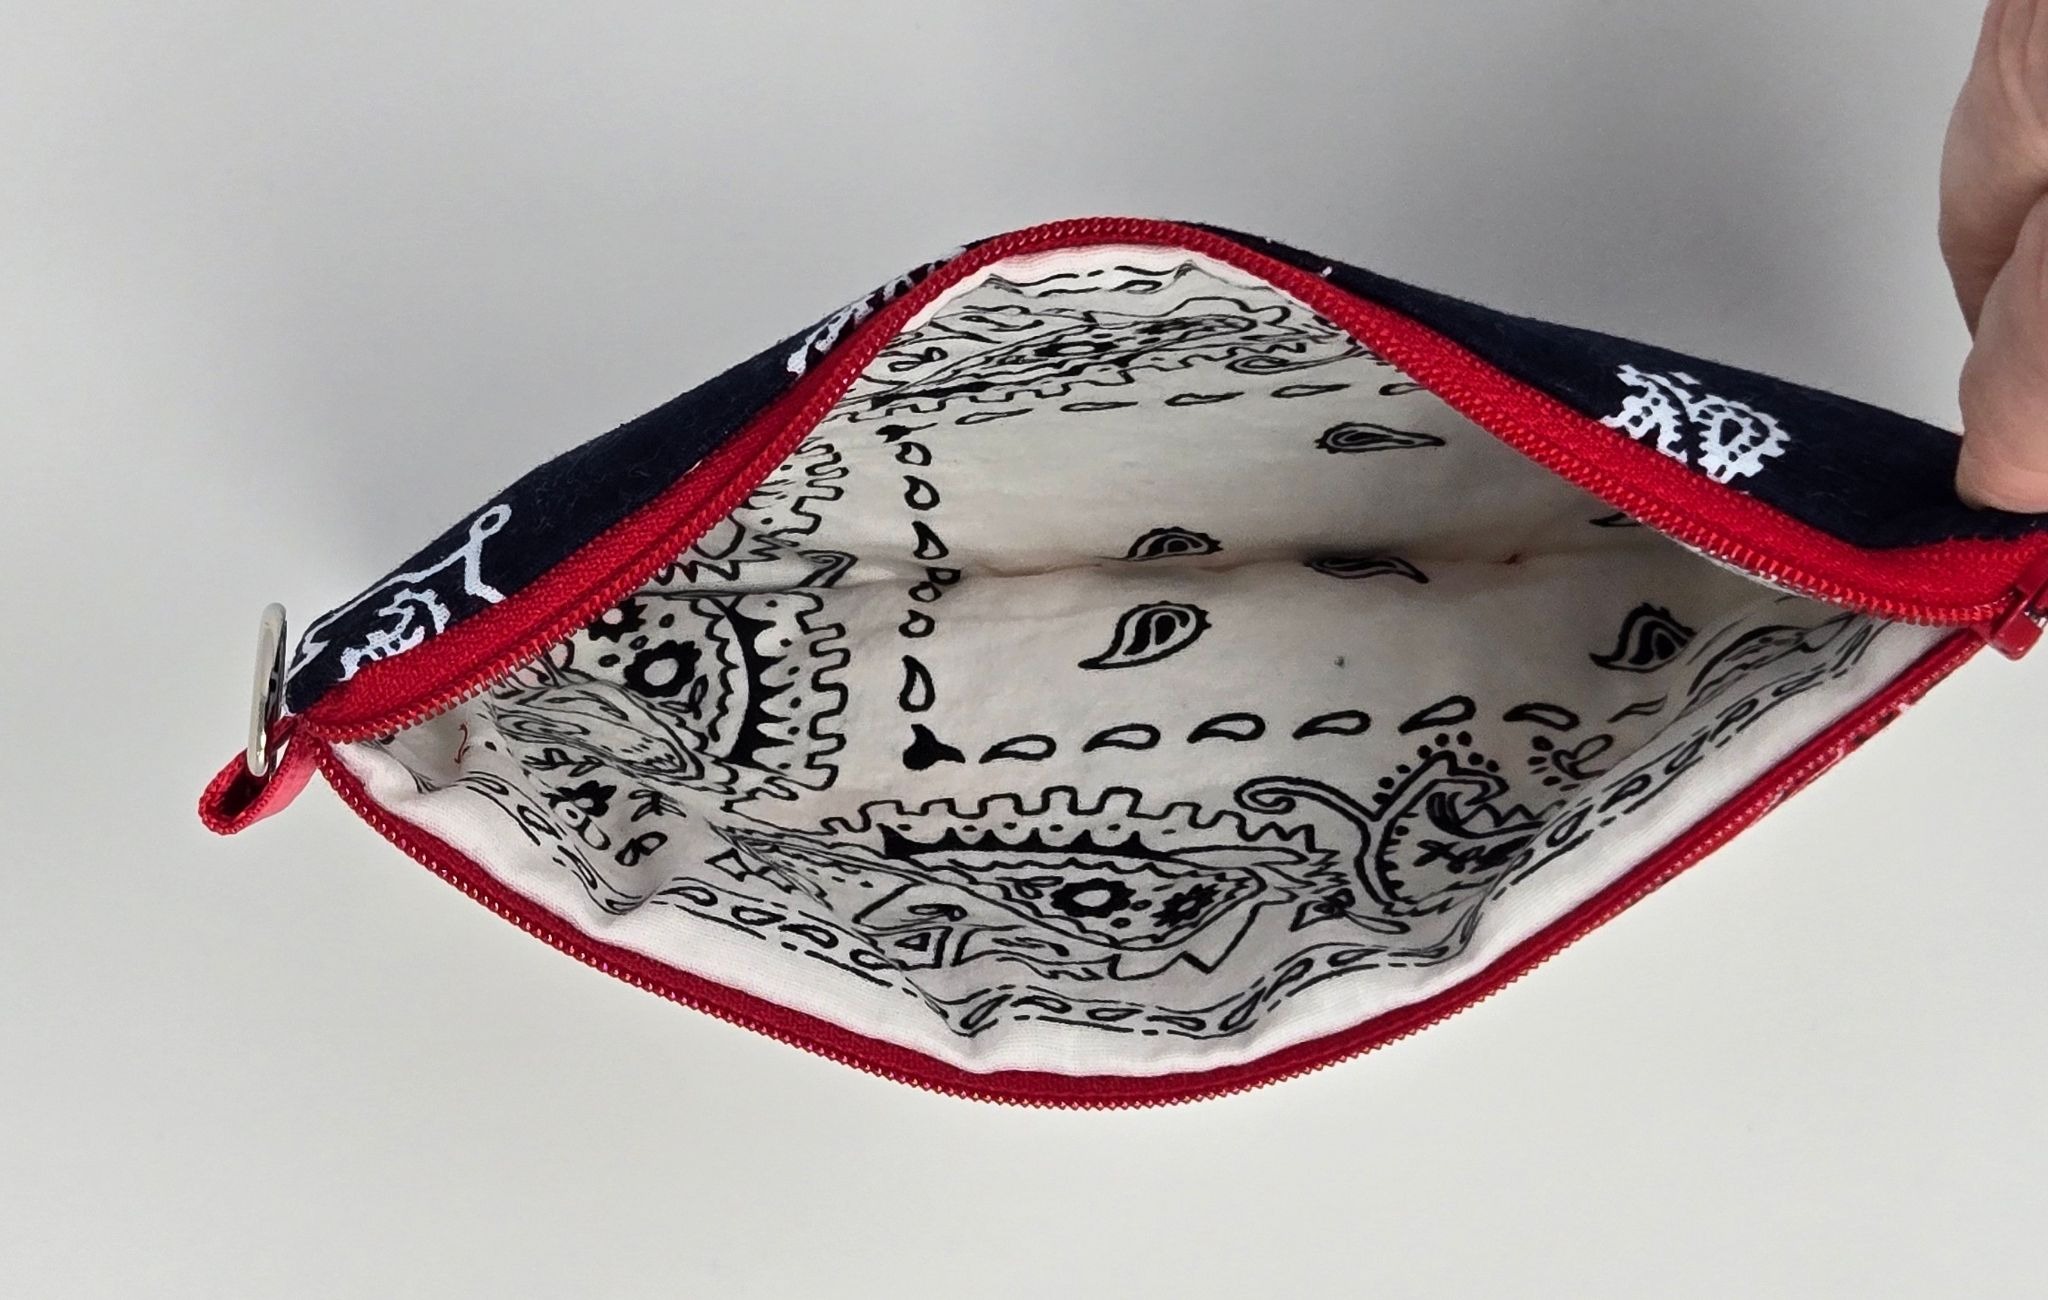
Follow the Ruffle Zipper Bag instructions that come with the design. This is a really quick pouch to make! Skip the step to add the ruffle, like I did, if you wish. I also centered the embroidery on the lower part of the pouch, being careful to leave enough below the stitching lines for the seam allowance. All pieces are cut generously. Trim the top part as per the instructions. Before adding the lining piece to the back, I trimmed a bit of the magicMESH from around the zipper teeth. DO NOT trim the zipper tack-down stitches! Just the placement line down the center of the zipper and a bit of mesh above and below is perfect. This will make opening the zipper later a breeze!

Continue to follow pouch steps to finish embroidery. Since I added the loftySOFT, my pouch was a bit harder to turn, but with a little patience, it worked fine. Give it a press and ta-da!


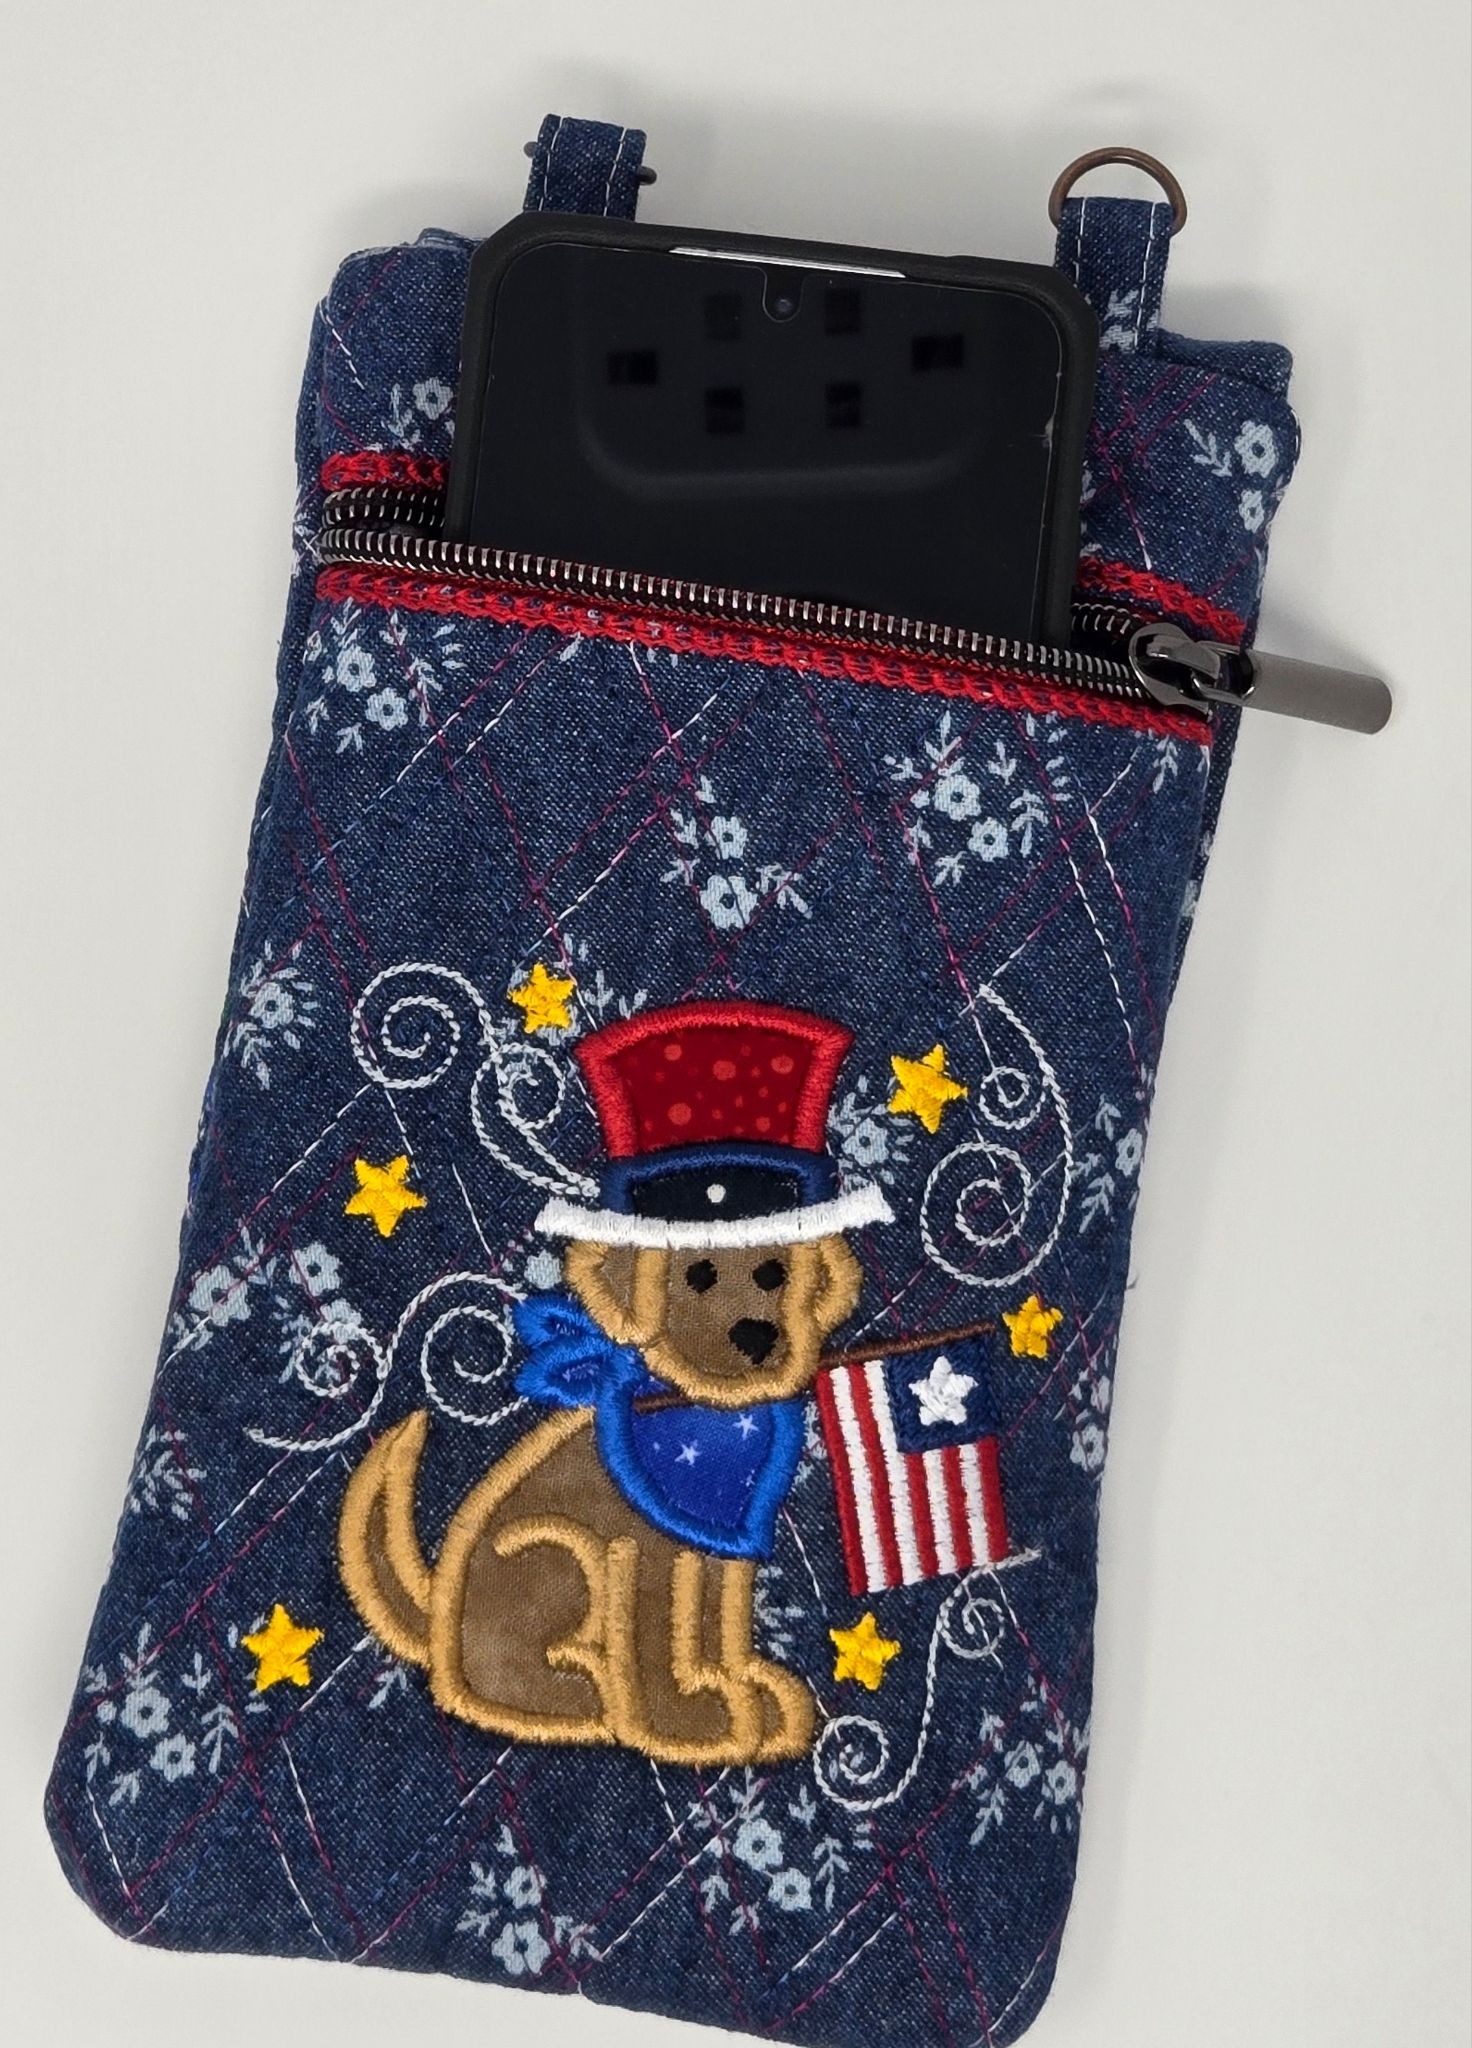
I was on a roll and decided to make the cross body bag with some SSS designs as well. I chose a lightweight denim for my bag, so I did not add any fusible interfacing to the back pieces. I did use the flannel for the quilted pieces, but the only place it was really necessary was the flap as the pattern suggested. So disregard the extra pieces in my photo.
The denim was sturdier than I thought! I used a quilter's cotton for the inside. If you use flannel for the flap, make sure to wash and dry it before beginning! It shrinks. I usually wash it the minute I bring it home.
This bag is done in three hoopings and has a vinyl pocket on the front. I skipped all those steps because I had embroidered on that piece.
DBJJ has a wonderful video demonstrating making this bag so I am not going to cover all of the small details. Check it out HERE.
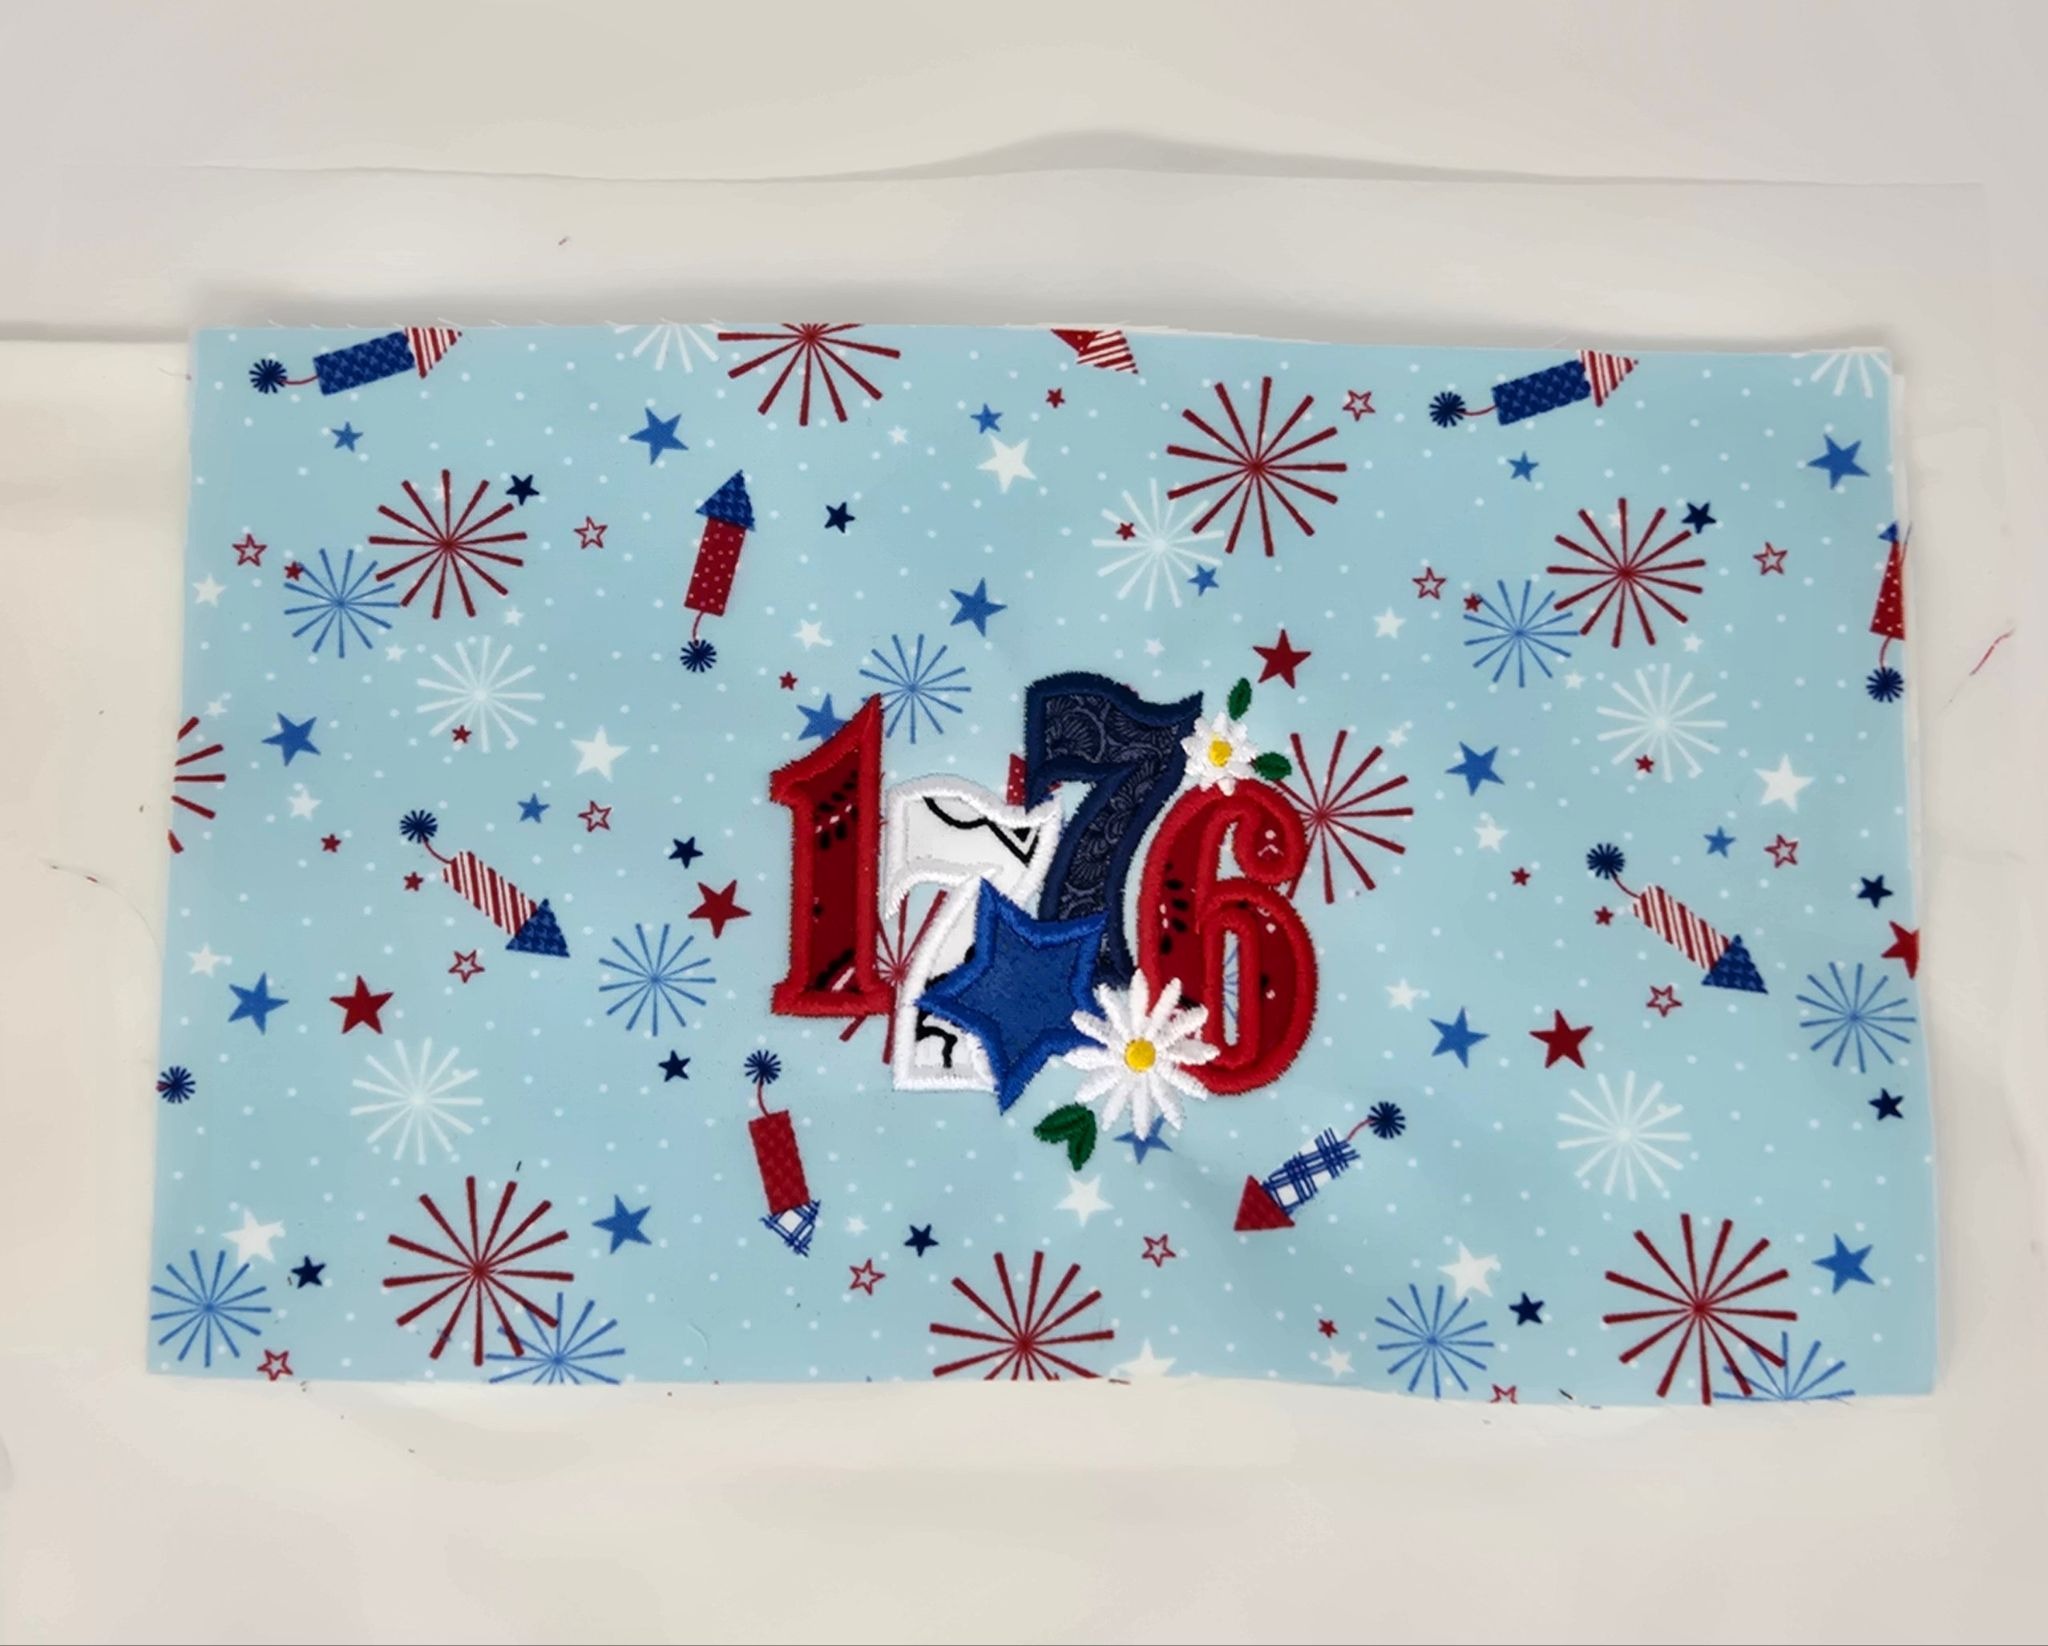
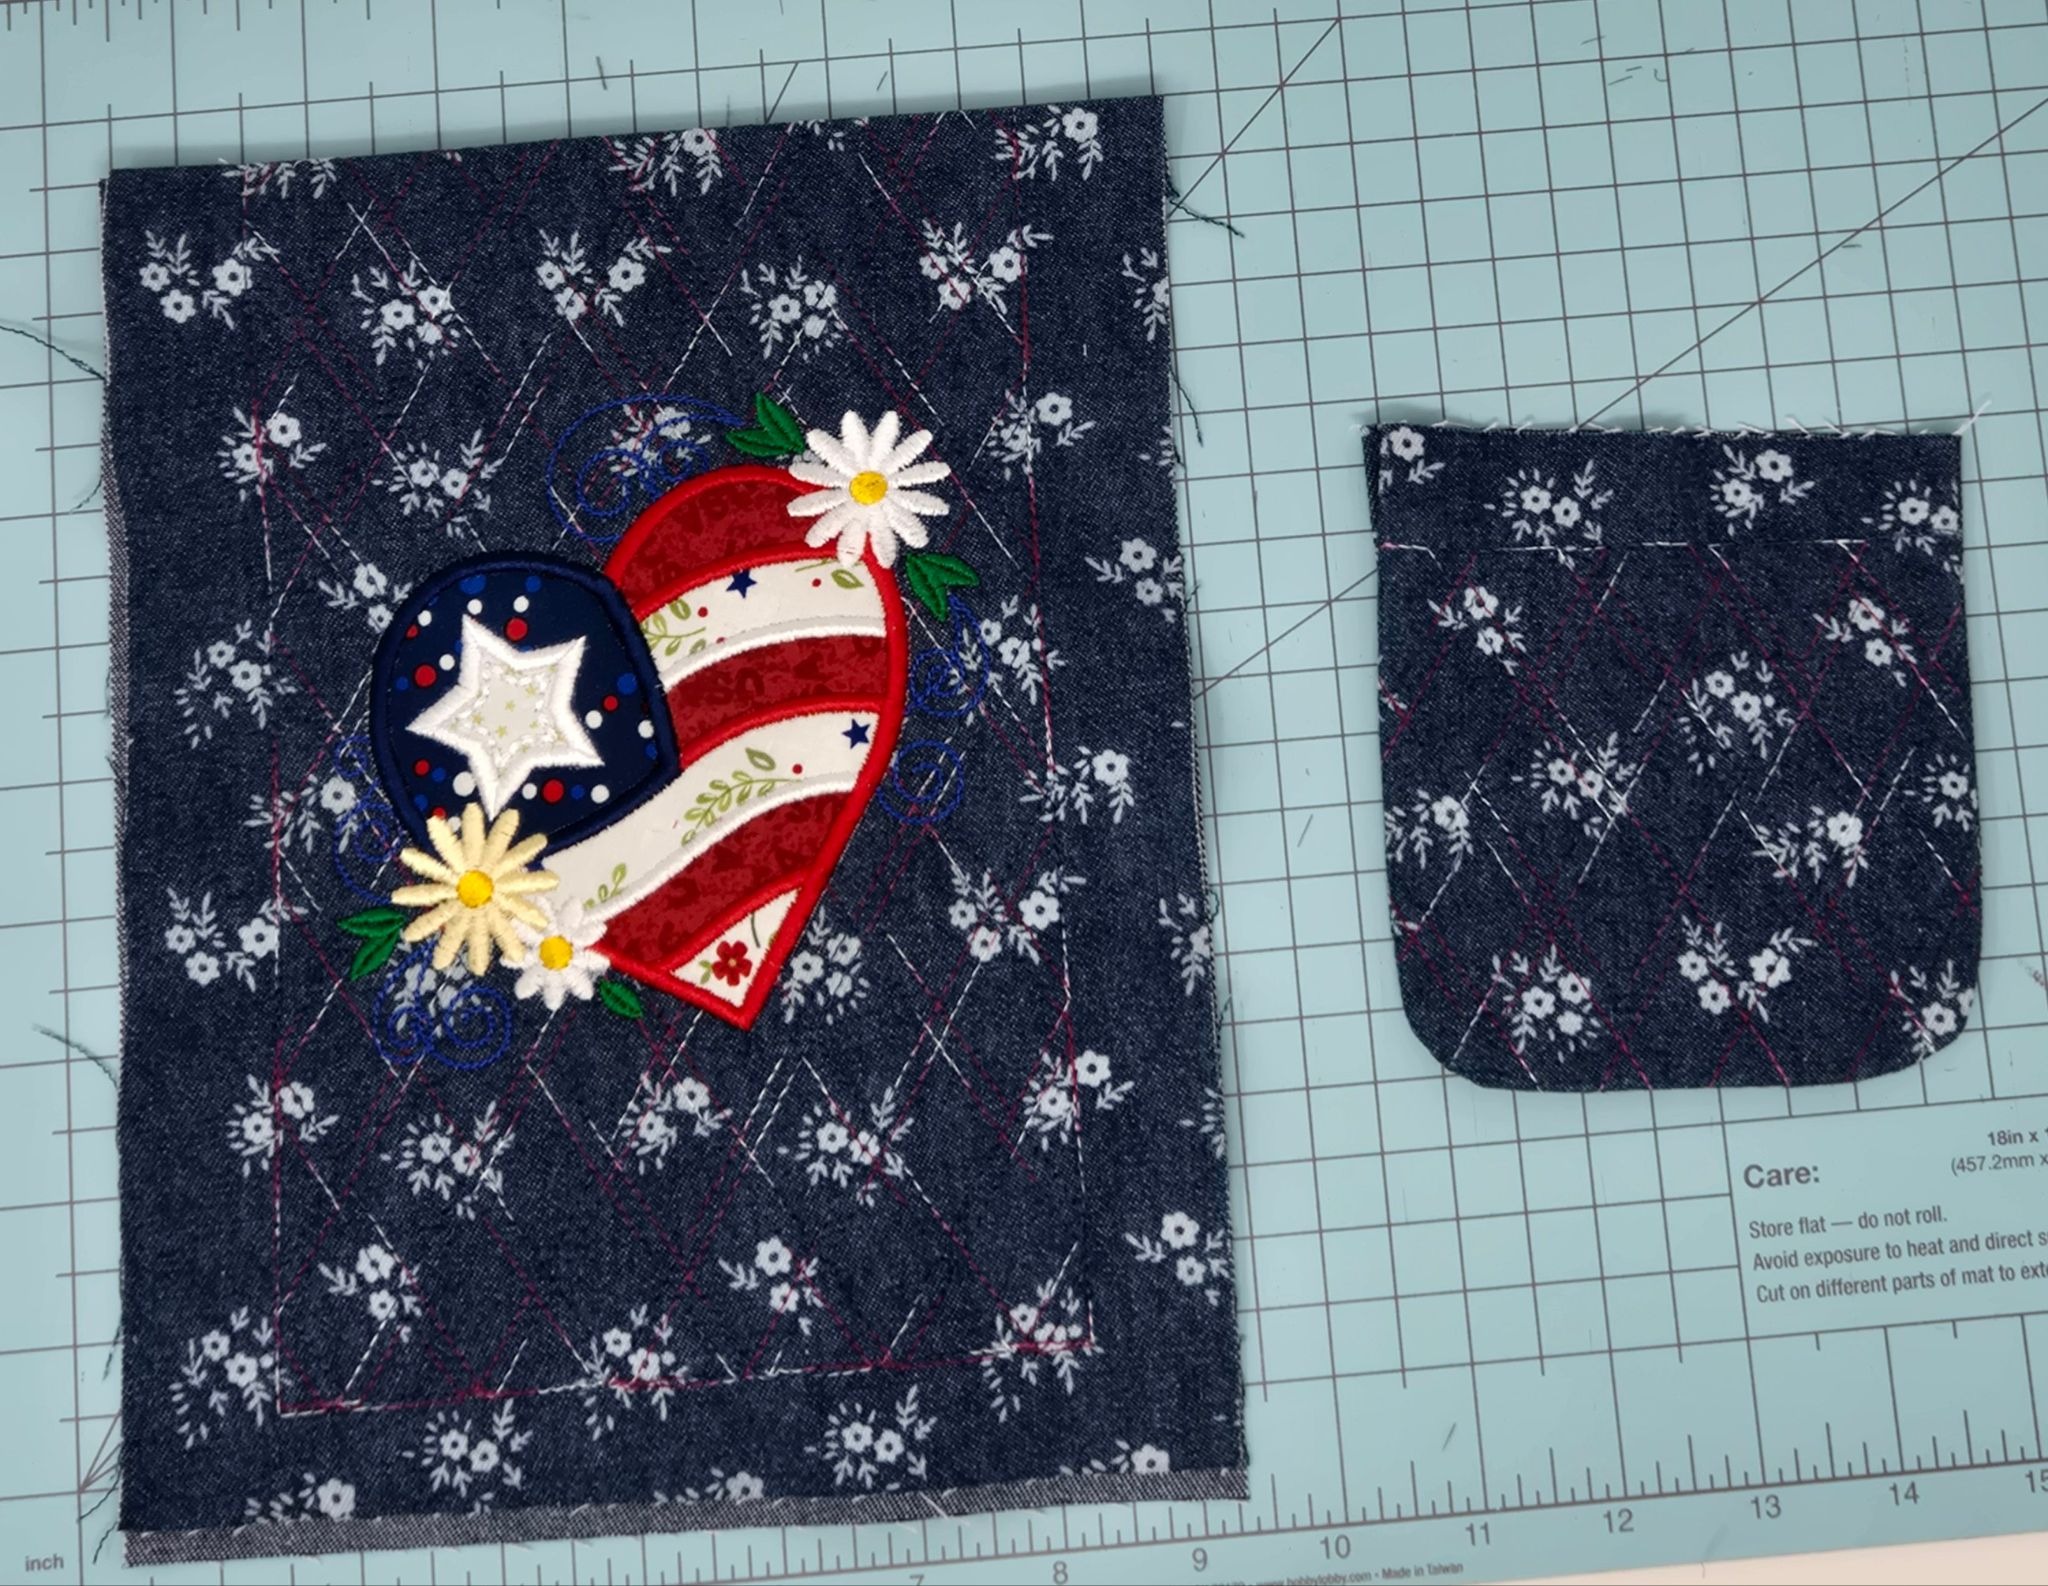
Gather your supplies. I used the Heart block from Set 3 and the Dog from Set 4, both 5x5 size, along with my 6x10 hoop.
After I did the quilting for Part 1, I kept everything in my hoop and switched over to embroidering my design. I skipped all the steps for the Heart block except the heart and daisies. This included the tack-down, placement, and the outside swirls. Since I already had quilting, I didn’t need any swirls.
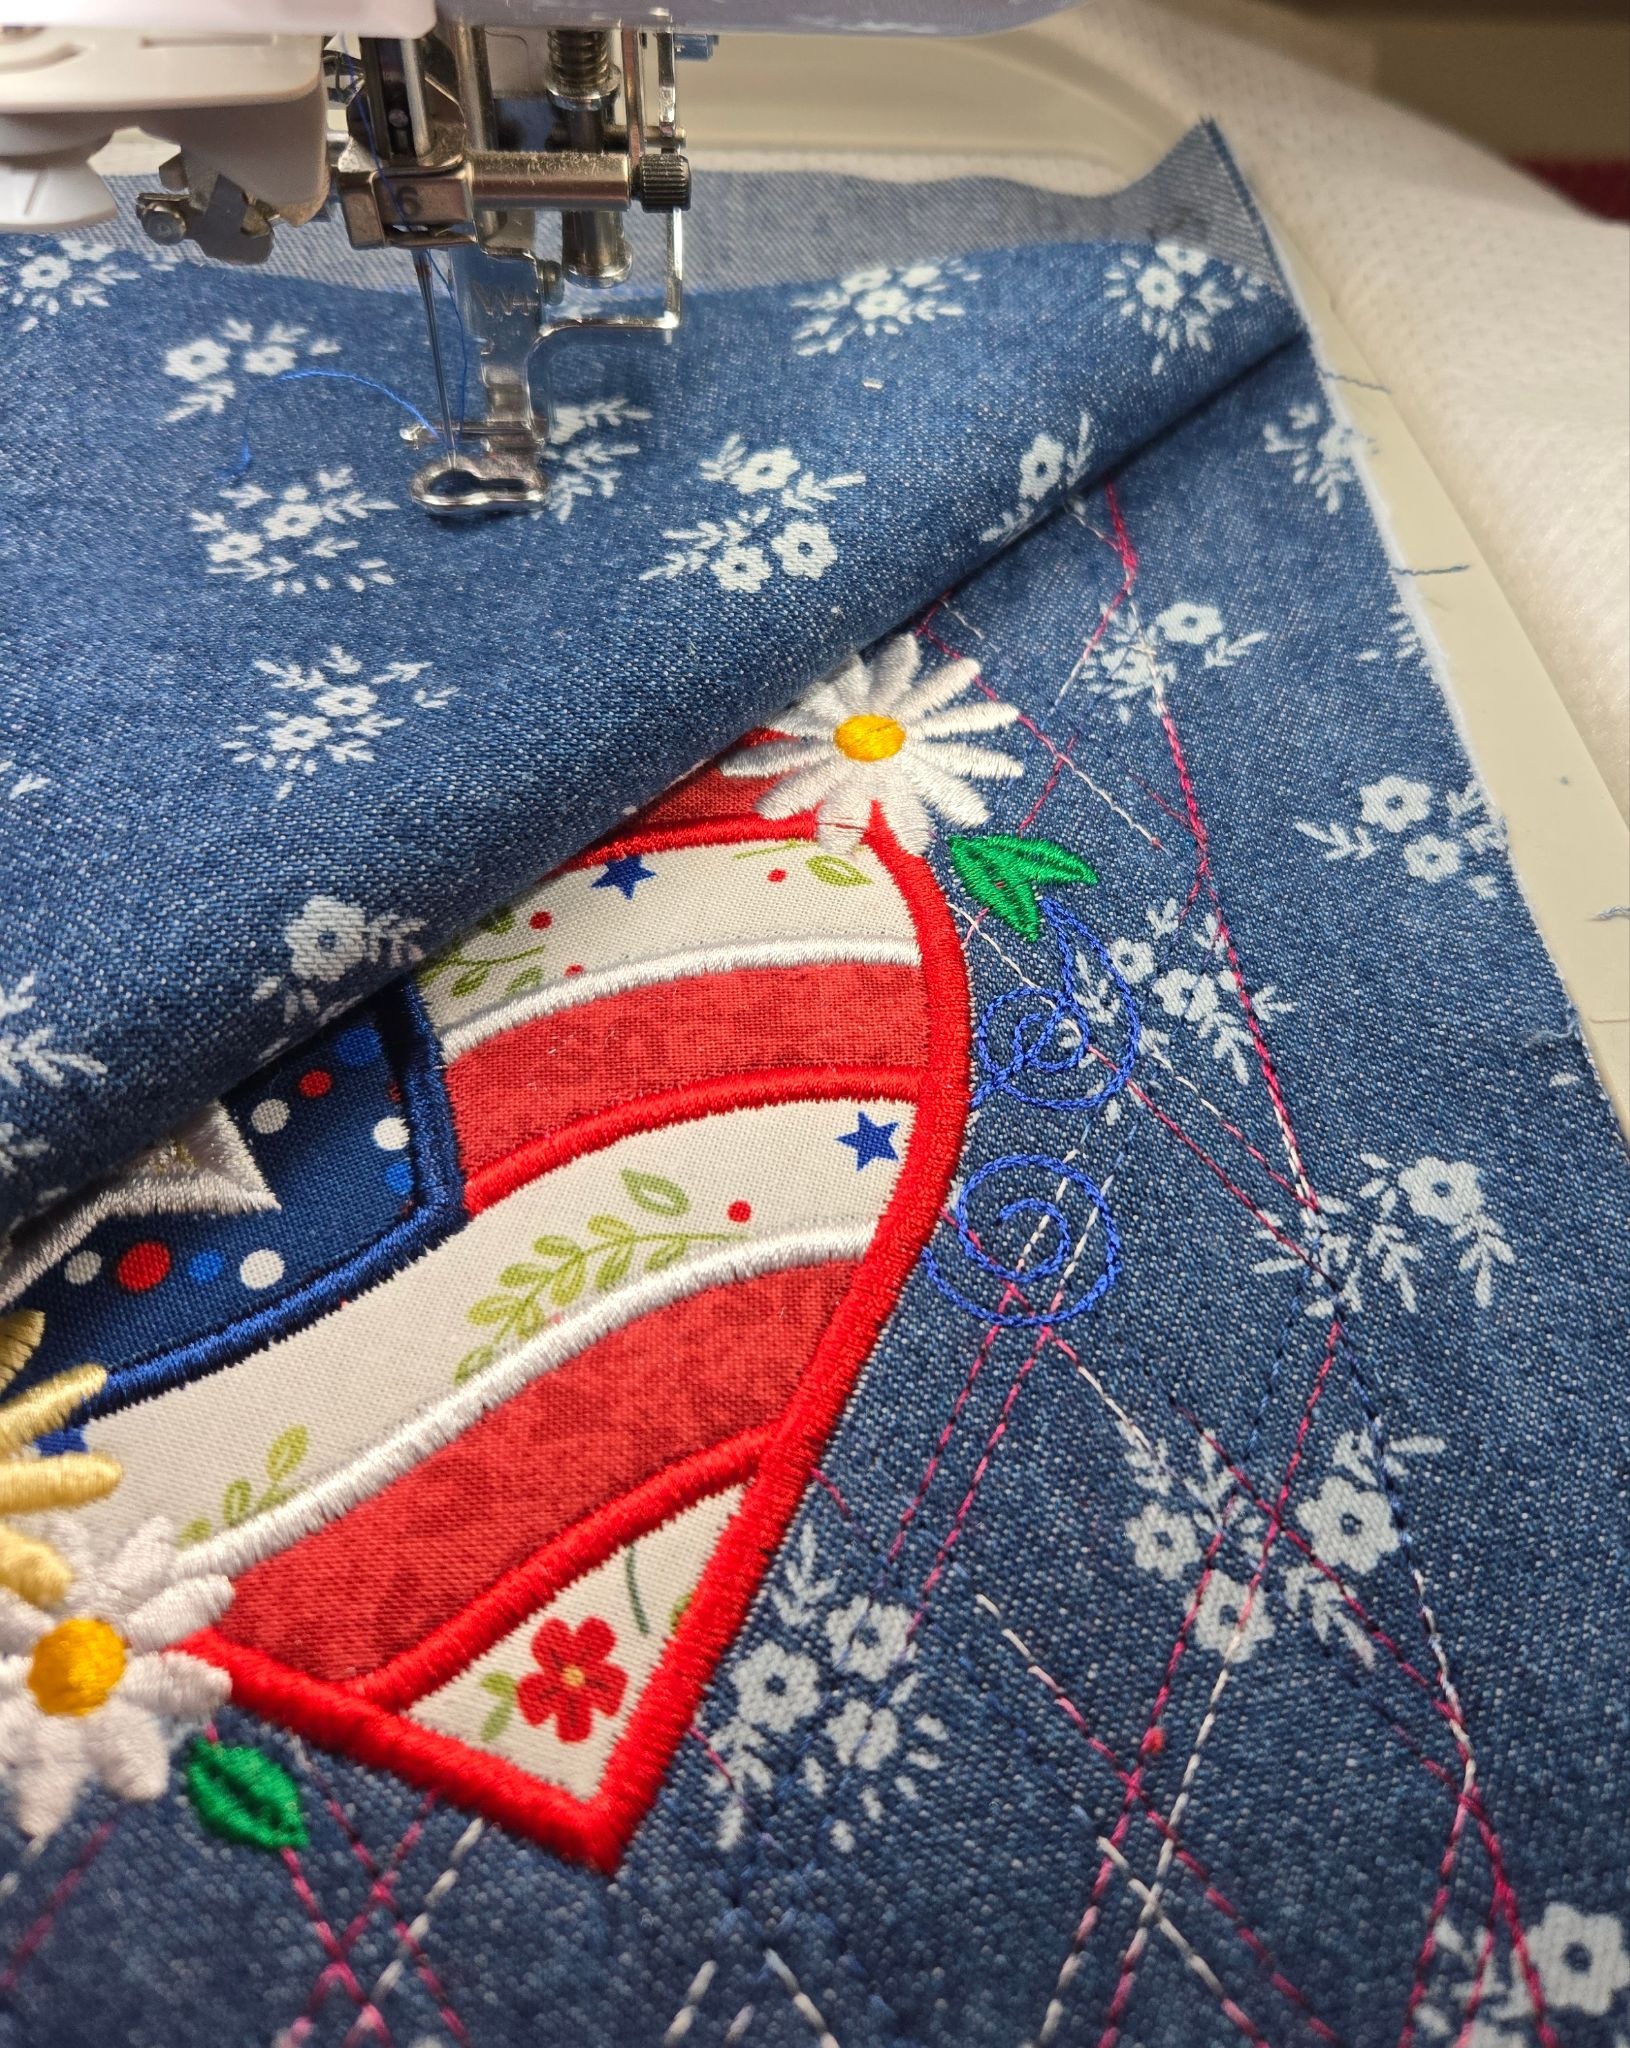
Finish Part 1 and embroider Part 2, the flap, according to the instructions. Don’t miss the part about trimming the open end of the flap like I did! Oops.
For Part 3, Step 44, I did not fold the lining down until after I had quilted the top piece and added the dog embroidery. Then I went back to that step, folded down the lining, and tacked it down. I did move the dog down to center it on the bottom part of the pocket.
I skipped all the tack-down and placement beginning steps and just embroidered the parts I wanted again. Then I went back to my USB and Part 3 and skipped steps until I got to Step 44.
Finally, I skipped the vinyl steps. It sounds much more complicated than it is! It is very easy to use that down arrow button to find your spot, and you do not remove anything from the hoop to do it.

Continue following the steps until your pouch is complete. I did slow my machine down as much as I could for adding the tabs, and also raised my foot to make sure nothing got caught. The video referenced above does a great job demonstrating these steps.
Turning the denim was not for the faint of heart! I did trim the flannel close to the stitching, as well as any seam allowances that were bulky. I ordered a strap but it has not arrived yet.
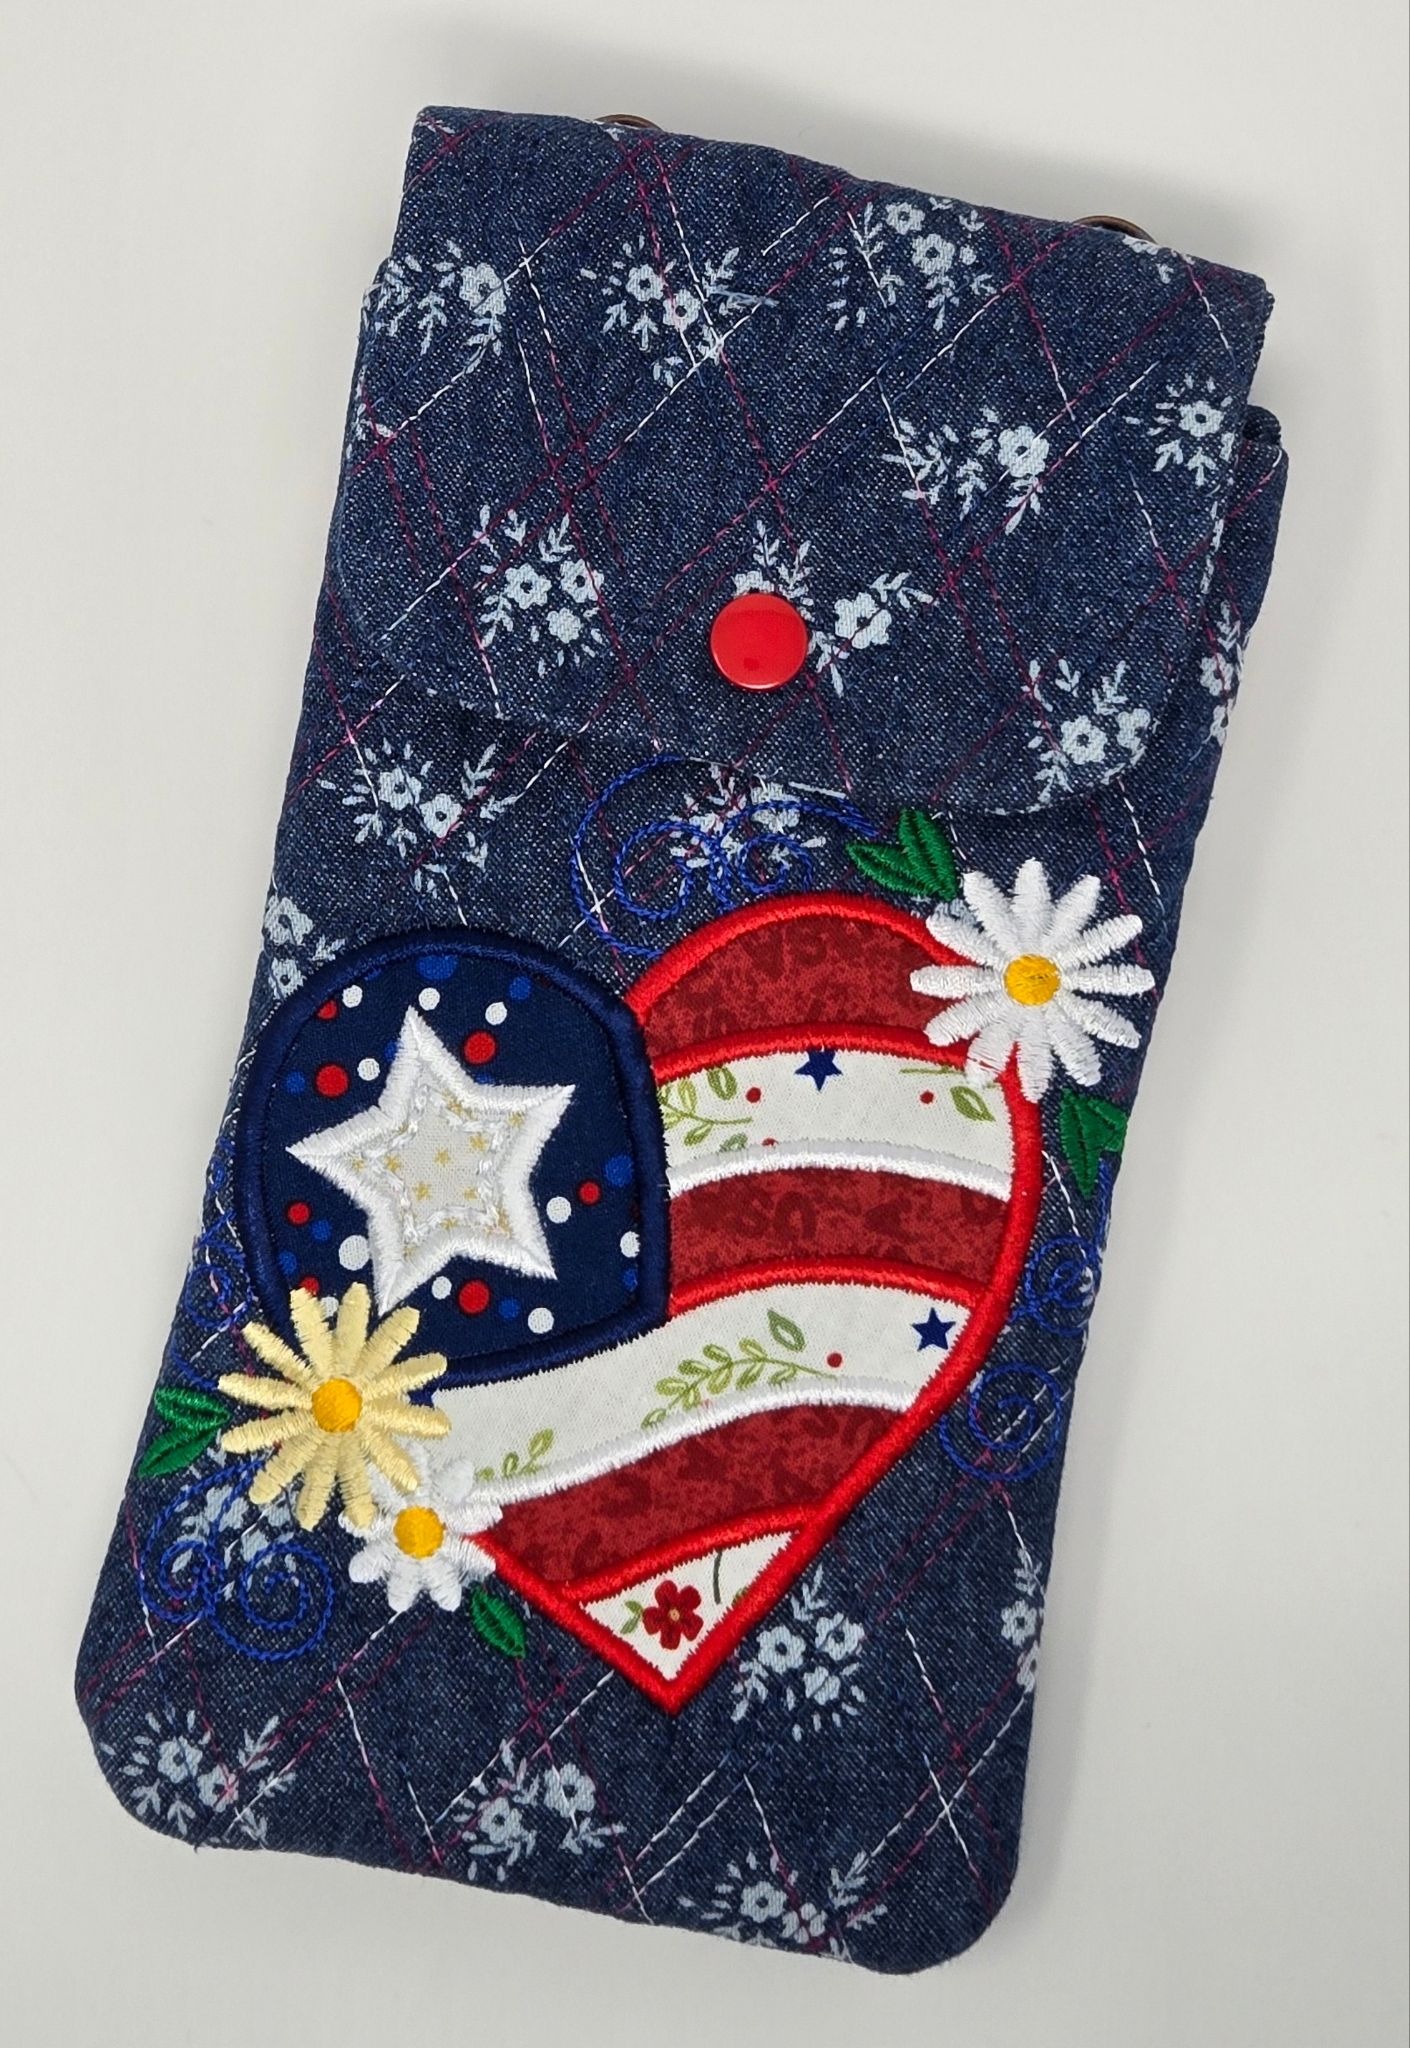
I do hope you make yourself some festive holiday pouches. I love how mine turned out! If you do, be sure to share your projects in the Designs by JuJu Embroidery Blessings Facebook Group, or use the hashtag #designsbyjuju anywhere on social media. We all love to see what you create!
