Toggle Nav
 Inspire.
Create.
Stitch.
Inspire.
Create.
Stitch.
Search
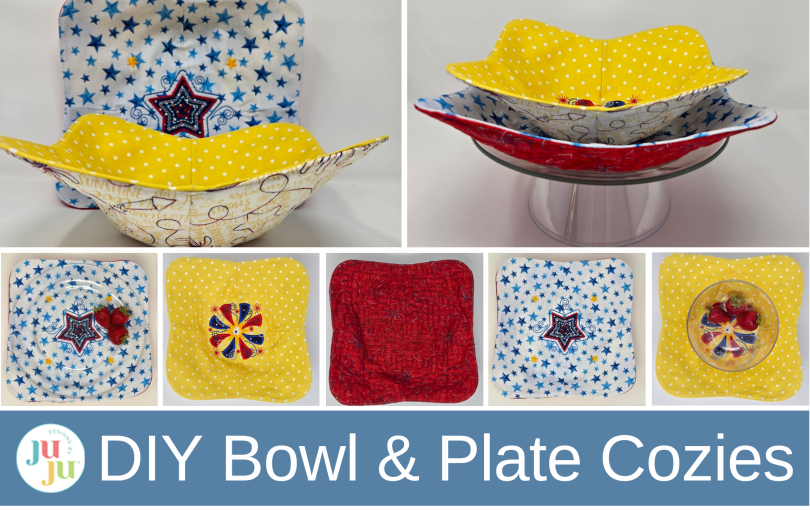
Learn how to make patriotic bowl and plate cozies with Star Spangled Stitches embroidery designs! These festive serving cozies are quick, fun, and perfect for adding red, white, and blue charm to your holiday table.
Bowl cozies are another fast and fun project—and they make great gifts! JuJu has six different ITH Bowl Cozy Designs to choose from, but what if you think outside the box a little bit? Can you make one using the Star Spangled Stitches quilt blocks? Yes, you can!
In the Easter Fun with Machine Embroidered Ready-Made Items blog post I used a bowl cozy for a basket liner. That was really fun to do and brightened our coffee table. Today, we are going to make our cozies from scratch to use as serving cozies. Let’s add some sparkle to our table with some fun serving bowl/plate cozies. They are so quick! A little embroidery, a little sewing, and voilà, you are ready to go! The beauty of making them from scratch is that you have the flexibility to make them to suit the bowls and plates you have, just by changing the length and/or width of the darts. Let me show you how.
Approximate finished size: varies, depending on the size of your bowls or plates.
Please be sure to check out the DBJJ team’s favorite supplies in the Designs by JuJu Amazon store. For stabilizers and batting, Designs by JuJu+ has everything you need.
PLEASE NOTE: These bowl cozies are NOT intended for use in the microwave. If you want your cozies to be microwave-safe, use all cotton batting (no scrim), fabrics, and threads.
I began by quilting my fabric for the back of my cozies the same way I did in the Star Spangled Stitches Project: Festive Patriotic Porch Pillows blog post. I quilted the entire FQ piece from selvage edge to cut edge. I also ran the quilting twice to give the look of a thicker thread. I added a strip of scrap fabric to the side to catch in the hoop so I could do two full hoopings of the design. (The blue fabric was for hooping purposes only.)

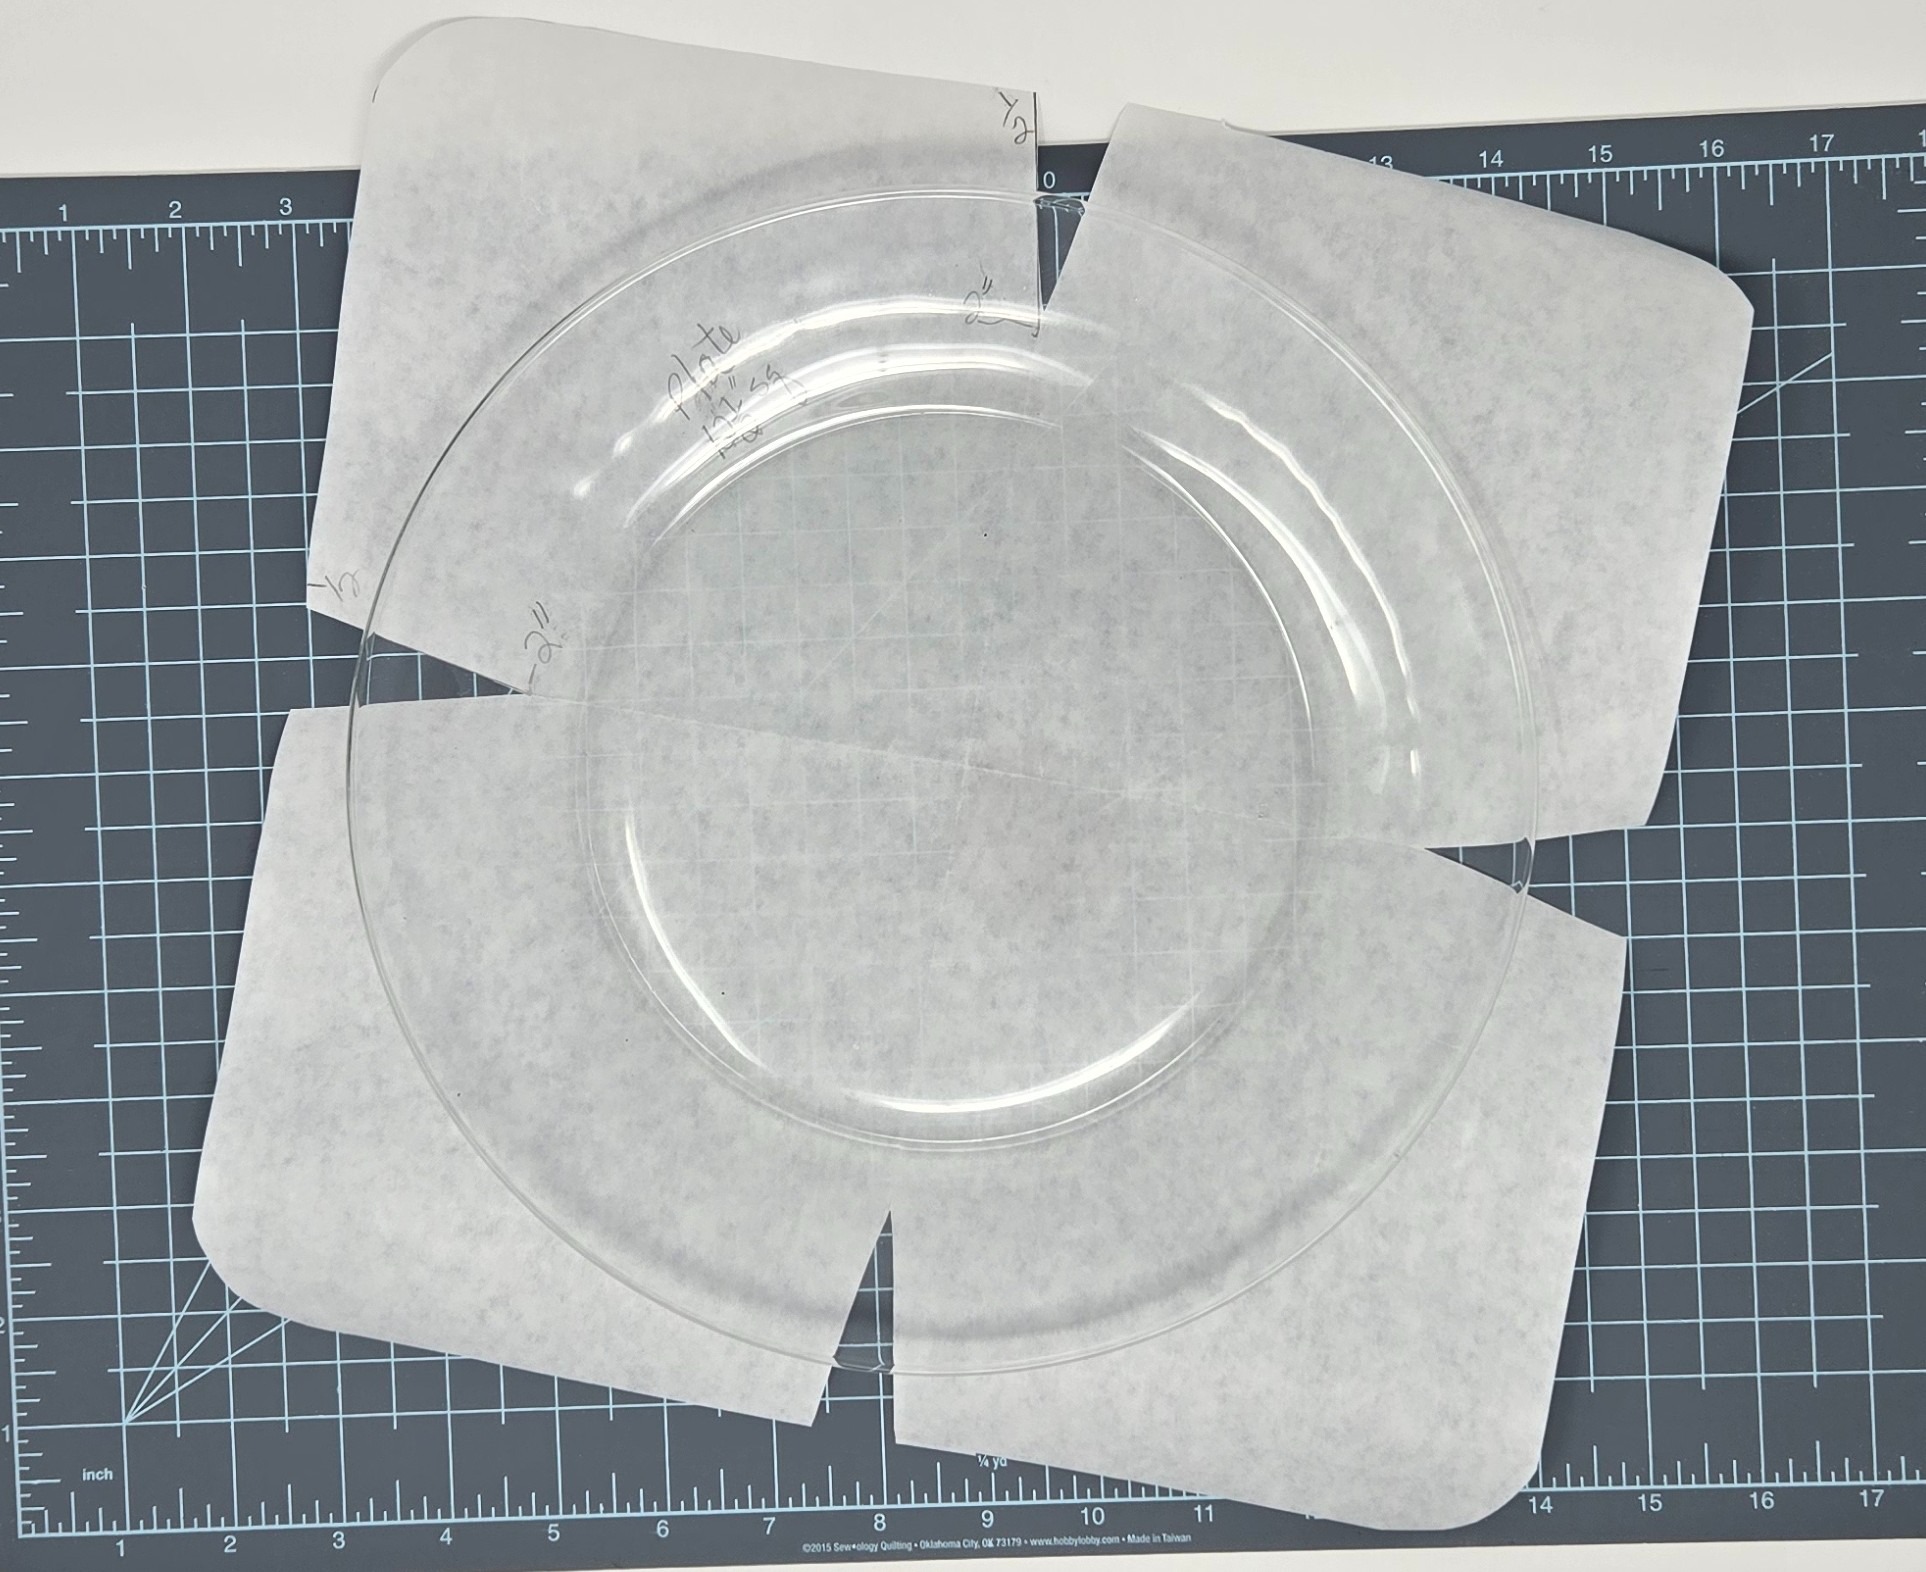
I always use freezer paper to make my templates. The shiny side can be dry pressed to your fabric, eliminating the need for pins. And it can be reused multiple times before it gets linty and you need to cut a new piece.
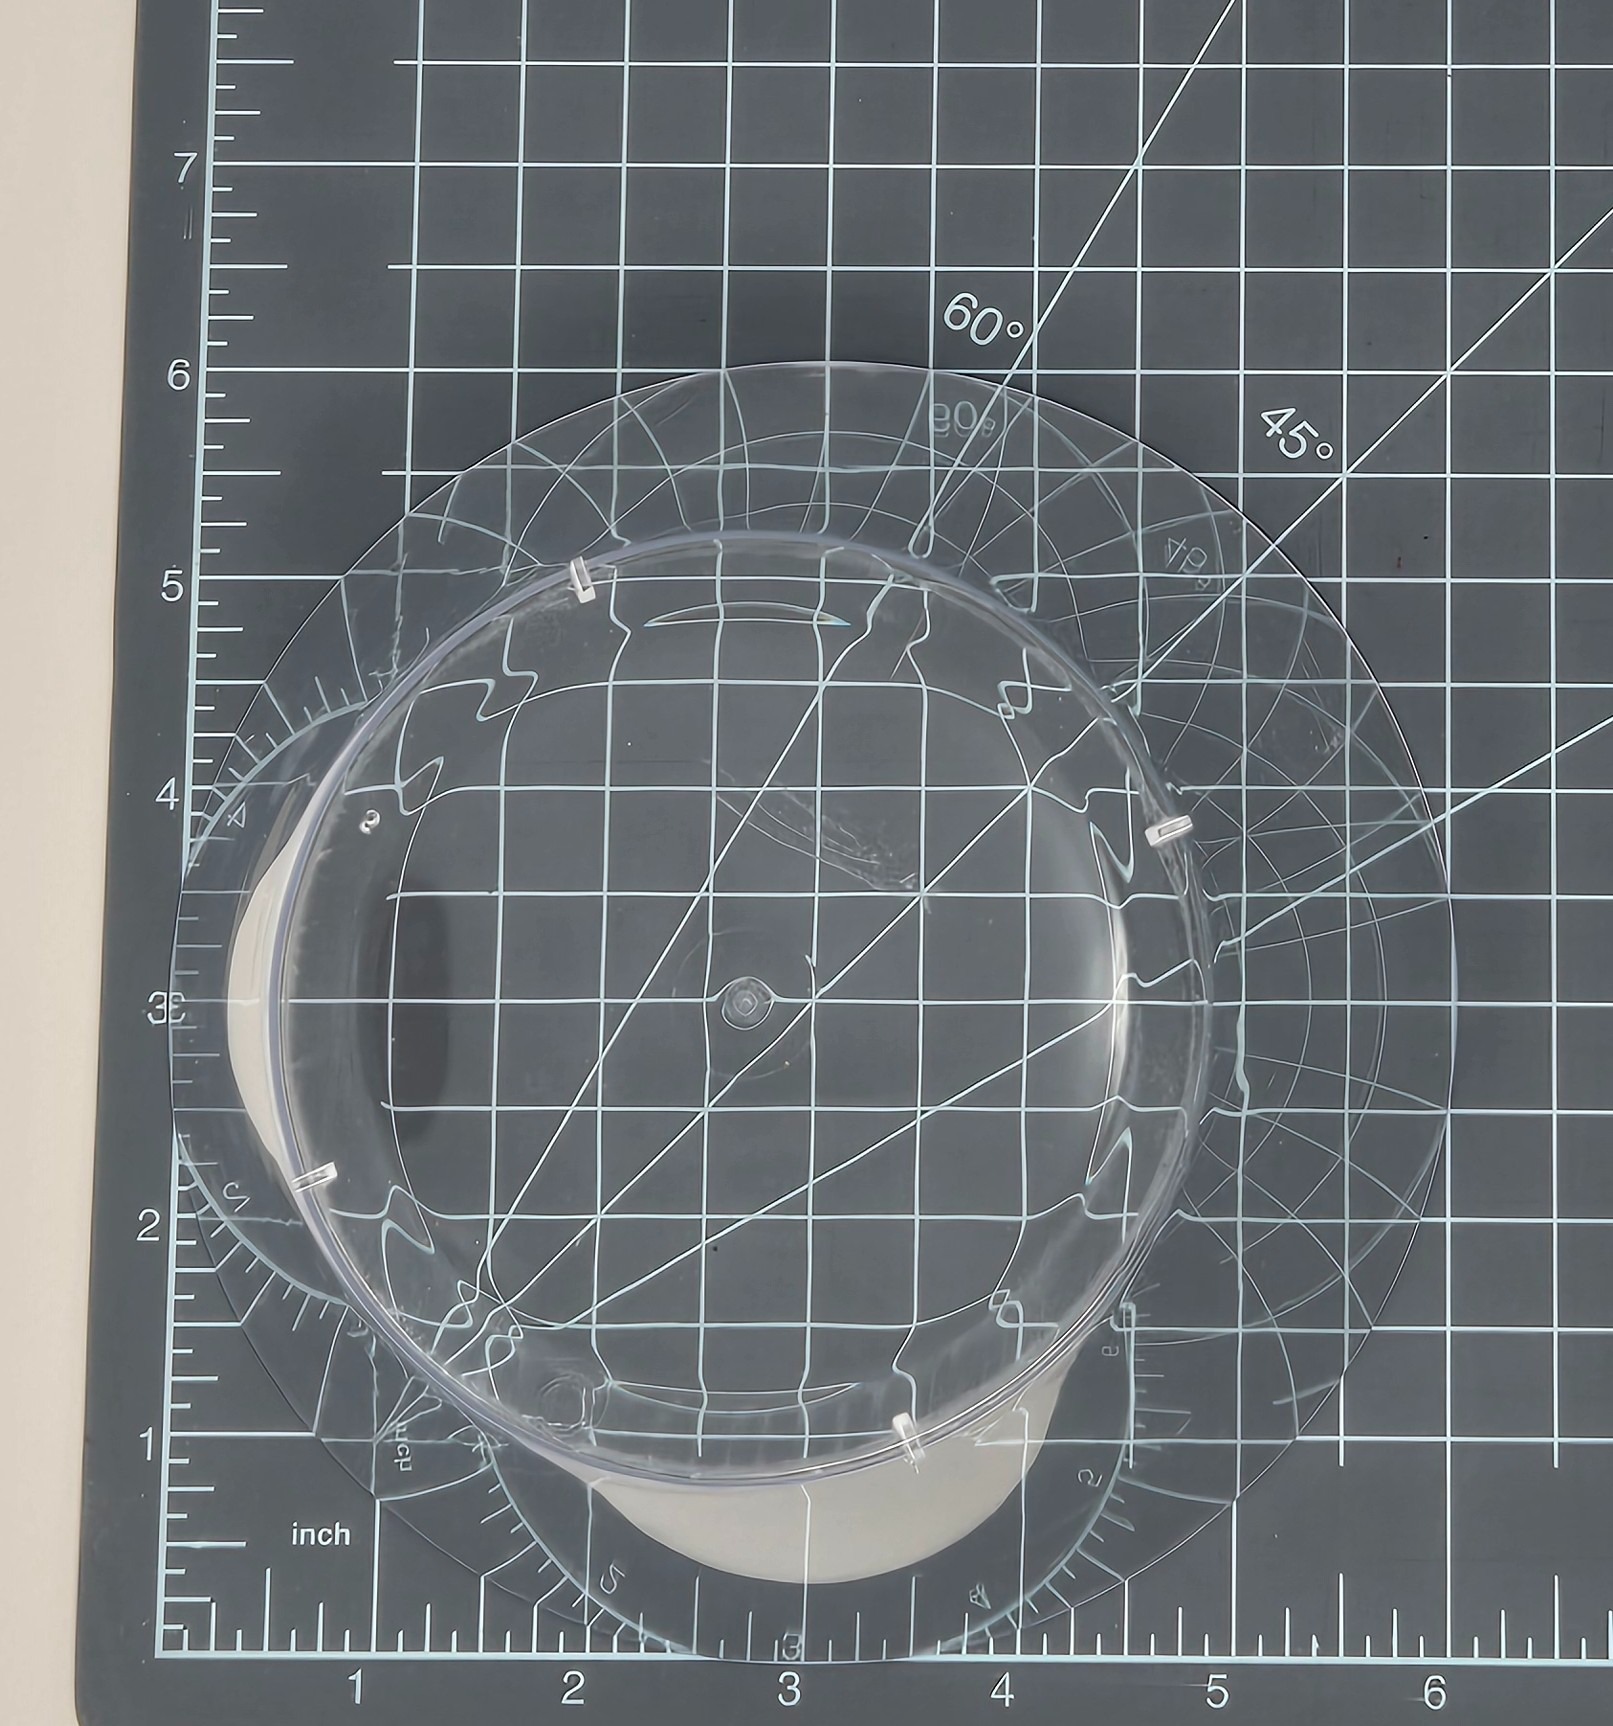
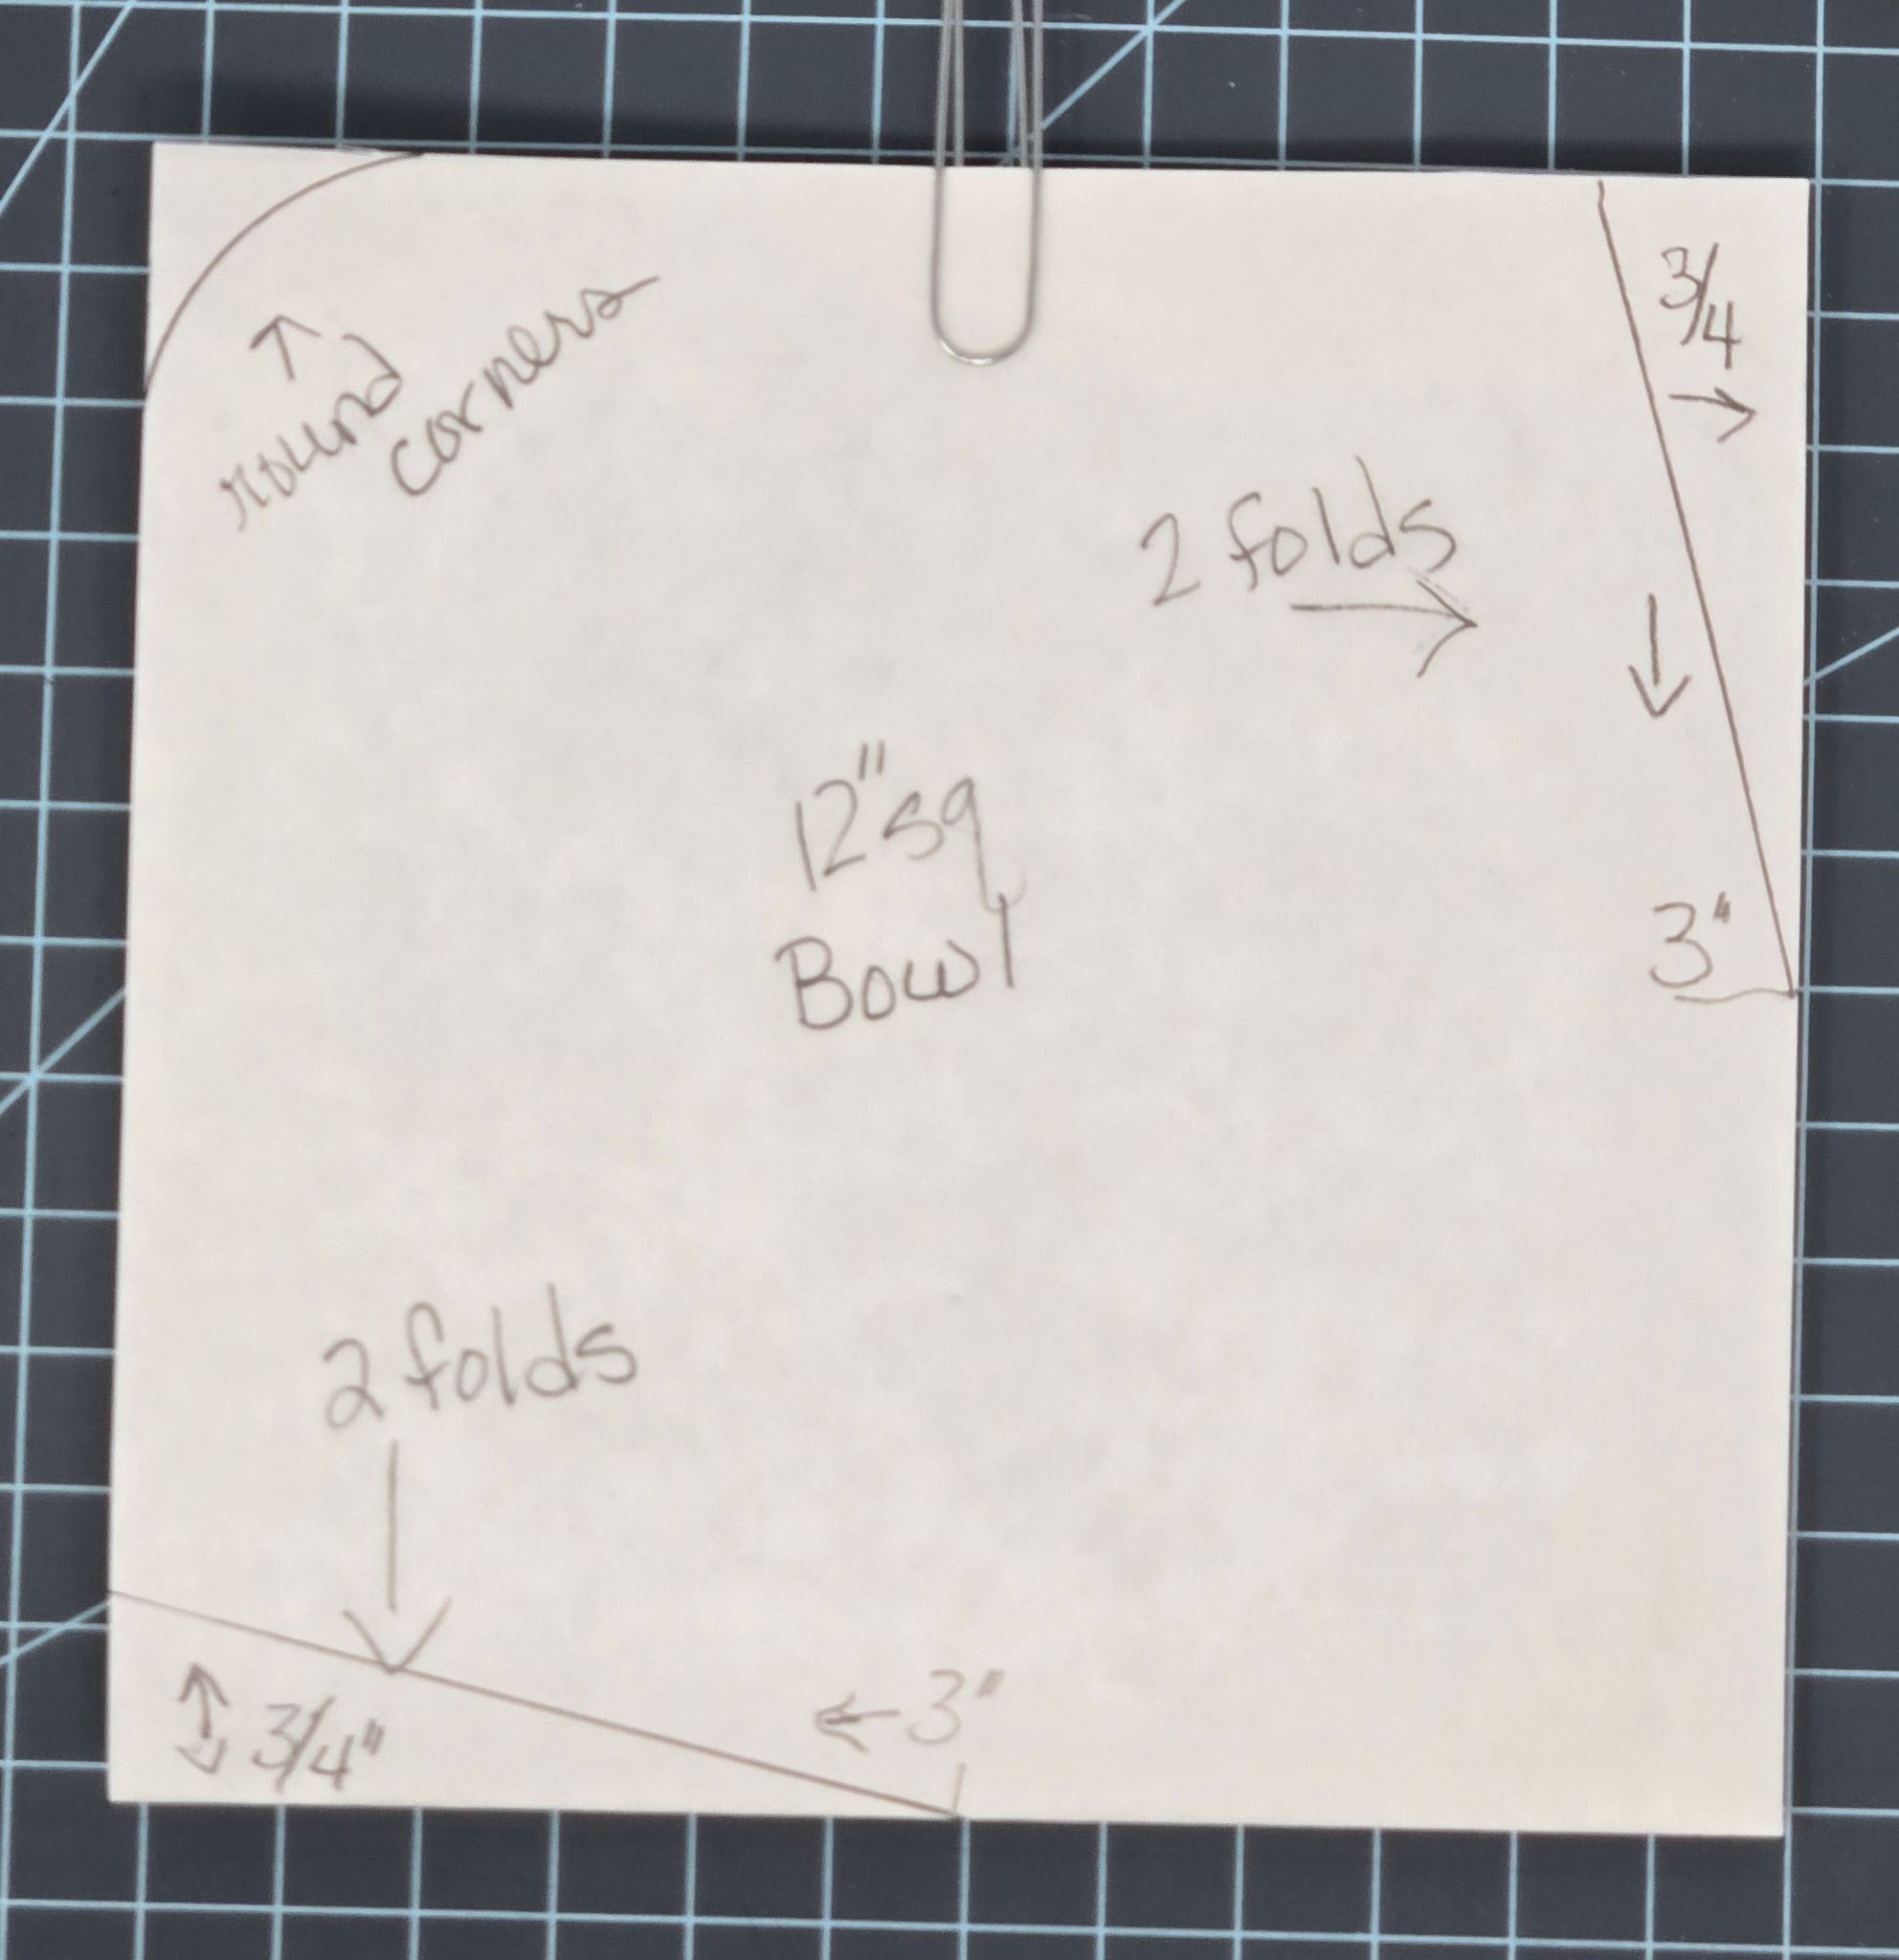
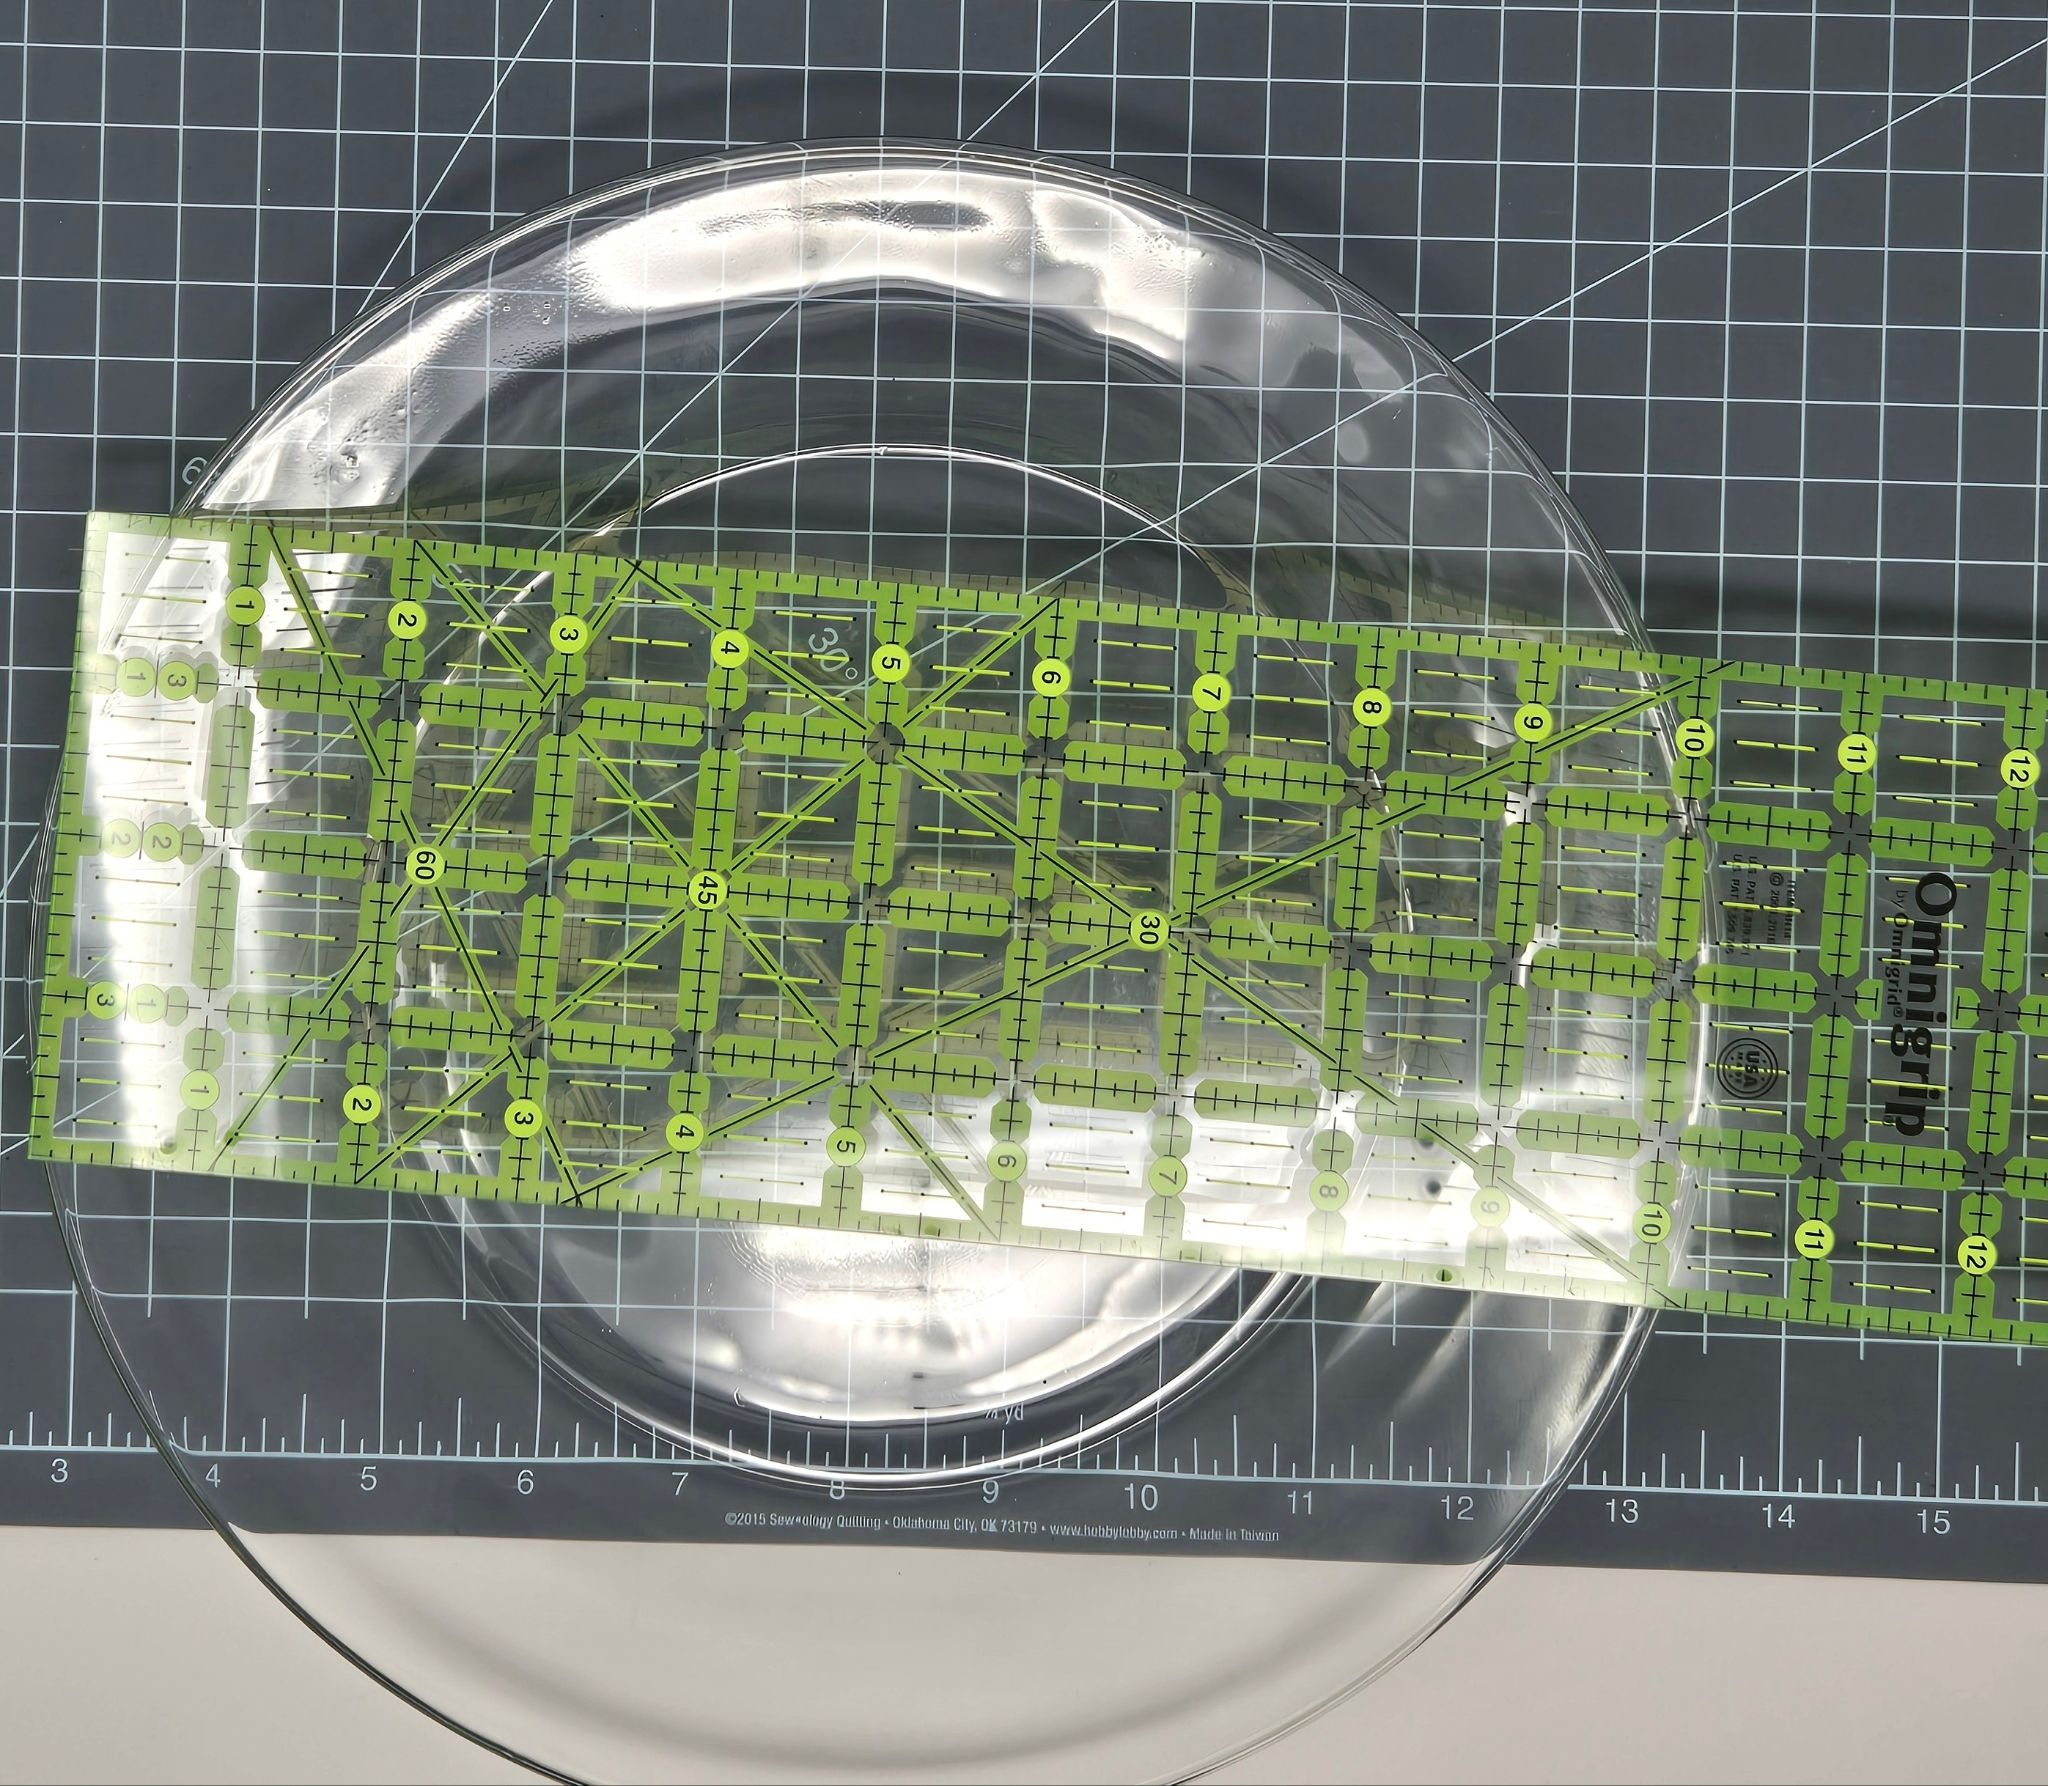
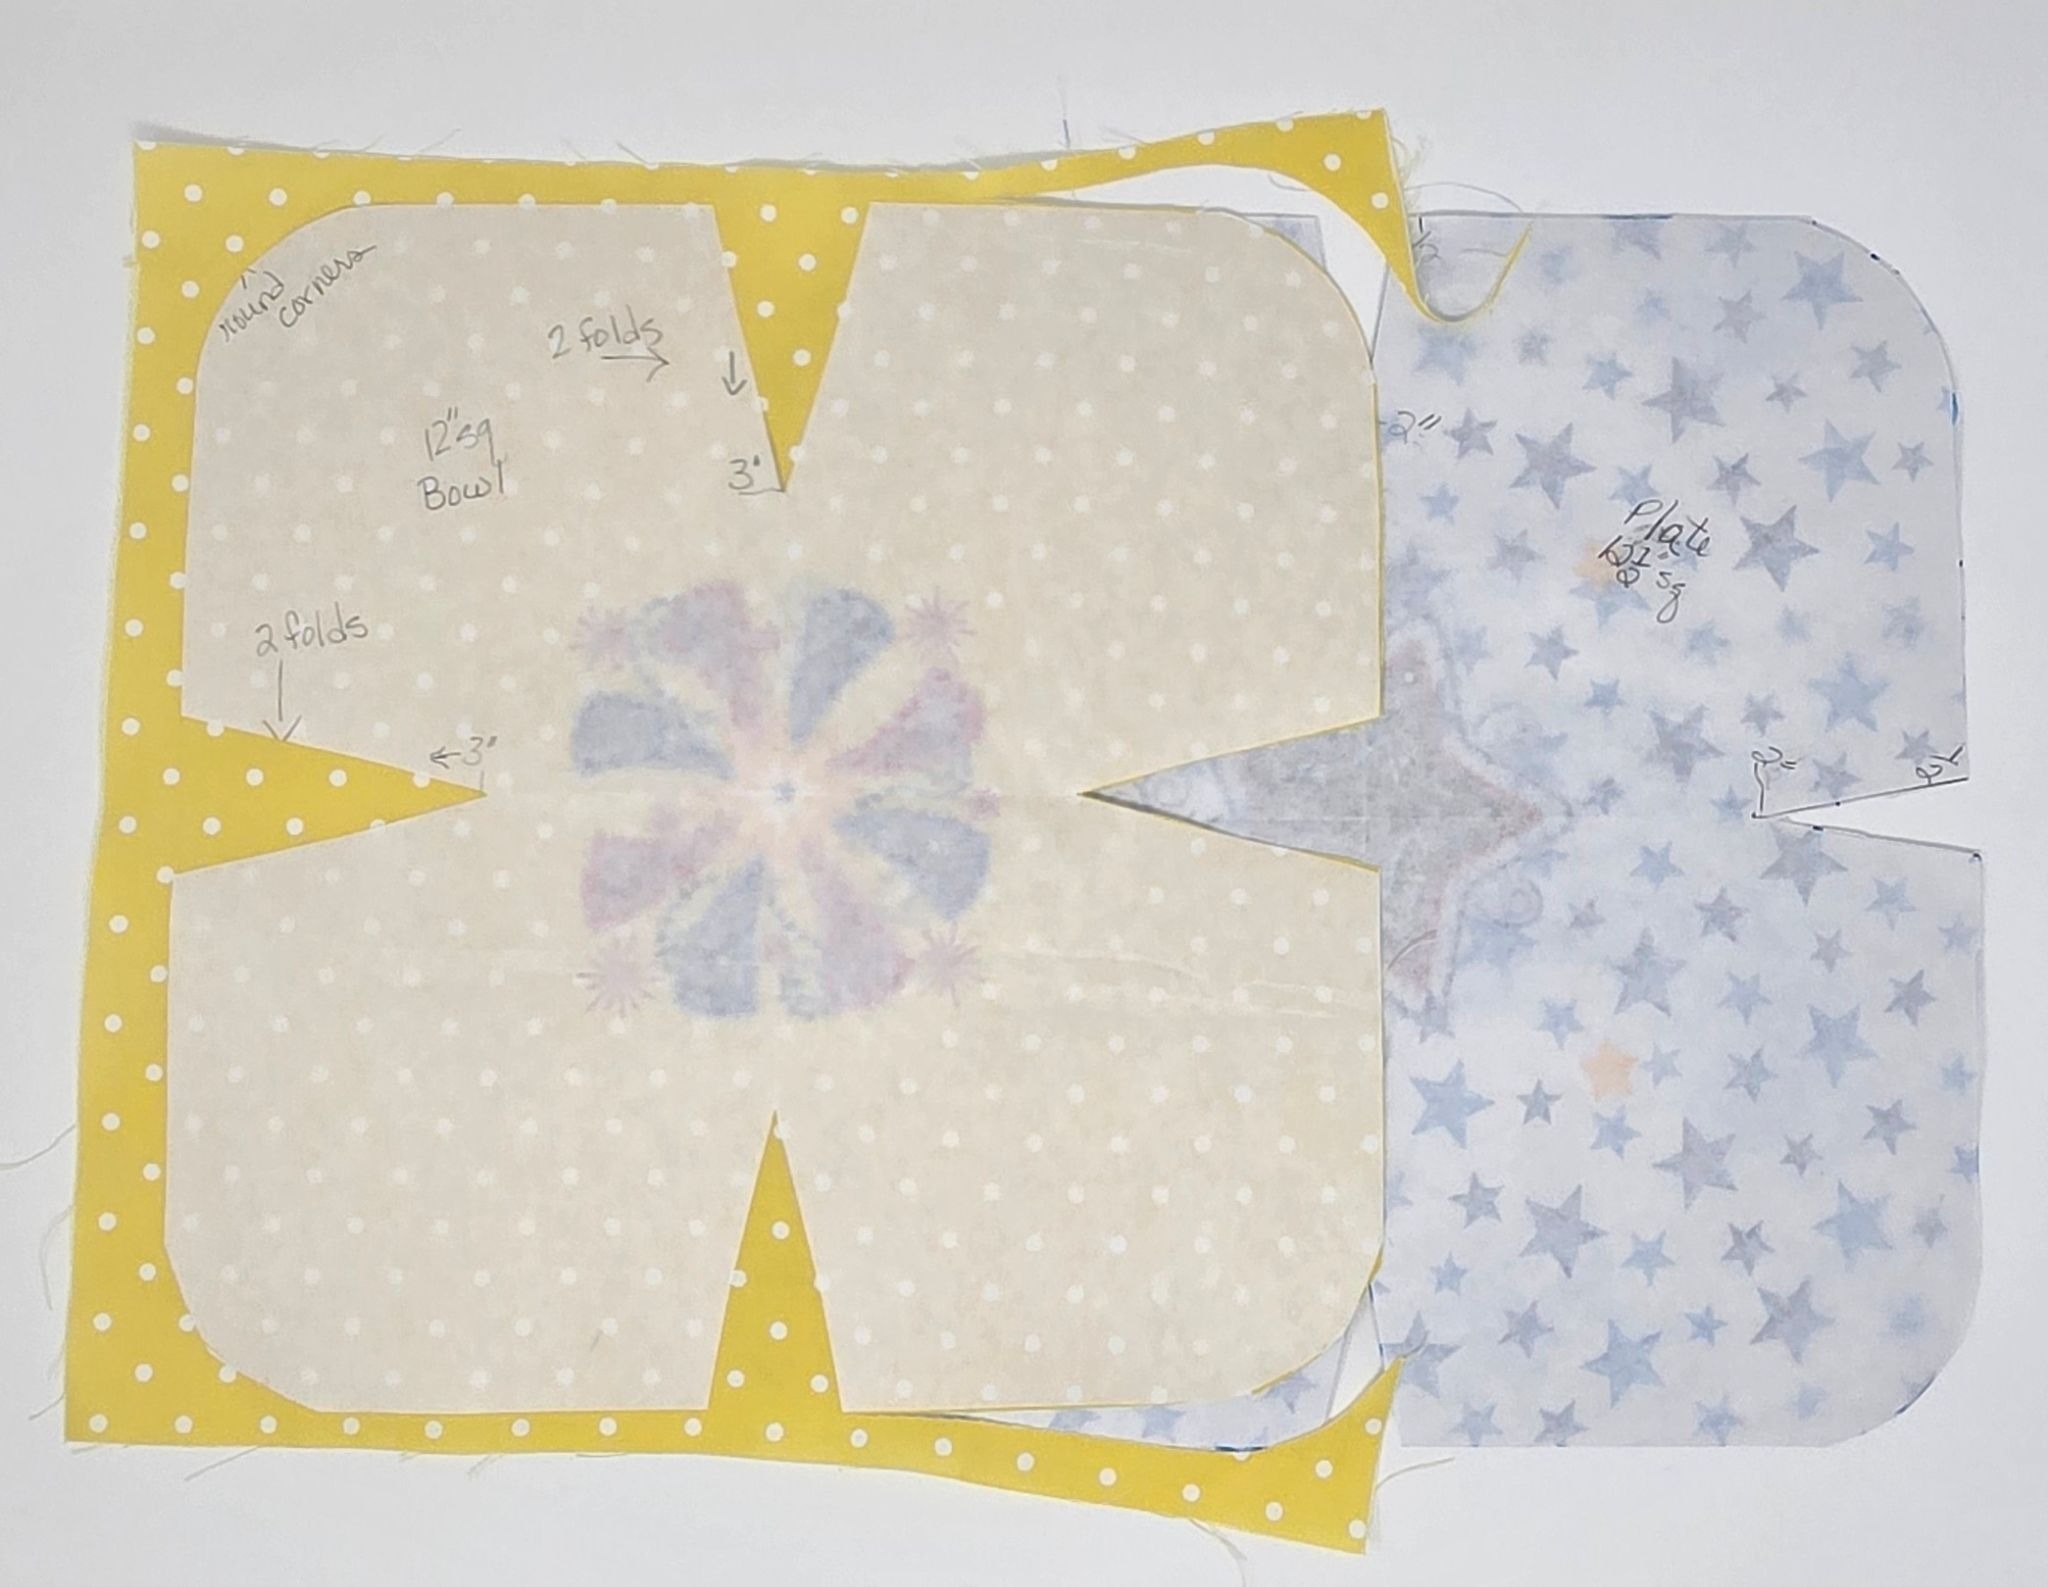
Measure the diameter of your plate/bowl. Then measure the height. My bowl is 6” across, and the height is about 3½”. Since I want the bowl to sit inside the cozy, I will add the two sides and the diameter measurements. 6” + 3½” + 3½” = 13”. I don't want the cozy to extend too far past my bowl edges, so I will reduce it to 12” and cut a 12” square of freezer paper.
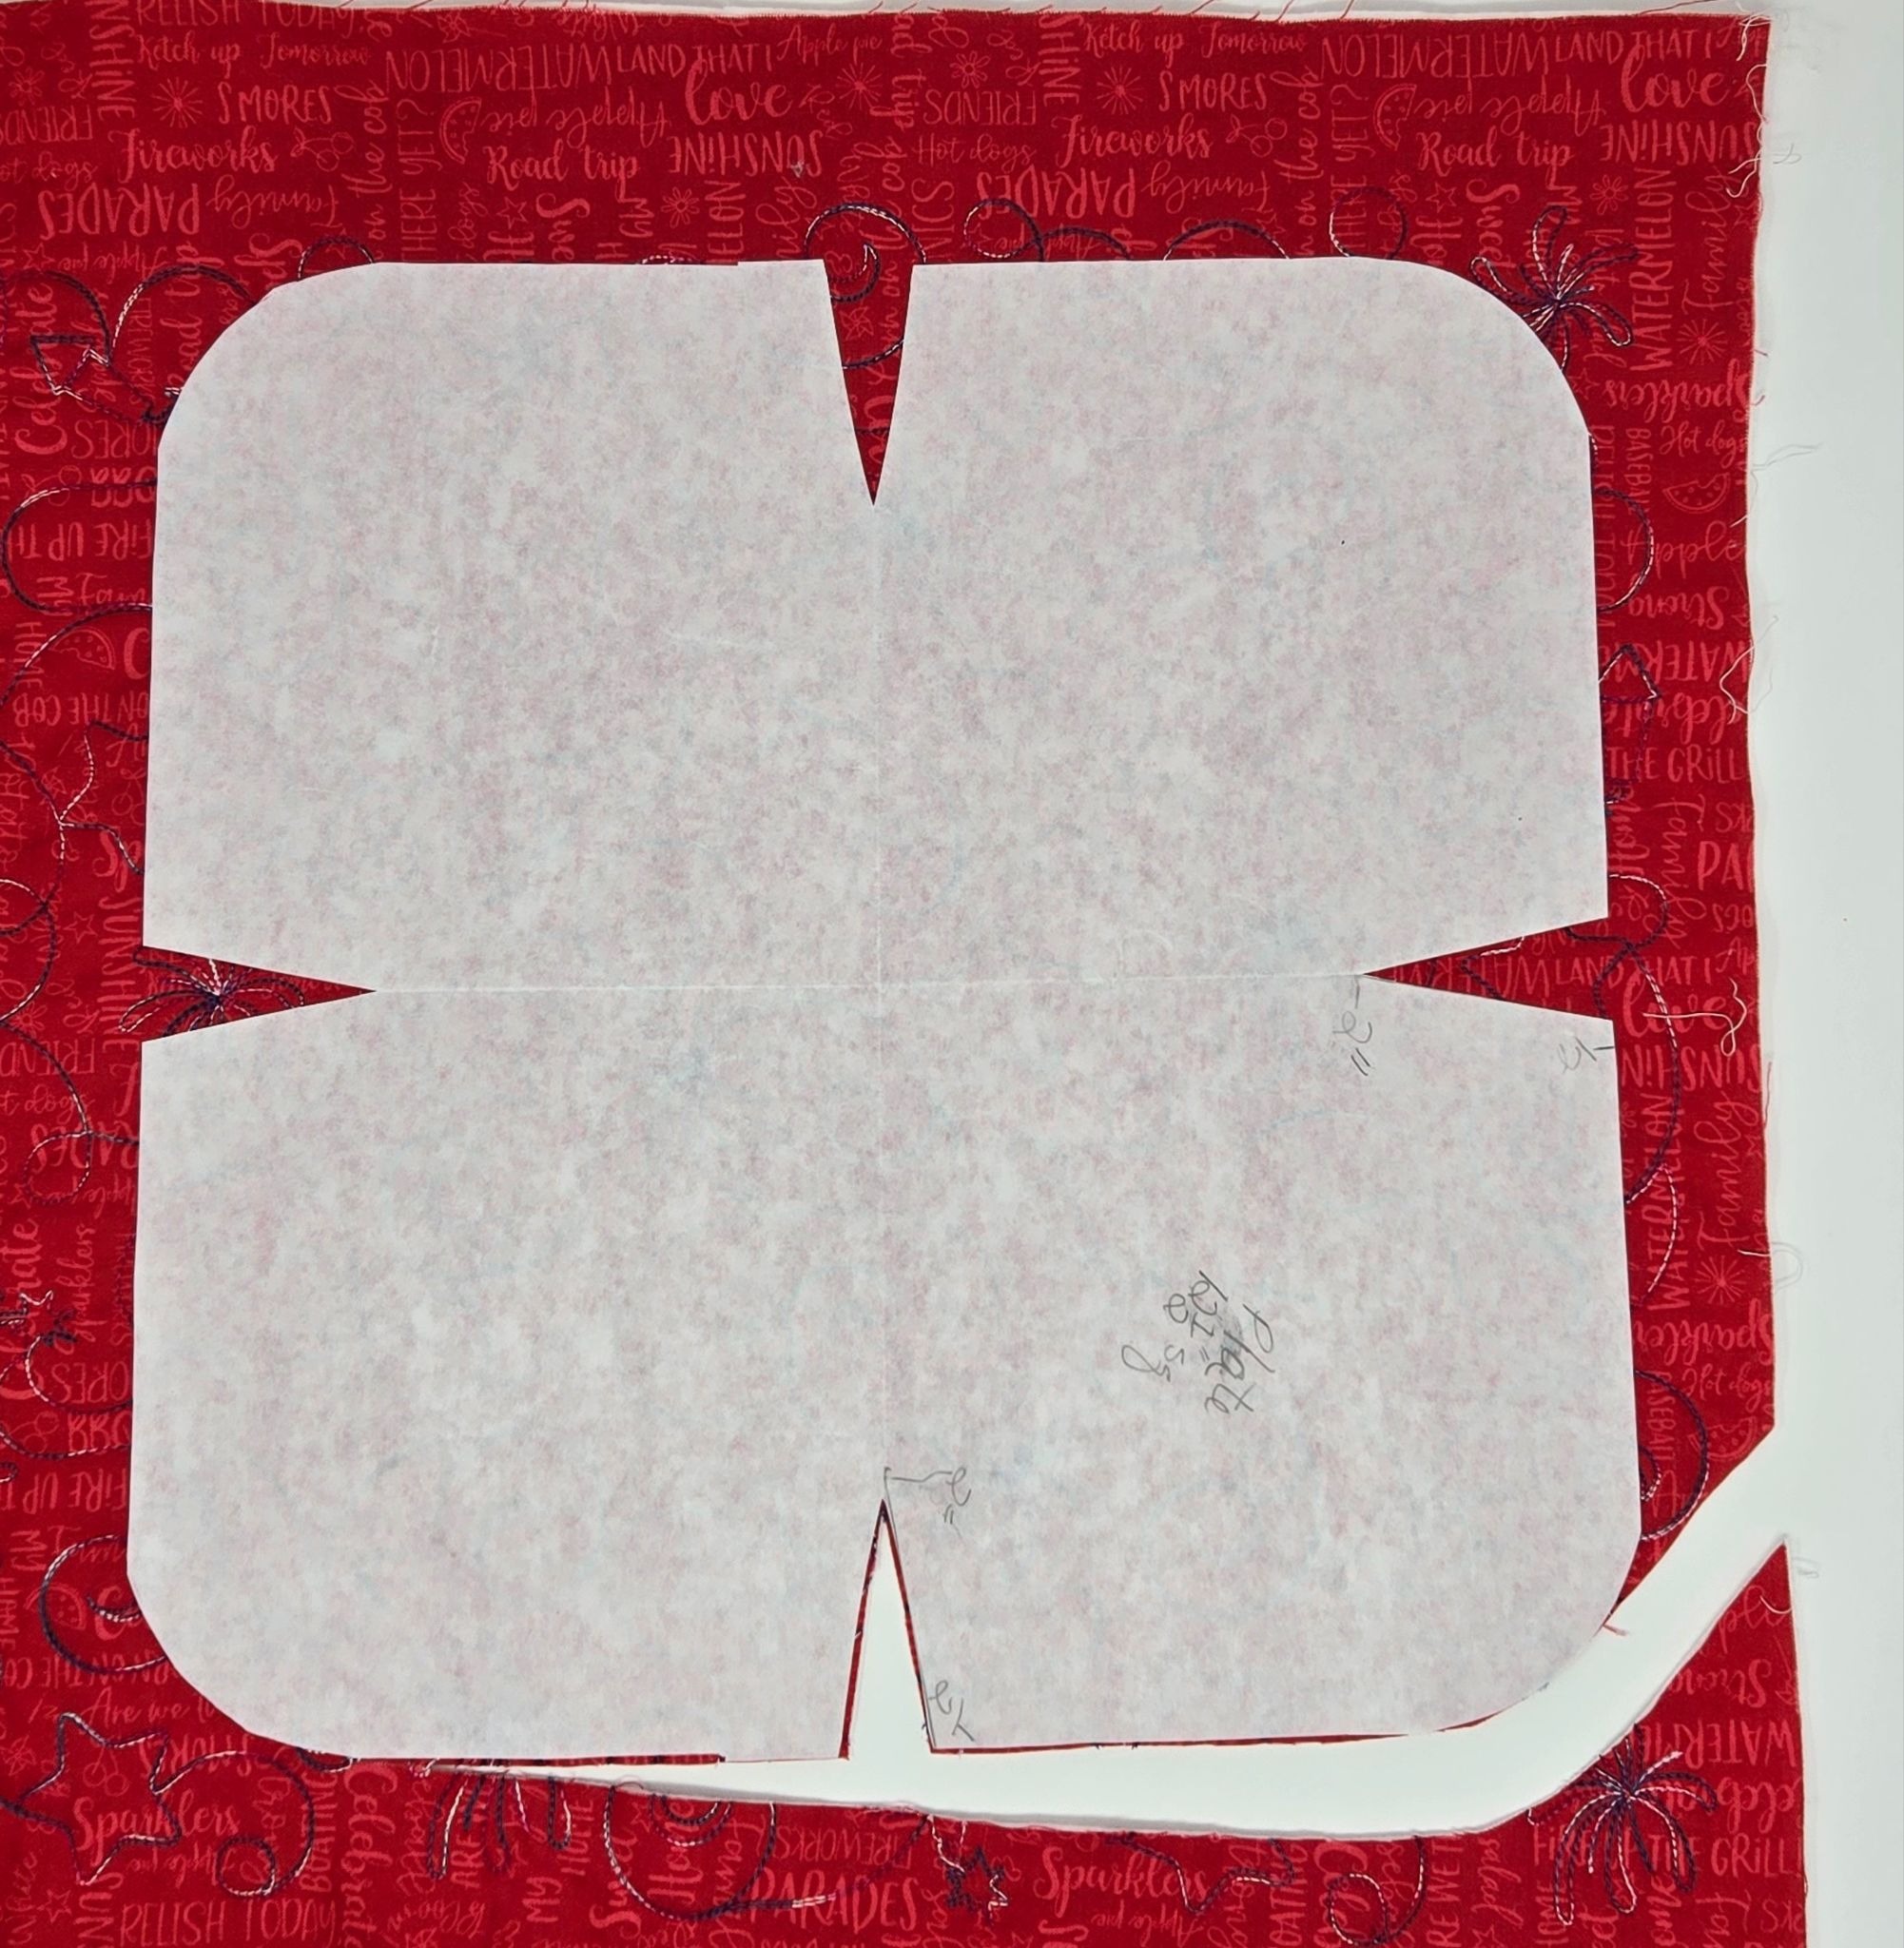
Similar to the technique used to make a paper snowflake, fold the freezer paper in half, then in half again. To get a deep cozy, the darts in the sides need to be a little wider than normal. I measured ¾” from the fold lines and made a mark. Then I measured down about 3”. Draw and cut the dart out of the freezer paper. Round the four corners if desired. Now we have our bowl template.
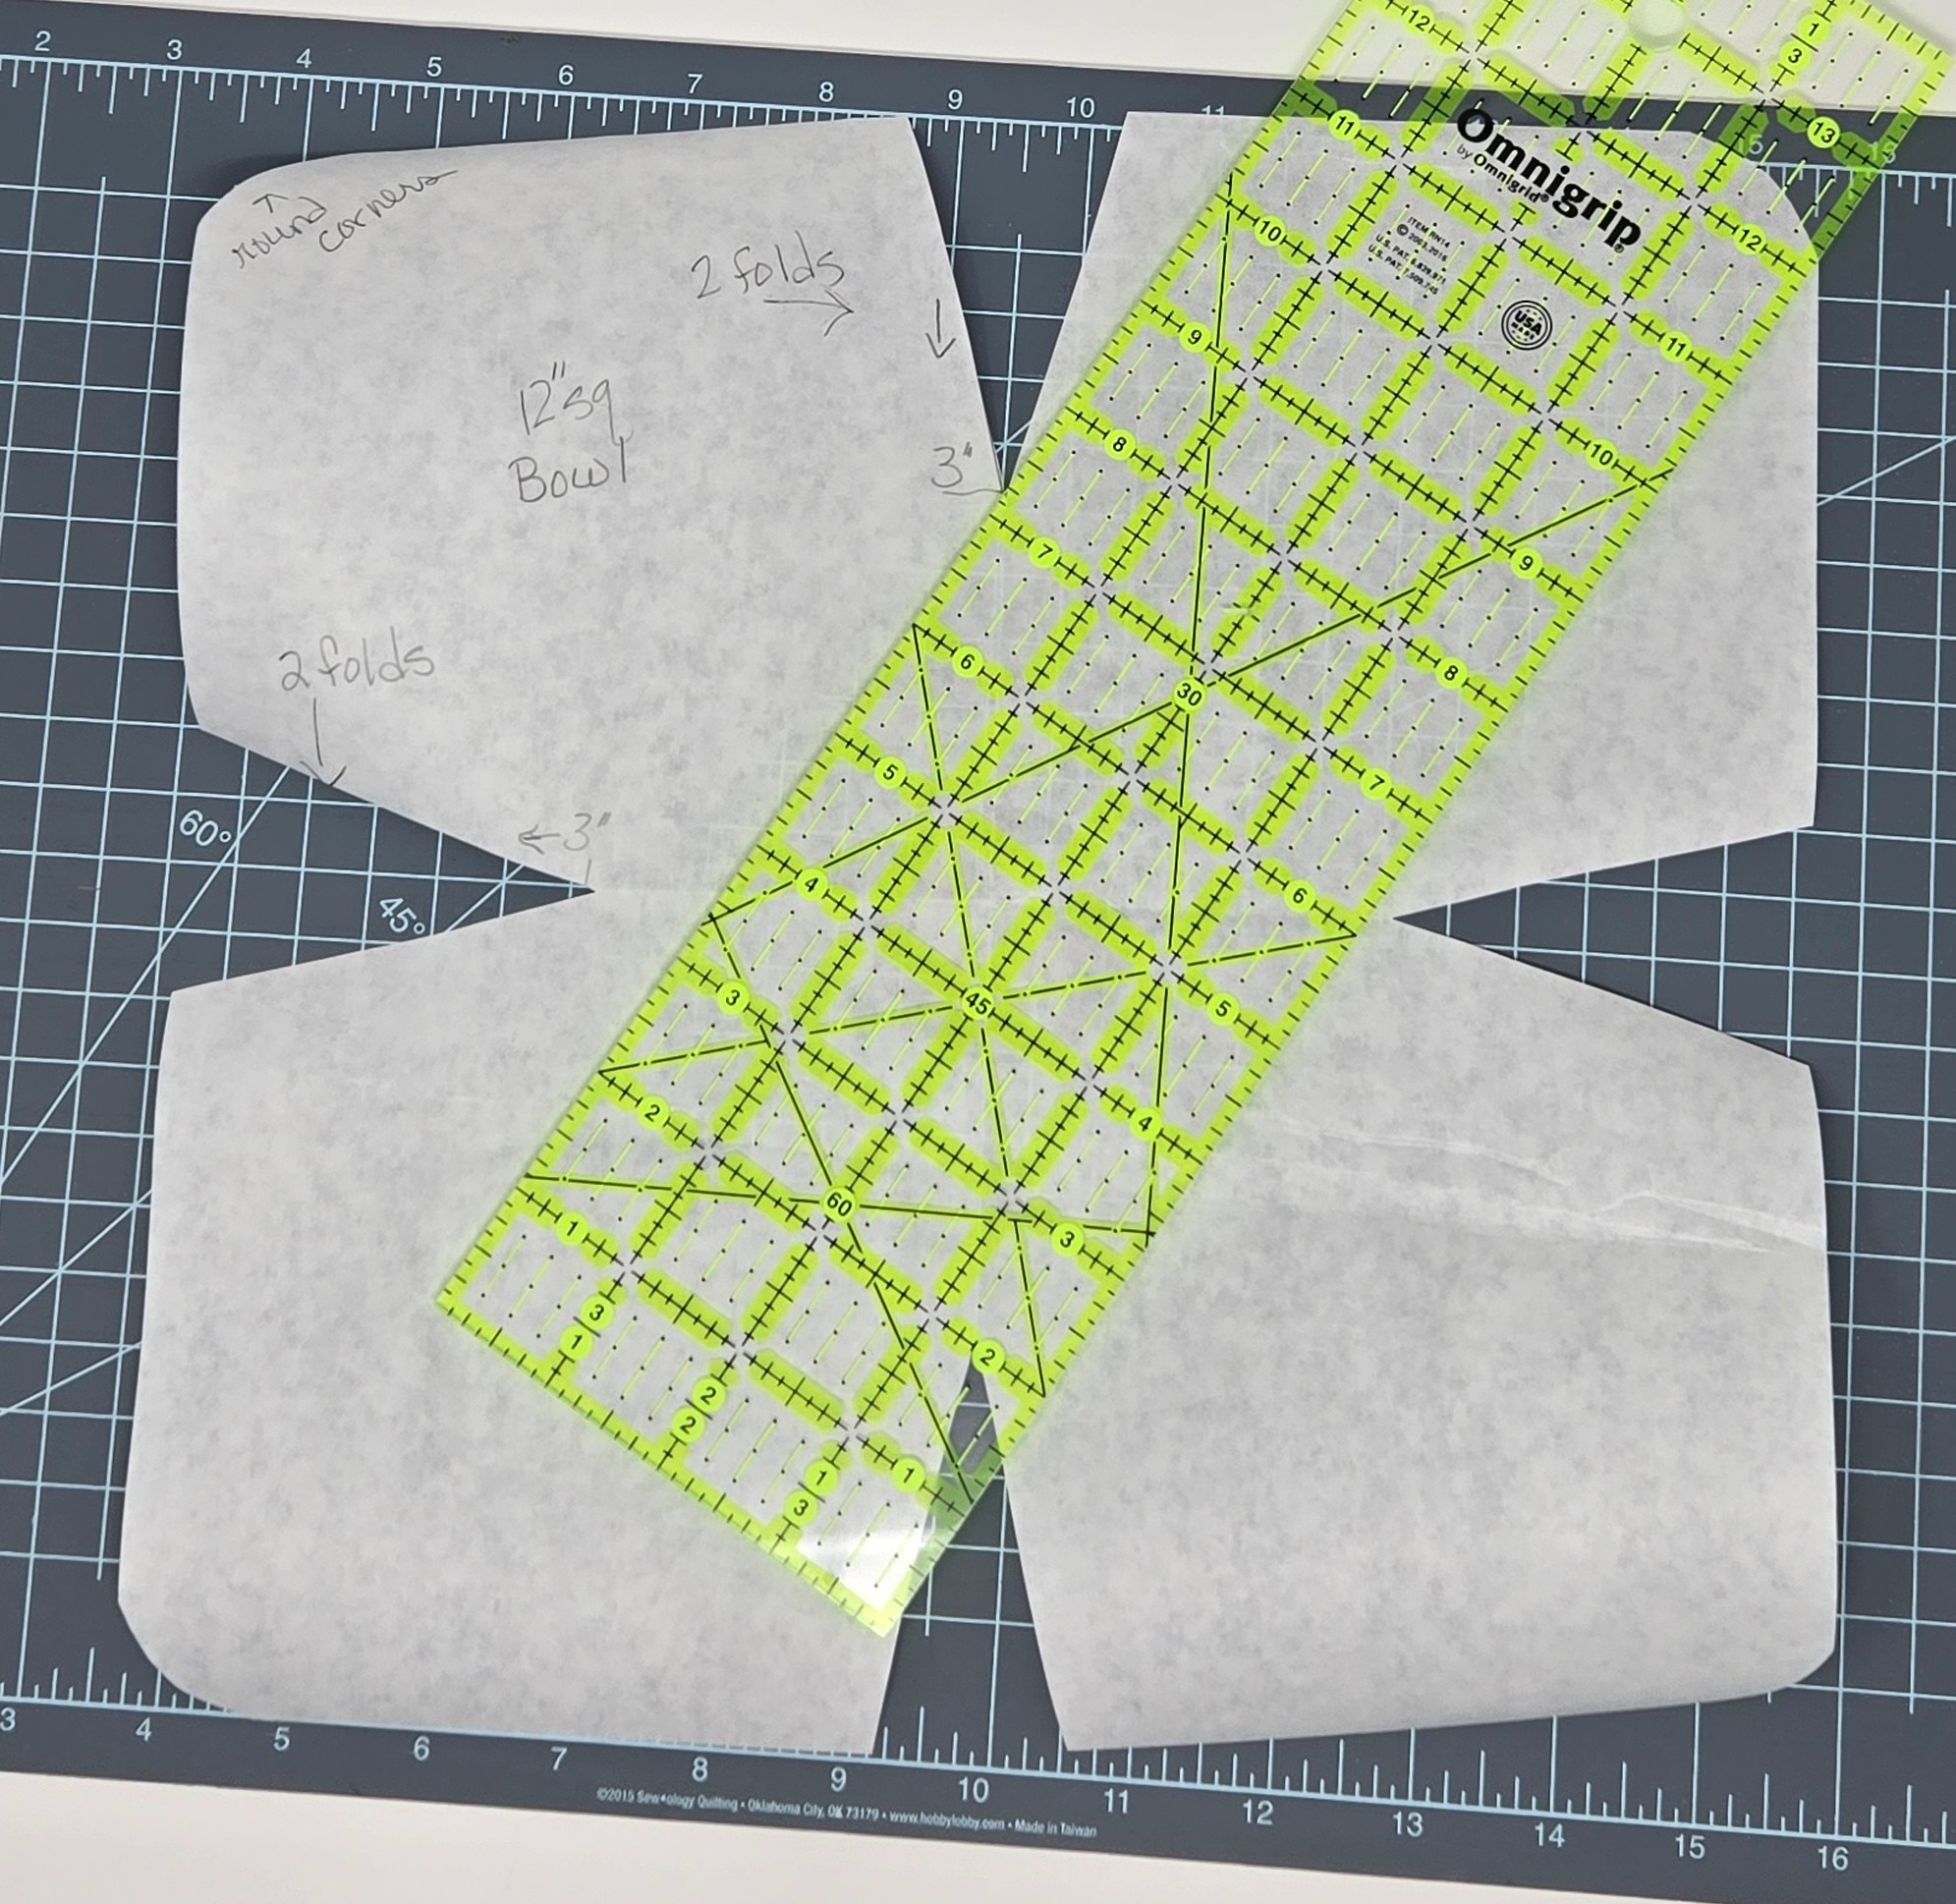
I did the same thing for the plate, but this time I am going to make very shallow darts. My plate measures 10½” across the diameter and sits ¾” off the table at the side. I cut a 12½” square of freezer paper, and marked a scant ½” from the fold of freezer paper x 2” darts. In hindsight, I could have made my dart even shallower by only going ¼” from either side of the fold.
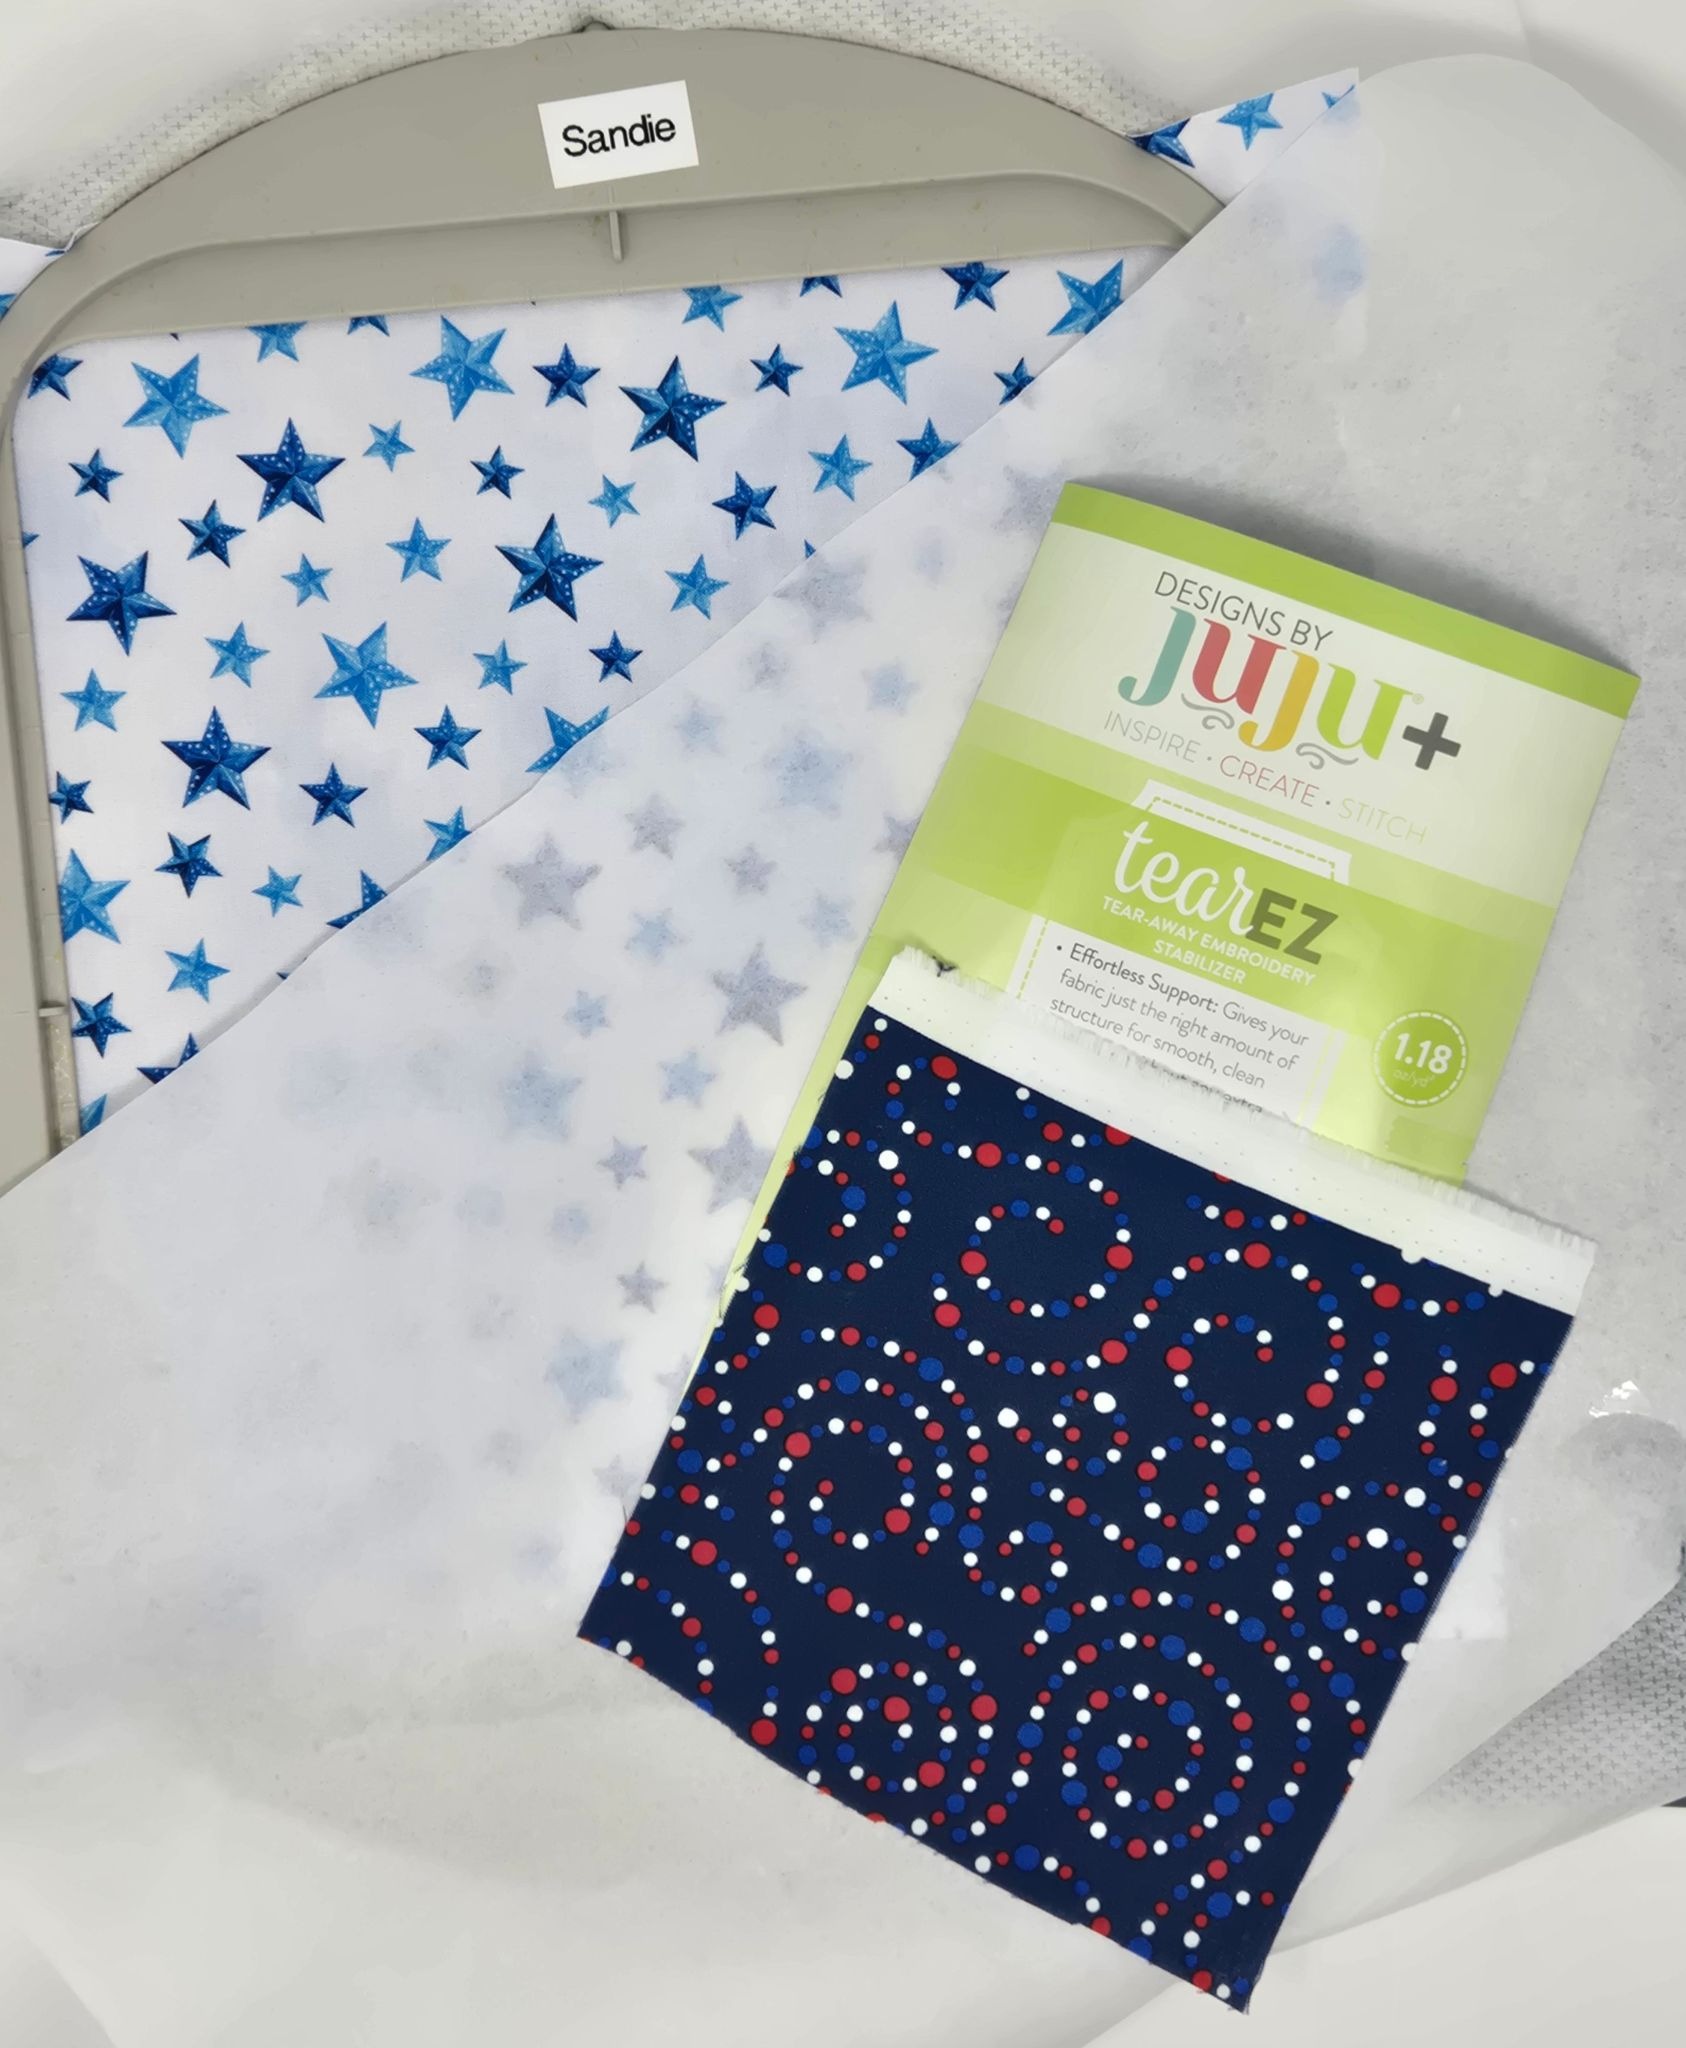
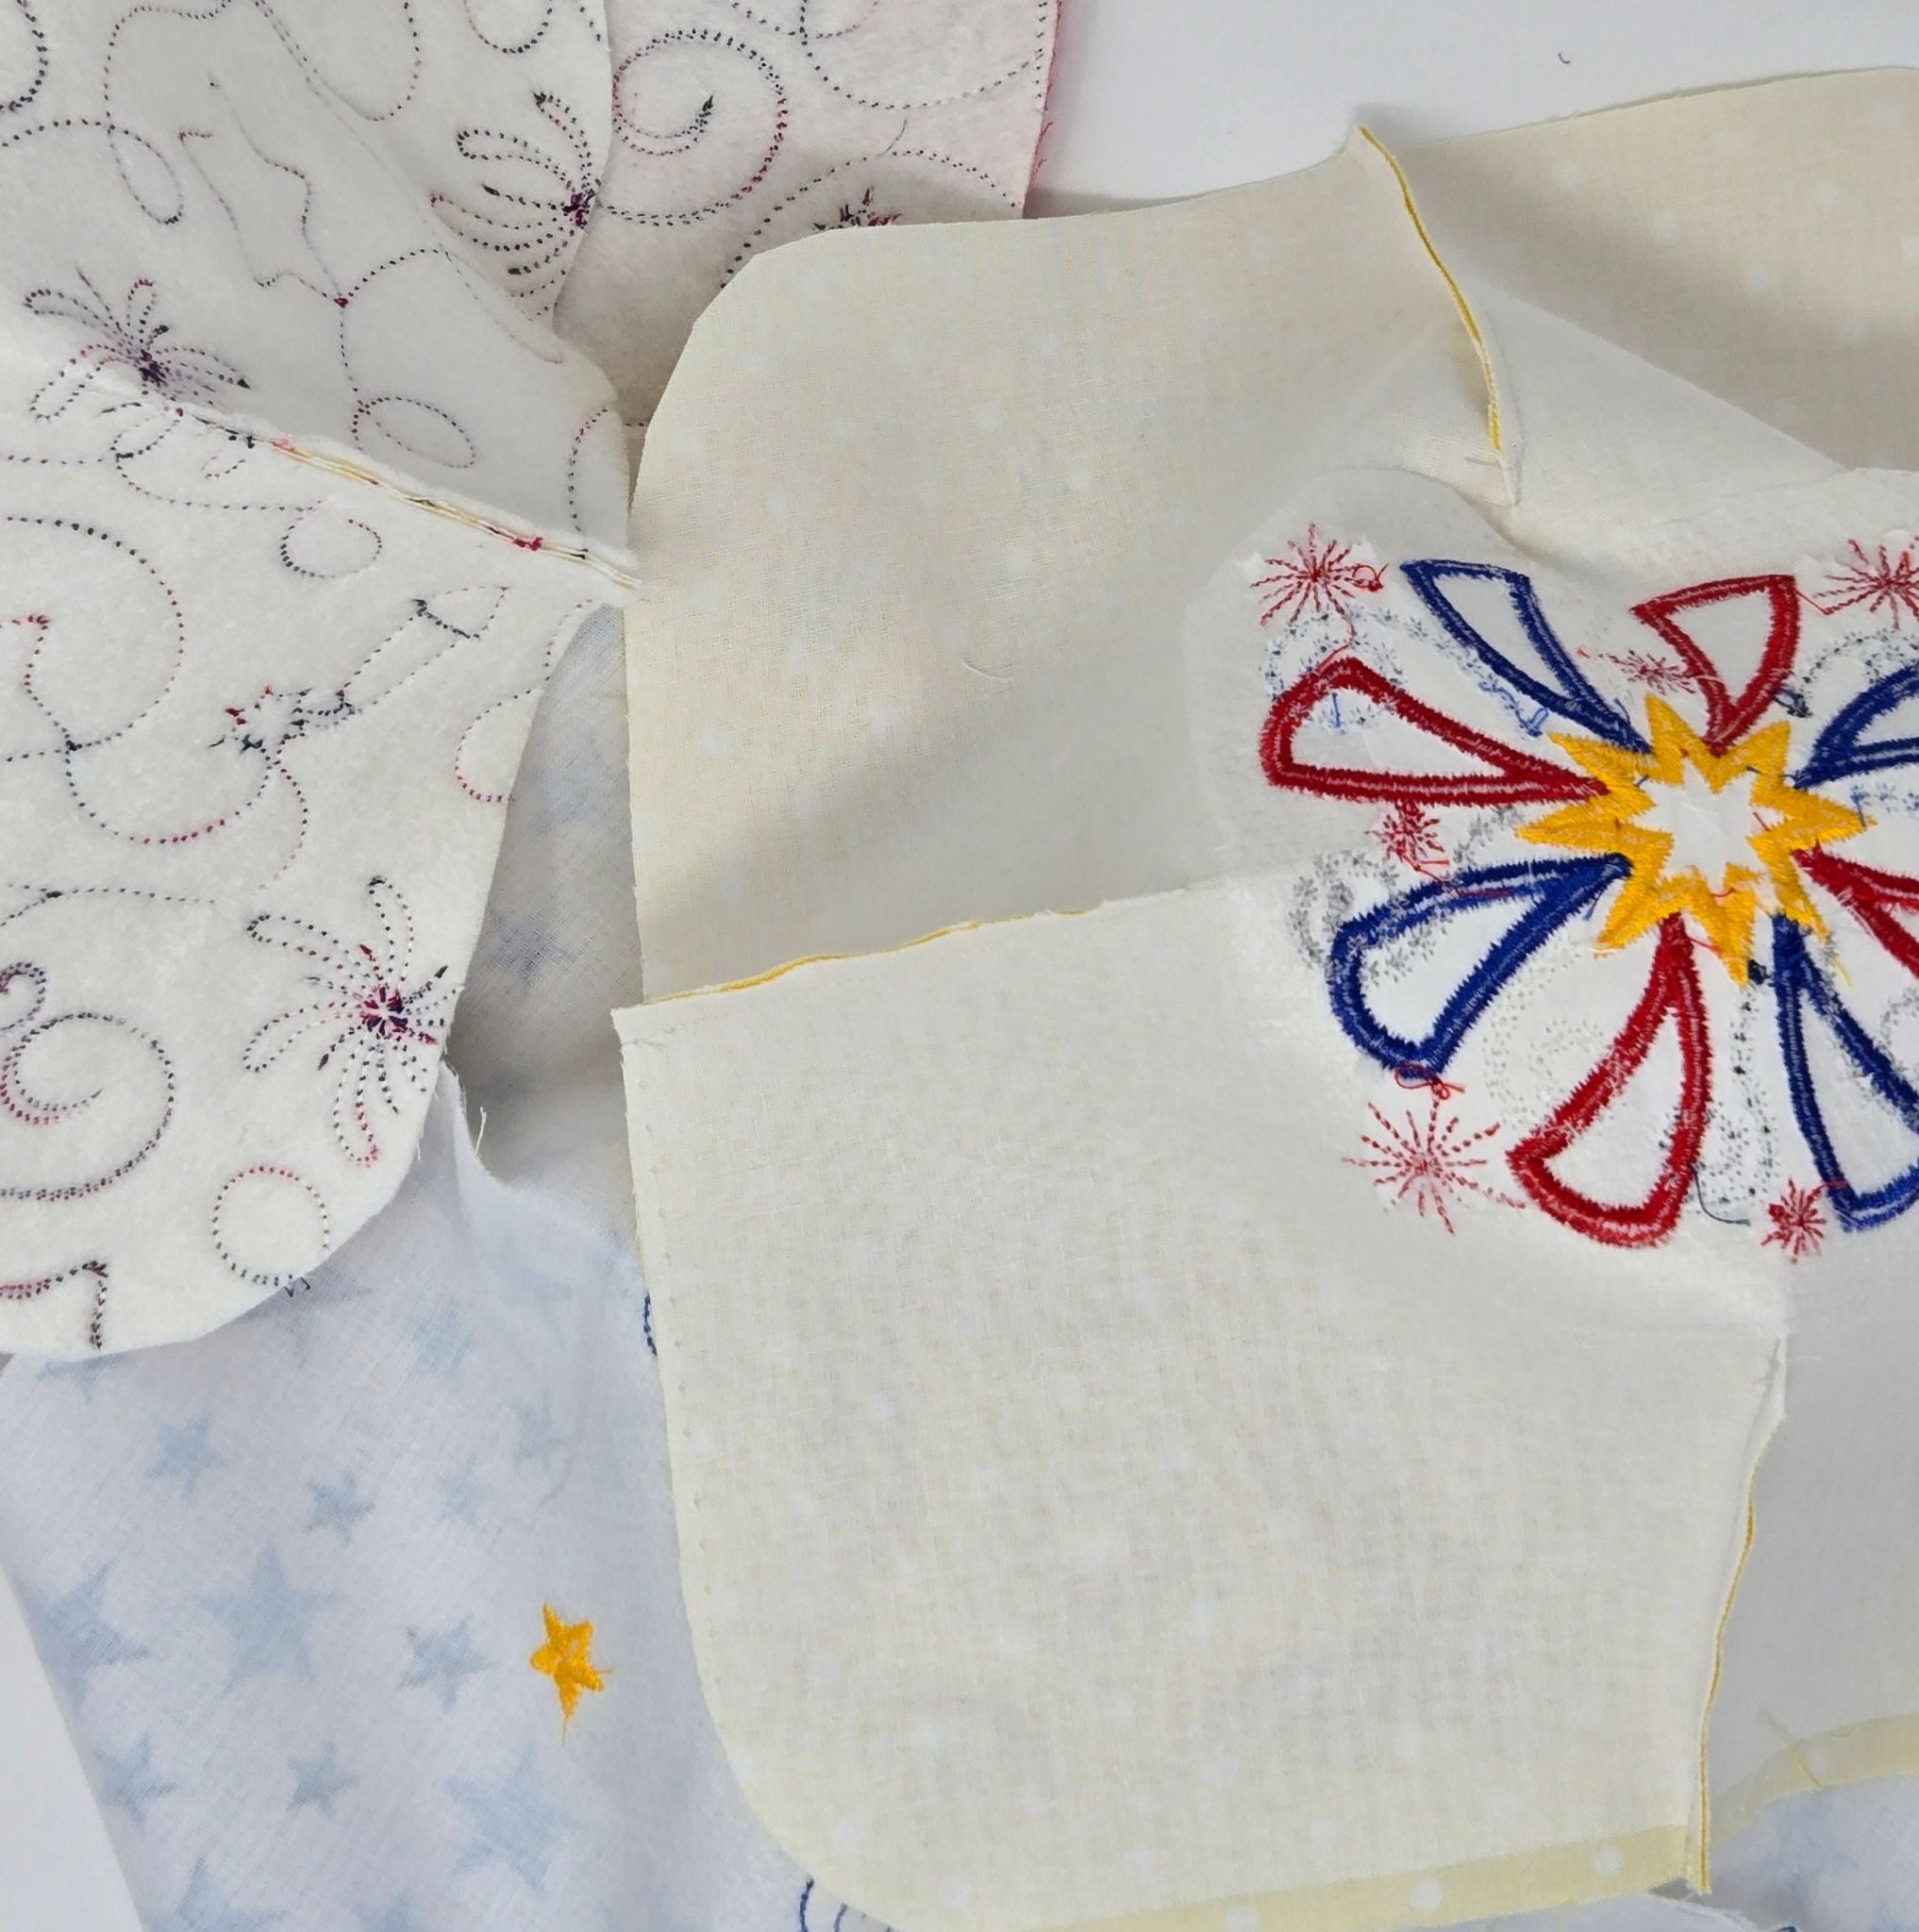
Gather your supplies, put your chosen designs on your USB drive, and prepare your fabrics. I cut a 13” square of my fabric and backed it with fuseEZ. This gives it a little extra body. I do not need another layer of batting because these cozies are for serving. One layer on the back will work perfectly.
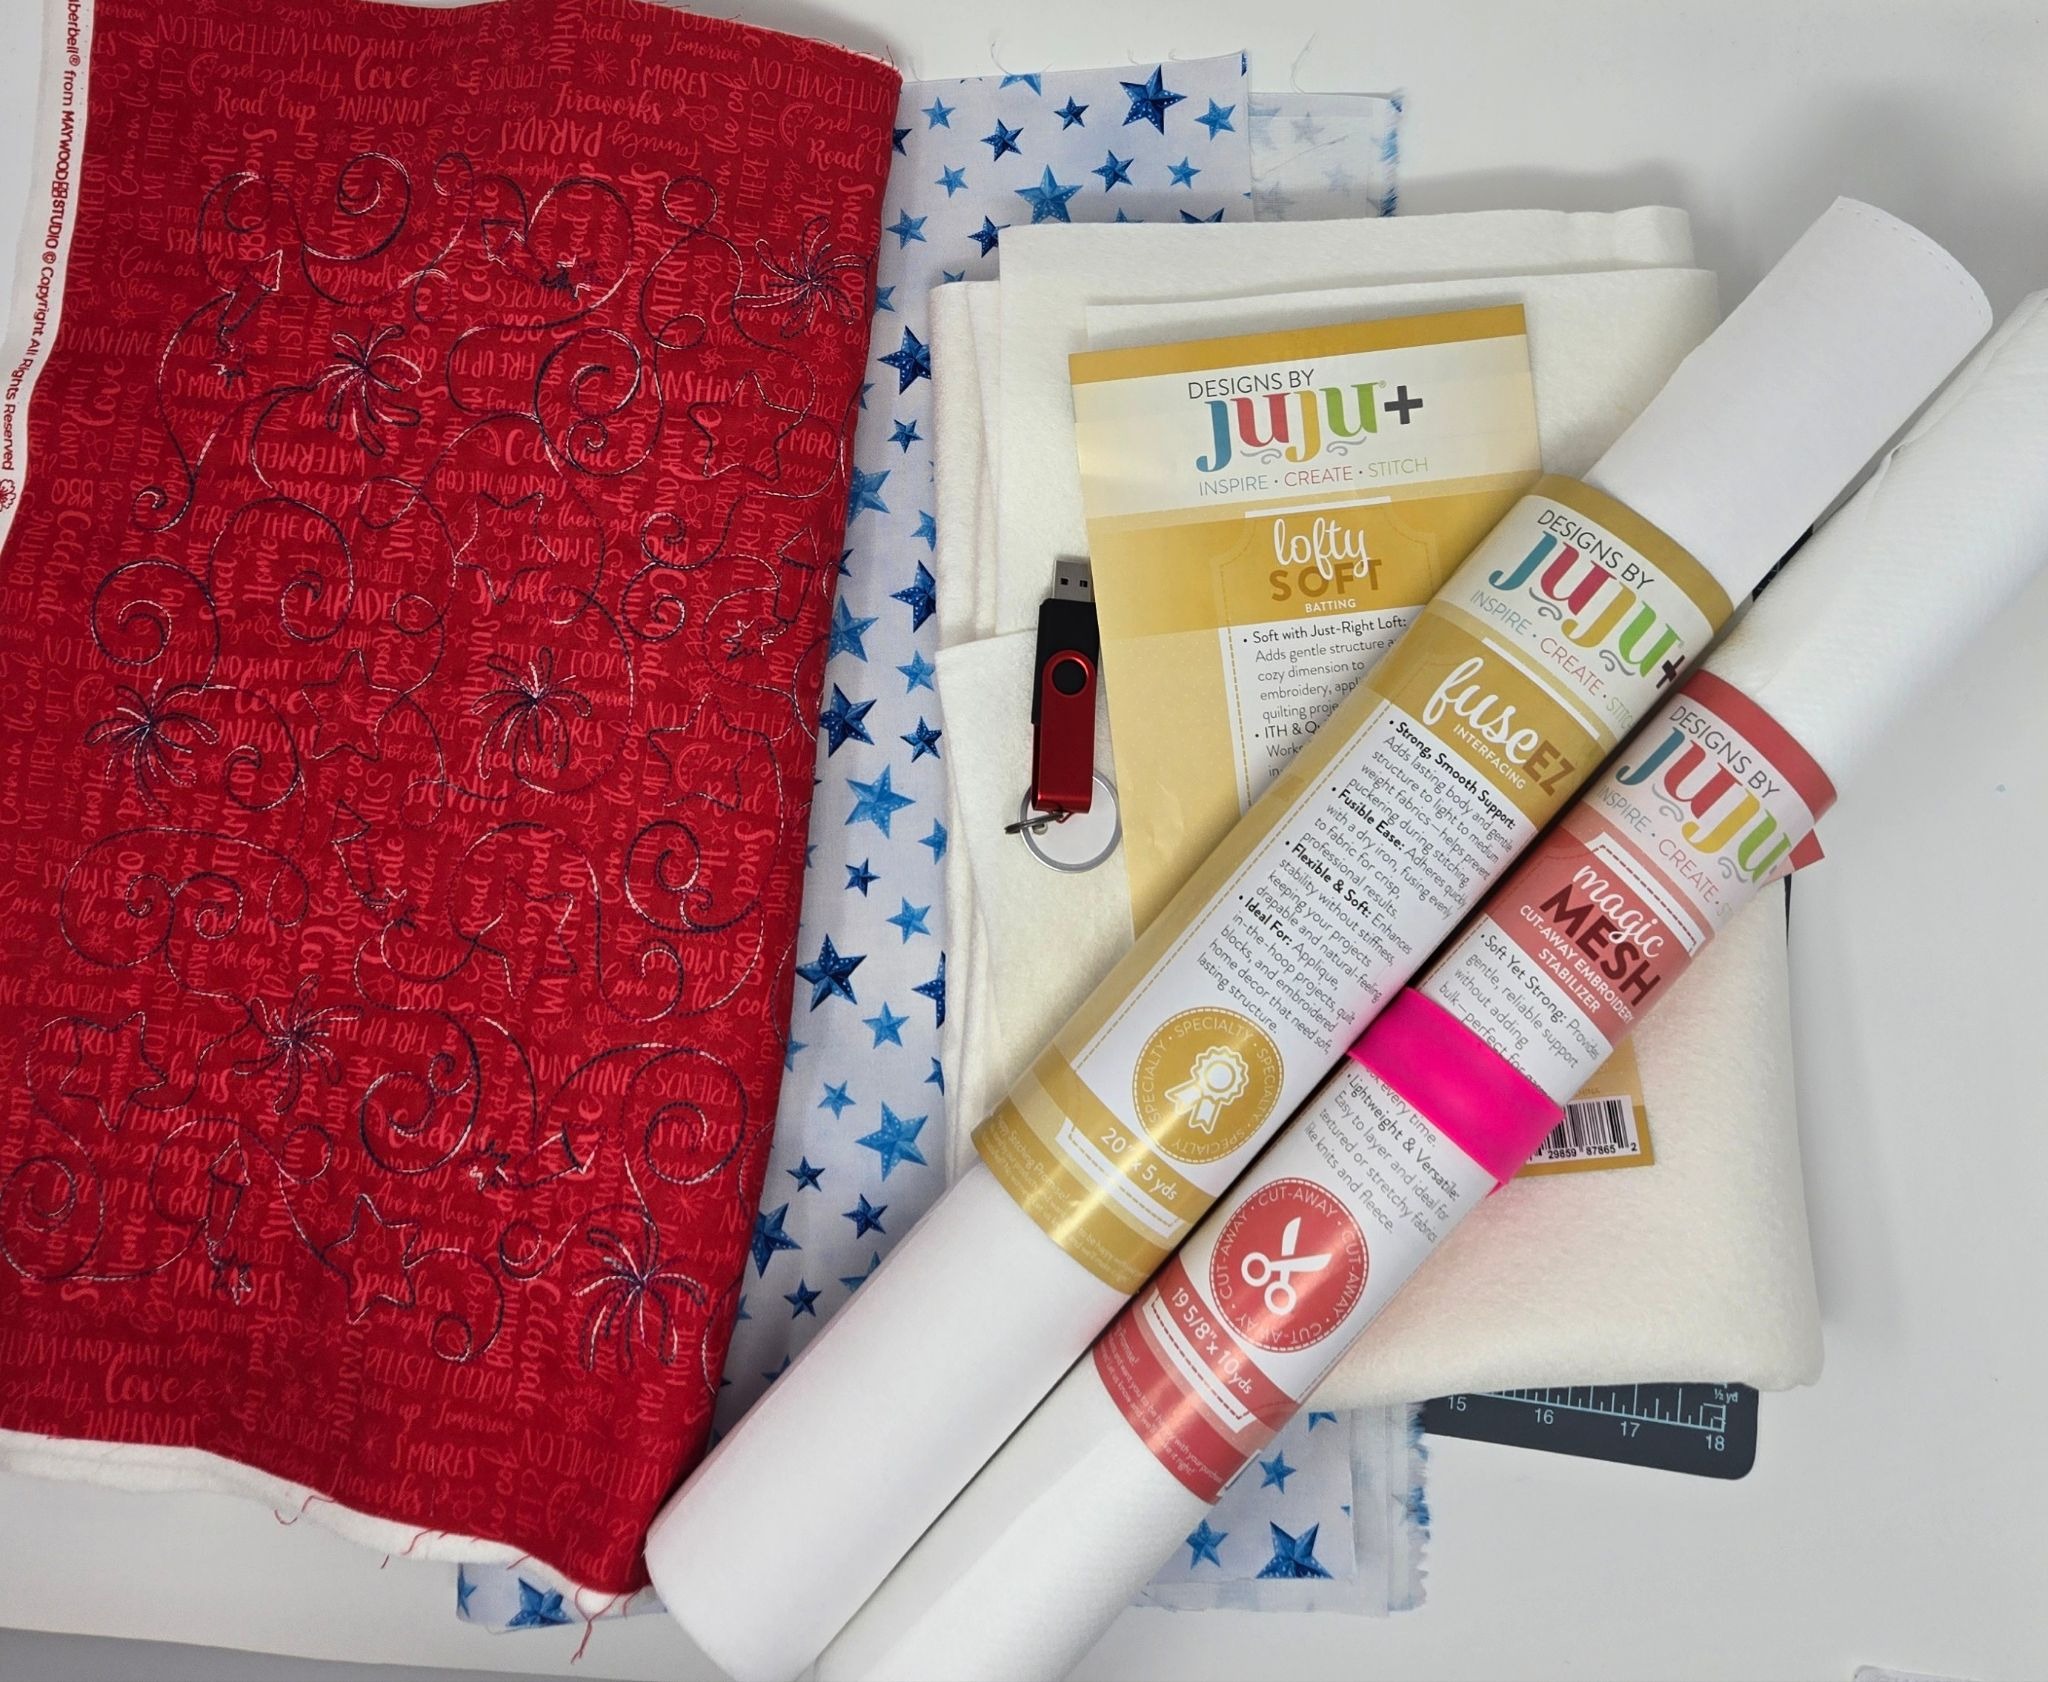
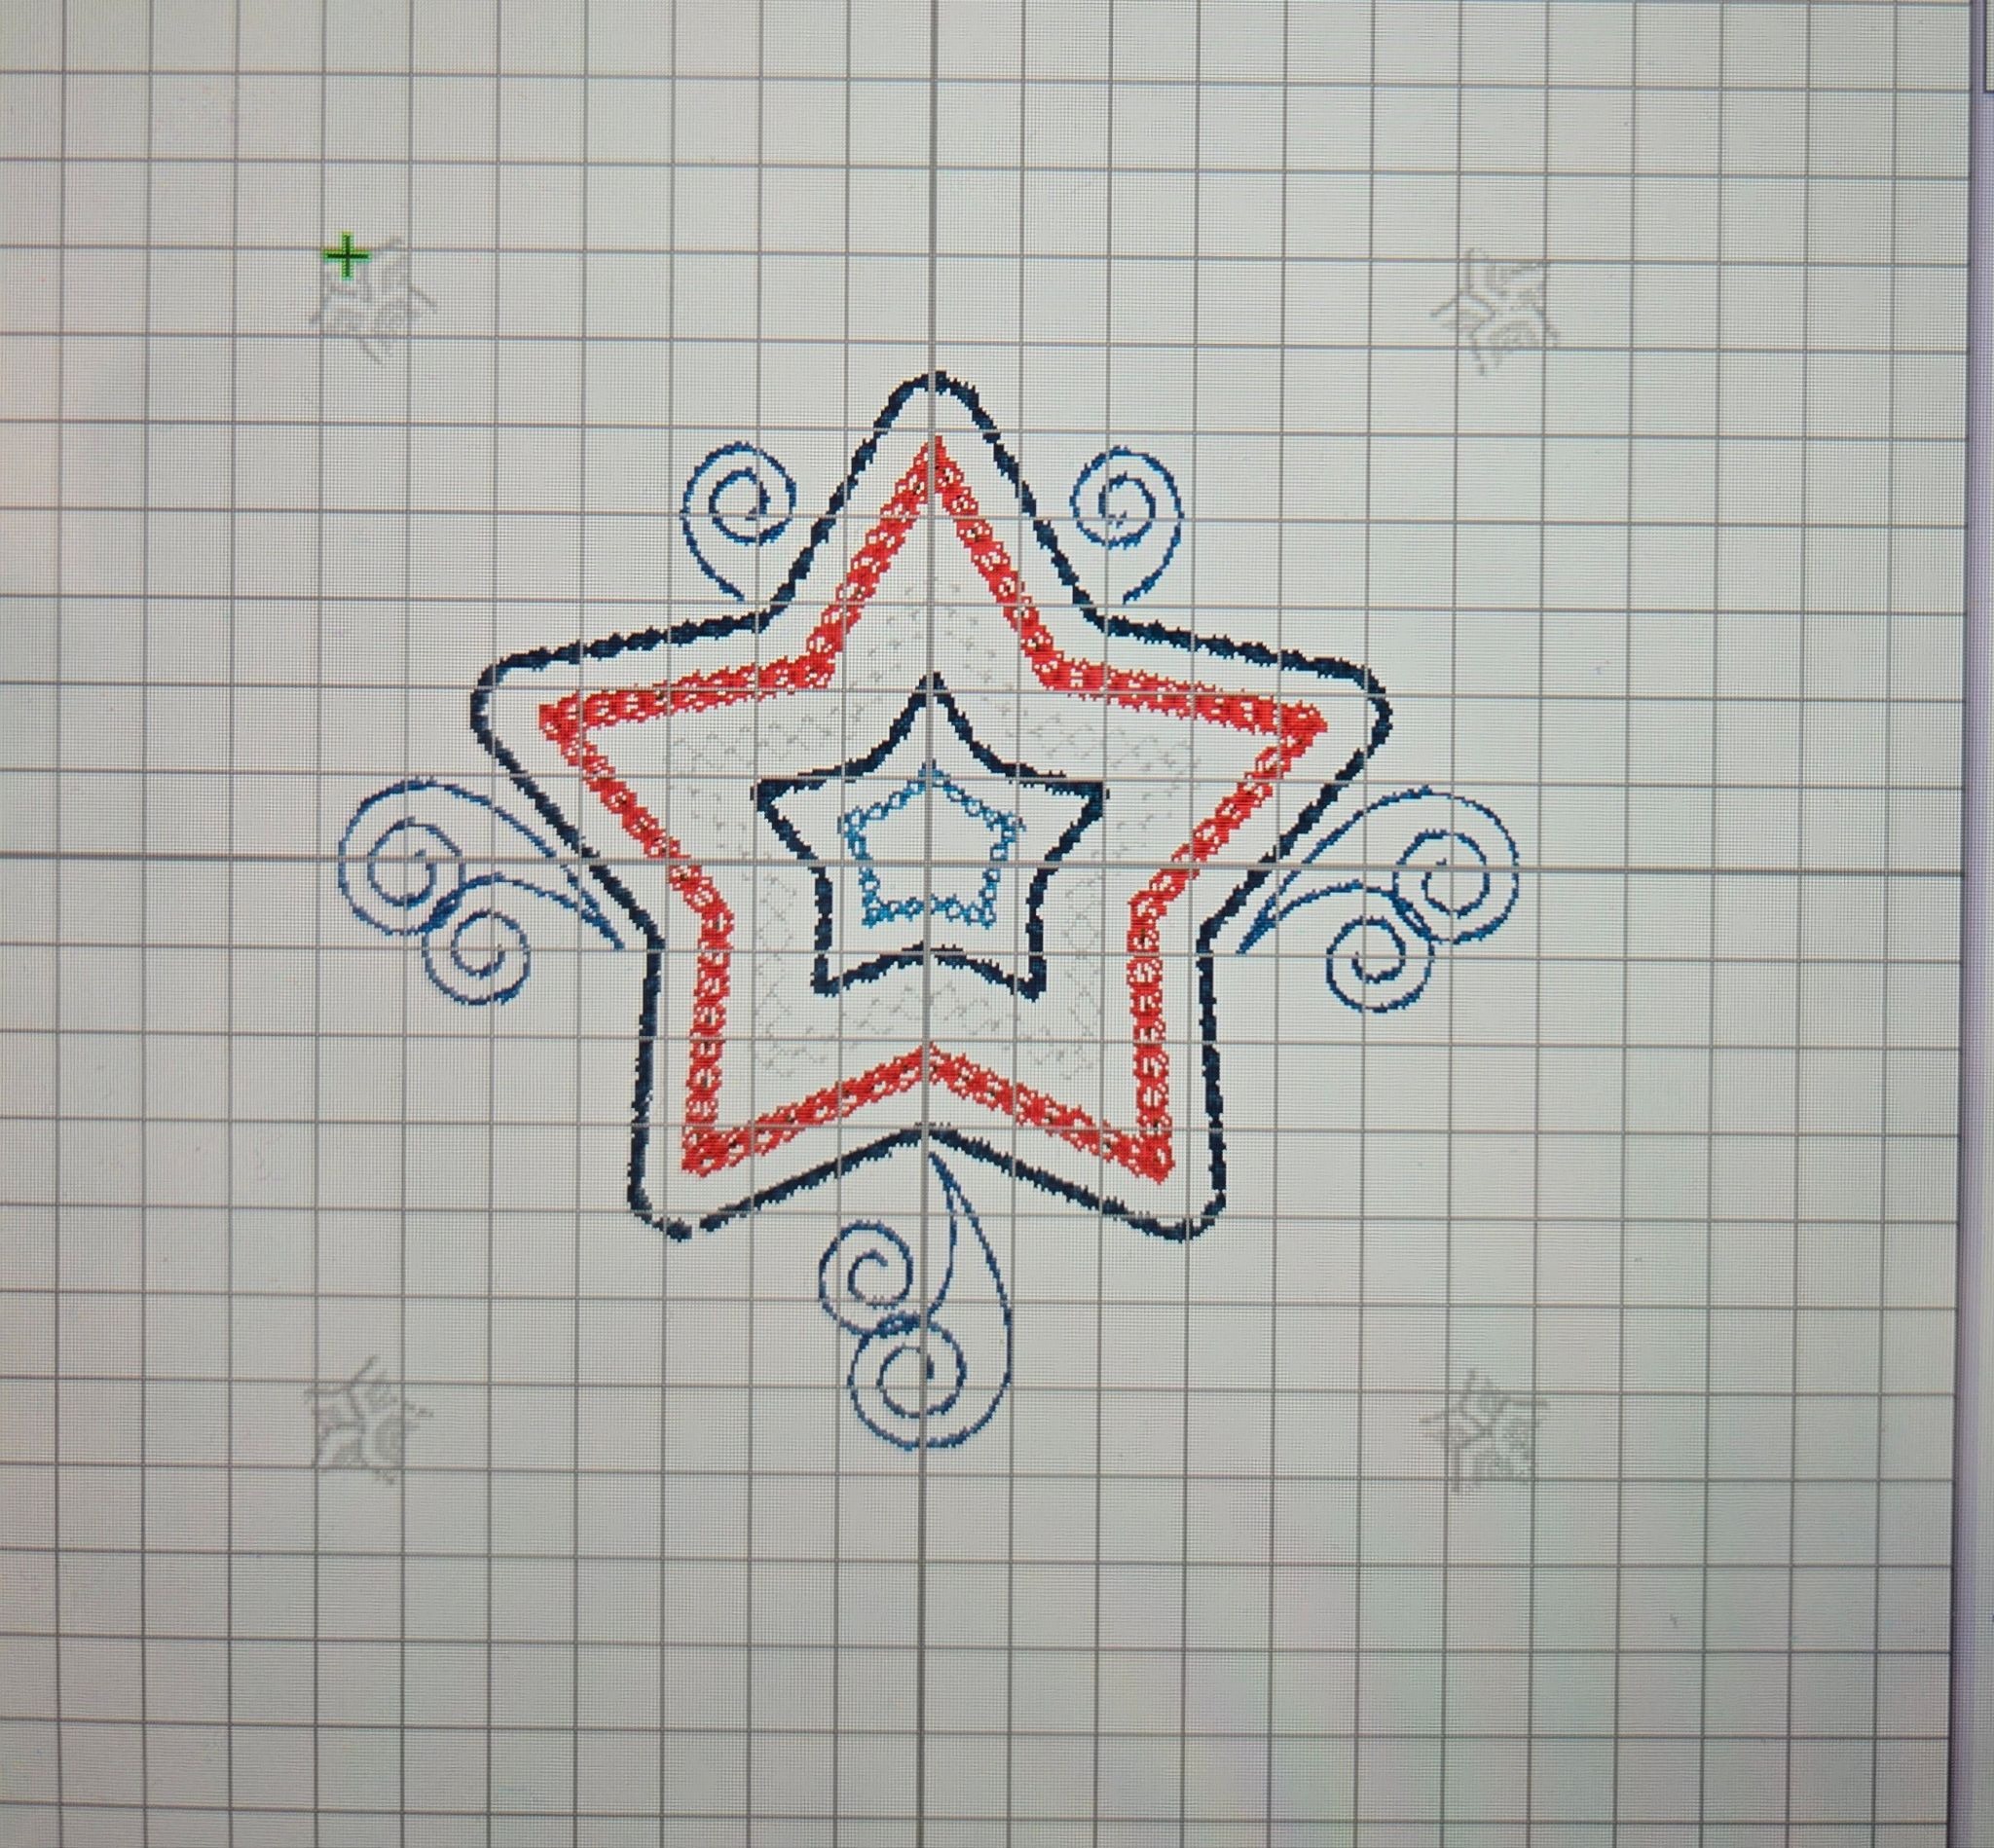
I took the design into my software and removed all the parts I would not be embroidering—the placement and tack-down lines for the batting and the borders around the star. You could also just skip these steps as you are embroidering if you don’t have software.
Slide the piece of tearEZ under the hoop to provide a little more support, and embroider your designs. I hooped and embroidered both fabric pieces the same way.
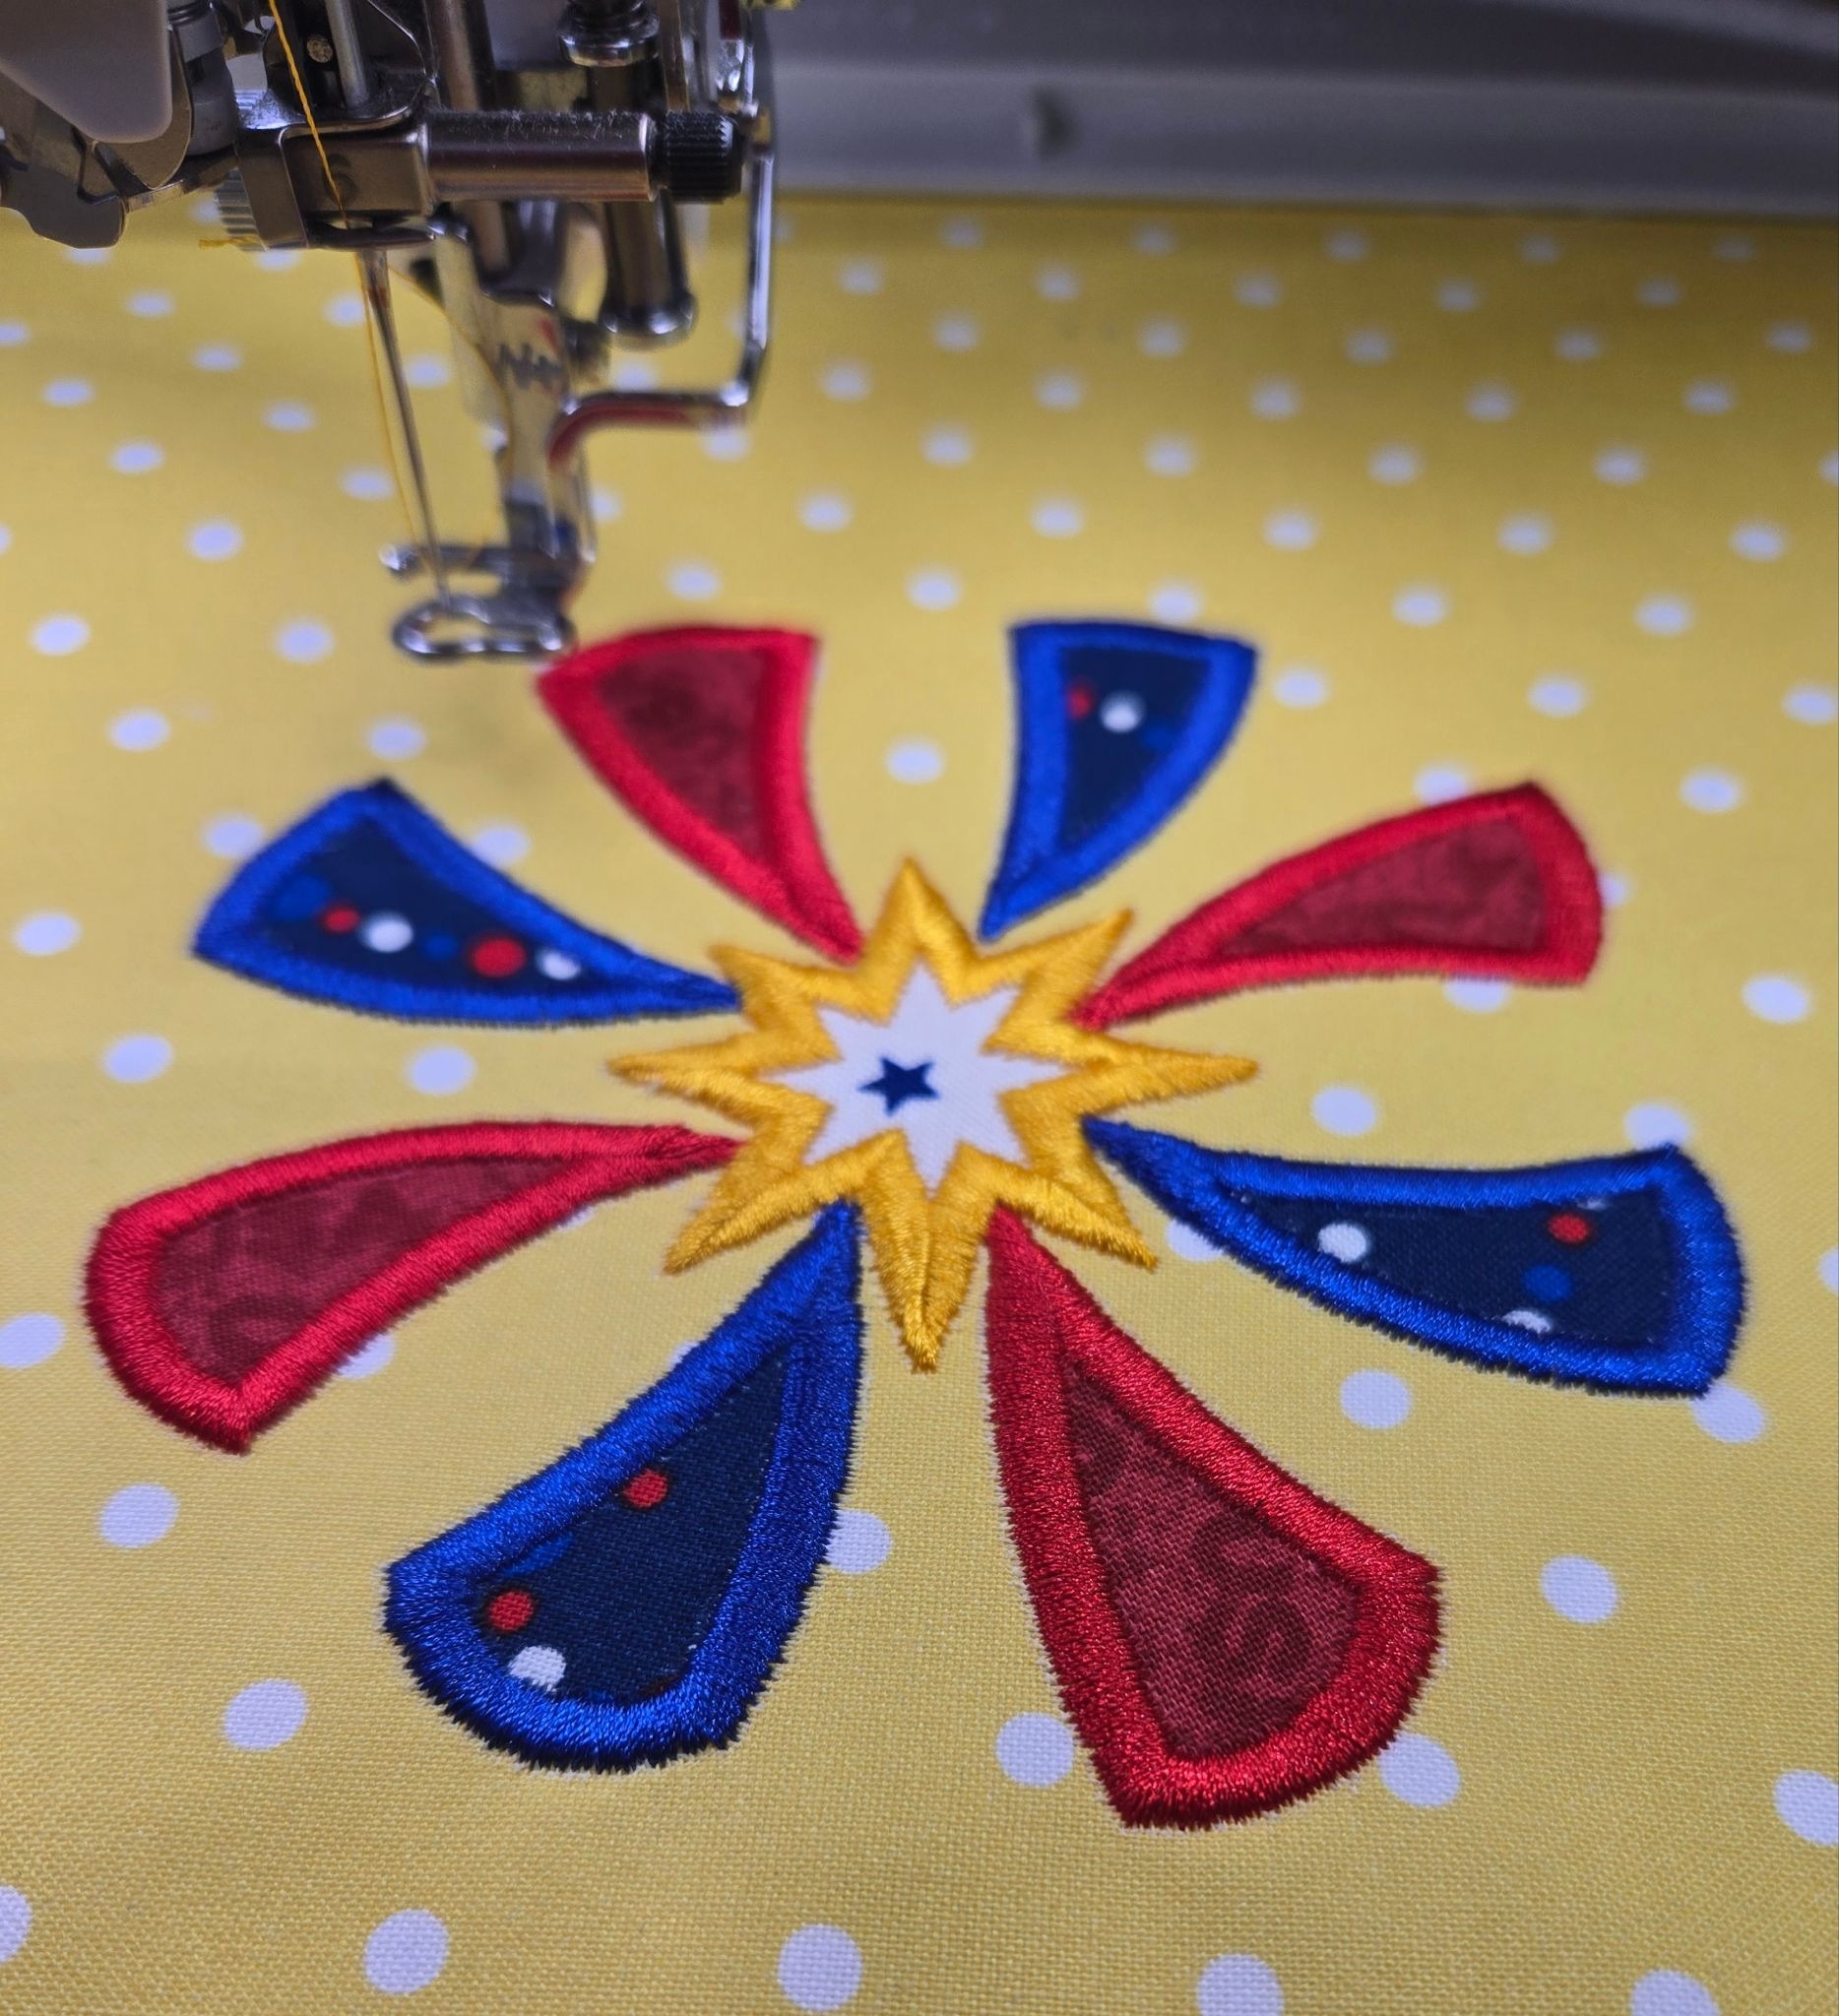
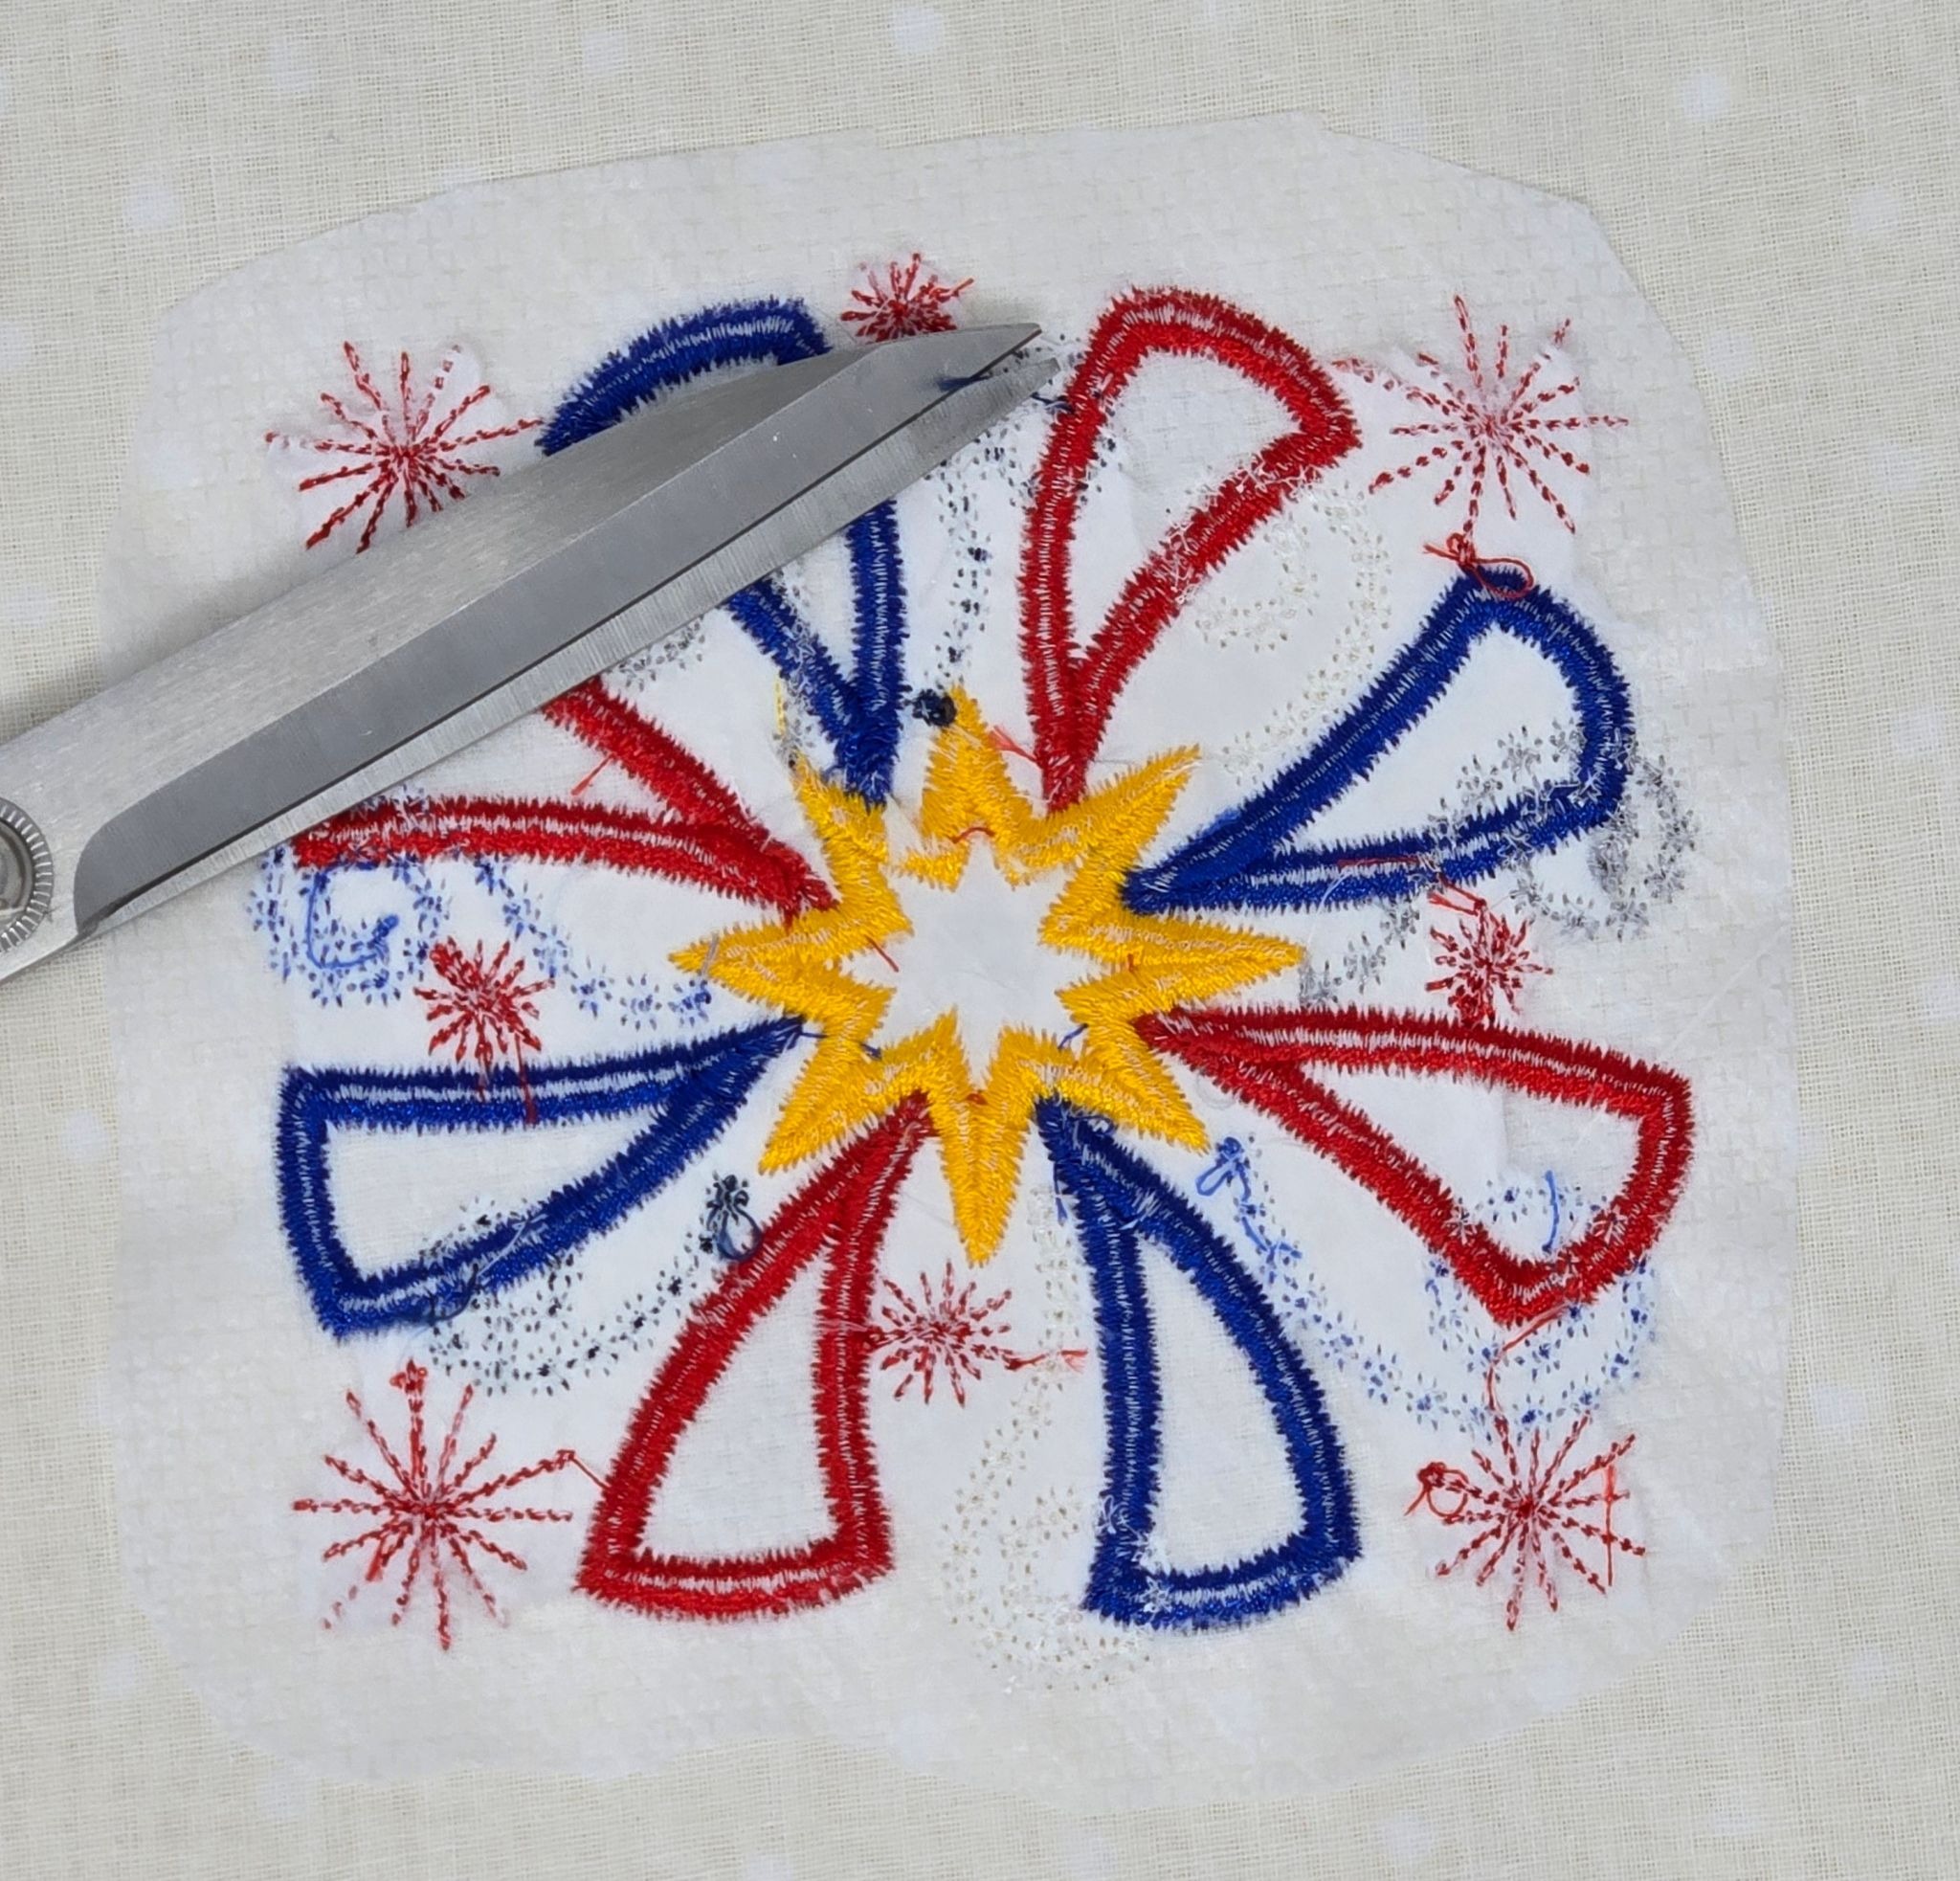
Remove the tearEZ, and trim the magicMESH and thread tails. It is okay if you can’t get all the tearEZ out—it softens with washing. I think it is better to leave it in those tiny spots than risk putting too much stress on the stitches.
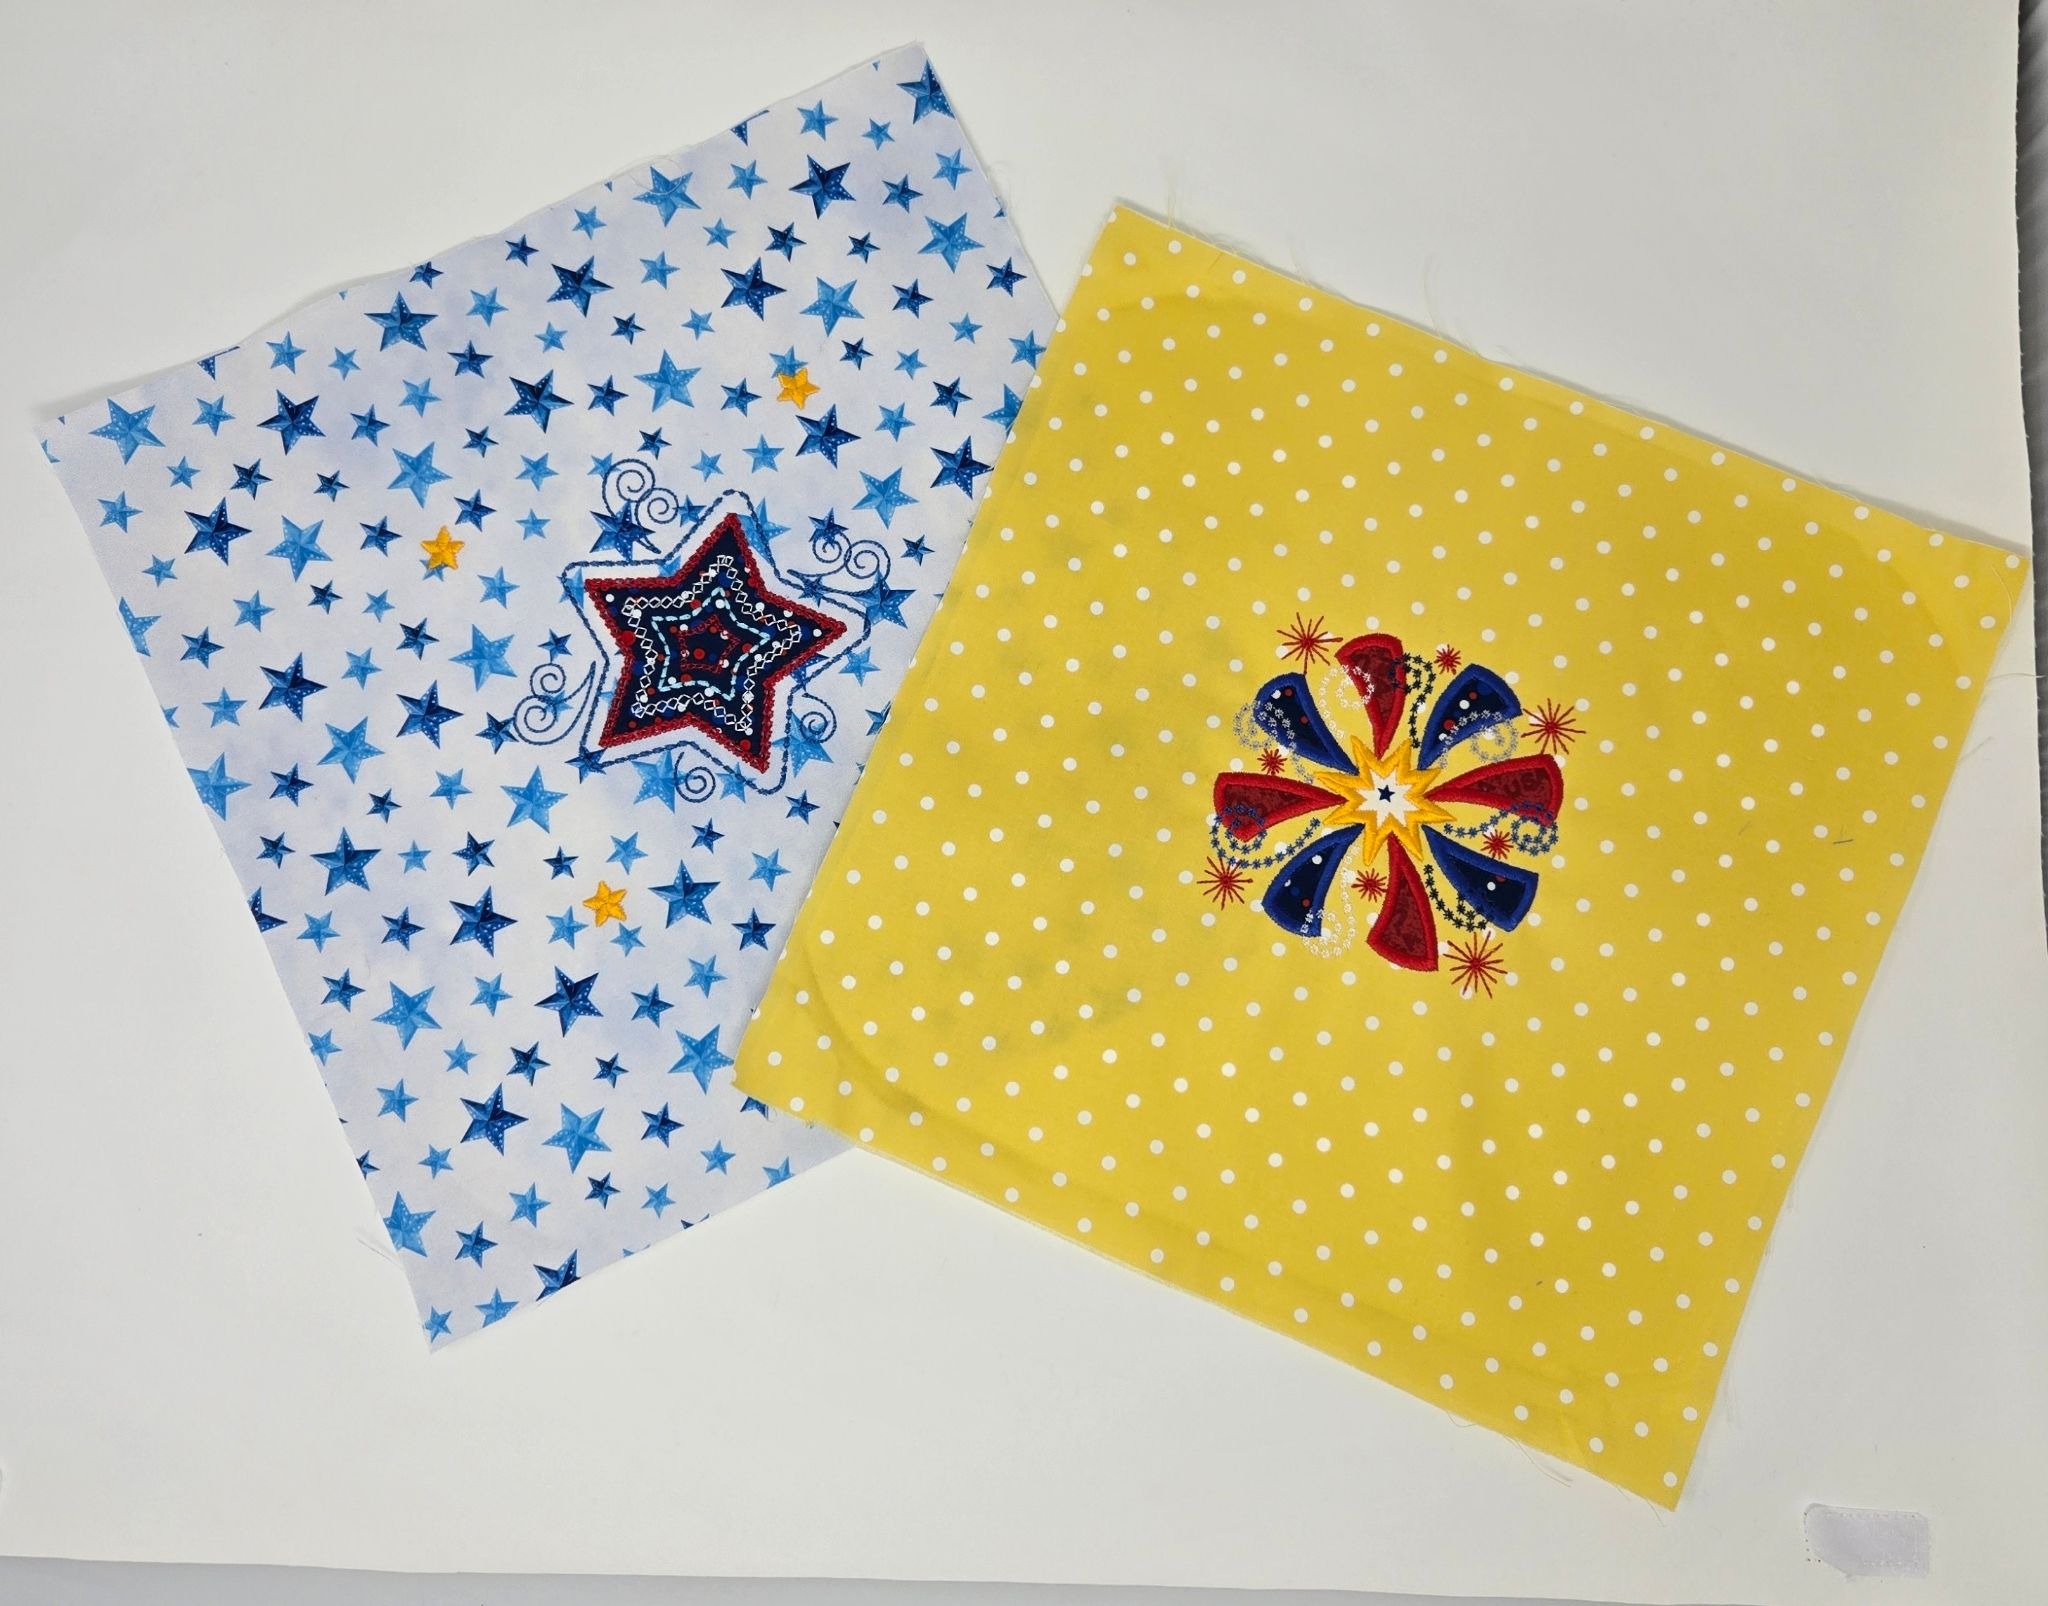
With a warm, dry iron (no steam), press the shiny side of the freezer paper to your embroidered pieces, centering the designs. Trim away excess fabric. Peel it off the cozy front and press it the same way to your quilted backing. Trim the backing fabric to match.
Clip all the darts together. Do both of the four darts on the front of the cozy and the darts on the backs. Sew them with a scant ¼” seam allowance and a 2.0mm stitch length, backstitching a few stitches at the beginning and end of each dart.
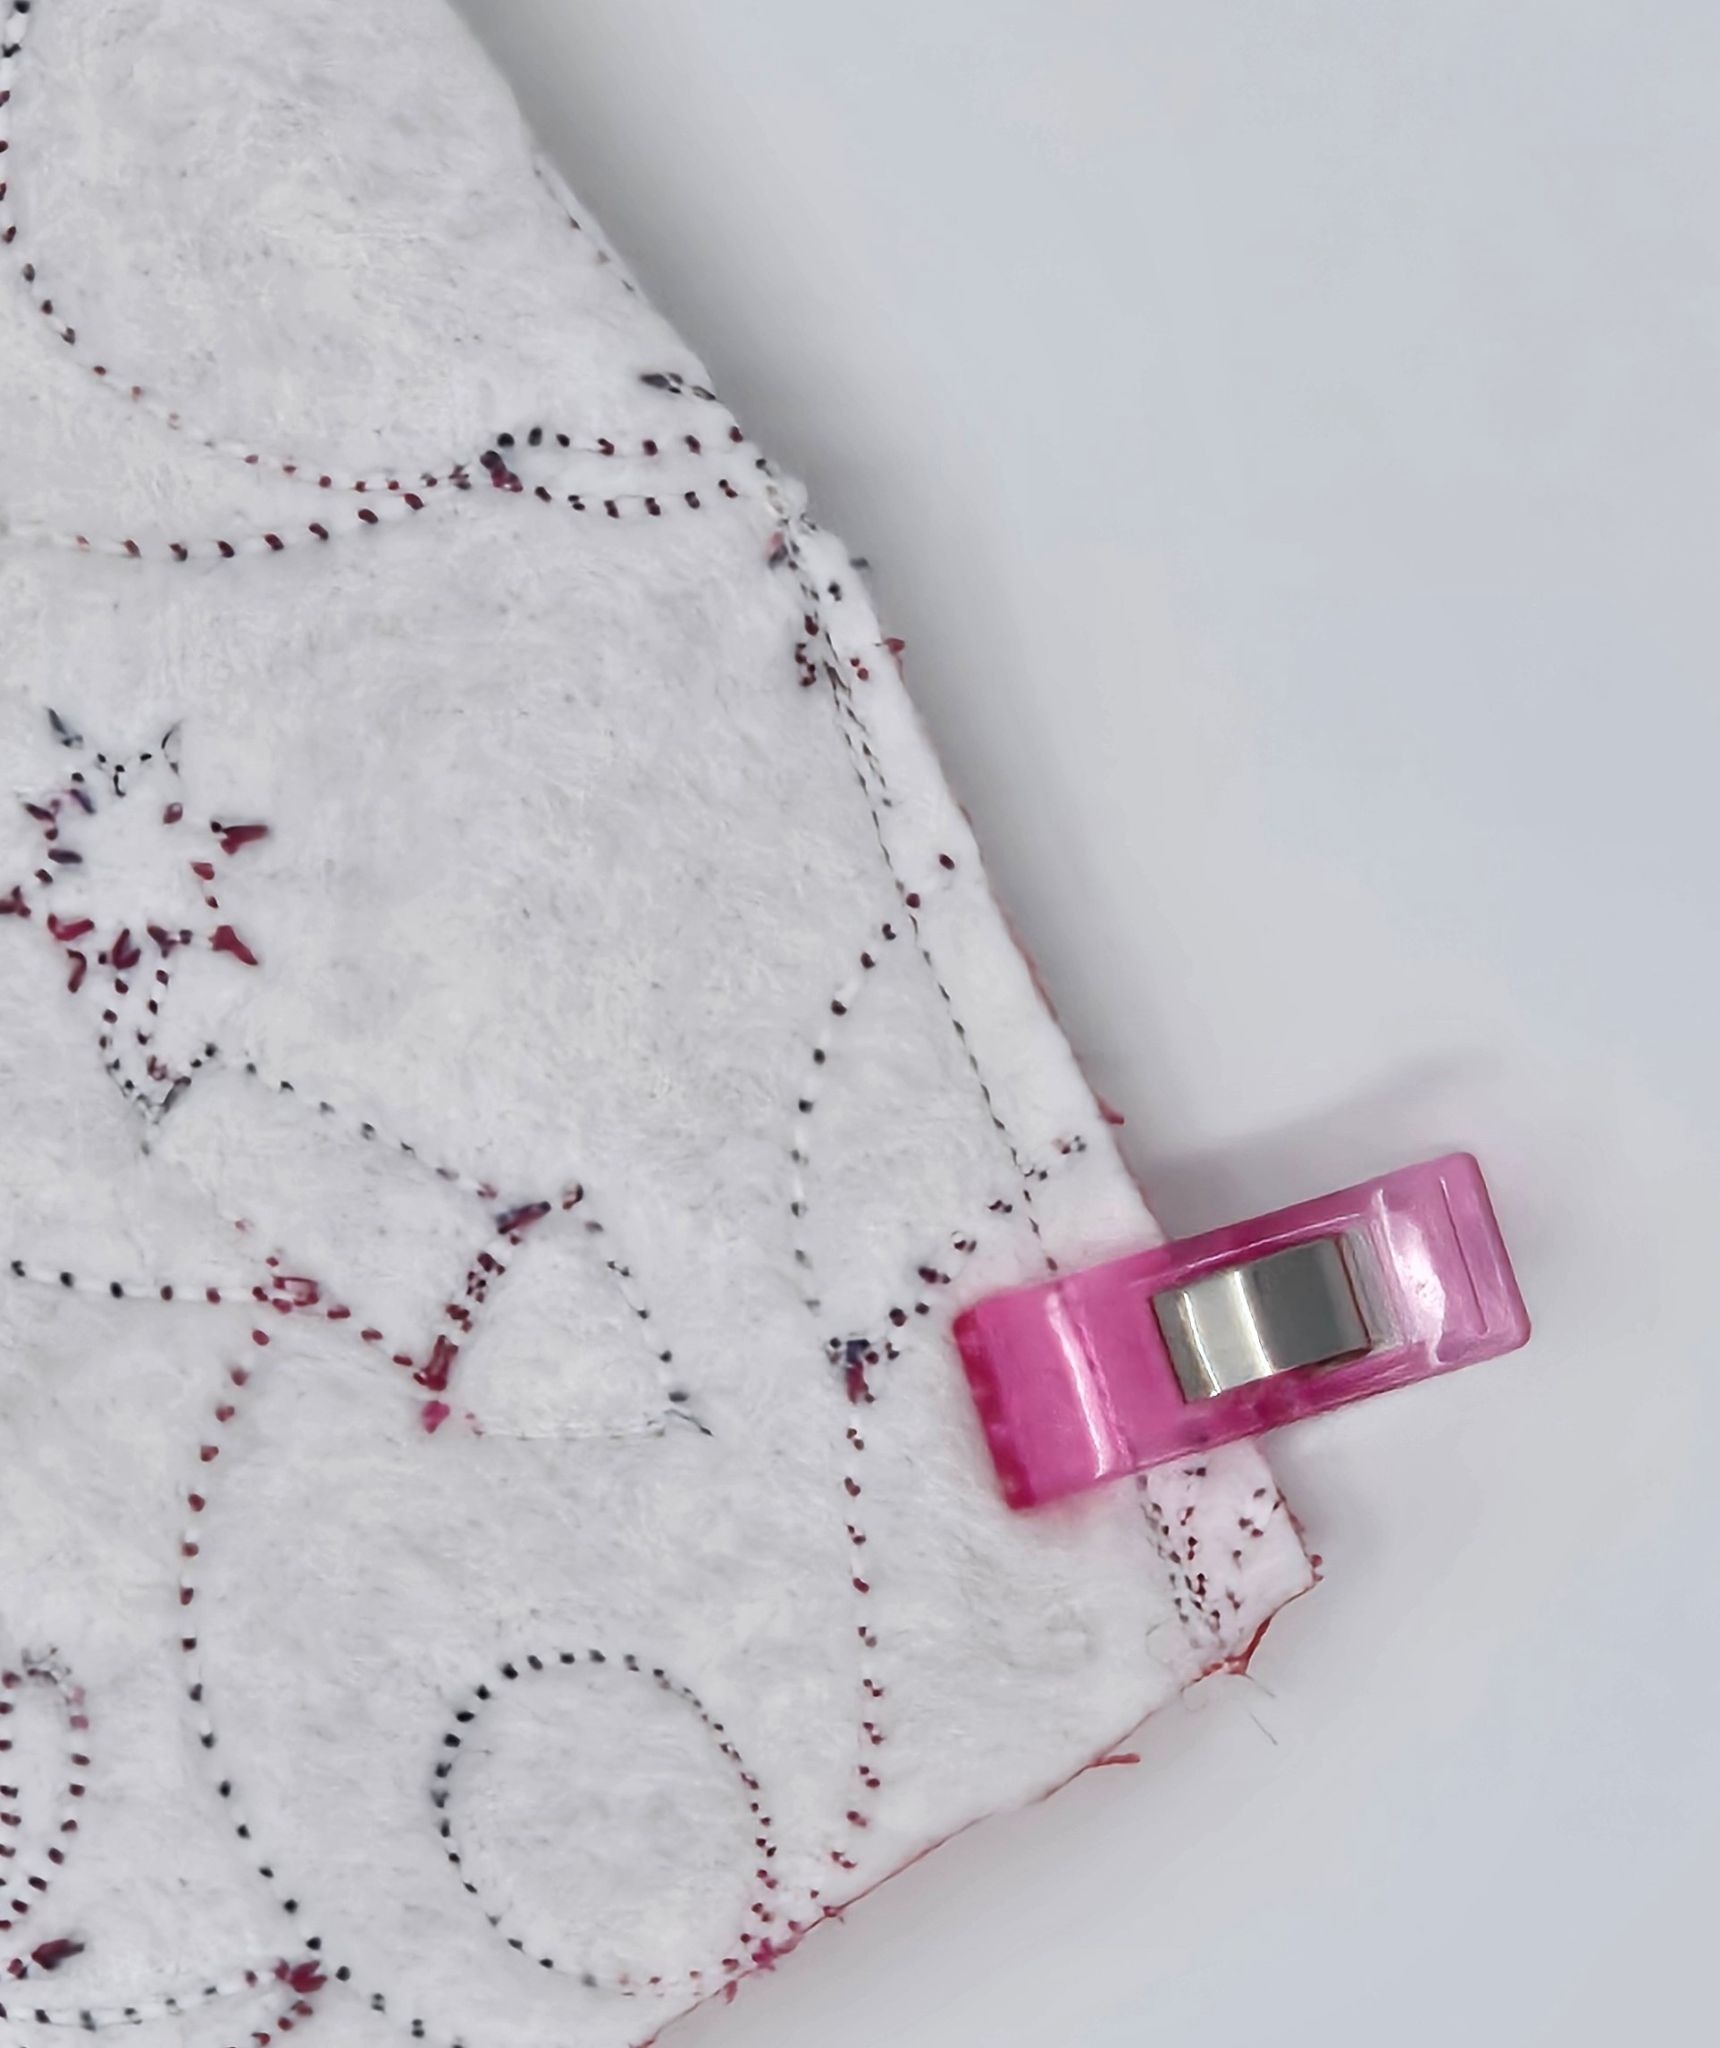
Press all the darts open. Then take the bowl or plate cozy front and match it to its back, right sides together. Pin/clip to match the darts, then the corners. Make a pencil mark to remind yourself to leave an opening for turning. I like to have my opening right after a dart to the beginning of the curve for the side. Sew around the cozy, backstitching at the beginning and end of the seam. I used a generous ¼” seam allowance and increased my stitch length back up to 2.5mm.
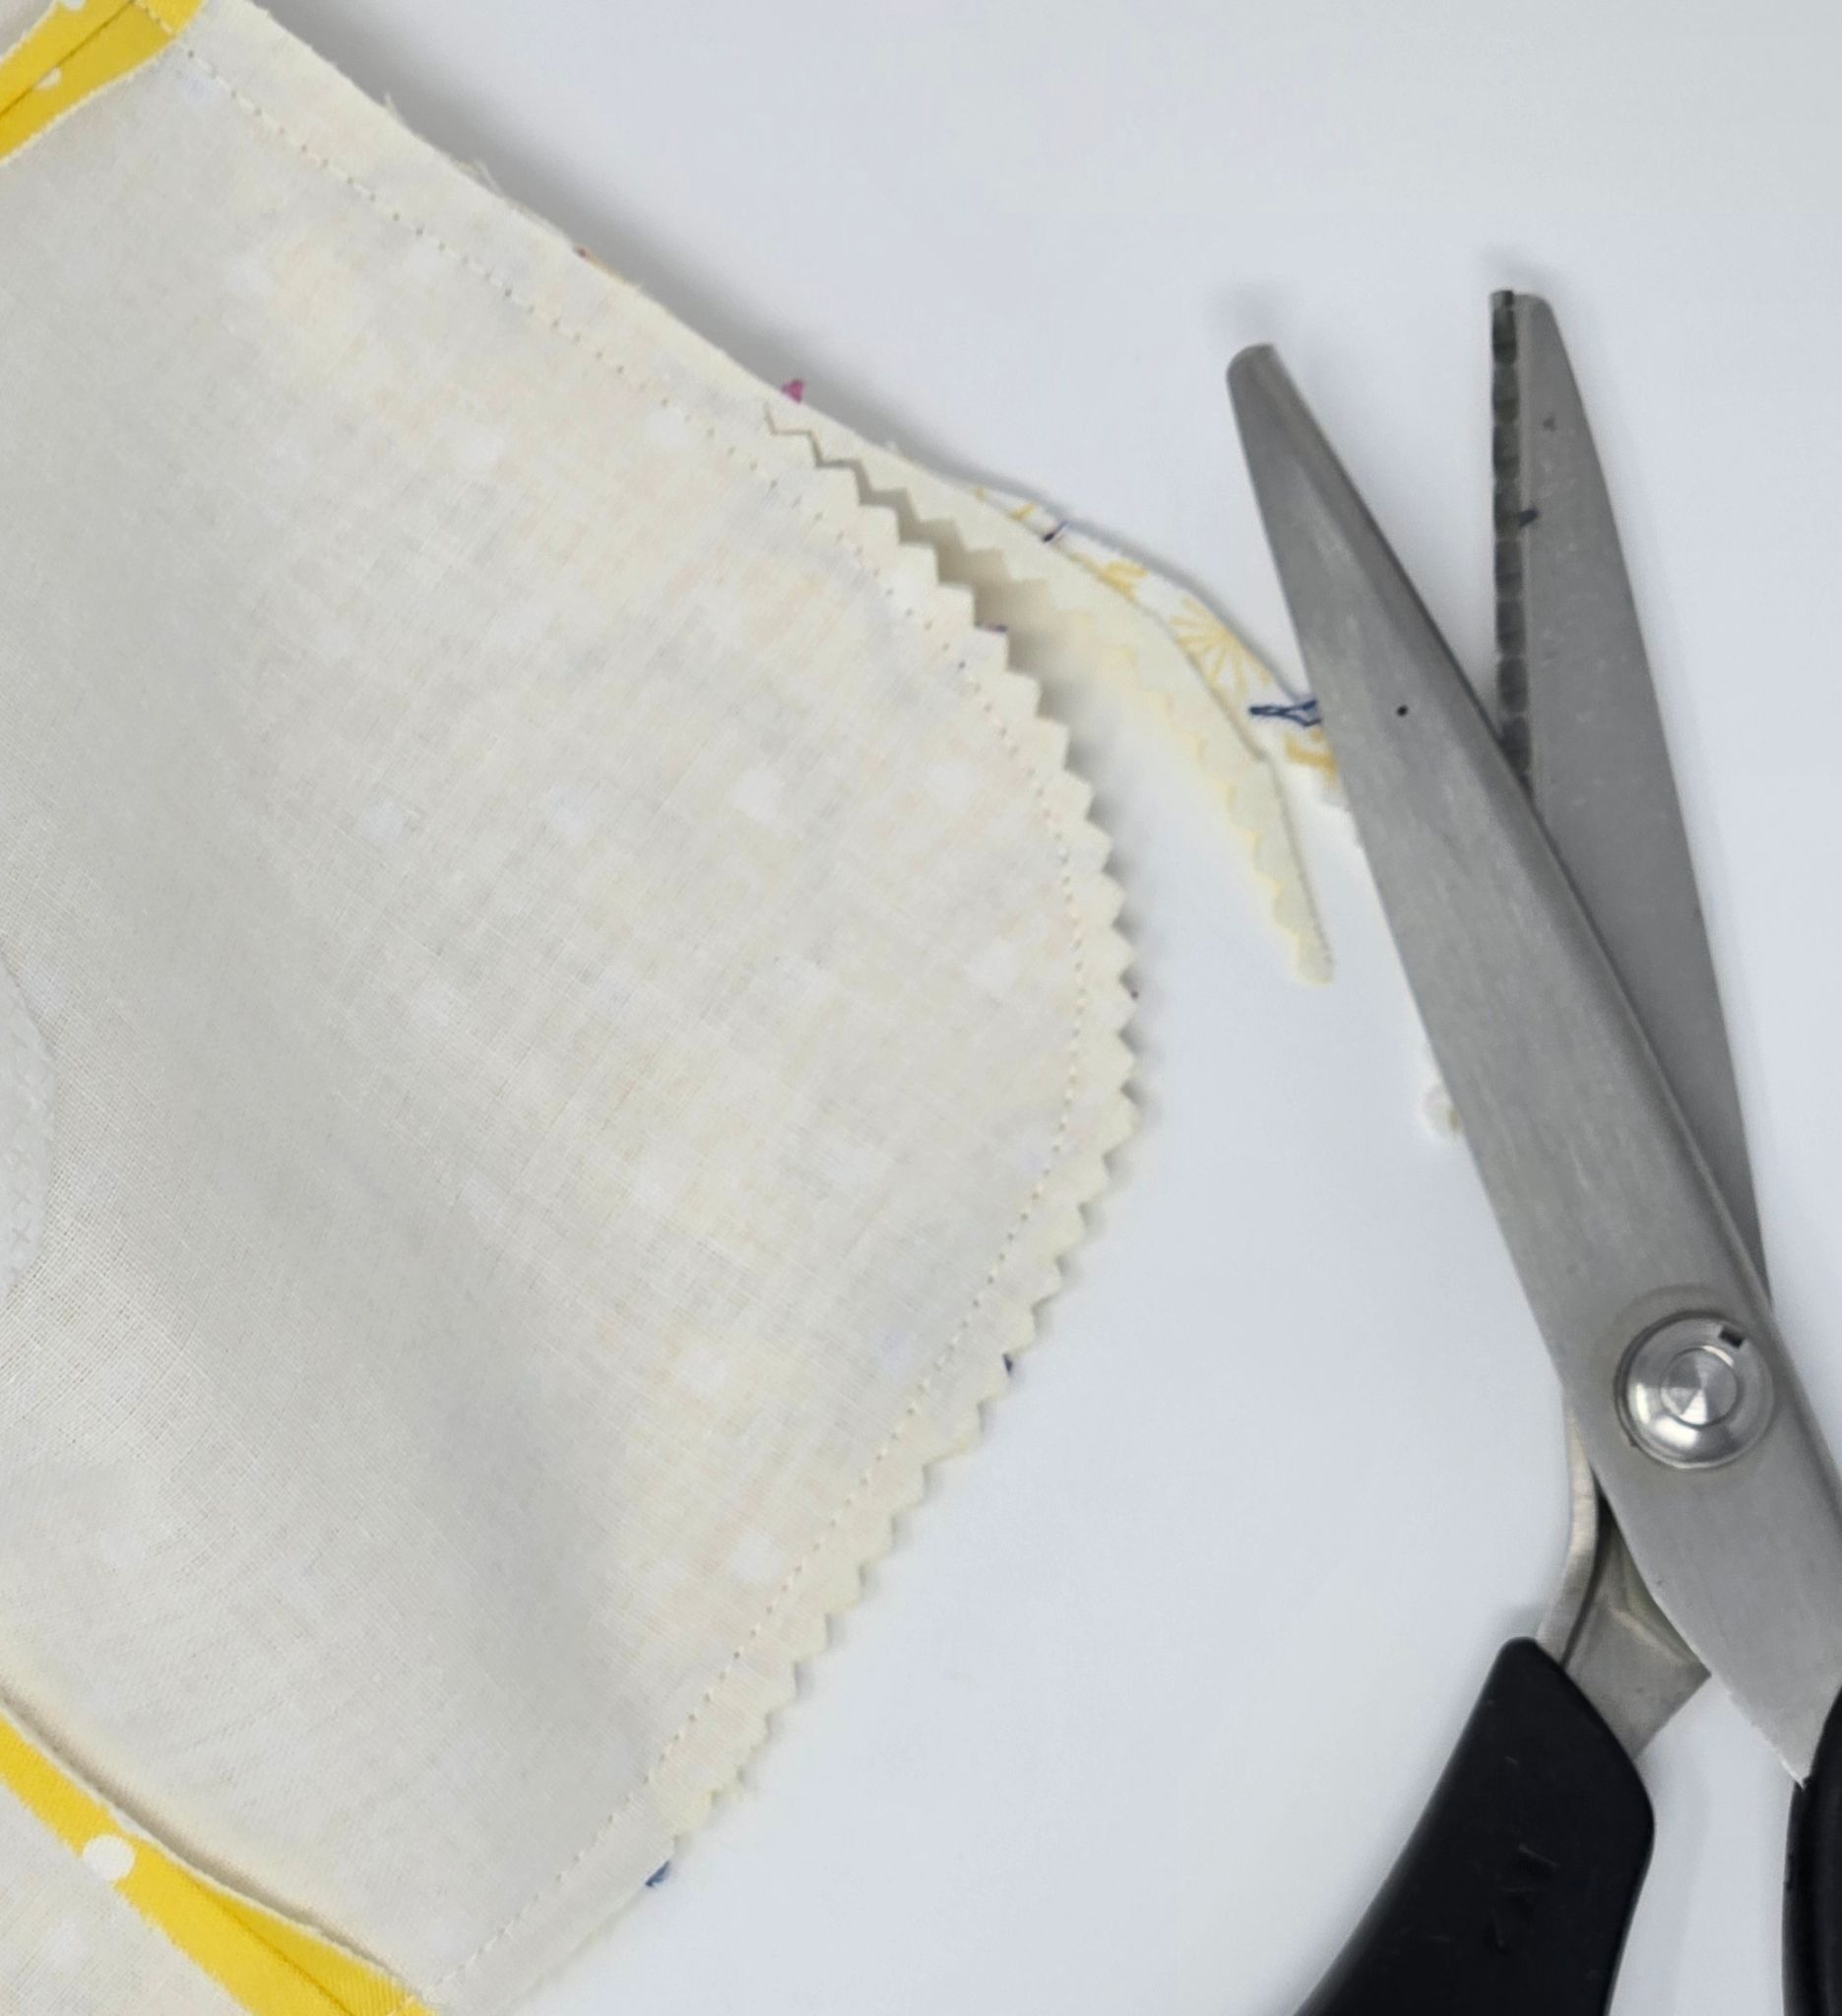
Once sewn, trim the seam allowance close to your stitching. Do NOT trim any seam allowance from the opening left for turning. I like to use my pinking shears, but if you don’t have them, make small clips into the seam allowance only at the rounded corners before trimming, mimicking the cut that pinking shears make.
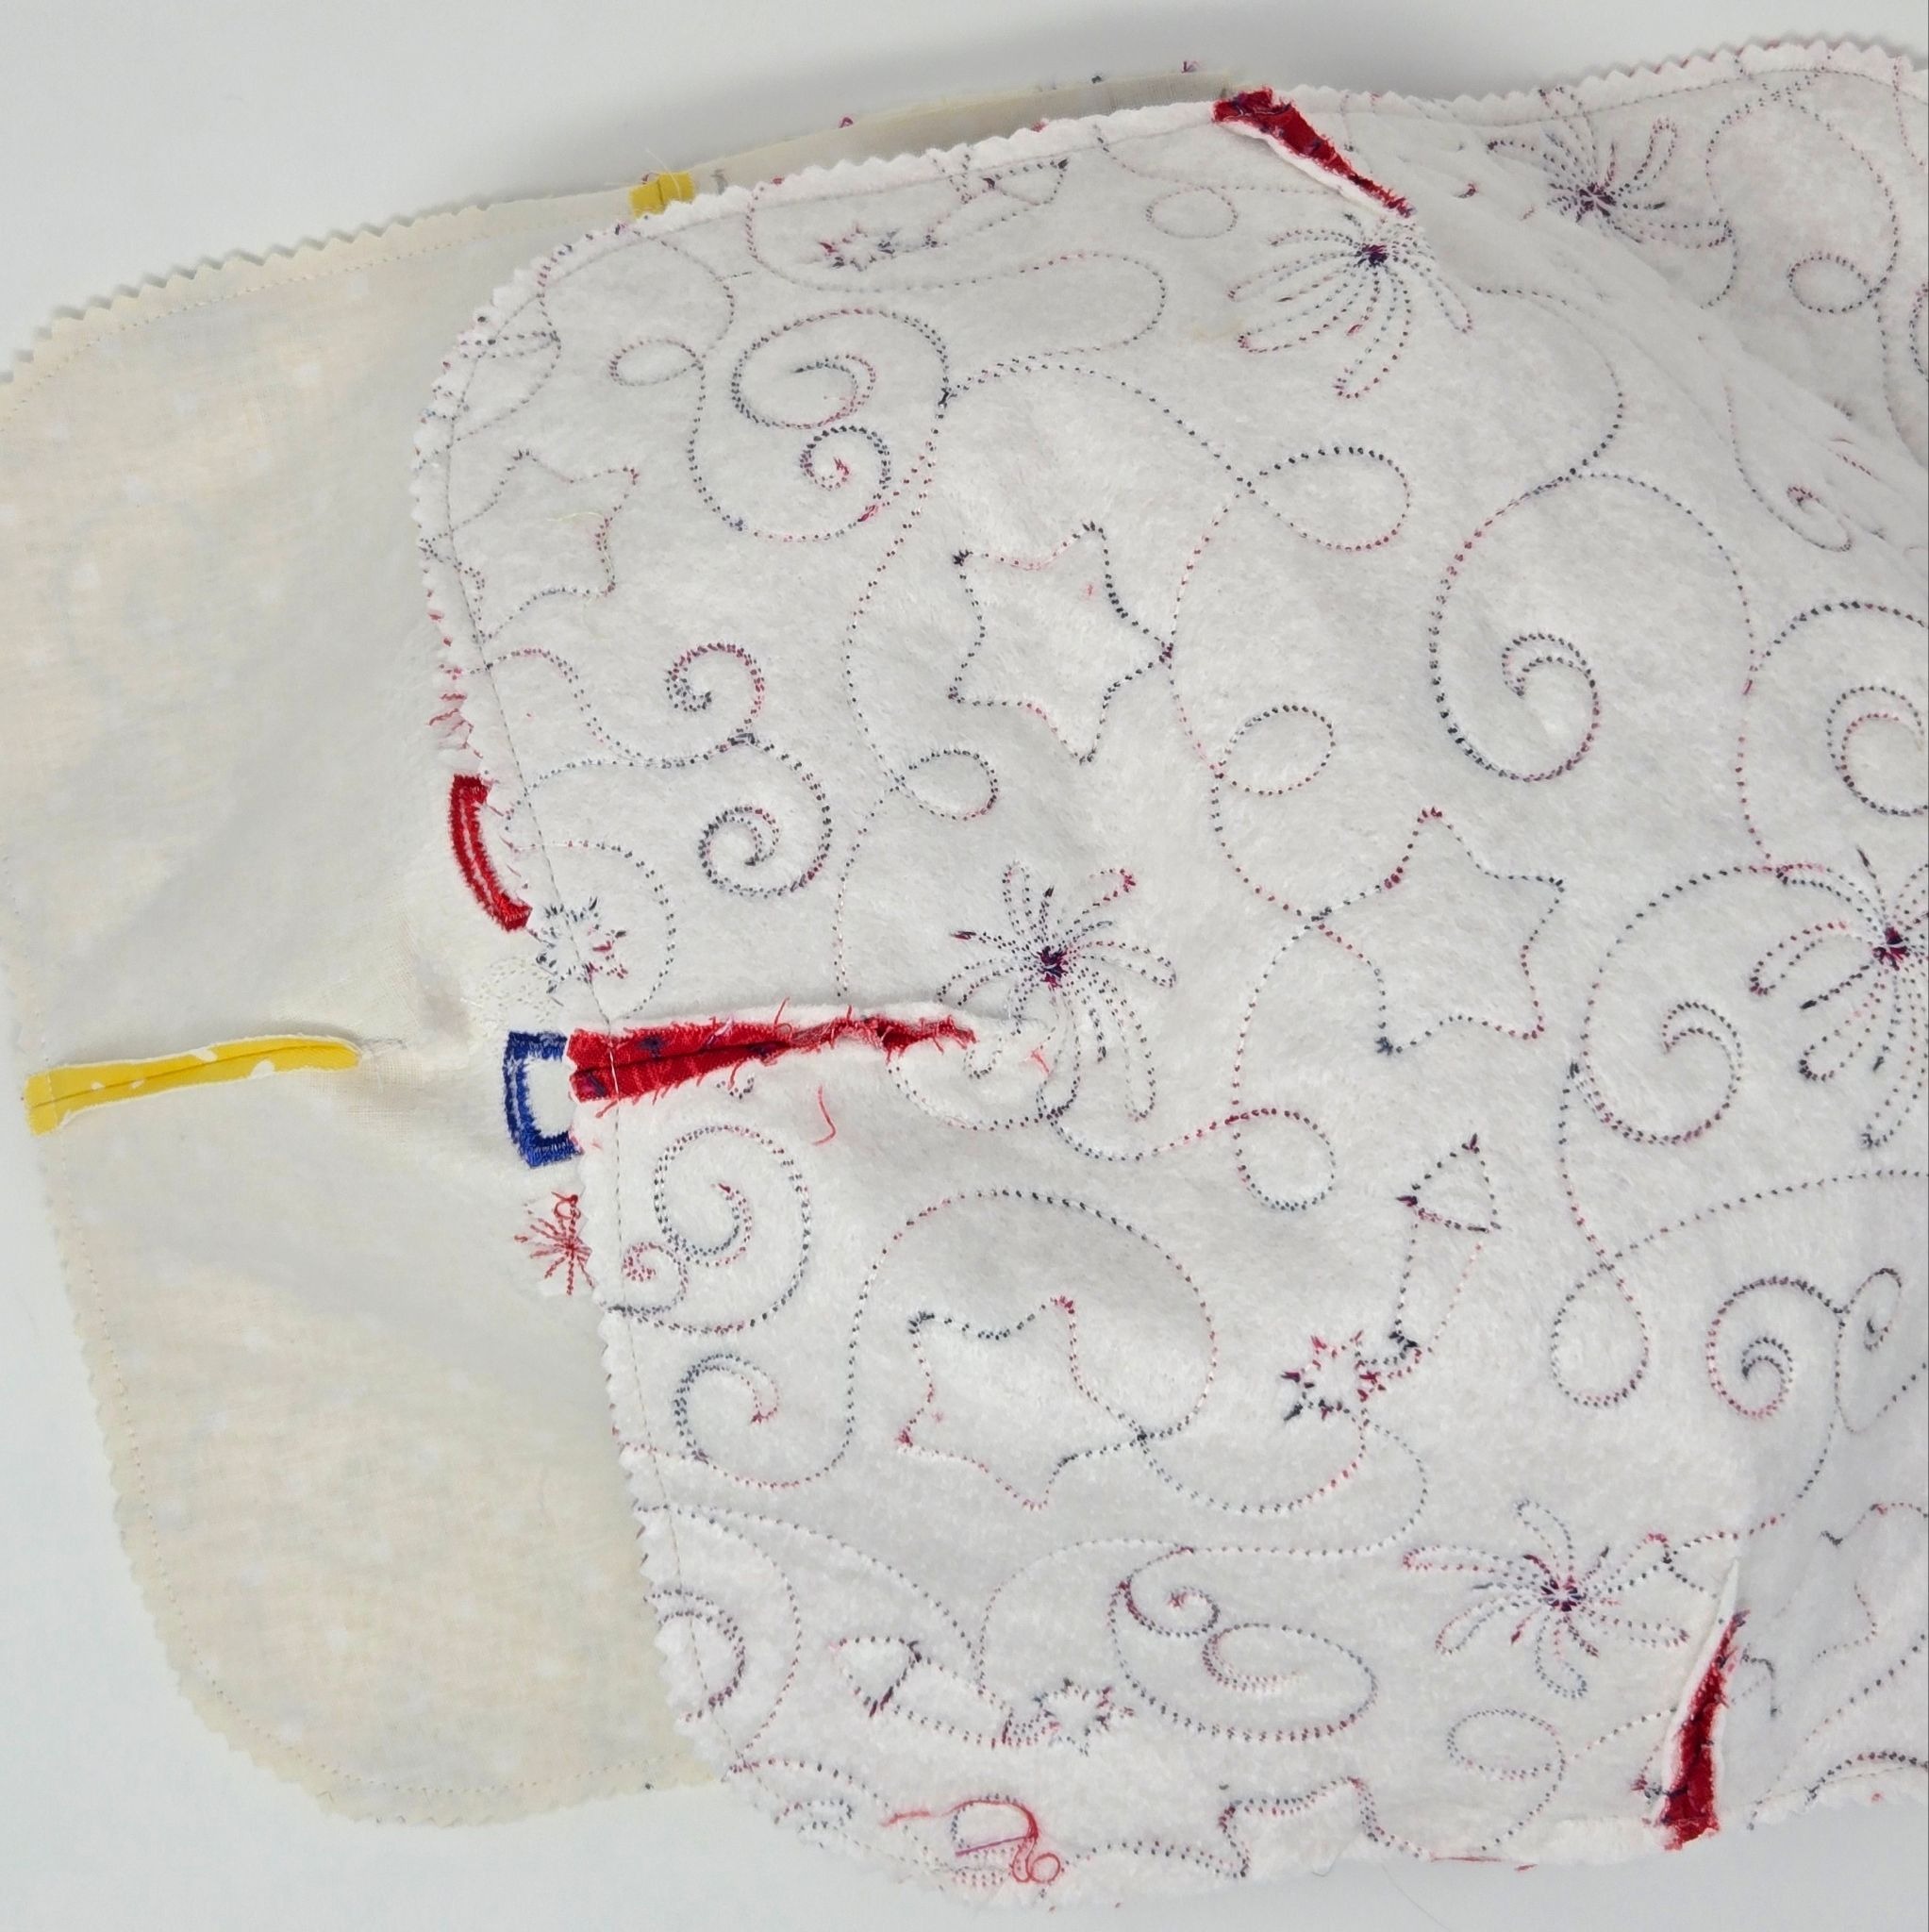
Turn the cozy right side out though the opening you left unsewn. Give it a good press, turning the opening seam allowance to the inside. It should turn much easier because you left it longer. Finally, sew around the outer edge, ⅛” from the edge using a 3.0mm stitch length. I like the longer length for topstitching, but this is personal preference. You will be sewing the opening closed as you stitch around the cozy.


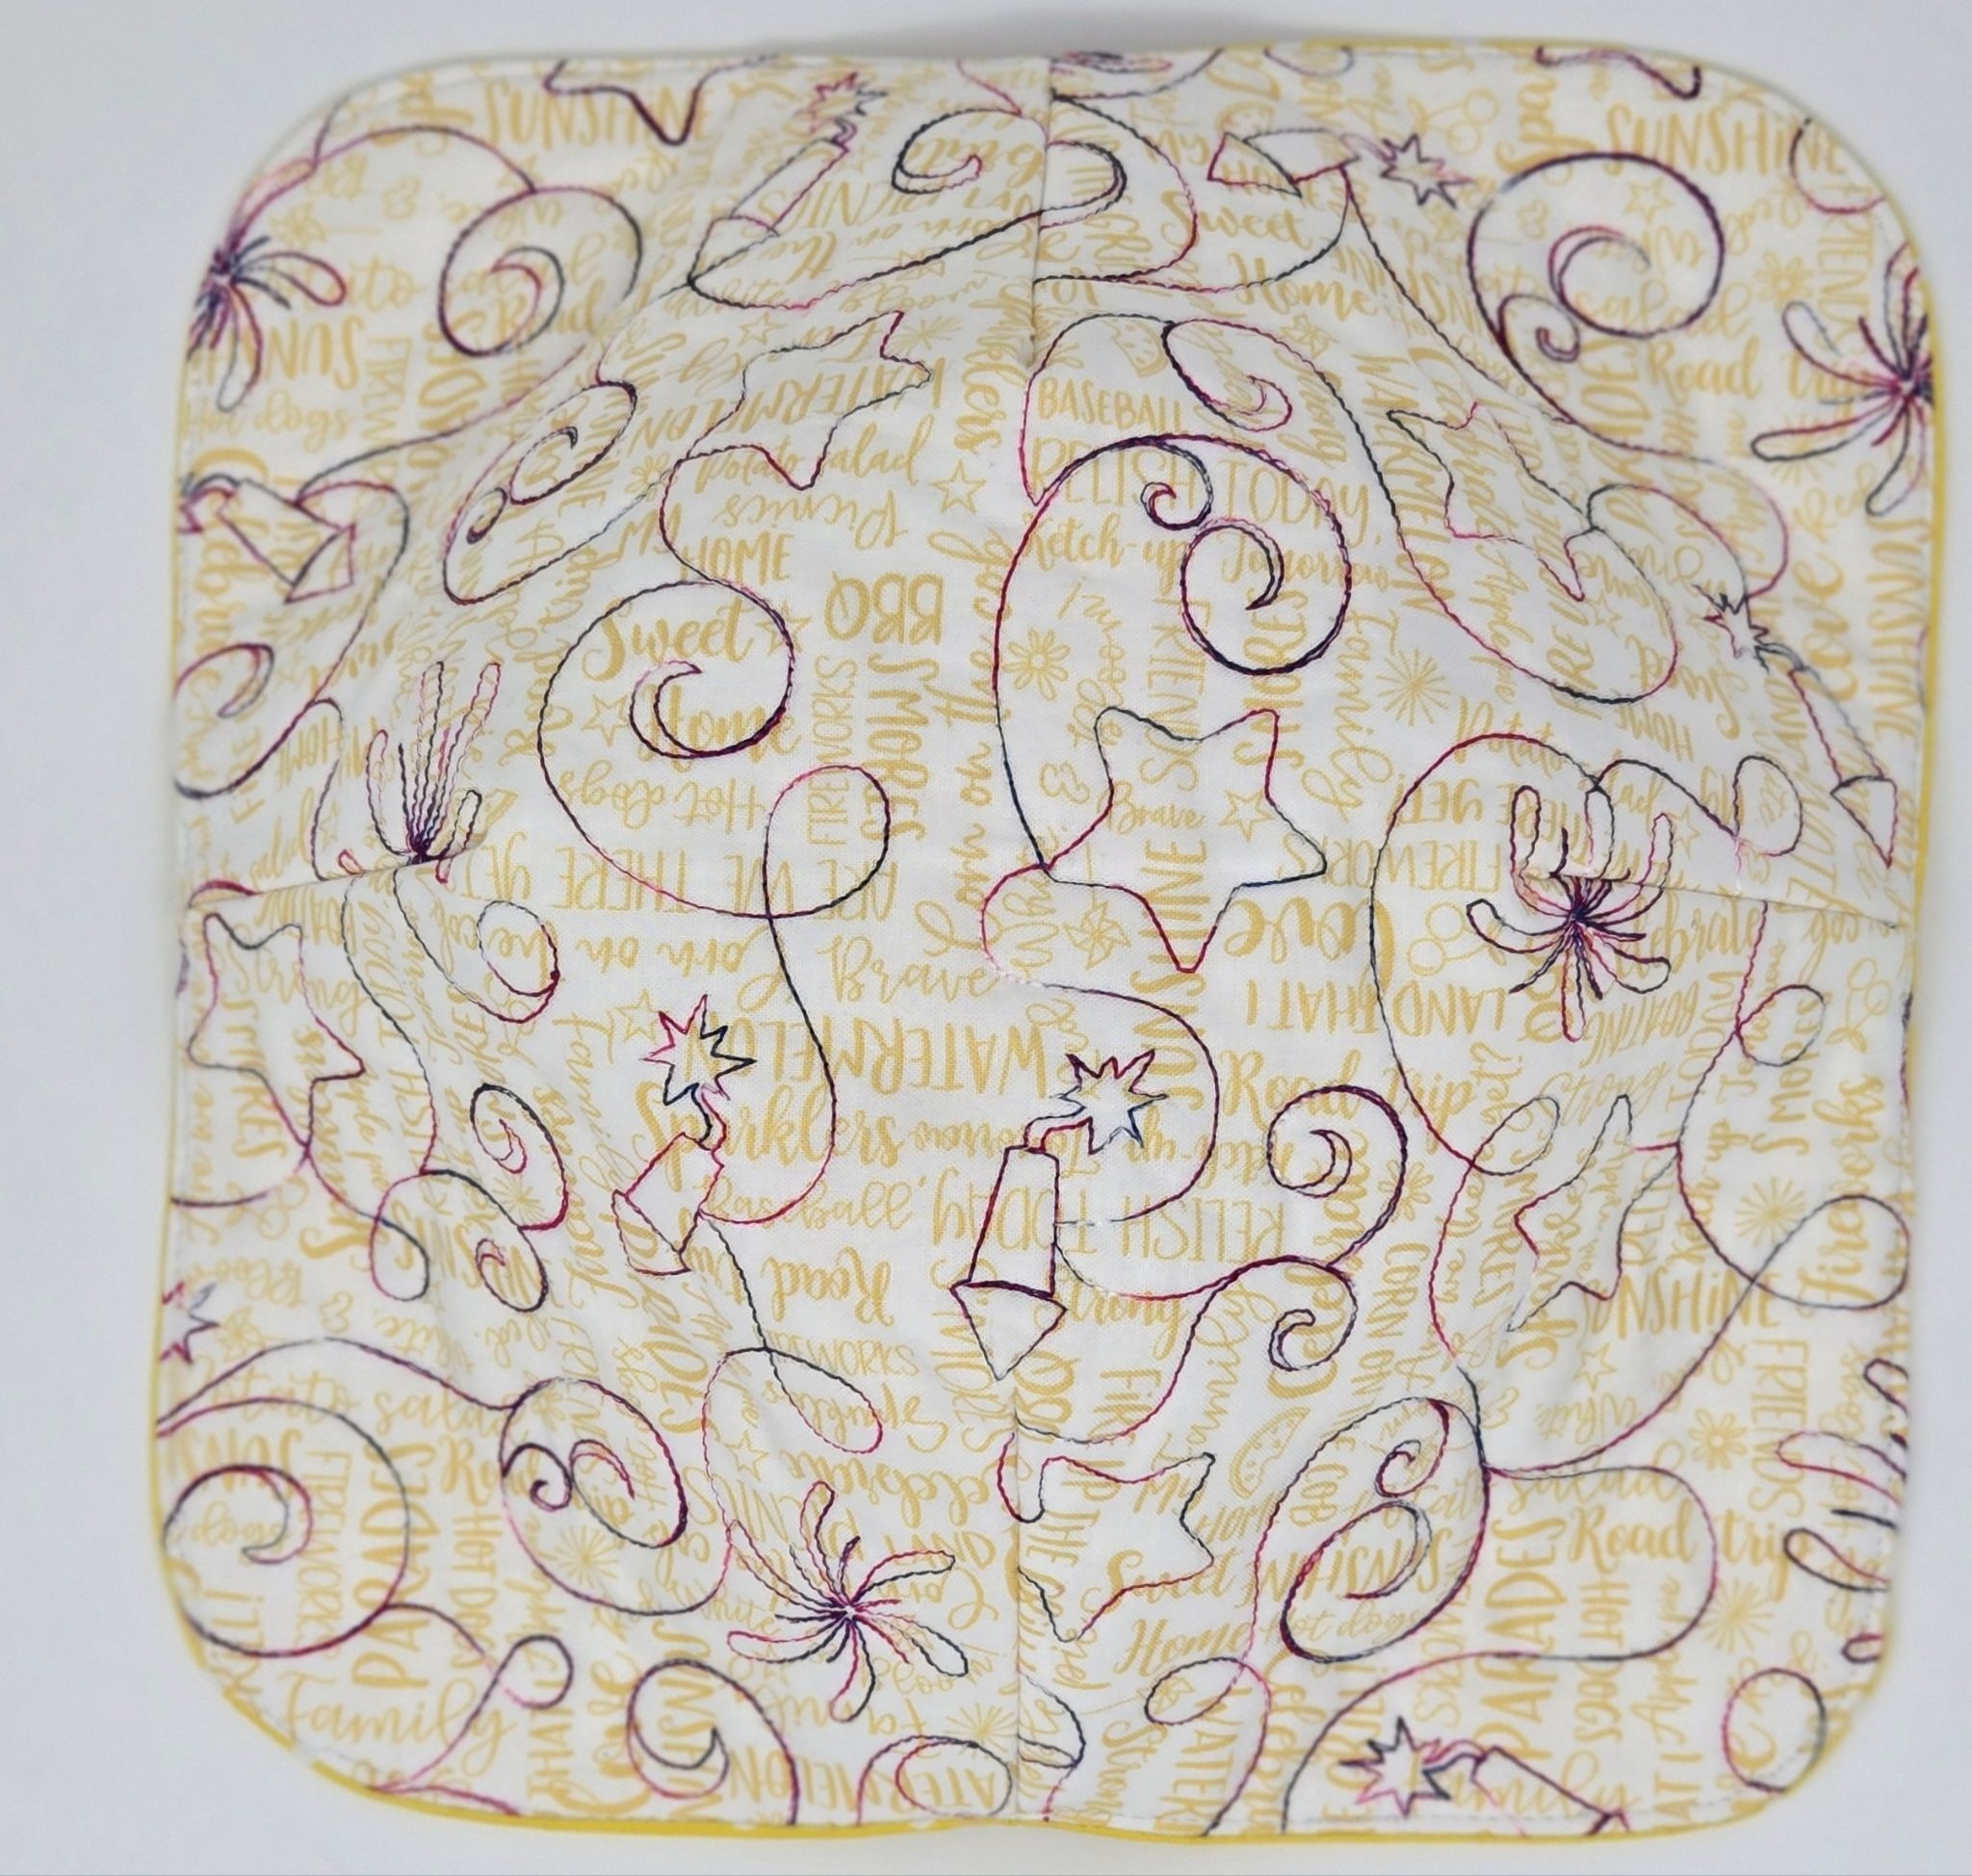
Woohoo! You are finished and ready to add some extra sparkle to your holiday table! Think about what designs you could do for other holidays. Birthday designs? Christmas? JuJu has designs for every holiday and season. Go have some fun!
Be sure to share your projects in the Designs by JuJu Embroidery Blessings Facebook Group, or use the hashtag #designsbyjuju anywhere on social media. We all love to see what you create!
