Toggle Nav
 Inspire.
Create.
Stitch.
Inspire.
Create.
Stitch.
Search
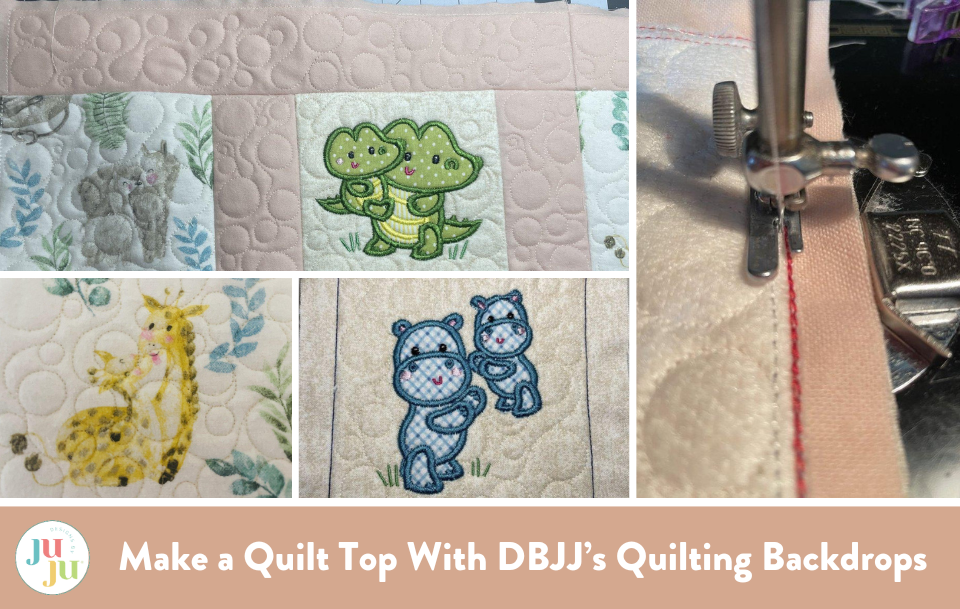
Quilting just got a whole lot easier with Designs By JuJu’s new quilt-as-you-go system, Quilting Backdrops! This innovative approach makes it simple to create stunning quilted pieces quickly and effortlessly.
In this tutorial, I’ll guide you through using the Quilting Backdrops system step by step to create a quilt top. Get ready to dive into the world of easy and fun quilting!
To begin, there are 4 steps to each block:
I will go over each of these steps, one at a time, so you can familiarize yourself with them before we begin the quilt top. Each design comes with In-The-Hoop (ITH), Quilt-As-You-Go (QAYG) files, and edge-to-edge (hoop filler) files.
I am using a Brother Dream Machine, so your screen may vary if you’re using a different embroidery machine or software.
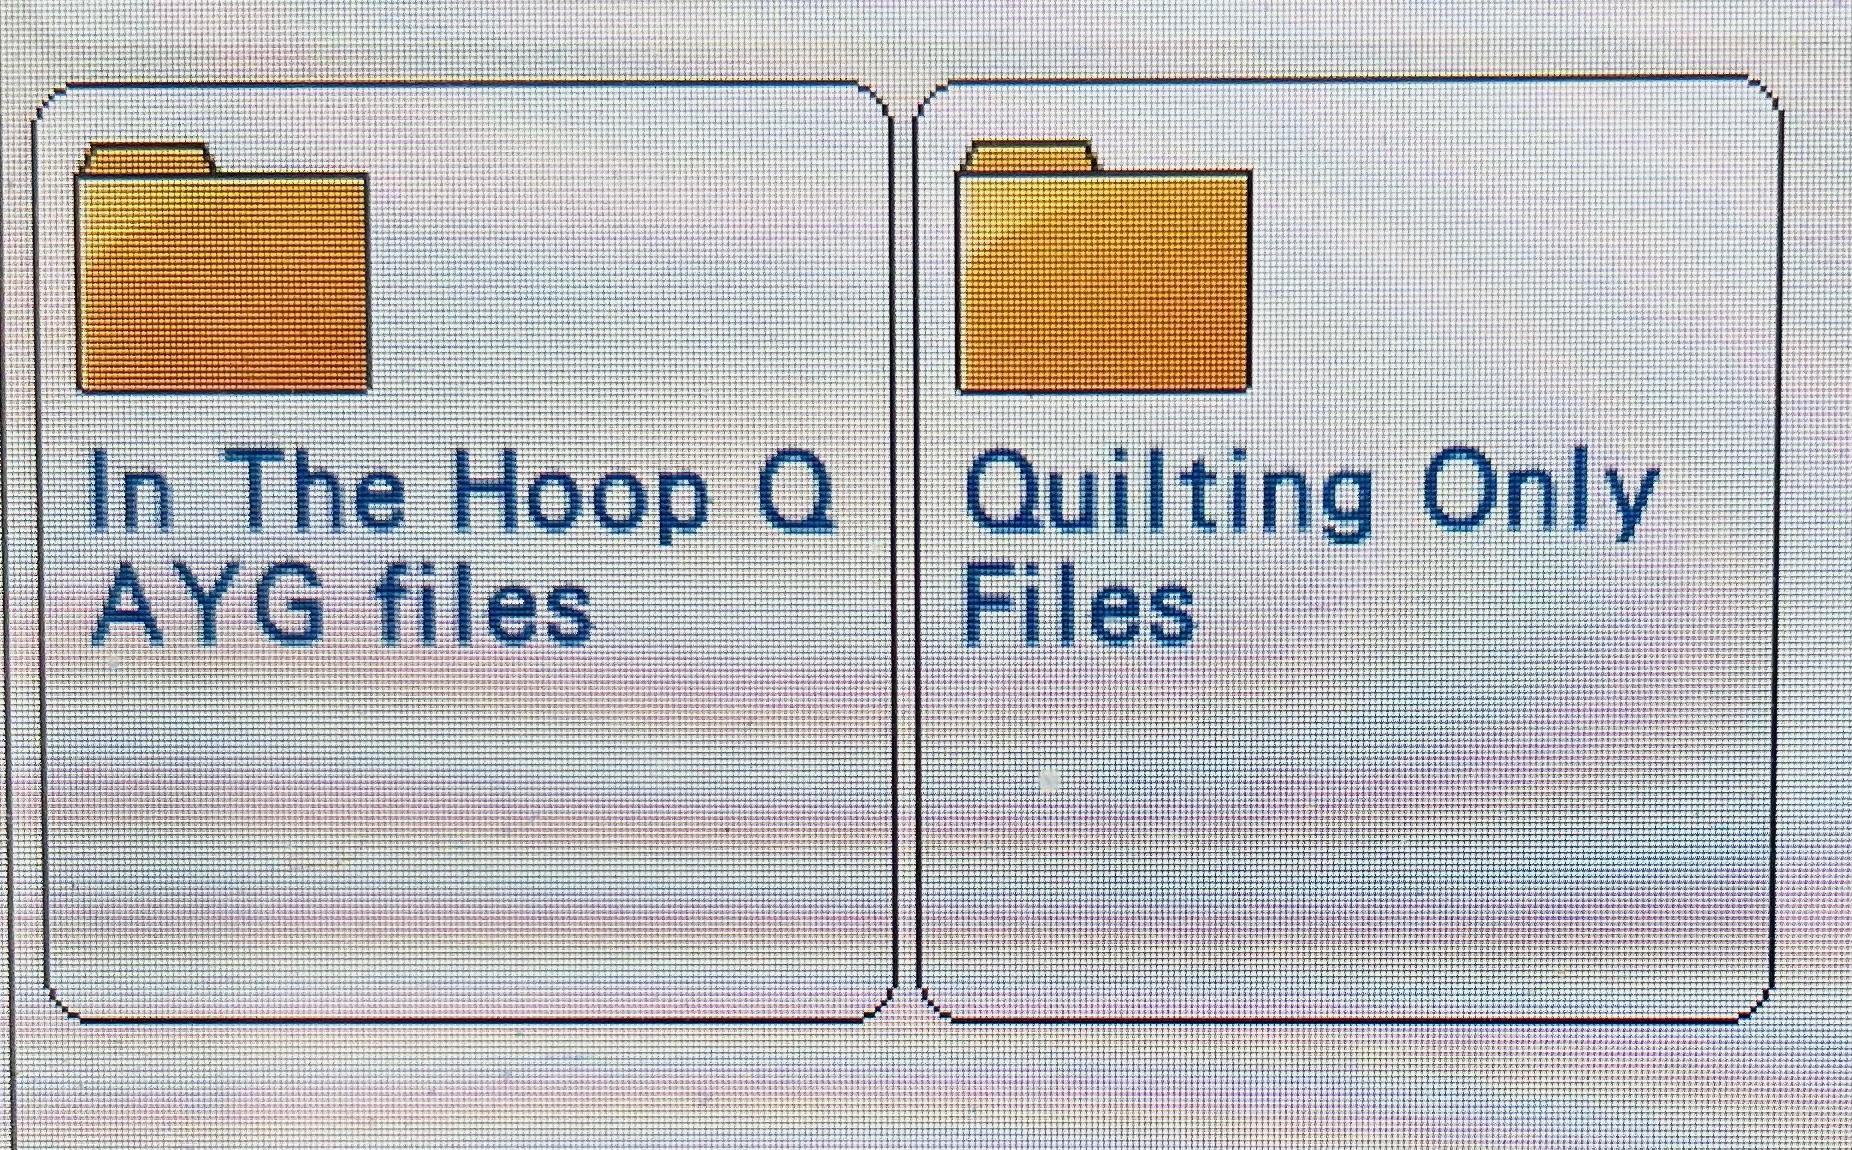
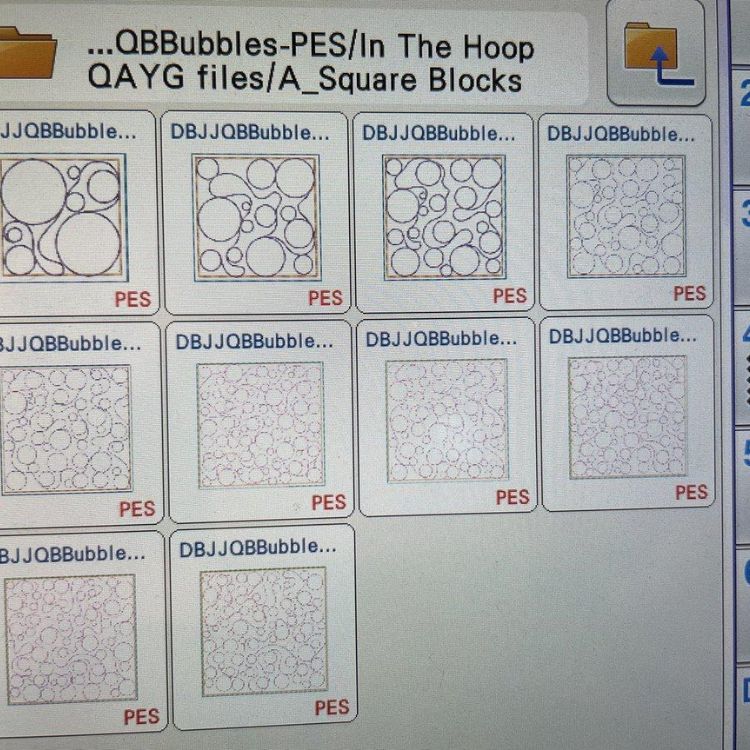
Here you will find multiple sizes of square blocks, sashing blocks, and 3”, 4”, and 6” blocks.
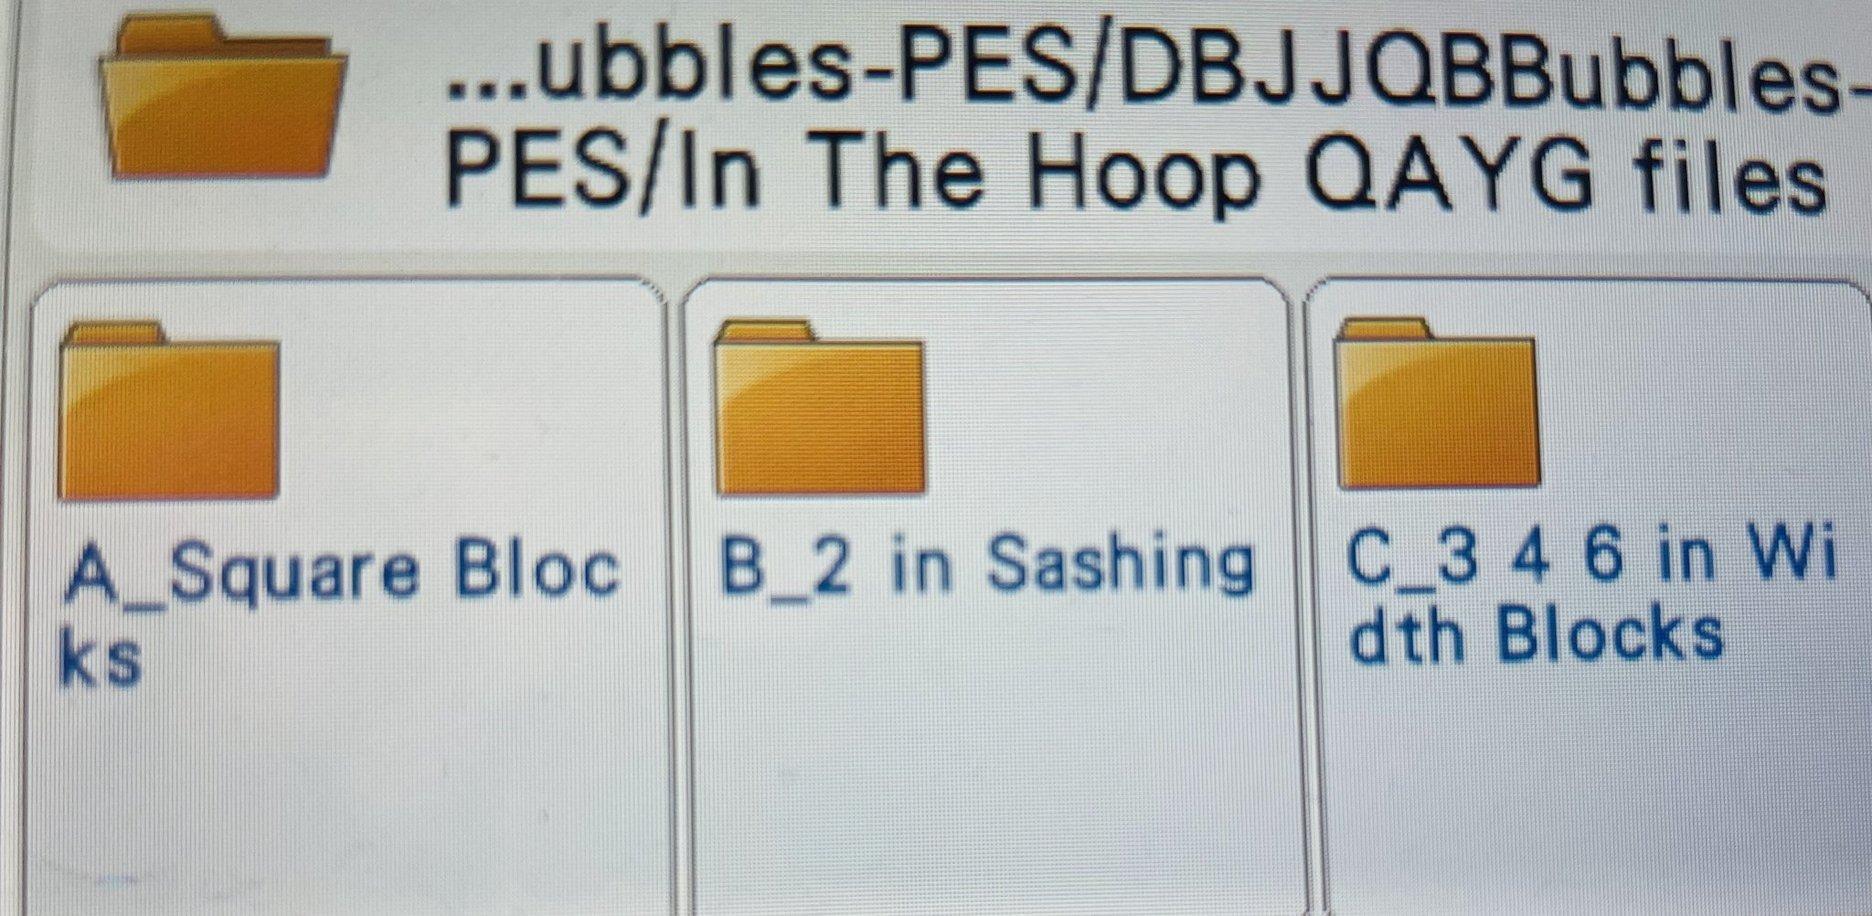
To begin, open up the A_Square Blocks folder.
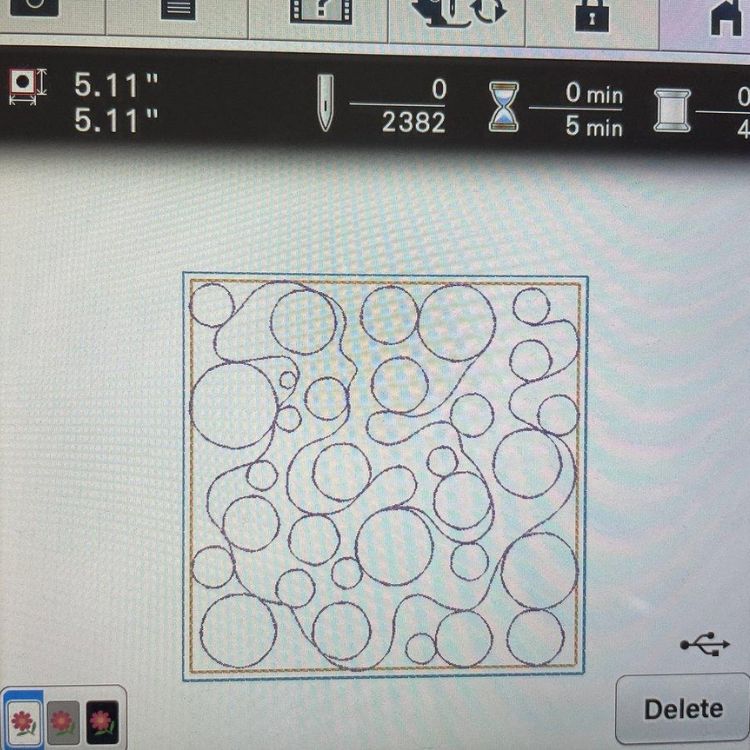
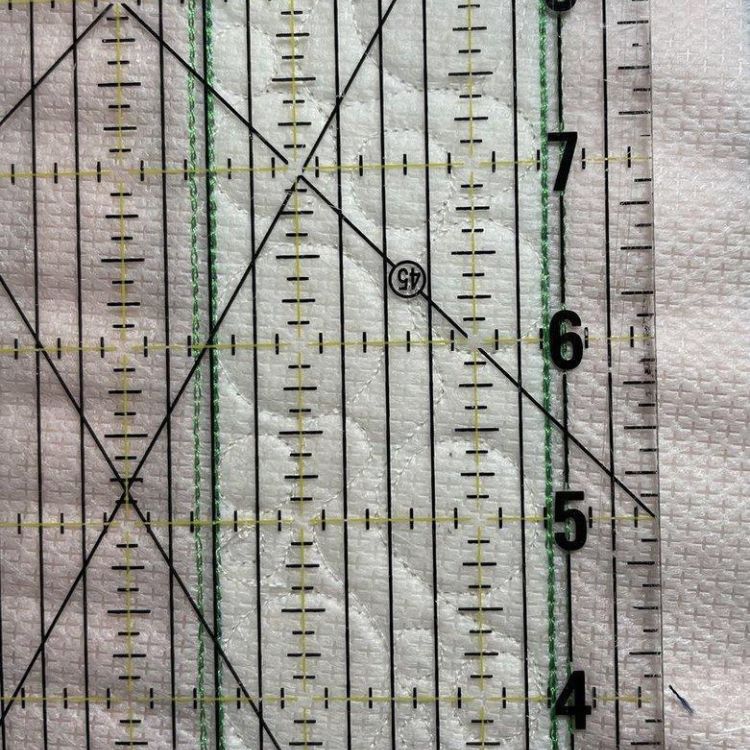
I am going to select the 5.11 × 5.11 and load it onto my machine. Don’t get confused by the .11, once you’re done, it will be an exact 5” × 5” square block. You can select any size you want to work with. The steps in this tutorial will work for all the sizes provided. Load your desired block size to the machine.

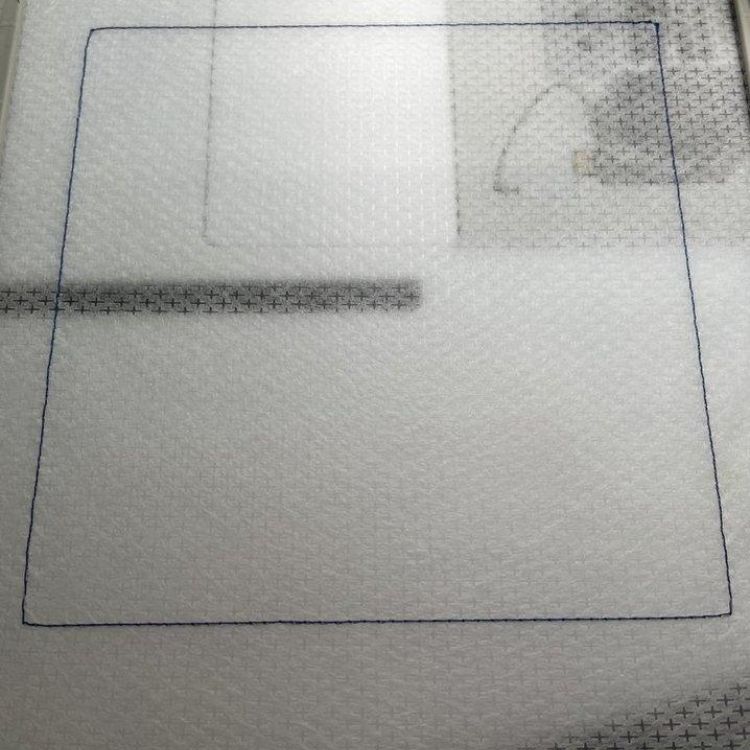
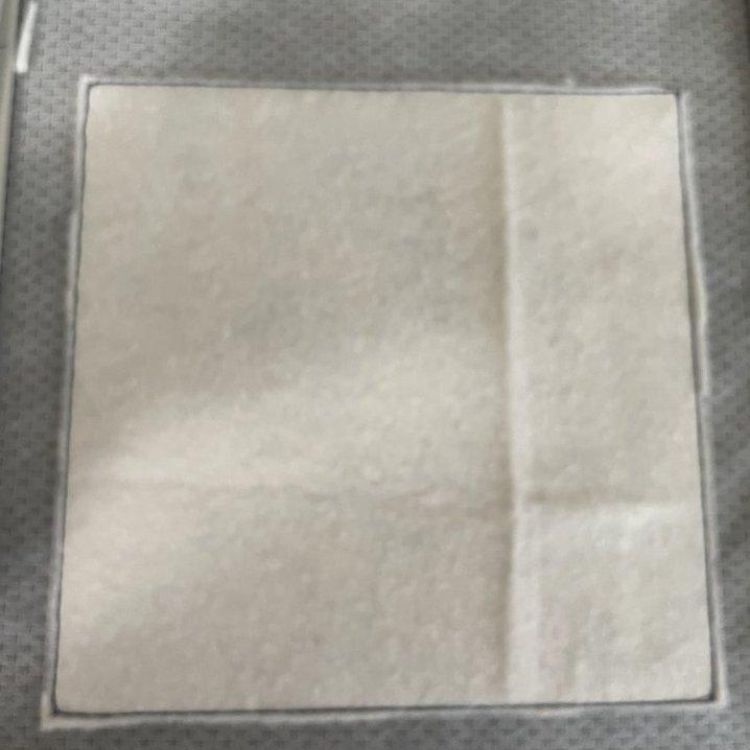
Hoop a piece of no-show mesh stabilizer, and attach the hoop to your machine.
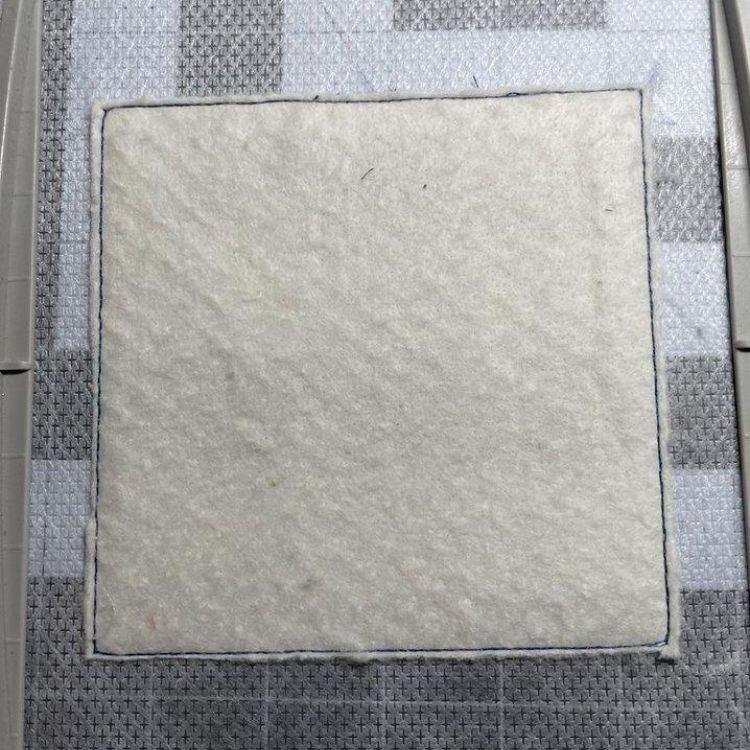
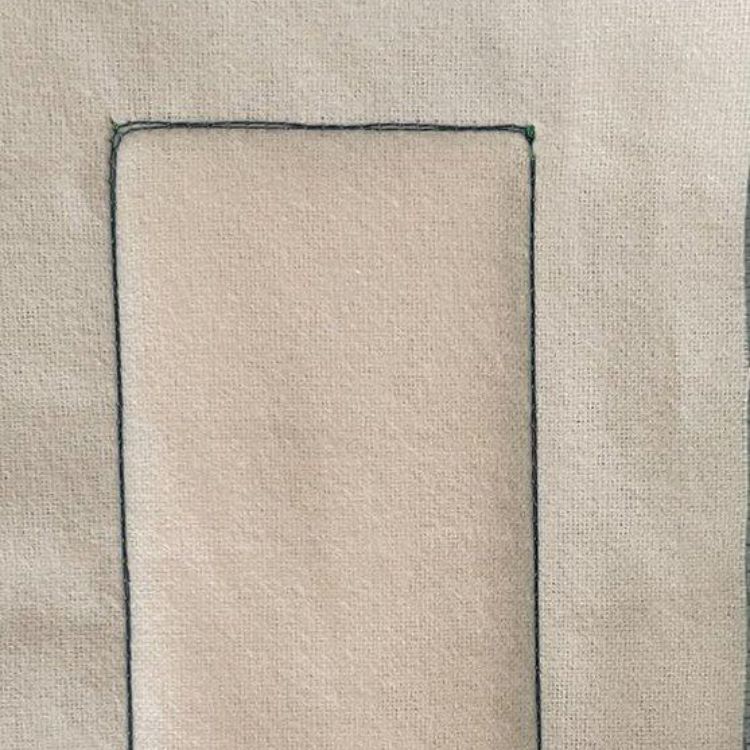
Select Embroidery and run the first step, the placement stitch for the batting. Lay batting over the outline. Run the second step, the tack down stitch. Trim the batting close to the stitches.
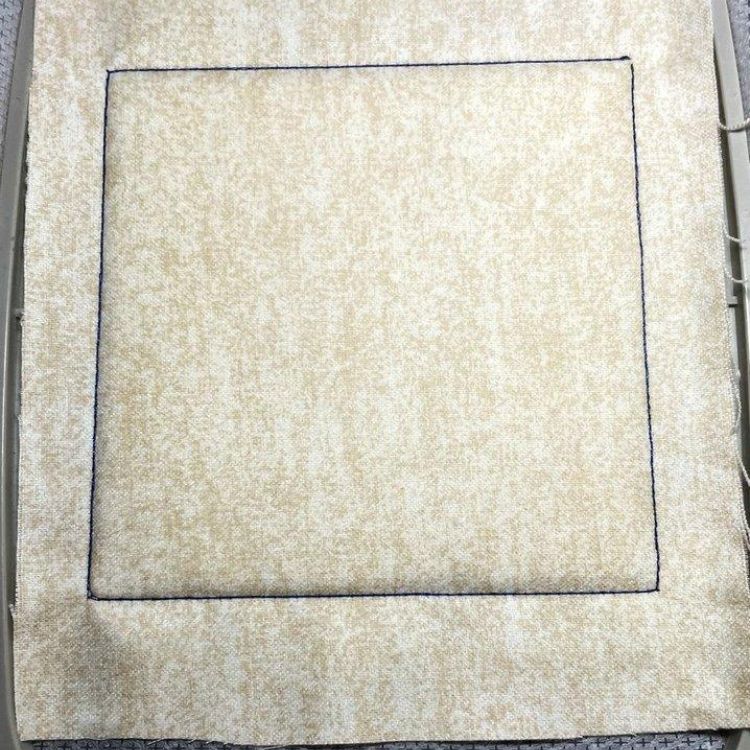
The third step will be the fabric tack down. Lay your fabric centered over the batting, making sure to always allow enough room for a ½” seam allowance on all four sides.
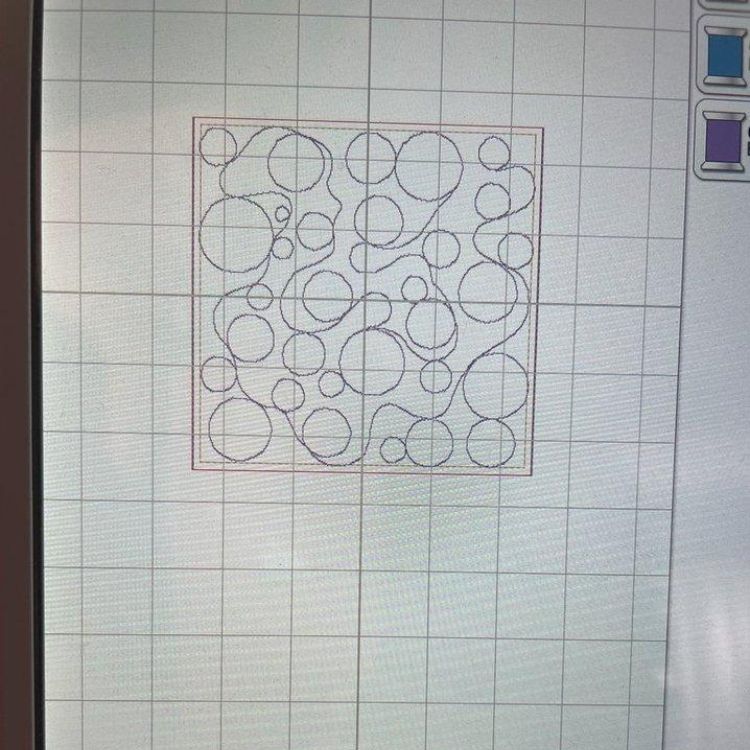
The fourth and final step is the quilting. Every block in sections A, B, or C are done using these four steps.
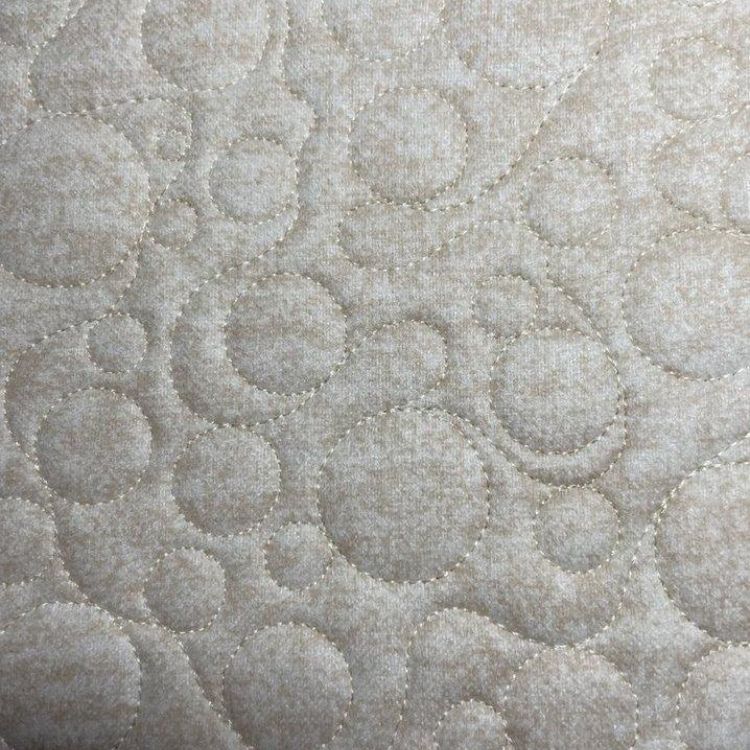
When sewn together, your background will match up perfectly and give you a beautiful, quilted finish.
Now that we have the steps down, let's make a mini quilt top.

For supplies used by JuJu’s team, check out Designs By JuJu's Amazon Store.
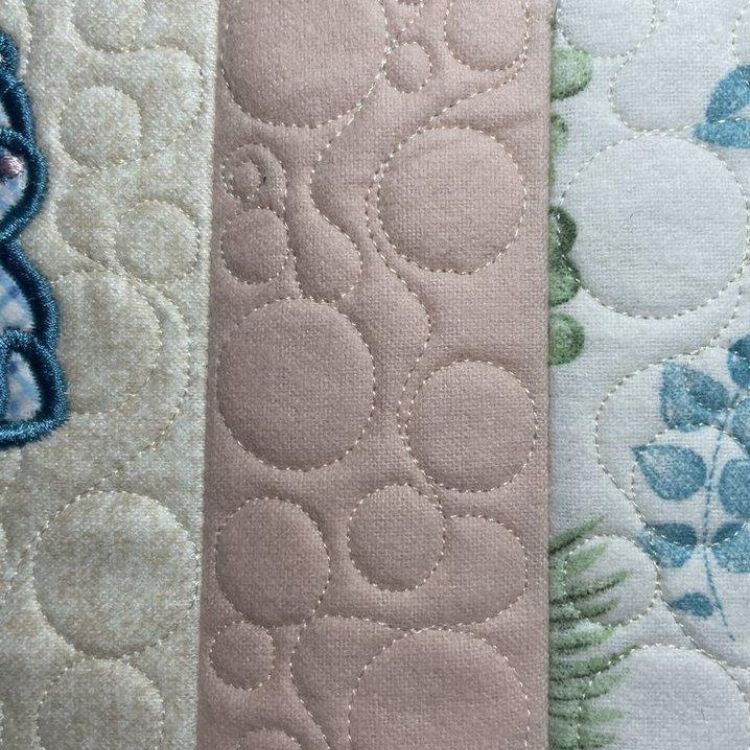
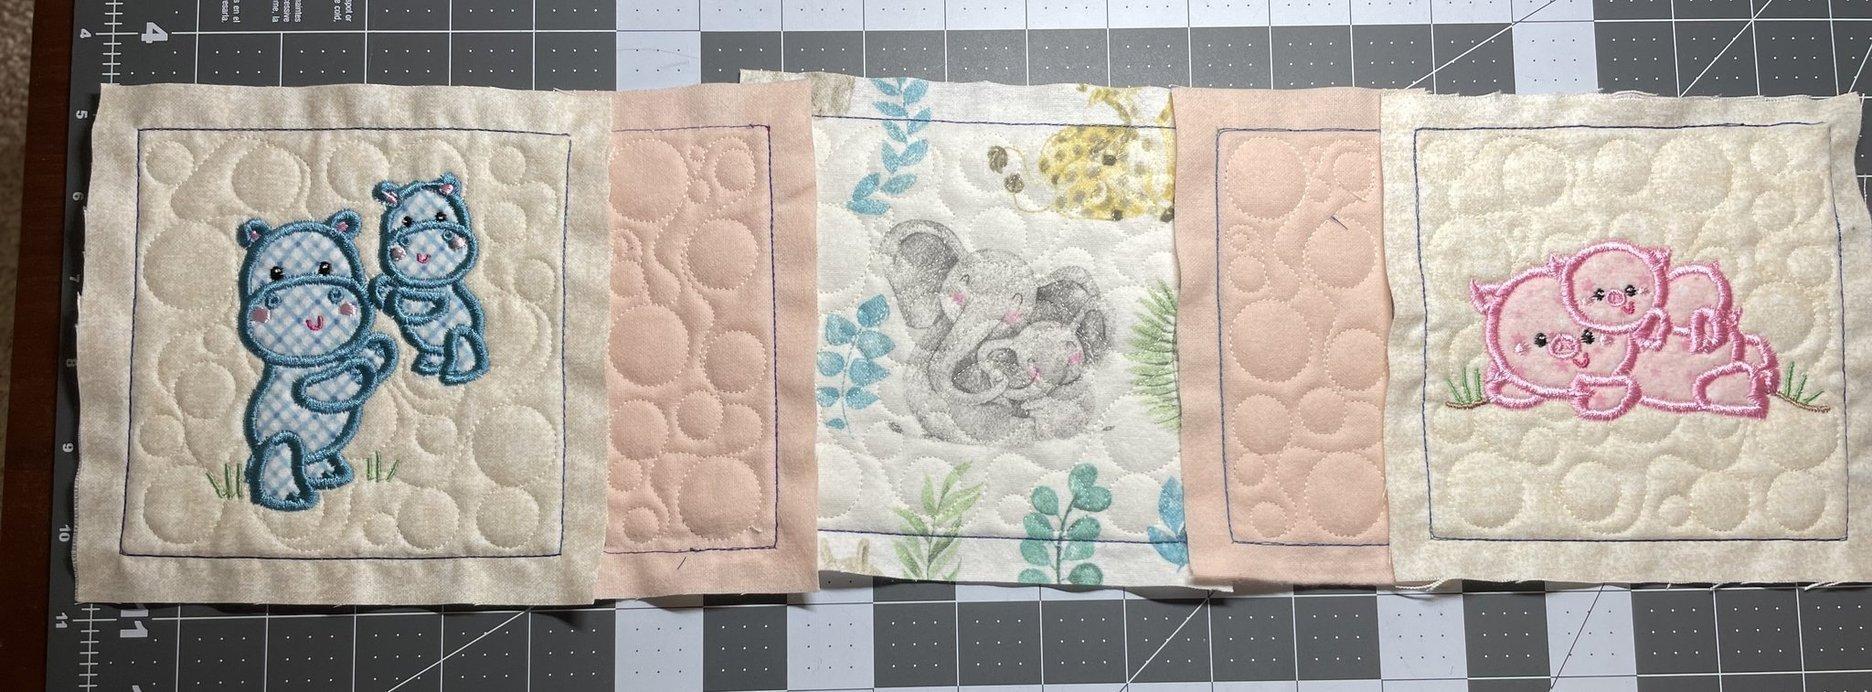
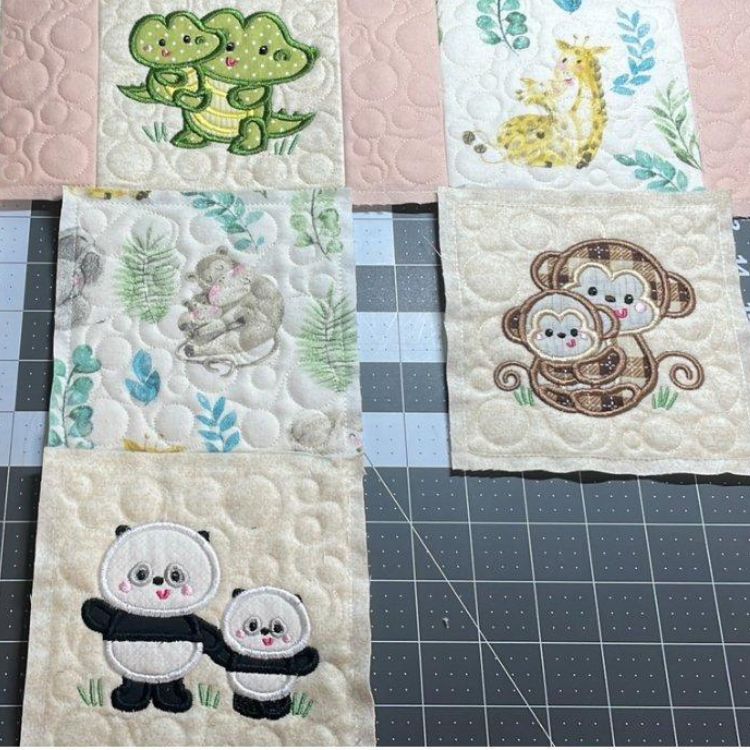
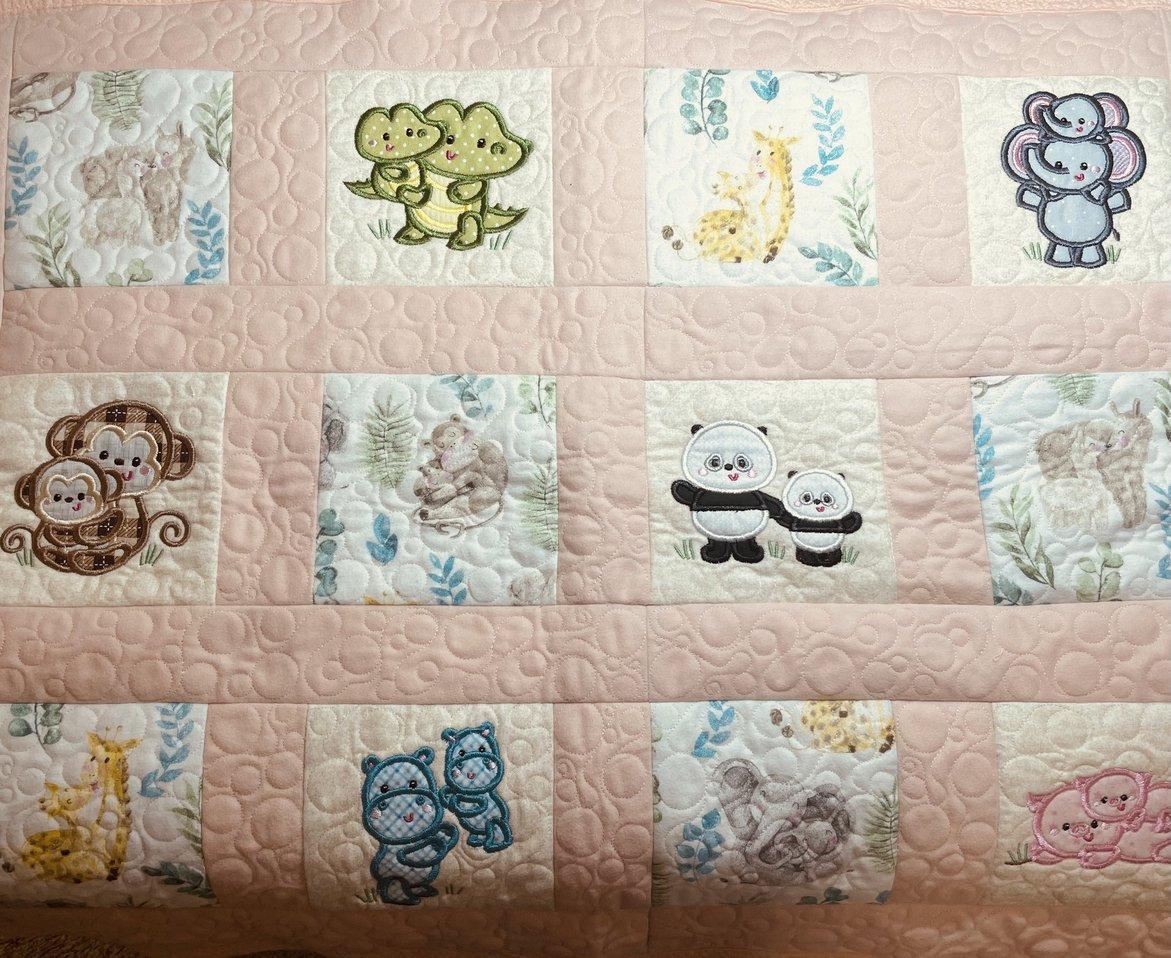
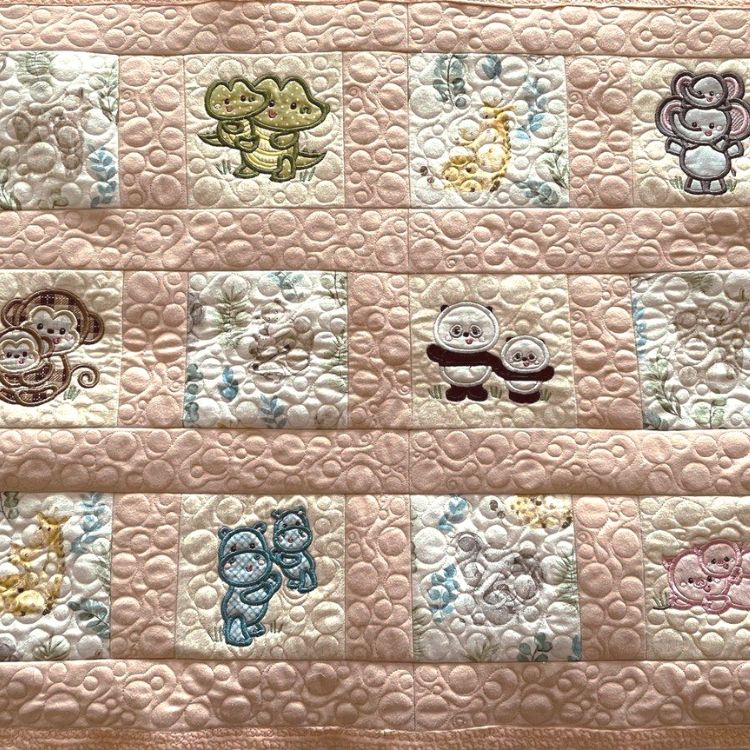
The first step is to decide how many blocks you want to make for your quilt top. I wanted a small quilt, so I did twelve blocks. After adding sashing and binding, my mini quilt will be 32” × 24”. You can make a larger quilt if you’d like by adding more blocks or making larger blocks. However you design your quilt top, the steps for each block and sashing will all be the same. I chose to do the quilting design on six of the blocks.
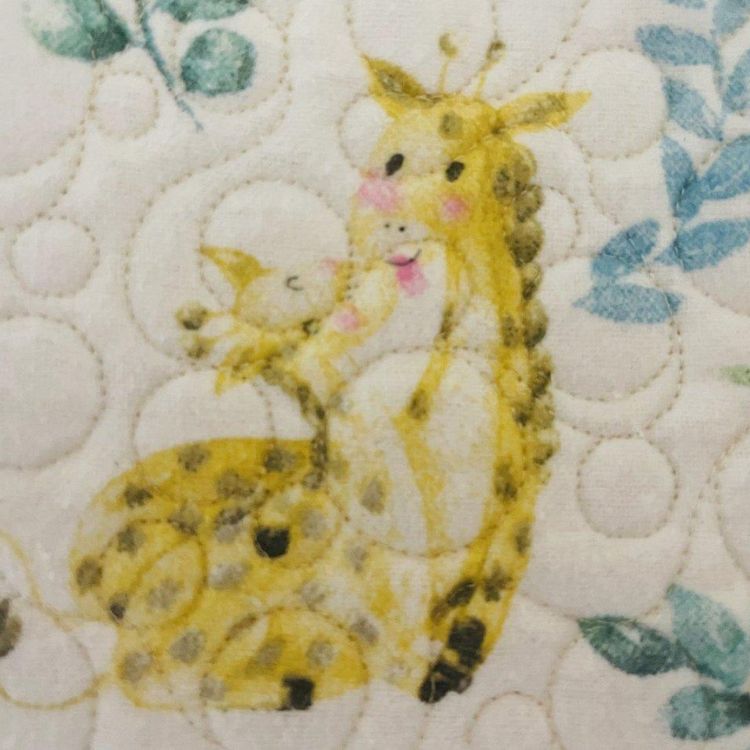
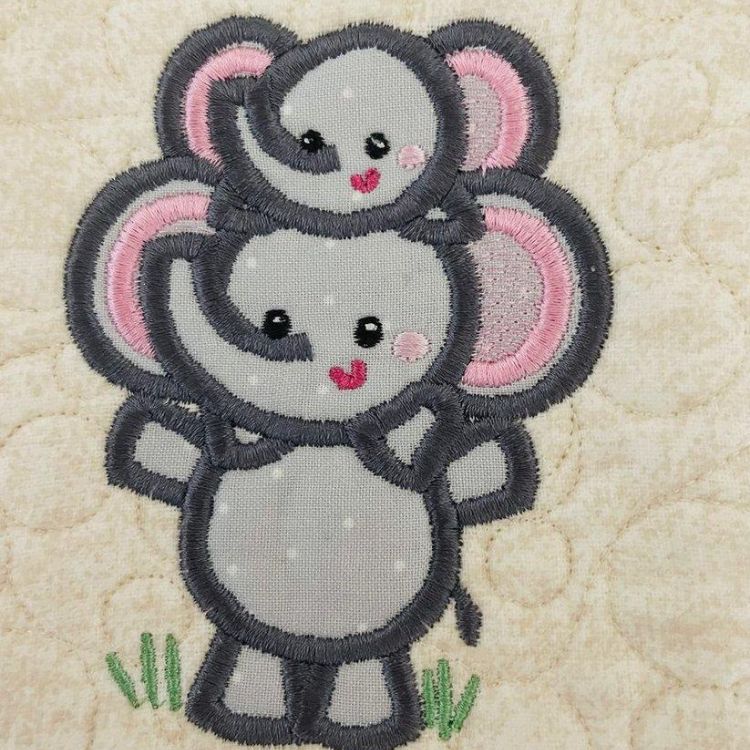
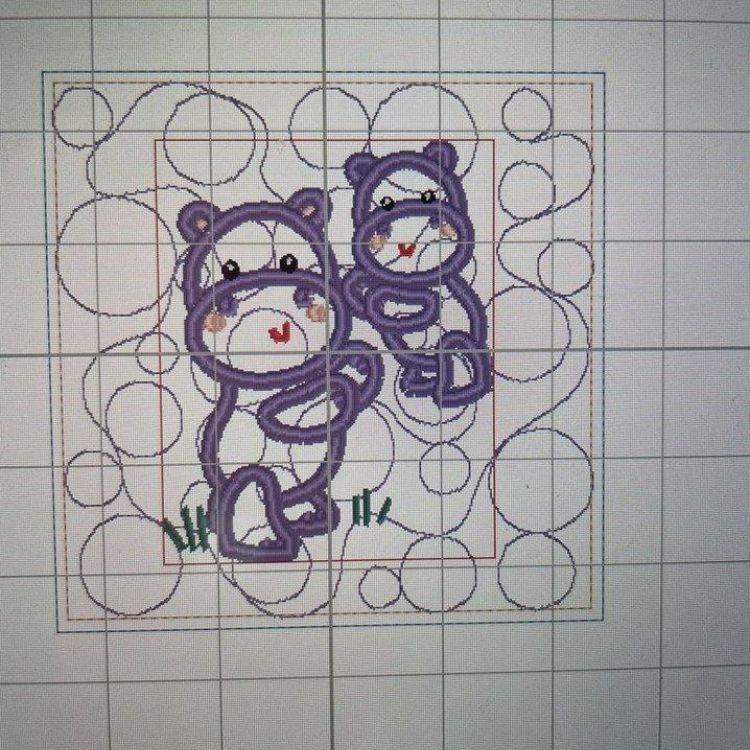
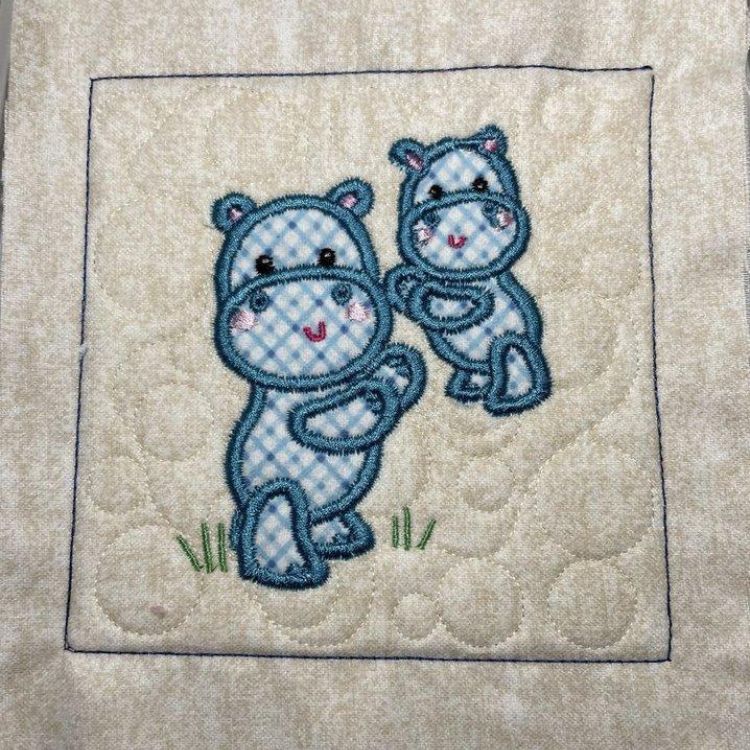
The remaining 6 blocks have the quilting design with an added applique design on top.
Open up the A_Square Blocks folder and select the size of design you want to work with. Add the block to your machine and select Embroidery. Hoop no-show mesh cutaway stabilizer and take it to your machine.
Before running this step, I recommend changing both your bobbin and top thread to a darker color. This will be hidden when the blocks are sewn together, but will allow you to easily line up and sew your blocks perfectly.
Cover the stitching lines completely with your batting. Run step two to secure the batting. Trim close to the stitches. This will keep the batting out of your seam allowance.
This stitch line is slightly larger than the batting placement. Cut your fabric large enough to give you a ½” seam allowance on all 4 sides. For example, I cut a 7” × 7” piece of square fabric for my 5” × 5” block. Lay it centered, over the batting, and run the stitching. Remember the dark thread in steps 1, 2, and 3 will not show when the blocks are sewn together.
Before beginning this step, replace your contrasting bobbin and top thread with a coordinated color. Run the quilting stitch.
You have now completed your first block with the new Quilting Backdrops system! Wasn’t that easy?
To add an additional design to the block, open up your desired block size, add it to your machine, select Add to return to your designs, and open up the embroidery design you wish to use.
Select the design closest to the size of your block and add it to the square on the machine. Make any necessary adjustments using the Size and Move buttons to center your design. Once you’re satisfied, select Embroidery to begin.
Run Step one, the batting placement. Add the batting. Run Step two, the batting tack down. Trim batting close to the stitches. Run Step three, fabric placement. Remember to cut the fabric large enough for a ½ inch seam allowance on all 4 sides. Run Step four, the quilting. If you’re using a different color top and bobbin thread, remember to replace these before you begin quilting. Continue with the remaining steps to complete your added design. When you’re finished, remove it from the hoop. Use these steps to finish all your square blocks.
Sashing Embroidery
Once you have all your square blocks completed, you can make the sashing blocks. They are created using the same four steps.
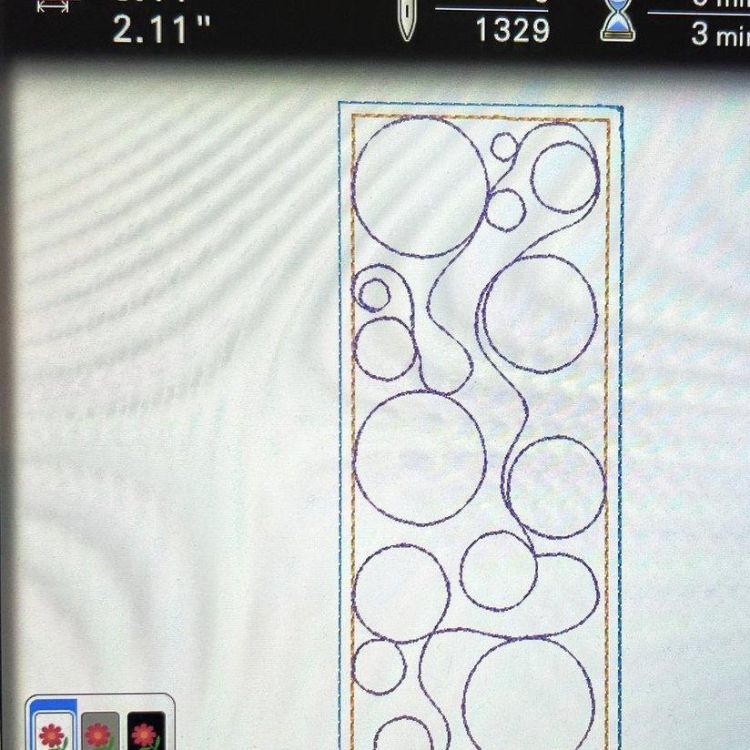
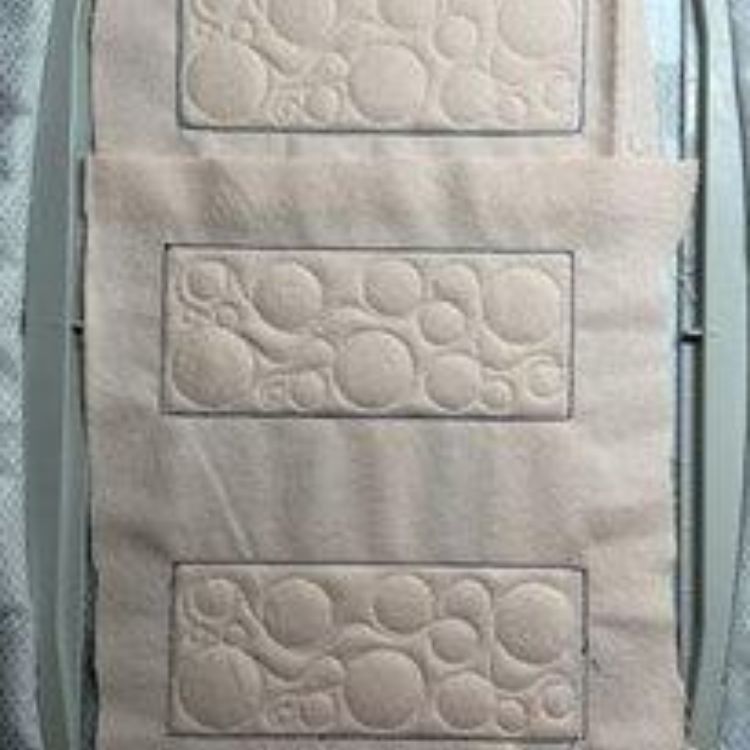
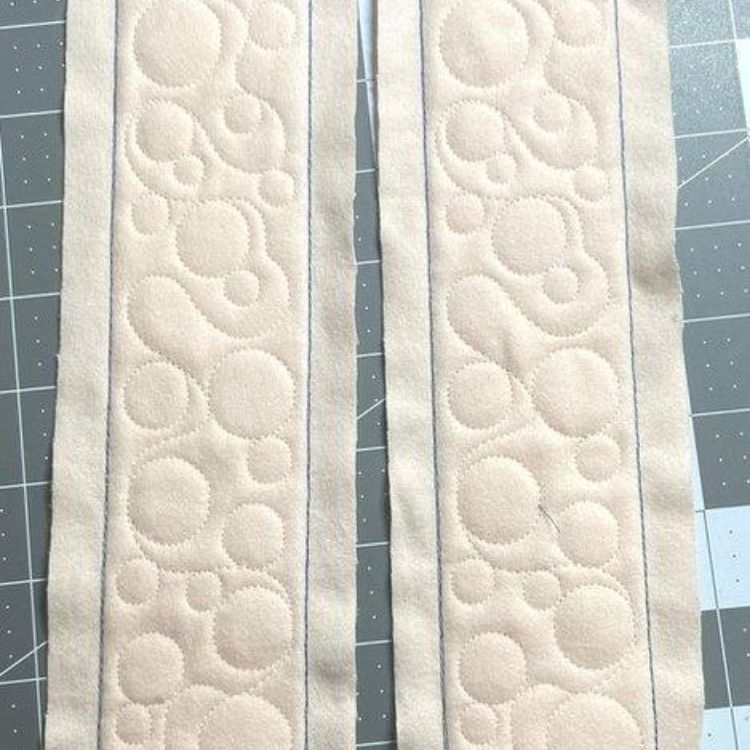
Open the B_2 Sashing files. Here you will find multiple length, 2-inch sashings.
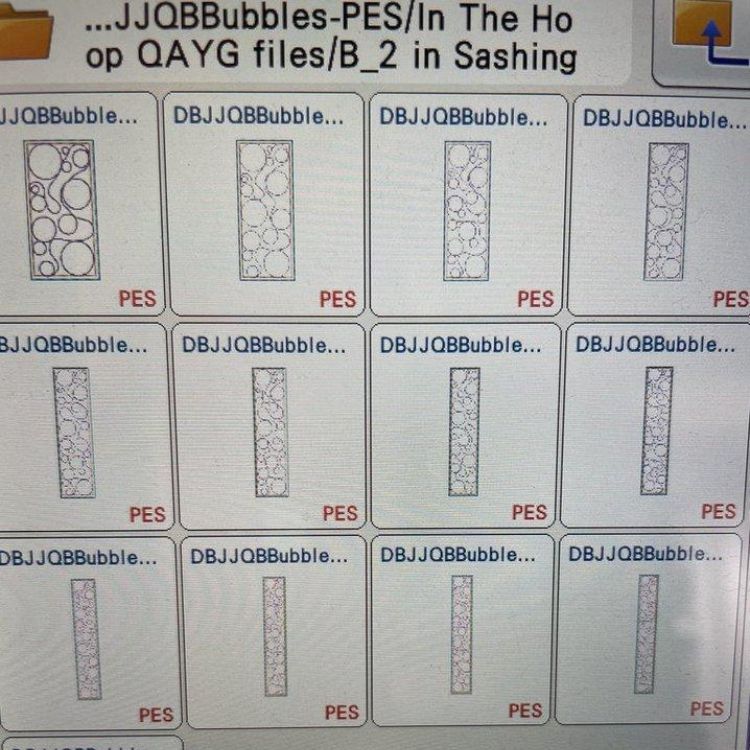
Choose the file that matches your square block dimensions. My square block is 5.11” × 5.11”, so I am choosing the 5.11 × 2.11. Add the correct size for your block to the machine.
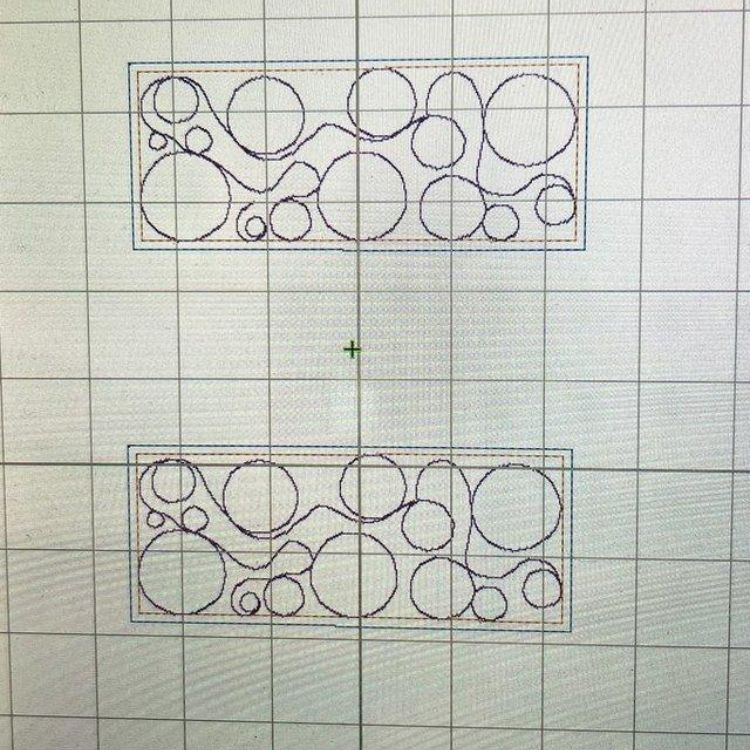
If your hoop is large enough to accommodate multiple designs, you can do more than one at a time. Remember to allow for the seam allowance between each design if you go that route.
Since this design is not directional, I rotated them to give me extra room. Some of the designs are directional, so be sure to load them into the machine accordingly if you’re using one of those.
These sashings will be sewn to the sides of the completed square blocks.
Run steps 1, 2, and 3, remember to change the bobbin and top threads before step 4, the quilting design.
When you’re finished, remove it from the hoop and set it aside until all your sashing blocks are complete.
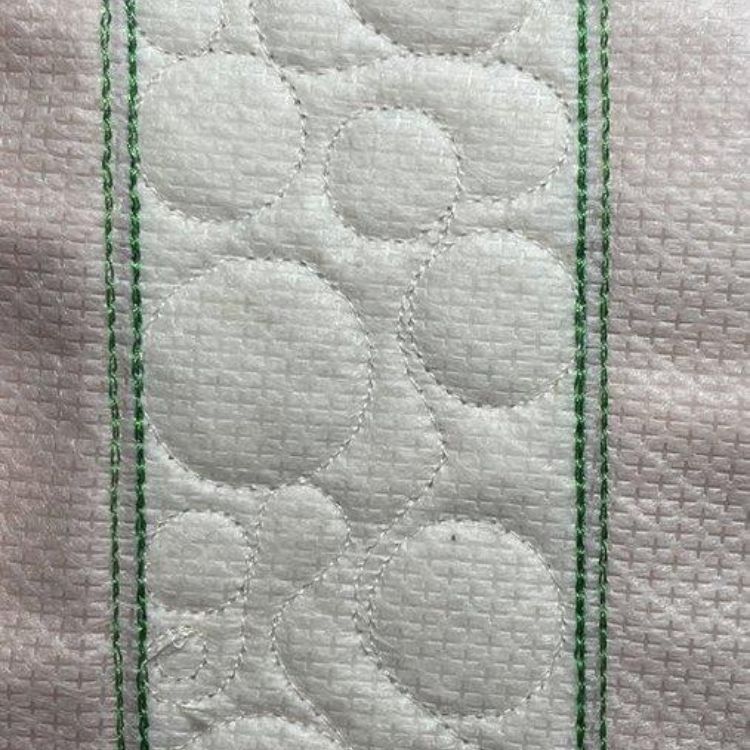
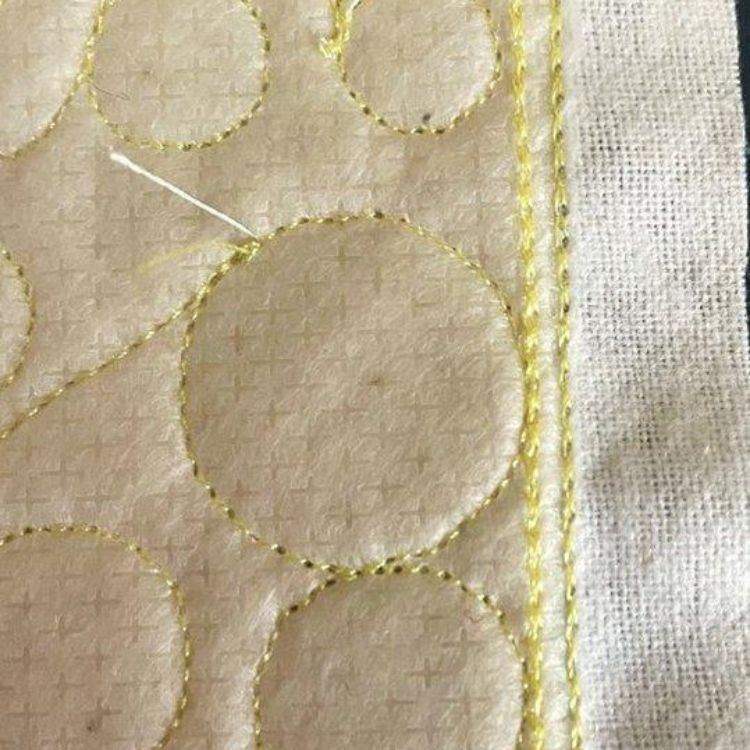
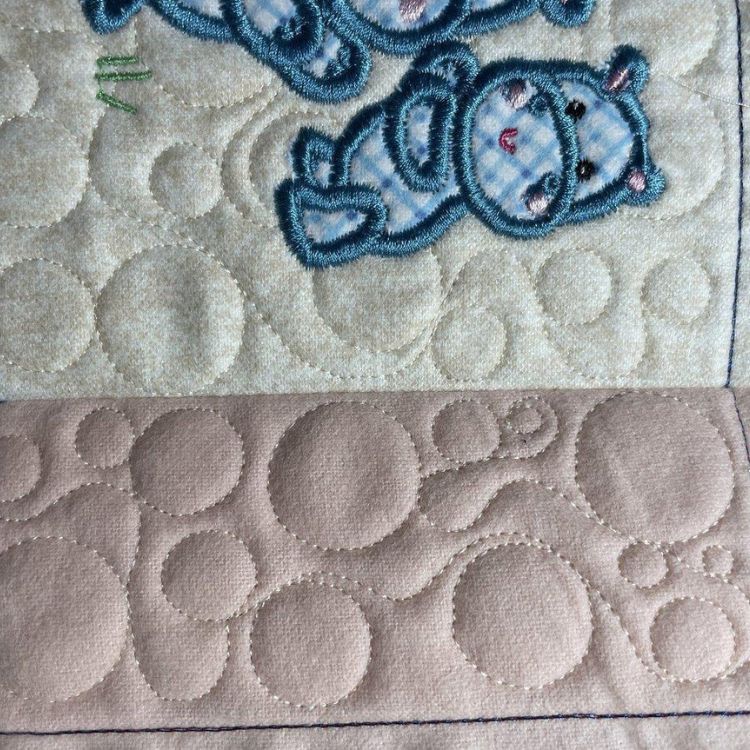
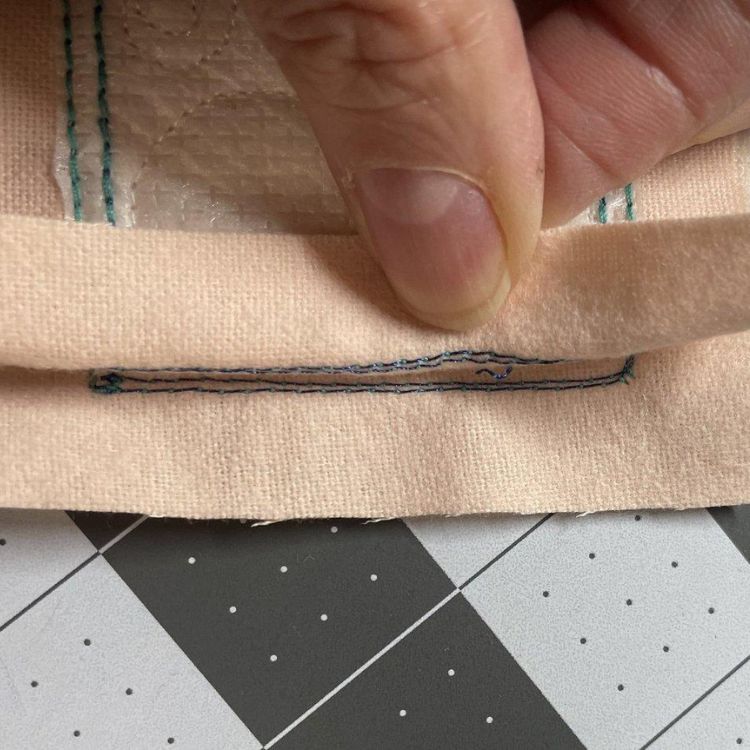
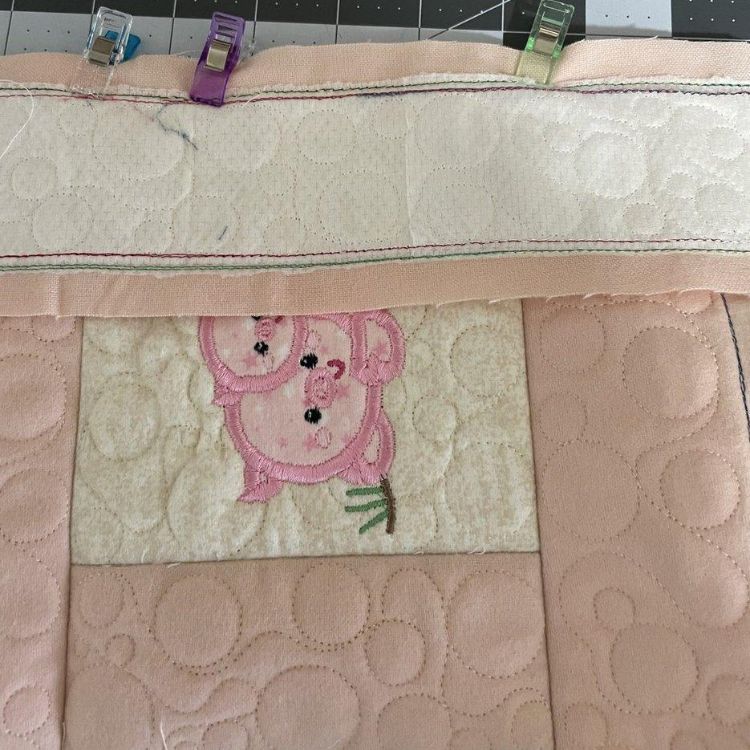
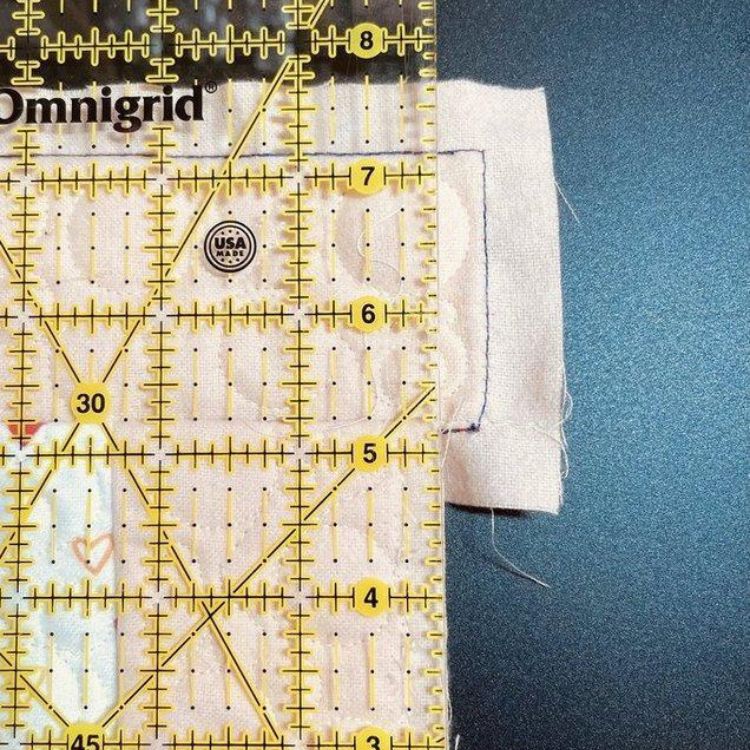
Once all your blocks and sashings are finished, trim them, leaving a ½” seam allowance. On the back, you will see two stitching lines. The inner one is the batting tack down and the outer one, shown with the arrows, is the fabric tack down. Trim ½” from the outer fabric tack down line.

If you don’t want the stabilizer in your finished seam allowance, now is the time to trim that away. This is optional. Be careful not to cut the fabric.
Lay your blocks and sashings on a flat surface and decide where you want each block to be. I alternated between a quilt design block and an applique block with sashing in between. Do not add the sashing to the top and bottom of the blocks. Also, do not add sashing to the left side of the first block and the right side of the last block of each row.
Example: The first block has sashing sewn on the right side only, add the second block, then another sashing, then third block, then another sashing, and so on until the last block, which has no sashing on the right side. Do this to complete all rows.
Later, we will add sashing across the top, bottom, in between each row, and down both sides.
This is where using dark threads will help you!
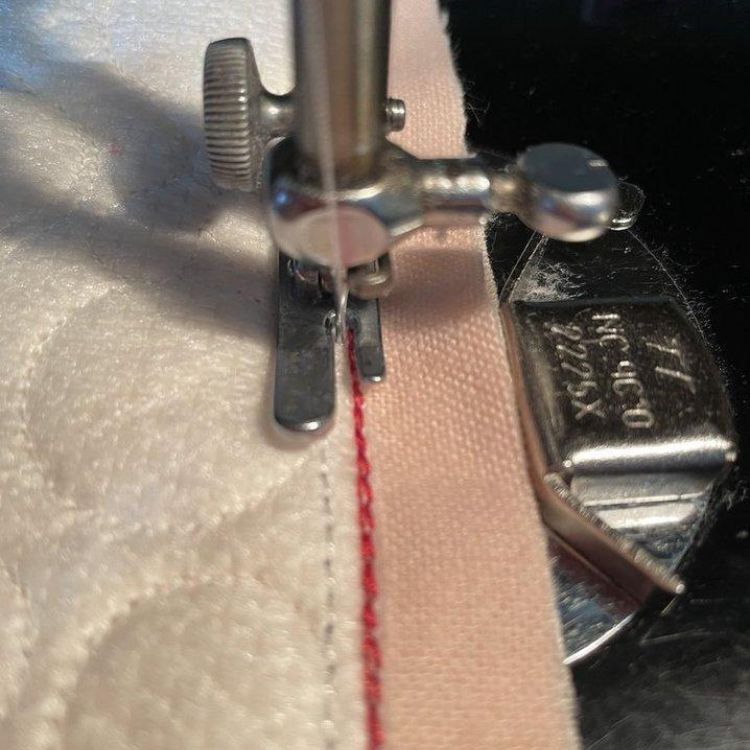
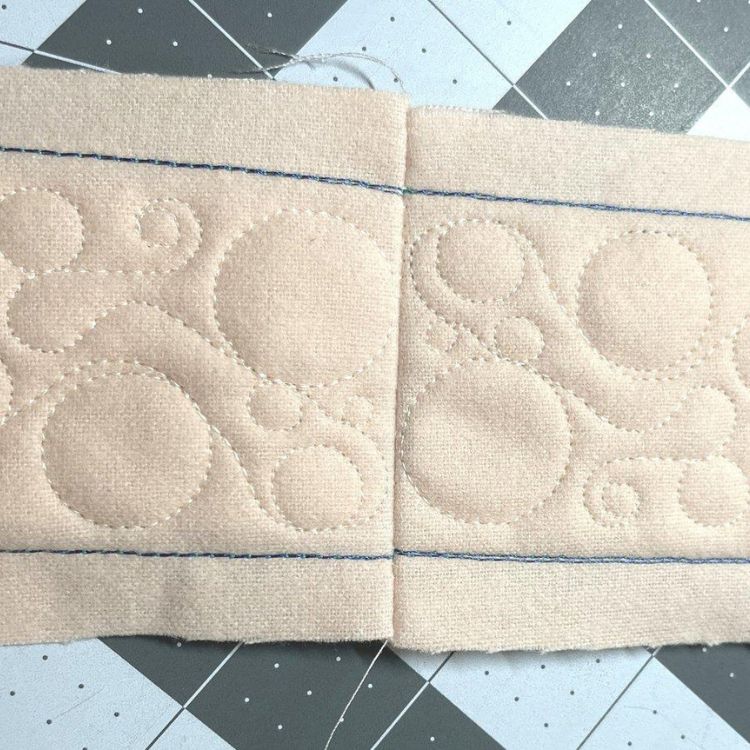
Take a square block and a sashing and line up the side edges and outer fabric stitch lines.
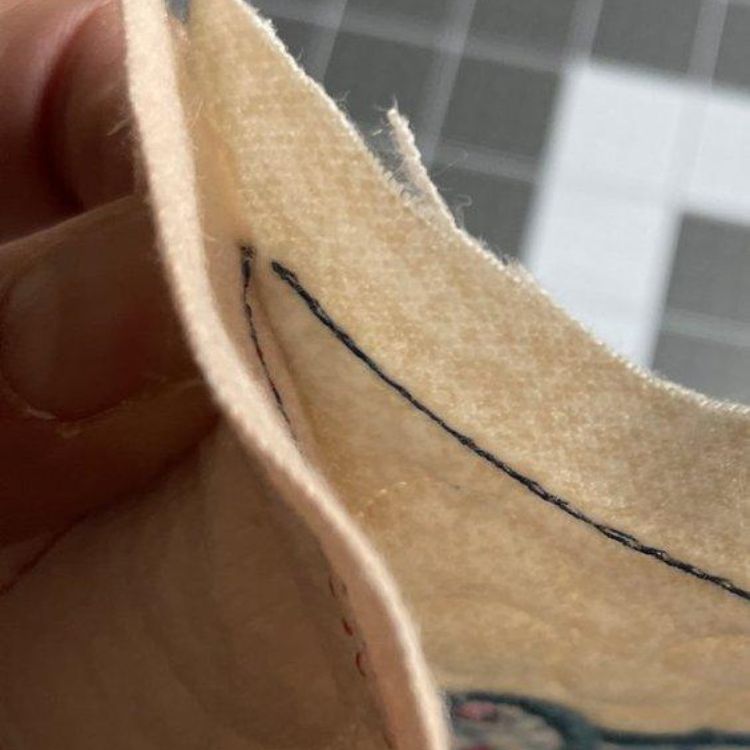
Pin or clip it together, and take it to your sewing machine. Line the needle between the two stitch lines.
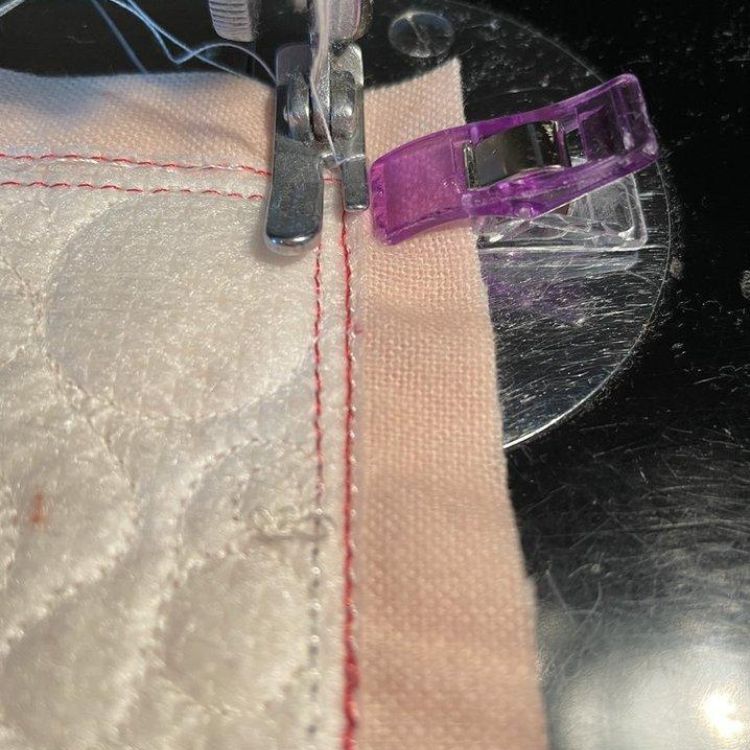
Stitch between these two lines so your blocks match up perfectly. Remember to backstitch at the beginning and the end.
When you’re finished, you will not see the dark thread. Continue on with the remaining blocks and sashing to complete all your rows.

Remember, the first block only gets sashing on the right side. Continue adding blocks and sashing to complete the row. End each row with a block and no sashing on the right side.
Once the rows are completed, we will add a long sashing at the top, bottom, and in between each row. To do this, go back to the designs and select the B_2 inch Sashing again. This time select the longest sashing your machine will accommodate.
Depending on the size of your quilt top and the length of sashing you’re able to stitch out, determine how many you will need to make. Measure the width of the quilt. The sashing will need to be a few inches longer than this measurement. This will ensure you have enough sashing once it is sewn to the quilt and allow for an even trim down the sides.
My machine will stitch out a 14.11” × 2.11”, so I will select that one. When the short ends are sewn together, the length will be 28 inches. I need 24 inches, so I will stitch out two for the top, two for the bottom, and two for each row. Stitch these the same way as the previous blocks and sashings using the 4 steps. Remove from hoop and trim to a ½ inch seam allowance.
Match up the seams and raw edges on the short end. Take it to your sewing machine and stitch between the inner and outer stitch lines. Continue adding, short end to short end, until your sashing is at least a few inches longer than the quilt top.
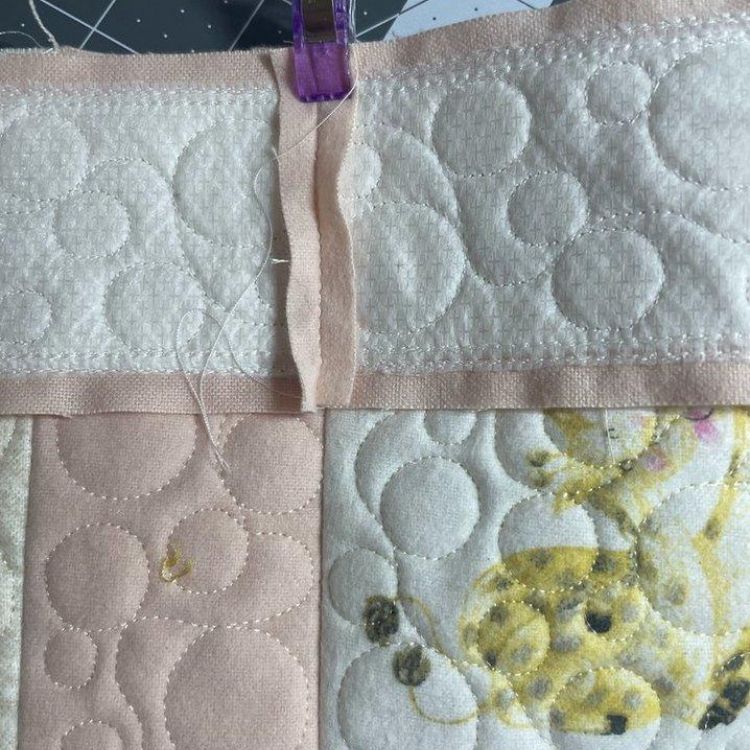
Pin or clip the sashing to the top and bottom of row one. If possible, match up any seams. Stitch between the inner and outer stitch lines. I stitched this one without the darker threads. As you can see, using the dark threads makes it easier to see the stitch lines.

Continue to add sashing in between each row, and finish with adding the final sashing to the bottom. Trim the sashing ends evenly with the blocks of each row so your quilt is square and even down both the sides.
Once you have all your rows and sashing complete, finish the top by sewing sashing to the sides of the quilt. To do this, measure the quilt from top to bottom.
Just like before, sew the sashing short ends together to achieve the correct length. Clip or pin to the sides. If possible line up any seams. Take to the machine and again stitch between the inner and outer stitch lines.
Trim the ends of the sashing as needed to square up the quilt top.
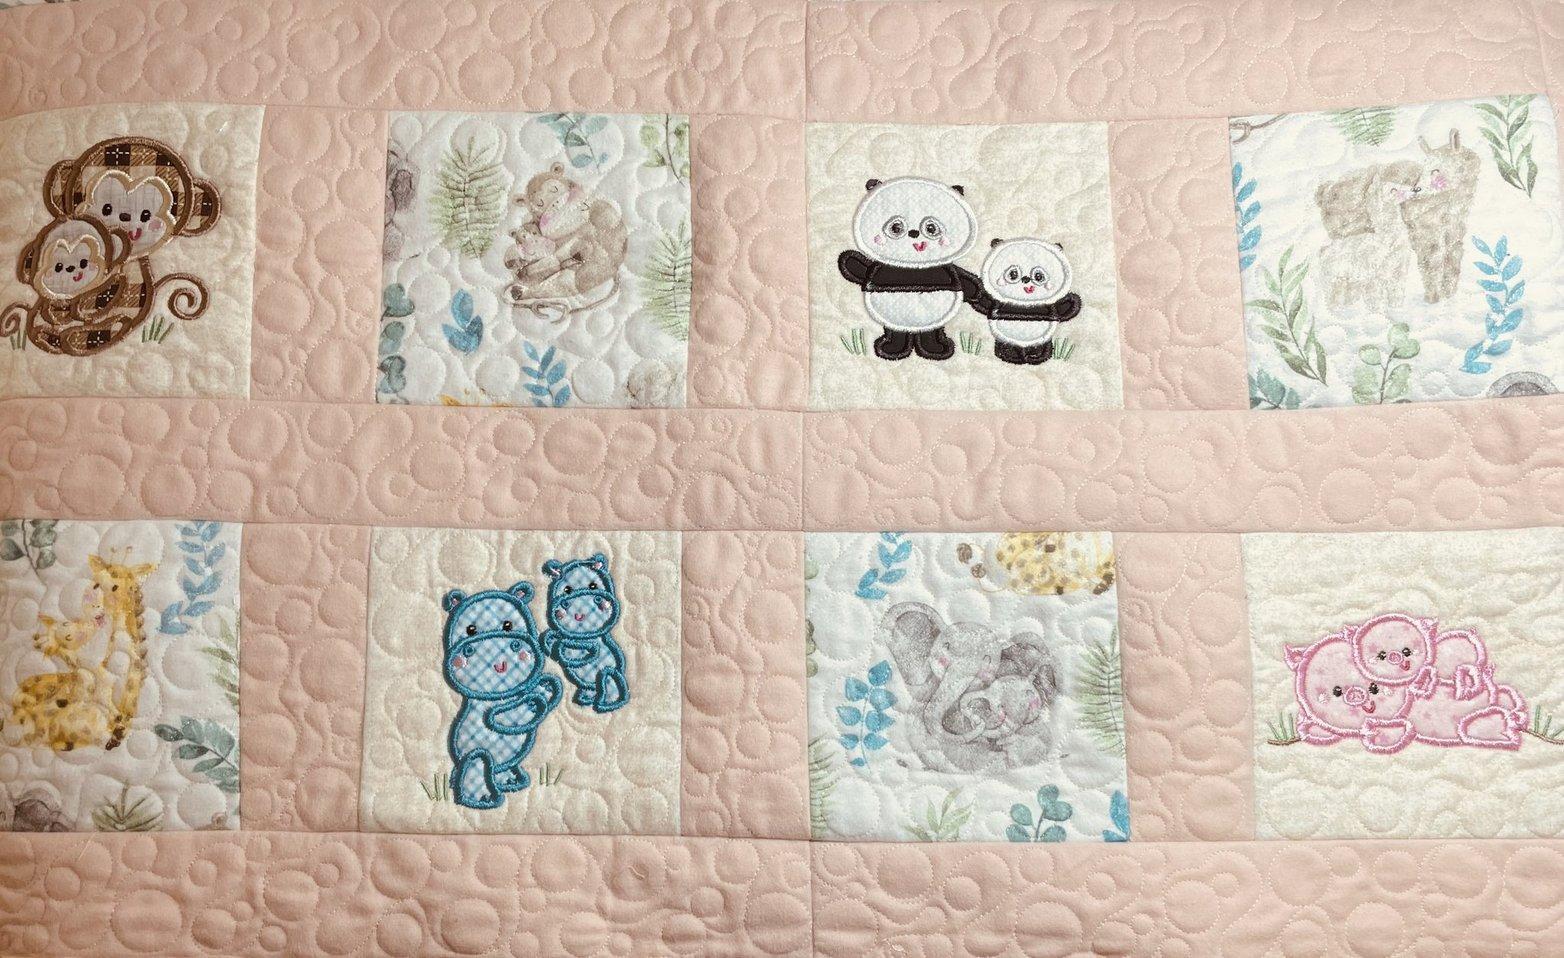
Look at how beautiful and perfect this quilting is! Add backing and binding and your mini quilt is complete.
You will love how fast your projects come together and how accurate the stitching is using Quilting Backdrops. This system is so easy to use and it’ll take your background quilting to a new level.
Try out all of the different designs (check back frequently as more new designs are rolled out) and be sure to post your projects on the Designs by JuJu Embroidery Blessings Group, or use #designsbyjuju! We’d love to see what you create!
