Quilting Backdrops: Make a Nativity Pillow
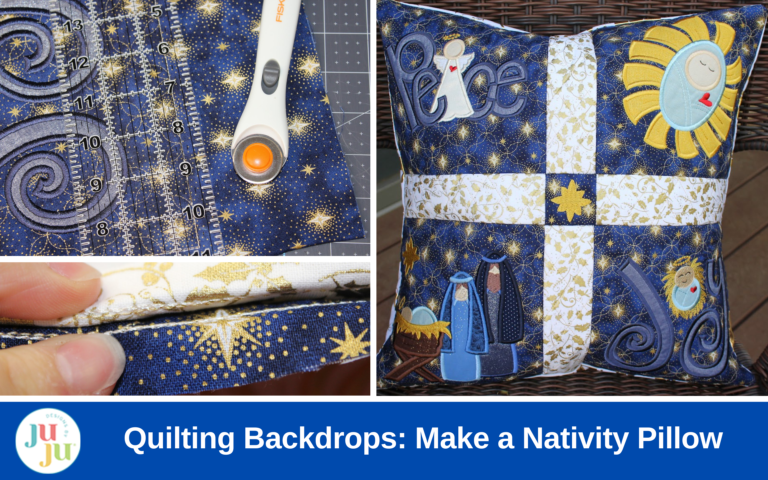
As the holiday season draws near, it’s the perfect time to transform your home decor to reflect the true meaning of Christmas. In today’s tutorial, I will teach you how to create a Nativity Pillow using DBJJ’s revolutionary Quilting Backdrops (QB) and Embrilliance software. I’ll also be showcasing some new nativity designs, offered in both satin and bean stitch, to infuse your home with warmth and love during this joyous season.
Supplies
Check out the DBJJ team’s favorite supplies in the Designs by JuJu Amazon store.
- Your choice of cotton fabric
- SF101
- Batting
- Cut-away stabilizer
- Embroidery thread (I enjoy using Sulky Poly Sparkle™ for my Quilting Backdrops.)
- Embrilliance Embroidery Software
- Sewing machine
- Straight-edge ruler
- Rotary cutter
- Sewing pins
- Scissors
- Pillow form (I used an 18” pillow.)
- DBJJ designs used in this tutorial
Check out this blog post and our YouTube playlist for more information on getting started with Quilting Backdrops.
Planning and Preparation
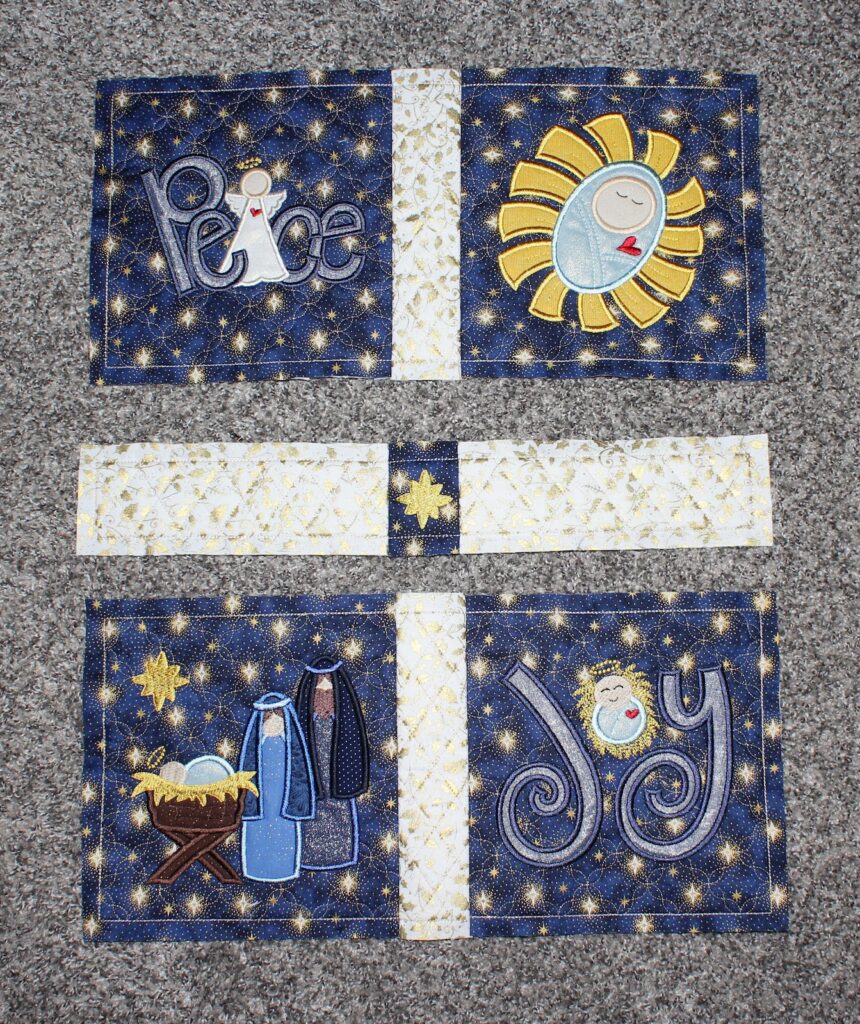
For my Nativity Pillow, I used an 18” pillow form. Keeping that dimension in mind, I created a design in Embrilliance that would measure approximately 18” x 18” when assembled.
- 4 - 8” x 8” quilt blocks - Orange Peel 2 Quilting Backdrops Design
- 2 - 2” x 8” horizontal 2” sashing blocks - Cross Hatch Quilting Backdrops Design
- 2 - 2” x 8” vertical 2” sashing blocks - Cross Hatch Quilting Backdrops Design
- 1 - 2” x 2” quilt block - Orange Peel 2 Quilting Backdrops Design (I used the 2" x 2" Orange Peel 2 QB design file for the placement and tack-down lines, deleted the quilting motif, and added the Star of Bethlehem image using Embrilliance.)
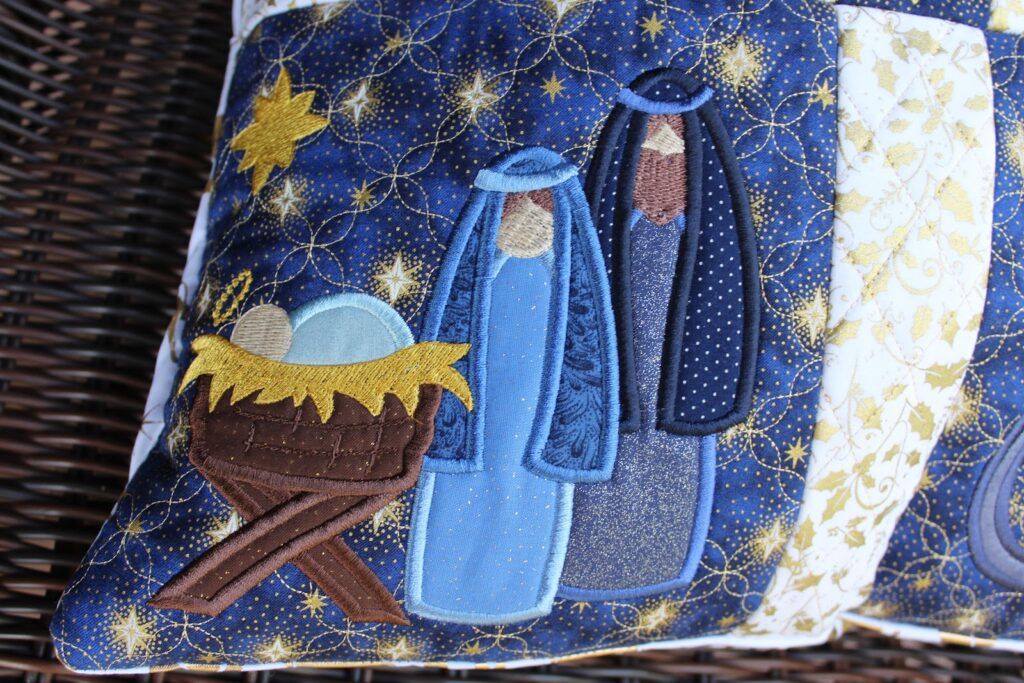
Once I had my initial layout created, I added the Nativity Christmas Applique Satin 1 Embroidery Design Set designs onto each of the 8” x 8” blocks and the Star of Bethlehem (from the Jesus, Mary, Joseph design in the Nativity Christmas Applique Satin set) onto the 2” x 2” block. My pillow design was complete.
Next I saved each individual 8” x 8” block and grouped together all four of the sashing blocks into one single file. I have Embrilliance Essentials, so I manually color sorted my designs so they would stitch together in one hooping. If you have Embrilliance Enthusiast, you can use the Color Sort feature to complete this step quickly.
Now that I had my Nativity Pillow designed and saved onto my USB, I was ready to get stitching!
Stitching a Nativity Pillow Using Quilting Backdrops
Step 1: Choose cotton fabric for your quilt blocks and apply SF101 to provide added stability.
Step 2: Load your first quilting blocks onto your machine. (I am stitching horizontal and vertical sashing blocks first.) If you have made any edits in Embrilliance, you will want to have those saved to your USB.
Step 3: Hoop cut-away stabilizer.
Step 4: Stitch the placement line for your batting.
Step 5: Tack down your batting and trim around it, being careful not to cut any stitches.
Step 6: Lay your fabric on top of your batting and tack it down. It should extend beyond the batting line by at least ½” on all sides.
Step 7: Stitch the decorative quilt block motif. (I used Sulky Poly Sparkle™ for this step.)
Step 7a (optional): Stitch any additional design elements (e.g., Nativity Christmas Applique on 8” x 8” quilt blocks).
Step 8: Remove the block(s) from the hoop and set aside.
Step 9: Repeat steps 1–8 for any remaining quilt blocks.
Step 10: Cut away excess stabilizer from the quilt blocks.
Step 11: Using scissors or a rotary cutter, trim each block, leaving ½” excess fabric around the outer stitch line. I prefer to use a rotary cutter and a straight edge ruler for this step.
Step 12: Lay out the quilt blocks according to your original design.
Step 13: Based on my original design, I had three “rows” that I needed to stitch together (top, middle, bottom). Working on one row at a time, stitch together the blocks to create strips that are all equal lengths.
To stitch your blocks together, align the outermost tack-down stitches of two blocks (right sides together) and secure using pins or clips.
Pro tip: If your design layout is different, it is important to keep in mind that you want to create rows with equal lengths before you start stitching everything together.
Step 14: Stitch the blocks together using a sewing machine to make one long strip.
You will want to position your needle to stitch between the batting placement line and the fabric placement line. If you have done this step correctly, the only stitches you should see from the front of your Nativity Pillow are the quilting designs themselves, no outline/tack-down stitches.
Step 15: After the blocks are stitched together and you have rows of equal lengths, repeat steps 13 and 14 again to assemble the front of your Nativity Pillow into one large square. Press open seams with an iron once stitched.
Step 16: Once the front of your pillow is completely stitched together, you are ready to add the back of your pillow. You will want to do an envelope-style backing. Reference this blog post and this video tutorial for specific details on how to complete this final step.
Note: I had my fabric overlap about 4” to allow ample coverage once I placed the pillow form inside. I knew it would bulge and I did not want the pillow form to be seen.
Once you have your backing fabric cut and prepared, secure it to the front of the pillow using pins.
Step 17: Stitch all the way around the pillow using the Quilting Backdrops stitch lines as a stitching guide. Again, stitch between the batting and fabric tack-down stitches to ensure all placement stitches are hidden from the front of your pillow.
Step 18: Trim away any excess backing fabric and cut the corners at an angle for easier turning and sharper corners.
Step 19: Turn the pillow right side out through the back and iron if necessary. Place your pillow form inside and admire your one-of-a-kind decor piece!
The design capabilities using Quilting Backdrops and DBJJ designs are limitless. Use QBs to explore your creative side and design a pillow that is unique and matches your own personal style. Don't forget to share your creations on the Designs by JuJu Embroidery Blessings Facebook Group or anywhere on social media using the hashtag #designsbyjuju. We can't wait to see what you make!


