Toggle Nav
 Inspire.
Create.
Stitch.
Inspire.
Create.
Stitch.
Inspire.
Create.
Stitch.
Search
Inspire.
Create.
Stitch.
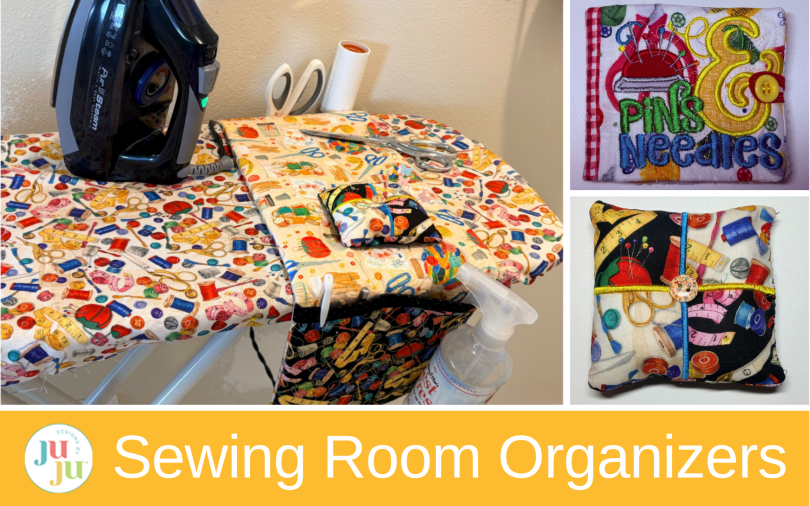
Create a handmade sewing needle keeper and ironing board organizer with machine embroidery. This beginner-friendly tutorial helps you organize needles, pins, scissors, and sewing tools while adding charm to your creative space.
In this step-by-step tutorial, you’ll combine machine embroidery with simple sewing to make a needle keeper book with labeled felt pages and an ironing board organizer with pockets and a pincushion. Use your favorite fabrics and Designs by JuJu designs to create a coordinated set for your sewing room—or a thoughtful handmade gift for a stitching friend.
Check out the DBJJ team’s favorite supplies in the Designs by JuJu Amazon store. For all your stabilizer, thread, and batting needs, be sure to check out Designs by JuJu+.
Finished size: 9” x 4”
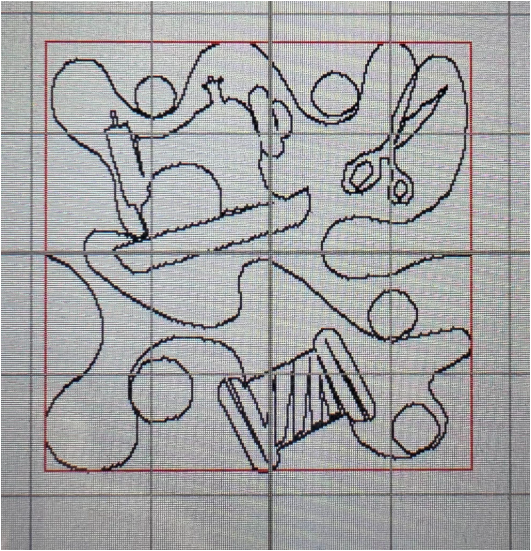
Load the Sewing 1 End-to-End Quilting Embroidery Design onto your machine. Select the 3.50" x 3.50" size and load it to the screen.
If your machine allows, add a basting box around the design.
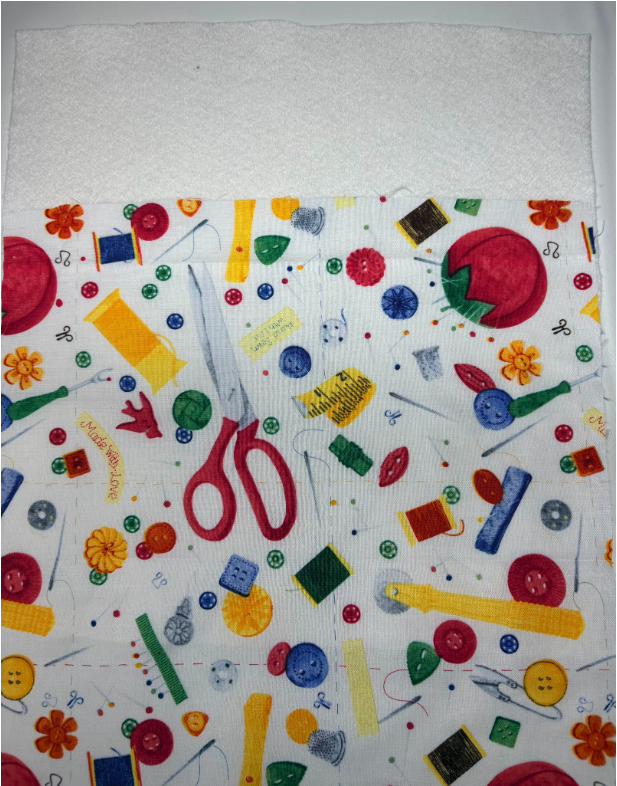
Cut two pieces of fabric and batting for the front and back, each 10” x 10”.
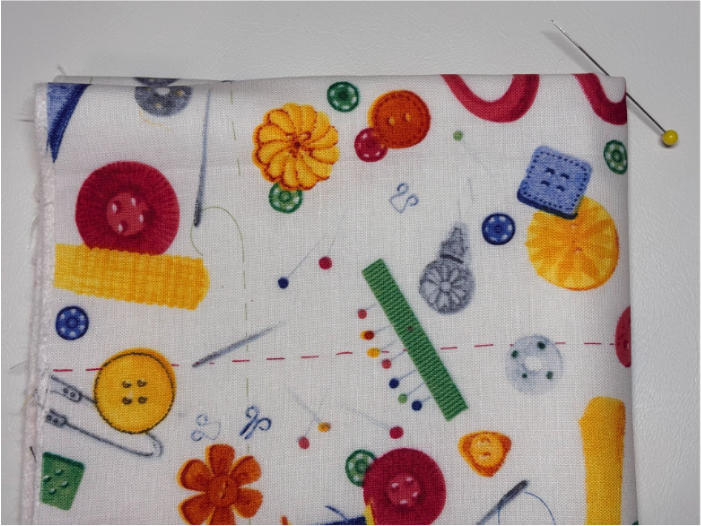
Fold the fabric into quarters and mark the center with a pin.
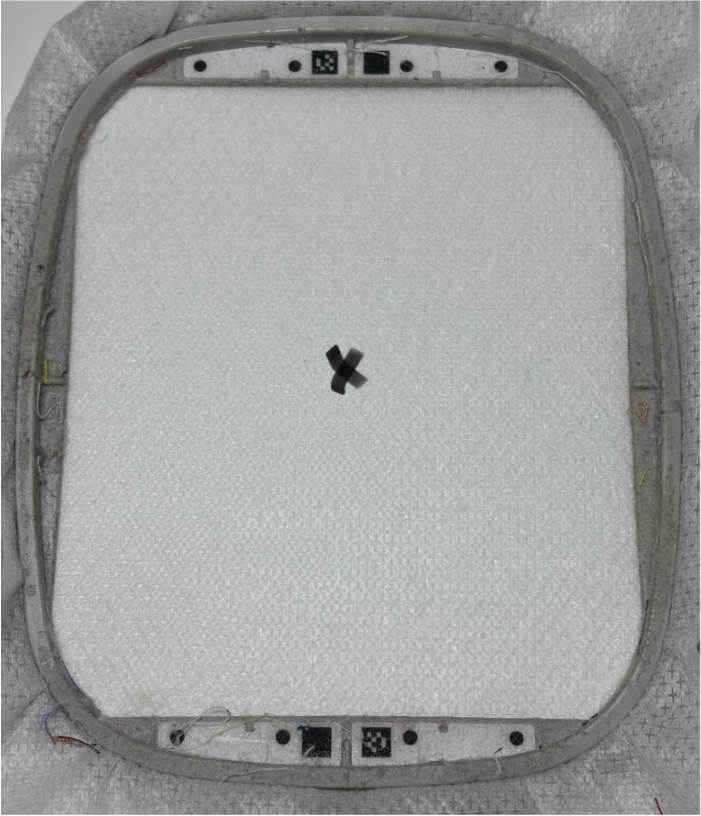
Hoop cut-away stabilizer, take it to the machine, and mark the design center on the stabilizer. Lay batting and one fabric square over the stabilizer.
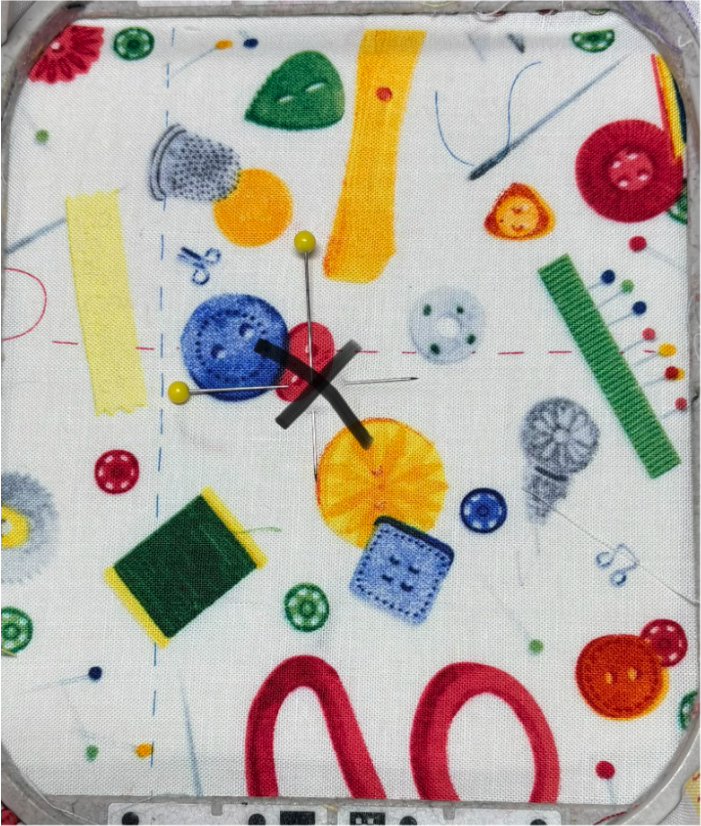
Align the center of the fabric and batting with the center mark on the stabilizer.
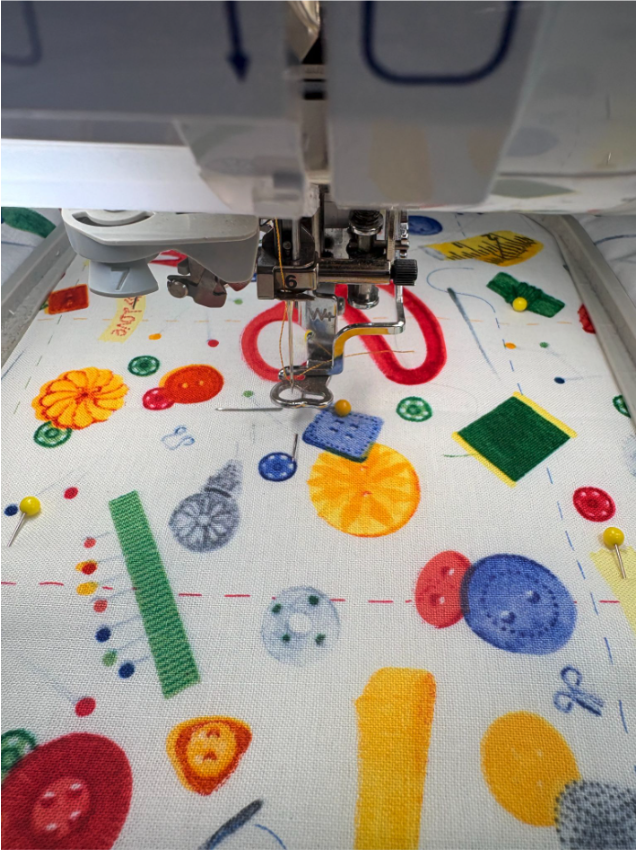
Hoop the fabric and batting with the stabilizer and take it to the machine. Check to ensure the fabric is centered. Pin in place.
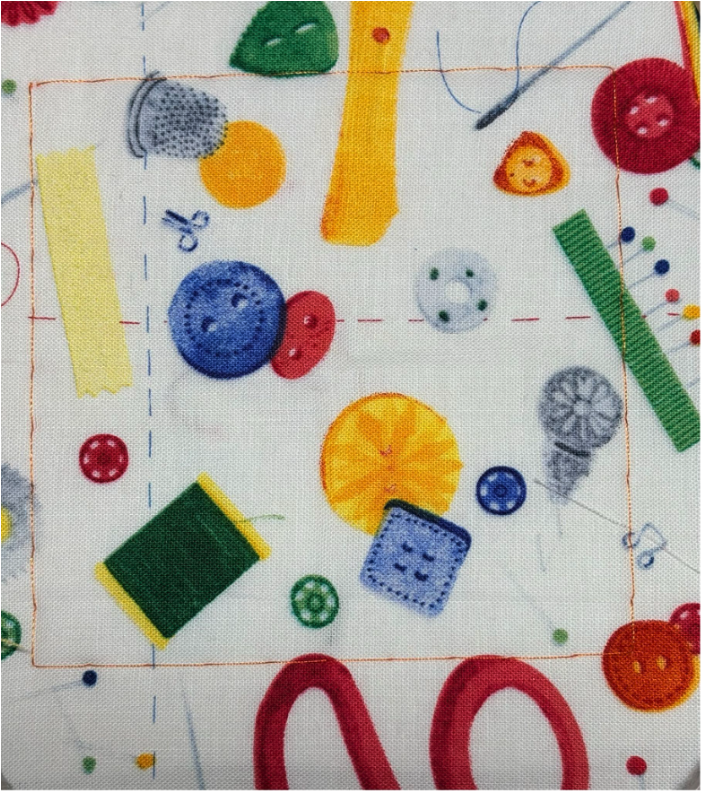
Run the basting box first, if your machine allows it. You can now remove the pins. If you do not have a basting box, keep the pins in place out of the stitching area.
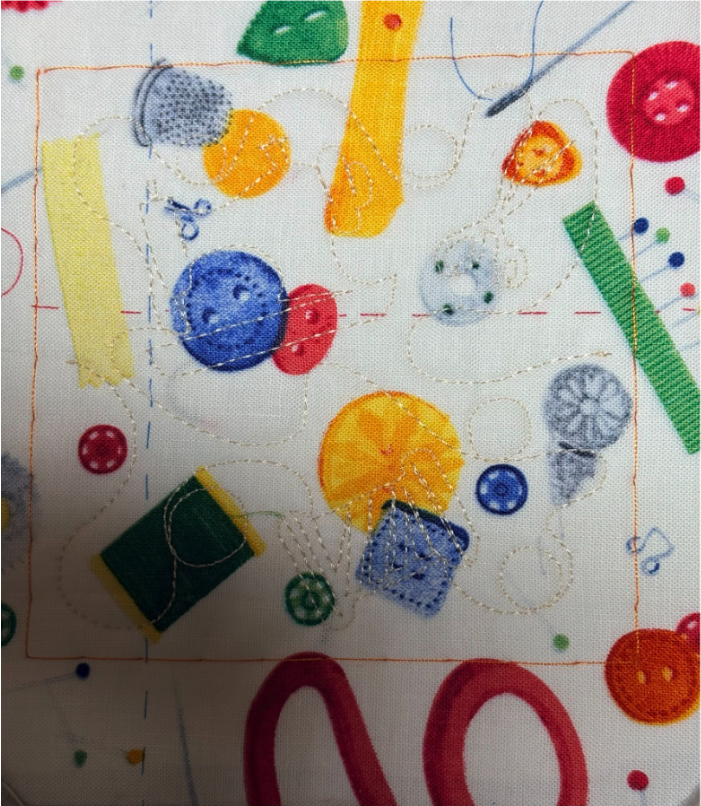
The next step is the end-to-end design. When finished, remove the fabric and set it aside.
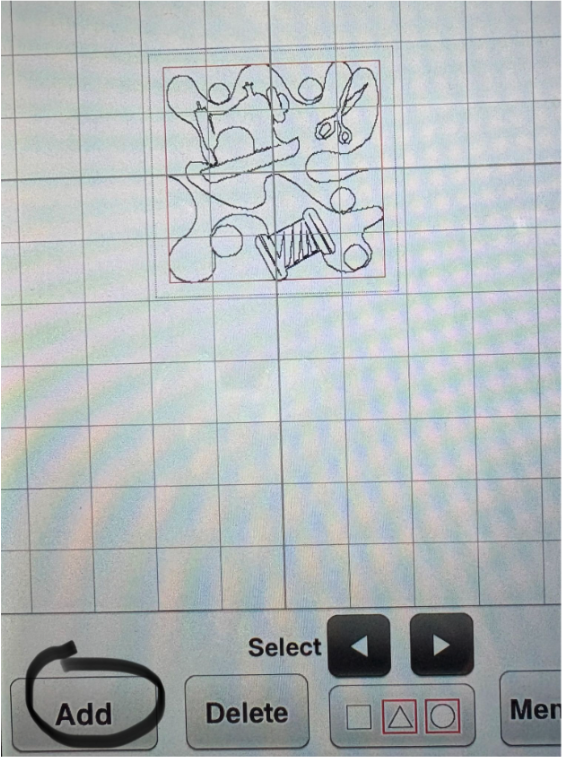
Return to the machine, but do not delete the end-to-end design. Select the Add key.
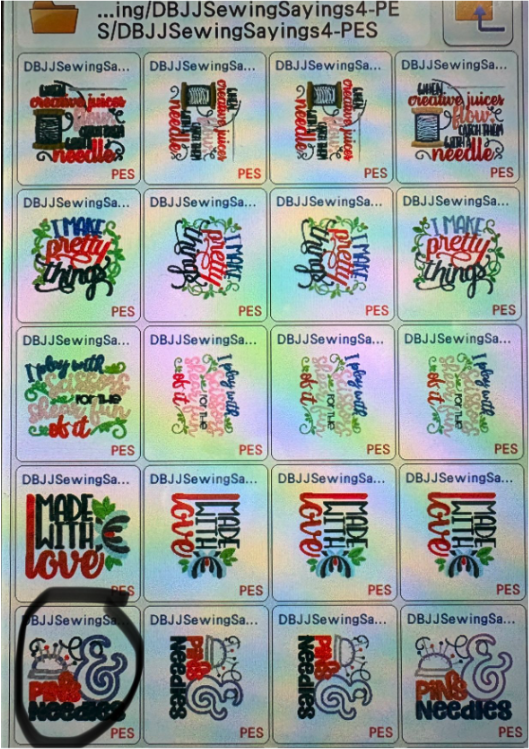
Load Designs by JuJuSewing Sayings Set 4 onto your machine. Select the 3.35" x 3.87" Pins and Needles design and add it to your screen.
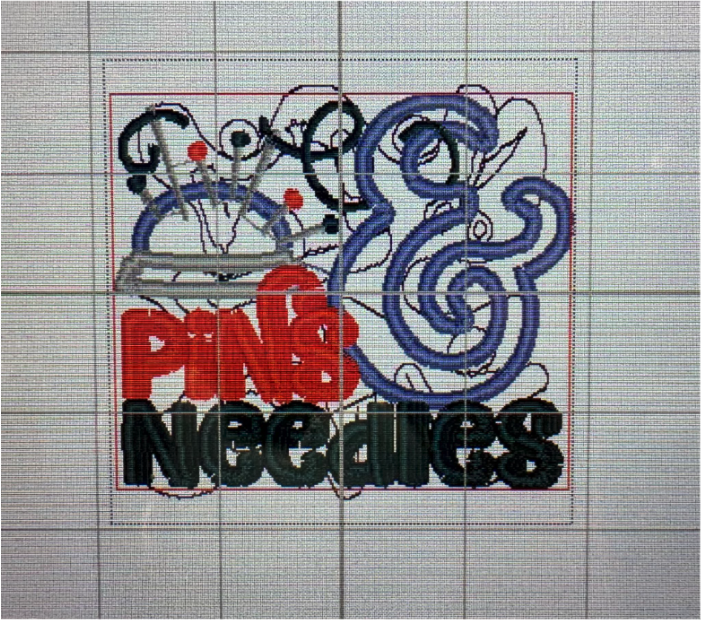
Make sure it is centered inside the end-to-end design.
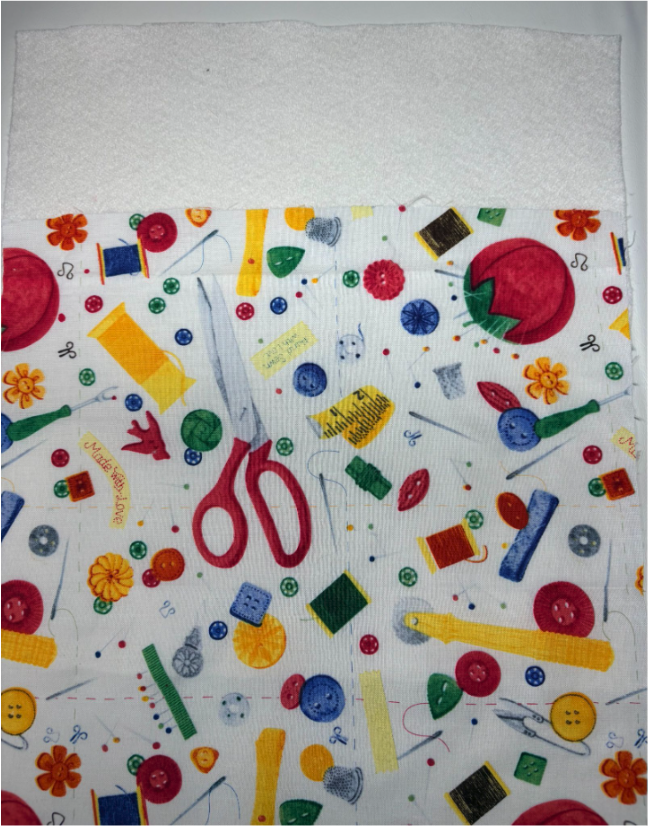
Repeat the previous steps to hoop the second piece of 10” x 10” fabric and batting.
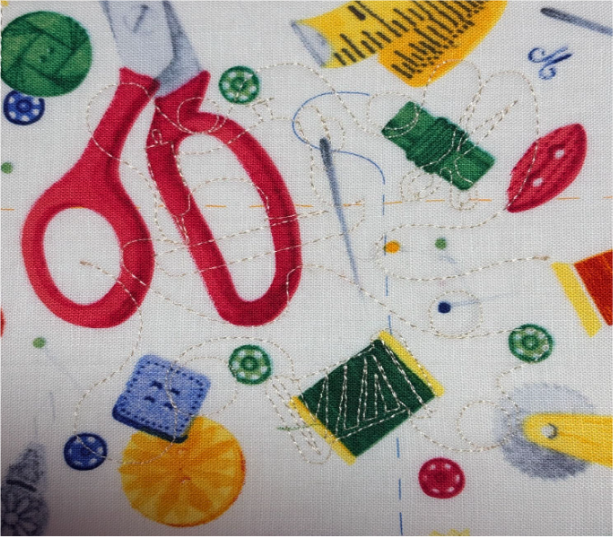
Take it to the machine and run the end-to-end stitches first.
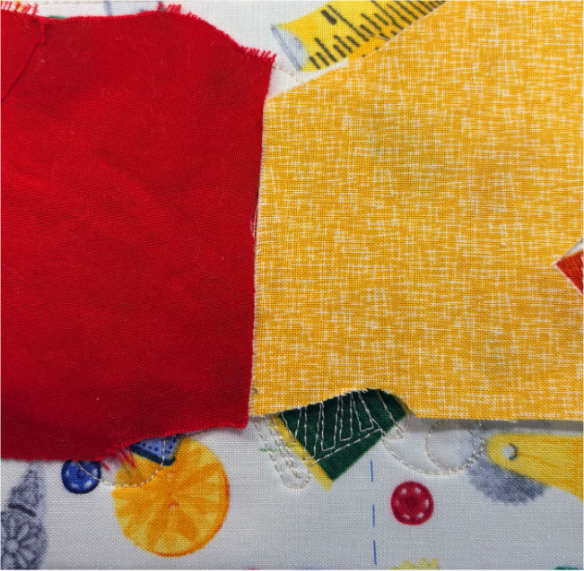
Next, stitch the applique for the Pins and Needles design. Run the placement stitches, then lay scrap fabric over all the stitch lines.
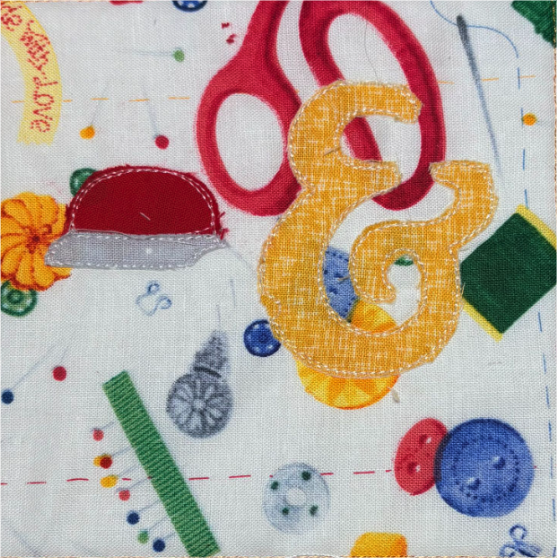
Run the tack-down stitches. Remove the hoop and set it on a flat surface. Trim the fabric. Return the hoop to the machine.
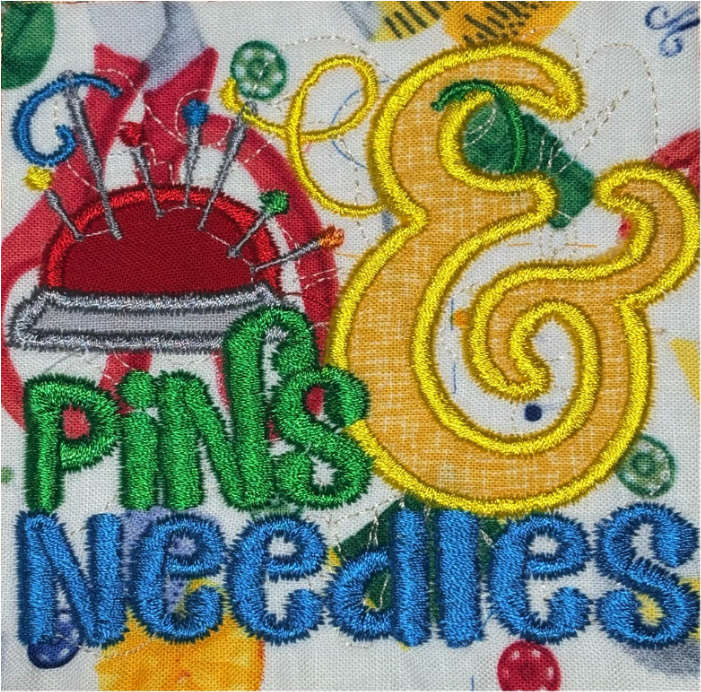
Continue with the rest of the design. Remove the design from the hoop.
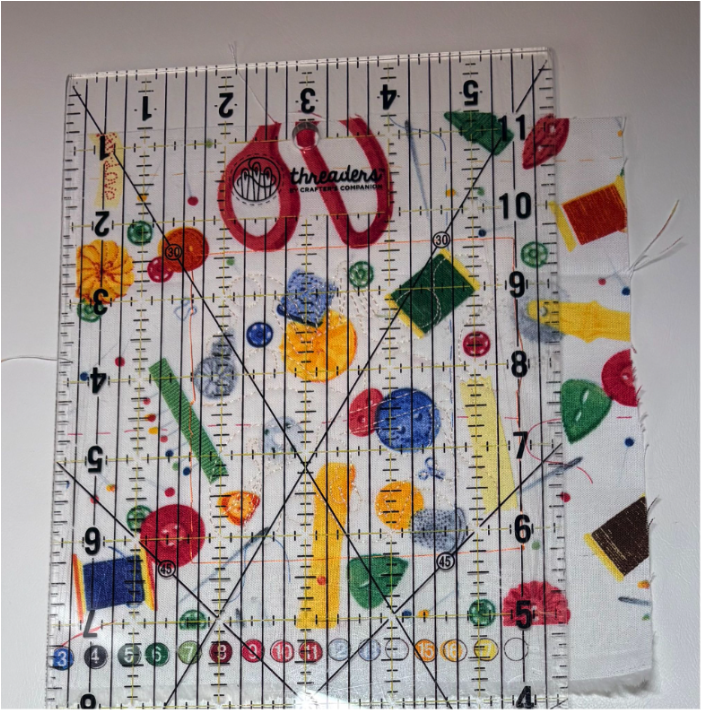
Using a ruler and your basting box as a guide, cut the front and back pieces to 5" x 5".
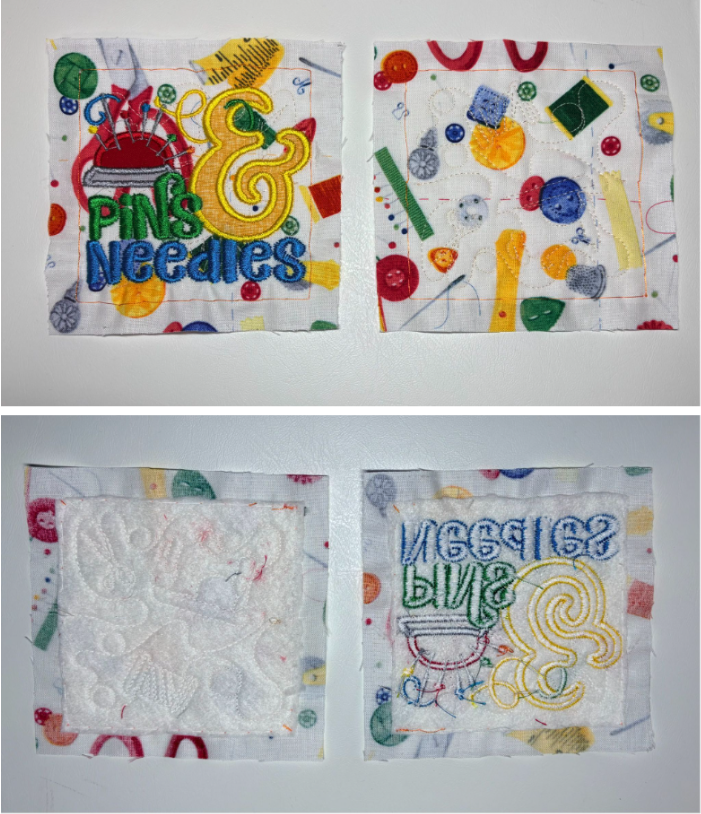
Trim the batting and stabilizer on both pieces close to the designs.
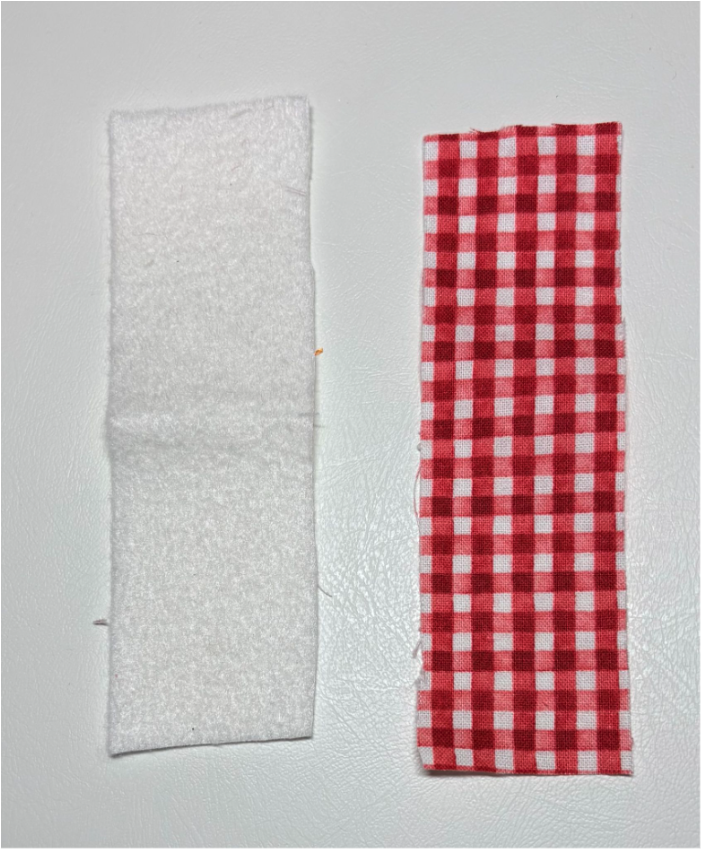
Cut a strip of fabric and batting for the binding, each measuring 1½" x 5".
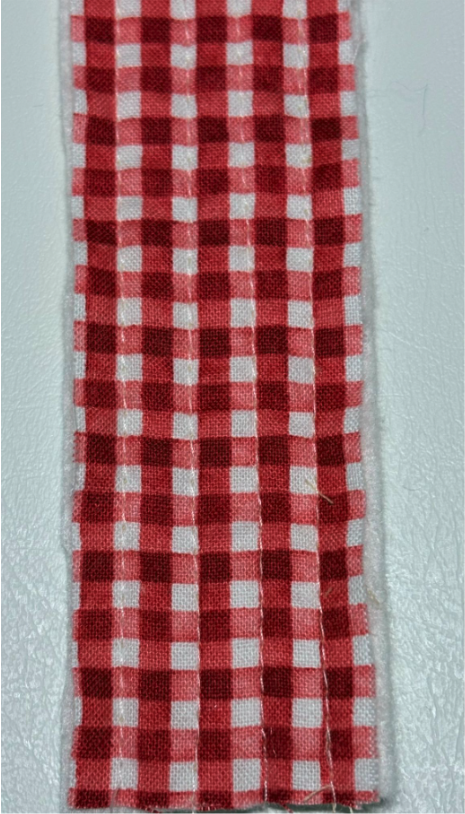
Lay the fabric on top of the batting, then take it to the sewing machine. Sew straight lines ¼” apart down the binding.
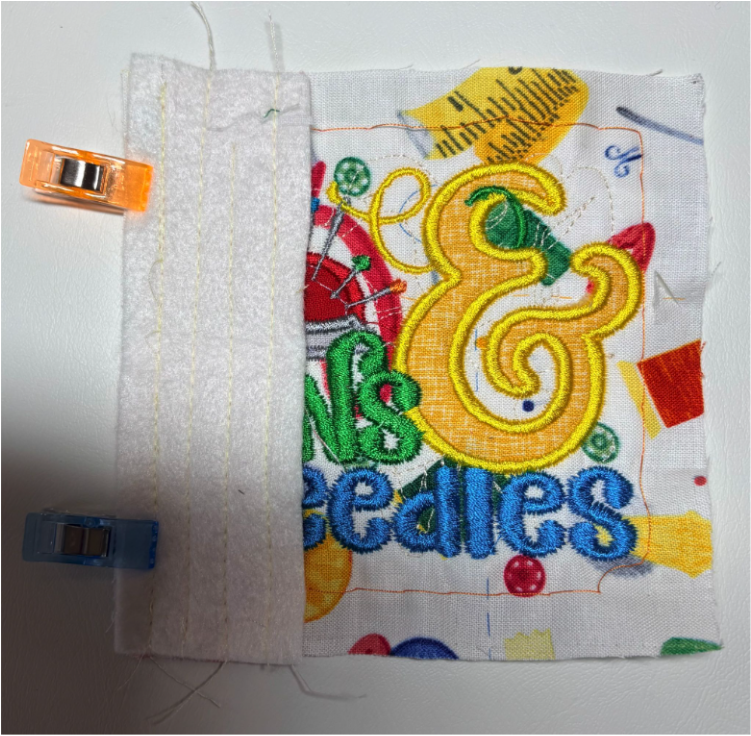
With right sides together, pin or clip the binding to the left side of the front fabric.
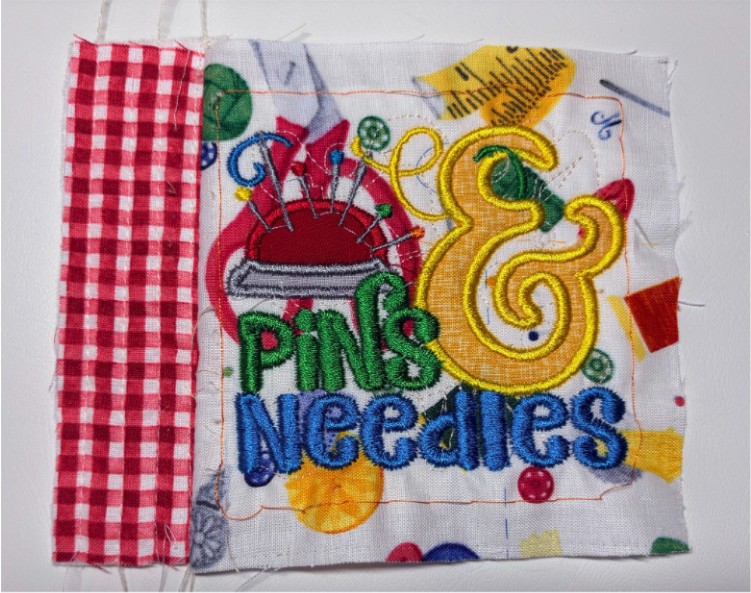
Sew a ¼” seam allowance.
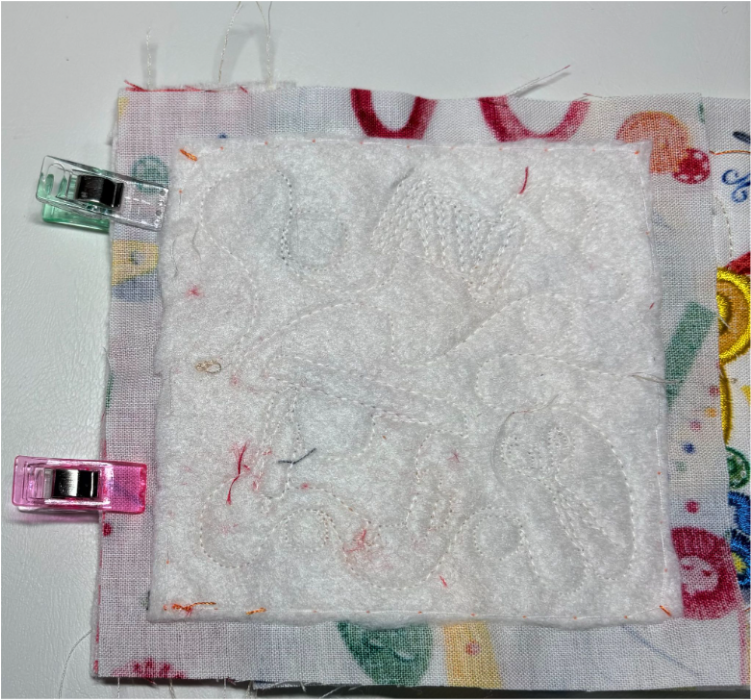
Pin or clip the back fabric to the opposite side of the binding. Sew with a ¼" seam allowance.
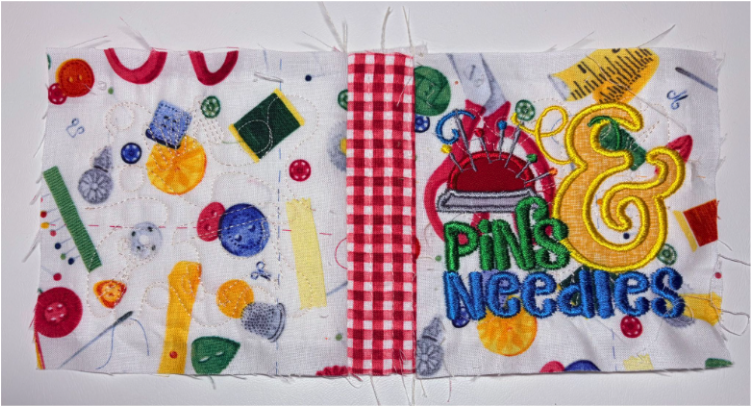
Open it up and press. It should measure 10½” x 5”. If it doesn't, just cut the lining to match. If your measurements are a bit off, don't worry. You can trim the edges, press the seams again, or square up the corners to get a neat finish. Making these small adjustments will help your project turn out well.
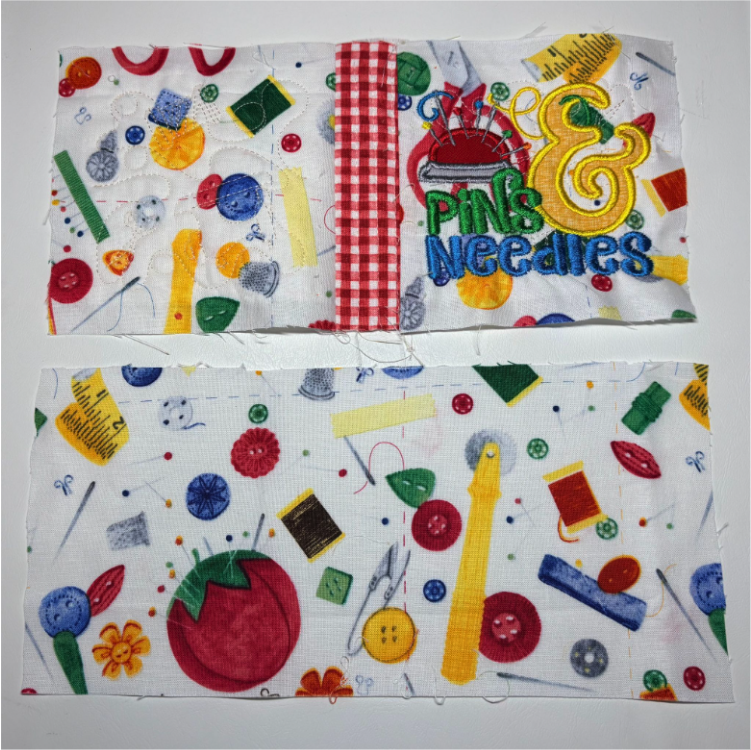
Cut the lining to 10½” x 5” or to match the size of the front.
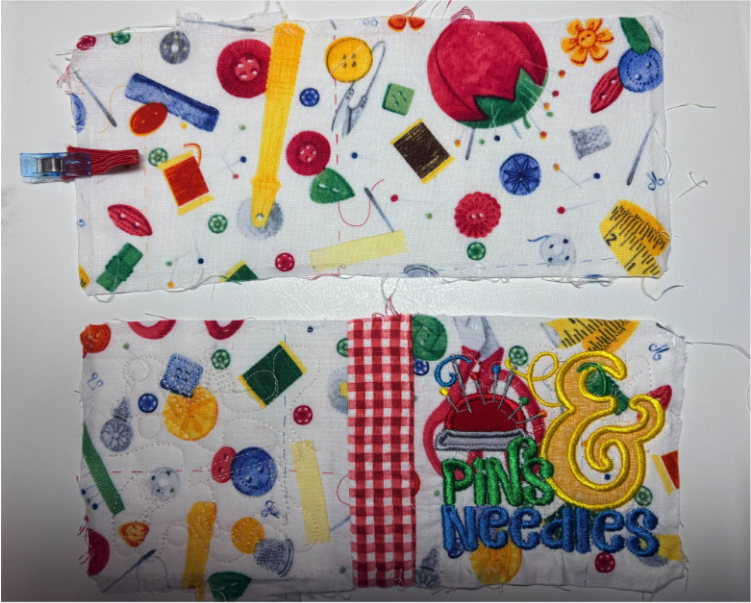
Fold the 3” piece of elastic in half. Pin or clip the edges of the elastic to the edge of the lining as shown in the picture, making sure the elastic is centered.
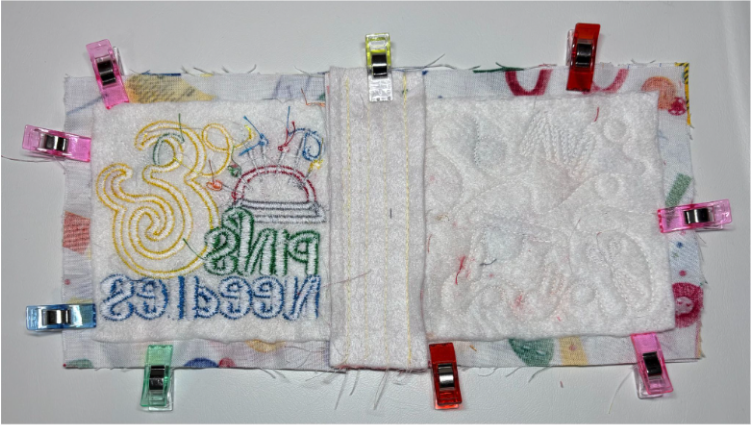
With right sides together, pin or clip the front to the lining. Leave a small opening for turning.
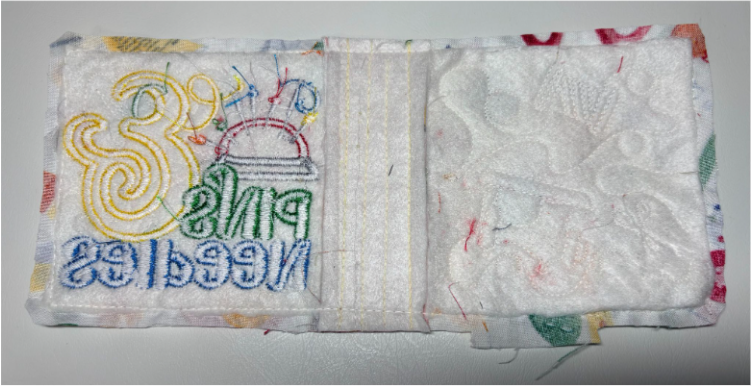
Sew around with a ½" seam allowance. Trim to ¼". Leave the opening untrimmed, and clip the corners.
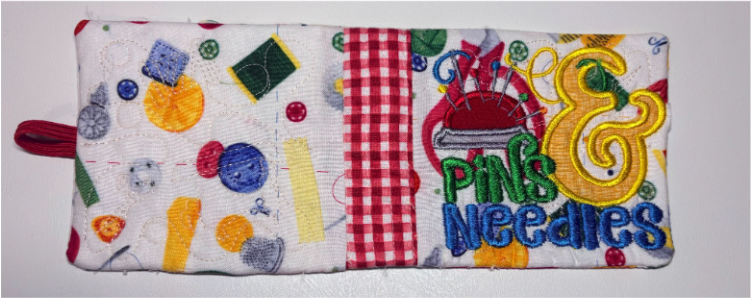
Turn right side out and press, turning the opening ends to the inside. Hand stitch the opening closed.
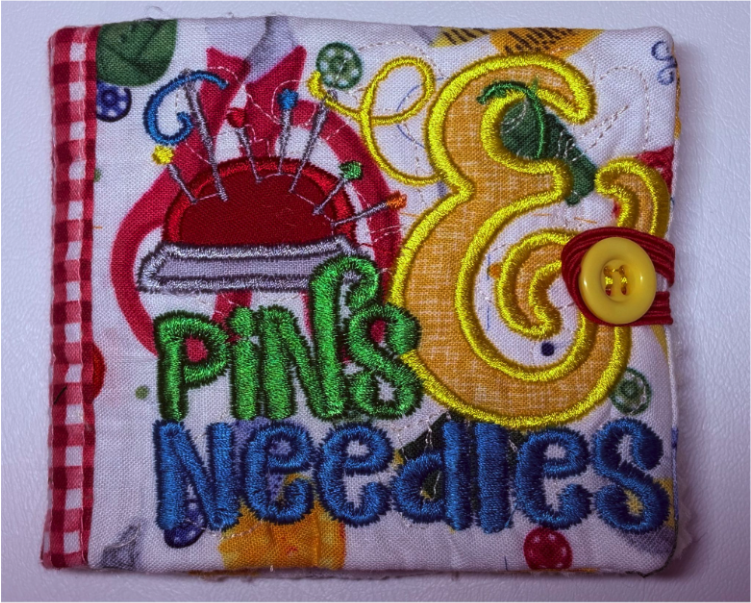
Sew a button to the front, aligning it with the elastic on the back.
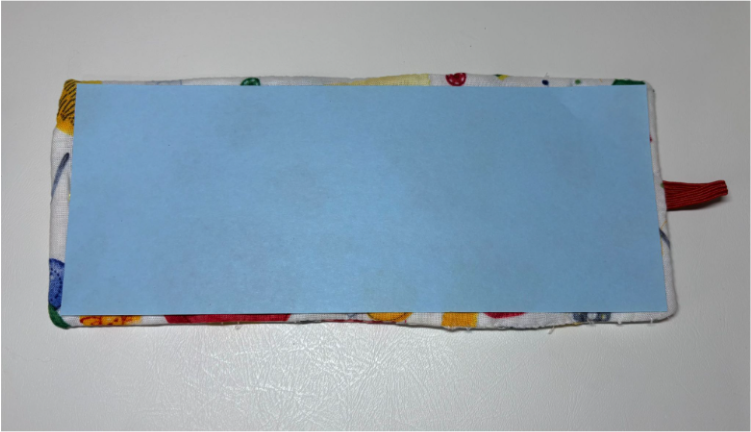
For the inside of the needle book, cut a piece of scrap paper 8¾" x 3½". Use this as a template.
Open the book and lay the paper across the inside. Make any adjustments in size. You want it just slightly smaller than the cover.
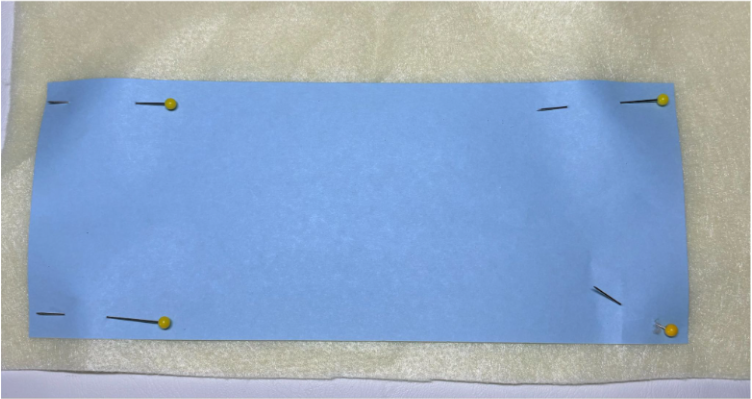
Once you are happy with the size, pin the paper to your felt and cut two pieces.
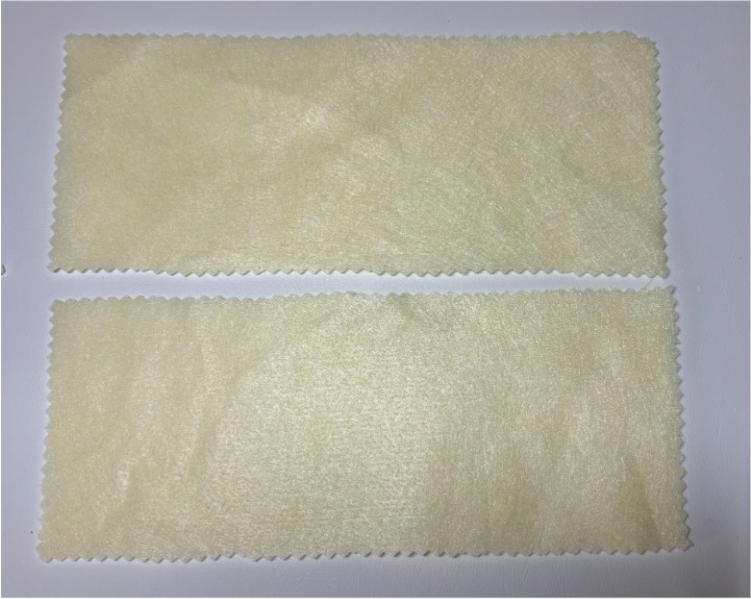
If you have pinking shears, use them; if not, no worries.
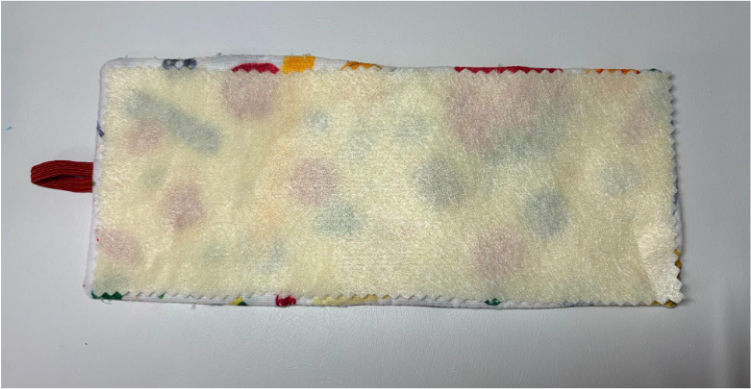
Lay one piece inside the book. If you need to trim it smaller, do that now.
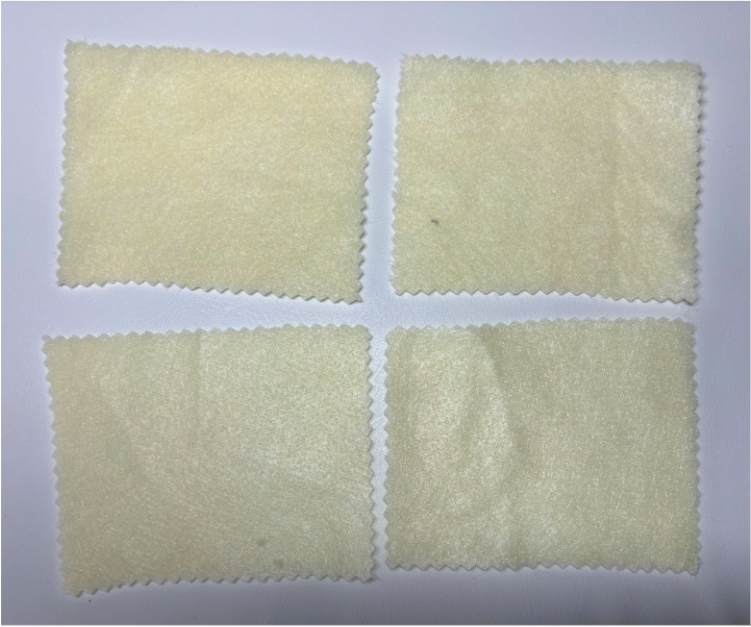
Cut five pieces of felt 3" x 4". My picture shows four, but I decided to add an extra one for the back.
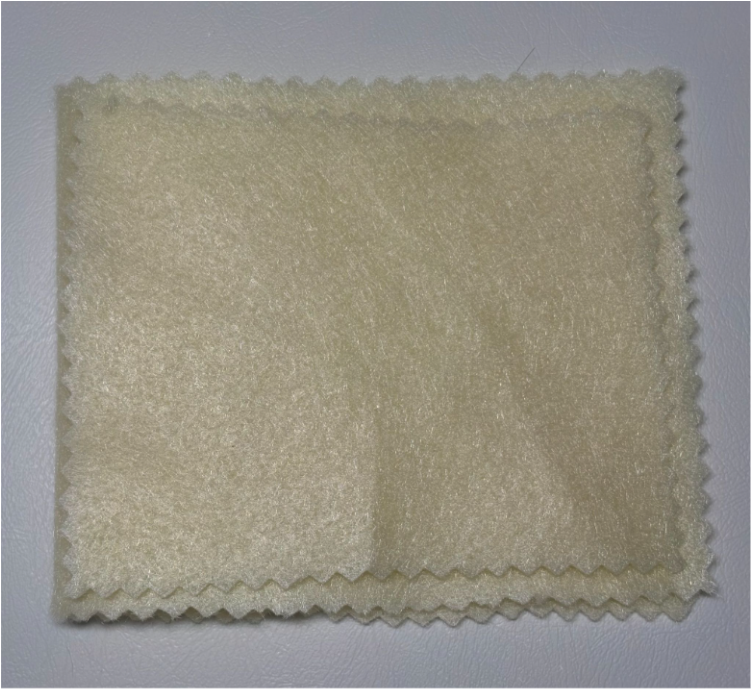
They should be just slightly smaller than the larger rectangle when it is folded in half.
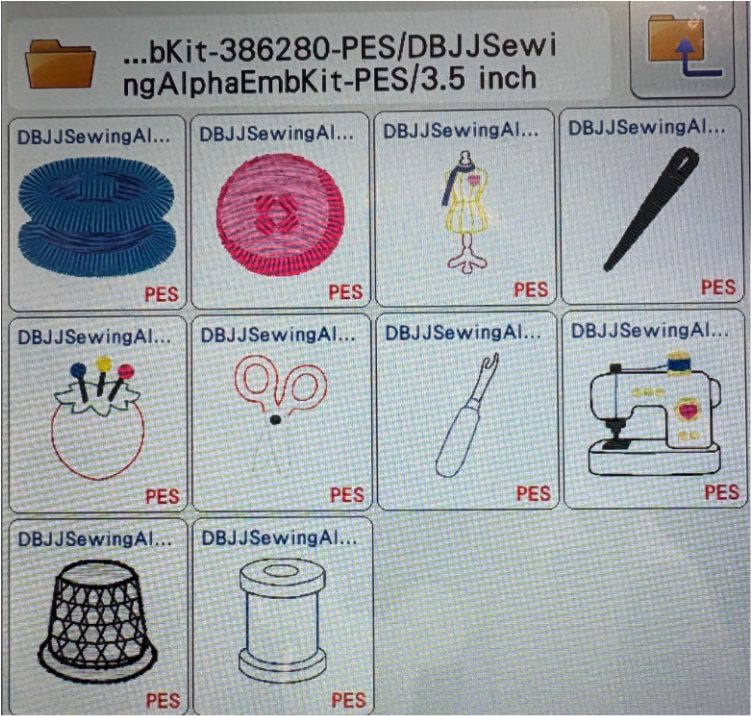
Load the Daisy Doodle Sewing Bean Stitch Embellishment Kit to your machine. Select the 3.5” designs. You can choose to use the same designs I used or choose different ones. I chose the Pincushion and Sewing Machine designs.
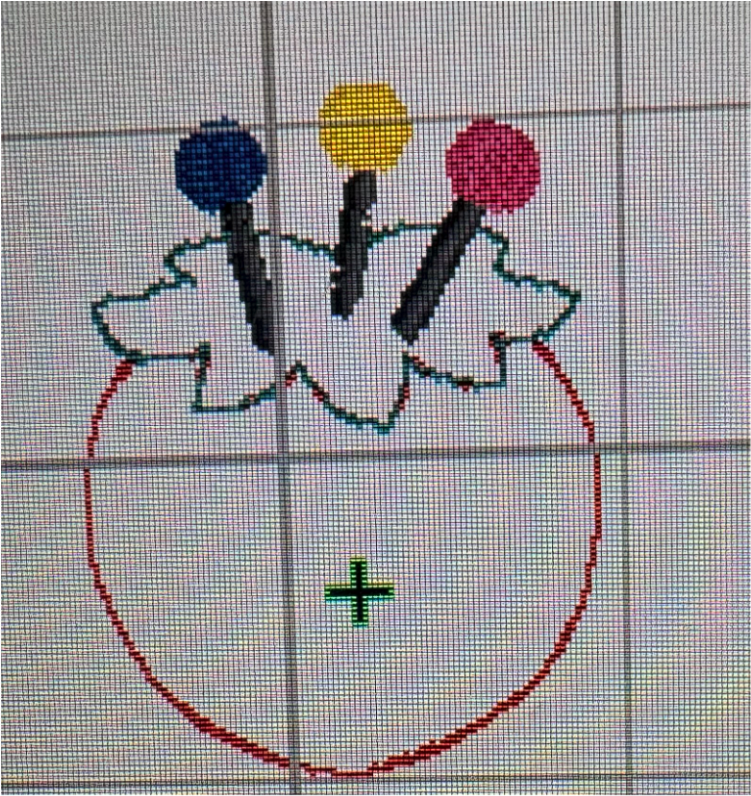
Load the design onto your screen.
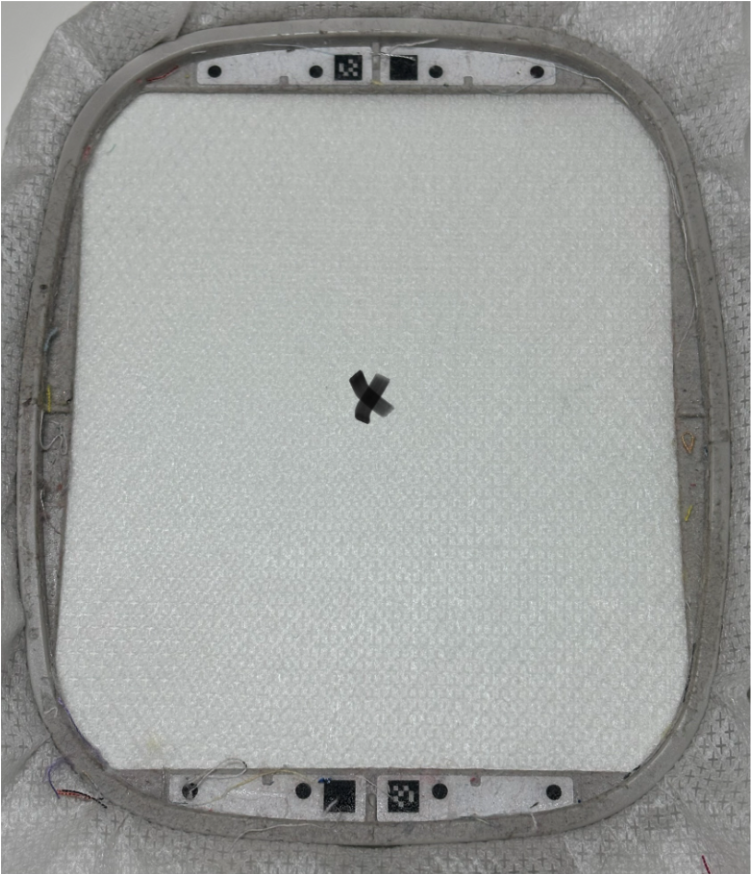
Hoop cut-away stabilizer in a 4x4 hoop. Mark the center of the design.
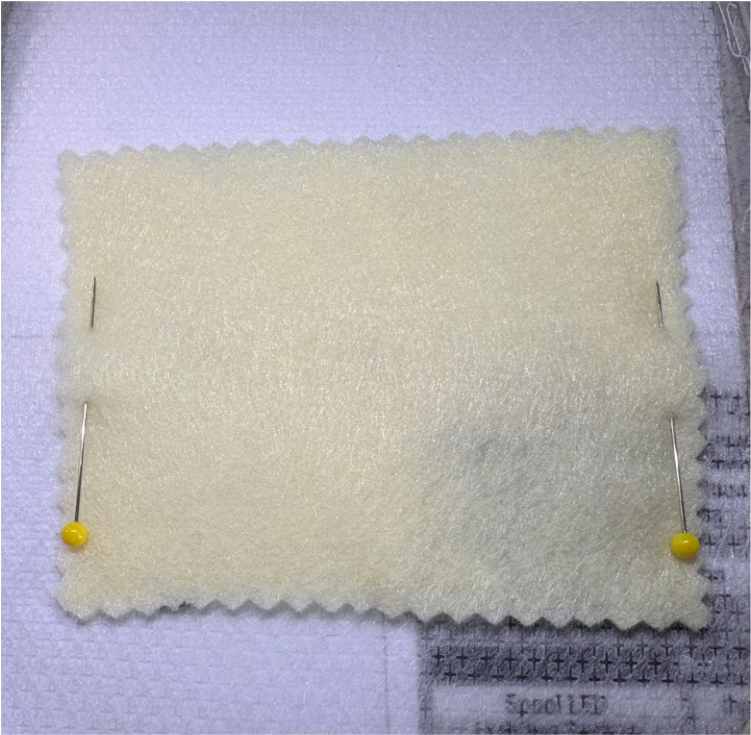
Center and pin the 3" x 4" felt to the stabilizer. Keep the pins out of the stitching area.
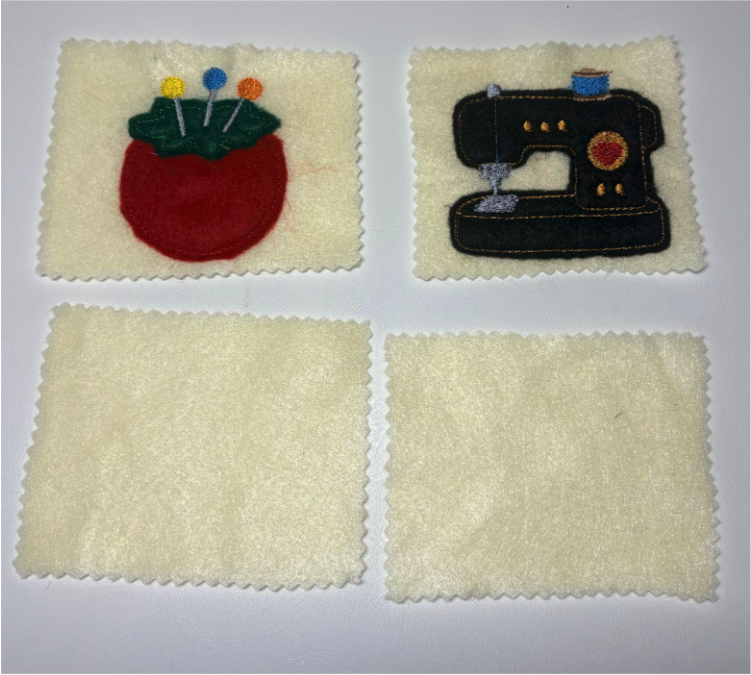
Stitch out the design. A bean stitch is an embroidery stitch that goes over the same line several times, making it thicker and more textured. Unlike a satin stitch, it leaves a raw edge. If you haven't tried a bean stitch before, watch this JuJu video first: How to Embroider a Bean Stitch Applique. When finished, load the Sewing Machine design in the 3.5” size and, following the same steps, stitch it onto a second 3” x 4” piece of felt.
Next, we will embroider the needle sizes. Please read these steps before continuing.
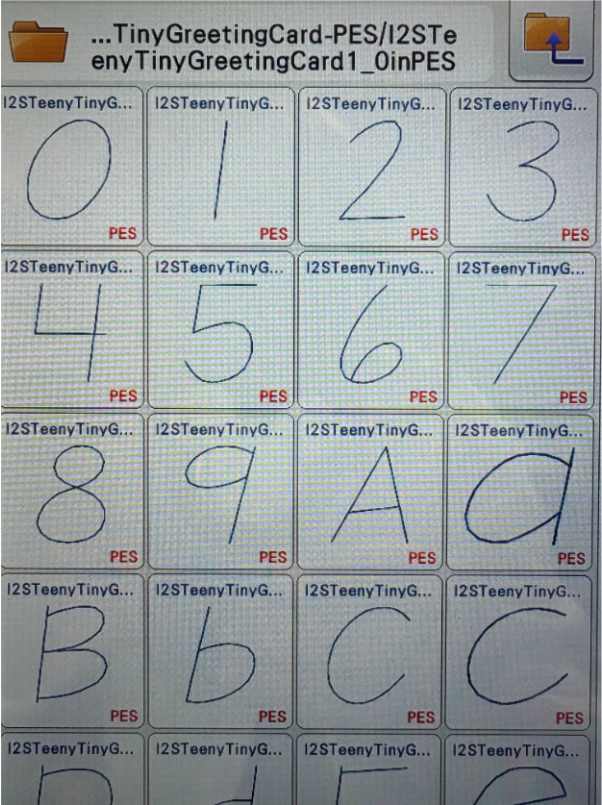
Load the Teeny Tiny Bean Stitch Embroidery Font to your machine. Select the 1” size and add the numbers to your screen.
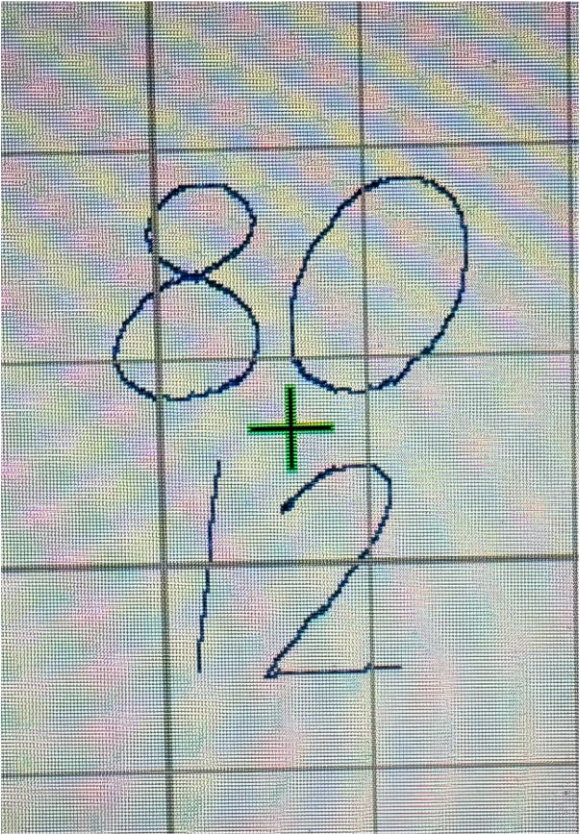
Use the Move keys to arrange and center them. You can arrange them any way you like.
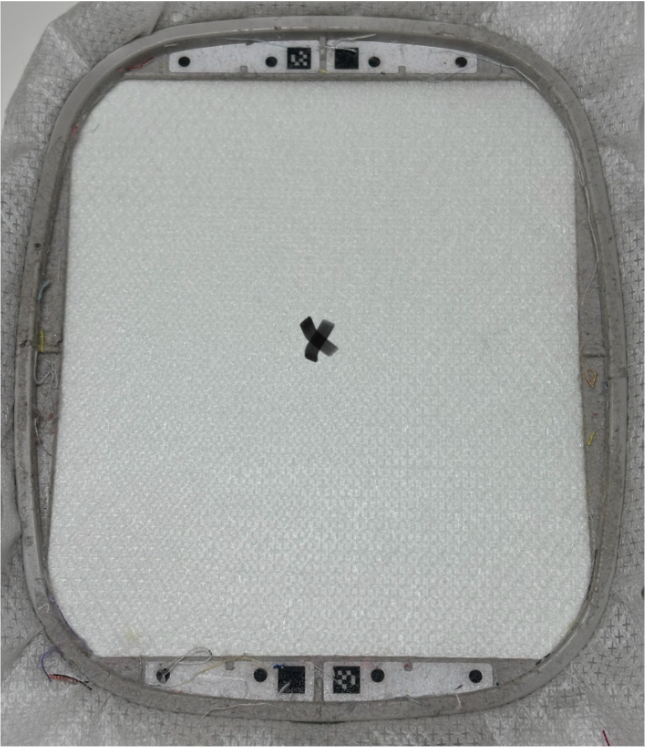
Hoop cut-away stabilizer into a 4x4 hoop and take it to the machine. Find the center of the design.
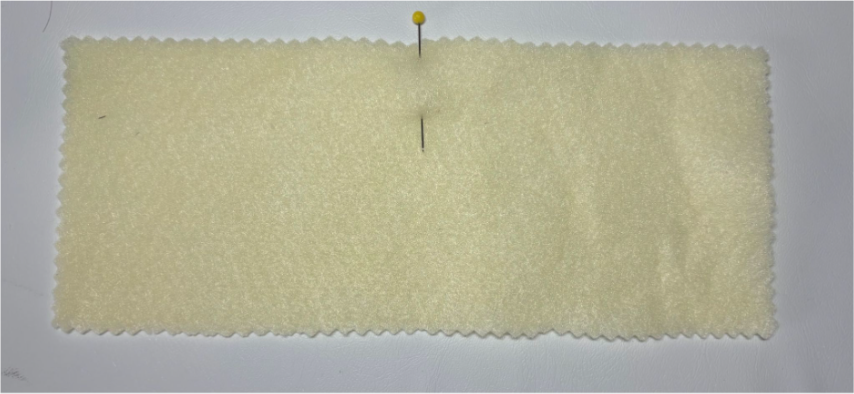
Fold one of the 8¾" x 3½" pieces of felt in half and mark it with a pin. This will be the center mark of the two pages. Next, find the left-side center.
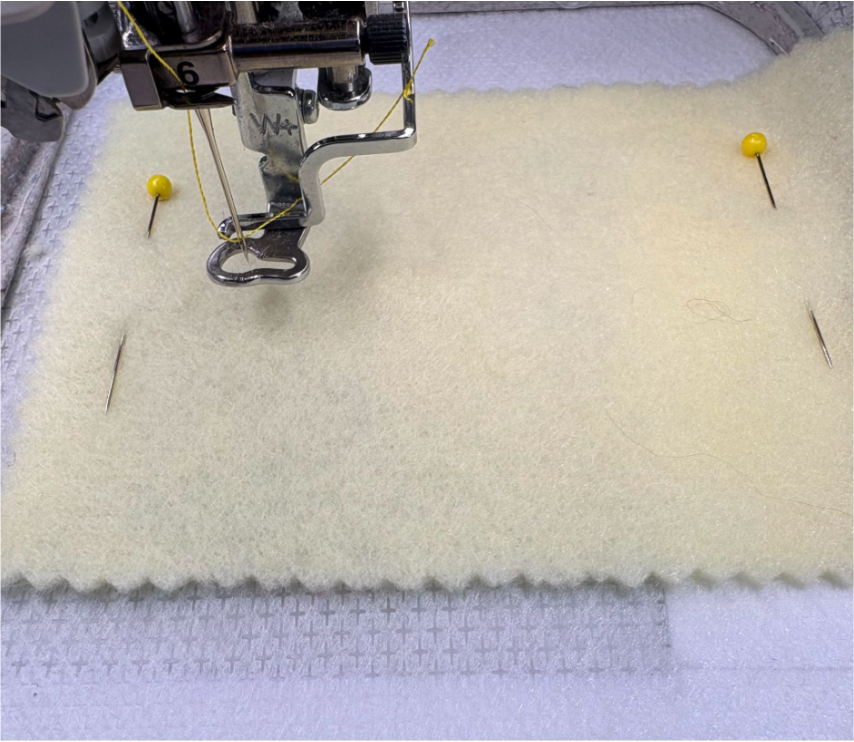
Pin the felt to the stabilizer, matching the center of the stabilizer with the left-side center of the felt.
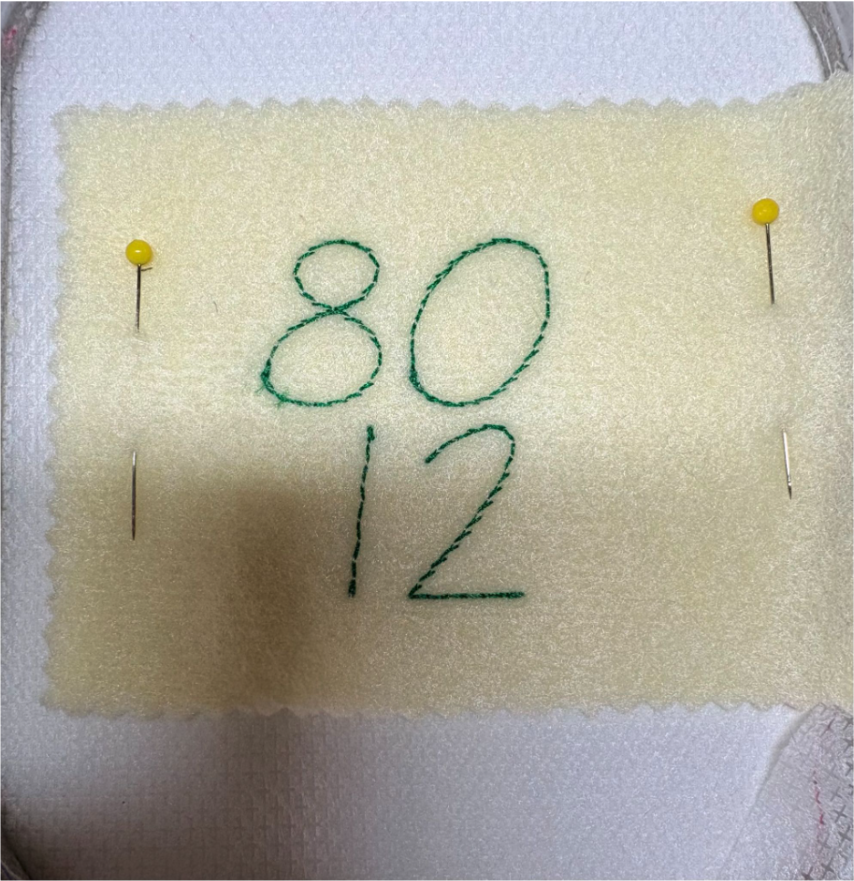
Stitch out the numbers.
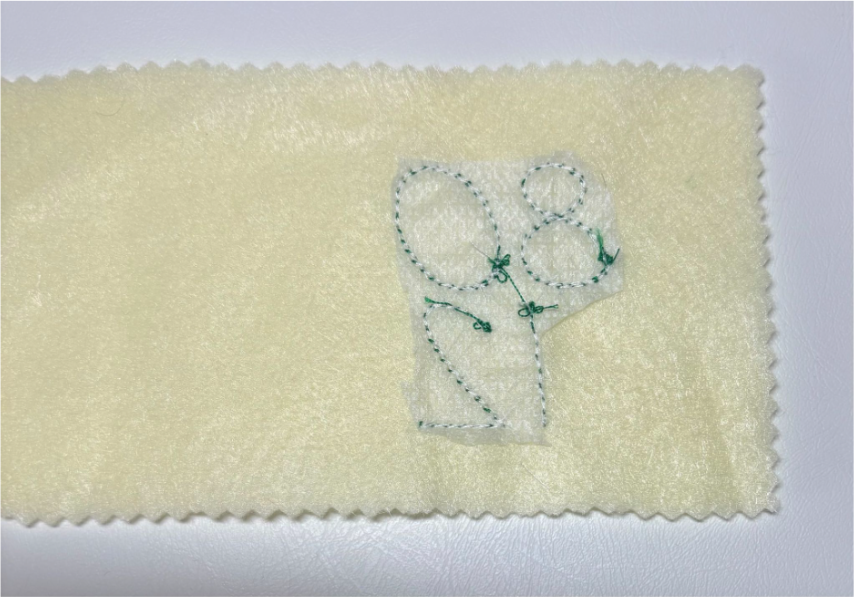
Remove the felt from the hoop and trim away the stabilizer.
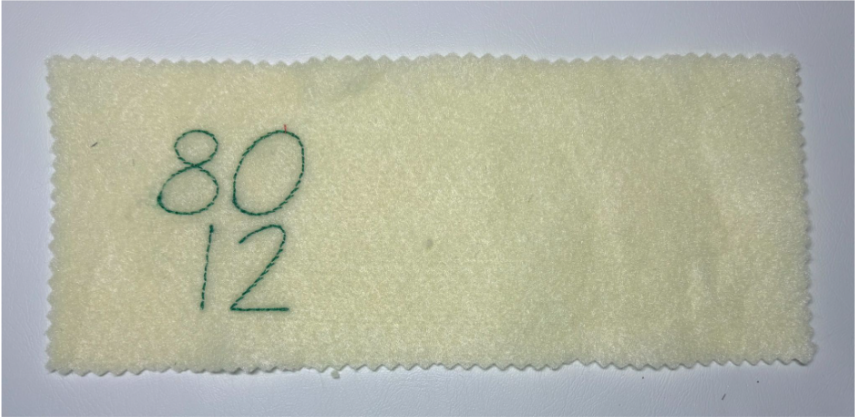
Your first page should look like this.
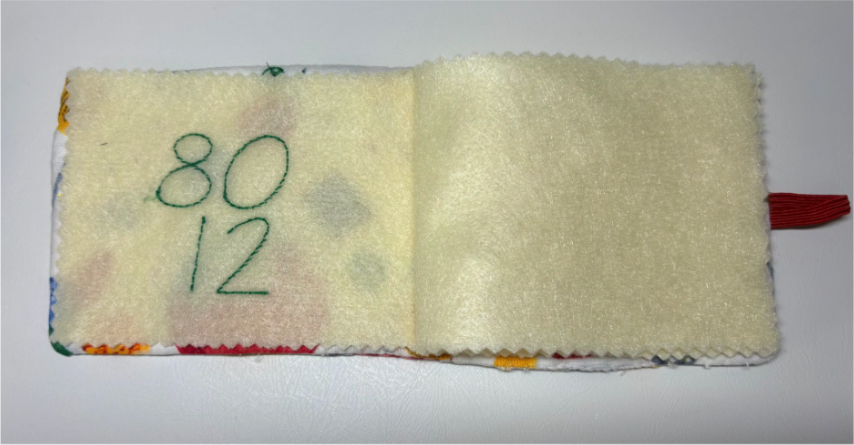
Lay the second 8¾” x 3½” piece of felt on top of the first one. Fold it in half as shown in the picture. Mark the center with a pin.
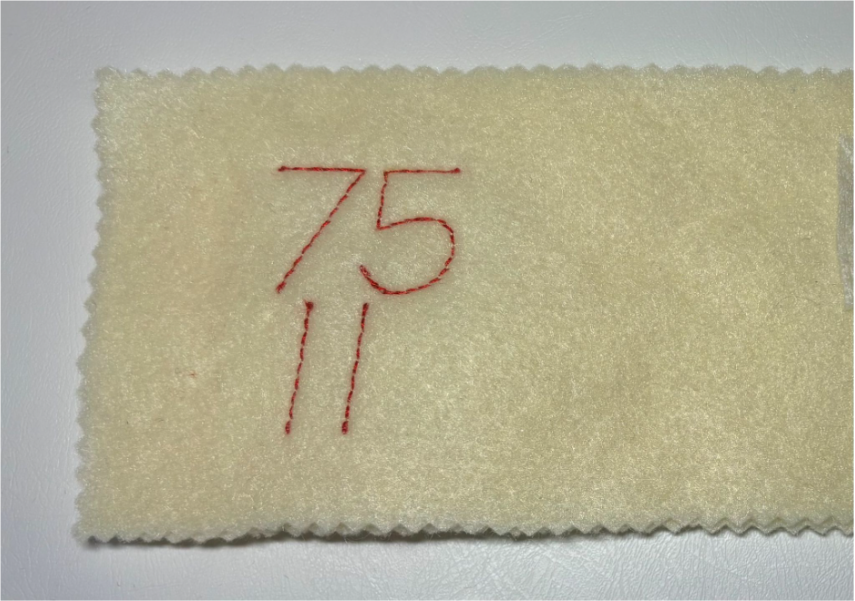
Remove the felt and add the next set of needle size 75/11 numbers to your screen. Follow the previous steps and stitch the numbers onto the left side of the felt.
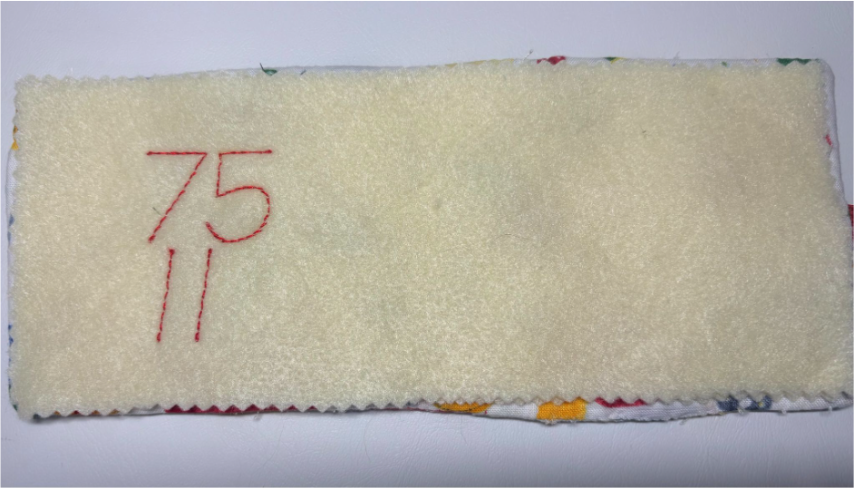
Remove it from the hoop and lay it back on top of the first 8¾” x 3½” piece of felt.
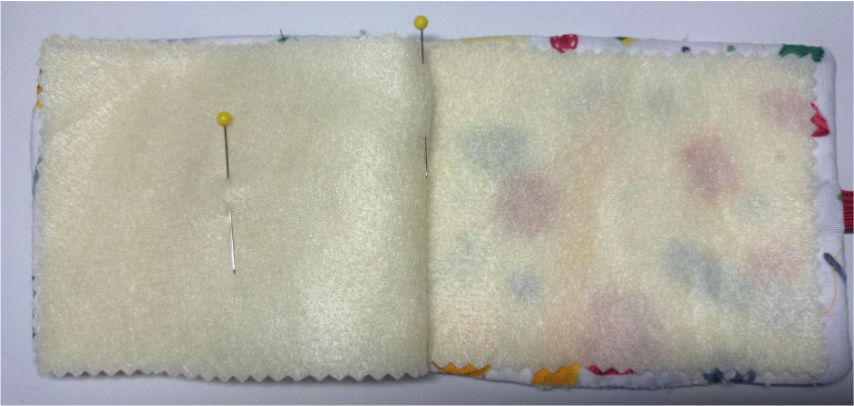
Fold it over to the left. Find the two centers again and mark or pin the area.
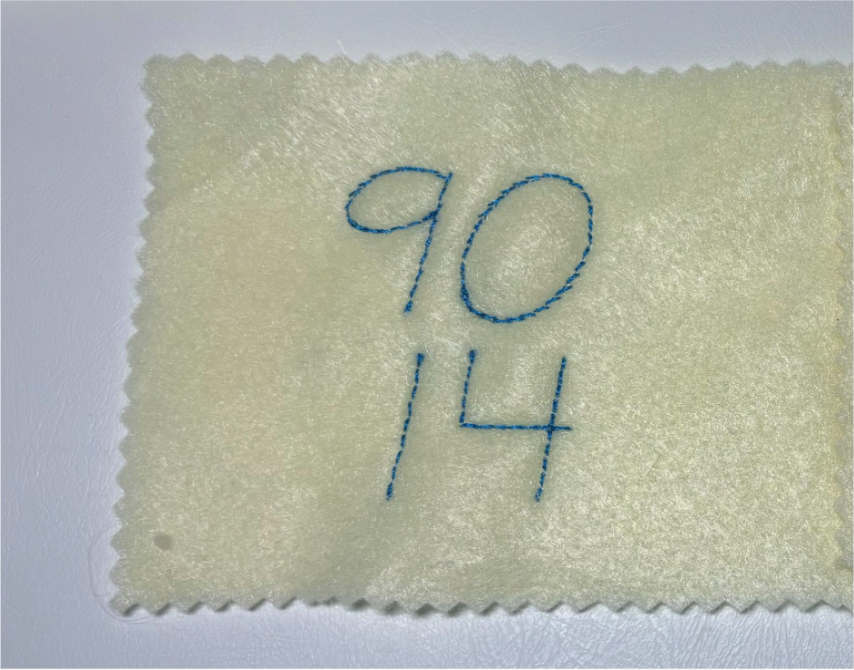
Load the next set of needle sizes 90/14 to your screen. Hoop the 4x4 frame with cut-away stabilizer.
With the 75/11 embroidered felt turned over, pin the left side to the stabilizer. The backside of the 75/11 should now be on the right side.
Stitch out the 90/14 numbers on the left side. Remove from the hoop and trim away the stabilizer.
Now layer the pages. Begin with the felt embroidered with 80/12 and the small felt piece with the pincushion.
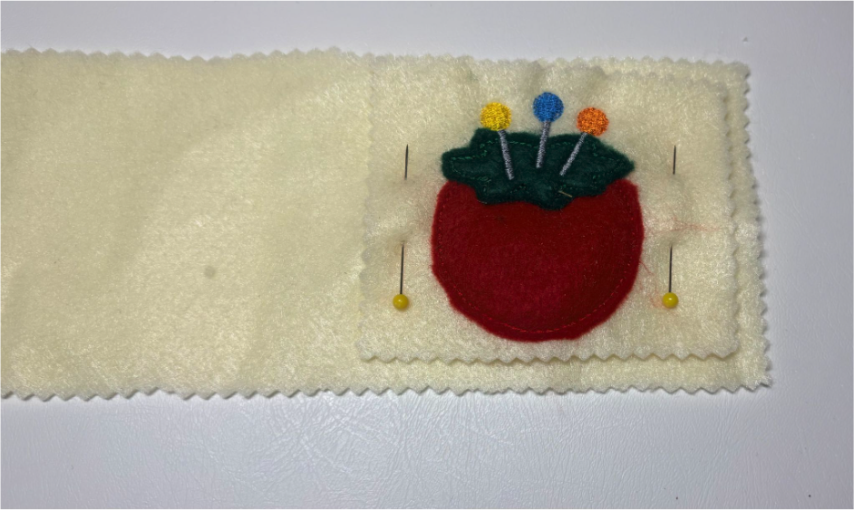
Pin the small piece with the pincushion to the back of the 80/12.
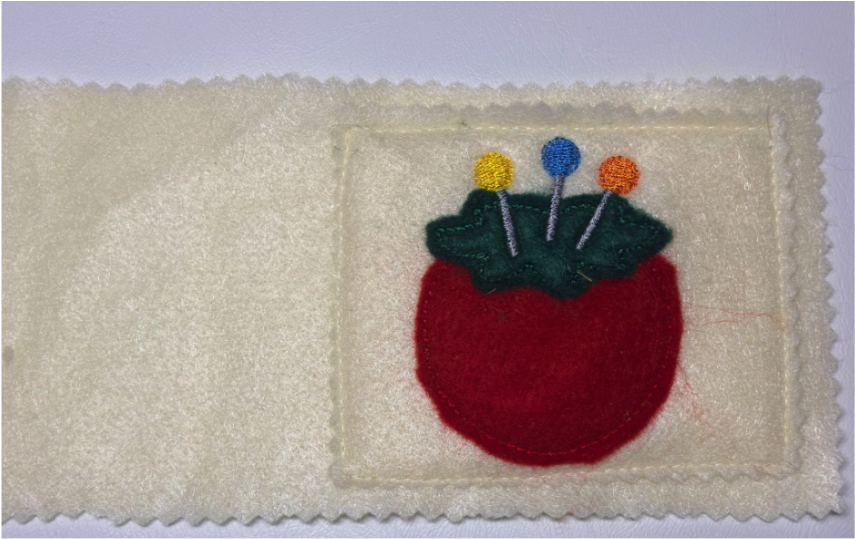
Sew around the edges.
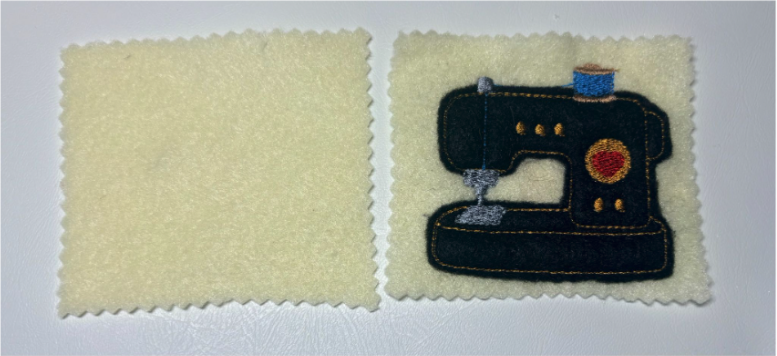
Take a blank piece of felt and the sewing machine.
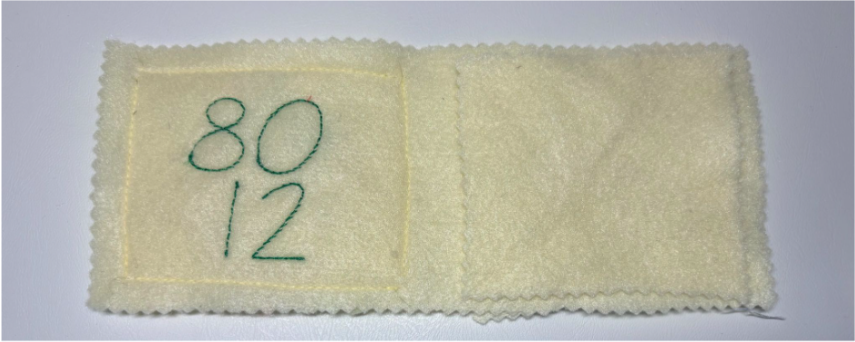
On the opposite side, lay a blank piece opposite the 80/12.
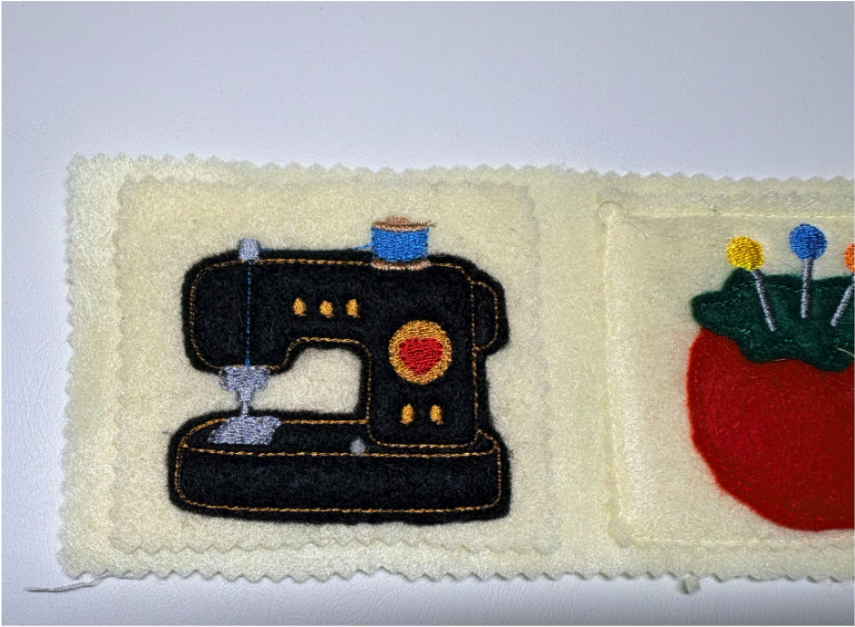
Add the sewing machine to the back. Pin the two pieces to the felt. Sew around the edges.
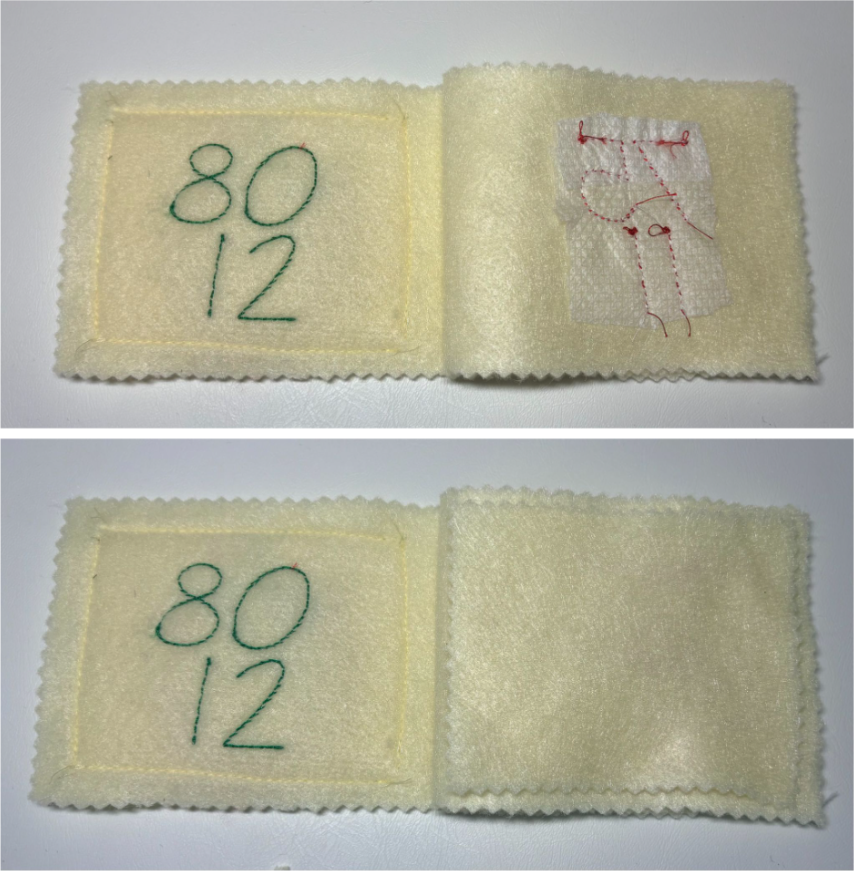
Next, take the 75/11piece and sew a small blank 3” x 4” piece on the back side.
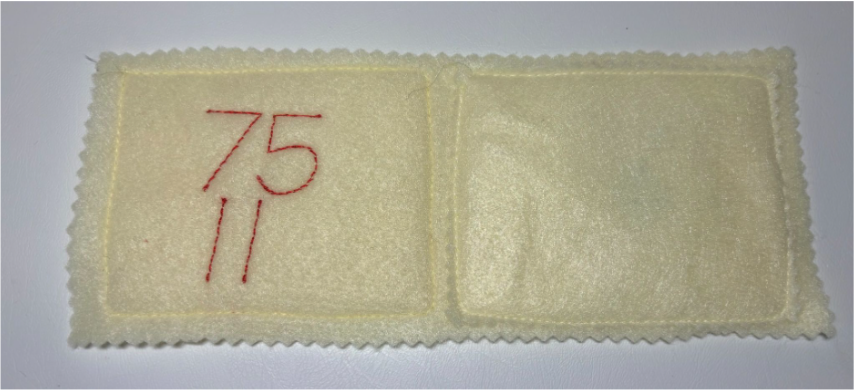
Do the same on the back side of the 90/14 piece opposite the 75/11.
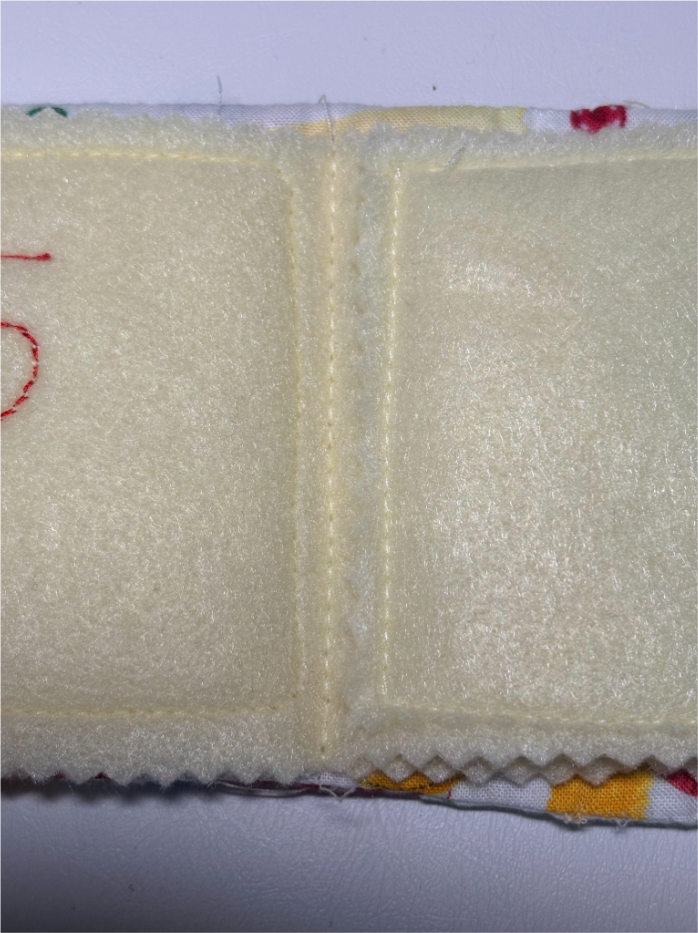
Layer the two rectangular pieces of felt on top of your lining and sew down the middle to attach the pages.
This might seem a little confusing at first, but once you start, it will make sense. Just remember to sew a blank piece of felt to the back of the 75/11 and 90/14 numbers, and add the last blank piece on the opposite side of the sewing machine.
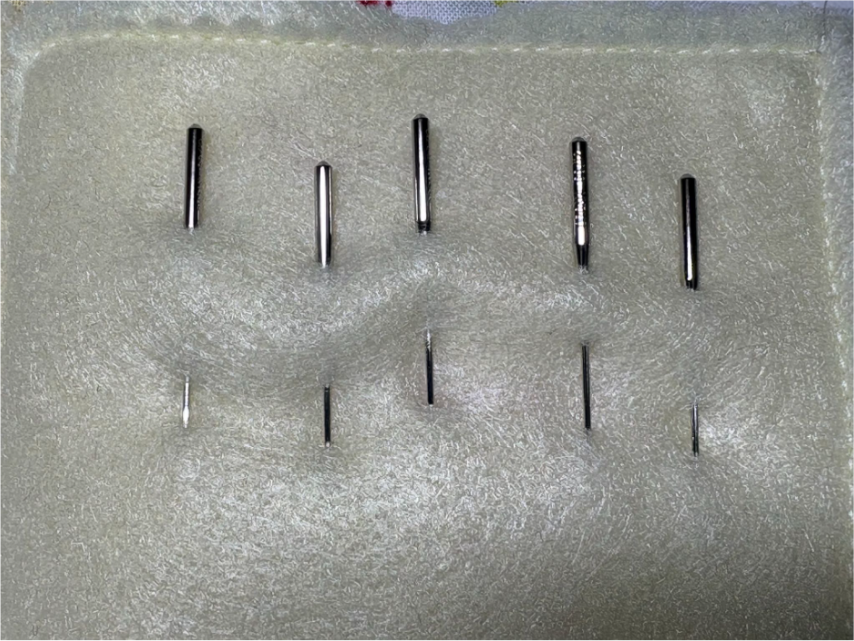
Put the correct needle size into the blank pieces of felt opposite the needle number.
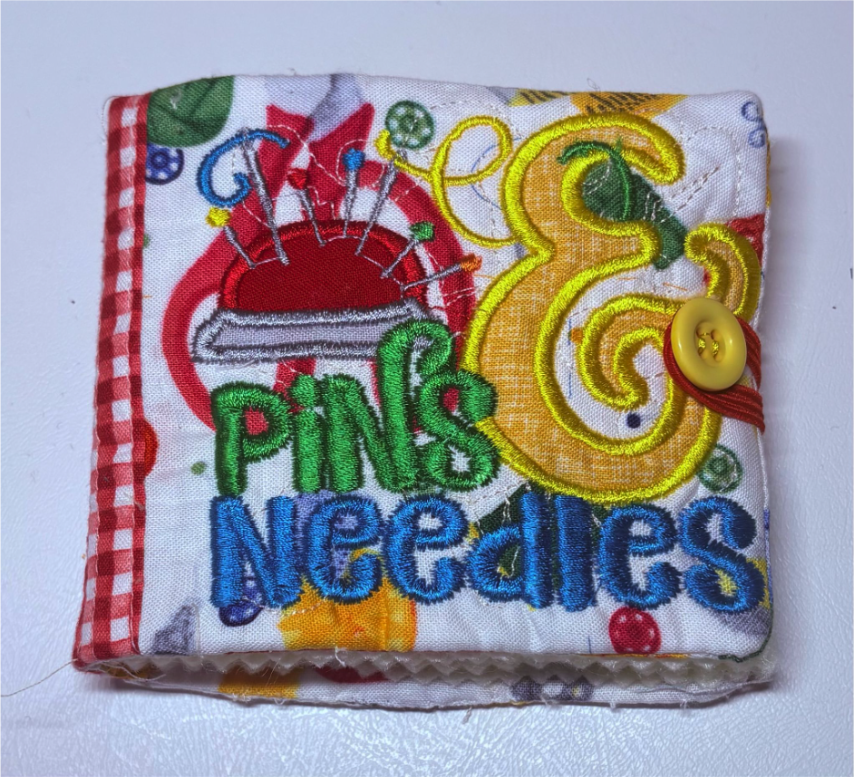
Close the needle book and loop the elastic around the button.
Your needle keeper is finished! The labeled felt pages keep your machine needles organized and protected, while the embroidered cover adds a cheerful personal touch.
Now that your needles have a tidy new home, let’s organize a few more sewing-room essentials. Using coordinating fabrics and Designs by JuJu embroidery designs, we’ll create an ironing board organizer with roomy pockets for scissors, marking tools, a seam ripper, and other supplies. A coordinating pincushion keeps your pins close at hand while you press.
Finished size: 28½” x 8½”
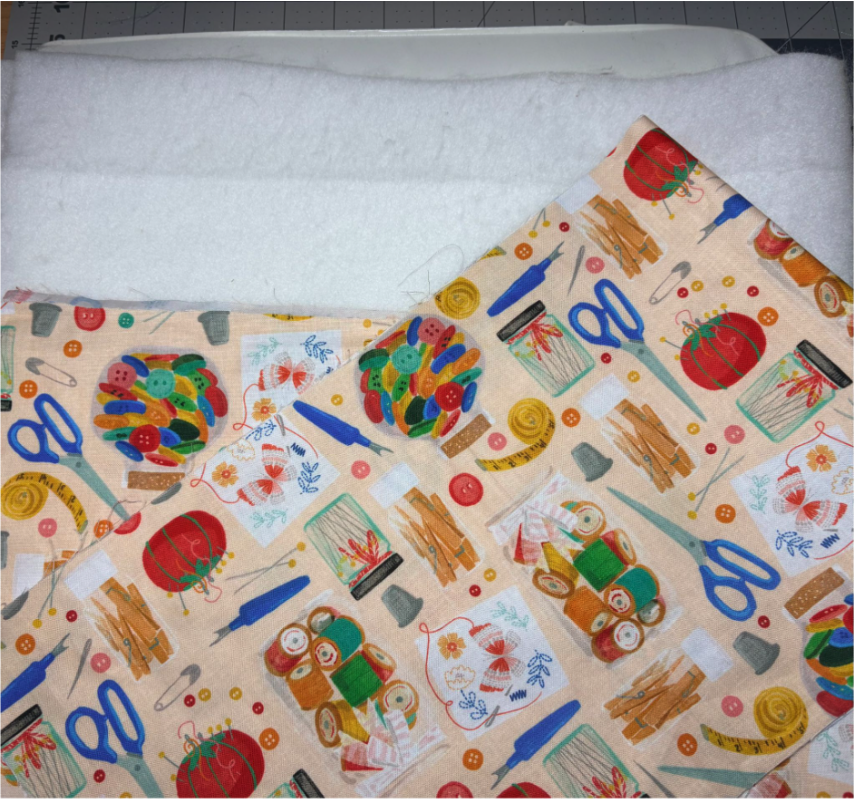
Cut your main piece of fabric and batting to 10” x 30”. We will quilt this piece, then trim it to 9” x 29”.
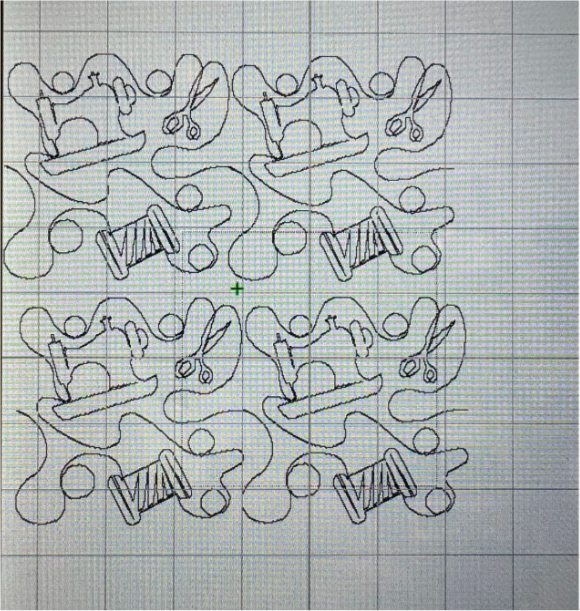
Load Sewing 1 End-to-End Quilting Embroidery Design onto your machine and select the size you wish to use to quilt your fabric. I chose to use the 4.50” x 4.50” design size. If you have room on your hoop, you can add the design multiple times. Remember to line them up.
If you haven’t tried end-to-end quilting before, check out the instructional blog and YouTube video below before you start the quilting steps:
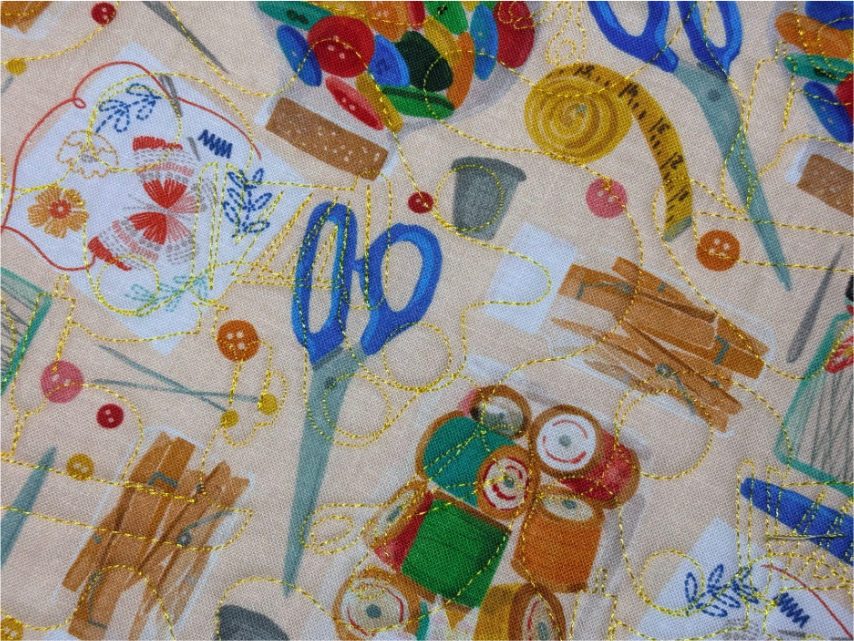
Hoop your fabric and batting. There is no need for a stabilizer. The batting will serve as the stabilizer. Quilt the front piece only.
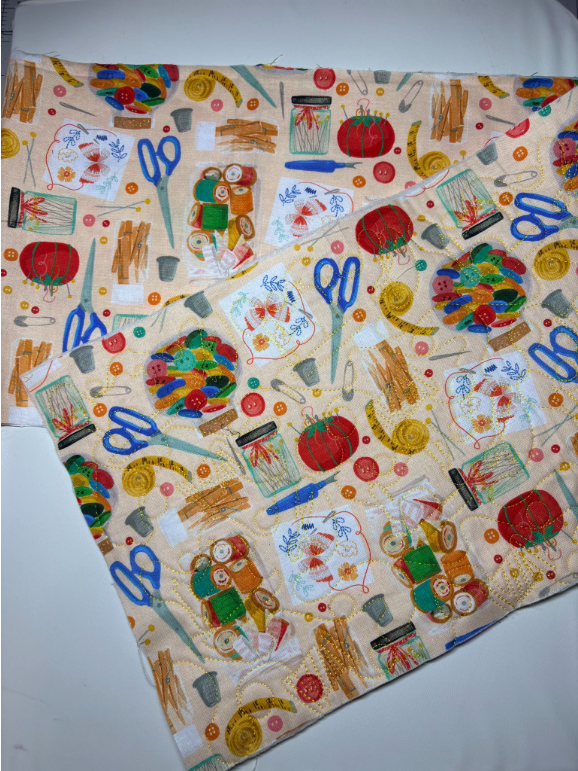
Remove the fabric and batting from the hoop and trim to 9" x 29”. Cut the backing fabric 9” x 29”. Set aside.
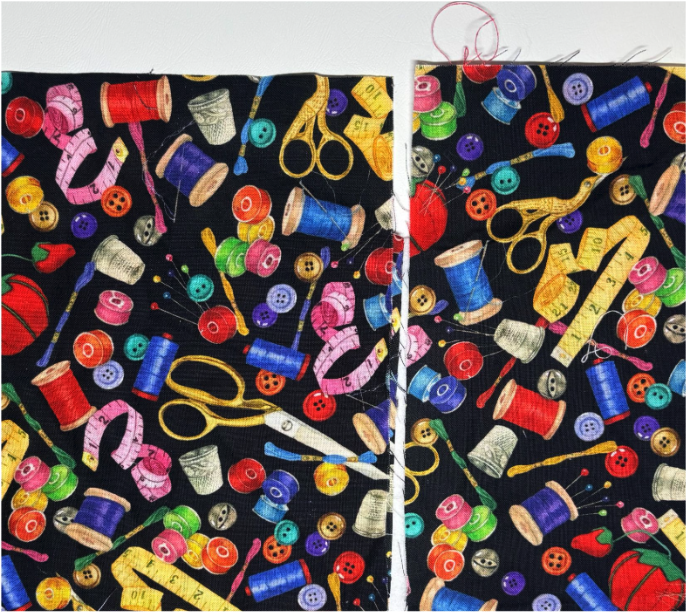
Next, we will quilt the fabric for the pockets.
Cut one piece of fabric and batting 10” x 10” for the large pocket and one piece of fabric and batting 10” x 6” for the smaller pocket. These will both be trimmed down later.
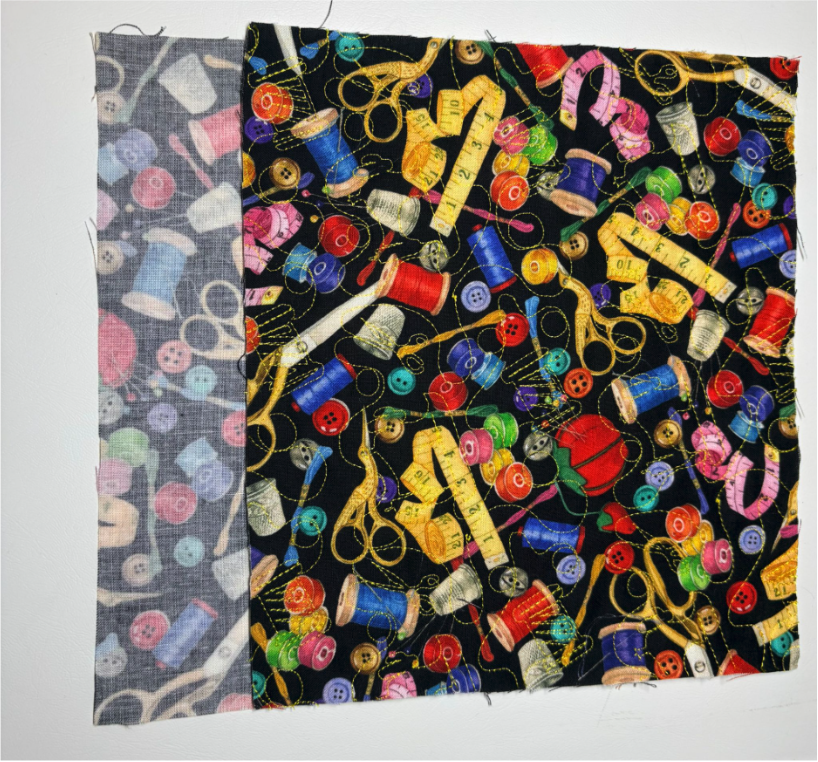
Using the same quilting design and method, quilt both pockets. Trim the large pocket to 9” x 8”.
Trim the small pocket to 9” x 4½”.
Cut two pieces of fabric for the backing: one measuring 9” x 8” and one measuring 9” x 4½”.
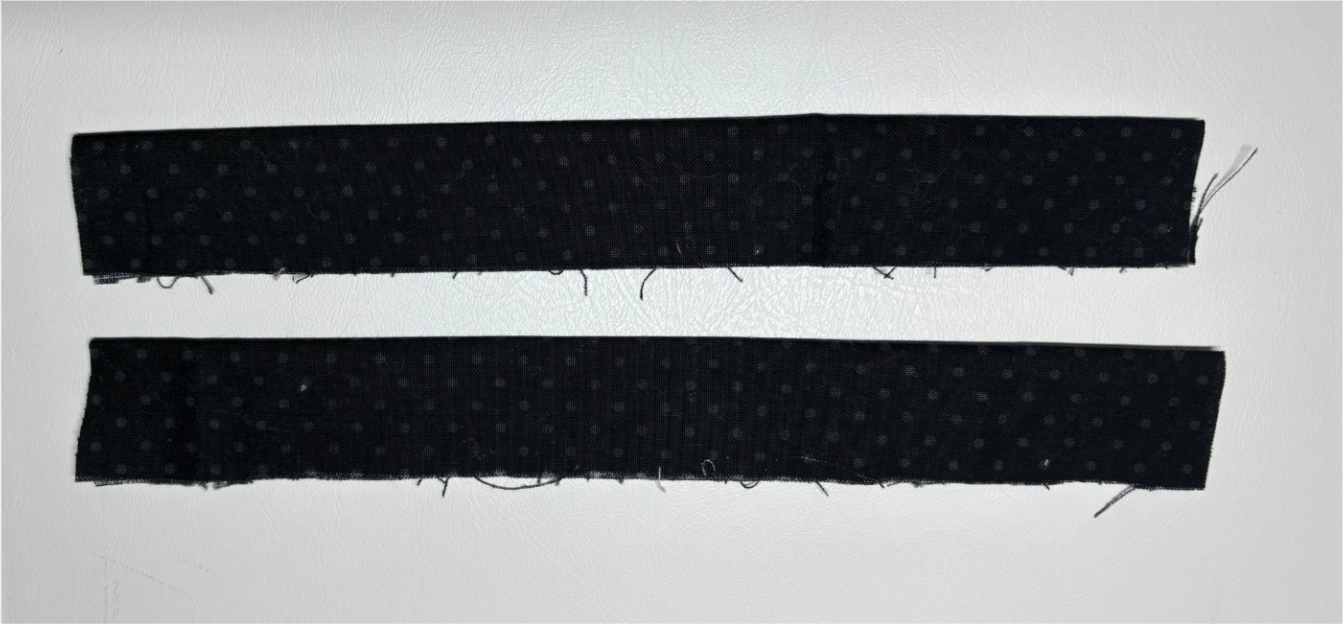
Cut two pieces of fabric for the binding across the top of the pocket, 2” x 9”. Fold each piece in half lengthwise and press.
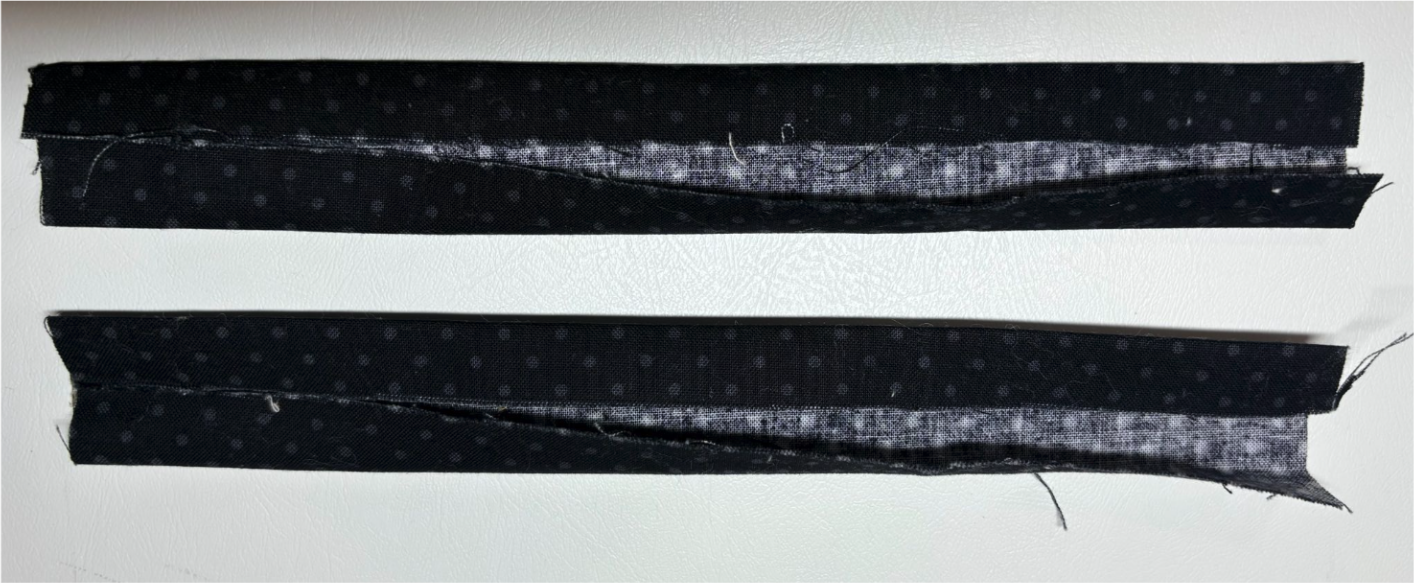
Open up and fold each raw edge to the center.
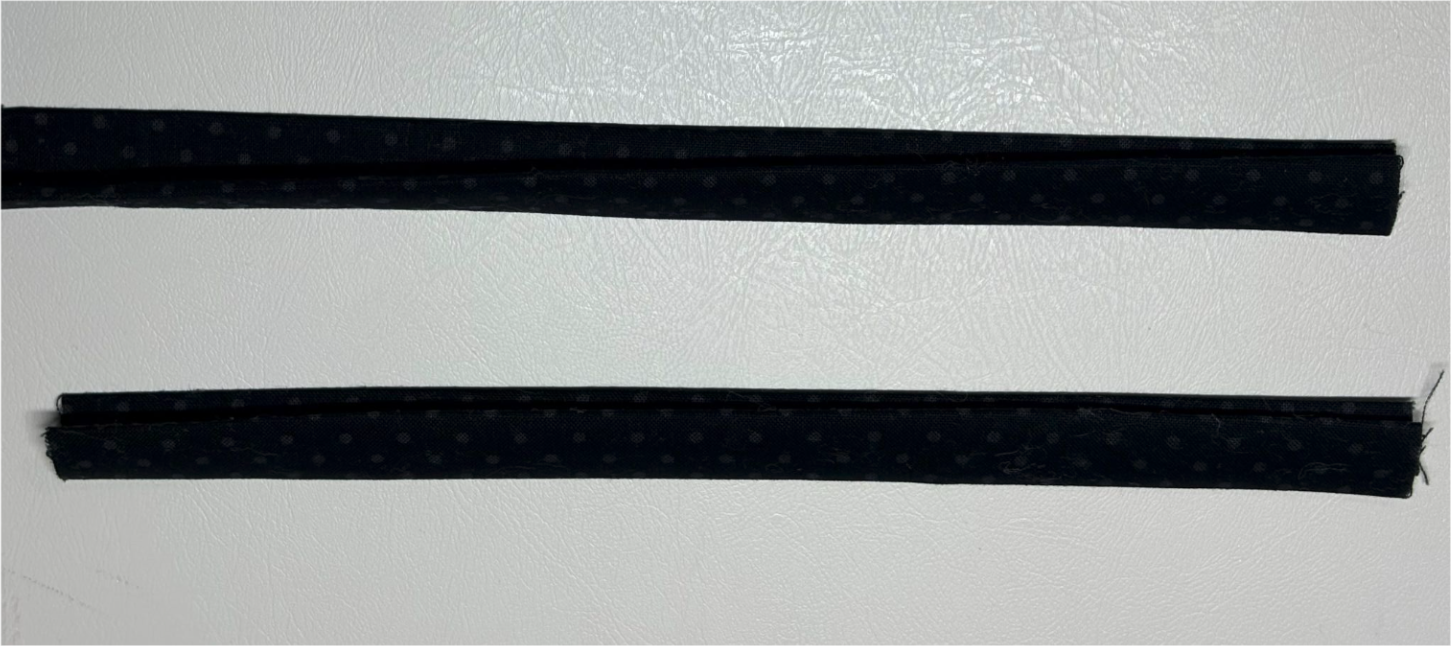
Fold in half again and press.
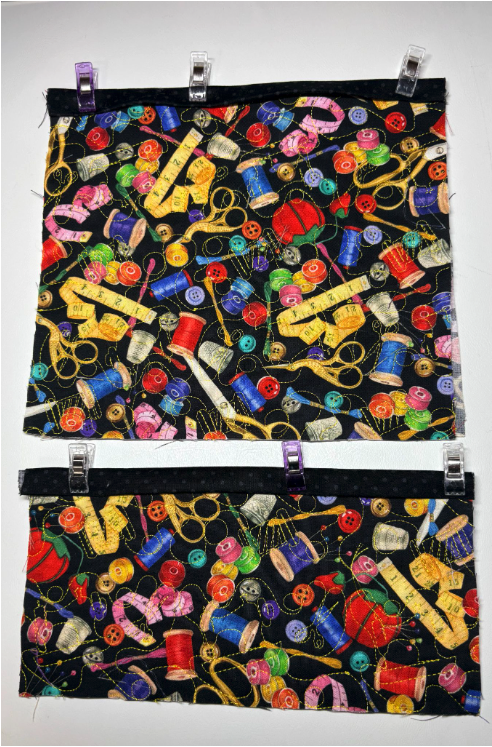
Align the front and back pocket fabrics wrong sides together. Clip the binding strip to the top of the front and back of both pockets.
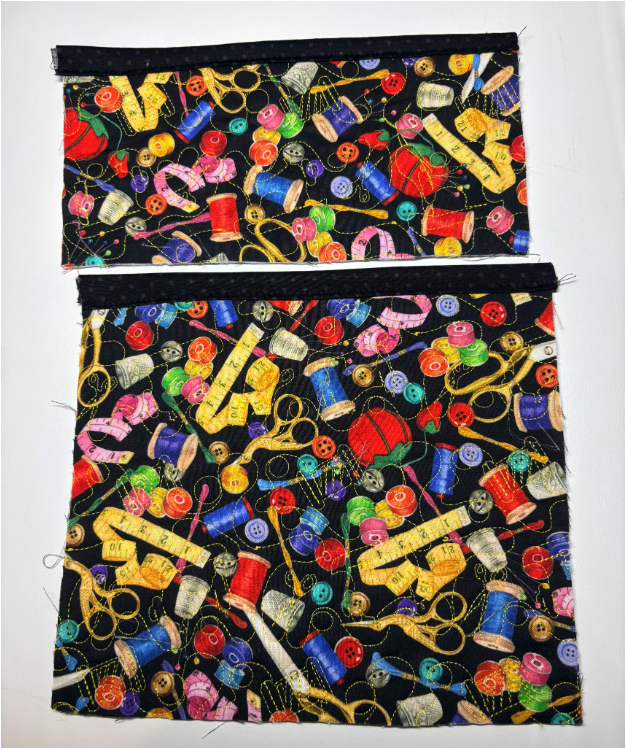
Sew across the binding close to the bottom edge.
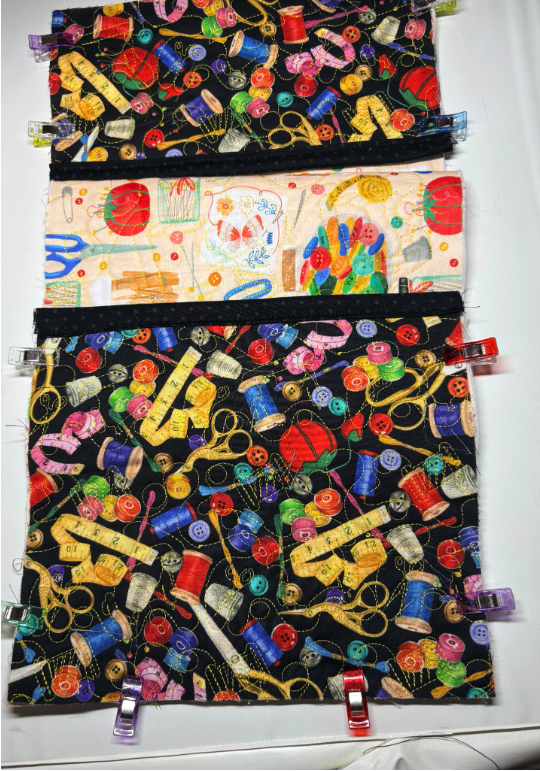
Place one pocket on each end of the main fabric piece, matching the raw edges.
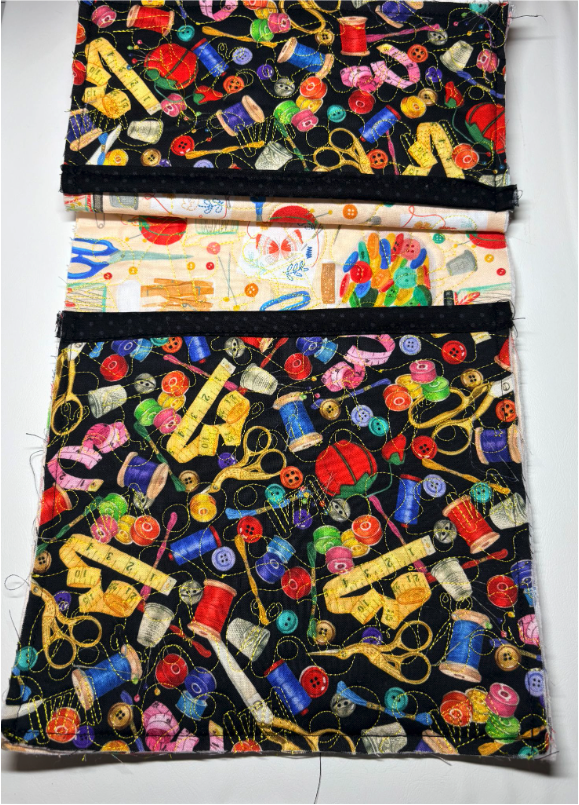
Sew with a ¼” seam allowance around the sides and bottom.
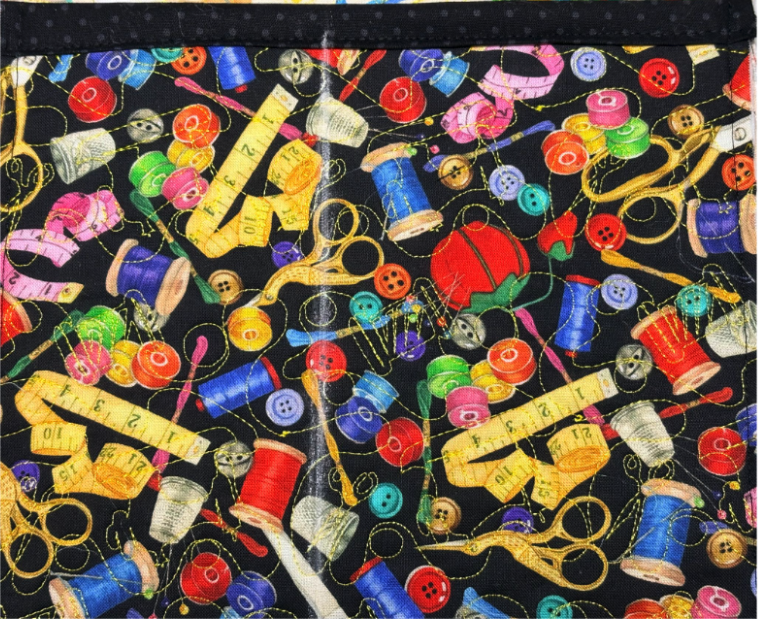
Decide if you would like to divide your pockets. If you do, draw a line with tailor’s chalk or erasable pen.
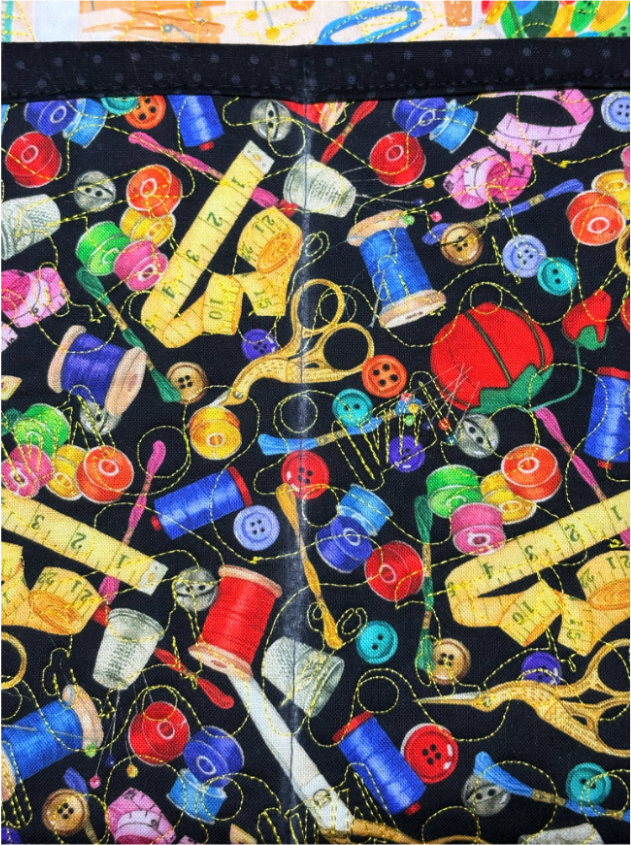
Sew down your lines beginning at the very top of the binding. Remember to backstitch.
Set the top of your organizer aside.
Next we will make the pincushion.
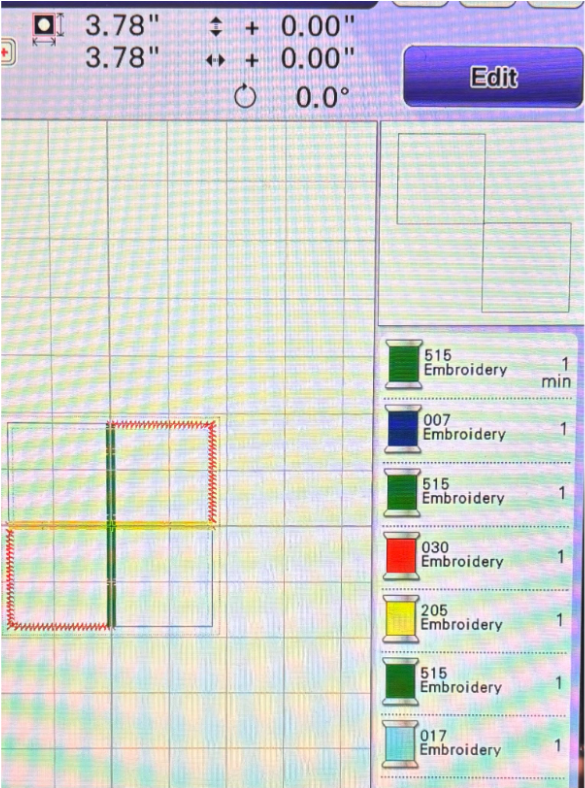
Download the Pieced Pincushion Set.
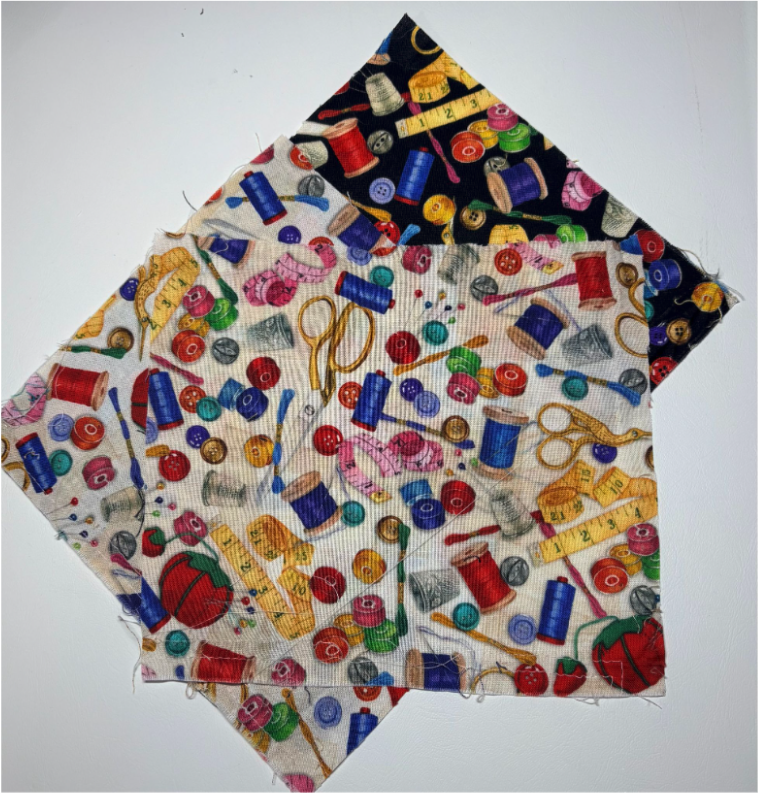
Cut your fabric according to the directions included in the download.
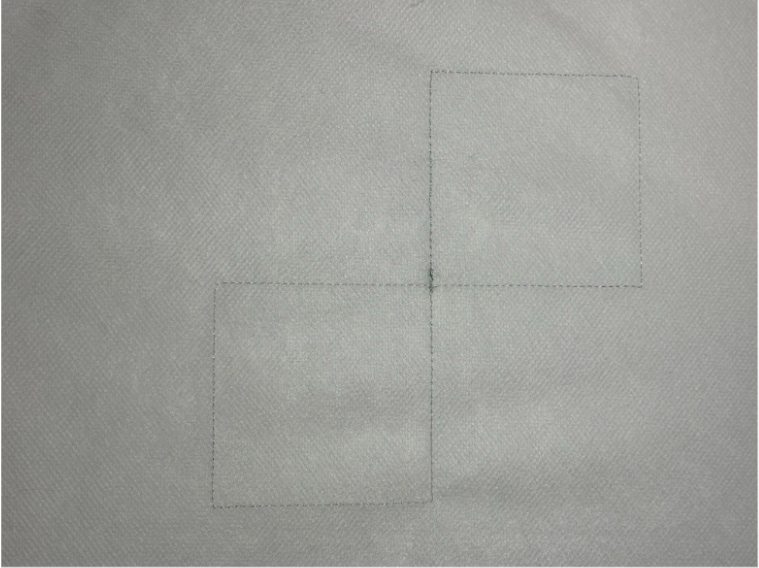
Hoop cut-away stabilizer and run the placement stitch for the first piece of fabric.
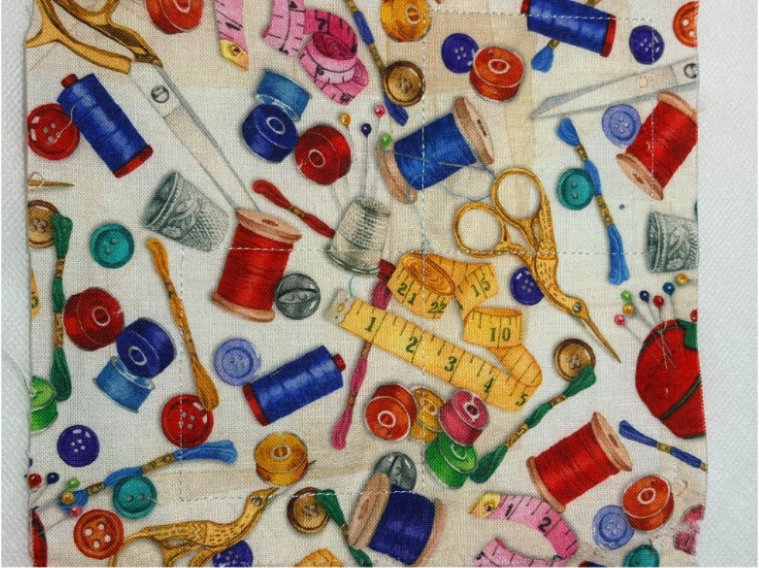
Lay the fabric over the stitches and run the tack-down stitches.
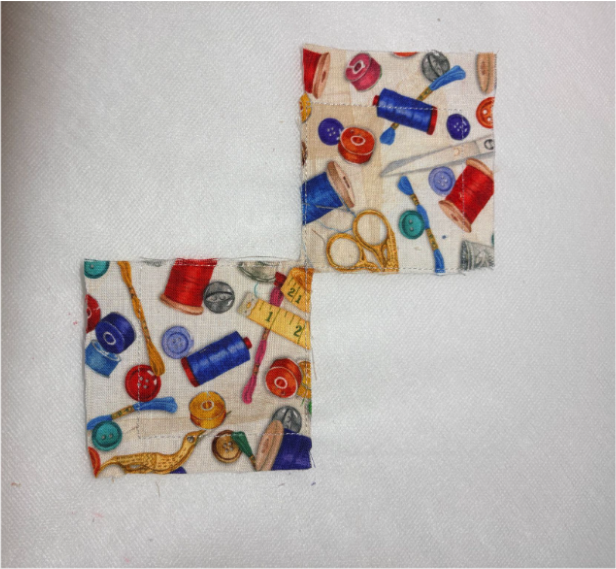
Trim the fabric close to the stitching on the inside edges, but leave at least ½” excess around the outside.
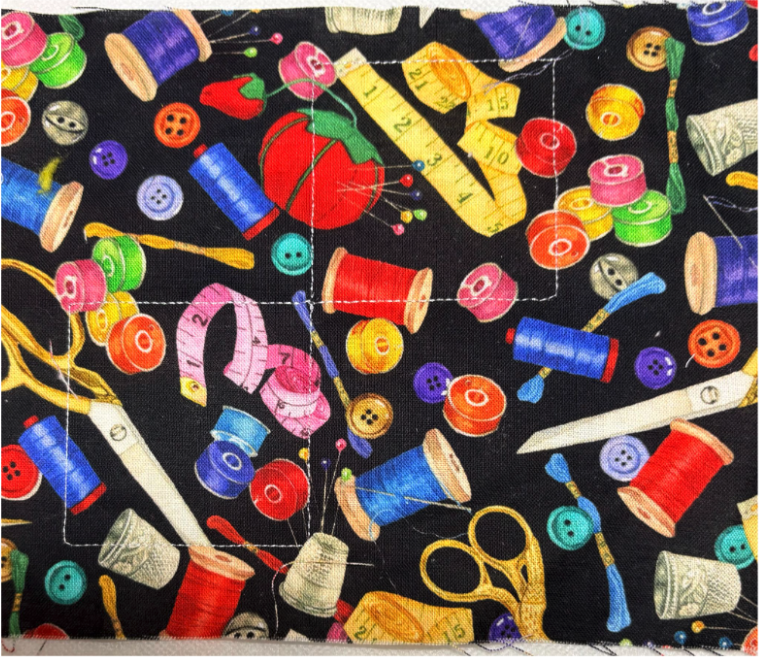
Lay the second piece of fabric down, then run the tack-down stitch.
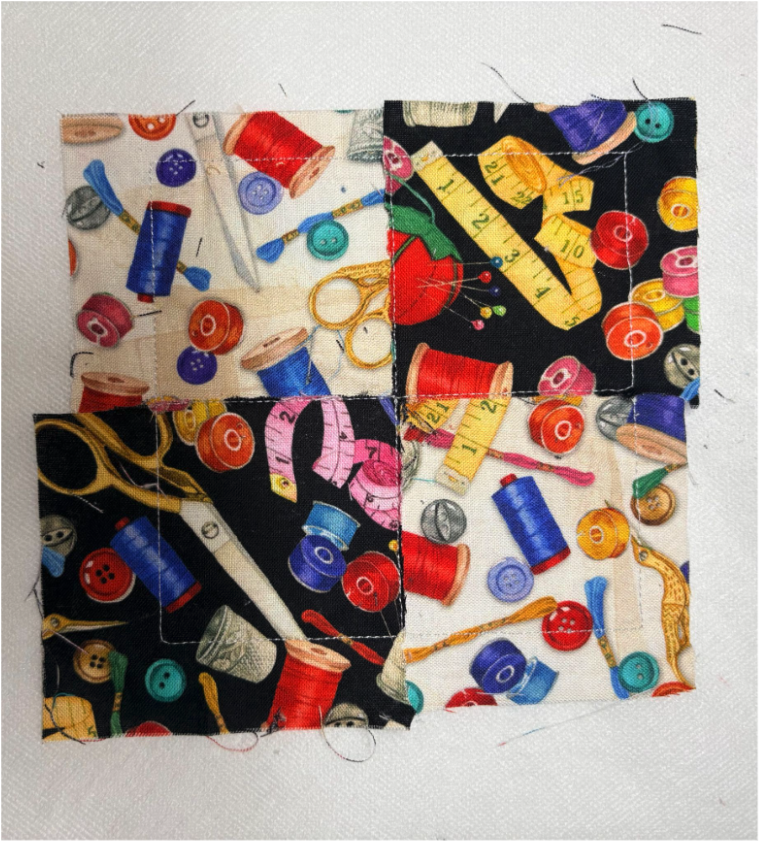
Trim the fabric close to the stitching on the inside of the design, and leave at least ½” excess around the outside edges.
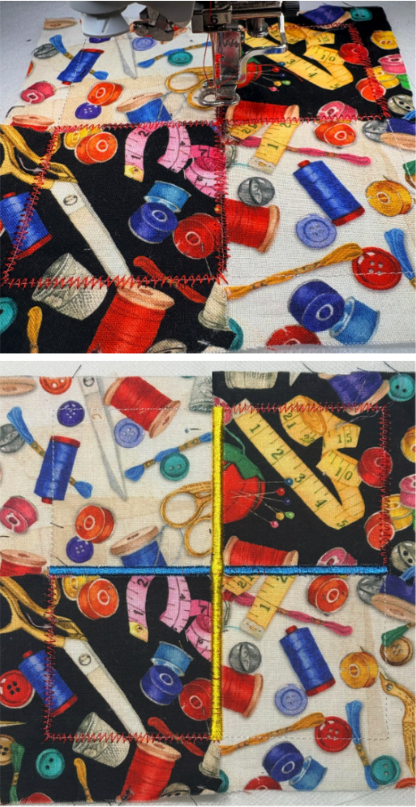
Continue stitching according to the directions.
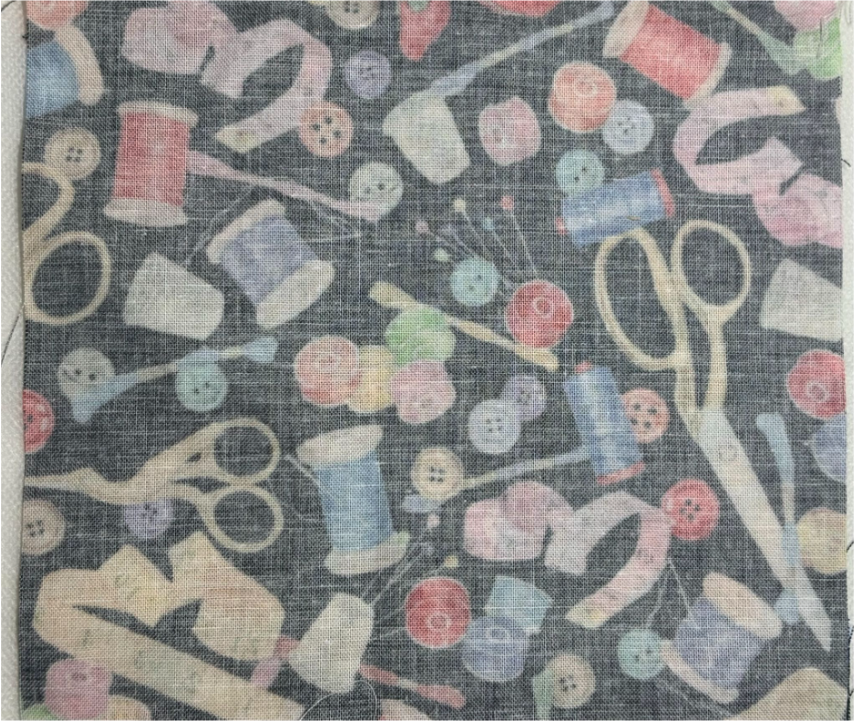
Lay the final piece of fabric right side down and run the final stitches.
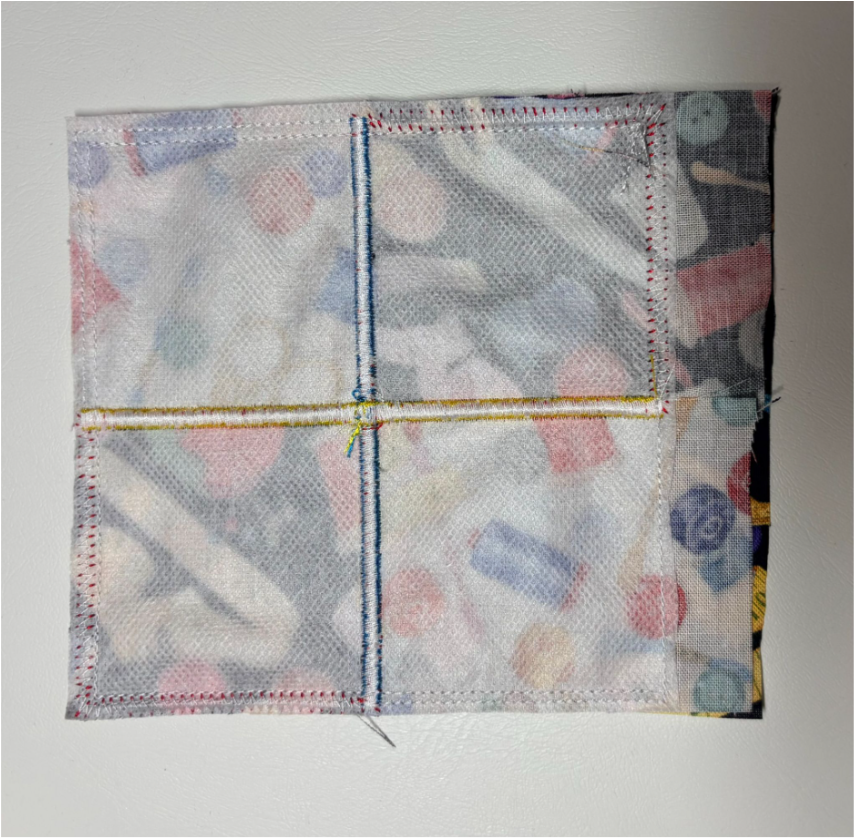
Remove from the hoop and trim ¼” from the stitches. Leave the open end untrimmed or trim to ½”.
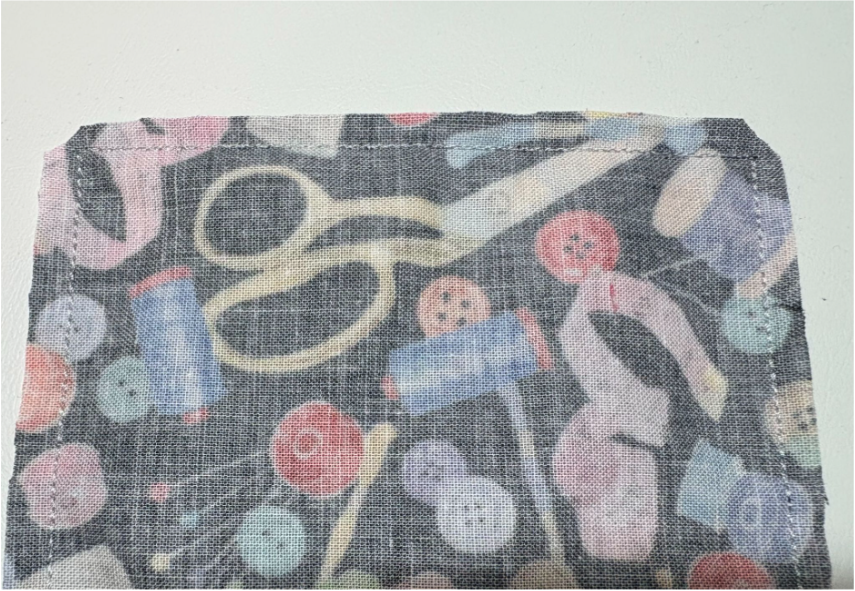
Clip the corners.
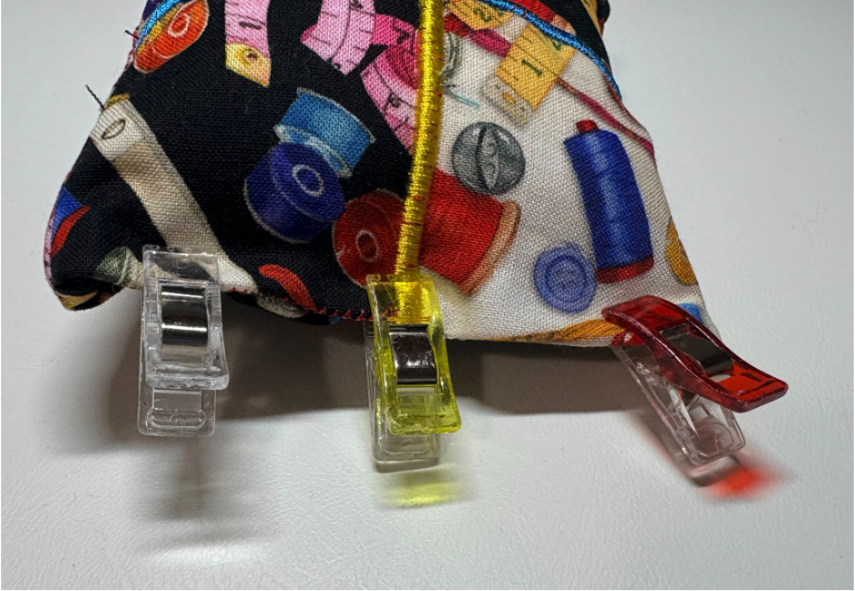
Turn the pincushion right side out and fill it with Poly-fil. I recommend using just a little so it is not too full. This will make sewing the button on easier. Turn the opening to the inside and pin or clip closed. Hand stitch the opening closed.
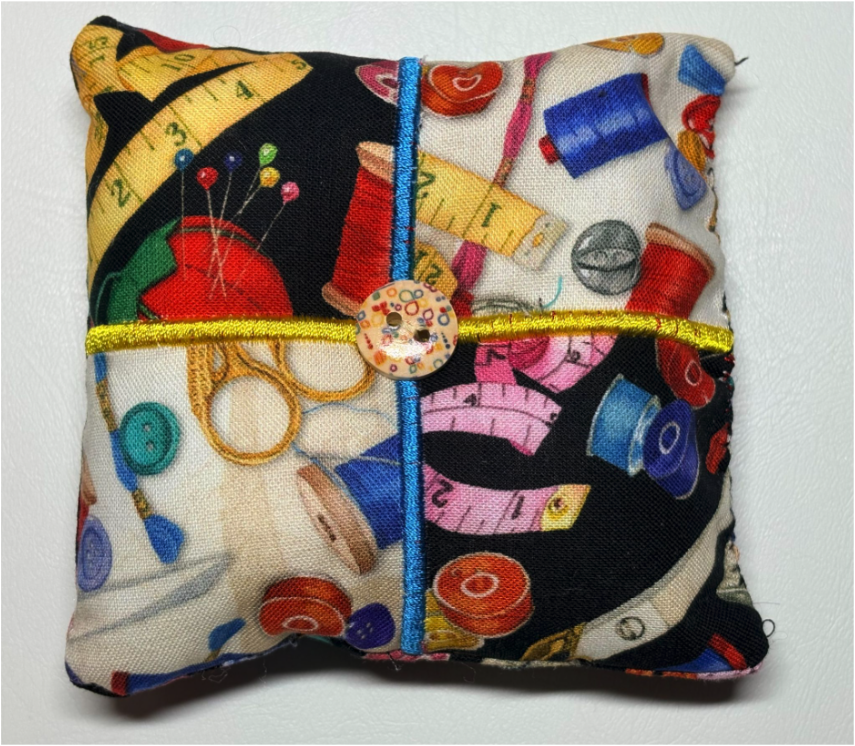
With a large needle, attach a button to the center of the pincushion.
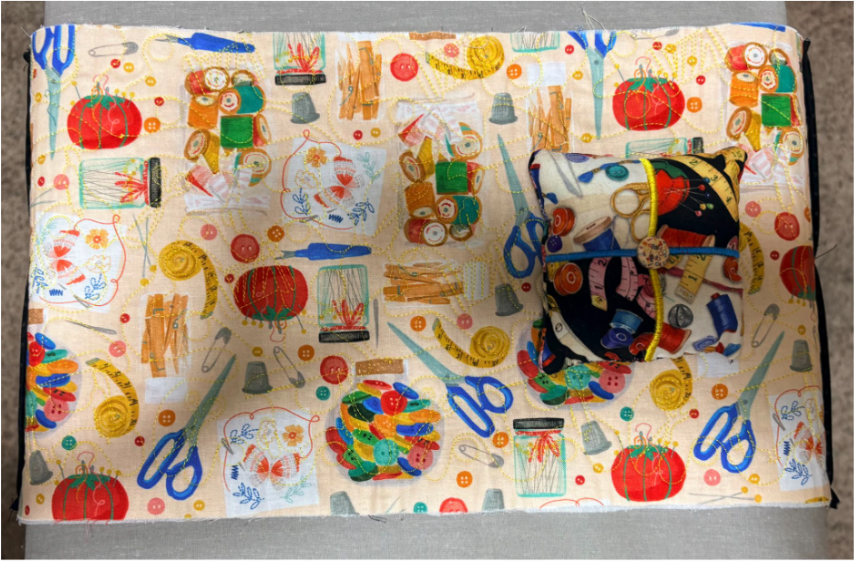
Lay the top of the organizer over your ironing board—Mark where you would like your pincushion to be.
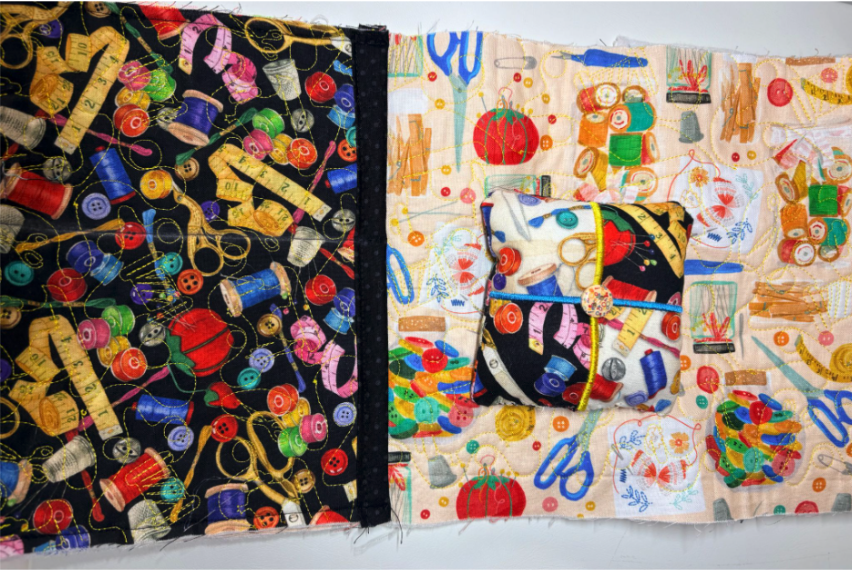
Attach the pincushion by securely sewing down the four corners.
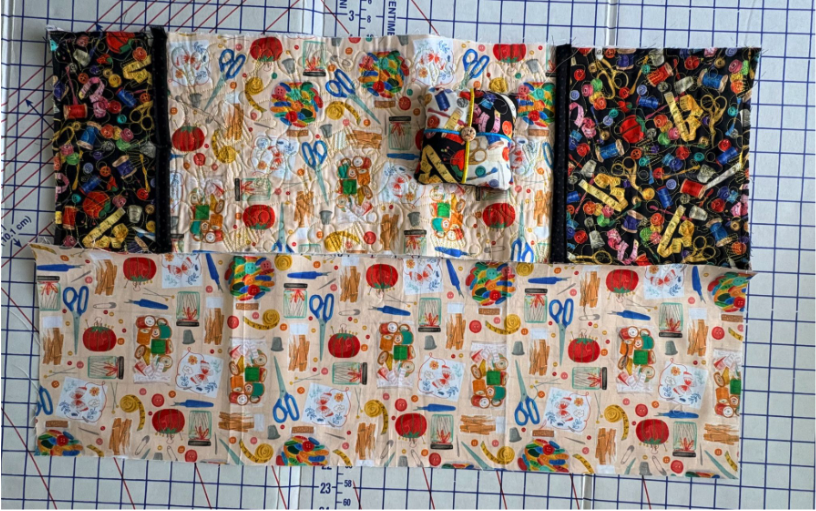
Now it’s time to add the backing fabric that is cut to 9” x 29”.
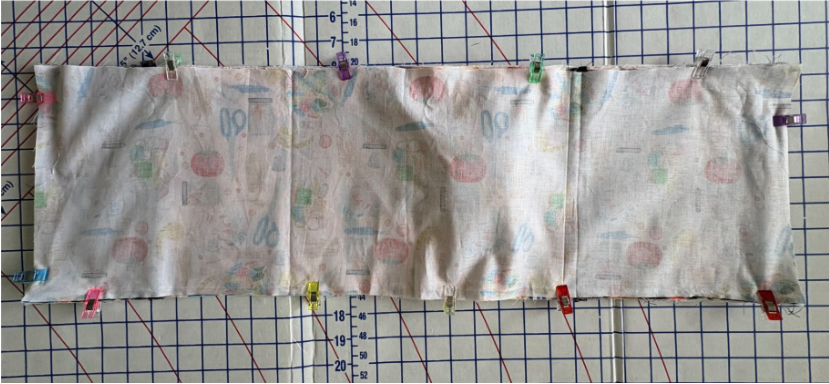
With right sides together, pin the back main fabric to the front, matching all raw edges. Leave a 2”–3” opening for turning. Take it to the sewing machine.
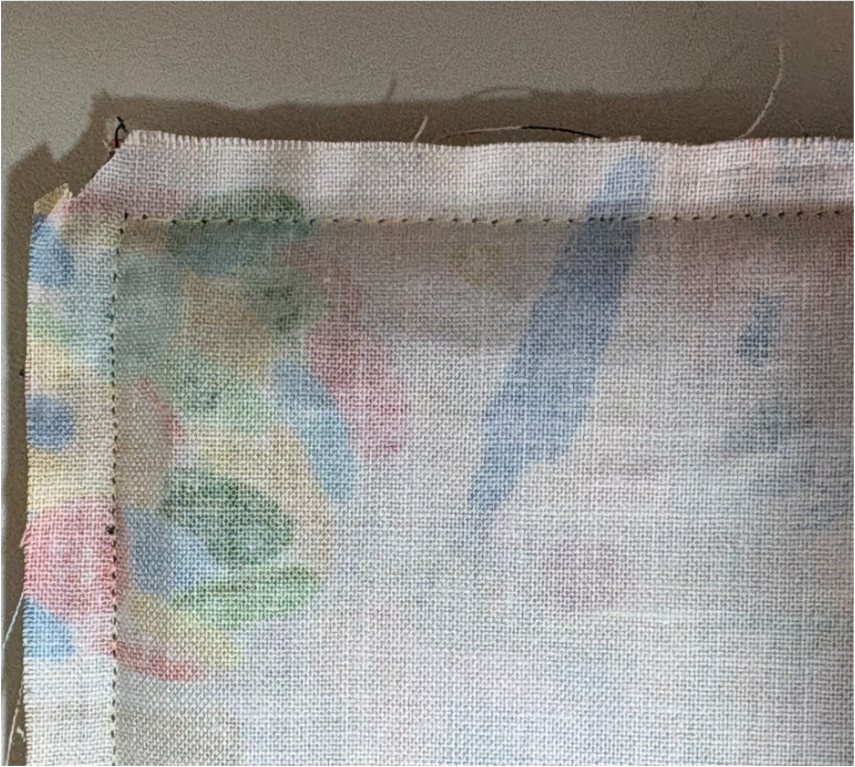
Sew a ½” seam allowance all the way around. Remember to leave the opening.
Clip the corners.
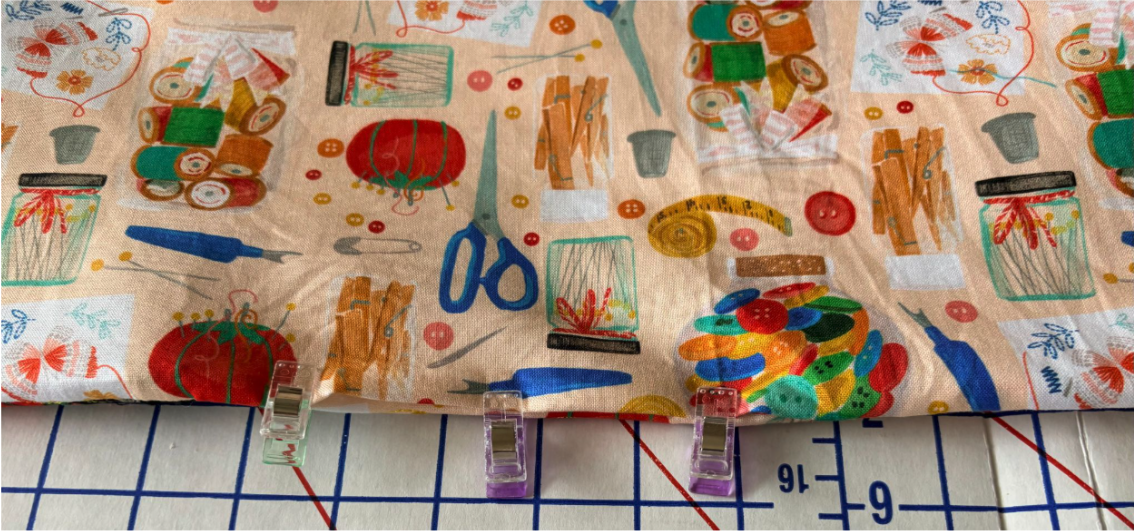
Turn the organizer right side out. Tuck the raw edges of the opening to the inside and clip closed.
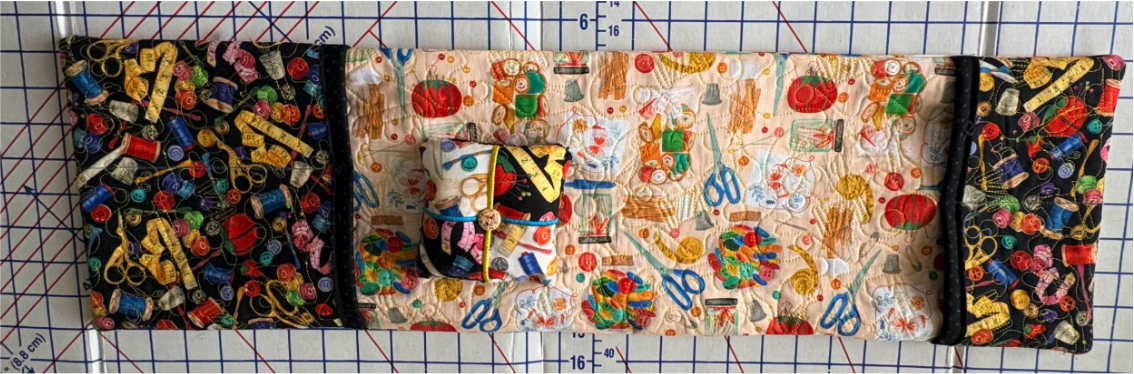
Sew the opening closed and your organizer is finished!
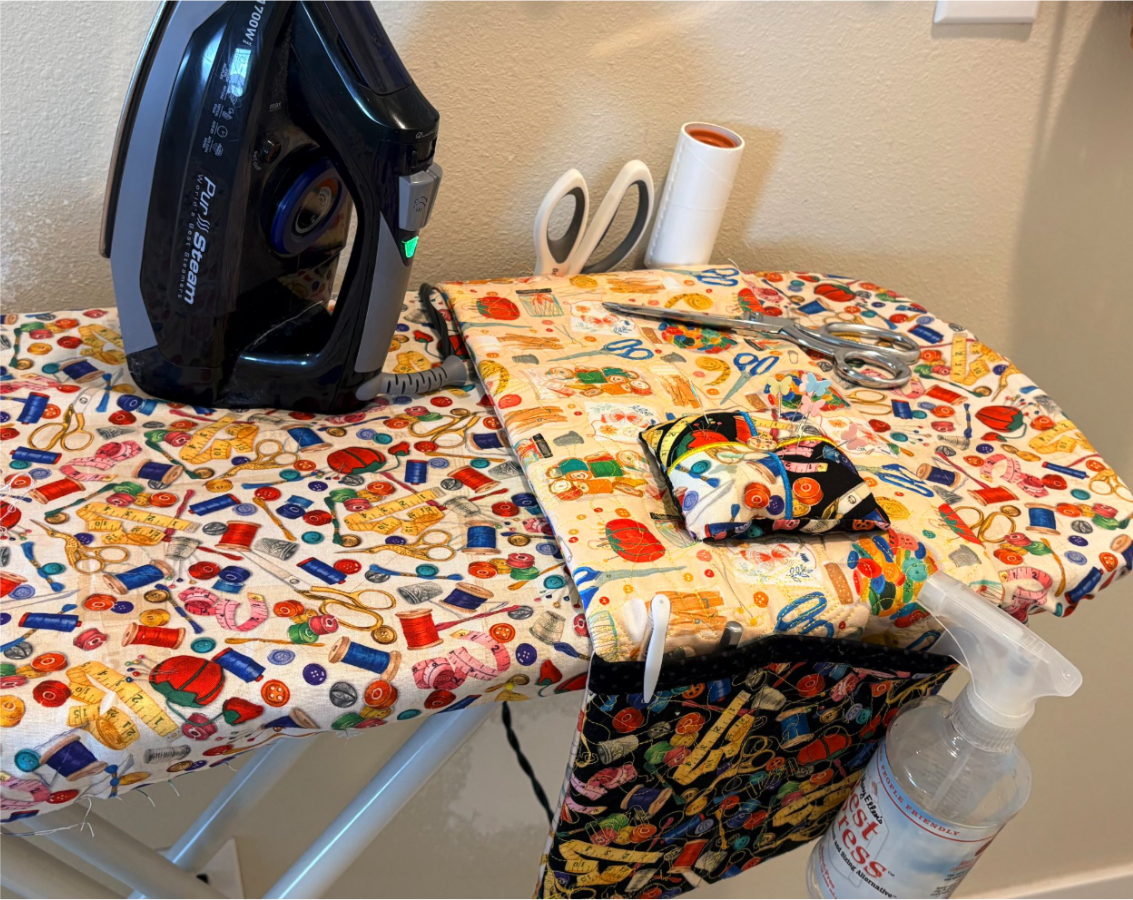
Thank you for sewing along with me. I hope these two projects inspire you to add some beauty and organization to your sewing space. Handmade organizers are practical and make every sewing session more enjoyable by keeping your favorite tools within reach.
Whether you make just the needle keeper, the ironing board organizer, or both as a set, you'll have sewing accessories that are both useful and beautiful. These projects also make thoughtful handmade gifts for your sewing friends.
We’d love to see what you make! Share your projects with the Designs by JuJu Embroidery Blessings Group on Facebook community and let us know which fabrics and embroidery designs you chose. Your creativity inspires others and helps our sewing community grow.
Until next time, happy stitching! I hope your sewing room is always full of creativity, beautiful fabrics, and well-organized tools.