Toggle Nav
 Inspire.
Create.
Stitch.
Inspire.
Create.
Stitch.
Inspire.
Create.
Stitch.
Search
Inspire.
Create.
Stitch.
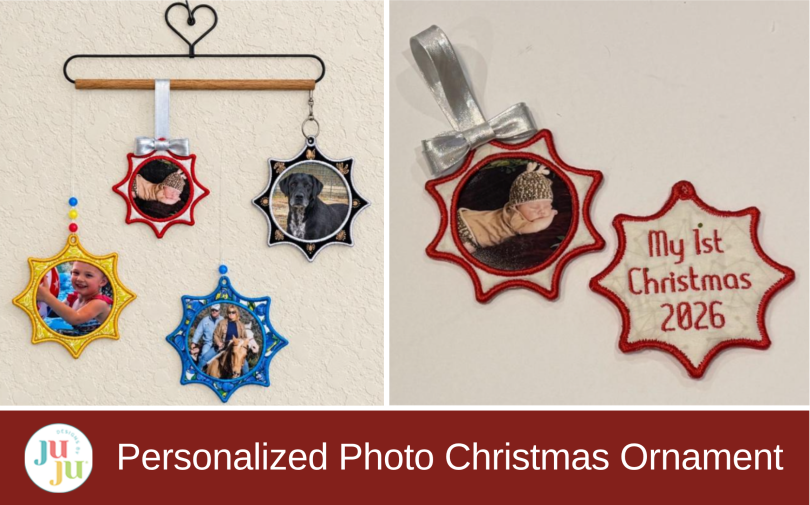
Create a personalized photo Christmas ornament with machine embroidery. Add a favorite picture, name, date, or message for a heartfelt handmade keepsake or Christmas gift.
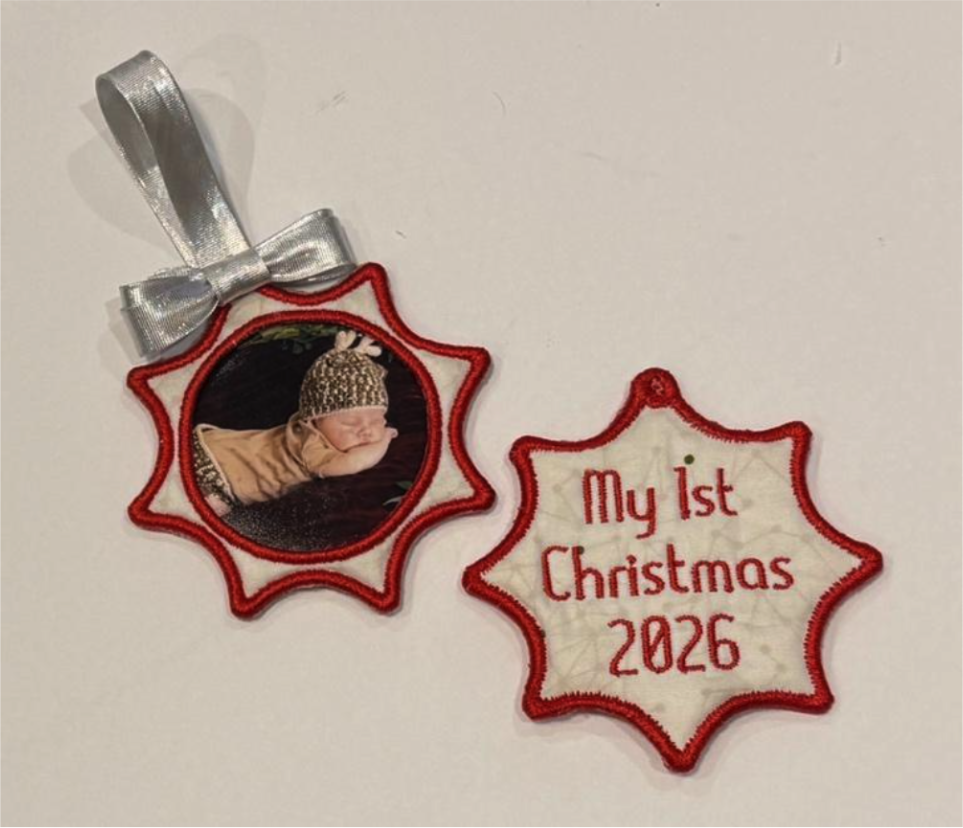
There’s something extra special about a Christmas ornament that captures a memory you can hold onto year after year. In this project, we’re going to create a custom-embroidered snowflake ornament featuring a favorite photo right in the center. It’s a fun way to turn a simple embroidery design into a keepsake that is truly personal. I’ll be making mine for a baby’s first Christmas with “My 1st Christmas 2026” embroidered on the back, but the possibilities are endless. Add a name, date, special message, or choose any of the other eight different snowflake designs offered. By the time we’re finished, you’ll have a beautiful little keepsake ready to hang on the tree or a heartfelt gift.
Check out the Designs by JuJu Amazon store for our team’s favorite supplies. For batting, stabilizers, and threads, Designs by JuJu+ has everything you need.
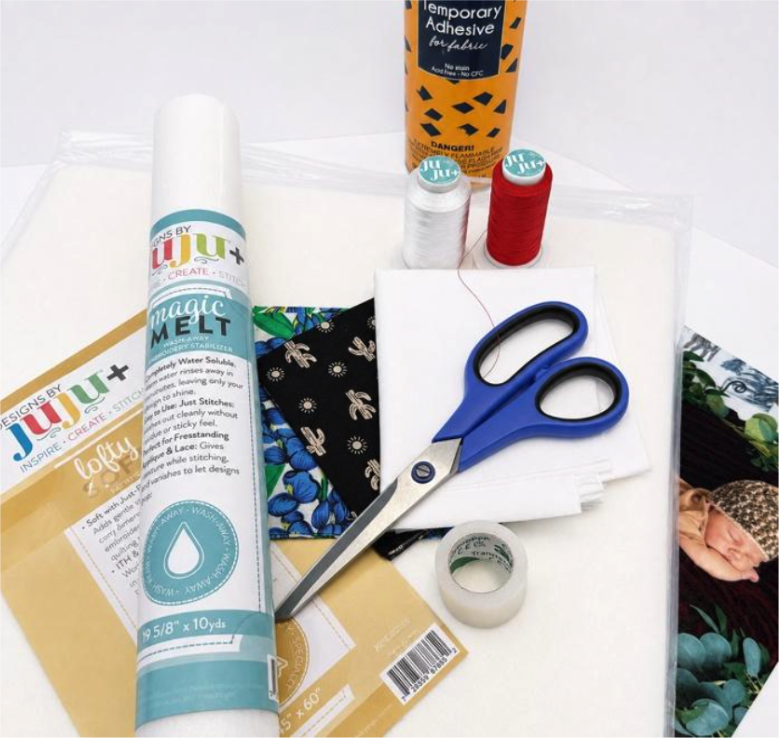
Now that you've gathered your supplies, it's time for the exciting part: planning your project. This is where you get to decide how you’re going to make your snowflake ornament uniquely yours.
Have your photo ready, and keep in mind the size and proportions of the picture. There are several options when it comes to choosing and preparing your photo:
For my first attempt, I used regular copy paper to print my photo so I could compare results. As you’ll see later in the project, I changed the picture because I wasn’t happy with the way the paper looked. Sometimes you have to use trial and error to help determine your preference on the ornaments.
The opening on the 4” x 4” ornament design for the photo is about 2”, so keep this in mind when choosing your picture. Try to avoid the photo zoomed in too closely. Make sure enough of the image is visible so it fits nicely within the circle.
Brightness and clarity are also important for getting the best results. A photo that is bright, clear, and not too dark will show up much better in the finished ornament.
Next, choose your fabric and thread colors. Since I chose light-colored background fabric, I used a darker thread to create contrast for lettering and the outlined satin edge. Don’t forget to have a bobbin wound with the same color thread ready to go for the satin edges.
Finally, choose an embroidery design and font size that are appropriate for your project. Since I’m making the 4” x 4” snowflake, I selected a ½” font so the lettering would fit nicely on the back of the ornament.
I wanted my ornament to have an embroidered back as well as a finished front. If you prefer to stitch only the front, then skip this step and move directly to the front of the ornament.
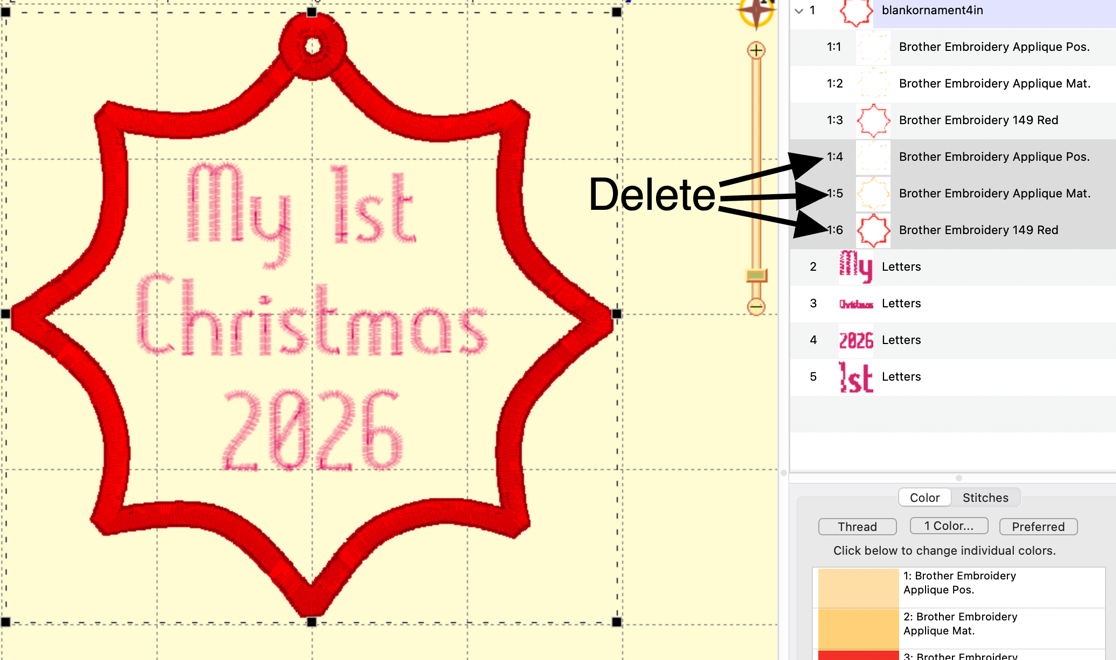
Before stitching, I opened the blank ornament design in Embrilliance and arranged everything exactly where I wanted it on the ornament. After that, I deleted steps 4–6, since those steps will be used during the next hooping when we attach the back of the ornament to the front.
Now it’s time to hoop. For this project, I used two layers of DBJJ+ magicMELT Water-Soluble Stabilizer. Using two layers provides extra support and helps prevent the stabilizer from tearing during stitching.
Place the stabilizer in the hoop, and be sure that it is smooth and taut without any wrinkles or loose areas. A properly hooped stabilizer will help give your embroidery a clean, professional finish.
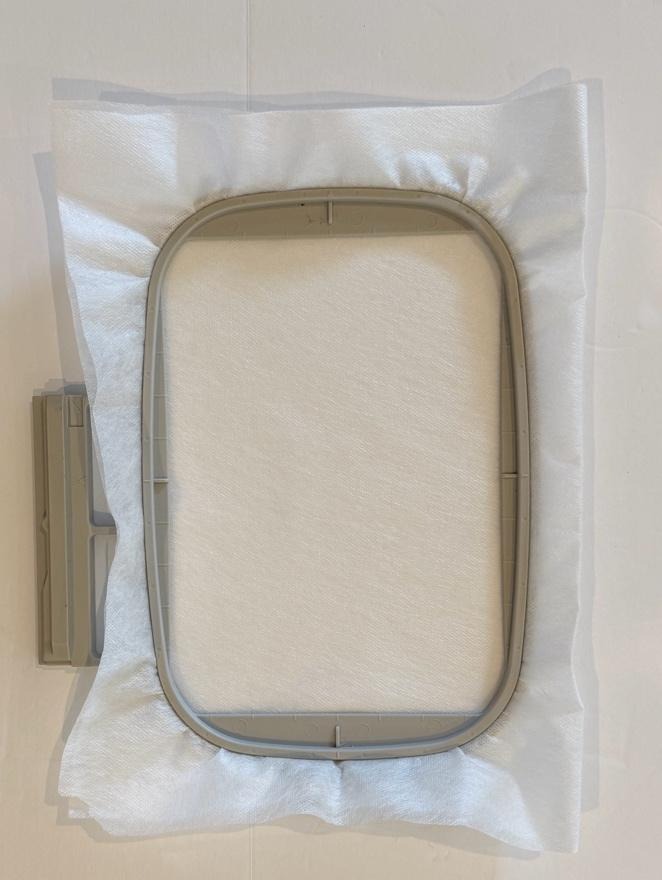
With everything hooped and ready to go, it is time to see the design come to life!
We’ll begin by stitching the back. Load the back portion of the design onto your embroidery machine and follow the color stops in order. The first color stop is a placement stitch, which will show you exactly where to position your materials.
Once the placement stitch is complete, lay the batting over the stitched area, followed by your background fabric right side, and completely cover the placement stitches. Continue to the next color stop. After color stop 2 has finished stitching, gently trim the batting and fabric as close to the stitching as possible without cutting the stitches. Take your time with this step since those stitches hold everything in place.
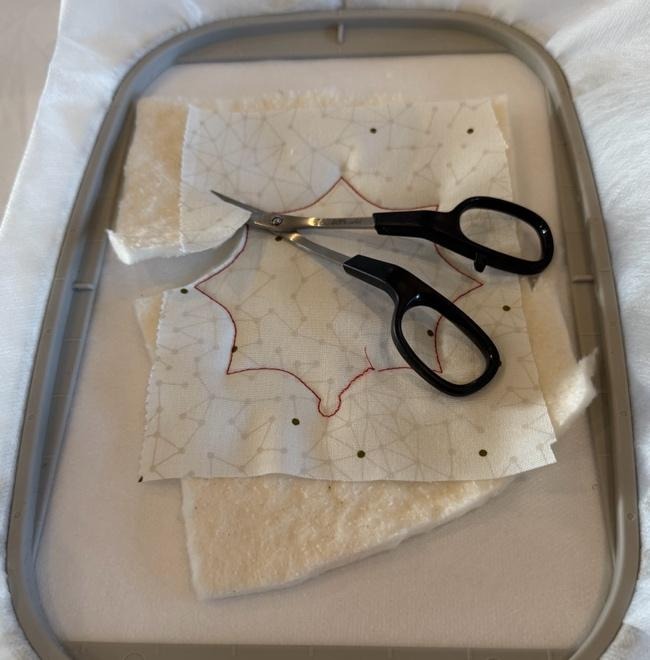
Stitch your desired text on the back, and run the reinforcement tack-down.
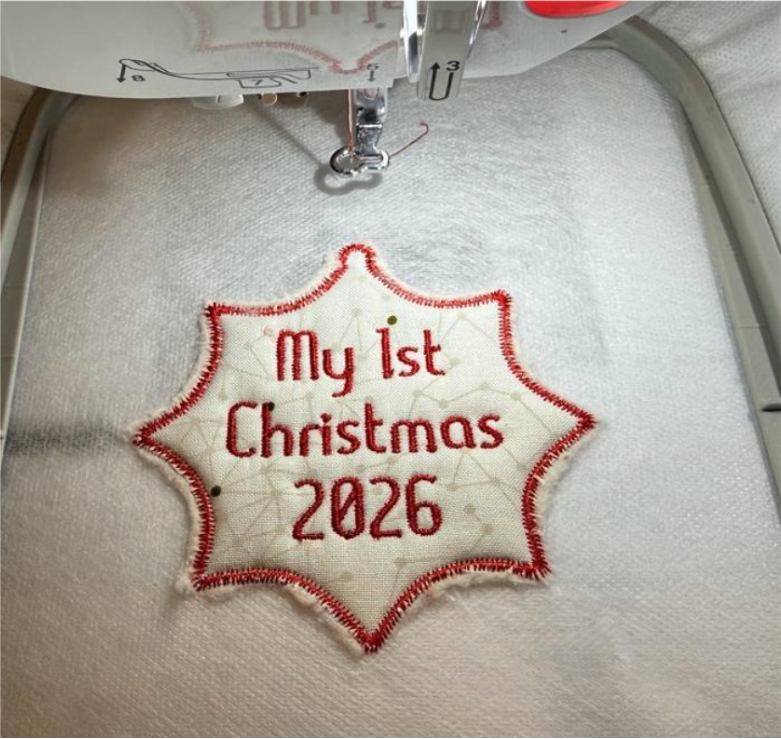
Now it’s time to remove the ornament from the hoop. Carefully trim away as much of the excess water-soluble stabilizer as possible, getting close to the stitching without cutting it. Once you’ve trimmed around the ornament, use a cotton swab dipped in a little water to dissolve any remaining stabilizer. Set the finished back aside while we move on to stitching the front of the ornament.
Now it’s time to stitch the front of the ornament. Repeat the first three color stops just as you did for the back, following the same steps for the placement stitch, batting, fabric, and reinforcement tack-down.
Color stop 4 creates a circle for inserting your photo. Once it has stitched, cut around the inside of the circle, removing the fabric and batting from the center. Be slow with this step and do not cut into the stabilizer or any of the stitches.
I skipped color stop 5, as indicated in the design instructions. If you are using photo fabric, you can run this stitch to attach it.
Color stop 6 is the final satin edge stitch that creates the finished edge around the center of the ornament, giving it a clean, polished look.
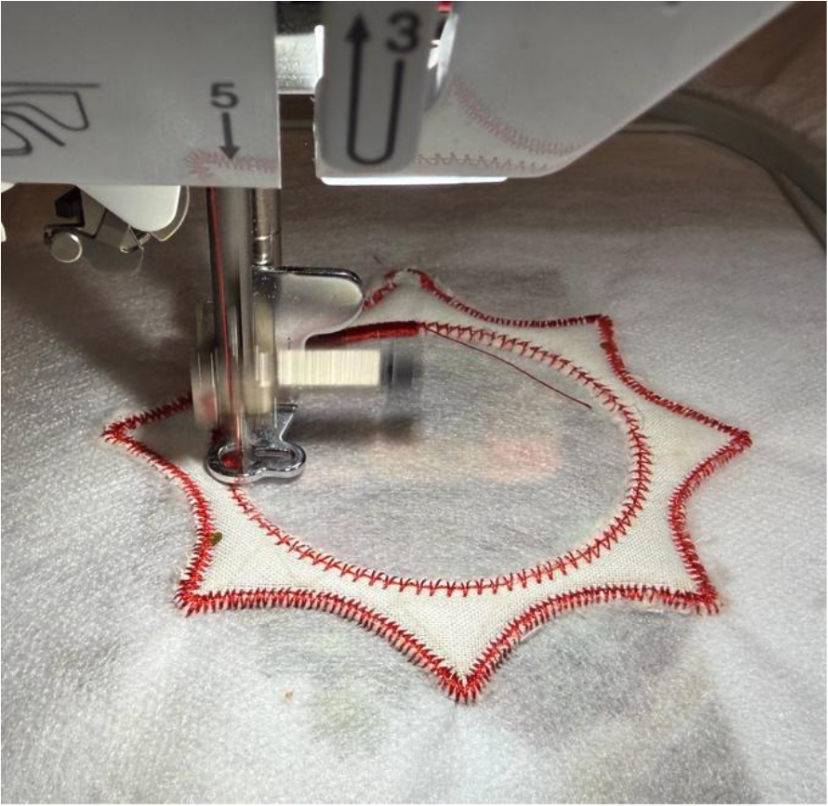
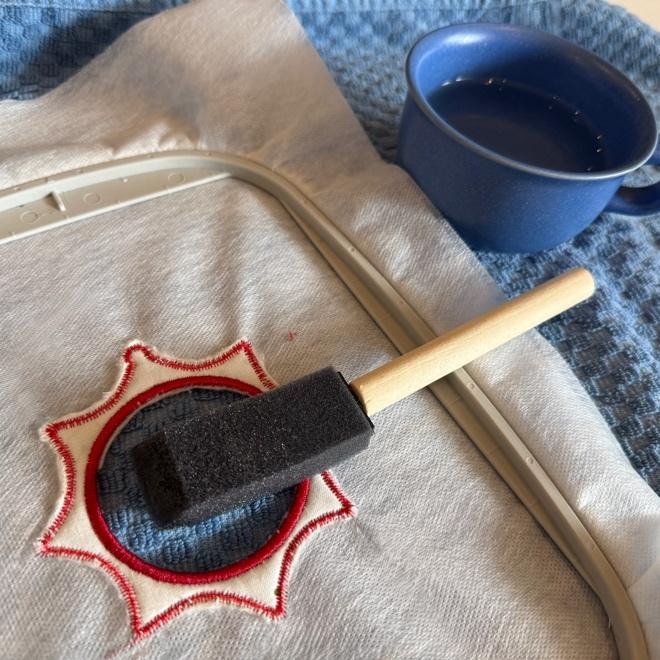
Next, trim away the water-soluble stabilizer from the center of the opening only. This is the perfect time to remove any remaining stabilizer from the area where your photo will be placed. It’s important to do this before inserting your photo. Once the photo is in place, water could damage it.
I had a small craft sponge on hand, which worked great for removing the remaining stabilizer. You could also use a damp cotton swab or simply dampen your fingertip and run it around the inside of the circle.
Whatever method you choose, be careful to keep the water inside the center opening. You don’t want water to drip onto the remaining stabilizer around the ornament, as it will begin to dissolve and could potentially ruin all your hard work. I have a bit of experience with this.
Now for the fun part; arranging your photo and getting it perfectly centered.
Before attaching your photo, make sure the inside circle is completely dry. You don’t want to risk damaging the picture with any leftover water.
Since I printed my photo on regular copy paper, I was able to easily adjust the size until I found the perfect fit. I opened a new Word document, selected Insert > Picture, and then adjusted the photo size as needed. Through a little trial and error, I found using 4” worked well for landscape photos and 5” for portrait photos. Of course, this can vary depending on how closely the person is cropped or zoomed in within the original photo. I played around with several different pictures and sizes until I had a good idea of what would fit best inside the ornament.
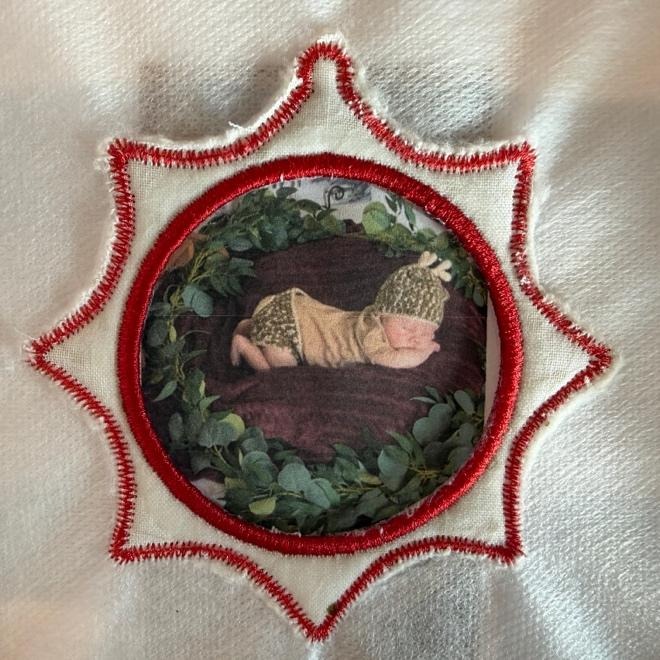
Attach the photo using adhesive spray on the back of the ornament. I found the easiest way to get the photo perfectly centered is to use the front and back pieces as a guide.
Place the front and back of the ornament together and line them up. Then, using the center opening in the front as your guide, trace a circle onto the back piece. This gives you a clear target to work within and makes centering the photo much easier when it’s time to attach it.
This is also a good time to do a little cleanup. Trim away any excess batting and stabilizer around the edges so everything is neat and tidy.
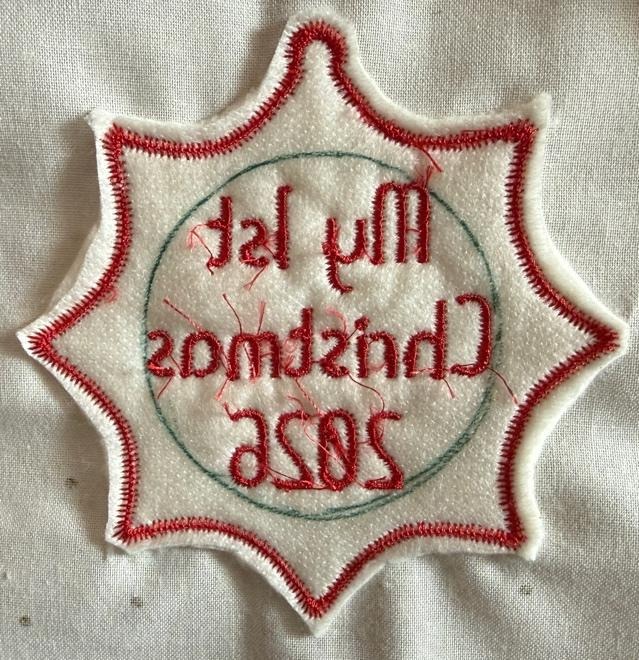
Now it’s time to trim the photo to the correct size. You don’t want to cut it too small, or it could slip out of the center opening. On the other hand, if it’s too large, it may interfere when we attach the back of the ornament to the front.
We need it “just right.” Trim the photo so it fits neatly inside the opening without extending into the area where the front and back will be joined. Apply a light layer of temporary adhesive spray to the back of the design and place the photo inside the circle you previously marked for placement.
Now it’s time to bring the back and the front of the ornament together. Turn the hoop over and again align the front of the ornament with the back, making sure all the edges and the center opening line up. Although the adhesive spray helps hold everything in place, I still like to add a small piece of tape on four of the points for extra security.
Once everything is lined up and securely in place, return the hoop to your embroidery machine and run the final three color stops to join the front and back and complete the ornament with a nice satin edge.
Once all the stitching was complete, I removed the hoop from the machine and removed the ornament from the hoop.
Next, I used an awl to carefully create a small hole at the top of the ornament for the ribbon.
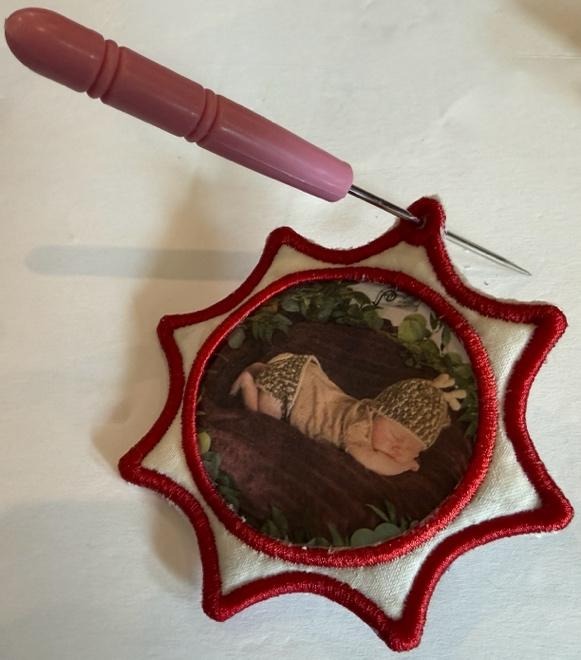
After seeing the finished ornament, I decided to have my photo professionally printed because I was not satisfied with the look of the picture I had printed from my computer. To my surprise, I was able to carefully remove the original photo and replace it with the professionally printed version.
I wouldn’t recommend doing this repeatedly, since removing and replacing the photo could eventually distort the circle. However, it’s nice to know that the photo can be changed out if needed.
Now that you have the photo you love, it’s time to give your ornament a final clean up, add the ribbon, and get ready to hang it.
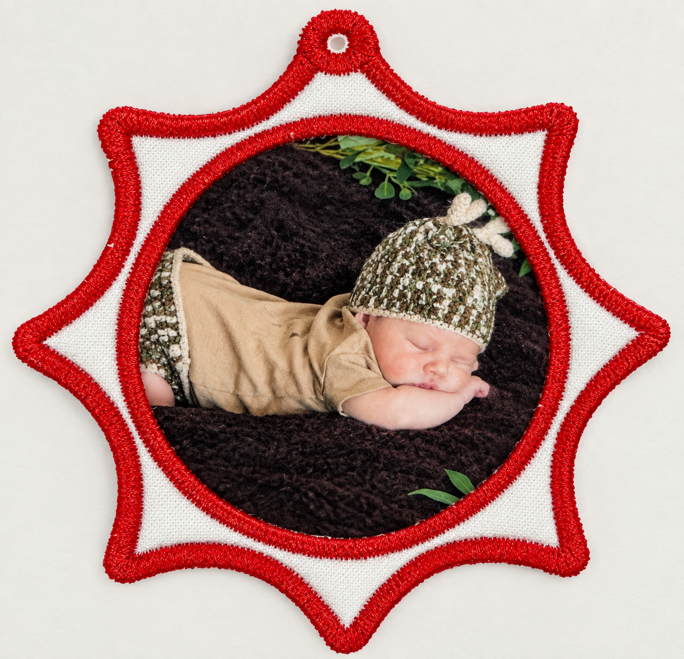
Since the hole I made to insert the ribbon was smaller than the ribbon I wanted to use, I decided to glue the ribbon and bow directly to the top of the ornament instead. It worked perfectly and gave me the finish look I wanted.
I made two Christmas ornaments for this project: one to keep and one to give as a gift. I think a personalized photo ornament makes such a special keepsake.
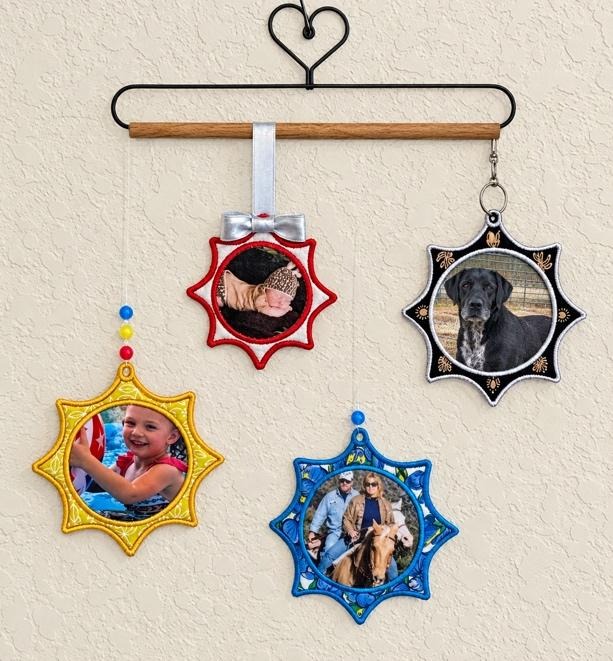
Ornaments aren’t just for Christmas! I decided to start a hanging family tree in my craft room, and I was thrilled to make more photo ornaments to add to it. For these, I used fishing line to hang them since I couldn’t decide on the color of ribbon I wanted to use. I love that the clear line lets the ornaments stand out.
I also made a personalized bag tag for my daughter using a photo of her dog. To protect it, I placed a piece of clear sewing vinyl over the photo before stitching. By adding a clip and key ring, it can easily be attached to a bag or anything else she wants to personalize. I have a feeling she’s going to love it.
That's all there is to it! Whether you make them for Christmas, a family display, gifts, or even a personalized bag tag, photo ornaments are a fun way to turn a favorite photo into something you can enjoy every day.
For other gift ideas, be sure to check out Christmas Ornaments Bundle: Stitch Merry Little Gifts All Season Long.
Please share your finished ornaments with us in the Designs by JuJu Embroidery Blessings Facebook Group community! Or use the hashtag #designsbyjuju anywhere on social media. We love to see what you create!