Toggle Nav
 Inspire.
Create.
Stitch.
Inspire.
Create.
Stitch.
Search
Inspire.
Create.
Stitch.
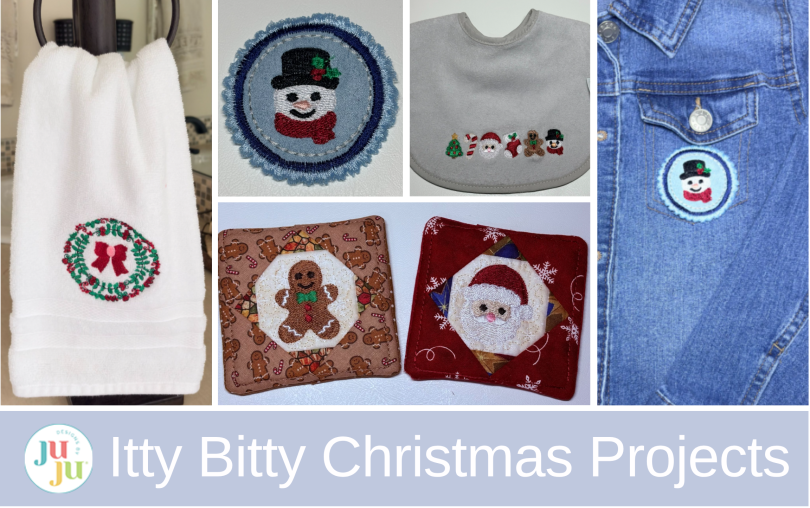
Discover four festive Christmas embroidery projects using Itty Bitty designs: a hand towel, baby bib, embroidered patches, and in-the-hoop coasters.
Turn Christmas Itty Bitty Embellishment Set into festive towels, baby bibs, coasters, and patches for a little holiday cheer!
Finished sizes: Vary
Check out the DBJJ team’s favorite supplies in the Designs by JuJu Amazon store. For all your stabilizers, threads, and batting, Designs by JuJu+ has everything you need.
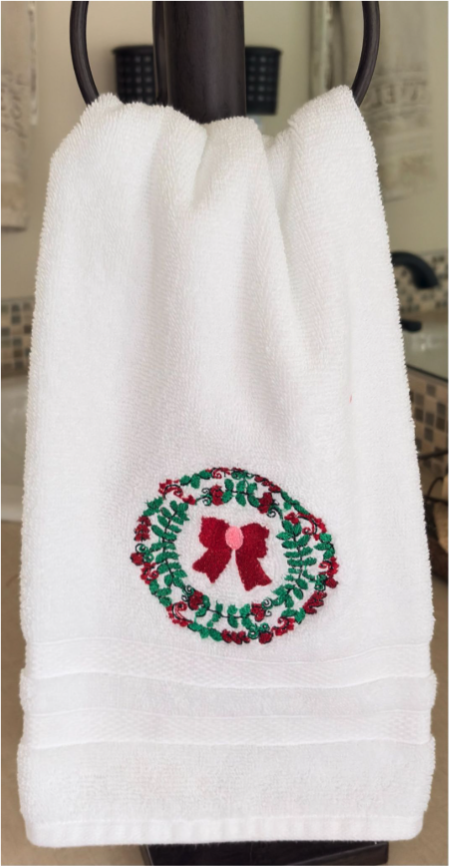
Deck the halls—and the hand towels! Add a little extra personality to your holiday decorating with a festive embroidered towel featuring a merry Christmas wreath with an itty-bitty design tucked inside. This fun project comes together quickly and adds the perfect handmade touch to your holiday home. Whether you’re stitching one for yourself or making a few as gifts, it’s a merry little project that’s sure to make you smile!
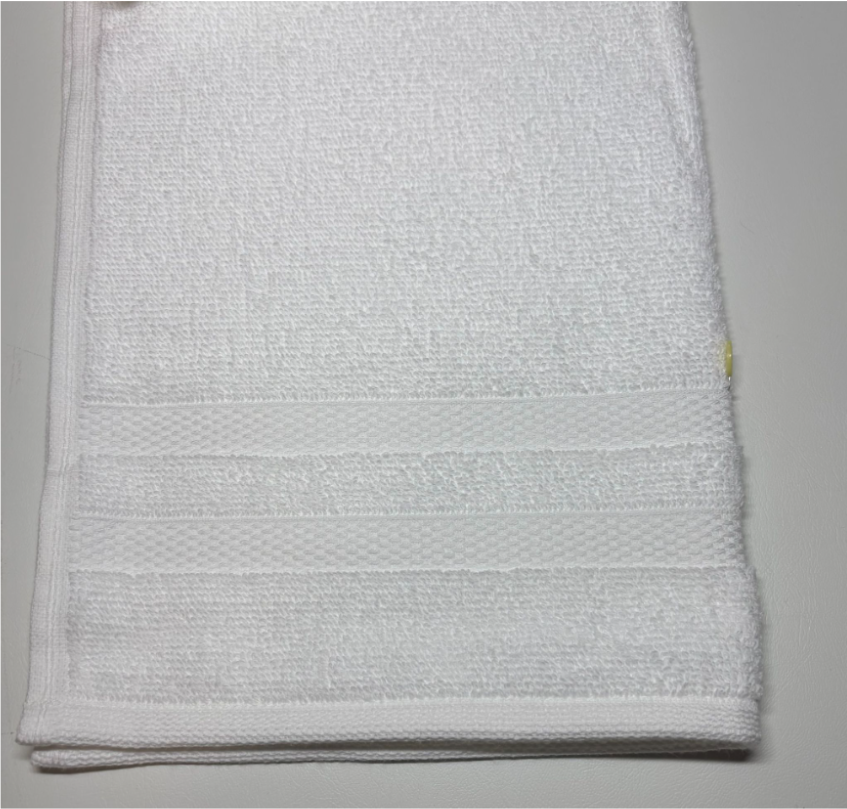
Wash, dry, and press your towel as needed. Fold the towel in half to find the center, then mark it with a pin.
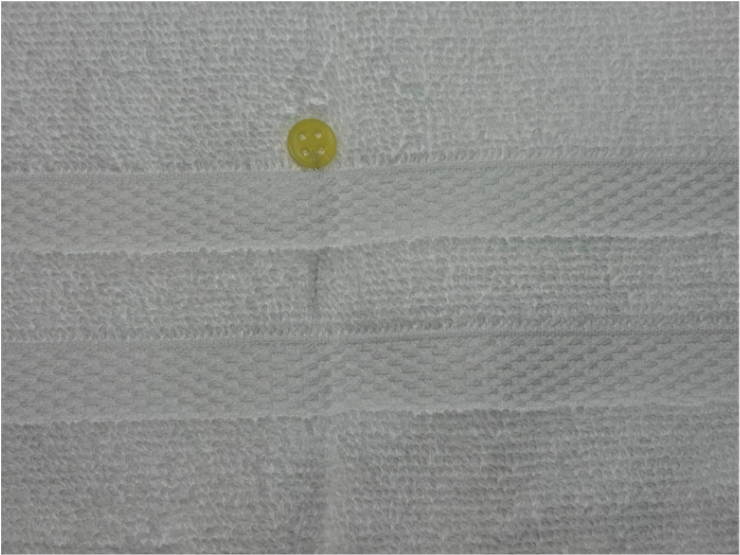
Unfold the towel and decide where you would like the bottom center of your embroidery design to be. For my towel, I positioned the design just above the existing waffle design, as shown in the photo.
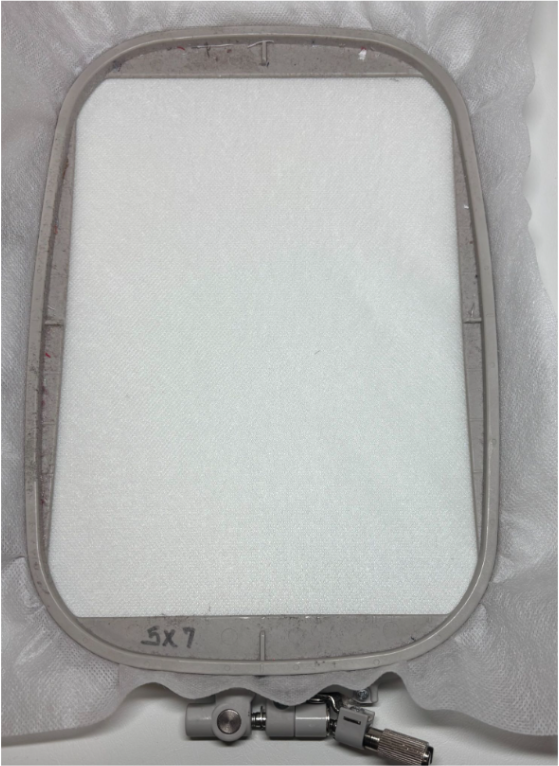
Hoop the magicMELT Water-Soluble Stabilizer in a 5x7 hoop.
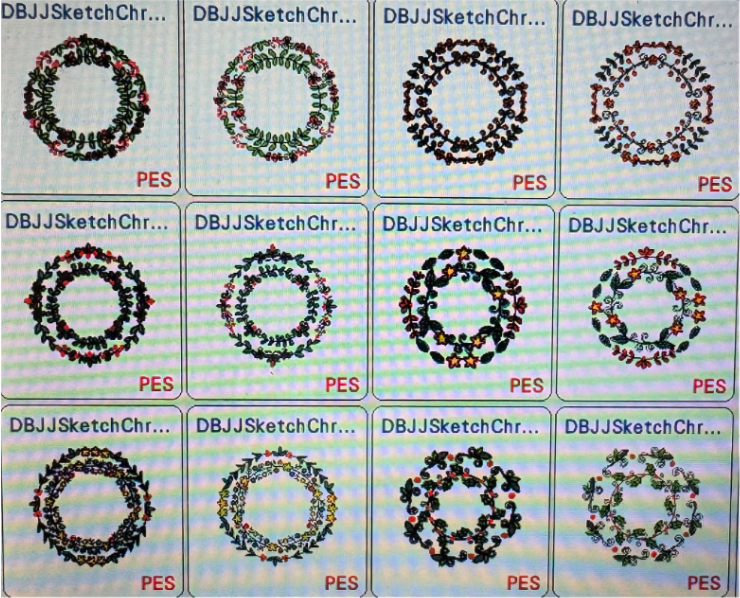
Load Sketch Christmas Wreaths onto your embroidery machine.
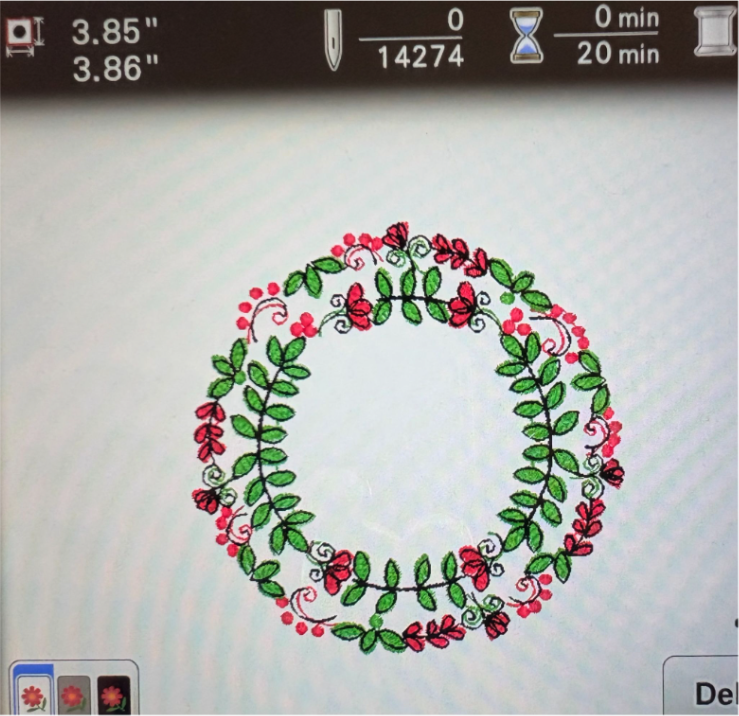
Select the wreath you want to use, then add it to your machine screen.
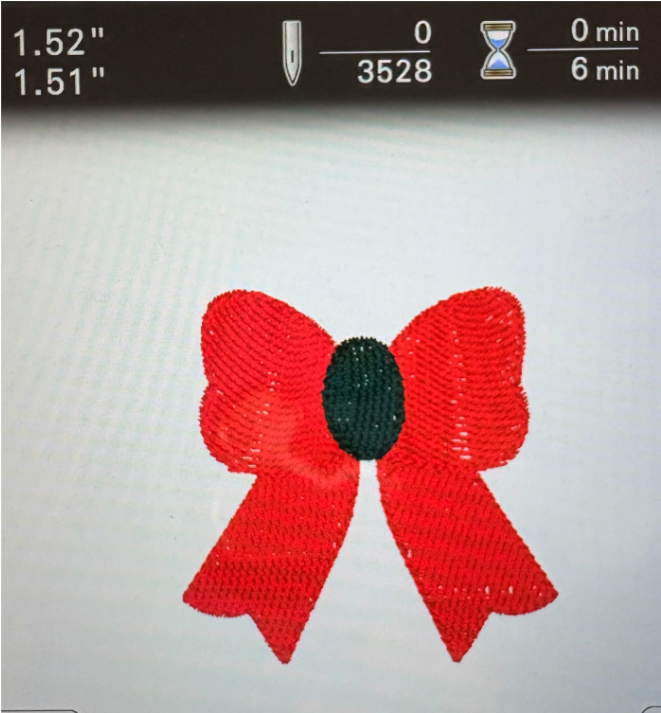
Next, load the Christmas Itty Bitty Embellishment Set set. Select the 1½" size, choose the design you would like to place inside the wreath, and add it to your screen.
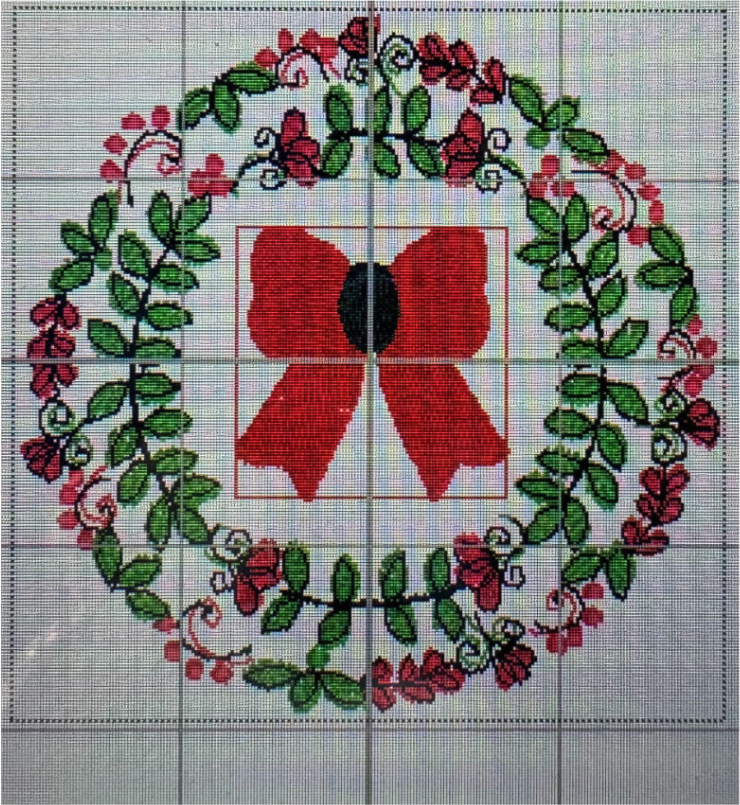
The small design should fit nicely inside the wreath.
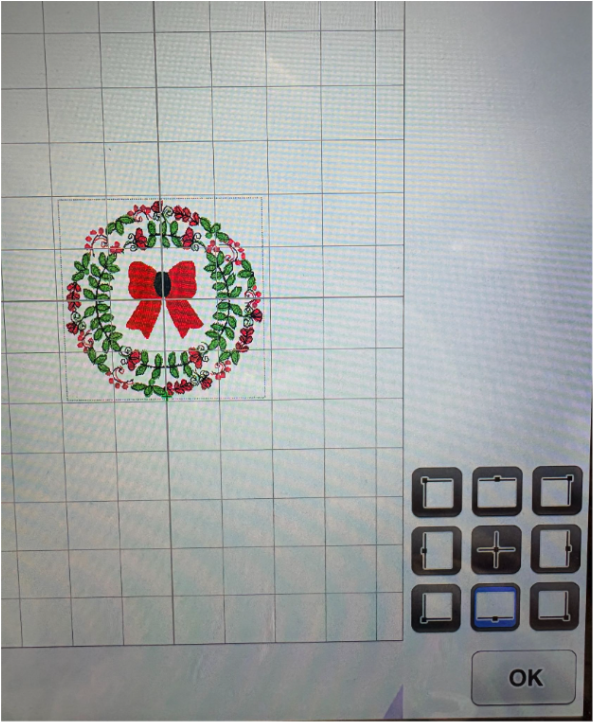
Using the Positioning keys on your machine, locate the bottom center of the completed design. I use a Brother 8500 embroidery machine, so your machine screen and controls may look a little different.
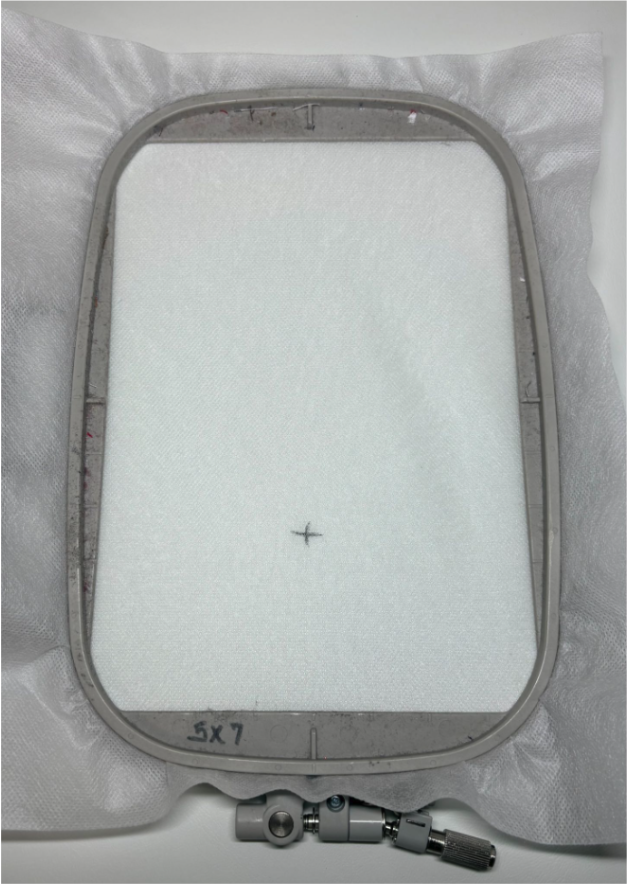
Take your hooped stabilizer to the embroidery machine and mark the bottom center of the hoop's stitching area on the stabilizer.
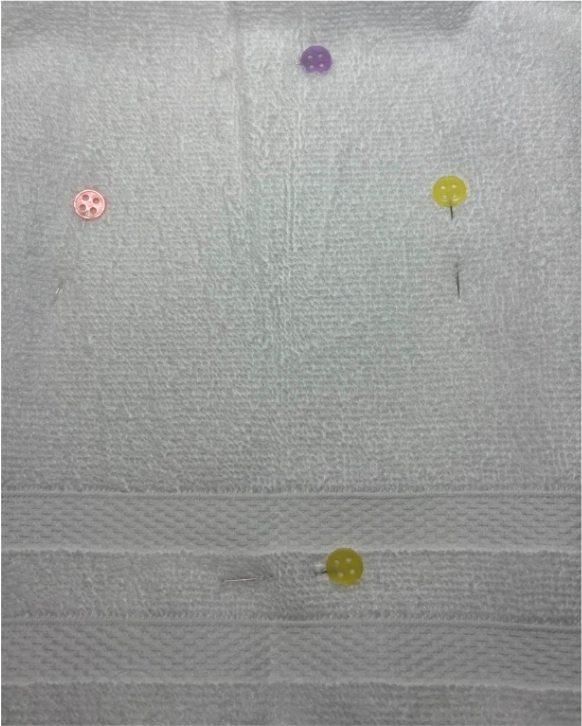
Line this mark up with the location you chose for the bottom center of your design on the towel. Pin the towel securely to the stabilizer, making sure it is straight and positioned correctly.
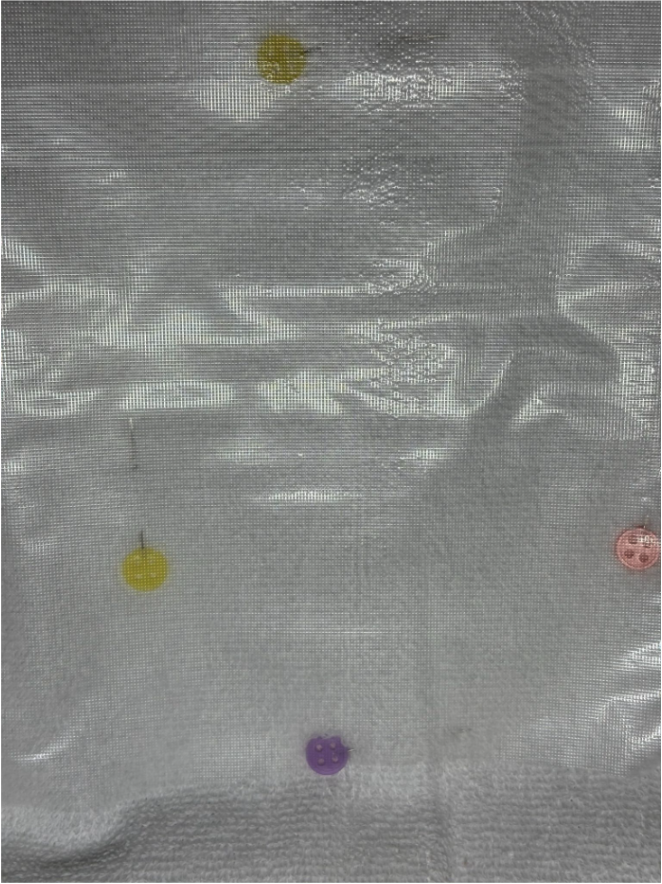
Place a water-soluble topper over the towel. This will help keep the stitches from sinking into the towel's nap.
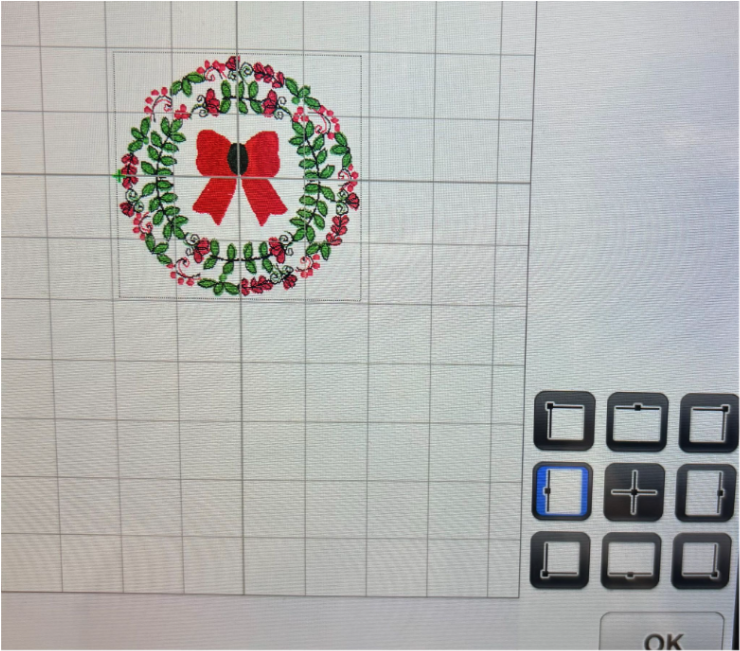
Before stitching, use your machine's Positioning keys to check the design's sides and corners. Make sure all pins are safely outside the stitching area.
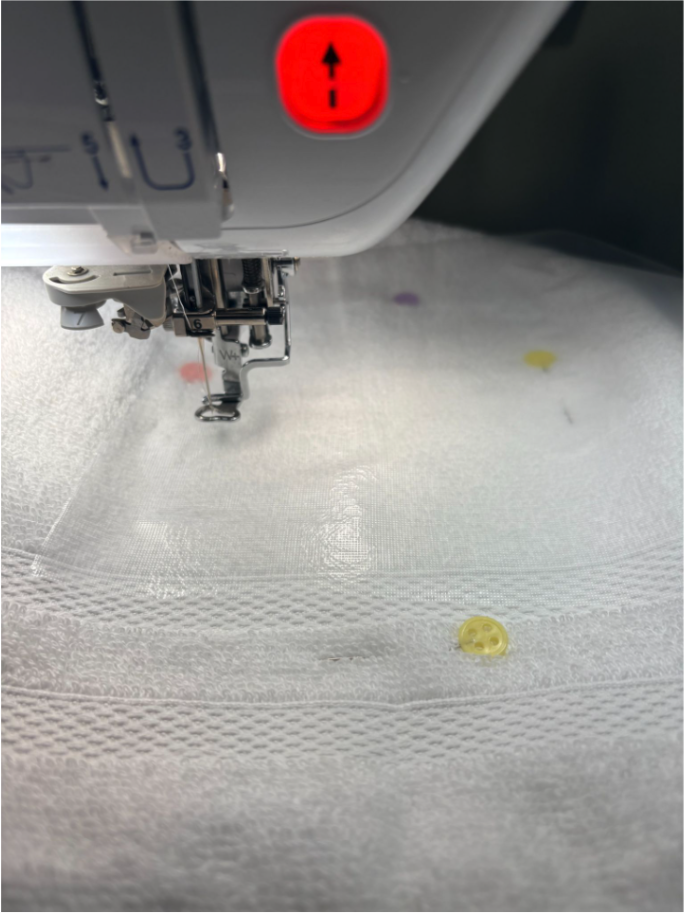
Once everything is positioned correctly, stitch out your design.
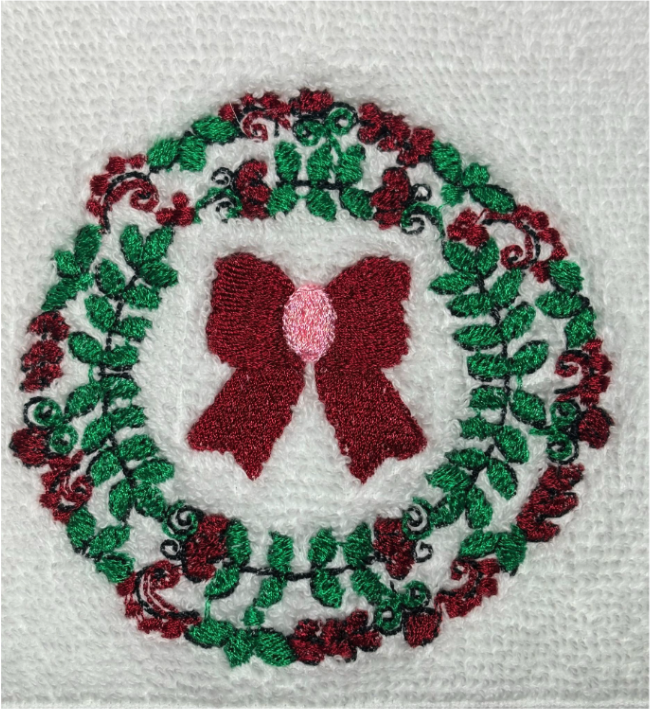
When the embroidery is finished, carefully remove the towel from the hoop. Remove the water-soluble topper and trim away the excess wash-away stabilizer.
Wash the towel according to the manufacturer's care instructions to dissolve any remaining topper and stabilizer.
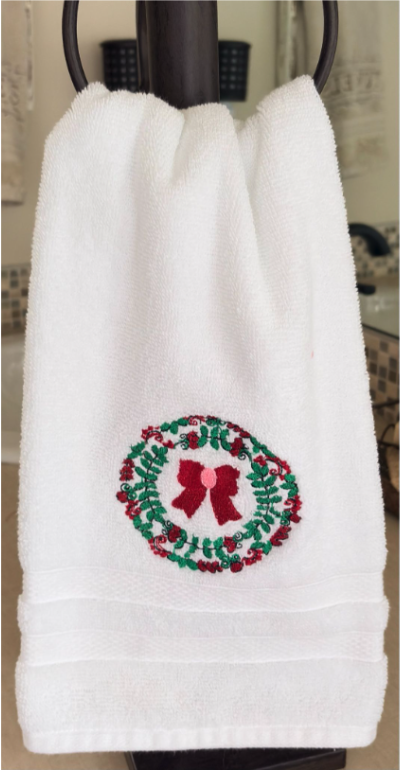
Once your towel is clean and dry, it’s ready to show off for the holidays! A little embroidery is all it takes to turn an ordinary towel into a cheerful holiday accent—and it makes a wonderful handmade gift too. Happy stitching!
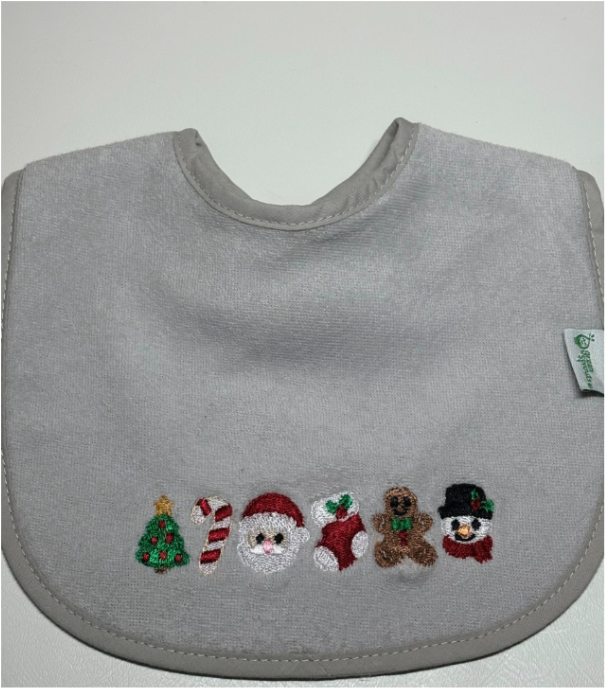
Tiny stitches, big Christmas cheer! Turn a plain baby bib into an adorable holiday keepsake with a row of sweet designs from the Christmas Itty Bitty Embellishment Set. This quick and easy project is perfect for adding a festive touch to your little one's wardrobe—or creating a handmade gift that's almost as cute as the baby who wears it!
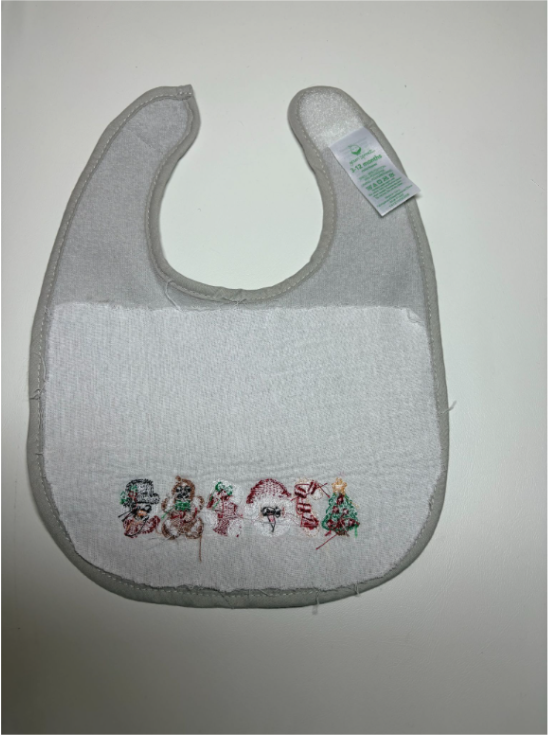
Wash and dry the bib. Press it if needed, then apply fuseEZ Fusible Stabilizer to the back of the bib following the manufacturer's instructions. You can choose to apply it to the entire back or just the area being embroidered.
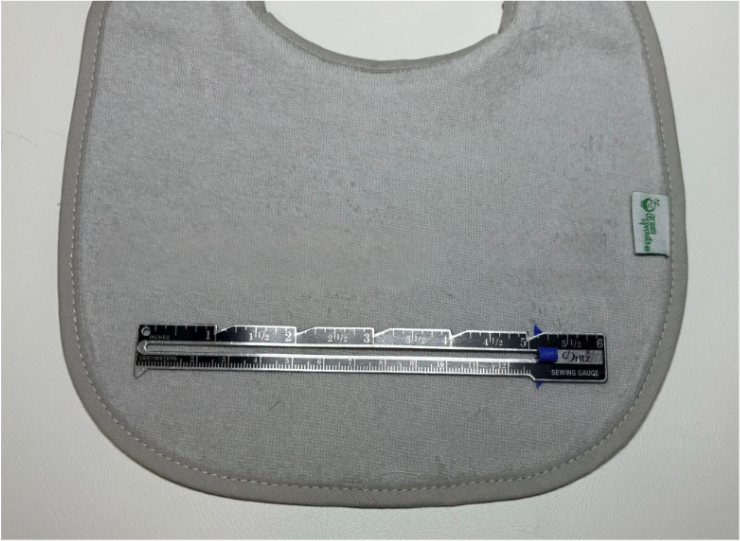
Find the center of the bib. Then, measure across the bottom where you want to place your embroidery. This helps you see how many designs will fit across the bib.
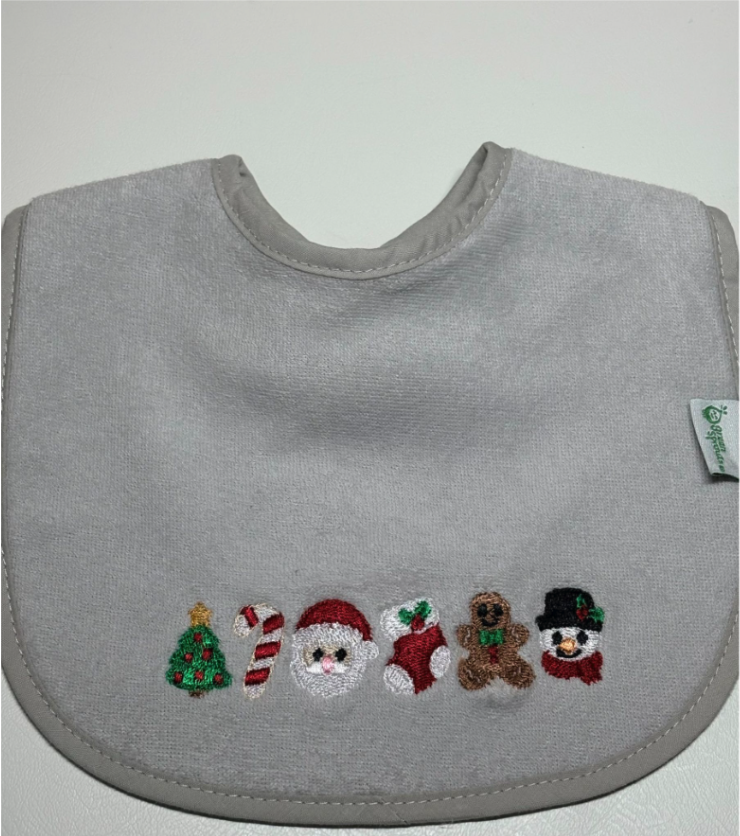
For my bib, I used the 1” Christmas Itty Bitty Embellishment Set and stitched six across. If you want to use larger designs, just use fewer so they fit comfortably.
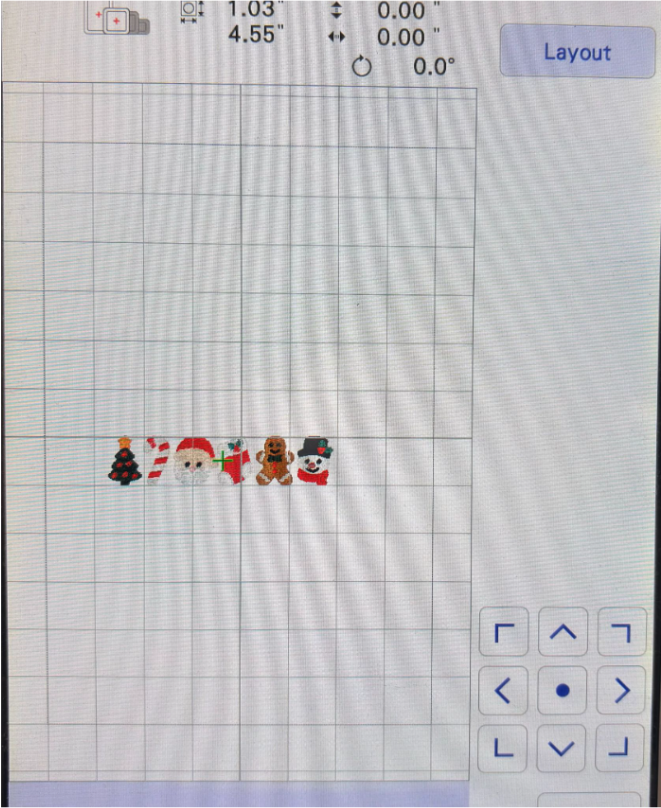
Load the Christmas Itty Bitty Embellishment Set onto your embroidery machine. Choose the 1” designs you want and arrange them evenly across the screen. If you’re using bigger designs, add fewer to keep the layout balanced.
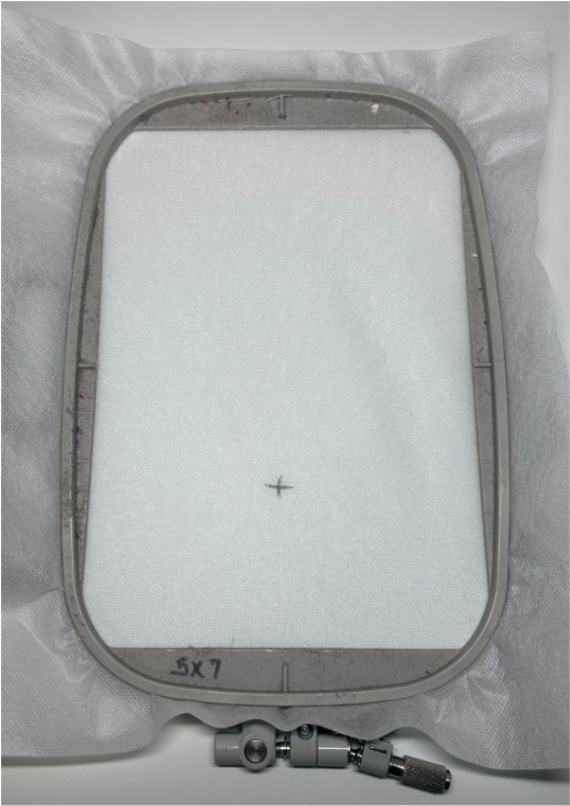
Hoop the magicMELT Water-Soluble Stabilizer into a 5x7 hoop and take it to your embroidery machine. Use your machine’s Positioning keys to find the bottom center of your design layout, and mark this spot on the stabilizer.
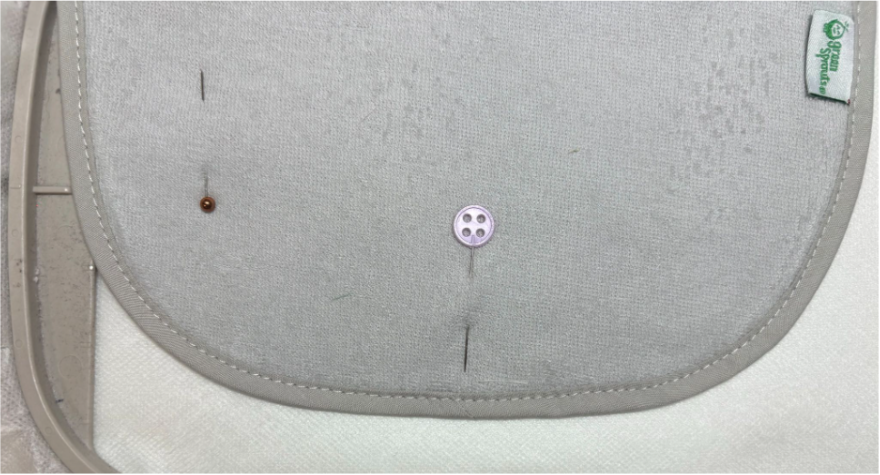
Decide where you want the bottom of the embroidery to sit on the bib. Line up the bib's bottom center with the mark on the stabilizer.
Pin the bib securely to the stabilizer, making sure it is straight and positioned correctly. Be sure all pins are completely outside the stitching area.
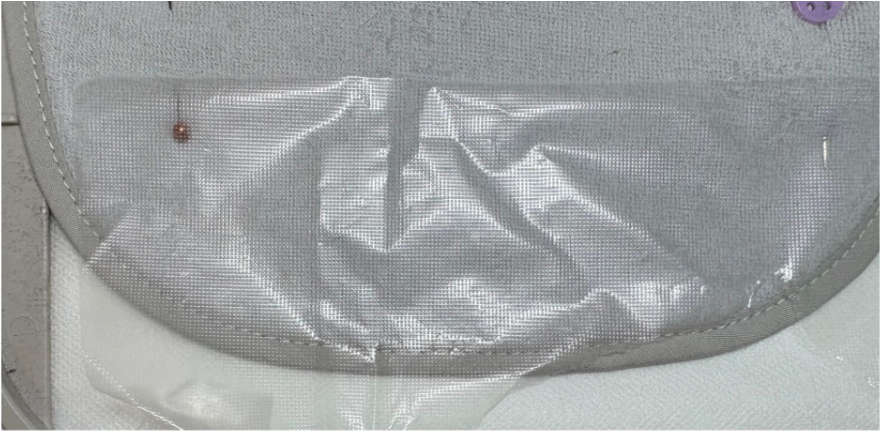
Place a water-soluble topper over the embroidery area. This will help keep the stitches from sinking into the bib fabric.
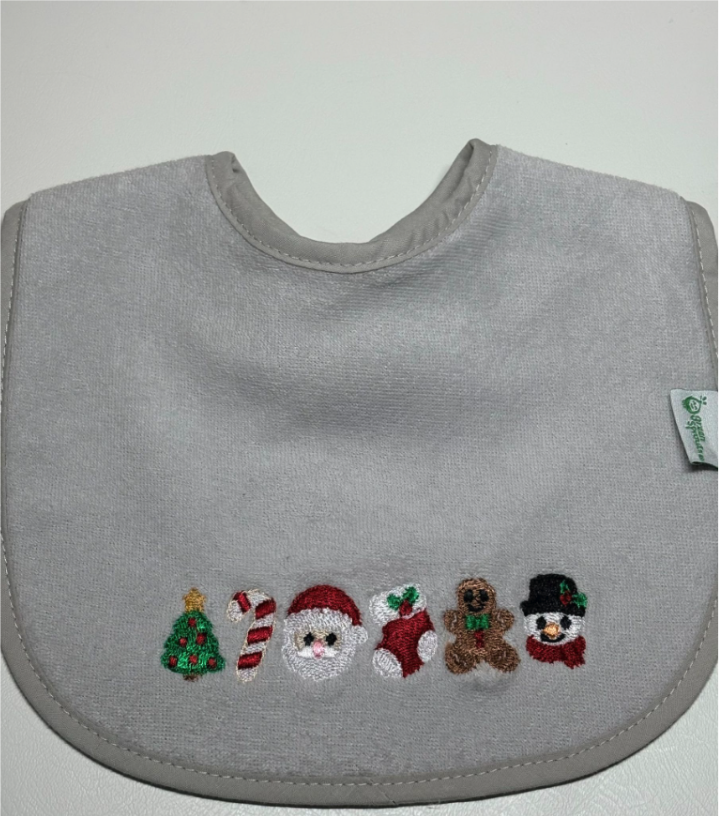
Take the hoop to your embroidery machine and stitch out your festive designs.
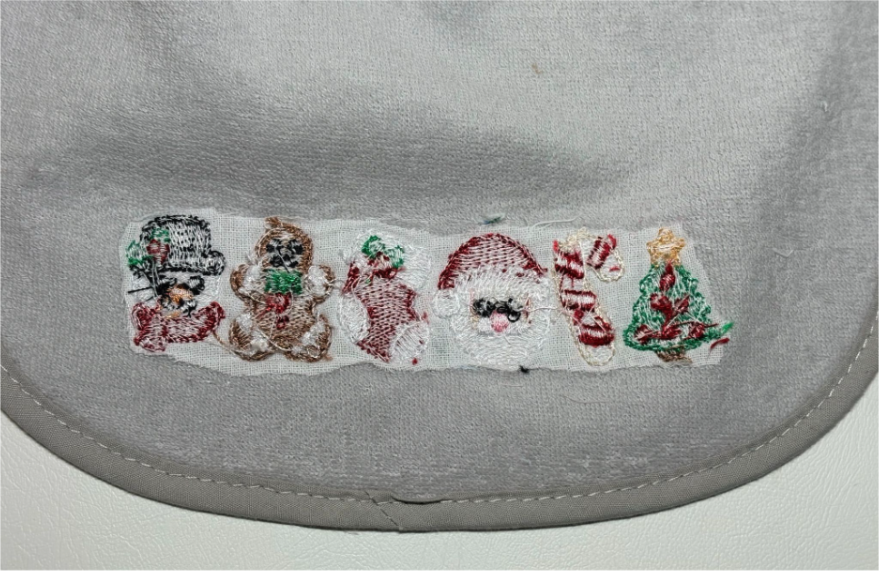
When the embroidery is finished, carefully remove the bib from the hoop. Trim off the extra stabilizer and gently remove the wash-away topper. Trim the fuseEZ around the design.
Wash the bib as the manufacturer recommends to remove any leftover stabilizer. And just like that, you've turned a plain baby bib into a Christmas delight! A row of tiny holiday designs makes this little project extra merry—and extra cute.
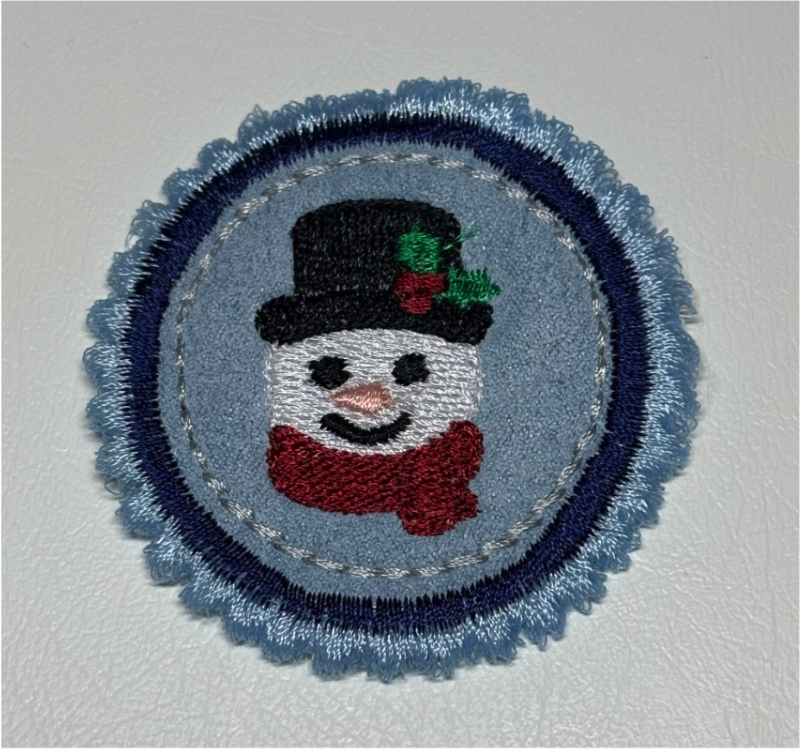
Patches are such a fun way to add personality to jackets, shirts, bags, and more—and this festive version lets you switch up your style with the seasons! Create a charming Christmas patch with your favorite holiday design, then make it removable so you can change it out when the next holiday rolls around.
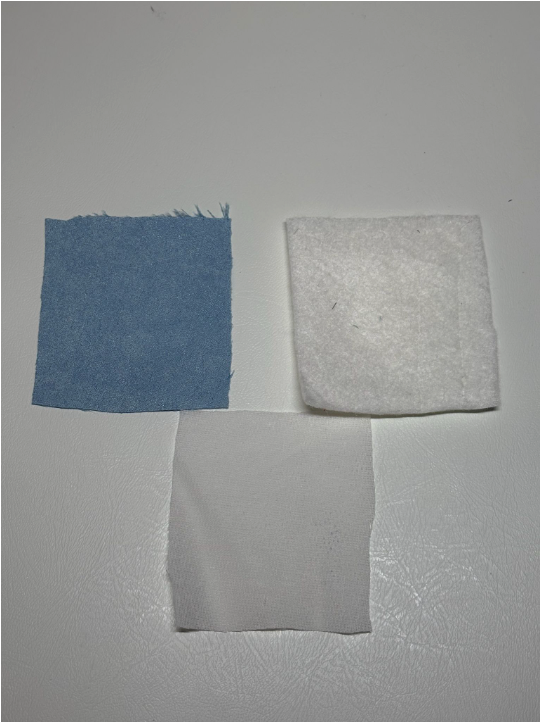
Cut the fabric, batting, and fusible interfacing into 4" x 4" pieces.
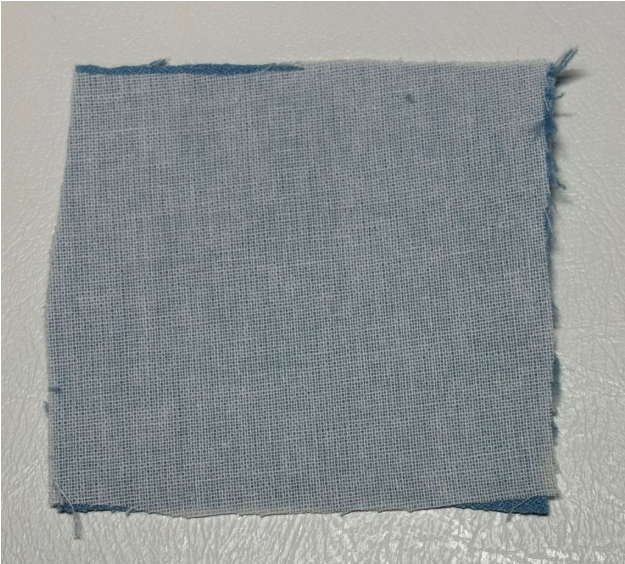
Fuse the fusible interfacing to the wrong side of the fabric following the manufacturer's instructions.
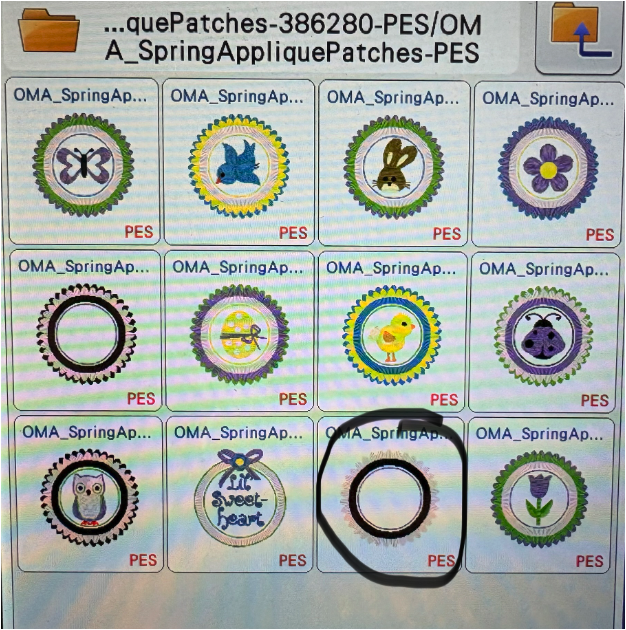
Load the Spring Applique Patches Embroidery Set by Oma's Place, and choose the patch you like.
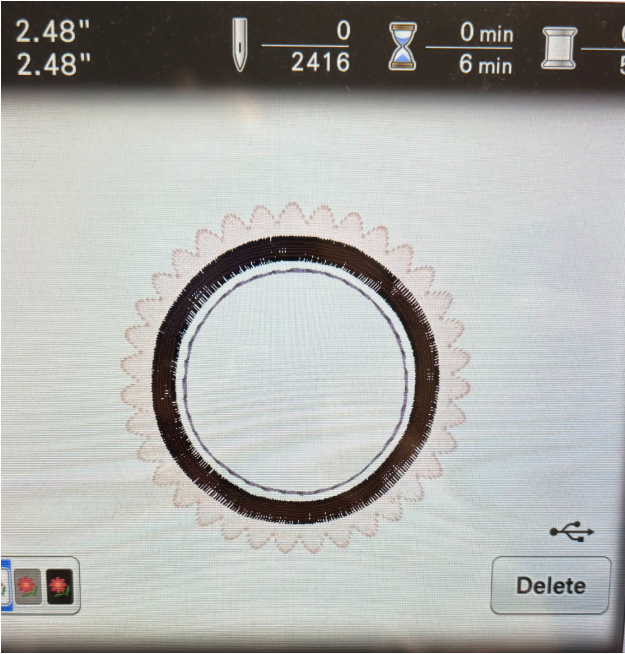
Load the blank patch design onto your embroidery machine. Select Add.
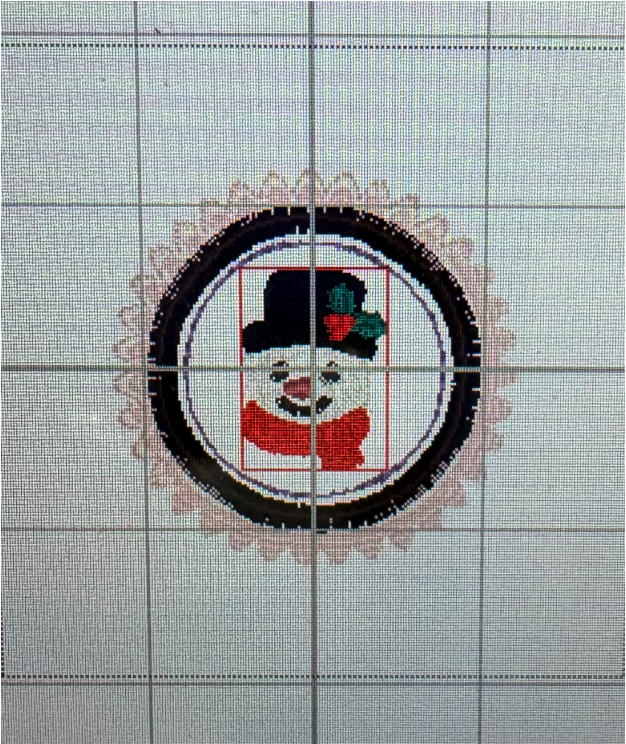
Then add the 1” Itty Bitty Christmas Design of your choice to the center.
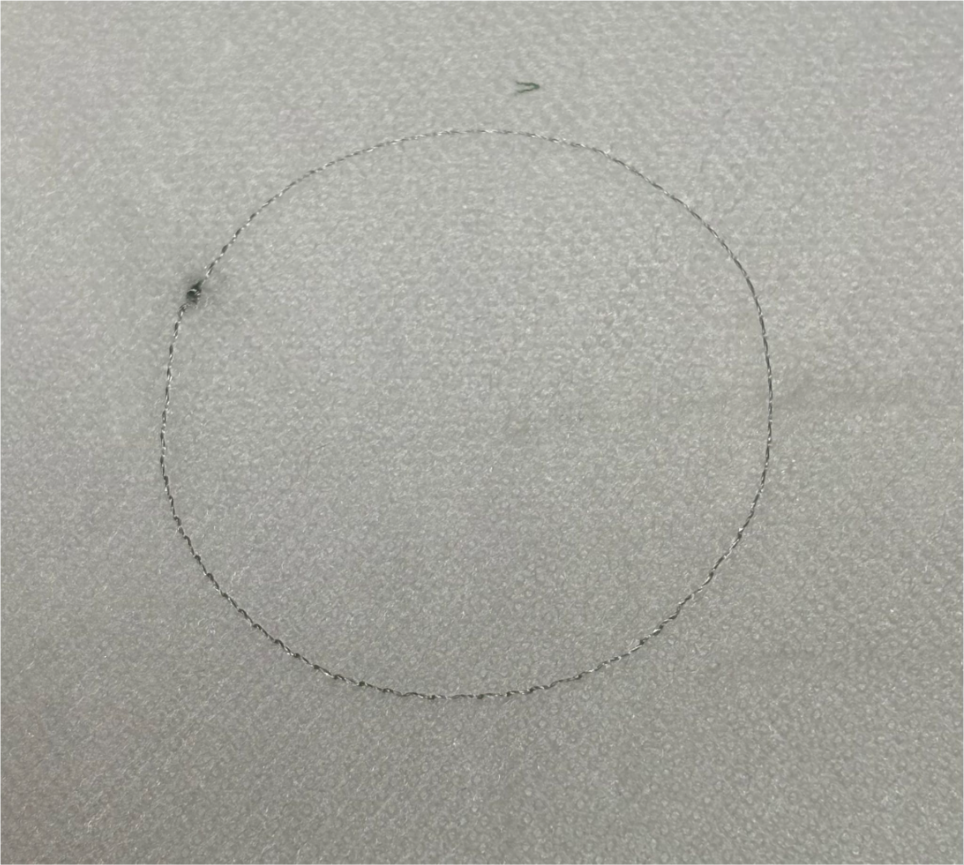
Hoop wash-away stabilizer in a 4" x 4" hoop. Take the hoop to your machine and stitch the first step. This will create the placement stitch for the prepared fabric and batting.
Remove the hoop from the machine without unhooping the stabilizer.
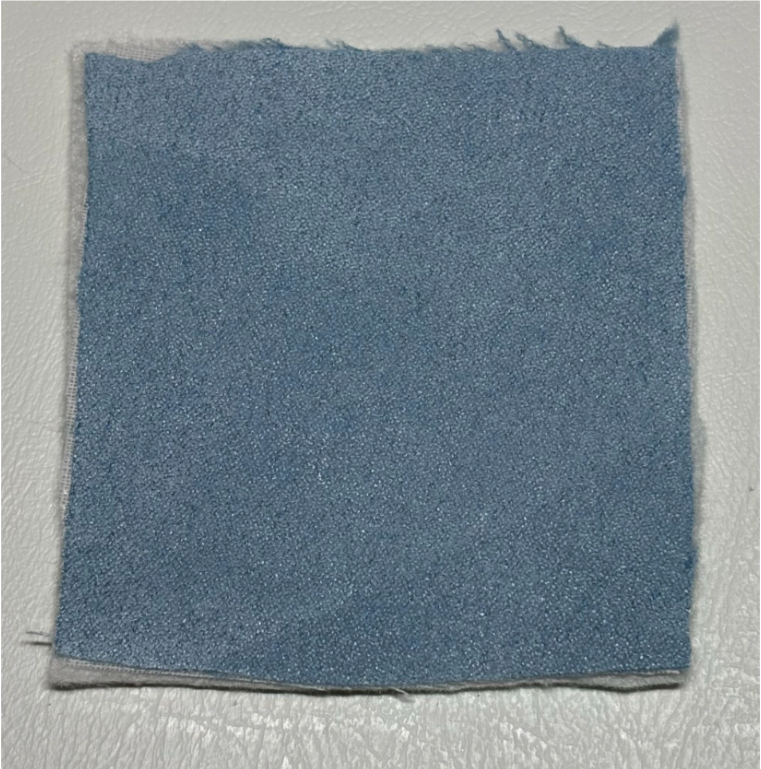
First, center the batting over the placement circle. Then place the prepared fabric on top, right side up. Make sure both pieces completely cover the placement circle.
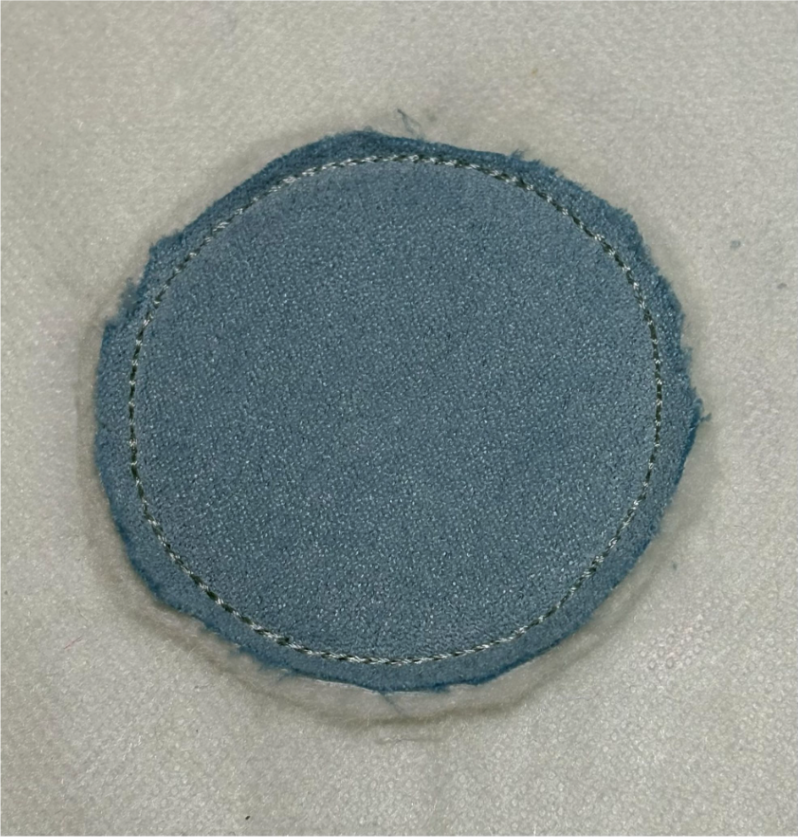
Return the hoop to the machine and run the tack-down stitch.
Once the tack-down is complete, remove the hoop and place it on a flat surface. Carefully trim the excess fabric and batting to approximately ⅛"from the stitching. This edge will be covered with a satin stitch, so you don’t have to be completely straight all the way around.
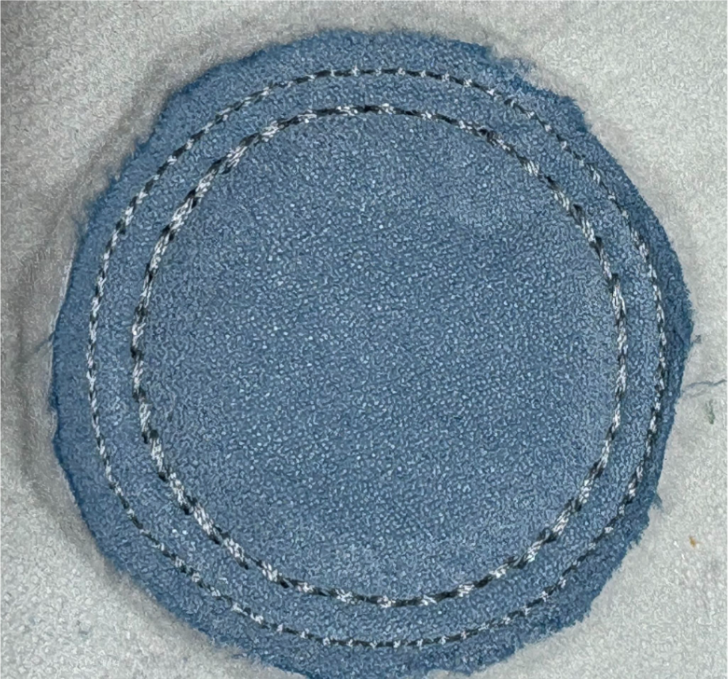
Return the hoop to the machine and stitch the decorative outline stitches around the patch.
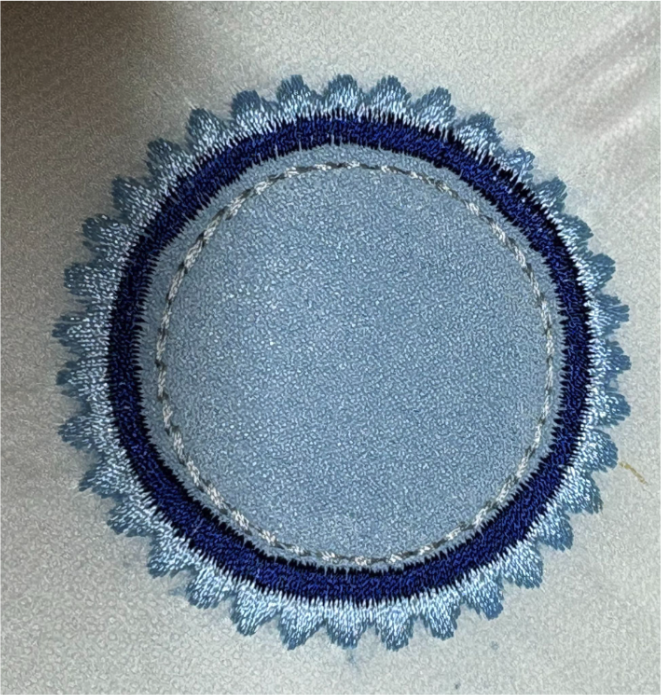
Next are the decorative edge stitches.
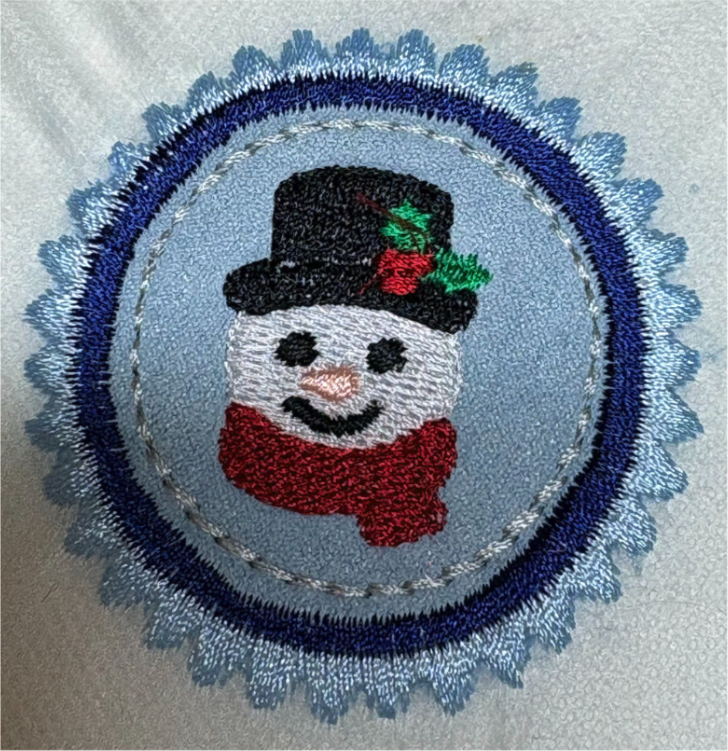
Finish with the Itty Bitty design.
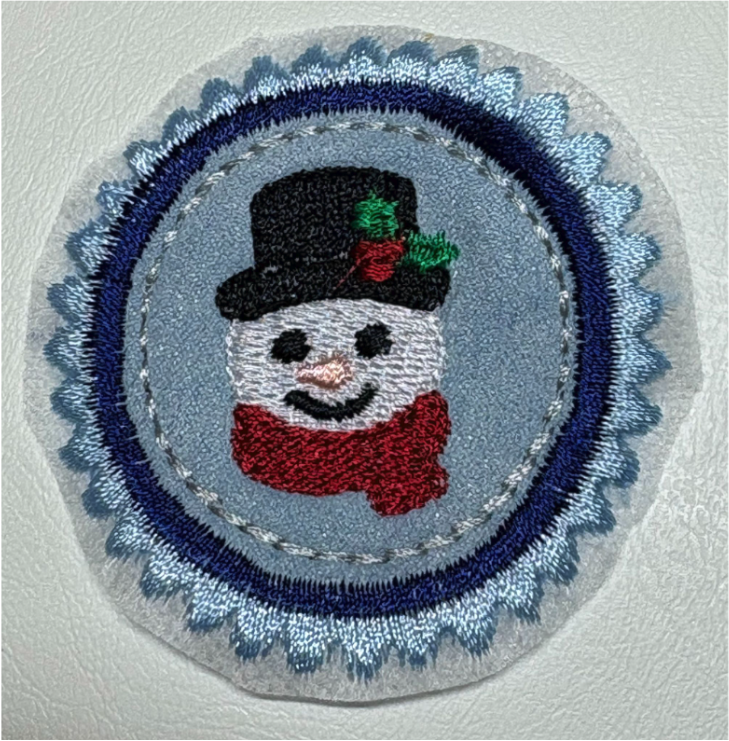
When the embroidery is complete, remove the patch from the hoop and carefully trim away the excess wash-away stabilizer. Use a little water and a cotton swab to remove any stabilizer remaining around the patch edges. Allow the patch to dry completely.
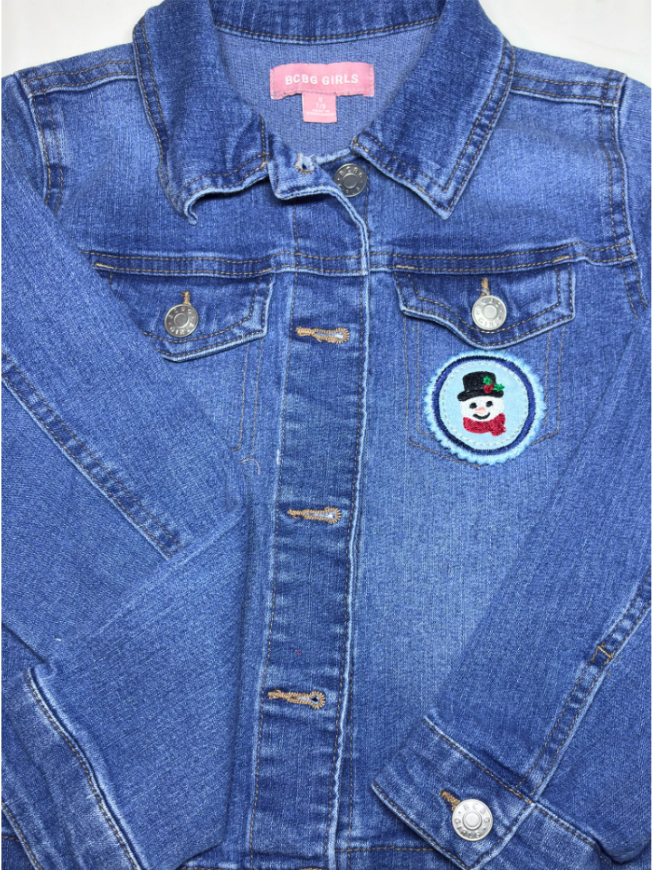
Your Christmas patch is now ready to sew to a jacket, shirt, tote bag, or whatever you choose!
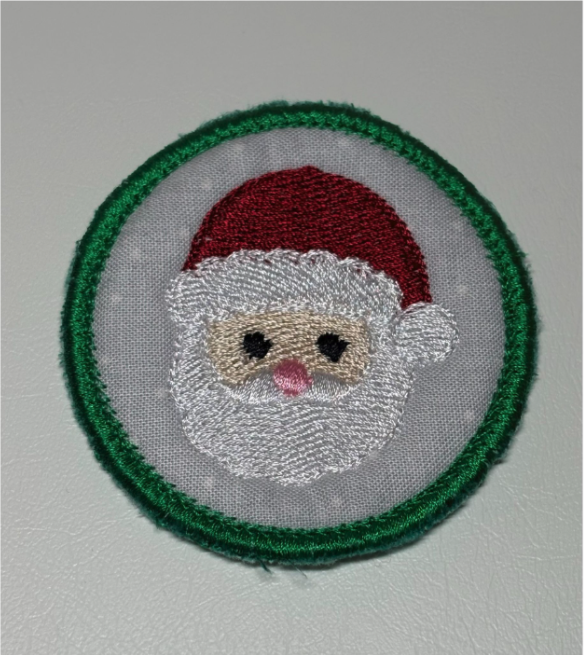
You can also use the In The Hoop Fabric Addict Patch Project by Oma's Place to create a patch.
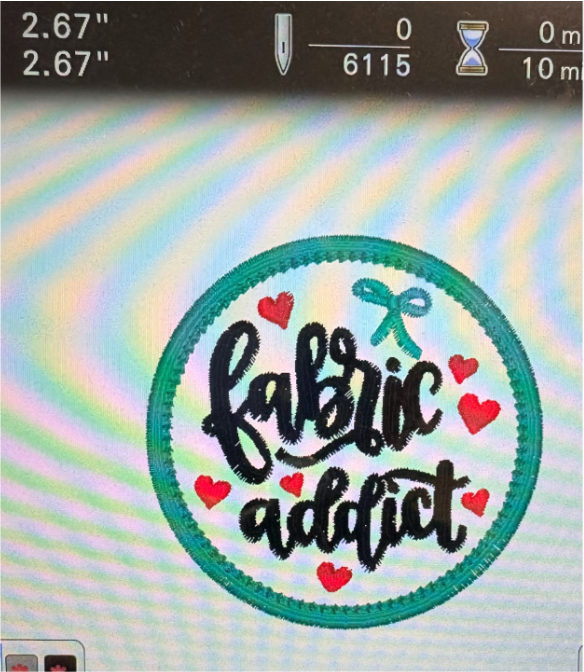
Follow the same steps as above. Load In The Hoop Fabric Addict Patch Project by Oma's Place to your machine.
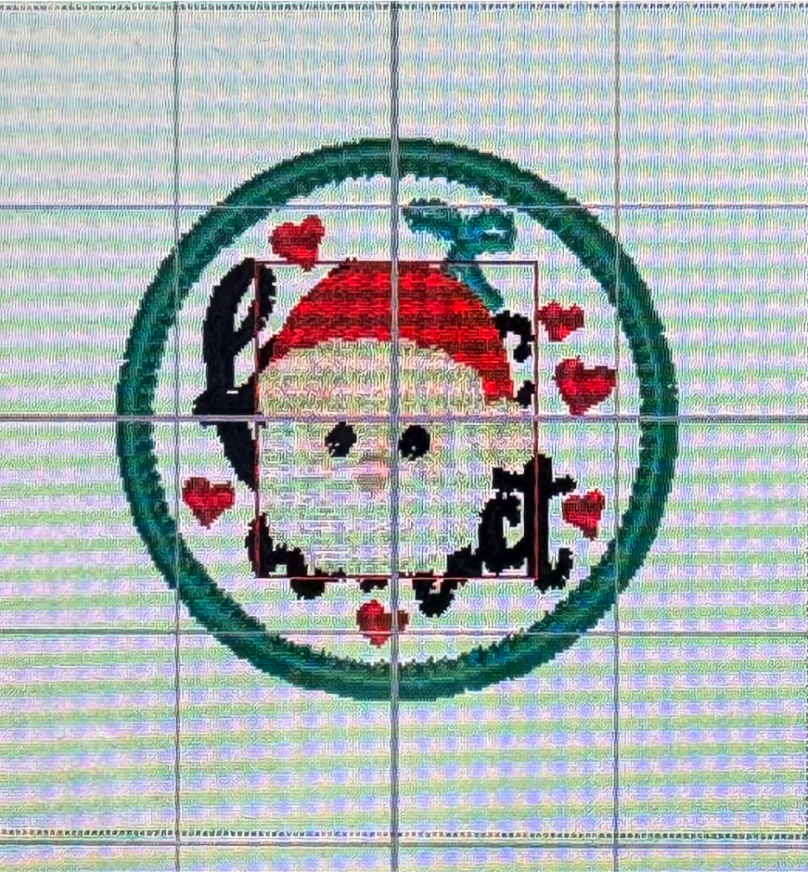
Add the 1.5” design of your choice. Keep it at the original size.
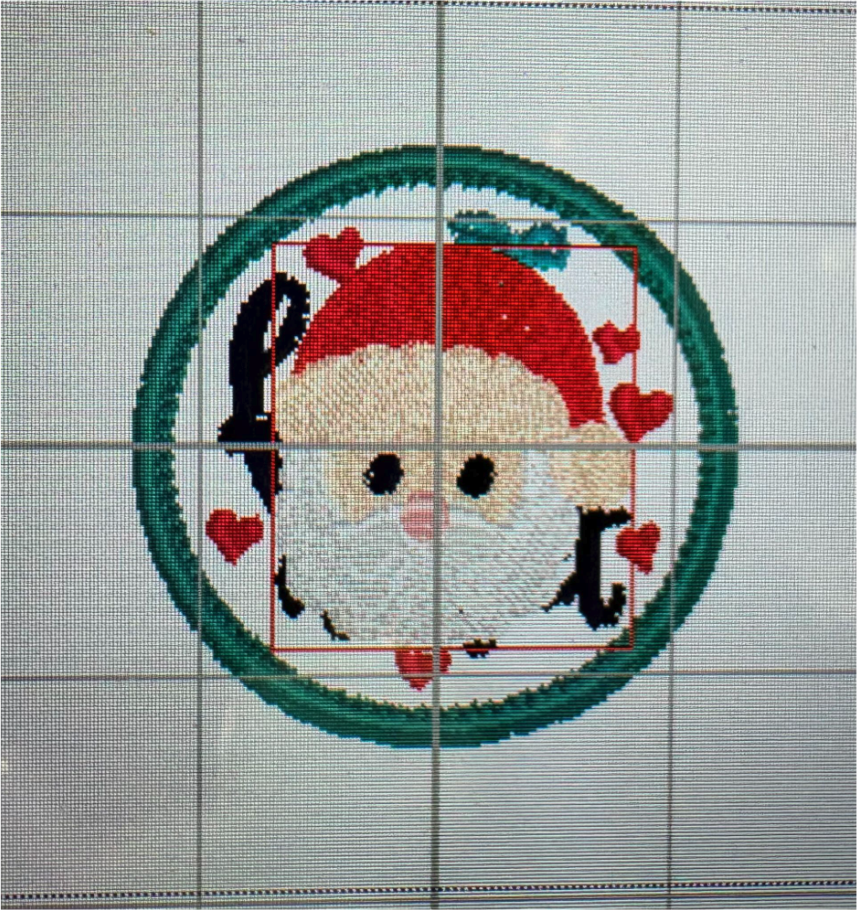
Or enlarge slightly if your machine allows. Keep it centered.
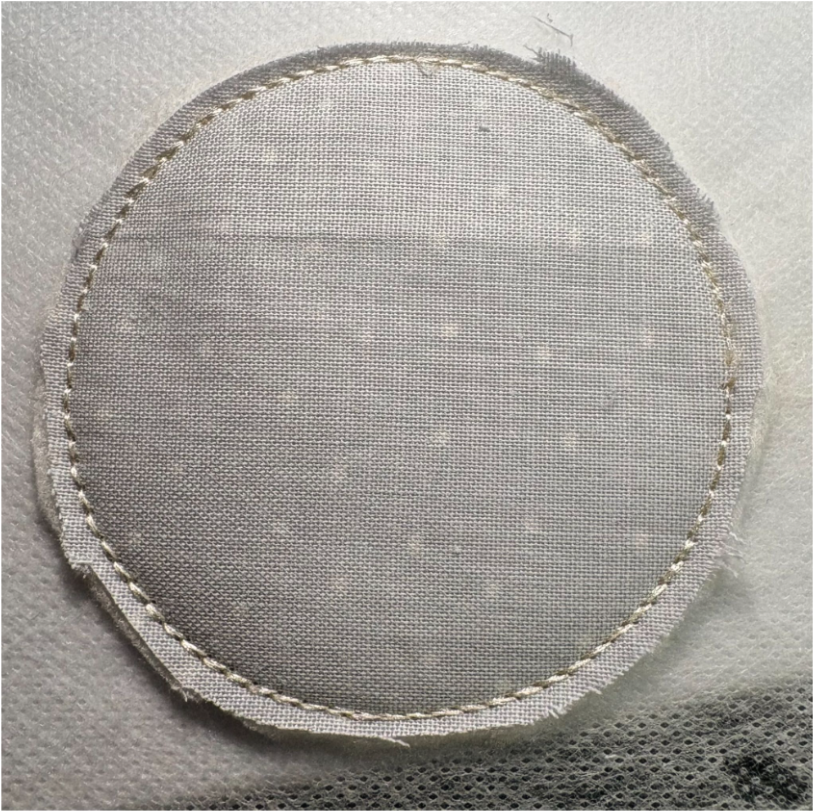
Hoop wash-away stabilizer and tack down both the batting and fabric as before. Trim close to both the batting and fabric.
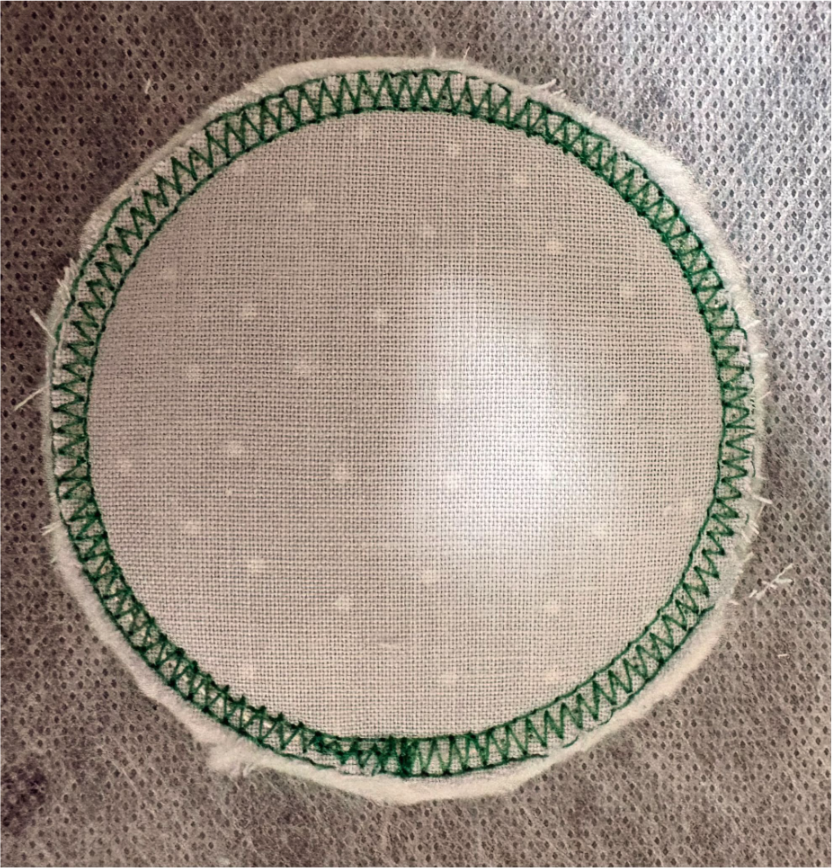
Run the beginning of the satin edge stitch. Stop the machine and trim closer if needed.
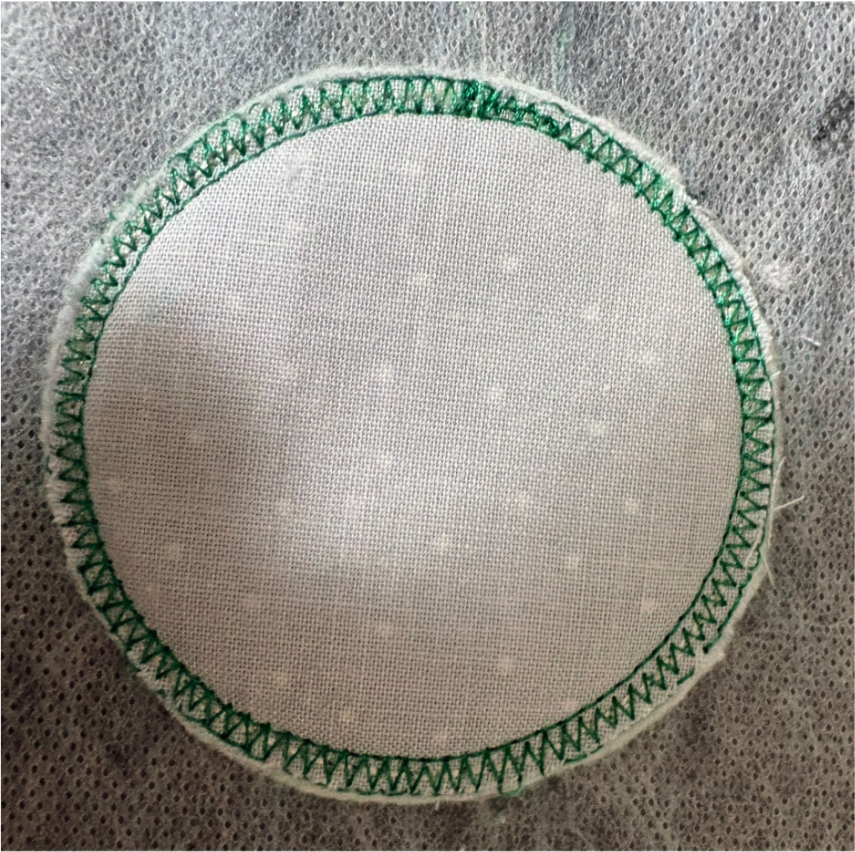
Once you are happy with the trimming, continue. Skip the decorative stitches that were included with the Fabric Addict design and stitch the Itty Bitty design in the center of the patch instead.
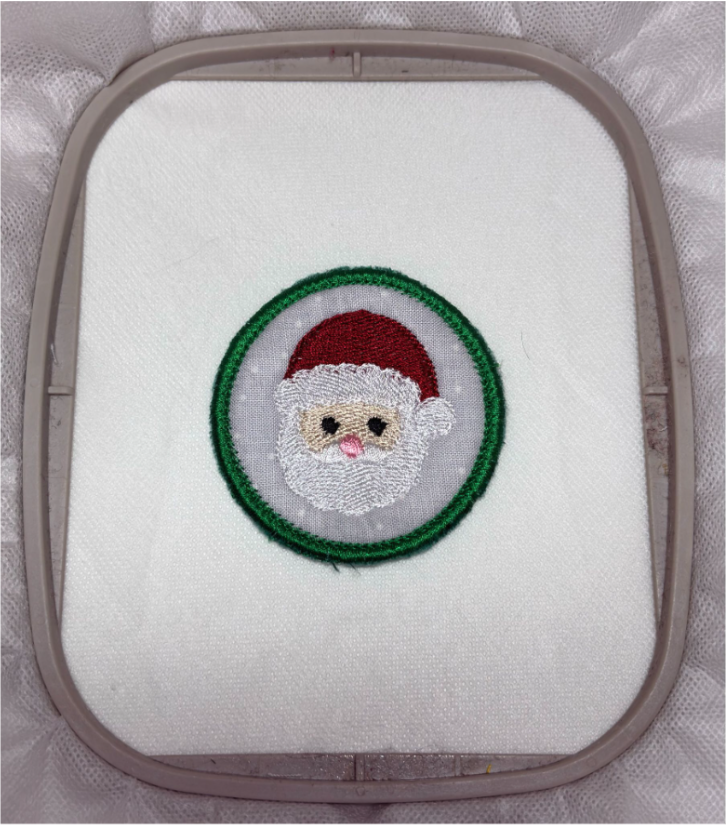
Remove the patch from the hoop and wash away the stabilizer.
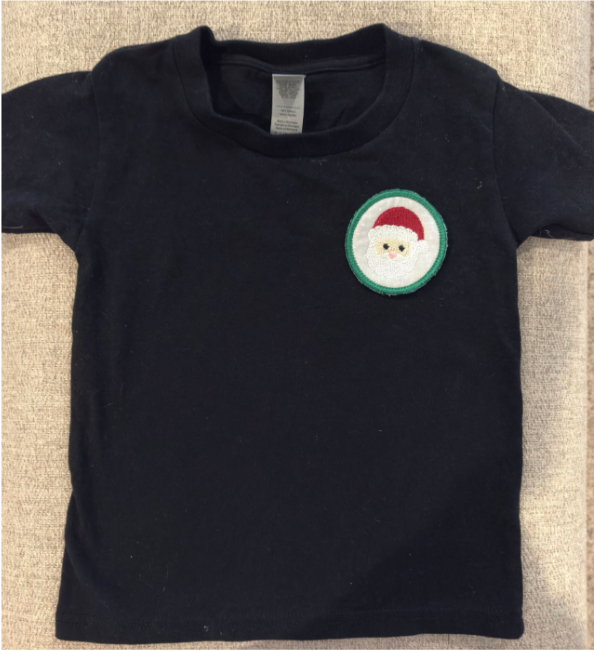
Now you have a festive little patch that can bring Christmas cheer wherever you put it—and when the holidays are over, simply switch it out for a new seasonal favorite!
I made my patches to sew on so I can easily swap them out with the seasons. If you want to make yours iron-on, cut a piece of Heat-n-Bond Ultra slightly smaller than your patch. Following the manufacturer's instructions, iron it onto the back of the finished patch. Once it is attached, you can iron the patch onto your project.
Important: Do not sew or embroider over Heat-n-Bond Ultra after applying it.
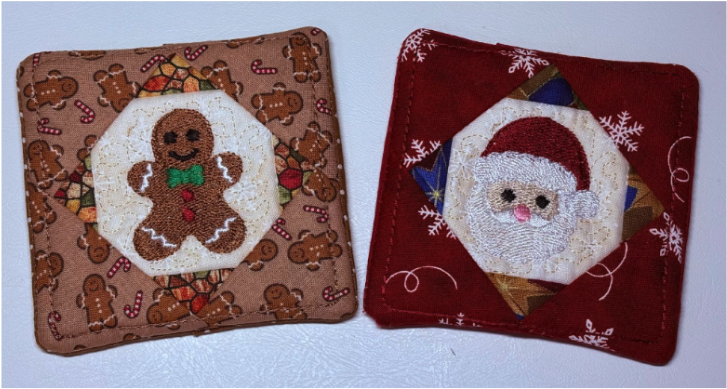
Add a little Christmas cheer to your table with handmade coasters! These in-the-hoop coasters are quick to stitch and a fun way to combine festive fabrics with your favorite Itty Bitty designs. Mix and match your fabrics and embroidery to create a set that is uniquely yours.
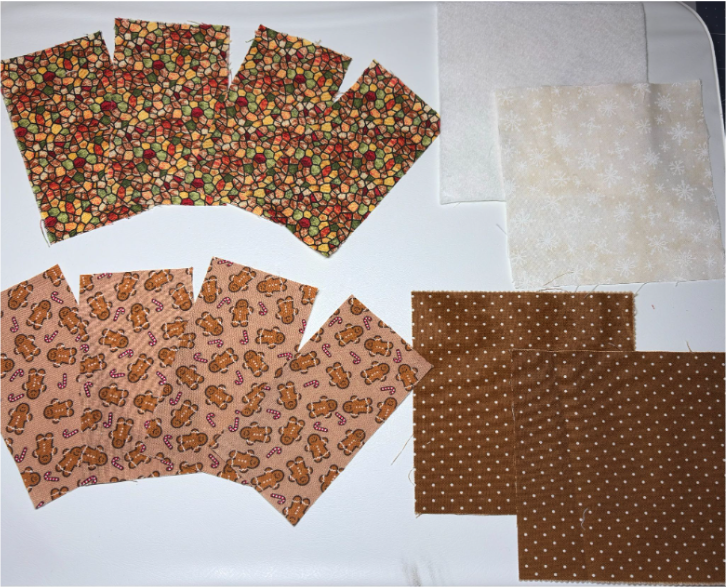
Cut your fabric:
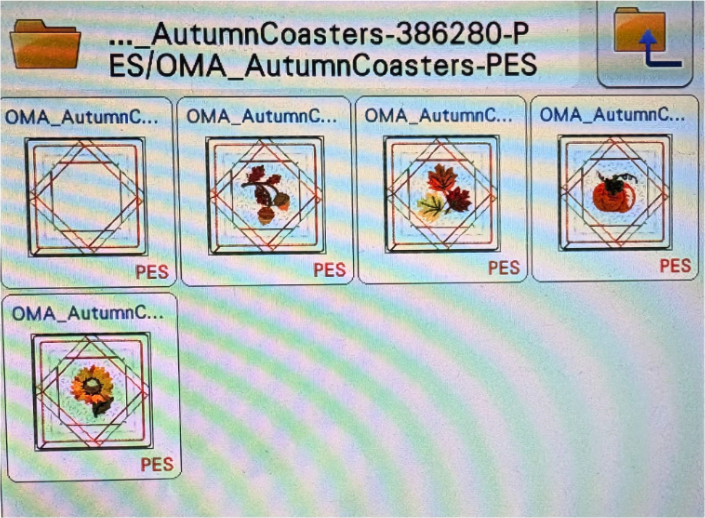
Load the In The Hoop Autumn Coasters Project by Oma's Place to your embroidery machine. There are five coaster designs to choose from. One design is blank and does not include stippling, while the other designs include stippling. You can use the blank design or choose one with stippling. I chose a stippled design because I liked the extra texture it adds to the coaster.
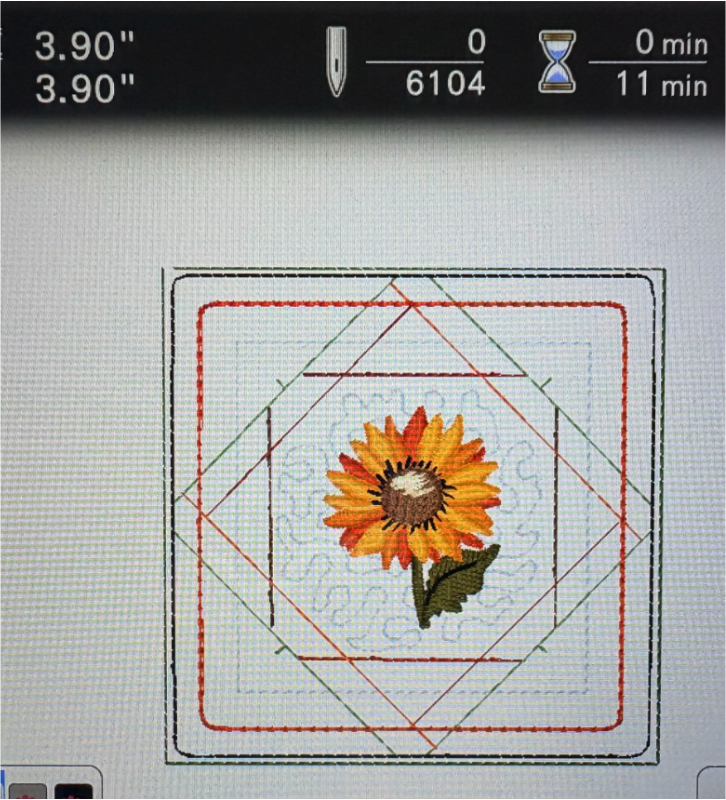
Add your chosen coaster design to your machine screen.
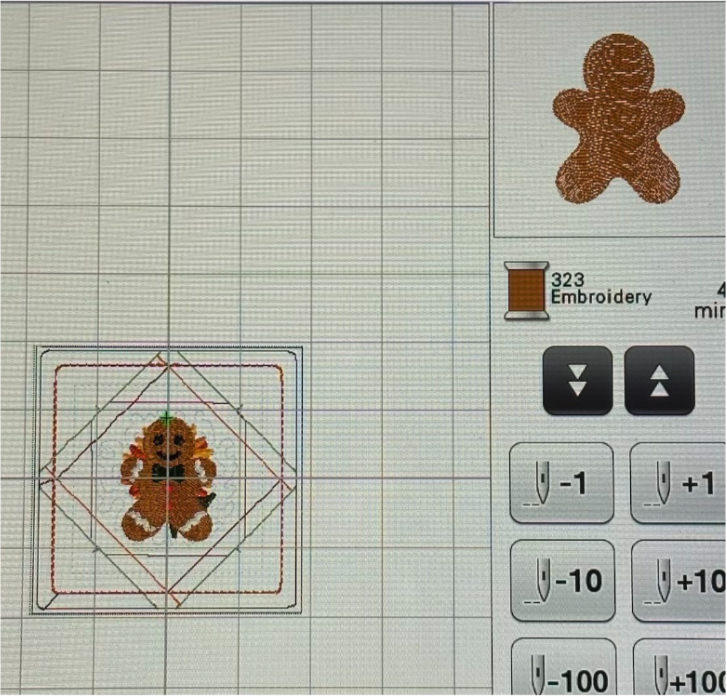
Select Add and upload the 1½” Itty Bitty design of your choice. Keep the Itty Bitty design at its original size, or enlarge it if your machine allows.
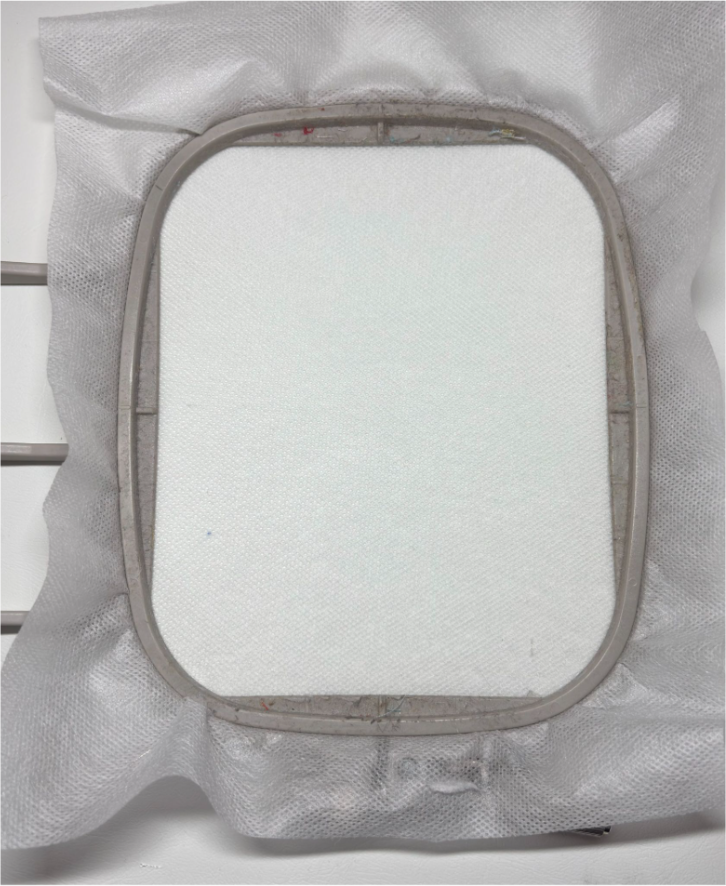
Hoop magicMESH Cut-Away Stabilizer in the 4x4 hoop.
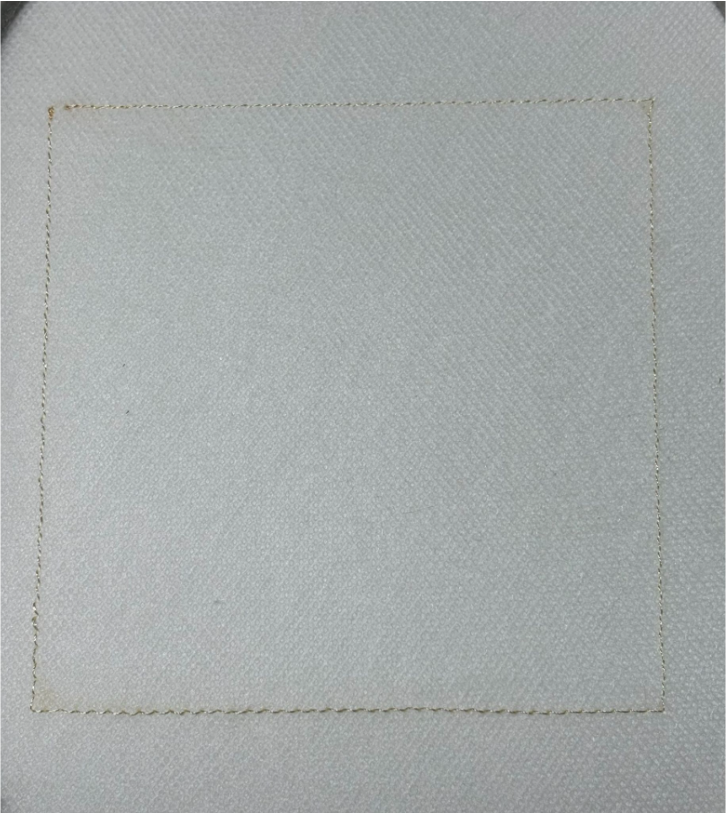
Take it to your machine and run the first step of the coaster design. This is the placement stitch for the batting and background fabric.
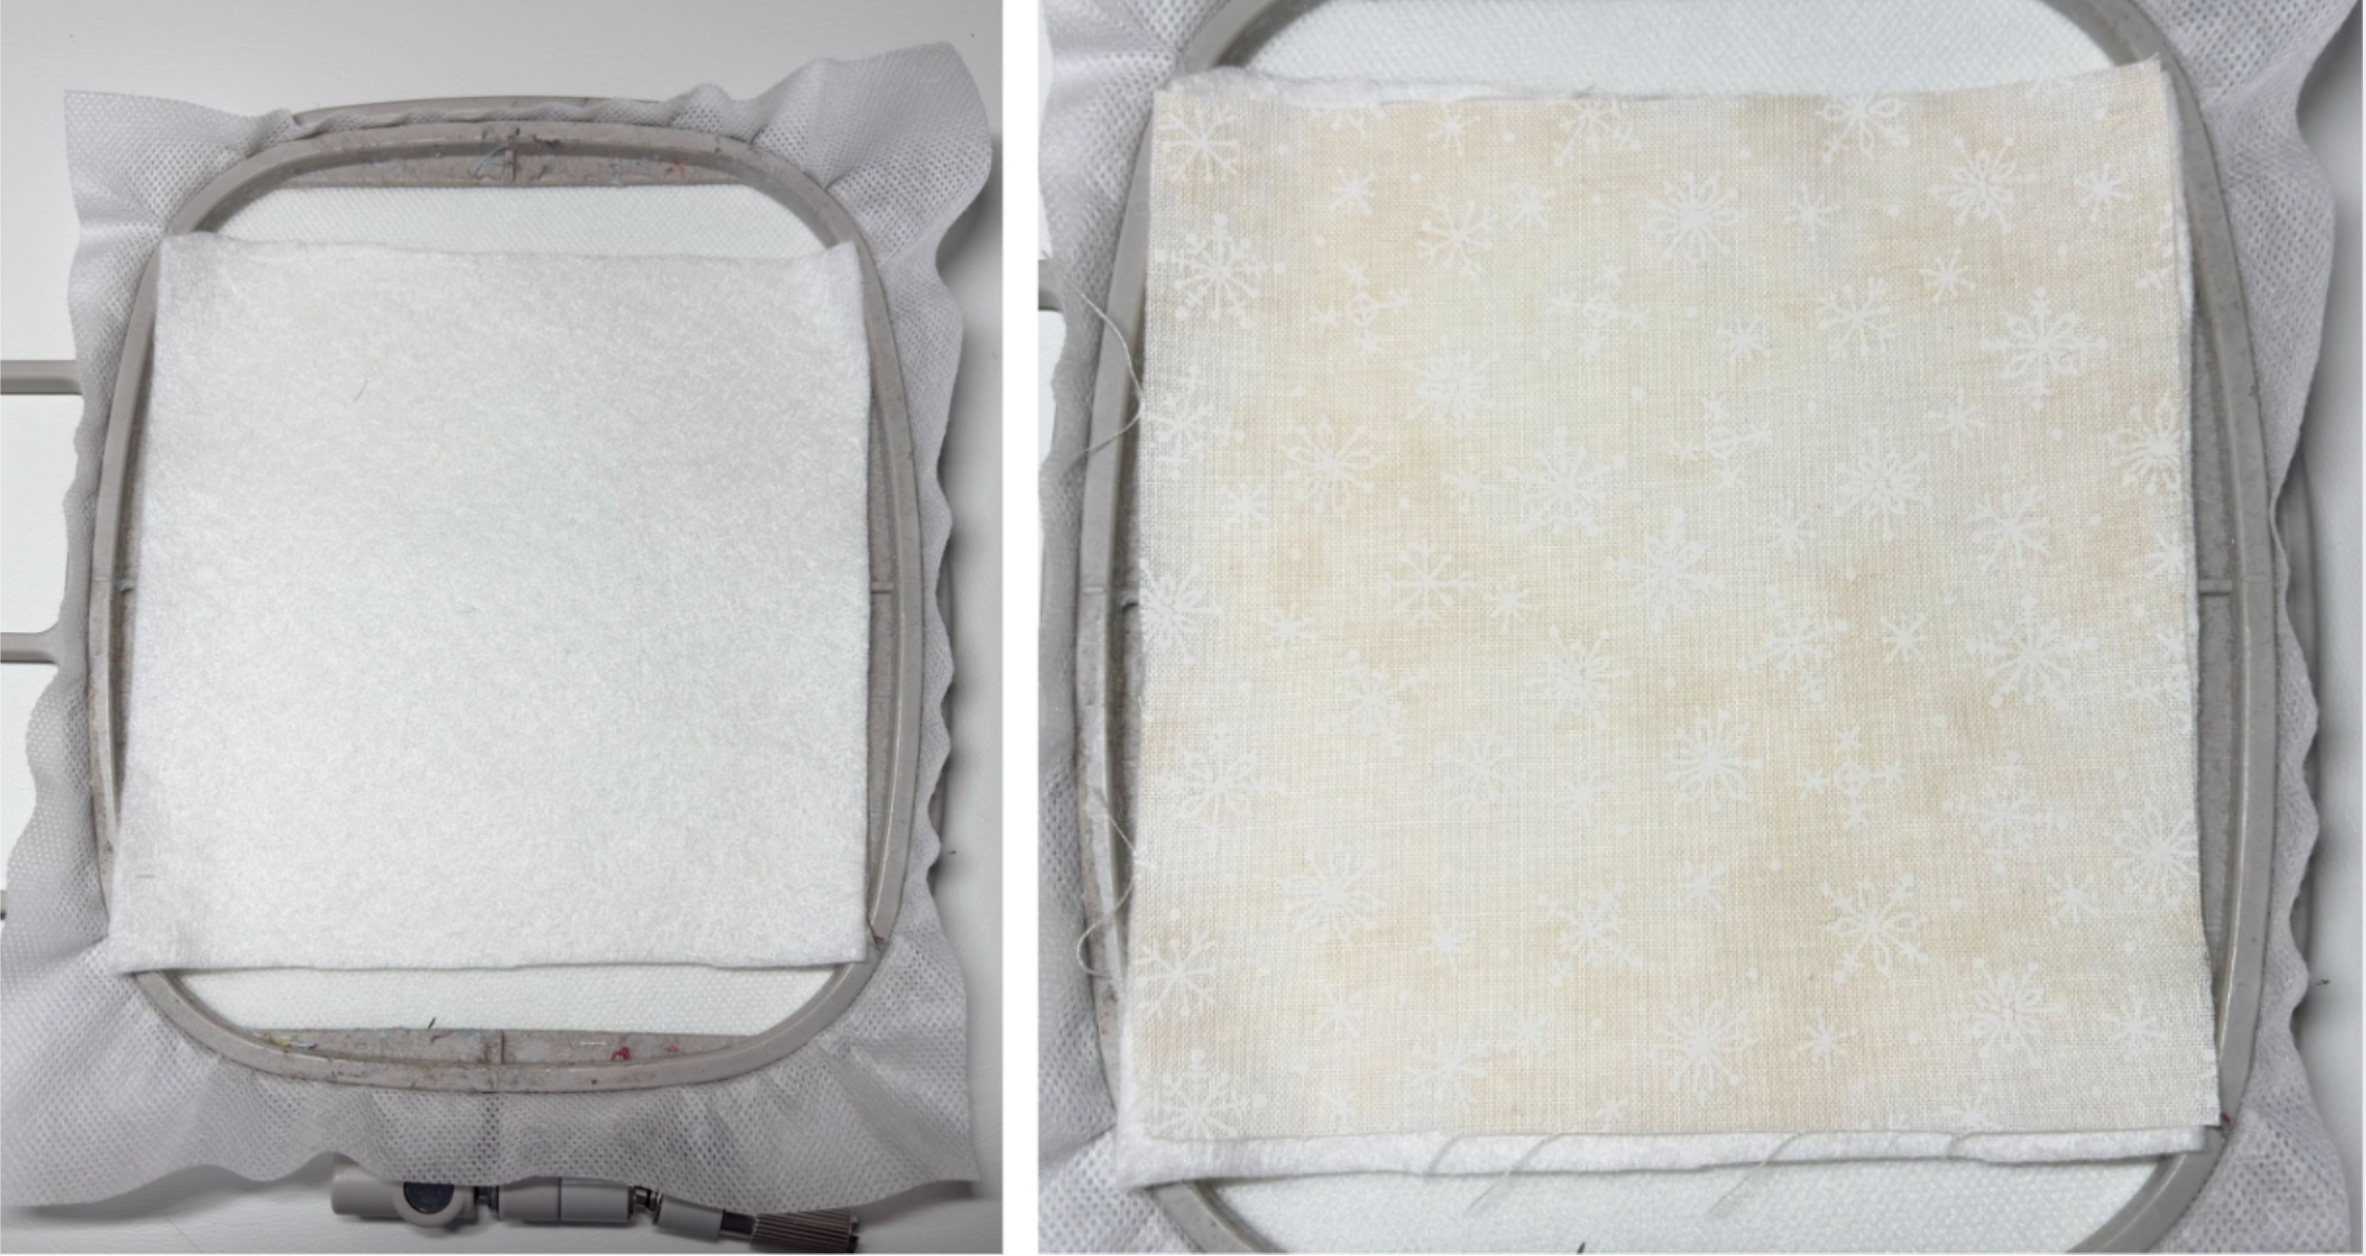
Lay the batting over the placement stitches, then place the 5” x 5” background fabric on top. Return the hoop to the machine.
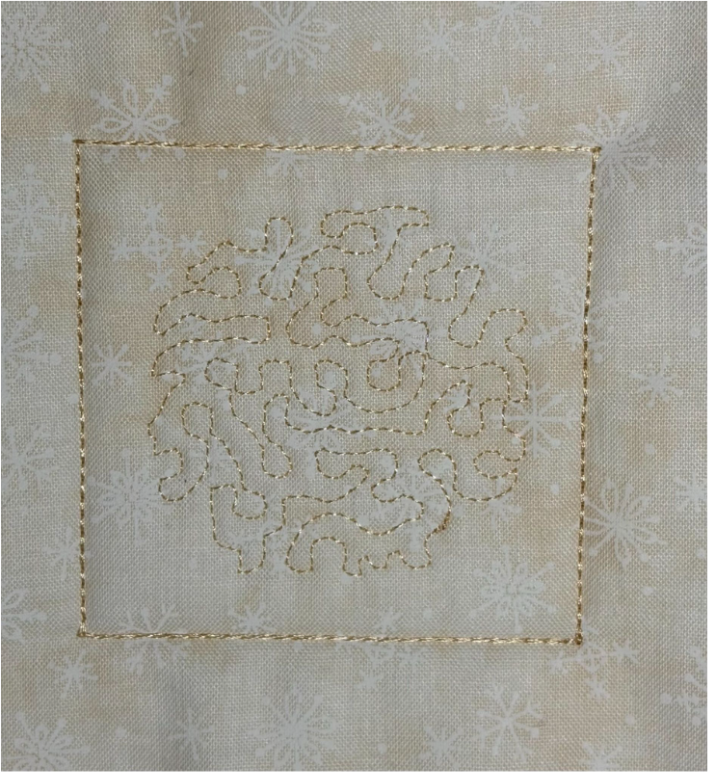
Run the next step to stitch the tack-down. If you selected a design with stippling, the stippling will stitch now too. Choose the thread color you would like to use. If you chose the design without stippling, stitch the tack-down and move on to the Itty Bitty design.
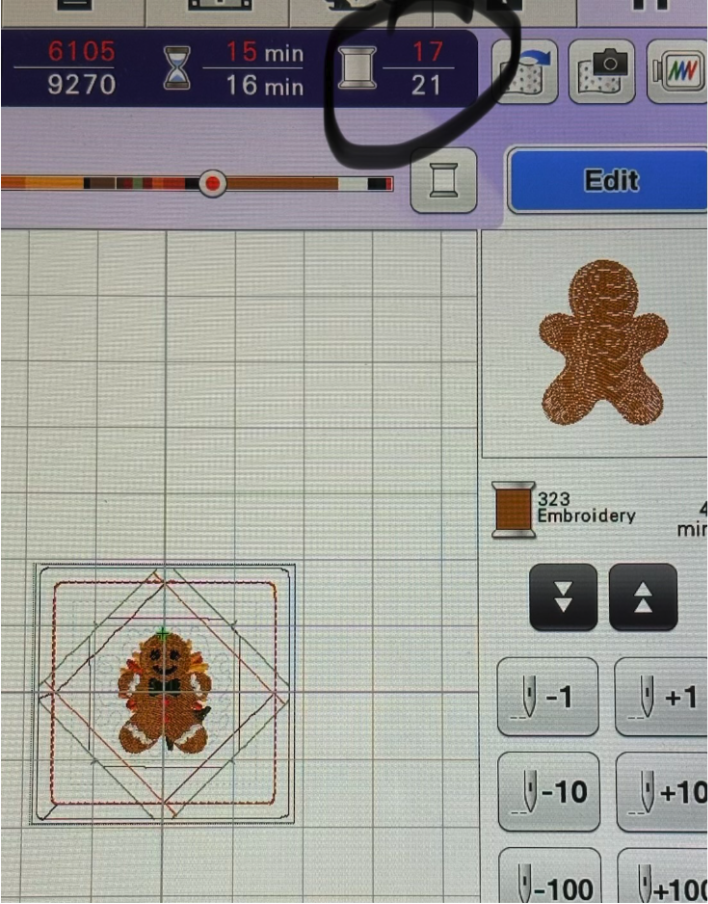
Advance the stitches to the beginning of your Itty Bitty design (skipping any decorative stitches from the original design that you do not want to use) and stitch it out.
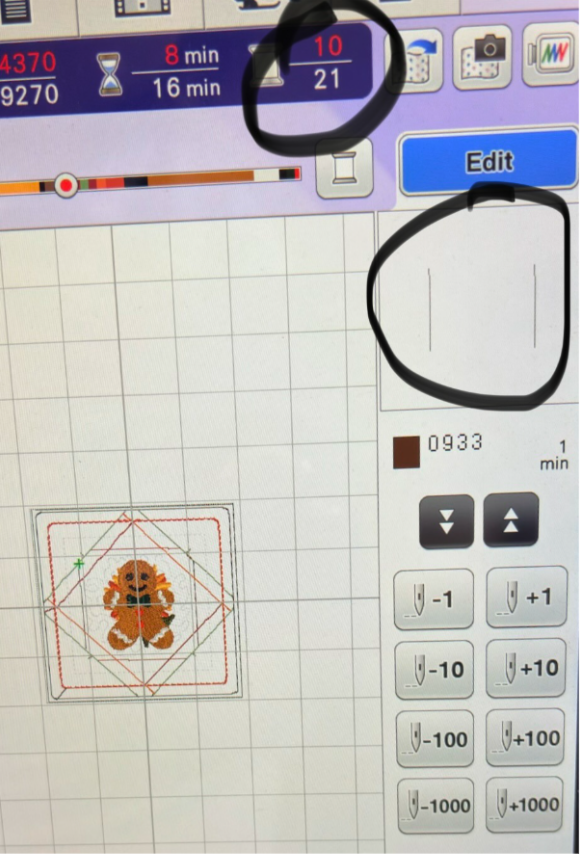
When the Itty Bitty design is finished, return to Step 10 of the coaster design to begin adding the front pieces.
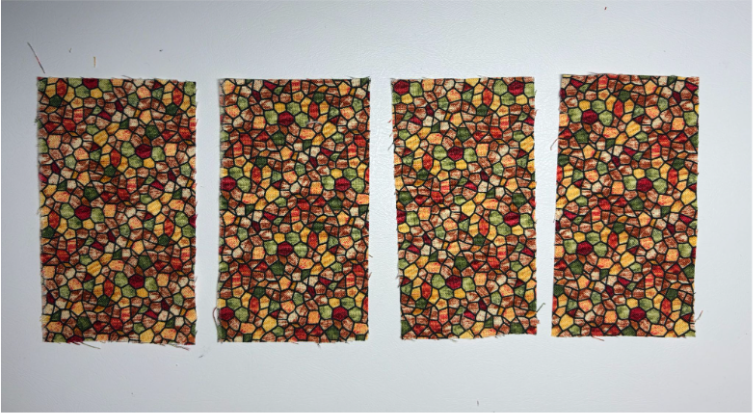
Gather the first four 4½” x 2½” fabric pieces.
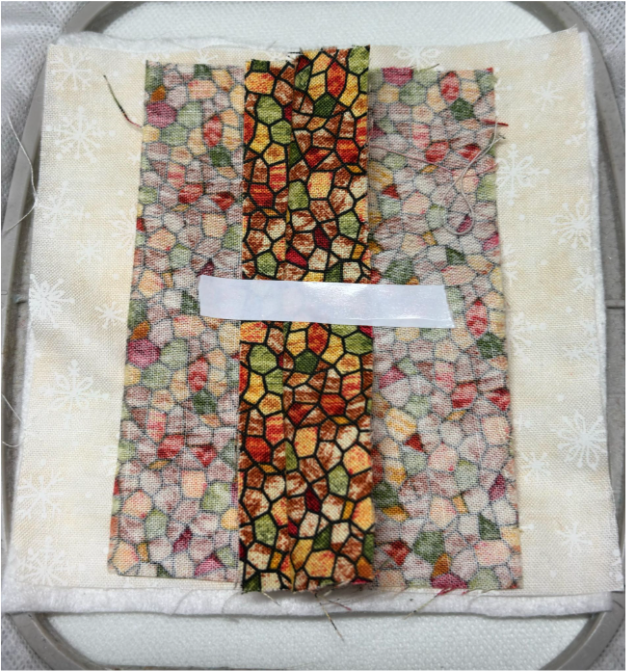
Take two pieces and place them right side down on opposite sides of the front stitch lines. Position the raw edges about ⅛” to ¼” from the side stitch lines. Fold the opposite raw edges back and tape them out of the stitching area.
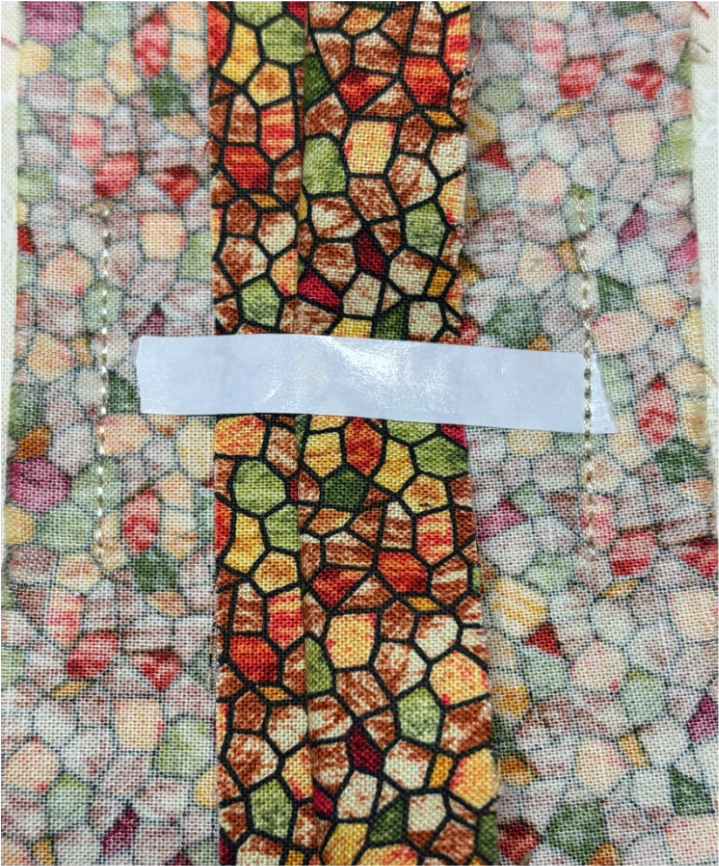
Run the next step.
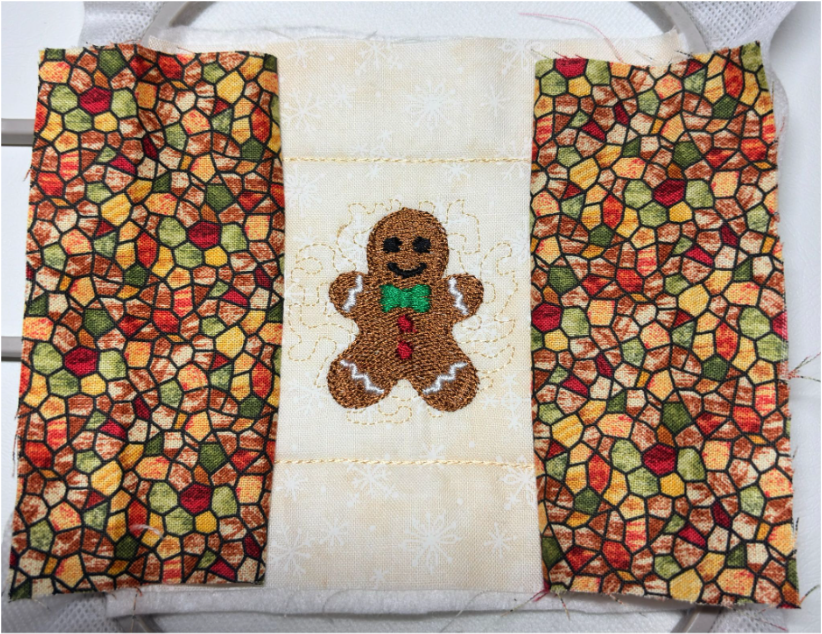
Remove the tape and finger press the fabric back over the stitches, as shown in the picture.
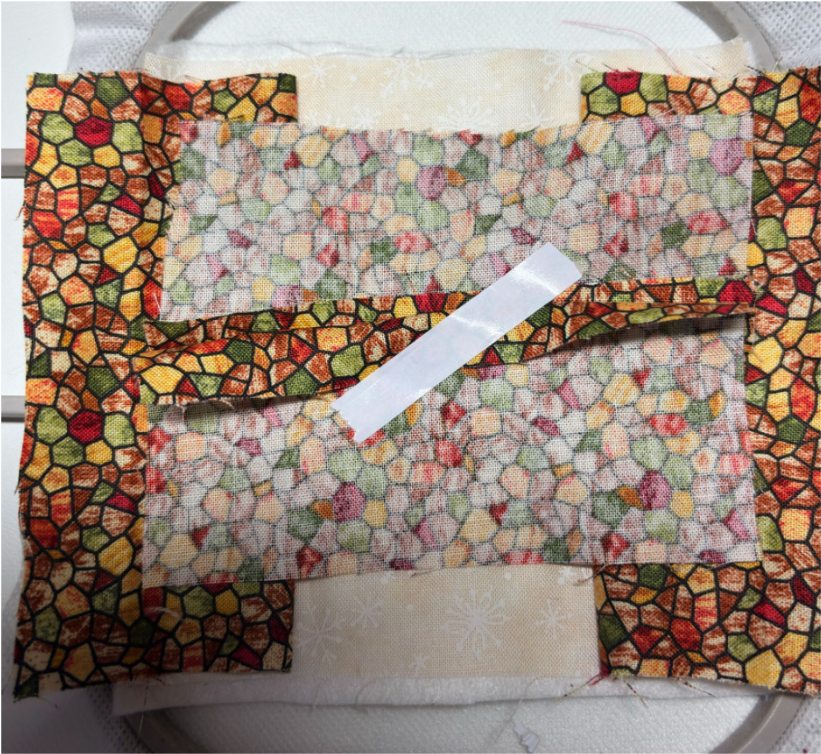
Take the remaining two pieces of 4½” x 2½” fabric and place them across the top and bottom of the coaster in the same manner. Tape the opposite raw edges back and away from the stitching area.
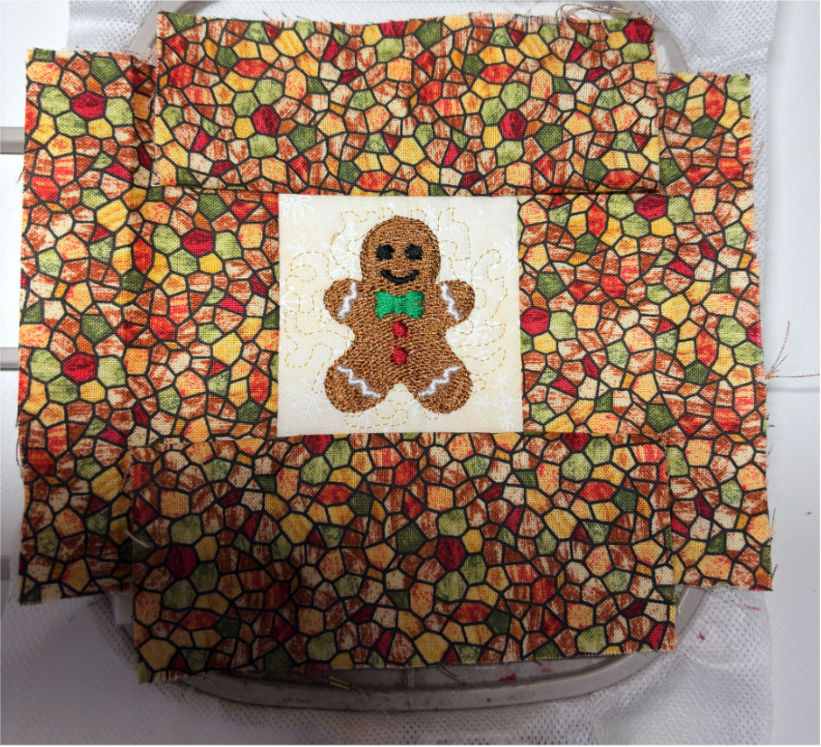
Run the next step. Finger press the fabric back over the stitches and smooth it flat, as shown in the picture.
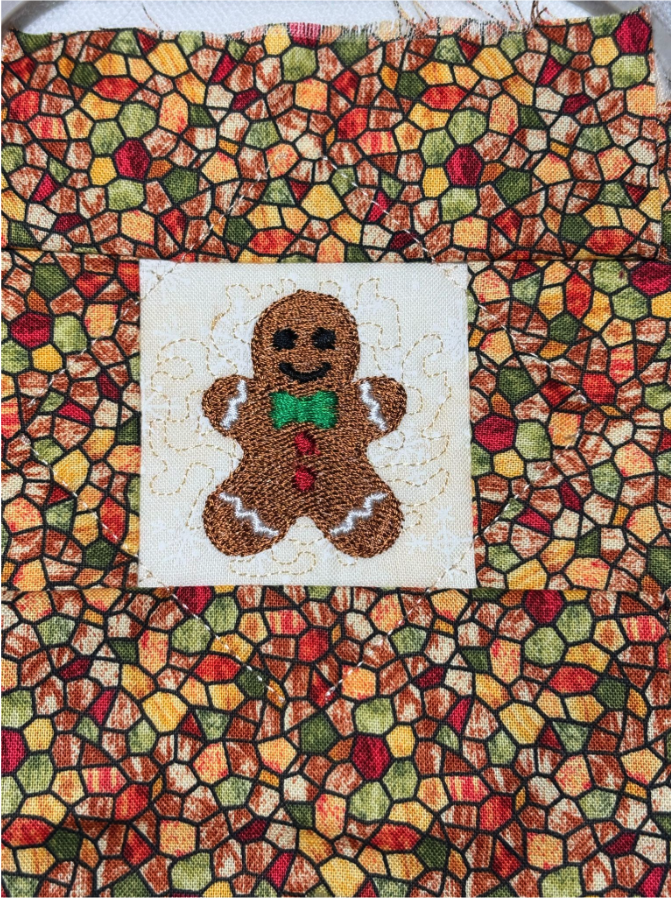
Next, stitch the offset square around the front. These will be the stitch lines for the coordinating fabric. Before stitching, make sure the fabric is pulled tight and is not bunched or wrinkled. Use tape to hold it in place if needed.
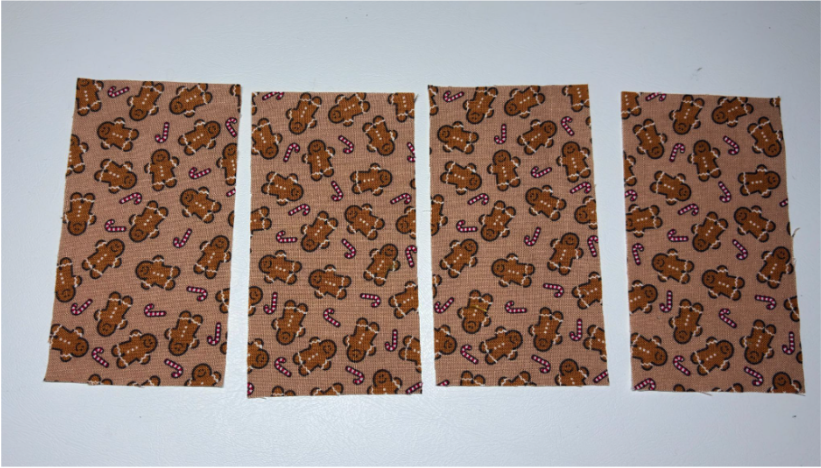
Gather the four coordinating fabric pieces.
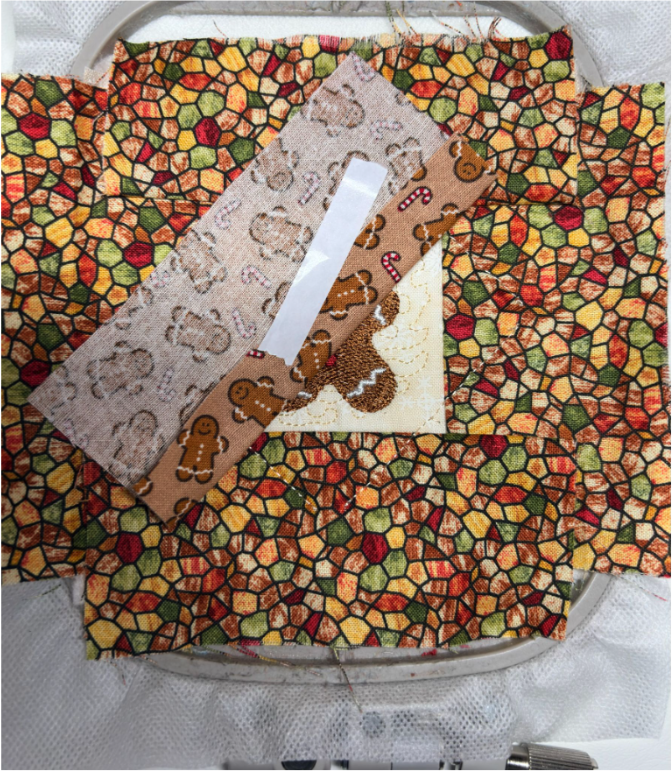
Place the first piece along the left side stitch line. Let the fabric extend approximately ⅛” past the stitch line. Fold the opposite raw edge back and tape it out of the stitching area.
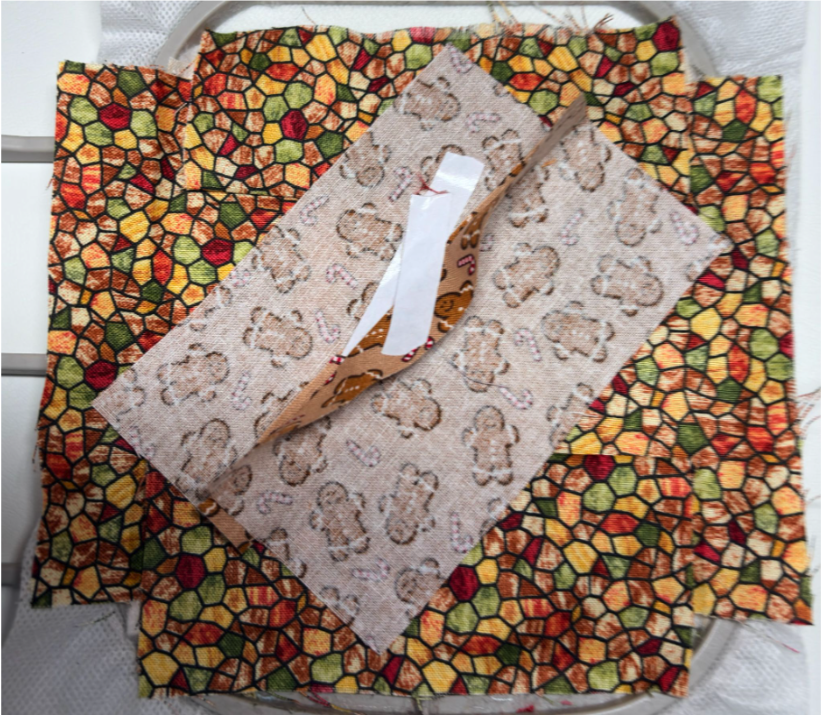
Place the second coordinating fabric piece on the opposite side, again keeping the raw edge out of the stitching area.
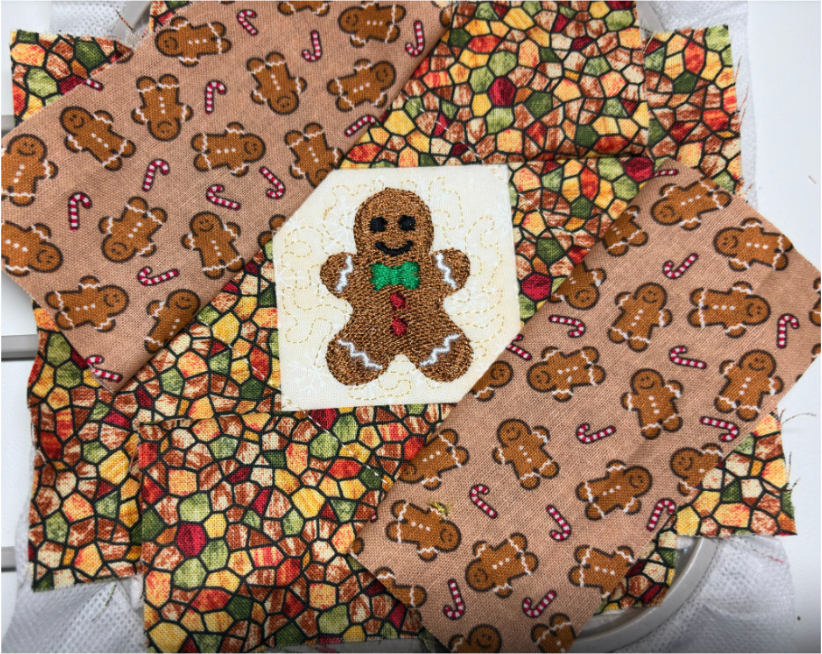
Run the tack-down stitch for these fabric pieces. Remove the tape and finger press the fabrics back over the stitching.
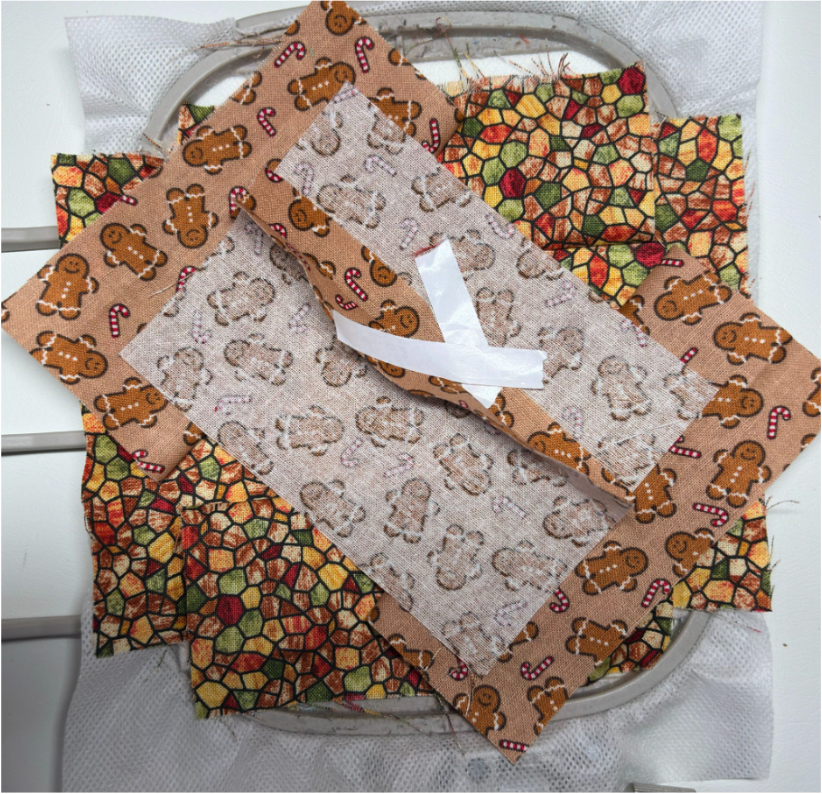
Repeat the process with the remaining two coordinating fabric pieces.
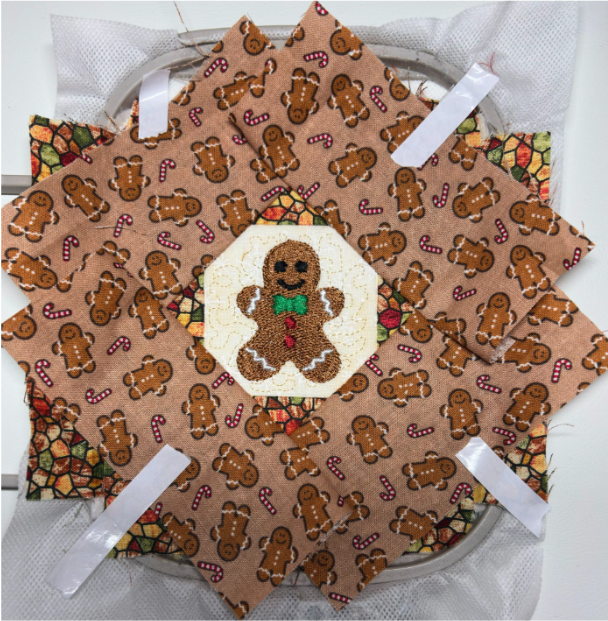
Once all four pieces are in place, finger-press them back and smooth the fabric. Pull everything tight and use tape along the edges of the hoop to keep the fabric secure.
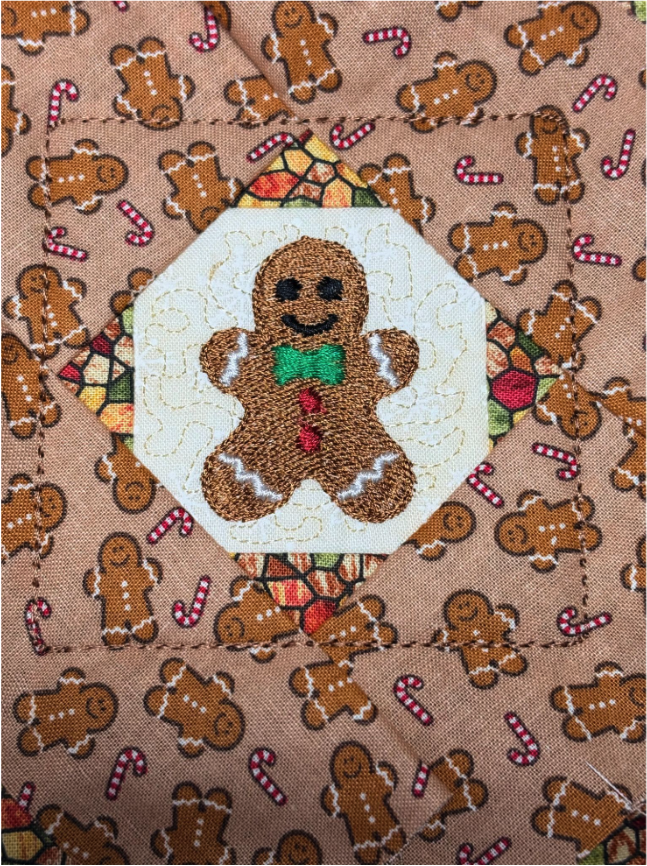
The next step adds a decorative stitch that will be visible when the coaster is turned right side out. Choose the thread color you would like to use, and run the decorative stitching.
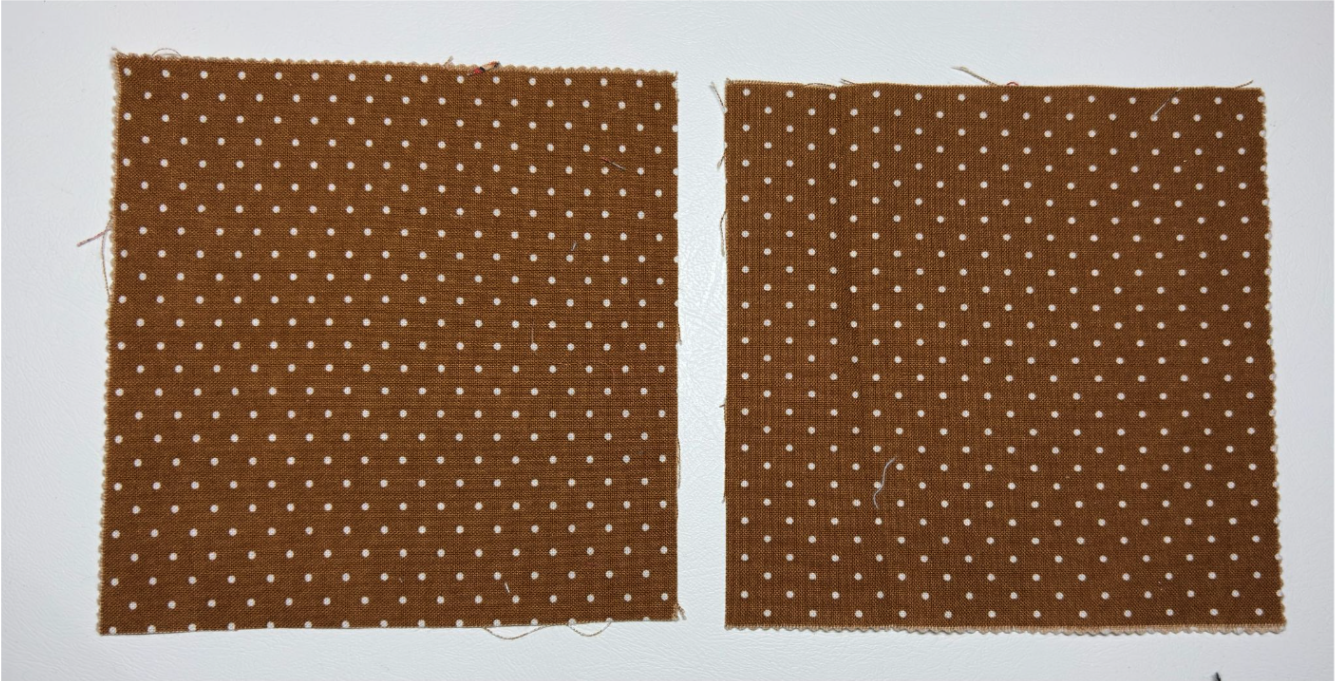
Prepare your two 5” x 5” backing pieces.
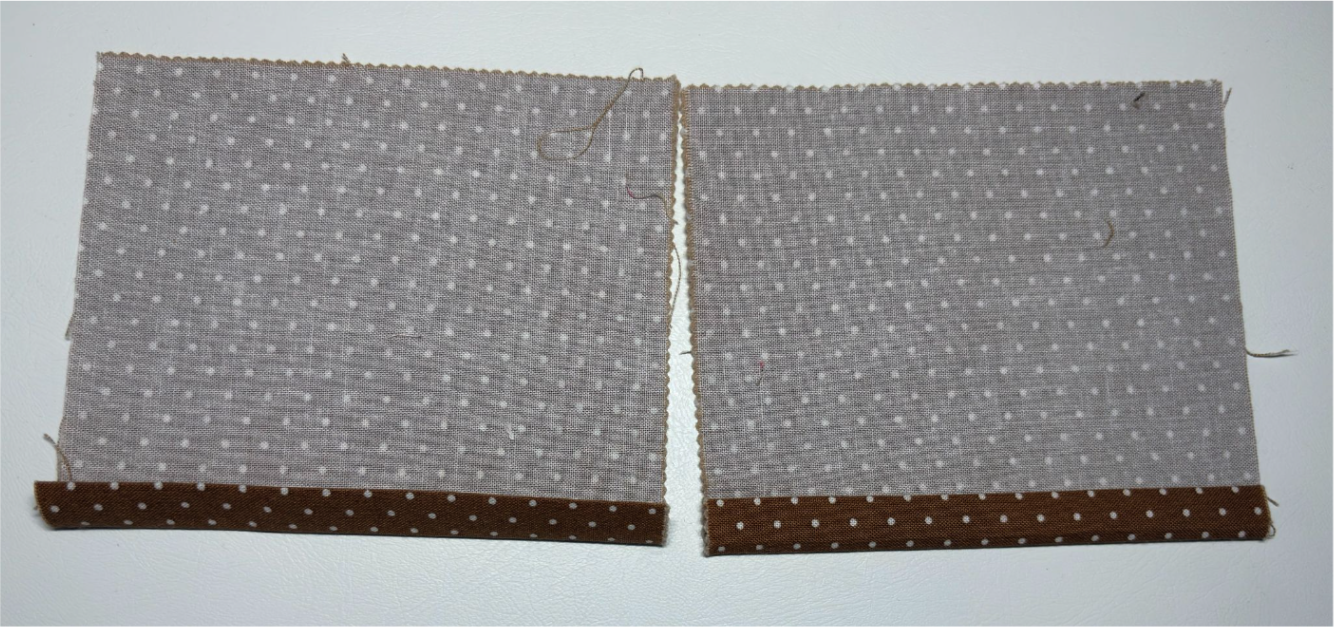
Press one edge under approximately ¼”, then fold and press it again so no raw edges are showing.
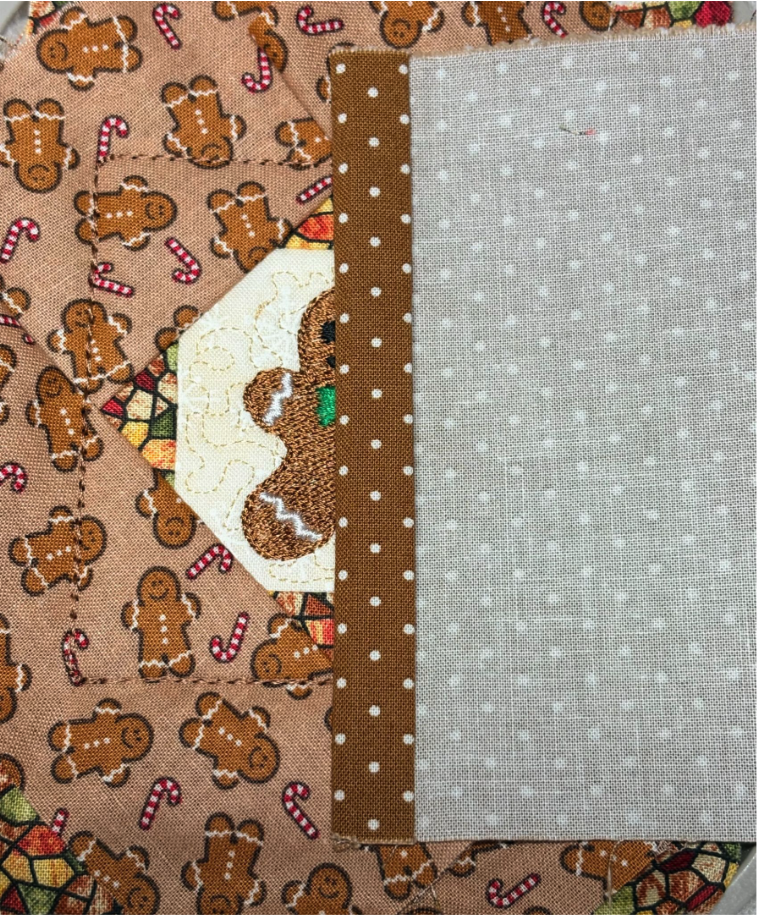
Place one backing piece in the center of the coaster with the right side facing down.
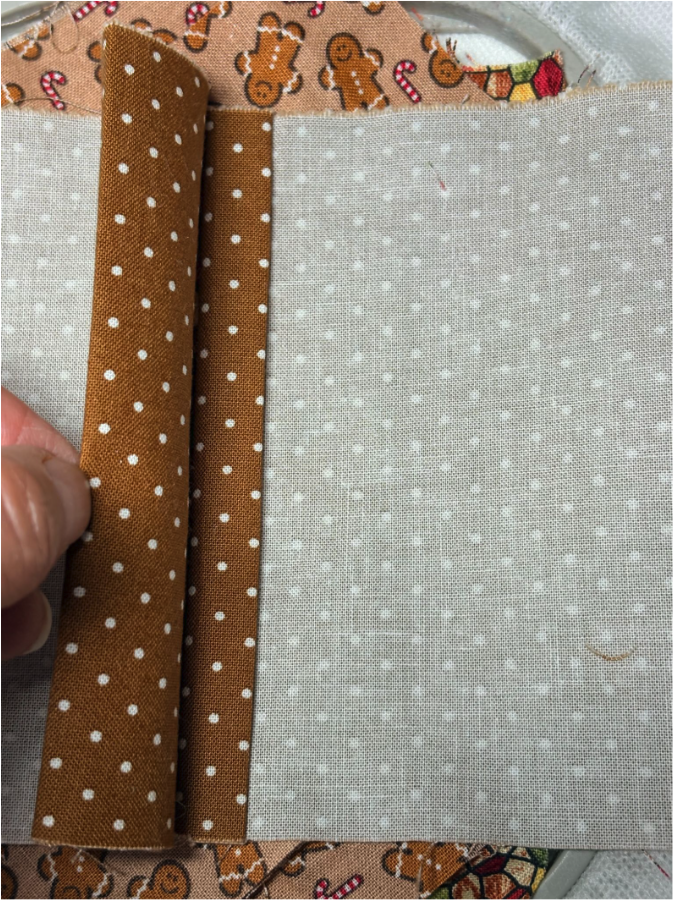
Place the second backing piece on top, right side down.
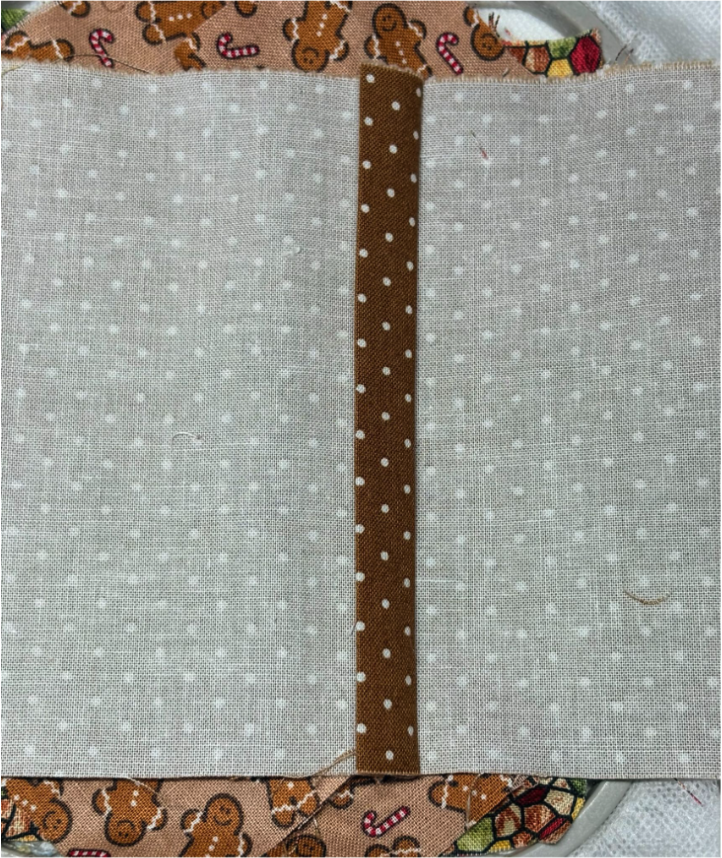
Overlap the finished edges slightly so both pieces cover the back of the coaster.
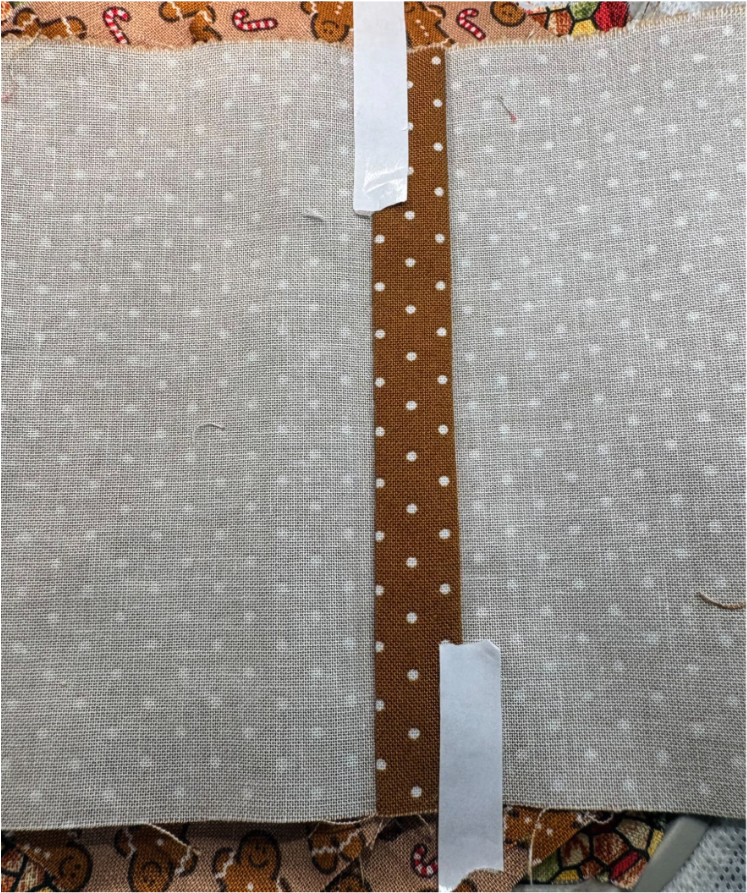
Tape the backing edges to hold everything securely in place.
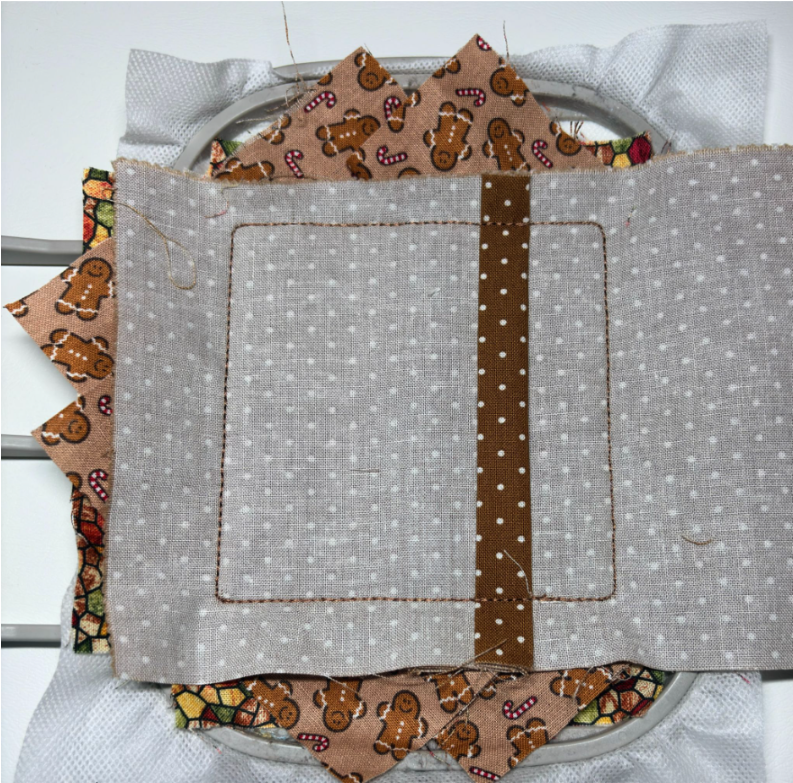
Run the final step of the design.
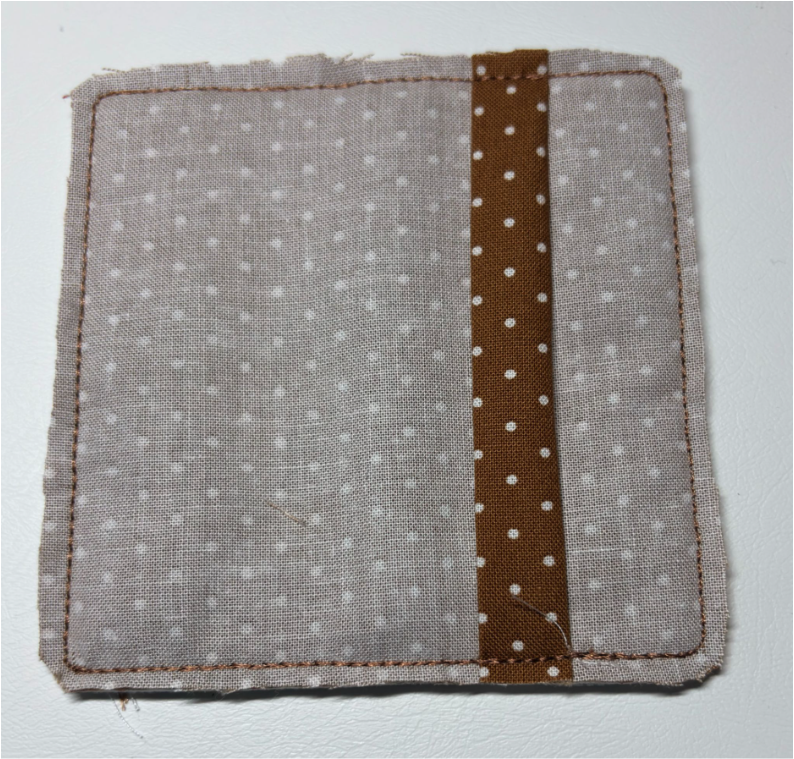
Remove the coaster from the hoop. Trim around the coaster, leaving approximately ⅛” to ¼” from the outside stitch line.
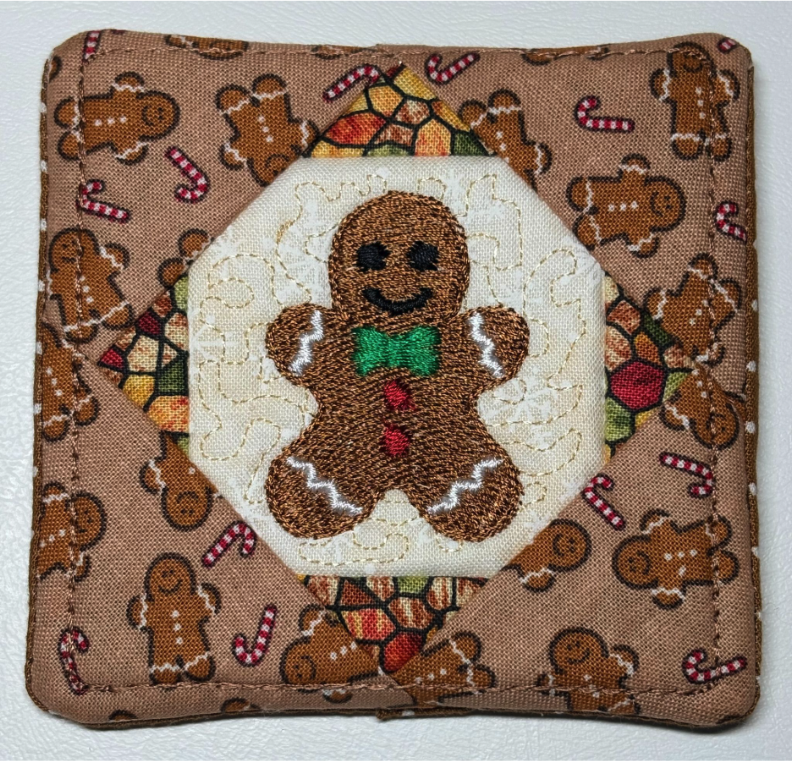
Turn the coaster right side out and gently push out the corners.
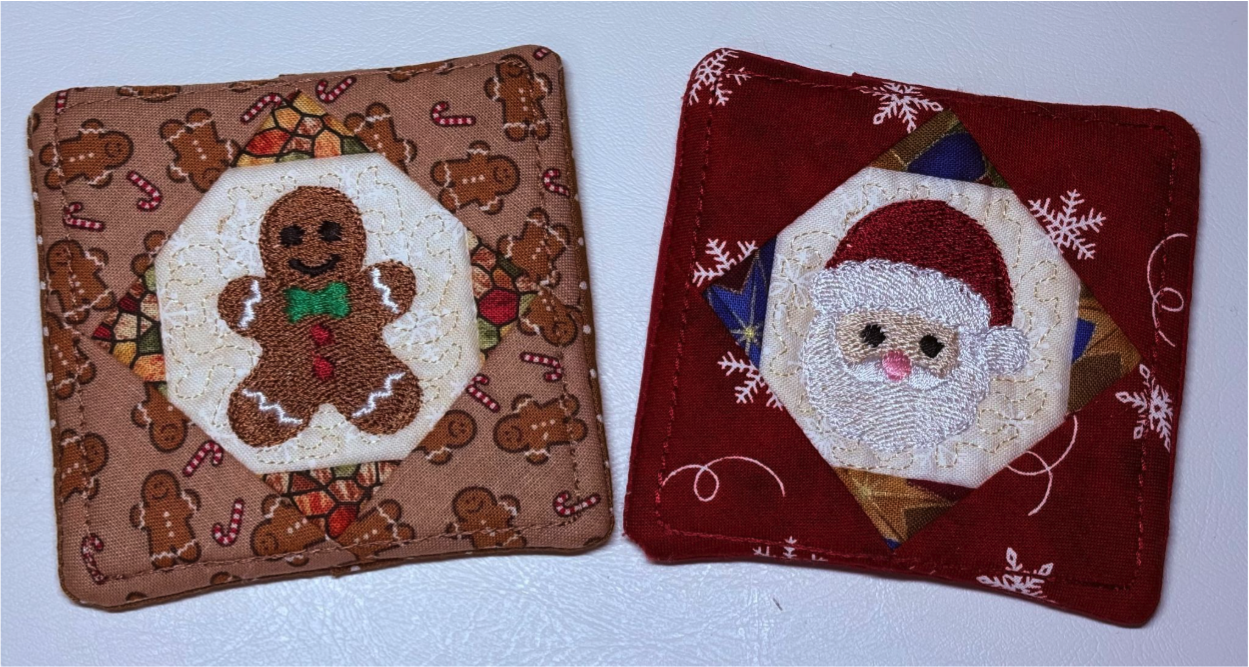
Give your coaster a nice press, and you’re finished!
Make a matching set using the same center design, or have fun using a different Itty Bitty design in each coaster. With so many little Christmas designs to choose from, you can create a festive set where every coaster has its own personality!
Bring a little extra Christmas cheer to your home with these fun and festive embroidery projects! From cheerful hand towels and adorable baby bibs to charming coasters and interchangeable patches, the Christmas Itty Bitty Embellishment Set make it easy to add a personal touch to your holiday creations. Mix and match your favorite fabrics, colors, and designs to make each project uniquely yours.
Be sure to share your festive creations with the Designs by JuJu Embroidery Blessings Group on Facebook or use the hashtag #designsbyjuju anywhere on social media and inspire fellow embroidery enthusiasts with your holiday projects. Whether you’re stitching for yourself, decorating your home, or making something special for someone else, every little stitch adds a bit of Christmas magic.
Until next time, happy stitching and Merry Christmas!