Toggle Nav
 Inspire.
Create.
Stitch.
Inspire.
Create.
Stitch.
Search
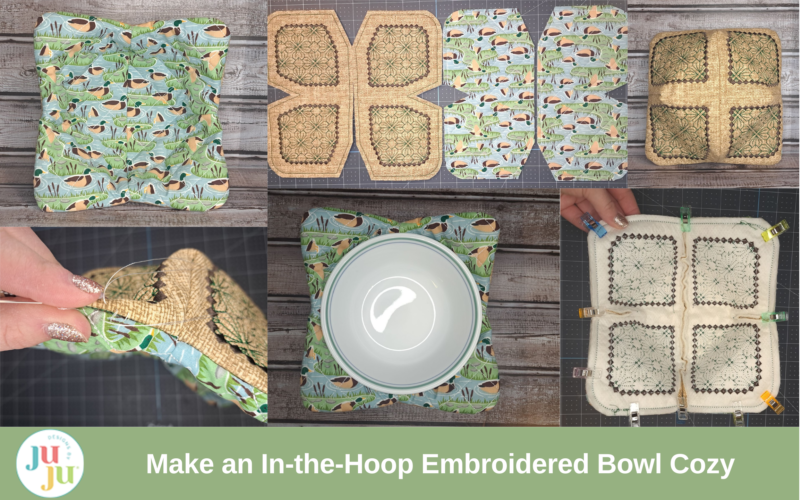
Soup season is in full swing and now is the time to fire up that embroidery machine to stitch out Designs by JuJu’s latest ITH project—bowl cozies! You may be wondering, what exactly is a bowl cozy? Bowl cozies are often described as “hugs” for your bowls, used to protect your hands from extreme temperatures like hot soup or cold ice cream. In today’s tutorial, I will be showing you the supplies and steps to create an embroidered bowl cozy.
Included within your purchase from Designs by JuJu are TWO sets of PDF instructions. One set of instructions details how to make a microwave-safe bowl cozy, while the other shows how to make a bowl cozy that is NOT microwave safe.
Each DBJJ bowl cozy can be made in two sizes, a small bowl cozy (suitable for bowls with an ~7” diameter), and a medium bowl cozy (suitable for bowls with an ~9” diameter).
Additionally, there are two types of blocks included for download, single and double. Single is for smaller hoops to stitch out one panel at a time, requiring 8 total hoopings (4 for inside of cozy/4 for outside of cozy). Double is for larger hoops where two panels are combined already, requiring 4 total hoopings (2 for inside of cozy/2 for outside of cozy).
And if all of that wasn’t enticing enough, there are two designs included within each bowl cozy purchase: a quilted background and a motif background. The best part—every bowl cozy design is interchangeable. For example, if you want to pair the stipple quilted background from ITH Bowl Cozy 2 with the motif 1 background from ITH Bowl Cozy 1, you can.
Check out the DBJJ team’s favorite supplies in the Designs by JuJu Amazon Store.
Note: The supplies listed above are used for a bowl cozy that is NOT microwave-safe. If you want to create a bowl cozy that is microwave-safe, make sure to check out this YouTube video and the PDF instructions that come included with your purchase. All materials (batting, fabric, thread/bobbin) must be 100% cotton in order for the bowl cozy to be microwave safe.
For this tutorial, I will be showing you how to make a small bowl cozy that is NOT microwave safe, using the double panel files.
If you are looking for a tutorial on how to make a bowl cozy that IS microwave-safe, check out the YouTube video linked above. Bonus: That video also demonstrates how to stitch the single-panel files.
Step 1: Load your first bowl cozy block onto your embroidery machine (make sure you have selected the correct size).

Step 2: Hoop no-show mesh cut-away stabilizer.

Step 3: Stitch the placement line for the batting and fabric.

Step 4: Lay the batting and fabric over the placement line, making sure that the placement line is completely covered.

Step 5: Stitch the tack-down line to secure the batting and fabric.

Step 6: Stitch the quilting/motif stitching.

Step 7: Remove your hoop from your machine and unhoop the block. Trim away the excess stabilizer close to the stitch line.
Note: If you have used thick batting, you may want to trim away the excess also.
Step 8: Using a rotary cutter and a straight-edge ruler, trim around the block leaving ¼” excess from the outer stitching line.

Step 9: Repeat Steps 1–8 for remaining quilt blocks (4 total needed) and motif blocks (4 total needed).
NOTE: The following steps are completed at your sewing machine.
Step 1: Lay out all of your completed panels.

Step 2: Line up the inner (cross hatch) blocks, right side together, so the stitching lines match up. Pin or clip together.


Pro Tip: Poke a sewing pin through the two blocks. This creates a secured point that will allow you to pin or clip completely around the block without it wiggling around. Remove the pins before sewing and your blocks will stay aligned and secured with the sewing clips.
Note: If you are making the single panel blocks, you will need to first stitch together two single panels to make one larger vertical double panel.
Step 3: Sew the blocks together, stitching just inside the outer stitch line. Press open your seams once complete.


Step 4: Next, it is time to sew the outer triangles together to make the darts for the bowl cozy. Again, align the stitch line and pin/clip to secure. Stitch just inside the outer stitch lines.

Sew and press open the seams. Repeat for all remaining darts.

Complete this step for all remaining darts.
This completes the inside portion of the bowl cozy.
Step 5: Repeat Steps 1–4 again for the outer (motif) blocks.

Step 6: Once both the inner and outer panels of the bowl cozy are assembled, stack them, right sides together, making sure to line up the seams. Pin/clip all the way around the bowl cozy.

Step 7: Sew around the bowl cozy, just inside the outer stitch line. Make sure to leave a gap wide enough to turn the bowl cozy right side out.
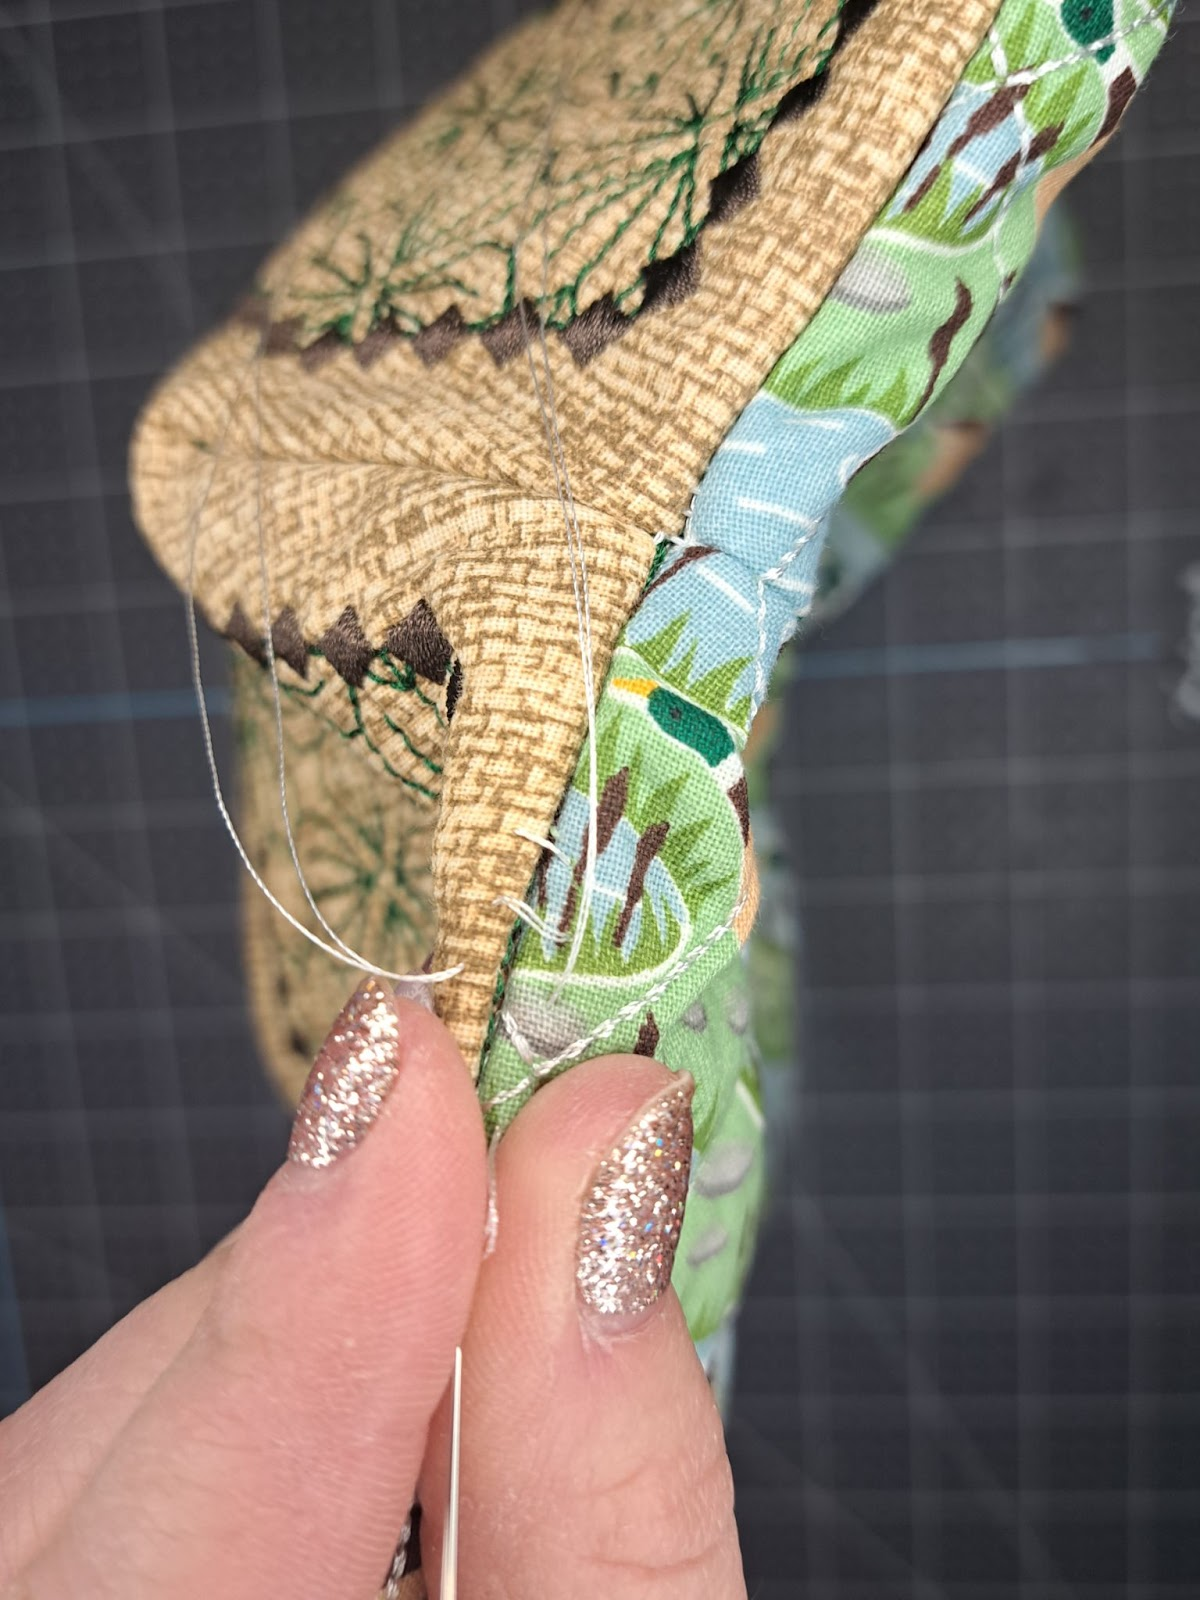
Step 8: Turn the cozy right side out through the gap, carefully pushing out corners and seams.

Step 9: Hand sew the gap closed. DBJJ recommends a ladder stitch for this step.
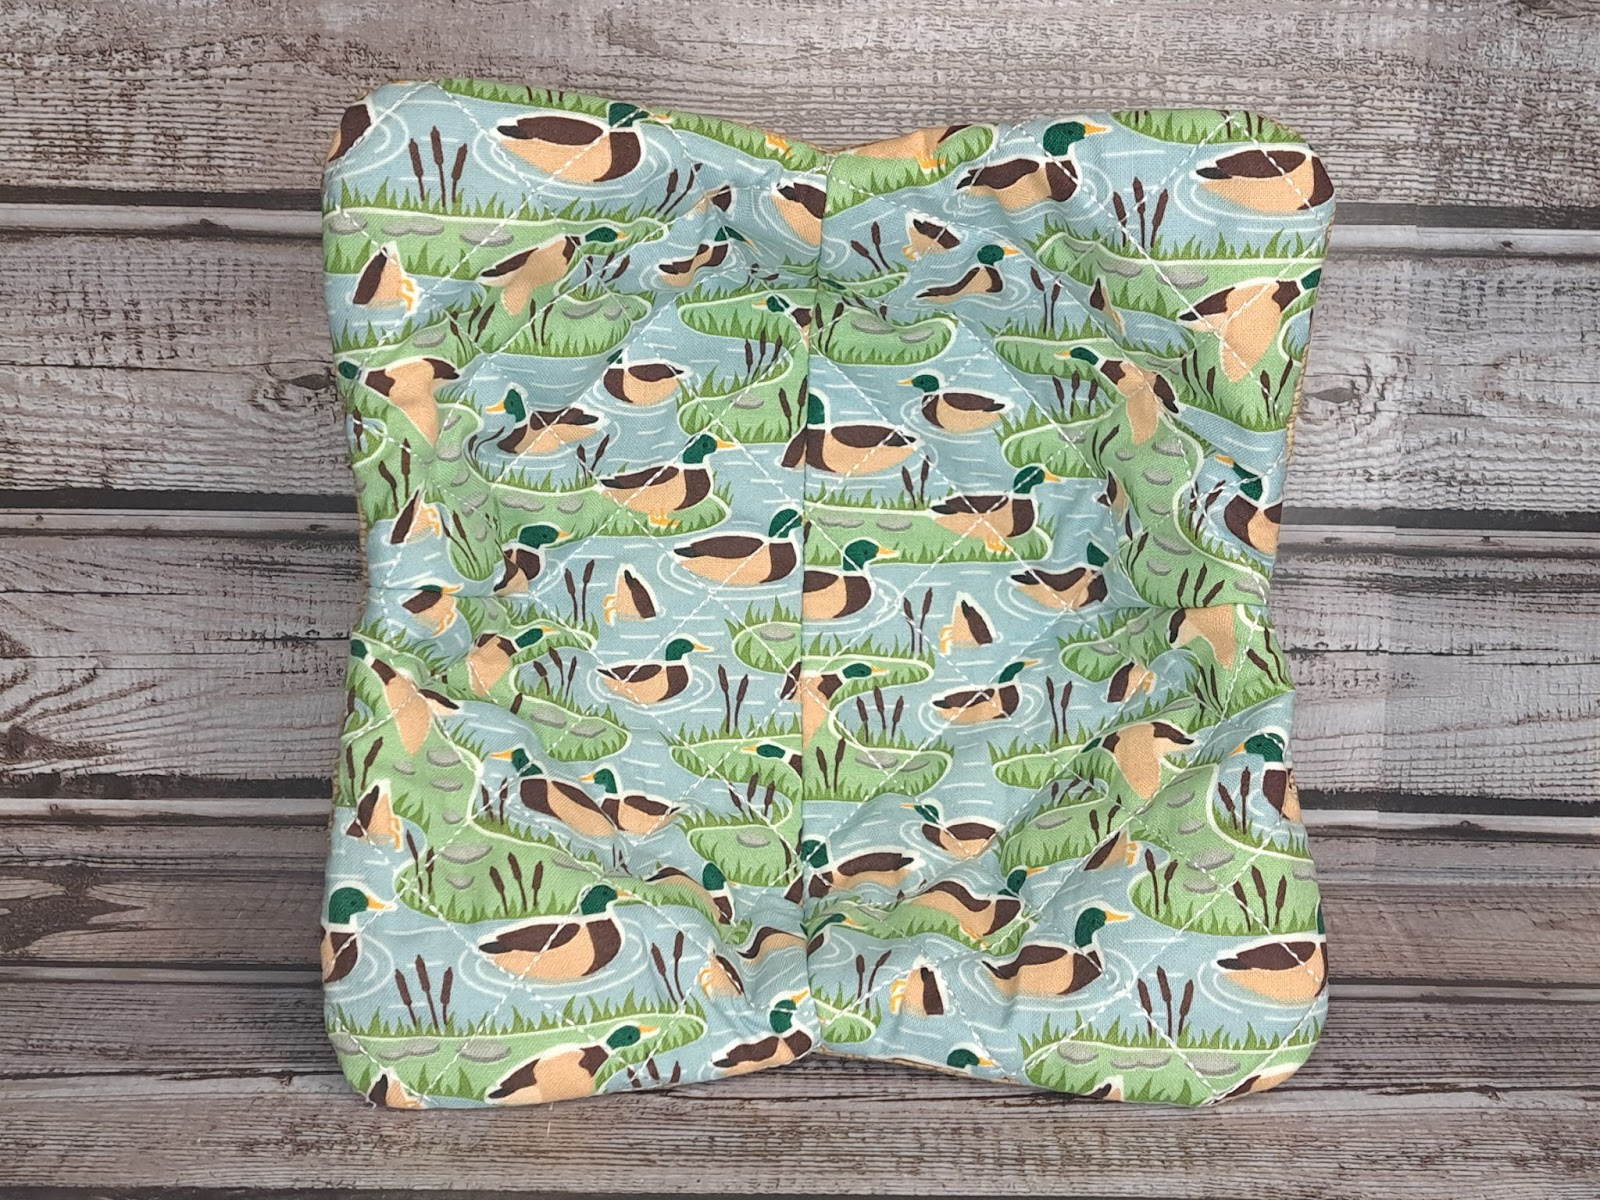
Your bowl cozy is complete! Cuddle up with a warm bowl of soup or cool down with some ice cream. This bowl cozy will be your new favorite year-round kitchen accessory.


I hope you have enjoyed today’s blog post on how to make an ITH embroidered bowl cozy. Don’t forget to check out the YouTube video linked above for a tutorial on how to make an ITH microwave-safe bowl cozy.
If you loved this project, you’ll find plenty more just like it in our Quick Gifts Hub and Home Hub—a curated collection of quick, creative, and practical projects perfect for gifting (or keeping!)
Make sure to join the Designs by JuJu Embroidery Blessings Facebook Group for more inspiration and to share your own creations, or use the hashtag #designsbyjuju anywhere on social media. We can’t wait to see what you make!