How to Embroider Baby Socks – Adorable DIY Baby Shower Gift Idea
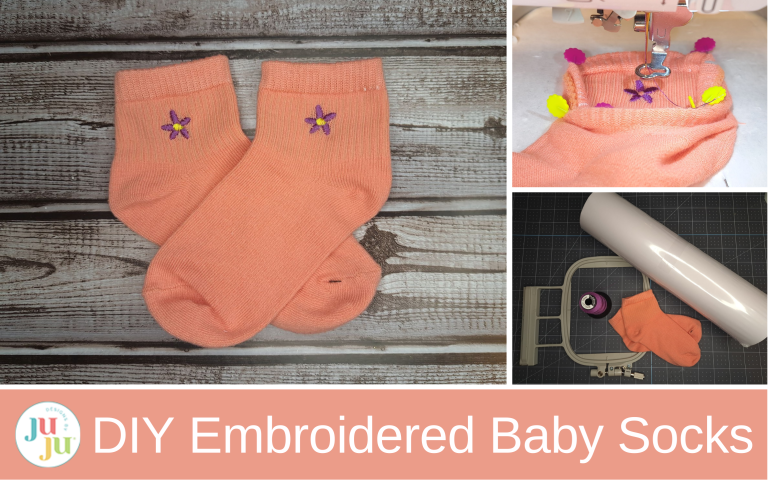
Embroider adorable baby socks with your 4x4 hoop—perfect for personalized gifts or baby showers!
If you’re anything like me, you are always looking for fun and unique ways to personalize gifts using your embroidery machine. Baby showers are always on the forefront of my mind when it comes to thoughtful, handmade gifts, and there is no limit to the awesome embroidered baby presents you can create.
In today’s blog post, I am going to show you how to customize baby socks for a special, one-of-a-kind gift using Designs by JuJu's Alphabet Embellishment Kits. The embellishment kits were created to use in conjunction with the Daisy Doodle Alphabet; however, there are so many other fantastic uses for these dainty designs. Included in each design set is a mixture of mini stitched designs and bean stitch applique designs. The mini stitched figures are perfect for adding to small projects, such as baby socks.
Check out the following blog posts for more fantastic embroidered baby shower gift ideas:
Supplies
Check out the DBJJ team’s favorite supplies in the Designs by JuJu Amazon store.
- Baby’s/children’s crew-length socks
- Self-adhesive tear-away stabilizer
- Embroidery thread
- DBJJ designs used in this project:
- Also mentioned in this project:
Embroidering on Baby Socks
For this tutorial, I am going to show you how to embroider on baby/toddler socks. The steps in this tutorial are the same if you want to embroider on kids’, teens’, or even adults’ socks.
This project is perfect for small hoops (I am using a 4x4 hoop). I am stitching the 2.5” mini daisy from the Easter Embellishment Kit Embroidery Set.
Note: The embellishment is not 2.5”, but rather is sized to fit the 2.5” Daisy Doodle Alphabet.
Step 1: Hoop self-adhesive tear-away stabilizer.
Pro Tip: Score the paper on the stabilizer to prevent leaving a sticky mess on your hoop.
Step 2: Turn the sock inside out and stick it onto the stabilizer.
Step 3: Pin the sock to the stabilizer. Self-adhesive stabilizer is perfect for this project because it will hold the sock in place so you can pin the edges out of the way.
The pinning takes a little bit of finagling. You want to pin as much of the excess sock as possible out of the way so it does not get caught in the stitch path.
Step 4: Place the hoop onto your machine.
Step 5: I always run the stitch outline simulator (or Trace or Trial) to ensure the design will fit onto my project. This allows me to center my image and position it onto the sock exactly where I want it to stitch. Running the stitch outline simulator also allows me to double check that my pins are out of the stitch path.
Step 6: Stitch the design.
Step 7: Remove the sock from the hoop. If you used tear-away stabilizer, you can easily remove the sock from the stabilizer and continue to use it for additional socks.
Repeat steps 1–6 for the other sock.
These embroidered baby socks are so easy to create! How cute would they be paired with a baby blanket or stuffed animal? Be sure to check out the other fantastic Alphabet Embellishment Kits available to find one that fits your specific design needs. You could also add a simple single-letter monogram for a fun variation.
I hope you have enjoyed today's tutorial on creating personalized baby socks using your embroidery machine and a 4x4 hoop. Make sure to join the Designs by JuJu Embroidery Blessings Facebook Group for more inspiration and to share your own creations using the hashtag #designsbyjuju. We can’t wait to see what you make! Happy stitching!


