Toggle Nav
 Inspire.
Create.
Stitch.
Inspire.
Create.
Stitch.
Search
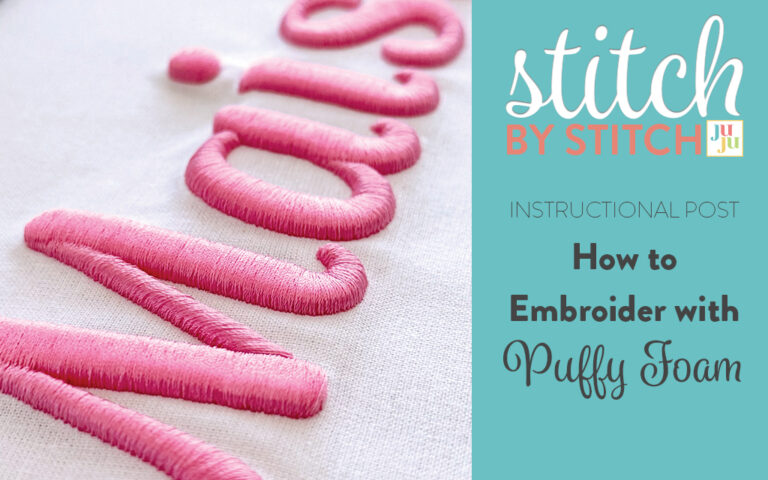
Looking to add eye-catching dimension to your embroidery projects? Puffy foam embroidery is the perfect way to create bold, raised lettering that pops! In this tutorial, we’ll walk you through how to use Designs by JuJu’s Puffy Foam Fonts, from setting up your design in embroidery software to stitching and removing the foam for a clean, professional look. Whether you're personalizing gifts, crafting standout monograms, or adding a fun 3D effect to your projects, this easy-to-follow guide will help you achieve stunning results. Grab your puffy foam and let’s get stitching!
Check out Embroidery Supplies JuJu Uses for our favorite supplies!
Use the embroidery editing software of your choice to create a text design with one of our fonts specifically digitized for use with puffy foam.
TIP: BX files are included with purchase for use with Embrilliance software.

Hoop your fabric or item with the appropriate stabilizer for the material you are embroidering.
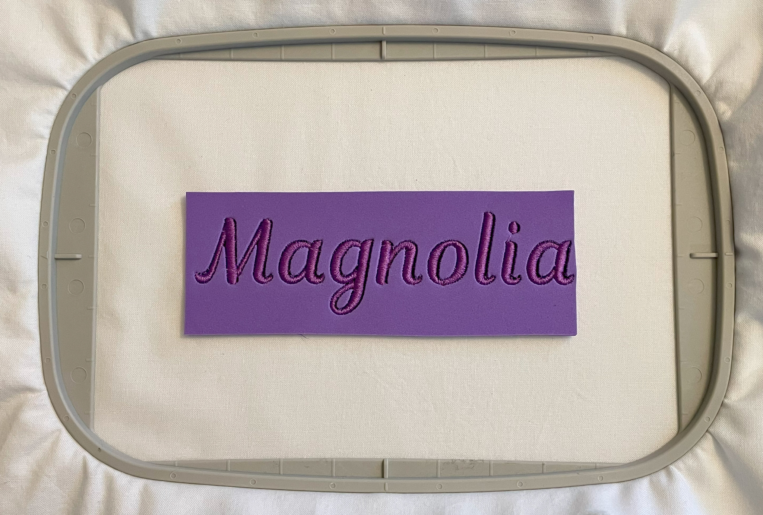
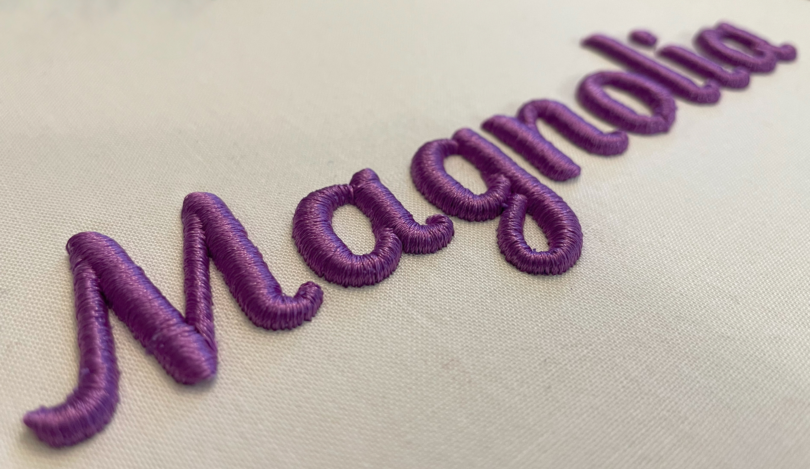
Use a piece of foam similarly colored to the embroidery thread you are going to use. In the sample below, we used Sulky’s 3mm Puffy Foam in purple.
Sulky Puffy Foam is currently available in 12 colors in two thicknesses (2mm and 3mm).
We recommend using puffy foam that is specifically designed for use with embroidery machines, because it has been tested to be safe for machine embroidery and tears away cleanly. If you use craft foam, you may find it to be more difficult to remove.
Lay a piece of foam over the area to be embroidered. To minimize waste, consider the overall dimensions of the text design you have created and cut a piece of foam a bit larger than that rectangle. In the example, we cut the foam approximately 2” x 6” and laid the foam in the same orientation as the design, using the hoop template to make sure the foam was centered.
TIP: You may want to add a basting box to your design for accurate placement.

Stitch the text design directly on top of the puffy foam.
Trim any jump stitches that were not cut by your machine.
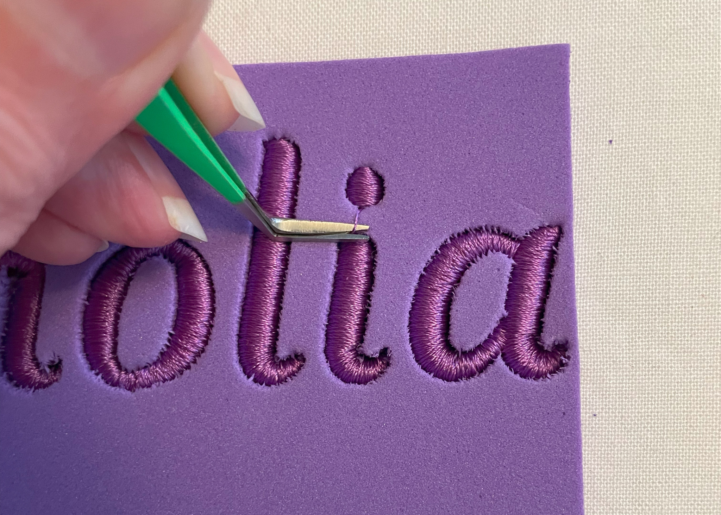
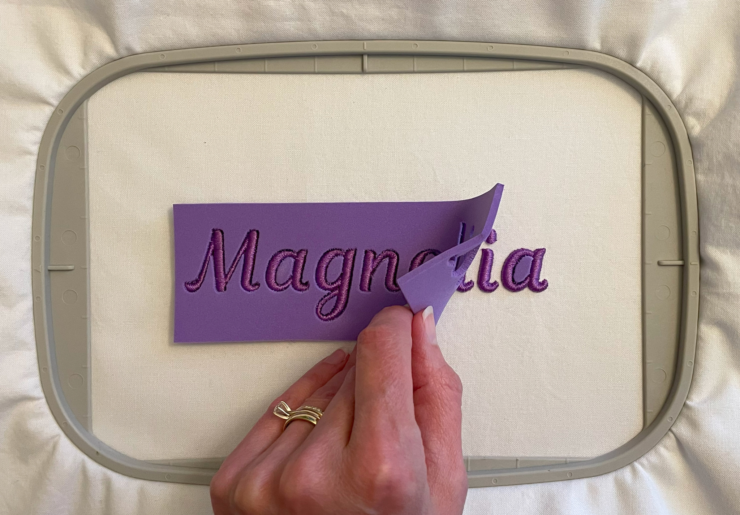
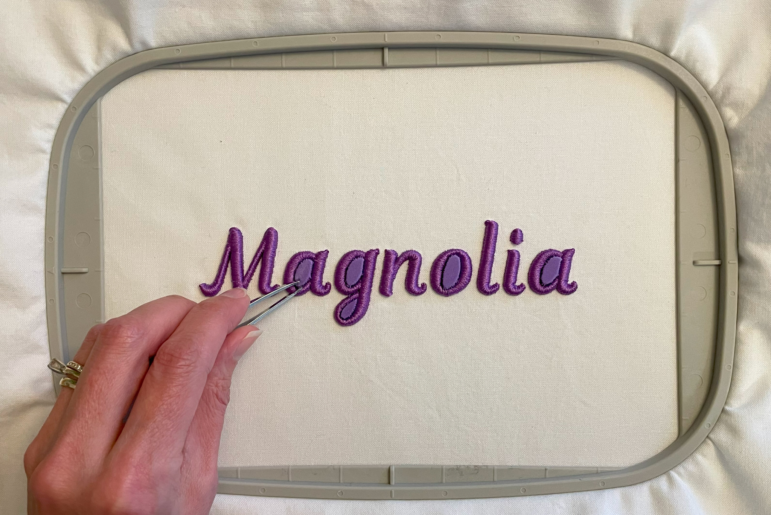
Very carefully tear away the foam from the perimeter of the text design.
Use tweezers to remove any small pieces of foam that didn’t tear away, such as the area inside the hole of a letter.
If any “pokies” remain, you can use heat to make them shrink inside the stitching. A hair dryer, heat gun, or steam iron held over the foam (but not touching the foam) will work.
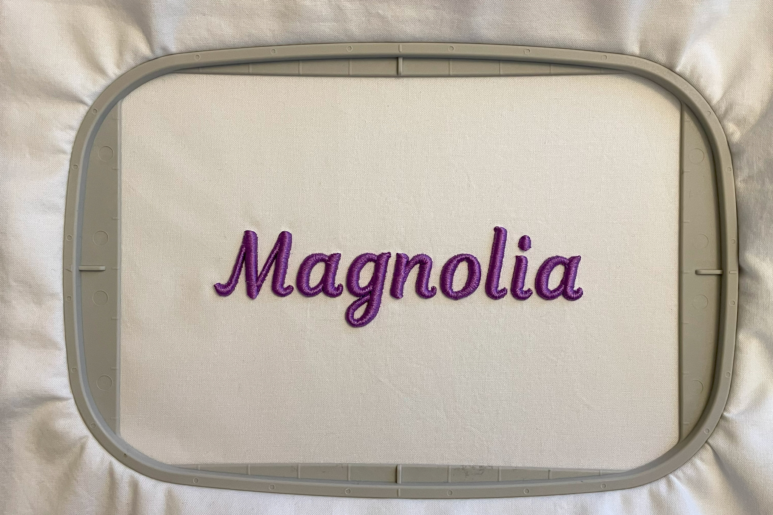
Step back and admire your work!
If you make this project, please share it with us in the Designs by JuJu Embroidery Blessings Facebook group, or anywhere on social media using the hashtag #designsbyjuju. We can't wait to see what you create!