Toggle Nav
 Inspire.
Create.
Stitch.
Inspire.
Create.
Stitch.
Search
Summer is the perfect season to celebrate with family and friends outdoors! Whether you’re hosting a barbecue in the backyard or enjoying a chat on the front porch, a refreshing ice cold beverage is a must. And what better way to protect your surfaces than with a DIY fabric coaster?
In this tutorial, I’ll guide you through creating your very own embroidered fabric coasters that will reflect your unique style and decor. With hundreds of designs to choose from, you’ll have endless possibilities for coasters that are as stylish as they are functional!
Did you know that JuJu has all her favorite embroidery supplies on Amazon? Check out the Designs By Juju's Amazon Store.
Supplies needed for cork, vinyl, or cotton coasters:
Additional supplies needed for cotton coasters:
Designs used in this tutorial include:
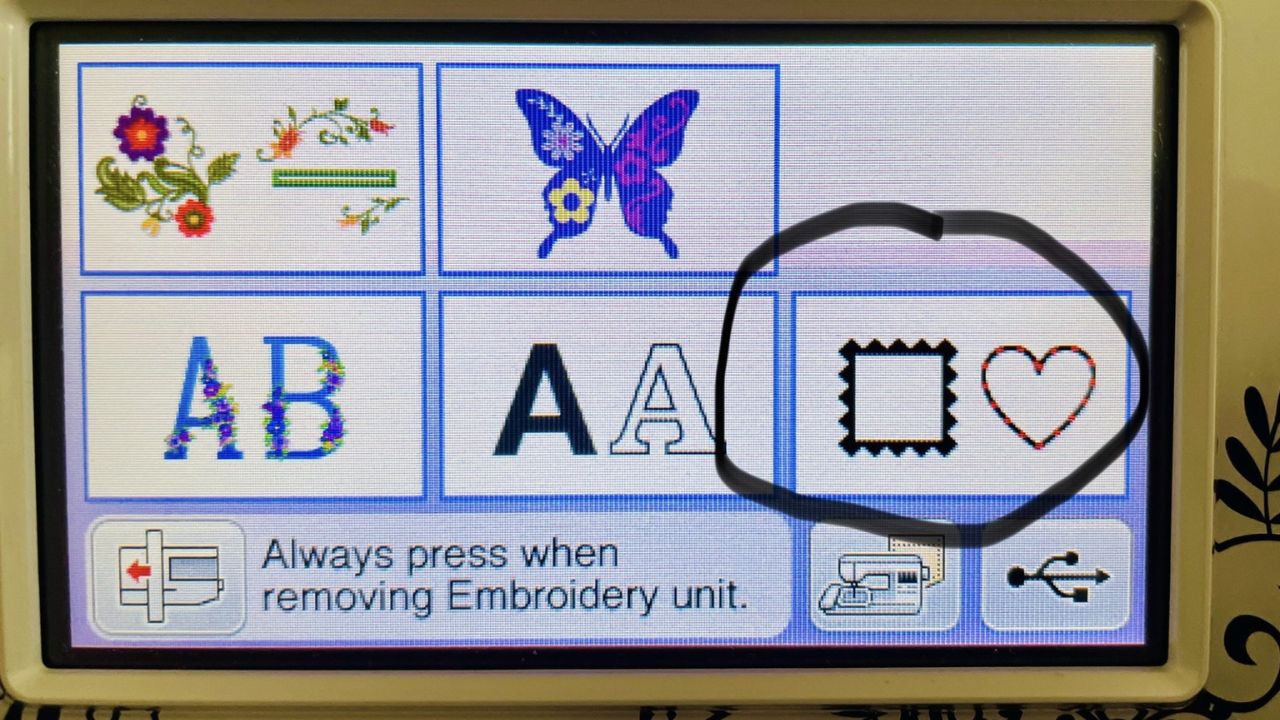
To start, open up the shapes icon located on the home page of your embroidery machine. I’m demonstrating on a Brother NQ1600E machine, so your built-in shape options may vary if you’re using a different embroidery machine.

You can choose from a variety of different shapes for your embroidered coasters! I chose to use a circle.
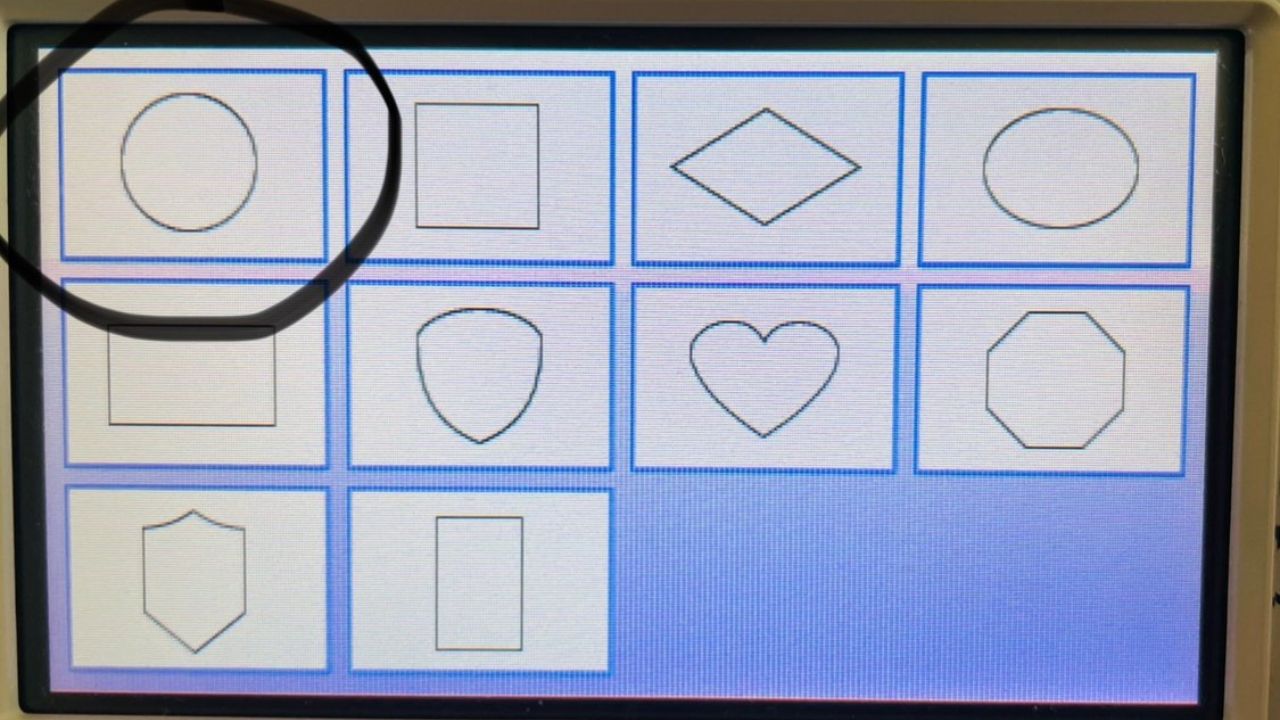
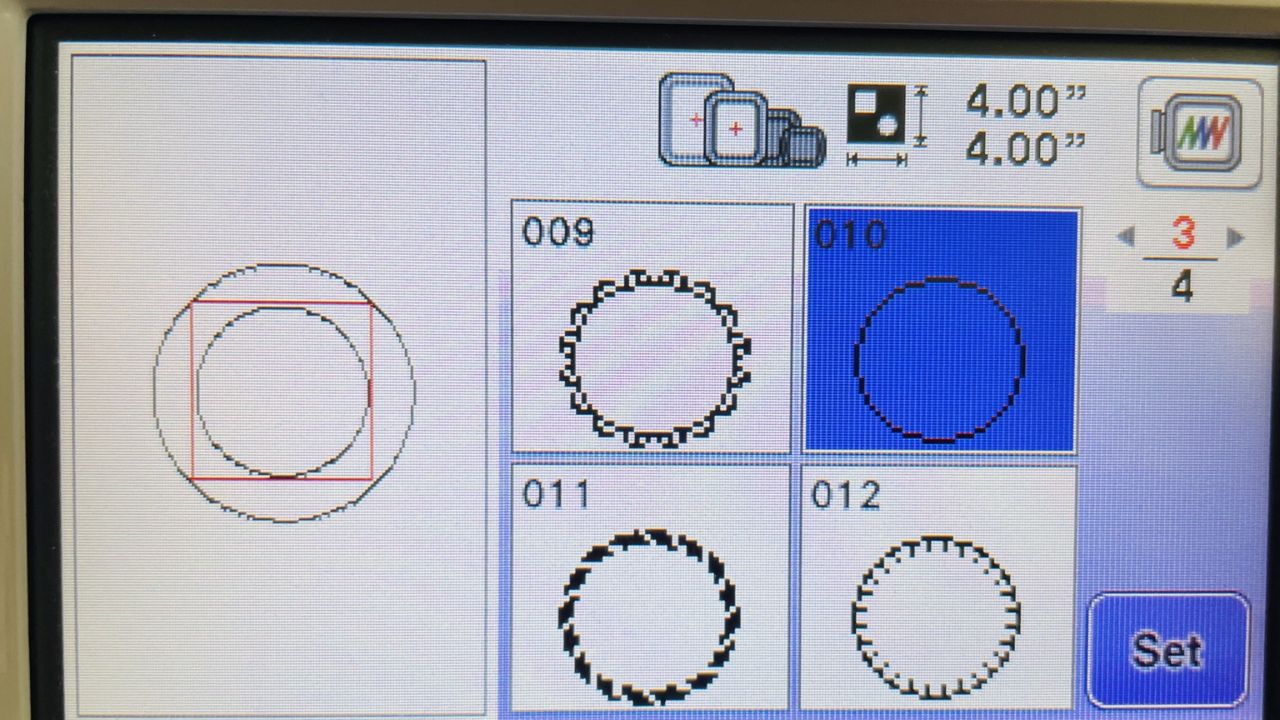
For this tutorial, we’ll use the single stitch circle, found under the circle icon. However, you can choose to experiment with the other stitching options if you’d like!
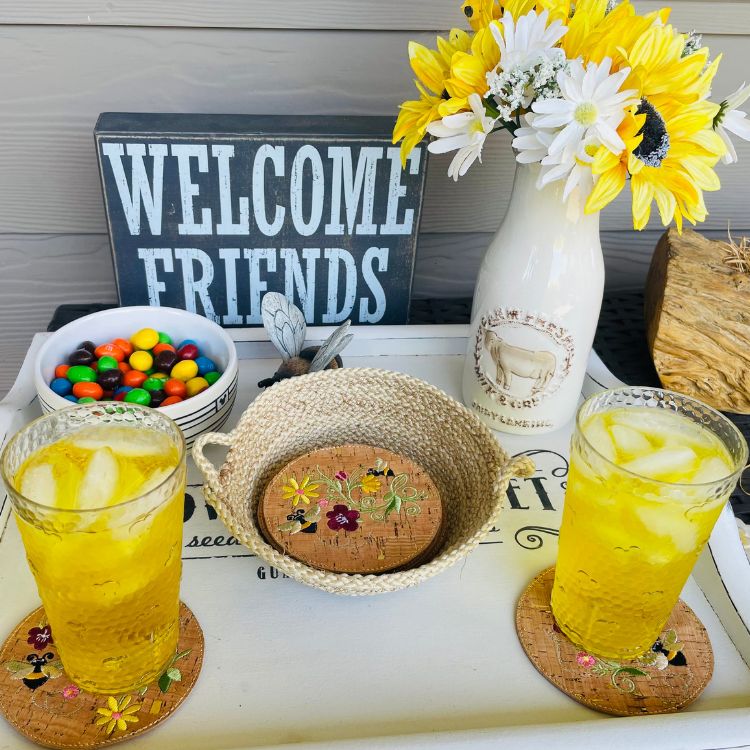
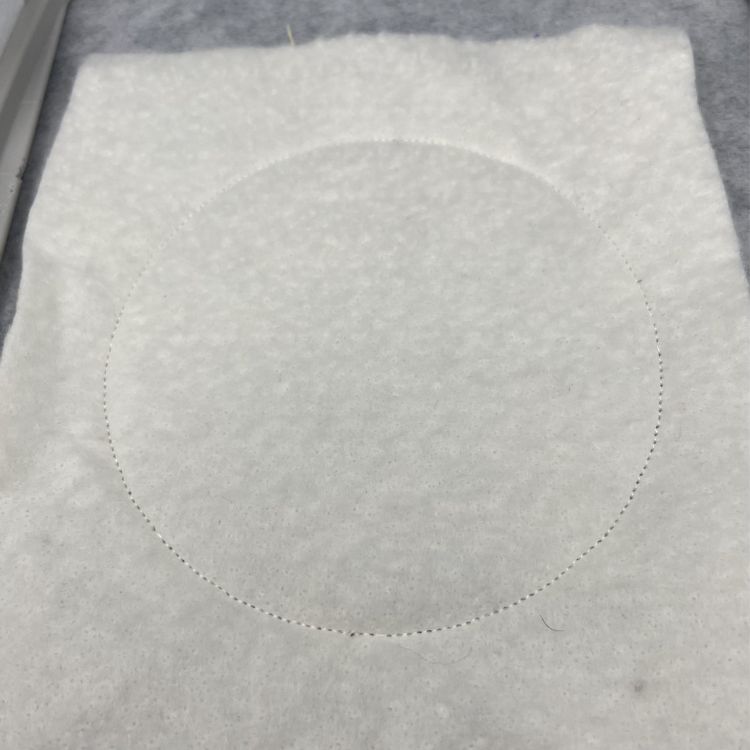
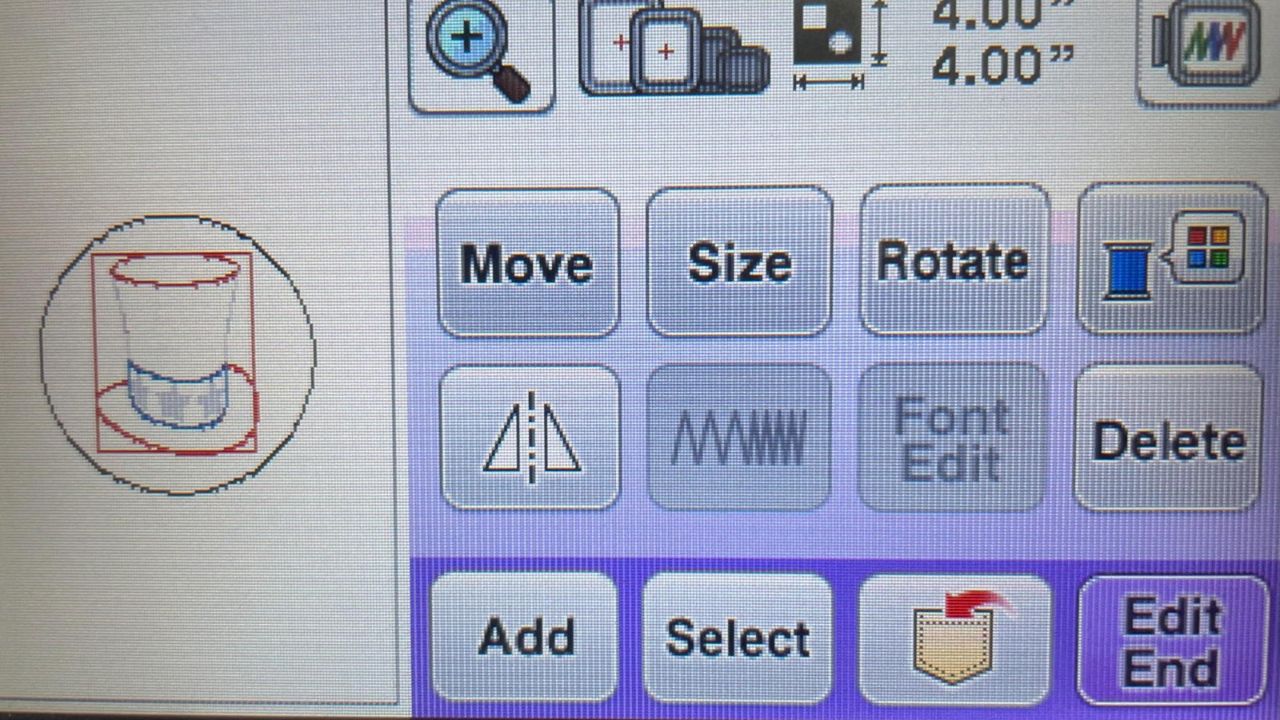
Size your shape to at least 4" x 4”. This makes for a nice coaster size and will accommodate a small embroidery design. When you’re done modifying the shape, press OK.
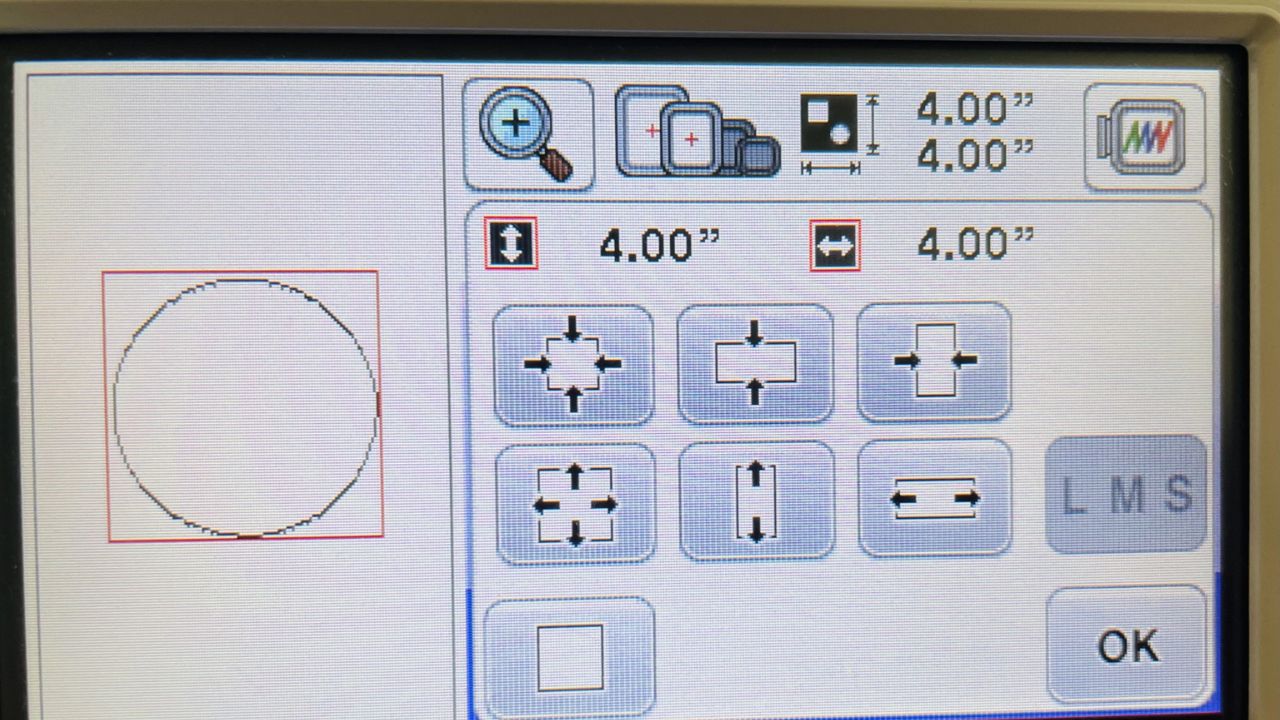
Then, select Add and repeat this step to add another circle. Size this to a 4" x 4” to give you two, identical circles. The first will be your placement stitch for your fabric. The second will be your tackdown stitch.

As you can see above, my machine automatically set the other circle to 3.79”, not 4.00”. Remember to double check your work and keep editing your sizes (using the size indicator) until they match.
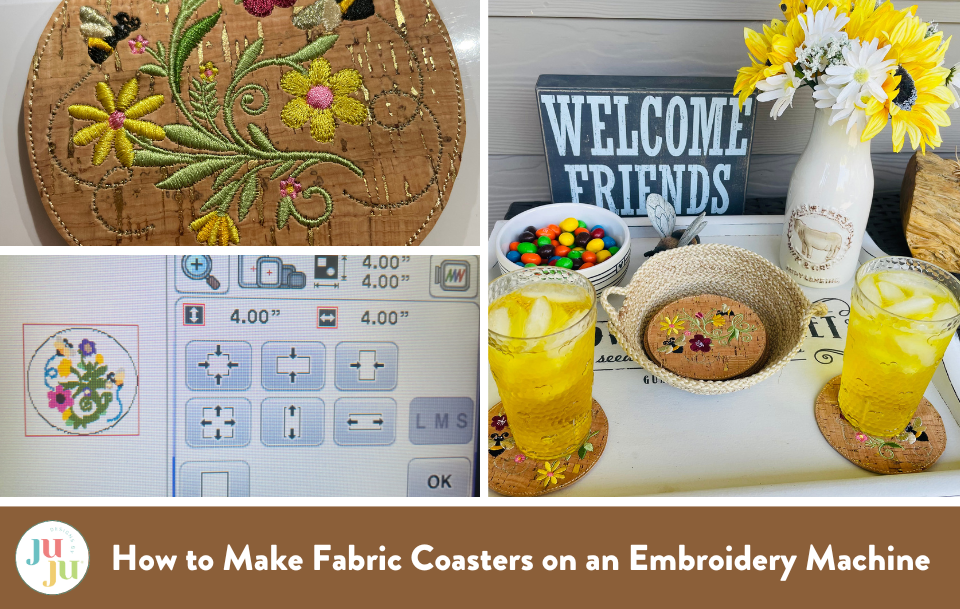
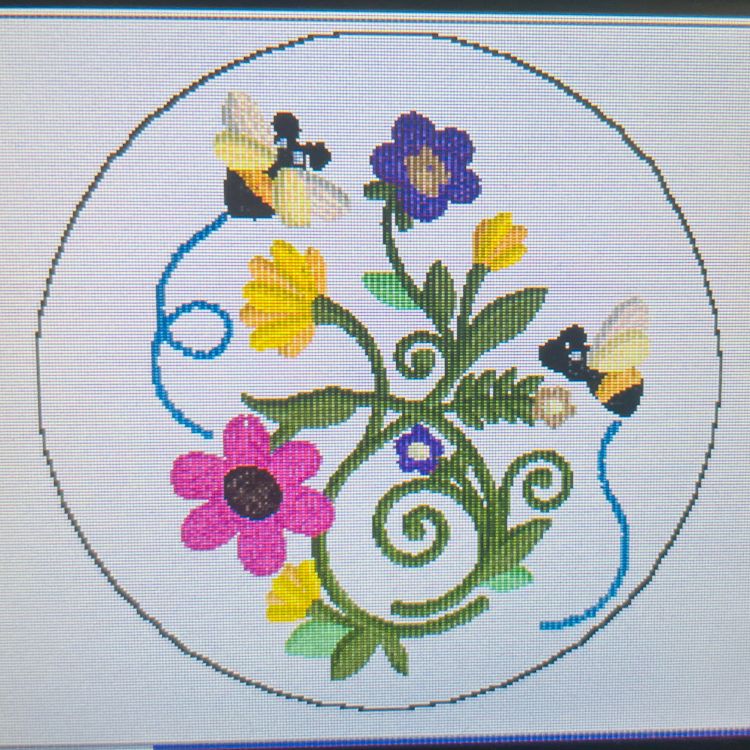
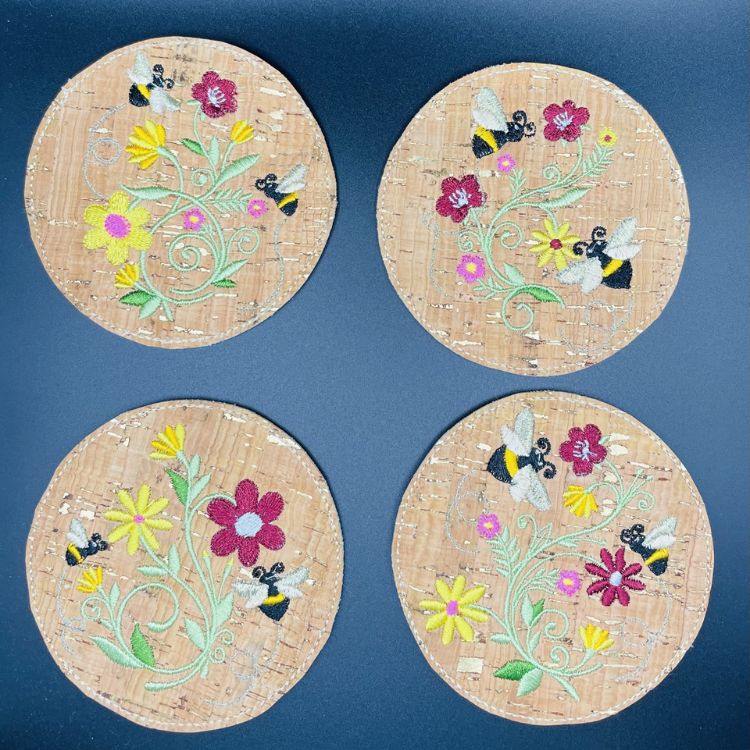
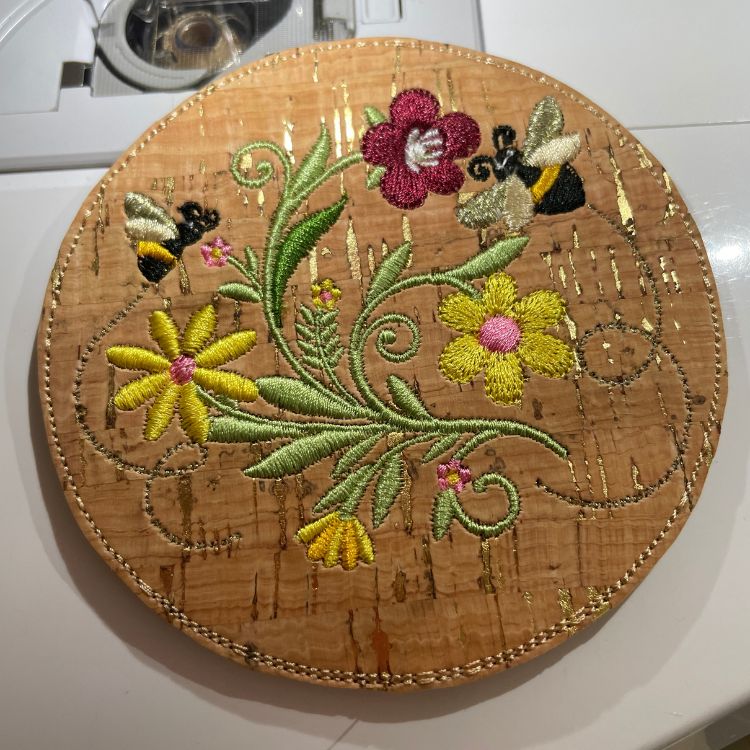
Now the fun part! Be creative and choose from the large selection of JuJu designs for your coasters. Bees are so trendy now and I love them in my decor, so I chose Busy Bees Flowers 1.
I love this set, as well as Busy Bees Flowers 2. Using these two sets, I was able to make twelve different coasters! Let your imagination go wild and find the perfect coaster design idea for your needs. Once you have decided on your design, select the size that will fit within your circle and add it to your circle.

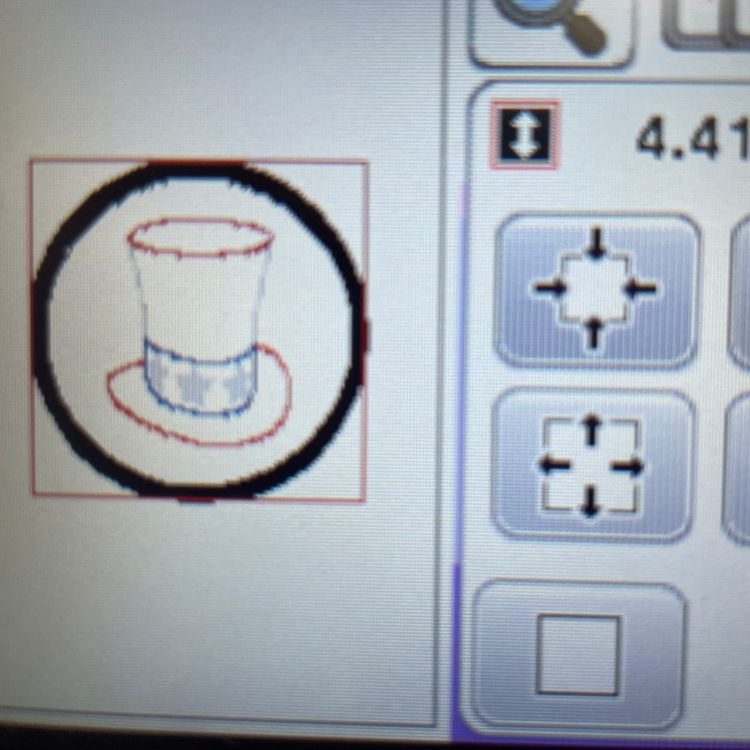
If you’re using a 4" x 4” circle, you’ll most likely need to size down your design so it fits perfectly inside. Zoom in to see the placement of the design in your circle and if necessary, make adjustments. You want your design to fit nicely and be centered.
Once you’re satisfied with your coaster design, select Add and return to the circle shape you’re using. Select the circle again and add it to your screen. Select Size and resize to 4" x 4". This stitching will attach our front and back and will be the final step of our project.

All the circles should match up and your design should be nicely centered. Now, select Embroidery and you are ready to stitch out your custom coaster!
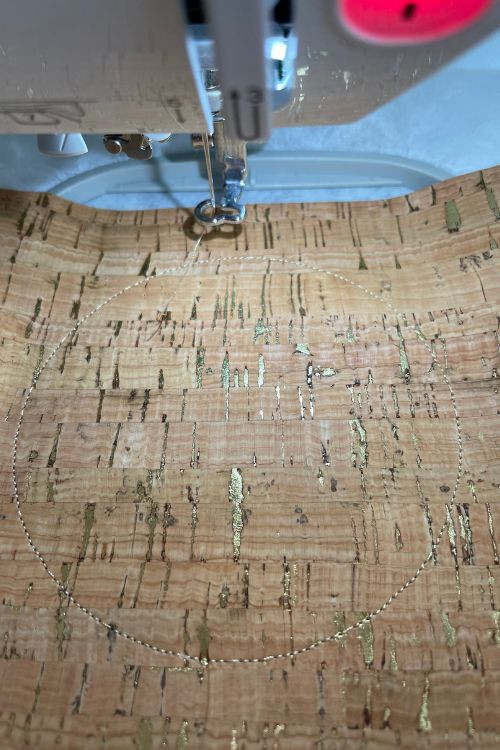
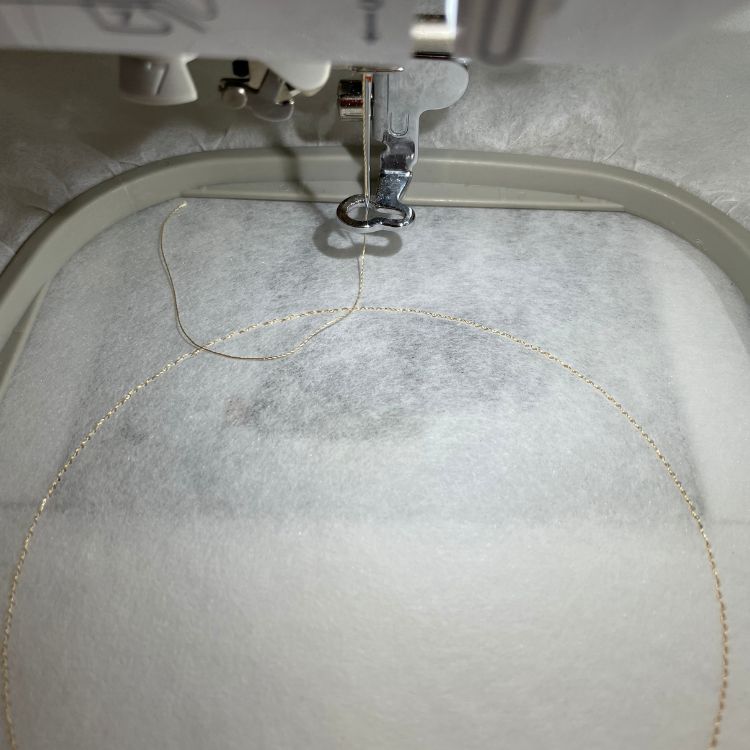
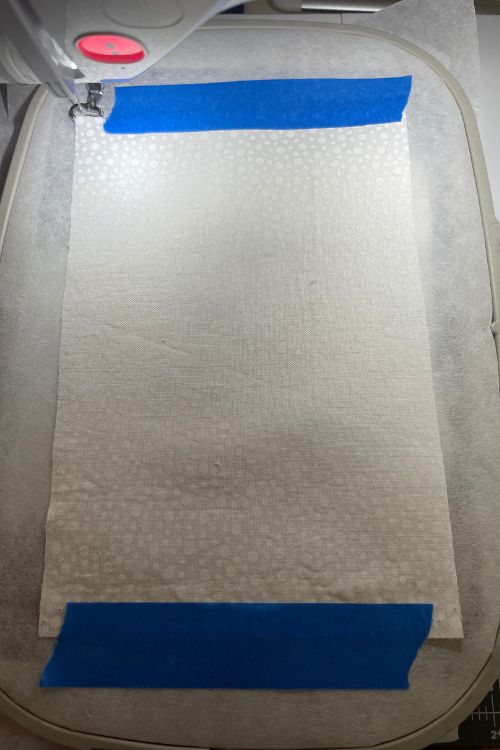
Let’s start with cork or vinyl coasters. Now that we have our circle shapes and design loaded onto our machine, hoop the tearaway stabilizer and insert it into your machine.

Run the first stitch. This will be your placement stitch.
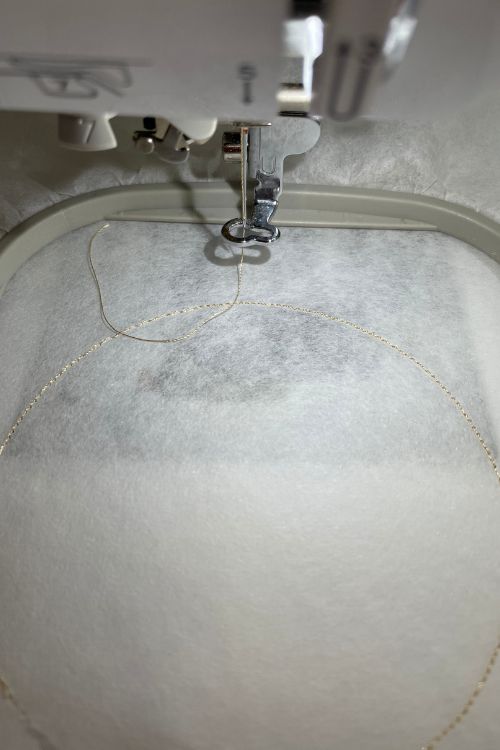
Place your cork or vinyl on top, making sure to completely cover the circle with room around it for trimming. I recommend a square at least 4.5” to 5”.
Run the tackdown stitch. Do not trim the cork, but continue with the remaining steps of the design. Do not stitch the final step yet.

When you’re finished with your design, remove the hoop. Turn it over and tape the backing in place.


For a nice finish on the front and back of your coaster, have the top and bobbin threads match.
Return the hoop to the machine and stitch the final stitch. This attaches the front and back together. If you like you can repeat the last stitch twice for added security.
Remove from the hoop, tear away the stabilizer, and trim close to the stitches, being careful not to cut through the threads. Use the stitching as a guide to cut a nice circle.
Your raw edge coaster is now complete. You can save the design to your machine memory or USB drive for future use. To make additional coasters, repeat the steps above.

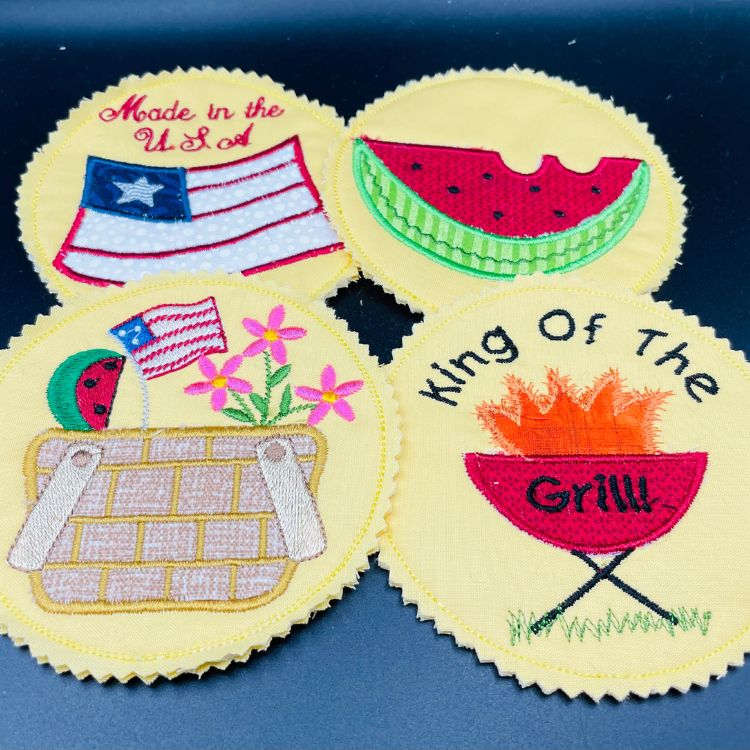
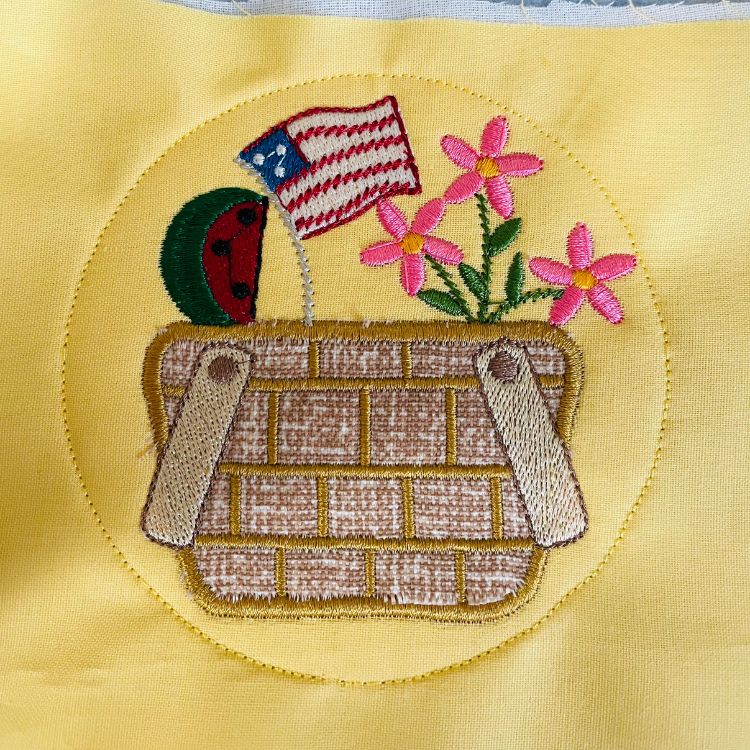
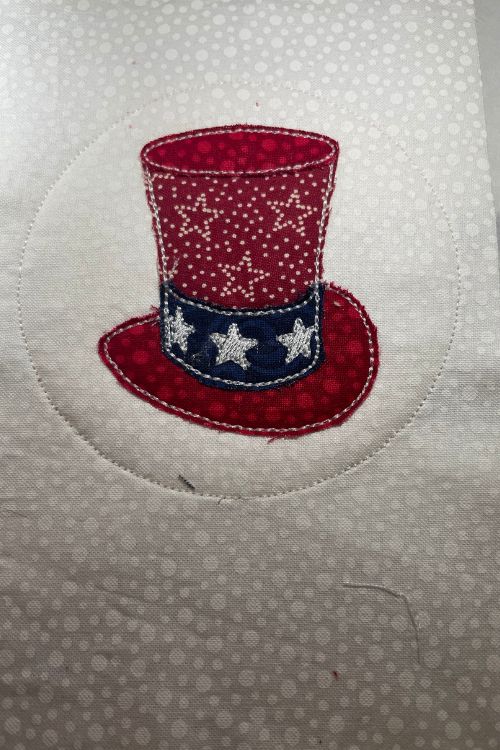
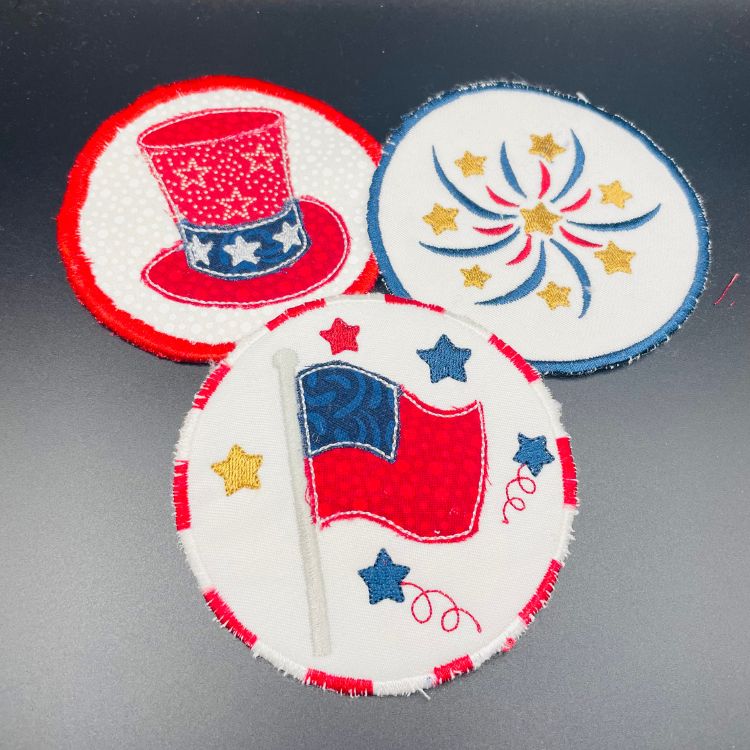
Let’s begin by prepping our cotton fabric by fusing Pellon SF101 to the wrong side. This will prevent your stitches from puckering. If you’re using an appliqué design, scrap fabrics can be used. These fabric coaster patterns are from Celebrate the 4th Applique Set 1.
For this embroidered coaster, follow the steps listed above, layer three circles instead of two. This will give the placement for both batting and fabric. Then, add your chosen design, followed by a fourth circle. This circle will attach the front to the back.

Be careful to make sure all your circles are the exact same size and completely overlap.
Now, hoop the tearaway stabilizer and run the first stitch. This will be the placement for your batting.
Lay the batting over the circle and stitch Step 2. This is the tackdown stitch for the batting. Trim the batting close to the stitches.

Lay your cotton fabric over the circle. Remember to cut your fabric large enough to leave room for trimming later. I recommend 4.5” to 5” squares.
Run the tackdown stitch. Continue to stitch out the design, but don’t stitch the final step yet (the 4th circle, to attach the front to the back).


When the design is complete, remove the hoop from the machine and turn it over to the back.
Tape the cotton backing to the hoop. If your stitches show through the fabric, I recommend fusing SF101 to the cotton.

Before returning the hoop to the machine, change the bobbin thread to match the top thread. This is so the front and back threads match.

Now, run the final step to secure the front to the back. If you’d like your coaster to be more durable, you can run this stitch twice.
Remove your project from the hoop.
This next step is totally optional, but I like to trim away any excess SF101 before using the pinking shears. You do not have to do this step if you don’t want to. If you choose to, be careful not to snip your fabric or stitches.


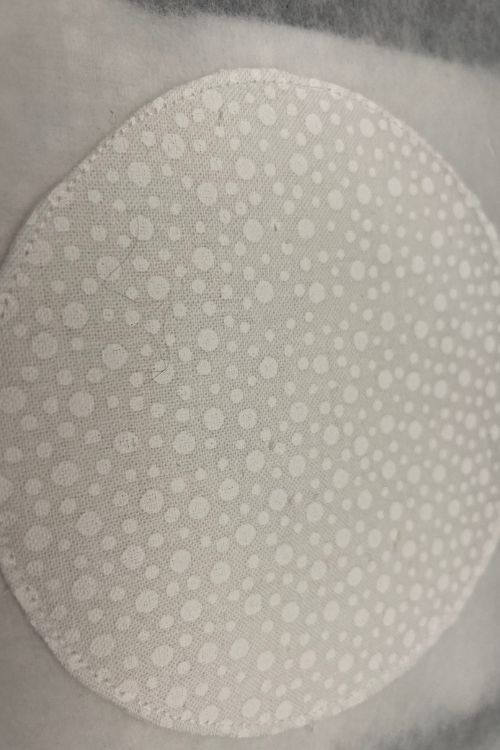
Using pinking shears, trim around the coaster stitching, using them as a guideline for your circle.
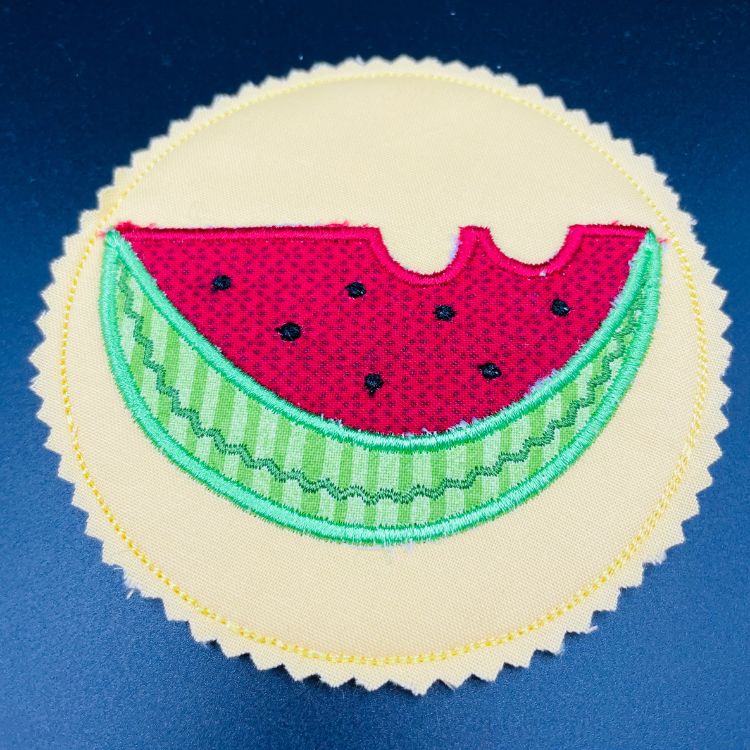
There you go! An adorable, raw edge cotton coaster!
Open the Shapes icon on your embroidery machine.
Select the Circles icon.
Follow the directions above to layer three circles, ensuring all of your circles are the same size and completely overlap. Always use the size indicator.

Select Add and upload the design of your choice. Resize and move the design to fit into the circles. The design I’m using is from Patriotic Alphabet Embellishment Kit. This set comes with multiple design sizes which are perfect for coasters.
Select Add and return to the shapes. Add one more circle to attach the front to the back. Enlarge your circle to match the previous ones.
Now, let’s make our coaster edge. Press Add one more time and go to your embroidery machine's built-in shapes section.
There are multiple designs you can use to create different edges for your coaster, so feel free to play around. In this tutorial, I’m going to use the satin edge finish. Highlight and select Set.
Because this is a satin stitch, this circle will be just slightly larger than the 4"-inch" circles. Enlarge it just enough so that it completely covers the existing circles.

I find it easiest to start with too large of an edge, sizing it down as I go. This way you can better judge when the satin inner stitch matches the outer stitch of the placement circles. You may have to play around with this a bit, but you will get it. Don’t get discouraged.


Once you are satisfied, prep the coaster fabric (both front and back!) by fusing SF101 to the wrong side. Gather scraps for the applique if needed.

Hoop tearaway stabilizer and run the first stitch. This is the placement stitch for the batting.

Trim the batting closely to the stitches. Place the coaster front fabric over the batting and run the next stitch to tack it down.

There is no need to trim yet. Run the remaining stitches to complete your design. Don’t run the last two steps yet! These are to attach the front and back, as well as the satin stitch.

When the design is finished, remove the hoop and turn it to the backside.
Tape the back coaster fabric securely to the back of the hoop, right side out. Then return the hoop to the machine and run the next step.
Before running the final satin stitch, trim both the front and back close to the tackdown stitches. Be careful not to cut through any stitches.
Make sure both bobbin and top threads match!
When you’re finished, remove your project from the hoop, trim any loose threads, tear away all exposed stabilizer, and admire your new coaster!
Feel free to save the design to the machine, computer, or USB for future use.
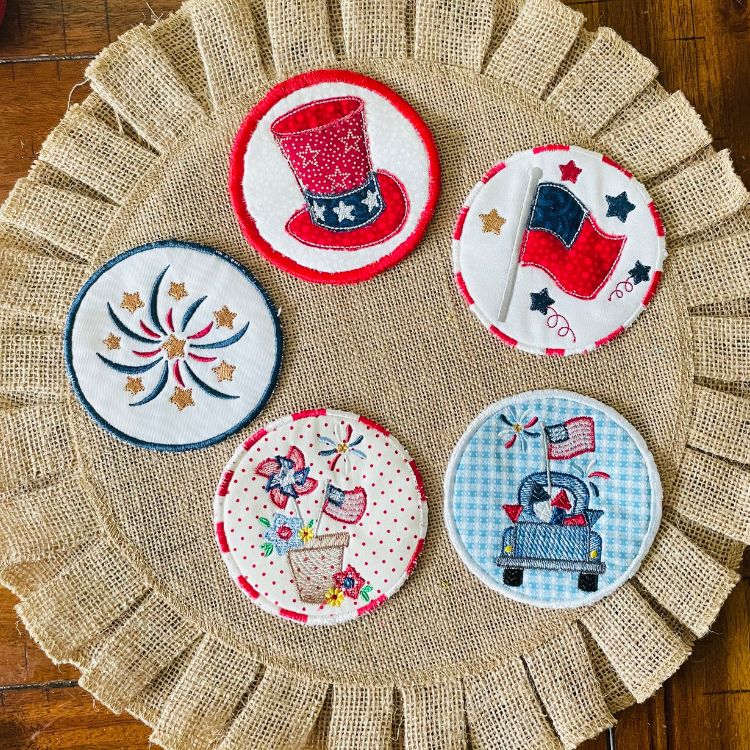
These coasters are from the Patriotic Alphabet Embellishment Kit. Using the different sizes available, I added the stars to the flag coaster!
Mix and match your designs! The bottom two are from Americana Sketch. Try using print fabric for your background, or use variegated thread for a fun look. The coaster design possibilities are endless!
Be creative in how you display your new embroidered coasters. Make them part of your summer decor!
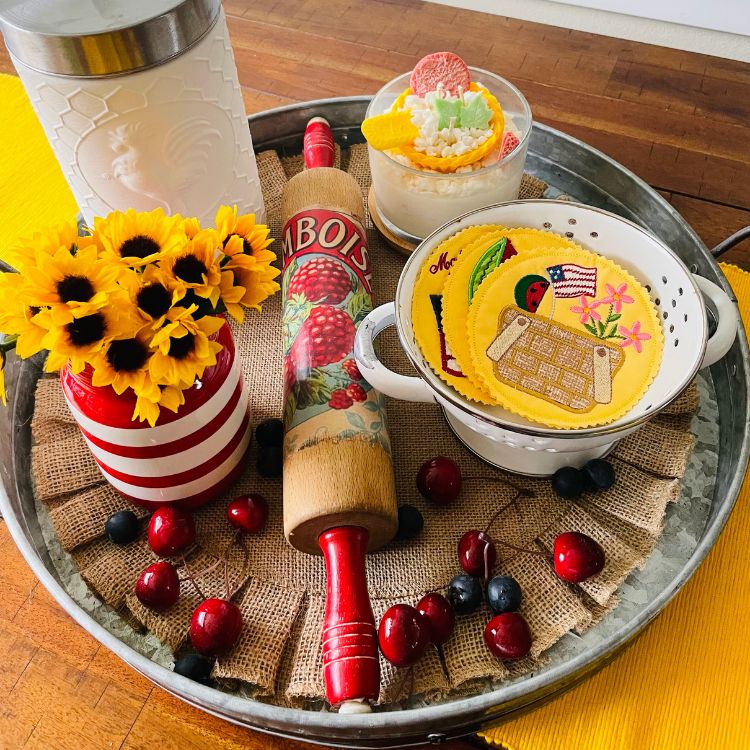
I love how these designs from Blooming Summer turned out on my coasters. They’d look perfect by the pool or as part of a beach theme!


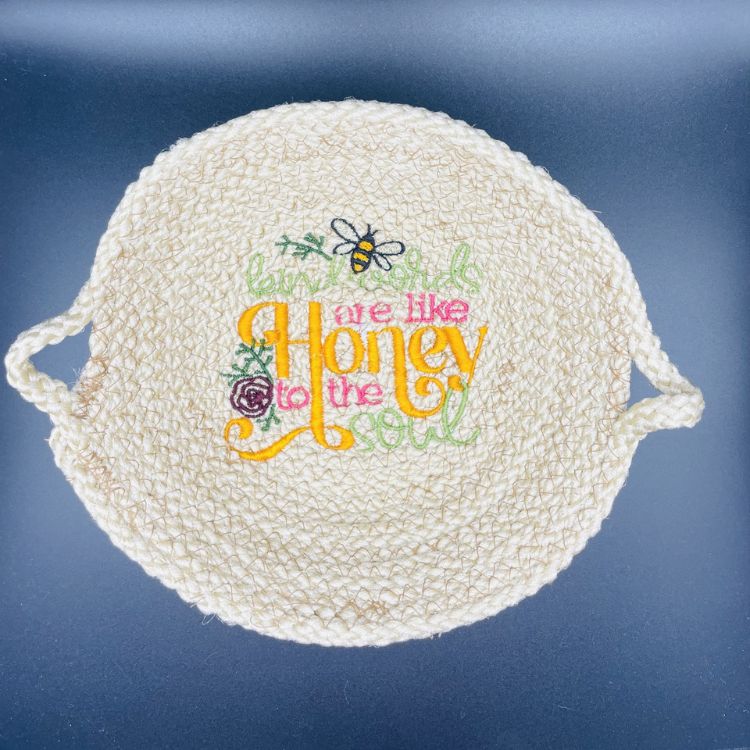
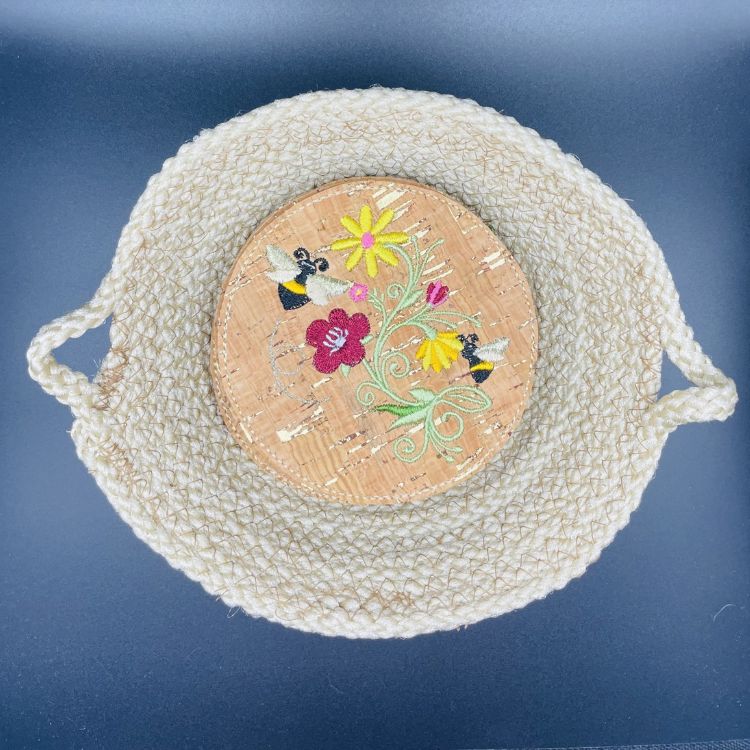
Now that you have a collection of adorable, custom, fabric coasters, why not make the perfect companion bowl to keep them in? These are so fun to make and easily customizable to match your decor. Check out our How to Make an Embroidered Rope Basket tutorial!
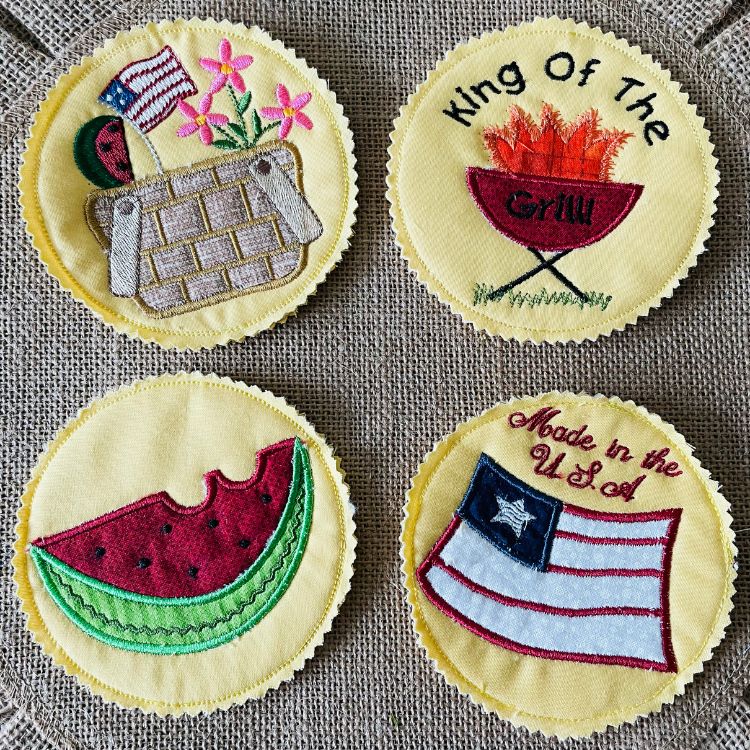
These vibrant handmade fabric coasters are perfect for adding a splash of summer to your decor. But don’t stop there—these coasters are versatile and can be customized for any occasion! Designs by JuJu has a wide variety of designs to choose from, perfect for any holiday, season, or celebration.
These embroidered coasters also make for some great gifts. Homemade is always from the heart!
If you loved this project, you’ll find plenty more just like it in our Home Hub—a curated collection of quick, creative, and practical projects perfect for gifting (or keeping!)
Don’t forget to share your creations with us on social media: Designs by JuJu Embroidery Blessings Group - Facebook. We love to see everyone's creativity!
