Toggle Nav
 Inspire.
Create.
Stitch.
Inspire.
Create.
Stitch.
Search
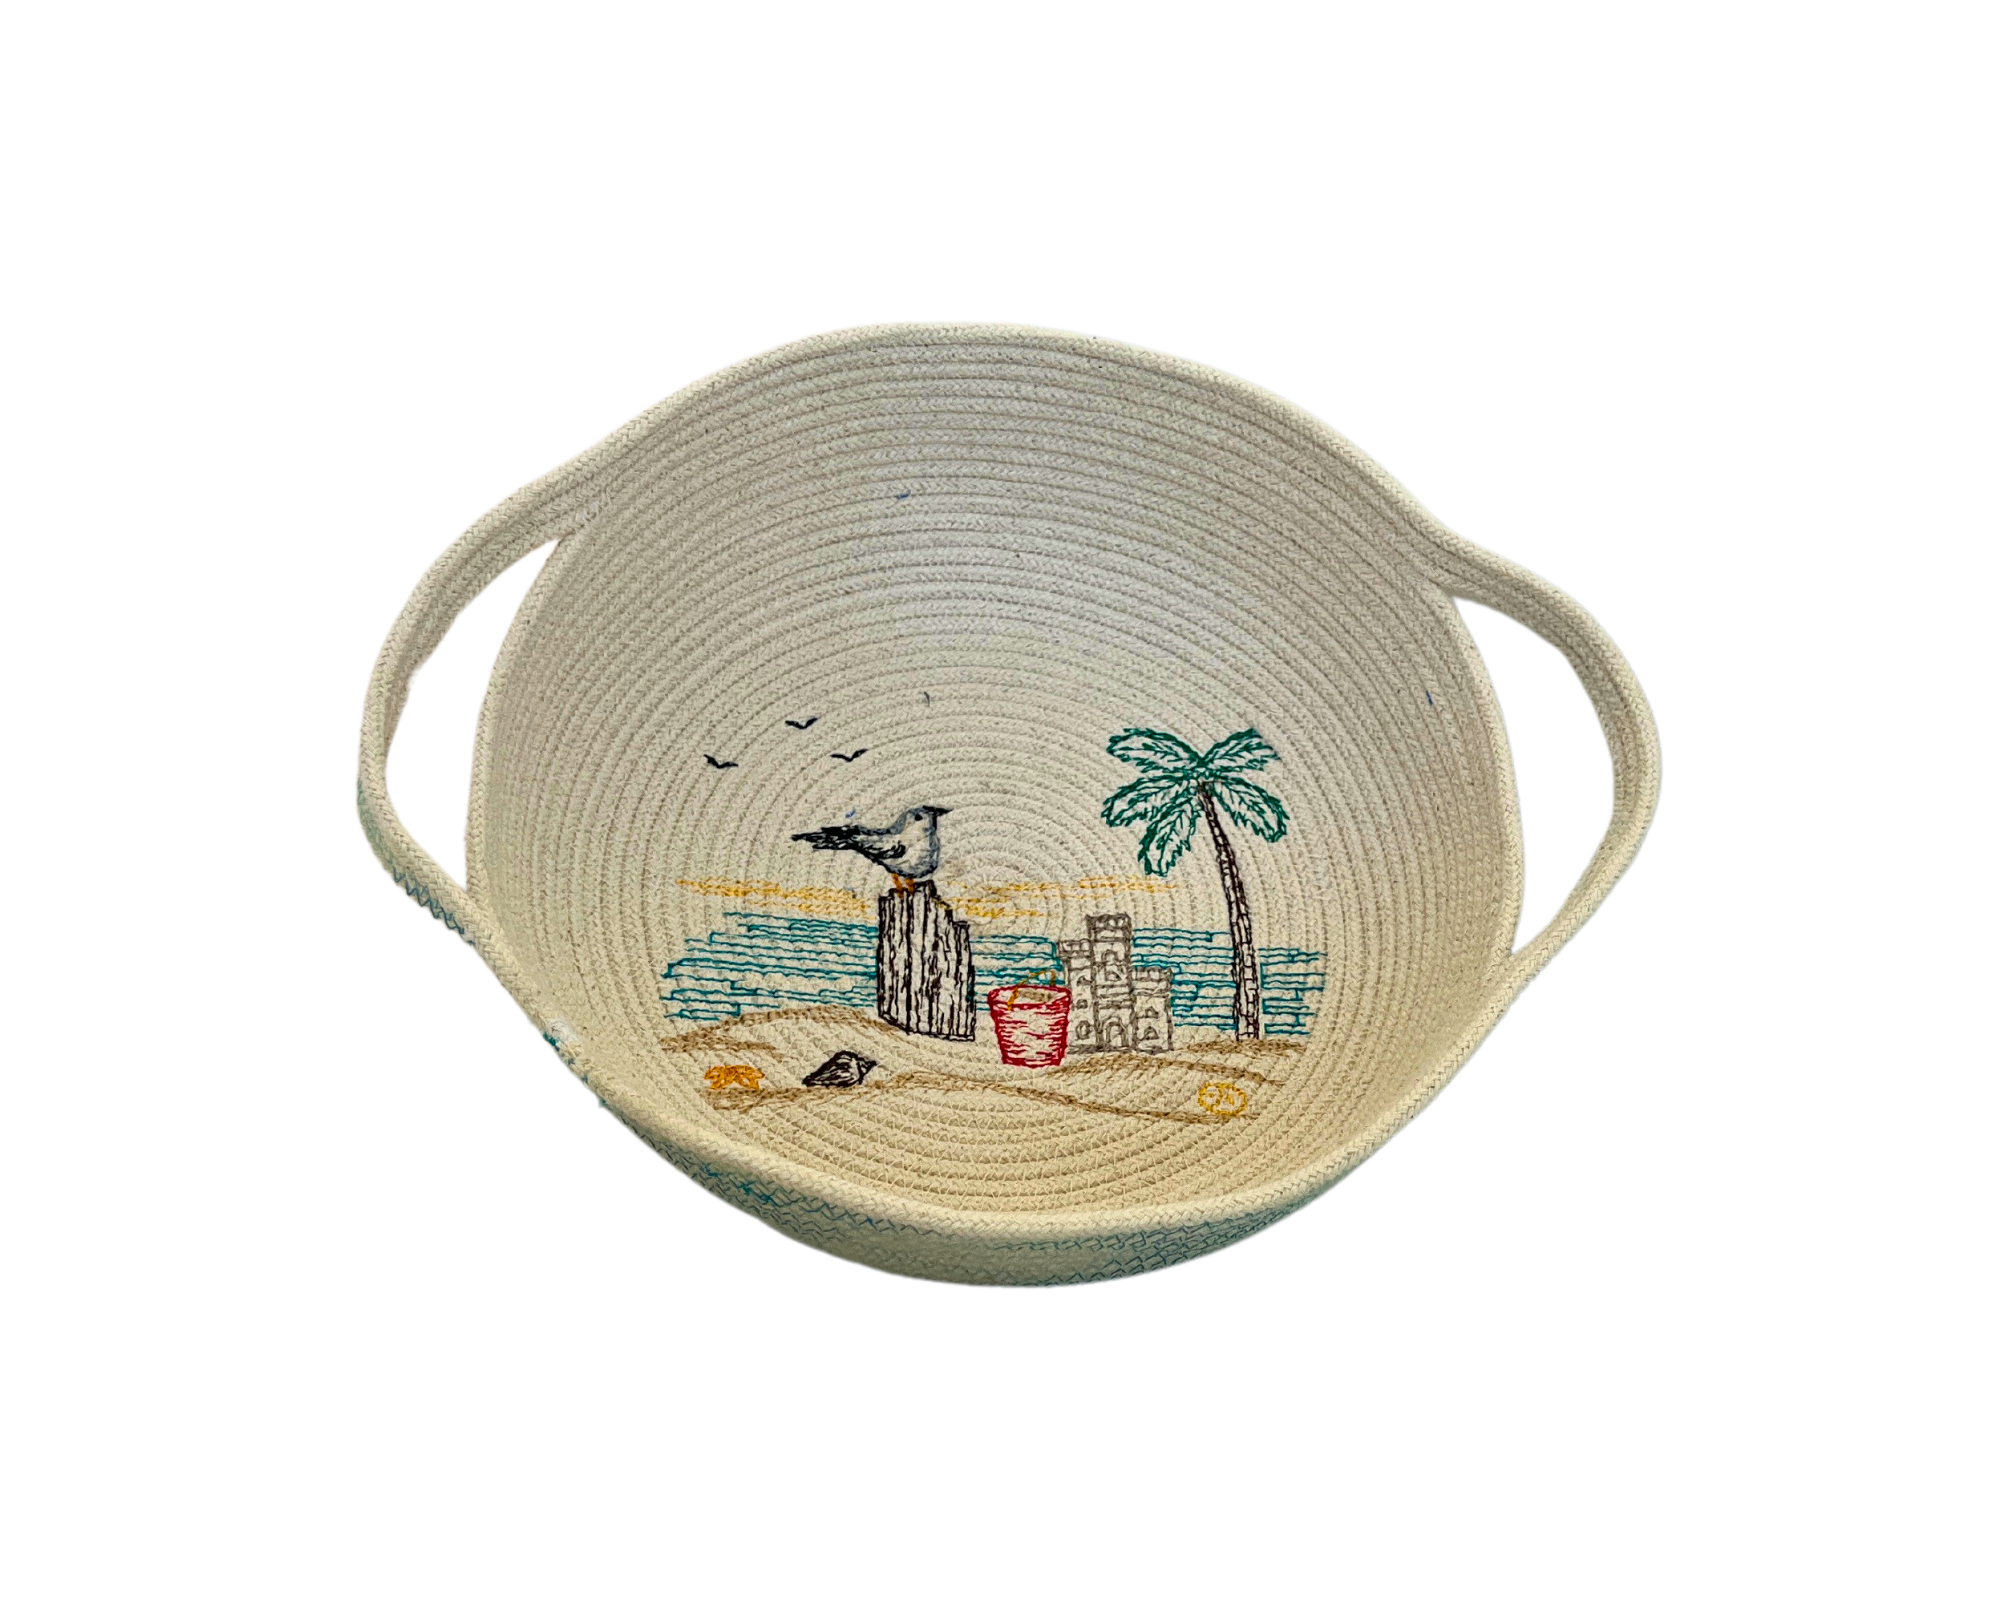
Rope bowls and baskets are very popular and for good reason. They are quick, easy, and fun to make! But you may be wondering, “Can I embroider a rope basket?” The answer is, “Yes!” In this project we will use a beautiful, machine embroidery design to embellish the basket base and coordinated thread to jazz up the exterior.
This machine embroidered rope basket project results in a functional home accessory that perfectly coordinates with your decor. Beware though, you’re going to want to make a lot of these.
NOTE: Check out Embroidery Supplies JuJu Uses.
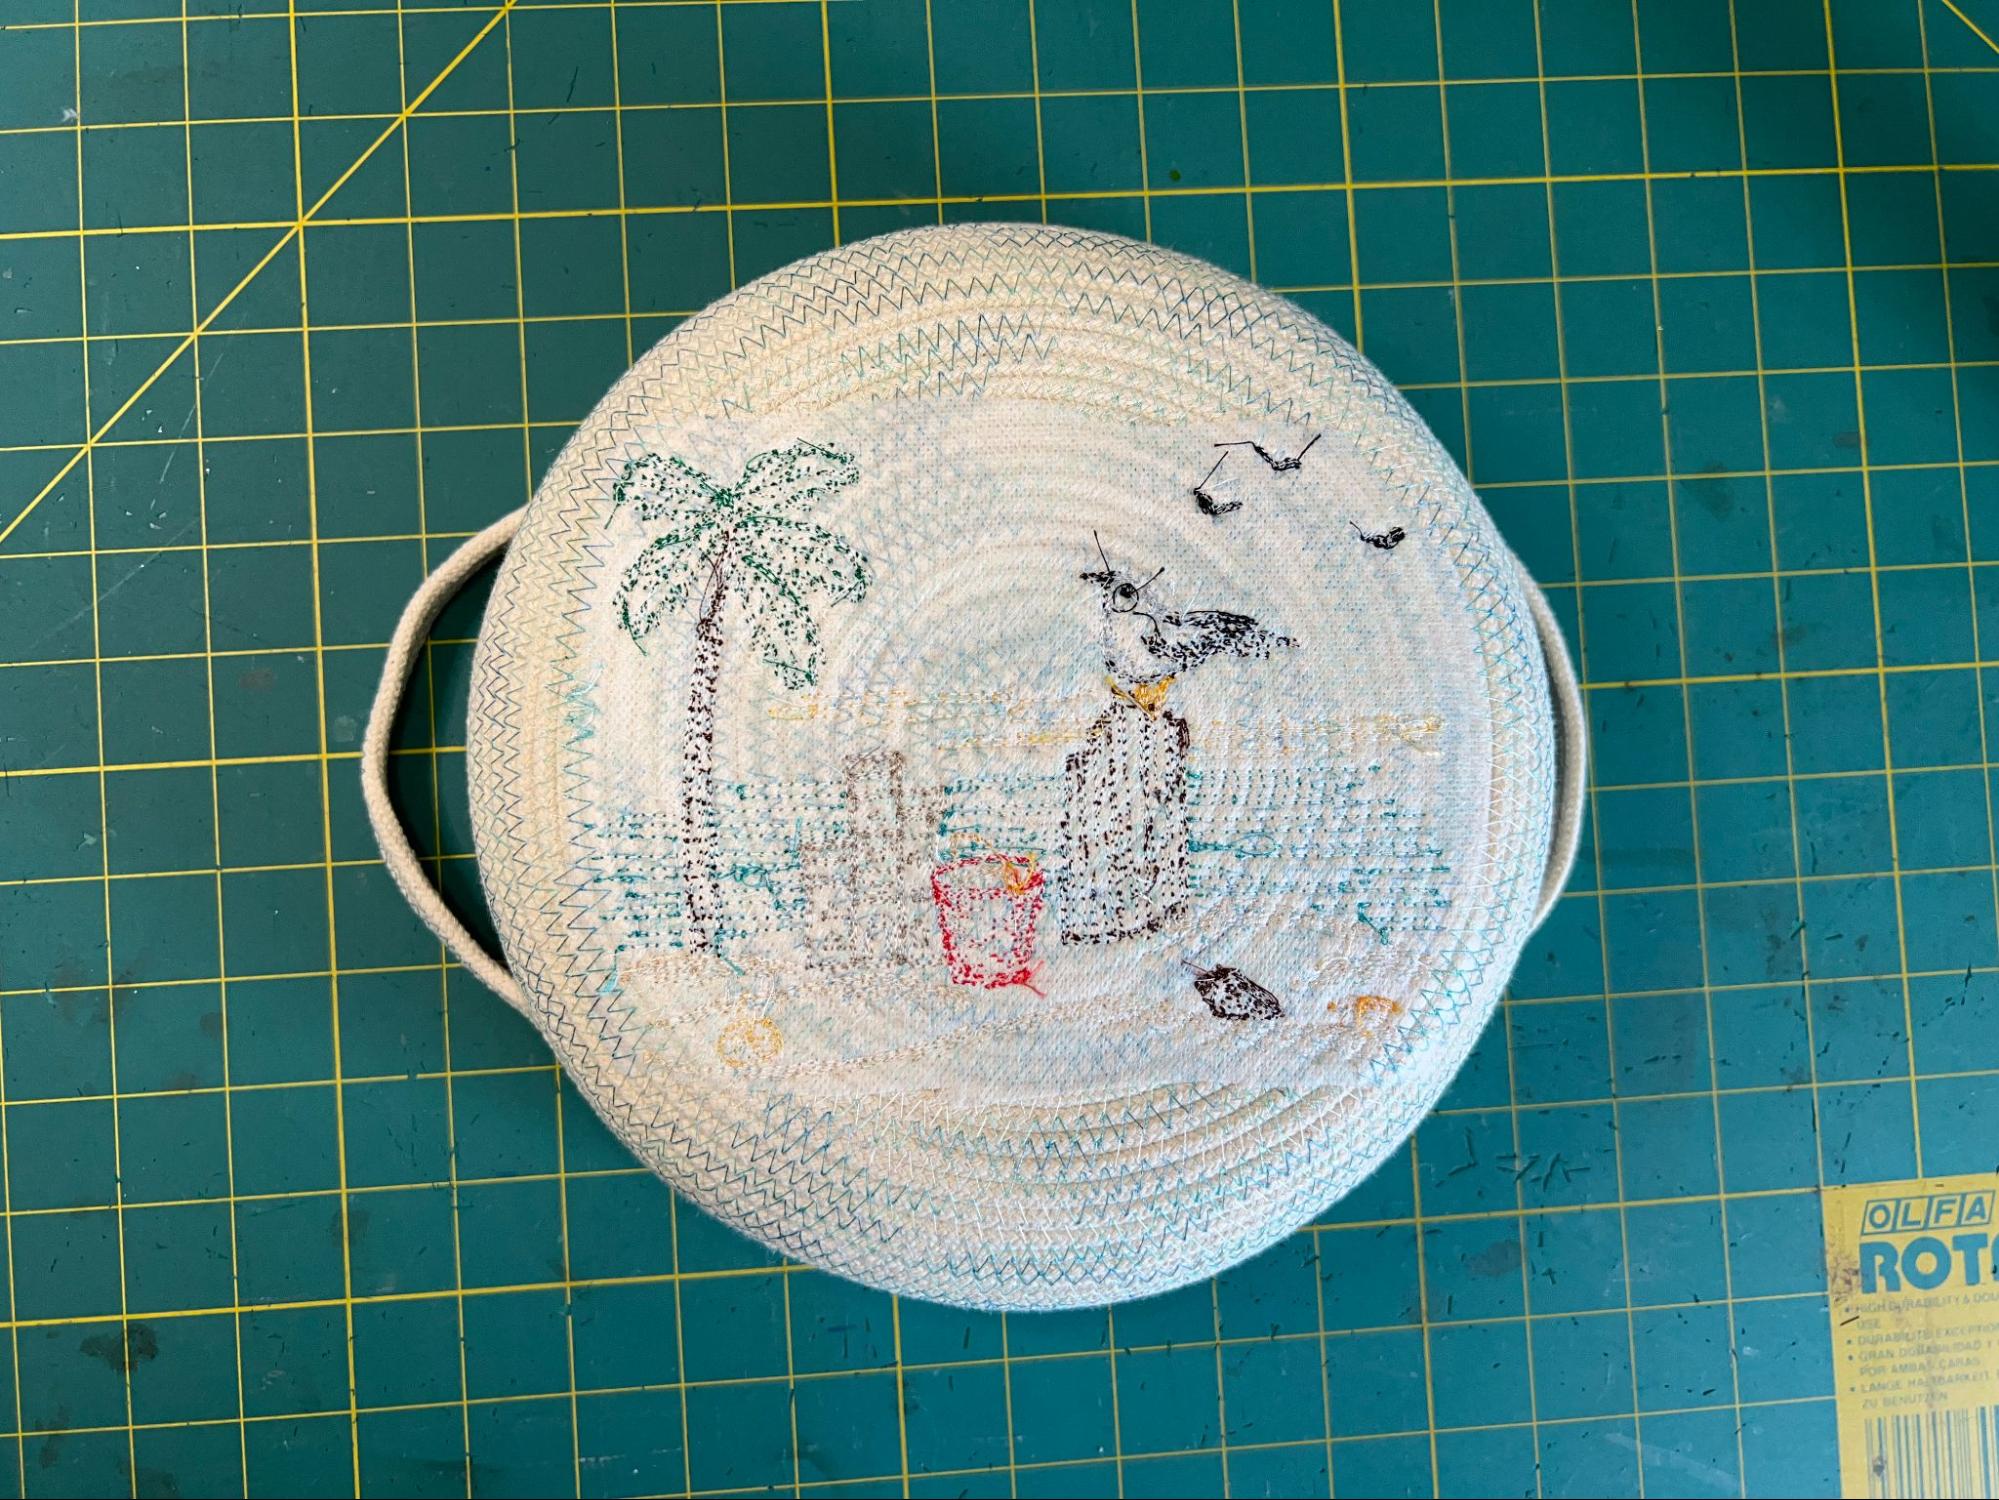
For this project, I’m using variegated thread in my bobbin and white thread on the top so that the stitches on the inside of my basket will be relatively invisible, and not detract from the embroidery, and the stitches on the outside will be decorative.
Wind the rope into a ball to make it easier to pull from as you sew.
NOTE: I put mine in a container at my feet so that I can easily pull it as I sew, but also keep it contained.
Wrap a small piece of invisible tape around the end of the rope and trim it to ¼”.
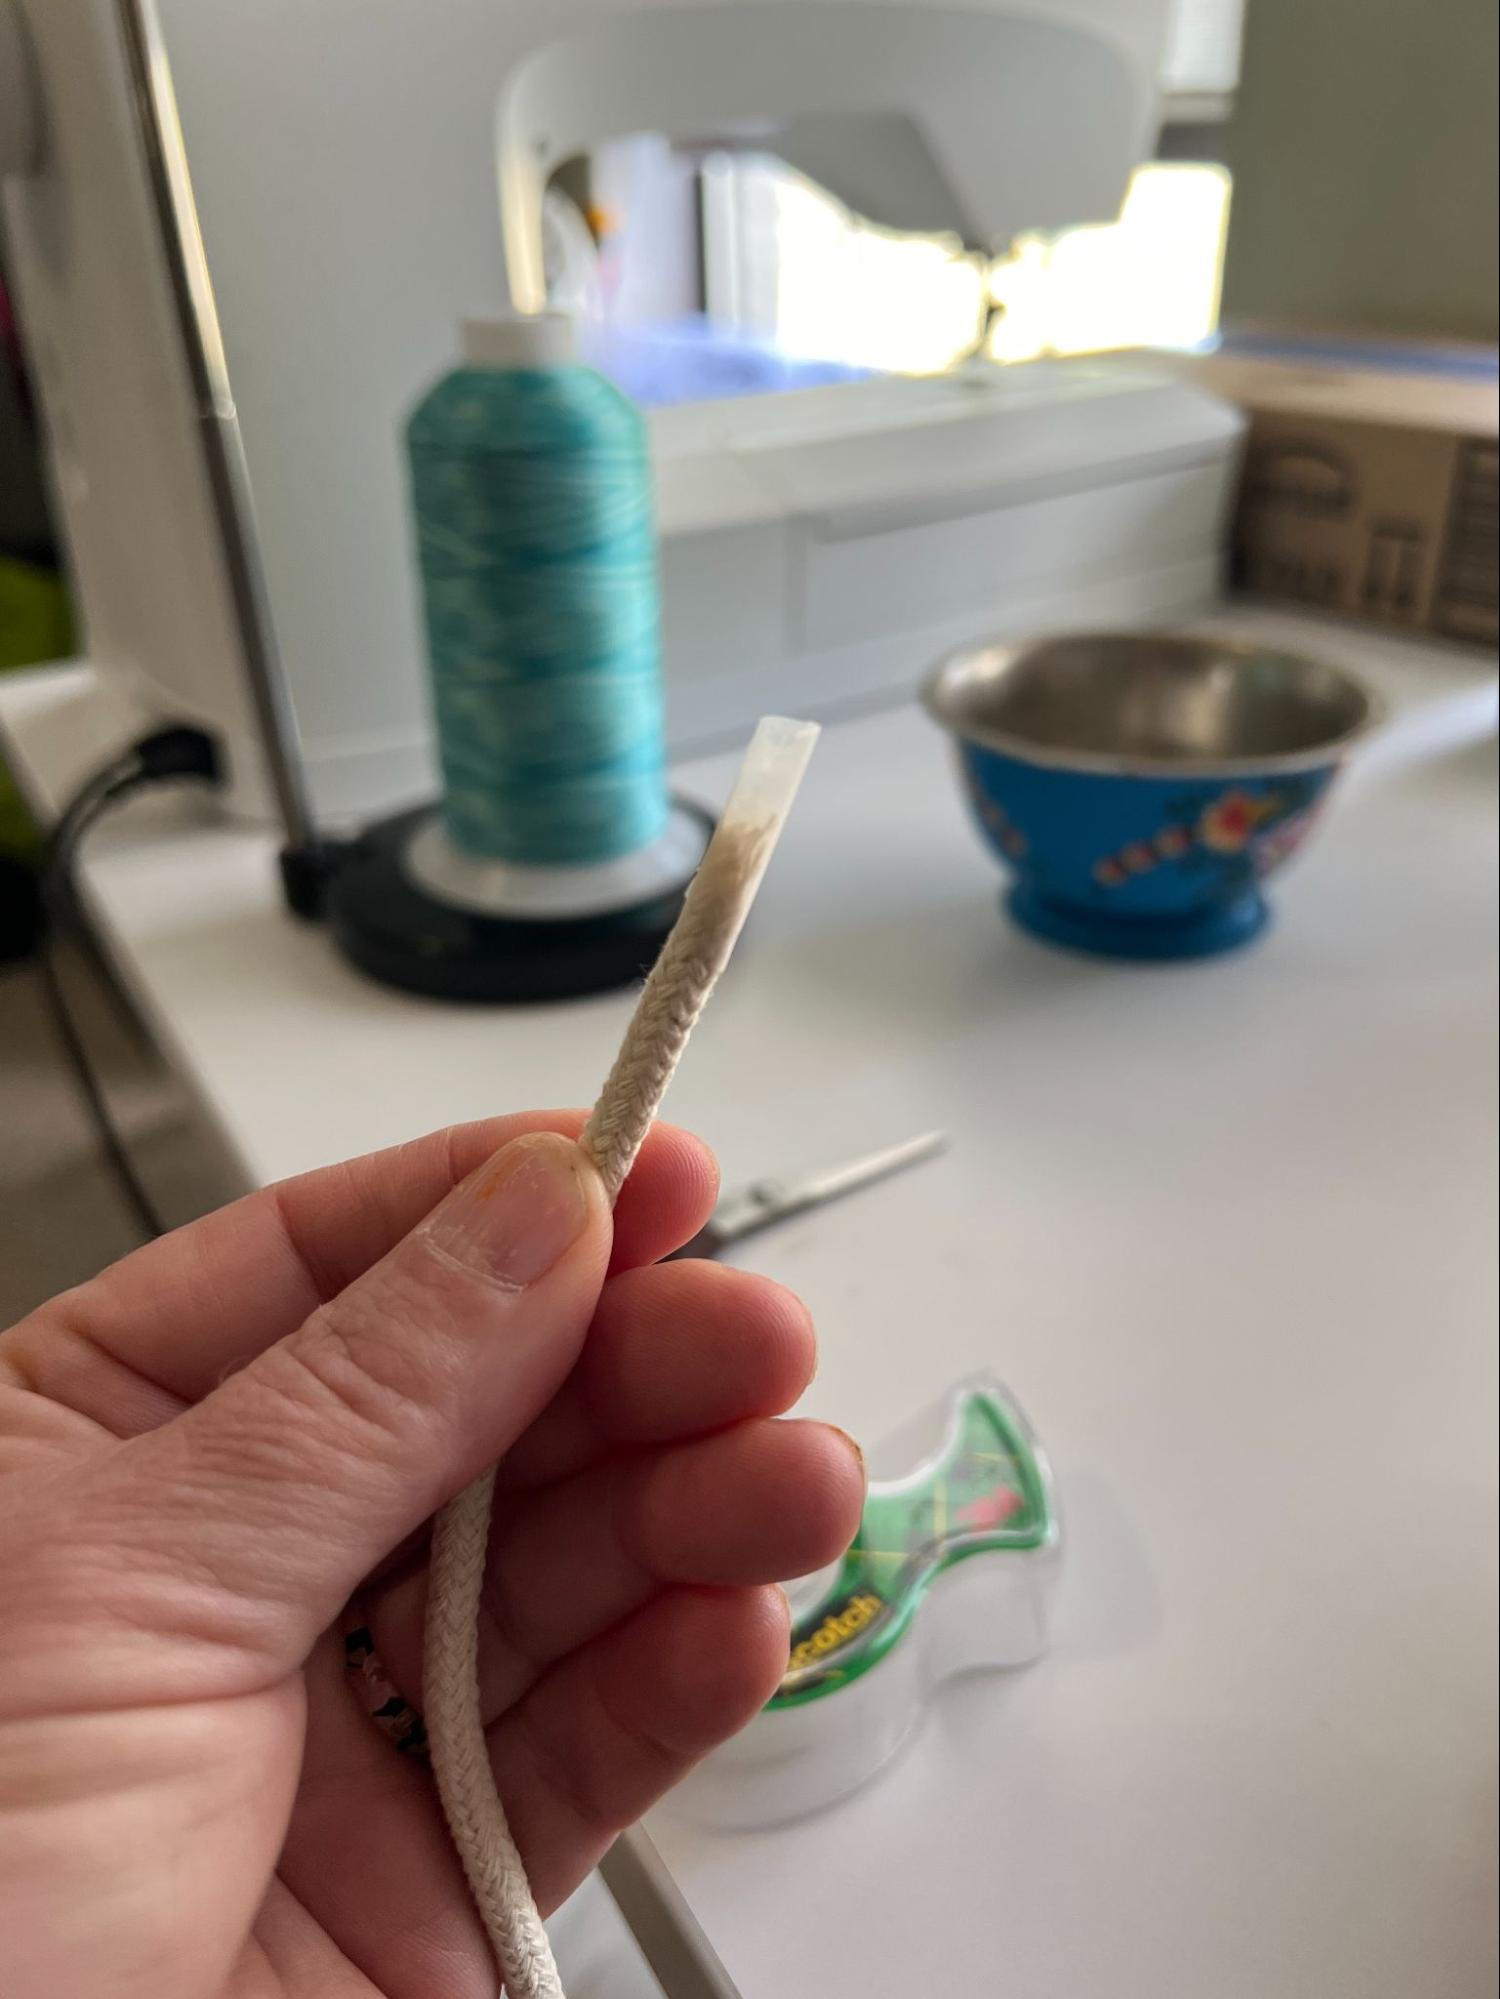
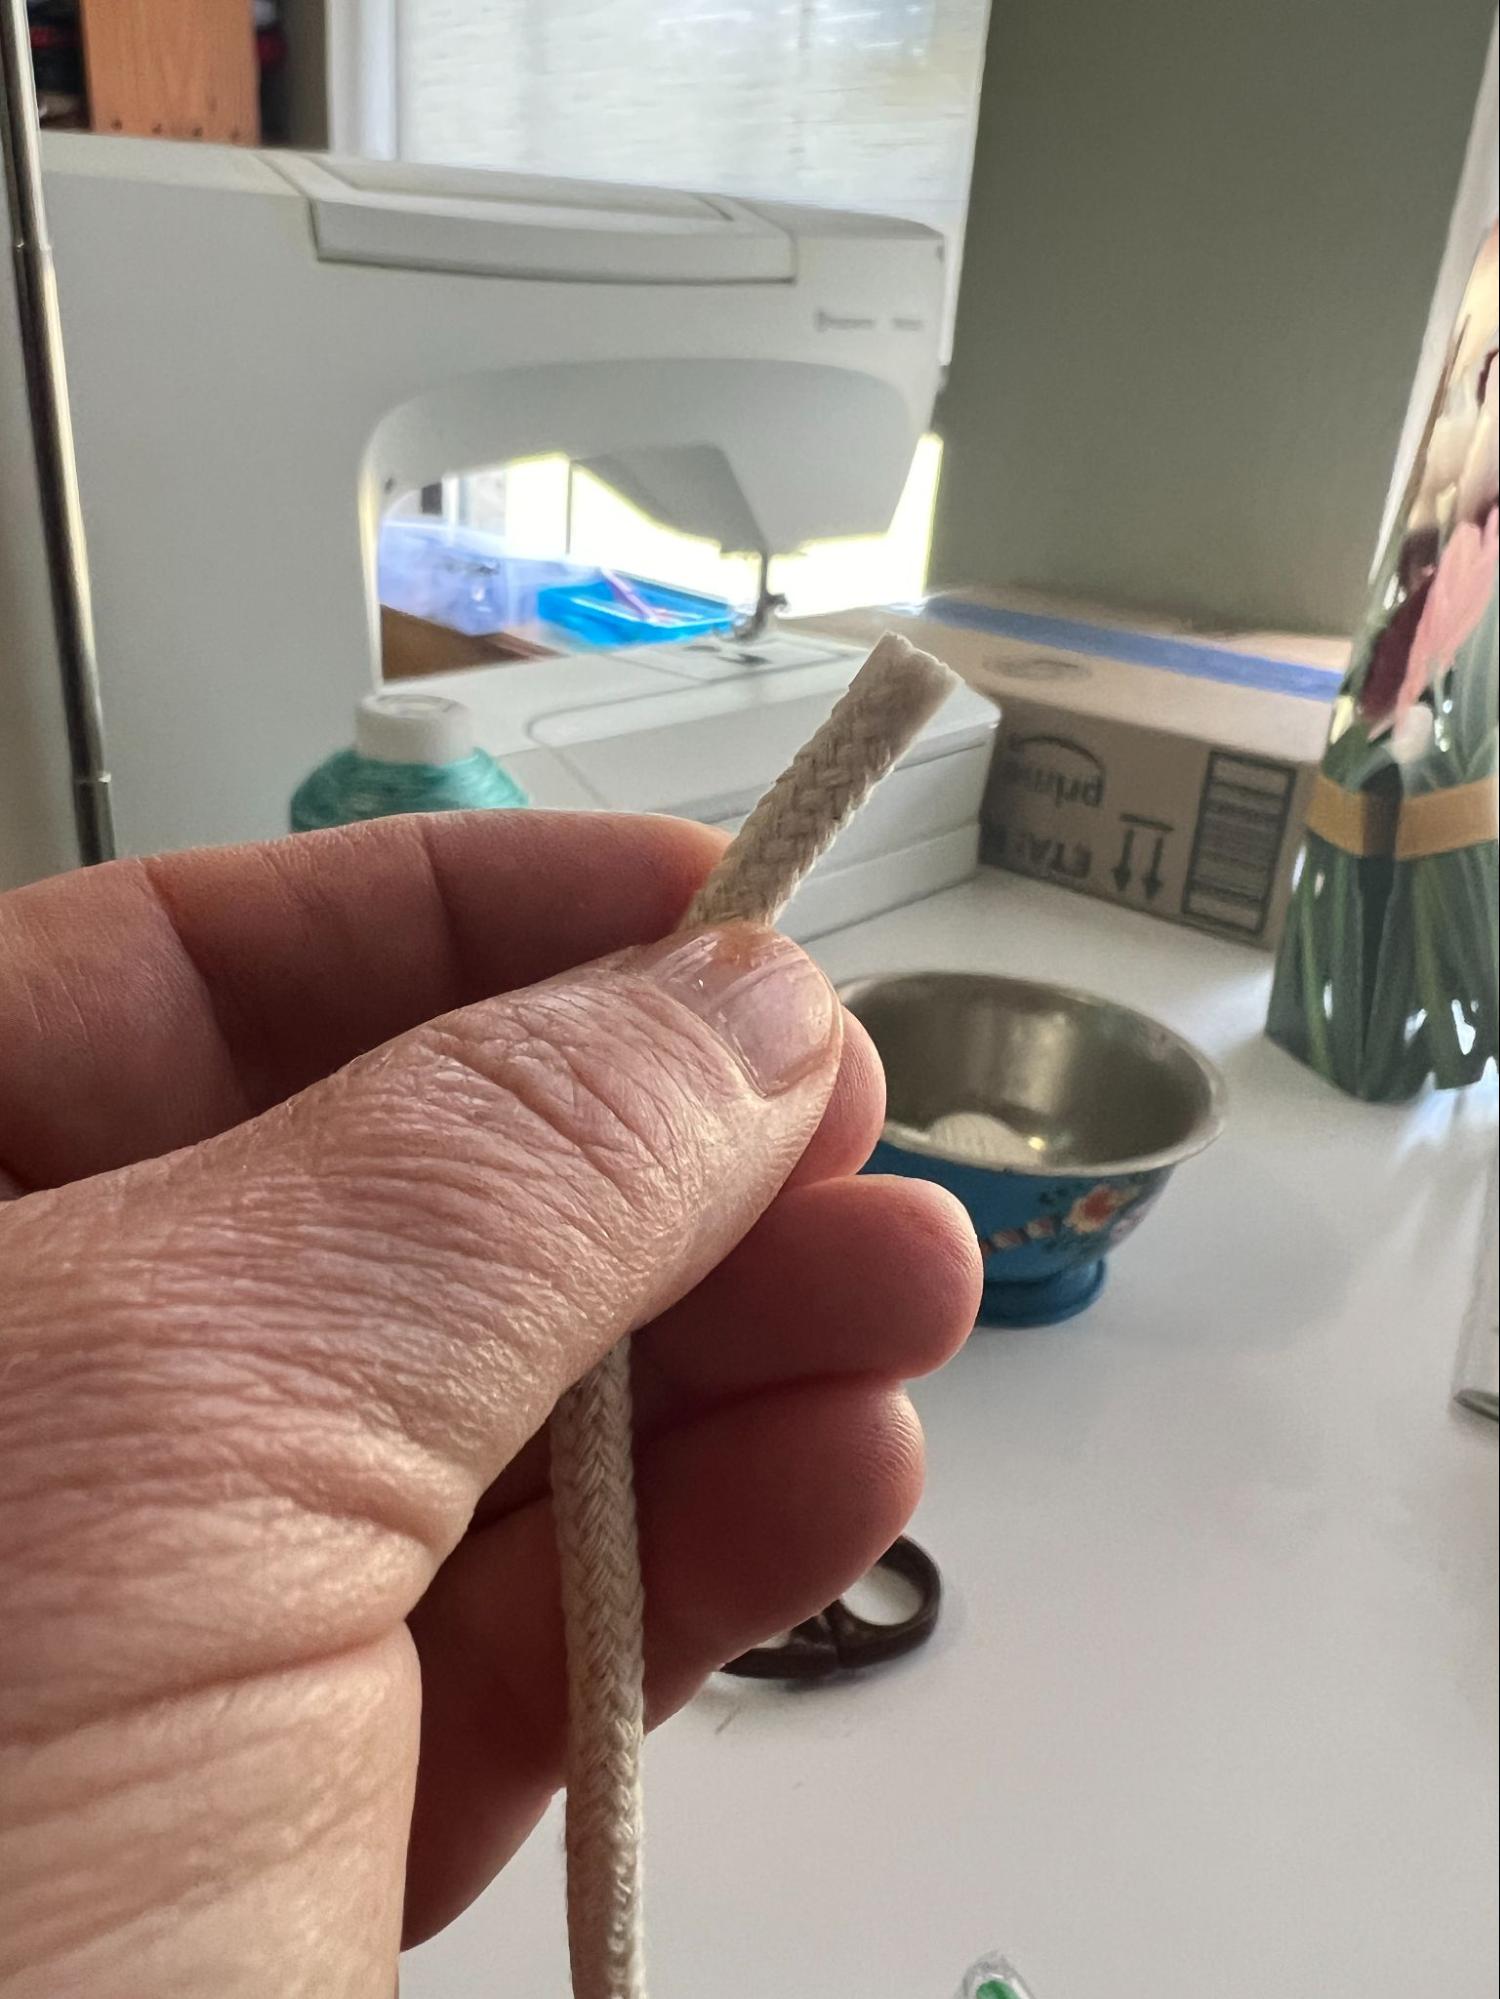
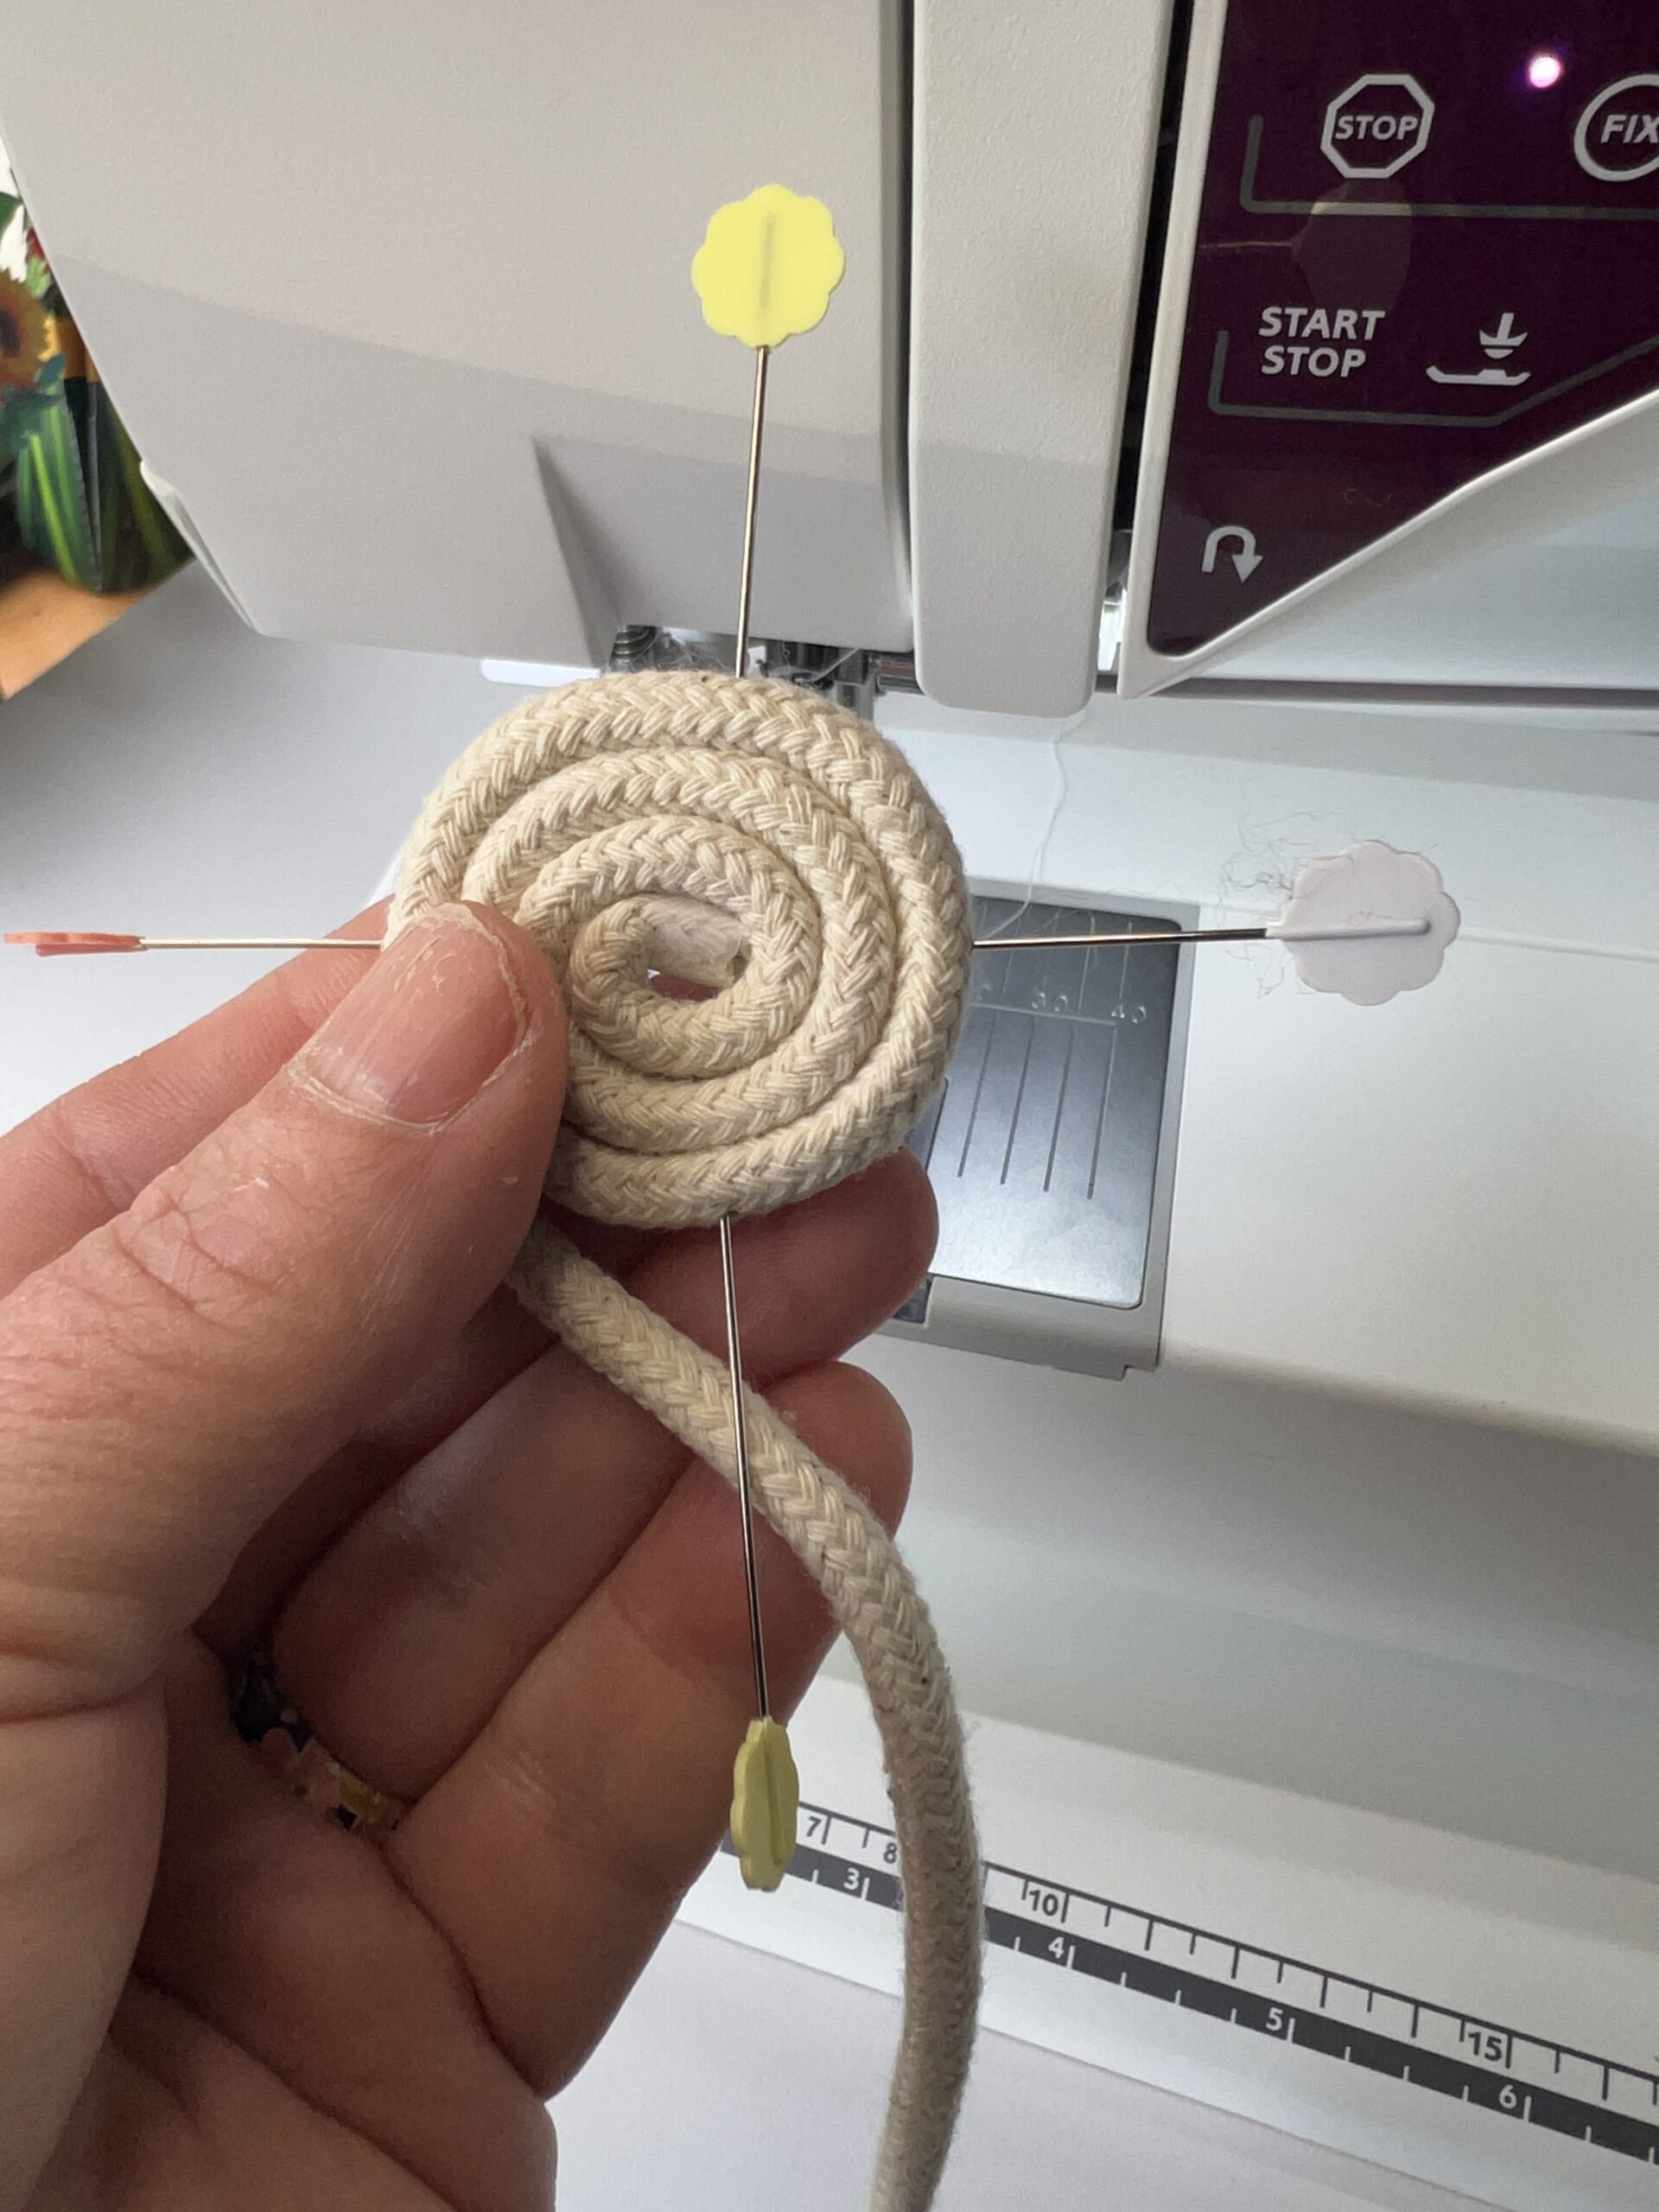
Tuck that end in tight upon itself to begin creating a spiral shape.
Once you’ve wound about 4 rows, pin that all together with pins to hold it in place while you stitch.
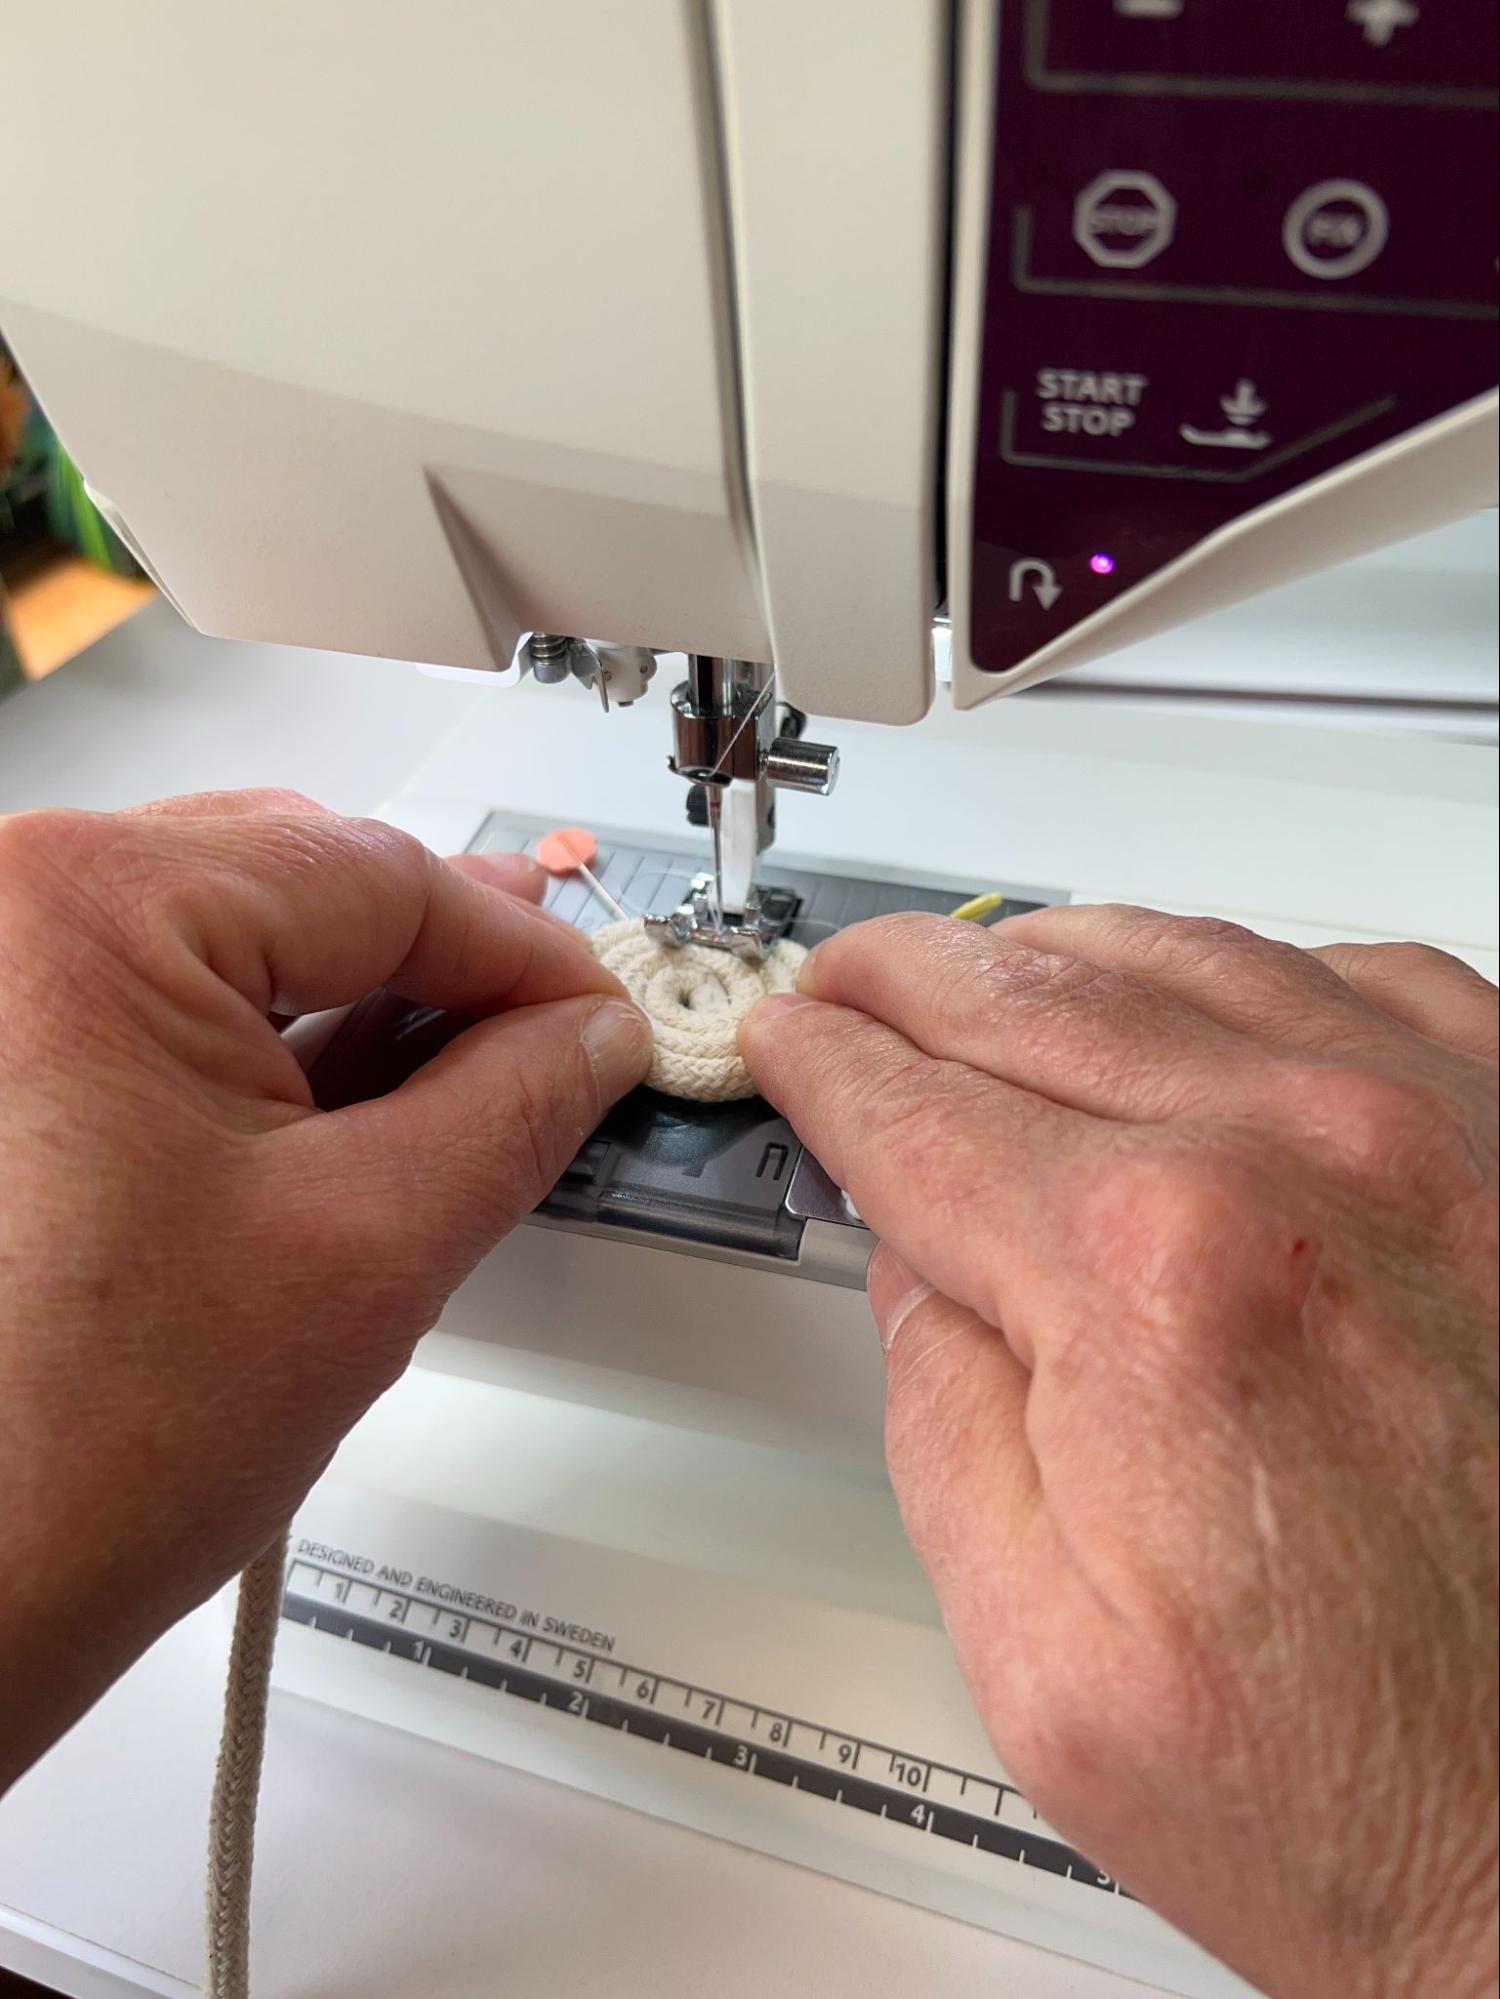
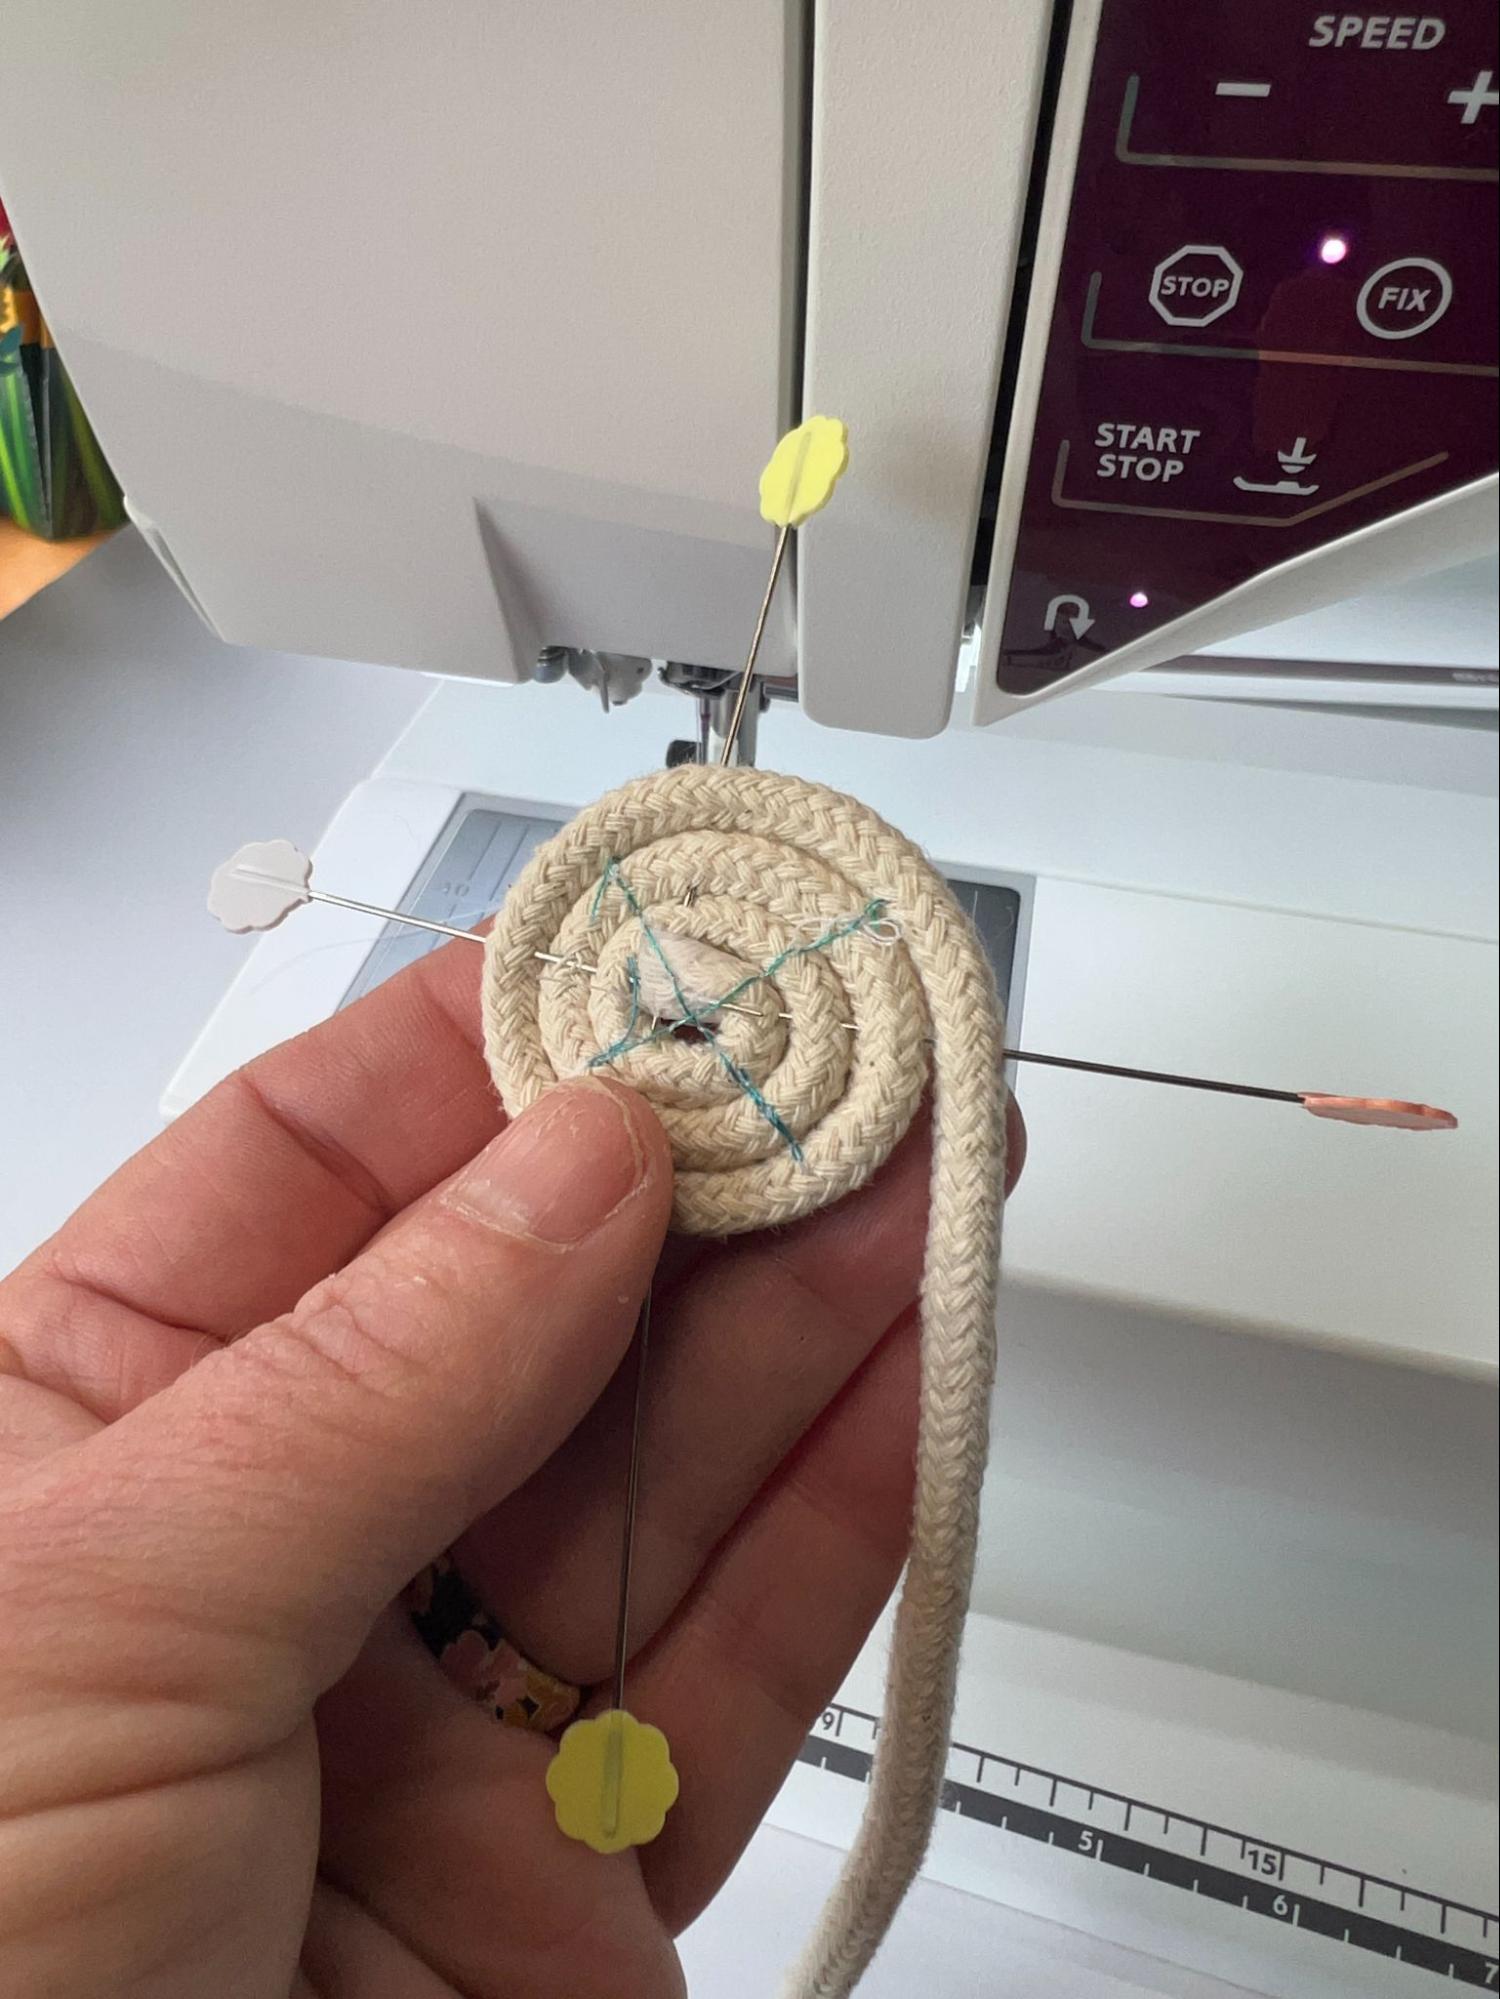
At your sewing machine, using a straight stitch, start sewing on the third row. Sew through the middle, to the opposite side, ending at the third row on the opposite side of the spiral, being careful not to hit any of the pins. Rotate the spiral 90 degrees and repeat this process, creating an “X” that will hold the spiral in place.
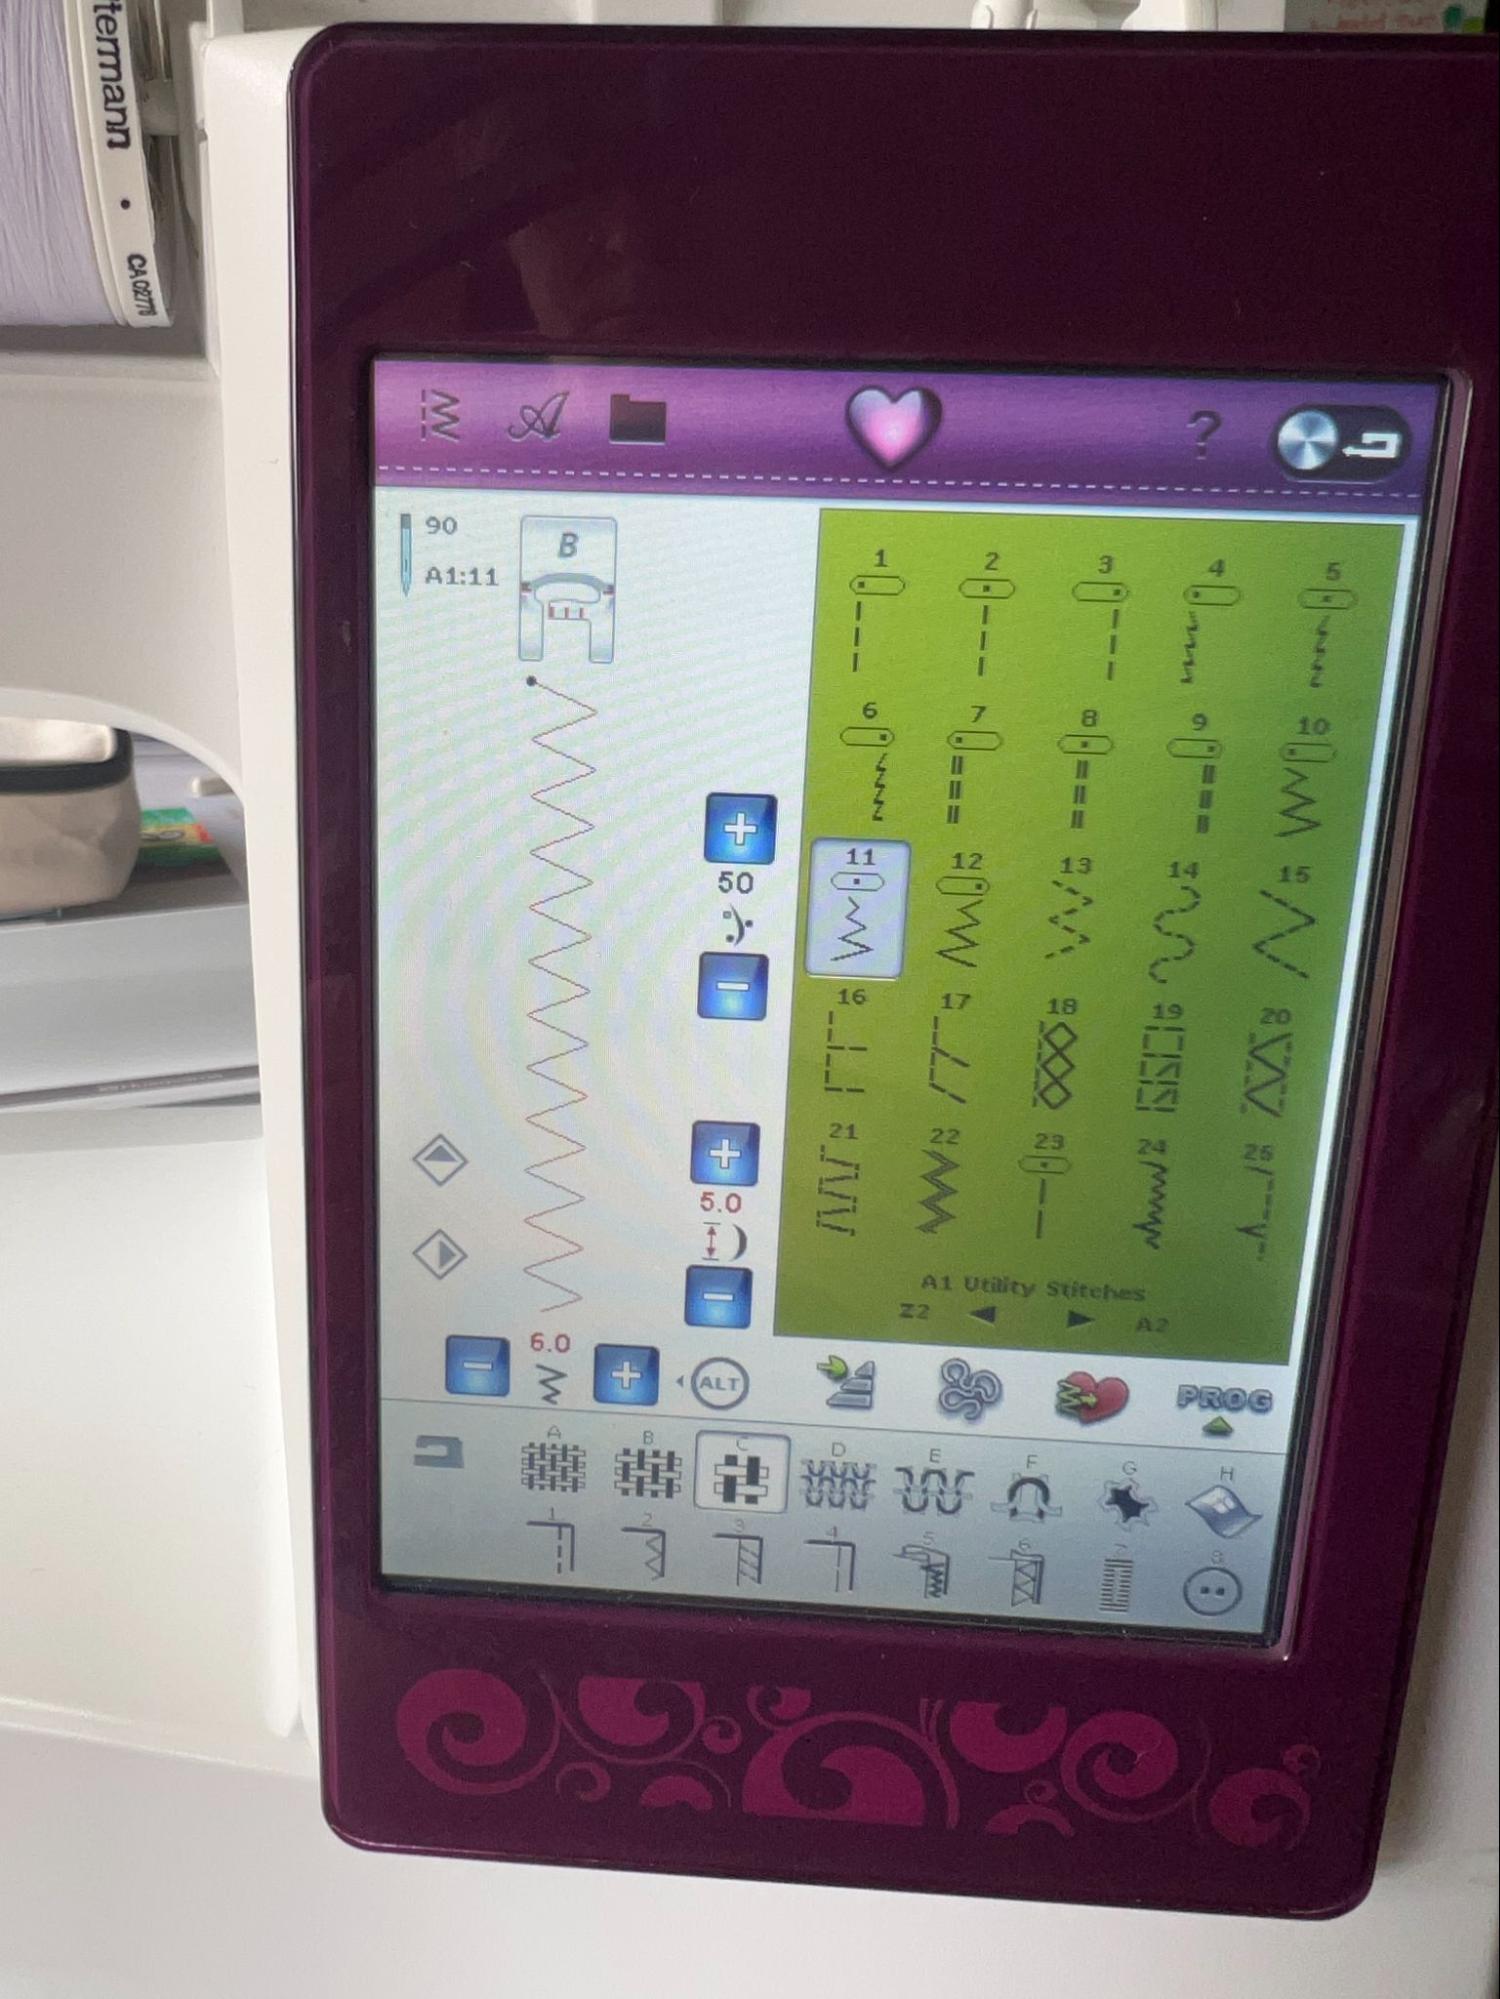
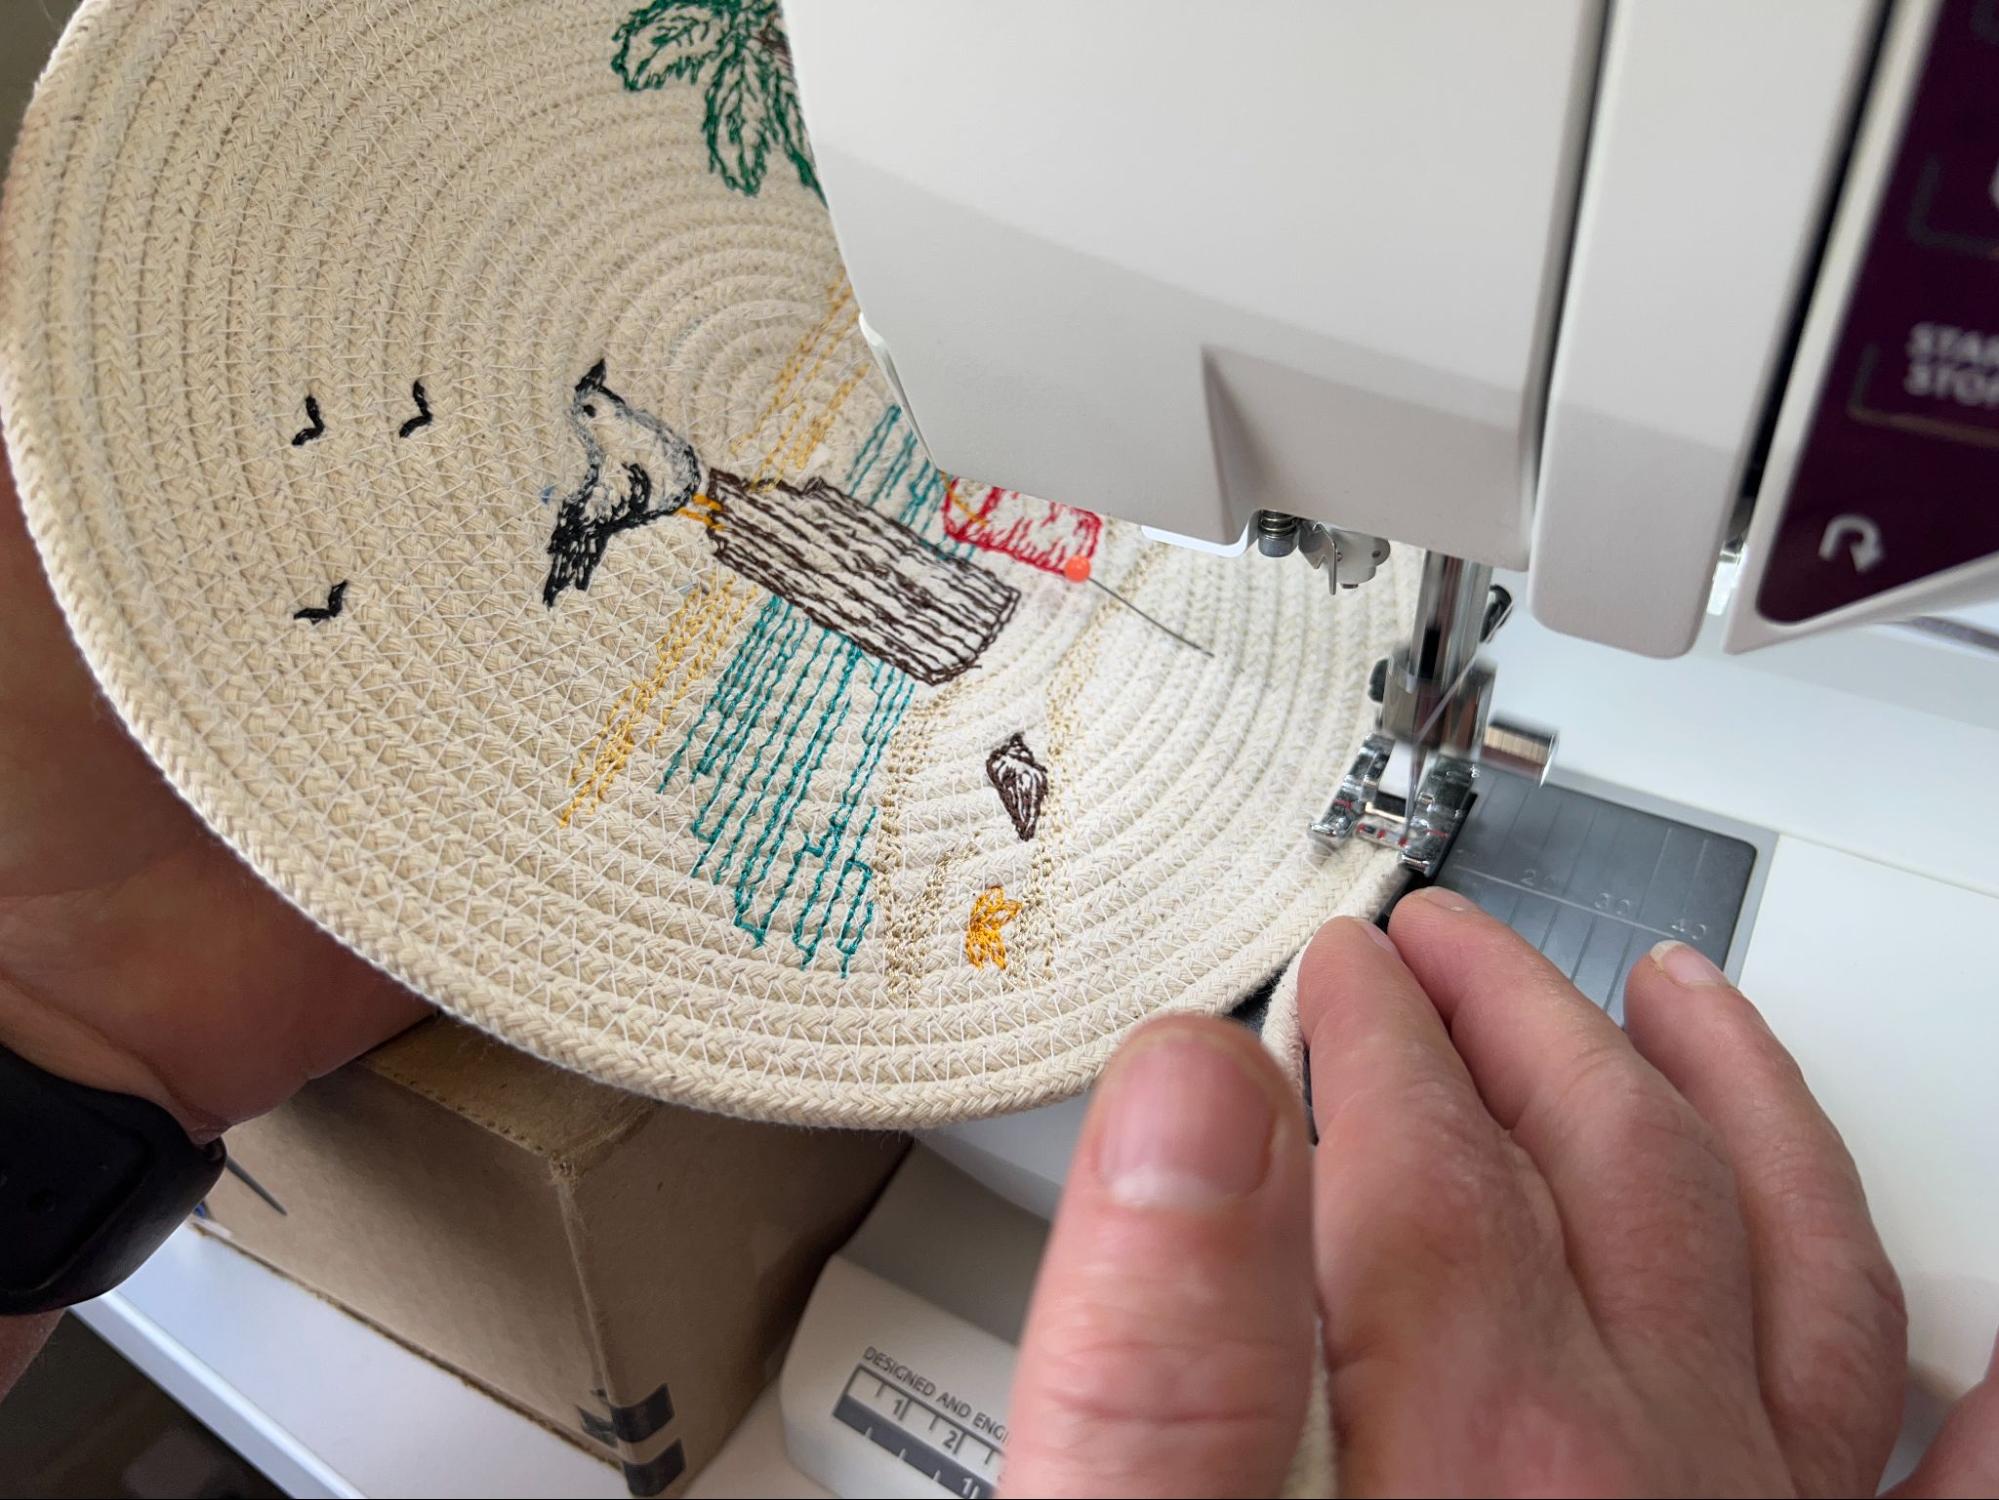
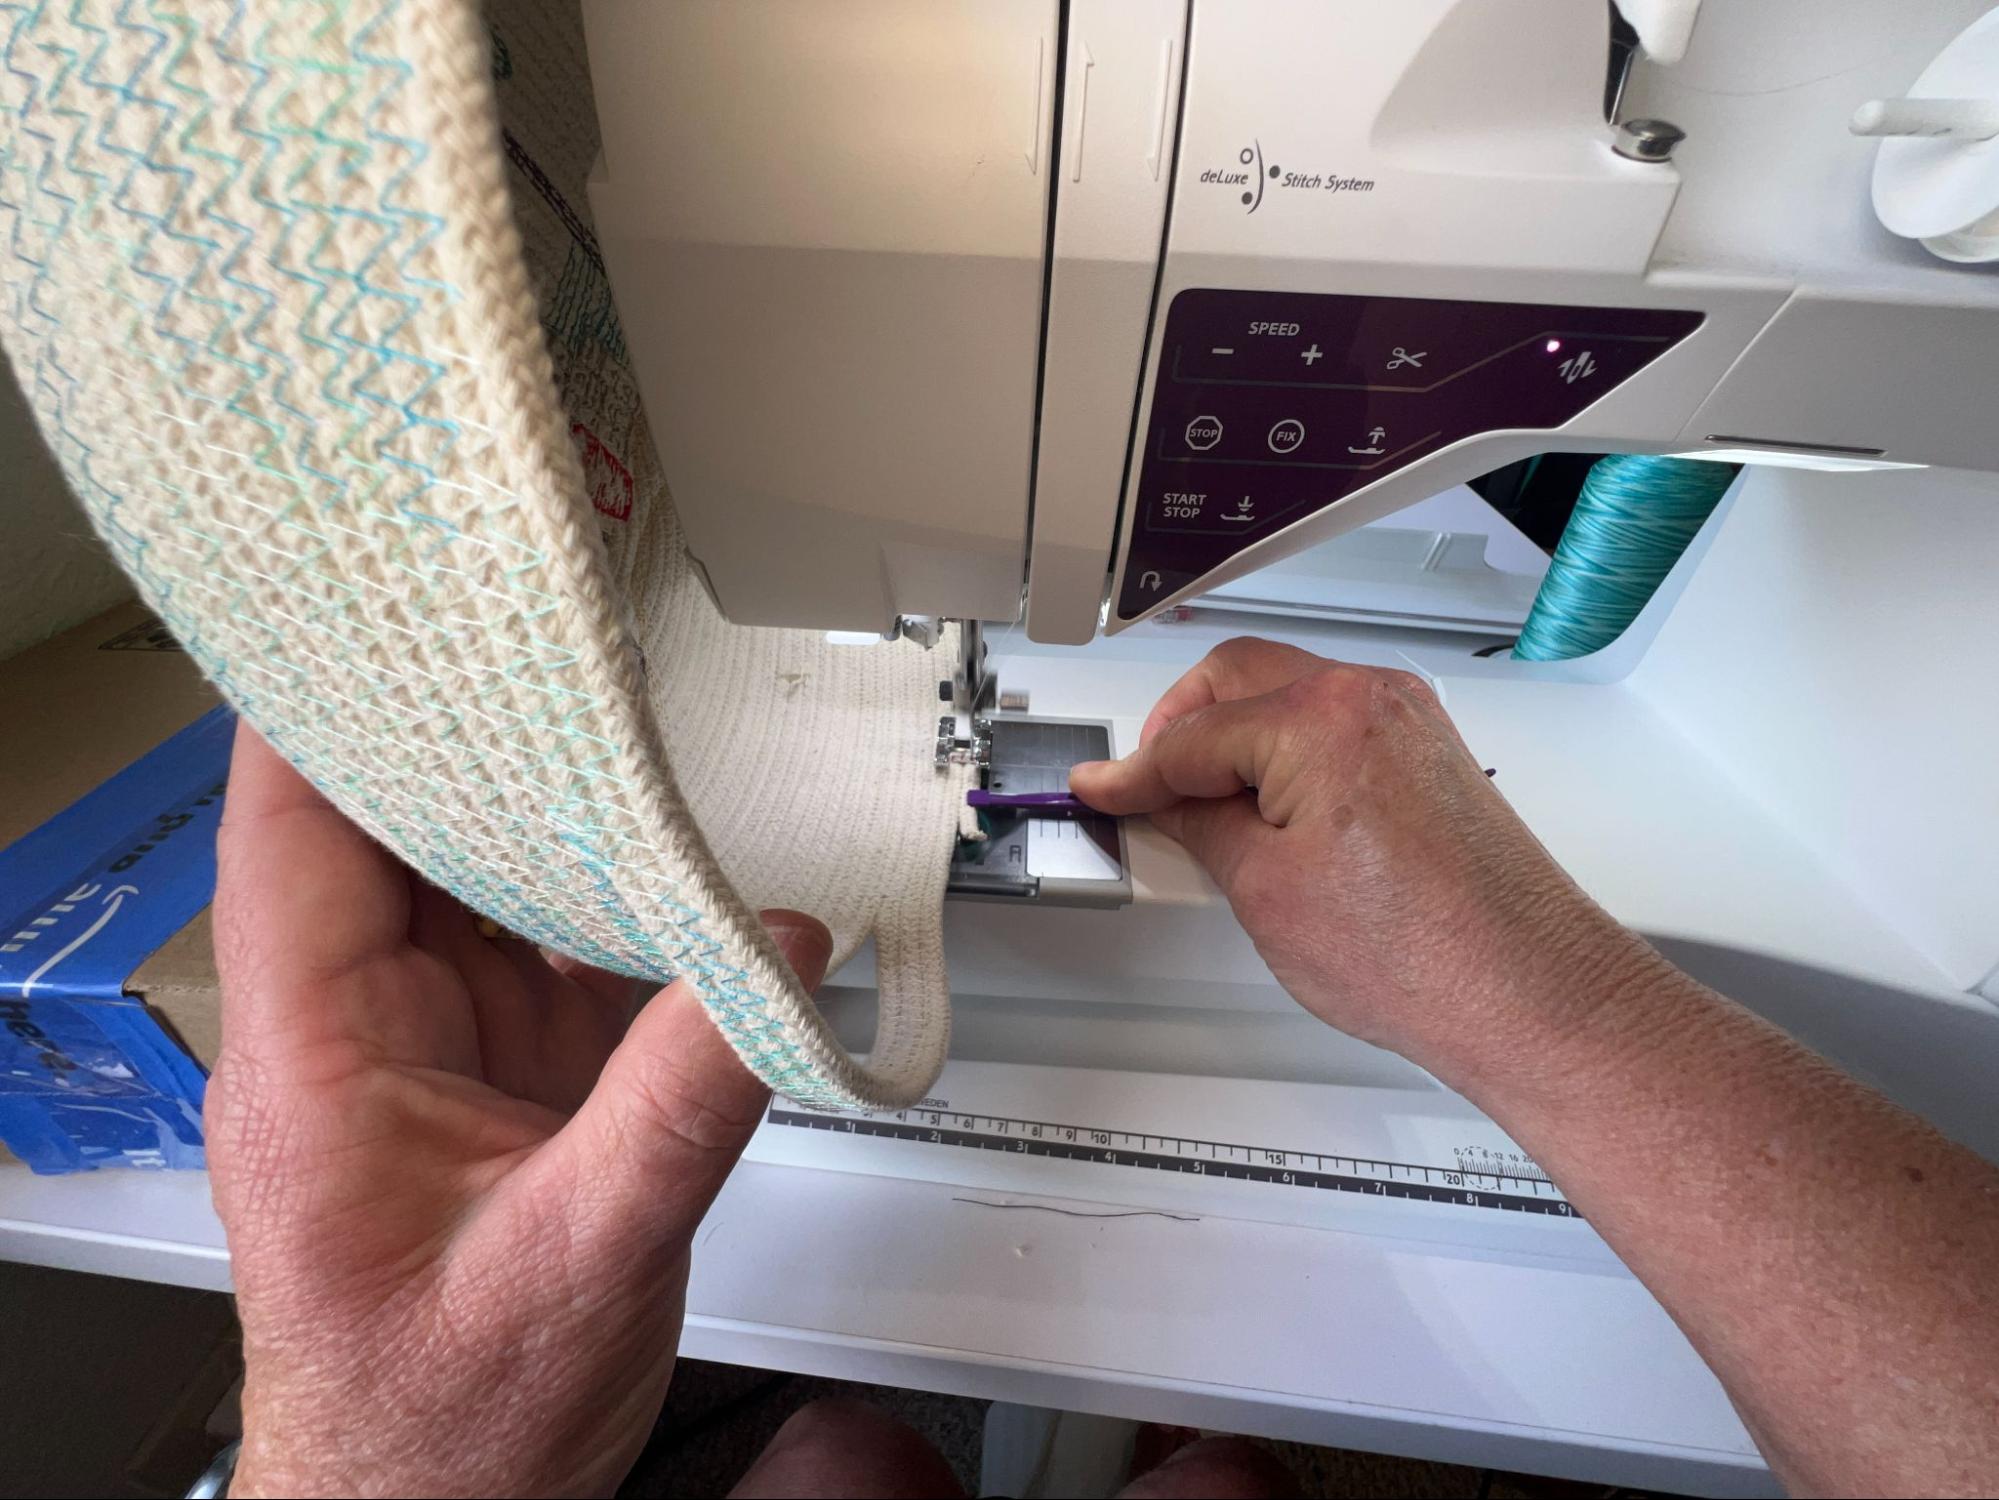
Set a wide zigzag stitch on your sewing machine. I used a width of 6 and a length of 5 for this project. Decreasing the length of the stitch will result in more dense decorative stitches if you’re using variegated thread in your bobbin.
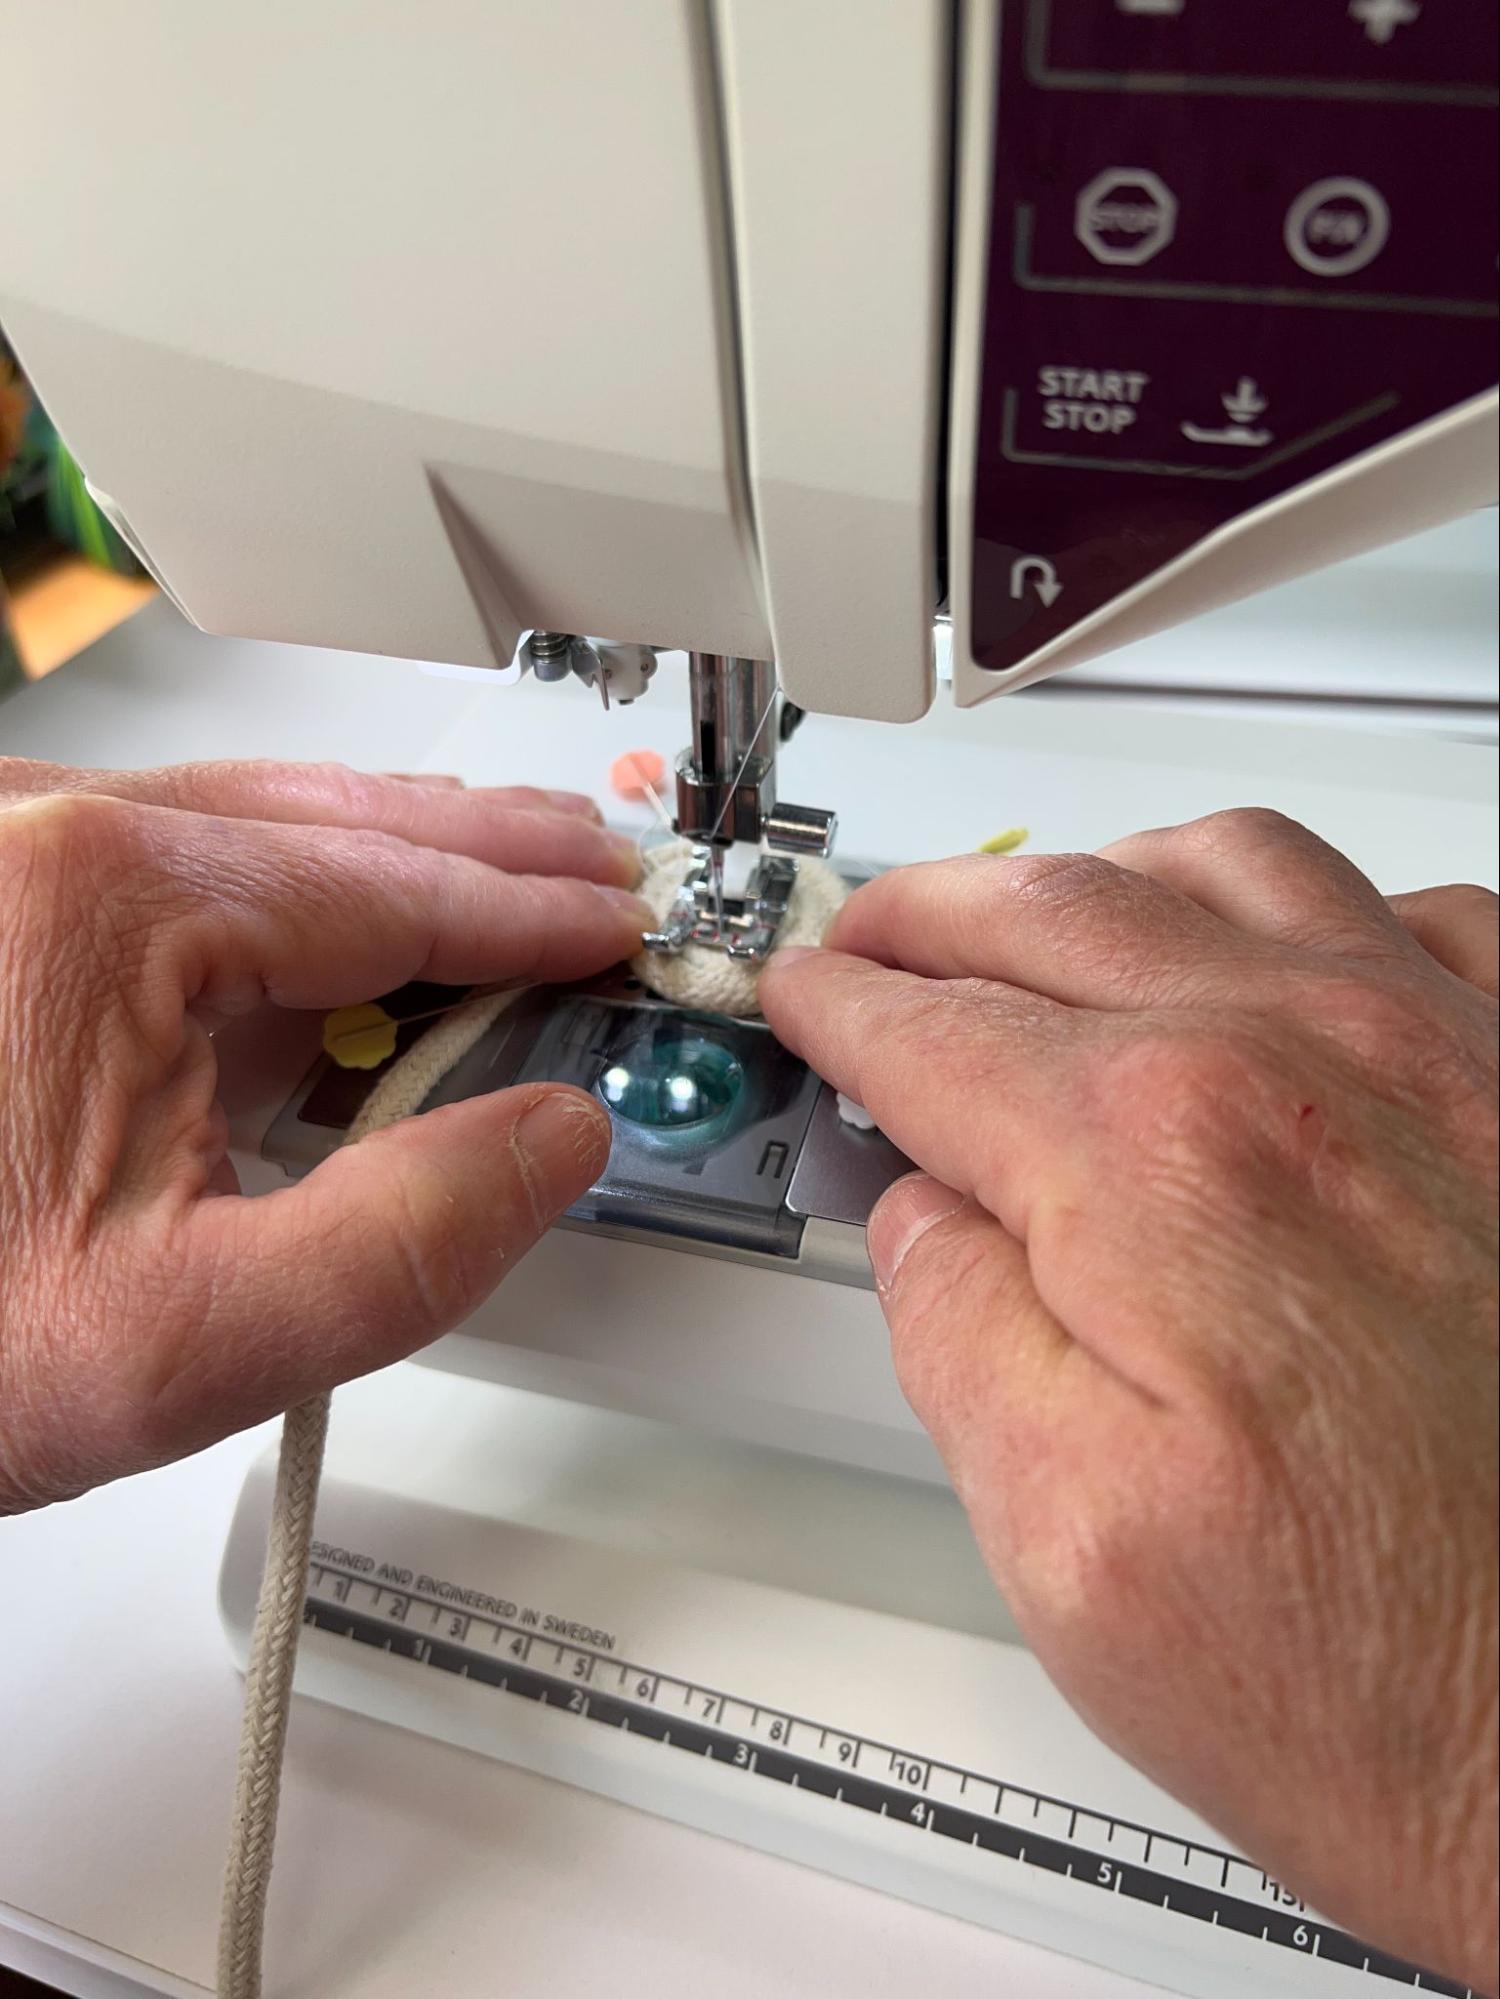
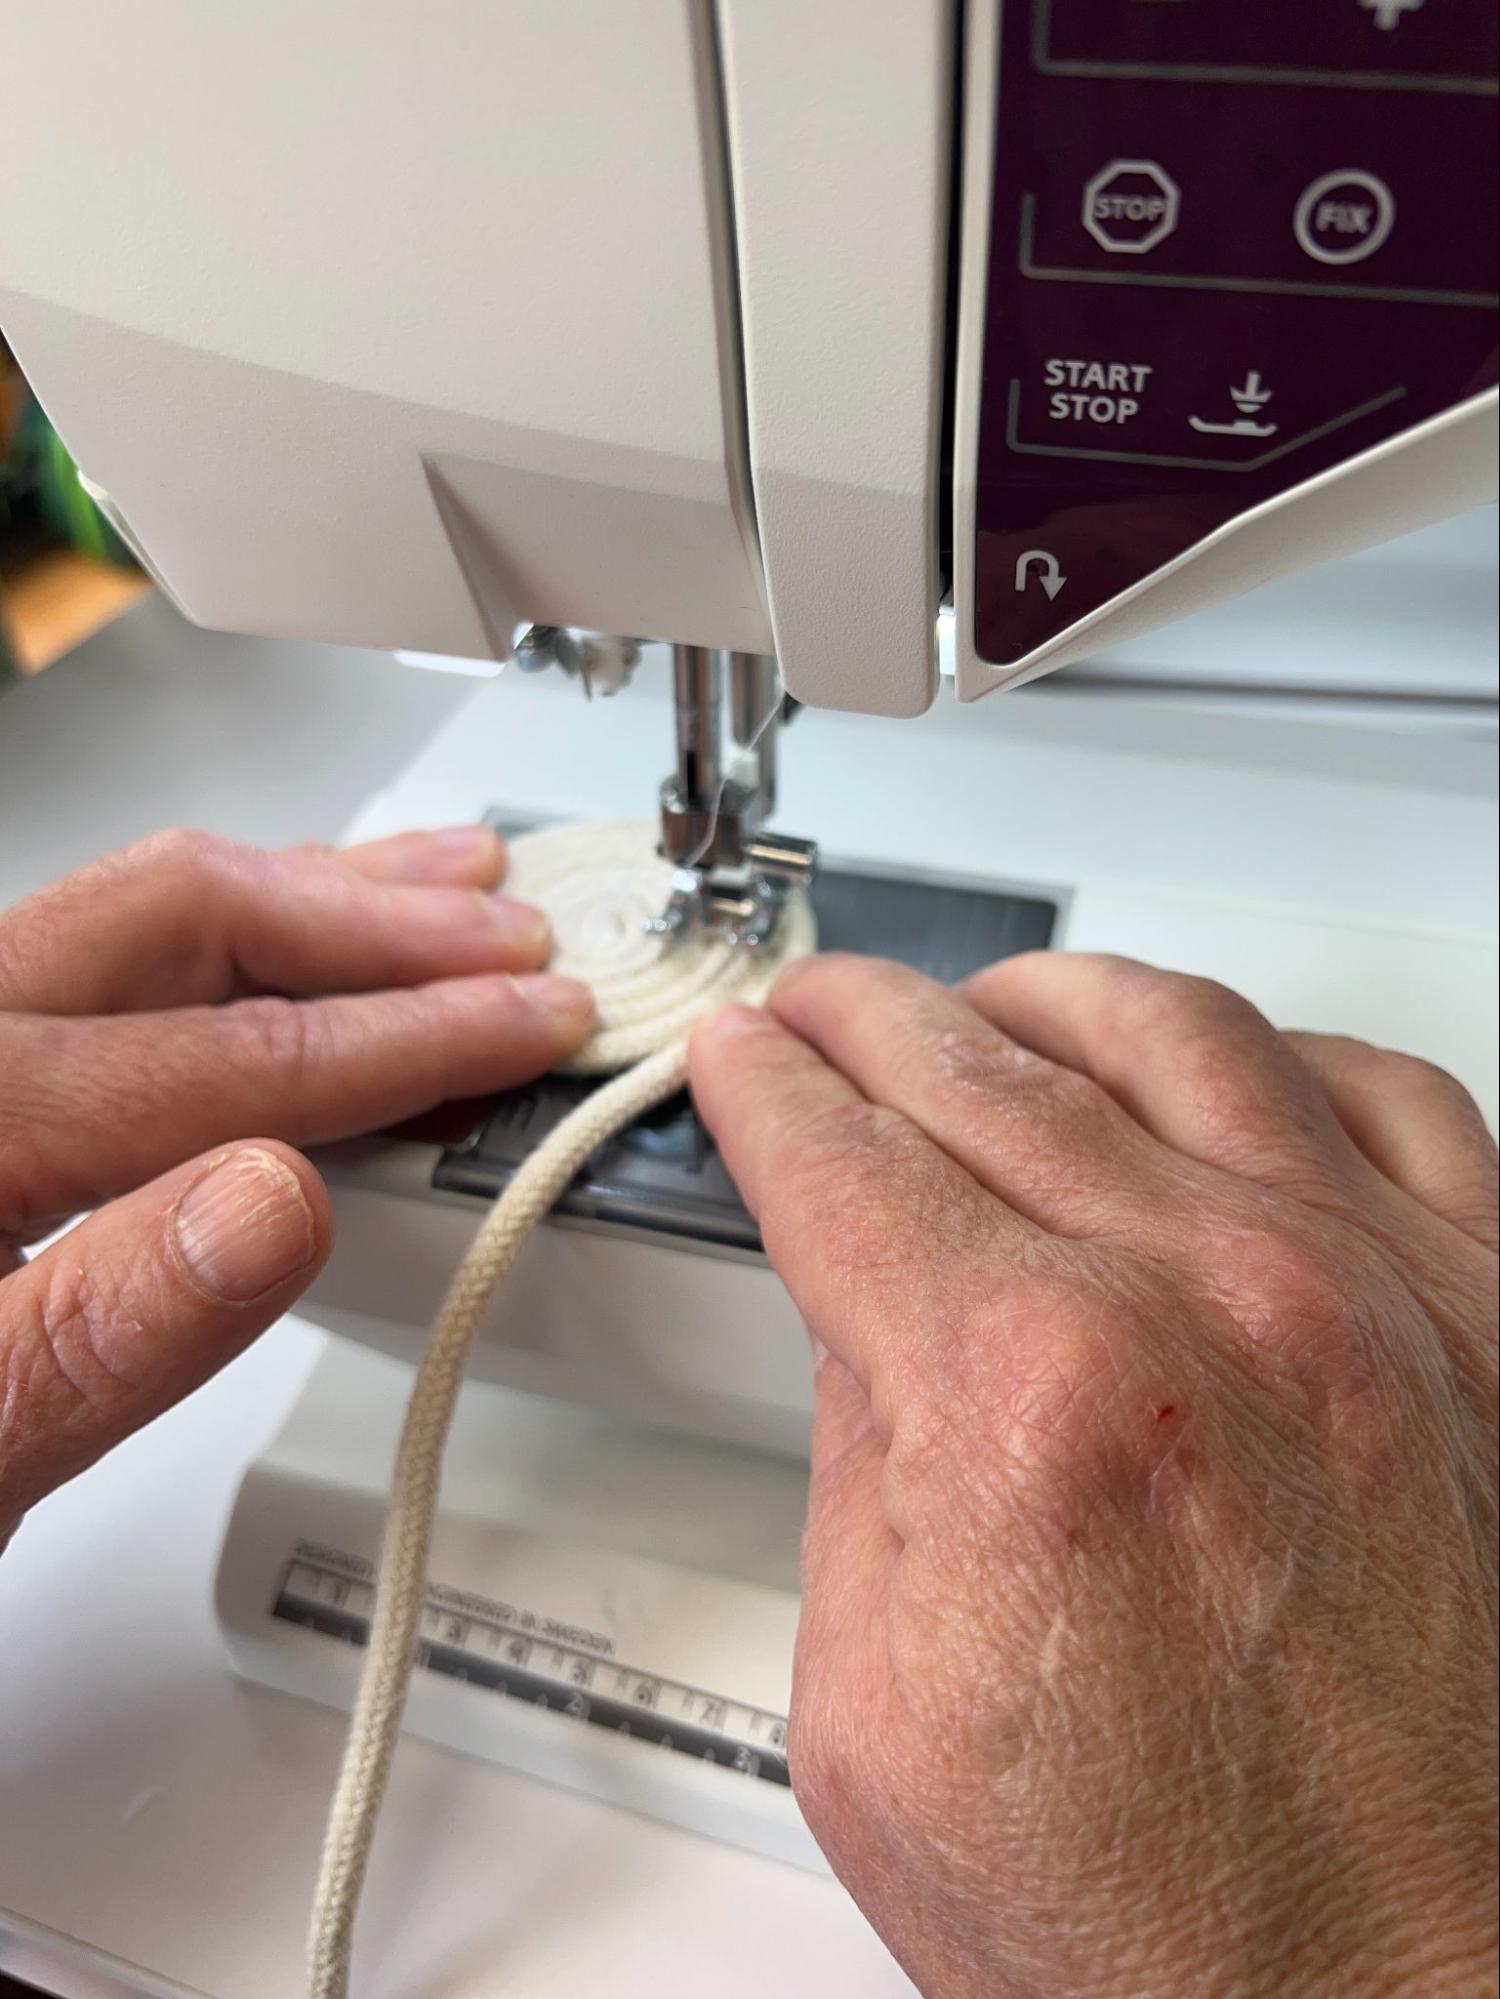
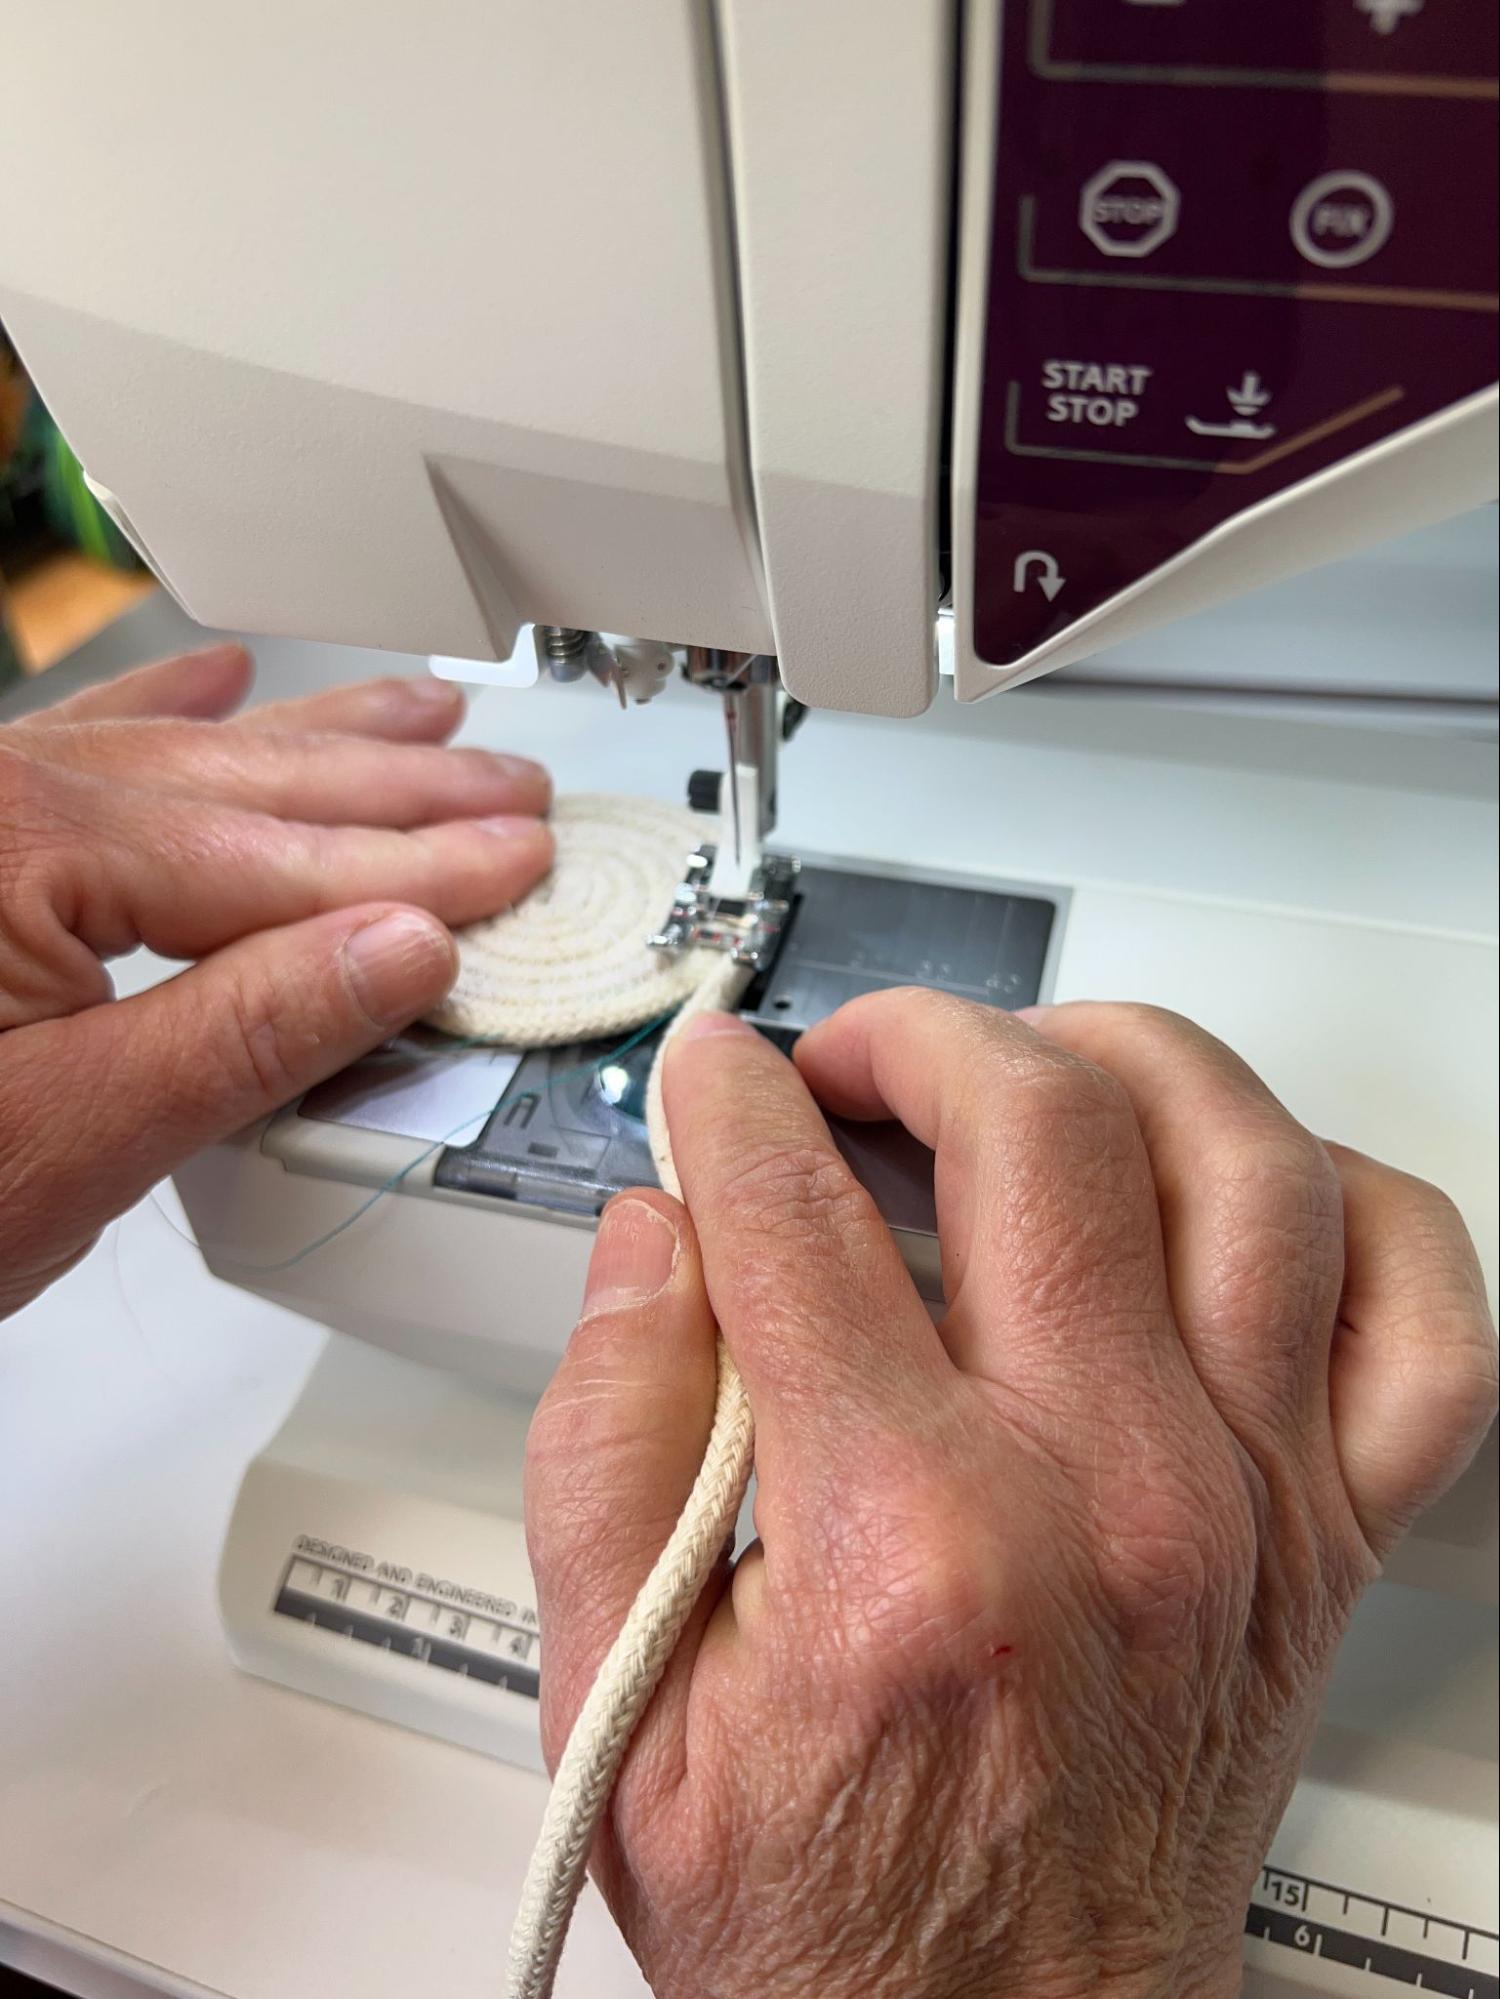
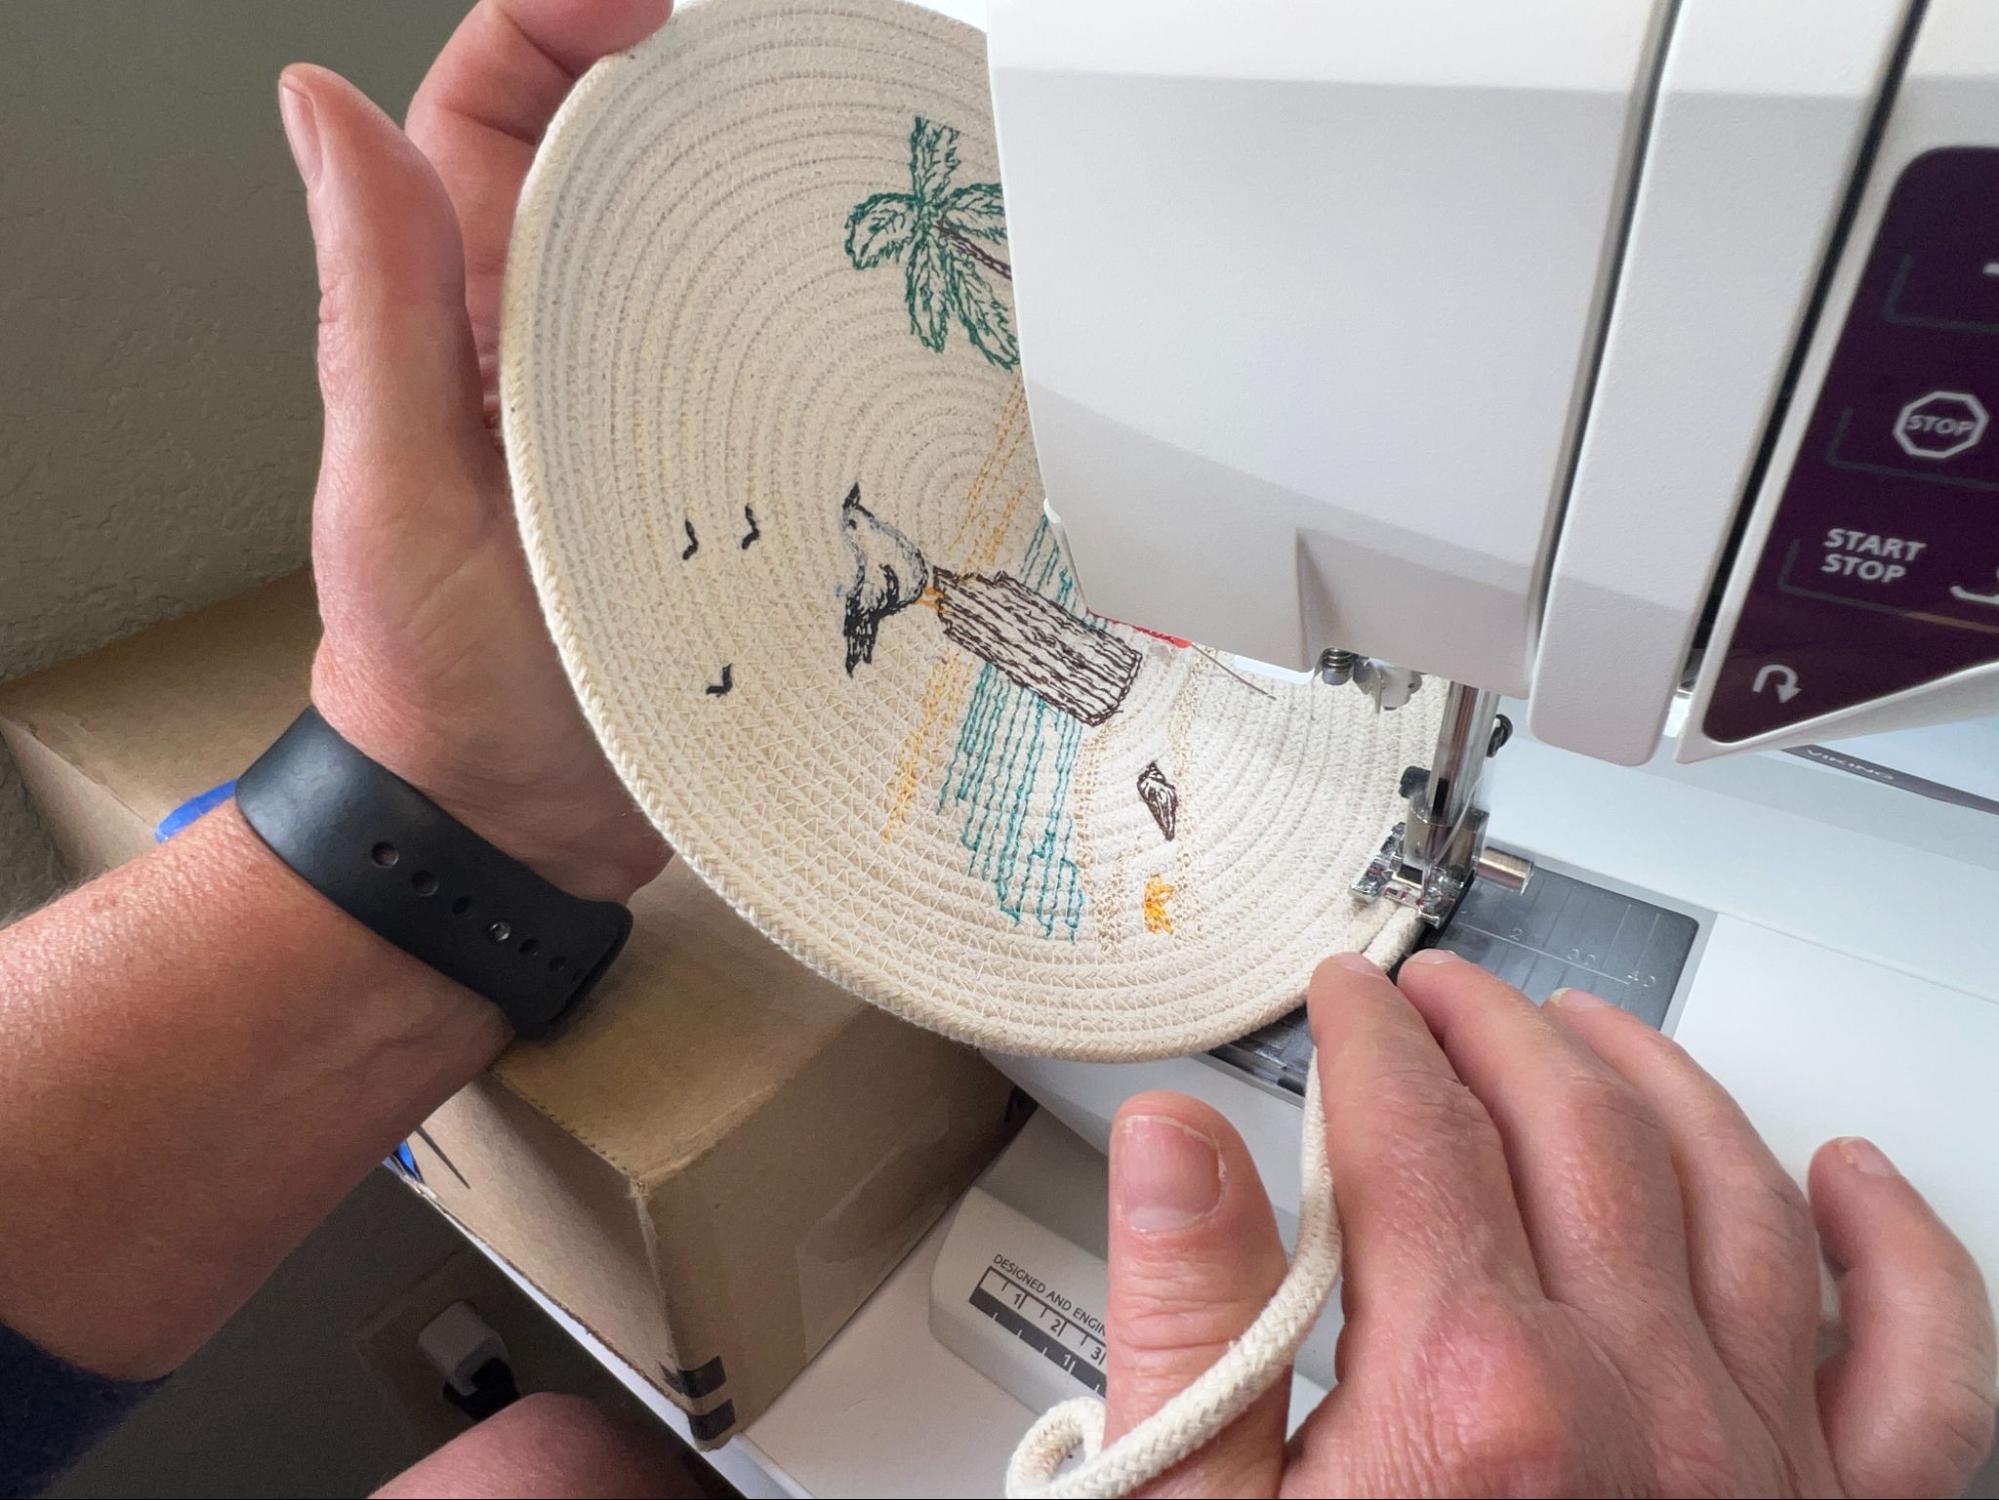
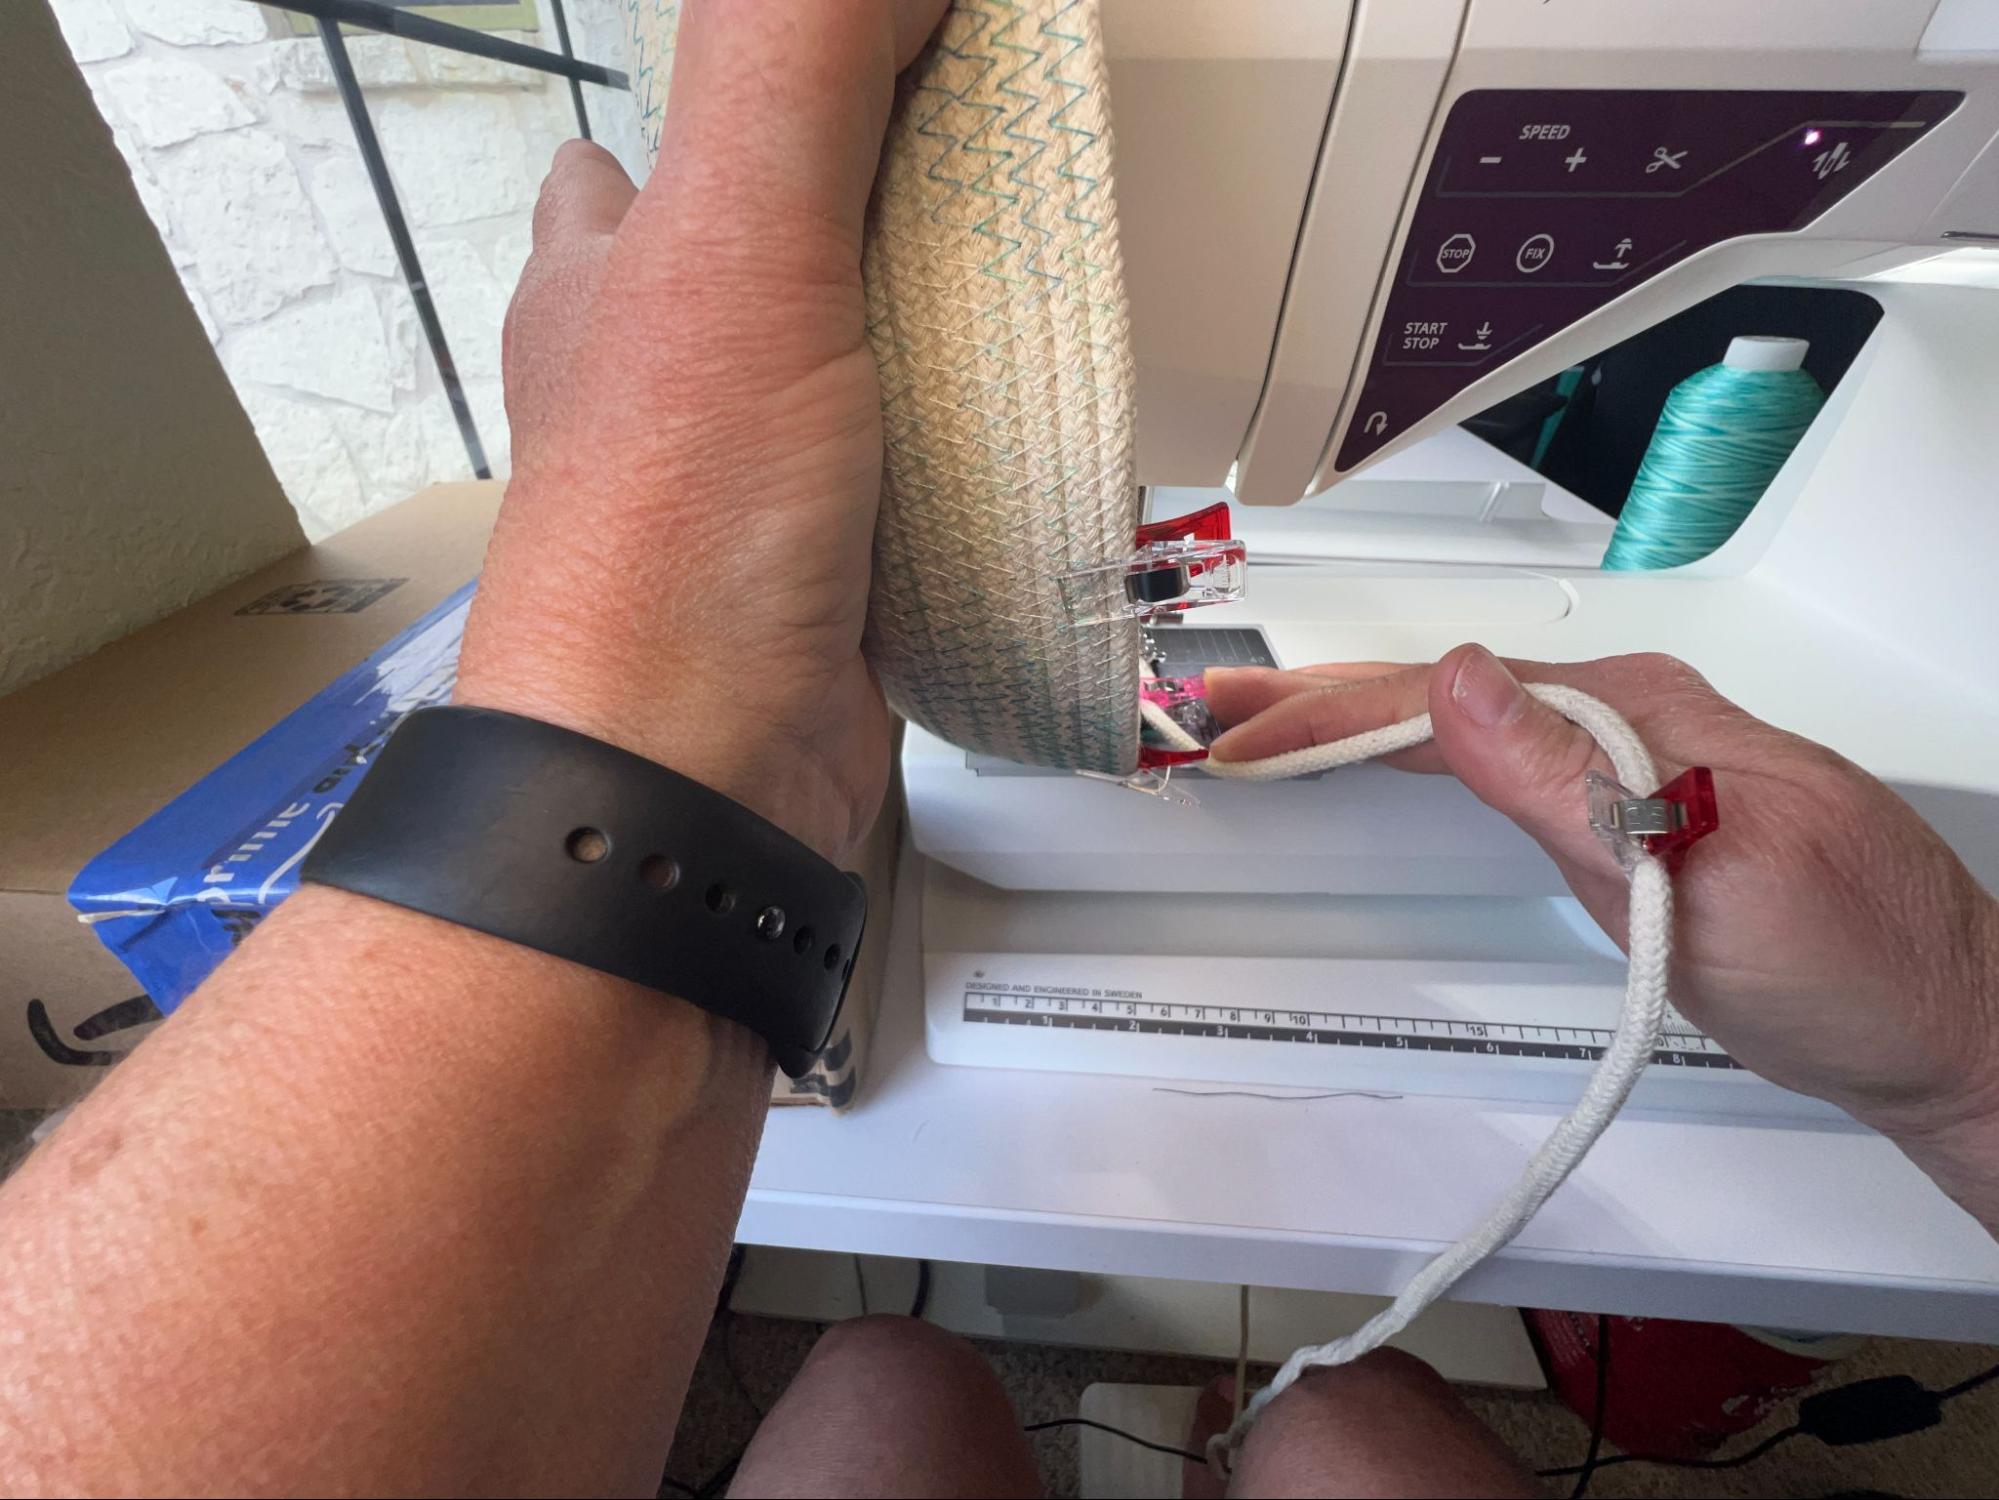
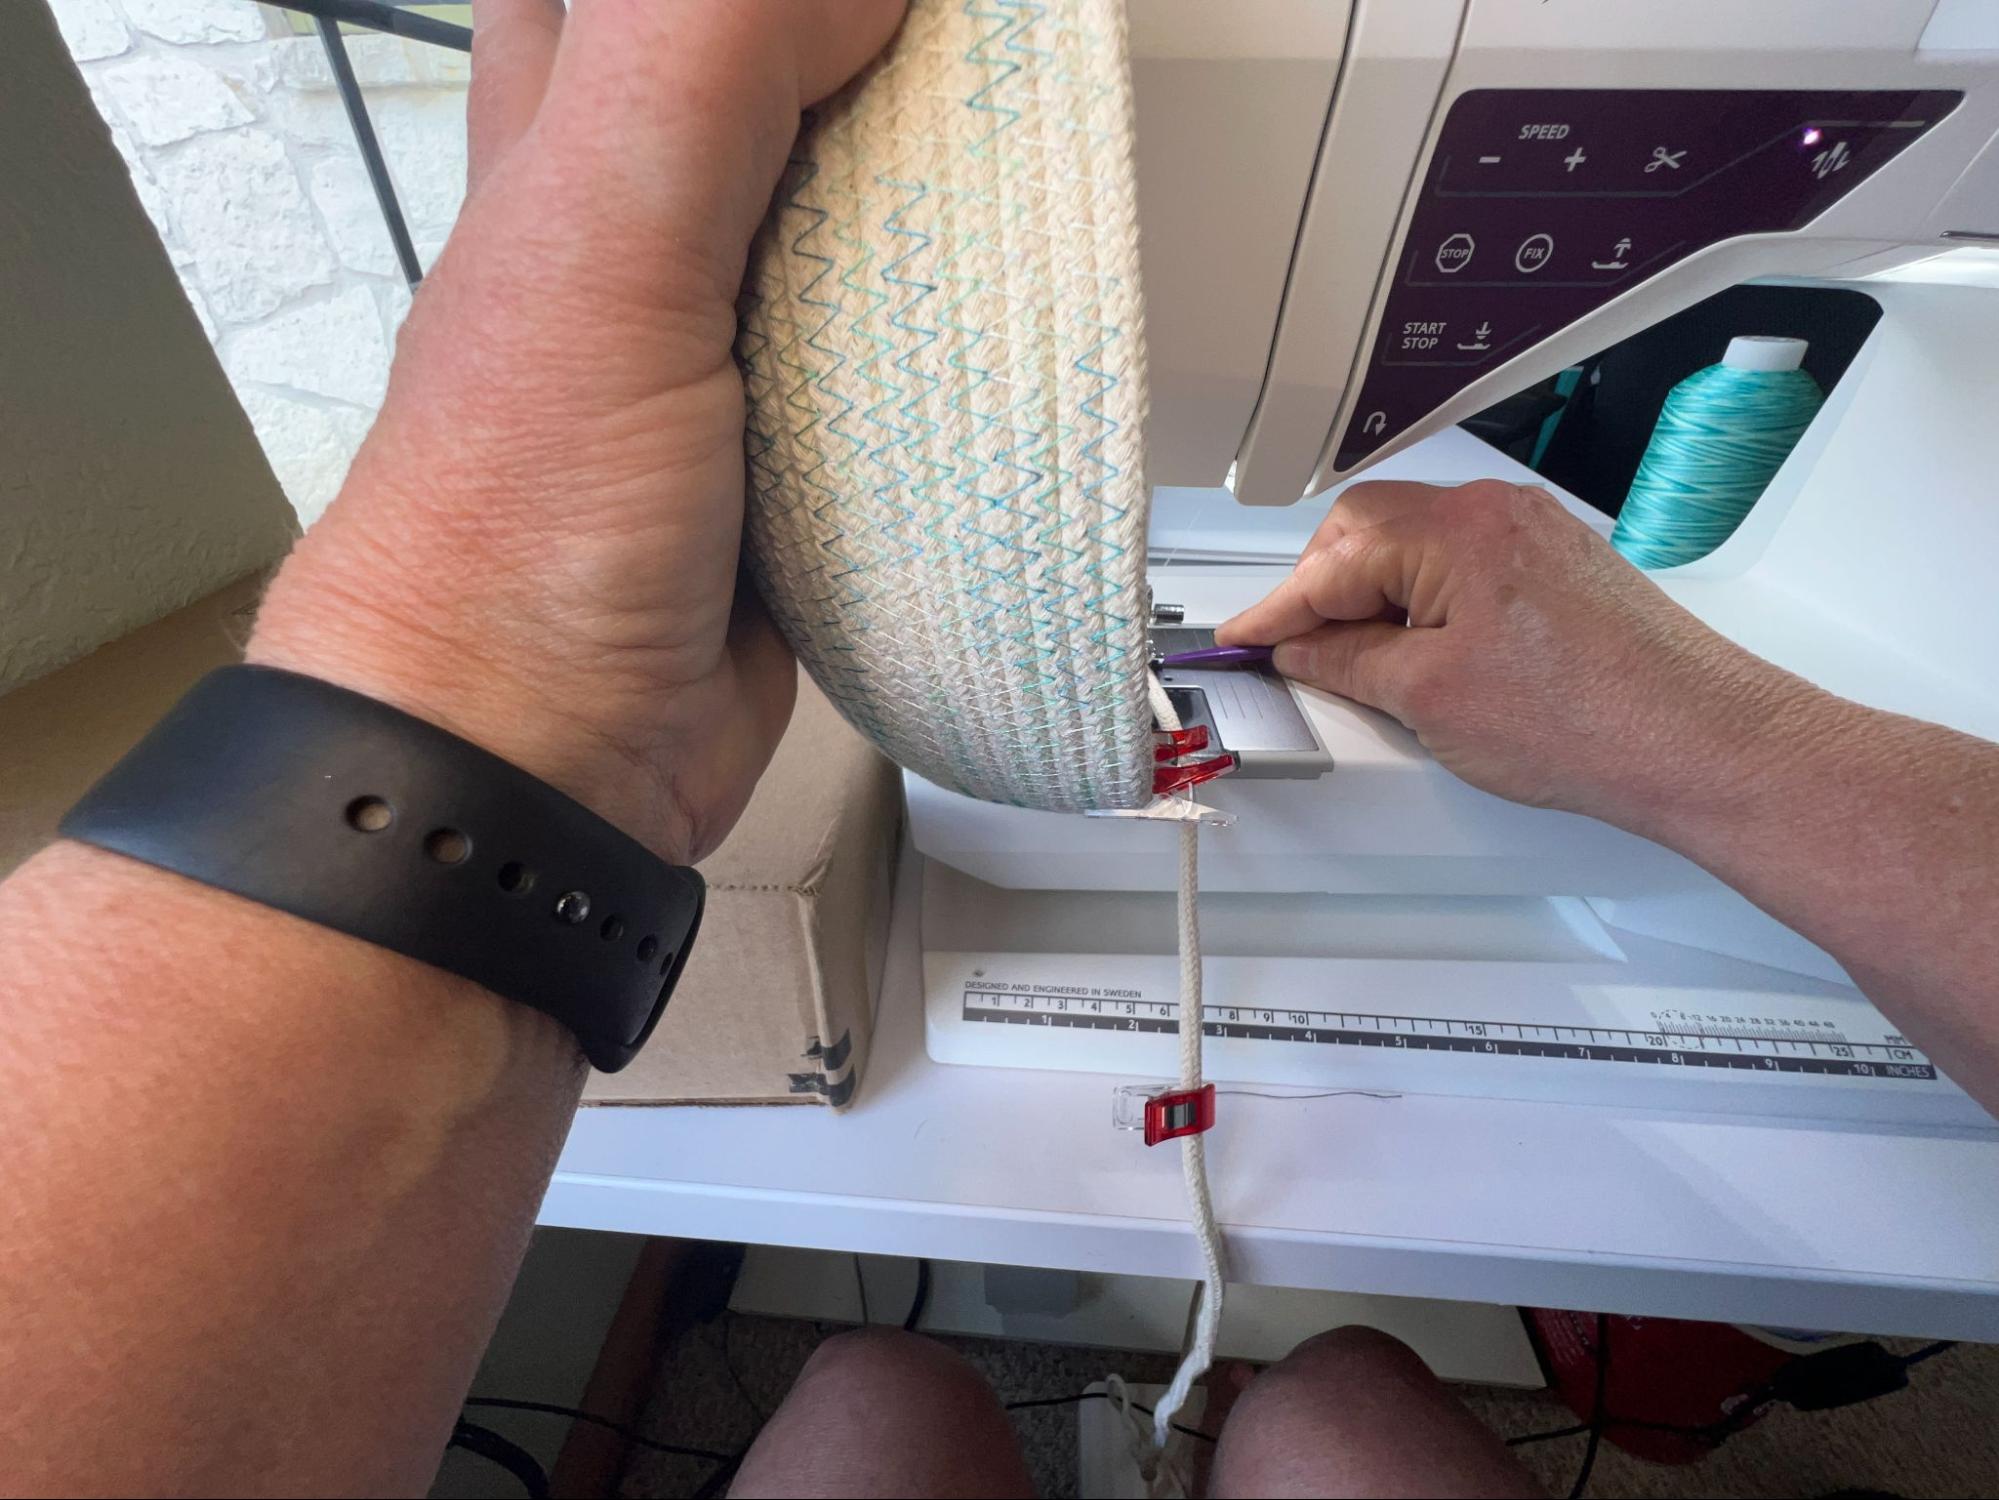
Beginning in the area that’s already secured by the previous stitches, use the center of your presser foot to line up with the gap between the two rows of rope. Ensure your needle is positioned in the middle of the foot. Begin to zigzag stitch to attach the previous row to the next row.
NOTE: Always have the tail of the rope coming off the right side (wrapping clockwise). Go slowly at first and pivot frequently. If you can set your machine to stop in the needle down position, that’s really handy at this point. Use your left hand to apply light counter-clockwise pressure on the spiral, while using your right hand’s thumb to guide the outermost row of rope.
Continue wrapping until the base is the size you desire. I’m making a 7” base for this basket.
NOTE: It’s helpful, if you don’t have an extension table for your sewing machine, to find a box or stack of books about the height of the base of the sewing machine to rest the basket base on as it grows. Keeping the basket base level as you sew is key to it staying nice and flat.

When your basket base is the desired size, backstitch, and remove it from your sewing machine but DO NOT cut the rope.
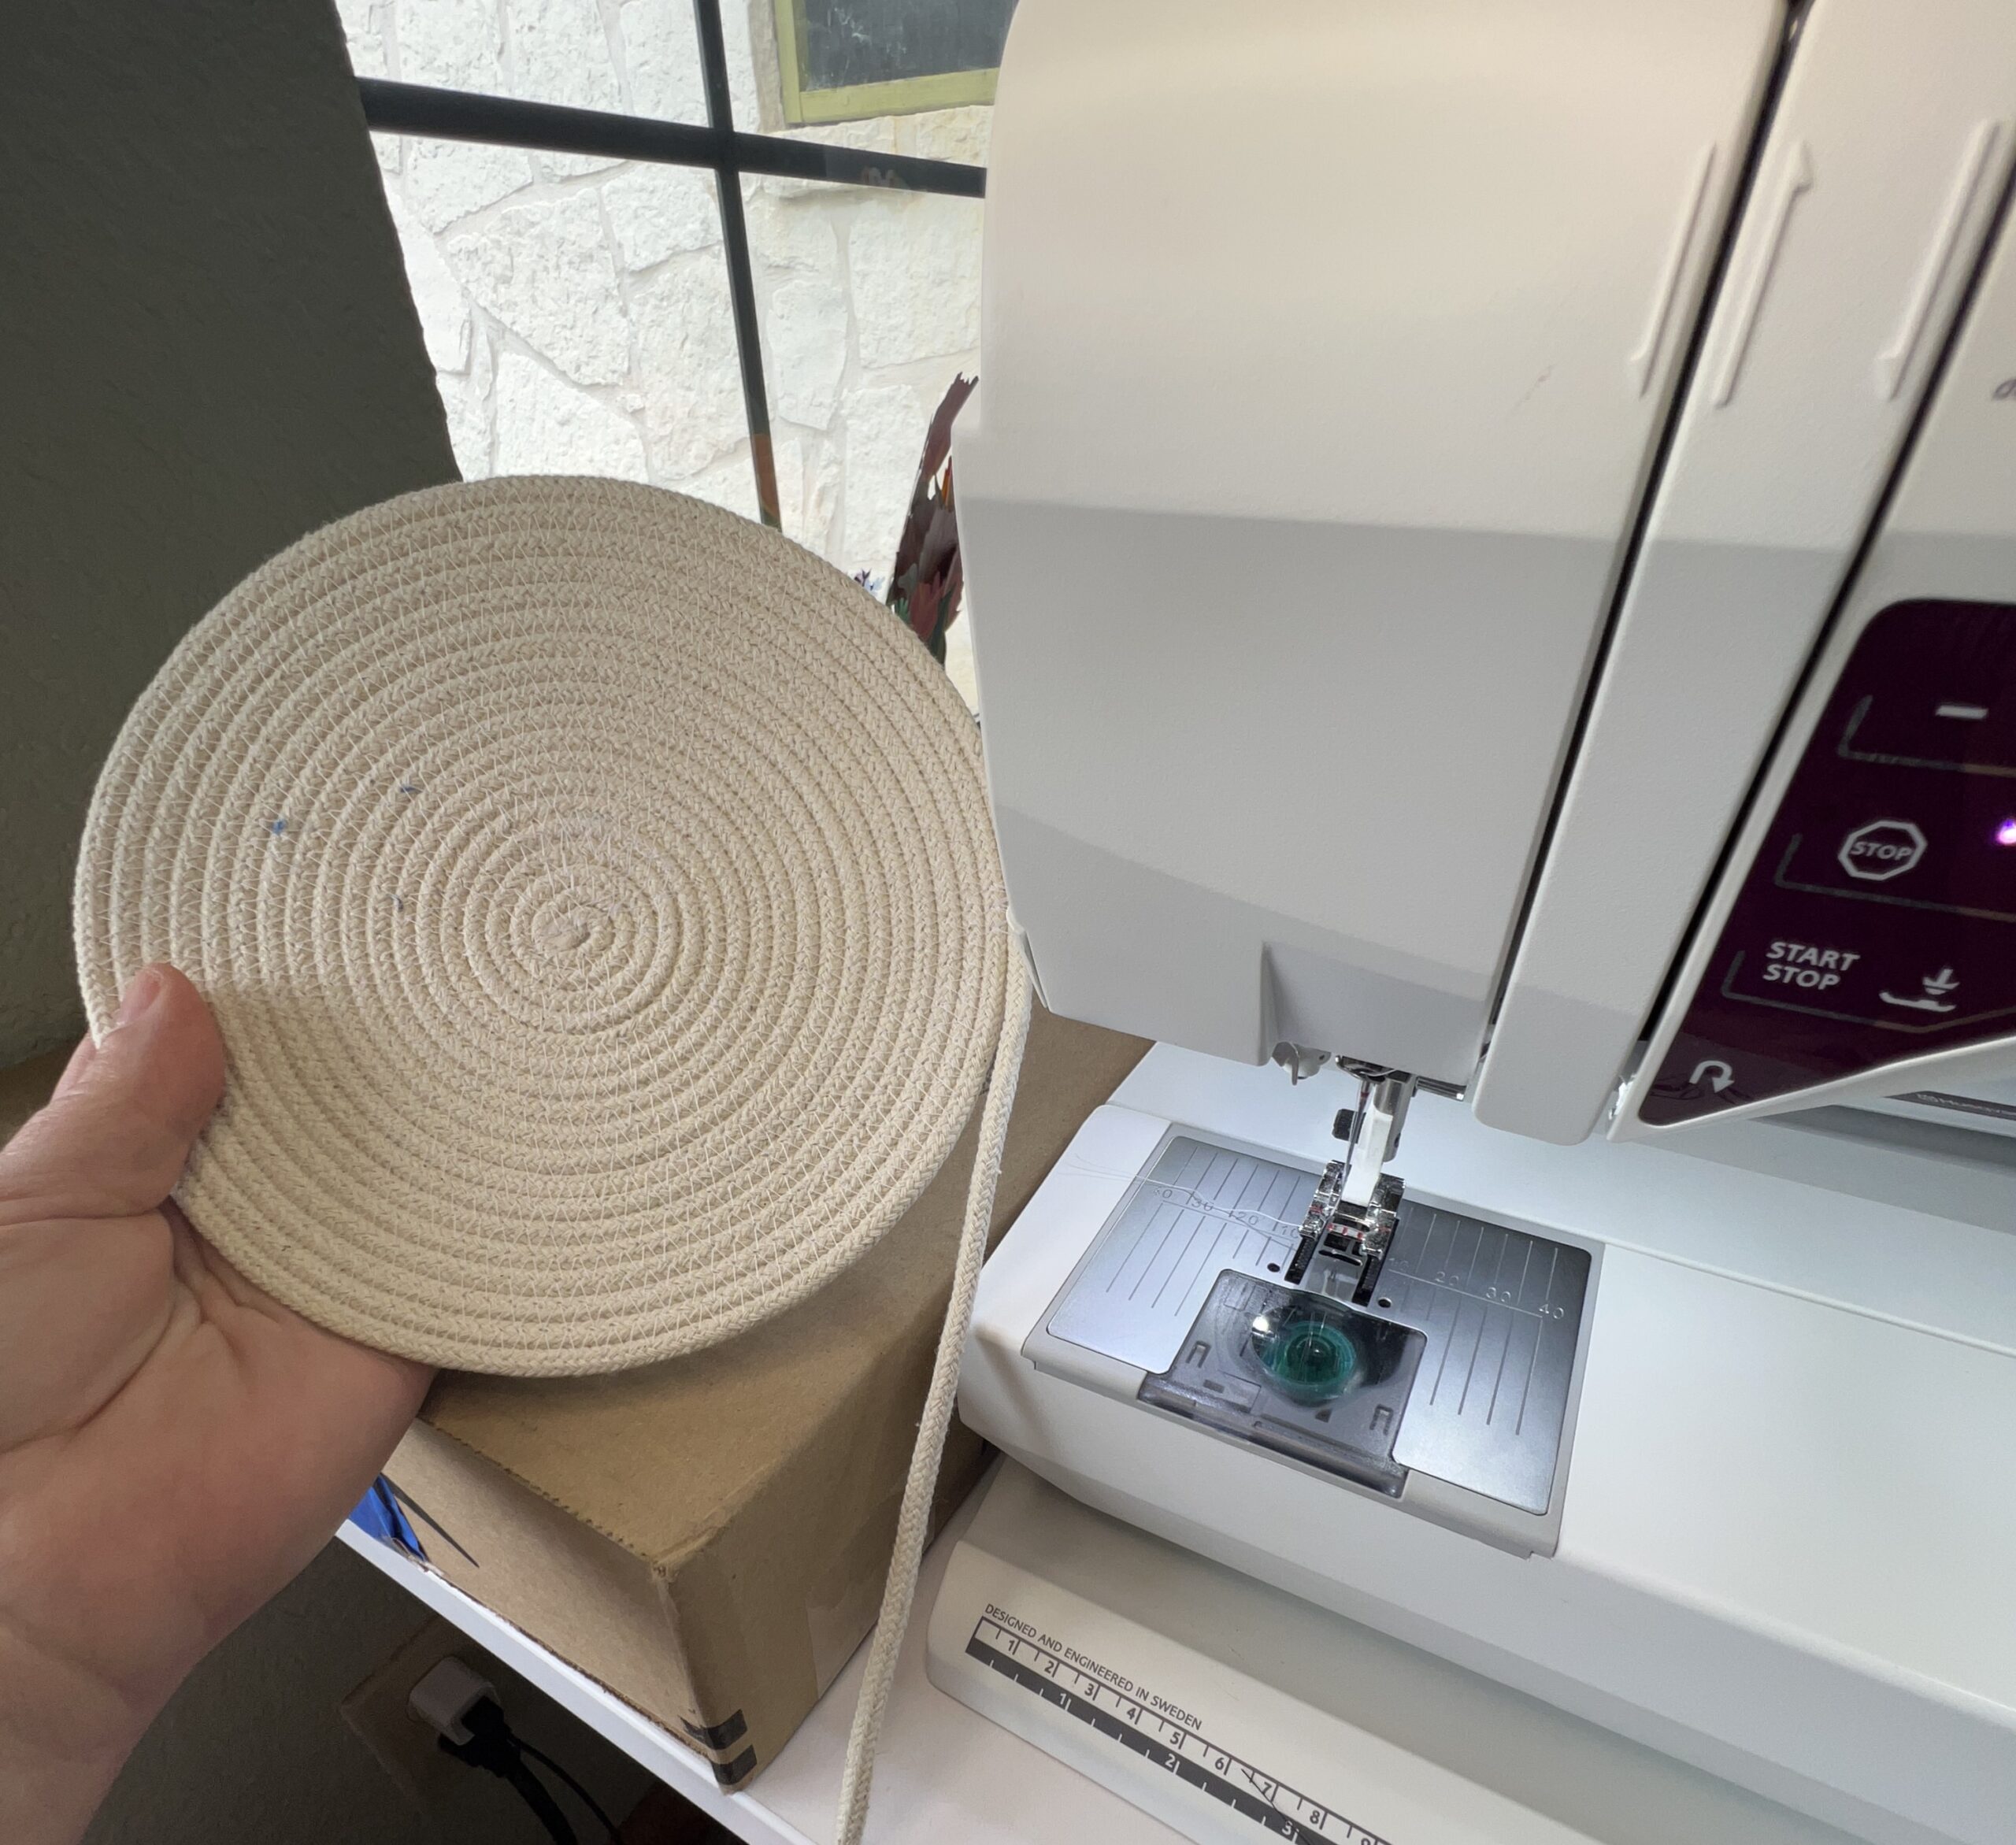
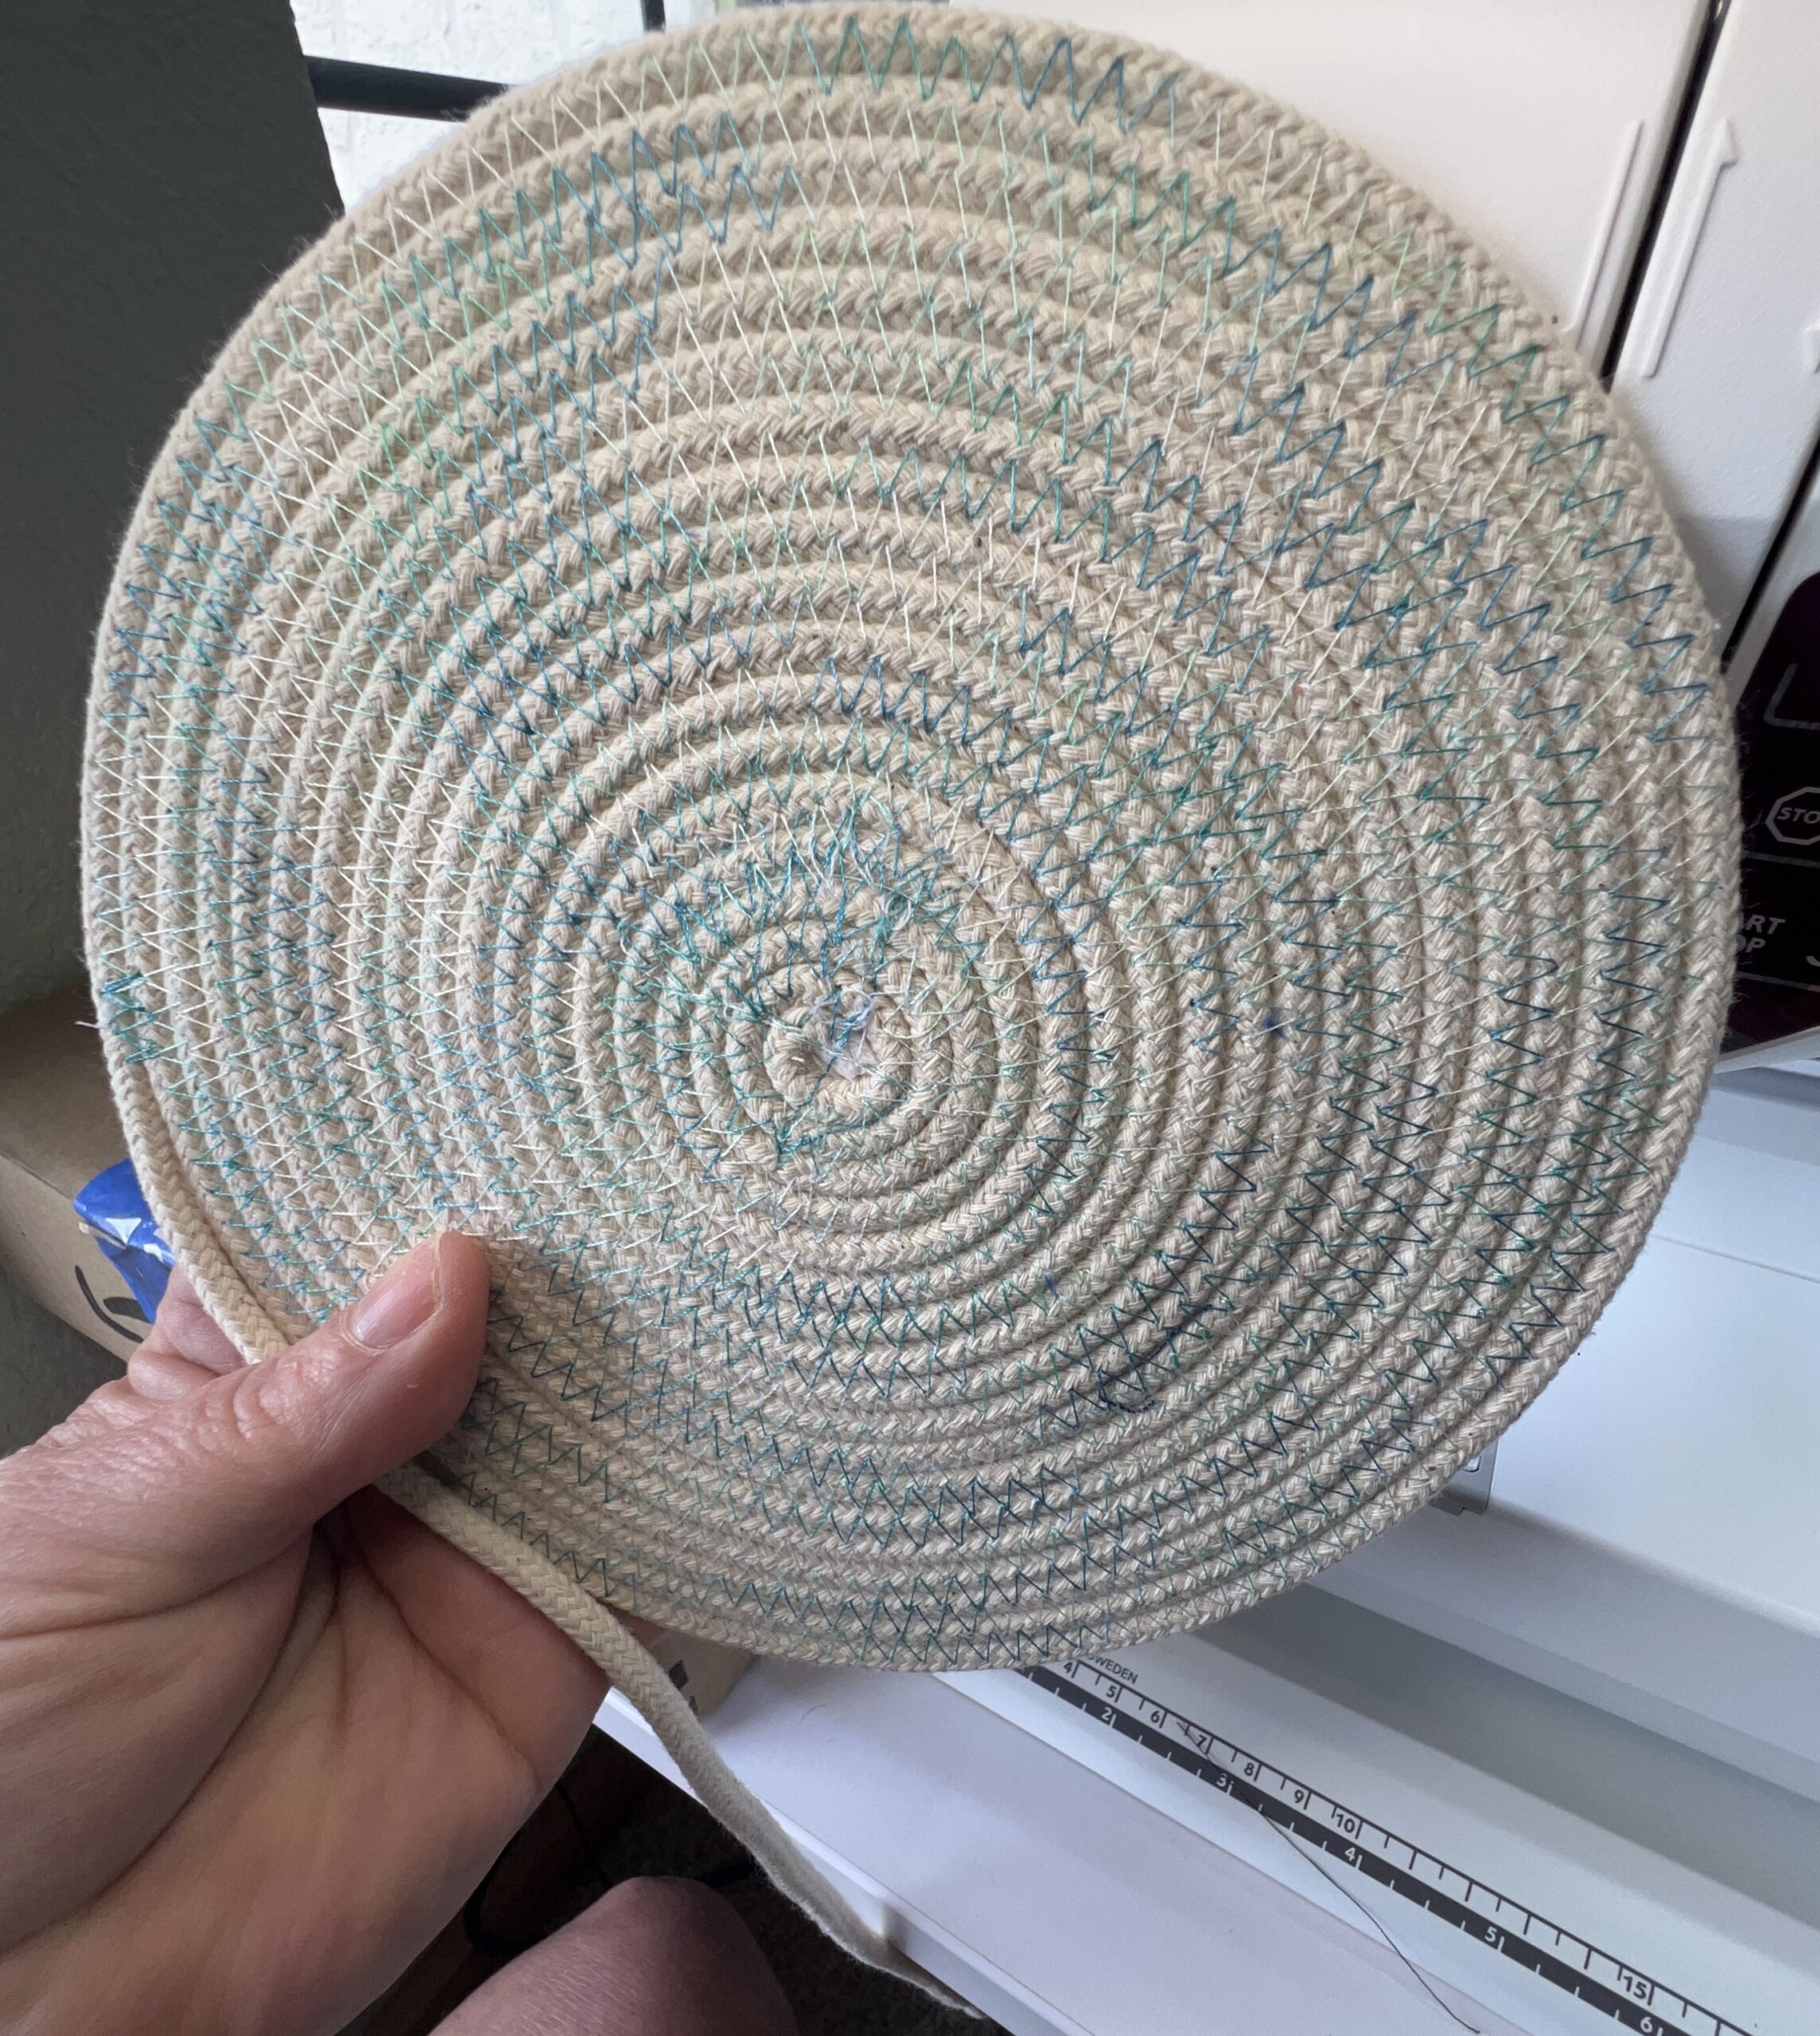
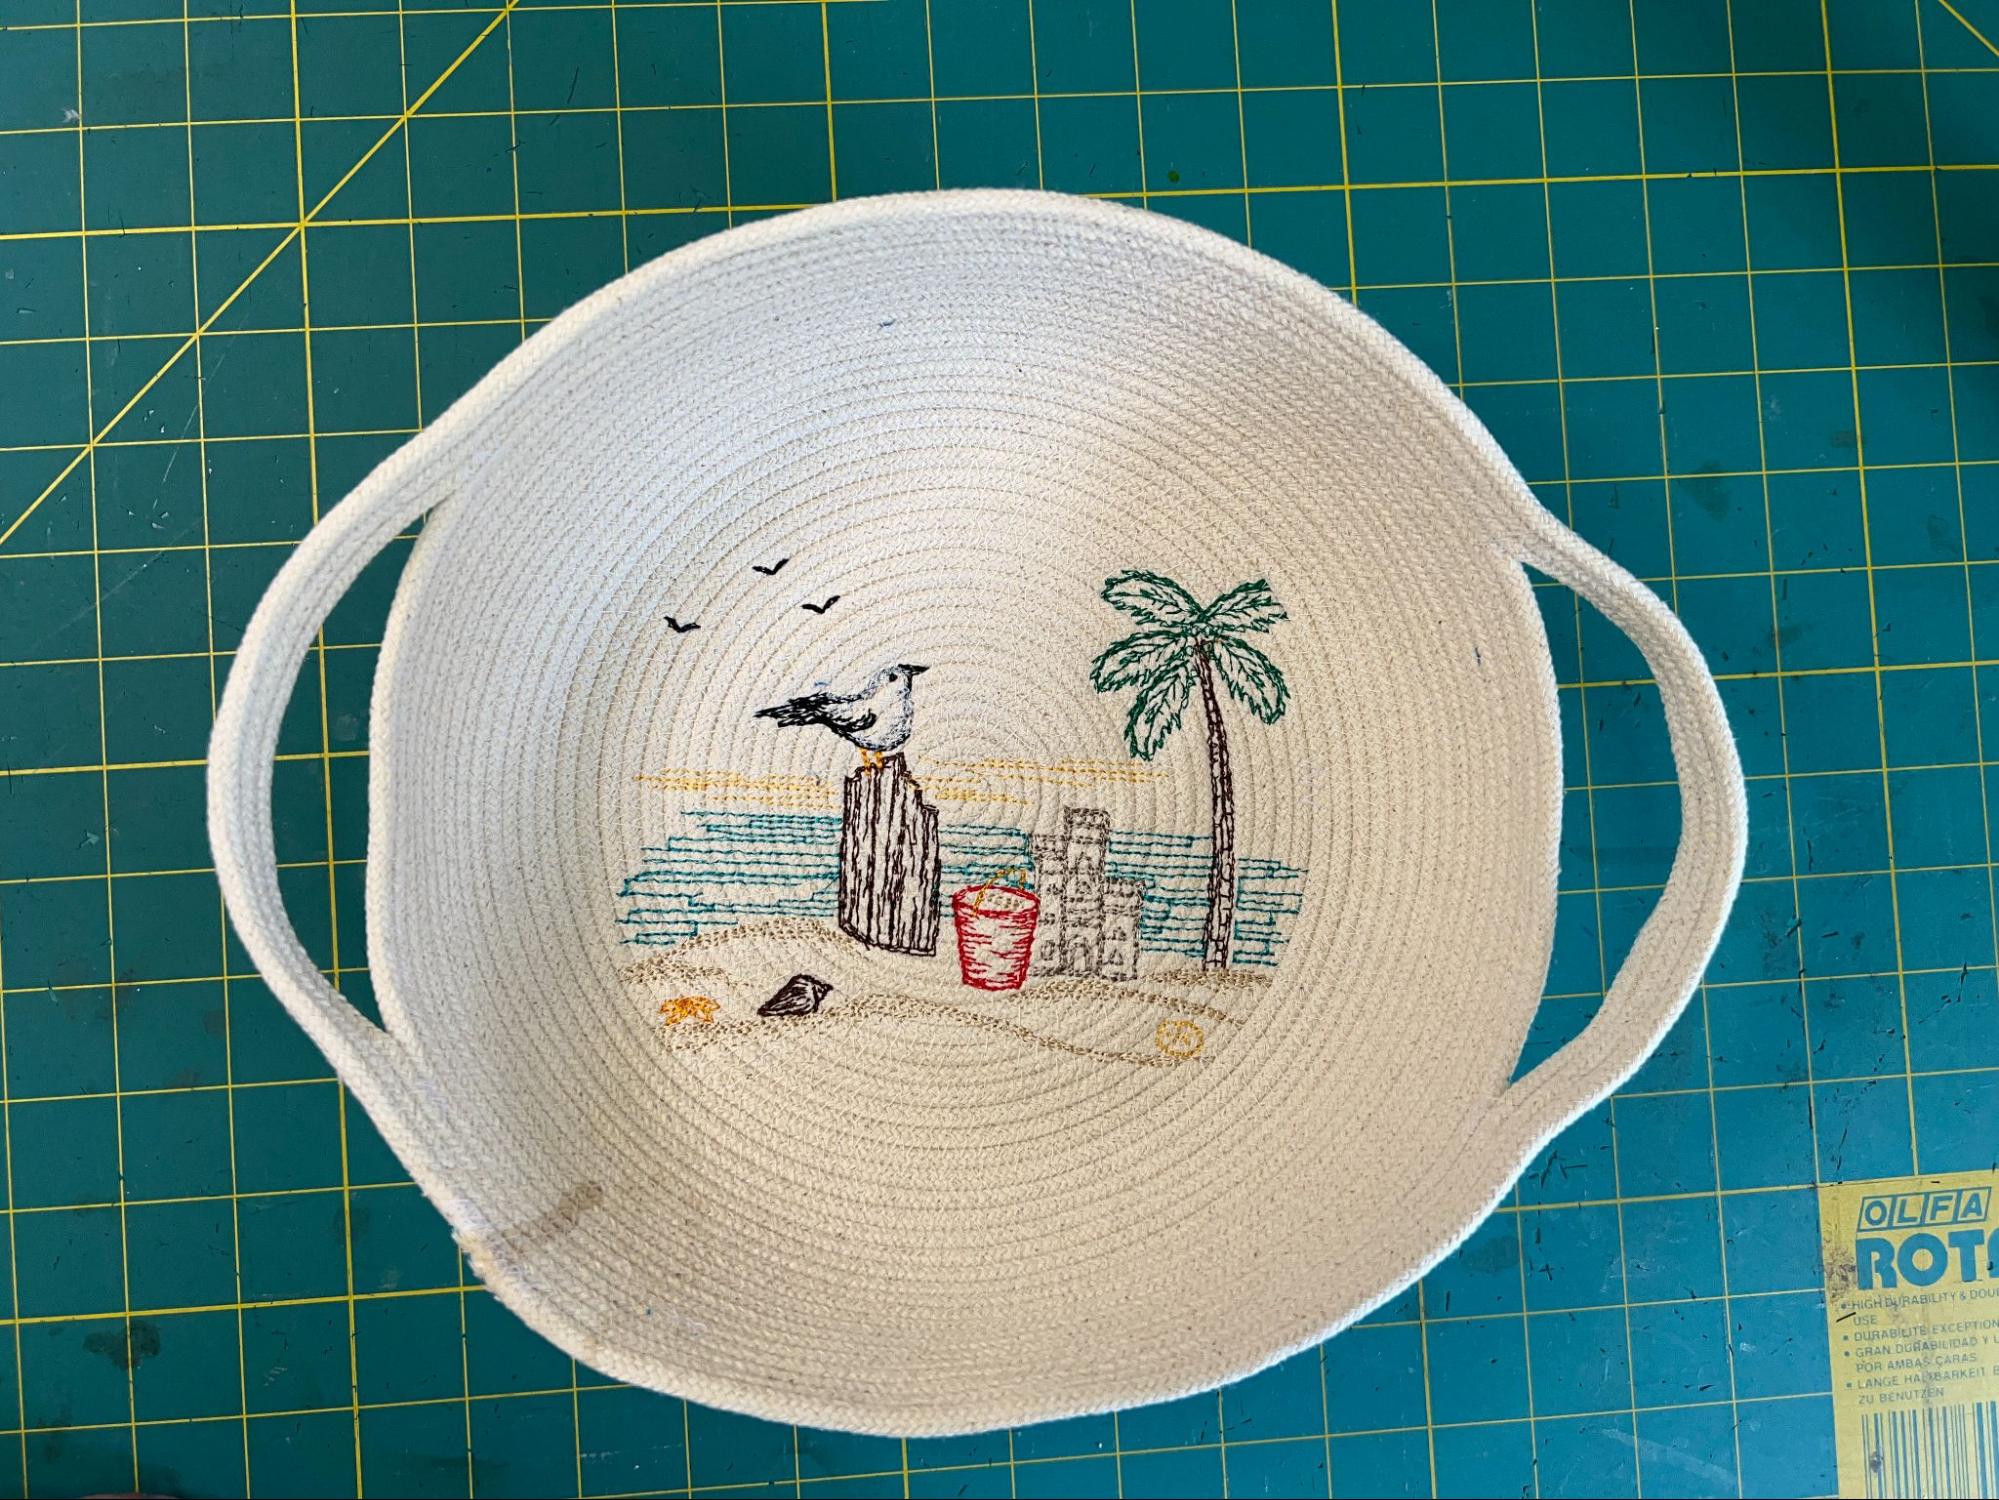
It’s already looking great with that variegated bobbin thread. Now we’re going to embellish the base with a little machine embroidery before coming back to create the side of the basket.
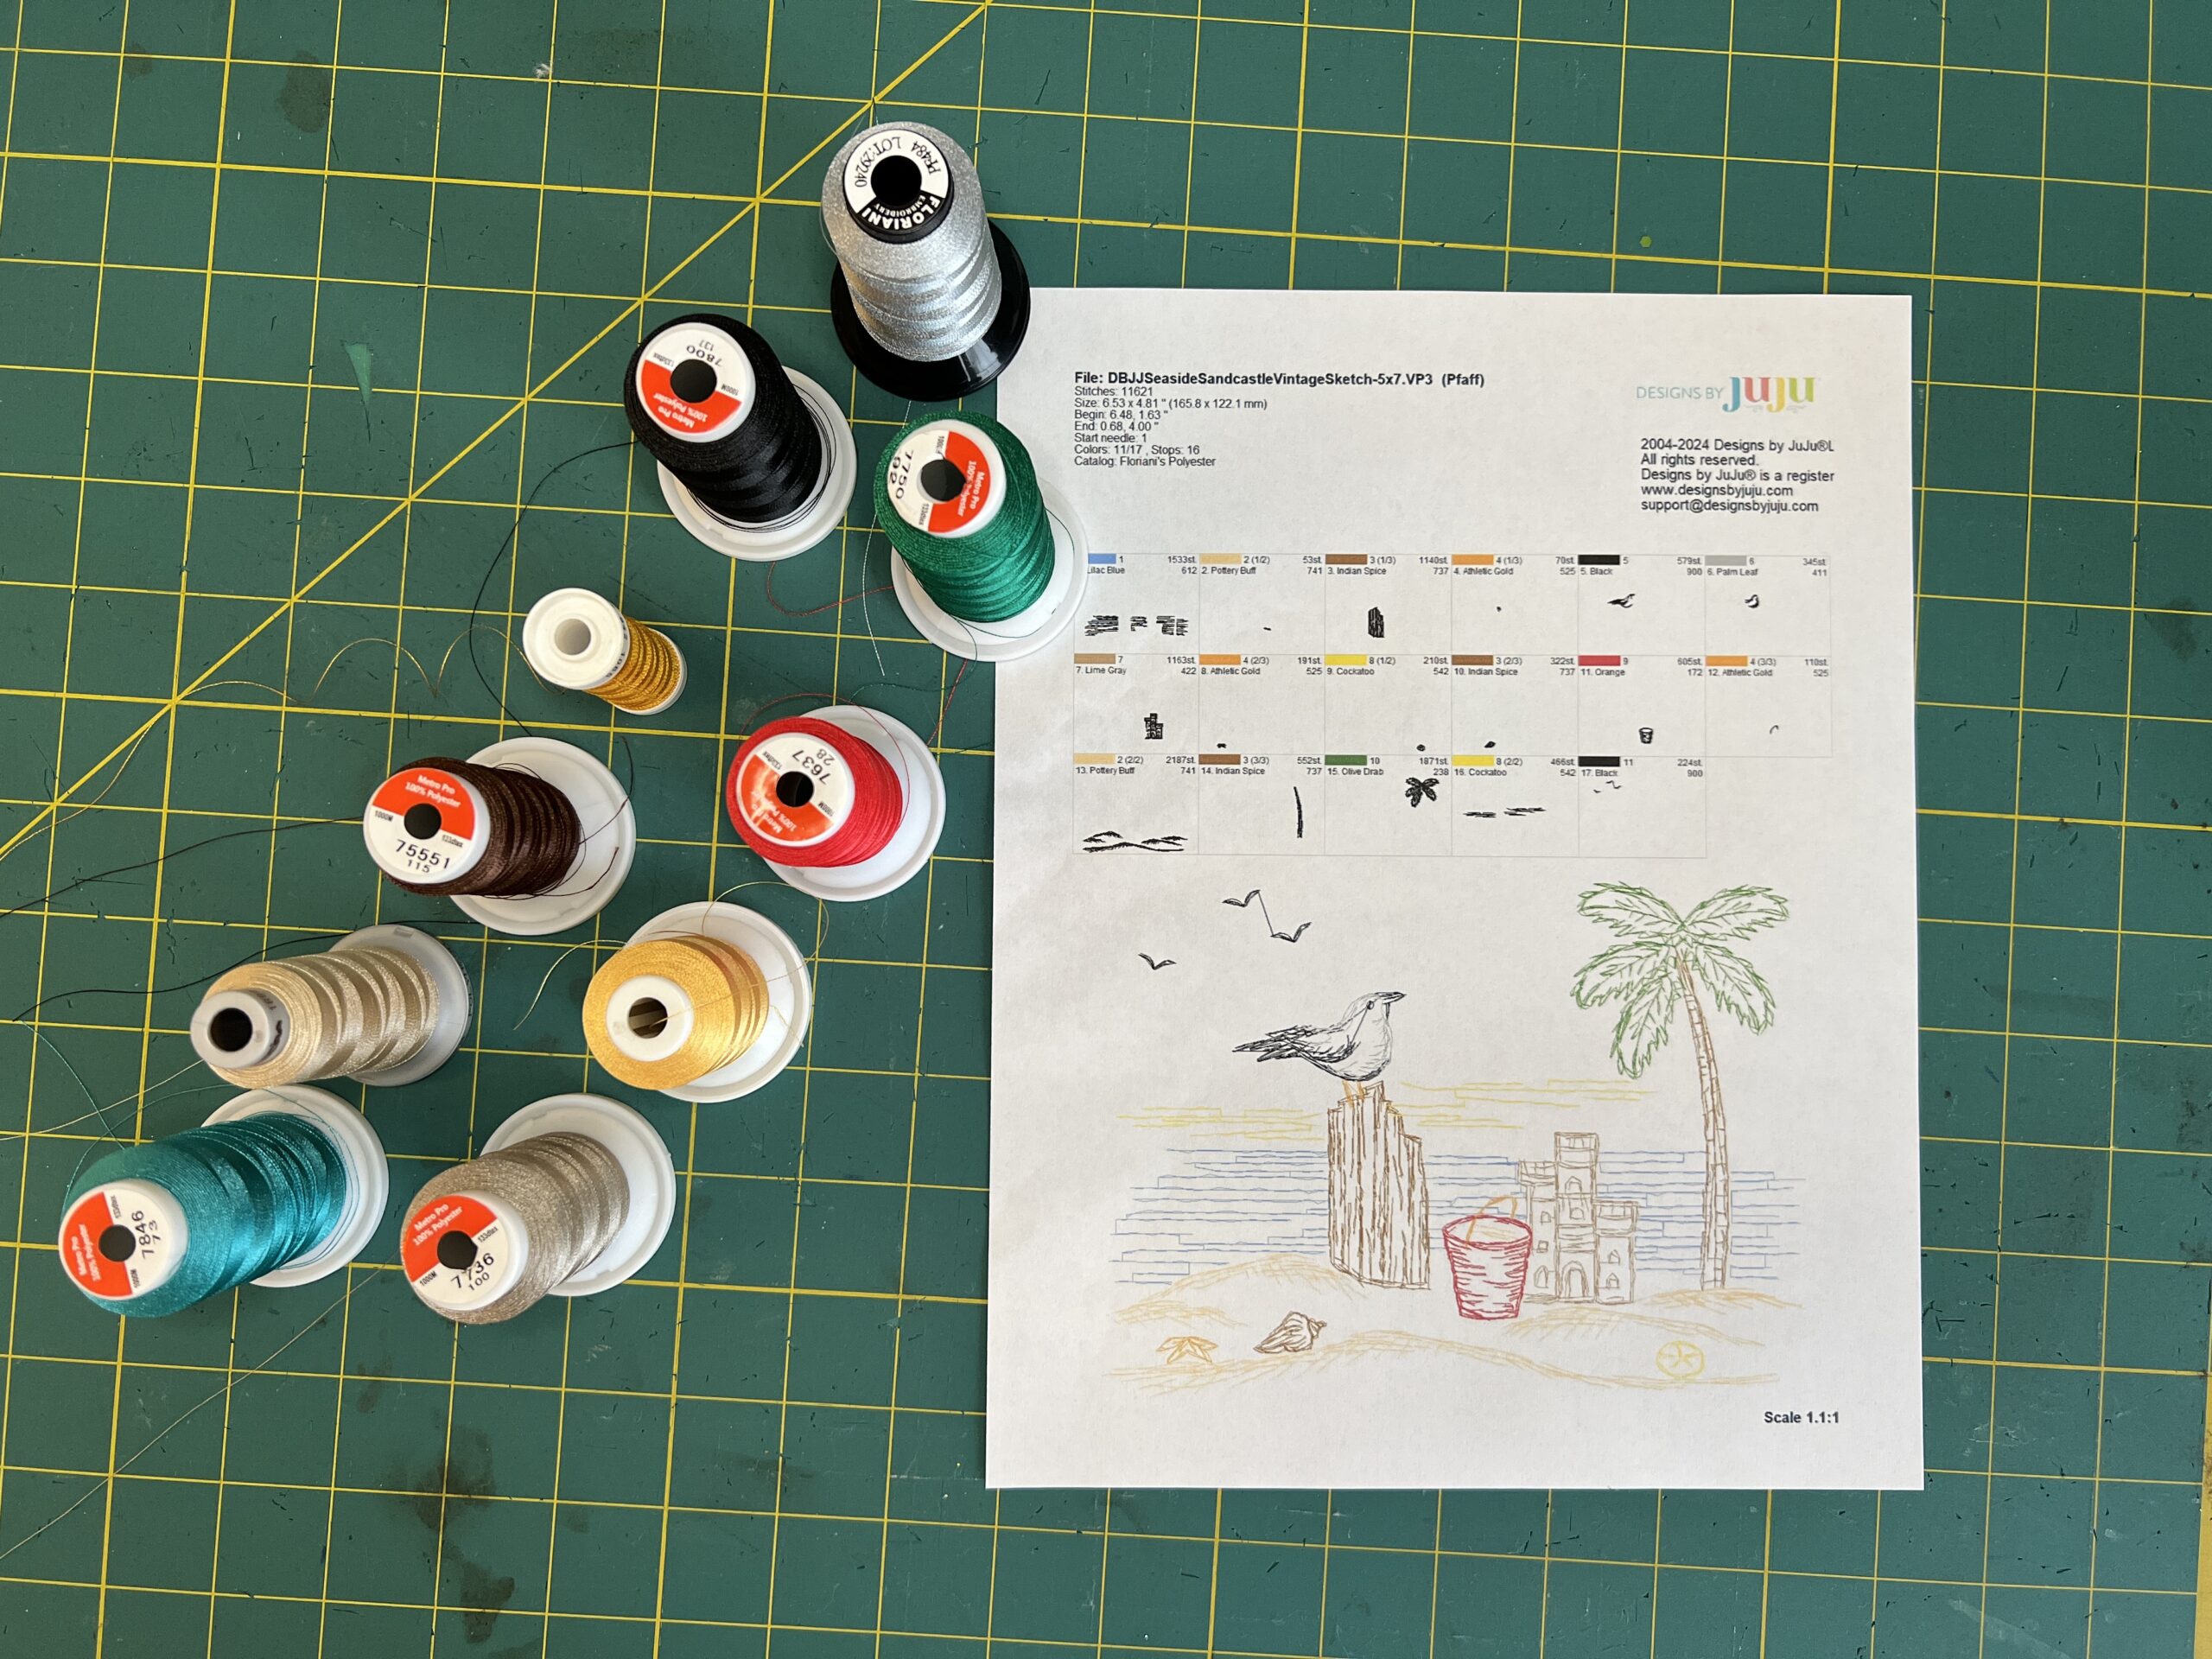
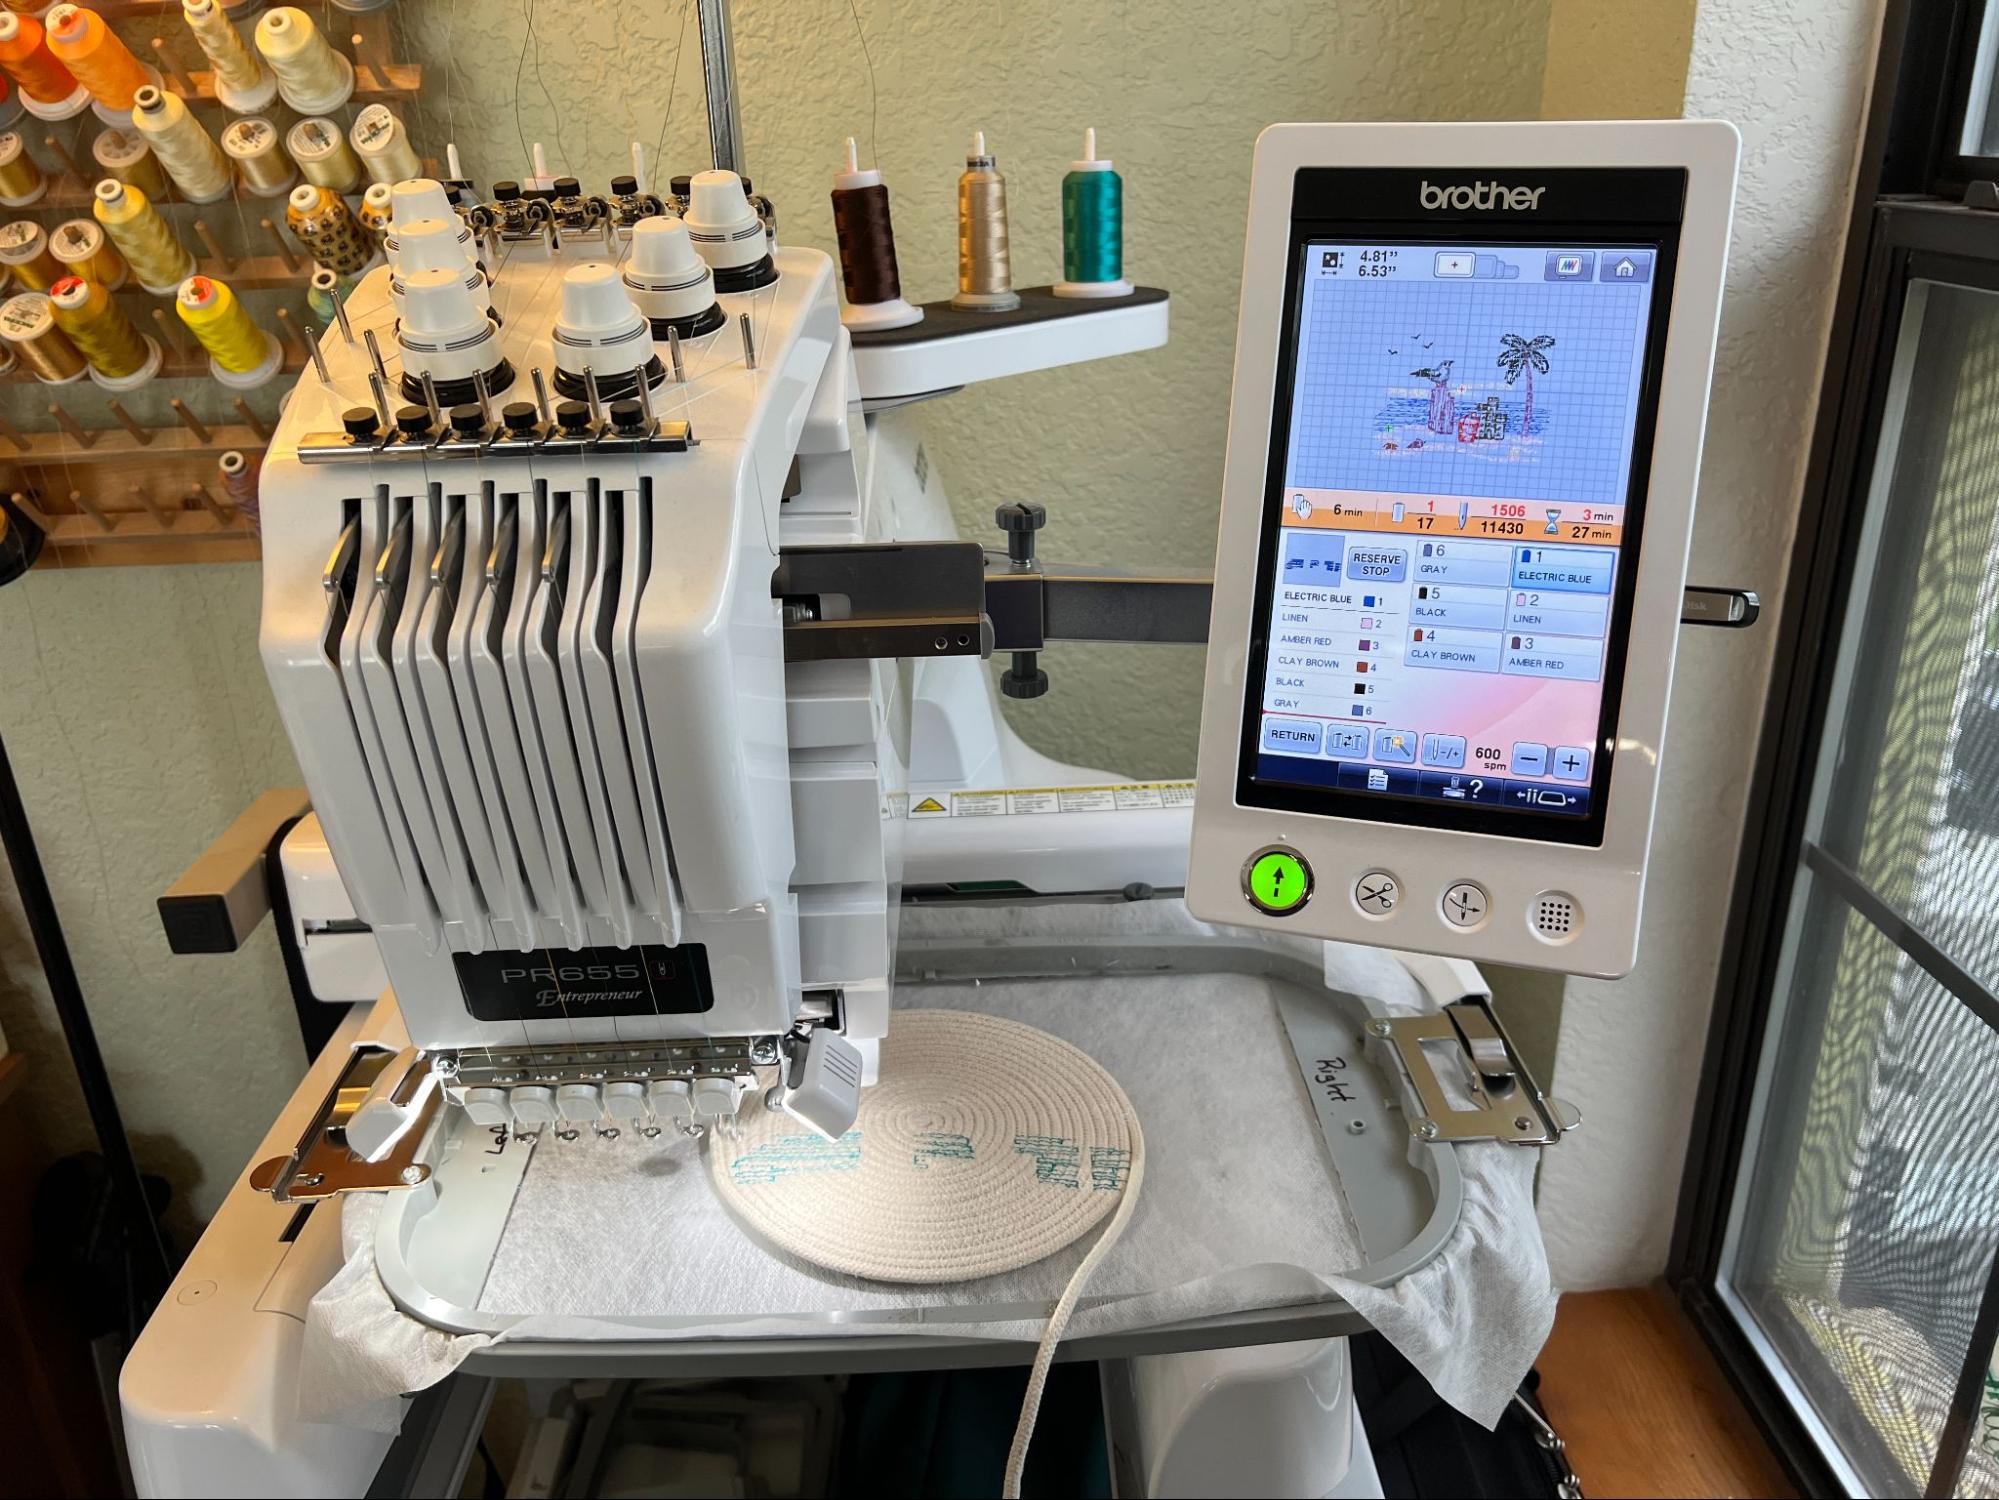
I selected the Seaside Sandcastle Vintage Sketch design from DBJJ. I prefer sketch machine embroidery designs for rope basket embellishment because they are not dense with stitches and don’t overpower the rope basket base.
Your downloaded design folder will contain a folder named something like “DBJJ Seaside Sandcastle Vintage Sketch Color charts.” In that folder there will be a color chart for the design. I really like printing this out and making notes on it as I plan my project. The color chart file is like a roadmap for the project and is helpful to me as I plan out what threads I’ll need and the order in which they’re used.
Now that you’ve familiarized yourself with each step of the design, select your thread colors and line them up in the order you’ll need them (single-needle machines) or load them onto your thread stand (multi-needle machines) to avoid confusion during stitch out.
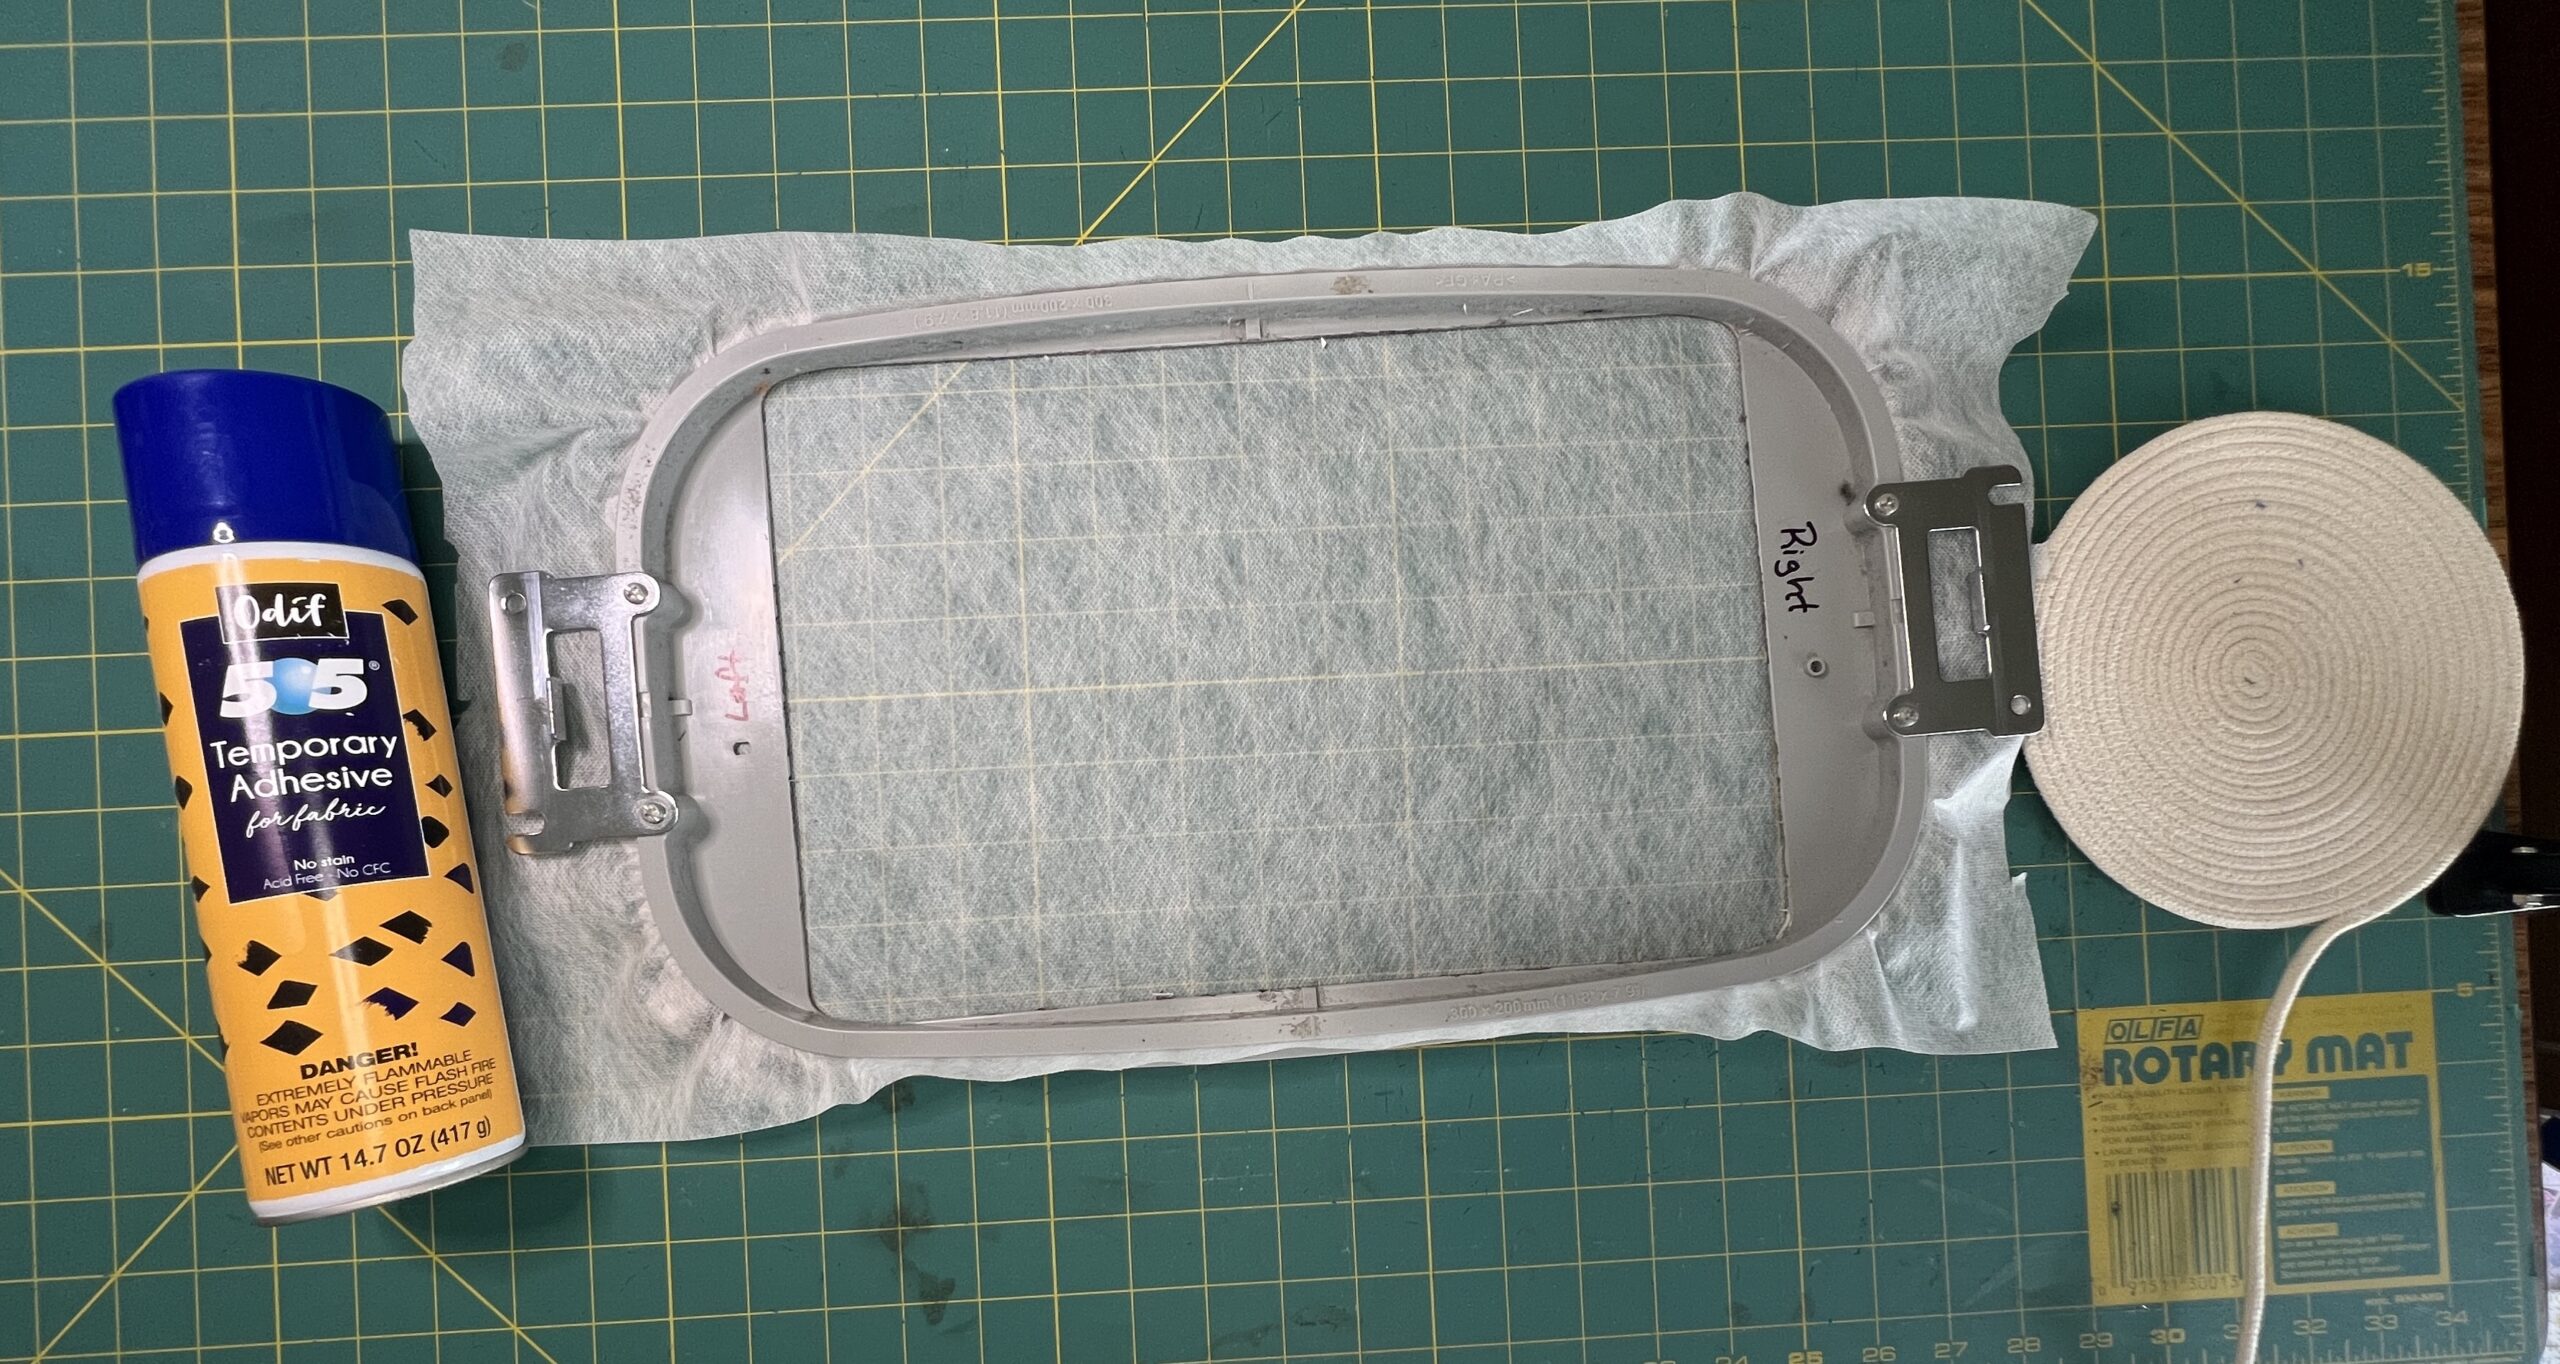
Select a hoop large enough for the base to sit flat inside of it. Hoop a piece of WSS. I’m using an 8” x 12” hoop and DBJJ’s Seaside Sandcastle Vintage Sketch design in the 5” x 7” size.
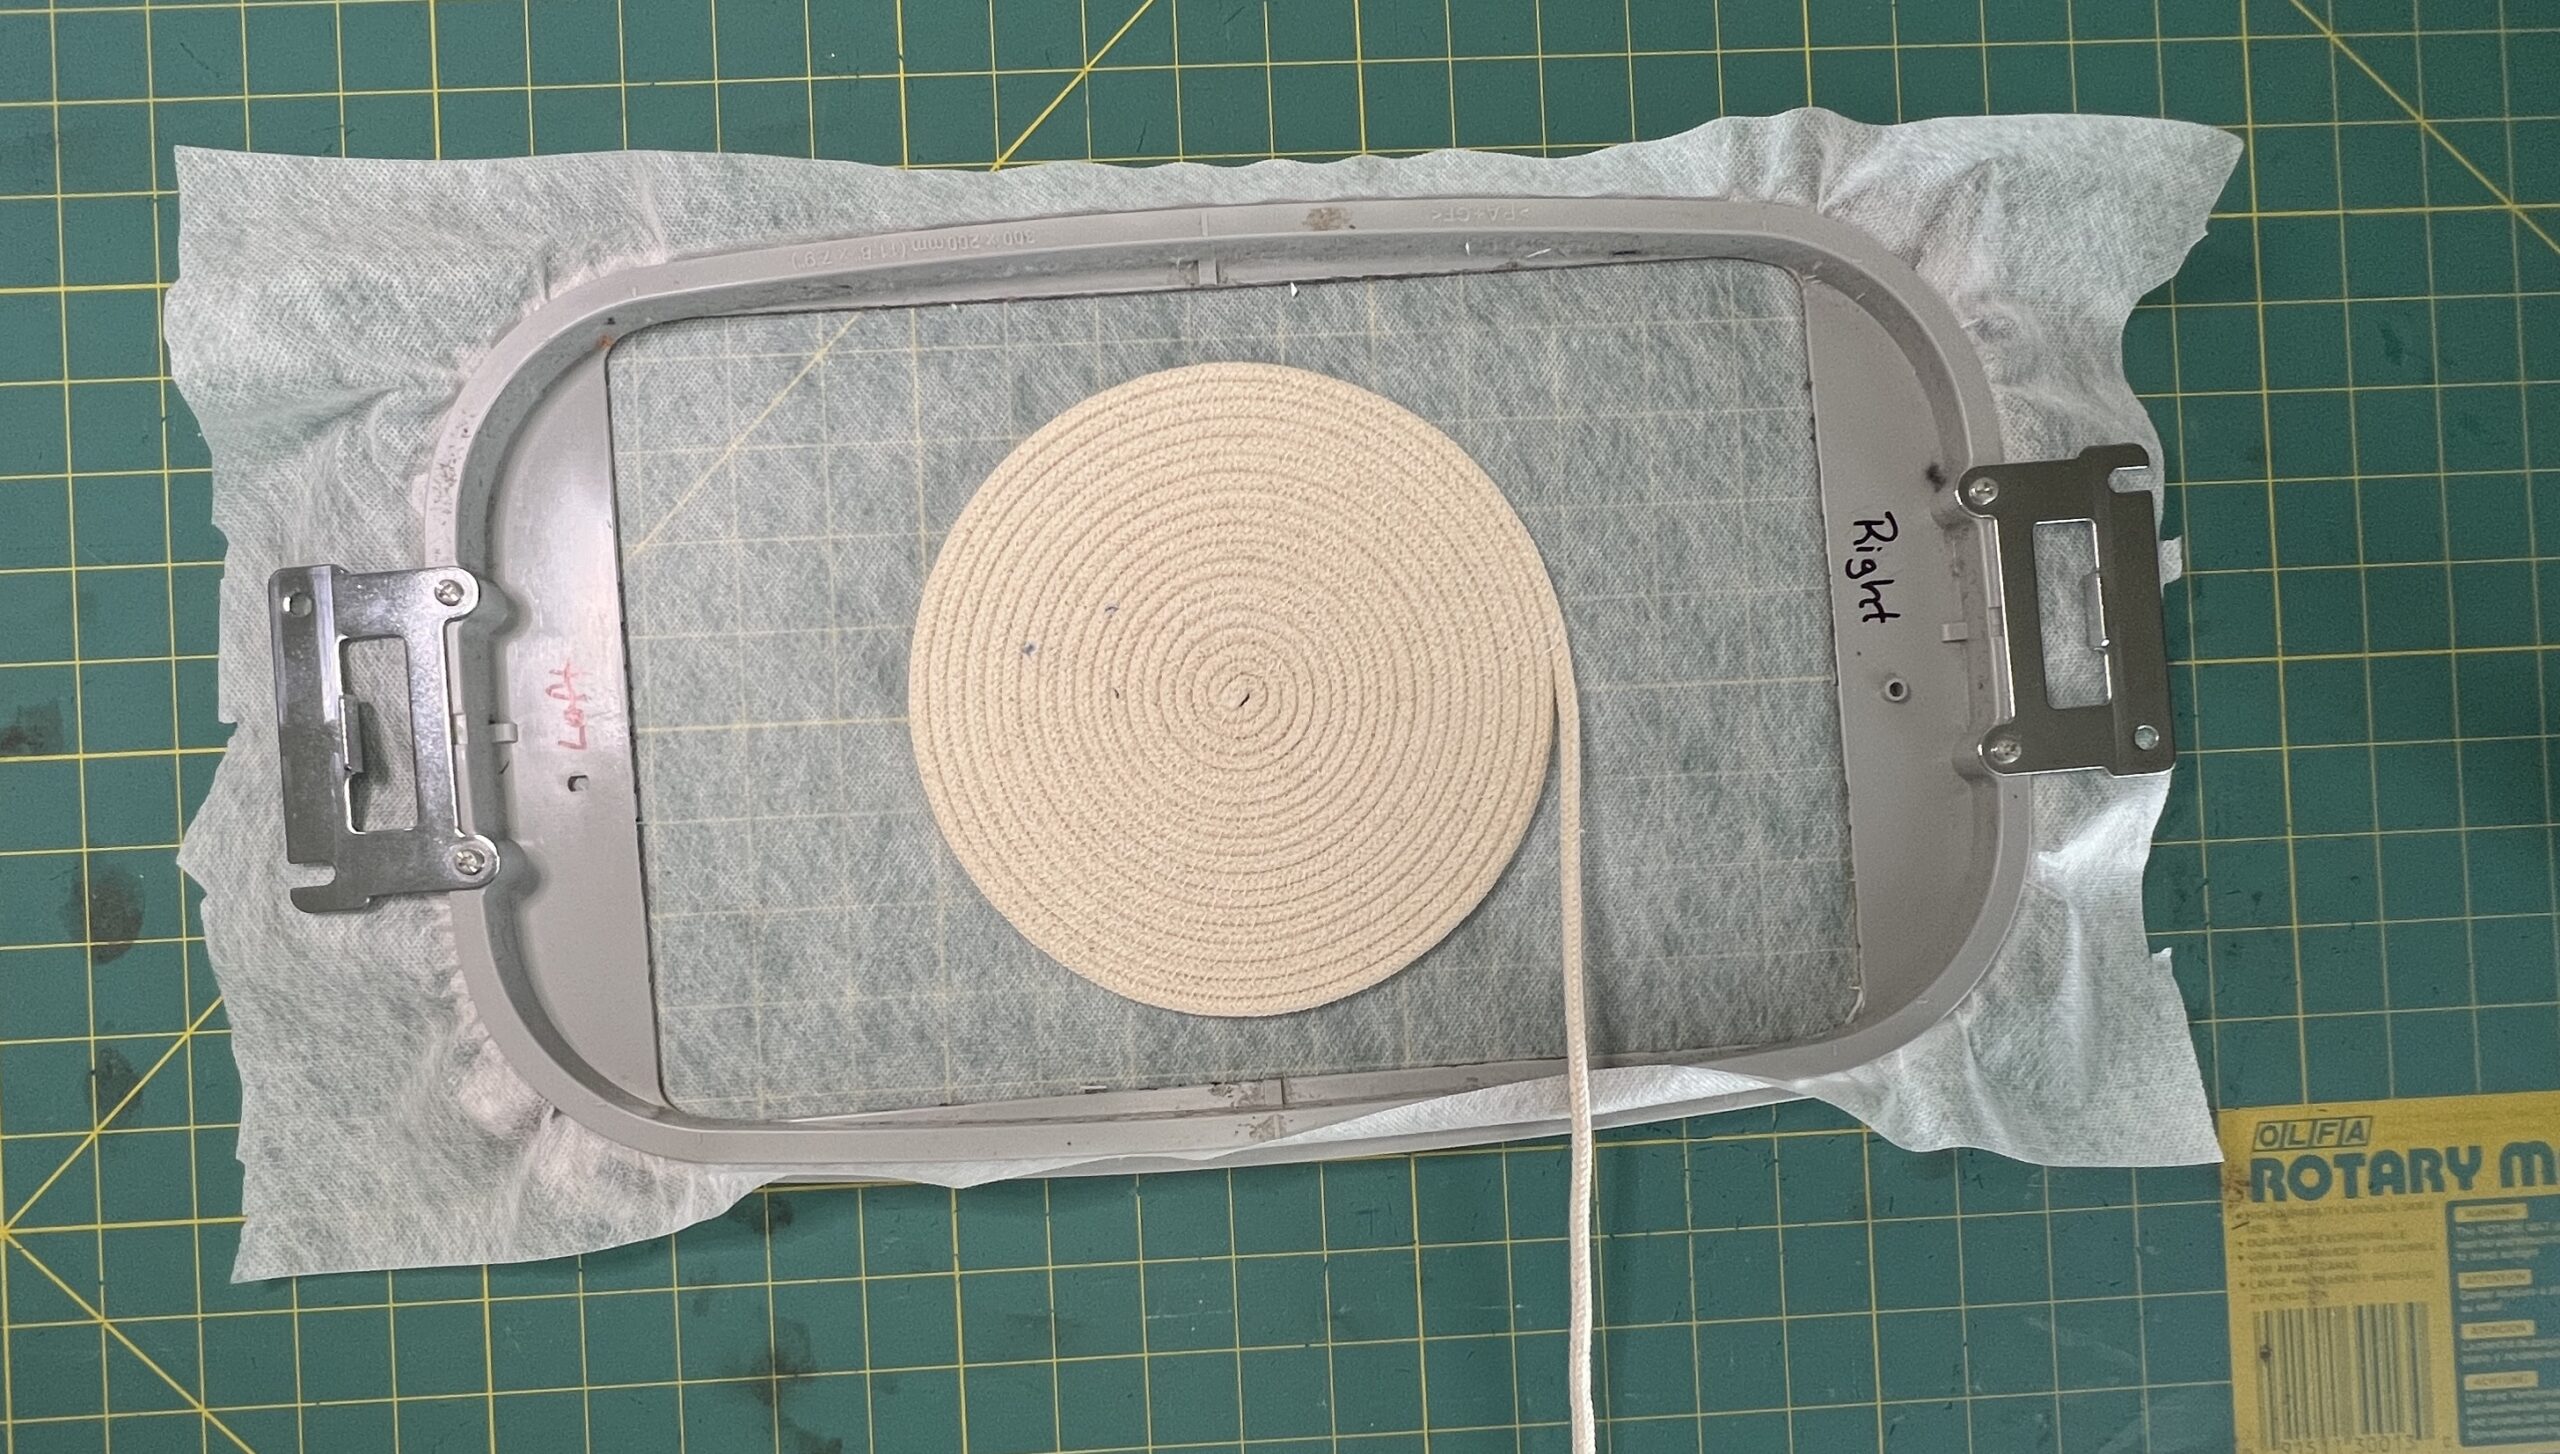
Use tape or adhesive spray to secure your base in the center of the hoop, leaving the end of the rope hanging out of the way.
NOTE: if you’re using decorative thread in your bobbin, make sure you adhere the rope basket base to the WSS with the decorative thread face down so that the embroidery stitches out on the side without the decorative stitches.
Run a trace of the design before stitching to ensure that your base is large enough to capture all of the design.
NOTE: In this project, I measured my rope basket base across the middle (the widest part) and it was 7”. I then chose to use the 5” x 7” design, which was actually 6.5” wide. What I did not take into consideration is that my entire base was not 7” wide, so a little of the sand and a tip of a palm leaf stitched out on my stabilizer. No harm. No foul. This is art.
Stitch out the design, keeping the dangling rope out of the stitching field and free to move as the machine stitches.
When the design has completed stitching, remove the hoop from the machine.
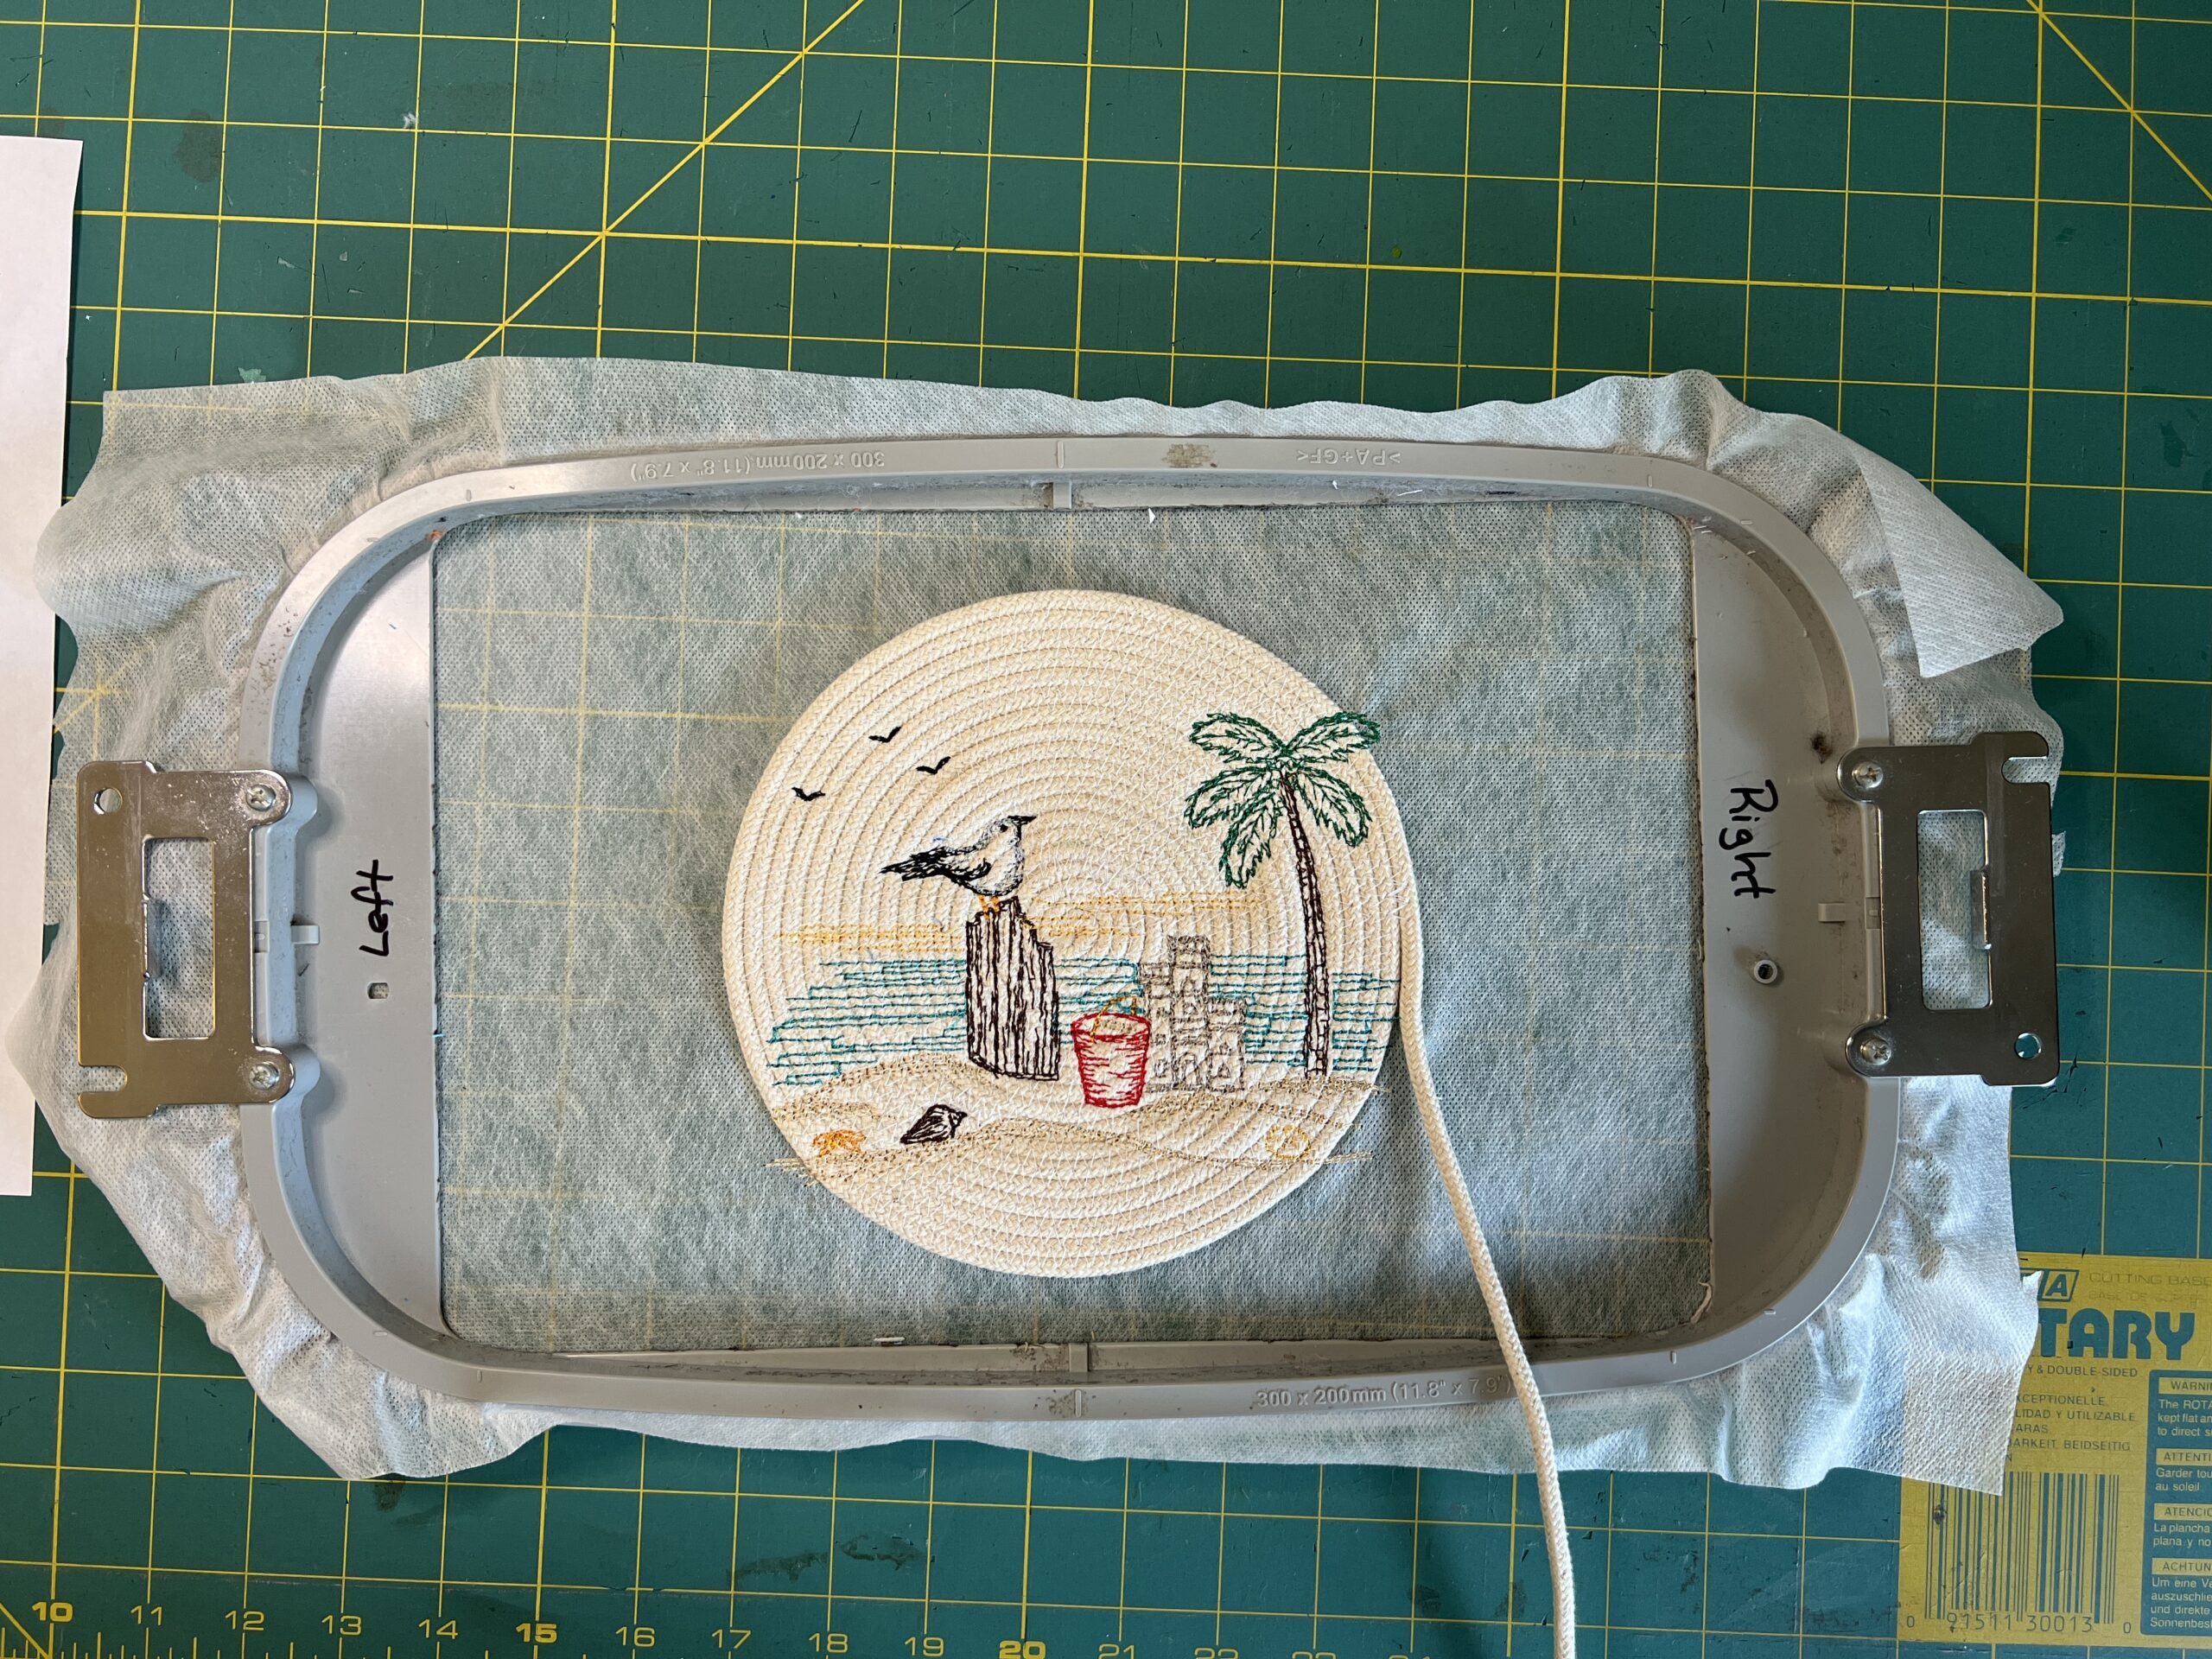
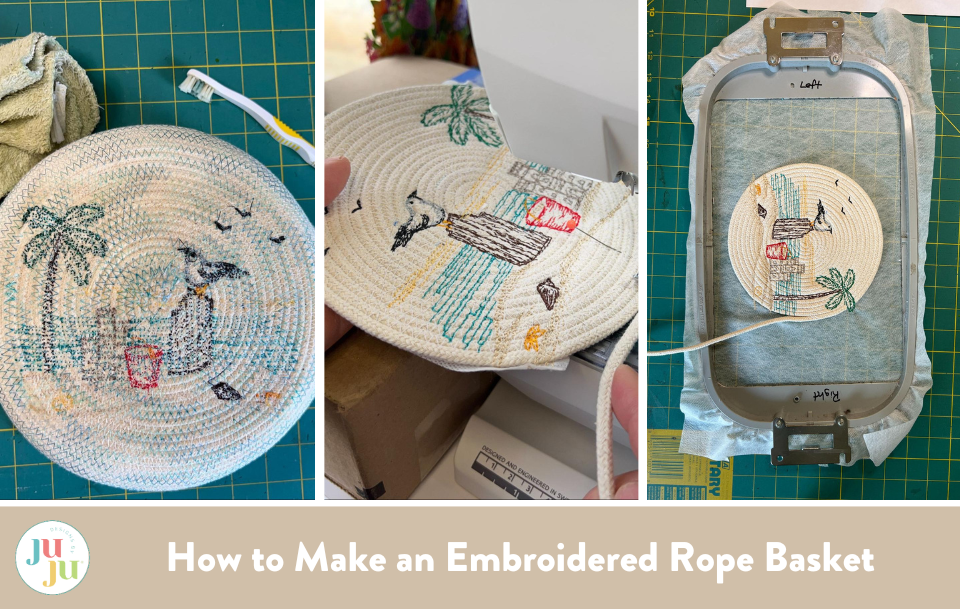
Remove the embroidered rope basket base from the hoop and trim the WSS close to the decorative stitches, without cutting any of the stitching.
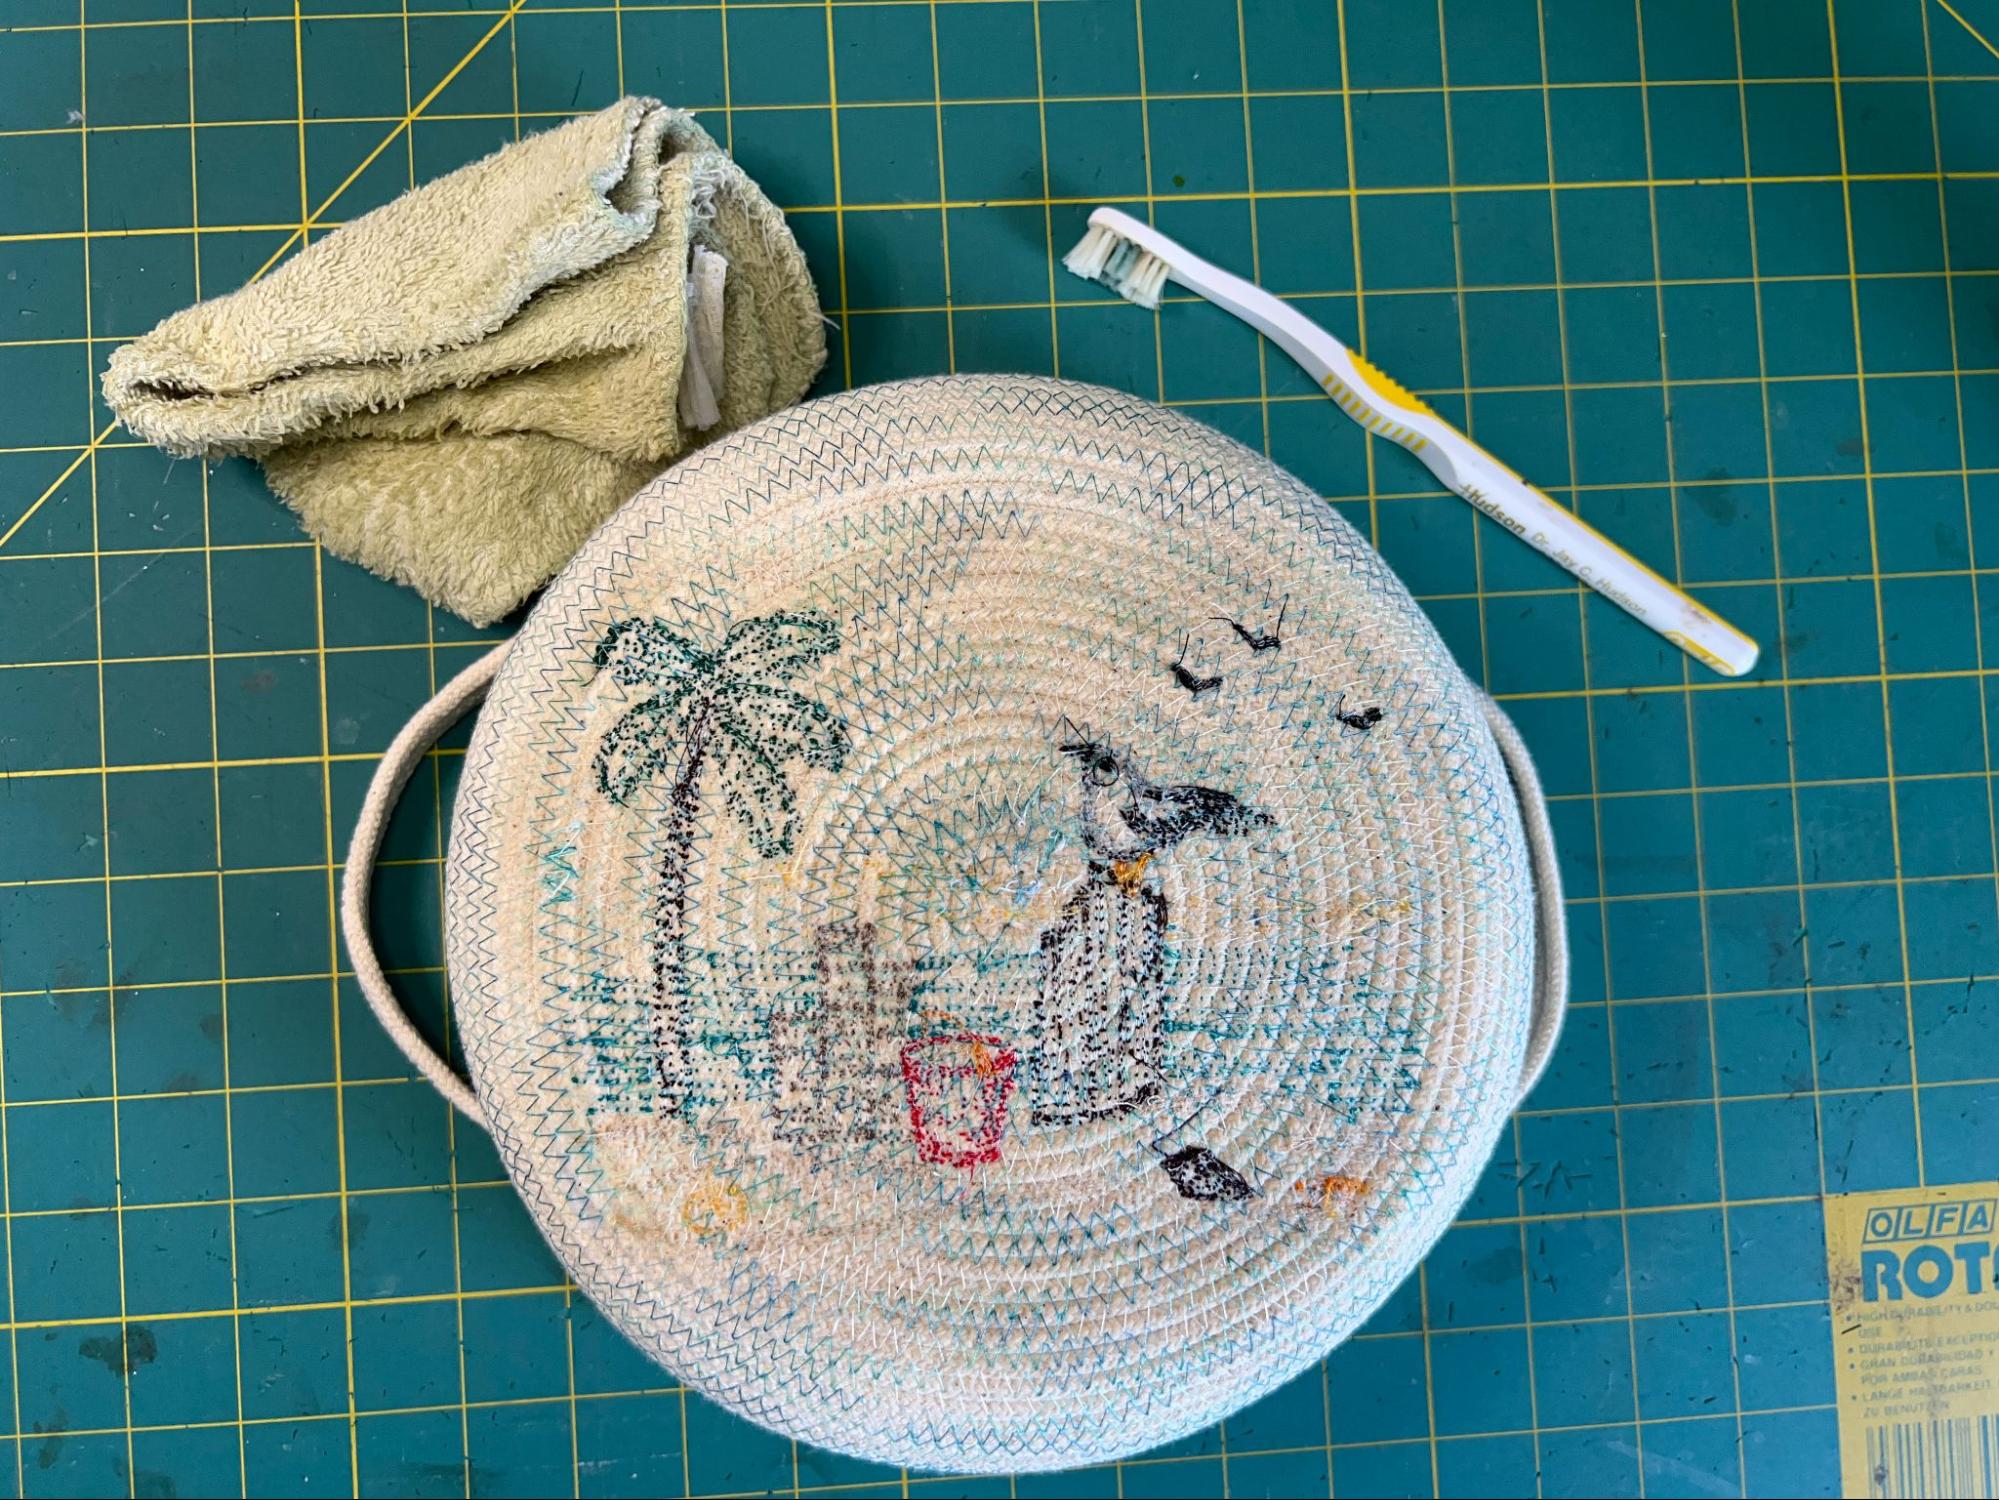
NOTE: You can use a cotton swab, paint brush, or old toothbrush dipped in water to dissolve any remaining WSS. That can be done at this point or you can wait until the basket is complete. Since I accidentally have stitches on the WSS, I’m going to wait until the basket is complete before I get rid of the WSS so that those stray stitches can be secured by the remaining rows of rope.
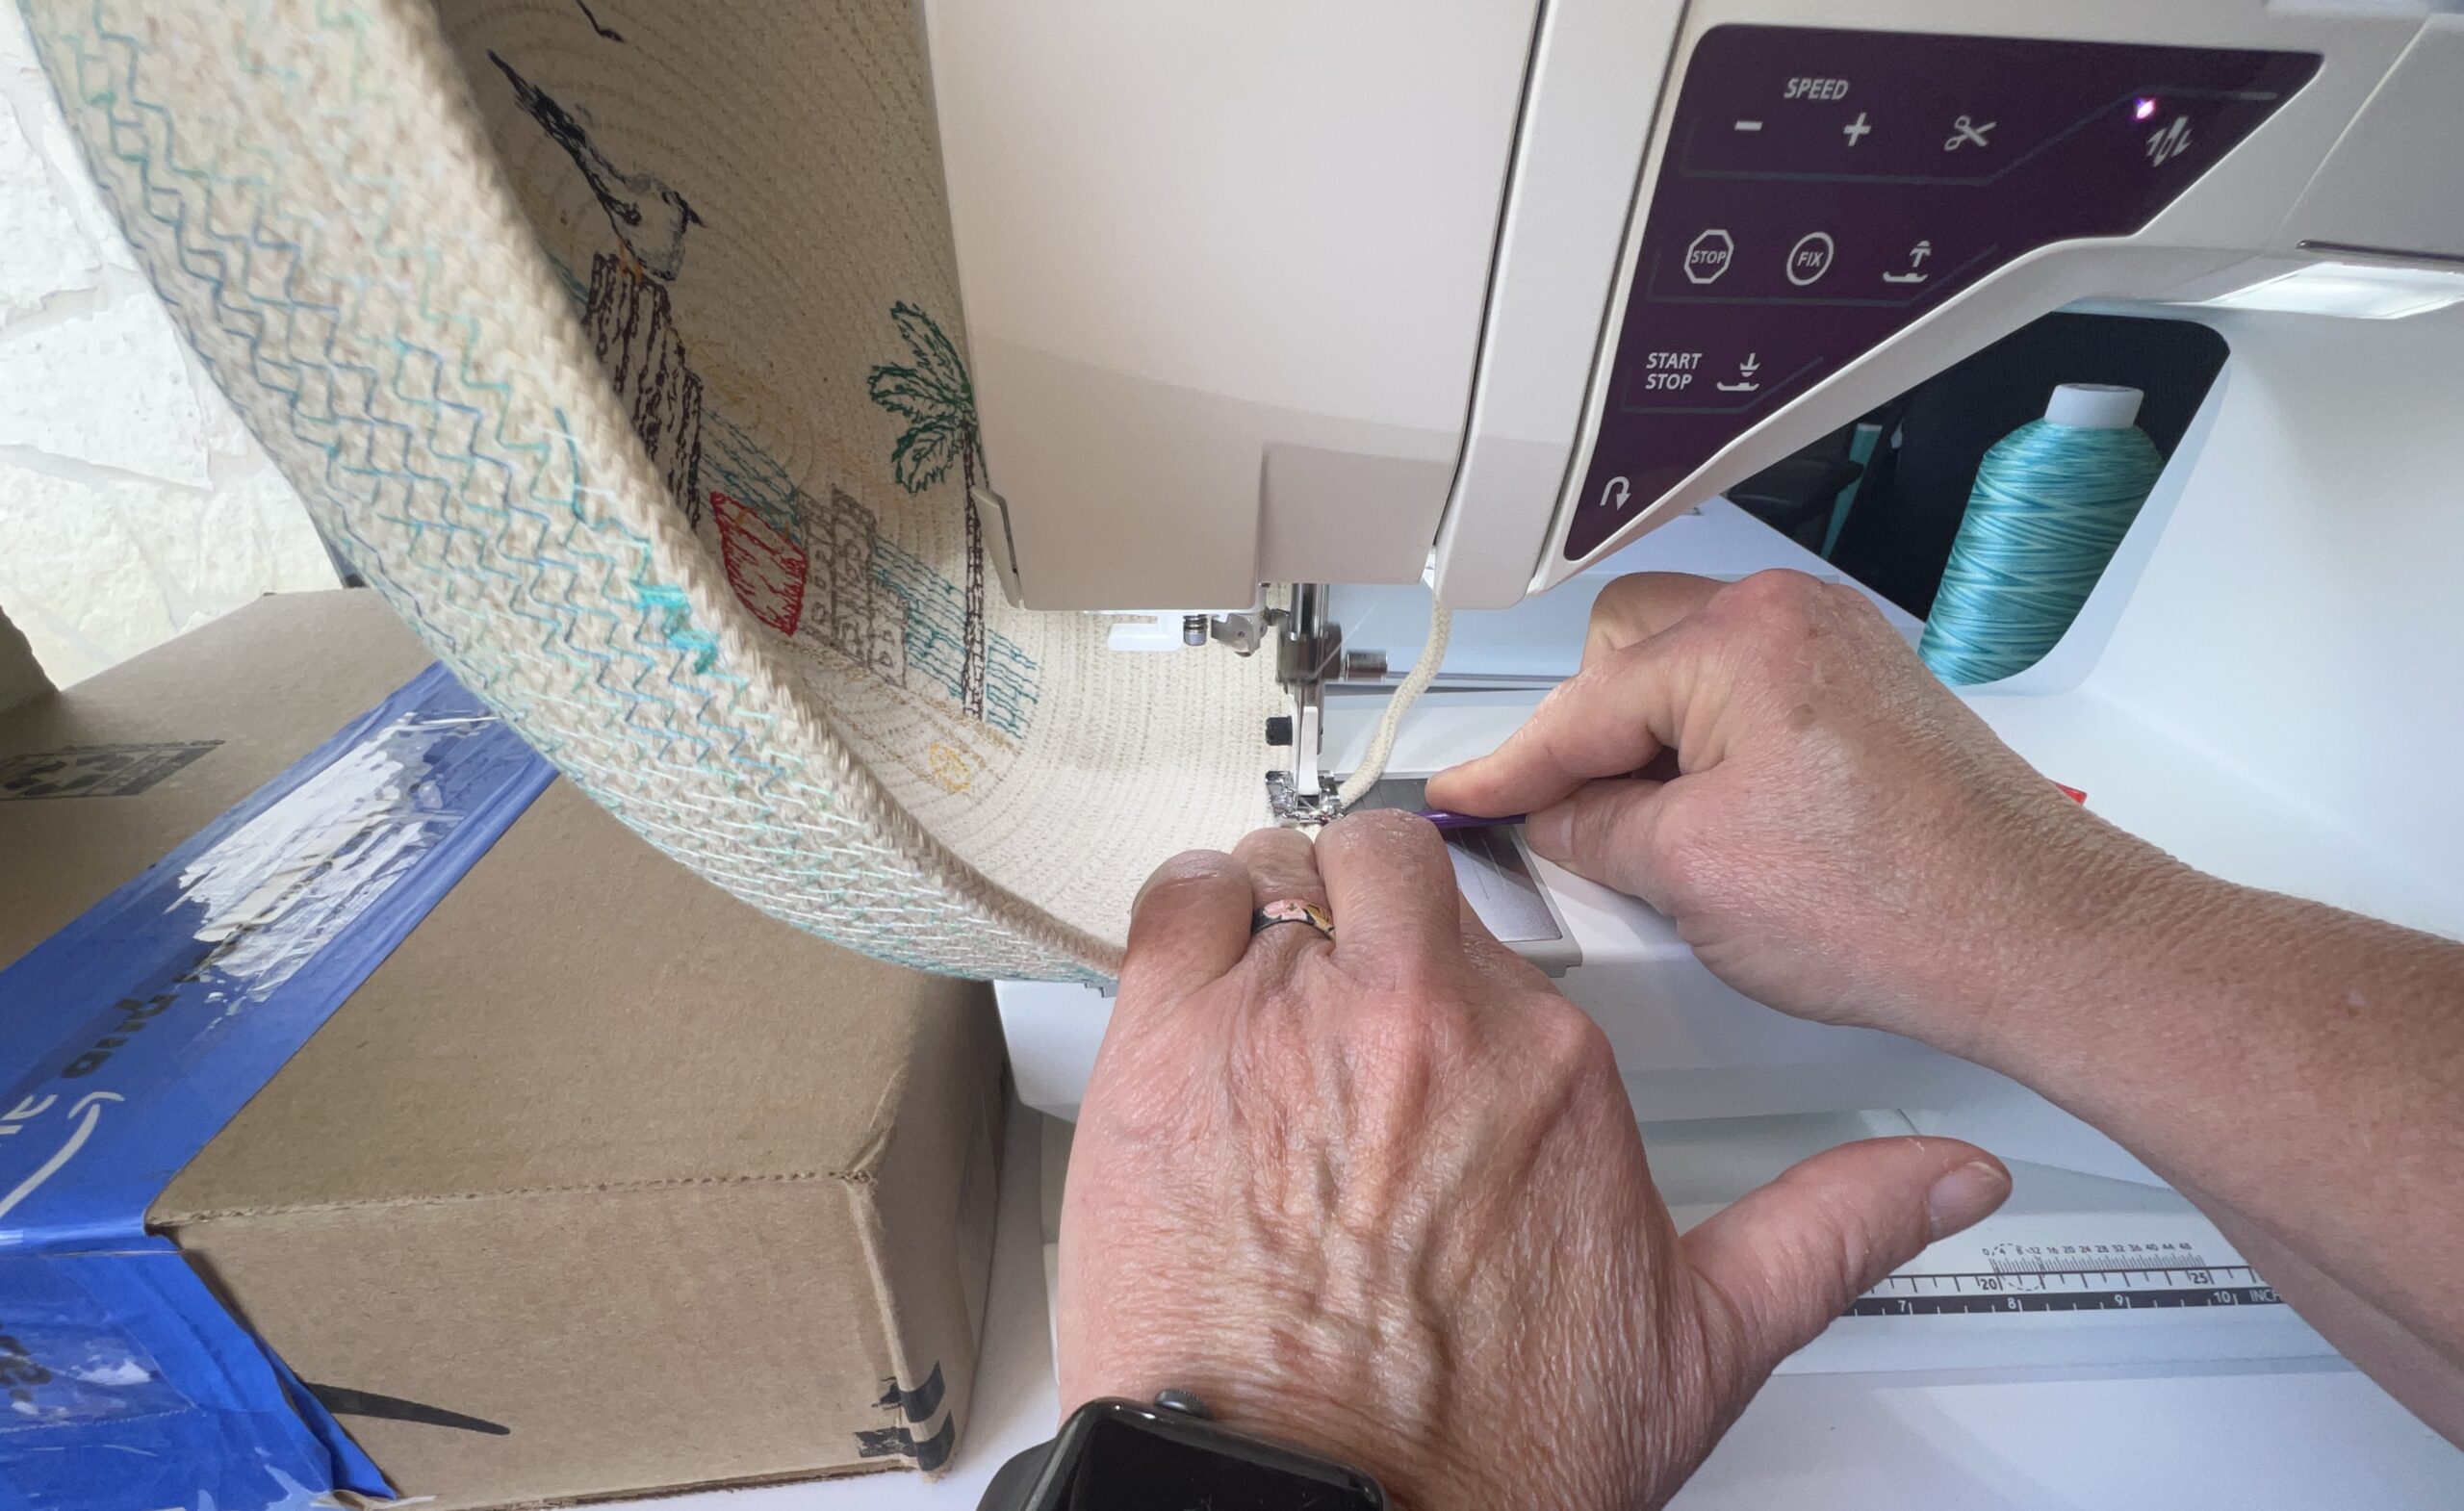
Now return your embroidered rope basket base to the sewing machine to continue making the sides.
Choose a point on the basket and place a pin to have a visual marker from which you can count the number of rows you add.
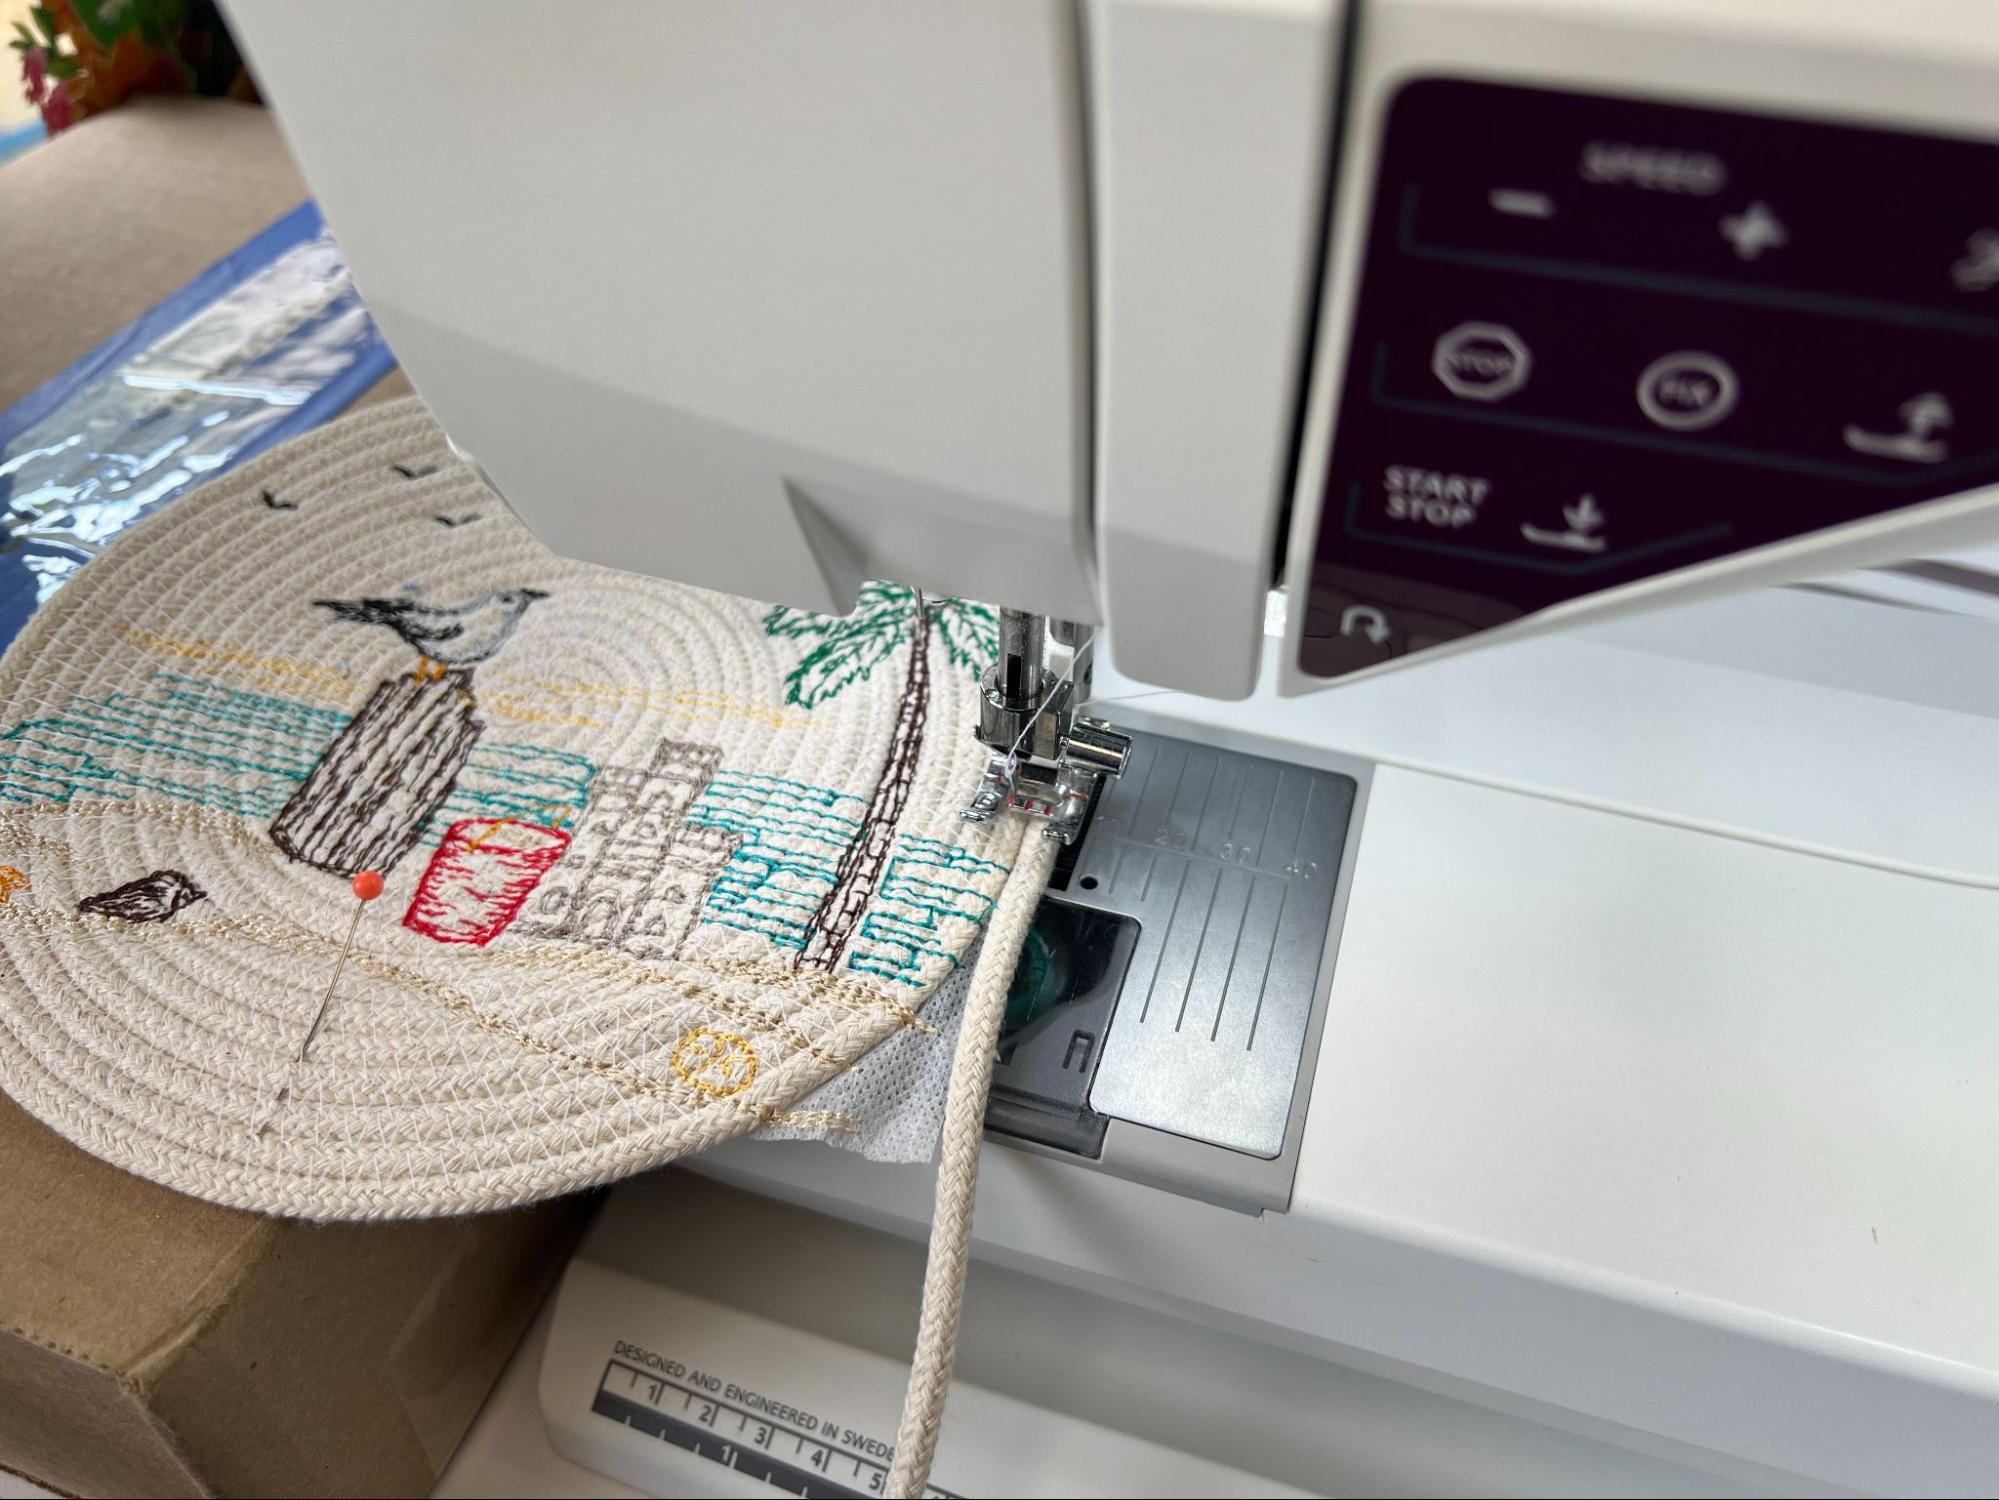
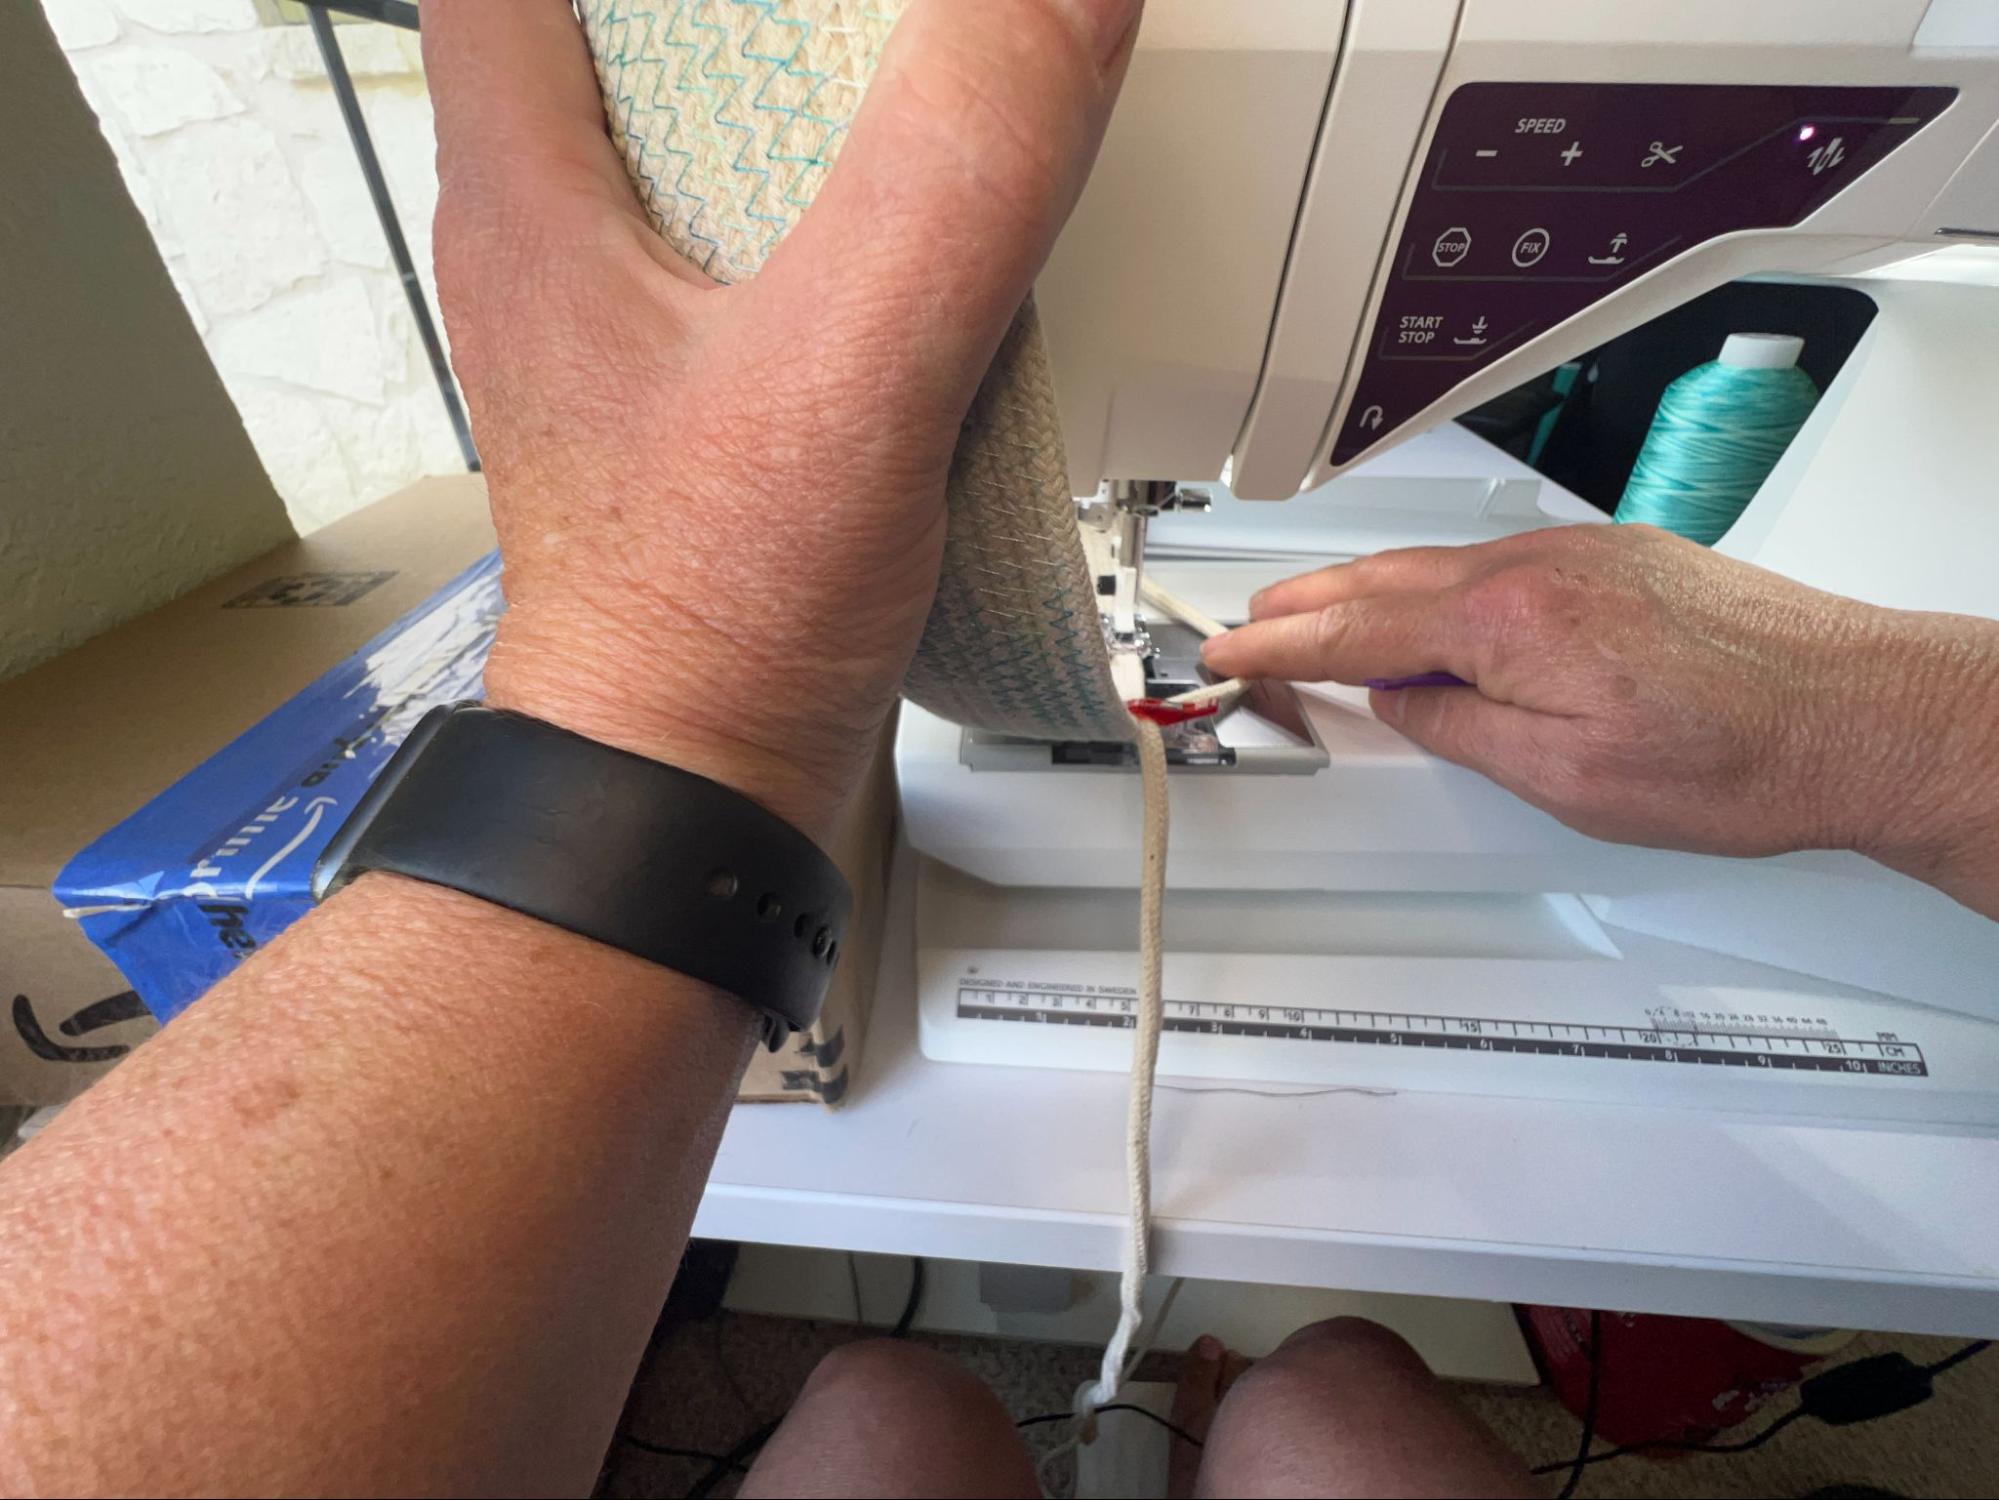
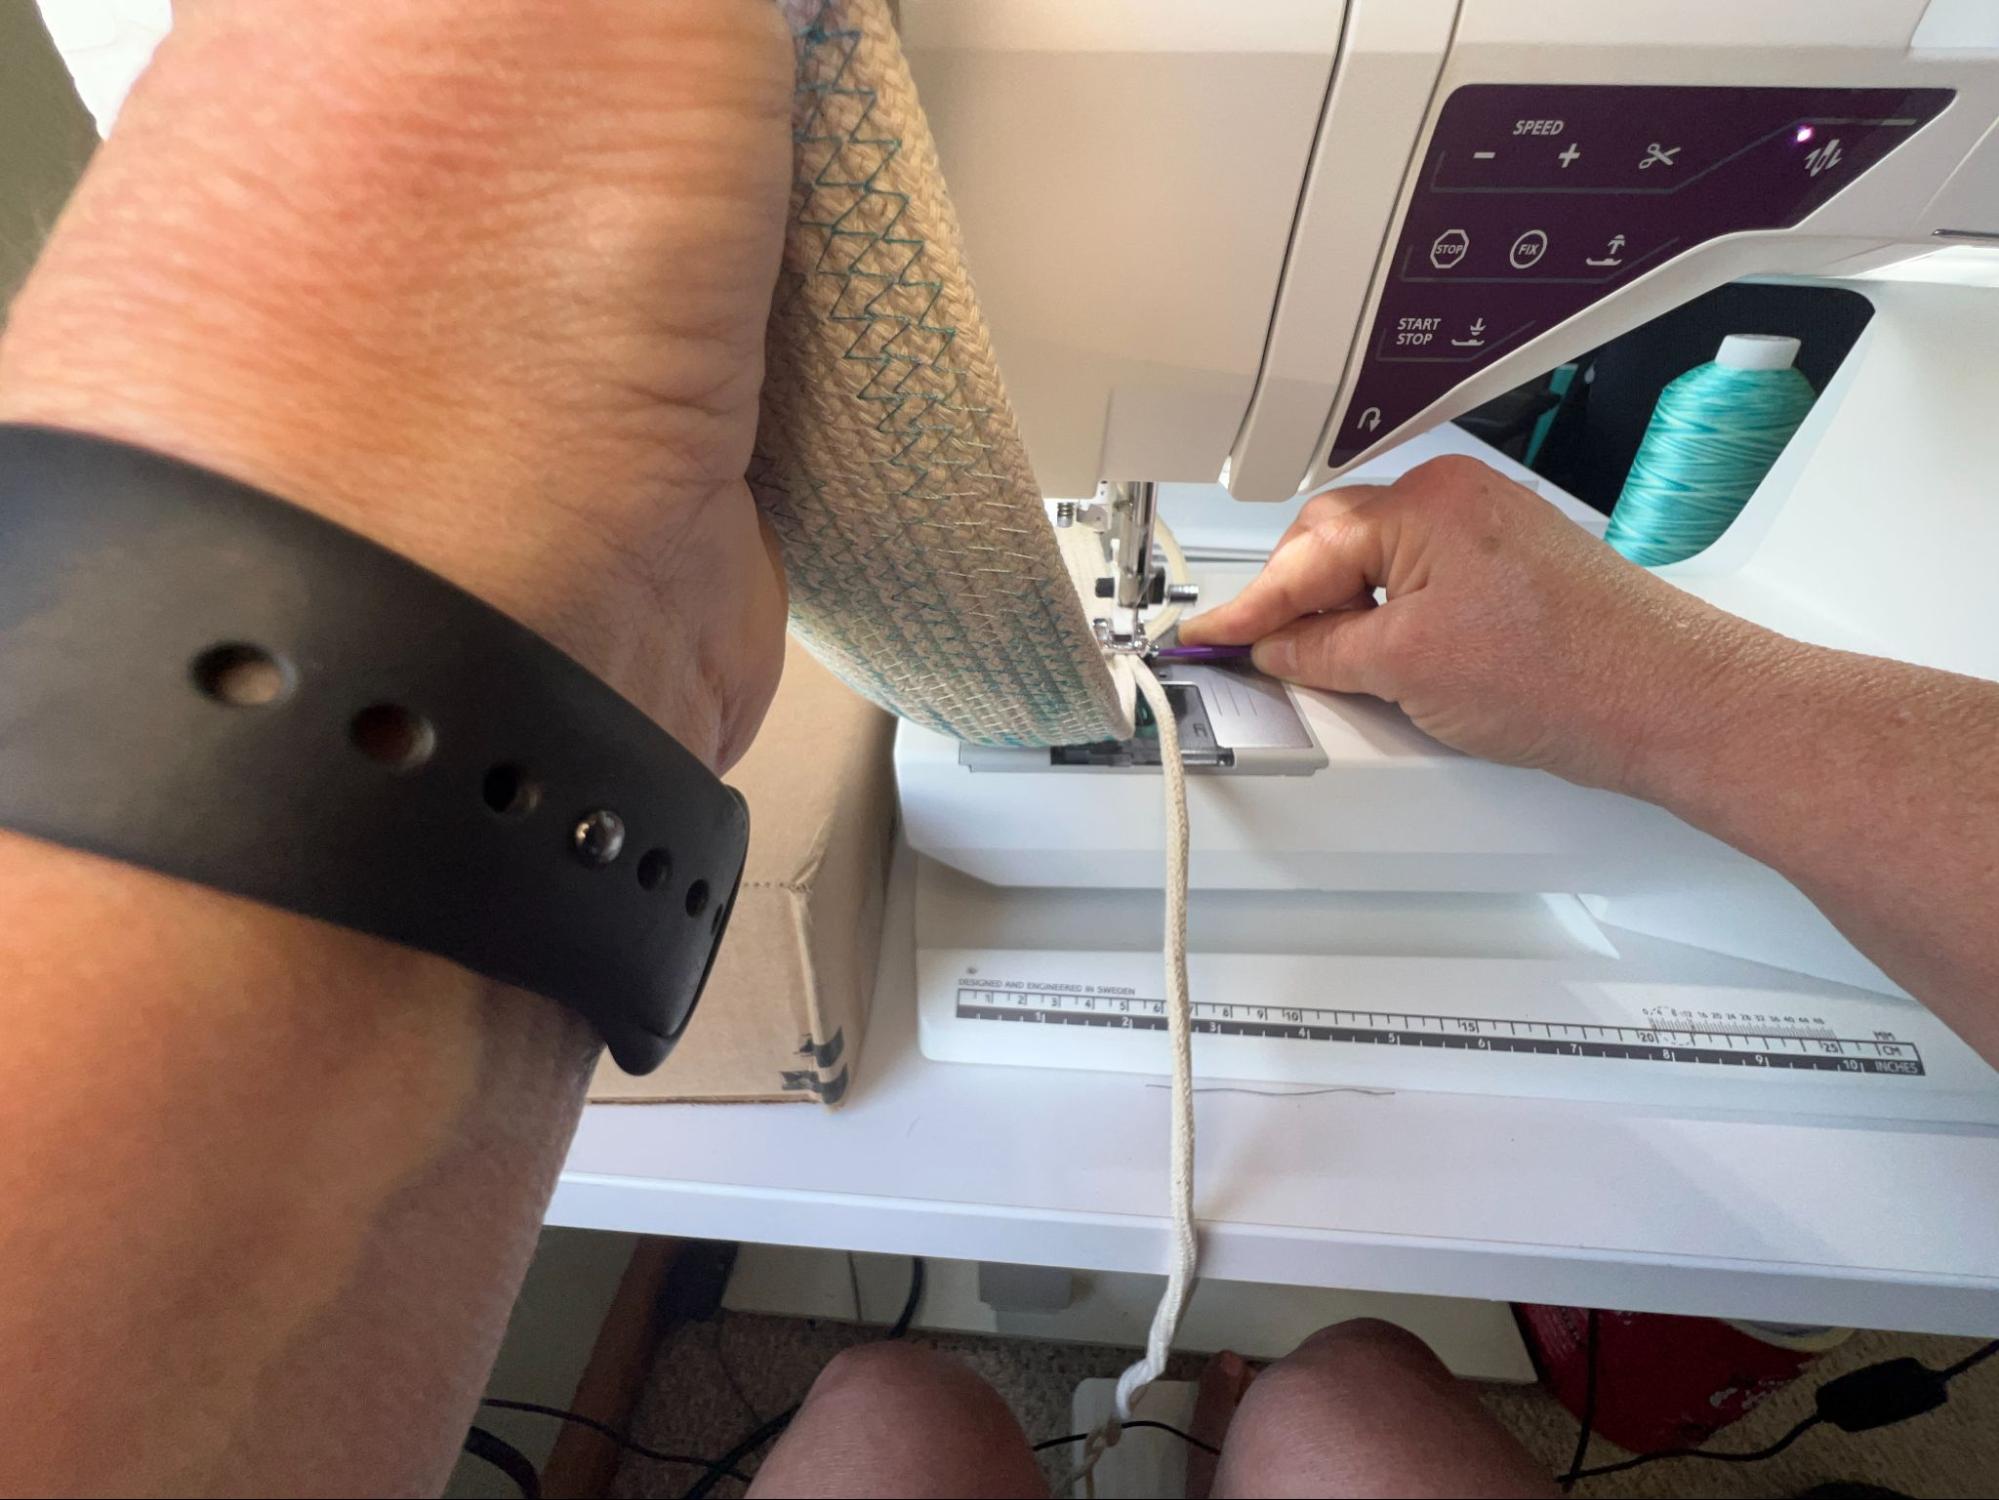
Put your left hand under the base to just slightly elevate it and create the beginning of the curvature for the side of the basket. Sew three rows like this.
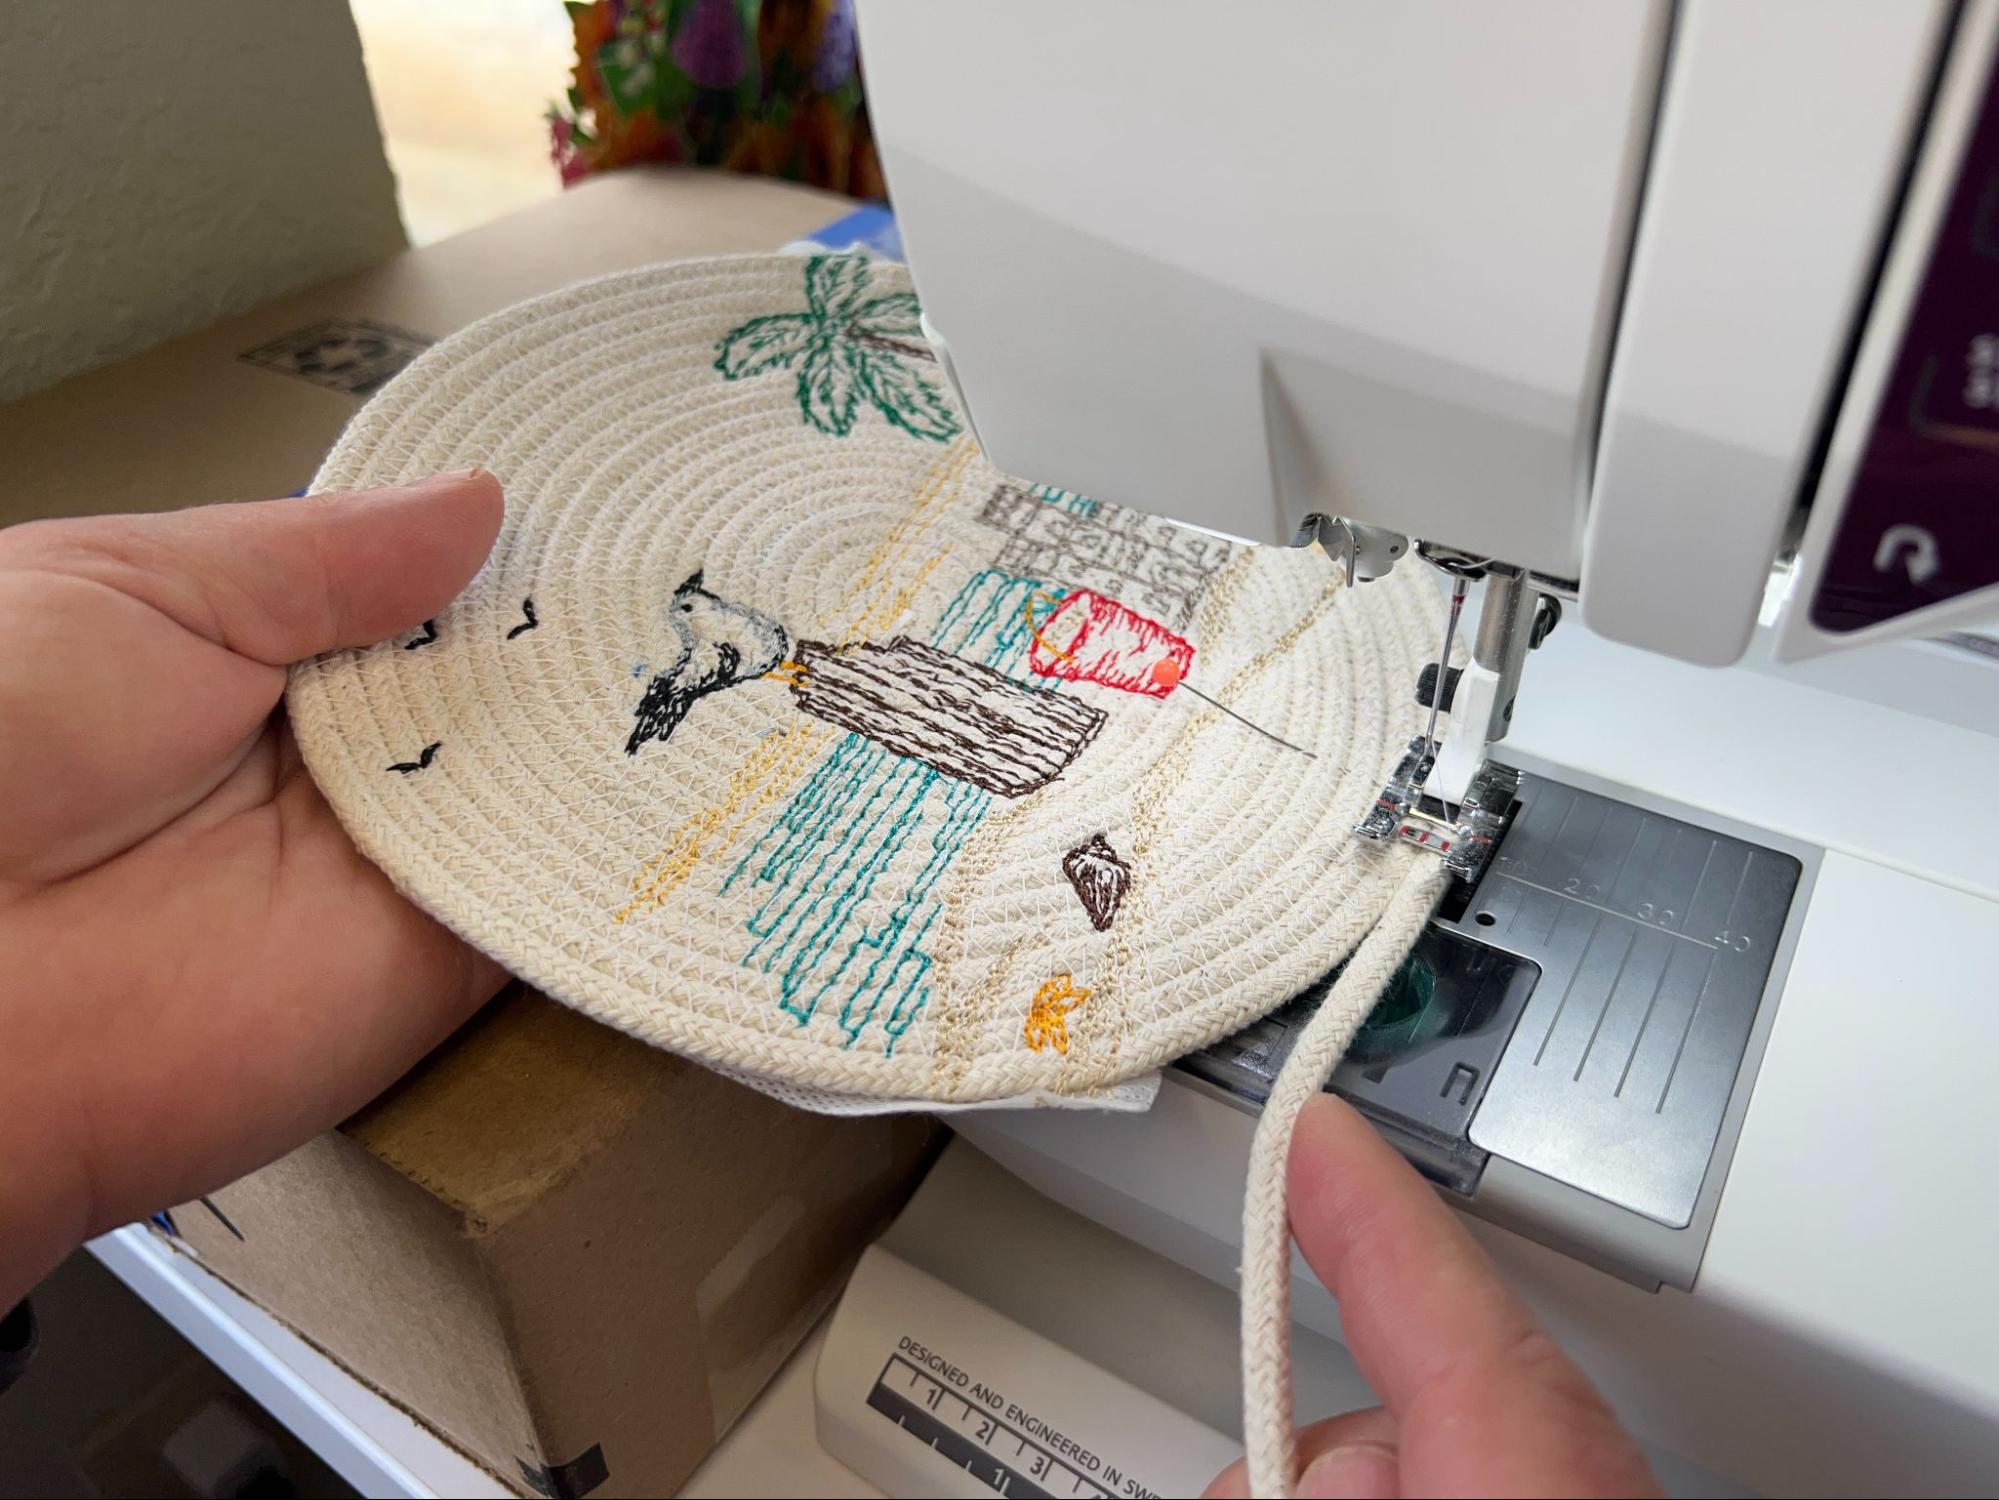
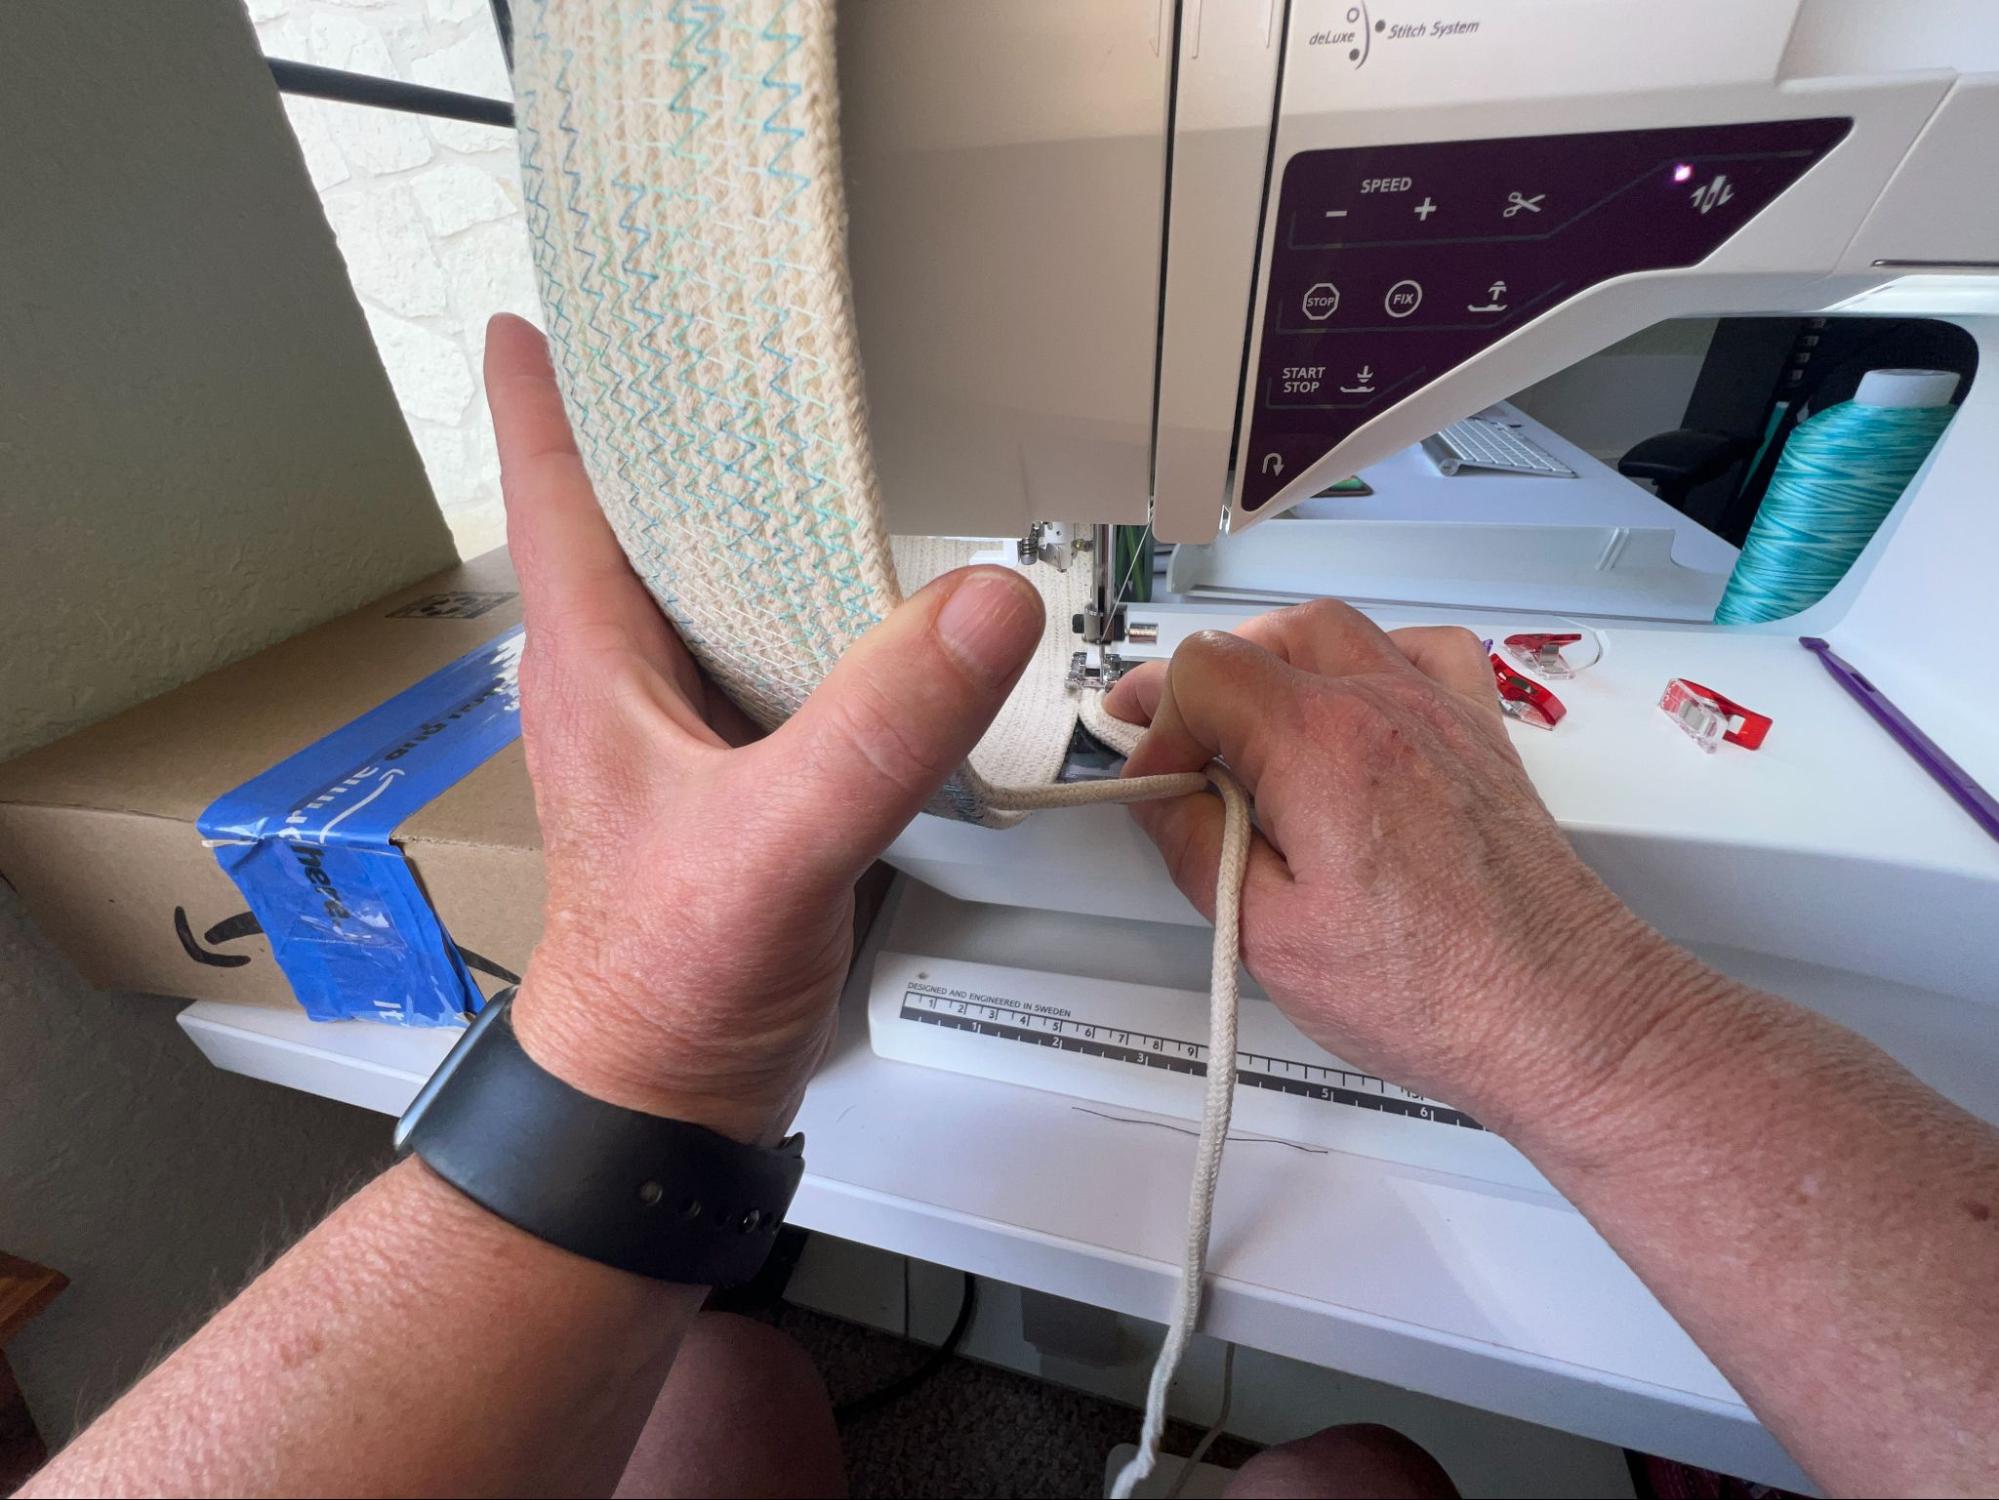
Next, raise the base a little more (an inch or two) with your left hand and sew three more rows.
Once again, raise the base a little more so that it is now about 3” from the arm of the machine and sew two more rows.
Raise the base so that it’s straight up, perpendicular to the base of the machine, and sew two more rows.
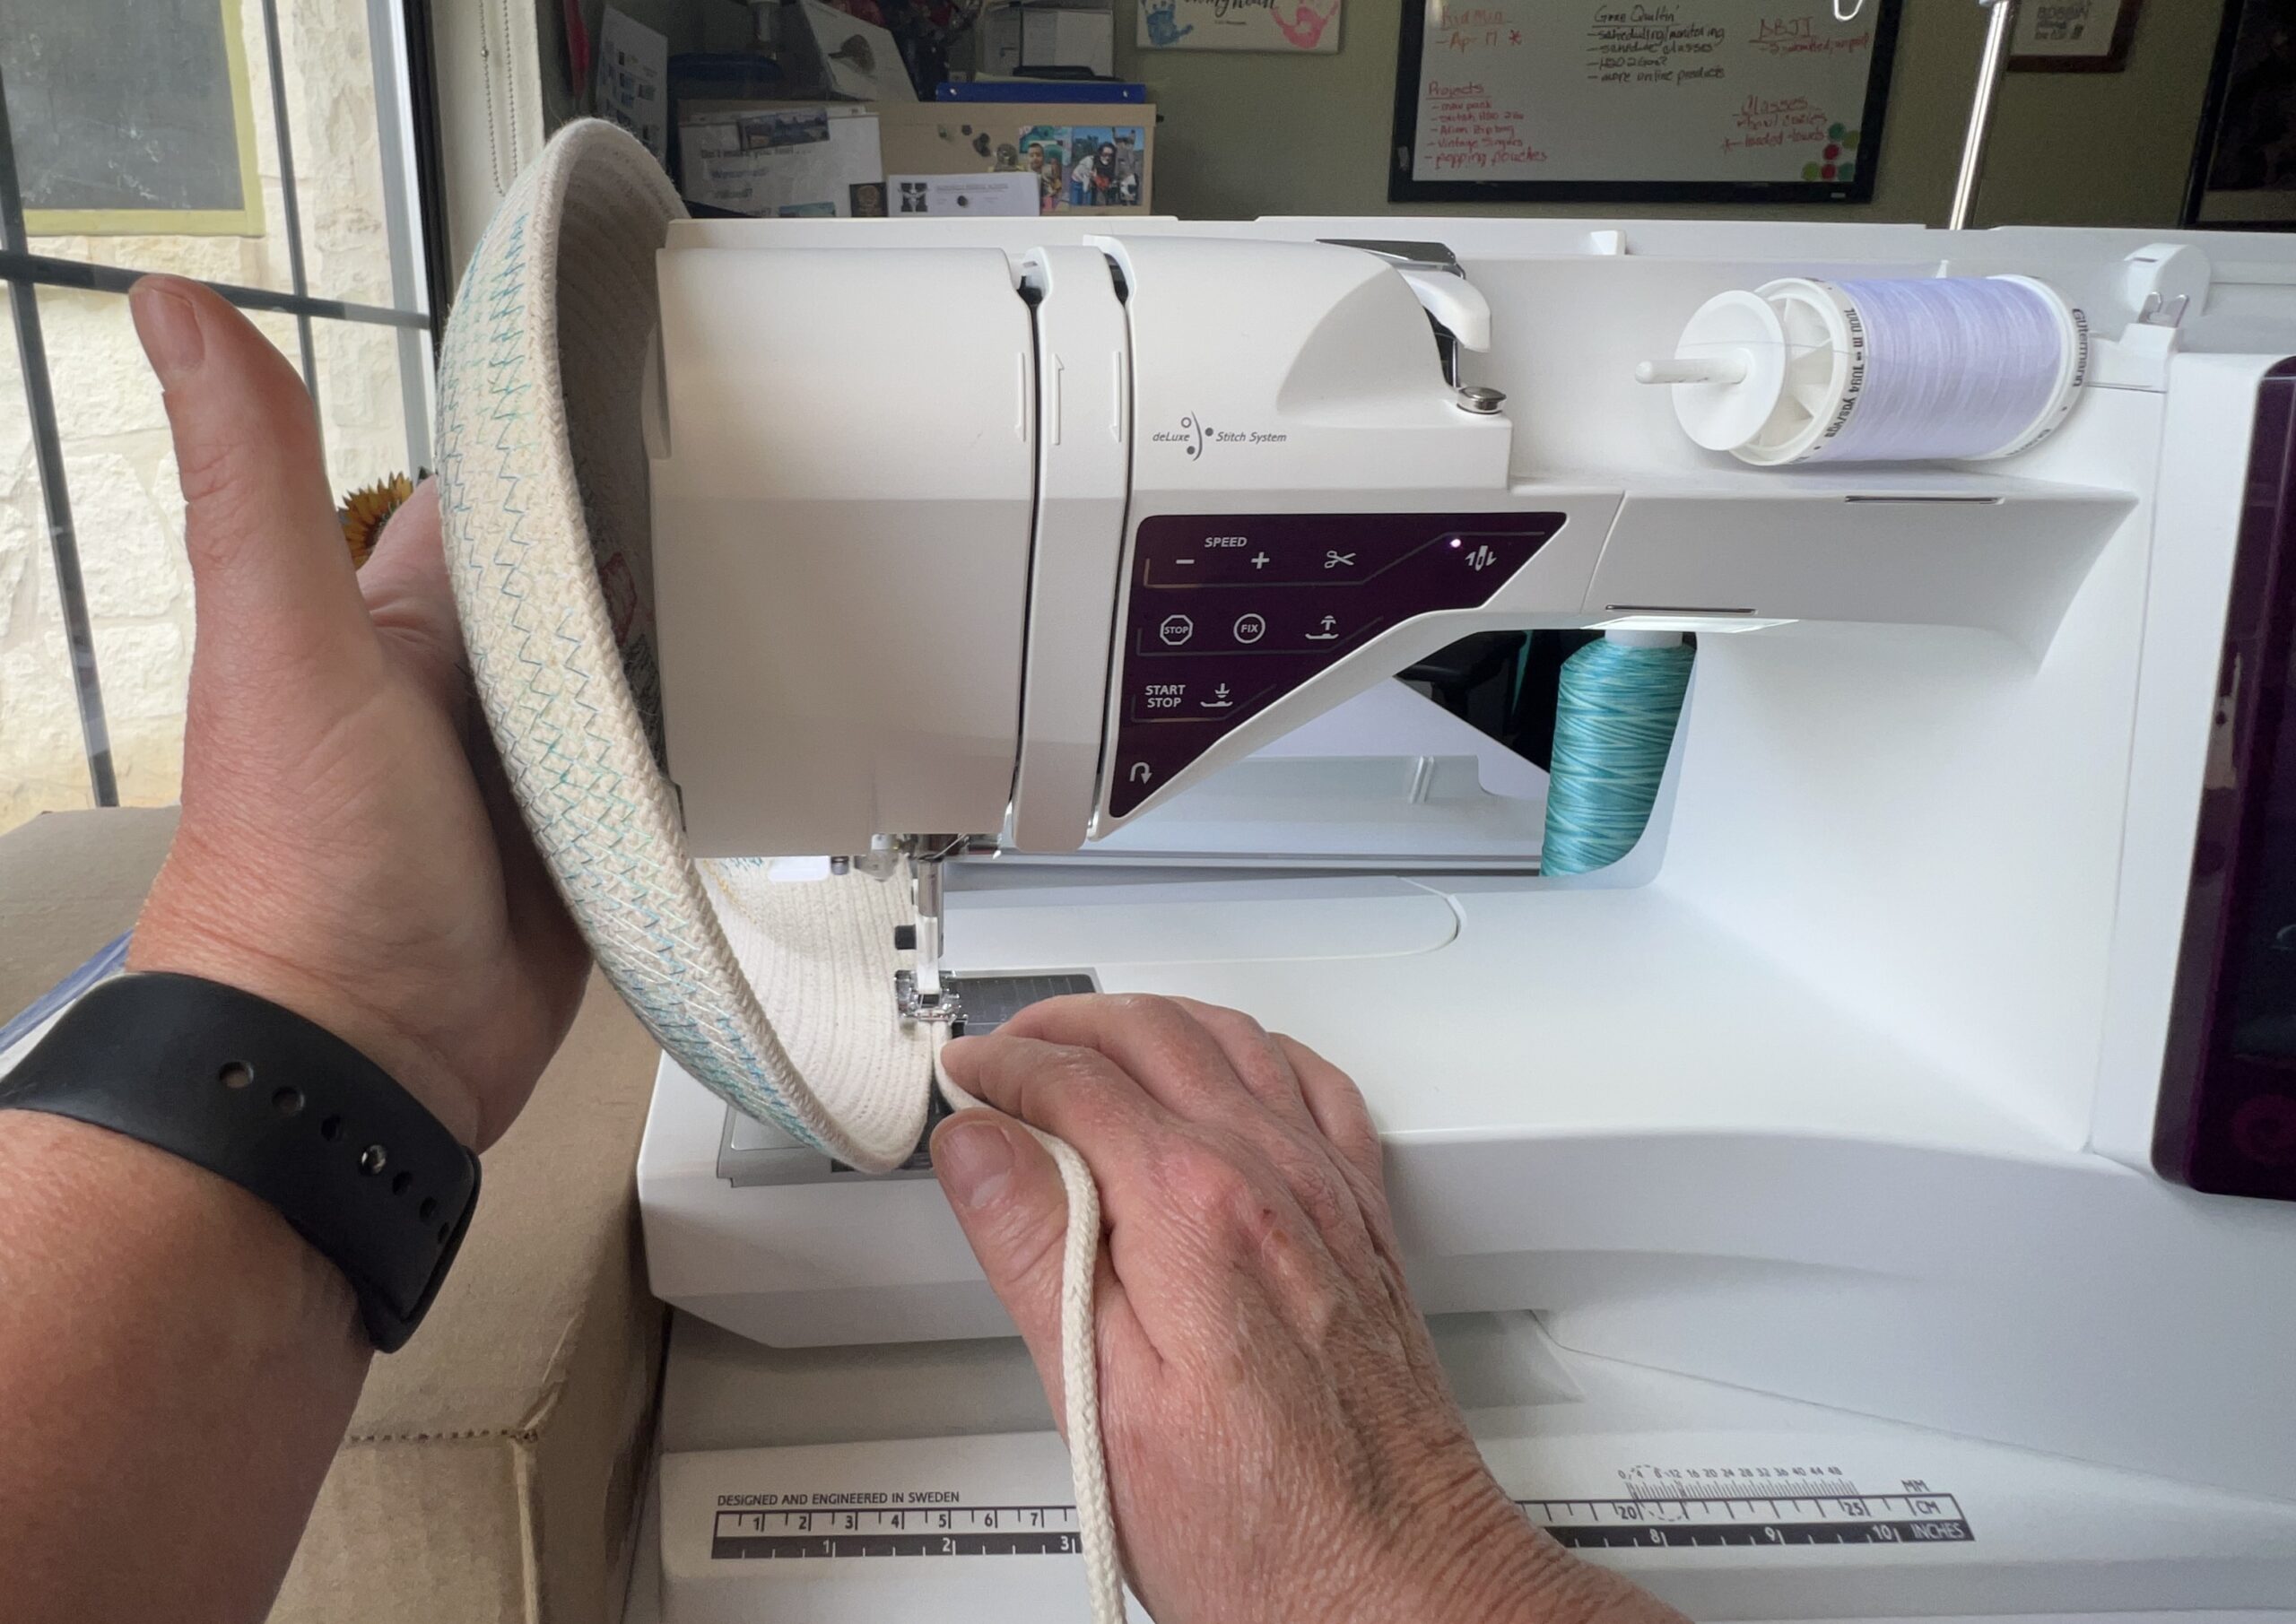
Now continue adding rows, with the base perpendicular to the machine bed, until the basket side is the height you want.
Once you have the side of the basket at a height you like, pick a point to backstitch and remove the basket from the machine. Do not cut the rope yet, we’re about to make handles.
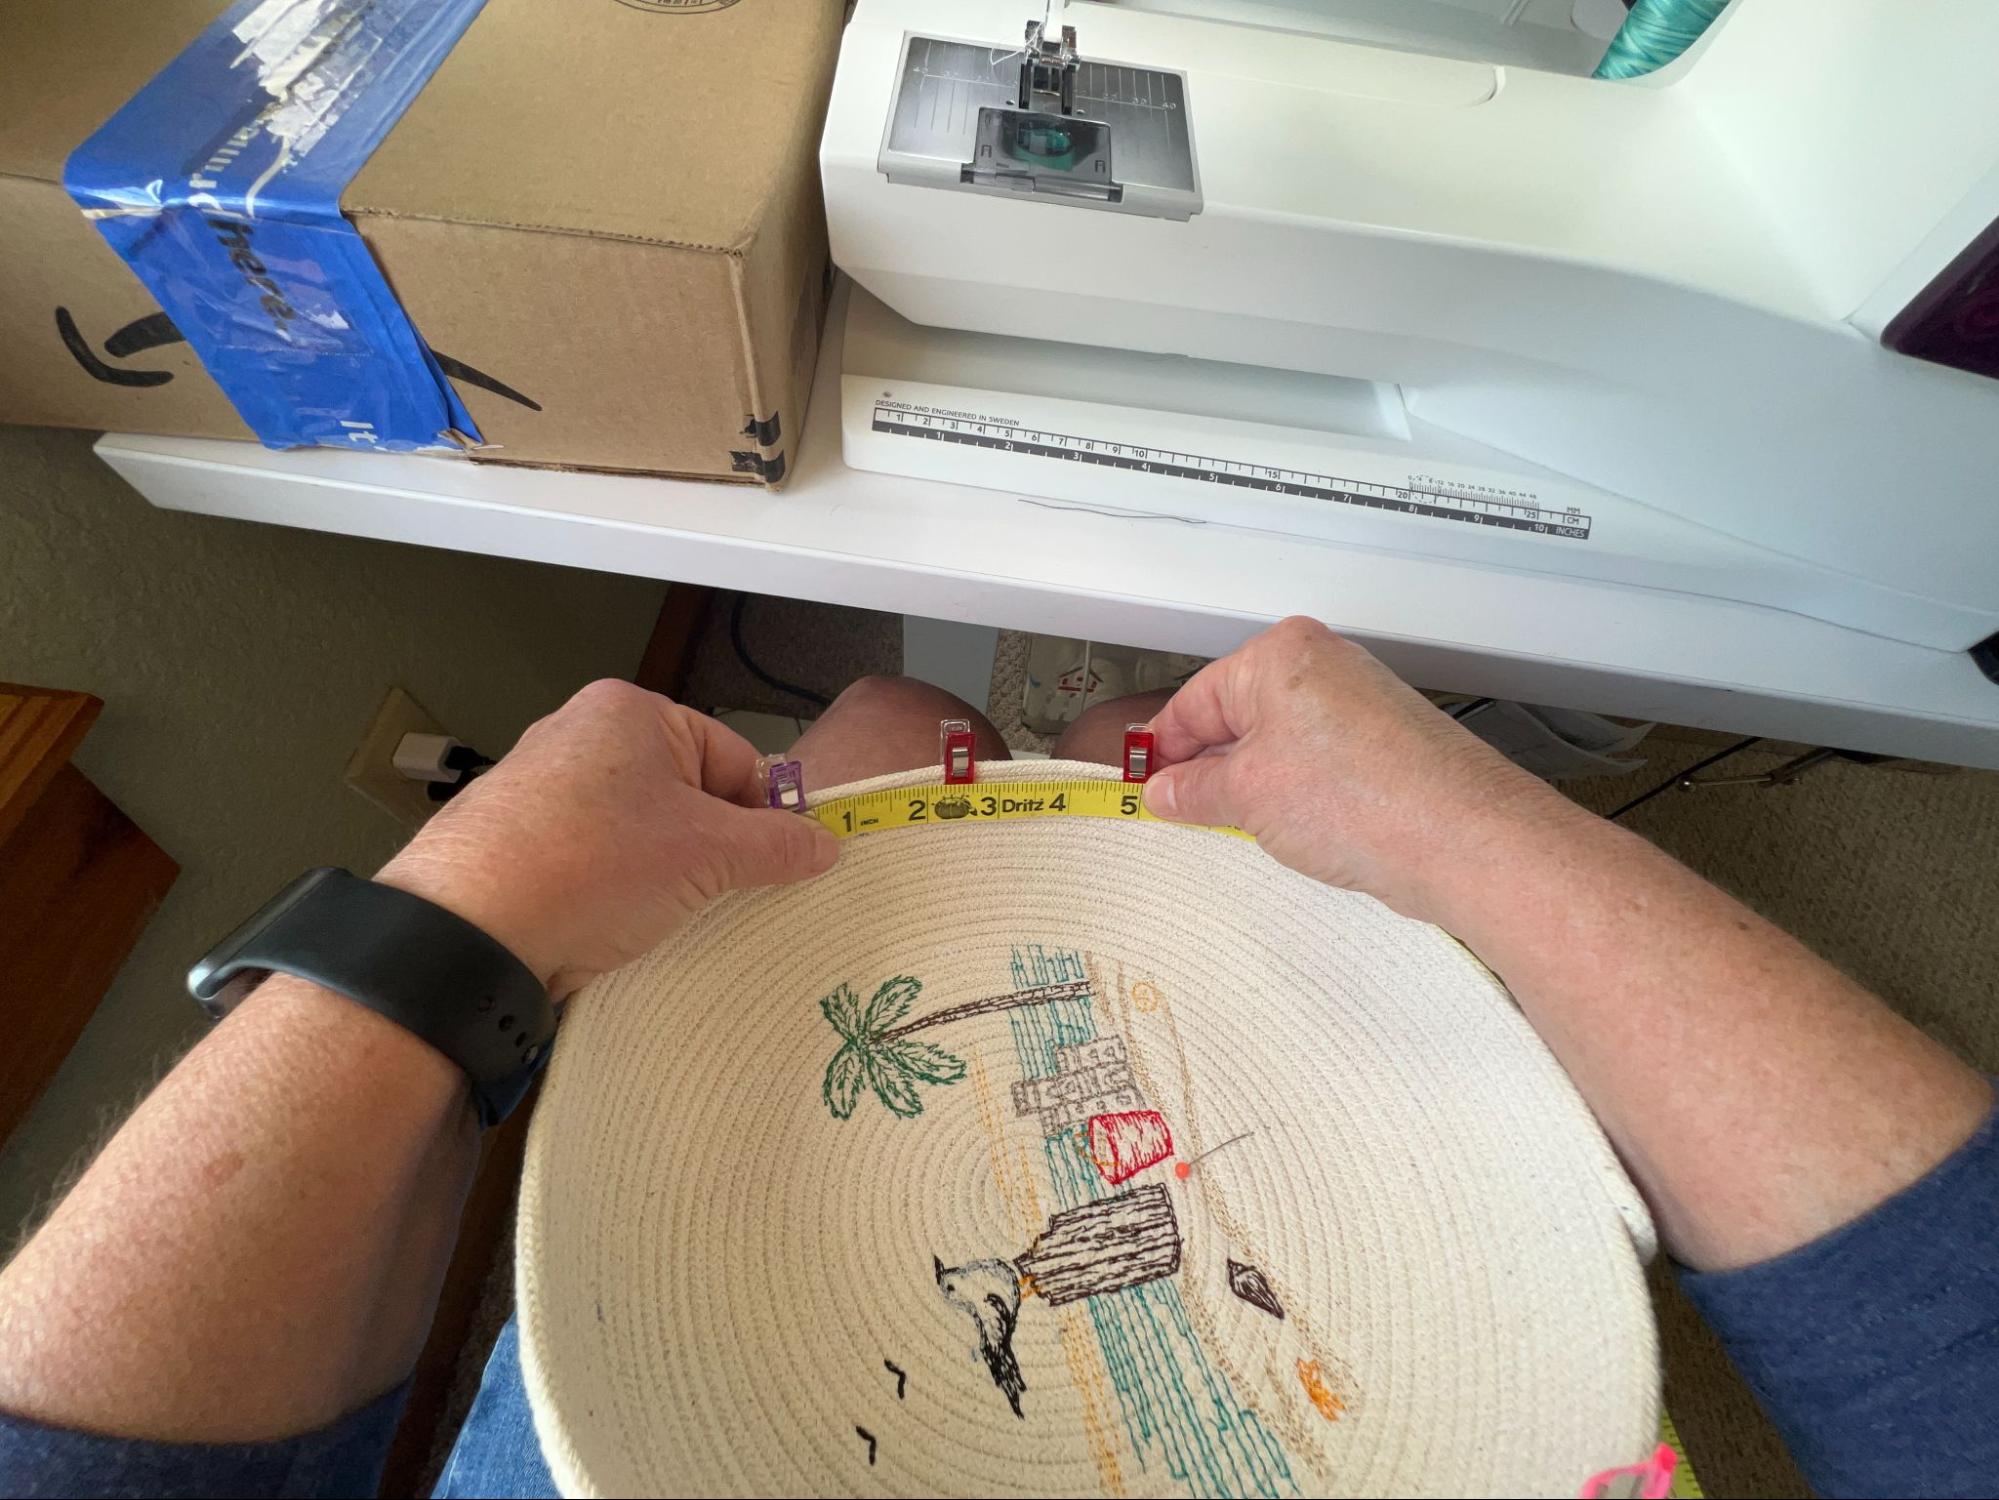
Choose a location for the handles and measure 5” of space on the basket and 6” of rope for a handle, mark both with clips.
Do the same on the opposite side of the basket to mark the location of the second handle.

Take the rope basket back to the machine and resume zigzag stitching until you get to the pin/clip that marks the beginning of the first handle.
Backstitch to reinforce this area where the handle begins.
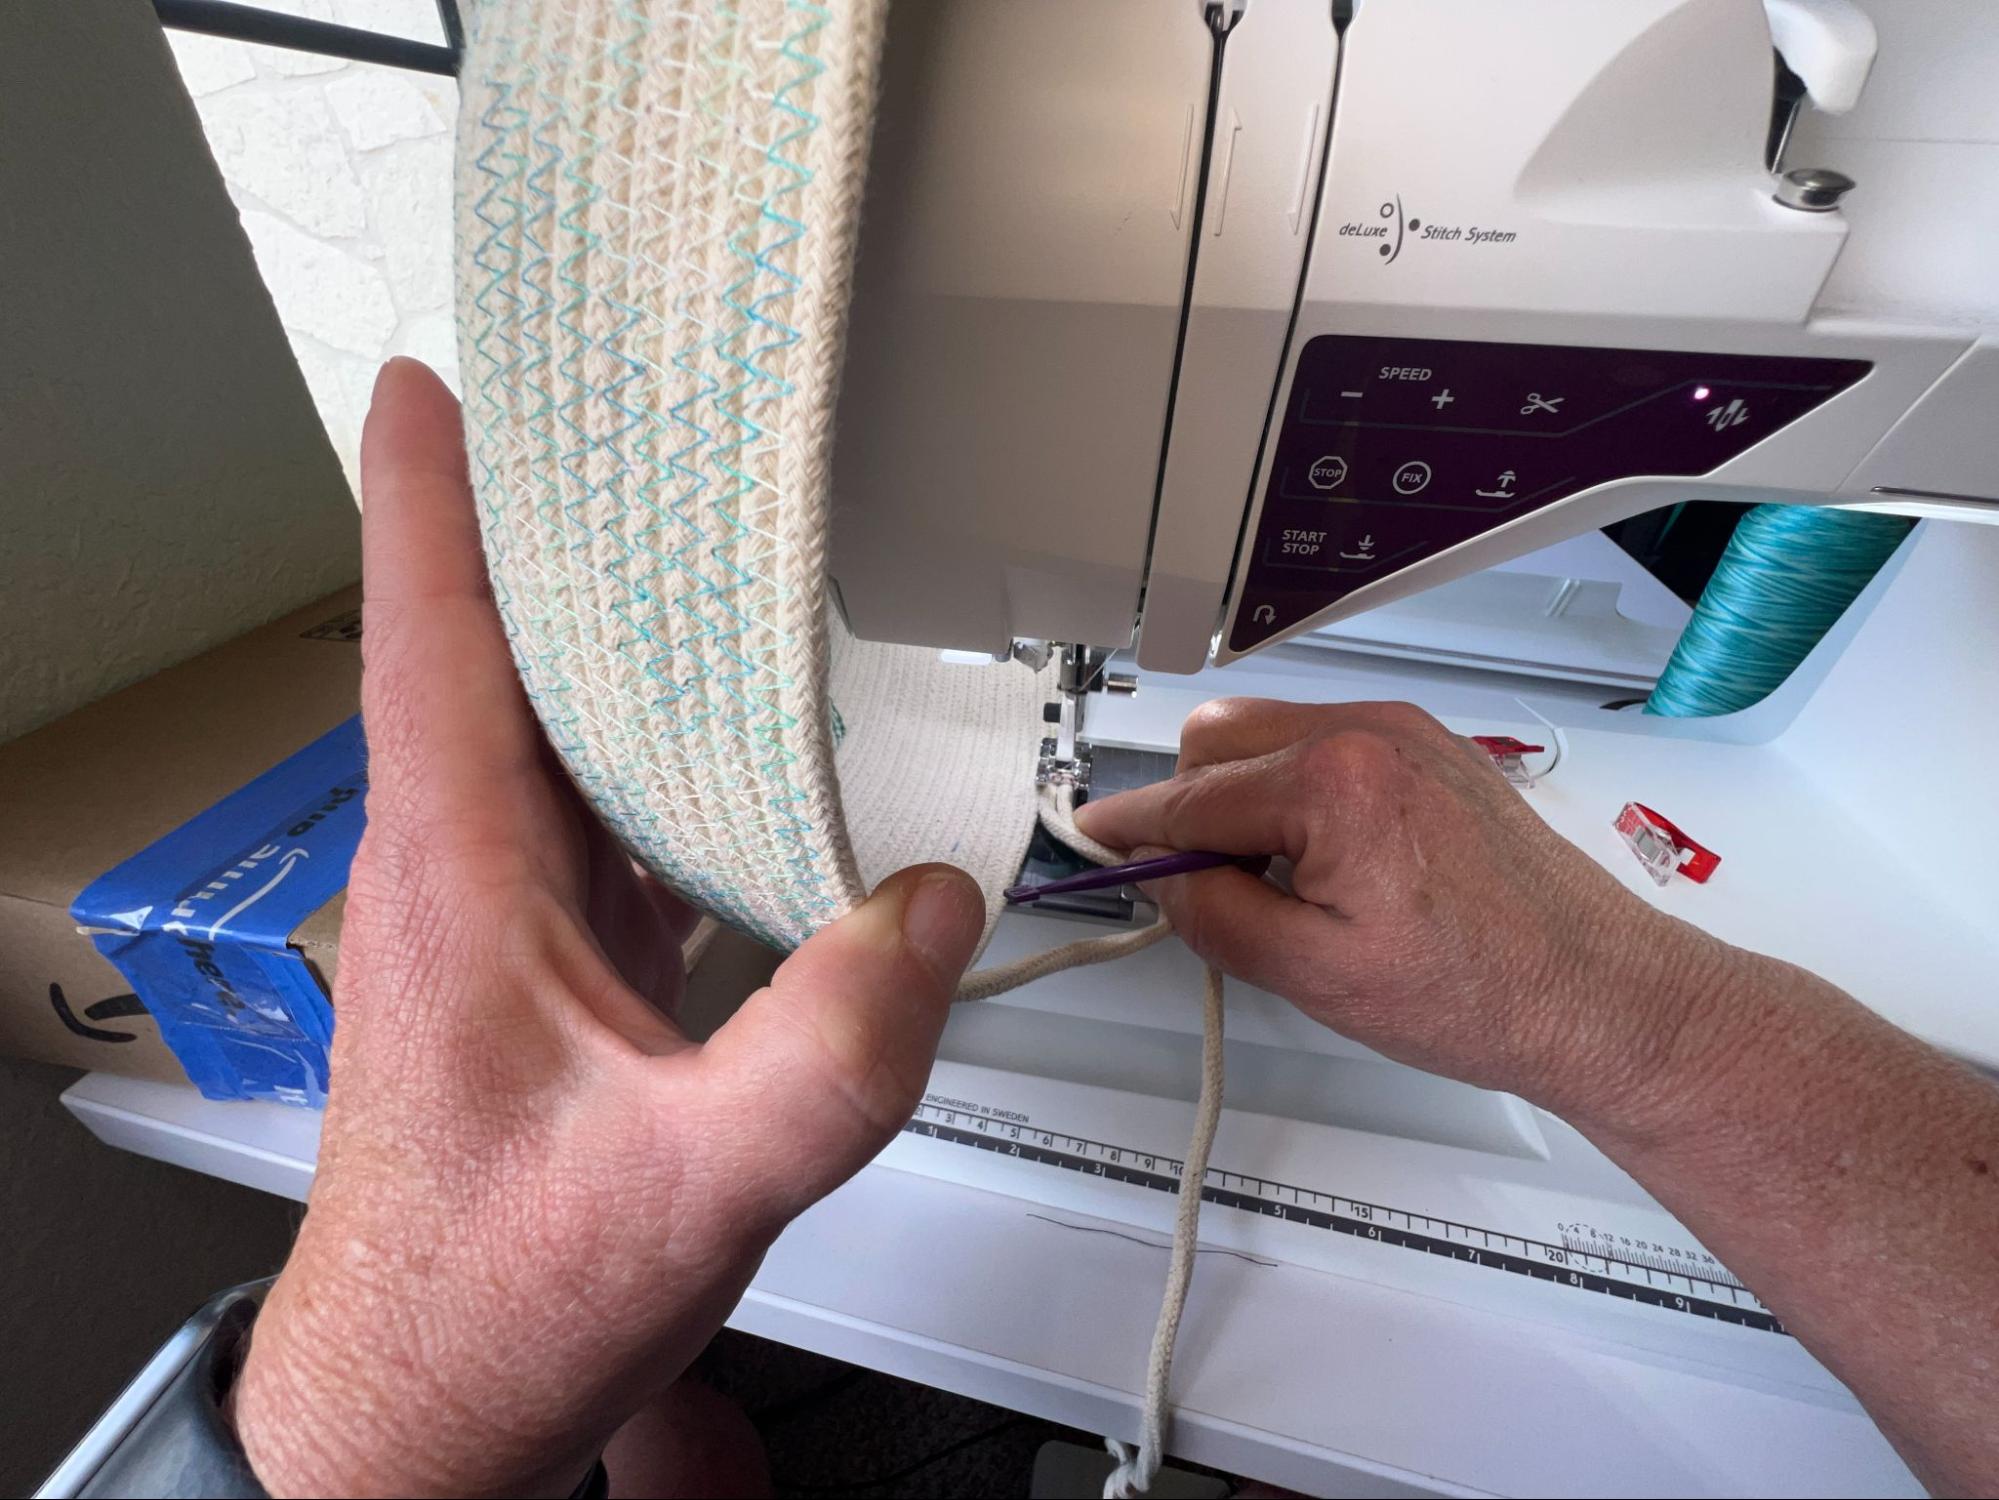
Angle your foot/stitching back towards the previous rows stitched, not catching the rope that’s been marked for the handle. You want it to be separate from the bowl side to form the handle.
At the pin/clip on the far side of the first handle, bring the rope back to the basket, at the 6” mark you made earlier, and angle your foot/stitching so that it now resumes sewing the new row of rope to the basket. Backstitch here to reinforce.
NOTE: you may want to use a crochet hook or stiletto to help ensure a snug fit of the new row of rope.
Continue sewing until you get to the second handle pins/clips.
Once again, backstitch at the beginning of the handle, measure 6” of rope for the handle and 5” on the basket.
Sew along the edge to the far side of the handle, where it rejoins the basket.
At the pin/clip on the far side of the second handle, bring the rope back to the basket, at the 6” mark you made earlier, and angle your foot/stitching so that it now resumes sewing the new row of rope to the basket. Again, backstitch here to reinforce.
Sew around the edge until you get back to the first handle.
Continue adding the new rope row to the handle.
Sew around the edge until you get to the second handle and again sew the new rope to the handle there.
Do this sequence of steps one more time so that you end up with three rows of rope on each handle.
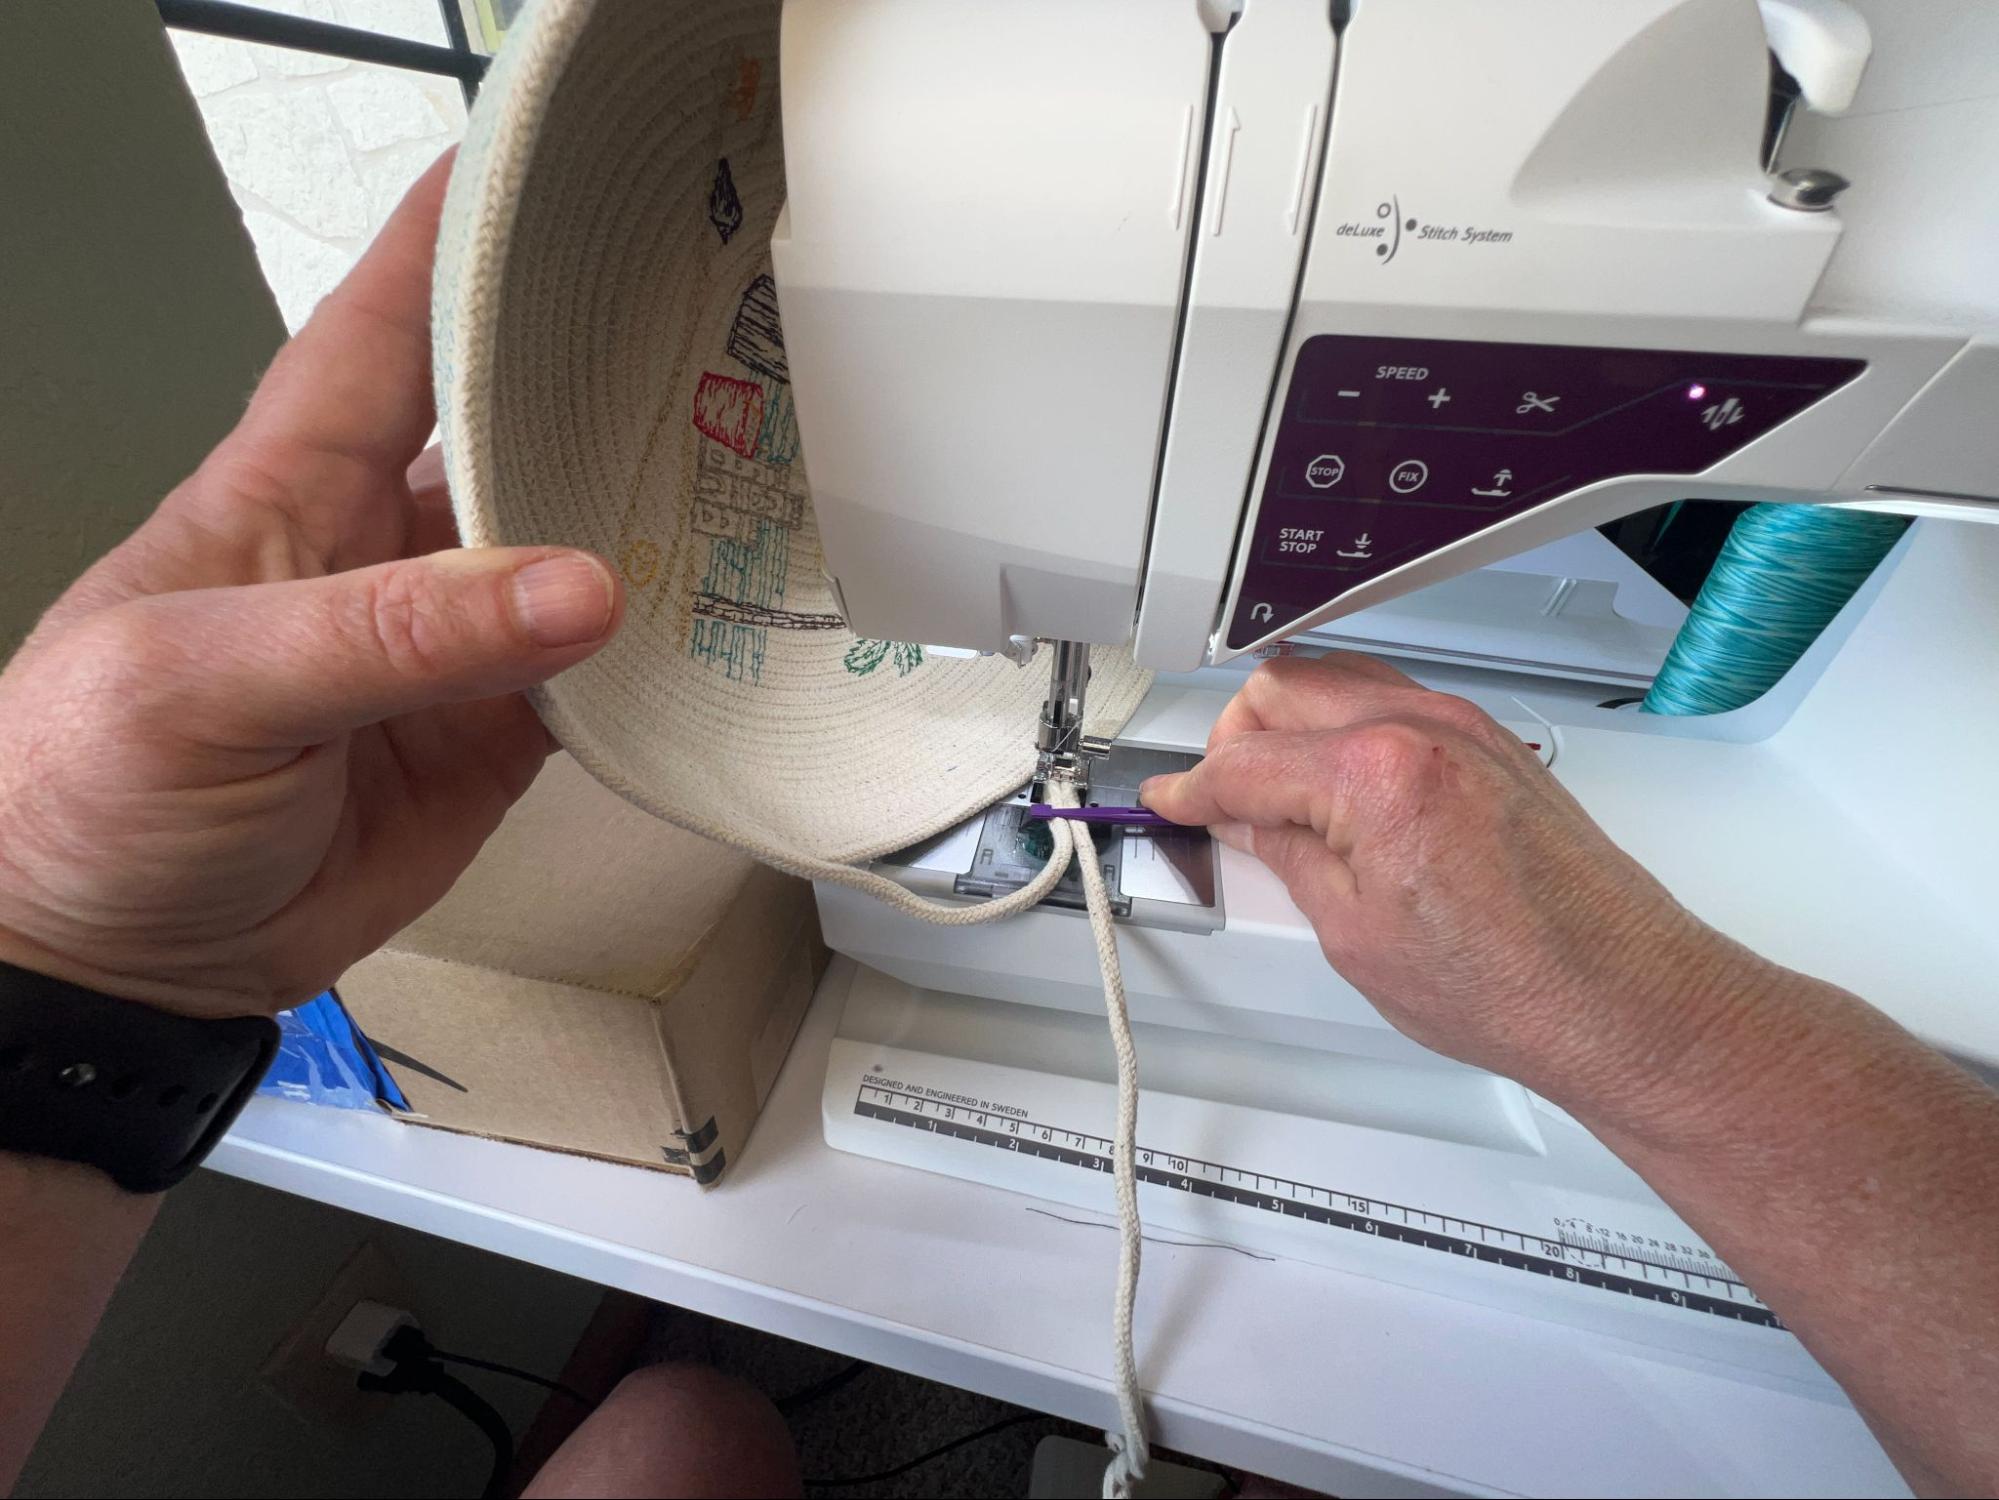
Stop attaching rope a few inches before you start the fourth row on the handle.
Cut the rope at an angle and ease it in to finish the basket.

Backstitch and remove from the machine.

If you didn’t remove the WSS in an earlier step, you can go ahead and do that now. I find that an old toothbrush and a washrag, dipped in water, work well to remove the stabilizer without unnecessarily soaking the whole project.
That’s it. We’re done. These embroidered rope baskets come together quickly and turn out so cute. They’re great for wrangling the assortment of remotes, glasses, pens, and other random stuff that land on my coffee table. I would also use one to keep spare toilet paper rolls handy in the bathroom. The possibilities are endless. Enjoy!