Toggle Nav
 Inspire.
Create.
Stitch.
Inspire.
Create.
Stitch.
Search
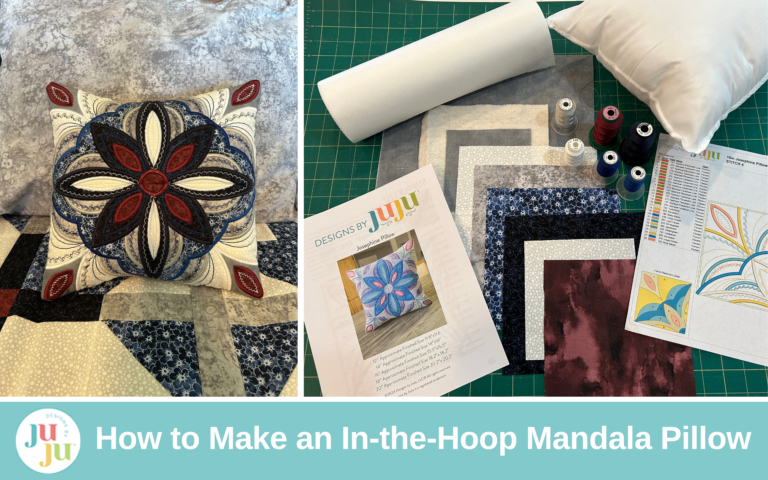
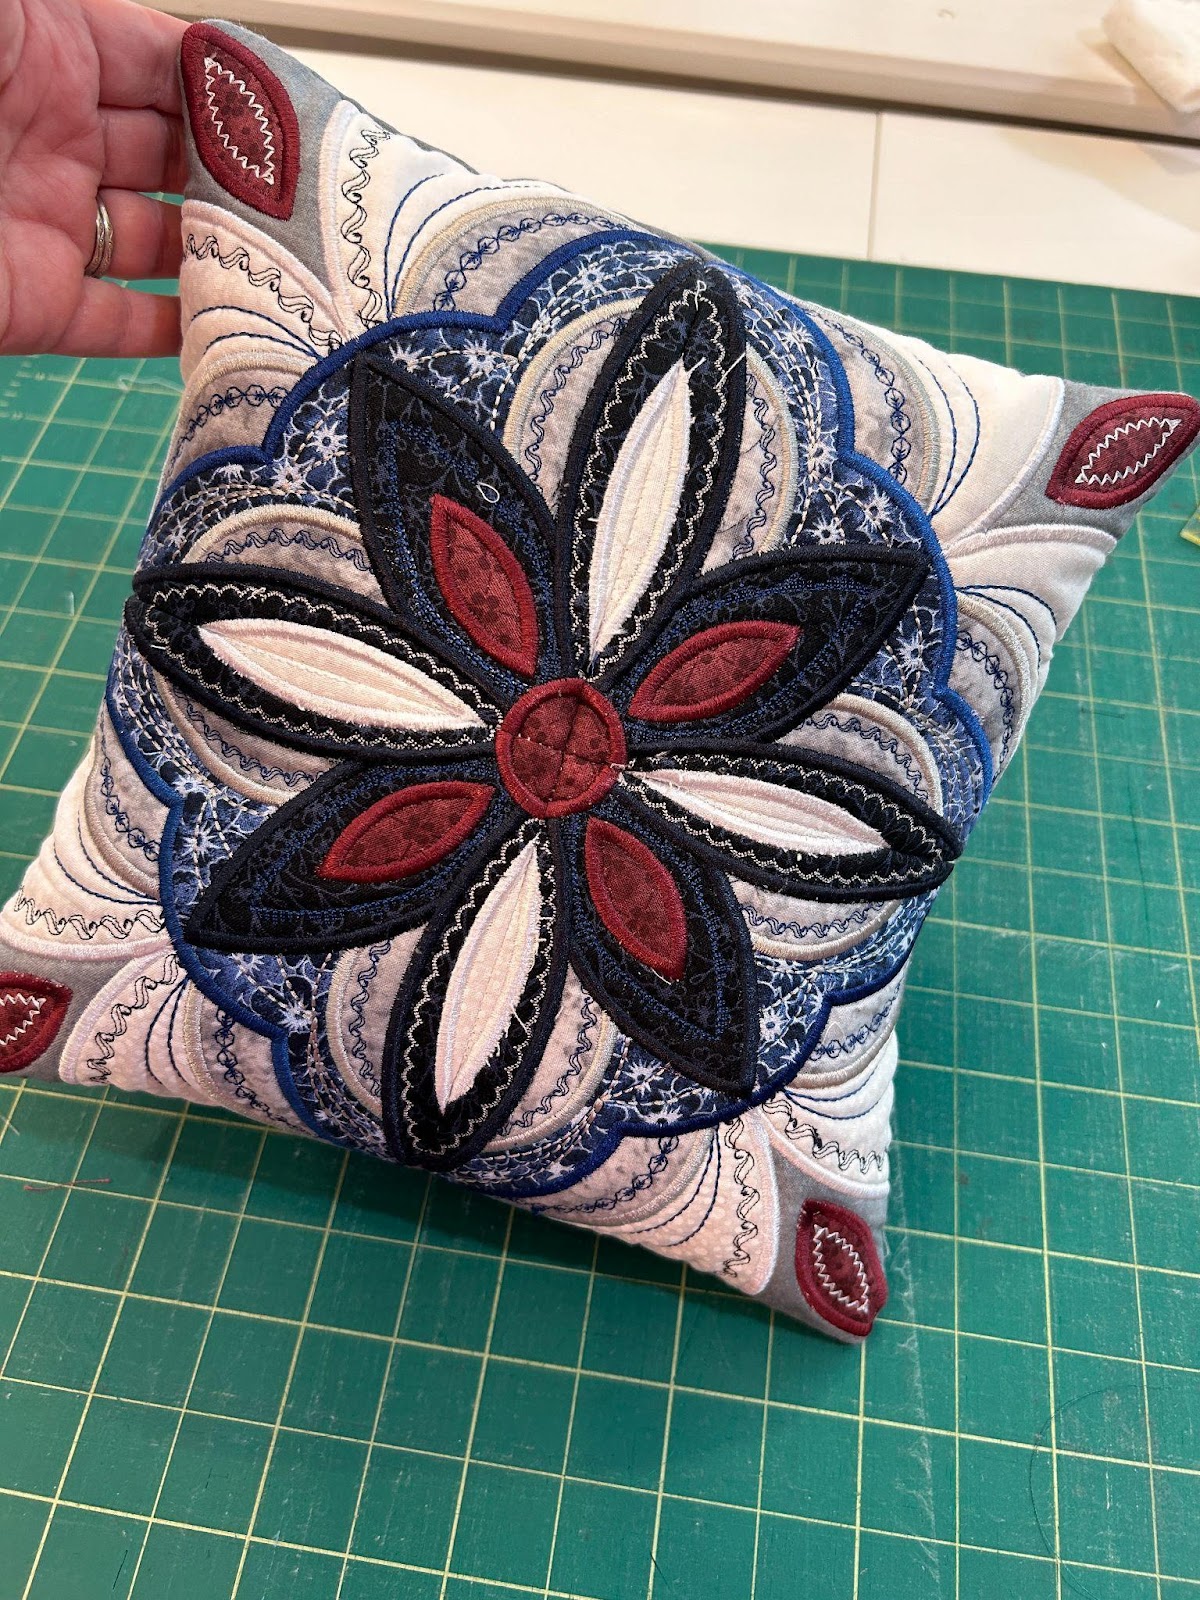
When I first saw these mandala embroidery designs, I was in love. They look amazing and I couldn’t wait to make one.
Mandala designs, with their intricate patterns and harmonious symmetry, have long been celebrated for their meditative and calming qualities. Combining this timeless art form with the coziness of a pillow creates a perfect blend of beauty and function. Whether you're a seasoned embroiderer or just starting out, this project will guide you step-by-step through the process of creating your very own mandala pillow.
Designs by Juju has quite a few machine embroidery mandala designs. I chose to make the Josephine Pillow today but the technique will work for any of the mandala embroidery patterns.
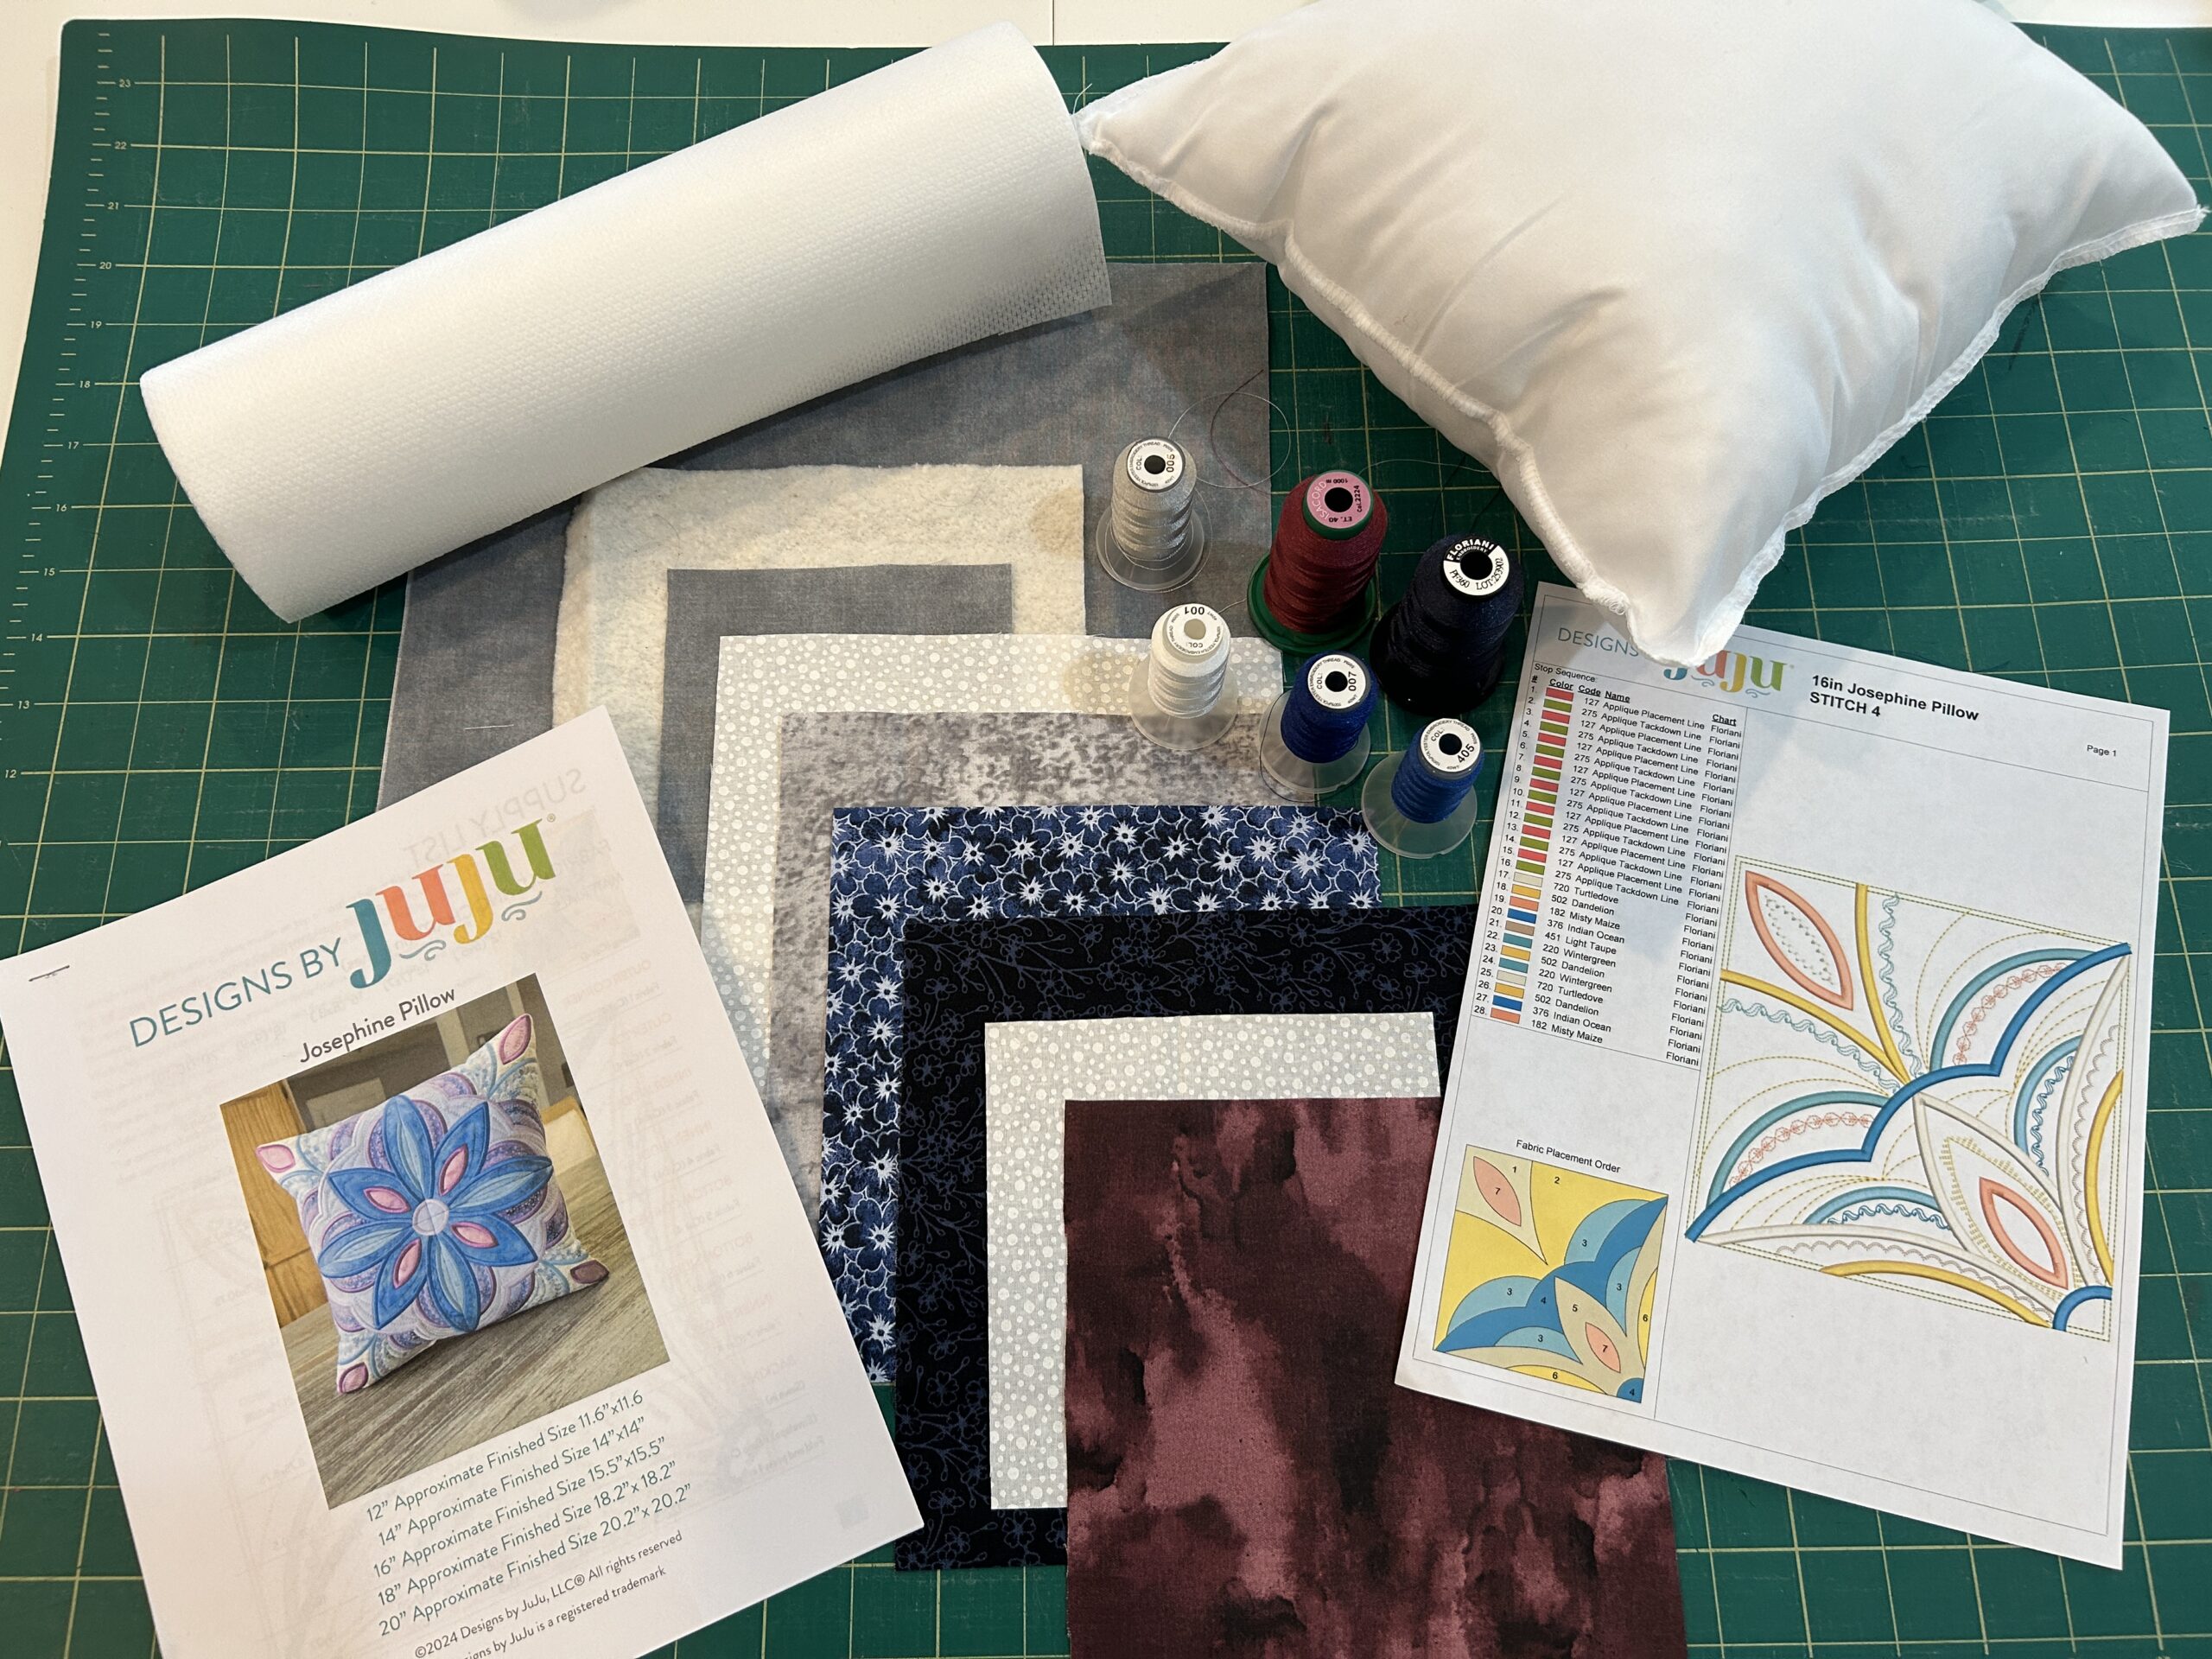
Check out Embroidery Supplies JuJu Uses for our favorite supplies!
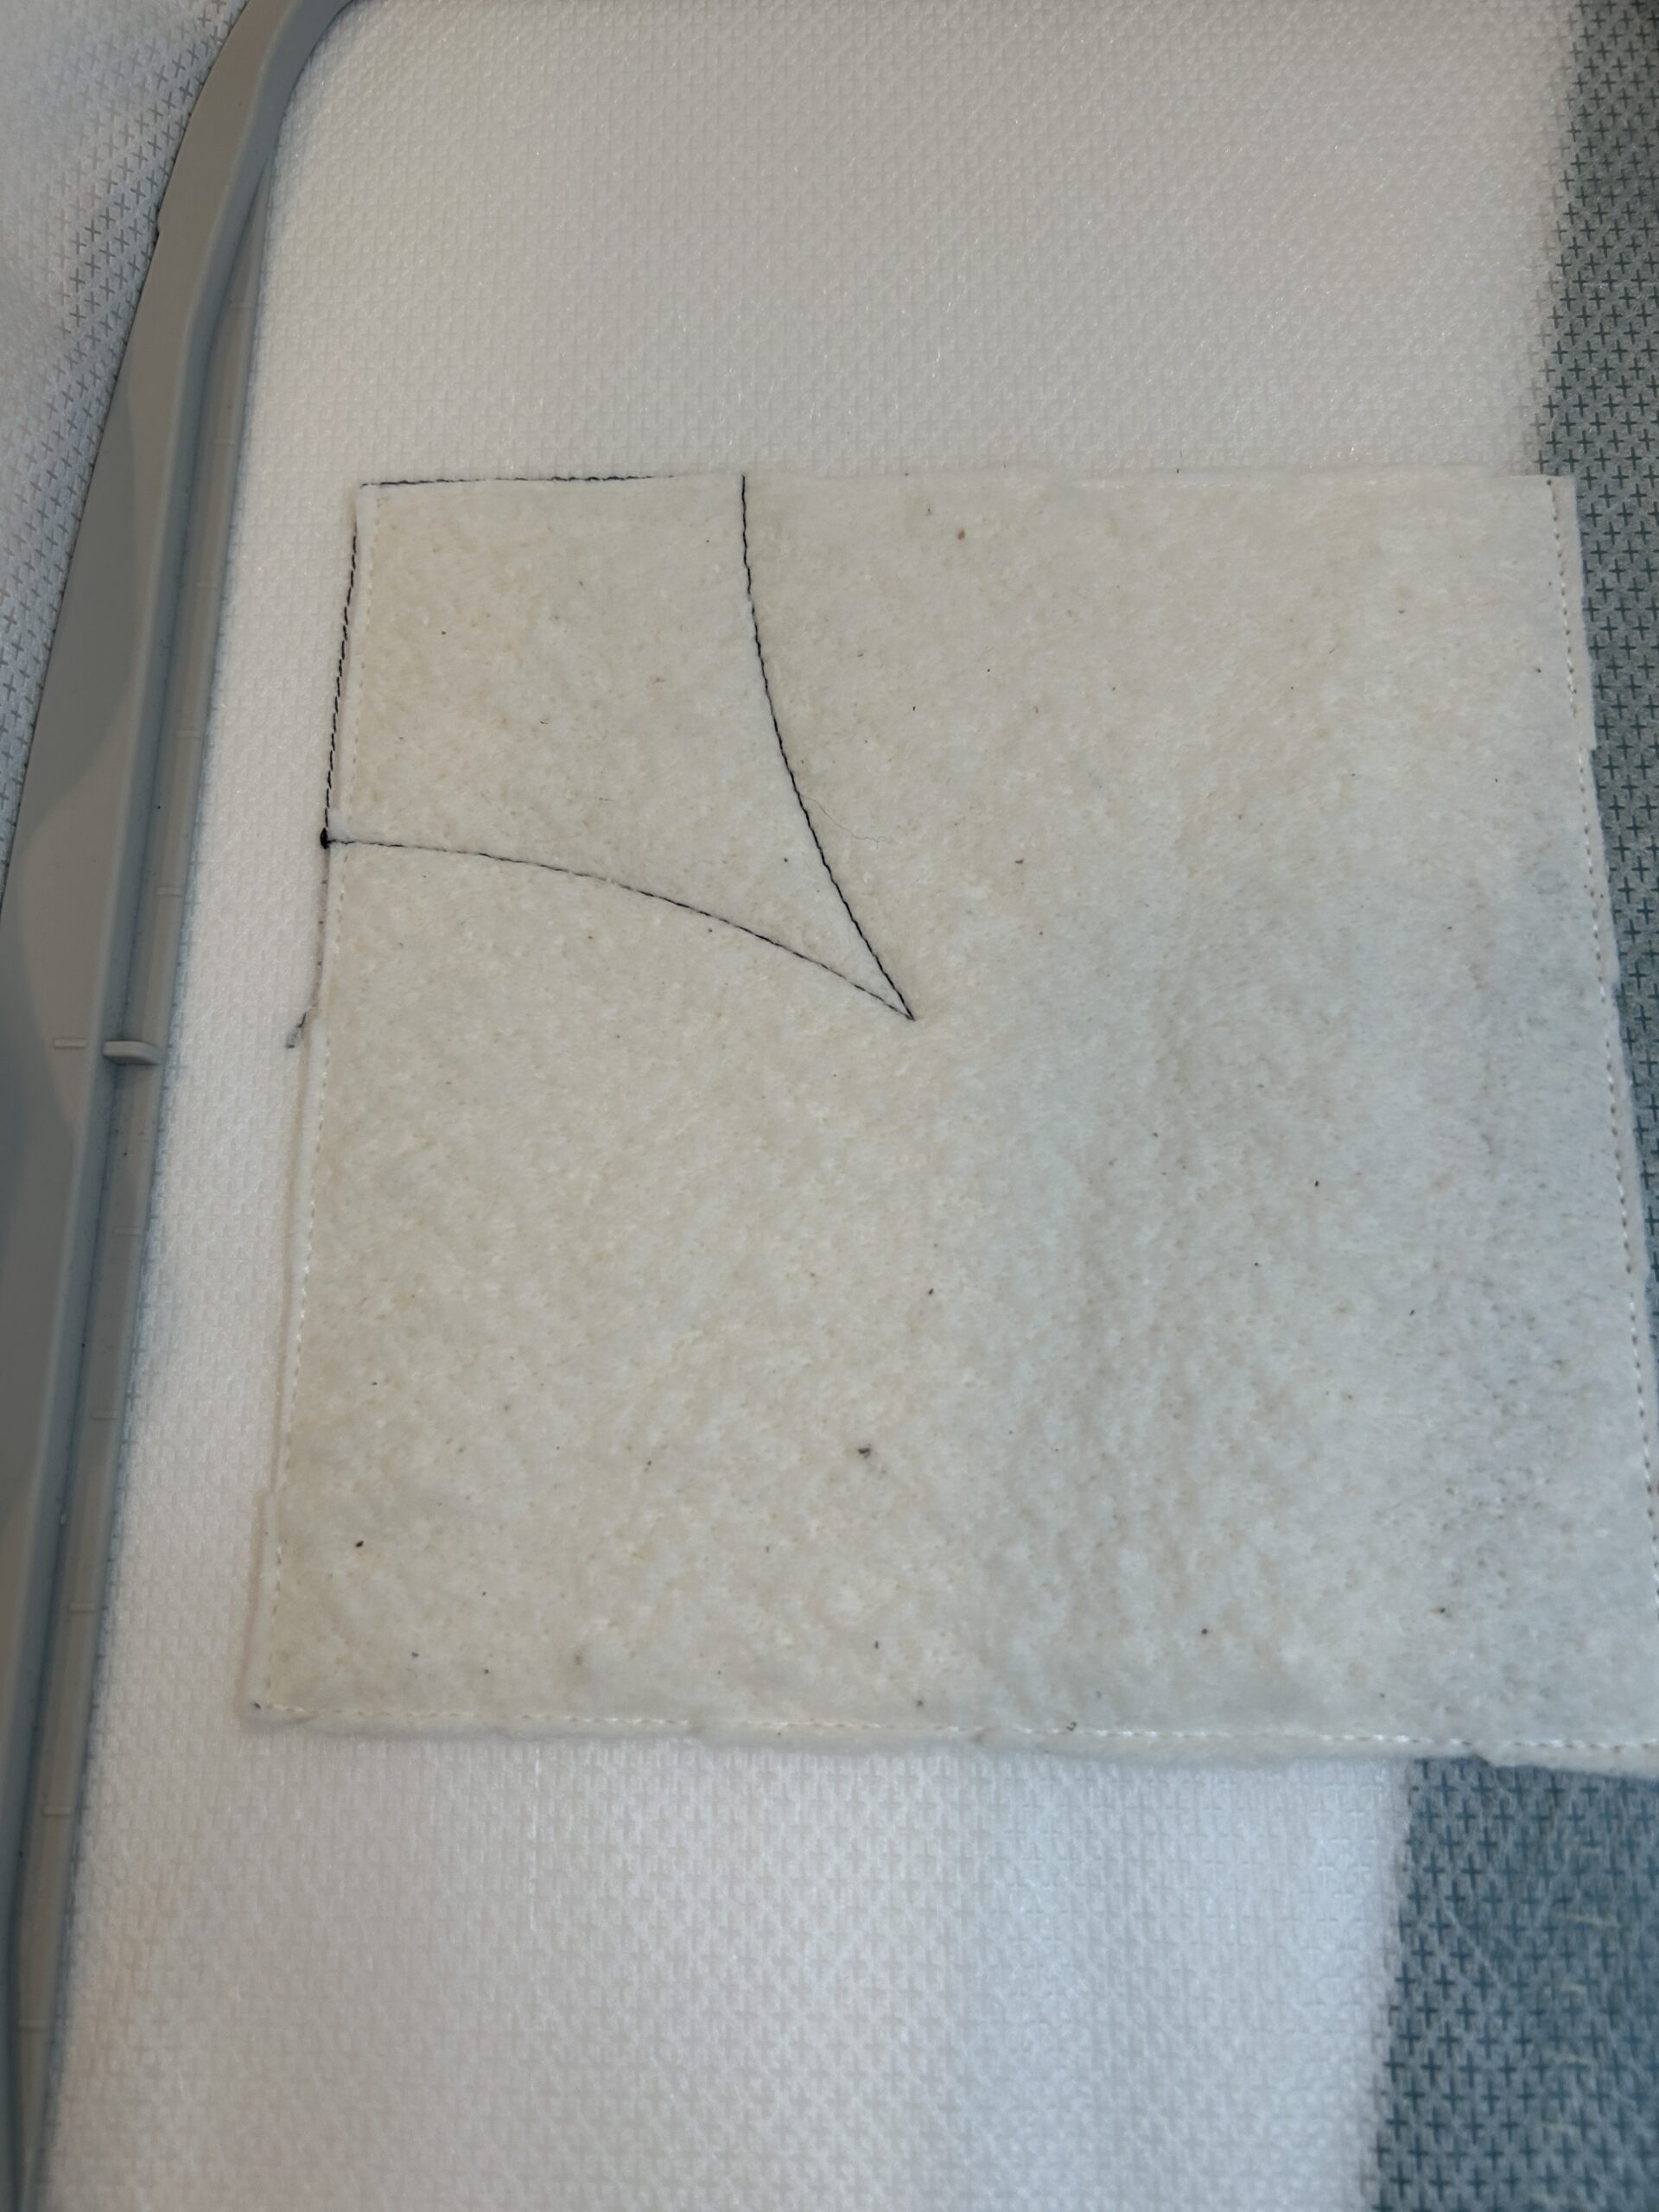
To start, load the design to the machine. We will be making four of the same design to join together to make our pillow. Put some no-show mesh in the hoop, then stitch out the placement stitch.
After the placement stitch has been done, place the batting, completely covering the placement stitch, and stitch it down.

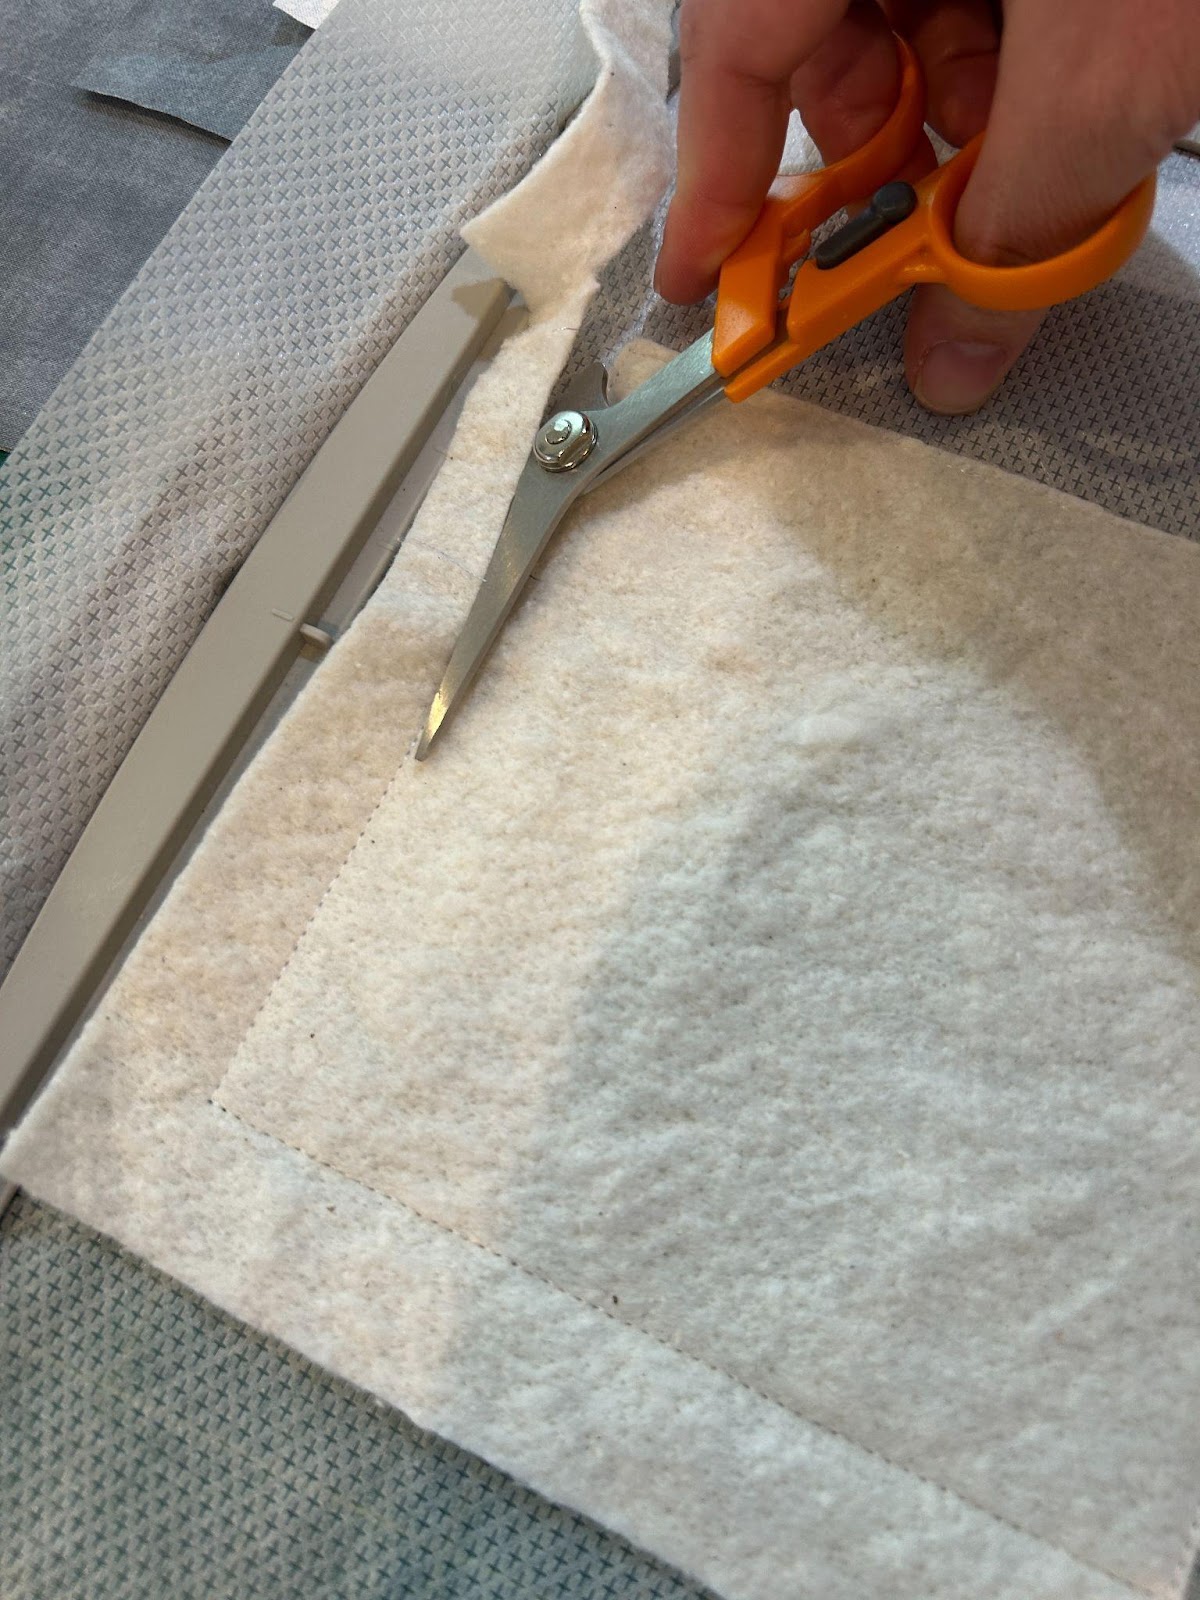
Trim around the batting as close to the stitching as possible.
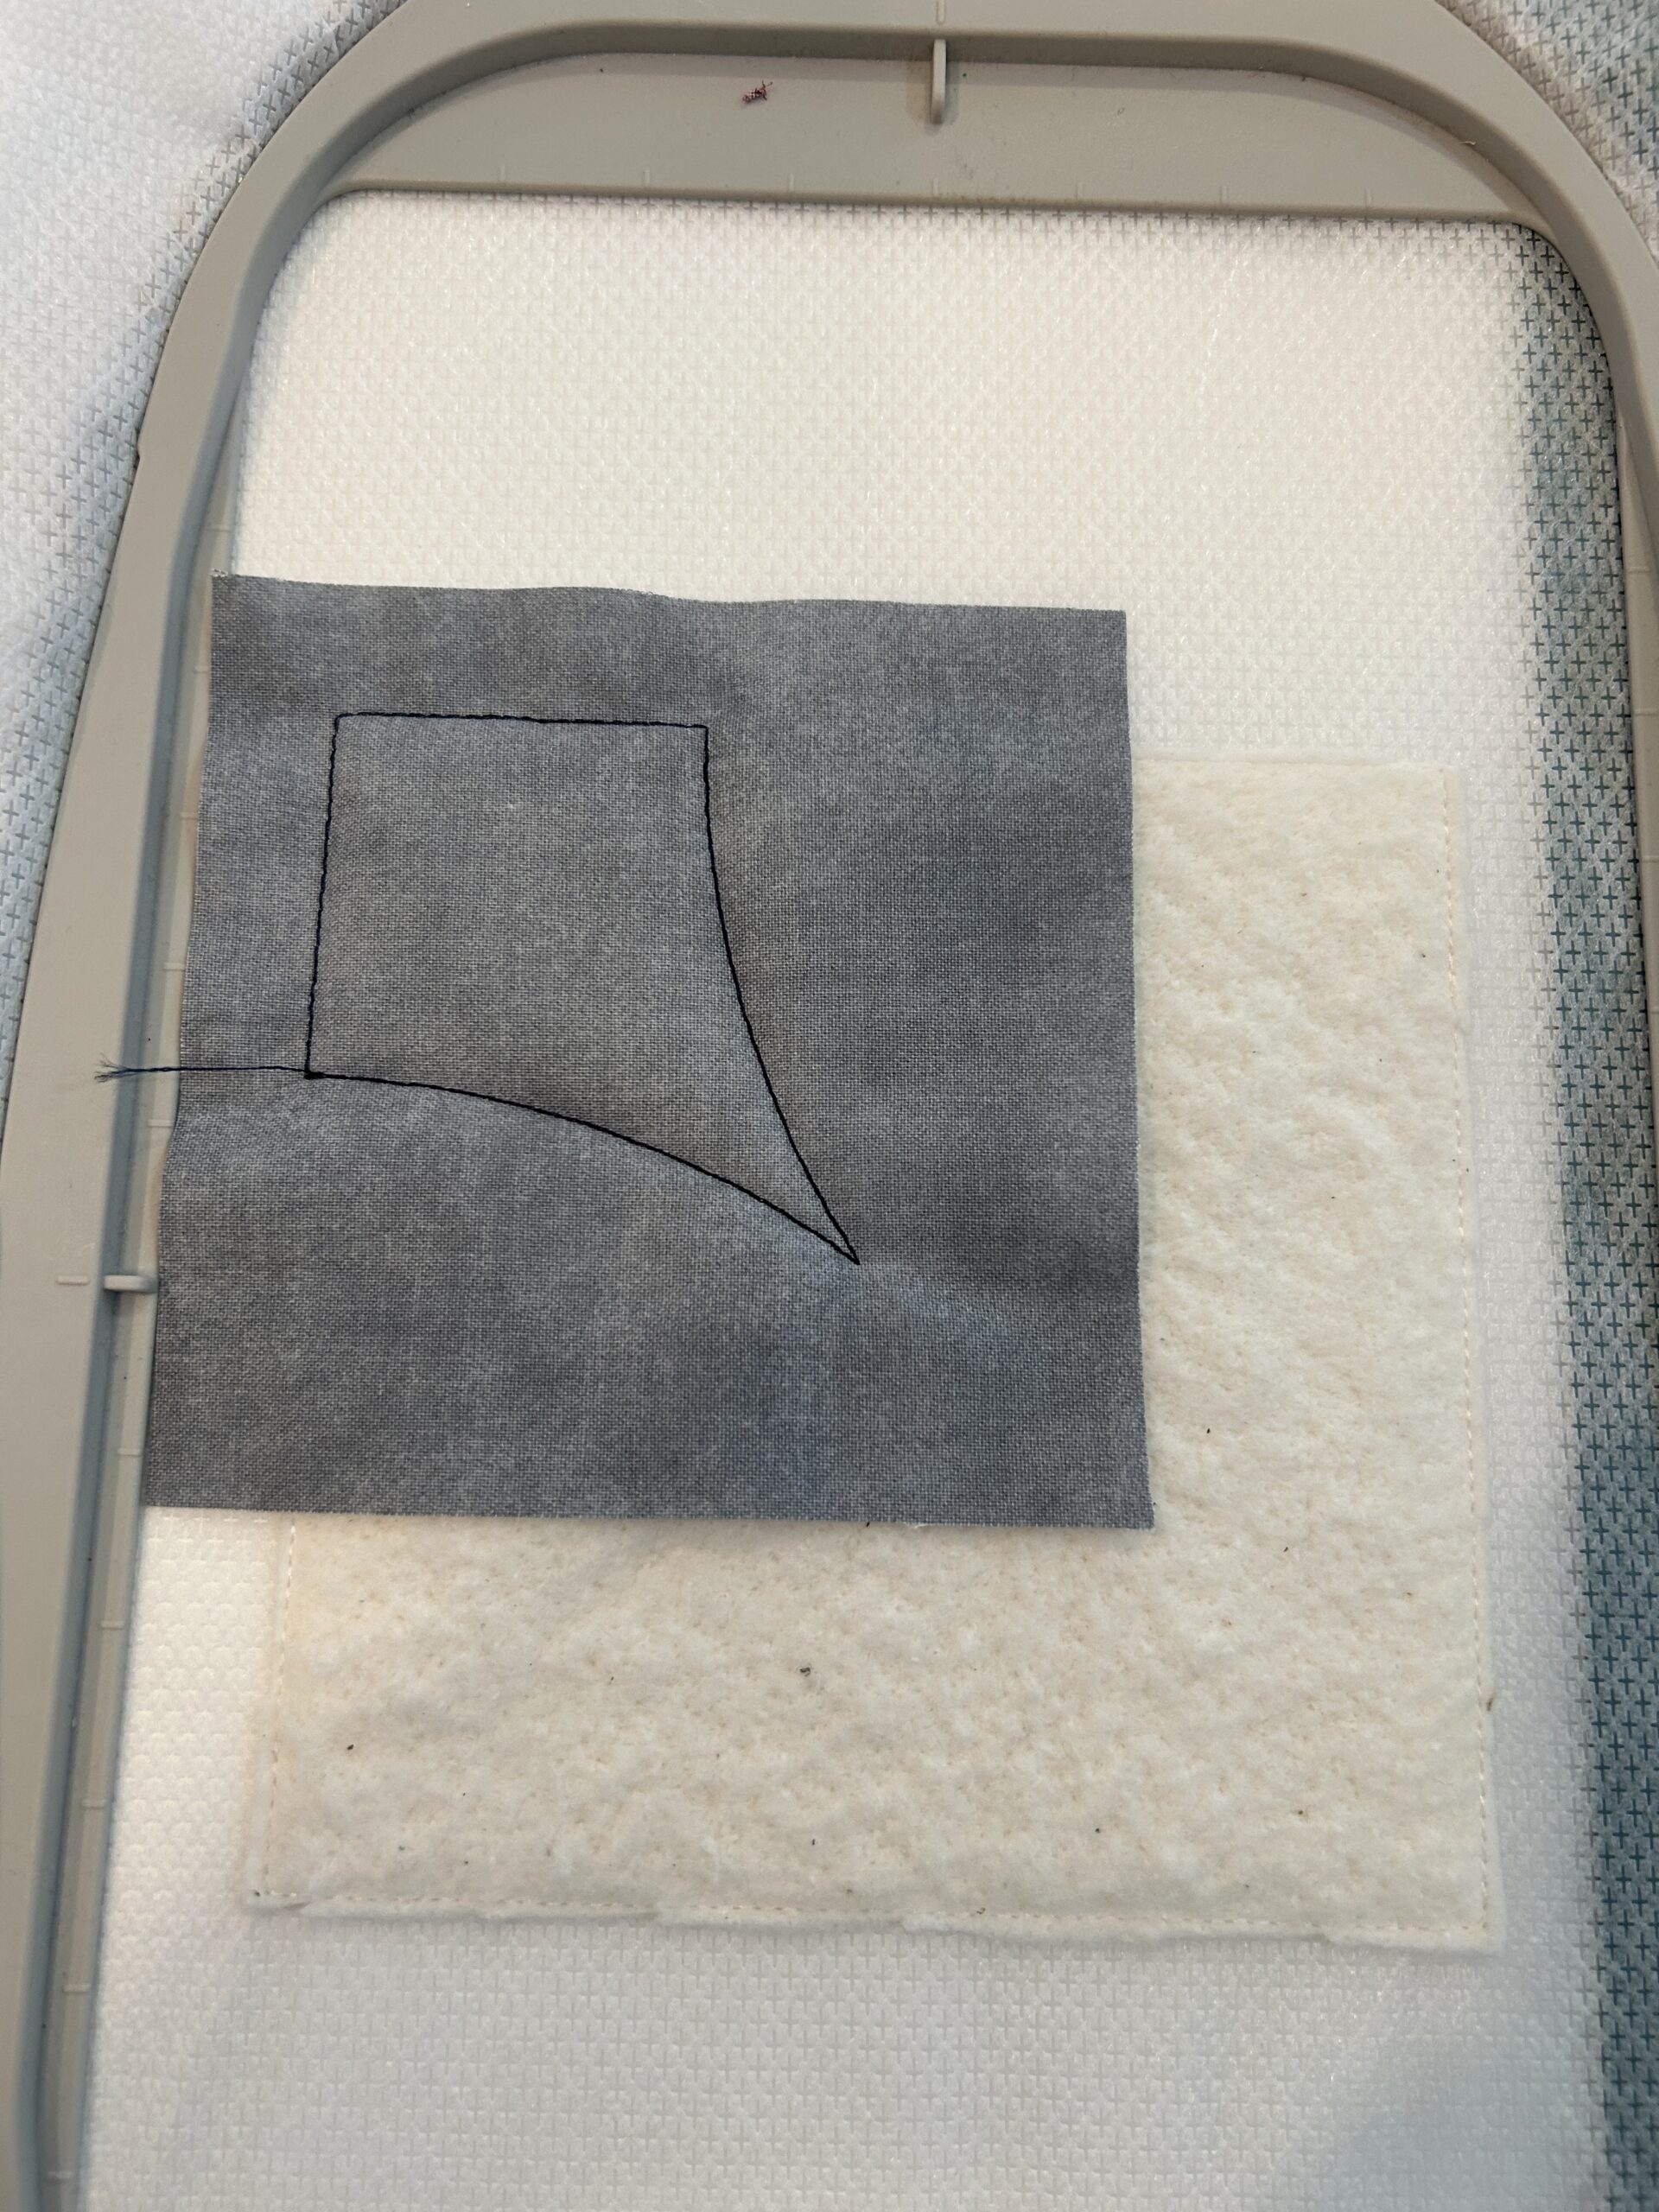
The next few steps are done the same way we do any applique. If you are new to applique, check out my post on how to get started with applique.
Stitch out the first outline/placement step.
Cover it with your first fabric and stitch the tack-down stitch. Make sure your fabric extends over the edges by at least ½”.
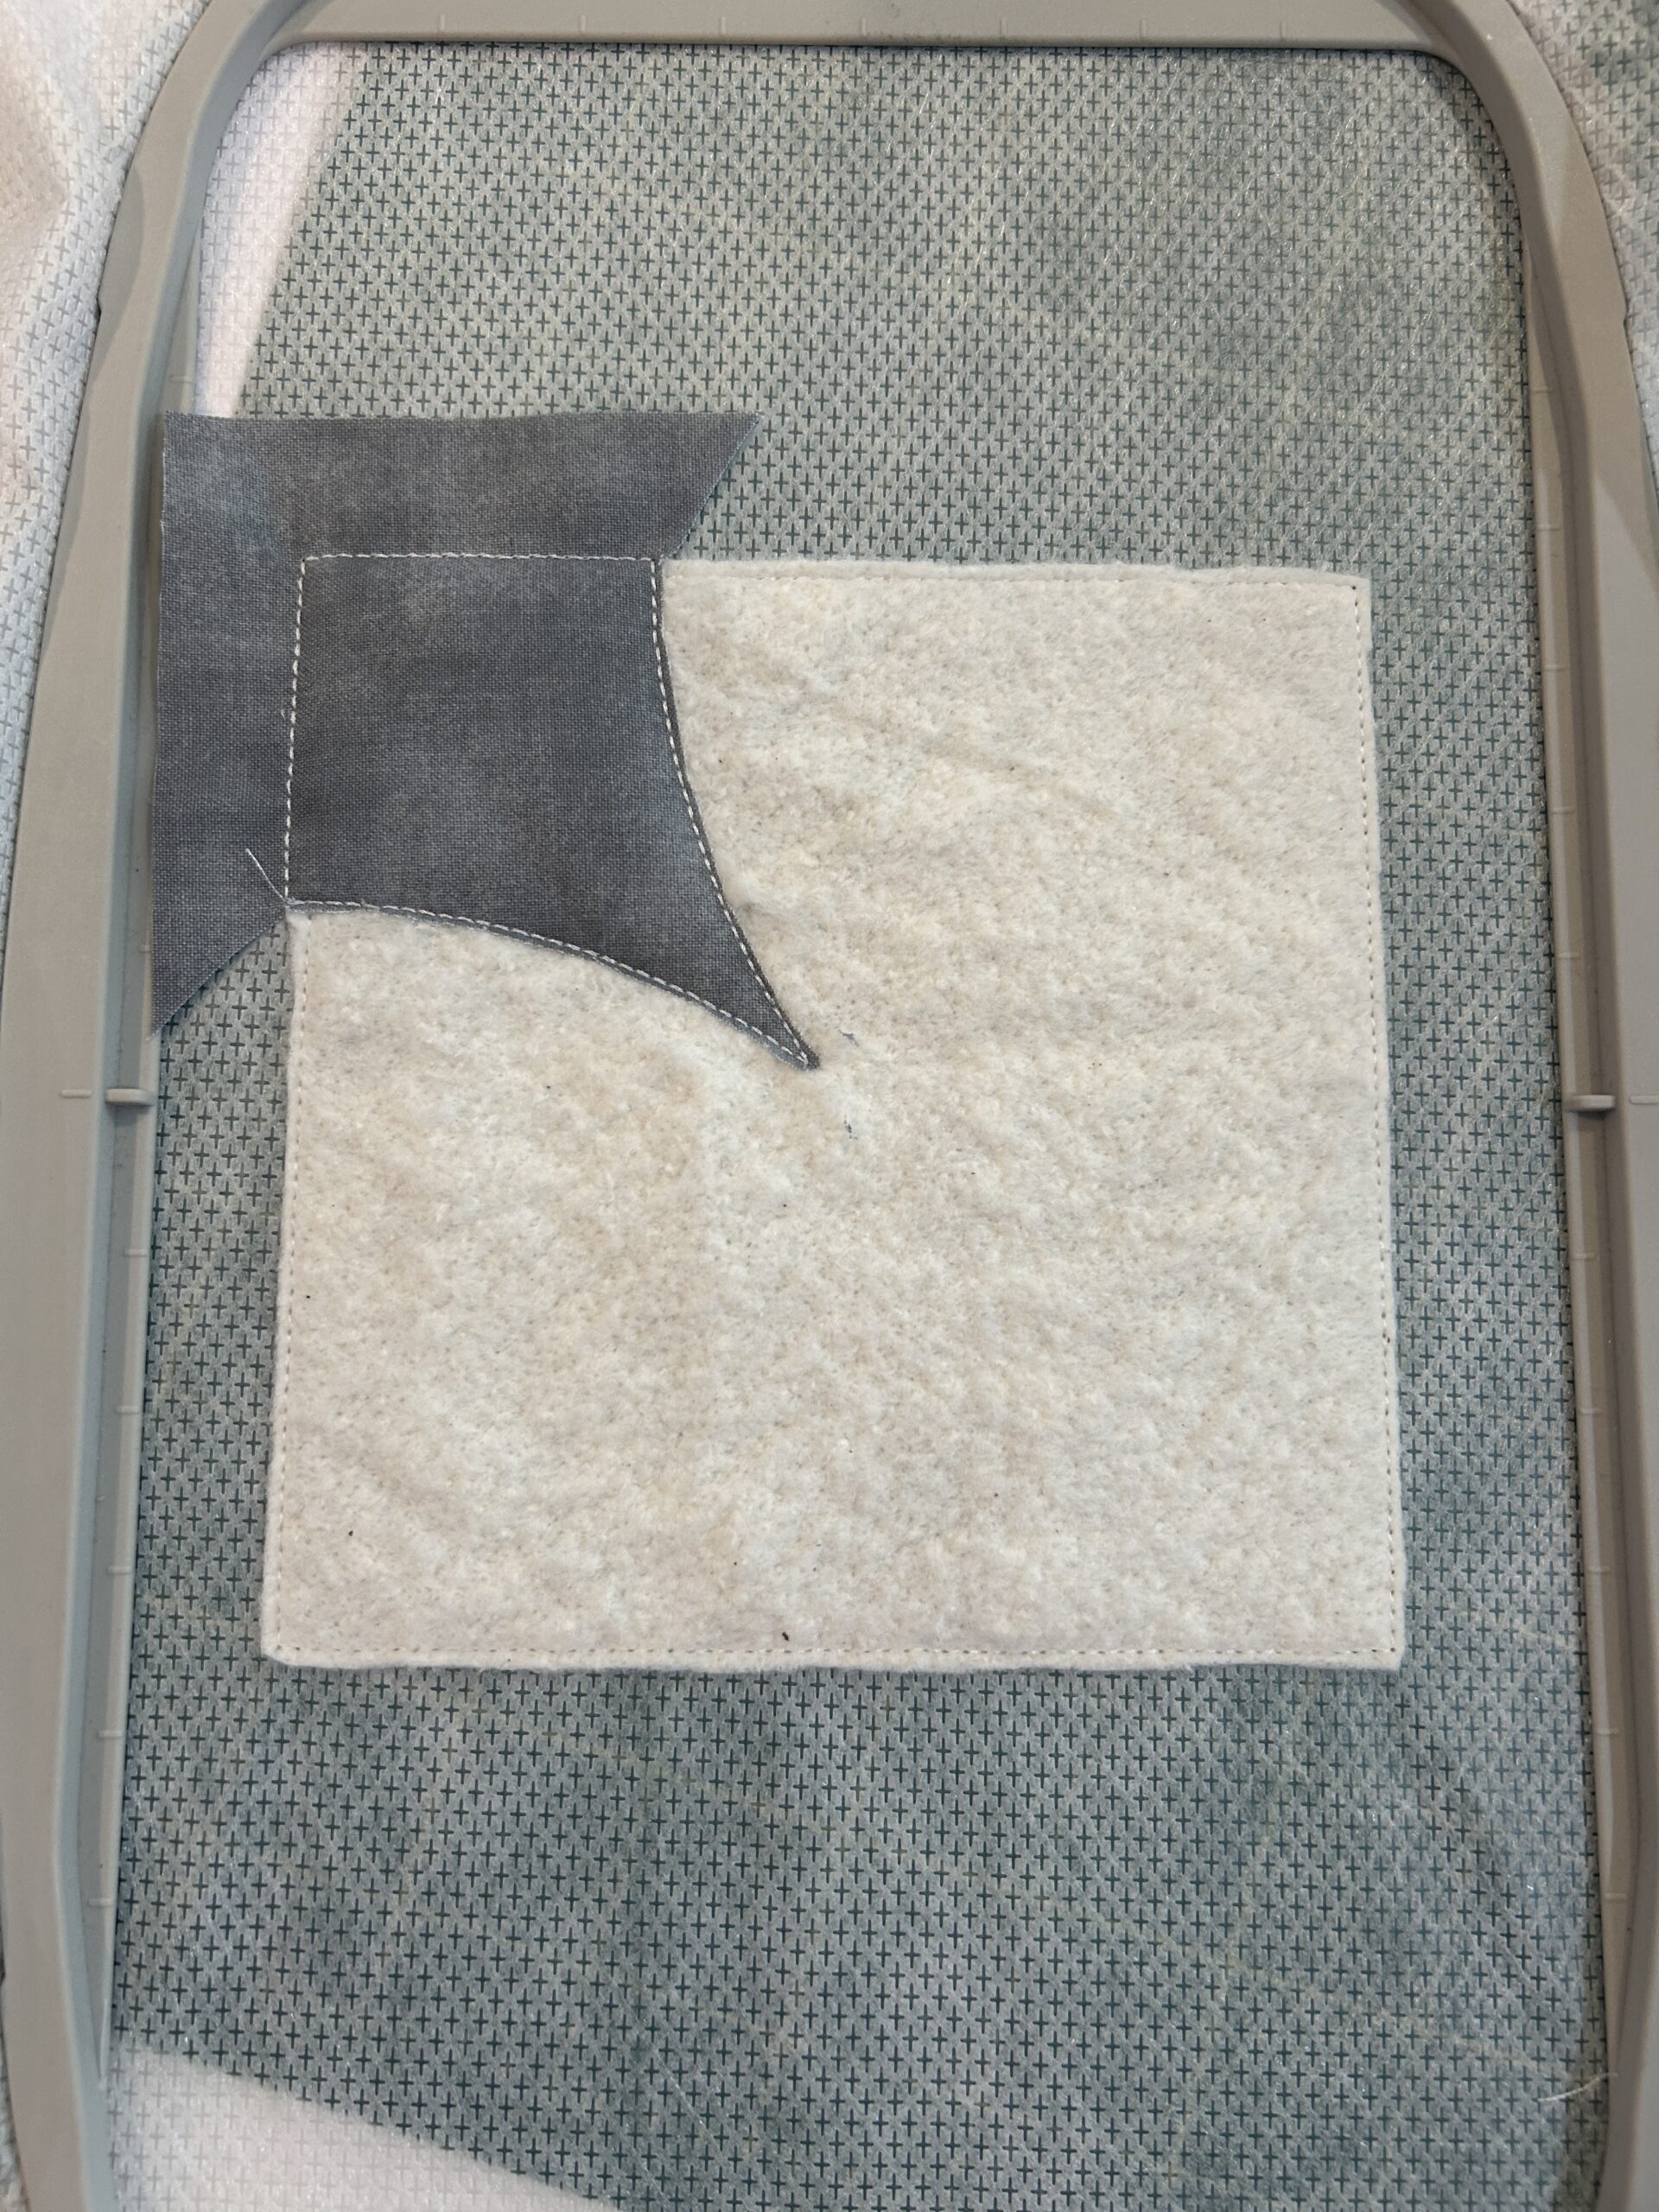
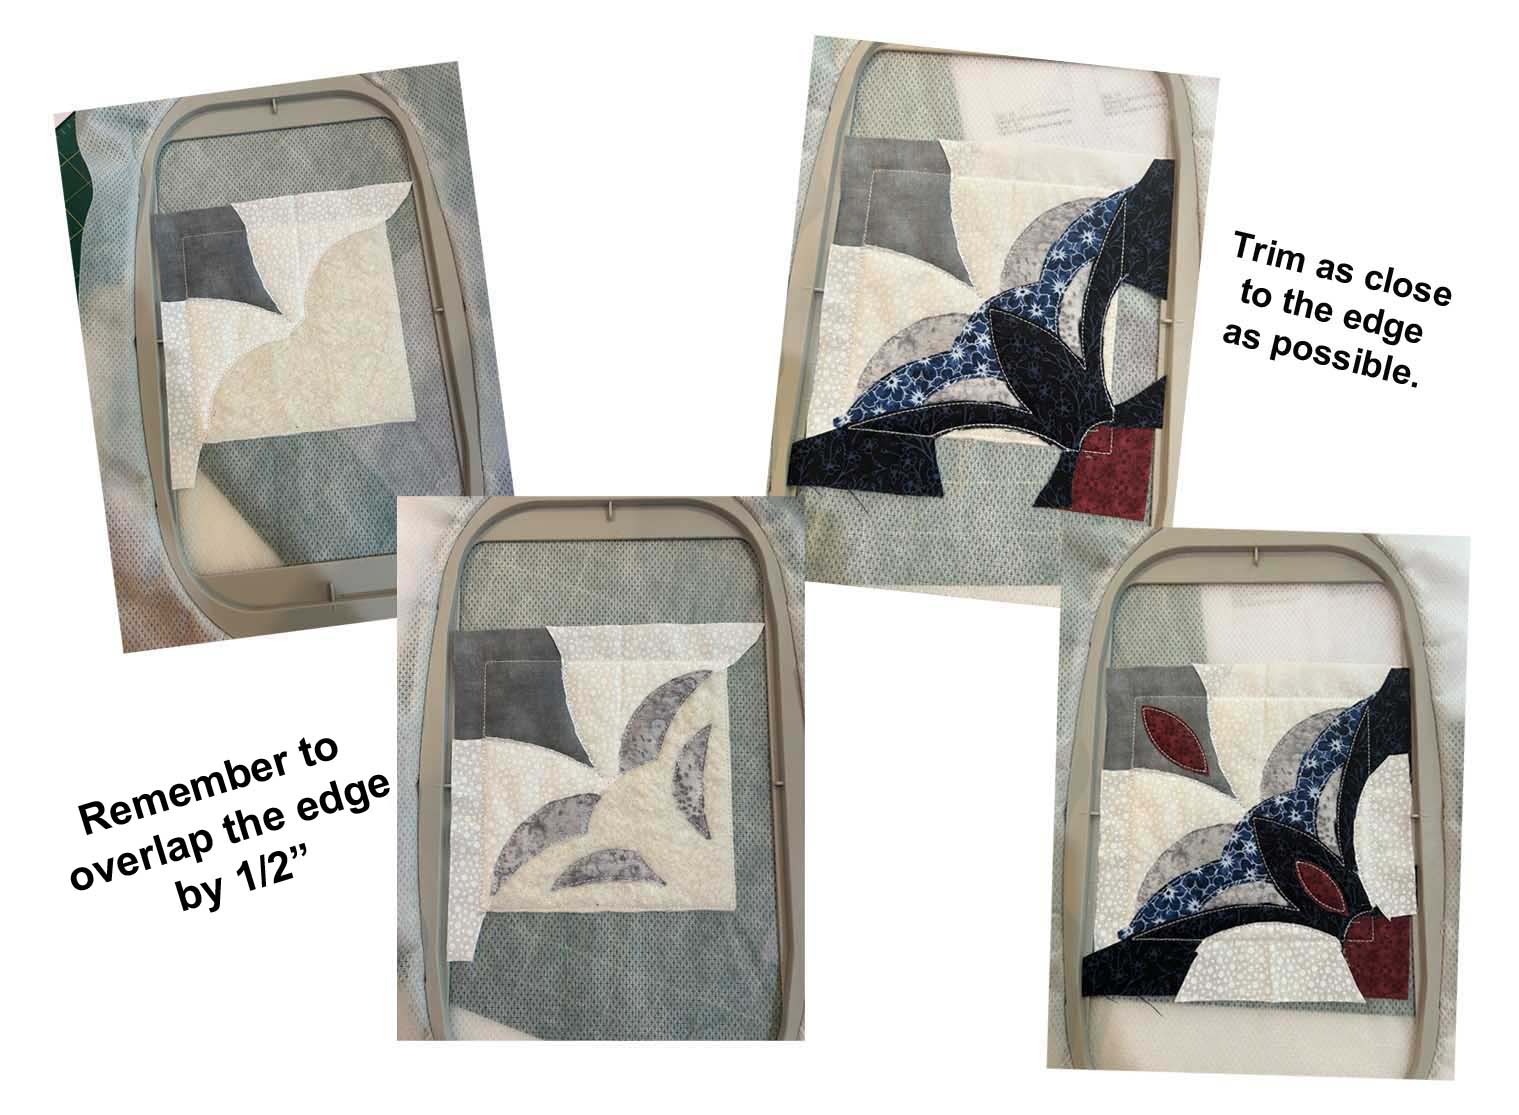
When it comes time to trim the fabrics, make sure you are only trimming the parts that are on the batting. This will leave enough around the edges that we can sew the pillow together. I like to angle it so there will be a little overlap of the fabric where the colors change.
Here are some pictures of this pillow as I went through the applique steps. Make sure when you place your fabrics, you are leaving at least ½” off the edges.
Once your applique steps are done, it’s time to bring your square to life. Using the color charts, I planned out my stitch colors. Some are satin stitches that I wanted to match my fabric, but some are decorative stitches that I wanted to contrast with the fabric. I love how we can make this fit our decor.
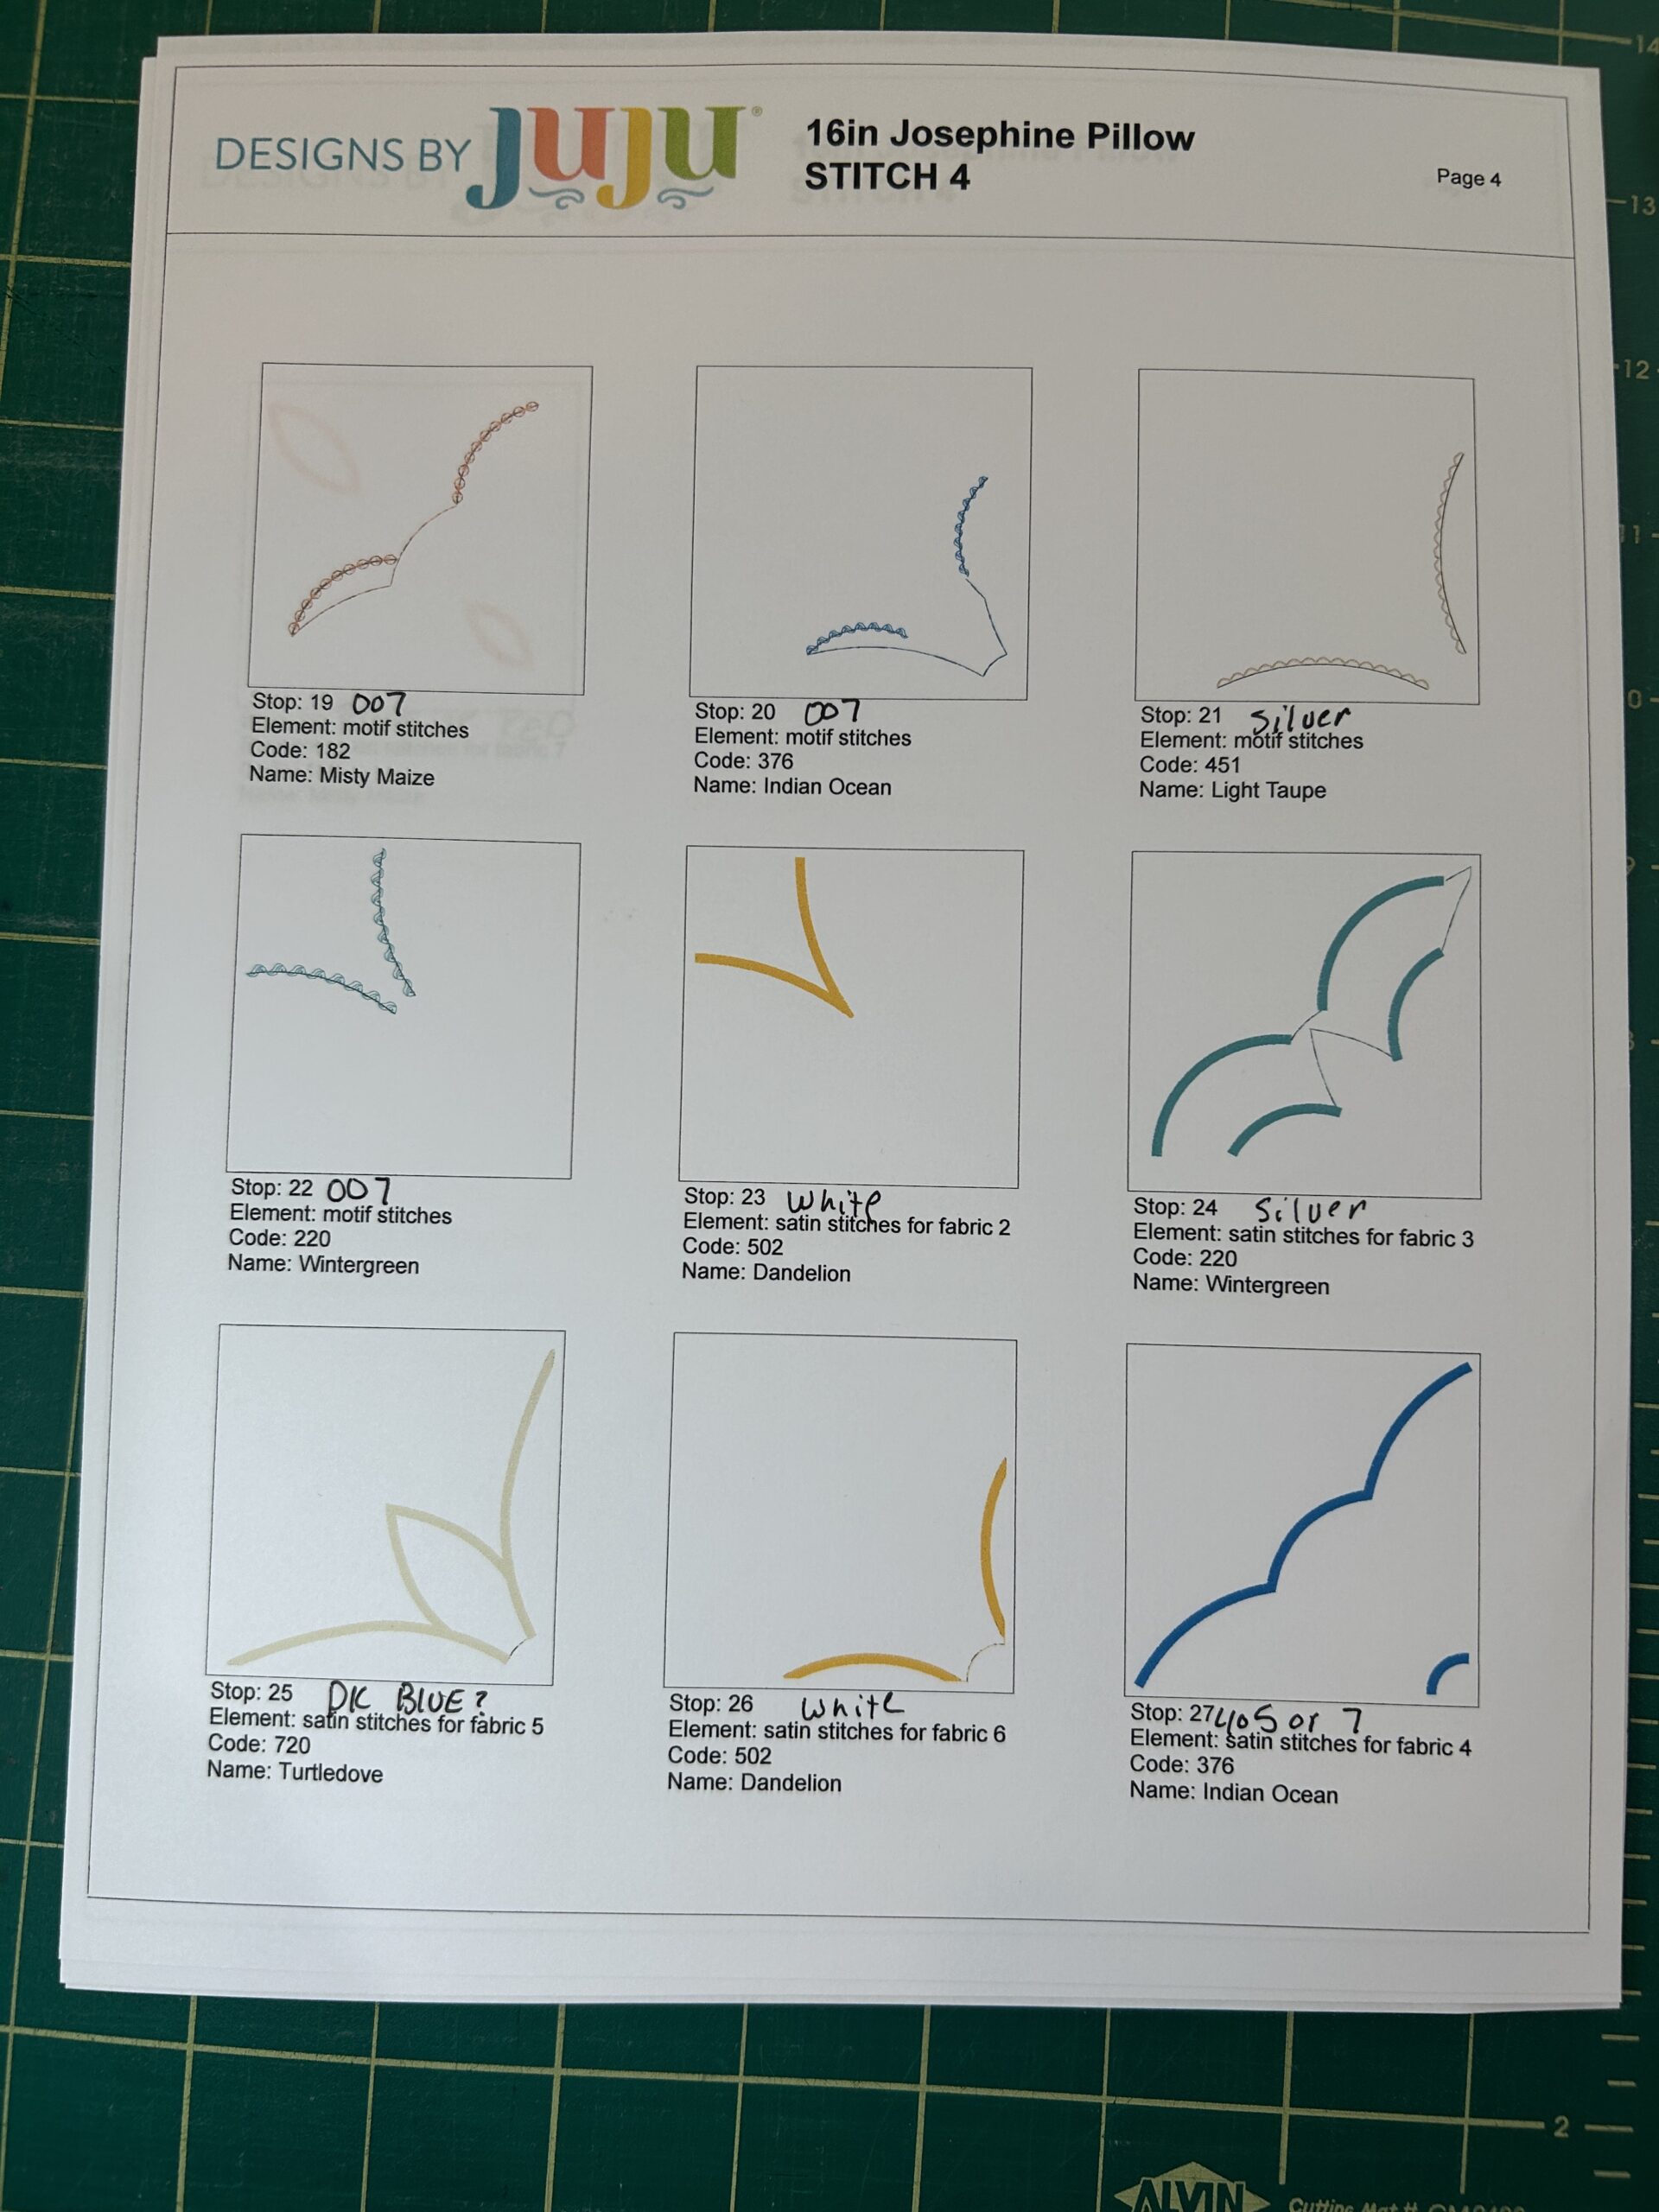
Start stitching the decorative stitches. Change the colors as needed, but make sure you go in order and no skipping. Some things overlap and we want it to work out the way it’s designed.

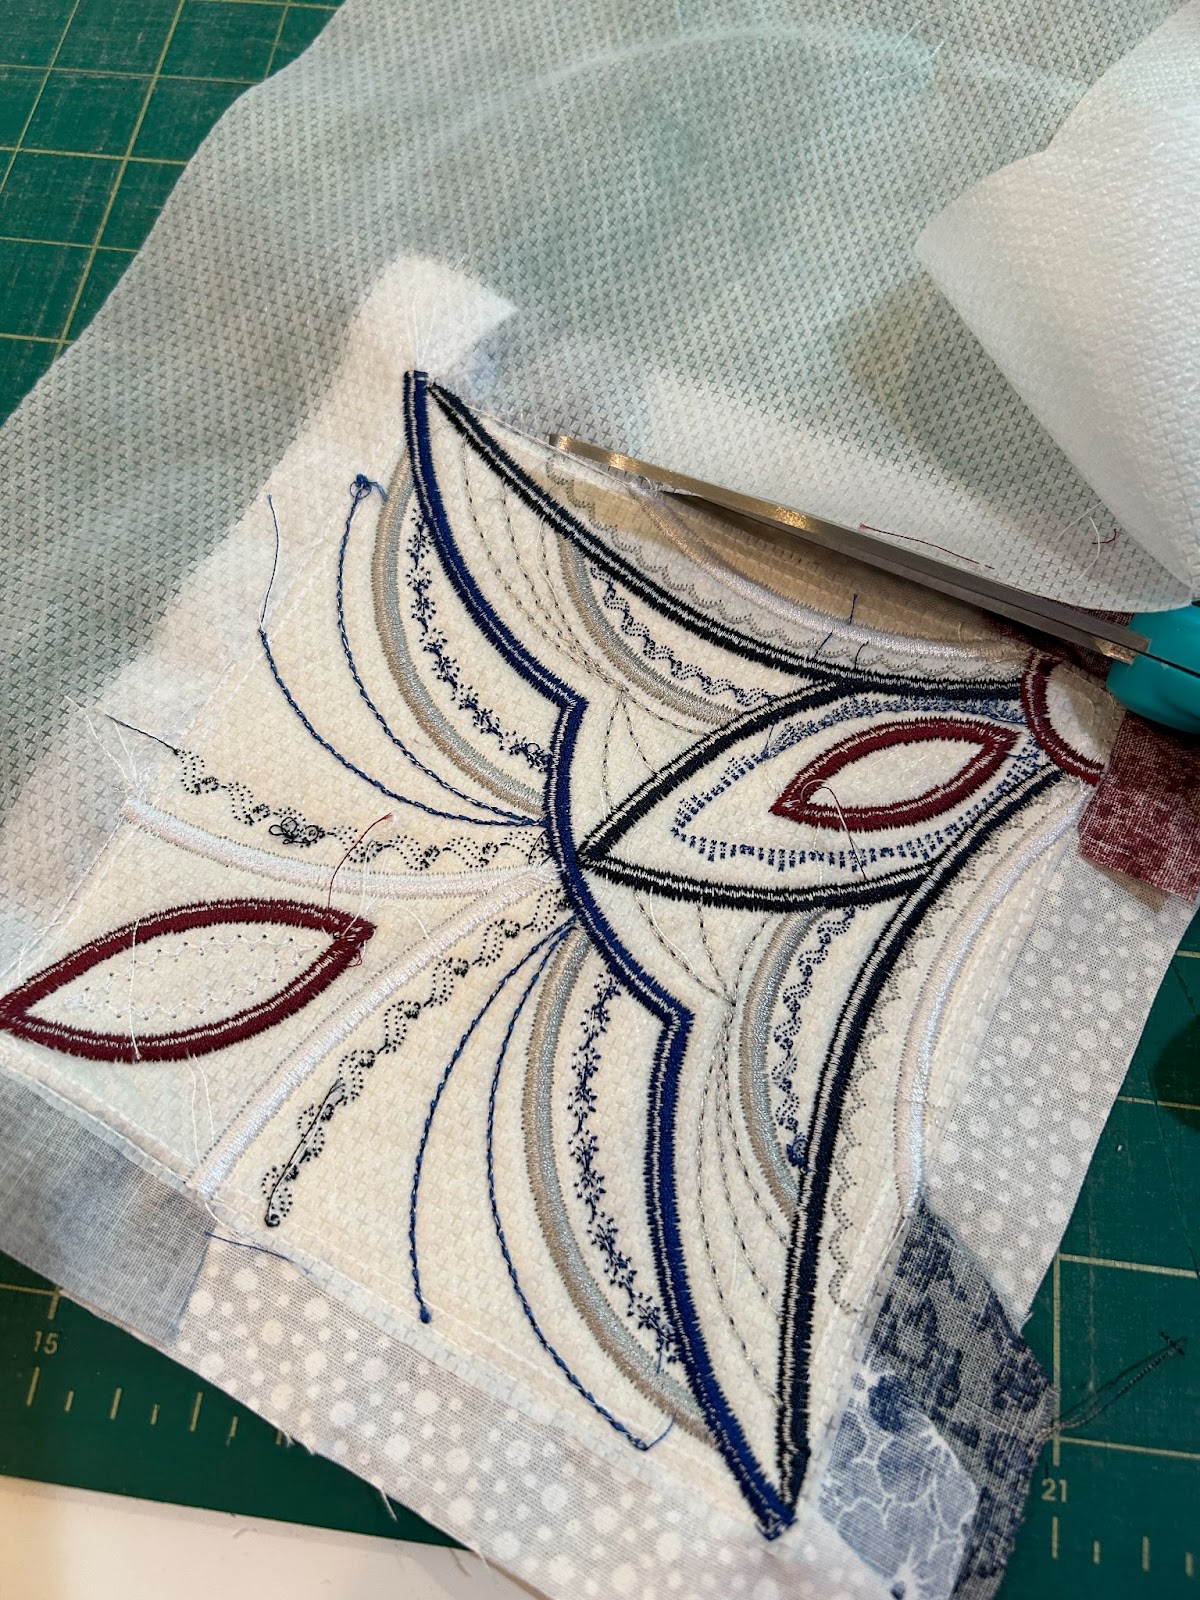
Once you’re done stitching, take it out of the hoop and trim just the stabilizer close to the stitches.
Then trim the block edges ½” away from the outside stitching line.

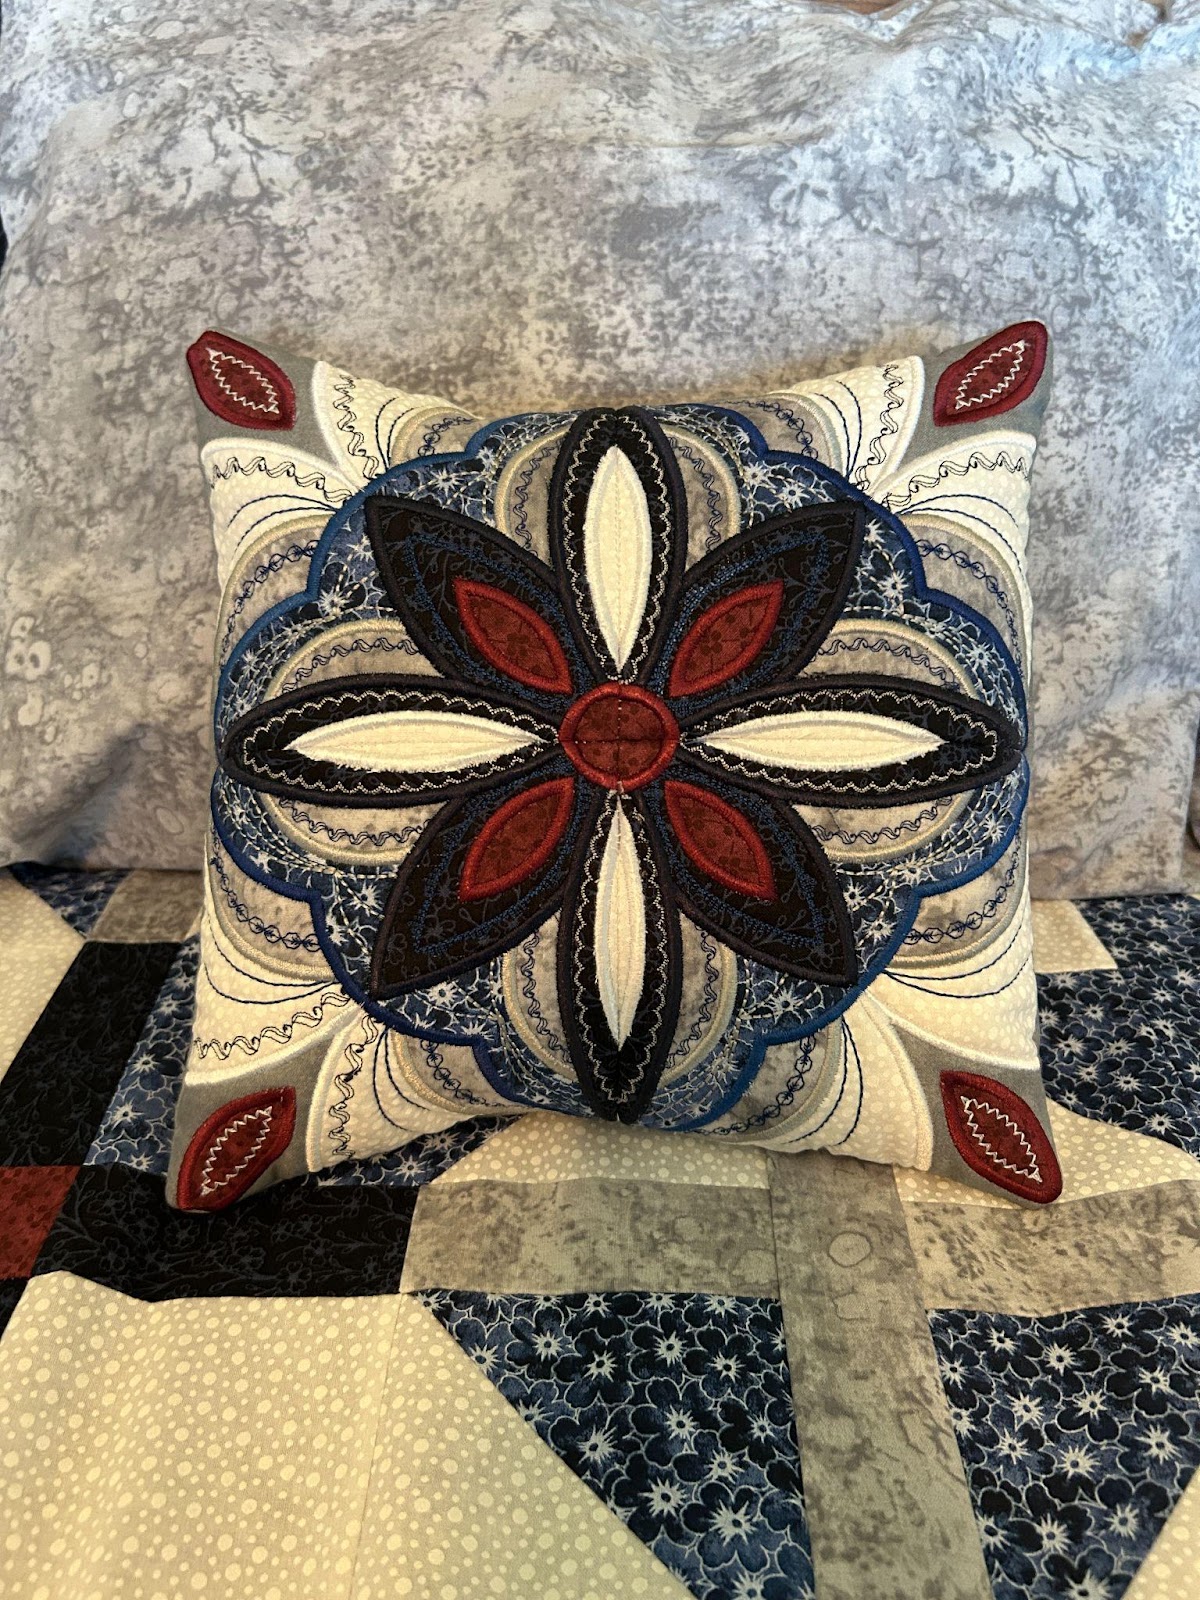
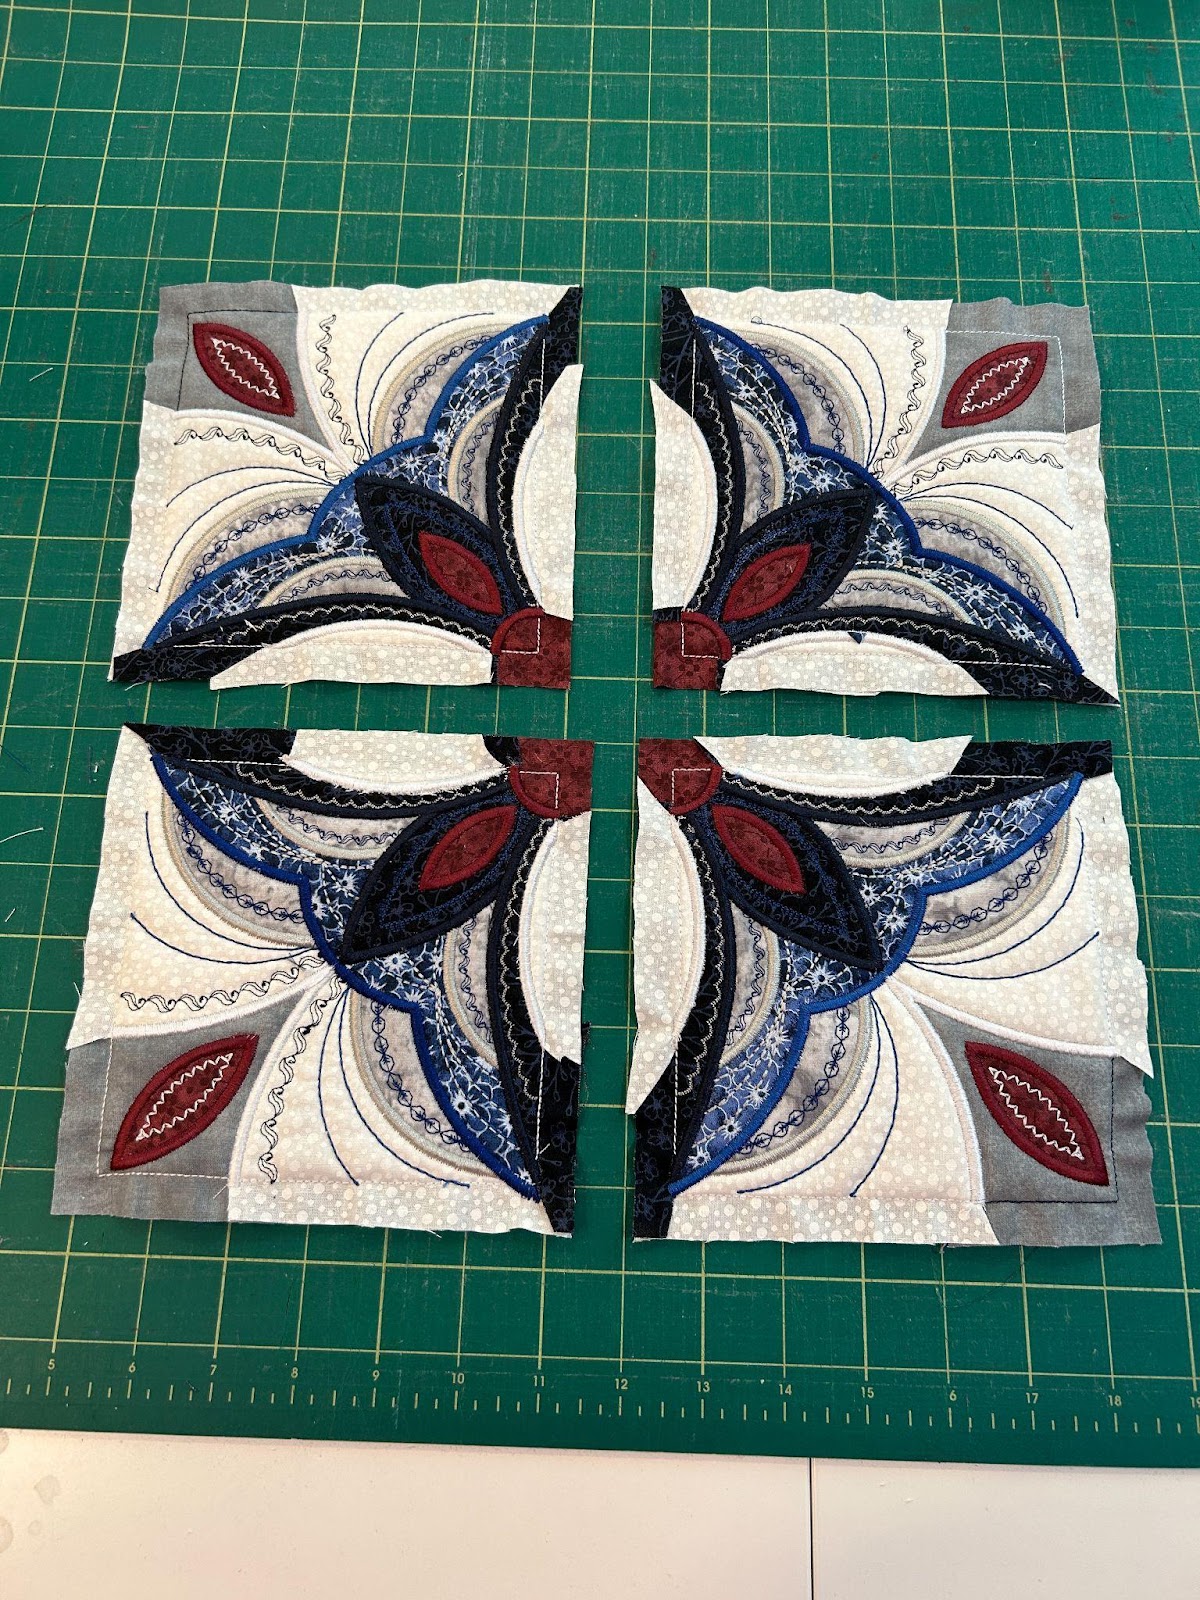
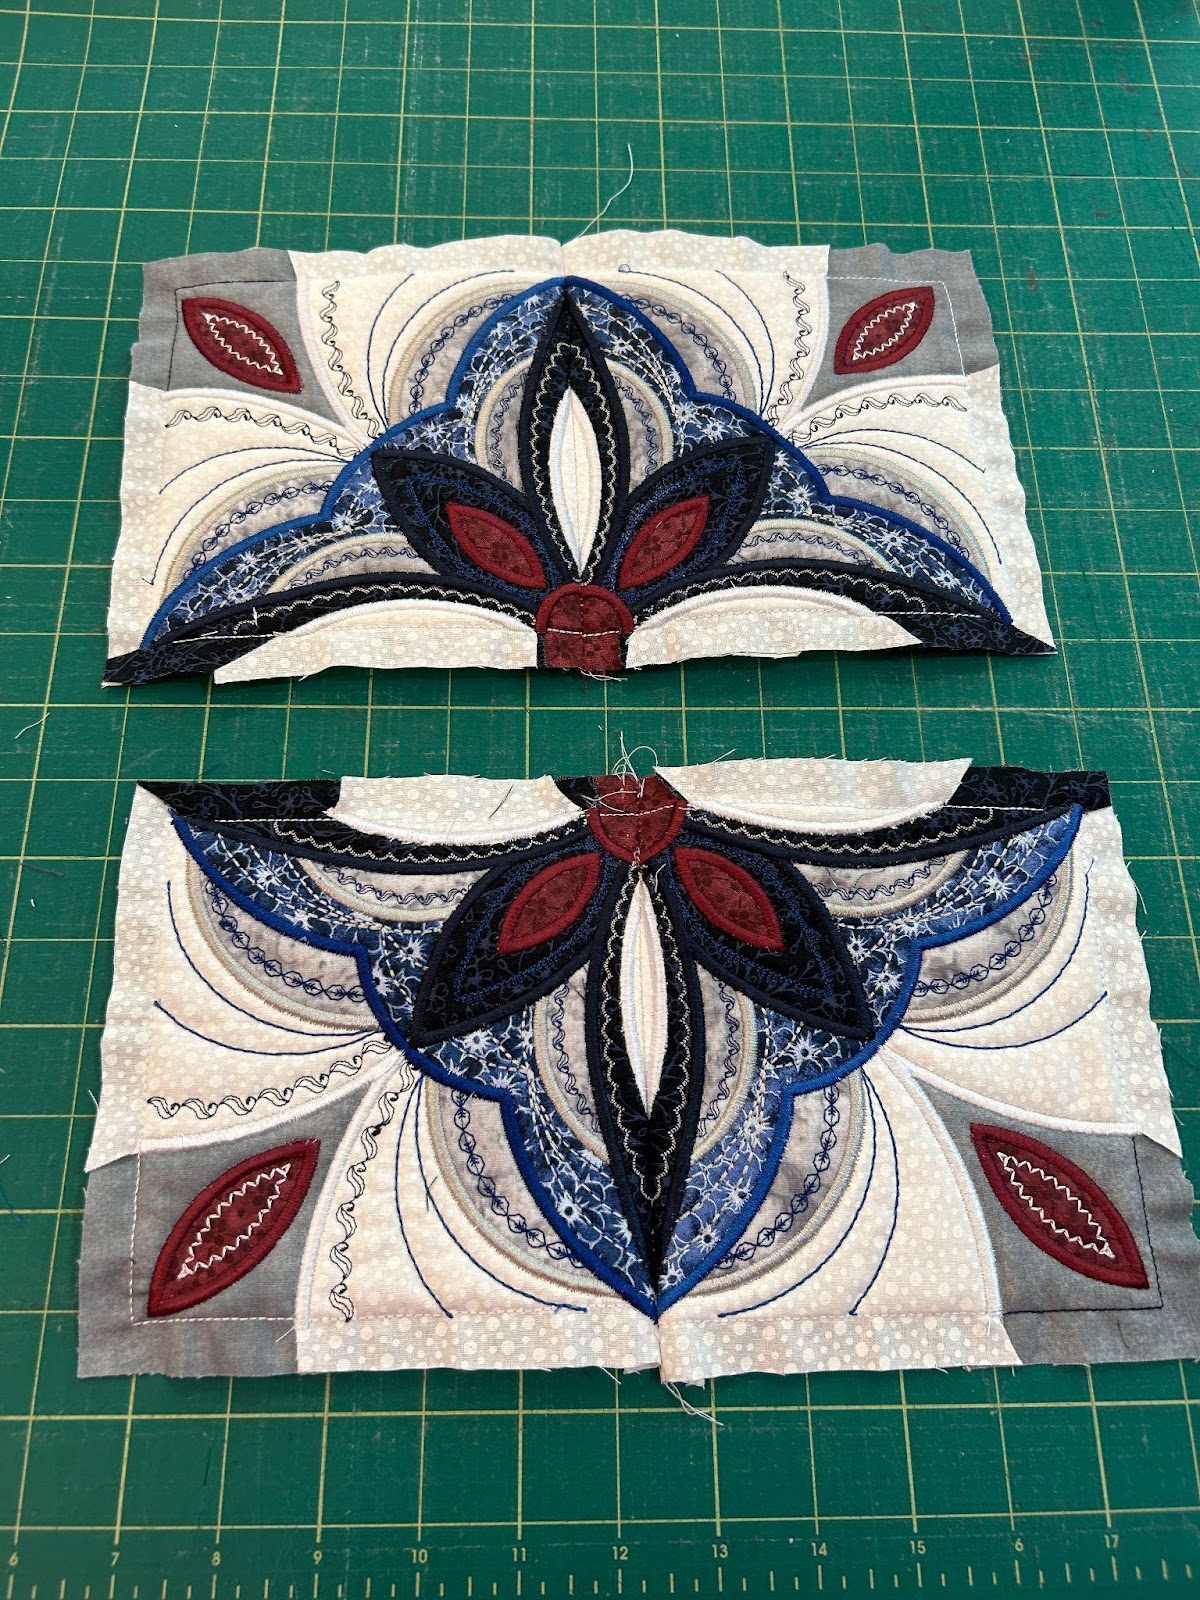
You have completed one of the sections of your mandala pillow. Repeat these steps three more times until you have a total of four sections. It looks awesome, all ready to stitch together!
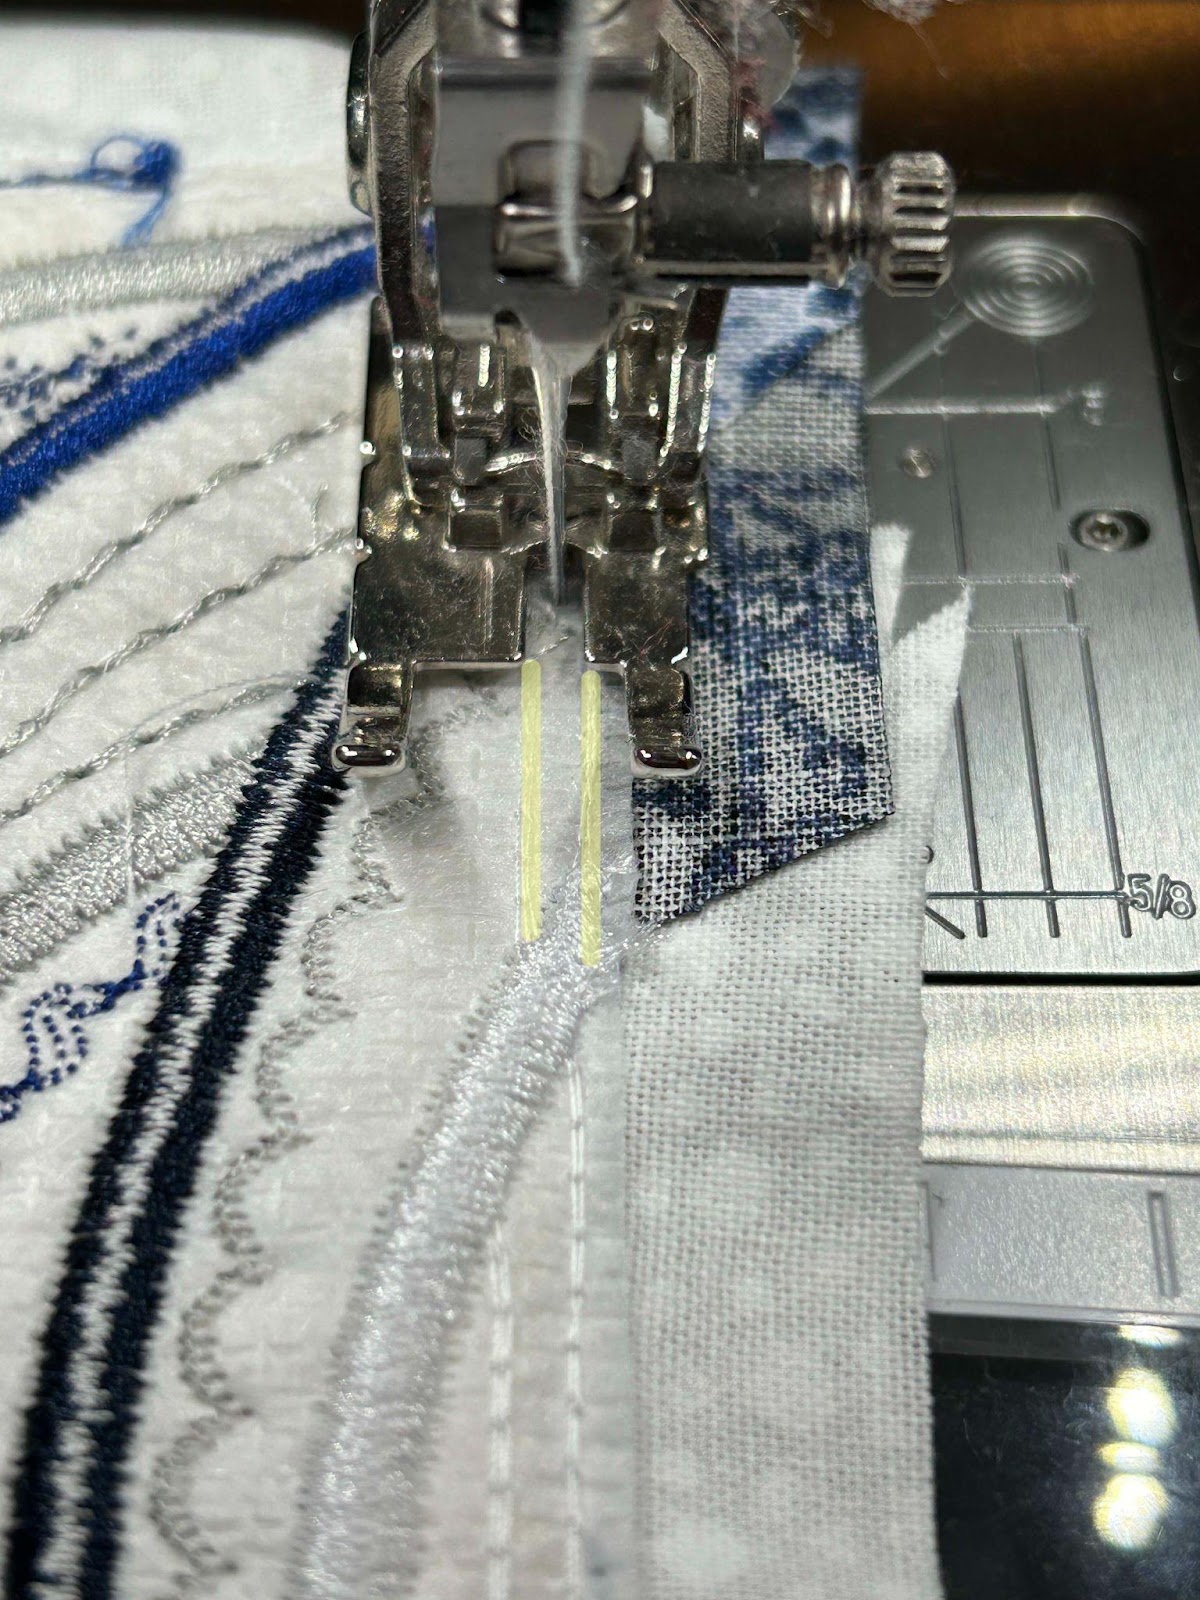
We will now take the top two sections and fold them so the right sides are together. Line up the outer stitch lines. When you stitch them together you want to stitch them with your needle between the two outer edges of stitching. I highlighted my two rows of white stitching.
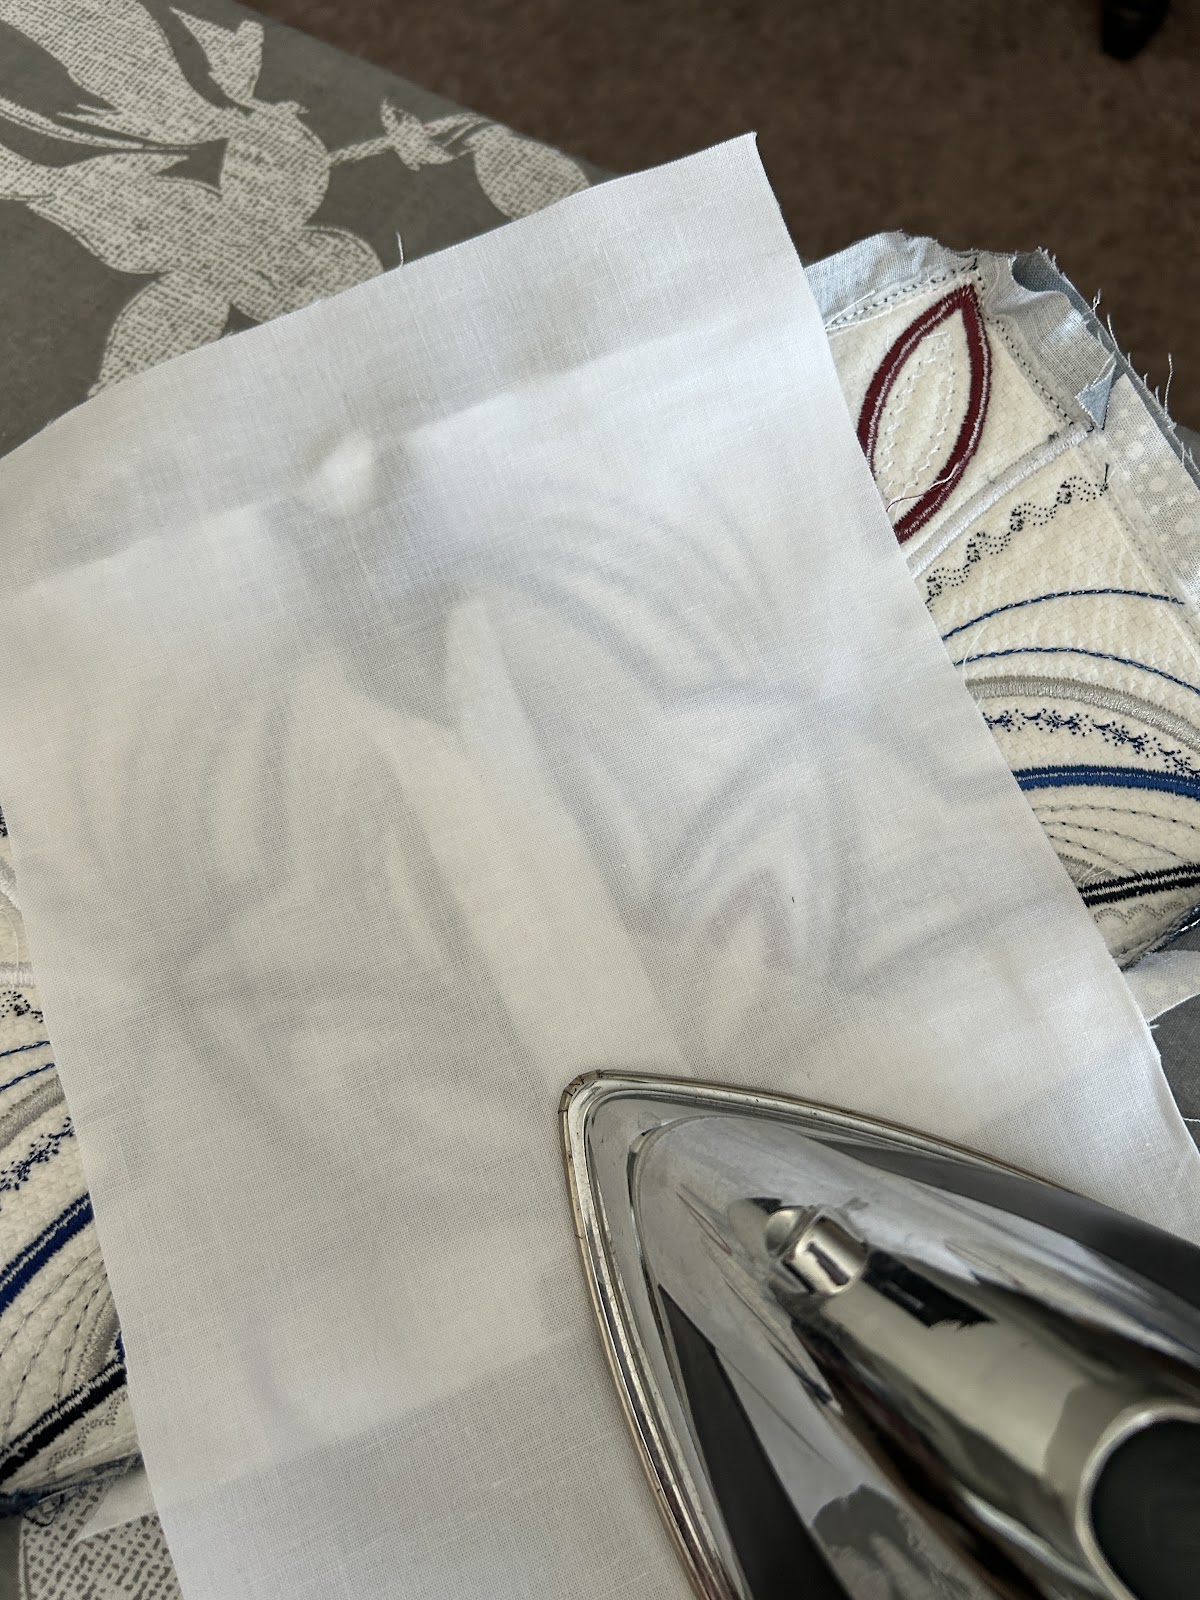
Using a pressing cloth to ensure your iron does not touch the no-show mesh, press the seam open.
Repeat the steps for the bottom two squares.
Now you’ll take the bottom and place it on the top with right sides together. Line up the stitches as you did before and sew the middle seam. Press the seams open and then your top is done!

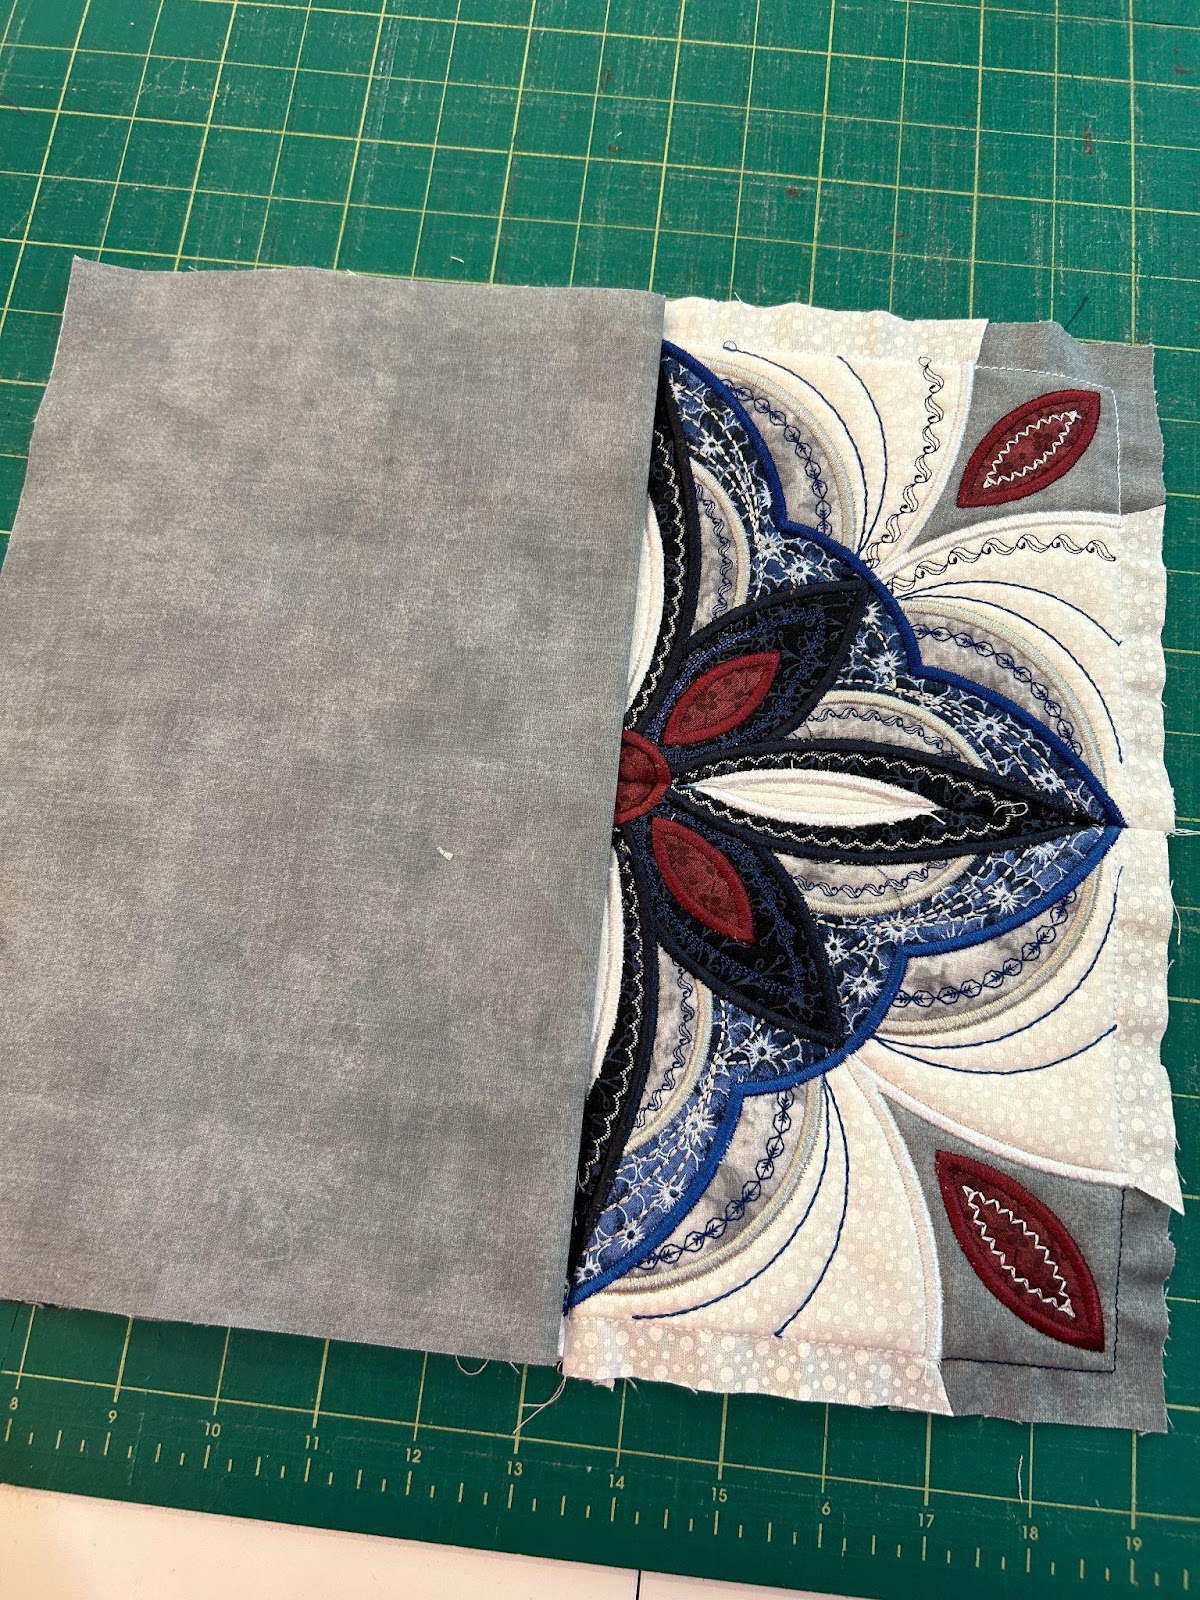
I like to make envelope backs for my pillows so I have the option to remove them for cleaning. Take two pieces of fabric for the back and press each of them in half.
With the pillow design facing up, place the left back piece with the fold in the center of the design over the top of the pillow design.
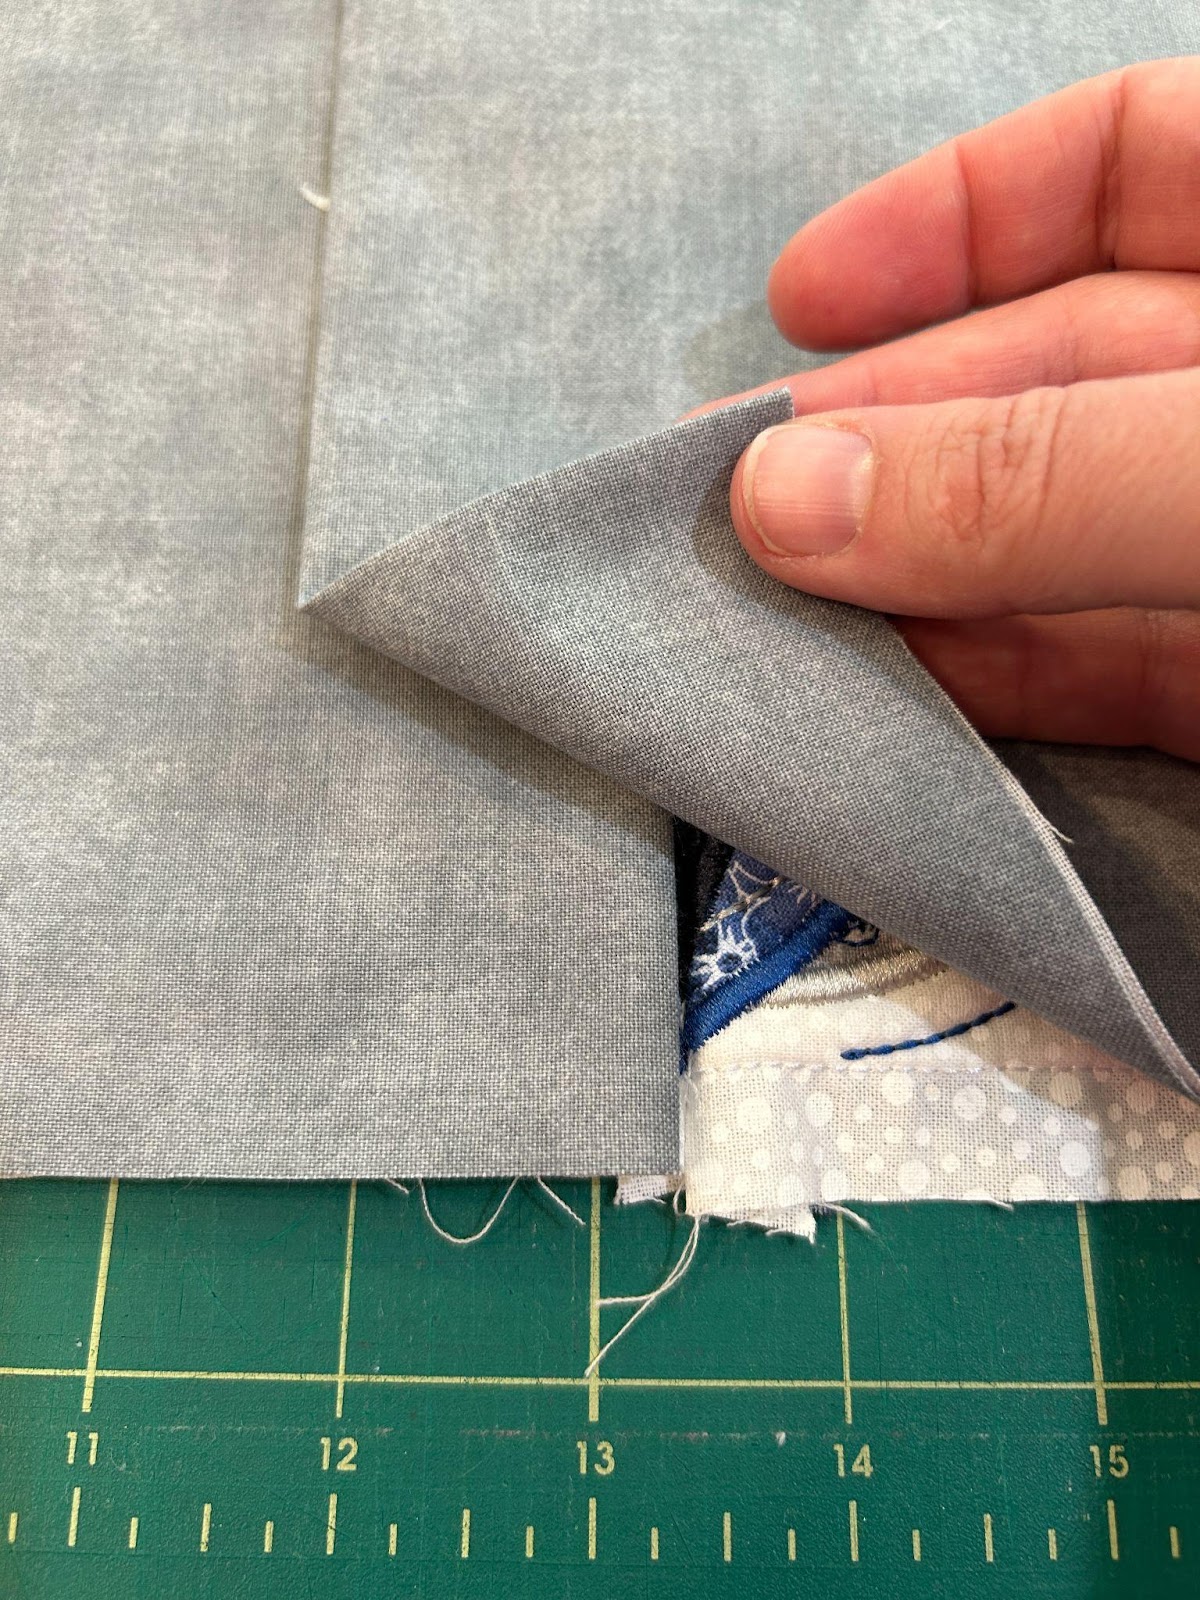
Lay the right backing piece with the fold in the center, overlapping the left backing piece about an inch and a half.
Pin or clip the backing pieces into place.
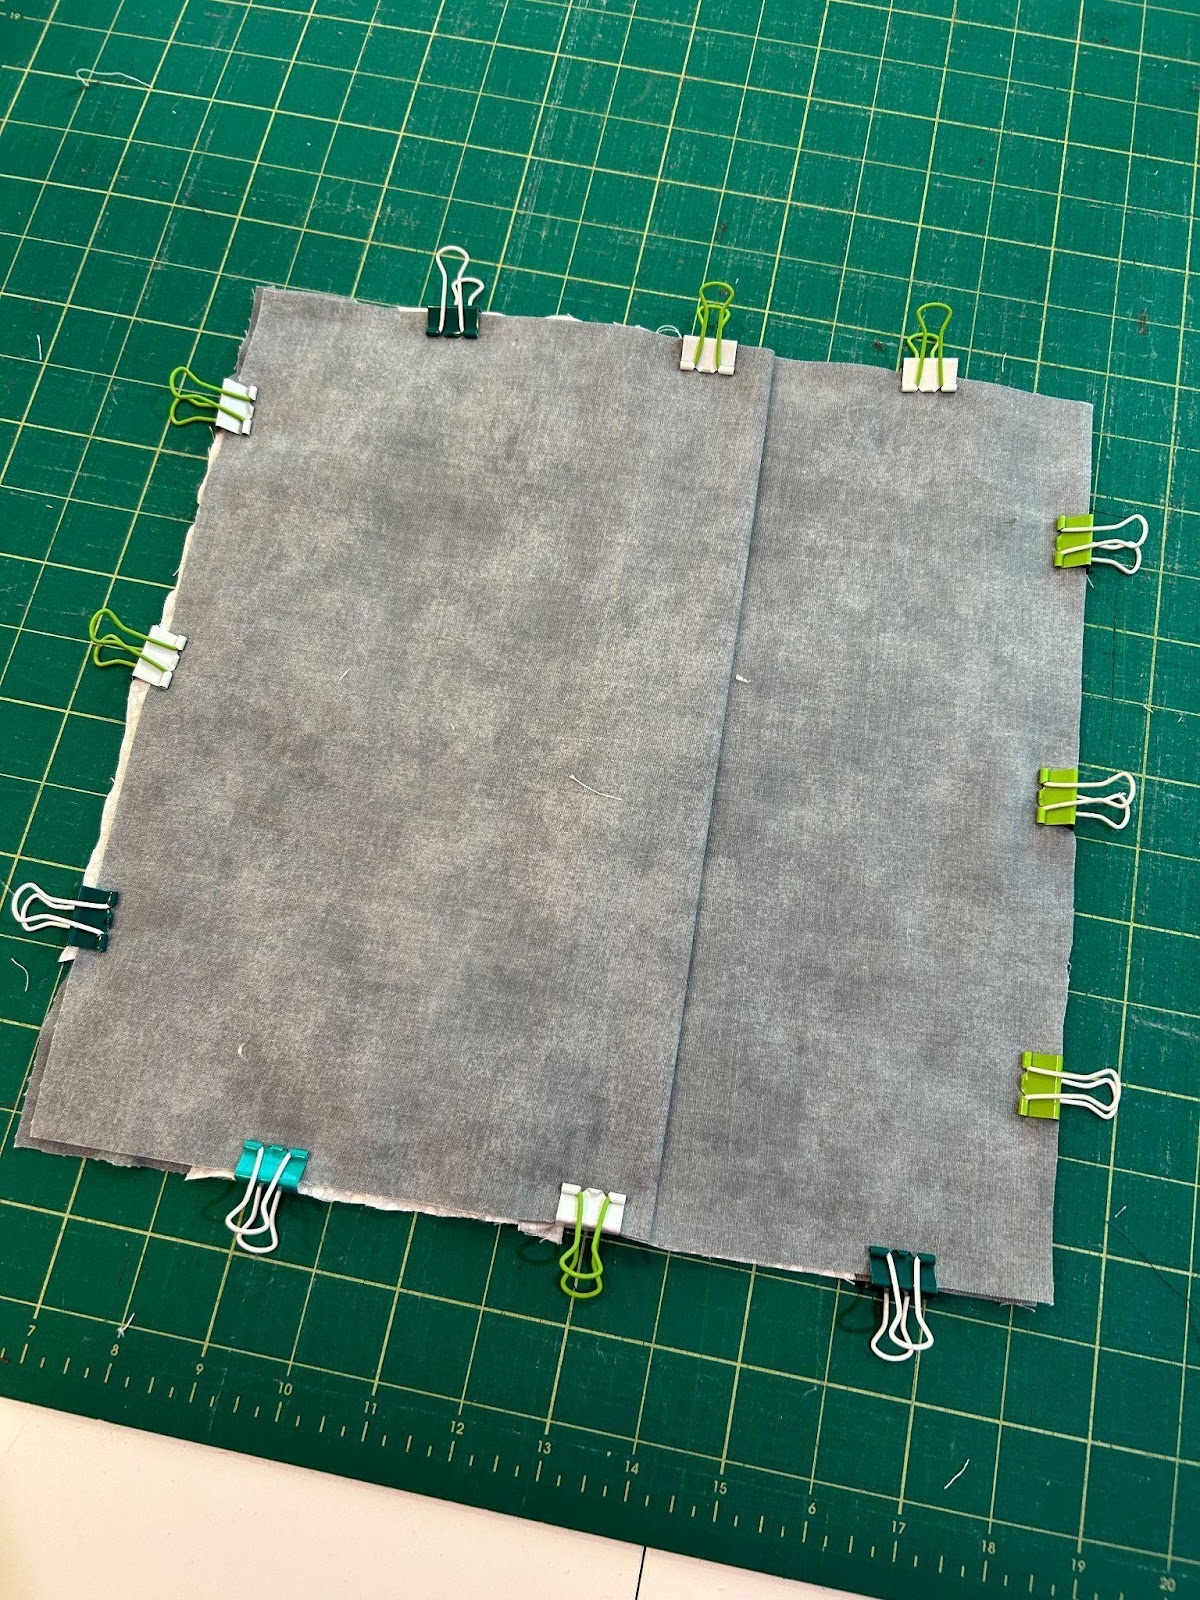
Sew all the way around the exterior of the pillow with a ½“ seam allowance. Clip the corners.
Turn the pillow cover right side out and stuff the pillow form inside.

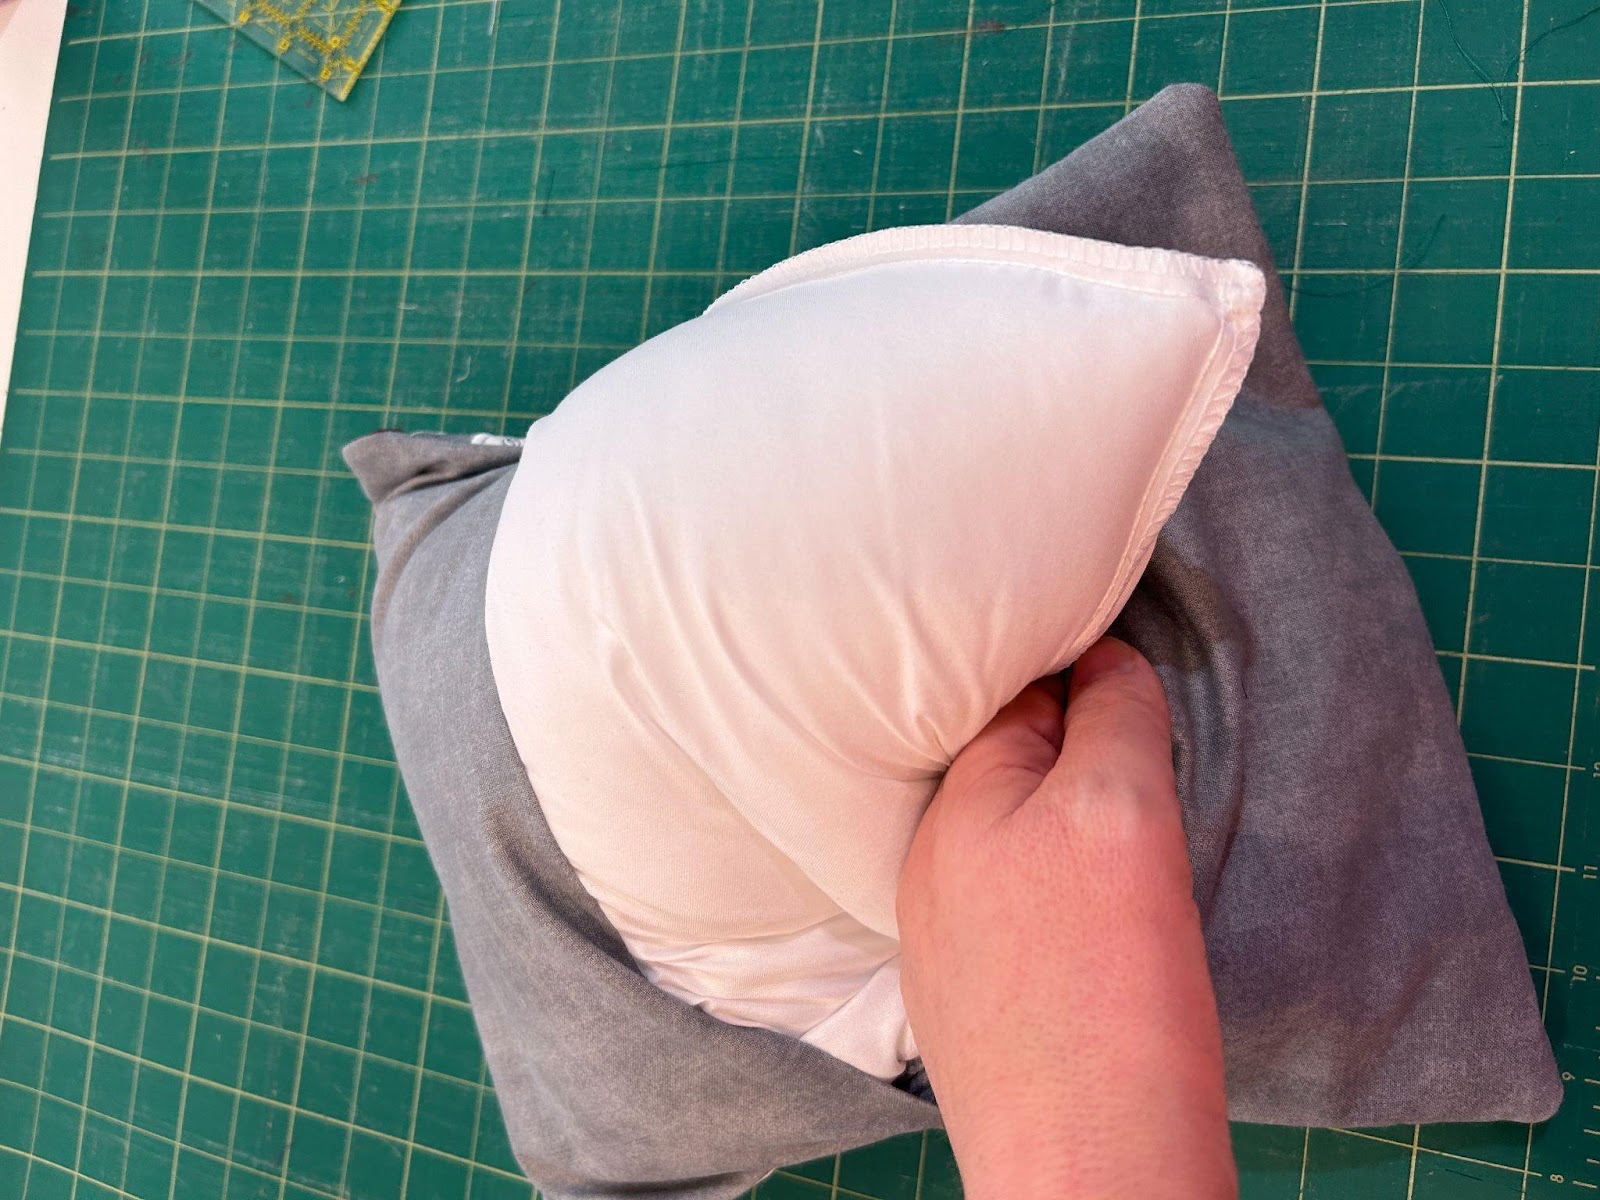
If you want to use Poly-fil®, place your backing on your design with right sides together and stitch around the edges, leaving a turning opening. Clip the corners, turn the design right side out, and stuff the Poly-fil® in the pillow. Hand stitch the turning opening closed.
Great job! You’ve completed your embroidered mandala pillow! They are so fun and will look amazing as you use them around your house. Don't forget to share your creations with us on social media using the hashtag #designsbyjuju so we can see your beautiful work.
If you loved this project, you’ll find plenty more just like it in our Home Hub—a curated collection of quick, creative, and practical projects perfect for gifting (or keeping!)
