Toggle Nav
 Inspire.
Create.
Stitch.
Inspire.
Create.
Stitch.
Search
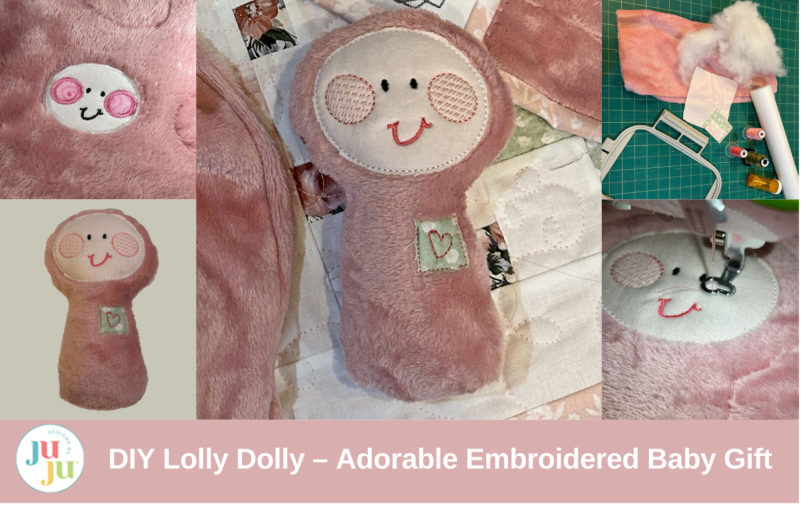
Make an adorable Lolly Dolly for baby gifts! Includes rattle variation and step-by-step tutorial.
It’s always fun to welcome a baby into the world. The Lolly Dolly is a great, easy, and fun addition to any package for a new little one. In this post I’ll show you how to make this and some of the different options available. I will also show how I turn the stuffie into a rattle that’s an optional addition.
Check out the DBJJ team’s favorite supplies in the Designs by JuJu Amazon store.
This project uses a little applique. If you’re new to applique, you can check out this post to see how to get started.
To begin we need to choose what type of look we are going for. We have a satin stitched head and satin stitched cheeks for applique; a satin stitched head with stitched cheeks; a bean stitched head with stitched cheeks; and a bean stitched head with bean stitched cheeks for applique. Mine is using the bean stitched head with stitched cheeks. But for reference, this is how they all look finished so you can choose the version you’d like.

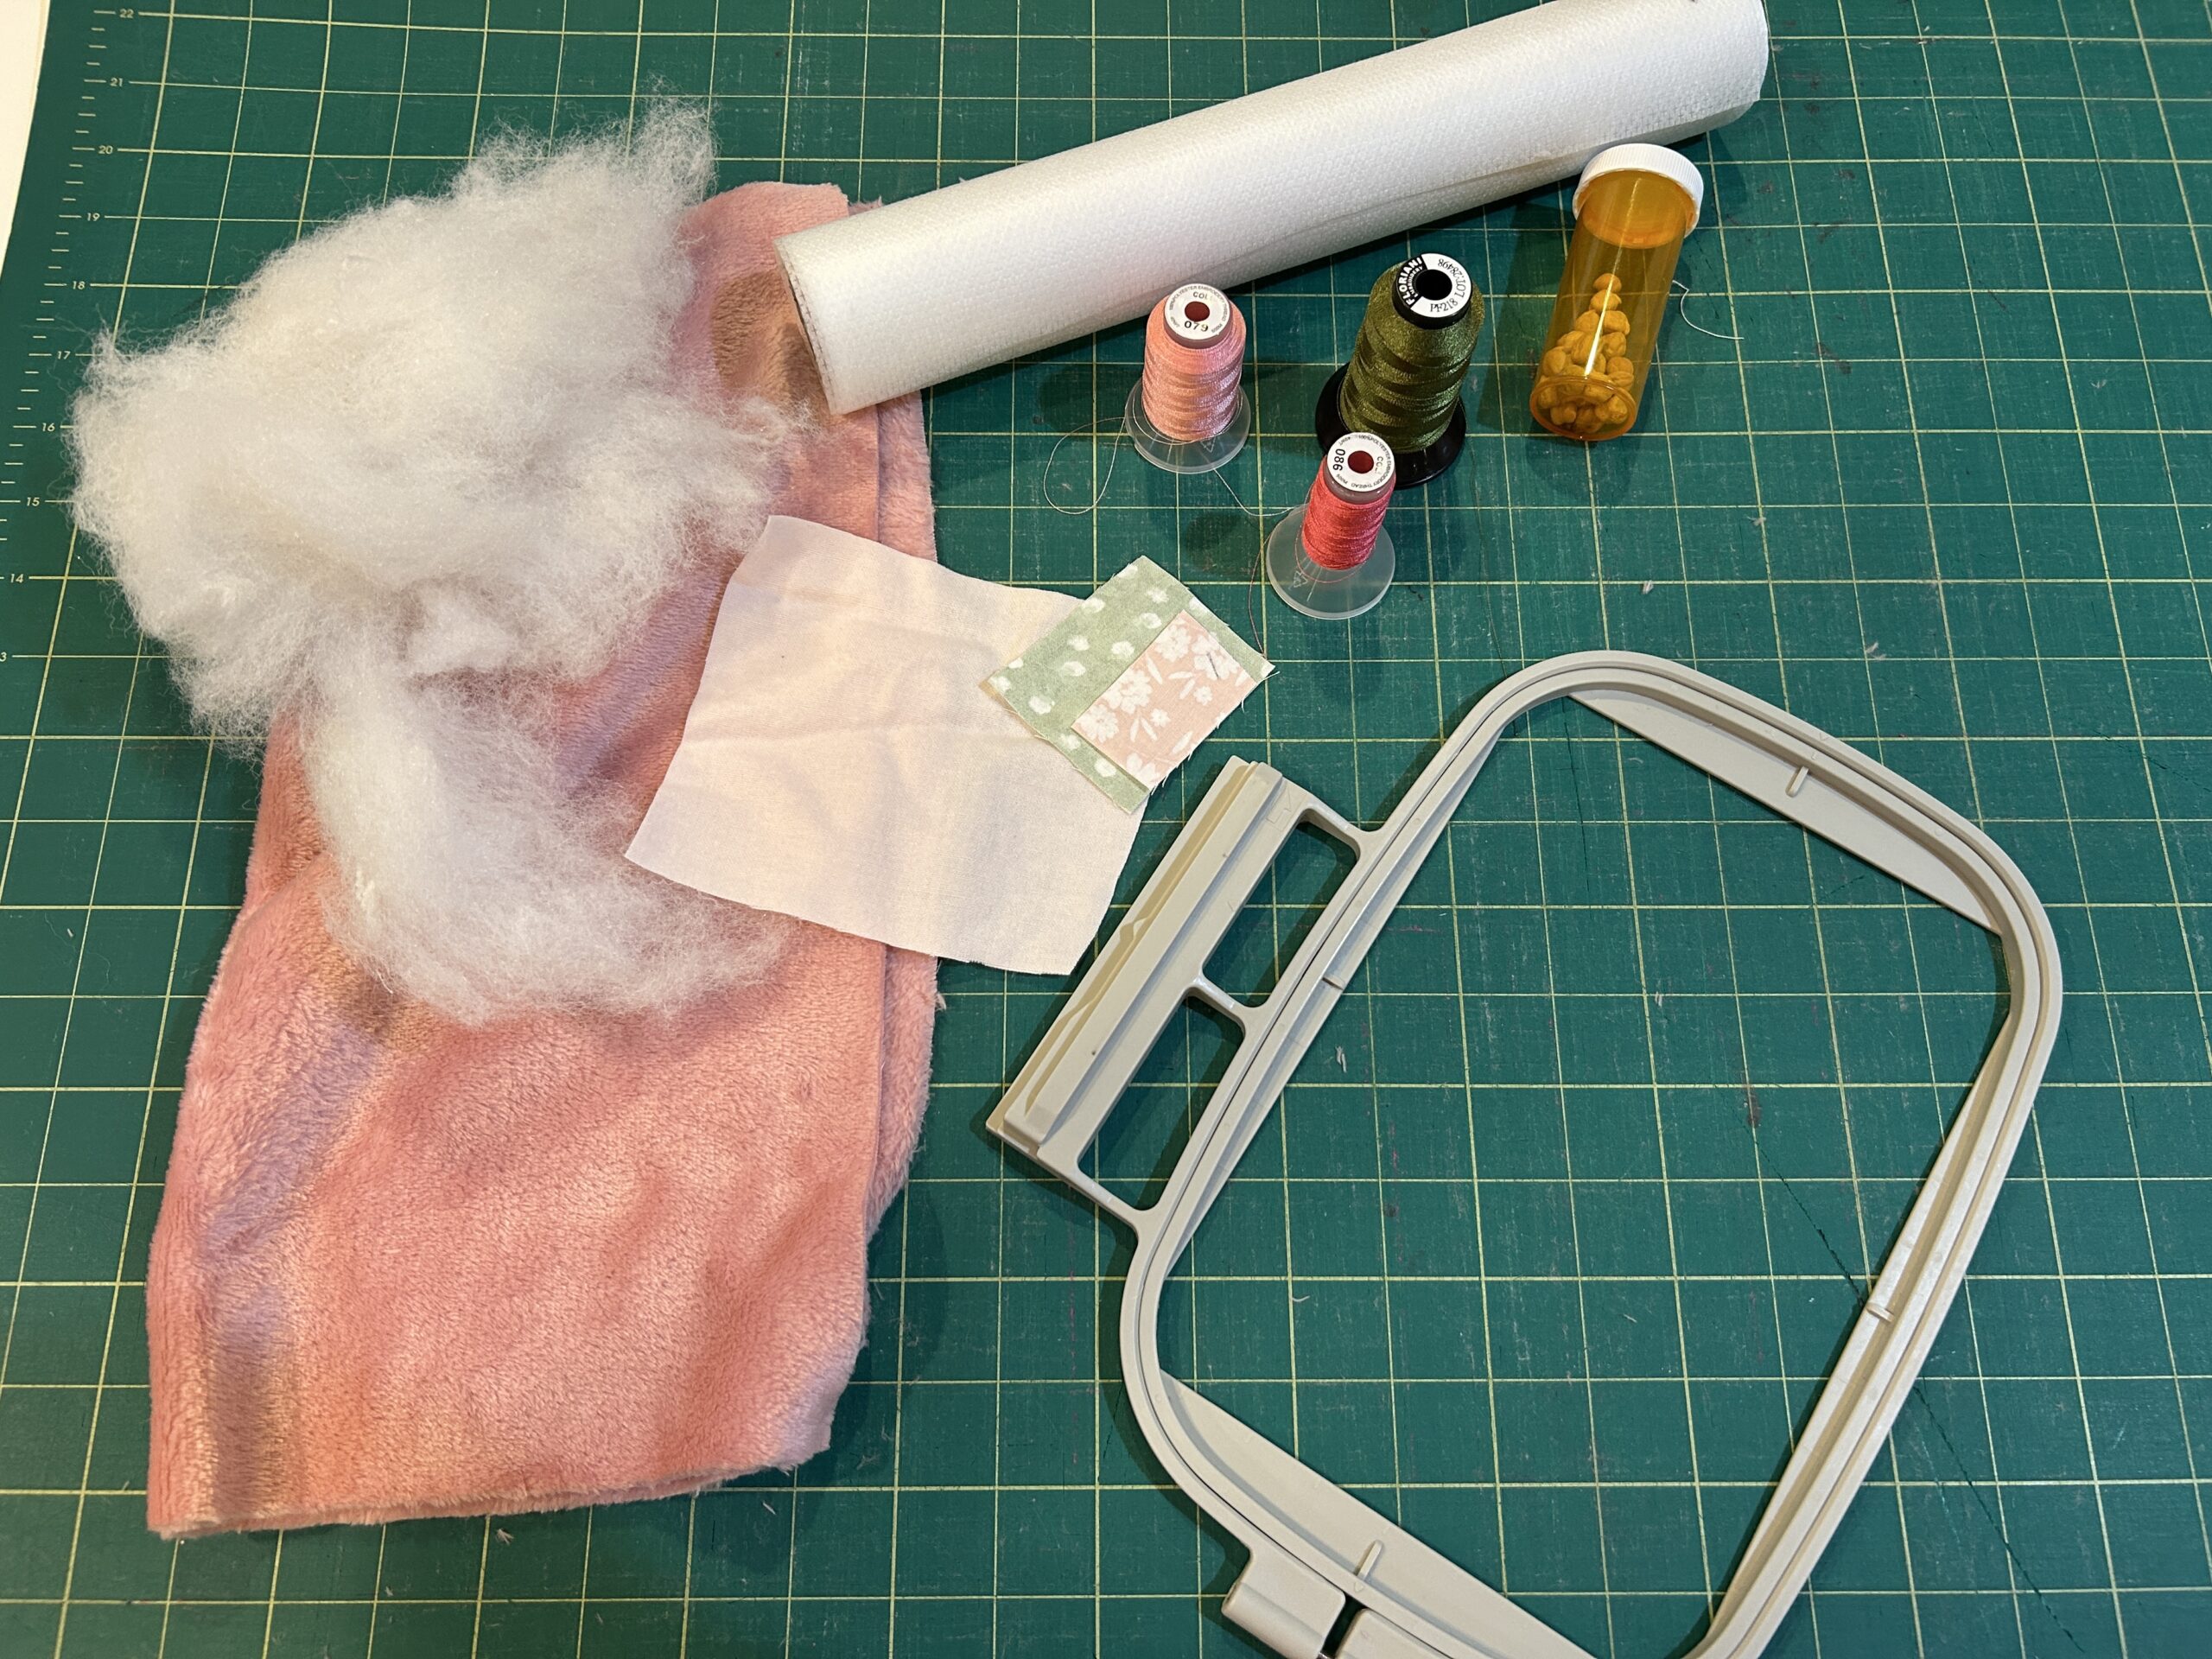
We will first hoop the cut-away stabilizer.

Then place your fabric, right side up, over the hoop. Secure the fabric to the stabilizer with pins. Just make sure you’re at the edges of your hoop and watch the machine as it stitches so you don’t sew over them. If you're using a very furry type of fabric, you can also use some water-soluble stabilizer over the fabric.

Stitch out the first step, which is the outline for our Lolly Dolly.

Next we stitch the placement for the face.

Cover the placement stitches with the face fabric and stitch the tack-down stitches for the face.

Now we will trim the fabric around the edges. Remember to trim close to the edges without clipping the stitches. This is the same for every face. If you’ve chosen a bean stitch edge, this will be the edge of the face, but if you have chosen a satin stitch it will stitch out next.

The next few steps will stitch the face—the eyes and the mouth. Feel free to use any colors you like for them.

Next will be the cheeks. Depending on what method you choose, you will either have the applique cheeks or the stitched-out cheeks.
For the stitched-out cheeks, just choose your thread color and stitch it out.

For the applique cheeks we stitch a placement stitch.

Then we will cover with the cheek fabric,stitch the tack down, and trim them close to the stitches.

If you’re using the bean stitched cheeks, you’re done. If using the satin stitched cheeks, continue with the satin stitch around them.

Our faces are now done! We can add the little heart pocket on the doll next. If you’re doing a bean stitch on the face, that’s how your pocket will finish out. If you’re doing a satin stitch on the face, your pocket and heart will finish with a satin stitch. The bean stitches will also have an outline stitched heart. The satin stitches will have a completely filled stitched heart.
Go ahead and stitch the placement stitch for the pocket, cover it with your pocket fabric, and stitch the tack-down stitch.

Cut close to the edges of the pocket.

If you’re doing the satin stitch version, you would stitch the satin stitches next. Then the heart stitches out. It will be an outline for the bean face versions and a filled heart for the satin face versions.

Now we will stitch the back to the front of our Dolly. Place your other piece of fabric face down, or right sides together, on top of your hoop.

Stitch out the last step. It will connect the back to the front but leave a gap for turning.

Remove from the hoop and cut the stabilizer close to stitches.

Now we will trim the front and back fabrics. We will want to trim about ¼ of an inch from the lines of the stitching. But where there is the gap for turning we can leave it bigger to help sew things together.

Turn it right side out. If you used a water-soluble stabilizer you can remove it now also. Look at that cute face!

Now it’s time to stuff with the Poly-fil. I like to make sure I’m getting it into all the edges to fill out the shape.

If you’d like to make your Lolly Dolly a rattle, take a small prescription bottle with a child-proof cap and put a few dried garbanzo beans in it. You can use anything you would like to make the shaking sounds in the bottle. I find the garbanzo beans make a loud shaking sound, and things like rice make a softer sound. Choose whatever you prefer. Slip the bottle inside and make sure it’s surrounded by Poly-fil.

NOTE: I always mention to the parents that this is in the Dolly. I’m comfortable with it sewn tight inside with a child-proof cap on the bottle, but I do want parents to keep an eye on it and be aware.
Now we can stitch the opening closed with a ladder stitch.

And your Lolly Dolly is finished. You can add it to anything else you’ve made for a newborn or even add it to a store-bought gift to personalize it a little bit more.

If you make a Lolly Dolly, please share with us in the Designs by JuJu Embroidery Blessings Group on Facebook, or anywhere on social media by using the hashtag #designsbyjuju. We love to see what you create!
