Toggle Nav
 Inspire.
Create.
Stitch.
Inspire.
Create.
Stitch.
Search
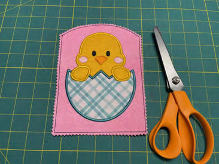
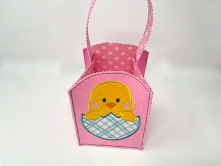
Looking for a fun and functional embroidery project? This In-the-Hoop Embroidered Fabric Basket is the perfect DIY for Easter treats, gift giving, or stylish home organization!
Made entirely in the hoop with just a bit of sewing to assemble, this adorable basket is a must-stitch for any embroidery enthusiast. Whether you’re filling it with goodies for a holiday celebration or using it to store crafting supplies, this project is as versatile as it is cute.
5x7 Approximate Finished Size 4.7”x6.3”
6x10 Approximate Finished Size 5.8”x 7.9”
8x12 Approximate Finished Size 7.3”x 9.8”
Check out Embroidery Supplies JuJu Uses for our favorite supplies!
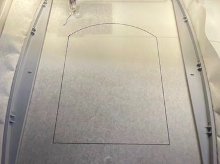
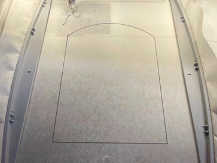
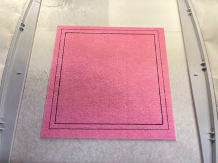
STEP 1: Hoop a piece of stabilizer. Please load design file labeled Front. Before starting please double check that you have loaded the correct design size.

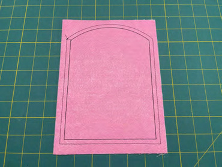
STEP 2: Stitch the placement line for the front.
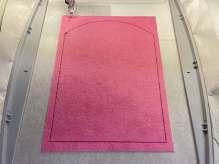
STEP 3: Run basting stitch to hold bonded fabric in place.
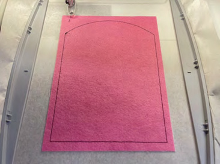
STEP 4: Stitch the inner line.

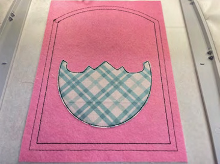
STEP 5: Now we are going to be doing the applique for the front of the basket. The first stitch is the placement line for the egg.
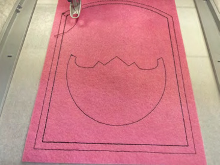
STEP 6: Cover placement line with egg fabric, making sure all sides are covered. Stitch tack down line. Trim around stitches as shown.
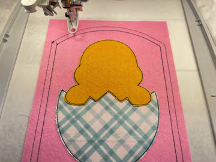
STEP 7: Stitch placement line for the chick.

STEP 8: Cover placement line with chick fabric, making sure all sides are covered. Stitch tack down line. Trim around stitches as shown.
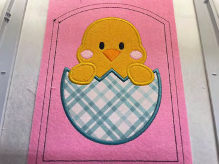
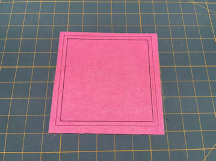
STEP 9: The next few stitching steps are the satin and decorative stitches for the front.
Refer to color chart, included with download, for satin and design stitching sequence.
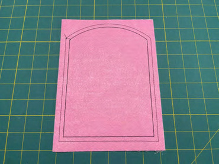
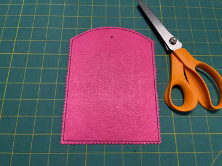
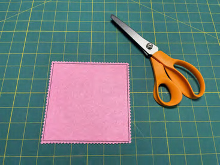
STEP 10: Remove the front from the hoop and trim away excess stabilizer.
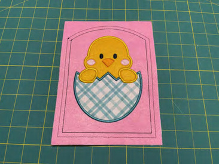
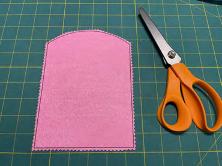
STEP 11: Trim the edges of the front, using pinking shears, between the outer and inner stitch line.
YOU ARE FINISHED WITH THE FRONT BACK
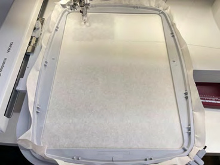
STEP 12: Hoop a piece of stabilizer. Please load design file labeled Back. Before starting please double check that you have loaded the correct design size.

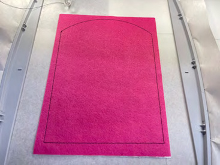
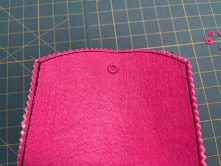
STEP 13: Stitch the placement line for the back.
STEP 14: Run basting stitch to hold bonded fabric in place.
STEP 15: Stitch the inner line.

STEP 16: Remove the back from the hoop and trim away excess stabilizer.
STEP 17: Trim the edges of the back, using pinking shears, between the outer and inner stitch line.
YOU ARE FINISHED WITH THE BACK SIDES
STEP 18: Hoop a piece of stabilizer. Please load design file labeled Sides. Before starting please double check that you have loaded the correct design size.
STEP 19: Stitch the placement line for the side.

STEP 20: Run basting stitch to hold bonded fabric in place.
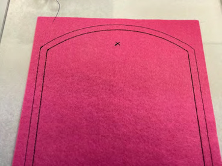
STEP 21: Stitch the inner line and the X.
STEP 22: Remove the side from the hoop and trim away excess stabilizer.
STEP 23: Trim the edges of the back, using pinking shears, between the outer and inner stitch line. Repeat this design using steps 18-23 once more for the second side.
YOU ARE FINISHED WITH THE SIDES BOTTOM
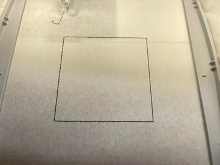
STEP 24: Hoop a piece of stabilizer. Please load design file labeled Bottom. Before starting please double check that you have loaded the correct design size.

STEP 25: Stitch the placement line for the bottom.
STEP 26: Run basting stitch to hold bonded fabric in place.
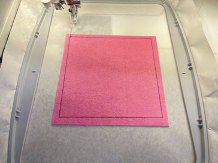
STEP 27: Stitch the inner line.
STEP 28: Remove the bottom from the hoop and trim away excess stabilizer.
STEP 29: Trim the edges of the bottom, using pinking shears, between the outer and inner stitch line.
YOU ARE FINISHED WITH THE BOTTOM HANDLES
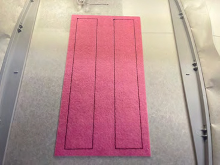
STEP 30: Hoop a piece of stabilizer. Please load design file labeled Handles. Before starting please double check that you have loaded the correct design size.

STEP 31: Stitch the placement line for the handles.
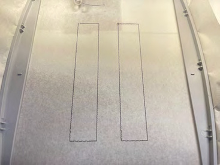
STEP 32: Run basting stitch to hold bonded fabric in place.
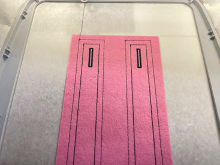
STEP 33: Stitch the inner line and the button holes.
STEP 34: Remove the handles from the hoop and trim away excess stabilizer.
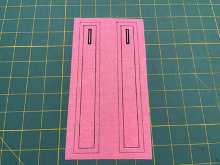
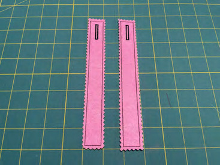
STEP 35: Trim the edges of the handles, using pinking shears, between the outer and inner stitch line.
YOU ARE FINISHED WITH THE HANDLE BASKET CONSTRUCTION
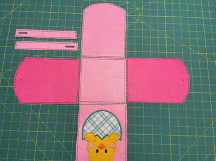
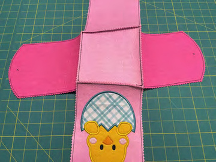
STEP 36: Lay out the pieces to form the basket.
SEWING MACHINE IS REQUIRED TO COMPLETE THE PROJECT
STEP 37: We will be attaching the front, back and sides to the bottom. First we will sew together the front bottom to the bottom of the basket.
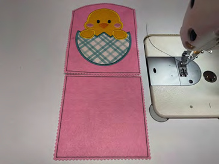
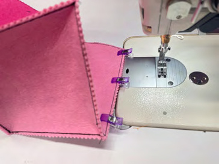
STEP 38: Flip the bottom up onto the front, inner fabrics together. Line up the pieces so the stitching line on both match. Pin or clip together.
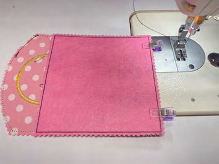
STEP 39: Sew the pieces together, sewing directly on top of the stitching line.
STEP 40: Repeat steps 38 & 39 till all of the pieces are attached to the bottom.
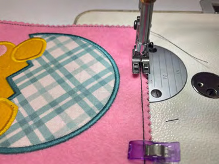
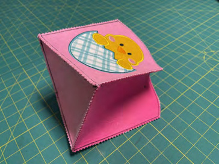
STEP 41: Now we are going to sew the front, back and sides together to construct the wall. Line up the pieces so the stitching line on both match. Pin or clip together and sew.
STEP 42: Repeat step 41 till all of the walls are constructed.
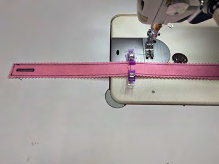
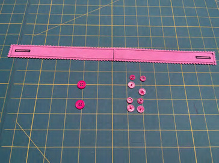
STEP 43: Now we will sew the two handle pieces together to form one long handle. Line up the handles so the stitching line on both match. (Button holes are at the ends) Pin or clip together and sew.
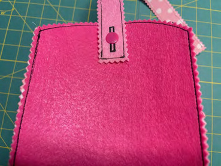
STEP 44: We will now be attaching the handle to the basket. Buttons or snaps can be used. If using buttons make sure to cut the middle of the button hole to allow the button to pass through.
STEP 45: Attach the button or the snap directly of the X on the side.
STEP 46: Push button through button hole to attach handle, or if using snaps, add the other part of the snap and attach to basket. Repeat steps 45 & 46 to attach the handle to the handle to the other side.
THE BASKET IS COMPLETE!!!!
If you loved this project, you’ll find plenty more just like it in our Quick Gifts Hub—a curated collection of quick, creative, and practical projects perfect for gifting (or keeping!)
If you make this project, please share it with us in the Designs by JuJu Embroidery Blessings Facebook group, or anywhere on social media using the hashtag #designsbyjuju. We can't wait to see what you create!