Toggle Nav
 Inspire.
Create.
Stitch.
Inspire.
Create.
Stitch.
Search
 I’m using design 3 in DBJJ320, Celebrate the 4th Applique Set 1. Open the design in Embrilliance Essentials (FILE, OPEN).
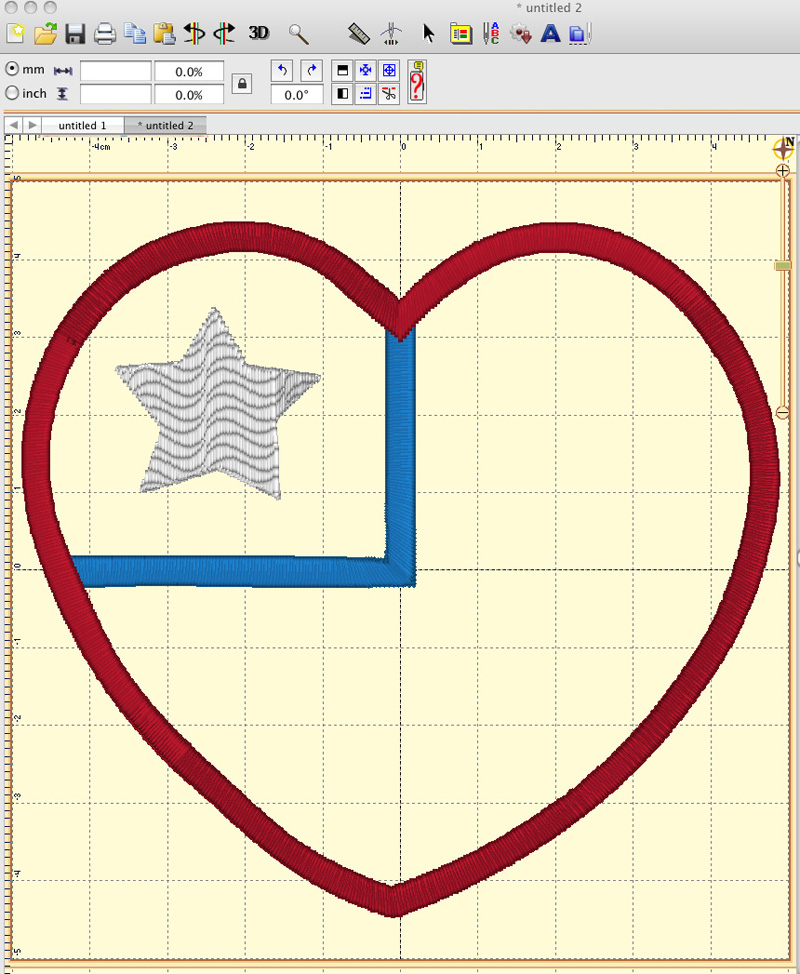
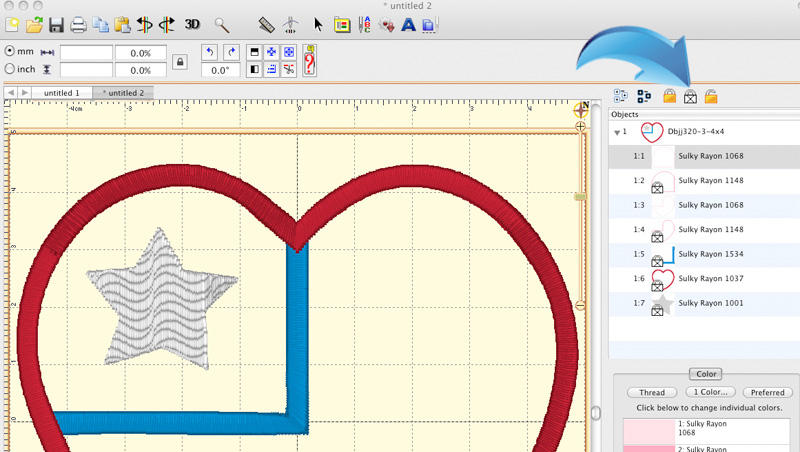
 The placement stitch is the part of the design you will need to create a template. It shows the position and size necessary for the applique fabric.
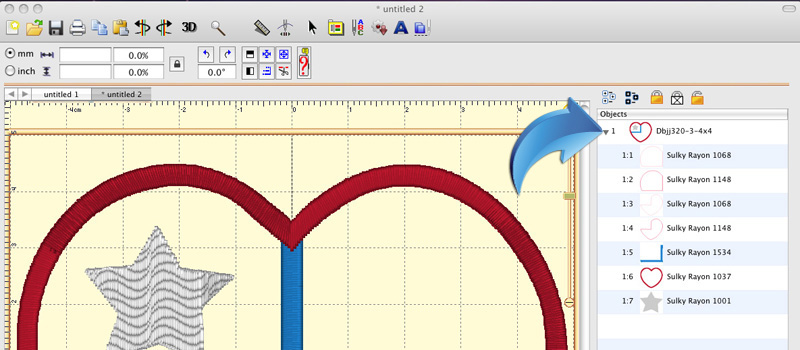
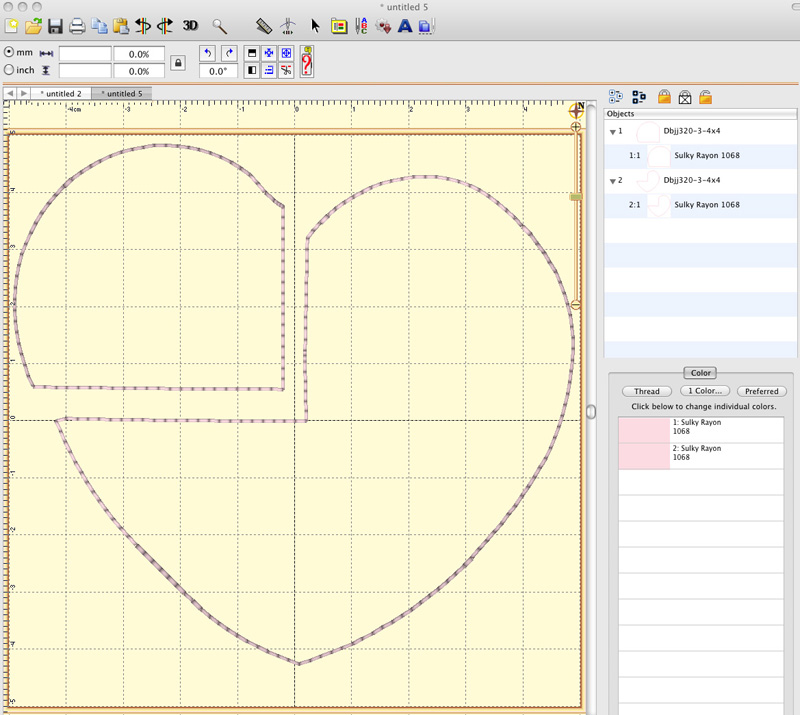
In the Objects panel, click on the drop-down arrow to show all of the parts of the design file. For this design, there are seven stitch sequences:
The placement stitch is the part of the design you will need to create a template. It shows the position and size necessary for the applique fabric.
In the Objects panel, click on the drop-down arrow to show all of the parts of the design file. For this design, there are seven stitch sequences:
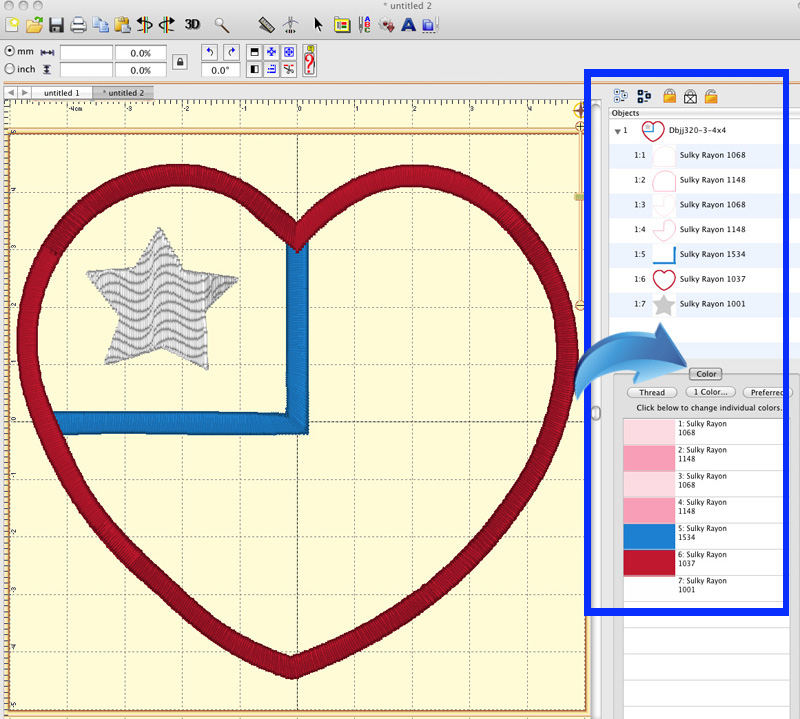 The Color section, under Objects, shows the color and thread name for each of the seven color stops. Designs by JuJu uses light pink (Sulky 1068) and medium pink (Sulky 1148) for the placement and tack-down stitches in most of their applique designs.
There are two applique components in this design: the star section of the heart (blue outline) and the remaining area of the heart (red outline). That means there are two placement stitches, number one and number three. These will be used to create our templates.
The Color section, under Objects, shows the color and thread name for each of the seven color stops. Designs by JuJu uses light pink (Sulky 1068) and medium pink (Sulky 1148) for the placement and tack-down stitches in most of their applique designs.
There are two applique components in this design: the star section of the heart (blue outline) and the remaining area of the heart (red outline). That means there are two placement stitches, number one and number three. These will be used to create our templates.
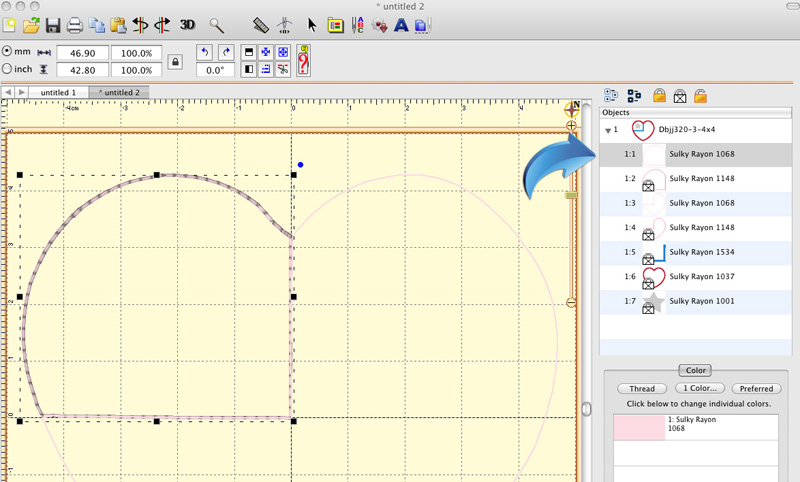
 Click on the first color (light pink 1068) in the Color window. Two placement stitches show in the Objects window for that color.
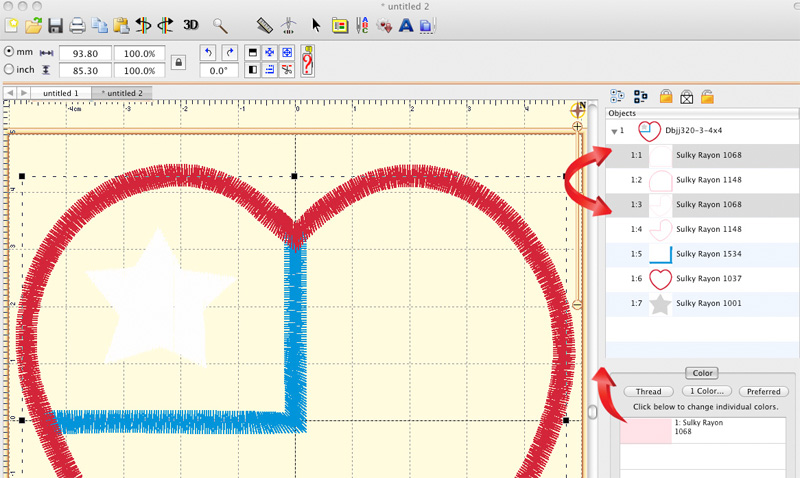
 To create templates for the heart corner and the rest of the heart, we need to isolate the design’s two placement stitches (color stops 1 and 3) by locking all other color stops. Click on the second color stop. Above the Objects panel, click on the Lock and Hide icon (white lock with an X). It hides design objects. Do the same to the other color stops (4-7).
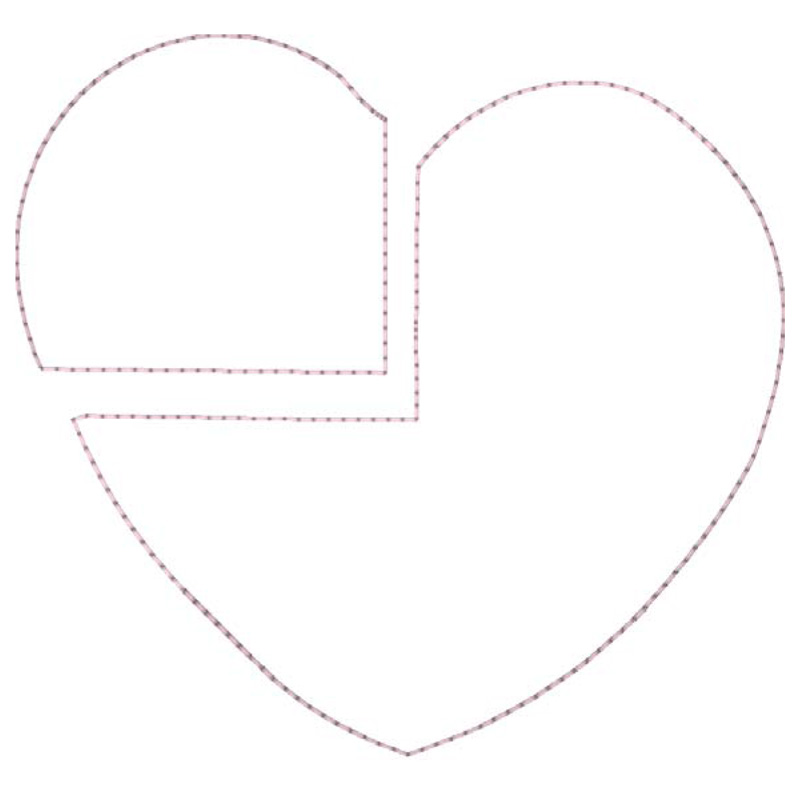
 Now. all that shows is the left corner and
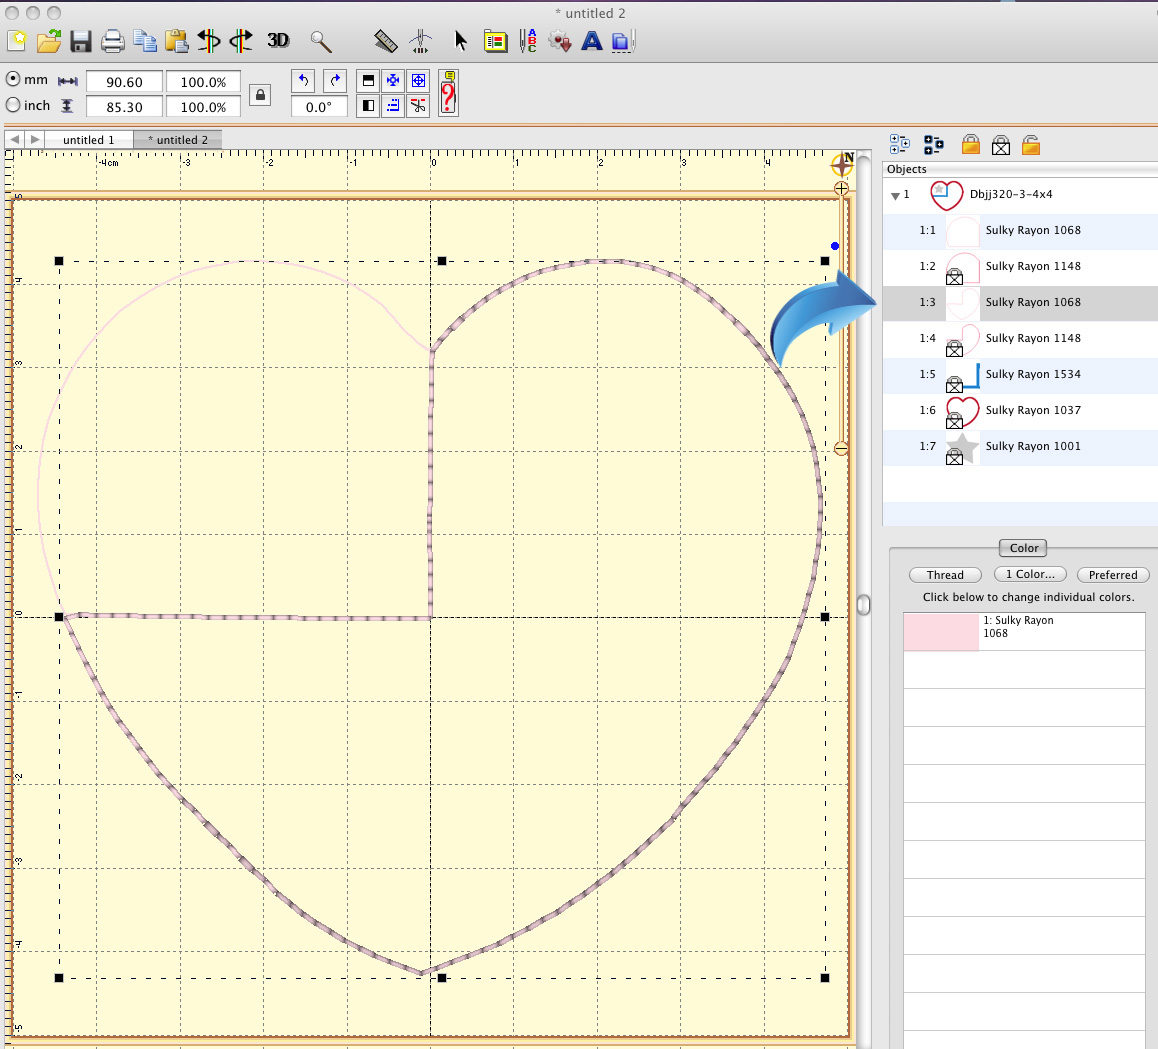 the rest of the heart, both placement stitches.
 The placement stitches are now all that show. But, to be useful, they need to be separated.
If you like, you can click on each of the colors you don’t need and delete them, then save the file as a template, but use a different name than the original file name so you don’t save over the original file.
The placement stitches are now all that show. But, to be useful, they need to be separated.
If you like, you can click on each of the colors you don’t need and delete them, then save the file as a template, but use a different name than the original file name so you don’t save over the original file.
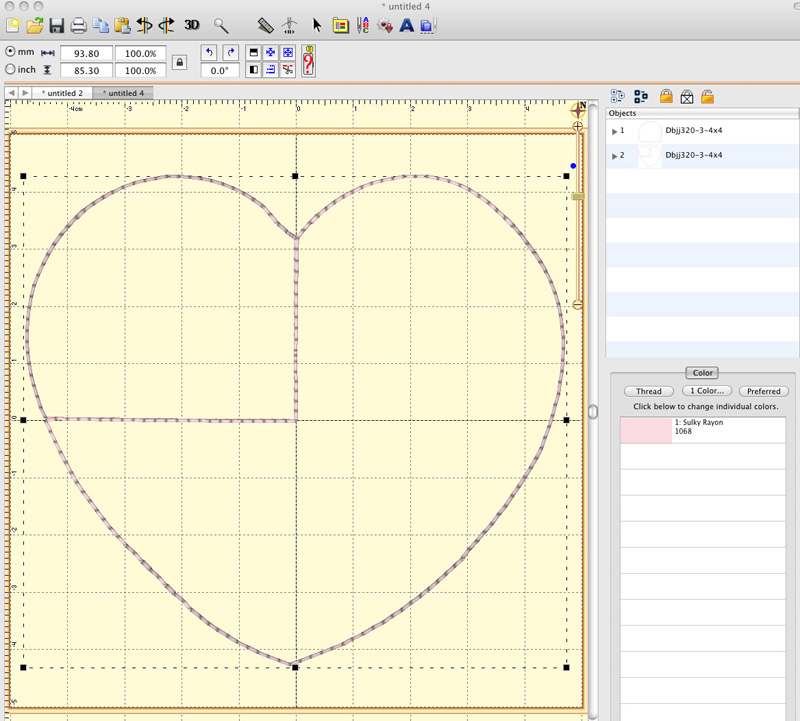
 To separate the two applique templates, click on the design in the screen and select EDIT, UNGROUP. Click on Object 1, the placement stitch for the star corner.
 Use the arrow keys on the keyboard to move the corner away from the rest of the heart.
 Now, you can print out the templates and use them to fussy cut fabrics for perfect applique placement!