Toggle Nav
 Inspire.
Create.
Stitch.
Inspire.
Create.
Stitch.
Search
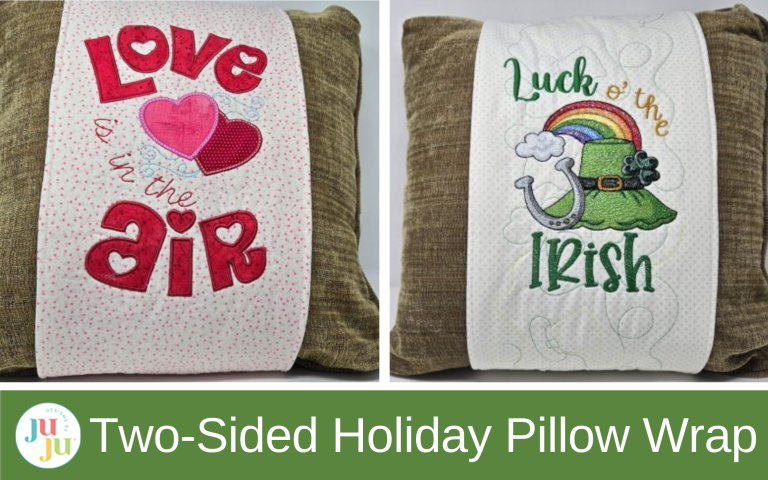
Two holidays, one pillow wrap—flip it over and decorate without adding to your storage pile!
If you love decorating for holidays and seasons but don’t love finding space to store it all, this project is for you. A double-sided pillow wrap is a fun, practical way to dress up your home for more than one occasion—just flip the wrap to change the look. In this tutorial, I’ll show you how to create an easy quilted pillow wrap with embroidery on both sides, giving you seasonal style that looks great on display and folds flat when it’s time to tuck it away.
Find the DBJJ team’s favorite supplies in the Designs by JuJu Amazon store.
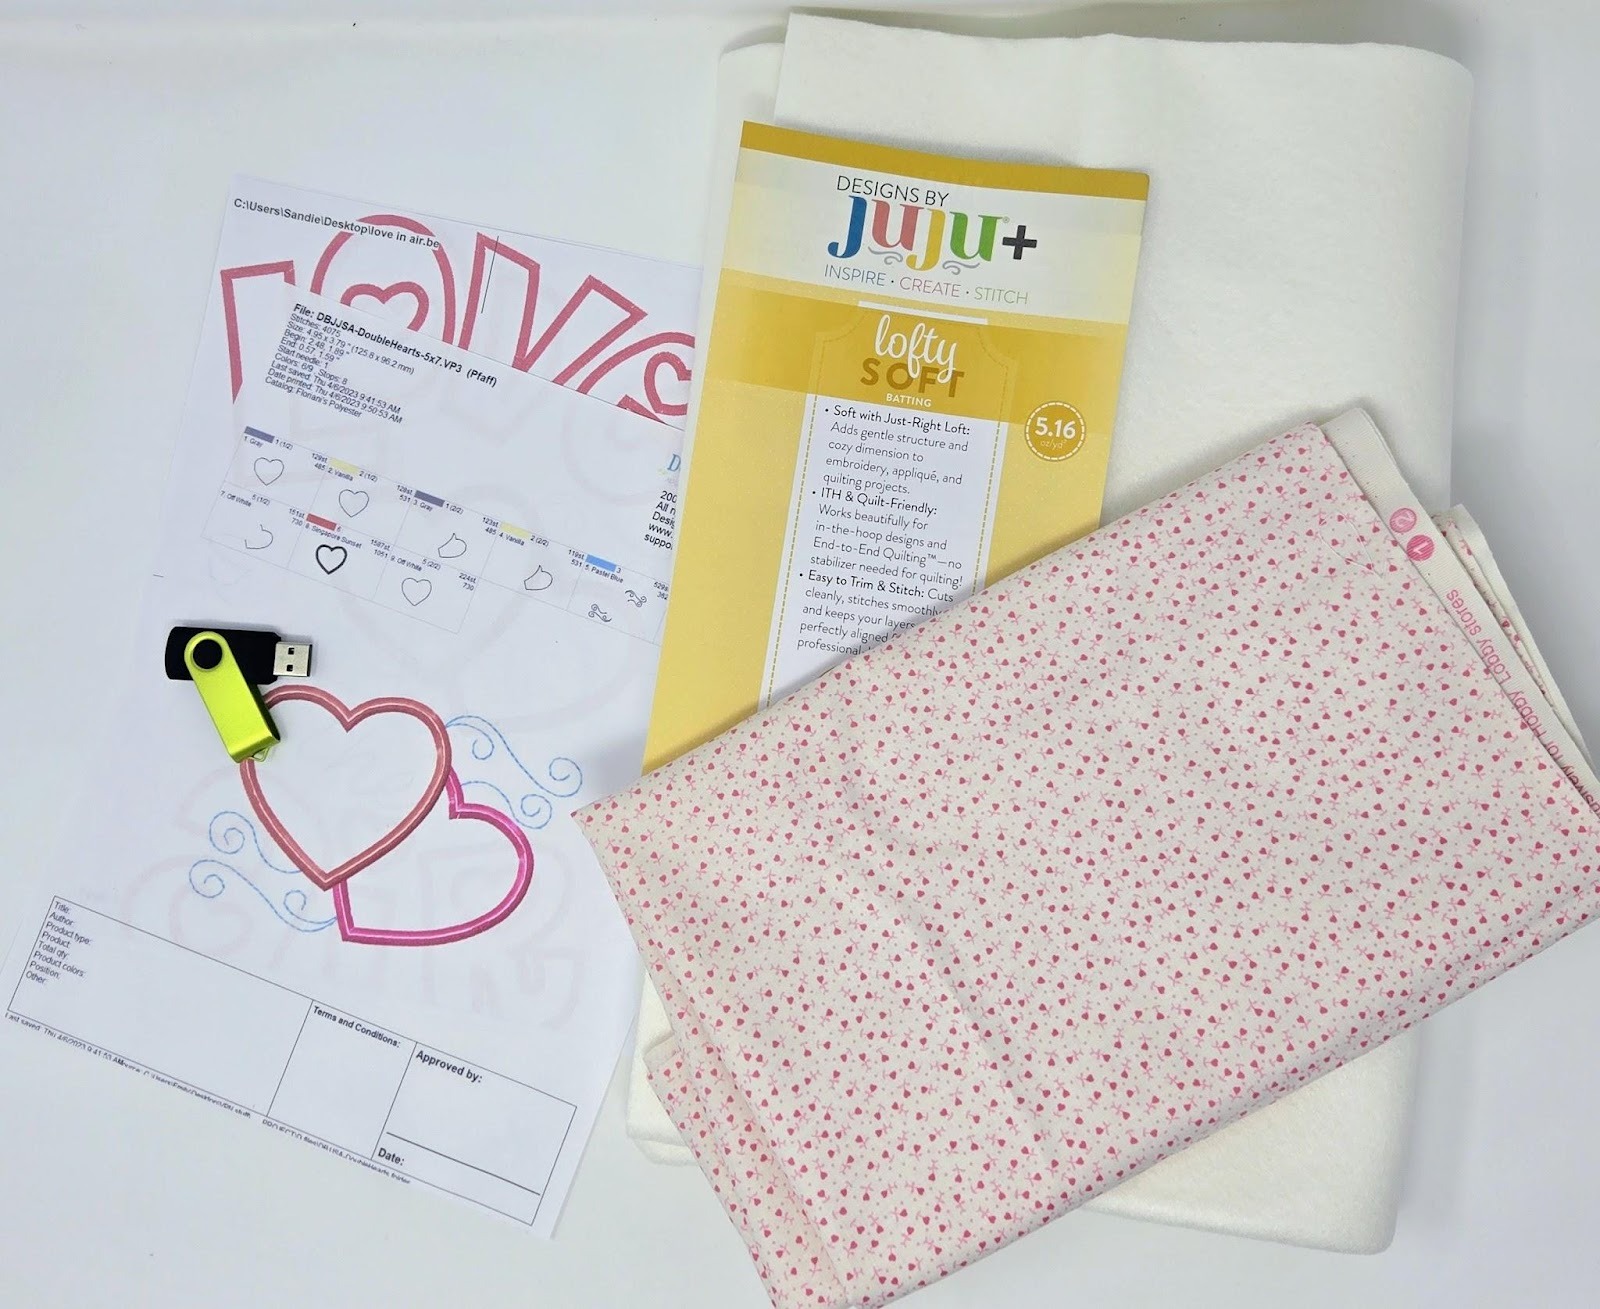
I generally do not use software. Instead, I add the lettering and design right on my embroidery machine screen. But this time I put everything into my Embrilliance Essentials software to arrange my wording around the images. I am still learning Embrilliance so it took me longer, but not that long! Embrilliance has a lot of free videos on their site to help you learn the program.
For each side of the pillow wrap, I imported the font sizes I wanted, used the little circle icon to curve them, and added the embroidery design. I saved the files and moved them to my USB. I also added the quilting designs to my USB from my computer.

If you like the size of your embroidery design—spacing and size of images—then you can go right to your machine to quilt your fabric. This blog post gives an excellent tutorial on how to align the design from hooping to hooping: How to Align End-to-End Quilting.
You can also use your software to change the size of the end-to-end quilting files if, for instance, you want a denser quilting. See this blog post for more on that: Changing Design Size in Embrilliance.
I left my strip of fabric 12” wide by the width of the fabric (⅓ yd) for each side of the pillow wrap. I also cut a strip of batting the same as my fabric.
Once we have finished embroidering, we will sew the two sides together on a sewing machine.
Using my largest magnetic hoop (7x12) and layering only my fabric and batting, I embroidered the quilting design. Because I chose an 8x8 quilting design, I had to shrink it on my machine to fit the hoop for the Valentine quilting. I quilted in white so it doesn’t really show but will give the pillow wrap great texture!


Once I had the strip quilted, I removed it from the hoop, and marked the center of the strip. I used pins to mark my center on my quilted fabric strip so I could line the pins up to the center marks on my hoop. Then I will remove the pins before embroidering.

Applique the hearts and wording.


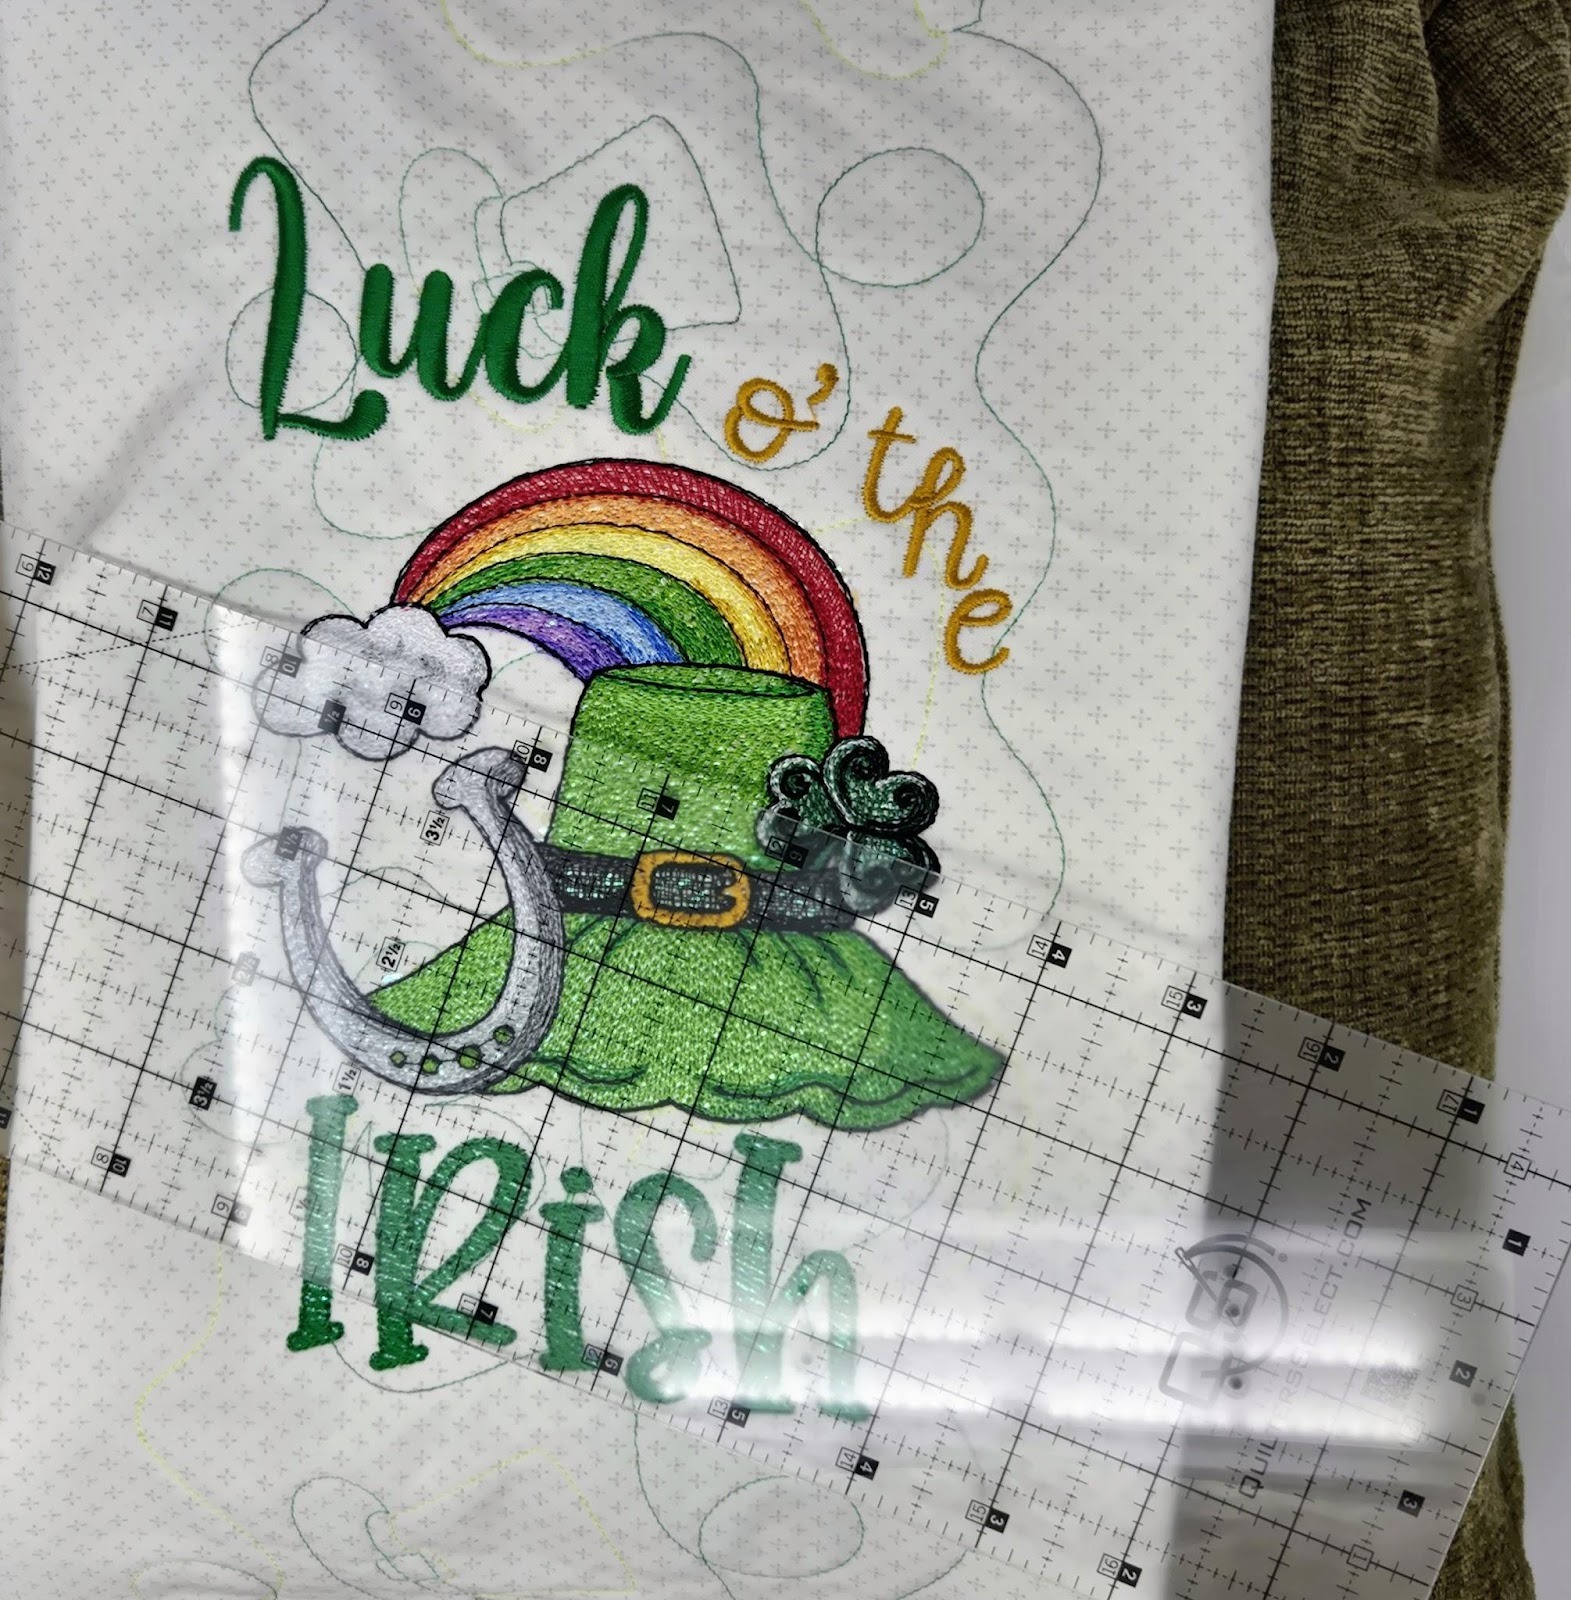
Repeat the above steps for the other side of the pillow wrap and your St. Patrick’s Day design. Gather your supplies and hoop your fabric and batting.

Quilt your strip of fabric. I used a variegated thread, so in some places the quilting is quite obvious and in others it isn’t.

I did need to tape a piece of tear-away stabilizer to the bottom of my project to get it into the hoop at the bottom. This is explained in the first blog post link above.
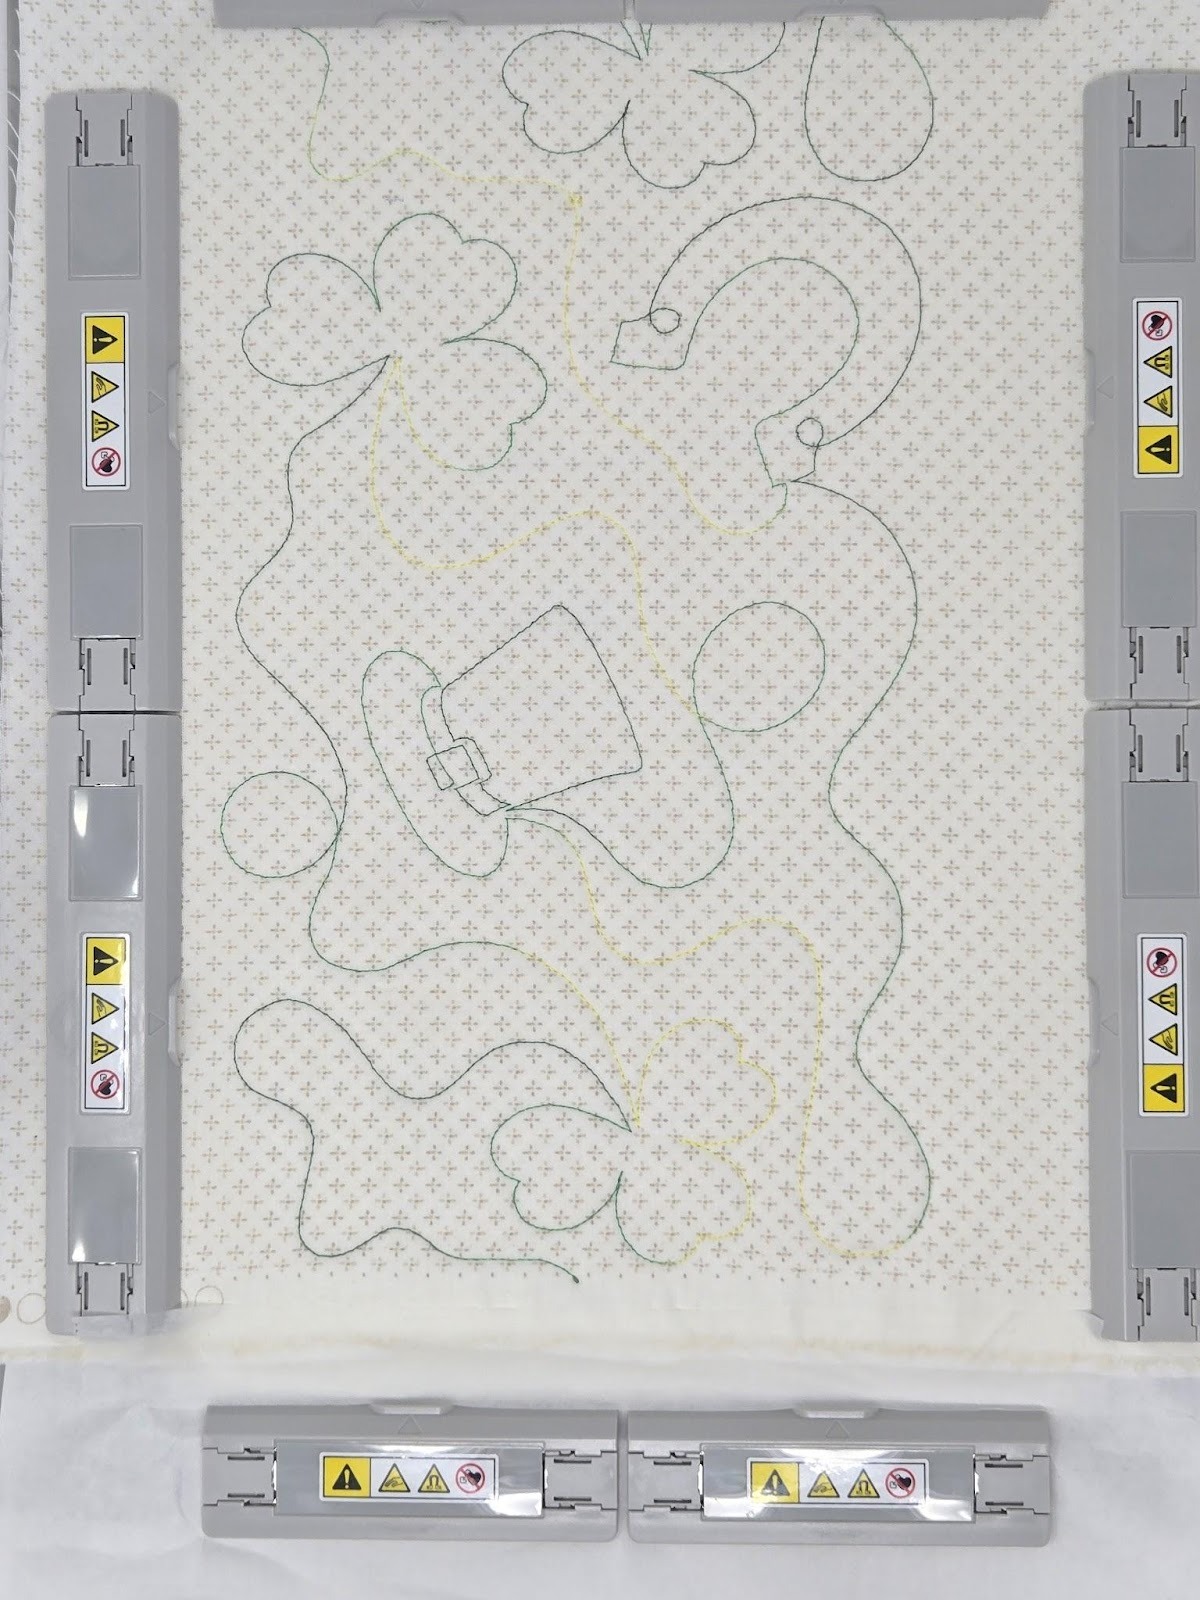
Next find the center of the piece and hoop the same way we did for the Valentine’s side.
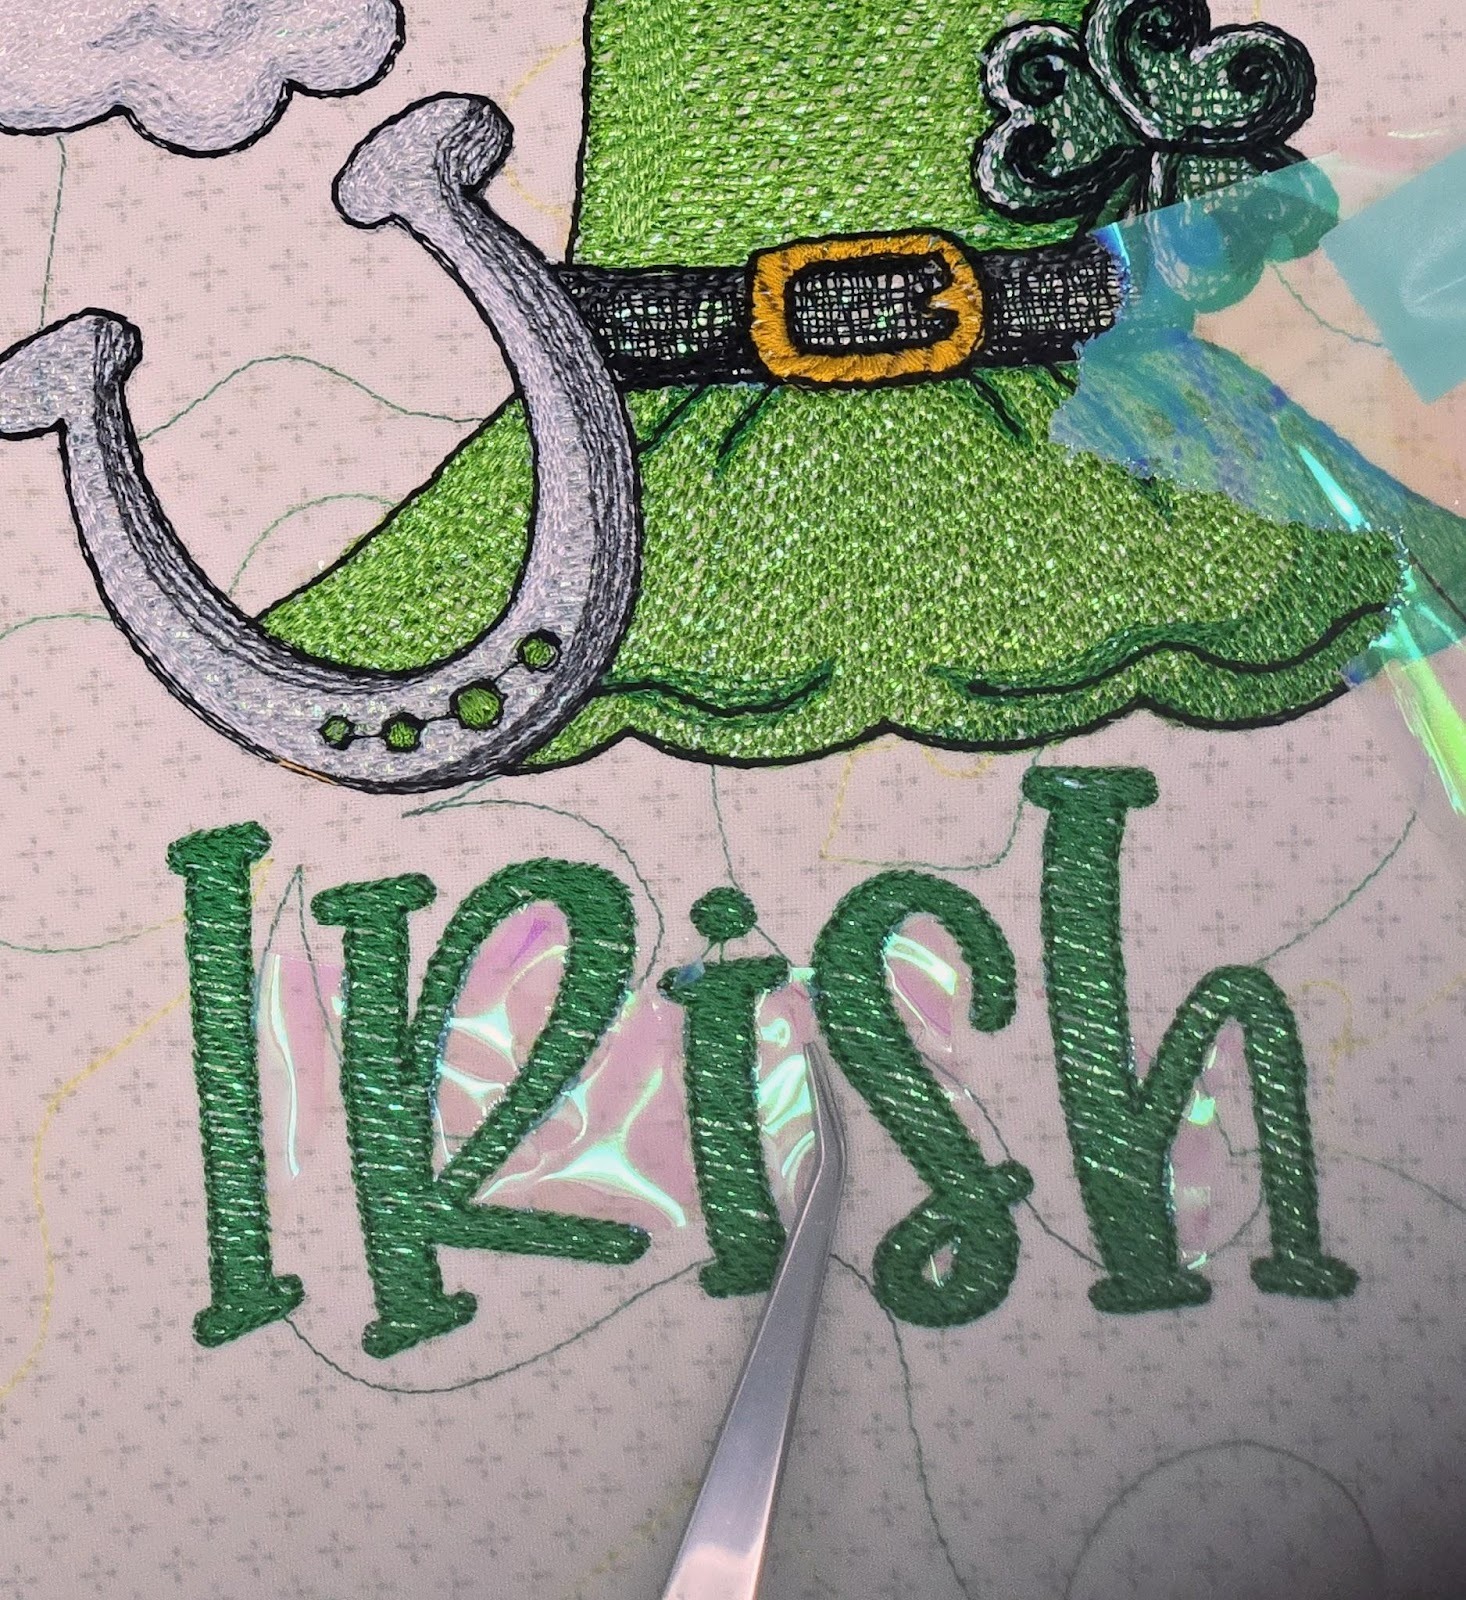
I taped the piece of Mylar down so it would be under the stitching of the embroidery design and the word “Irish” to give this part of the design sparkle. This works really well for sketch-type designs.
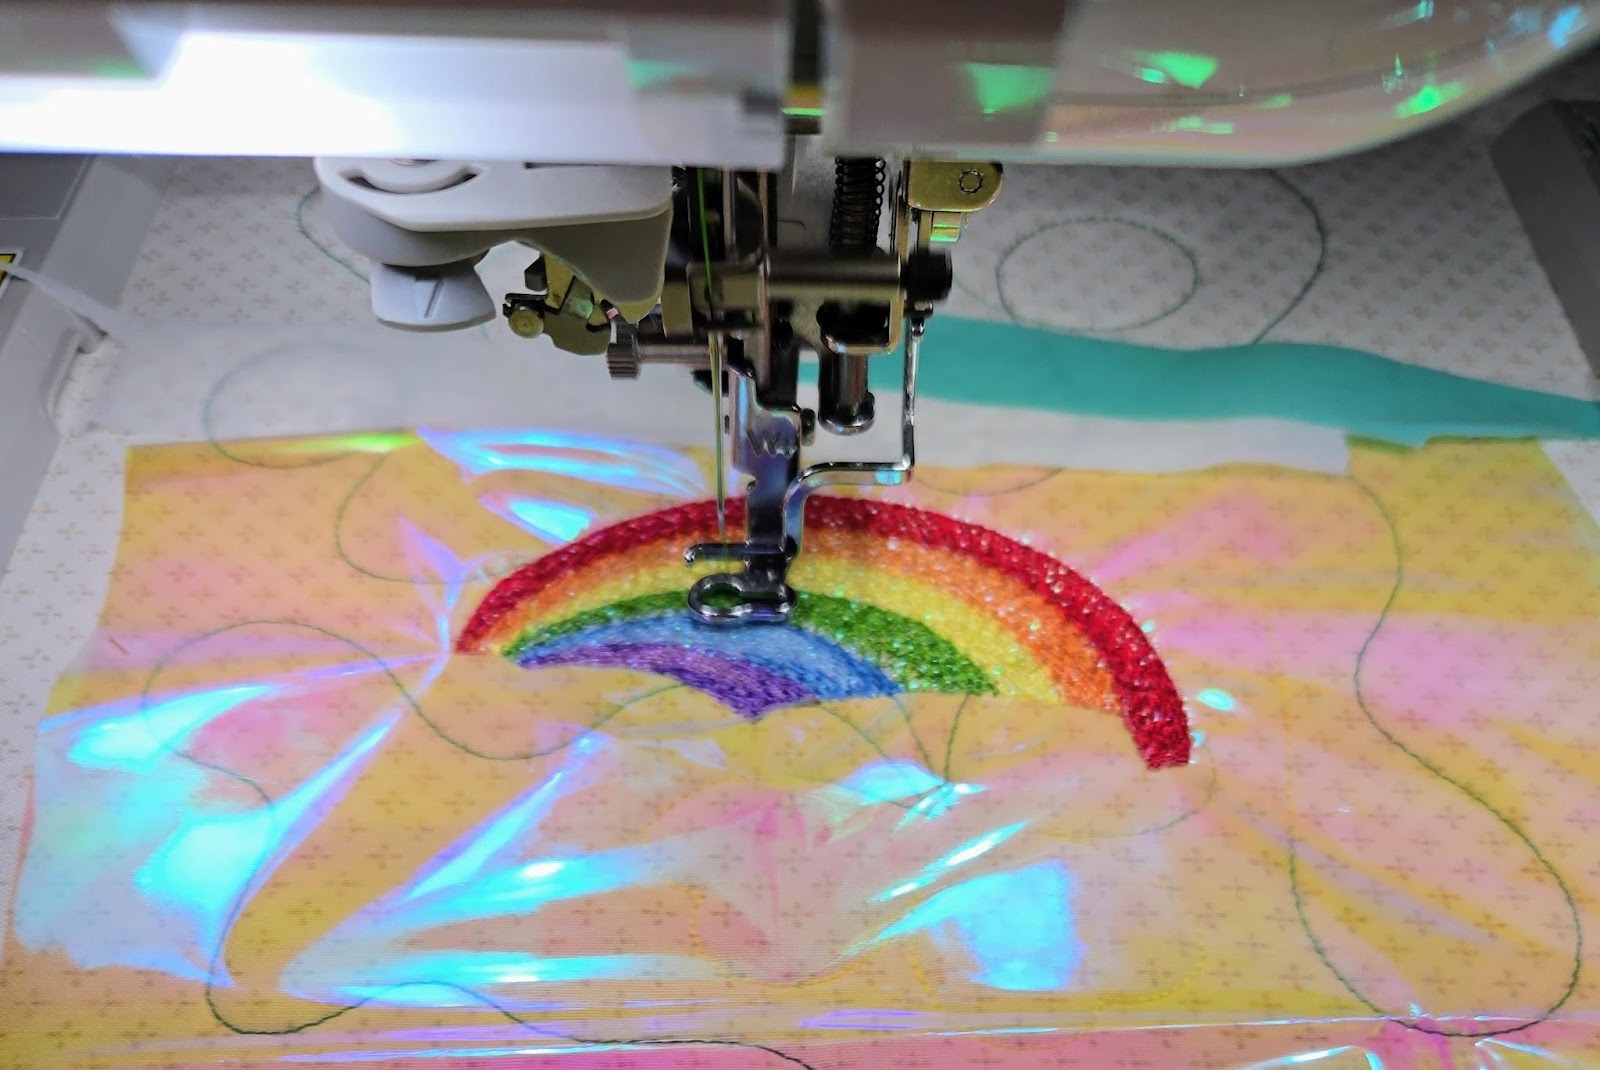
When I got to “Luck o’ the” I cut the Mylar away since it would not show under the satin stitches.
Once the embroidery is finished, gently tug the Mylar away from the edges of the design. I used tweezers to pull it out from between the letters.

Remove your embroidery from the hoop and now we will switch to our sewing machine.
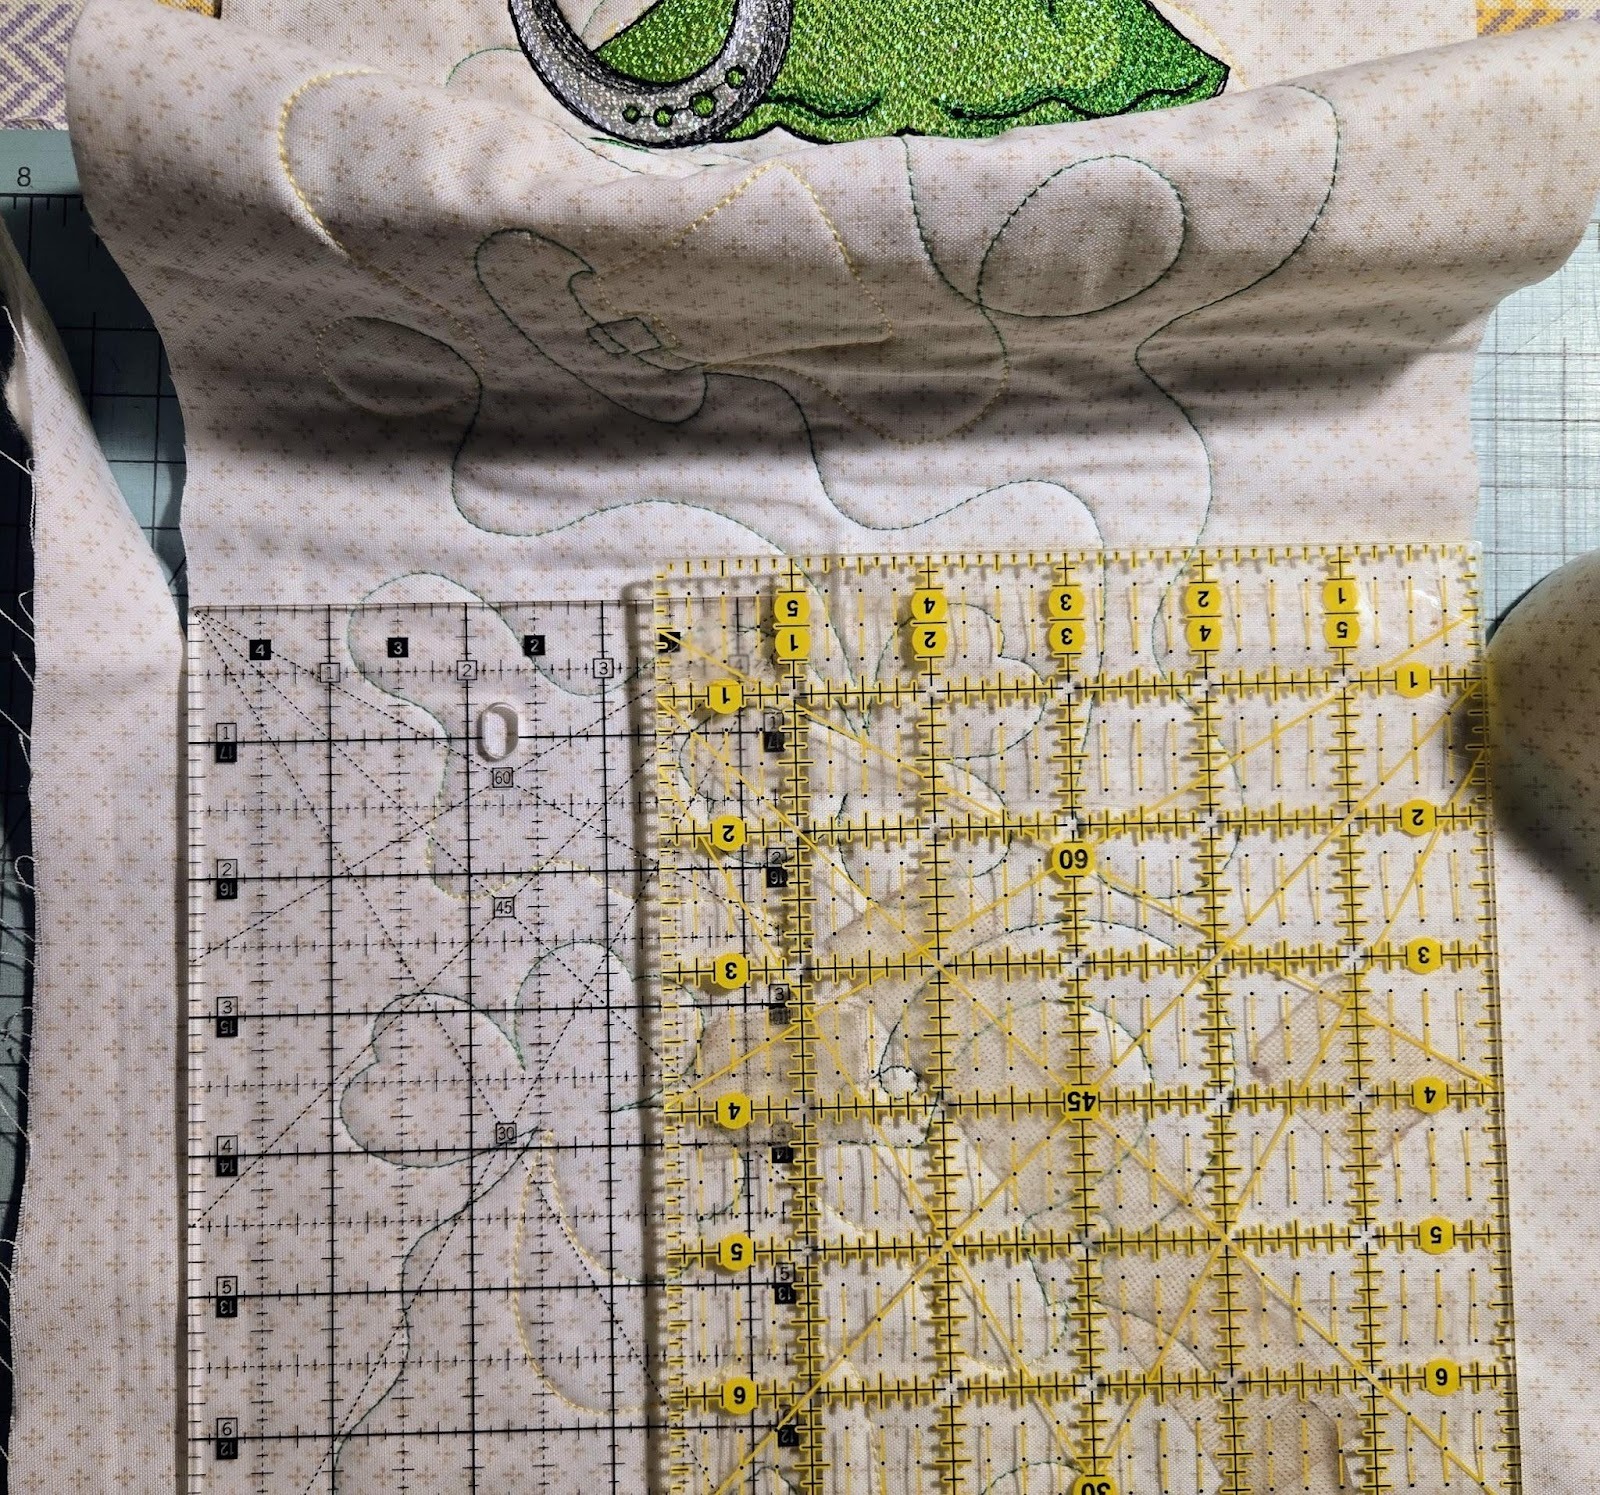
The first thing we need to do is place the two sides together and trim the ends even in length. One of my fabrics was slightly longer than the other, so I placed them so the embroideries matched up in the center and then trimmed the longer one. Then I placed my wrap across my pillow to decide how wide I wanted the wrap. I folded the edges under and decided on a 9” width.
Add ½” to your width to account for seam allowances. Since I do not have a long 9½” ruler, I overlapped two rulers to trim the sides of each wrap. Center the design within the 9½”.
When both are trimmed, sew ¼” seam down one long side, with right sides of wraps together, and back stitching at the beginning and end. Press seam open. Also fold ½” on each short edge back and sew down.
Sew one side of Velcro to the bottom of one side of the wrap. I sewed the loop side to the right side of the Valentine piece. It should be placed ½” from your seam, and ¾” from the raw edge. I sewed completely around it.

Adding the loop side of Velcro to the front of Valentine piece.
The other half of the Velcro needs to be attached to the St. Patrick’s side of the wrap. This time I took it to my pillow, centered the design on the front, and overlapped the back. At this point if I had a large overlap, I might have trimmed it and resewn the bottom hem, but I like a bit of overlap, so I left it. This is totally a personal preference and depends on the size of your pillow. Again, it should be placed ½” from the side seam and ¾” from the raw edge.

The last thing we need to do is sew the long raw edge together. Place your two embroidered sides, right sides together and sew a ¼” seam, back stitching at both ends. Press the seam open. This makes the final pressing and stitching so much easier to do as the edges will be nice and crisp.
Finally, turn the wrap right side out and press. Do not touch your iron to the Mylar—I have never done it, but I am afraid it could melt. Then stitch around the entire wrap about ¼” from the edges, closing short ends.
Ta-da! Time to enjoy your double-sided wrap! Okay, my pillow is ugly—time to go shopping!

I hope you enjoyed this tutorial and will go and play with your JuJu quilting backdrops, fonts, and seasonal designs! Please be sure to share your projects in the Designs by JuJu Embroidery Blessings Facebook Group, or use the hashtag #designsbyjuju anywhere on social media. We all love to see what you create!
