Toggle Nav
 Inspire.
Create.
Stitch.
Inspire.
Create.
Stitch.
Search

Imagine transforming a mundane kitchen necessity into a vibrant statement piece that not only protects, but also dazzles. Whether you're a seasoned quilter or a curious beginner, this project promises to ignite your creativity and elevate your kitchen decor to new heights. Are you ready to dive into creating your very own quilted stand mixer cover? Let's go!
Isn’t it funny how projects can suddenly appear in your life? Here’s how this one got started:
1. I have new, adorable fabric I bought for a quilt-along that I never ended up doing. But, I love the fabric and wanted to do something that shows it off.
2. I have a mixer that’s super annoying to dust. I’d really like to NOT have to clean it every time I bake.
3. I really wanted to play with Designs by JuJu’s new Quilting Backdrops!
Combining all three of these thoughts led me to create a DIY stand mixer cover. Follow along on my adventure and you can make your own too.
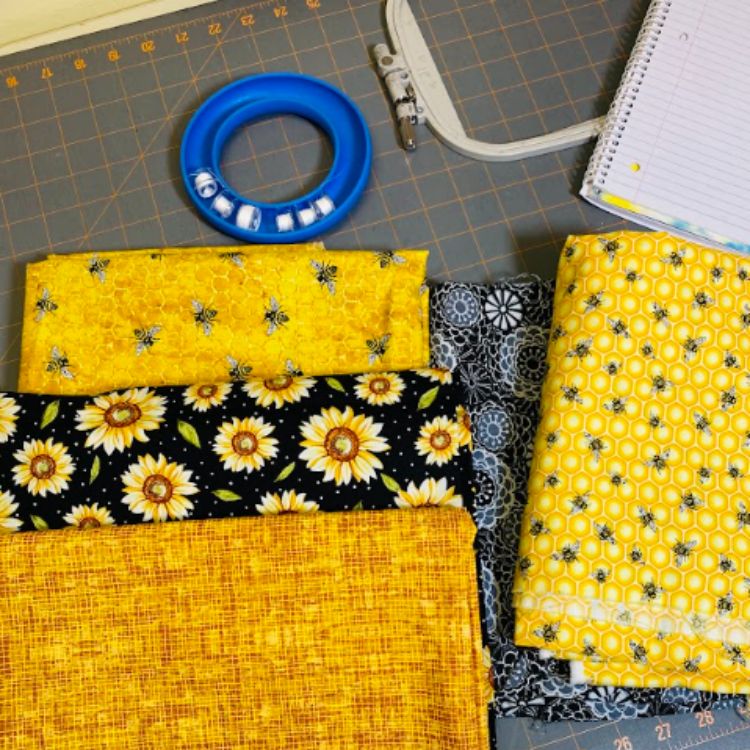
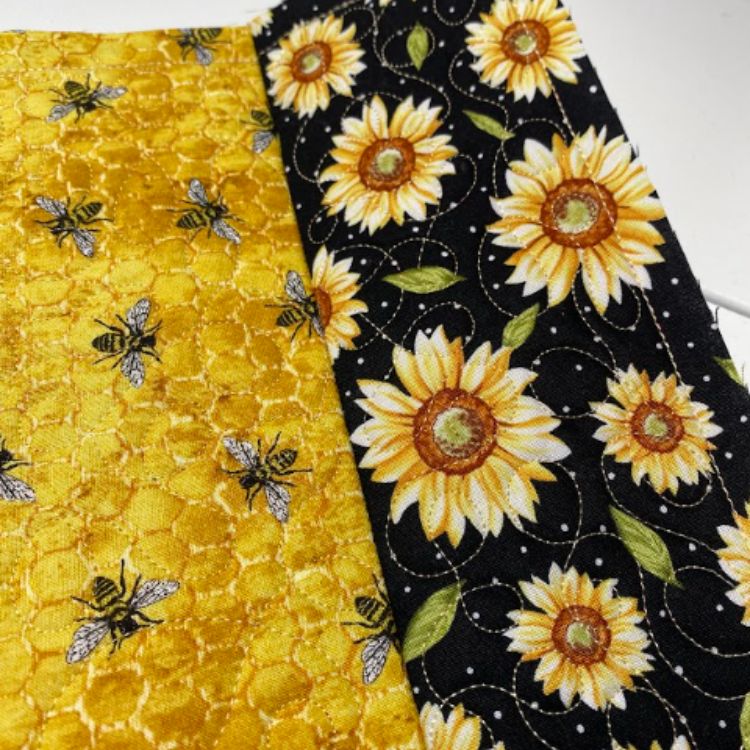
Here are my inspiration fabrics. I love all of these, but I didn’t end up using the gold fabric in the end.
Check out Embroidery Supplies JuJu Uses.
My stand mixer is a popular, 5-quart brand. To make a DIY mixer cover, I need a body 34” x 15” and two side pieces measuring 10” x 15” for the ends.
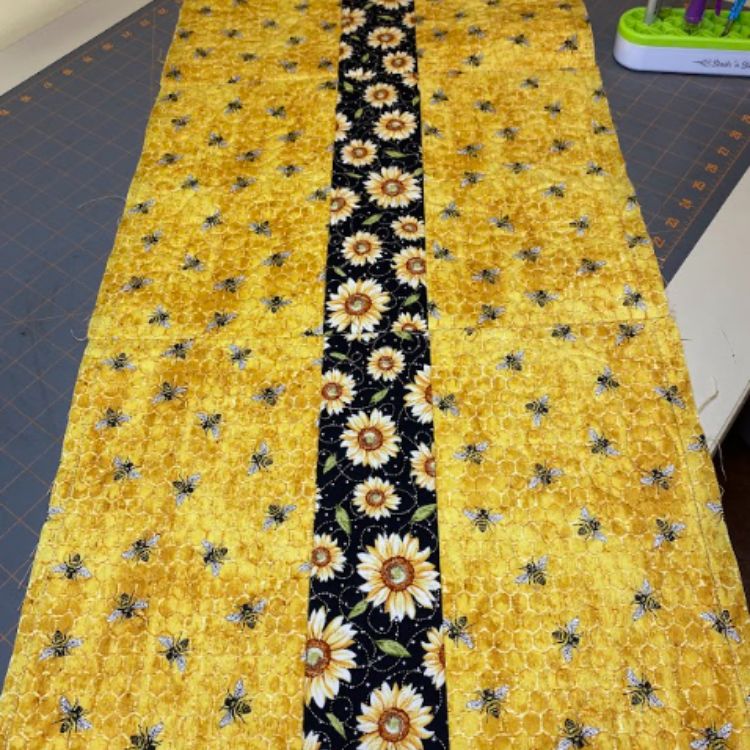
I’m using JuJu’s Quilting Backdrops (QB) to quilt the fabric. I drew a rectangle 34” x 15” and played around with the sizes of the Quilt-As-You-Go (QAYG) designs. Here’s what I ended up with:
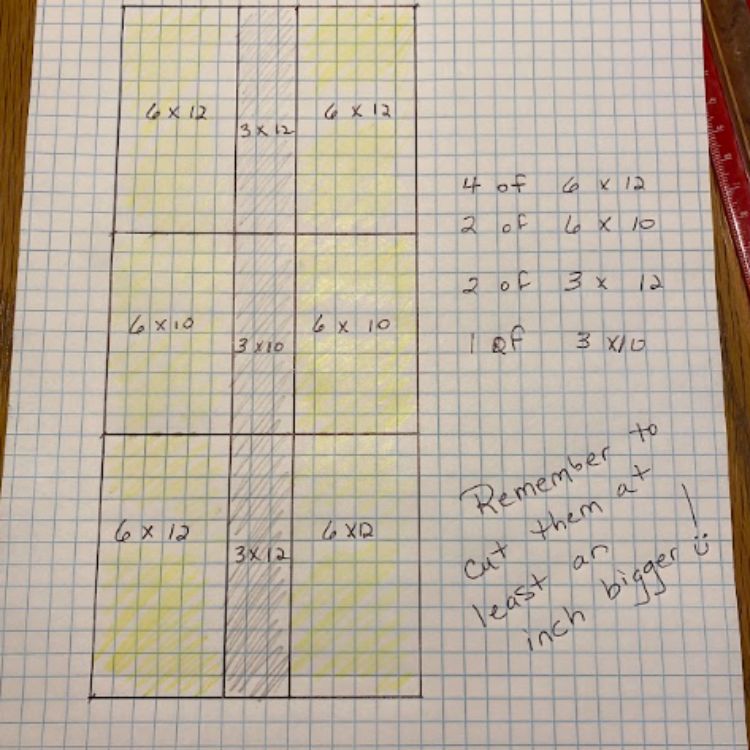
I started with the two middle strips, measuring 3” x 12”. JuJu’s QB instructions suggest cutting the fabric at least an inch larger than the stated size, so I cut the fabric pieces for the middle pieces 4 ½” x 14”. I know that’s a bit bigger, but that’s what I felt comfortable doing.
There are four QAYG steps, based on JuJu’s directions:
1. Single running stitch placement line for batting.
2. Double run tack down line for batting. You will trim batting out before the next step.
3. Double run tack down line for block background fabric. This tack down line is slightly larger than the batting line so that batting is not in the seams when you sew blocks together later. Your background fabric should extend at least 1/2" beyond the tack down line in all directions.
4. Quilting motif.
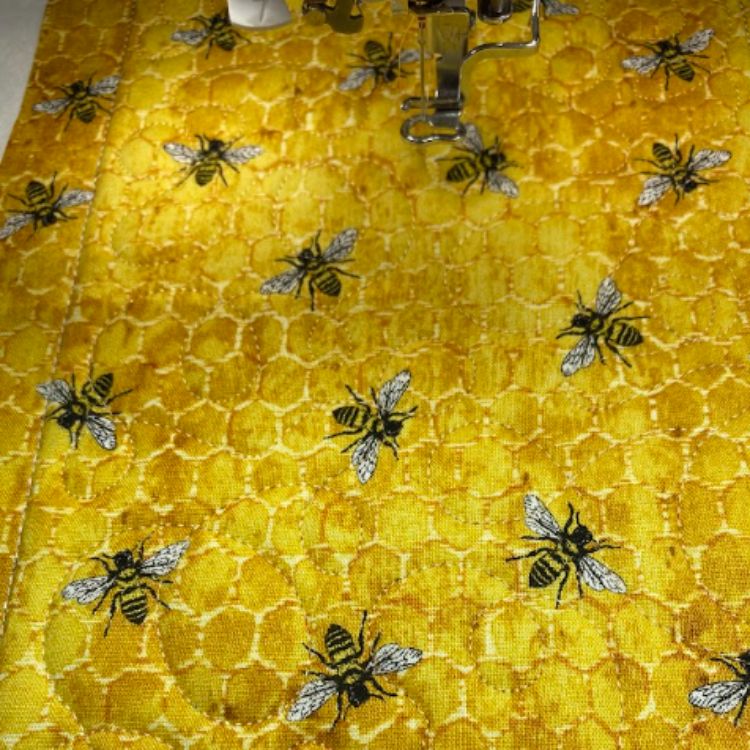
Here is what that looks like as I begin the first 3” x 12” rectangle:
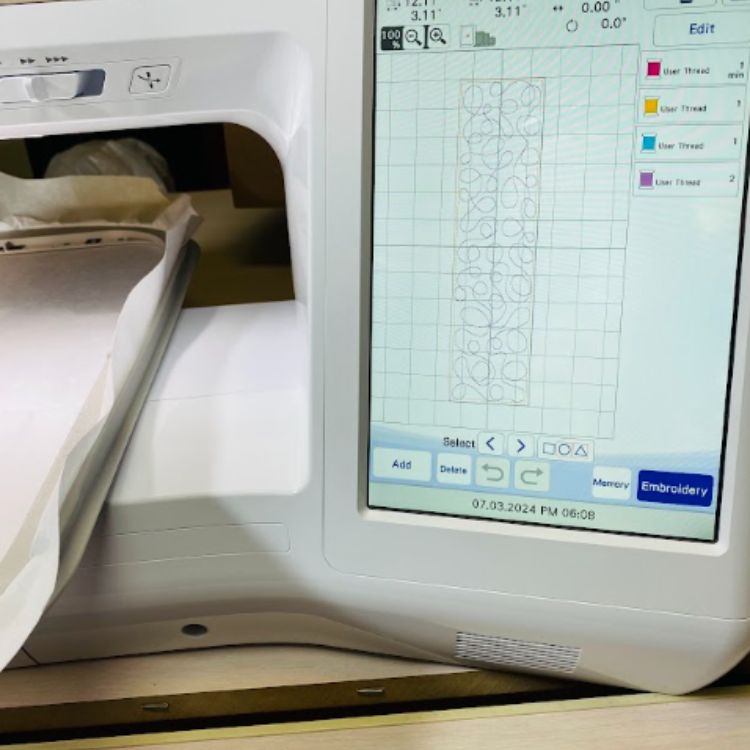
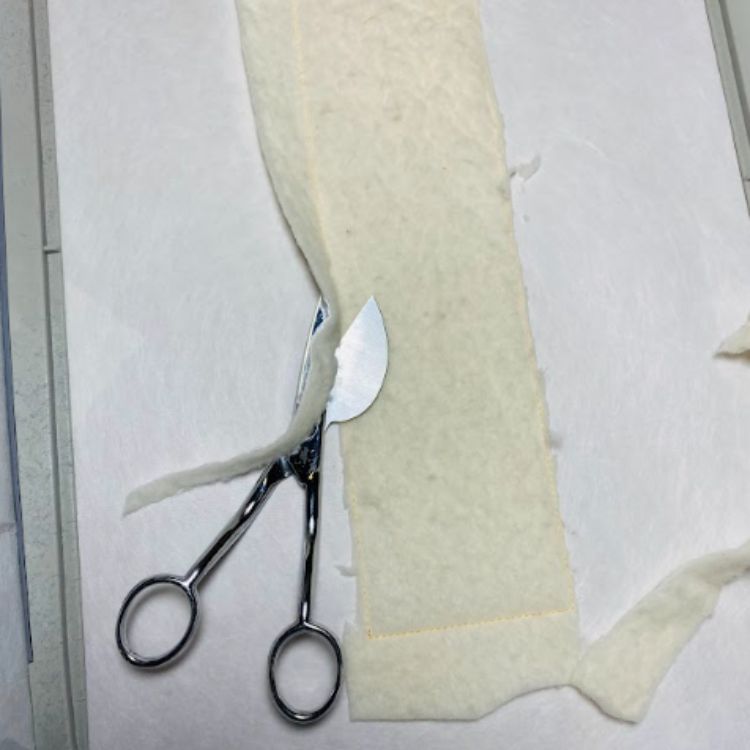
I’ve sewed the placement line, sprayed a little adhesive spray on the batting, and now you see the batting being tacked down and then trimmed.
Make sure to trim. I’ve been so eager to carry on that I’ve forgotten to trim the batting. Don’t make the same mistake!
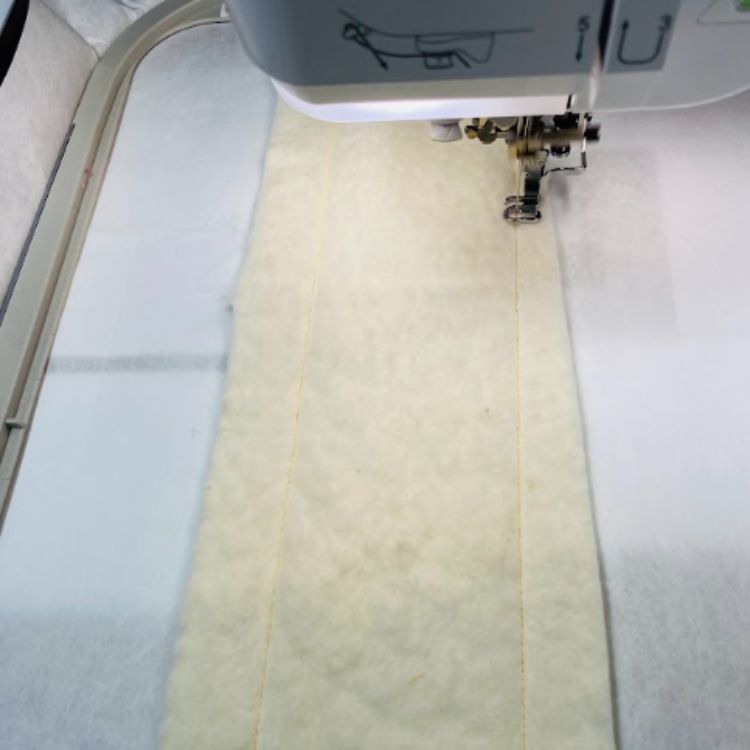
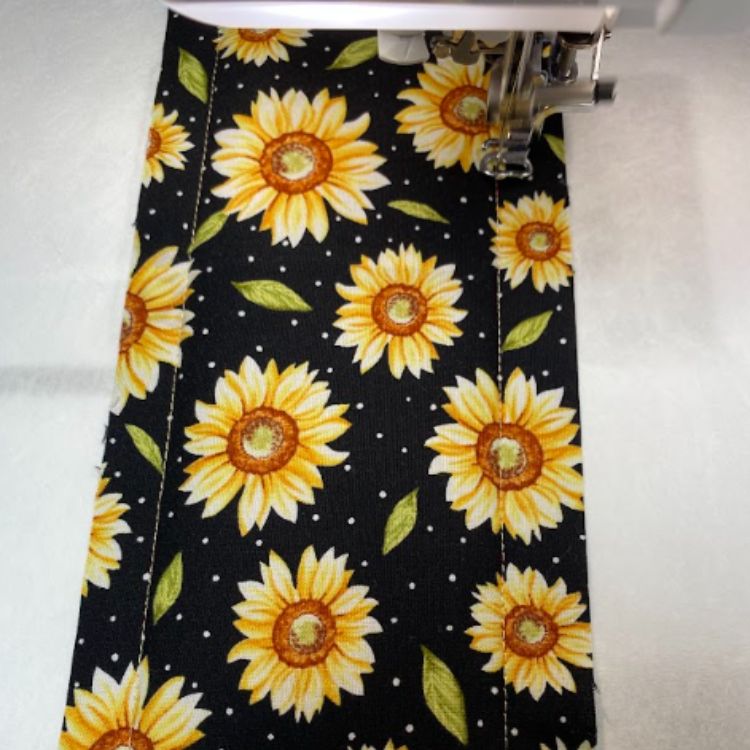
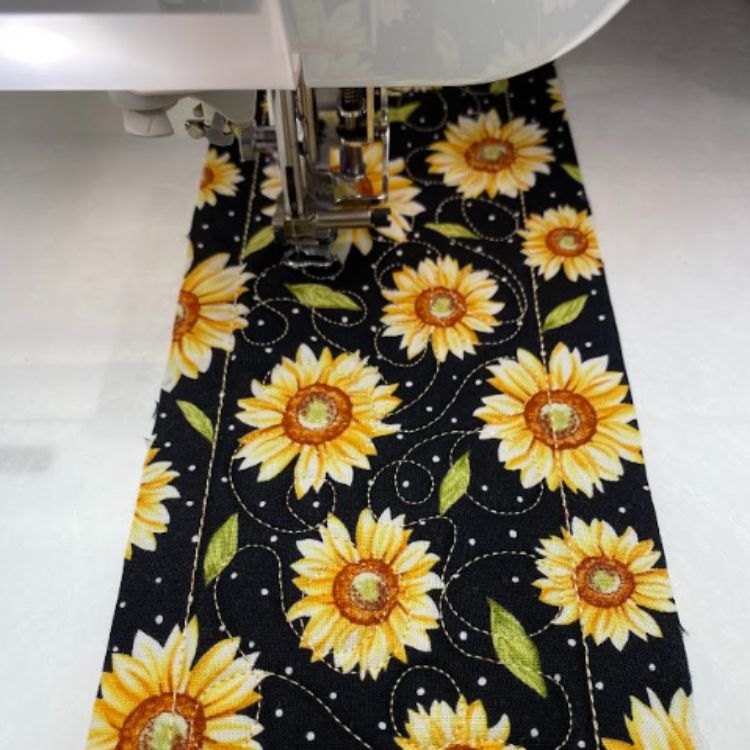
After I trimmed the batting, I lightly sprayed the floral fabric with adhesive spray and laid it over the batting. You can see the machine doing the fabric tack down and then the lovely quilting motif. Notice on the fabric tack down photo that my fabric extends at least 1⁄2'' beyond the stitching.
I repeat these steps for the other 3” x 12” pieces and make the 3” x 10” piece.
Now on to making four 6” x 12” and two 6” x 10” rectangles.
Note: Make a list of the measurements you need to cut the fabric rectangles. I cut the exact measurement instead of the extra 1”+ needed twice!.
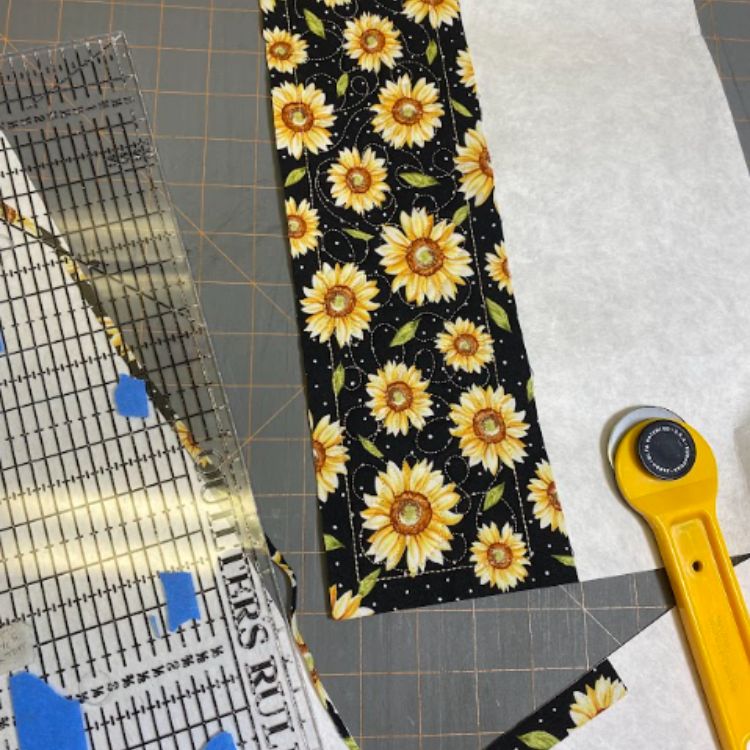
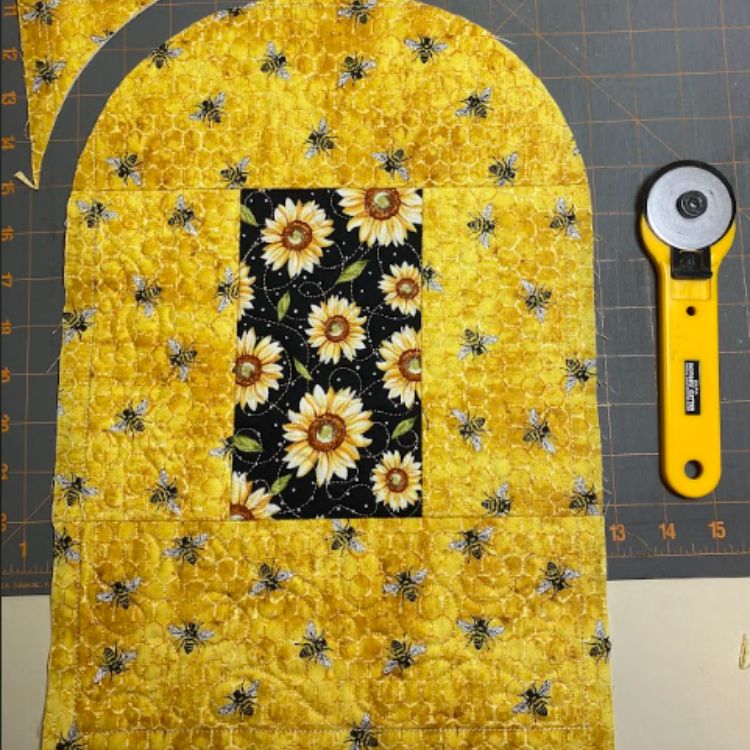
Once all nine of my rectangles have been sewn, I trim each piece at ½” all around. Then, I trim away the excess stabilizer. I used my rotary cutter and rulers to do this. Having consistent sides on all the pieces makes it easier for me to piece them together, even though it’s the tack down lines I’ll be matching up.
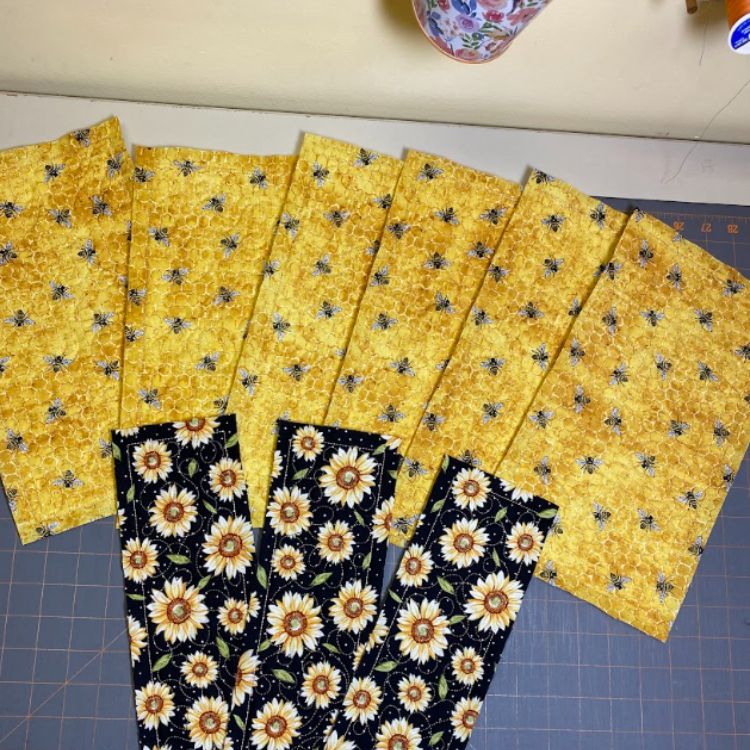
Now, I have all the pieces for the body section trimmed and ready to be sewn together.
Here you can see the front of one strip and the back of another. On the front piece, you can see the fabric tack down line. On the back, you see two lines: one is the fabric tack down line and the other is the batting tack down line.

The blocks need to be pieced with the corners matching the fabric tack downs. I stick a pin through at the corners to check.
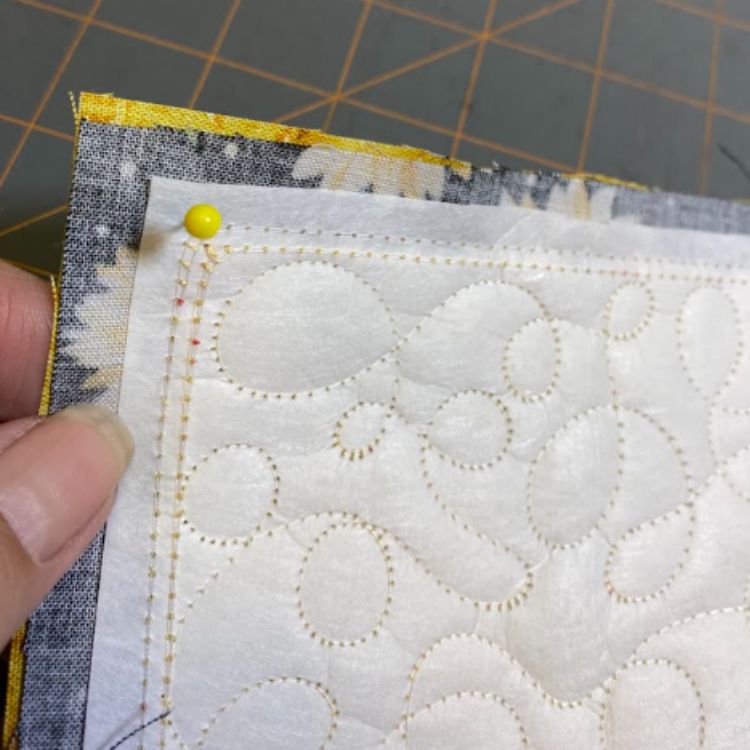
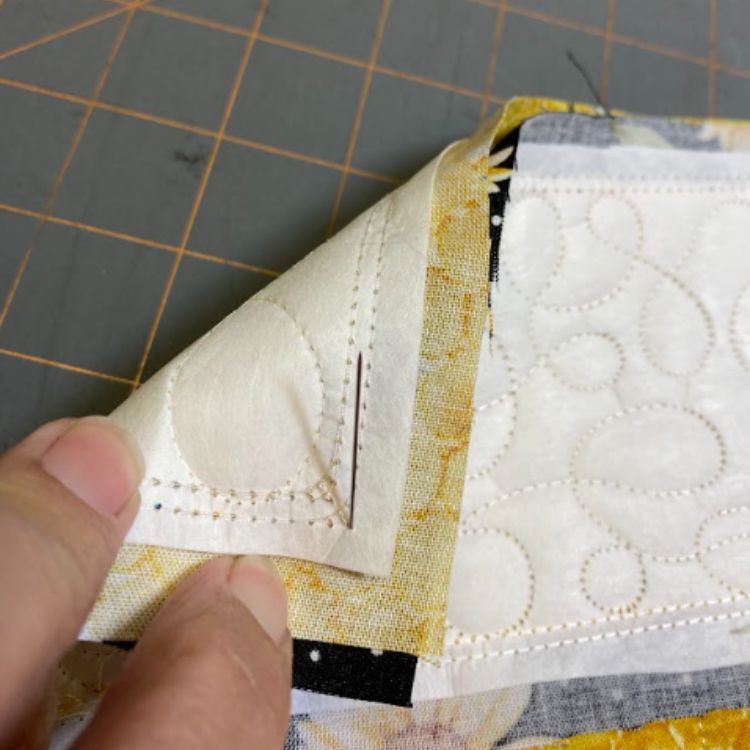
Sew right between those two lines. Afterward, you won’t see any tack down lines. As a quilter who is always trying to watch a ¼” seam, I’ll say that sewing between the lines is so much easier and quicker.
Here’s my three large pieces for the body of the mixer cover ready to be sewn together. Notice the seams are pressed open. When I piece these together, I’m still going to be using the corners to match them up. I also need to make sure that the seams of each section match. I pinned everything to make sure nothing shifted.
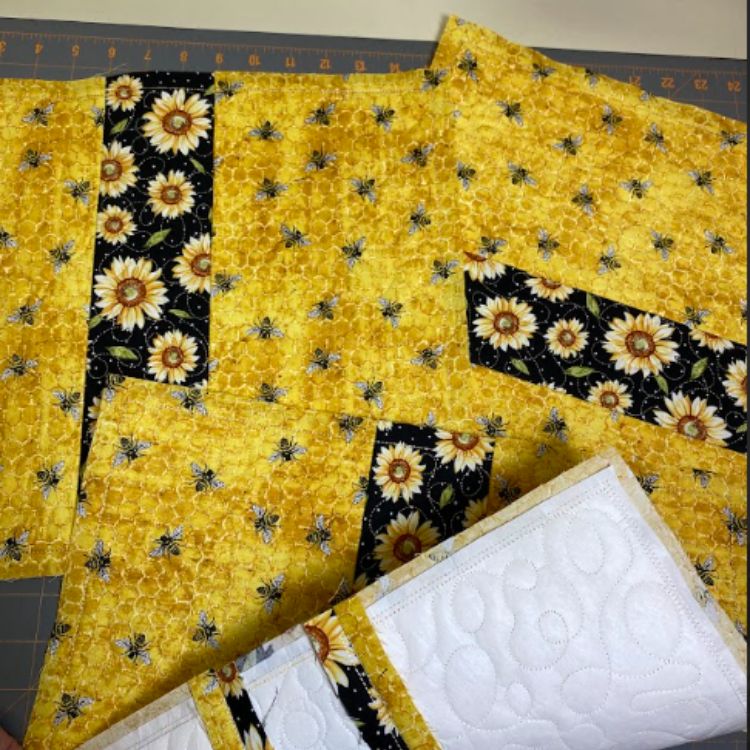
The main body part of the mixer cover is together.
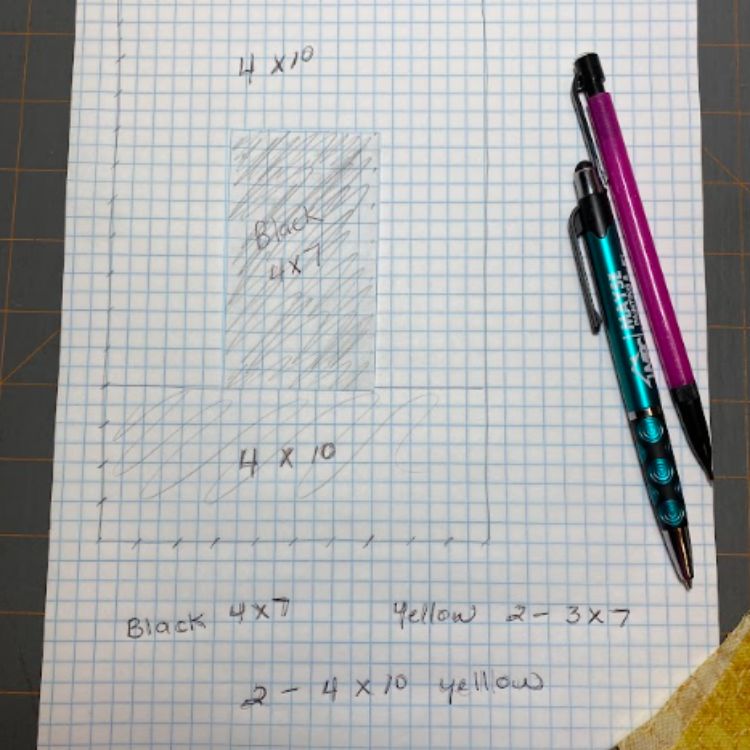
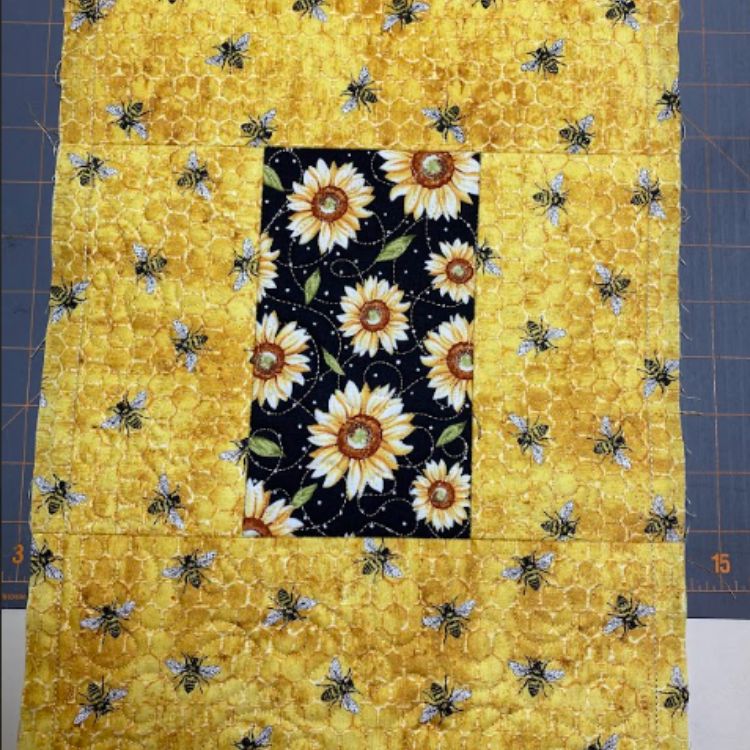
Now, I move on to making the two side pieces. They’ll need to measure 10” x 15”. I drafted this out on paper to help me decide which sizes of JuJu’s Quilting Backdrops I want to use. I really liked the way the quilting shows up against the black floral, so I wanted a large piece of black in the middle. Here you see the drawing I made and then the mixer cover side all stitched out and sewn together.
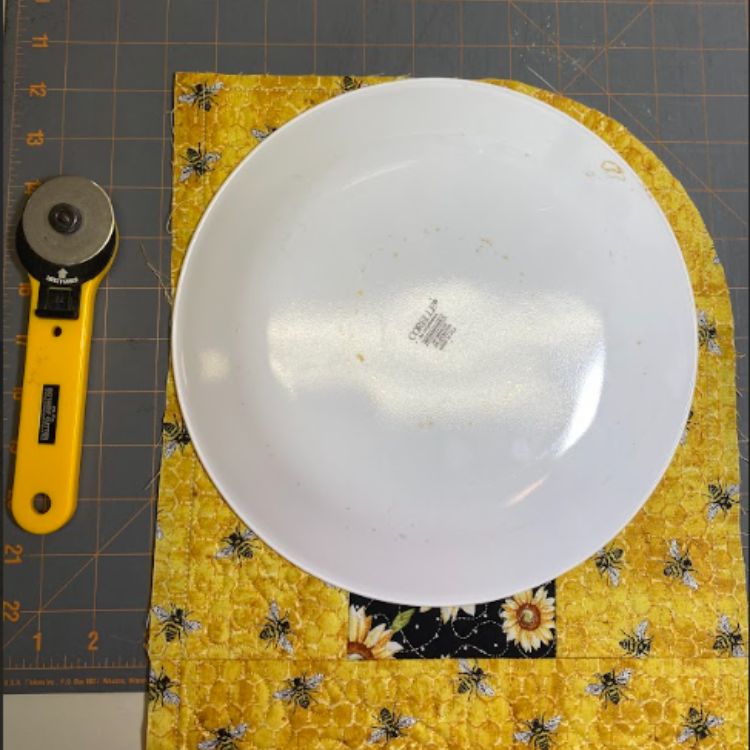
Using a plate, I rounded the top of the mixer cover sides.

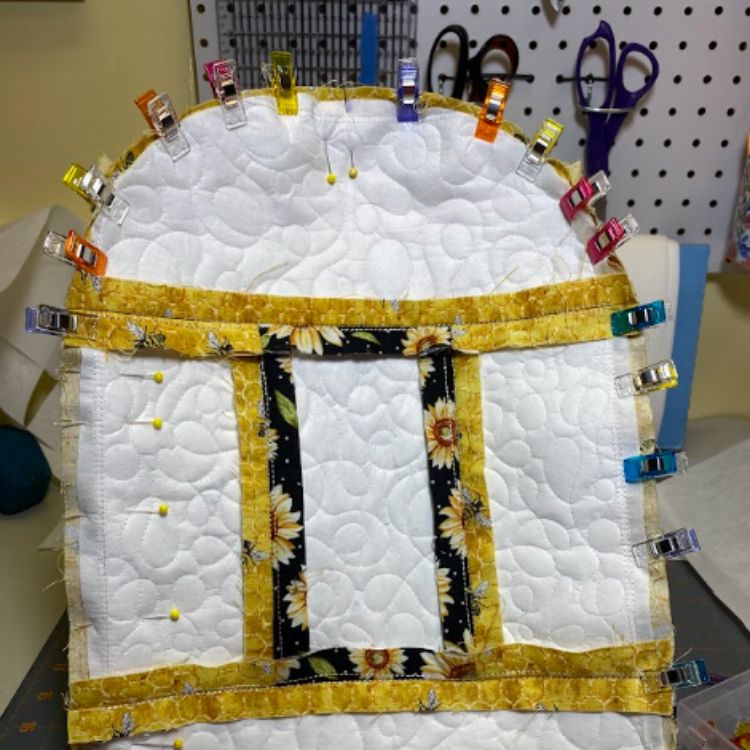
I find the middle of the rounded edge and the middle of the long side of the body piece and pin them right sides together. Then, working out from each side, I pin the side to the main body. At the very top of the rounded section, I still have part of the tack down stitch, but where I’ve rounded off, I don’t. I eyeball where I have the very top pinned and try to keep that same distance as I round the sides. Once I reach the tack down stitch going down the side, I match that tack down to the tack down of the body. I use pins and clips as I work.
Because the side is a little longer than the body, I marked where the body starts and stops on both sides. I want to run some backstitching a couple times to reinforce when I sew all around.
Note: I made the sides a little longer in case I bungled it when cutting with the plate.
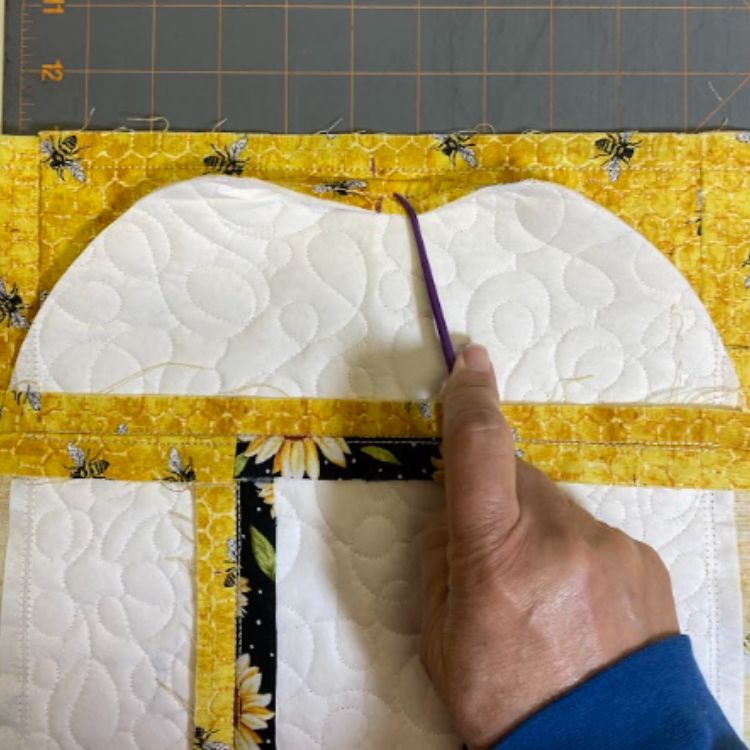
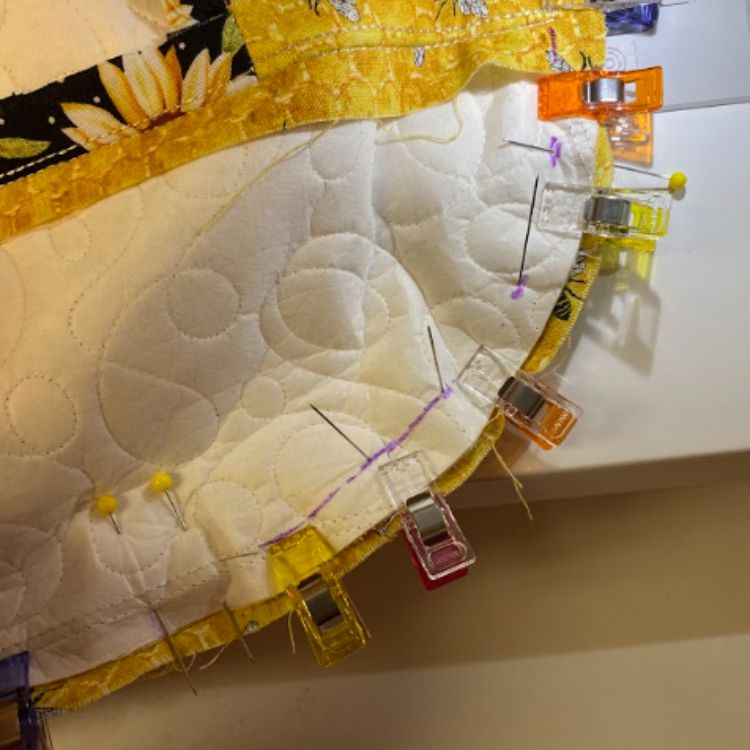
When trying to ease a curved piece to a flat piece, it is easier to sew with the curved piece on top so you can pull, stretch, etc. as you sew. Because I’ve cut off some of the tack down lines when I rounded I can’t see where I should be sewing. The solution is to poke pins through from between the tack down lines on the body and mark them on the side fabric. I connect the dots and give myself a sewing line.

Sew around slowly, sewing between the tack down lines when possible and following your marked sewing line when needed.
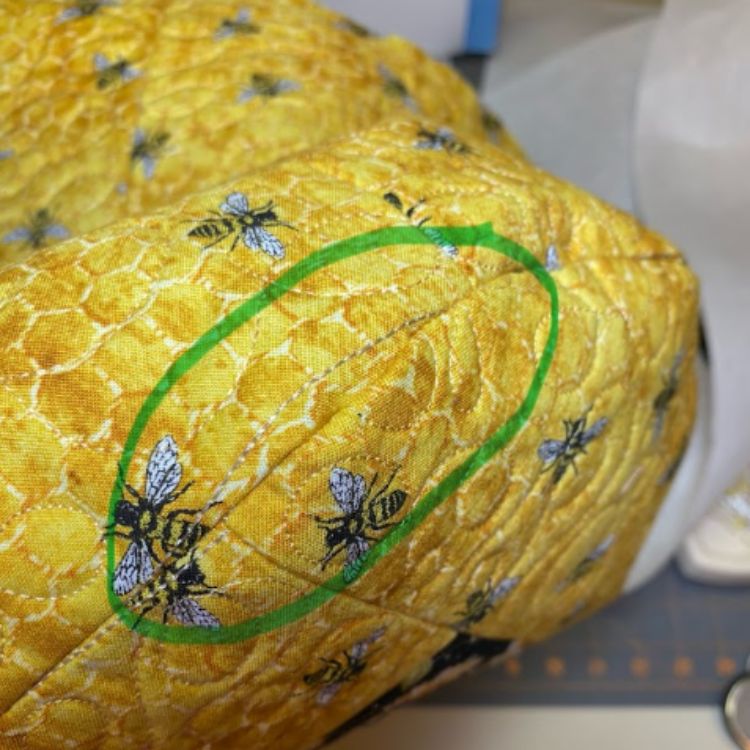
Push right side out and check your work. If you have an oops, like the tack down line is showing, it’s much easier now to work from the body side and sew between the tack down lines to catch it in.
Sew on the second side. Turn right sides out and press the side seams open. You don’t need to press all through the rounded area. Trim off the excess side fabric.
If you’re not interested in lining your DIY stand mixer cover, you can make a 2 ½” binding and sew it around the bottom edge and celebrate the finished DIY mixer cover you made using JuJu’s Quilting Backdrops.
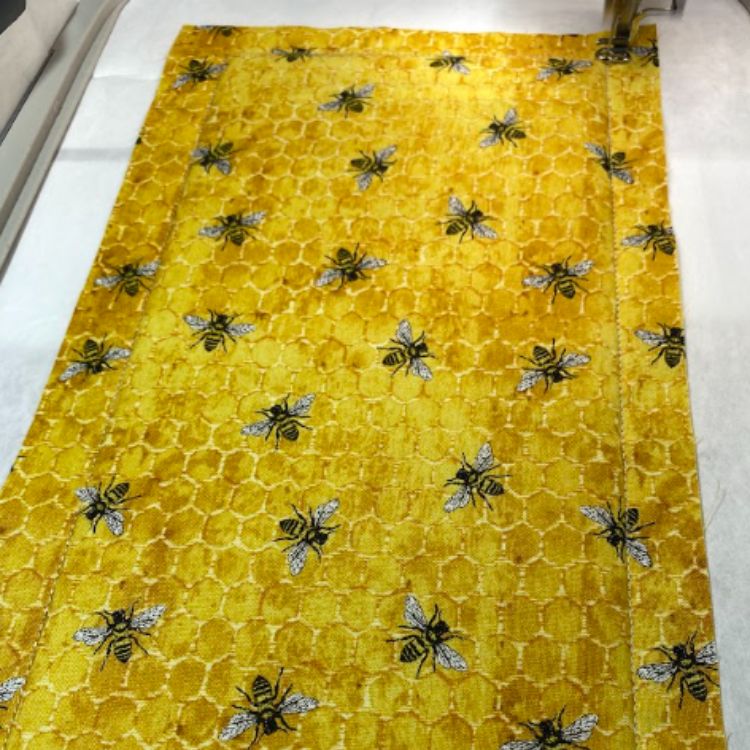
I chose to line my cover since I still had other bee fabrics.
I cut one piece 15” x 32” and two pieces 10” x 14”. I made this shorter by the inch I cut off from the quilted side pieces. Using the same plate as above, I round the tops of the sides. The lining pieces are sewn together with a ¼” seam, once again, easing in the curves.
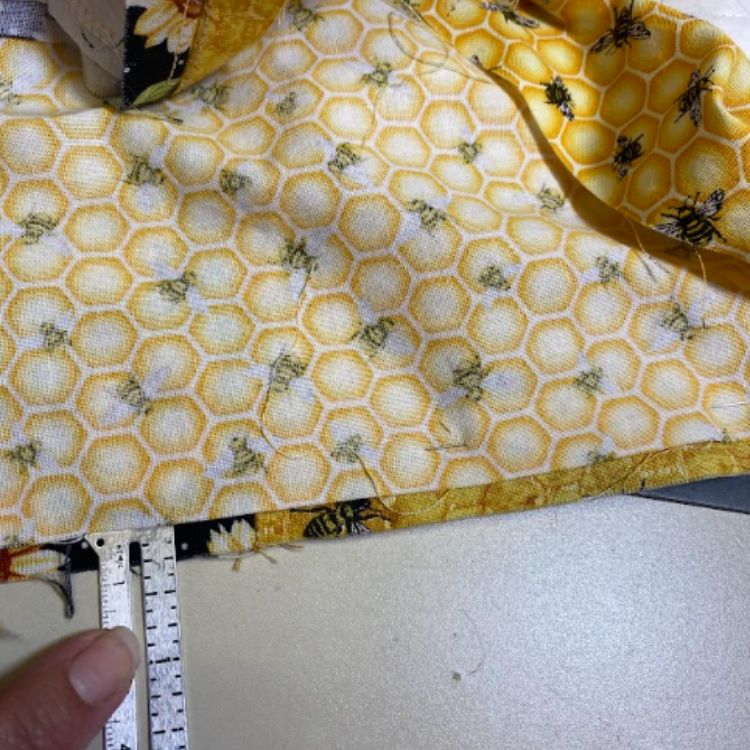
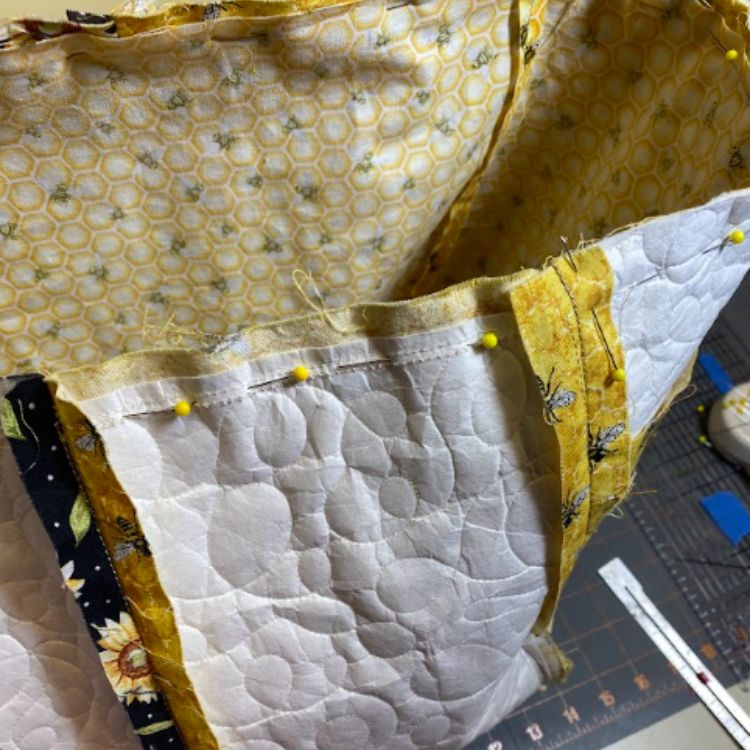
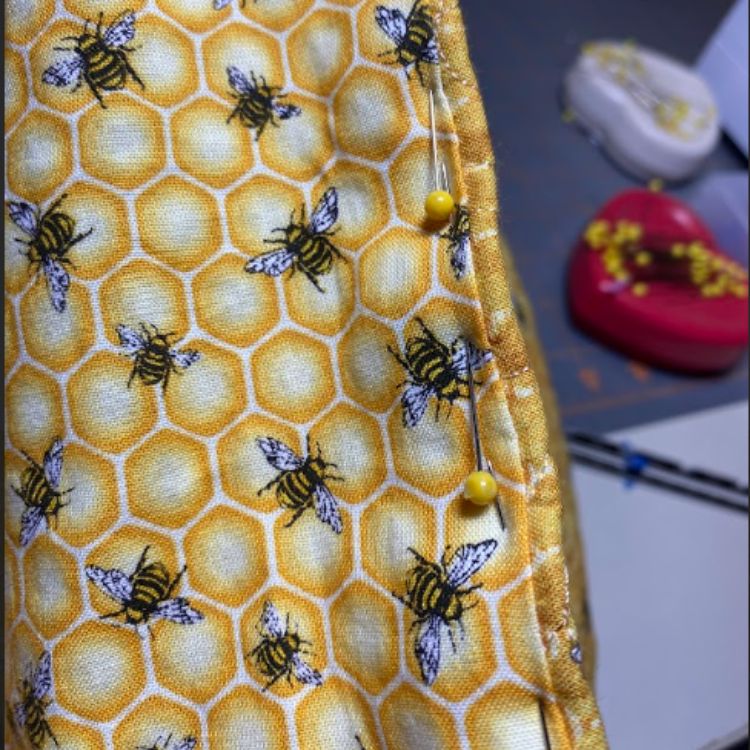
The lining is placed into the mixer cover so that the right sides are facing each other. If you remember, the cover has a tack down seam with its edge’s trimmed 1 ⁄ 2 '' away. I pin the liner into the cover ¼” down with the pins on the cover fabric. I’m pinning this way because I still want to sew through the two tack down lines. Look at the photos below which show how the liner is inside the cover and the measuring and pinning.
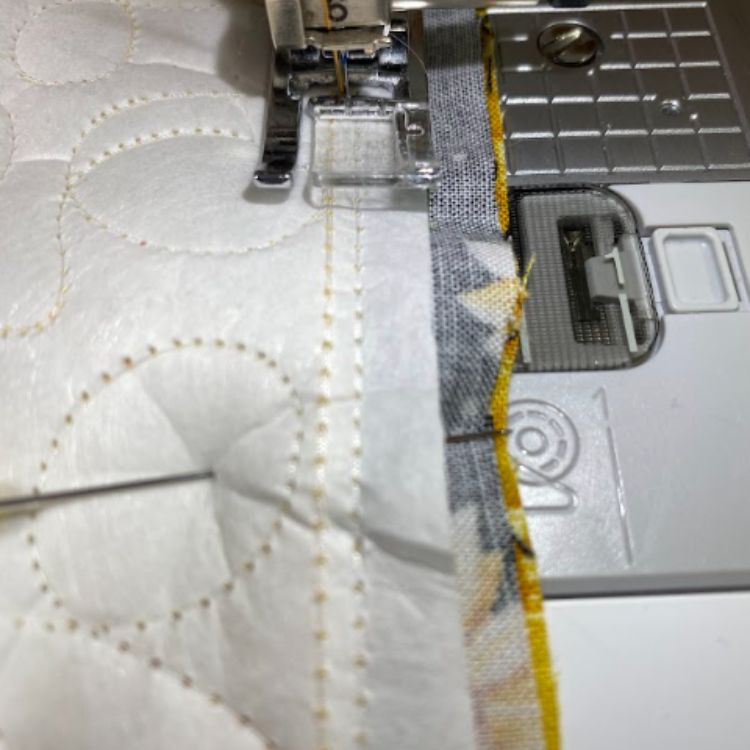
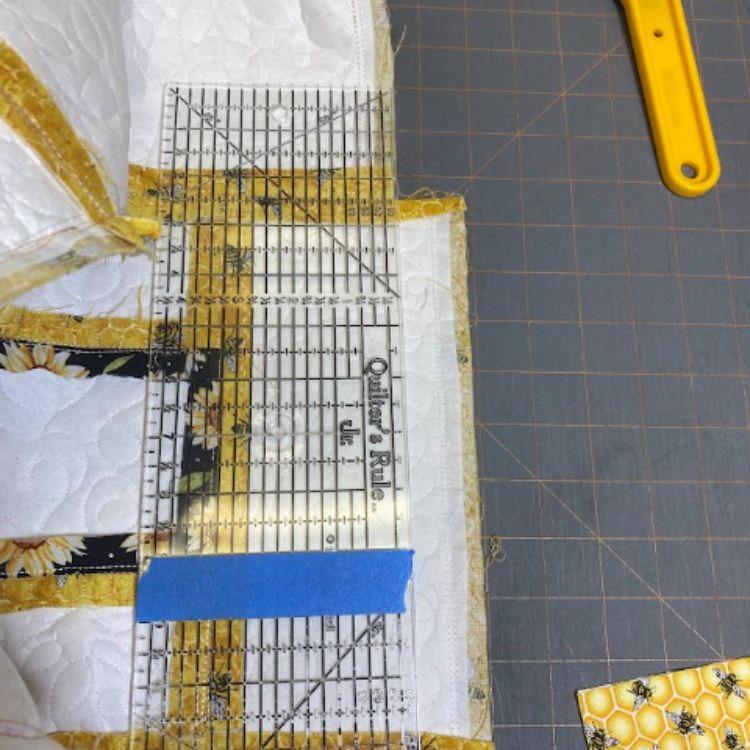
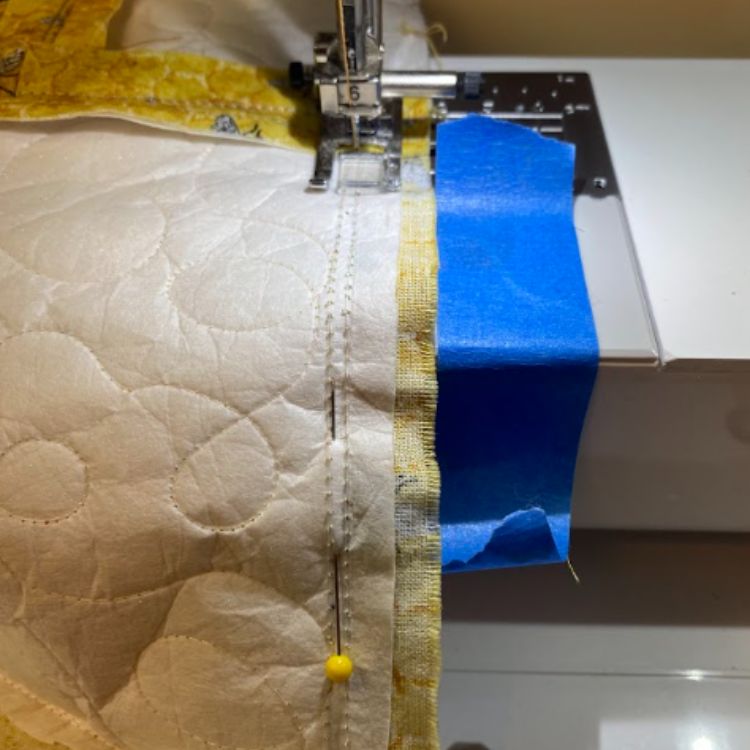
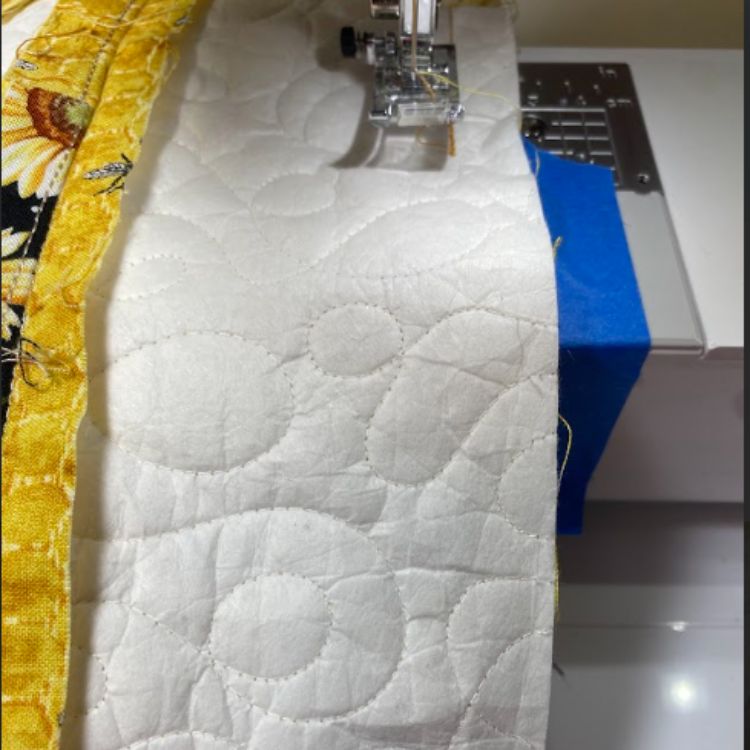
When I start sewing the lining to the cover, I pick a spot where I am sewing between the tack down lines. If you remember, I cut away about an inch off the bottom of the sides which meant I lost those tack down lines. I lay a piece of painter’s tape to mark my seam. As I get to an area that doesn’t have tack down lines, I use the blue tape as my guide. Also, I make sure to run some back stitching at the beginning and end of my sewing. Leave about a 3½” opening for turning.
Turn the mixer cover and liner right sides out and push the liner up into the cover.
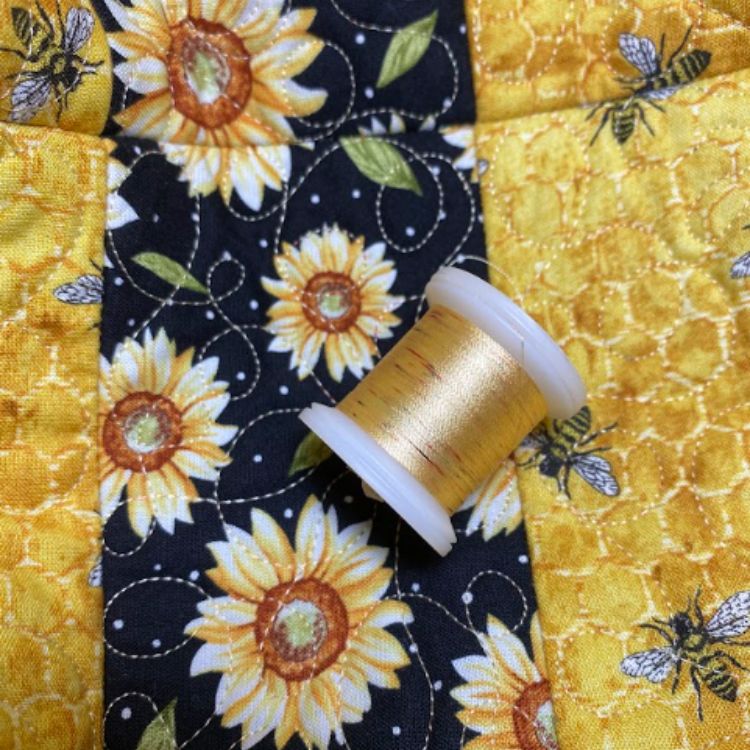
If I had used the same fabric for the lining as I did for most of the cover, I would probably just press the edges down and topstitch along the edge, making sure to also sew the opening closed. But since I used a completely different fabric, I’m going to roll the lining in just a tad before I topstitch so there’s no chance of it showing. I use the same thread for the topstitching as I did for the Quilting Backdrops and I press the opening closed before pinning it really well.
Here you can see how I rolled the lining into the inside just a bit.
Once the bottom edge was all top stitched down, I decided that the lining should be tacked down in a couple places so it didn’t collapse onto the mixer. I found a few places where from inside the lining I could hand sew a few tacking stitches onto a seamed area of the cover. This meant that no tacking stitches were on the outside of the mixer cover. I was able to use a couple of bees on the lining fabric to blend in the tacking stitches, effectively hiding them.
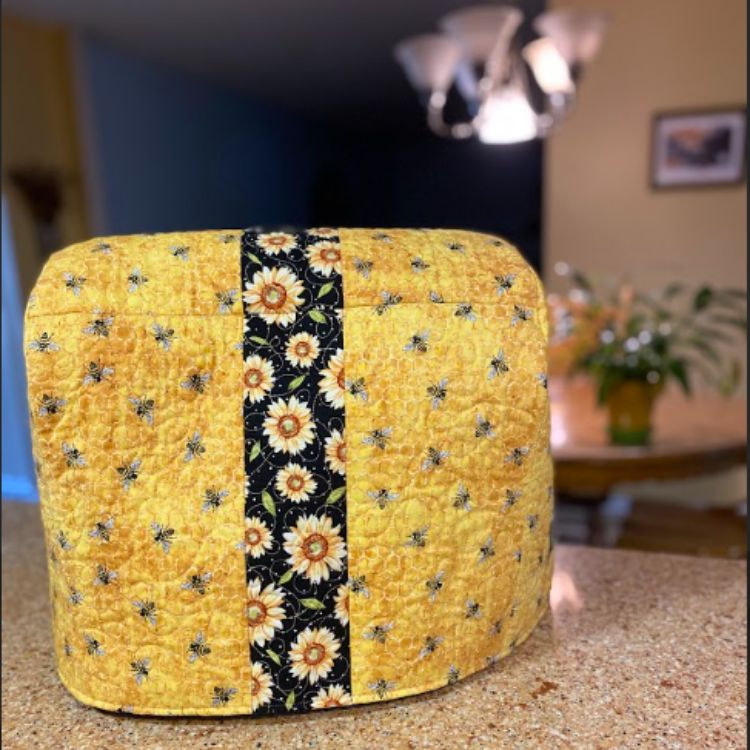
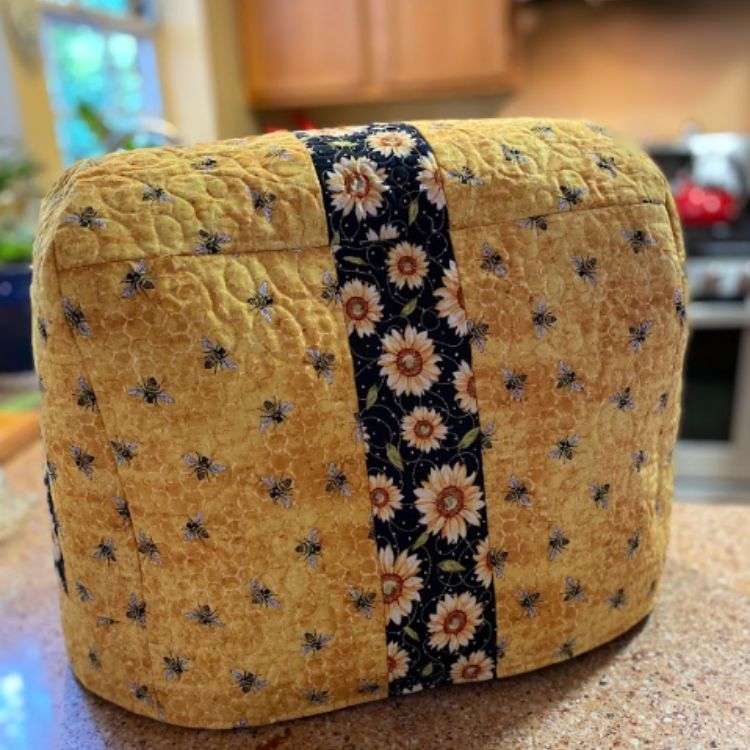
Here is my completed DIY mixer cover made with DBJJ’s Quilting Backdrops! I’m chuffed with how this turned out. You can go a lot fancier with this, blending several different prints, or embroidering JuJu designs on some of the squares. It would also be easy to put pockets on the long sides and again, you could add embroidered designs to those too! There’s no limit to what you can do with JuJu’s Quilting Backdrops and embroidery designs!
I’m sitting here laughing at myself, because if you remember in my introduction, I said I jumped into this project because I had this leftover fabric . . .
Well, there is still a lot of it left. I believe coordinated placemats are in my future.
Share your creations with us on social media: Designs by JuJu Embroidery Blessings Group - Facebook.
Special shout out to Designs by JuJu Embroidery Blessings Group member, LesnCindy Osborne, who posted several of her mixer covers and coordinated kitchen items, made with JuJu’s embroidery designs. Thanks for sharing your creations. You inspired me!