Toggle Nav
 Inspire.
Create.
Stitch.
Inspire.
Create.
Stitch.
Search
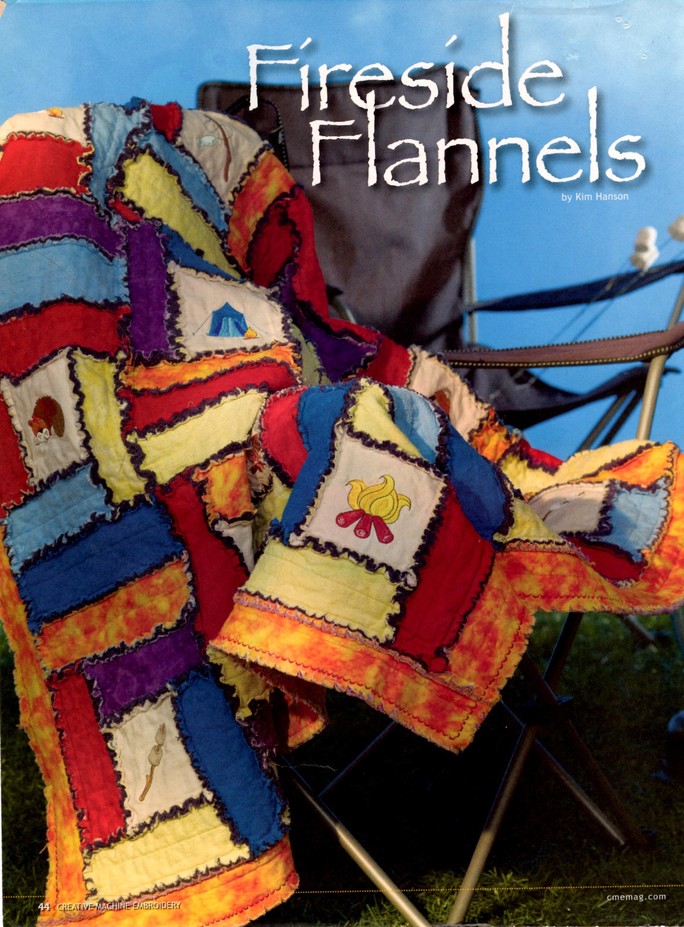
By Kim Hanson – www.KimHansonQuilts.com
 A quilter from way back, I made quilts for my three children and then nothing. Life was busy and quilting was put on the backburner. Once my first grandchild, Jacob, was born I wanted to make him a crib quilt, perhaps a rag quilt with soft and warm flannels, but more? A friend had given me a demo one day on machine embroidery - she did logos and such on t-shirts and jerseys and baseball caps. So I thought, "why not make a rag quilt, combining quilting and machine embroidery"?
I was overdue for a new sewing machine, so off I went in search of a good one that could also do machine embroidery; a machine that would fit my budget. Choosing a Brother 8200 because it was sorta easy to operate, stitched beautifully and had machine embroidery capabilities, I headed home excited to get started. After reading about my machine, practicing on my machine and tons of trial and error, I made Jacob a flannel rag quilt embellished with embroidery designs from a Brother embroidery card - more on this later.
It's a little ironic that my very first quilt pattern was published in 2009 in Creative Machine Embroidery magazine. Very odd platform for a quilter!
So... how can you get started in machine embroidery?
I've known sewists who have purchased (or been gifted) fabulous sewing machines, with embroidery capabilities that they choose to ignore. Huh? That’s like buying your dream house and only living in one room! Let's just dive in and see what we can learn.....
1. Do your due diligence. Ask questions of those who are already doing machine embroidery; what brand of machine did they purchase, how easy is it to operate, how is the level of support for their brand, what have they embroidered, etc. etc. Some very popular brands include Brother, Bernina, Janome and Husqvarna. If you like Facebook, join this Machine Embroidery and More Group of like-minded individuals who can help with your questions now and in the future. Jennifer Higby, group administrator, is a whiz and she will help you with any questions you may have.
2. Visit your local retailer/dealer. Come ready to ask questions and have a brand or two in mind when you stop in. Have a qualified employee give you a demonstration on a few machines. Take notes and more importantly, watch, look and listen!
3. Make a decision on which brand of machine to purchase and then decide if you will purchase new or used. Don't be afraid to purchase used! There are tons and tons of great machines out there - either at the sewing shop or on ebay or on Kijiji. The more important part is to choose a brand, have a basic knowledge of it and stick to that choice when purchasing used.
4. If you purchase a new machine, the cost of taking lessons on it must be included in your purchase price. Take advantage of the lessons. It is a steep learning curve for all of us.
Have the educator/retailer do three very specific things for you:
- Choose one of your machines’ built-in embroidery designs and watch it being stitched out in full. Understand that some machines (like Janome MC12000) have 300+ built-in embroidery designs and you will definitely want to access those designs and know how to stitch them out.
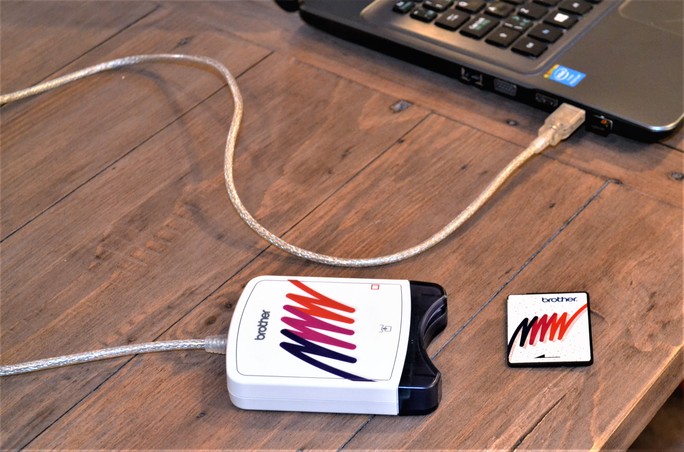
- Ask for a design to be stitched out from an embroidery card. (I used a Brother embroidery card to stitch out designs for my grandson's quilt, above).
- Have the retailer download an embroidery design from an online website (Designs by JuJu) either to their computer and then to your machine for stitch out or directly to your machine. It's critical that you completely understand how to get the design from the computer to your machine.
Completing lessons at the retailer’s will not only help you understand the very basics of your machine, but it will also provide you with a resource/contact person when problems arise….and trust me, problems will definitely arise!
5. If you have purchased a used machine, the same principle applies. Call the dealer and request that they give you a demo and/or a series of lessons on your machine. Even if you end up having to pay extra, it will definitely be worth it. (If you live in a rural setting or can’t access a dealership in person, rely on youtube.com. Search your particular brand of machine and view an online project tutorial.)
6. Before you leave the retailers’ to embark on your new adventure, make sure you have the following supplies on hand: muslin, fabric stabilizers, embroidery threads, embroidery bobbin thread, embroidery needles and the usual sewing supplies (scissors, etc.).Purchase only the bare essentials to begin with...that way, you won't become overwhelmed.
(Fabric stabilizers are very important to turning out quality embroidery images. They support the fabric onto which the embroidery design is stitched. Stabilizer allows the design to be flat and inflexible. It is available in four different types – tear-away, water soluble, heat-away and cut-away. A general rule of thumb to choose the correct stabilizer is to match the weight of the fabric being embroidered with the weight of the stabilizer).
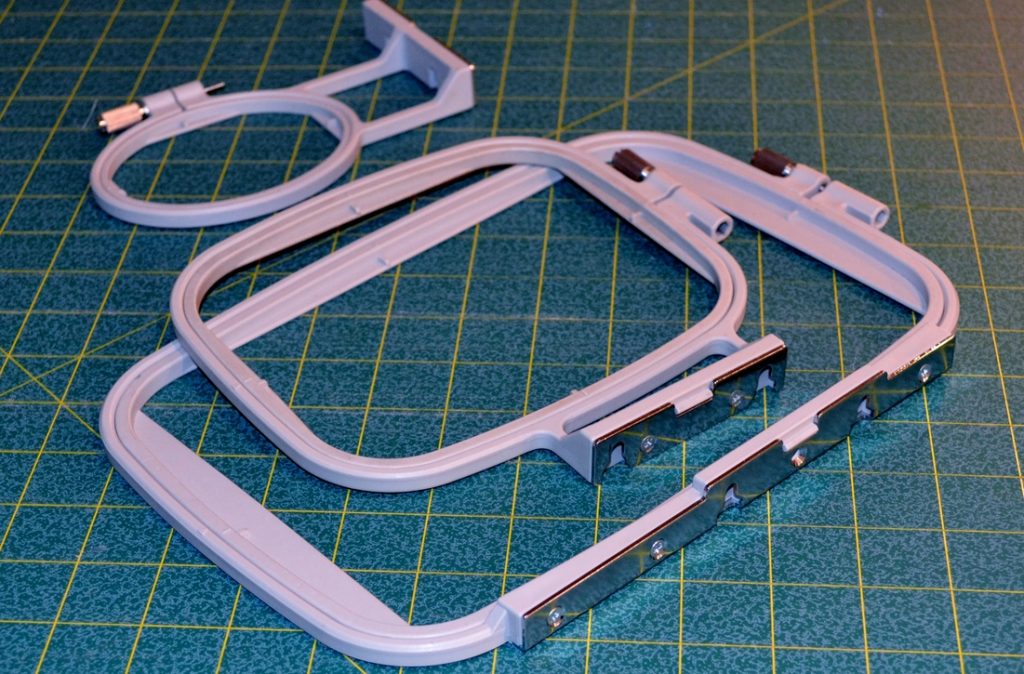
7. You're at home now, ALONE. Don't despair. Set up your embroidery machine and your supplies and we will get stitching. Your machine will come with two or three hoop sizes.
Use your medium hoop. Choose one built-in design from your machine that is one colour only. Layer an 8"x9" piece of white muslin over a slightly larger piece of lightweight stabilizer. Fold the fabric and stabilizer in half lengthwise and press and widthwise and press to find the natural centre of the square and mark with a pencil. Hoop the fabric and stabilizer using marks on hoop to centre. Pull the fabric tight so it resembles a drum. Tighten the screw on the hoop.

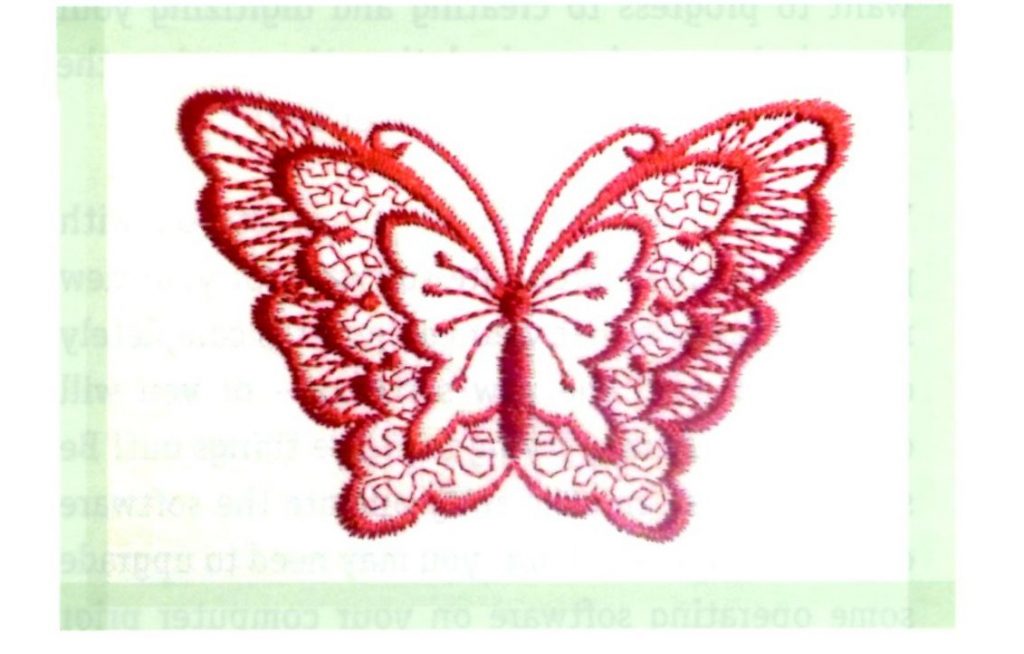
Stitch out your design and watch as your machine works. Give yourself at least a few days to stitch out and play with more built-in embroidery designs. Here is a photo of a built-in embroidery design of a butterfly that required no thread colour changes.
Remove your design from the hoop, tear away stabilizer and press.
8. Next choose a built-in design that has colour changes and go through the same process - hoop and center your fabric and begin to stitch. Be sure to trim all loose threads as you go. Definitely trim "jump" threads - those created on colour changes - close to the surface so your threads won't tangle.
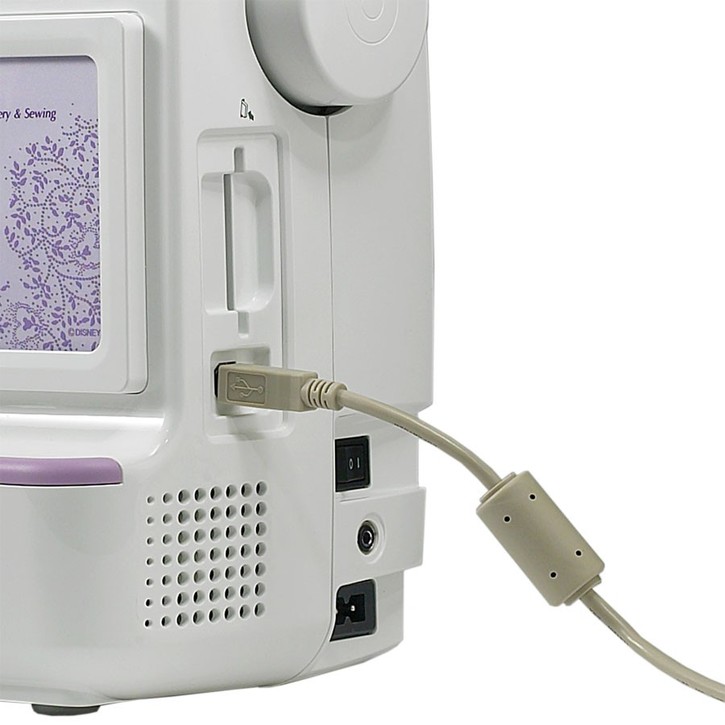
9. To fully explore the amazing world of machine embroidery, you must be able to operate and understand your computer. Embroidery machines work in conjunction with computer software – newer machines utilize a USB port and a flash drive/jump drive, while older machines use a card writer box and a memory card.
Accessing online designs will require a computer and software. Your retailer can help you find and purchase software that works with both your computer and your embroidery machine. For older model machines, you can purchase software online via ebay. Check your machine's manual first and purchase exactly what you need.
For example, I access online embroidery designs in this manner: (Your process could be identical or different, depending on the embroidery machine that you purchase)
- I use older model Brother machines for machine embroidery; the compatible software for Brother is PE Design;
- PE Design was installed on my computer's hard drive via CD;
- the embroidery file format I work with is .pes;
- I download a chosen embroidery design, in the .pes format from Designs by JuJu.
- I open the embroidery design and transfer it from my computer to my embroidery machine, via card writer box and memory card;
- the memory card is inserted into the slot on my embroidery machine.
- the image is ready to be stitched out.
.jef File format for MemoryCraft
.pes File format for Brother and Babylock
.hus File format used by Husqvarna/Viking
.pcs File format used by Pfaff embroidery
.xxx File format used by Singe
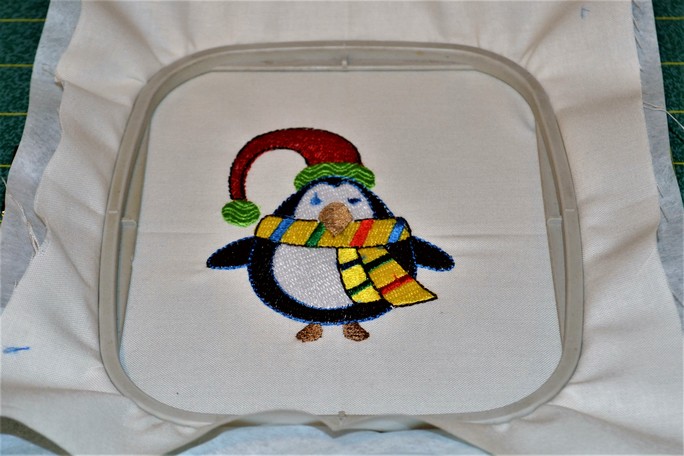
10. Let's stitch out a design from an online source now. Head to Designs by JuJu. Download the free penguin design, in the file format compatible with your embroidery machine and software, to a predetermined folder on your computer. If you aren’t successful the first time, carefully re-read the website’s download instructions and try again. Often, the file will be misplaced on your computer’s hard drive and it will take several tries to find it. Once you get the design saved into the folder on your computer, open it up and have a look. Download it to your embroidery machine, via card writer box and memory card or USB port or thumb drive/jump stick. Prepare your medium sized hoop with fabric and stabilizer and gather the appropriate thread colours. Stitch it out. What do you think? Does it stitch out as it appears on your computer monitor? Do you notice the beautiful textured stitching on the design? Are the stitches nice and tight or are some of them loose and not so well done? Are there any unexplained gaps in the stitching? Does your penguin look like this guy?
Congratulations! You are now equipped with the basics.
There are so many other facets to this wonderful craft - like machine embroidery applique designs and cutwork and embroidering on special fabrics. I will do a follow-up post in the very near future on more advanced machine embroidery techniques.
Please send me a note if you experience difficulties or have any questions. I'll be happy to give you a hand and together we can figure it out.
Thanks so much.
Kim Hanson
www.KimHansonQuilts.com