Toggle Nav
 Inspire.
Create.
Stitch.
Inspire.
Create.
Stitch.
Search
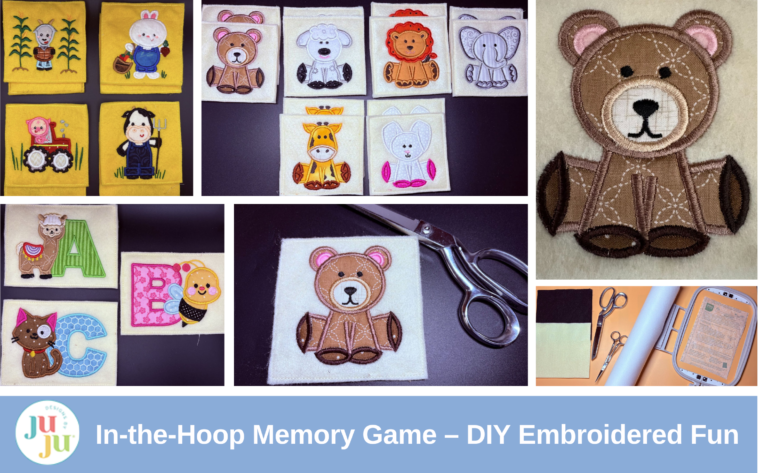
Do you have children who love the challenge of memory games? Imagine the joy on their faces when you surprise them with a custom-made one. And best of all it is done in the hoop combining the built-in shapes on your machine with the numerous animal designs available at Designs by JuJu. In this tutorial, I’ll guide you step-by-step to help you create a delightful game that will not only entertain but also bring happiness to the children in your life. Join me and let's make playtime fun!
Check out the DBJJ team’s favorite supplies in the Designs by JuJu Amazon store.

To begin you will want to select a design set that has at least six different animals. JuJu has many to choose from. Search "animals" on DBJJ’s website and you will find just the right one. I’ve included two that I used in the supplies list. The great thing about this game is that you can always add to it and change it up. Once you have decided on the set you wish to work with, upload it to your machine.
We will use the shapes already in our machine to create our blocks. My machine is a Brother Stellaire; your screen may look different.

Open up the square icon and select a single- or triple-stitch square. In this tutorial I will be using one with a triple stitch. Add the square to your screen.

With the edit button, select Size and create at least a 4” square or very close to it. Mine is sized to a 4.03” square.

With the duplicate key, create a second square.

Using the move key, line this square up with the previous square.

Use the grid on the screen to match up the two squares. This will be both your placement and tack-down stitches for the top of the felt.

Upload the 3” size of the design you wish to use. This is typically the smallest design in a set. Using the Size key you may have to reduce the size slightly to fit it nicely into the square.


Return to the Shapes file and select the same square again. Add it to the screen. With the Size and Move keys, align this square on top of the previous ones. This is the final stitch to attach the backing. I recommend saving each design you create for future use.
You are now ready to begin stitching.
A few tips before you start:
Have fun!

Hoop the stabilizer of your choice in a 5” x 7” frame. Take it to the machine and run the first step. This is the placement stitch for the top piece of felt.


Lay a 5.5” felt square down so all sides are even around the stitches. Run the tack-down stitch.

The next steps will be your applique embellishment stitches.

Continue with these steps until your design is complete. Do not stitch the final step yet.

Remove the hoop from the machine and place on a flat surface.

Turn the hoop over and add the 5.5” backing piece. Tape in place and return to the machine. Run the final step. This attaches the front to the back.

When finished, remove from the hoop and trim close to the stitches. Remember to make two identical squares.

Repeat the above steps until you have all your squares completed. The children in your life are going to love this little memory game! Remember, you can always add to it to keep them challenged.
Now that we have learned how to layer the shapes in our machine, you can let your imagination go wild. All the shapes in your machine are fun to play with. Experiment and see what you like best.

I made these adorable flash cards using the same steps. I used the rectangle shape and the Animal Alphabet Applique designs. I sized the rectangle to 5.35” x 3.93”, and the smallest designs fit inside perfectly. Cute Critters Alphabet would also be fun.
If you loved this project, you’ll find plenty more just like it in our Quick Gifts Hub—a curated collection of quick, creative, and practical projects perfect for gifting (or keeping!)
Please share your projects in the Designs by JuJu Embroidery Blessings Facebook Group, or anywhere on social media using the hashtag #designsbyjuju. We’d love to see what you create!
