Toggle Nav
 Inspire.
Create.
Stitch.
Inspire.
Create.
Stitch.
Search
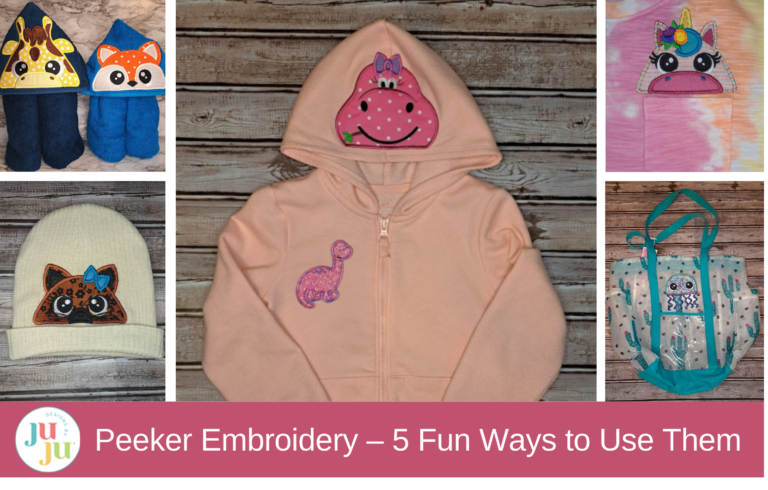
Peeker designs are most commonly used on hooded towels, but did you know that there are many other ways to use them?
In today's blog post, I will show you four creative ways to use these adorable designs to further stretch the value of your purchases from Designs by JuJu.
Check out the DBJJ team’s favorite supplies in the Designs by JuJu Amazon store.
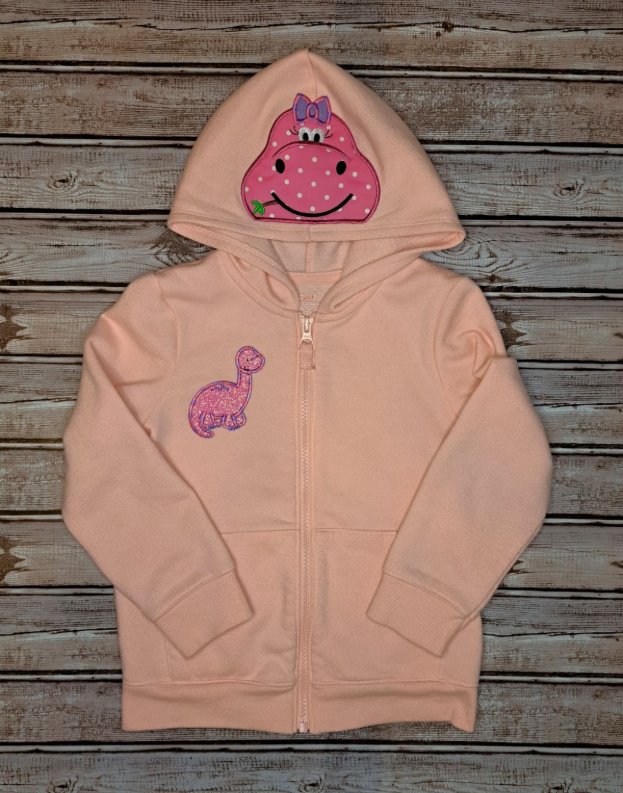
Over the years, I have seen so many cute peeker hooded sweatshirts for sale. You can create your own using one of the many peeker designs from DBJJ.
My daughter absolutely loves dinosaurs so I knew the brachiosaurus from the Dinosaur Peekers 1 would be perfect on her dinosaur hoodie. You can select any peeker design available to match your little one's interest. There are princess peekers, animal peekers, holiday peekers, and so much more. Check out the Fun Hat Peekers for firefighters, police officers, cowboys, and others.
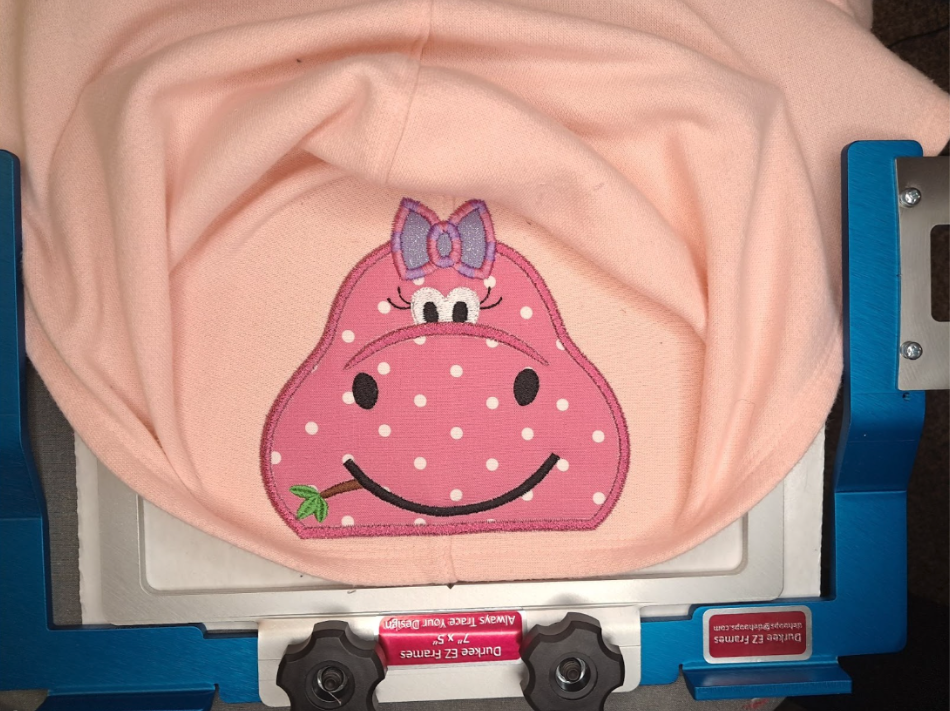
I am using a Brother PRS100 for this tutorial. You can easily stitch on a hood using a traditional flatbed embroidery machine. The steps remain the same; just make sure the rest of the sweatshirt is out of the stitch path as you complete the hood.
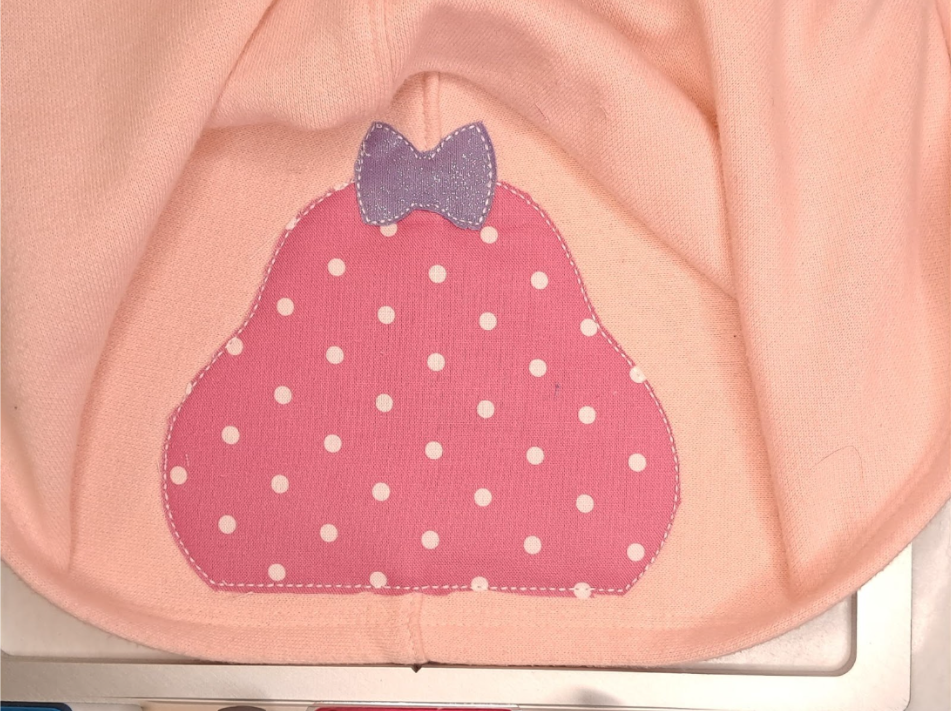
Step 1: Prep all applique fabric using Heat-n-Bond® Lite.
Step 2: Trim adhesive-backed tear-away stabilizer to fit your hoop. You can choose a different stabilizer, if you prefer, but I recommend using some type of an embroidery-safe spray adhesive to easily secure the hood to your stabilizer during stitching.
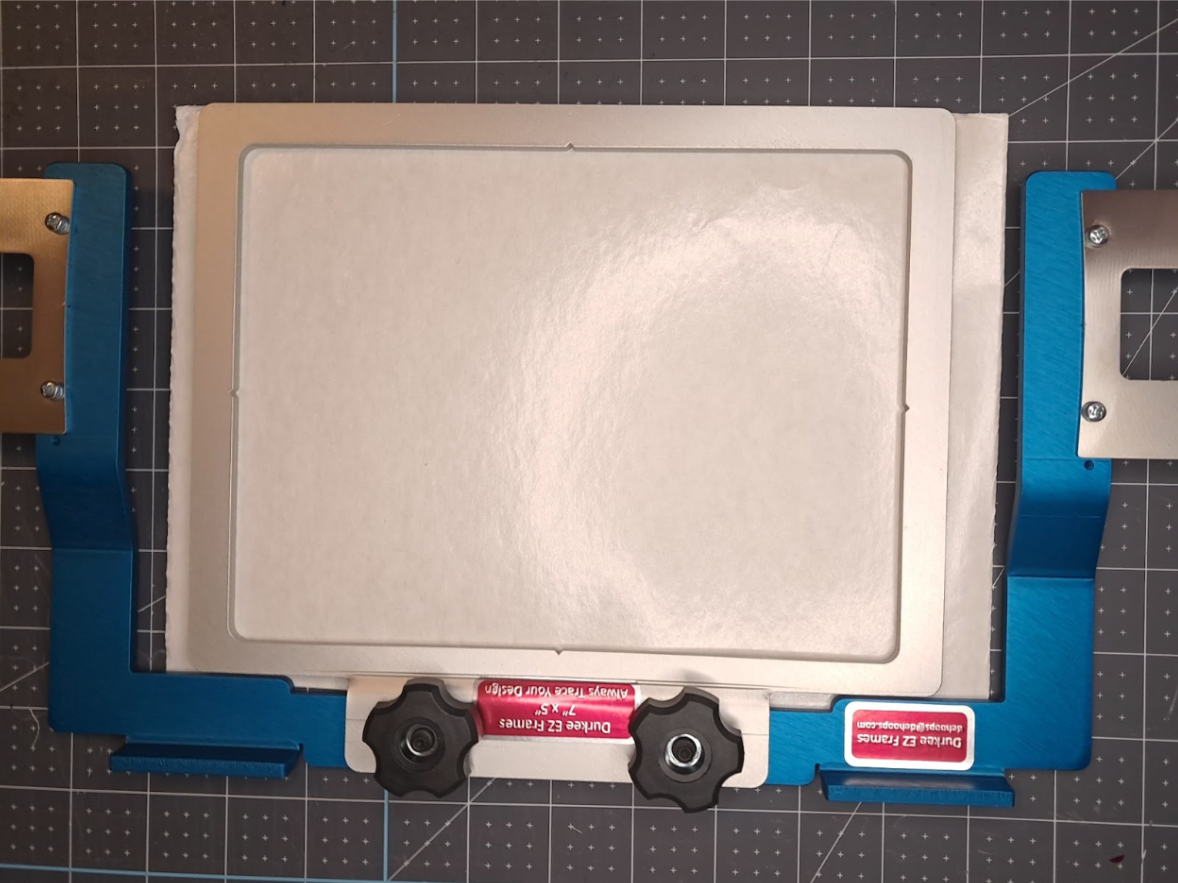
Step 3: Center the hood onto your stabilizer/hoop. I floated the hood onto my stabilizer, but you could also hoop it directly into the hoop with your stabilizer, if you prefer. I find adhesive-backed tear-away stabilizer makes it extremely easy to float projects for stitching.
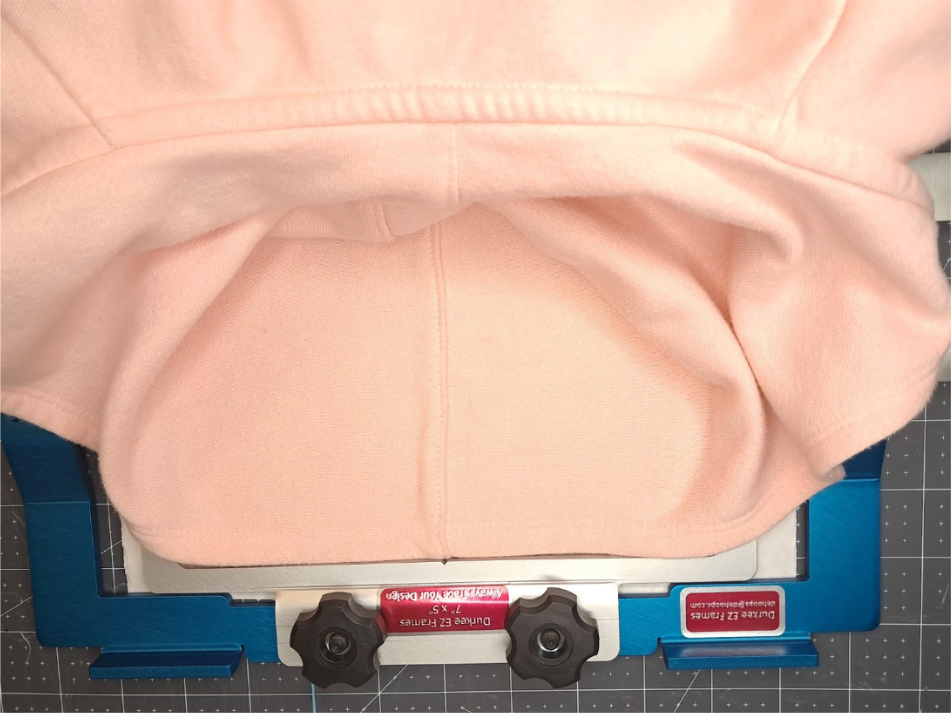
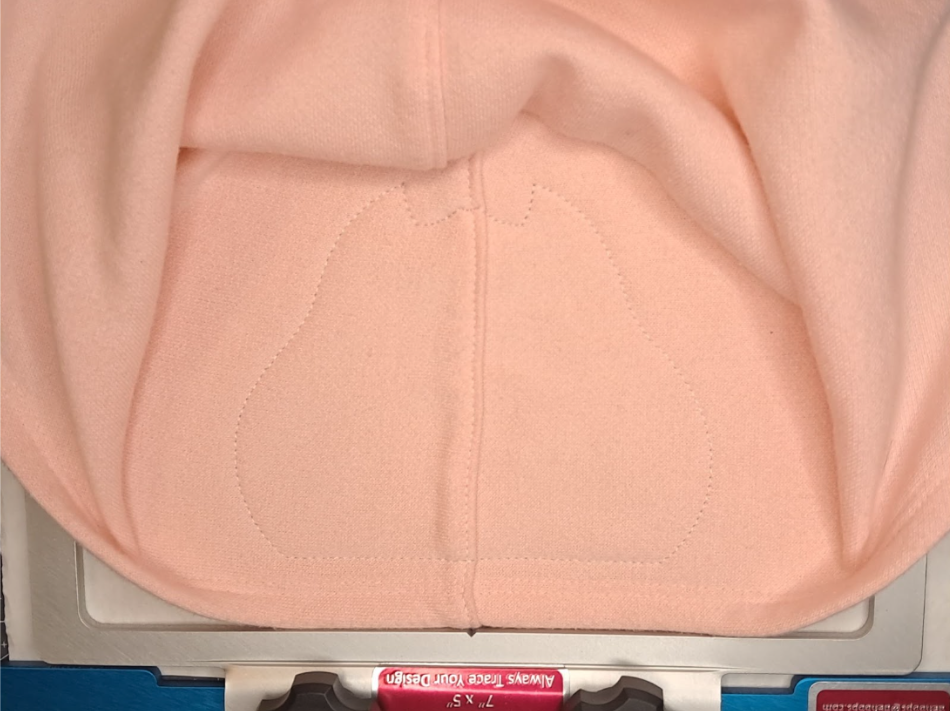
Step 4: Place the hoop on your machine and stitch the design (applique, decorative, and satin stitches). Make sure the rest of the sweatshirt is out of the way of the embroidery stitch path. You do not want to accidentally embroider any part of the sweatshirt to the hood.
Note: If you are embroidering on a hooded sweatshirt with a nap texture, you will want to use a water-soluble topper to prevent the nap from distorting the stitches.
Step 5: Remove the hood from the hoop and tear/cut away any excess stabilizer. Iron Sulky Tender Touch® onto the backside of the embroidery design (on the inside of the hood). This will ensure that your child's skin does not get irritated from the bobbin thread rubbing.
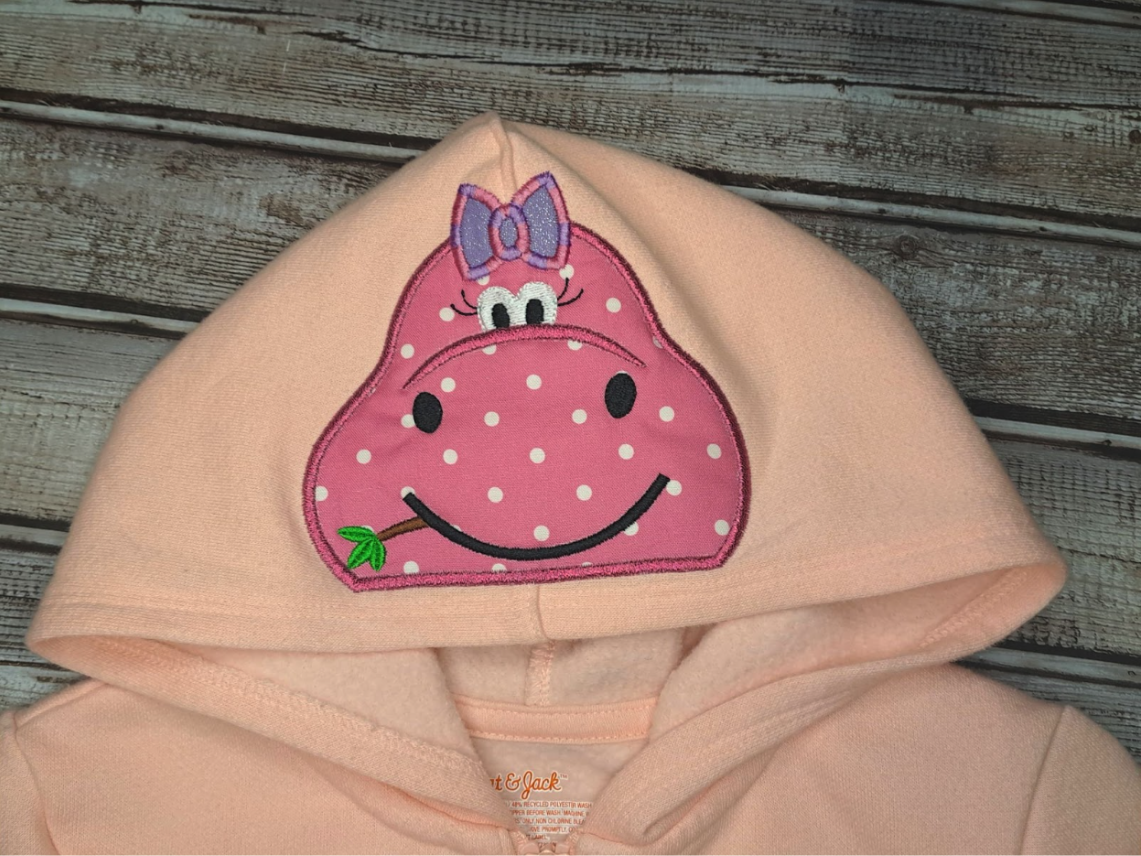
That's it! You now have a cute peeker hoodie for your child in five easy steps!
Keep reading to discover other creative ways to use peeker designs from DBJJ.
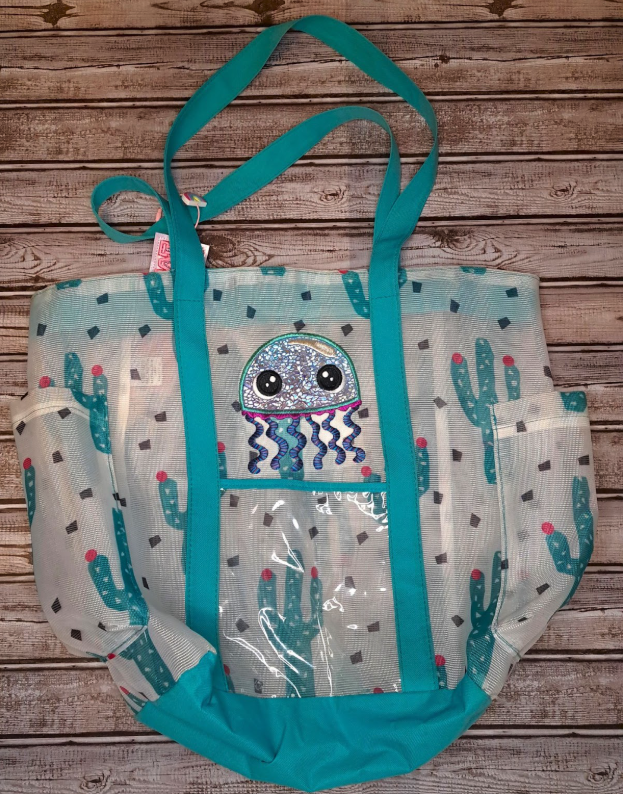
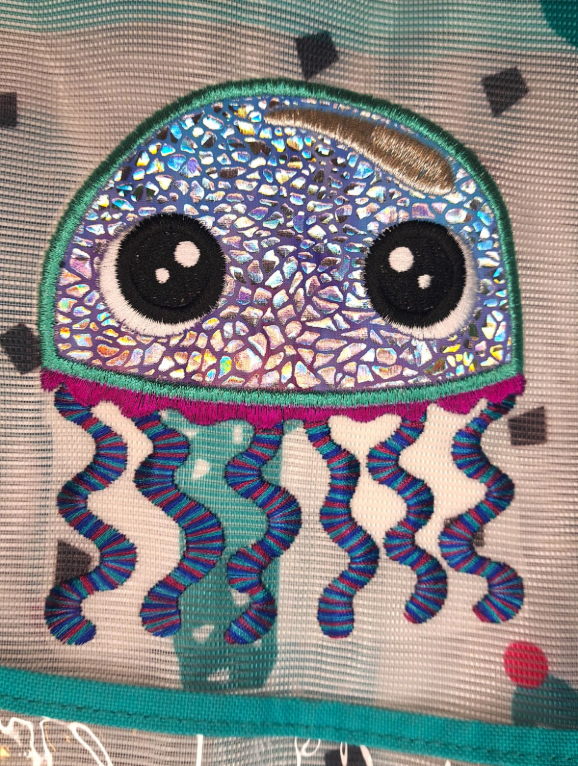
Peekers are so fun to add to pockets! For this project, I added the jellyfish from Beach Peekers 2 to our family beach bag. I used an adhesive-backed tear-away stabilizer for this project. I found this stabilizer to work best on my mesh beach bag because it held it in place during stitching and I was able to cleanly remove all excess stabilizer once finished. If you are embroidering on a canvas or fabric type bag, you could use a cut-away stabilizer for added support and durability.
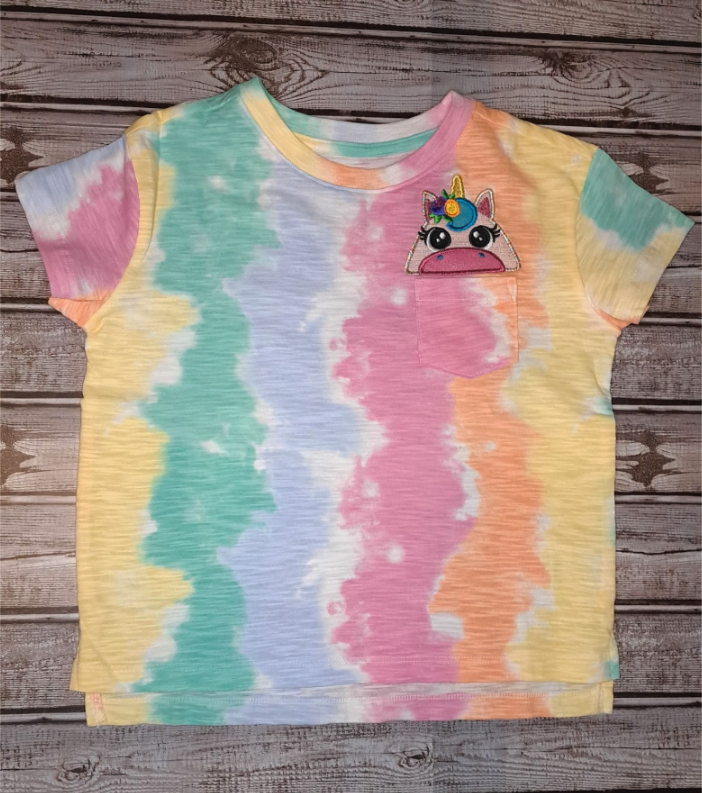
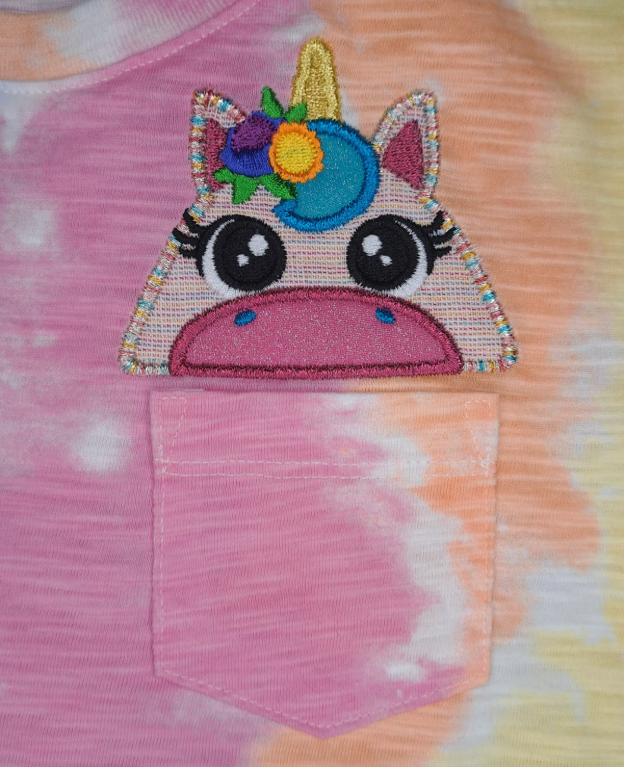
Peekers are not only fun on tote bag pockets, but also on T-shirt pockets. Stitching the peeker above the pocket gives the appearance that the cutie is popping out of the top. My daughter loved picking out the unicorn peeker from Spring Peekers 2 for her new shirt! There were so many cute options that it was hard to choose. Need help with embroidering on clothing? Check out this blog post for tips and tricks.
Pro-Tip: Peekers aren't limited to T-shirt pockets. Get creative and add them to jeans or overalls for a quirky customization!
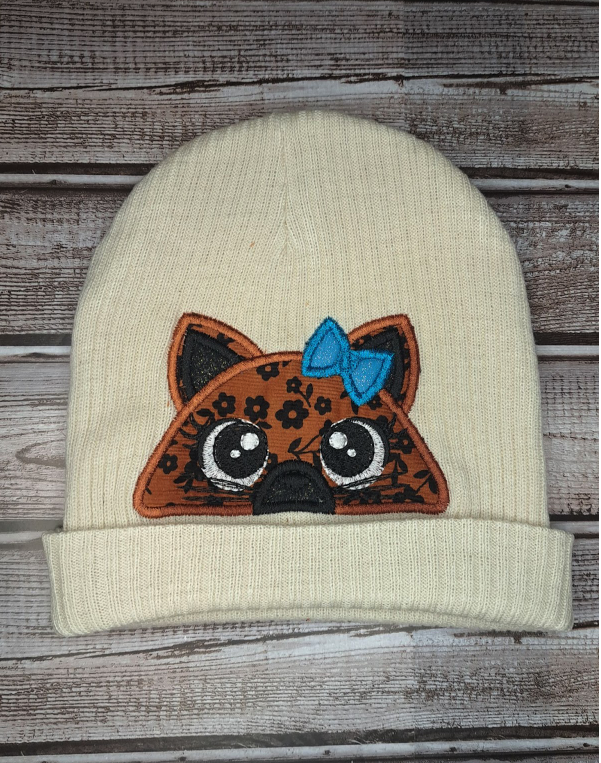
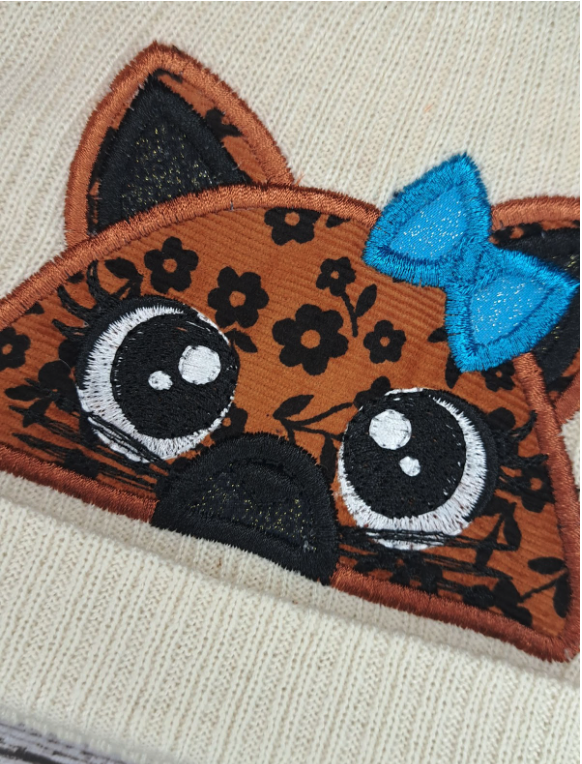
Peekers are the perfect addition for a plain beanie or stocking hat. I prefer an adhesive-backed tear-away stabilizer since hooping the beanie can be a little tricky. The adhesive holds the hat in place during stitching and tears away cleanly when complete. If you have a multi-needle machine with a hat hoop, you can even add peekers to baseball caps.
If you are a member of the Designs by JuJu Embroidery Blessings Facebook Group, you have probably seen the adorable Crafty Gemini peeker hats floating around. Check out this video for a step-by-step tutorial and this Facebook post for more details and tips.
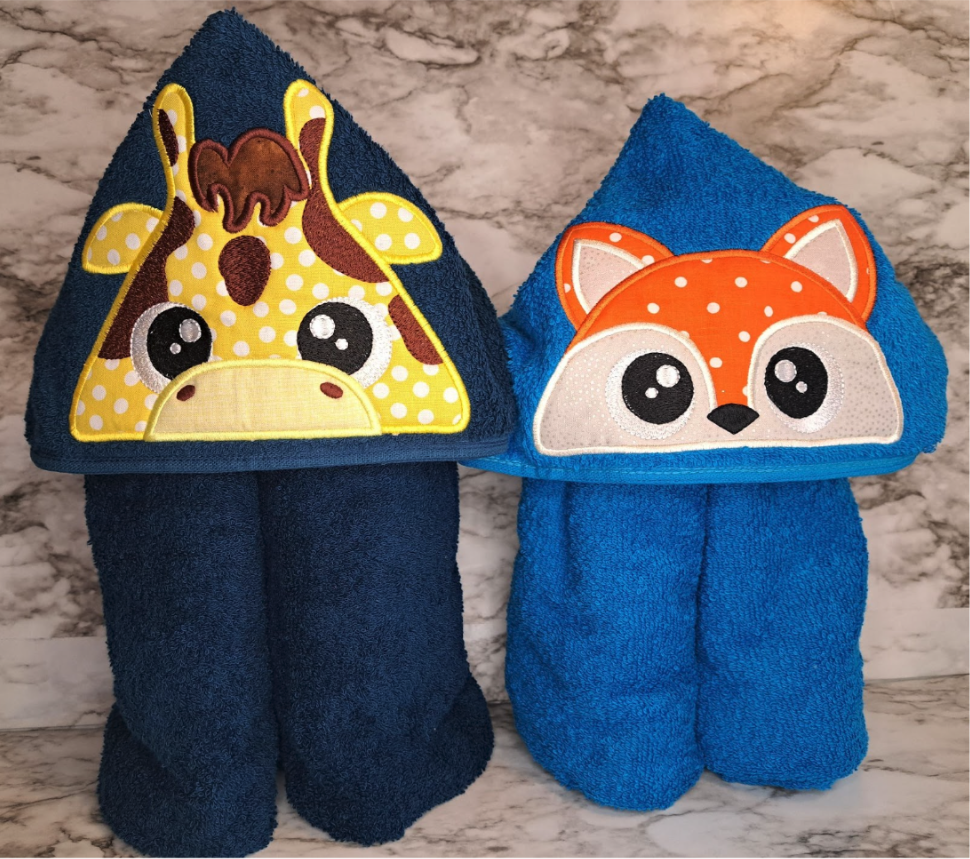
If you've never made a hooded towel, what are you waiting for? Grab a bath towel and a hand towel and follow along with this blog post and video for creating your own hooded towels. No need to wrap them up—try this method for a cute presentation. They are addicting!
Want to make a hooded blanket instead? Check out this freebie on the DBJJ website for a step-by-step tutorial to make your own.
All of the projects showcased in today’s blog post demonstrate the many creative ways you can use the peekers from Designs by JuJu. Have fun experimenting with them and make sure to check out the Designs by JuJu Embroidery Blessings Facebook Group for other ideas and to share your own creations using the hashtag #designsbyjuju. We can’t wait to see what you make! Happy stitching!