Toggle Nav
 Inspire.
Create.
Stitch.
Inspire.
Create.
Stitch.
Search
Who doesn’t wish at some time or another that they could go back in time and give themselves some words of wisdom?
What would you tell yourself when you were seeing your new or inherited embroidery machine for the first time? Read on to see what I would tell beginner me.
What would I tell my beginner self if I could go back in time? Two words: get started! Like a lot of people whose comments I have read, I let my machine intimidate me for a while before I cranked up the courage to start using it. Once my motivation finally won over the battle, I found machine embroidery was easier than I thought. Wow! I did an embroidery project! Yes, it was just a couple of words embroidered on a Halloween shirt, but I’d done it!
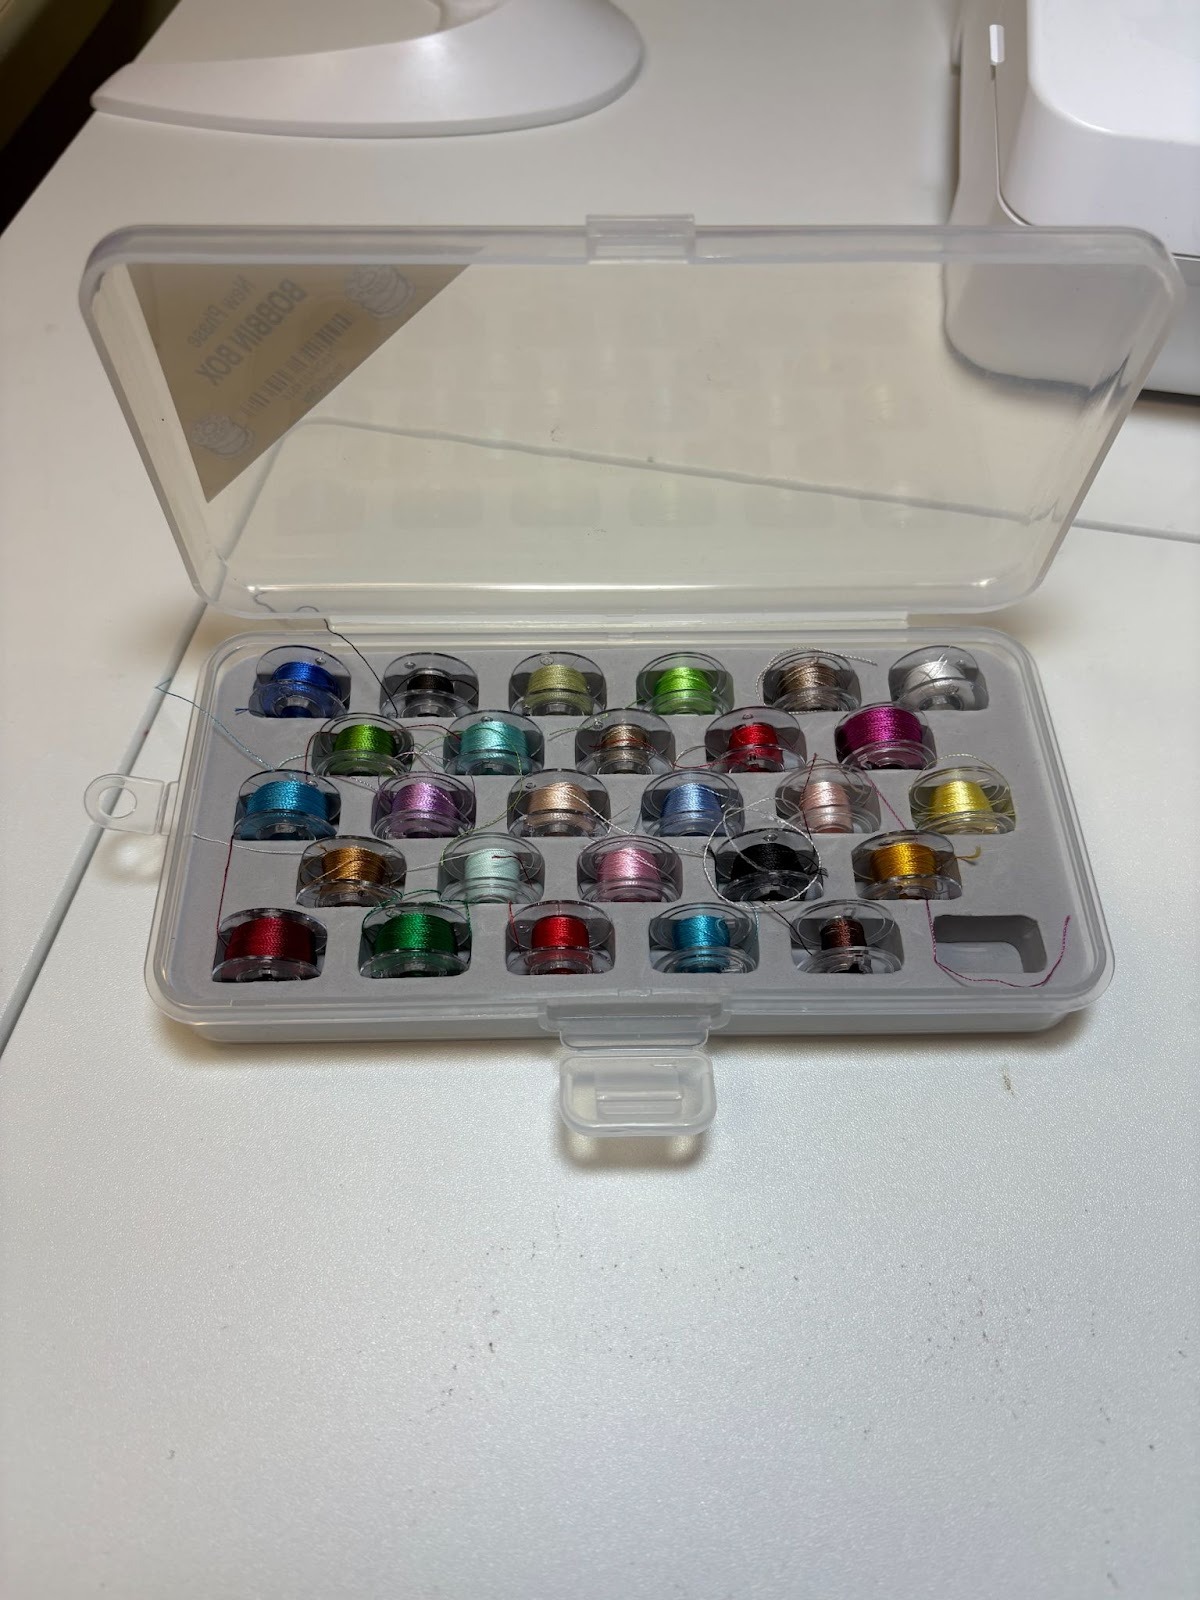
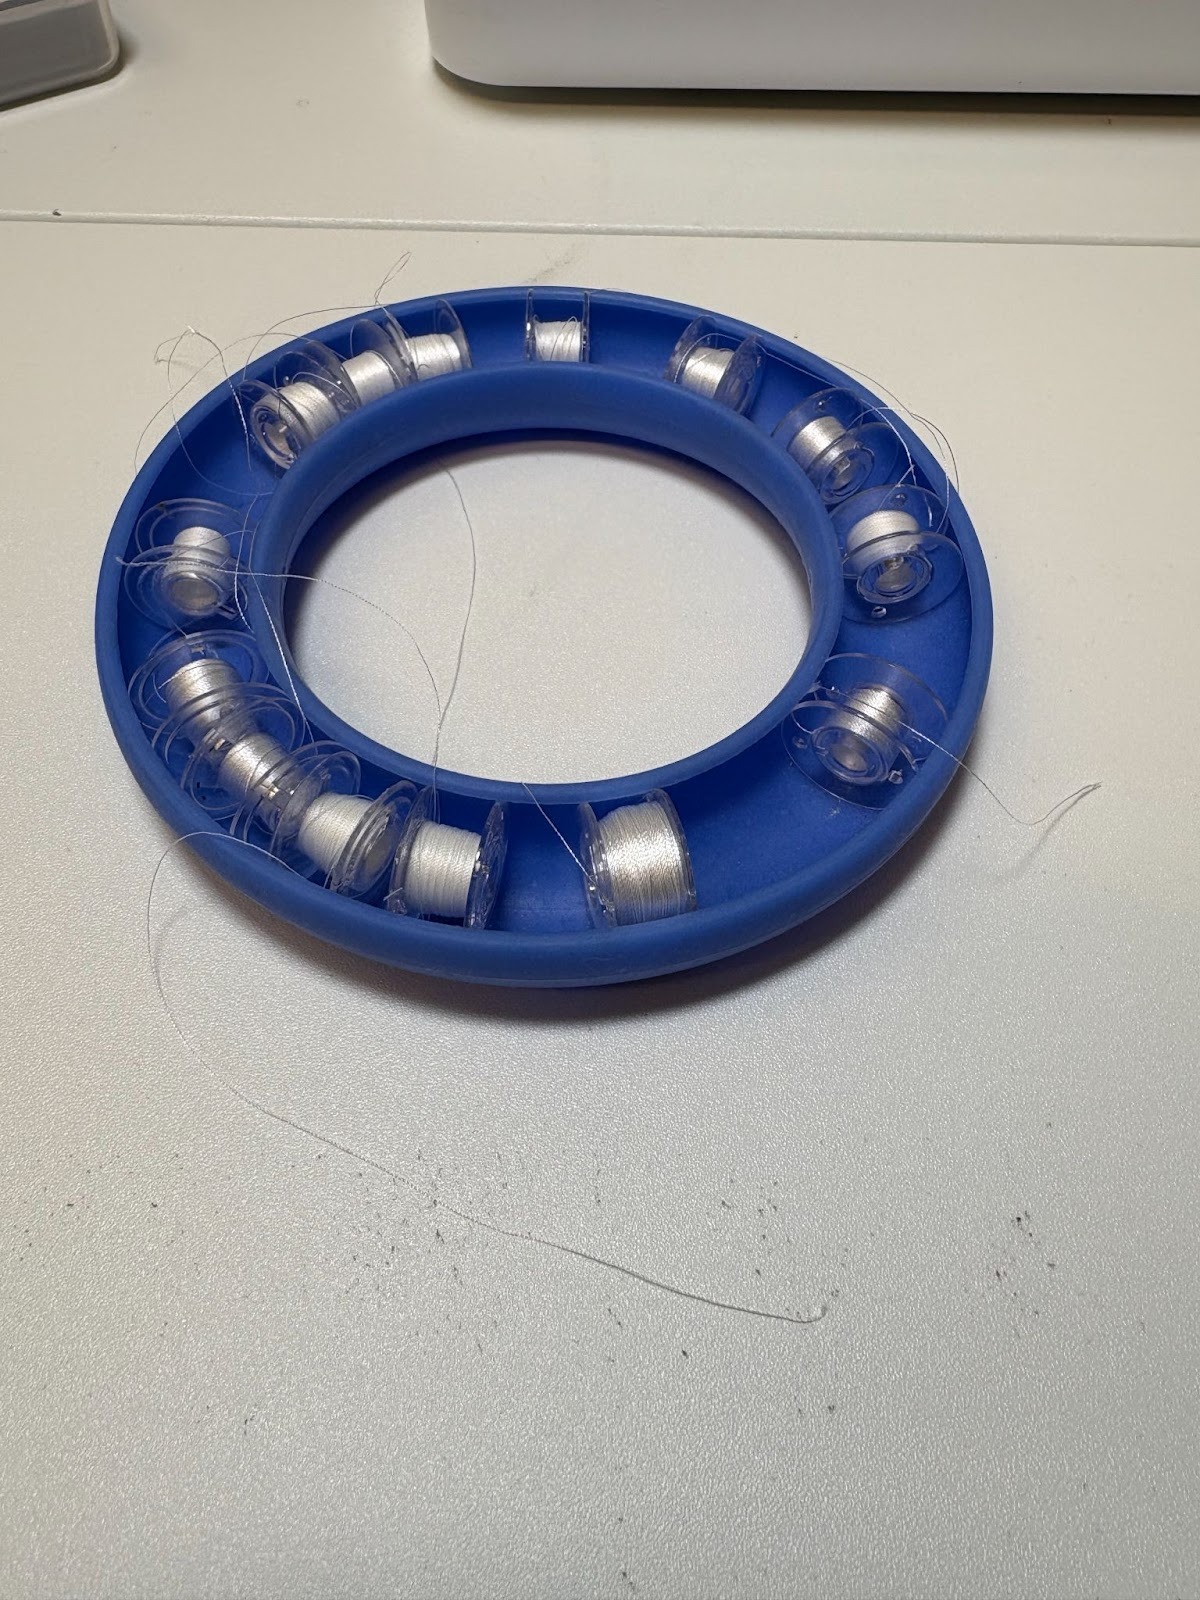
Now let’s talk about what my beginner self should have known but didn’t. First, there’s such a thing as bobbin thread. Not knowing this, I filled a bobbin for every color I was using. Years later, I still have a bobbin storage case with embroidery thread colors wound on them. When I remember, I try to use one of them up before reaching for a spool of thread. As you can see, I don’t remember well.
Bobbin thread is a finer weight than the regular embroidery thread. My go-to embroidery thread is Madeira 40wt. Bobbin thread comes in 60wt. and 90wt. (My machine uses 60wt.) Even though the weight number is higher, it’s a lighter thread. It helps to reduce bulk on the back of the design and unless the tension needs adjusting, it doesn’t show up on the top of the design. Bobbin thread comes in white or black. After machine embroidering for a good number of years and having done a variety of projects, I’ve yet to need black bobbin thread. Further down I say not to run out and buy stuff, so black bobbin thread is one thing I’d say not to buy until or unless you have a specific need for it. The good news is, bobbin thread is less expensive than embroidery thread. I buy it on spools and wind bobbins. Some people buy pre-wound bobbins but I never have. I usually make sure to have one or two fully wound bobbins at the beginning of a large project because I don’t like stopping in the middle of whatever I’m working on.
Second, my machine is a dual-purpose one, so there are TWO different bobbin cases. One is for sewing and one is for embroidery. Luckily, I don’t remember seeing a lot of differences in my beginning embroidery projects vs. my later ones. I recently looked at one of my first projects and it looks good. But who knows which bobbin case was in the machine at the time?
Third—and I did this for a couple of years before learning better—when you are ready for a color change or completely done embroidering, do not pull the thread out backwards. Before knowing better, when I was ready for a color change, I would simply take the spool of thread off the machine and pull the thread out backwards from the way the machine was threaded. Then I found out that pulling the thread from the machine that way can cause your tension to become wonky.
There is a correct way to remove the thread that is already threaded through the machine: Clip the thread near the spool. Then take the thread that’s through the machine needle and pull it all the way out. When I first started removing the thread this way, I admit I felt like I was “wasting” thread. However, I’ve decided that those little amounts of thread are worth preventing costly repairs on my machine!
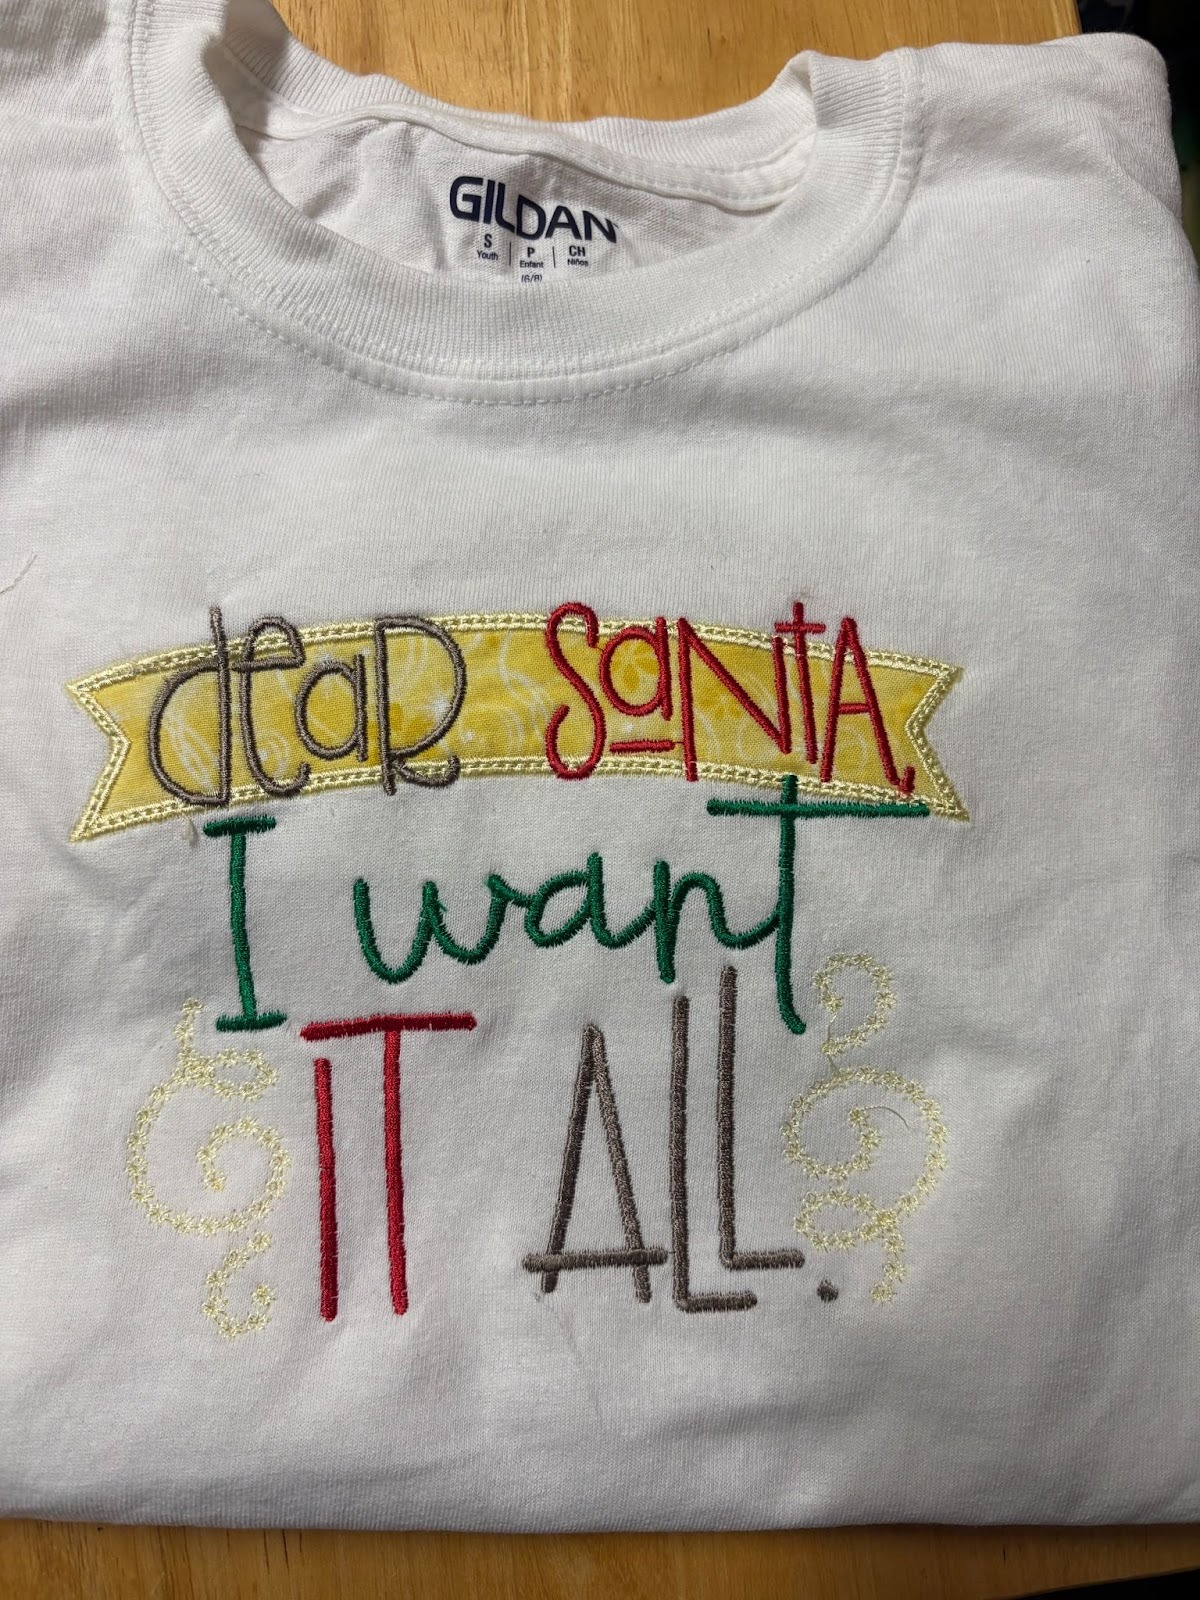
What else would I tell my beginner self? That’s easy: you’ll make mistakes, some fixable, some not. Don’t throw them away. After doing the Halloween shirt, one of my next projects was making Christmas shirts for my granddaughters. On one of them, I made a big mistake: the back of the shirt got caught up in the stitching under the hoop. If you’ve been there done that, you’re nodding along with me. But that mistake taught me to run my hands along the edges of the hoop before pushing the start button.
So I made a mistake, learned a valuable lesson, and kept trying. Motivation, especially when the heart is involved, helps us continue moving forward.
Another piece of advice I’d give myself is don’t buy all the stuff. I didn’t need to run out and buy all different kinds of stabilizers. For instance, I have my original roll of sticky-back stabilizer with its price tag of $24 still on it, barely used. Supplies are expensive, so don’t make unnecessary purchases. It makes more sense in the beginning to buy as you need a specific product for a specific project. Once I really got into machine embroidering, I learned what kind of stabilizers I actually use and what to have at hand.
I also would go back in time and give myself a not-so-gentle smack upside the head, because this one took me way too long to start doing even after I realized it was a problem. If you buy stabilizer from a shop where they cut it for you, label, label, label the stabilizer so your future self knows what it is. Is it Tender Touch™ to cover stitching so it doesn’t itch? Is it a woven stabilizer? Believe me, you will not remember, so label it.
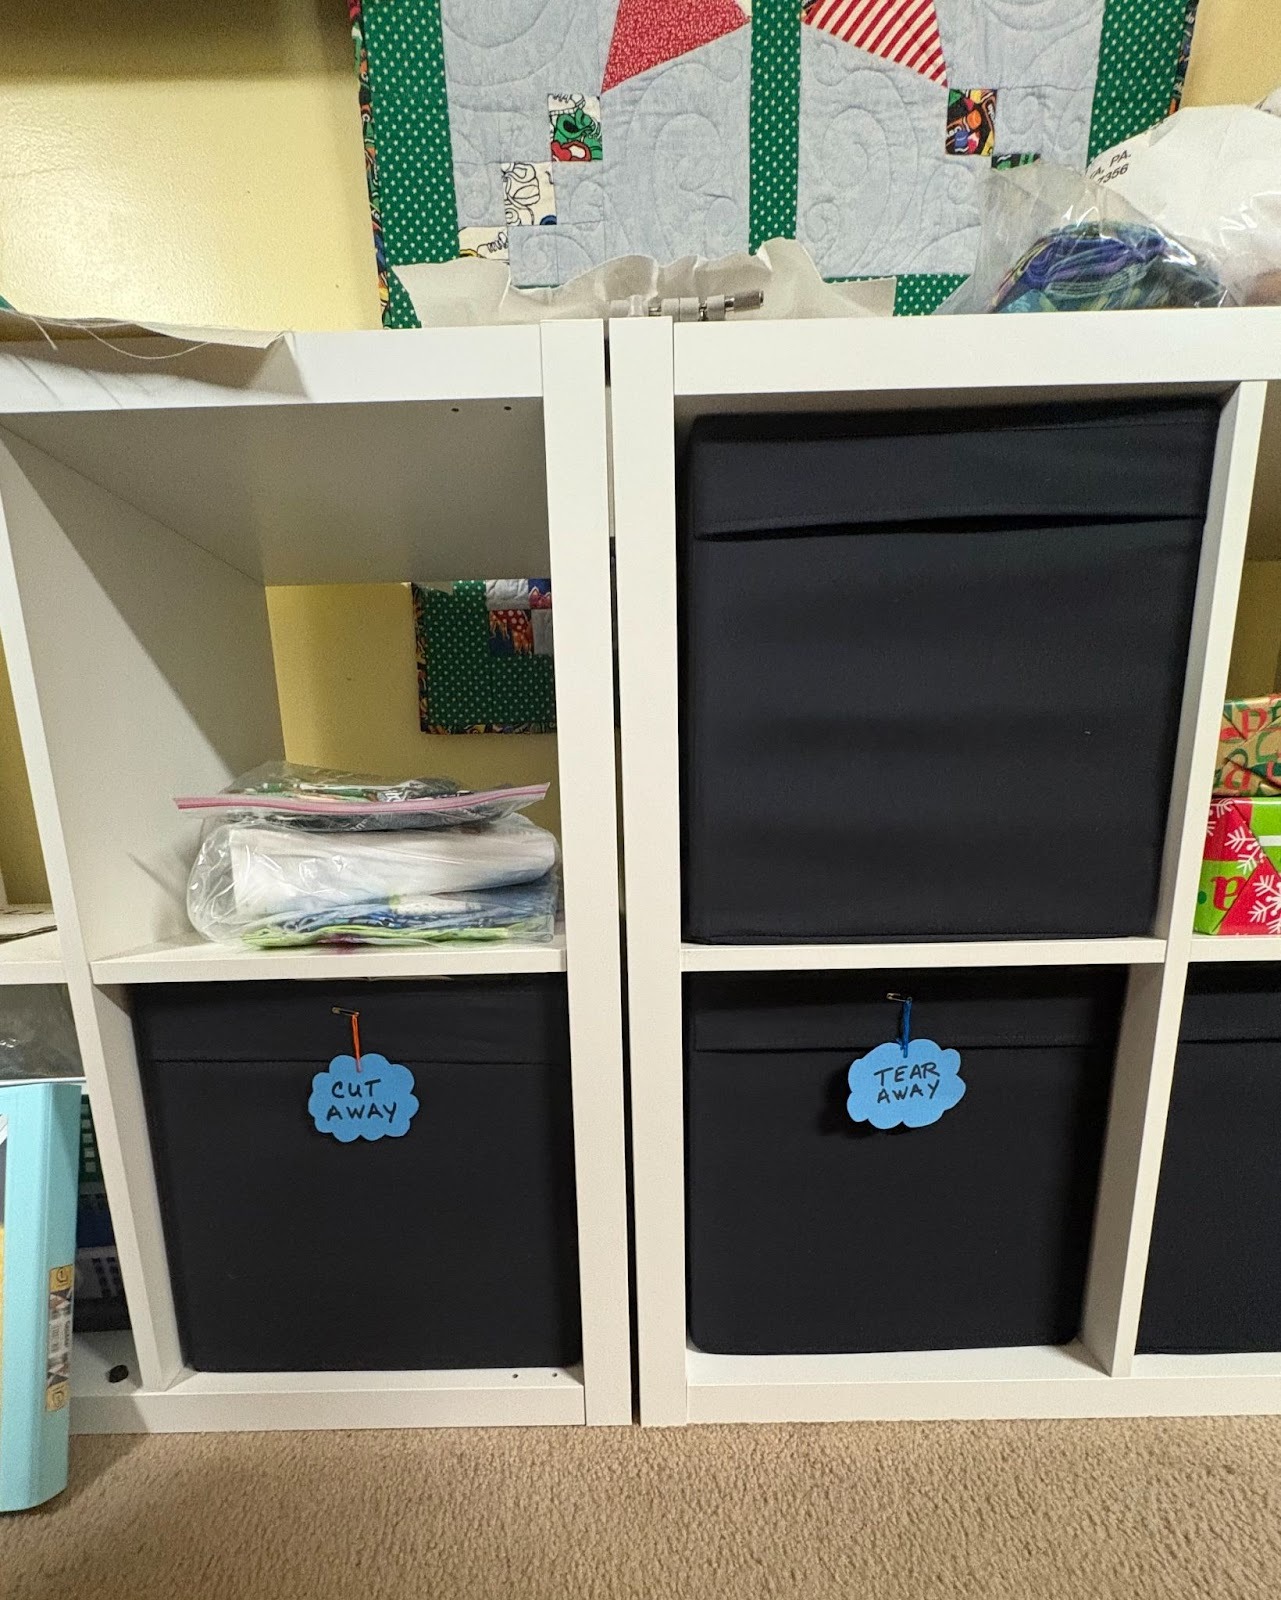
My beginner self didn’t do too badly on stabilizers overall, but I would still go back and emphasize that the correct stabilizer is crucial! I believe I did a few early projects with tear-away stabilizer that should have used cut-away. In the DBJJ Embroidery Blessings Facebook Group, I learned the phrase “if you wear it, don’t tear it,” which reminds me to use cut-away stabilizer for clothing.
If you are a beginner, you need to understand stabilizers: what they do and which ones to use. Here are two helpful blog articles you can read for further information:
What about other supplies? I already had a Dritz® Disappearing Ink Marking Pen because I’m also a quilter. It has been invaluable to mark my projects so my designs stitch out straight. That’s information my beginner self already knew, but you may not.
Something for not only my beginner self but my future self too: always keep spare needles on hand. You don’t want to break your last embroidery needle as you’re working on a project, especially if you have a deadline. With Joann® stores’ closure, my current and future selves have no place to go on a weekday evening or a Sunday to get more embroidery needles. Michaels, last I looked, did not carry machine embroidery needles.
I also wish my beginner self knew about contrast between fabrics and thread, something I remind myself to think about with every project now. The threads really need to contrast with the fabric. A turquoise background with a darker turquoise thread is really not going to work, no matter how pretty the spool of thread looks lying atop the piece of fabric. I was disappointed that my granddaughter’s name did not stand out on the first reading pillow I made.

I think my beginner self needs some praise now, after all the stories of my blunders. Here are some things my beginner self did correctly.
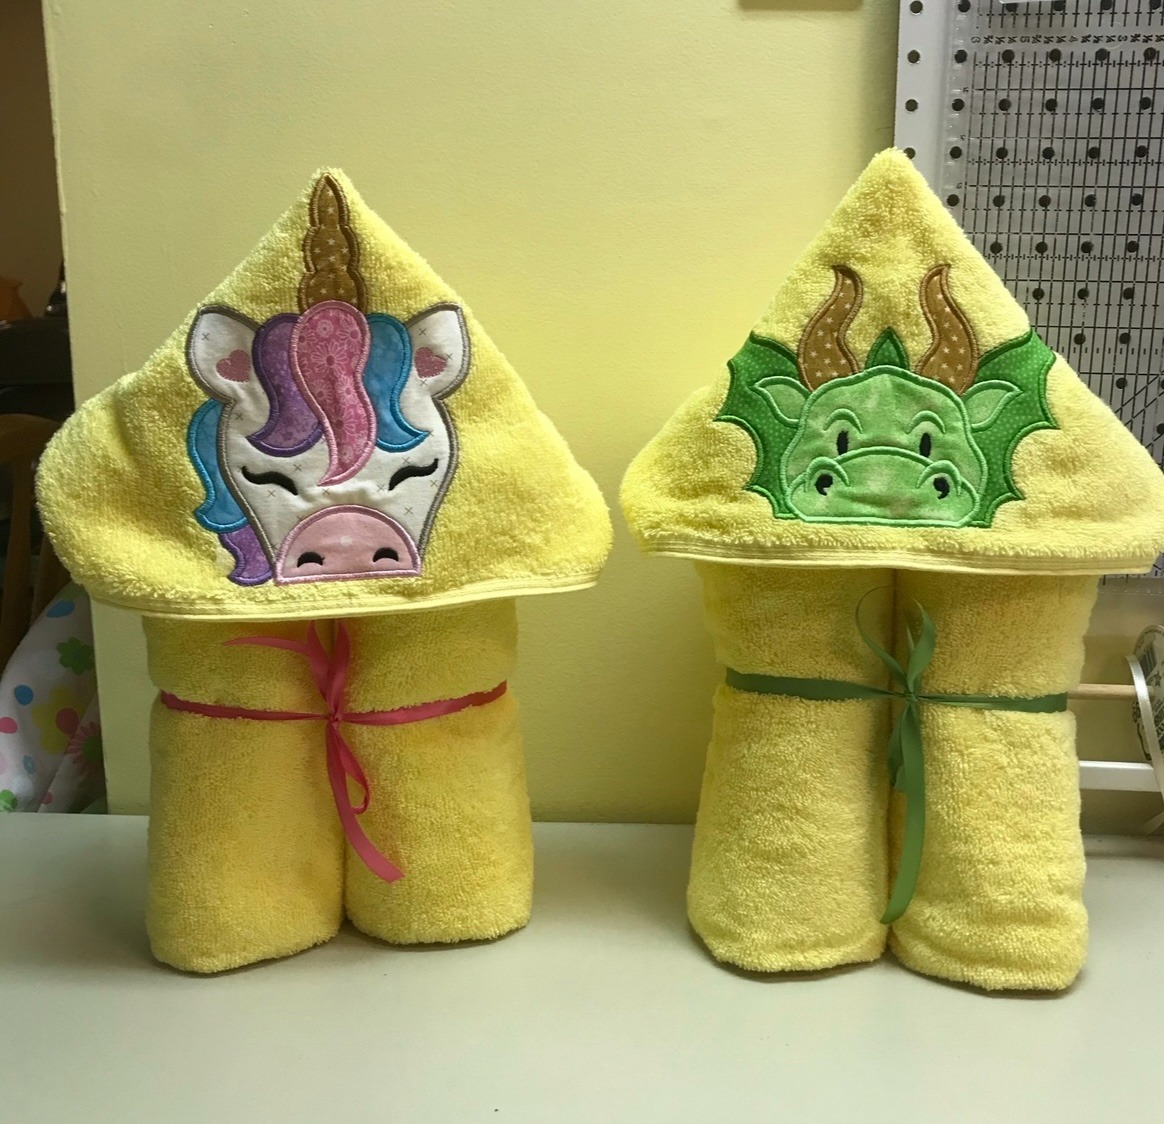
I found JuJu’s towel tutorial. From that video I learned about the water-soluble topper that should go on towels and any other fabric that might allow the stitches to sink in. I learned about size and placement of designs. That Christmas I felt very chuffed with the shirts and hooded towels I gave as gifts.
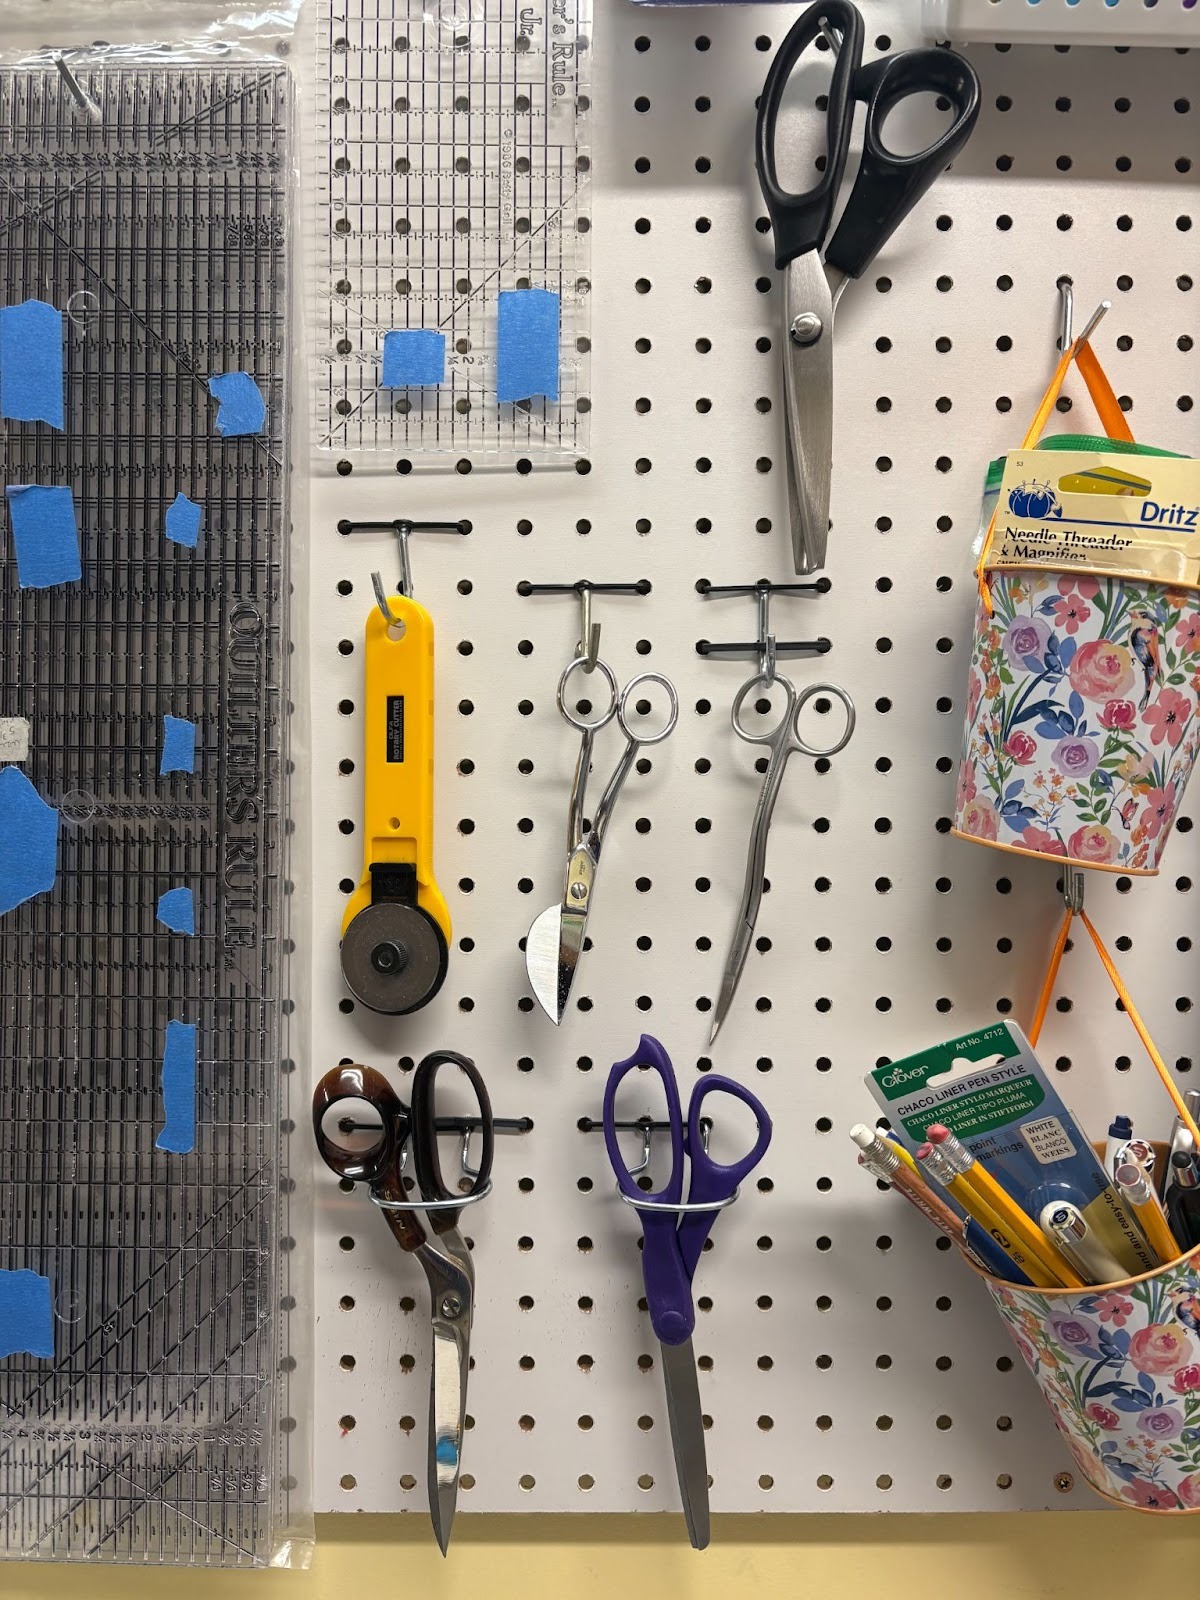
I purchased good applique scissors. They hang right above my work station so they're within easy reach when I take the hoop off the machine to trim the fabric. They go right back on the hook when not being used so I don’t accidentally lay something on top of them and cause damage.
Right from the start, I’ve been keeping records in a notebook of all the designs I’ve made. They include design name, placement, size, sometimes stabilizers, and thread colors. I add notes such as “these colors worked well,” “use Heat-n-Bond® Lite on all the applique pieces,” or “I wish I’d made it bigger.” Sometimes I copy one of the design directions into the notebook and highlight it so I don’t get ahead of myself and forget something important.
I also keep a list on the Notes app of my phone for supplies I will need soon. When it’s time to make a supply run or I happen to be near a shop, I won’t forget something I need. My future self thanks me for that.
Surprisingly, I’ve kept my mistakes. I have that original shirt, not as a memento of the beginning of my hobby, but because it became a practice shirt. The shirt is folded in the photo so you don’t see the other things embroidered on it. I have a couple of towels that have served the same purpose. Don’t toss something that got botched; use it for testing a stitch out for size or color. I used an old T-shirt of mine a few years ago to check the placement of a design. That shirt now has about six different designs embroidered on it. I even cut some of the embroidered tests out to place them on a project piece to check for size.
The most important thing I would have told my beginner self is read everything you can find, watch tutorials, and join the Designs by JuJu Embroidery Blessings Group on Facebook much sooner than I did. Earlier today I looked back to see when I joined the Blessings Group. I couldn’t believe it took me almost a year into embroidering before I joined it. But then I remembered that I hadn’t been on Facebook prior to that. Becoming a member of the Blessings Group is what moved me to be on Facebook. Now I’m always exploring our pages to see what others have done with designs I’m using. Folks are brilliant about adding a lot of details like the speed of the machine, the stabilizers used, the amount of time designs might take. Often if the information isn’t there but someone asks, they’ll get an answer very quickly. It may be from the original poster but it also could be from others who have stitched out that design. It’s a wonderful community of embroiderers who are happy to help.
Today my biggest resource whenever I’m starting a project, especially if I haven’t used a particular product before, is the Designs by JuJu blog. Even though I’m one of the bloggers, I learn from these articles too. If I’m stitching out a new design and there’s a Becky Thompson Power Tools with Thread tutorial, I always watch it.
I’ll wrap up by saying that if I could go back to my beginner self, I’d say, “It’s going to be great, so get moving. It’s going to be a wonderful journey.” I hope yours is too!
Please be sure to share your projects in the Designs by JuJu Embroidery Blessings Facebook Group, or use the hashtag #designsbyjuju anywhere on social media. We all love to see what you create!