Toggle Nav
 Inspire.
Create.
Stitch.
Inspire.
Create.
Stitch.
Search
A practical guide to using DBJJ embellishment kits with fonts, covering structure, layering strategy, and design exchanges.
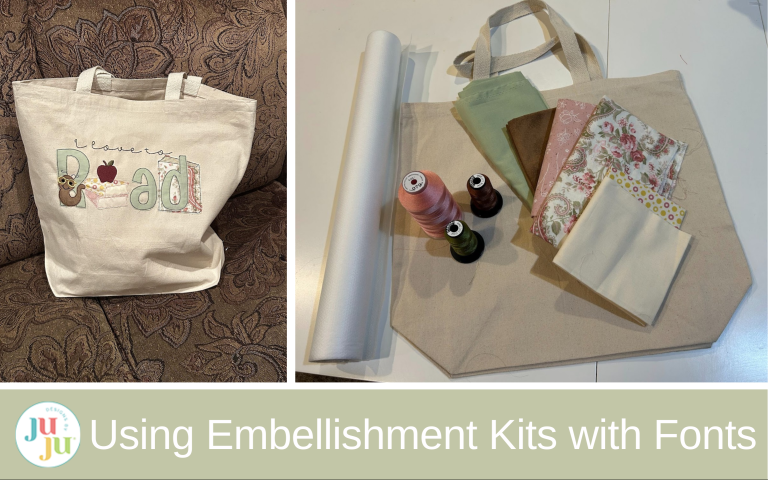
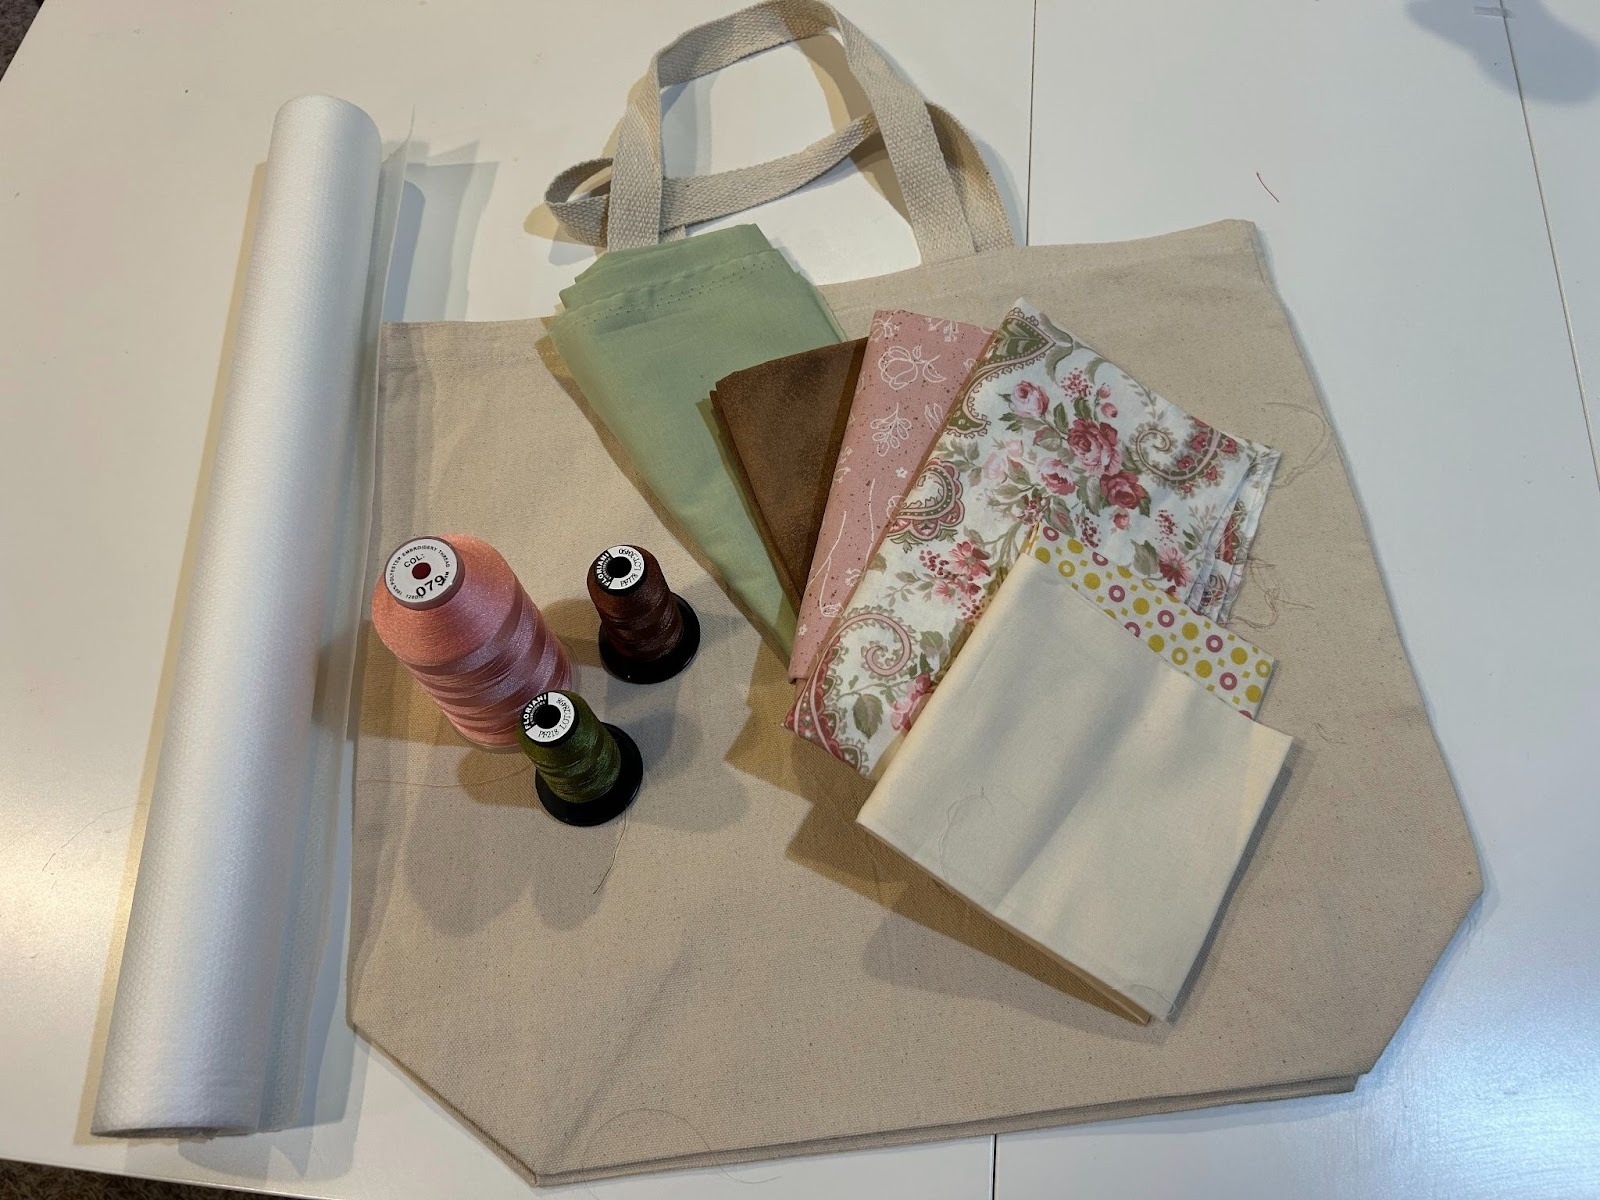
I love the look of DBJJ embellishment kits, but the first time I went to use one I felt a little intimidated. So if you’re feeling this way, let me help you learn how to swap designs, layer them, and combine them all into a perfect design for your project. We will be talking more about design than a finished project in this article. But these stitch out beautifully for bags, shirts, pillows, or whatever you can think of.
Check out the DBJJ team’s favorite supplies in the Designs by JuJu Amazon store.
We will start designing our project in Embrilliance. If you have the free version of Embrilliance, you can still design the letters of your design and insert the embellishments at your machine. If you have a paid version of Embrilliance, you should be able to save your whole finished project to transfer to your machine. I’ll walk you through both ways.
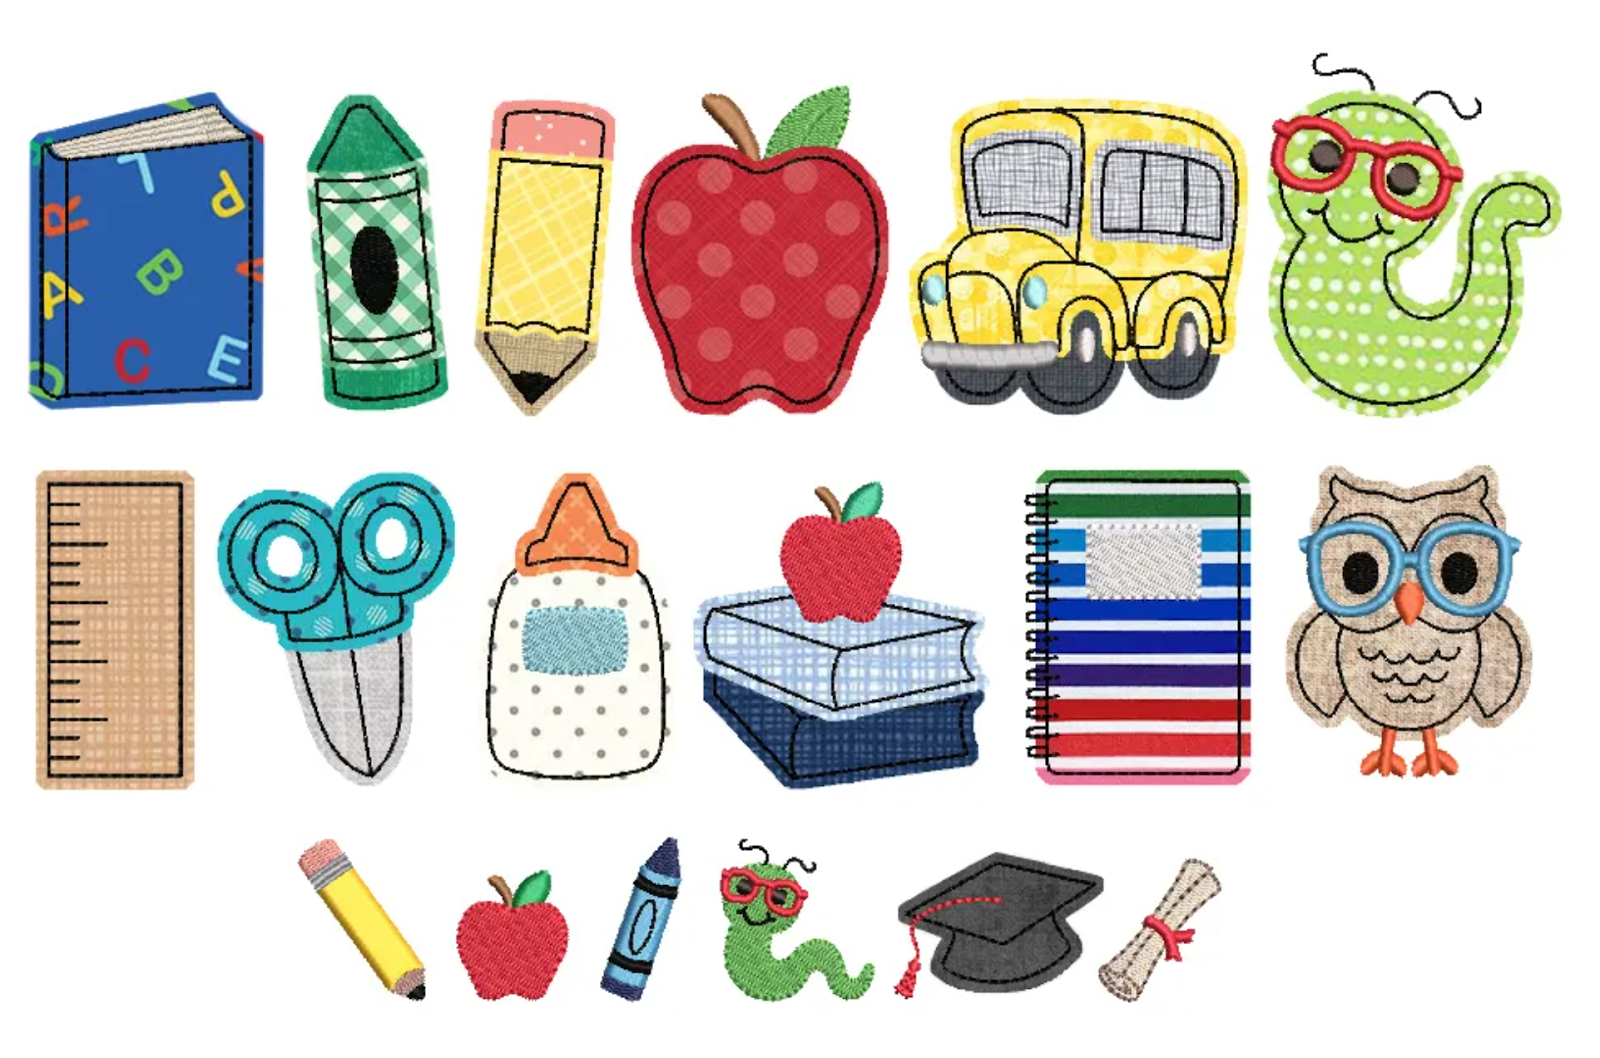
Embellishment kits can work with any font, but I like how they look with the Daisy Doodle Alphabet and the Emmy Doodle Alphabet. These fonts are finished with a bean stitch and have a raw edge to them, so it fits the same finishing style as the embellishment kits.

To start, open Embrilliance and type in your word you want to embellish. I’ll be using my name for starters in the 4” Daisy Doodle Bean Stitch Applique Alphabet.
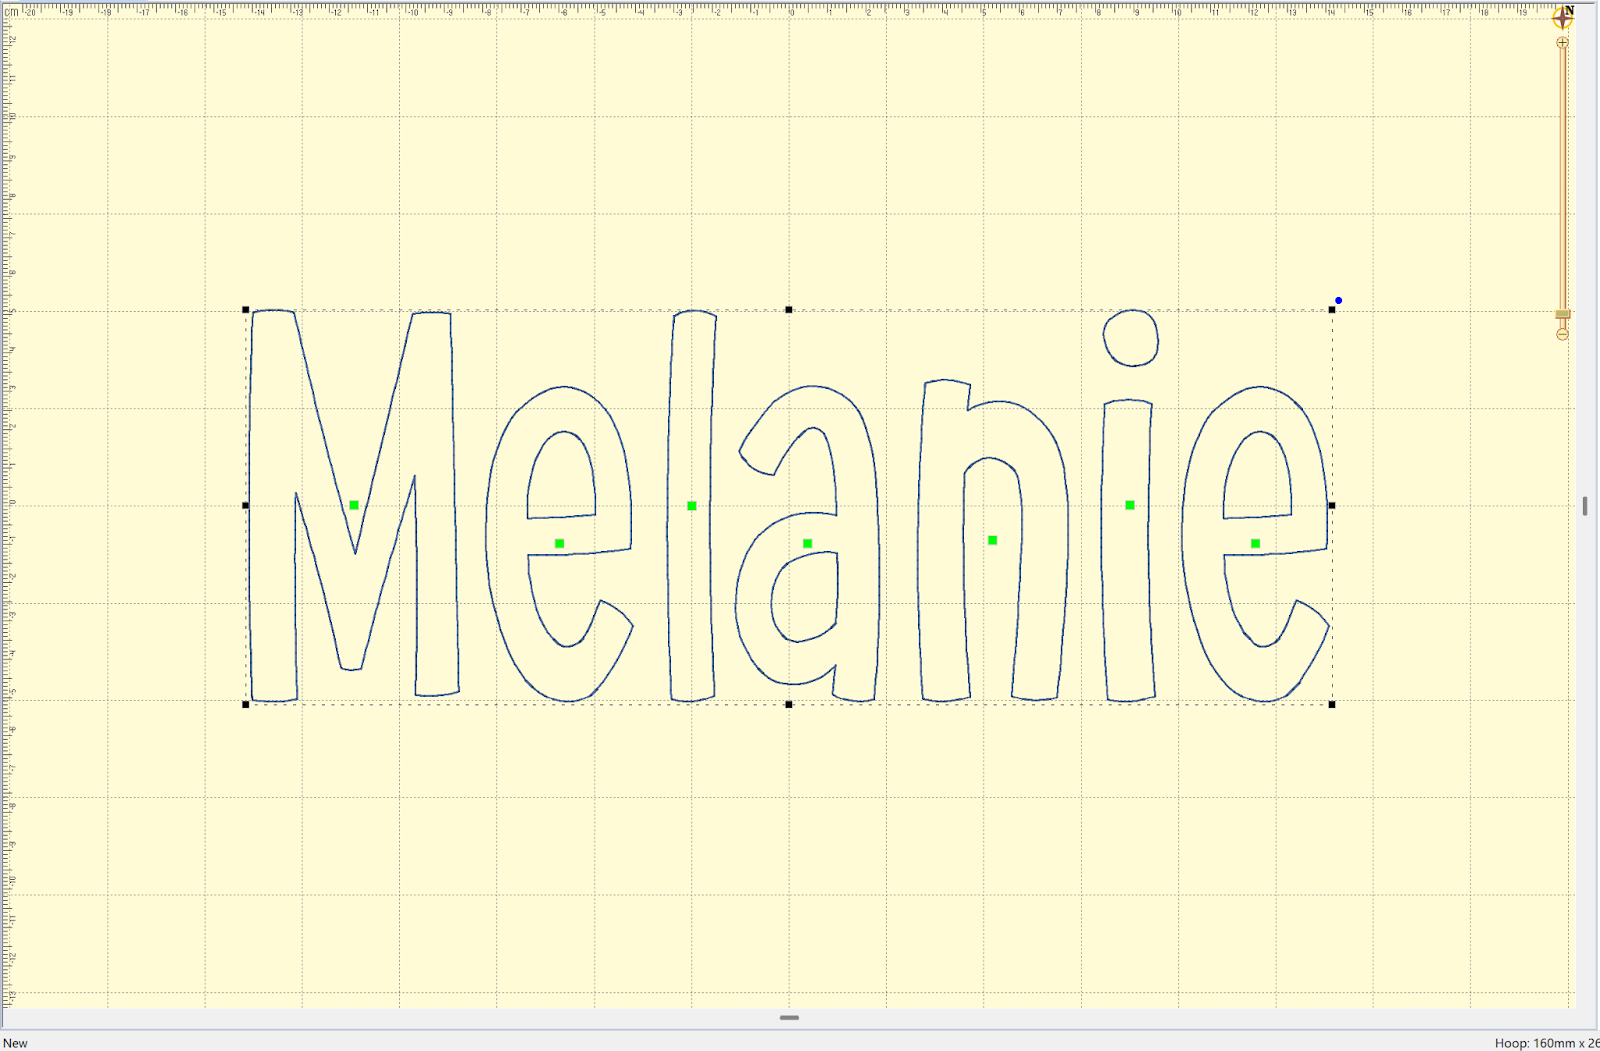
I’m going to use the Tropical Alphabet Embellishment Kit. I like to look at the general shape of the designs and see which ones would fit in my name well. The 4” size will make it easy to swap with the letters in my name. If you want it to be a bit smaller or larger you can choose a smaller or larger kit.

The tall surf board and the tree could work for the L in my name, and the coconut drink could work for either of the E’s or the A in the middle. I think it’s helpful to only exchange a letter or possibly two so that your word can still be read. Leaving the first and last letters alone will also help our brain be able to decipher the word.
TIP: To swap out letters, I will create groups of letters. So if I want to swap only the letter L, I will type “Me” in one section and “anie” in another. This makes it easy to space correctly for the embellishment I’m putting in for the L.
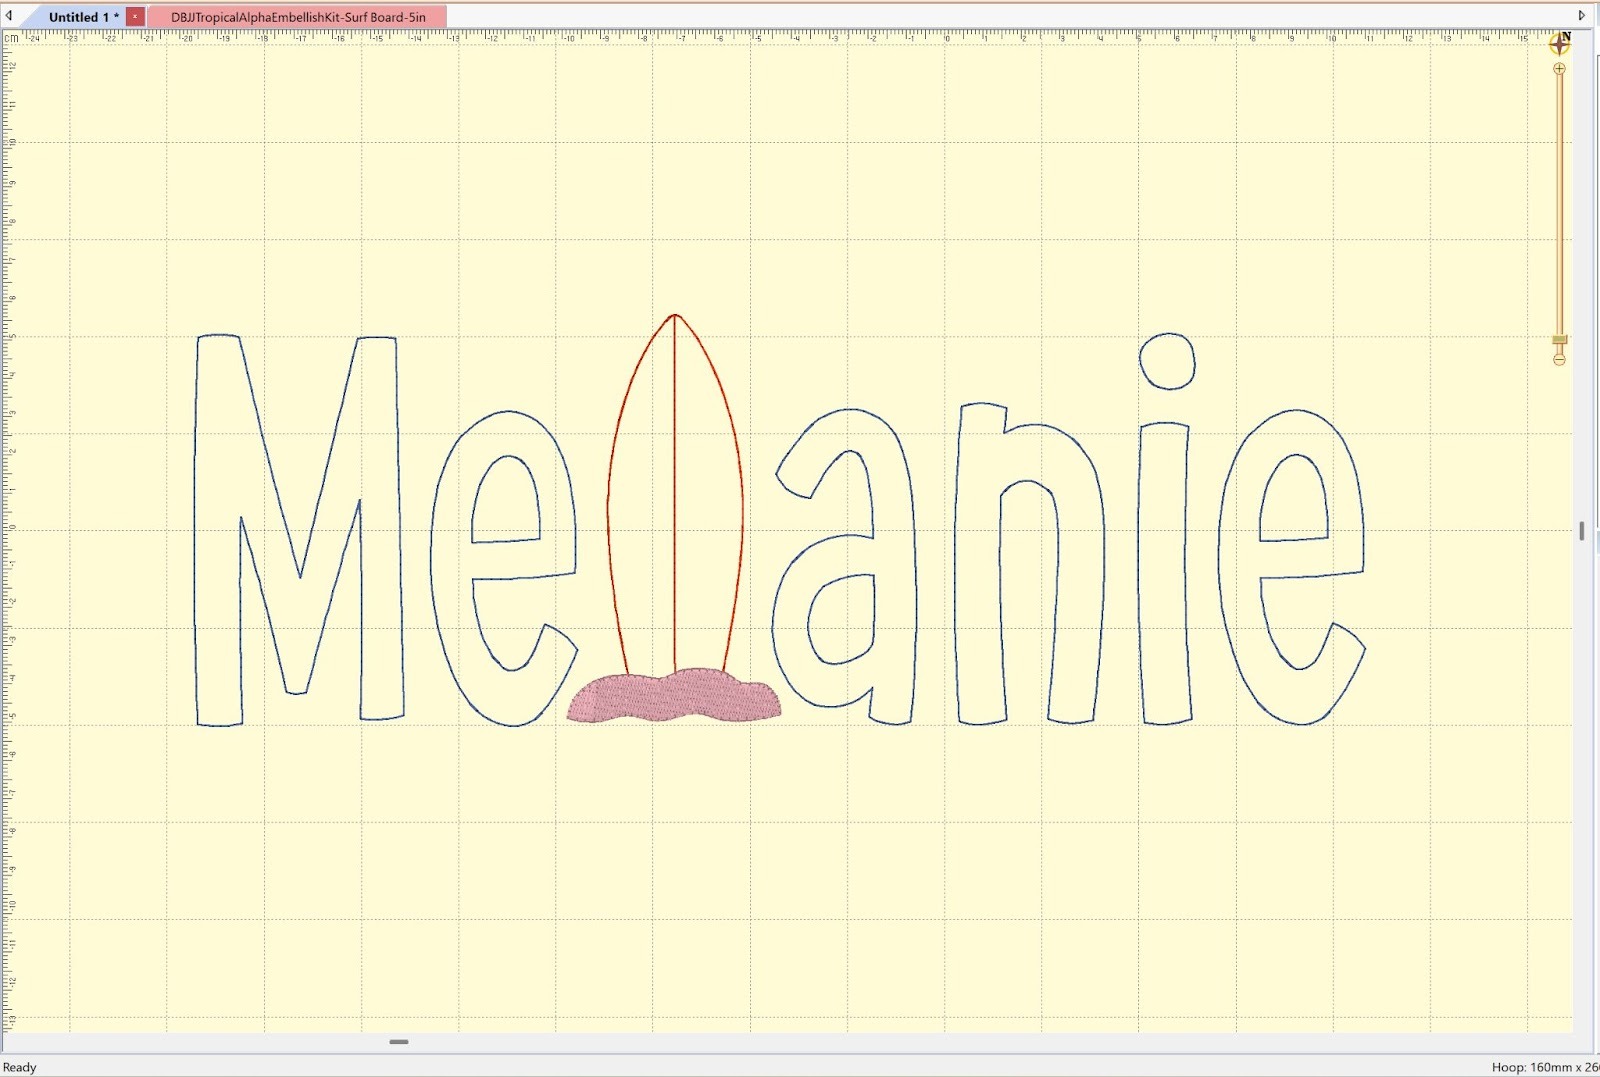
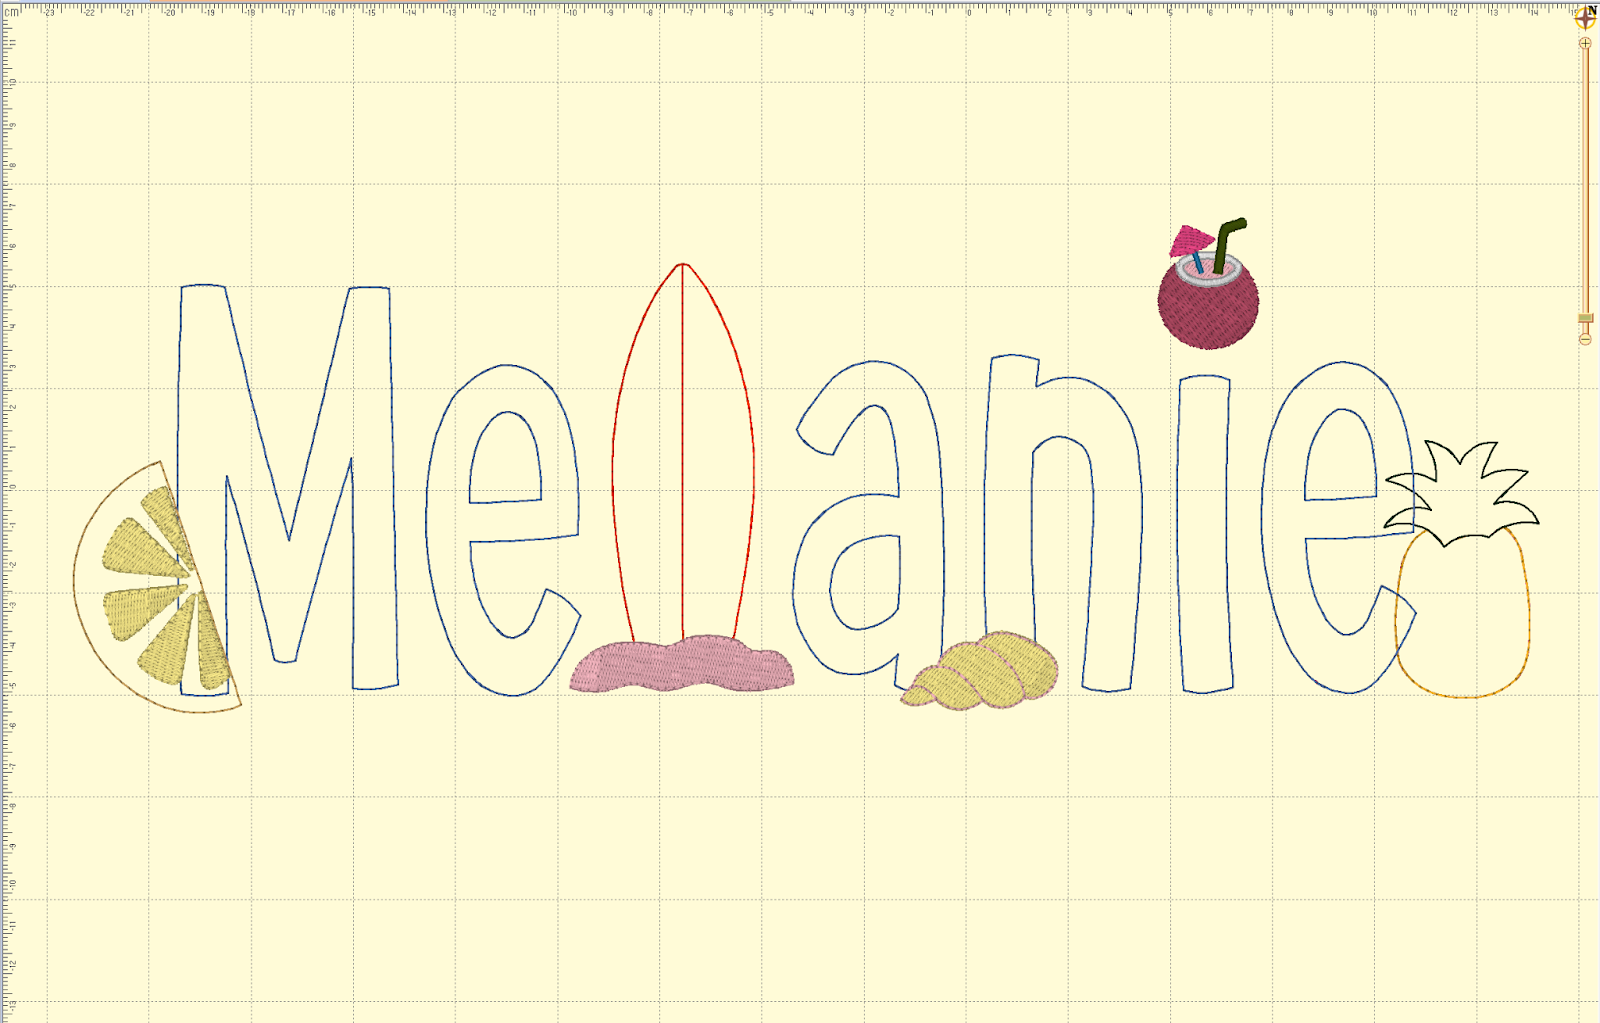
Here’s an example with one letter swapped. I ended up using a 5” surf board so my L would be larger than the lowercase letters
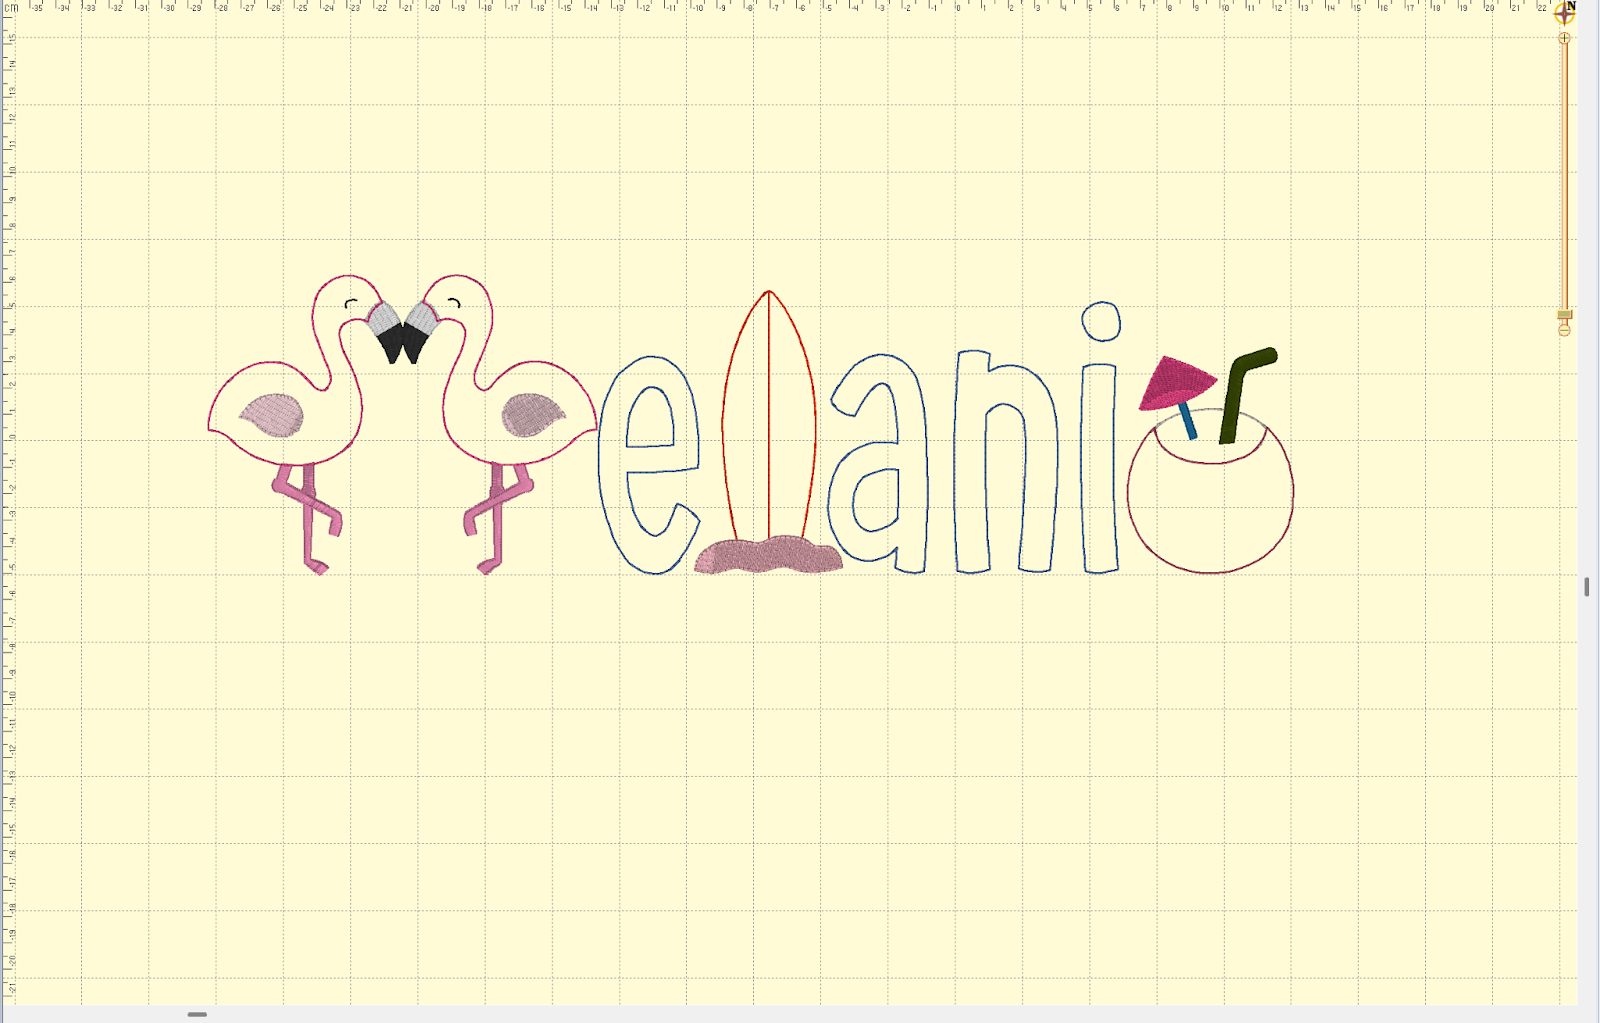
Here I swapped three letters. Even though I tried to make the first letter look like an M with mirrored flamingos, you can see it’s a little harder to make out what the word is with more letters swapped.
So let’s go back and use the word with the swapped out L and add some other embellishments. We aren’t swapping out letters this time; instead, we’re accessorizing the word we have. I placed the pineapple so that it is behind the last letter. I dotted the “i” with a coconut, and placed a shell and lemon wedge in front of the other letters.
To place an embellishment behind the word, we will stitch it out first. So it will be the first item to stitch out. To have an embellishment in front of a letter, we will stitch it out after the letters are completed. Think of these as layers. The things behind the word are the first layer, the words are the middle layer, and embellishments in front are the last (top) layer. If you’re using a paid version of Embrilliance, you can put in the stitch order and save it. If you’re on your machine, you can load the back embellishments first, the word next, and the top embellishments last to ensure they are layered properly.
The fun thing about these kits is that you’re not limited to just one kit. I’m going to add a couple of designs from the Beach Alphabet Embellishment Kit because I think they will work well together for my design.
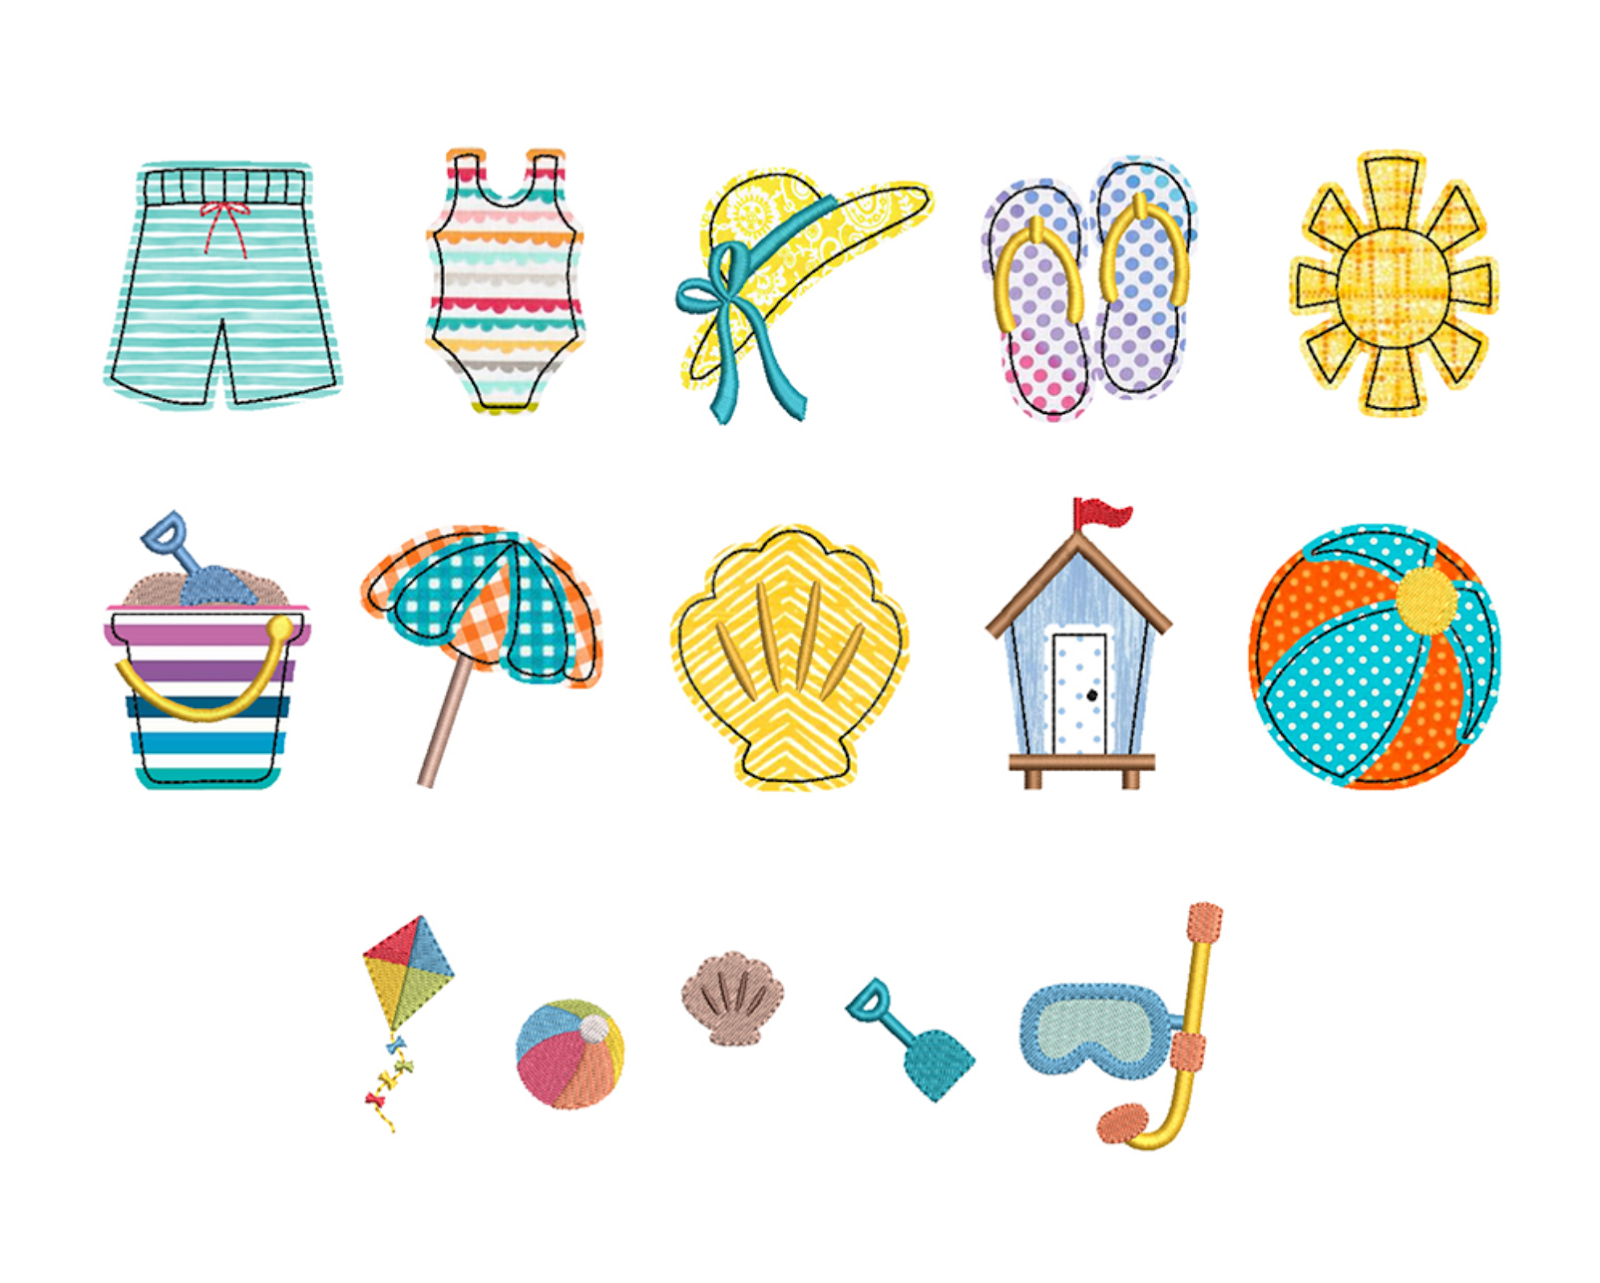
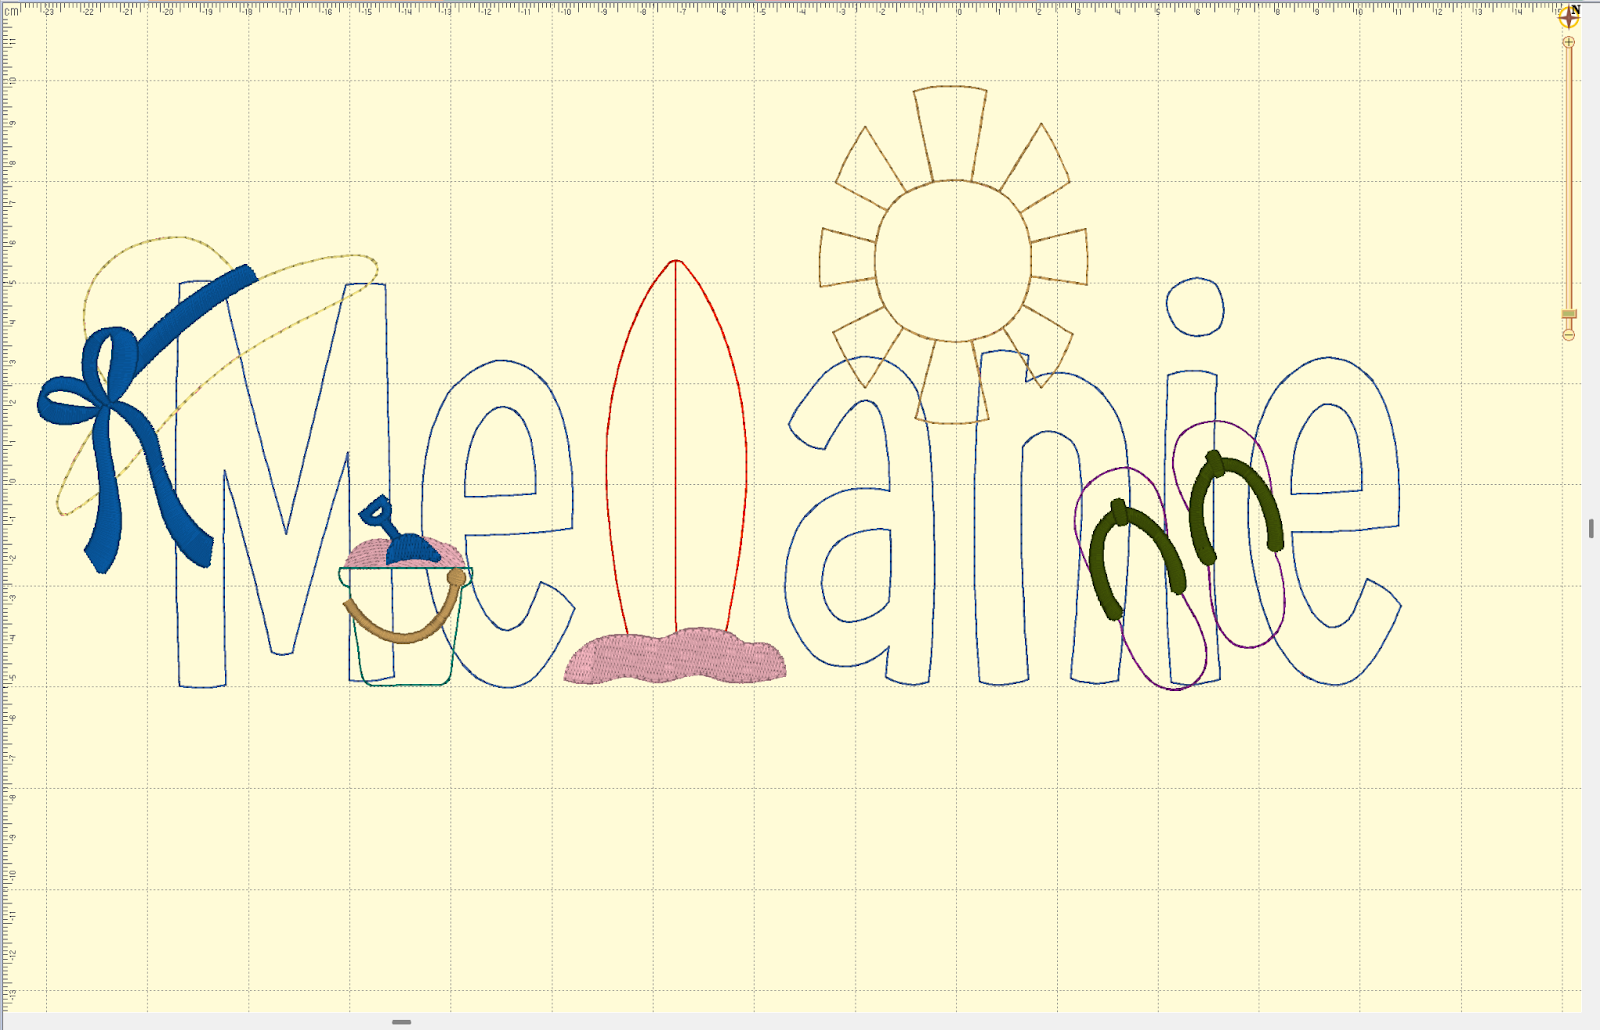
In this example, all the embellishments other than the surf board L come from the Beach Alphabet Embellishment Kit, but they still look great together. I used smaller sizes of some to fit them where I wanted, like the flip-flops and bucket. And I made sure to place the sun behind the letters, but the hat, bucket, and flip-flops are in front of the letters.
Let’s try another design. This time we will use the Emmy Doodle Bean Stitch Applique Alphabet Embroidery Font.

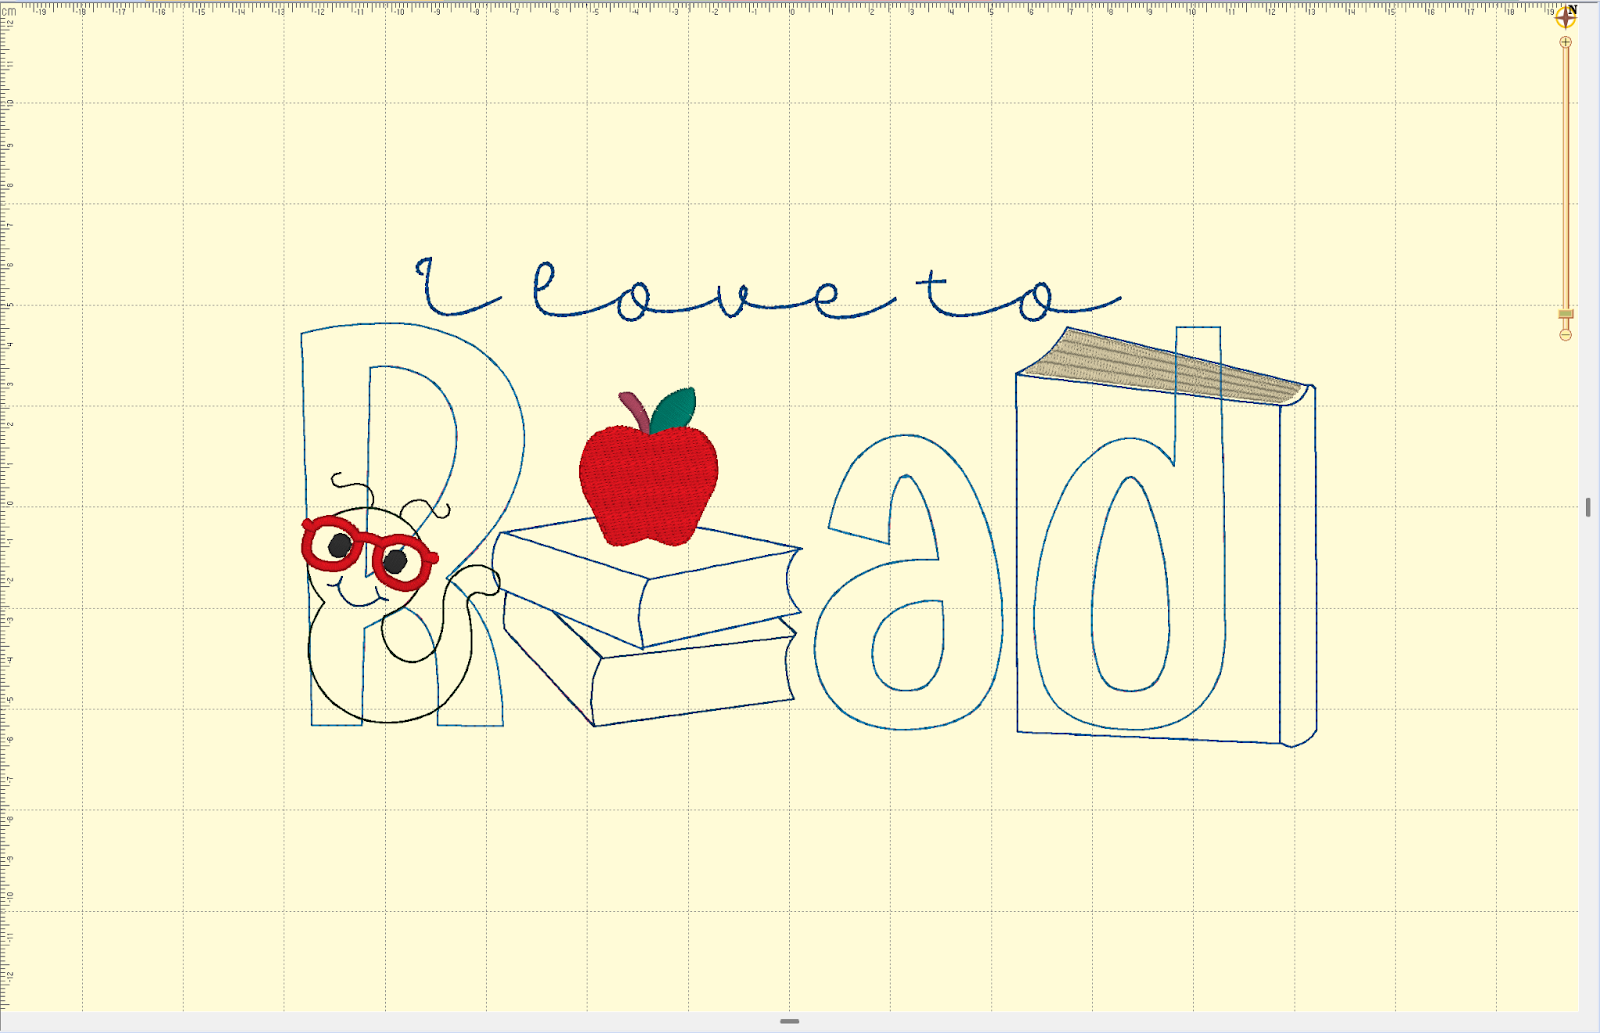
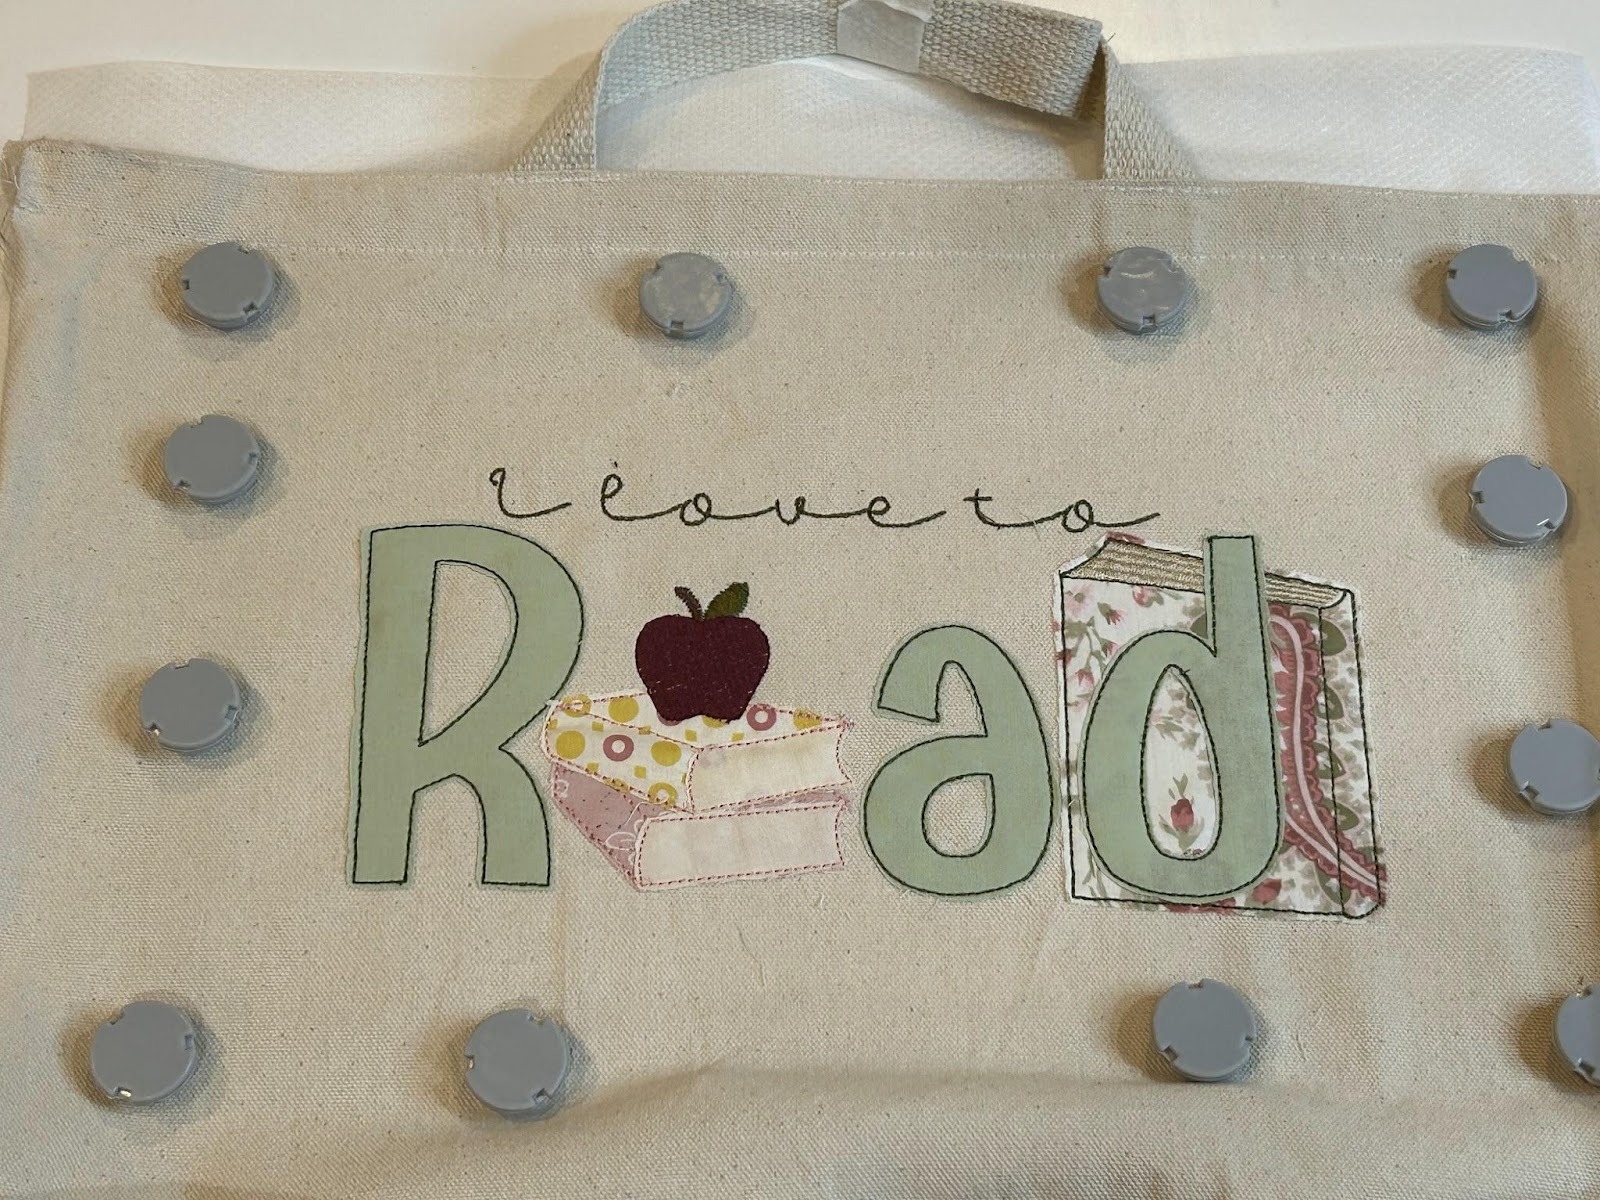
I love to add other fonts and words to my designs. Adding “I love to” in the Best Friend Forever Script Bean Embroidery Font makes this a perfect sentiment for a library bag.

And now using the School Alphabet Embellishment Kit, we will make this a library bag to remember.
I layered the word with one embellishment behind the letters, one in front, and one replacing a letter.
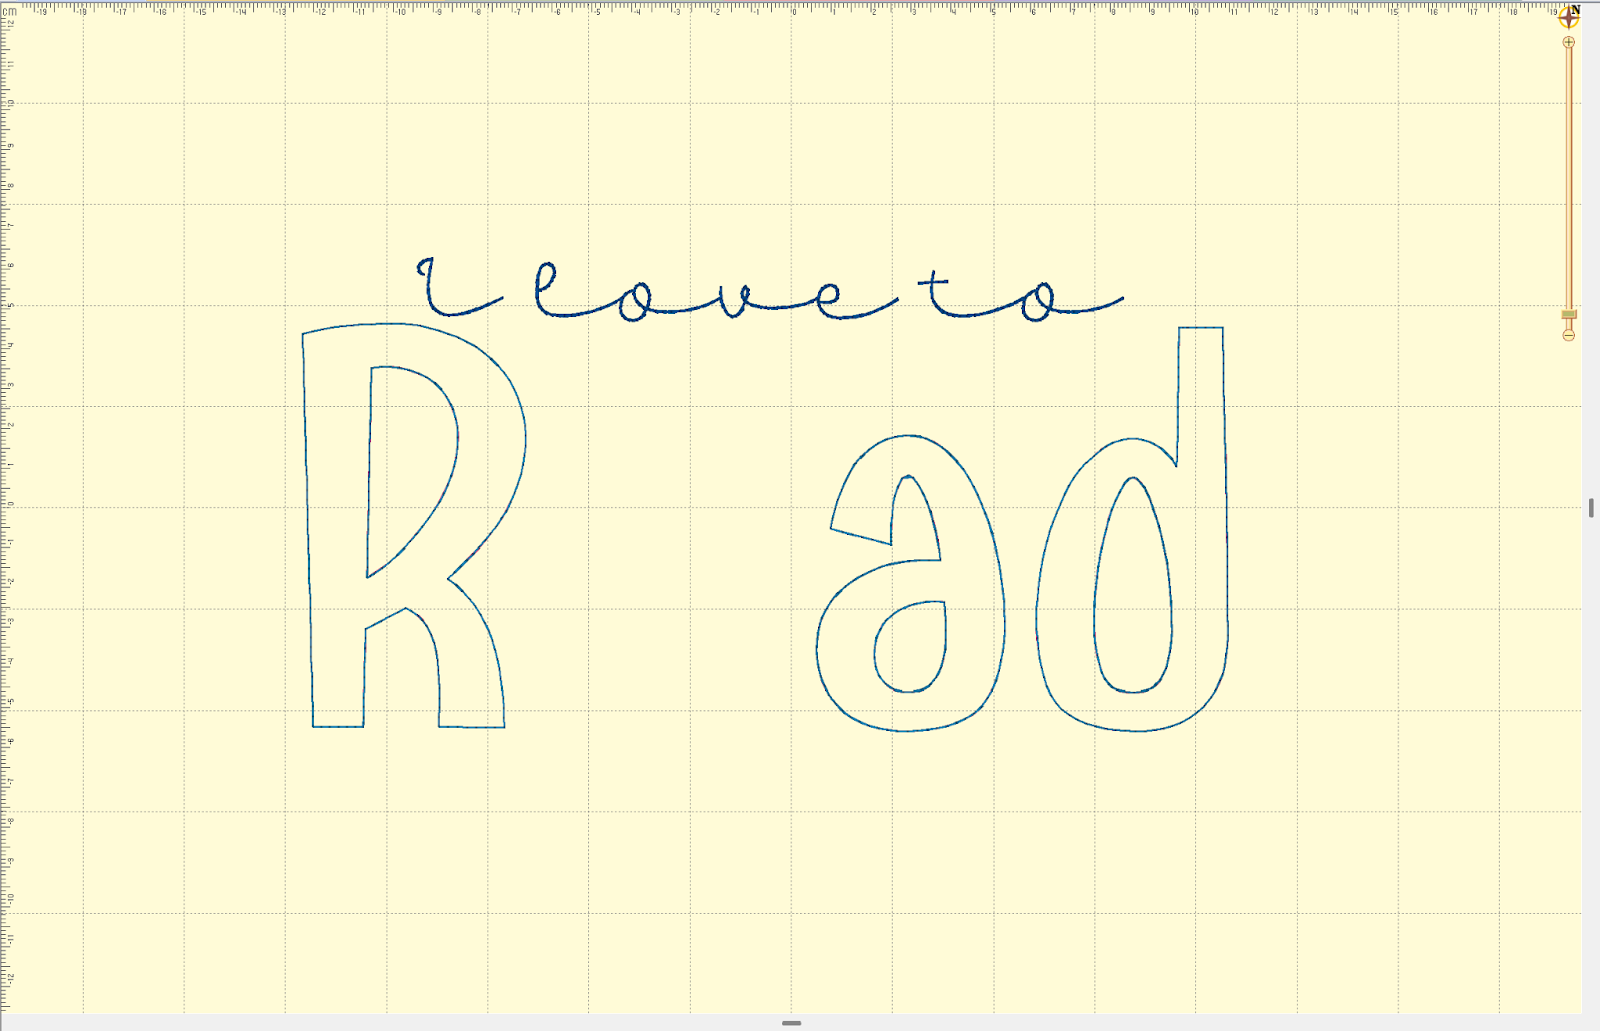
Since the layers are kind of hard to see in Embrilliance, let’s stitch this one out. If you have a paid version of Embrilliance, you can save the stitch file as is to transfer to your machine. If you are using the free version, you can save the letters to transfer to your machine and add the embellishments manually at your machine. By designing first and then removing the embellishments to transfer the letters to your machine you have the perfect spacing for sliding the embellishments right into your design.
Now to stitch my design. I hoop the tear-away stabilizer and my bag. Then I put it in my machine and load the design into my machine.
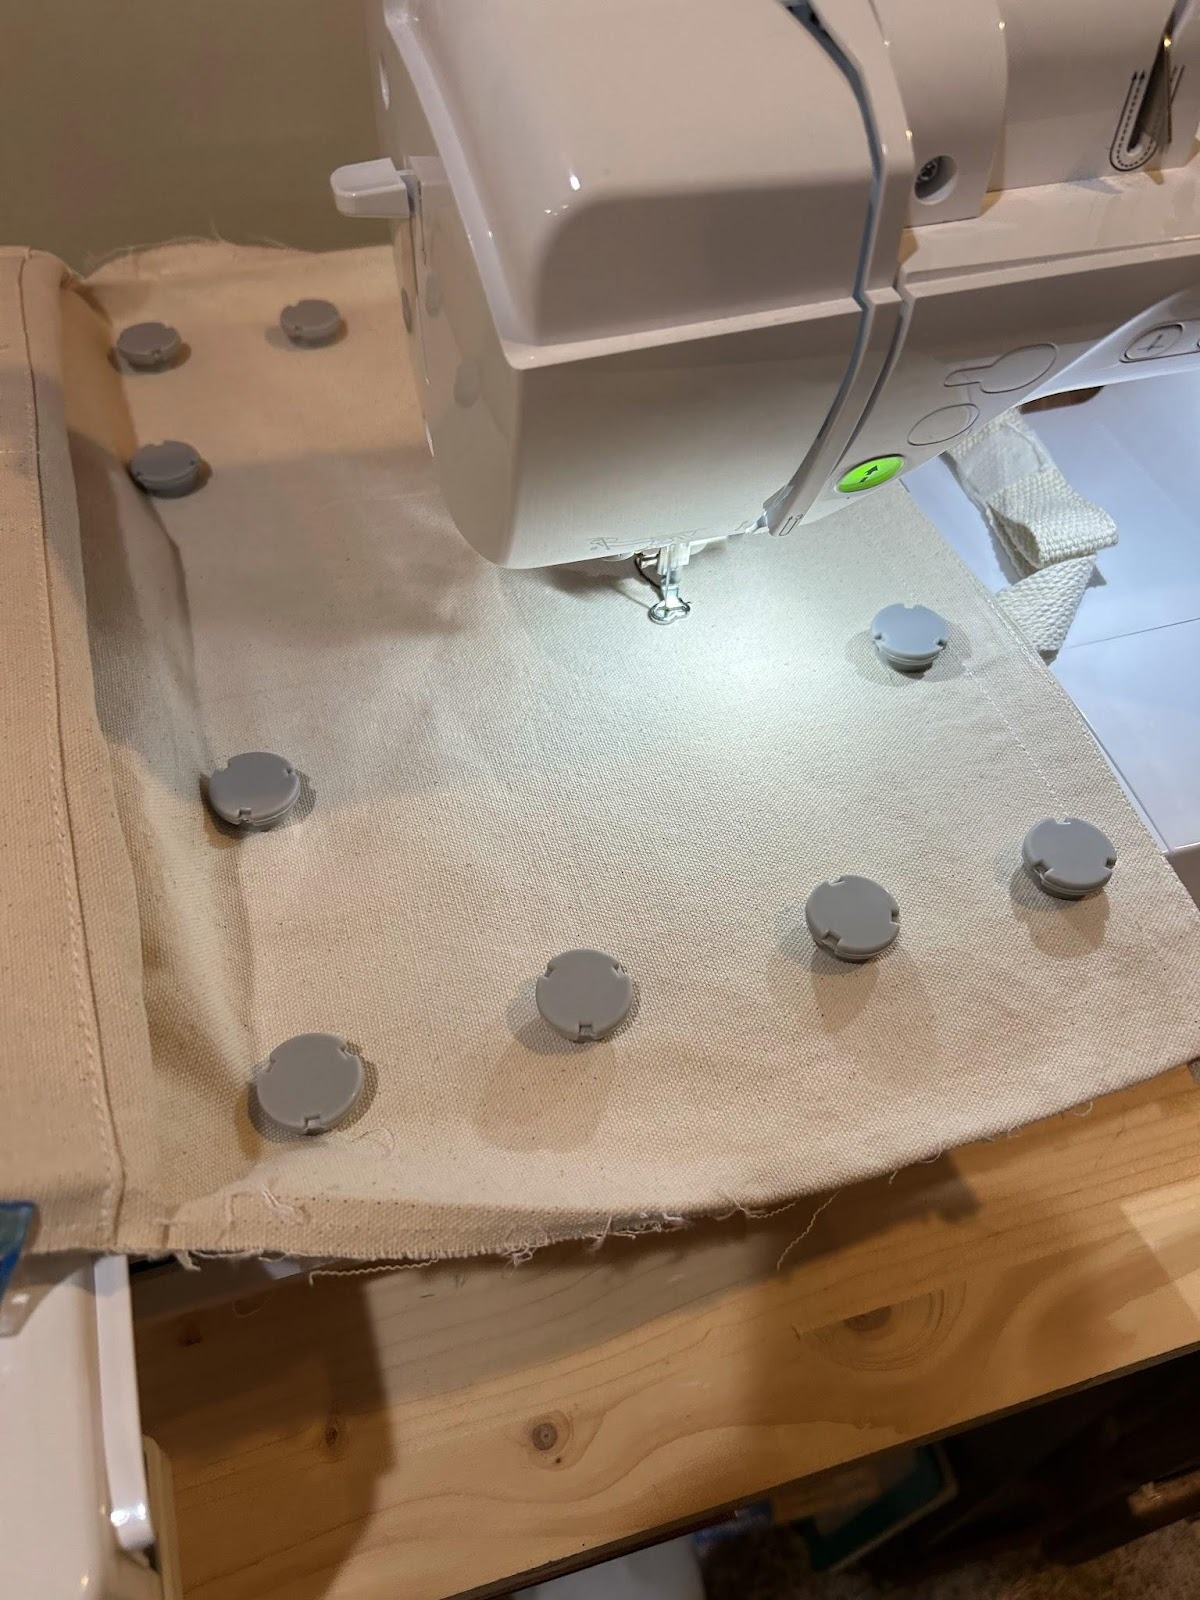
Stitch the first layer of the design first.

Then stitch the middle designs.
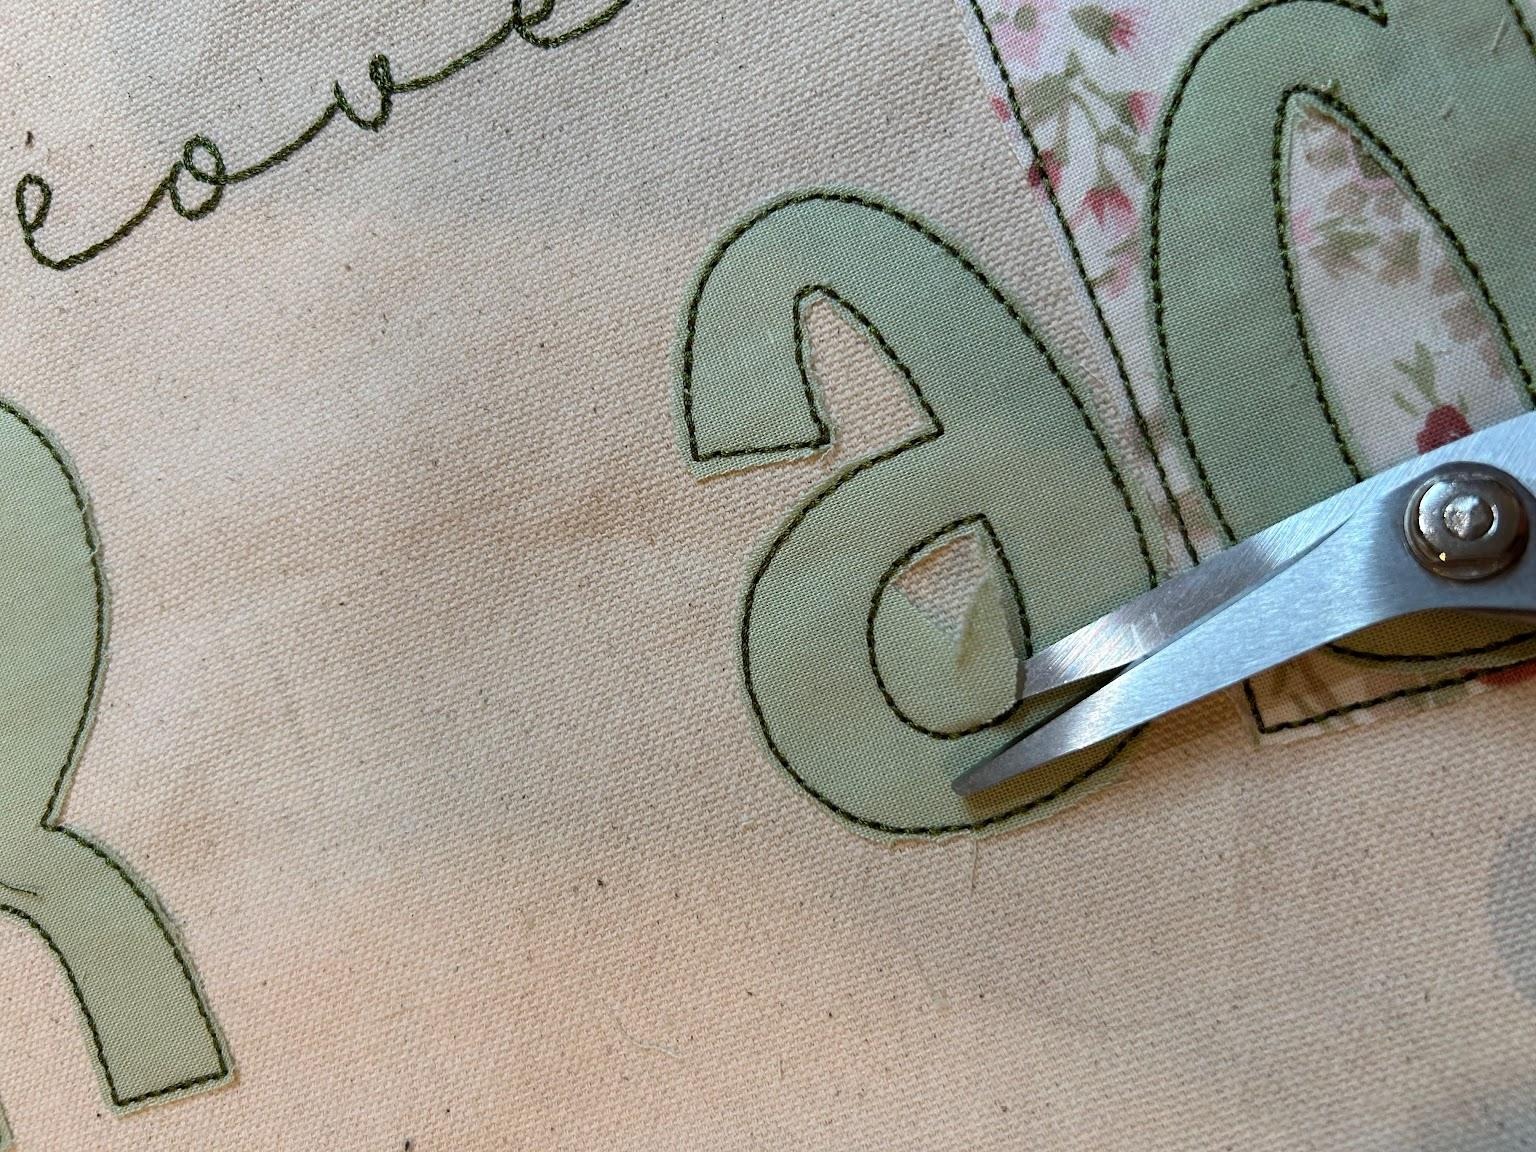
These designs are finished with a bean stitch, so you’ll have a raw edge on the fabric. I clip close to the design and try to keep the amount of fabric showing over the edge consistent all the way around.
And lastly, stitch the top designs.
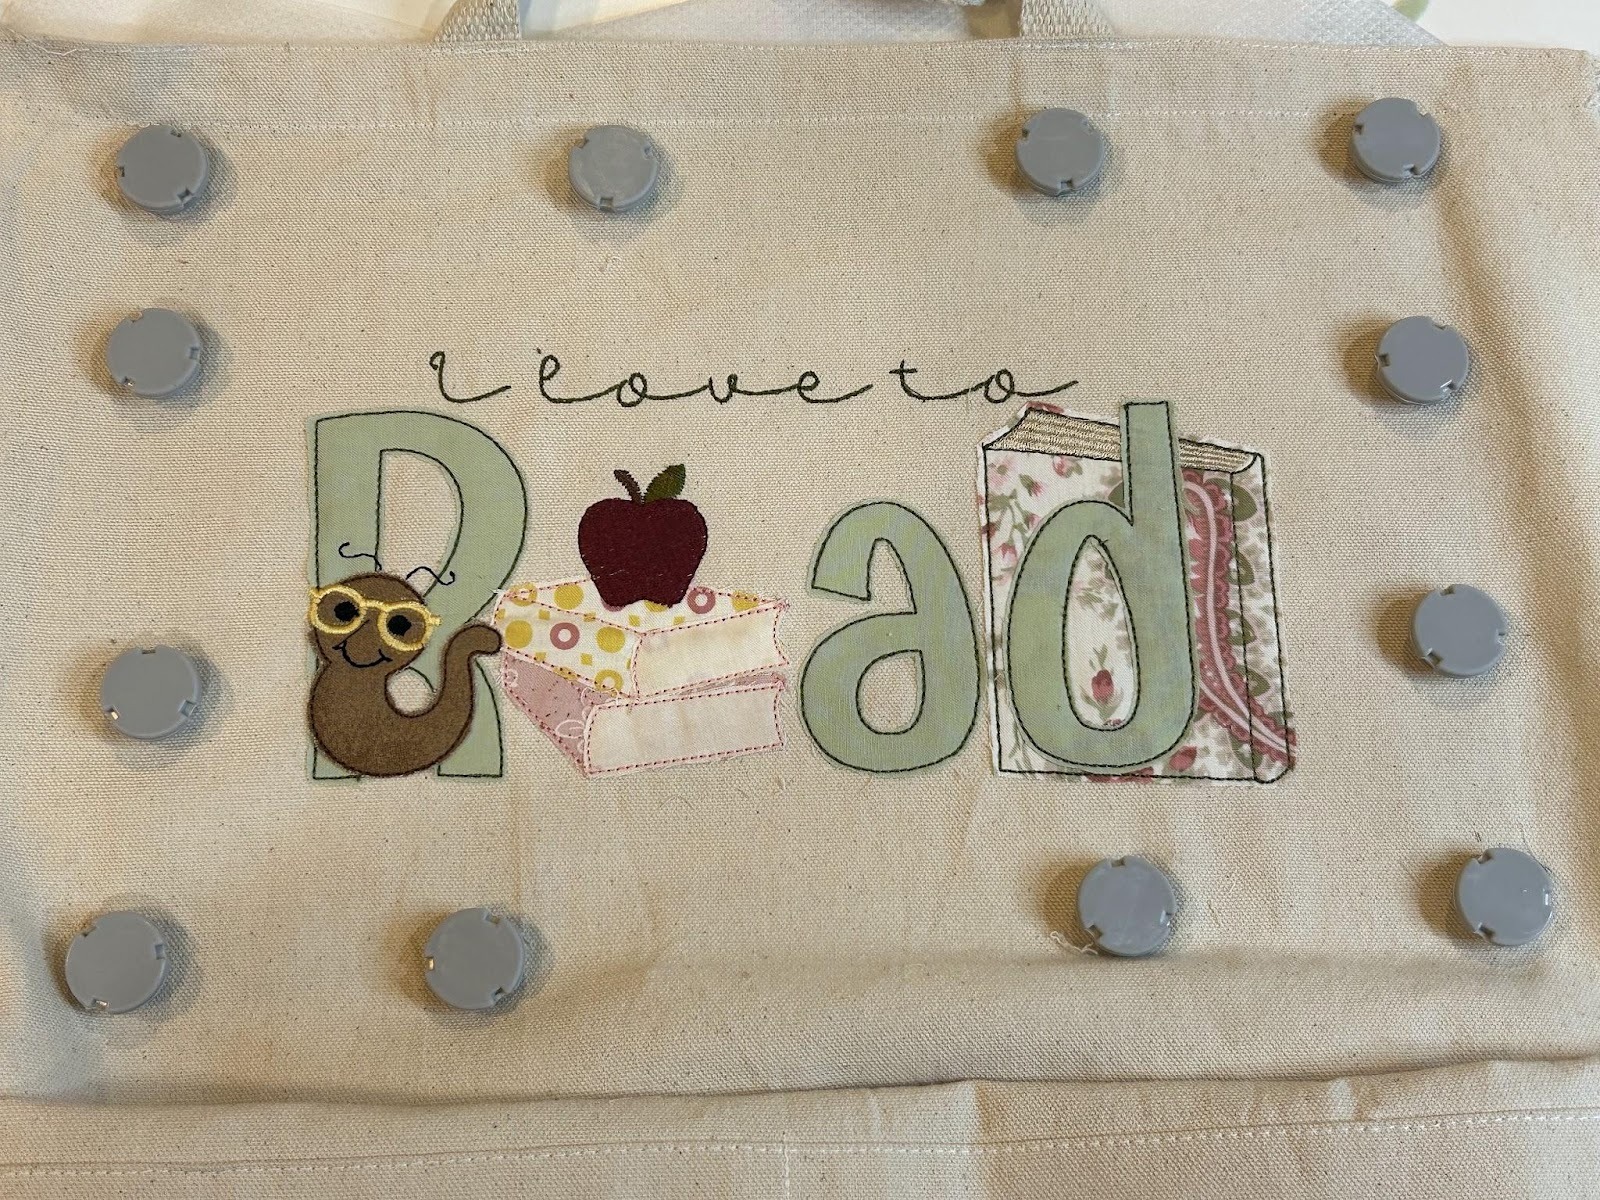
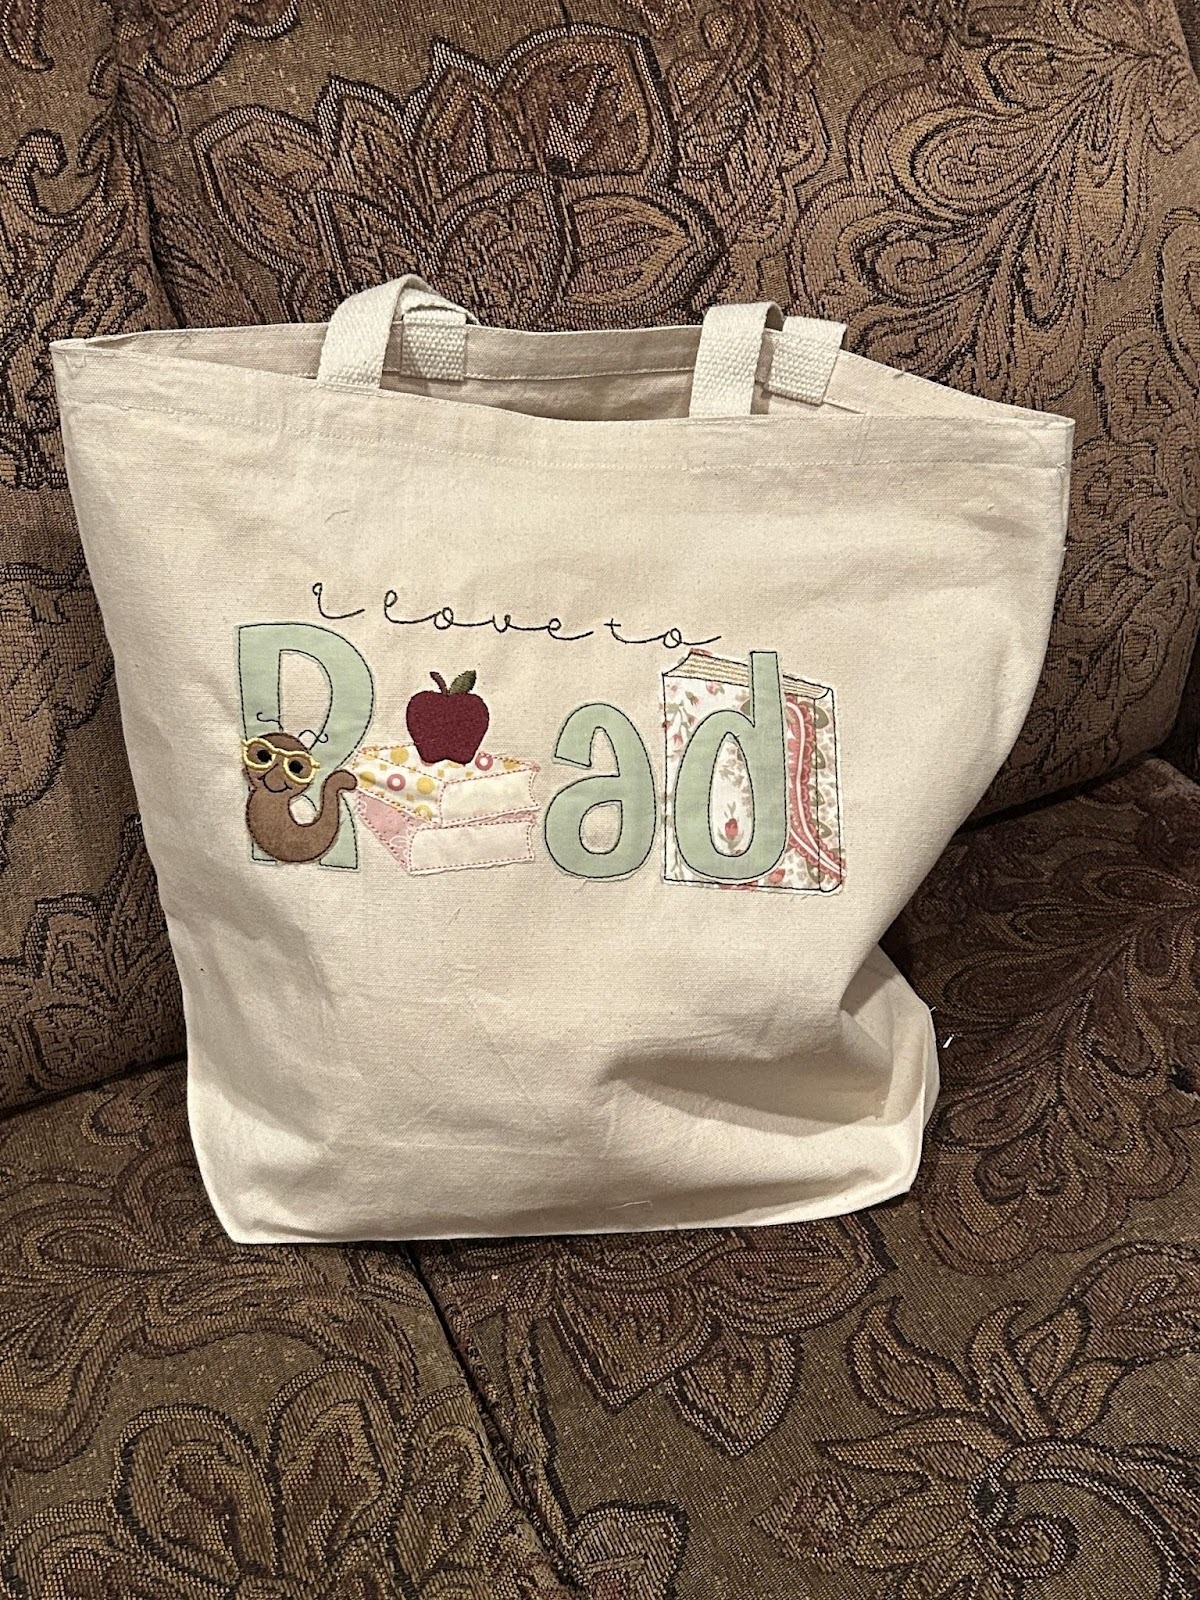
Now you have a nice embellished design that will be one of a kind!
I love all these kits and the almost infinite possibilities of arranging them! Please share yours with us in the Designs by JuJu Embroidery Blessings Facebook group, or anywhere on social media using the hashtag #designsbyjuju. Your ideas will help inspire all of us on our next project!
