Toggle Nav
 Inspire.
Create.
Stitch.
Inspire.
Create.
Stitch.
Search
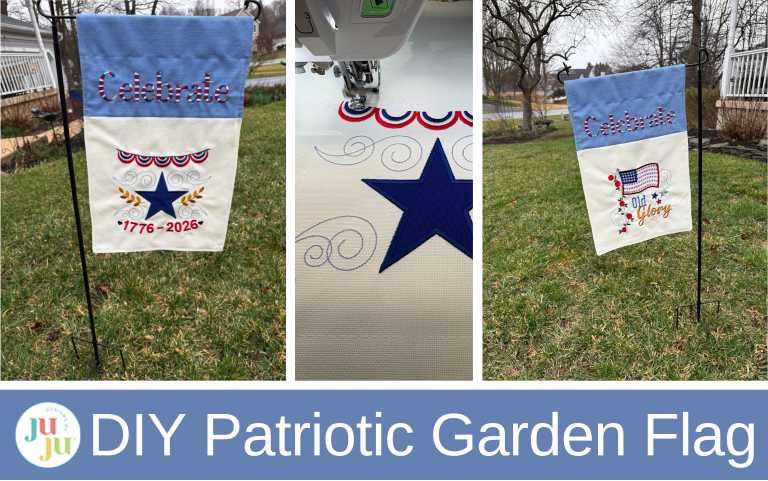
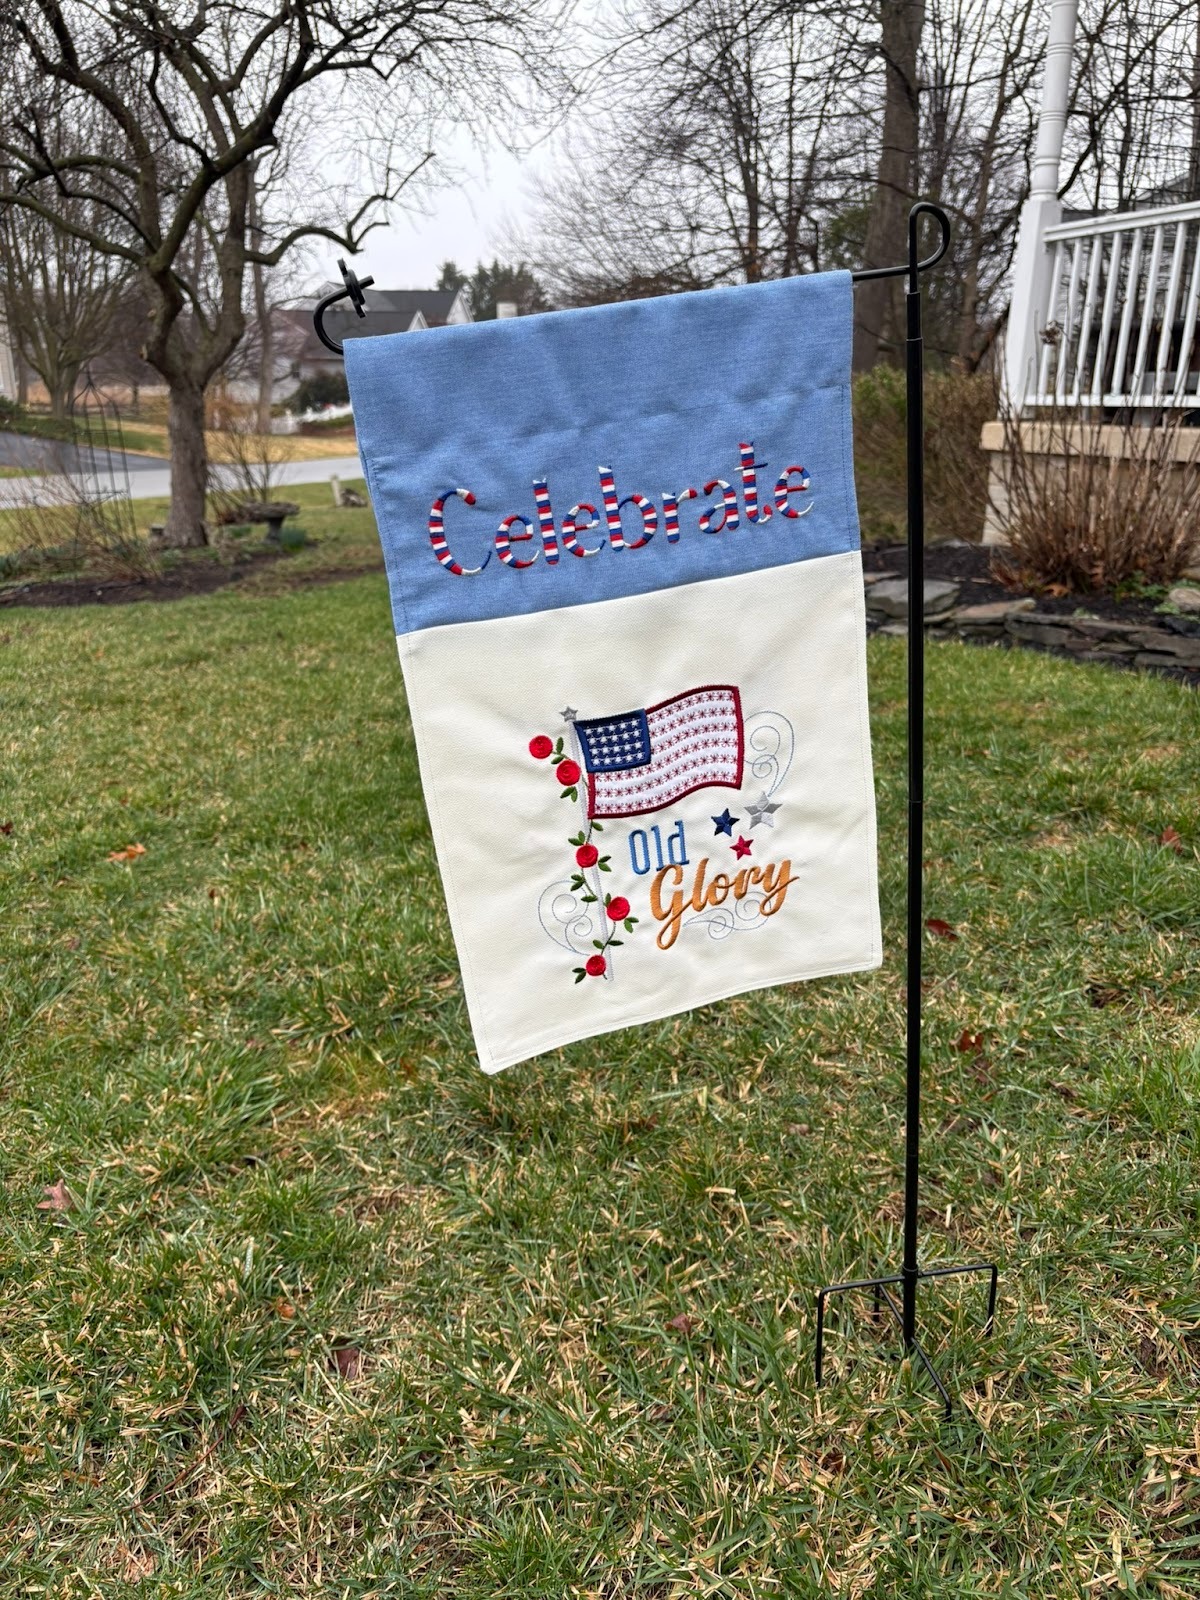
Show off your pride in our country’s 250th birthday and add some red, white, and blue to your garden with a patriotic garden flag!
Finished size: 12” x 18”
Check out the DBJJ team’s favorite supplies in the Designs by JuJu Amazon store. For stabilizers and batting, Designs by JuJu+ has everything you need.
Garden flags are meant to adorn our gardens in all sorts of weather. I have drawers full of 100% cotton and other fabric scraps that are excellent for most of the applique embroidery projects I make, but I don’t have a lot of outdoor fabrics and I didn’t want to buy yardage for small applique pieces. Because of that, I chose two designs from the Star Spangled Stitches collection that didn’t require a lot of applique: the Star 1776 from Star Spangled Stitches Set 2 and Old Glory from Star Spangled Stitches Set 4.
I referred to the DIY Embroidered Garden Flags Step-by-Step Tutorial for Custom Outdoor Decor blog post to help me get my project off on the right foot. Like the flags in that blog post, my flag will finish out at 12” x 18”. I’m also making mine double-sided so it can be enjoyed from both the street and the house.
If you want to make your flag exactly as I made mine:
I chose the 8” x 8” Star 1776 design from Set 2 for the first side of the flag. With a finished flag width of 12”, this leaves about a 2” space on each side of the design. I used Embrilliance to delete the first three steps of the design—the placement and tack-down lines—because I’m not making a quilt block. If you aren’t able to delete the steps, you can skip them during your stitch-out. Basting boxes help prevent puckering, so I almost always add them to any design I’m embroidering. I used Designs by JuJu+ tearEZ Tear-Away Stabilizer in my hoop and floated the fabric with 505® Temporary Adhesive.

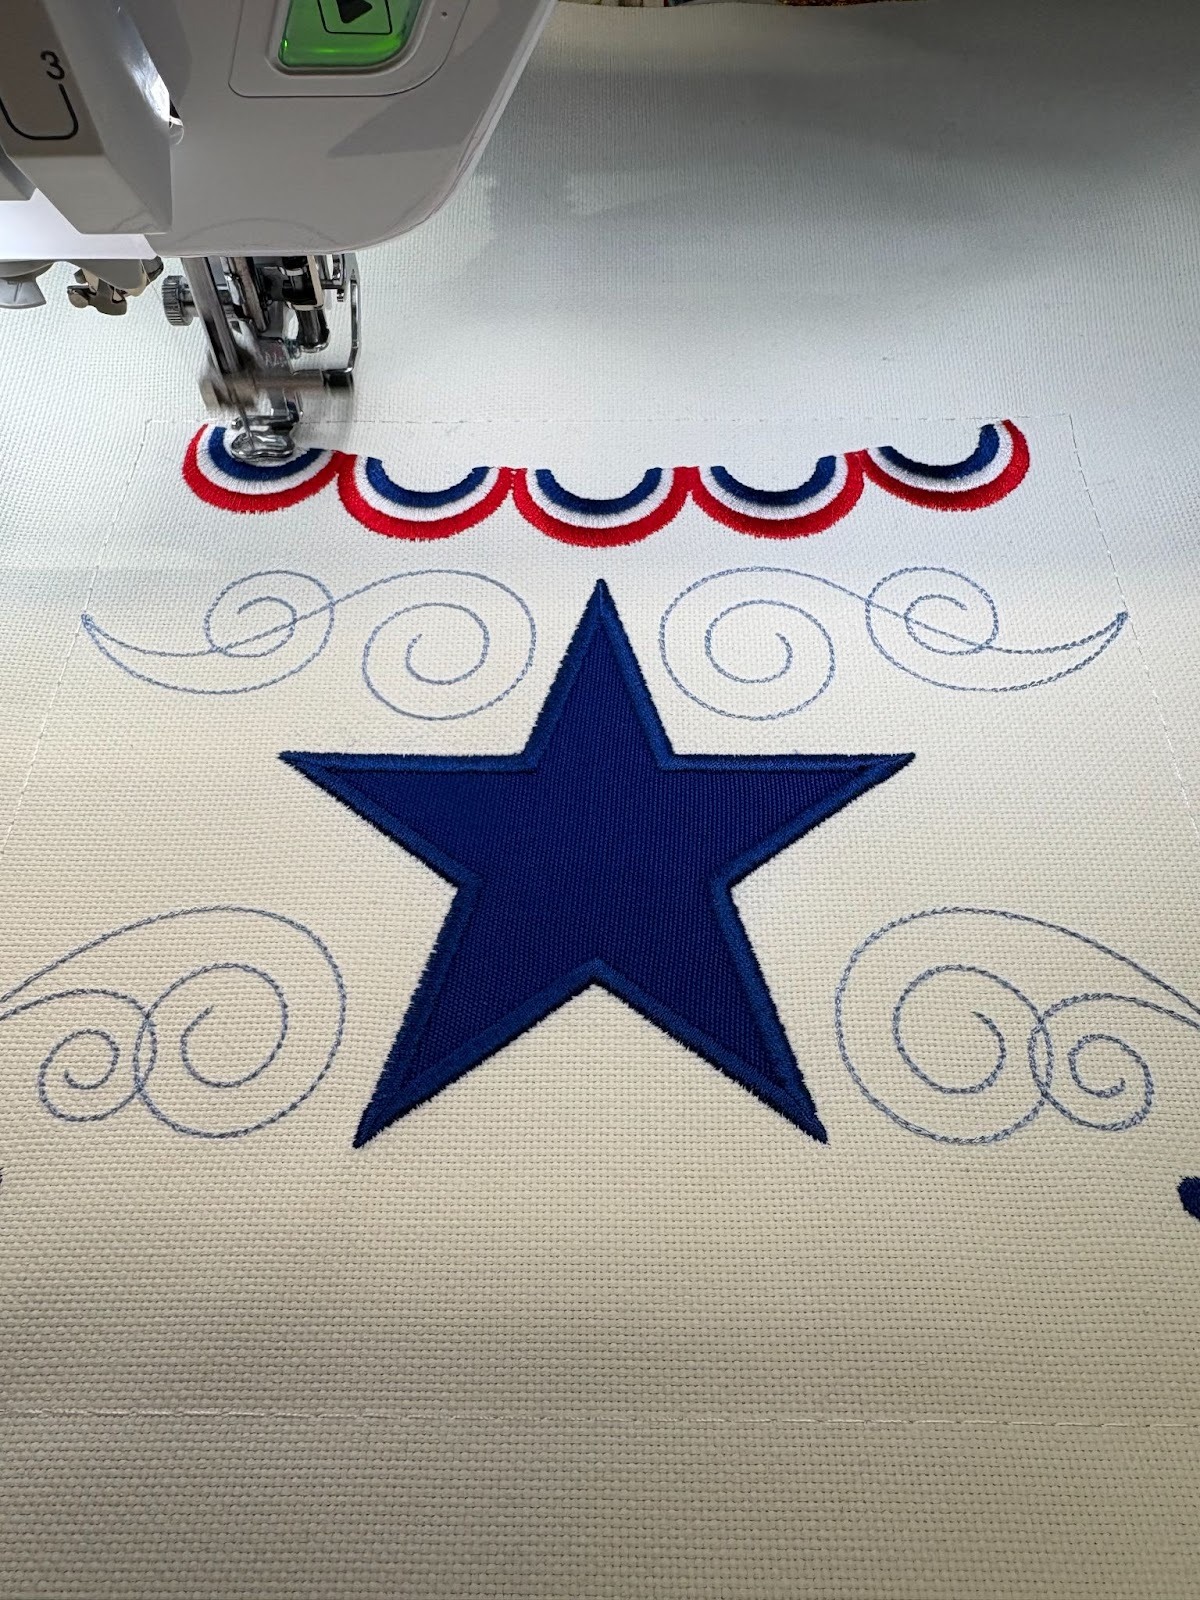
I stitched out the other side of the flag the same way as the first, using the Old Glory design from Set 4. Some of my color choices for both sides were made keeping in mind that the flag will be viewed from a distance compared to a pillow that you would see up close. I didn’t want the swirls and flagpole colors to “disappear,” so I made the flagpole a dark silver and the swirls a darker blue so they would still be seen from farther away.

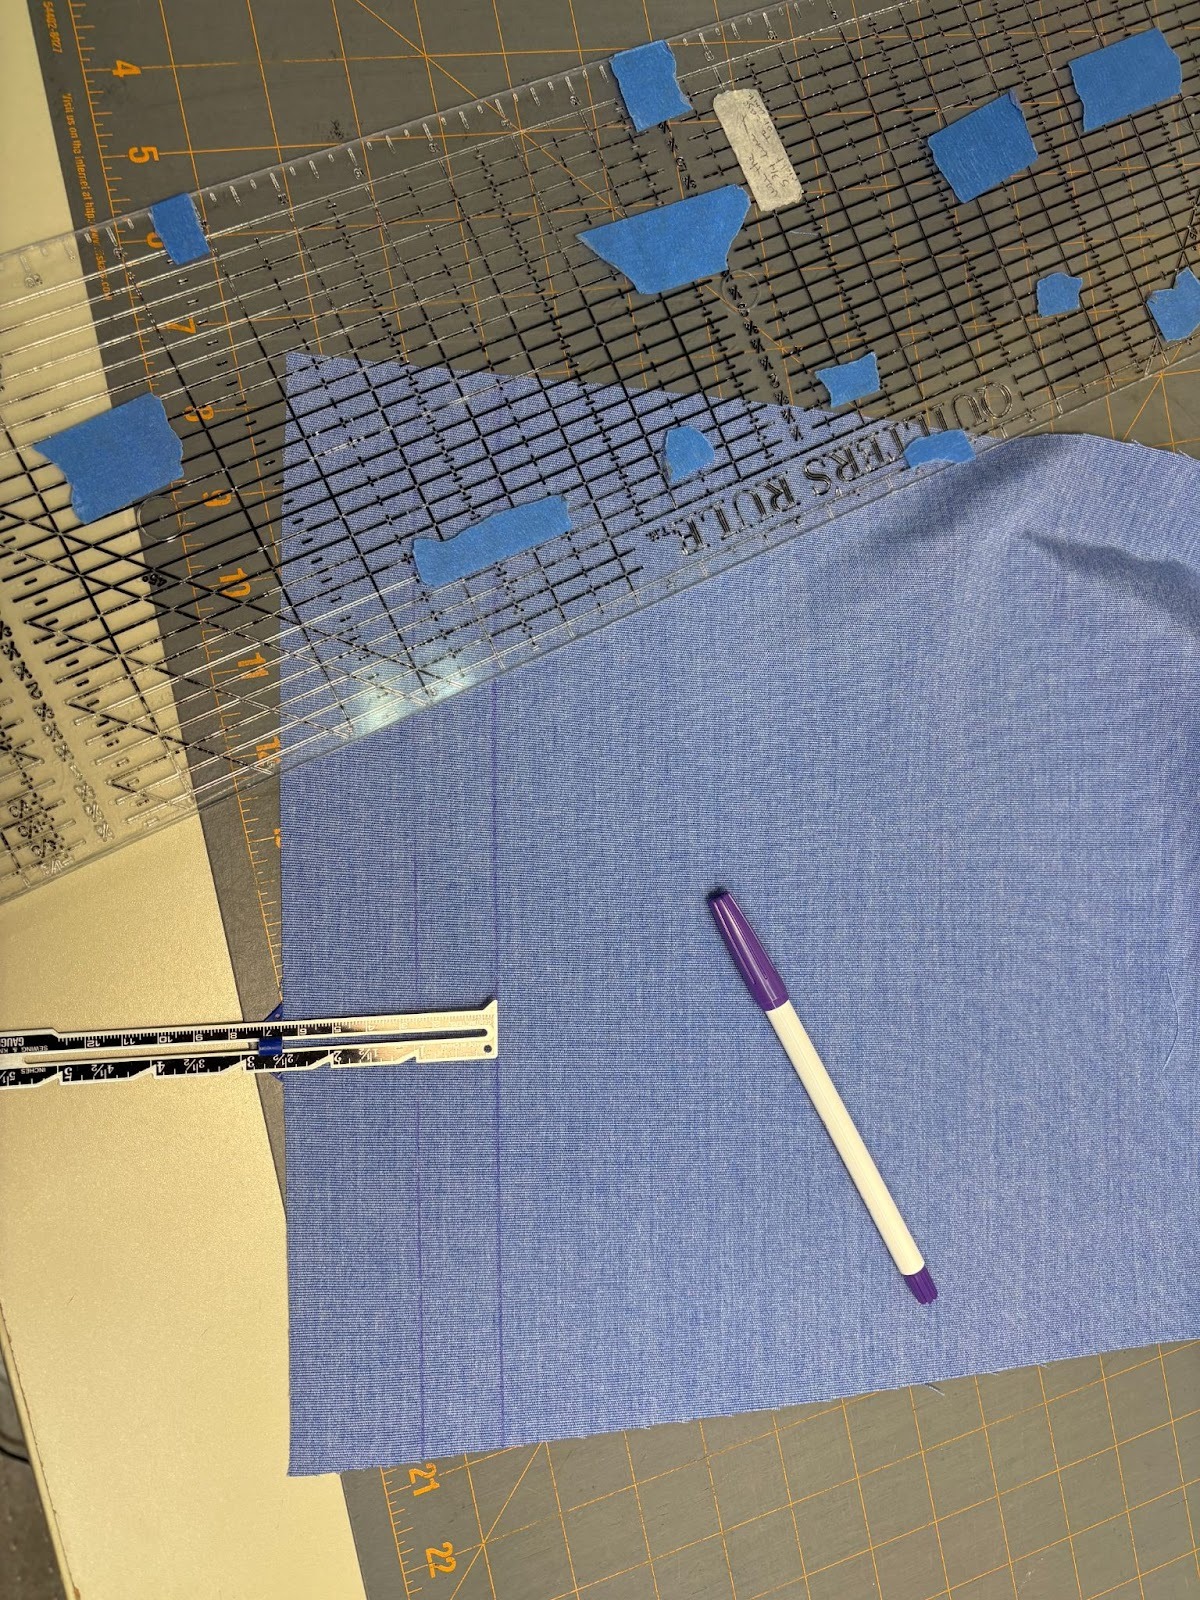
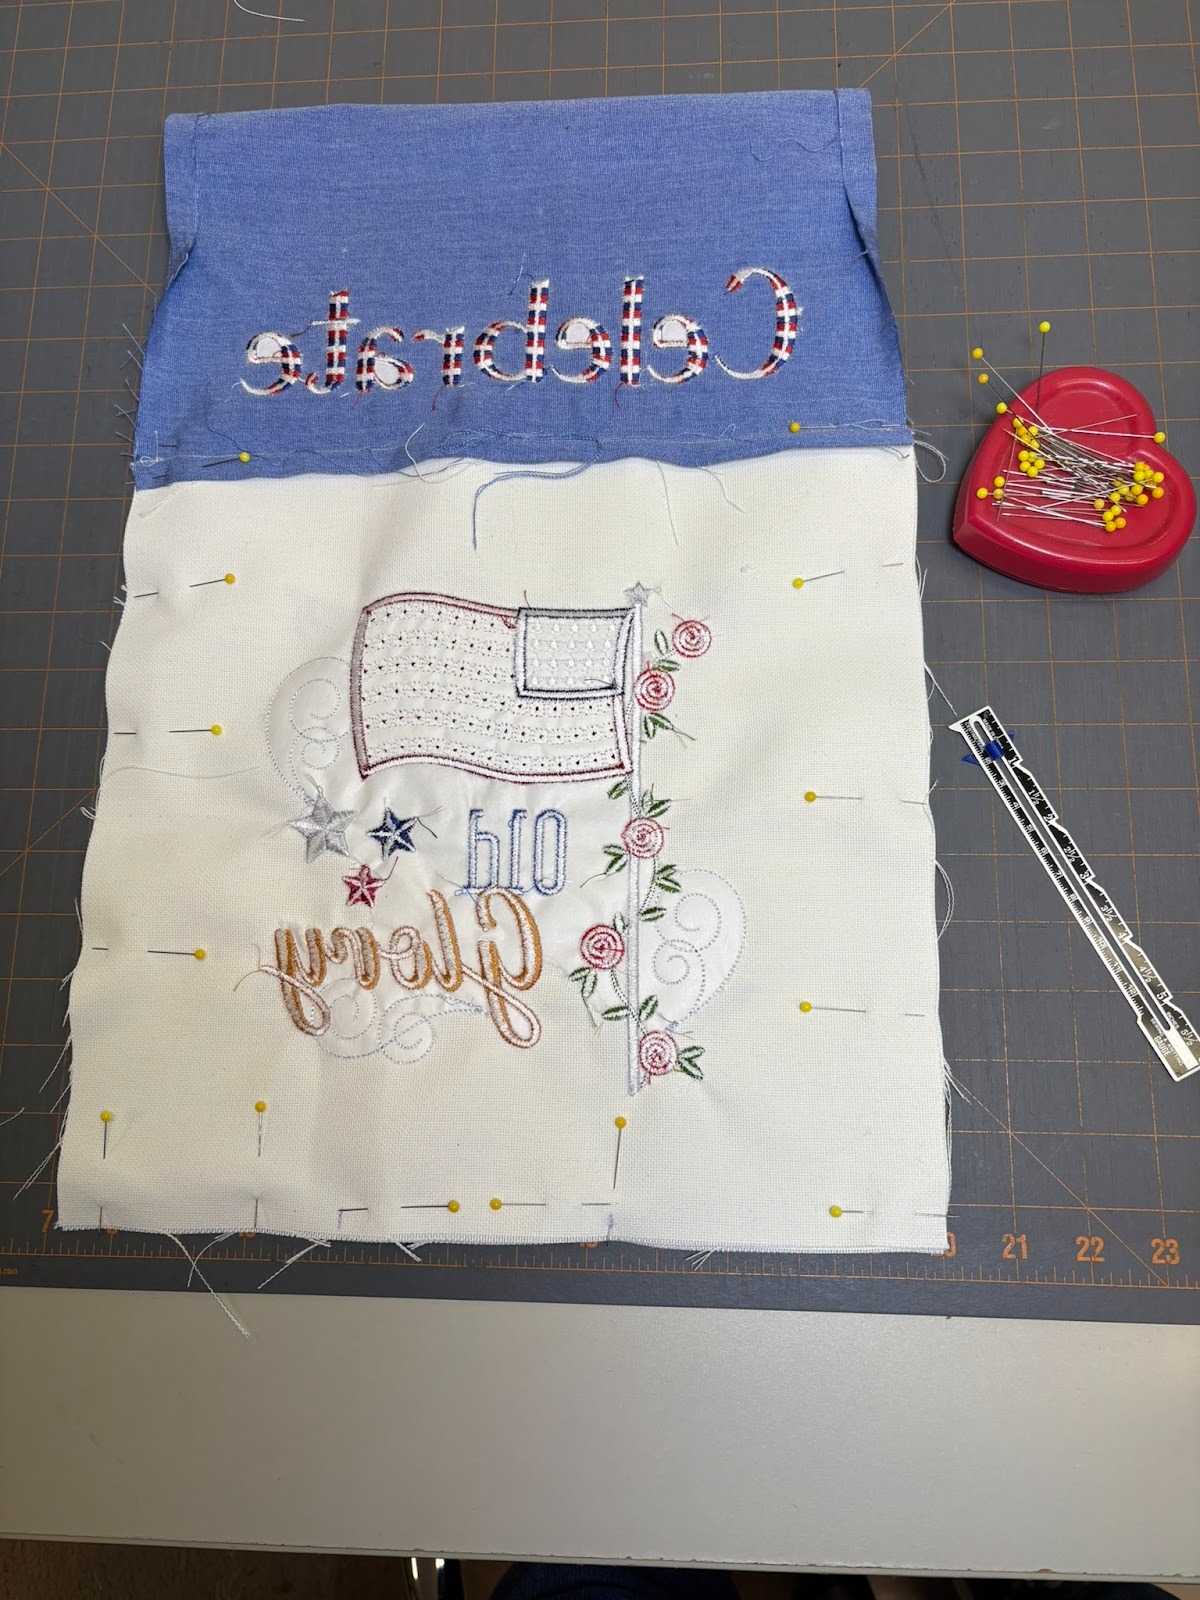
The top body of my flag is made from one piece of fabric, 13” wide x 14” long. I wanted to embroider Celebrate on each short end. I marked 1½” from the bottom of both short sides. That gives me the ½” seam allowance needed plus leaves a 1” space below the word Celebrate. I marked the 1½” line with my disappearing marker, which was useful for checking placement, and embroidered the words using the variegated red, white, and blue thread.
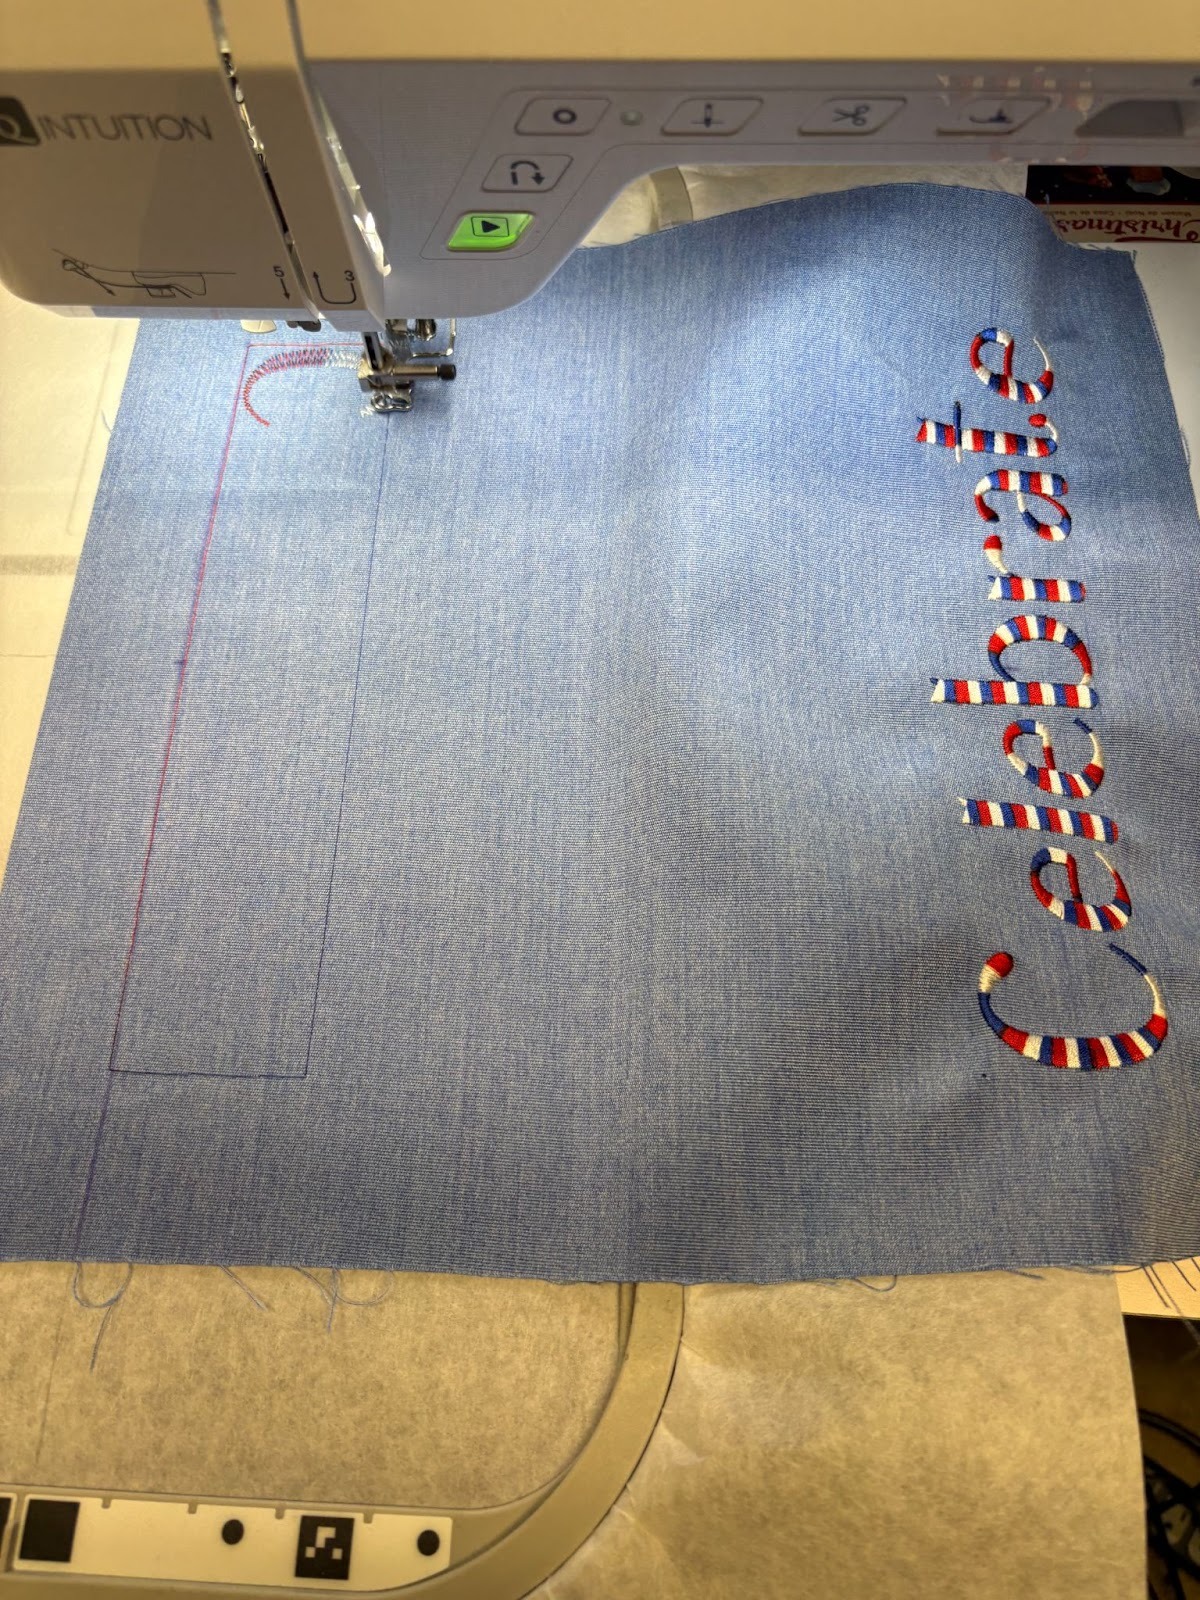
After Celebrate was embroidered on both ends, I sewed the designs to the upper body. Make sure you check orientation before you sew. I’m glad I did because one of my designs was upside down.

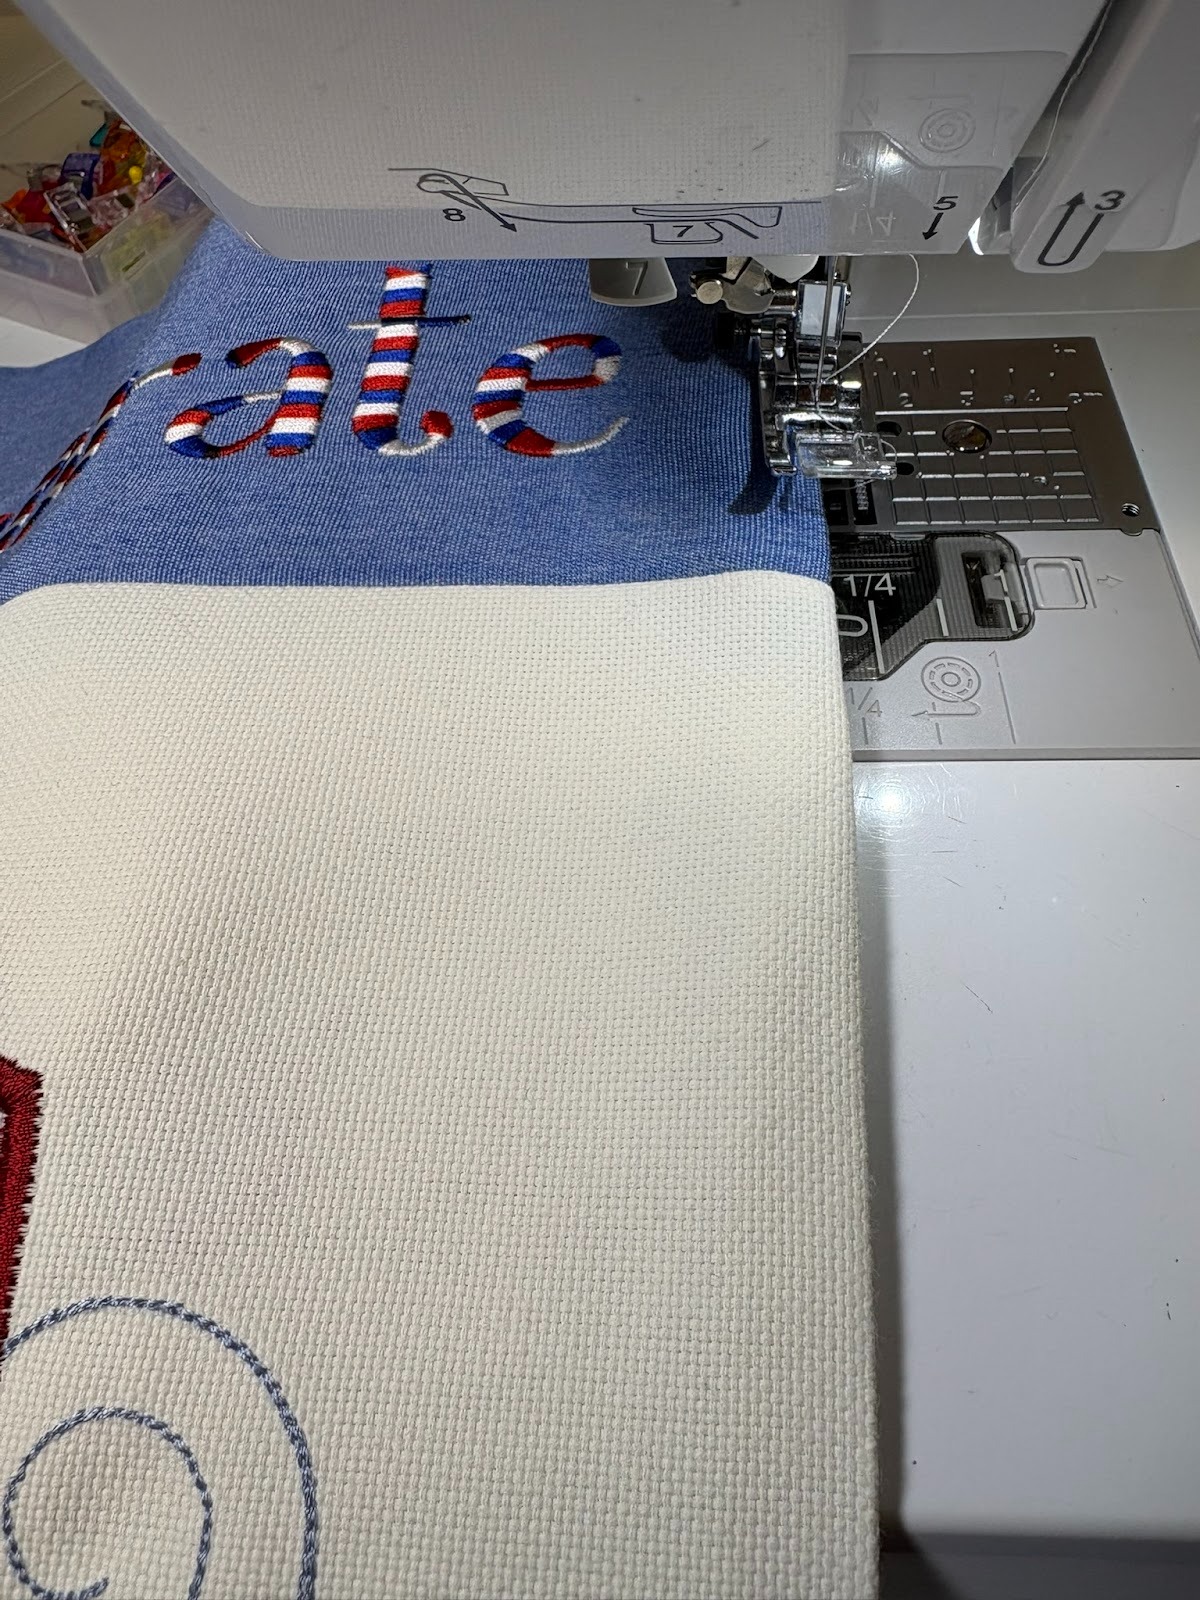
I pressed the seams to one side, pressing the seam on one end toward the word Celebrate and the other seam toward the embroidered design. This will allow the two seams to butt up to each other during sewing and will make it go under your sewing machine foot more smoothly.
Next, I needed to prep the casing for the flag, which I’m going to make 2½”. I marked the center of each side of the upper body of the flag, and then marked out 2½” to each side of the center marking. In other words, I now had 5” measurements that were centered on each side of the top.Take a look at the photos below to see the marks the pens are pointing to. I then used Steam-A-Seam2® between the marks and folded over a ½” seam on each side and pressed.


Next, I folded the flag with right sides together, nesting the seams where the lower and upper parts of the flag are joined. I marked a generous area to leave open on the bottom for turning. Starting ½” below the top of the flag, right below the area that has the Steam-A-Seam2, I sewed a ½” seam allowance, stopping at the point I marked for turning. I then did the same on the other side of the flag.
I trimmed my two bottom corners, turned the flag right side out, and pushed the corners out. The corners looked great, but then . . .
Unfortunately, the fabric at the opening completely frayed. While I’d been making the flag the material wasn’t fraying badly, but now I didn’t have enough fabric to sew the opening closed. I had to turn the flag back to the wrong side out, restitch a new seam allowance at the bottom, and retrim the corners. The corners were bulky once I turned it right side out and pushed them back out. Bummer!
I have plenty of this outdoor fabric left—more flags in my future—so I will run a line of straight stitching around the edges of pieces I cut in future projects.
The next step was giving the flag a good press. The seams were tending to roll in, so I had water at hand to dampen my fingers and grip the fabric better. Once everything looked good, I needed to sew the line for the casing. I wanted the casing to be 2½”, but my machine doesn’t have a marking that far out. So I measured and put down a strip of painter’s tape to use as my guideline and stitched the casing line.

I then topstitched along the two sides and bottom of the flag, matching the thread to the upper body and then the bottom body.
Because the opening area had been fraying, I ran a second line of topstitching in between the edge and the original topstitching.

My flag is ready to wave in celebration of our country’s 250th birthday! Right now it’s a great spot of color in my garden that’s just waking up for spring. I hope to see your garden flags and projects made with our Star Spangled Stitches designs!

Please be sure to share your garden flags in the Designs by JuJu Embroidery Blessings Facebook Group, or use the hashtag #designsbyjuju anywhere on social media. We all love to see what you create!