Toggle Nav
 Inspire.
Create.
Stitch.
Inspire.
Create.
Stitch.
Search
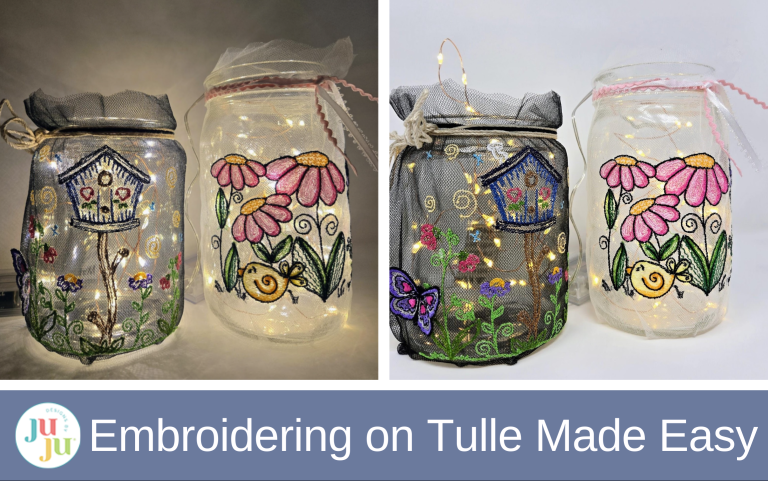
Tulle + fairy lights = pure embroidered magic!
Yes, you really can embroider on tulle—and it’s easier than you might think! In this fun DIY project, we’re stitching delicate sketch designs onto soft tulle and wrapping them around glass jars to create glowing, ambient light décor. With a little sticky-back wash-away stabilizer, your favorite DBJJ designs, and a strand of battery-operated fairy lights, you can transform simple jars into something truly special. The light shining through the airy embroidery gives such a beautiful effect, and the finished jars are lightweight, versatile, and oh-so-pretty displayed anywhere in your home.
Be sure to check out the DBJJ Amazon store for our favorite tools and products.
Embroidering on tulle is fun, but here are a few tips to make it easier:
There are also some benefits to using tulle:
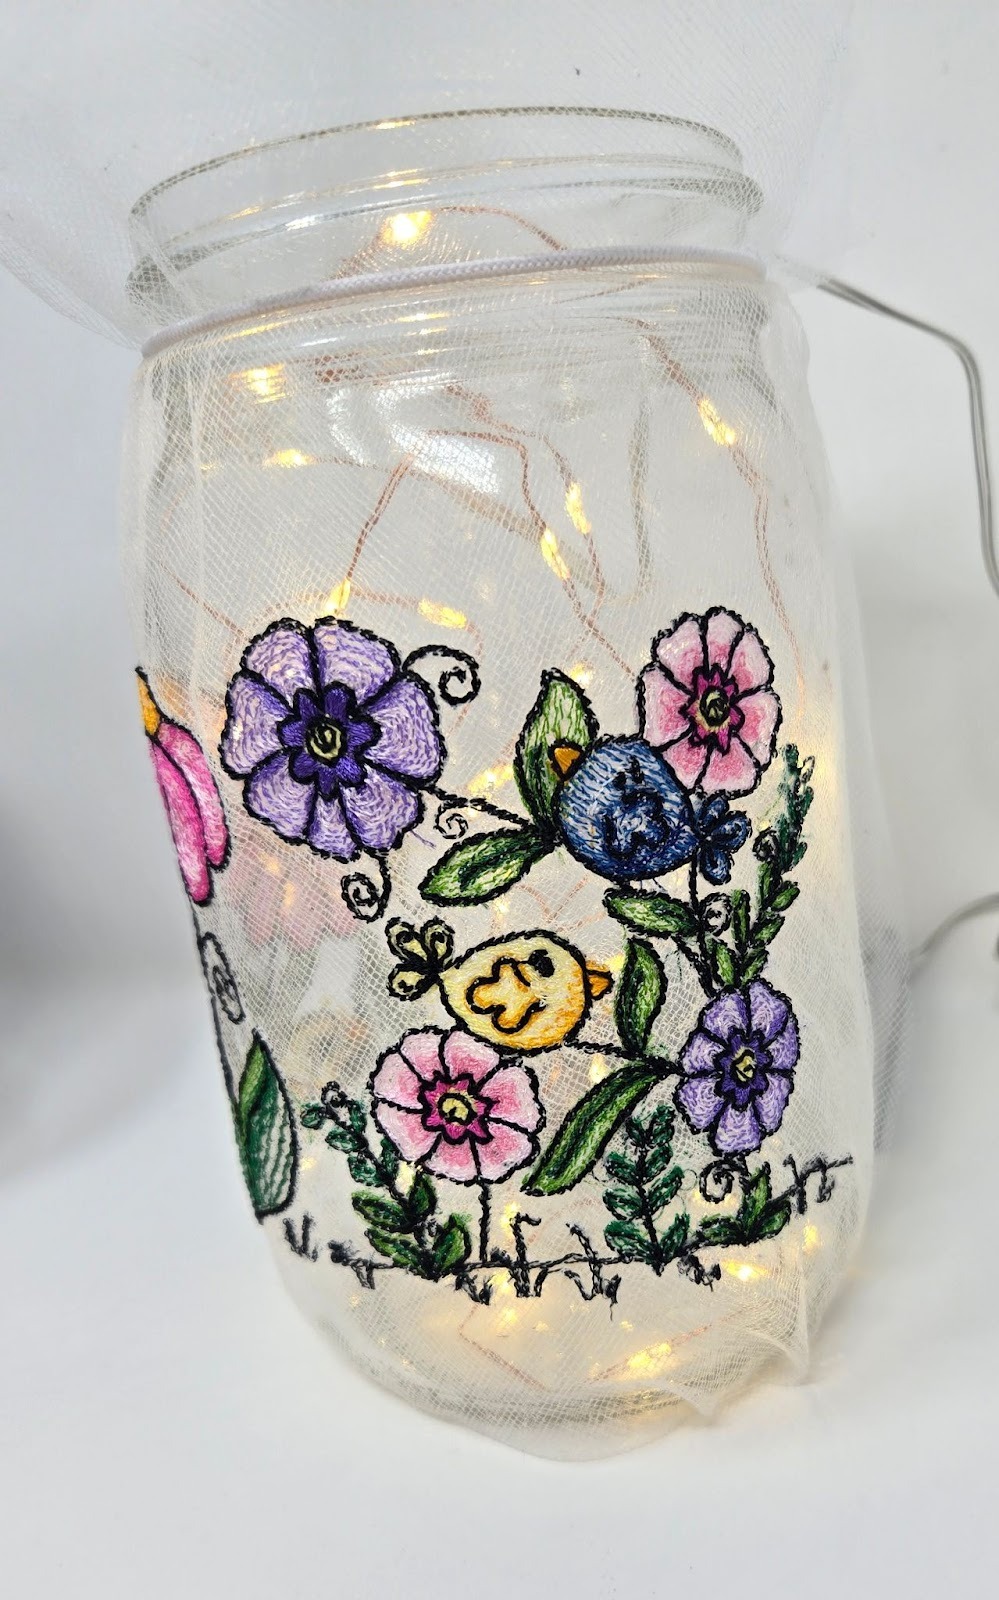
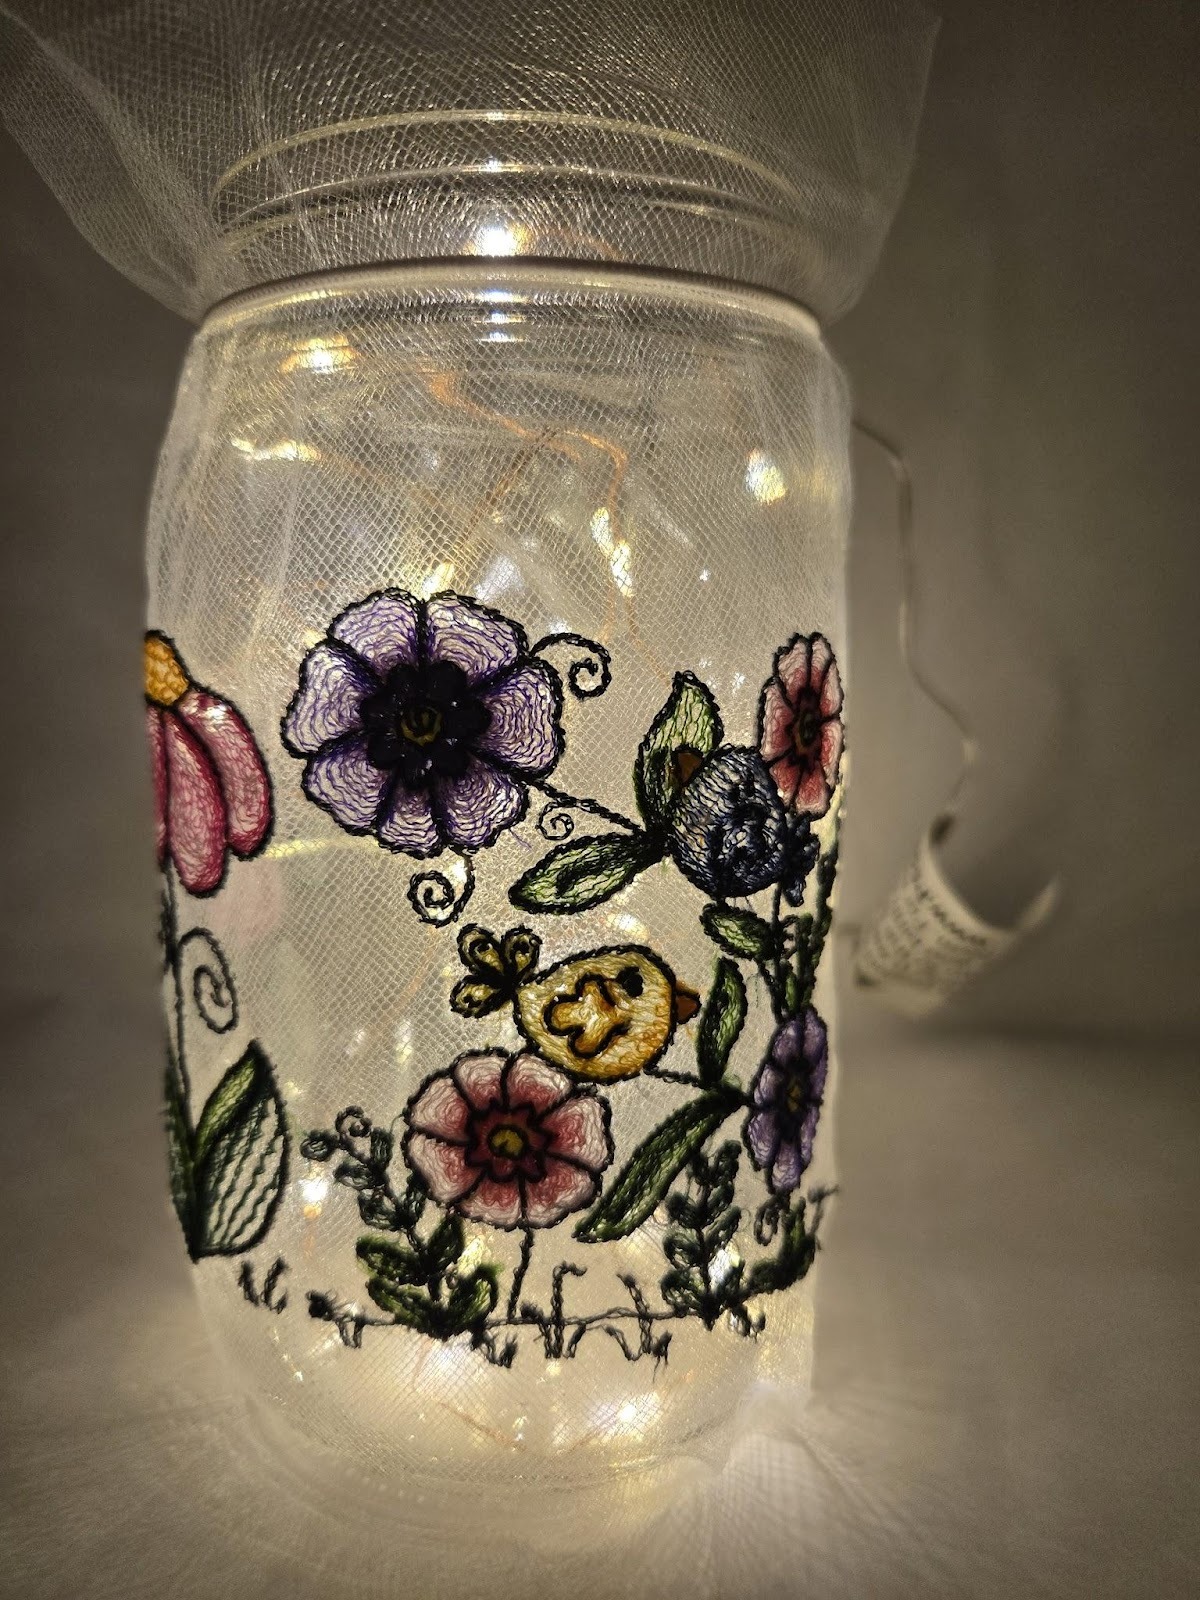
I chose the sketch designs for this project because the fairy lights will look so cool through them. I have not played with denser designs, but I think it would work the same way.
Gather your supplies and load your designs on a USB drive.

I like to use the paper-backed sticky stabilizer and float my tulle on it. If you use a standard wash-away stabilizer and hoop your tulle, remember, DO NOT STRETCH the tulle! It is very easy to do if you hoop it. And once out of the hoop, your design will be wonky.
I hooped the paper-backed stabilizer with the paper facing up. It does seem backwards, but then you take a pin and lightly score the paper in an X and gently tear the paper away to reveal the sticky part. Using the Celebrate Spring Sketch 2 designs, I used the Edit buttons on my machine to place two designs side-by-side. I also added a basting box from my embroidery Edit screen.

I used two layers of tulle for this project. The first stuck to the stabilizer quite nicely. The second layer I lightly held in place while making a basting box around my design. Remember—go slowly!

Once your design is finished embroidering, turn it over, trim all the threads, and remove the basting stitches. Had I been thinking, I would have started each thread color by holding my top thread, taking one stitch, and pulling up and holding the top and bobbin threads while the machine tied the threads. I would have had many fewer threads to trim!


I did wise up and held most of the threads on this one.

Once all your threads are trimmed and basting boxes removed, hold the tulle back and trim the stabilizer close to your embroidery. Be careful not to catch the tulle.

I accidentally nicked my black tulle but that’s okay. It happens, and there is always a fix! That is one of the things I love about machine embroidery—an accident presents an opportunity to be creative. I took only the butterfly from the Butterfly Flowers Embroidery Design and embroidered it on another piece of wash-away stabilizer and tulle. I did not use software. I loaded it to my machine and used the + and - buttons to skip all the other embroidery.


I carefully cut around my butterfly and washed away the stabilizer. I did not cut too close for fear of cutting my stitches. Instead I used a USB Rechargeable Arc Lighter.
I love this little tool! I can carefully burn the extra tulle away with no flame.


While I was rinsing my butterfly, I also rinsed the stabilizer out of my other two pieces. I then trimmed them both to approximately 9”x14”.
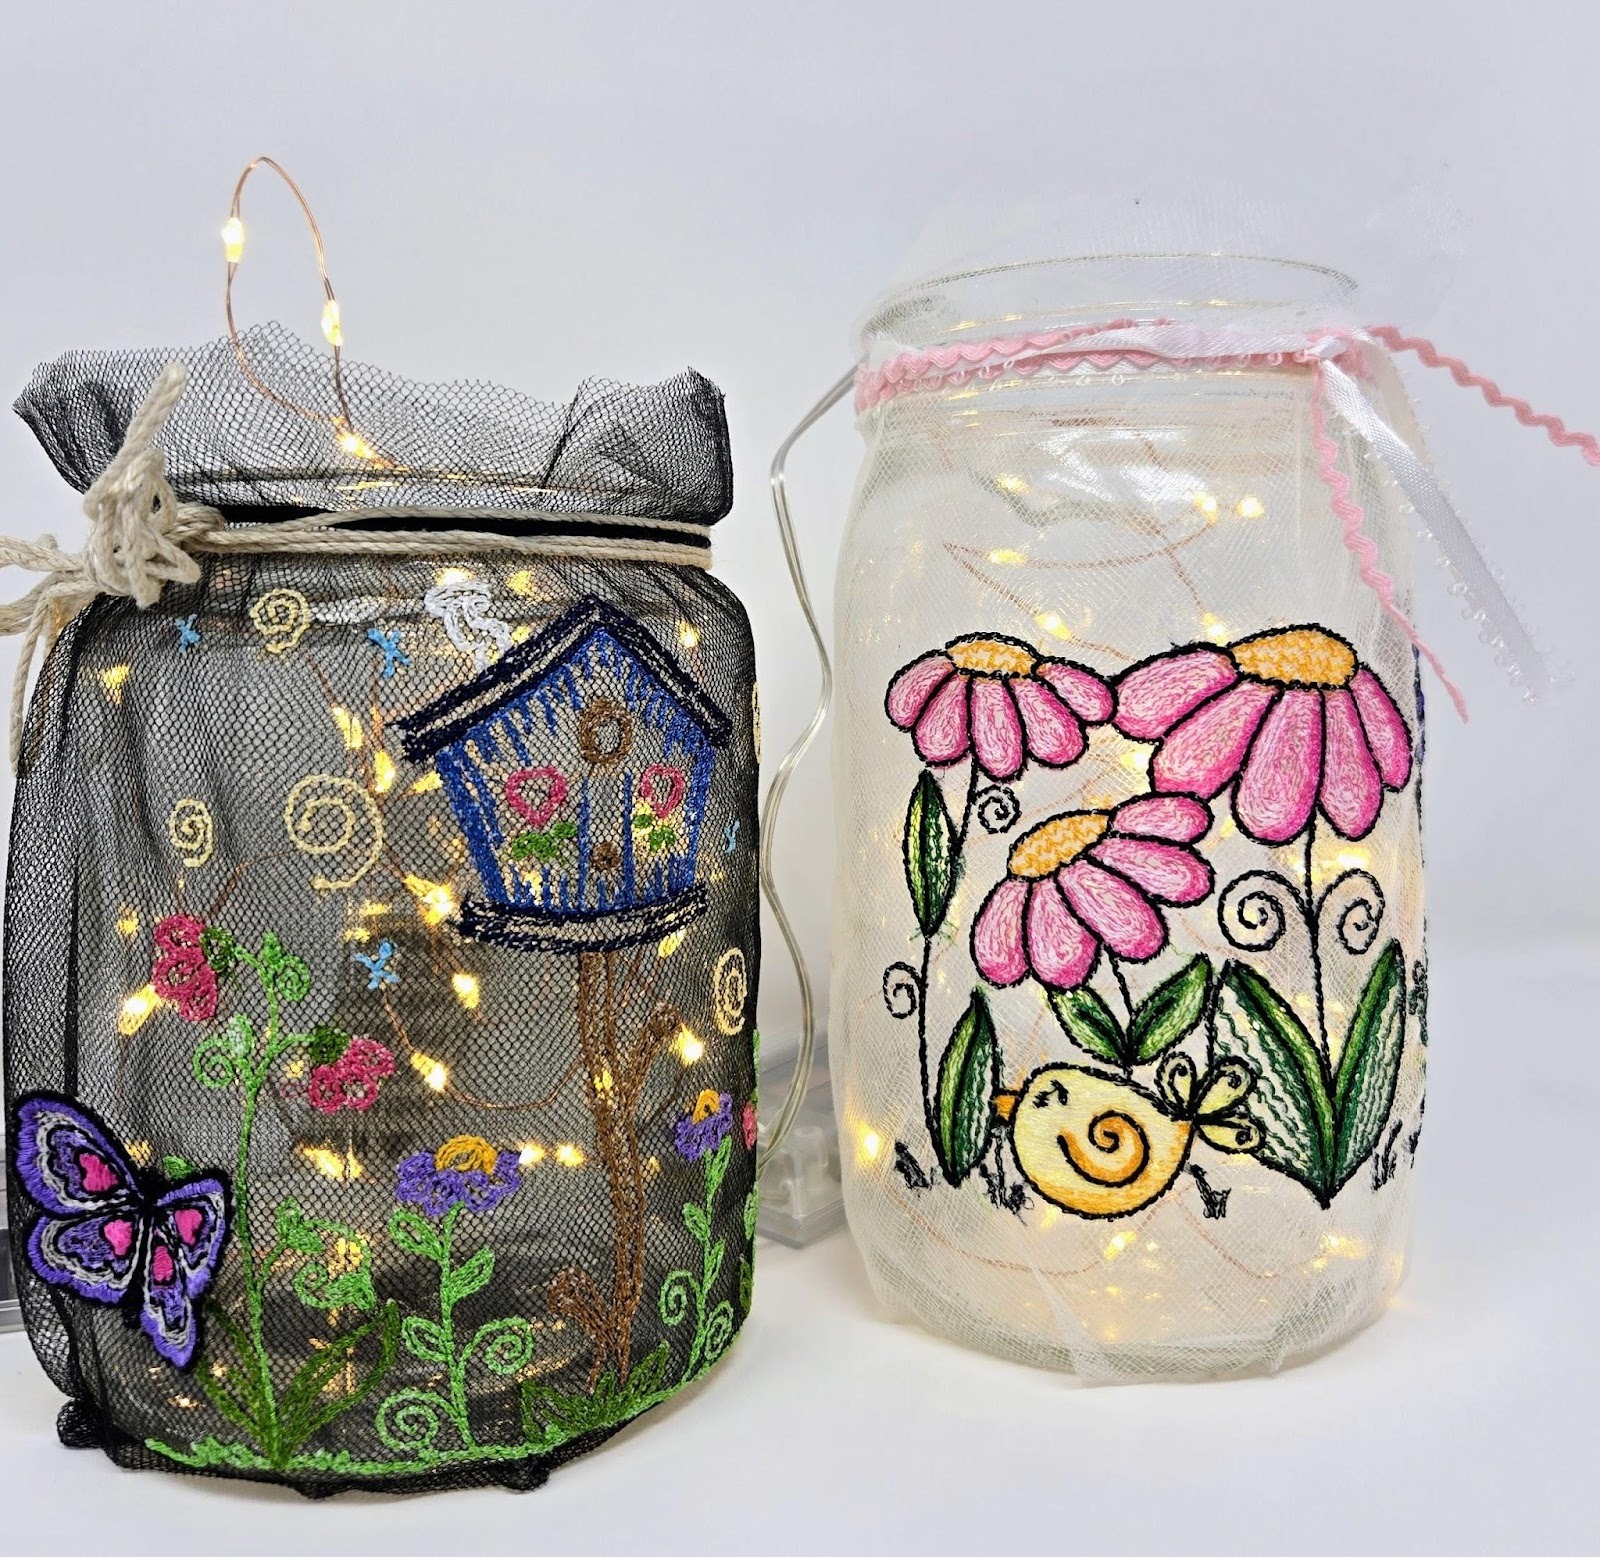
For the black piece I had an apothecary jar I used. I folded the design around the jar, overlapping the tulle at the back. I didn’t want to use stitches or glue for fear it might show later. I used a hair elastic to hold it at the top.

I tried to position it so the grass line of the embroidery was at the bottom of the jar. Then I flipped it over and folded the excess tulle on the bottom and hand stitched it in place with a few big stitches.

Since my apothecary jar is a little shorter than a normal quart jar, I trimmed the tulle about an inch from the top all the way around. Then I added a little jute over the hair elastic. To fix my little tear in the tulle, I used a clear glue and stuck my butterfly down along its body.


I did the same thing with the white tulle and a quart jar. Since the jar was taller, I left an inch of tulle at the top and took the rest of the tulle to the bottom and hand stitched it.
Two fun jars! I use one as a nightlight when my granddaughter stays over. They are so fun to have for a little ambient light!

I hope you enjoyed this tulle project and will go and make something with tulle too. Remember to turn your machine back up to speed once you have finished your tulle projects.
Be sure to share your projects in the Designs by JuJu Embroidery Blessings Facebook Group, or use the hashtag #designsbyjuju anywhere on social media. We all love to see what you create!
