Toggle Nav
 Inspire.
Create.
Stitch.
Inspire.
Create.
Stitch.
Search
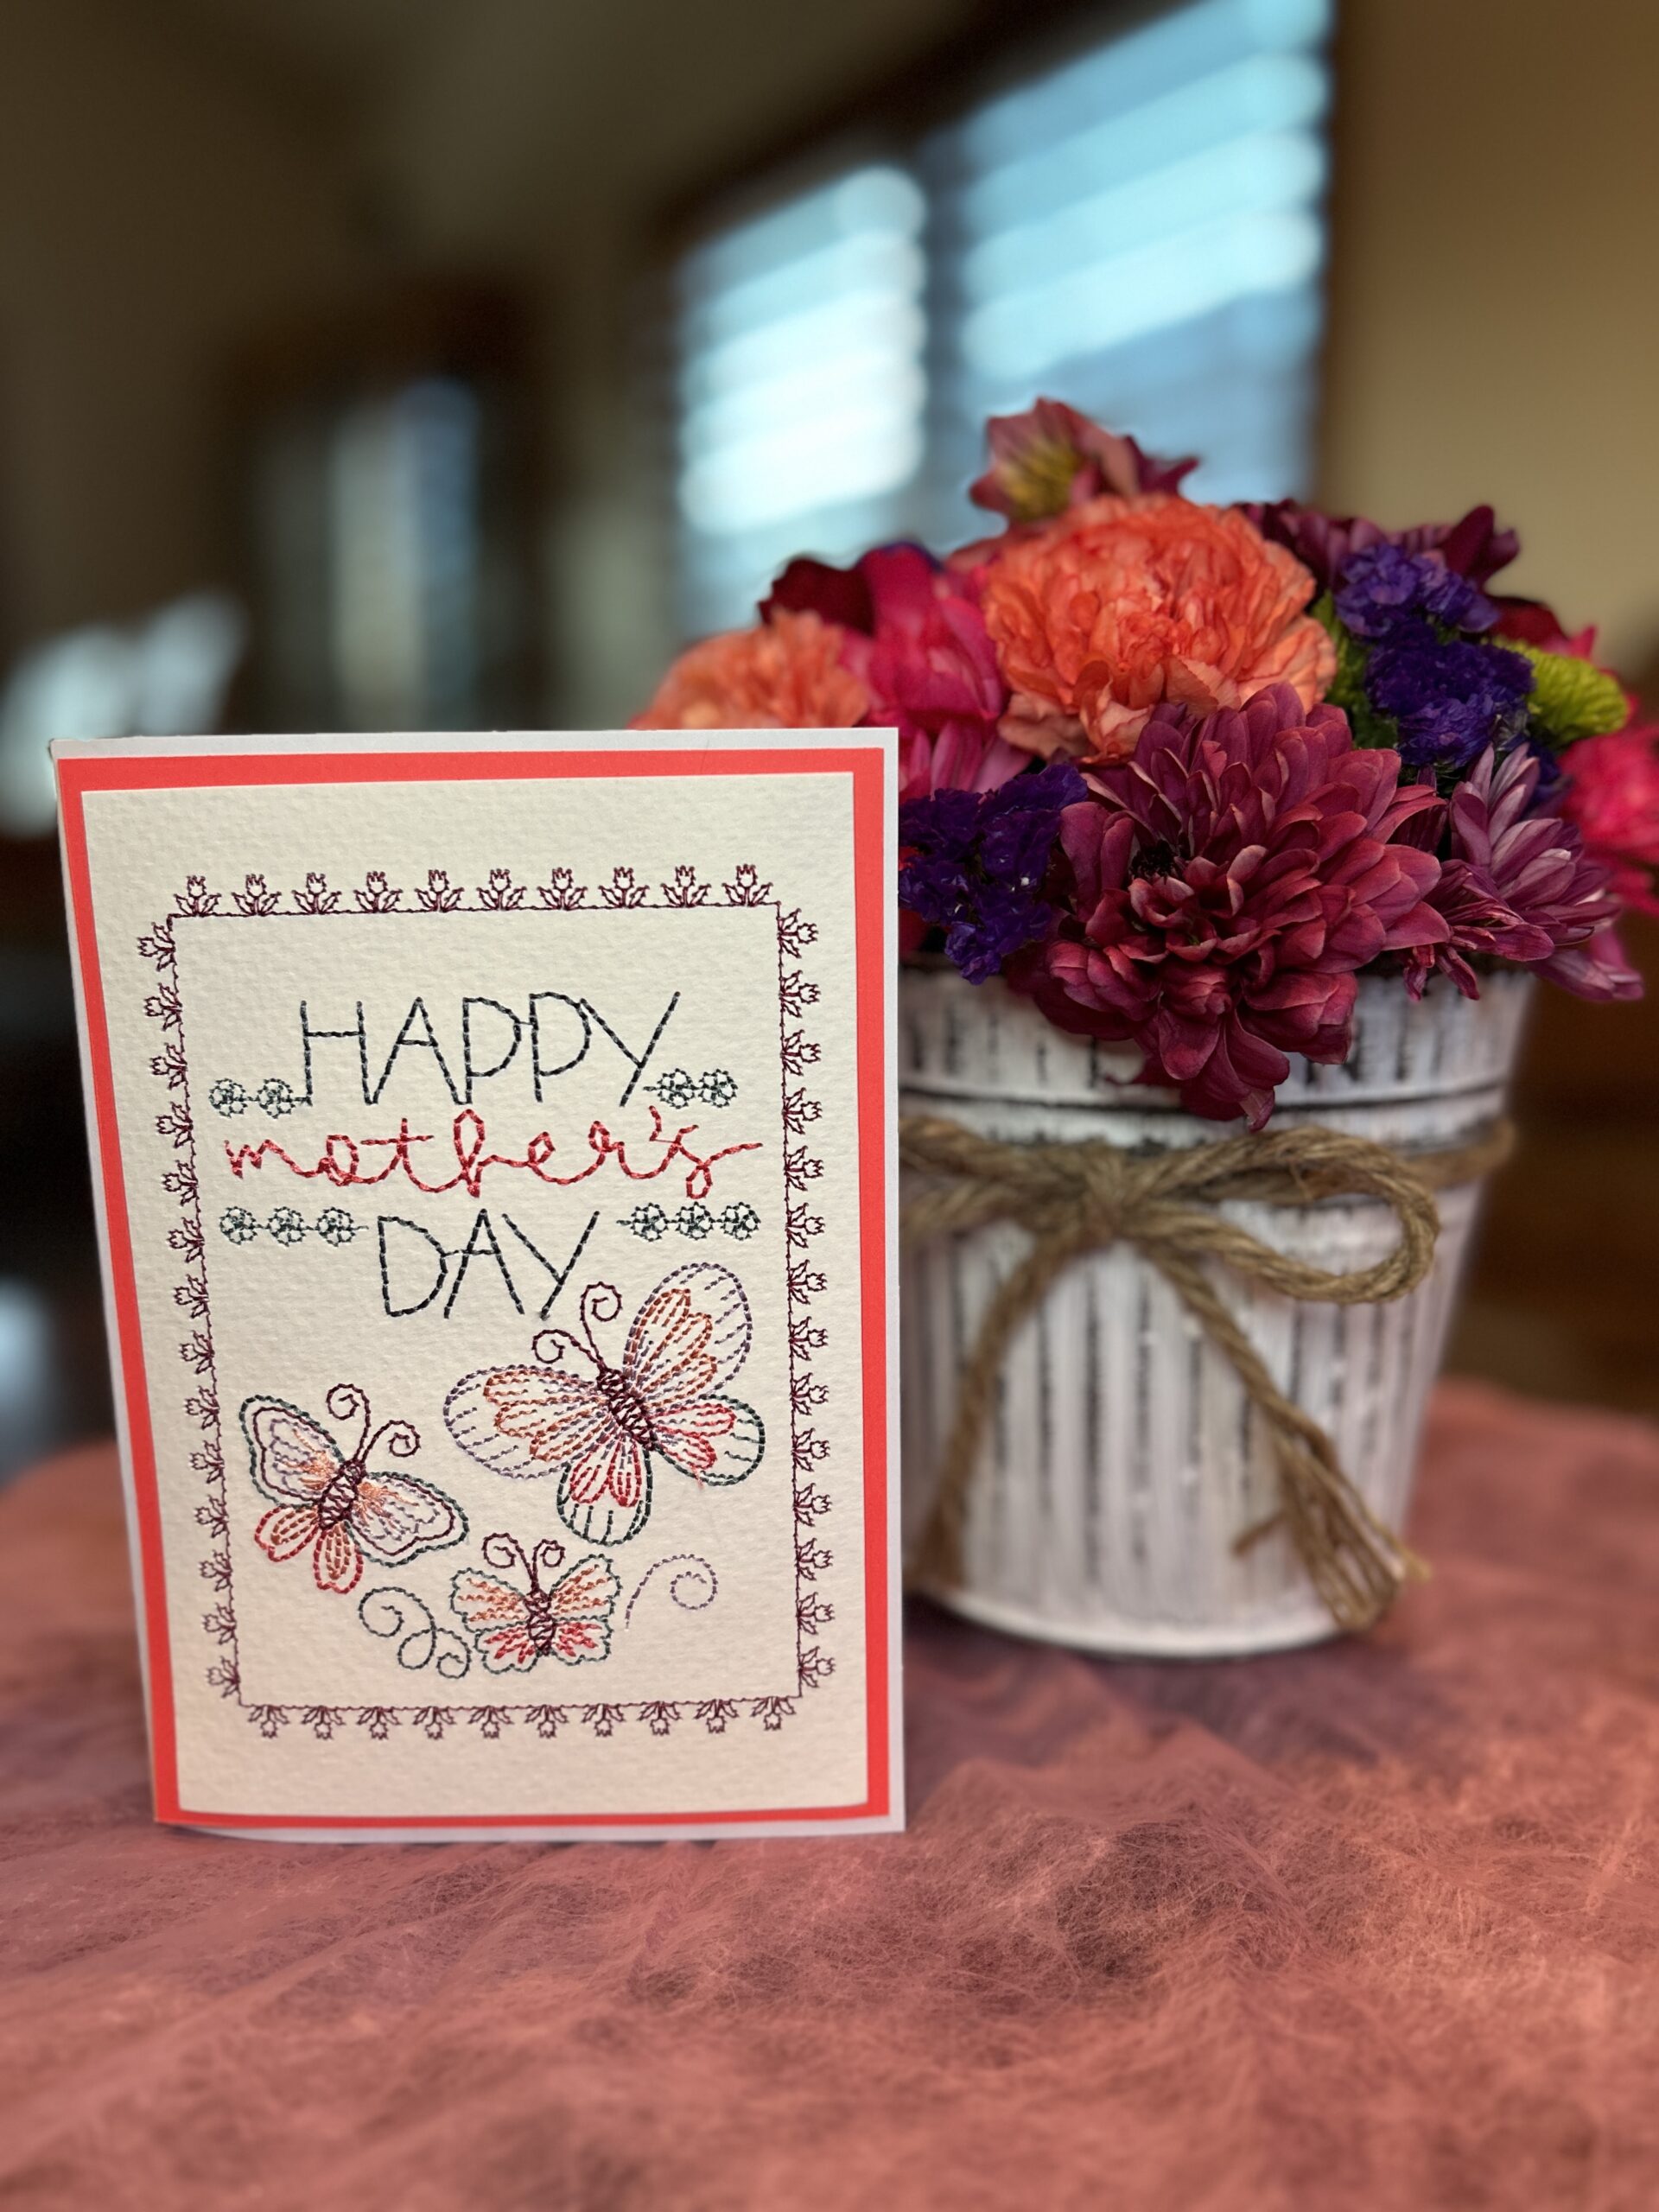
Today, we will be making an embroidered Mother’s Day Card! As the time comes to honor some of the special women in our lives, embroidered mother's day cards are a festive gift to bring in the spring, and celebrate the moms we love. Personalizing it to your mom’s favorite colors or the colors to match your present is easy! I was so happy with the design of this card by Juju's Mother’s Day Embroidery Designs.
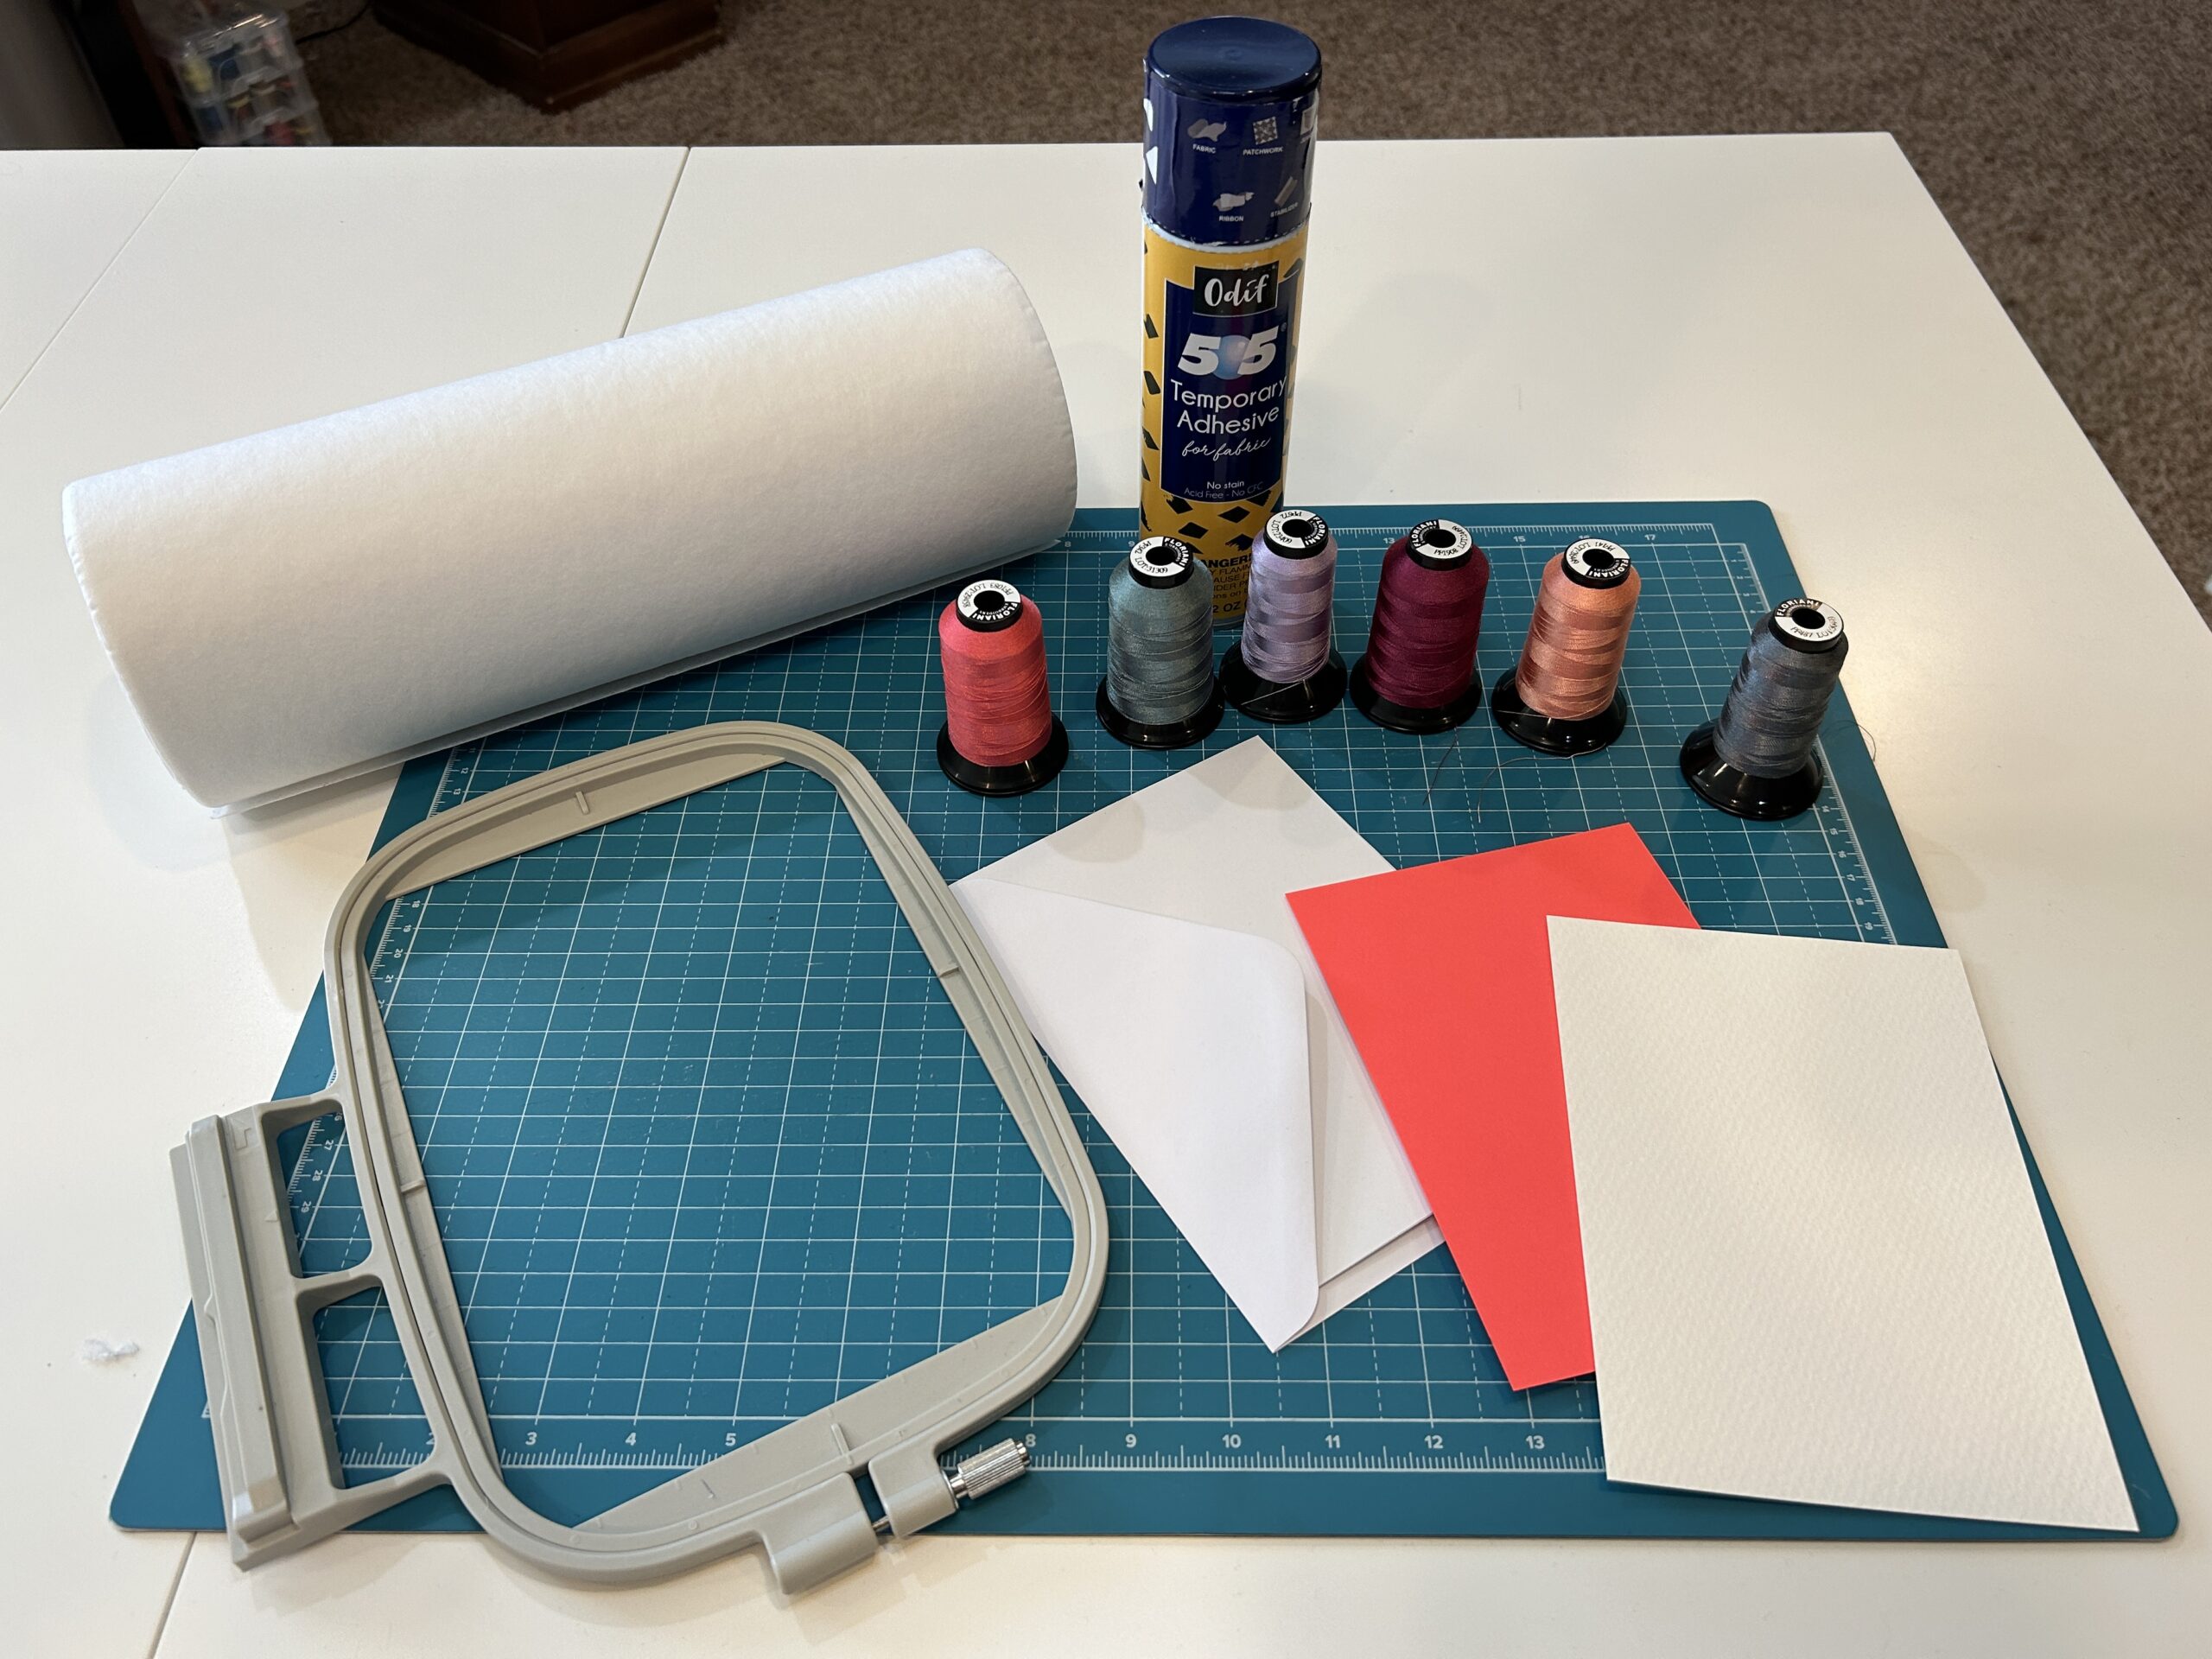
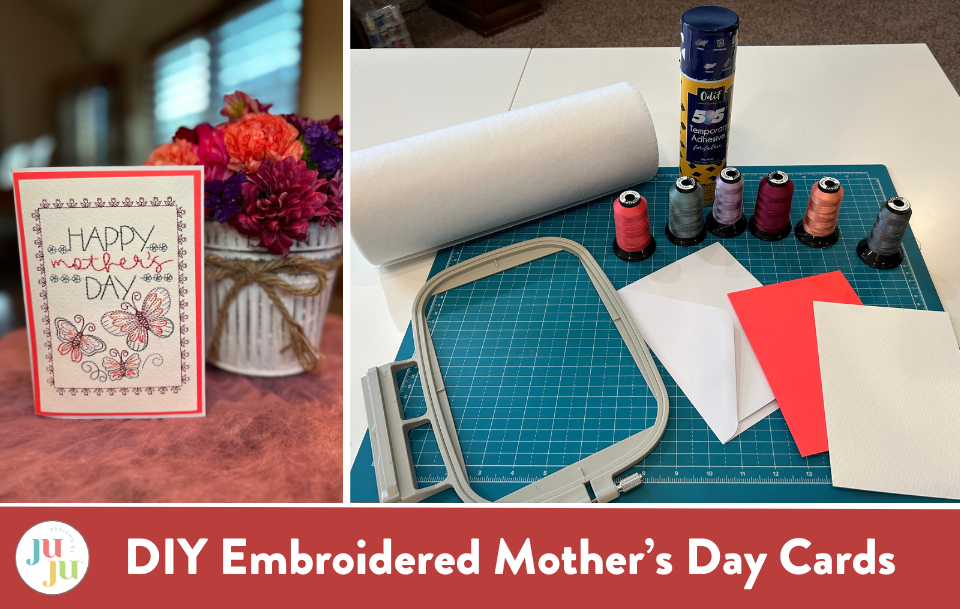
Supplies You Will Need:
To start, I changed the needle in my machine to the smaller needle above. It’s not completely necessary to use a smaller needle, and I have done many cards with my normal-sized needle, but I do like the look of the completed project with a smaller needle as it pokes a smaller hole.
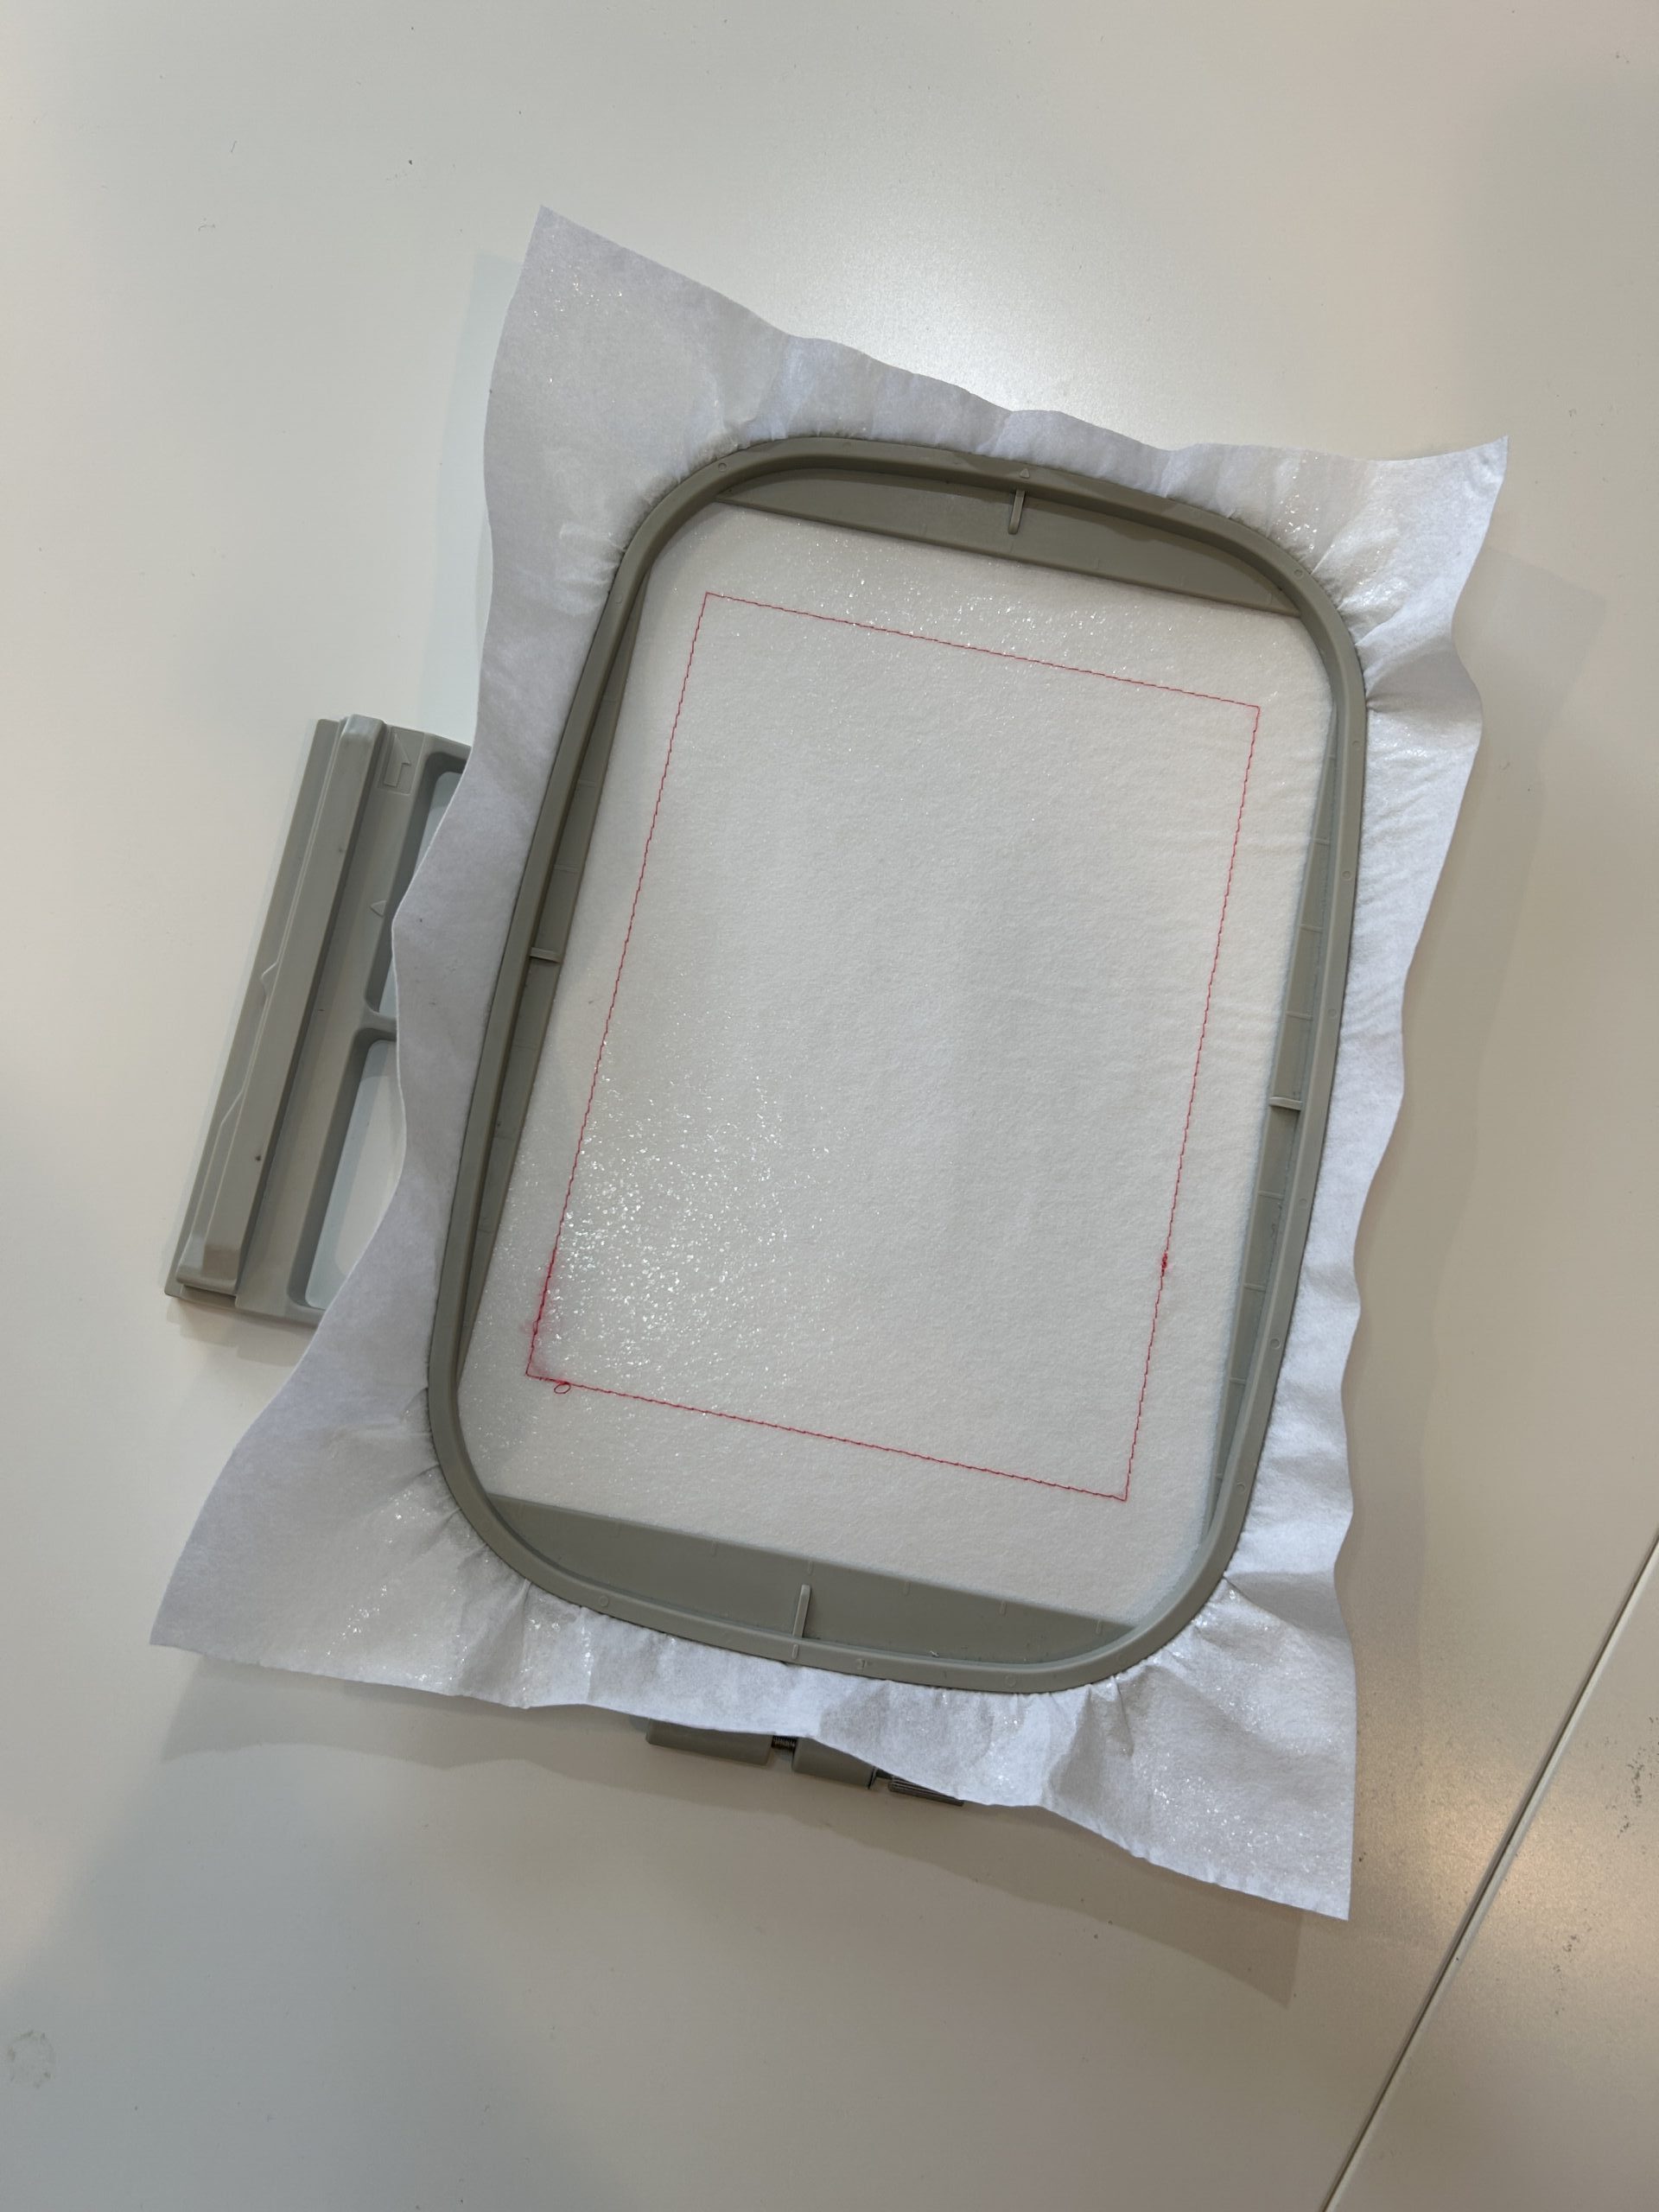
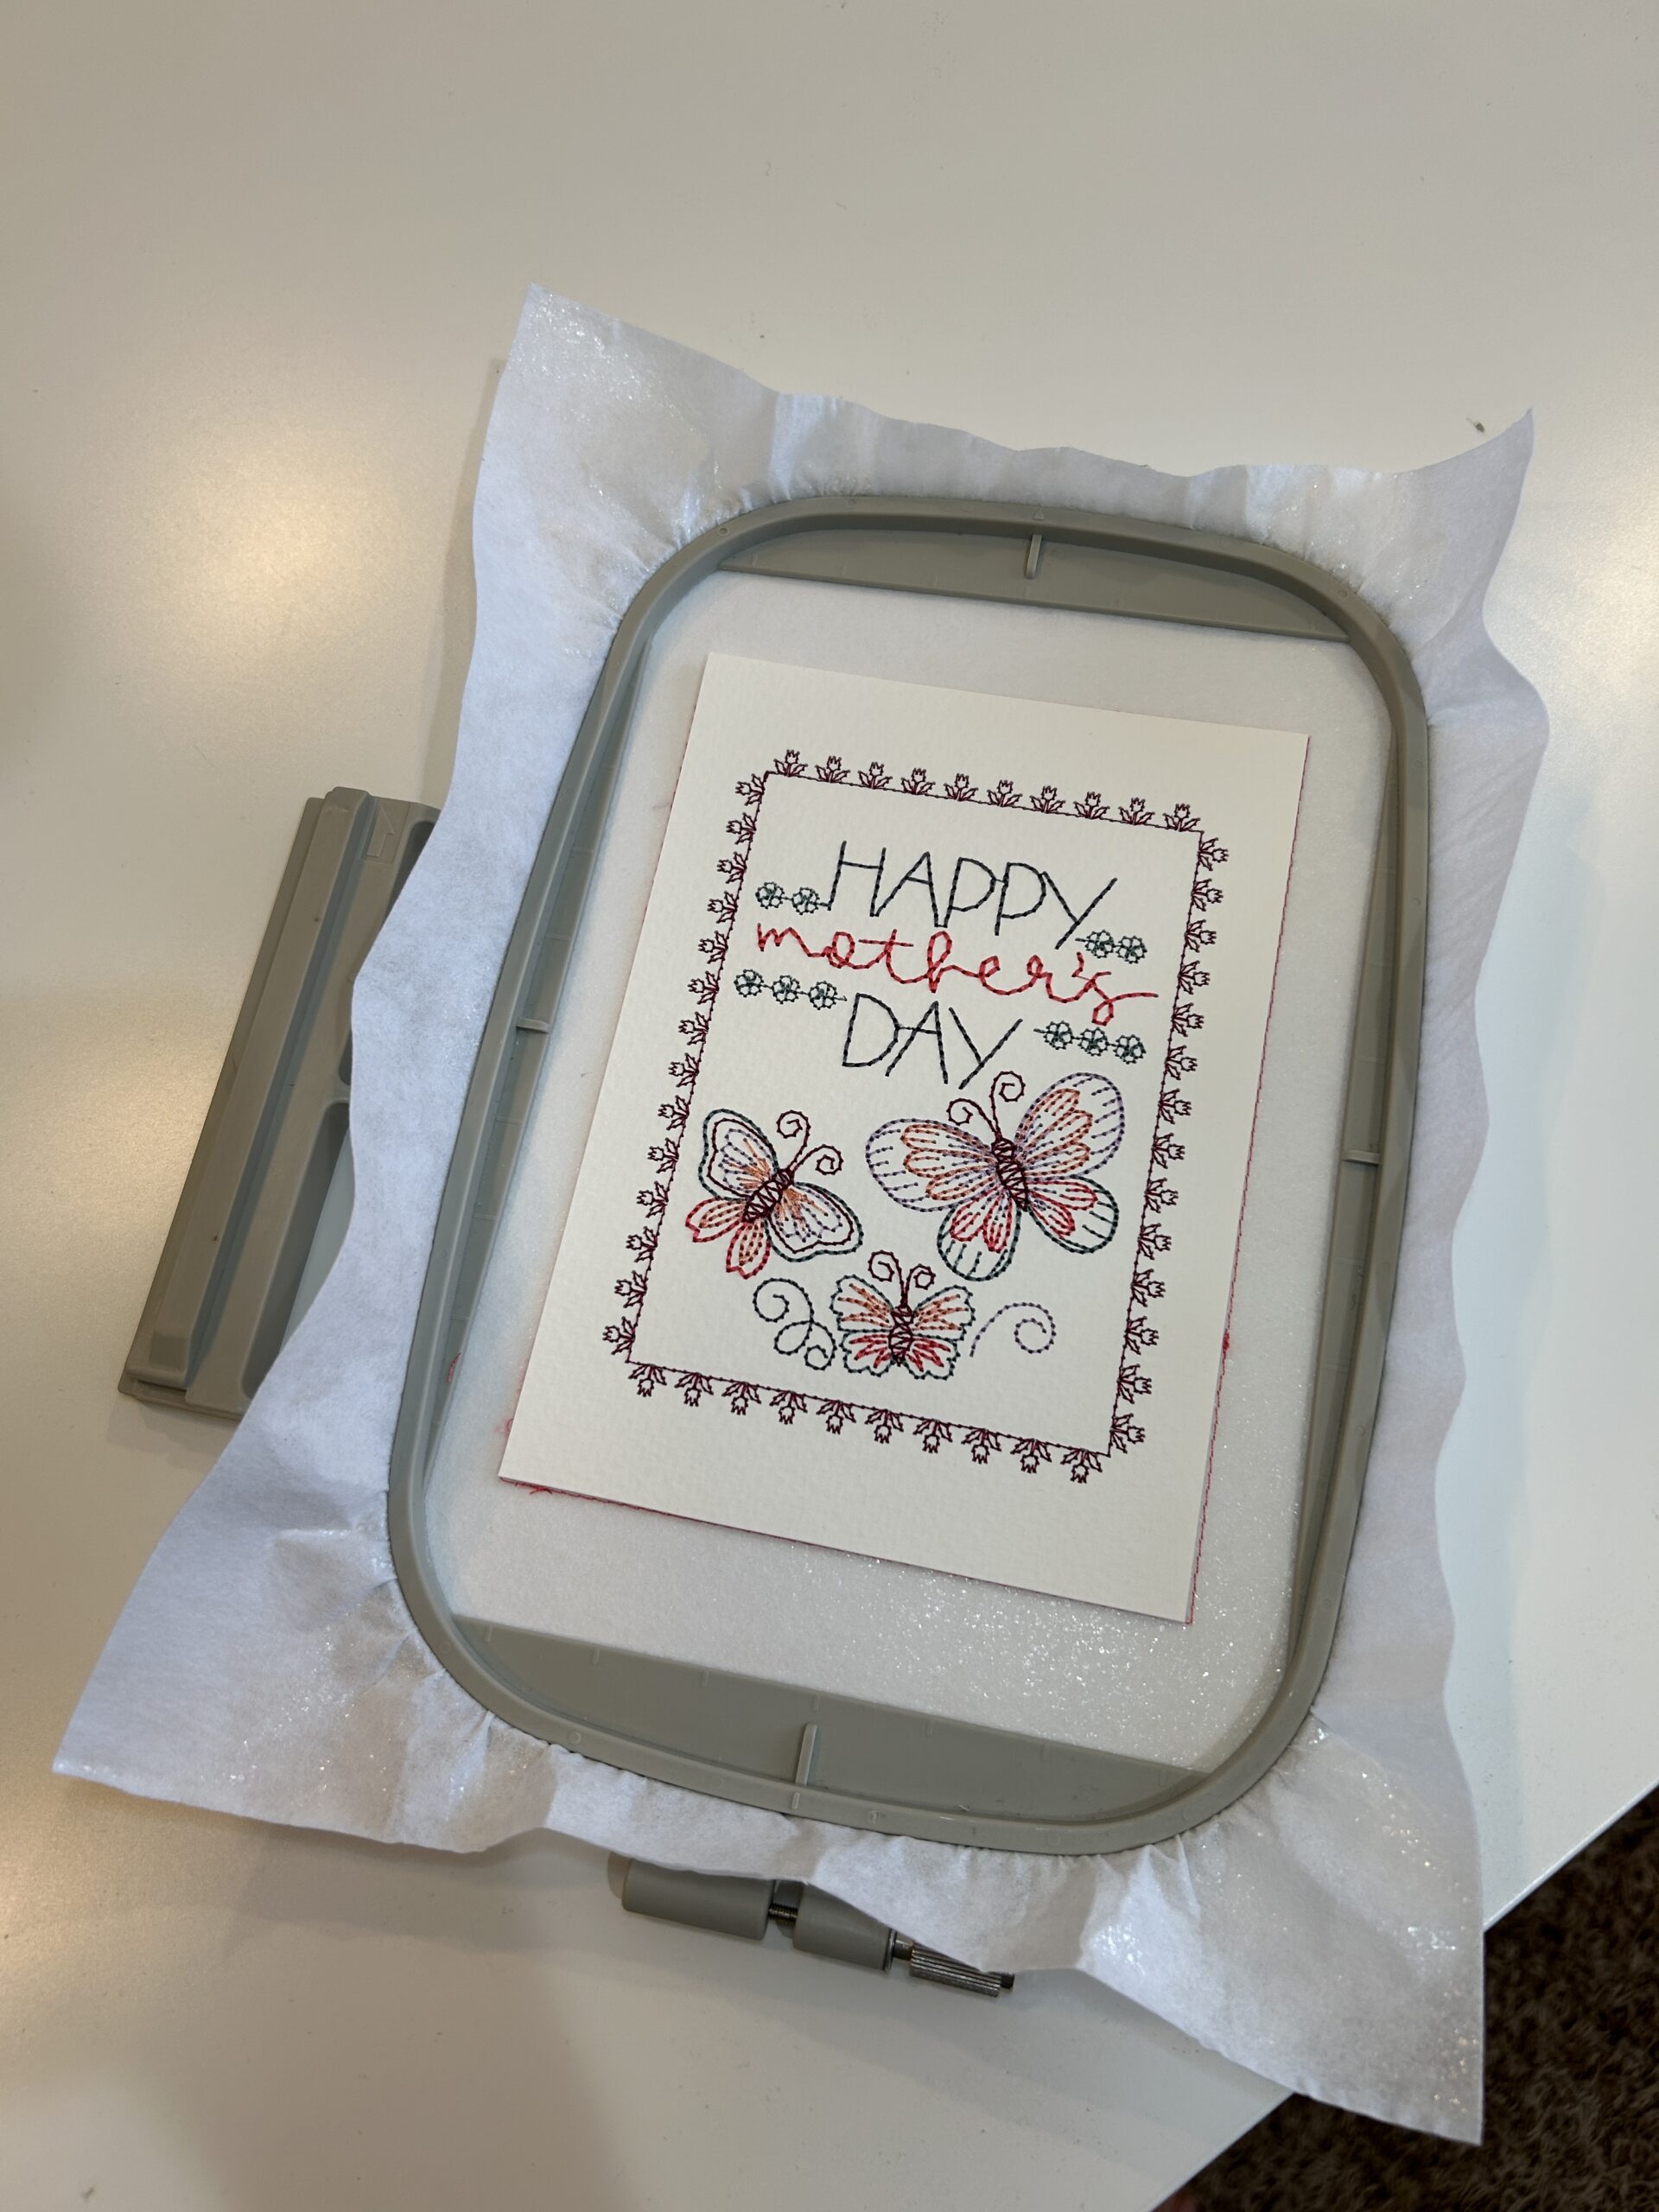
We will hoop the fusible cutaway stabilizer with the fusible side up.
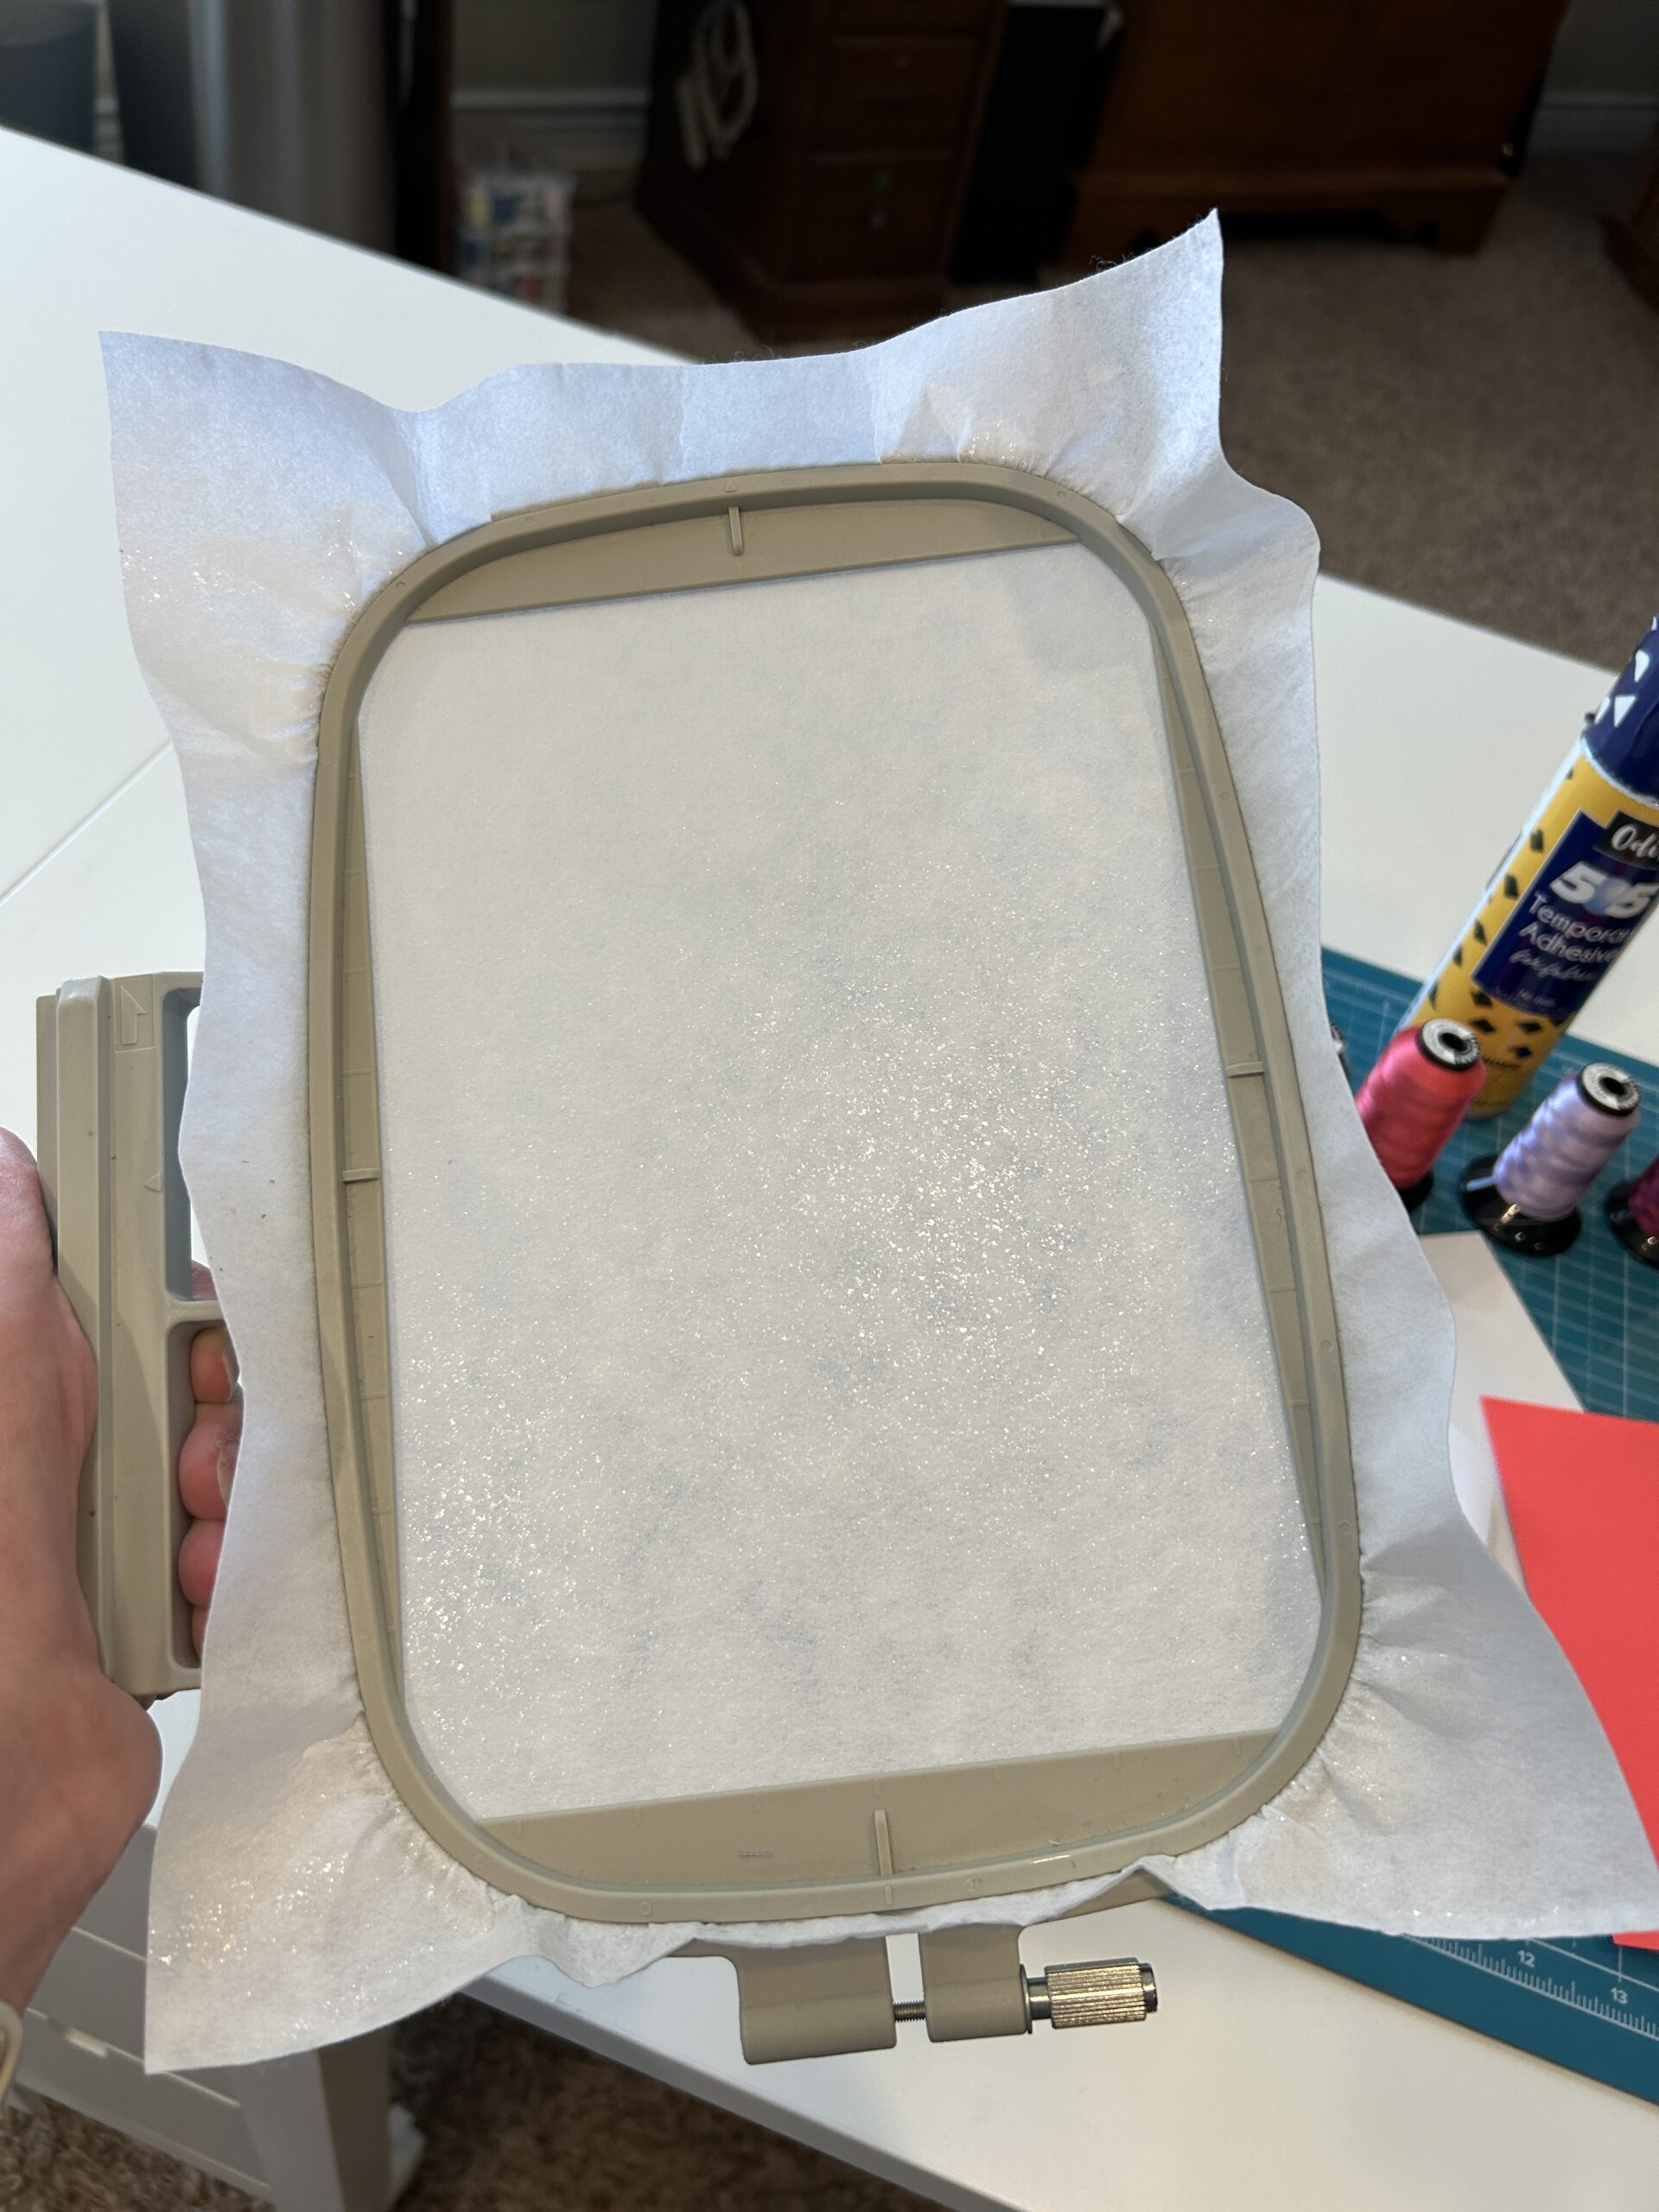
Stitch the first step, which is a placement stitch for our watercolor paper.
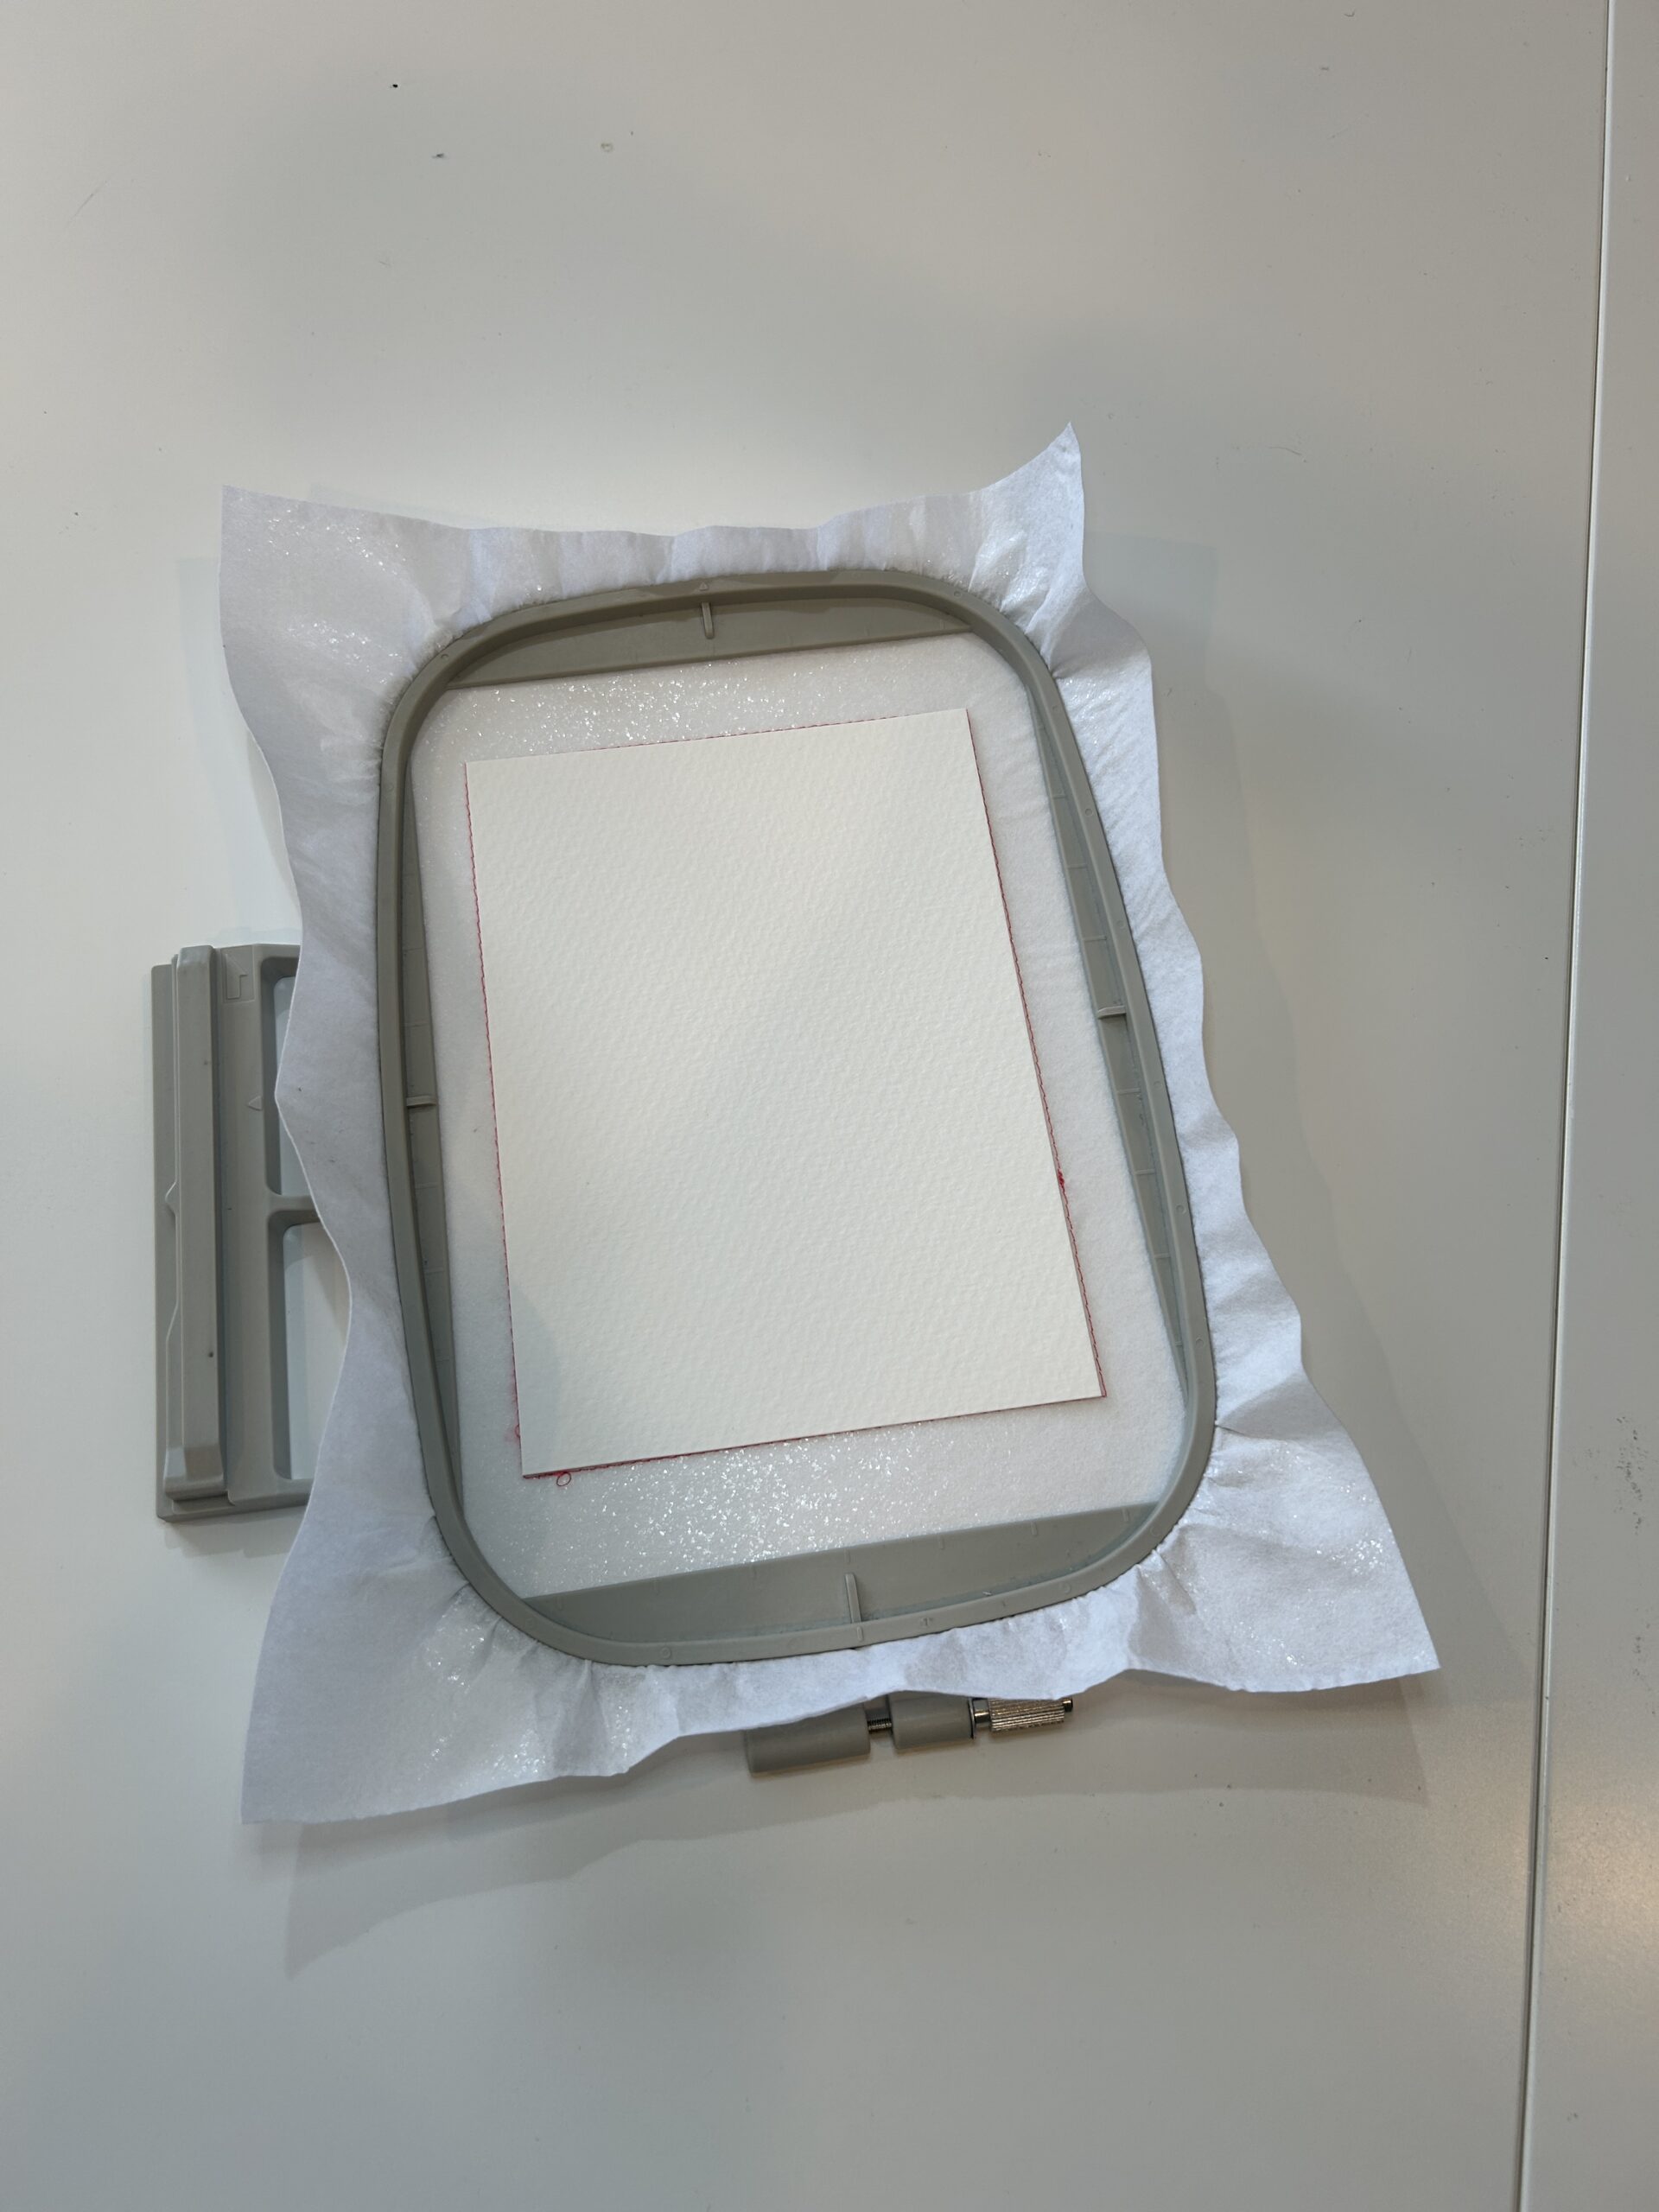
We now need to secure the watercolor paper in the hoop. We don’t want it to shift around while we stitch. If you have an iron small enough to fit in your hoop, you can press the watercolor paper to the stabilizer. If your iron is too big, a small spray of adhesive on the backside of the watercolor paper and placing it inside the stitches will hold it secure while it stitches out. Secure the watercolor paper into the hoop and place the hoop back in your machine.
Continue the stitches on the pattern. Use the color chart to help plan your design to coordinate with your gift or desired colors.
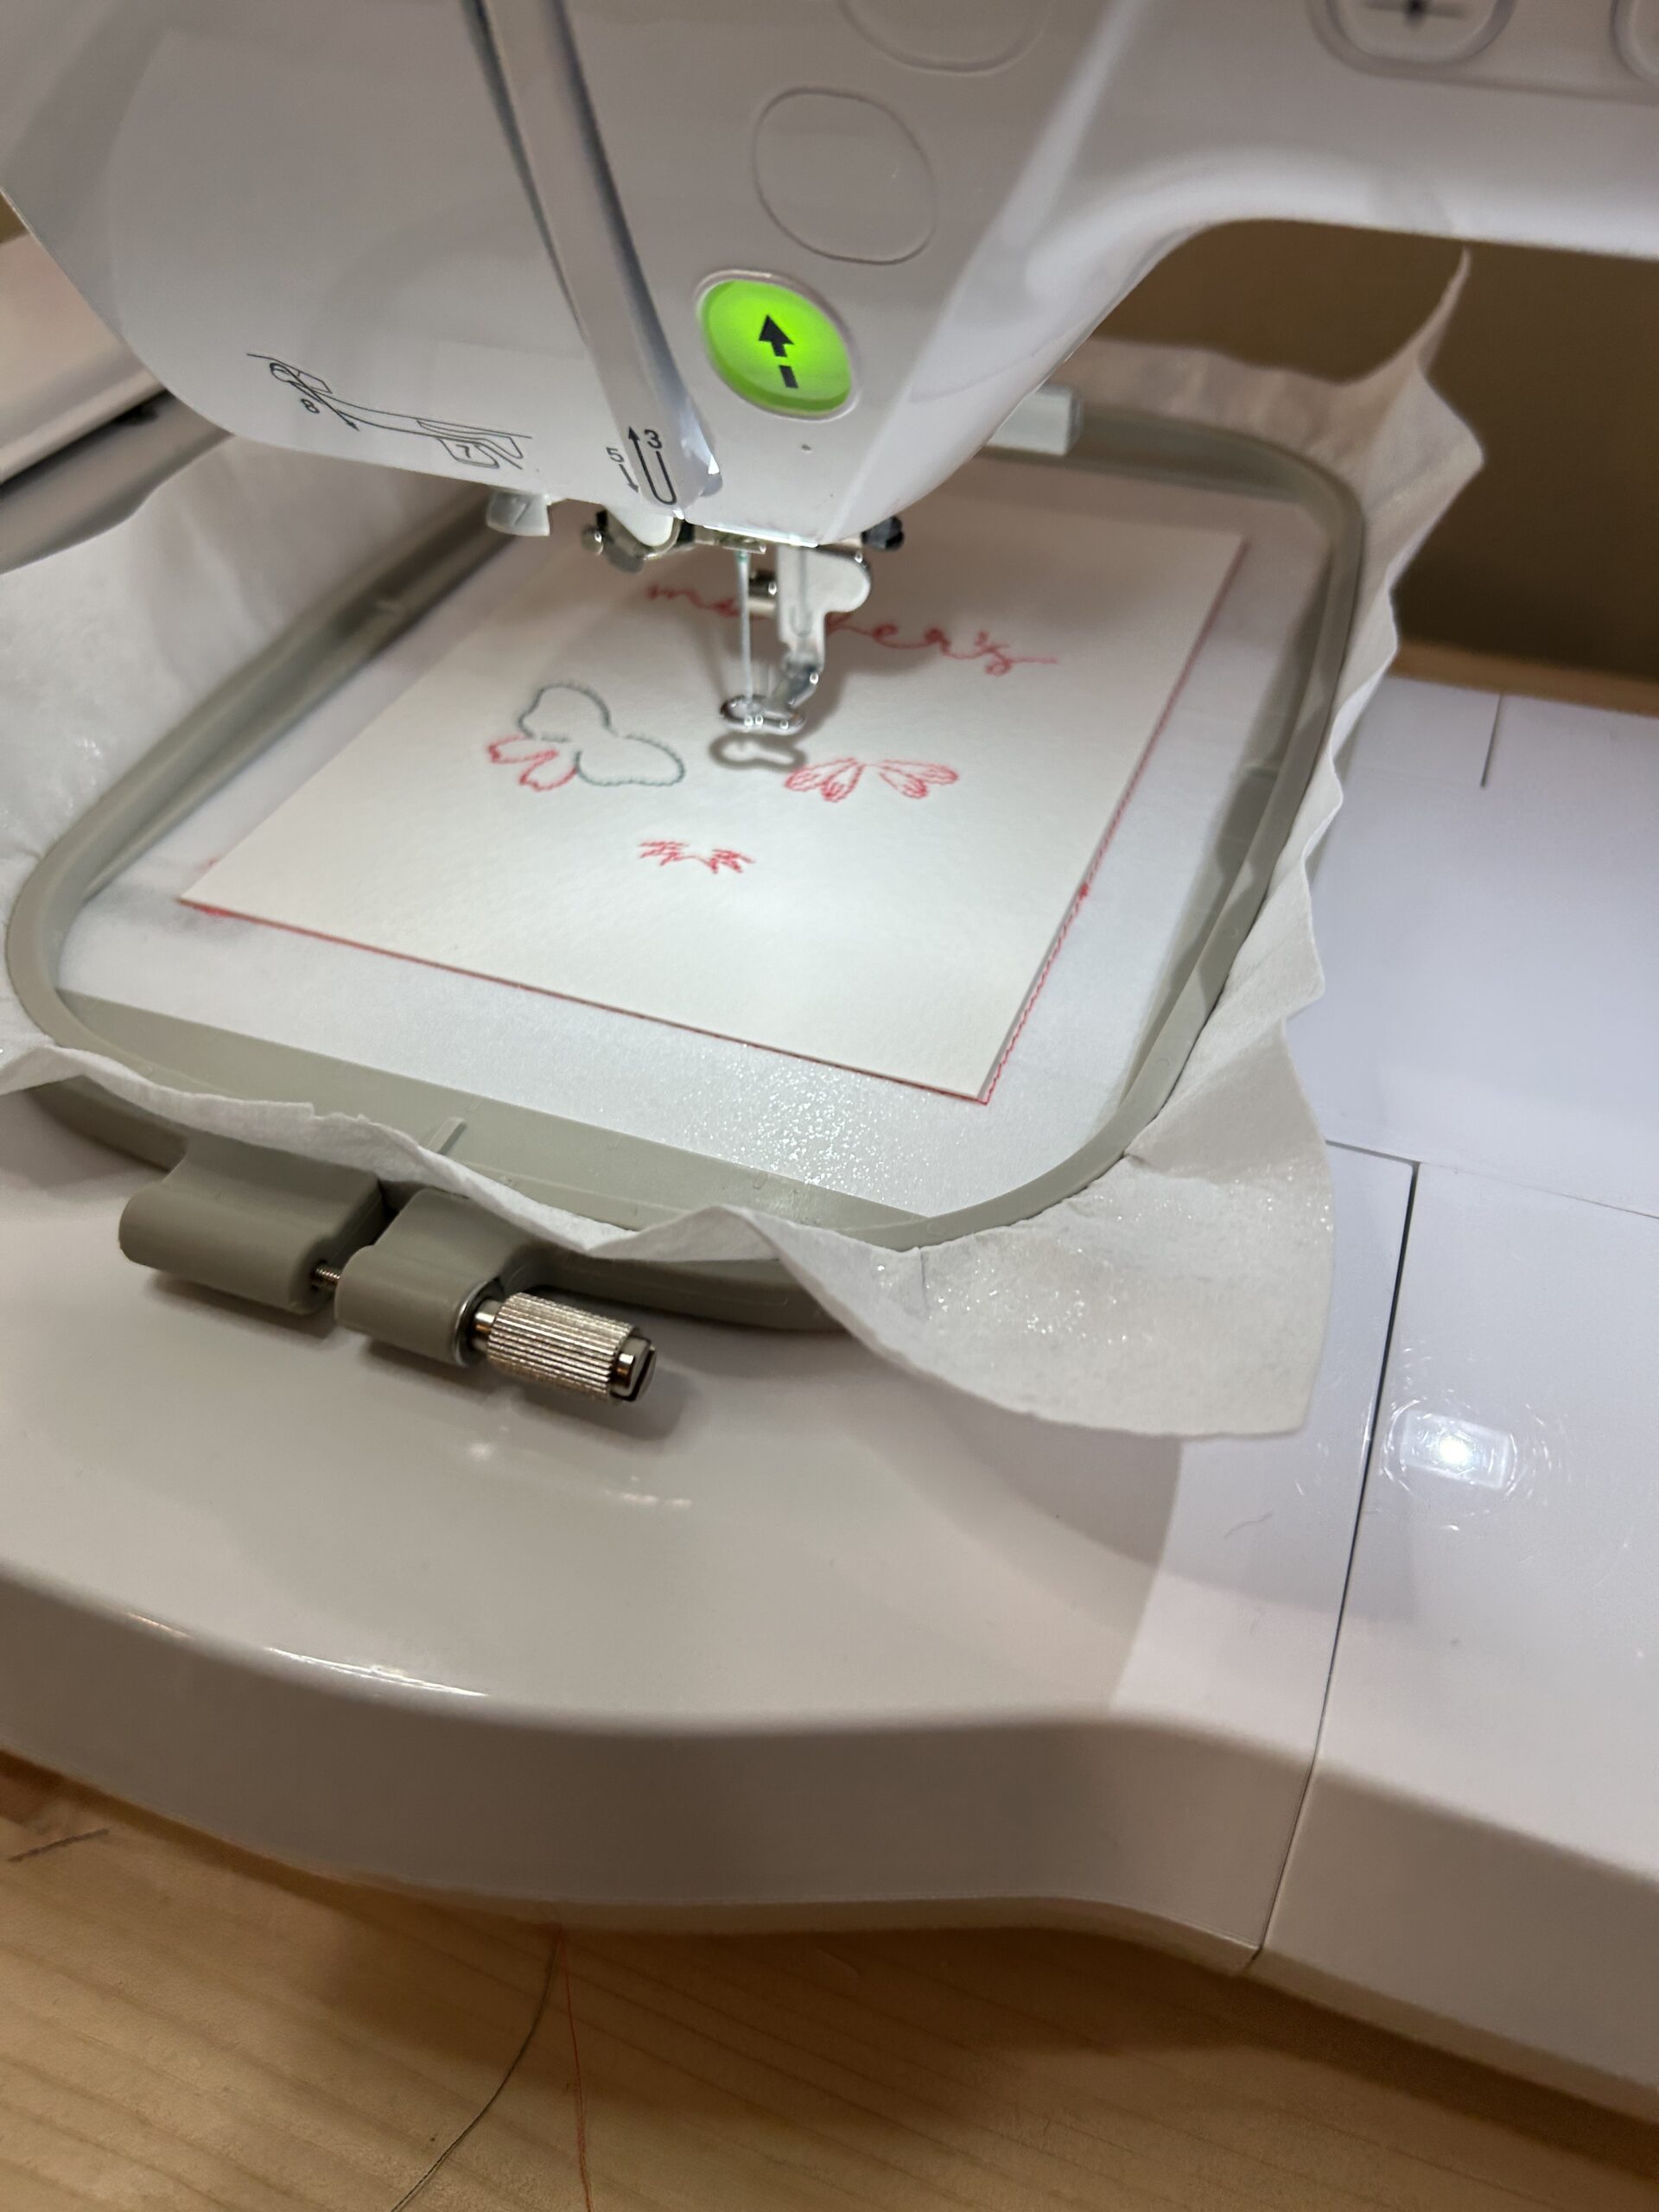
Make your color changes and keep stitching!
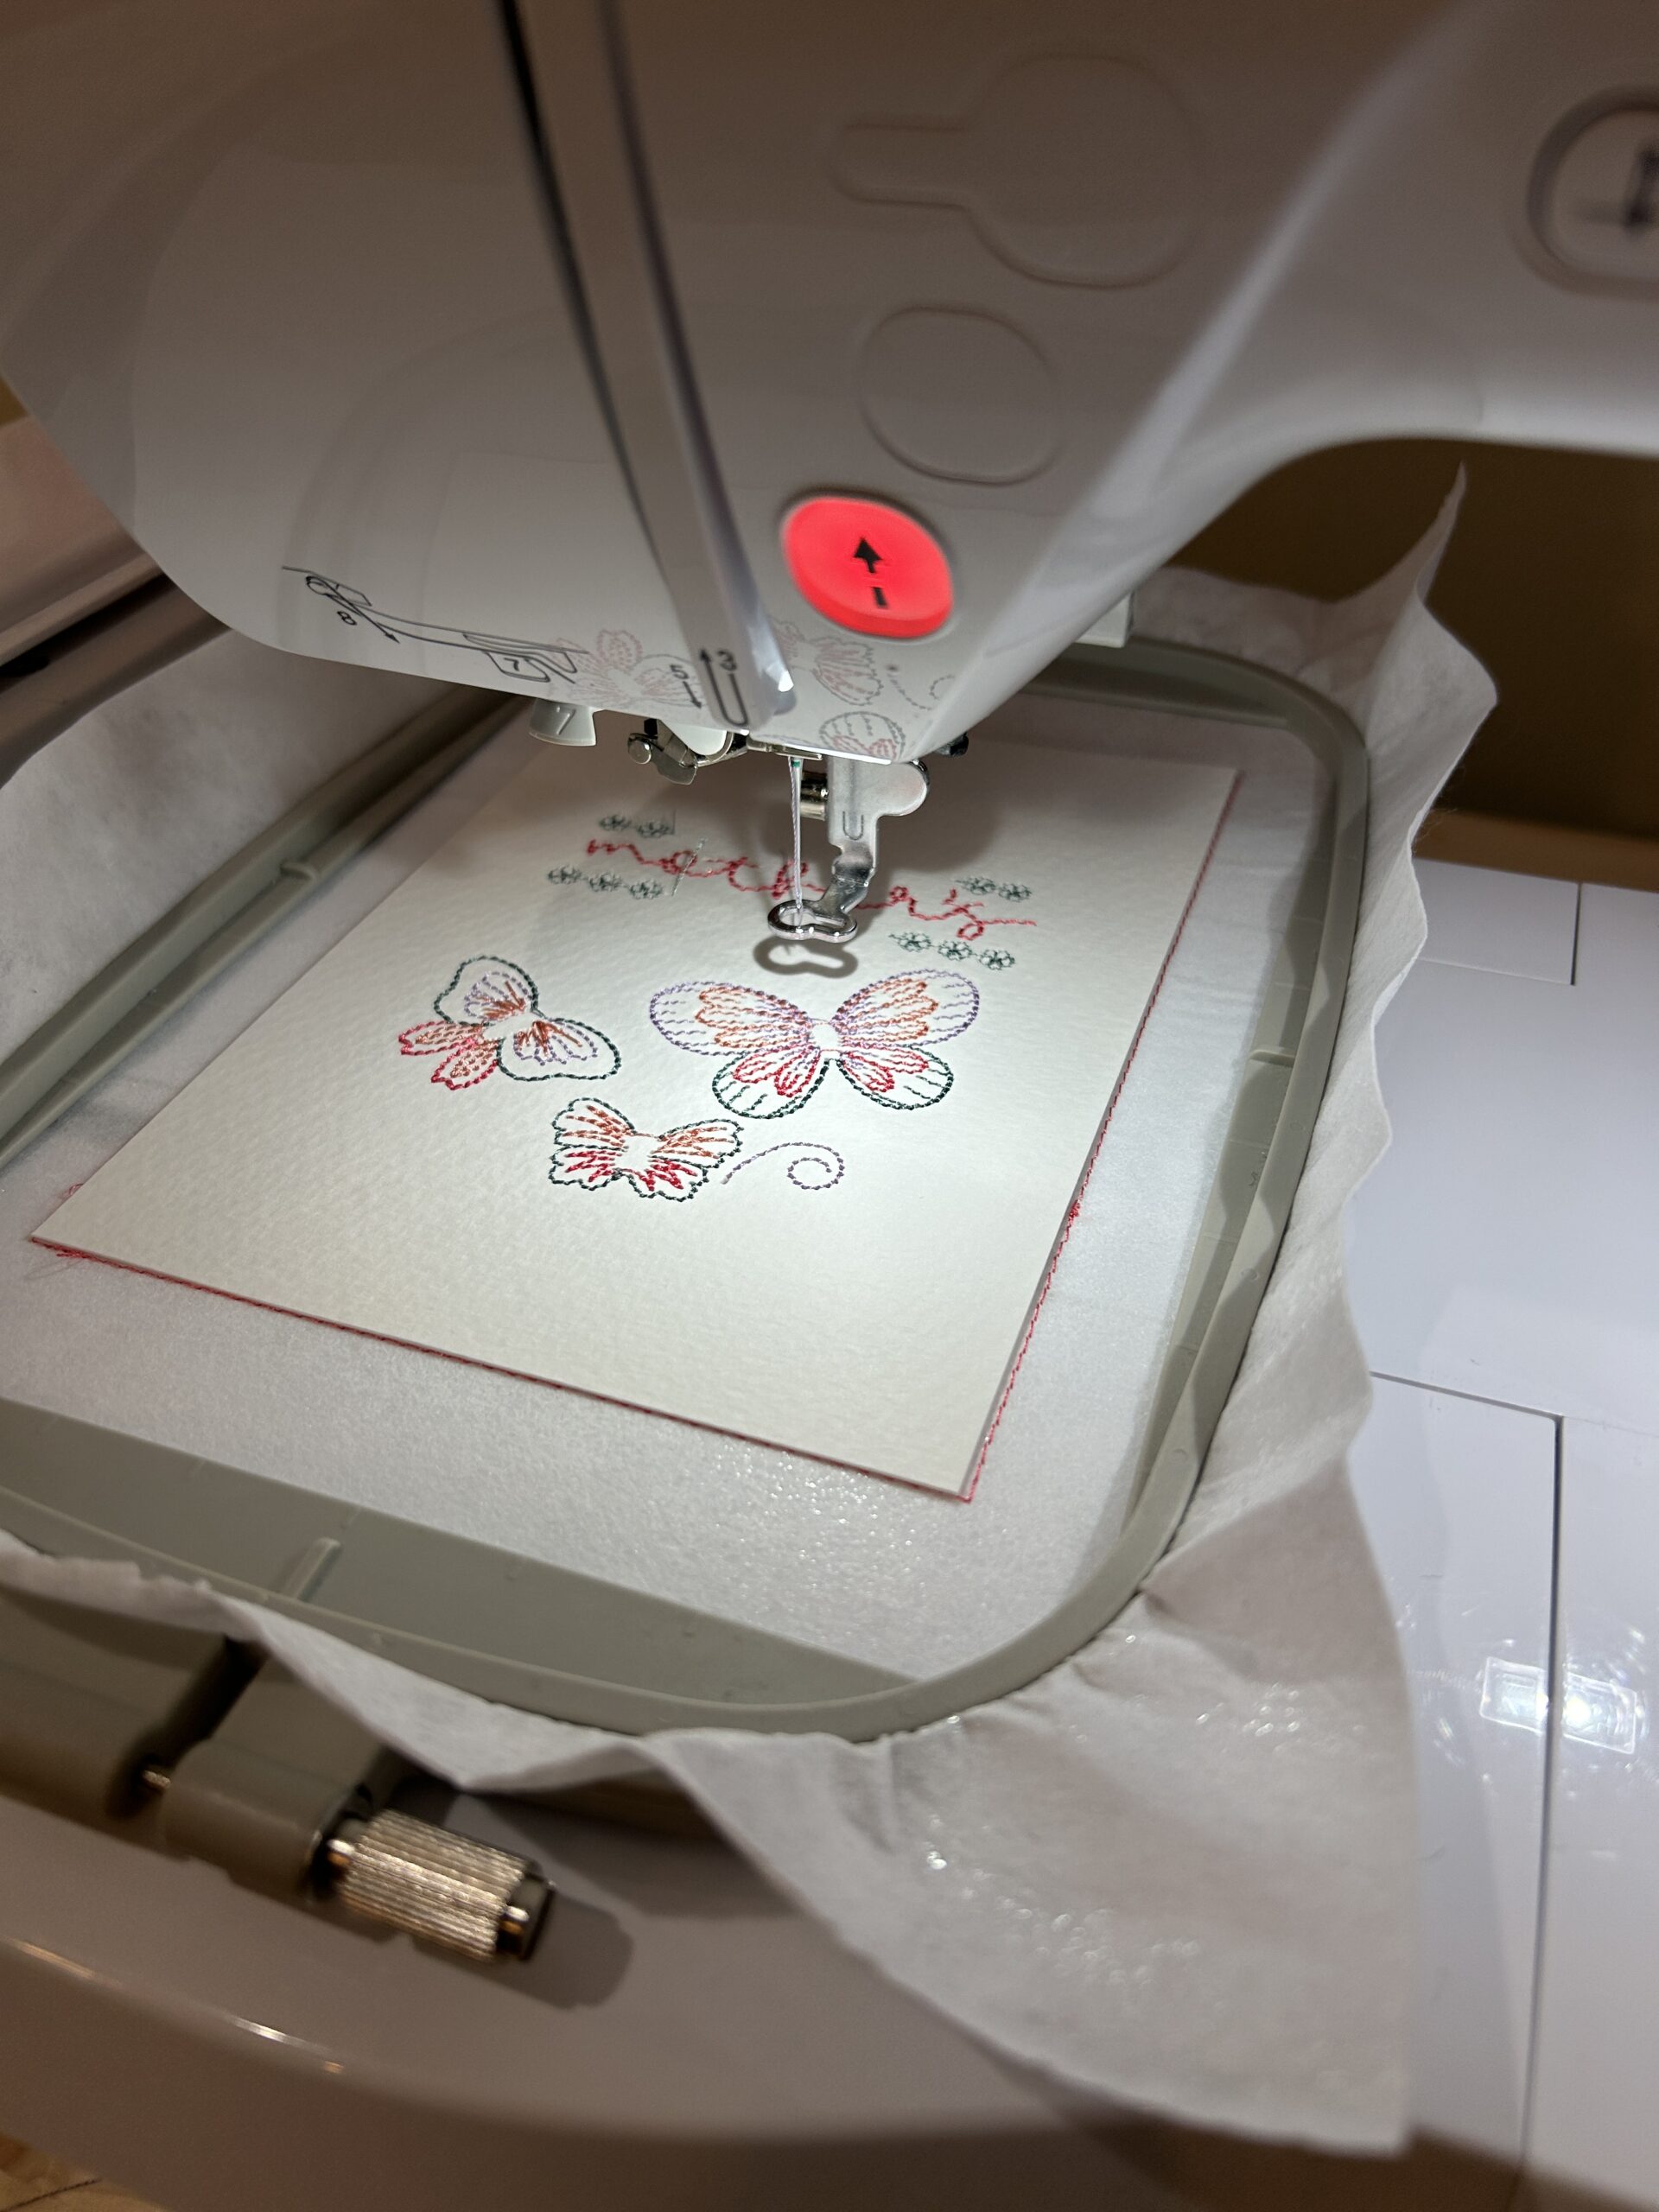
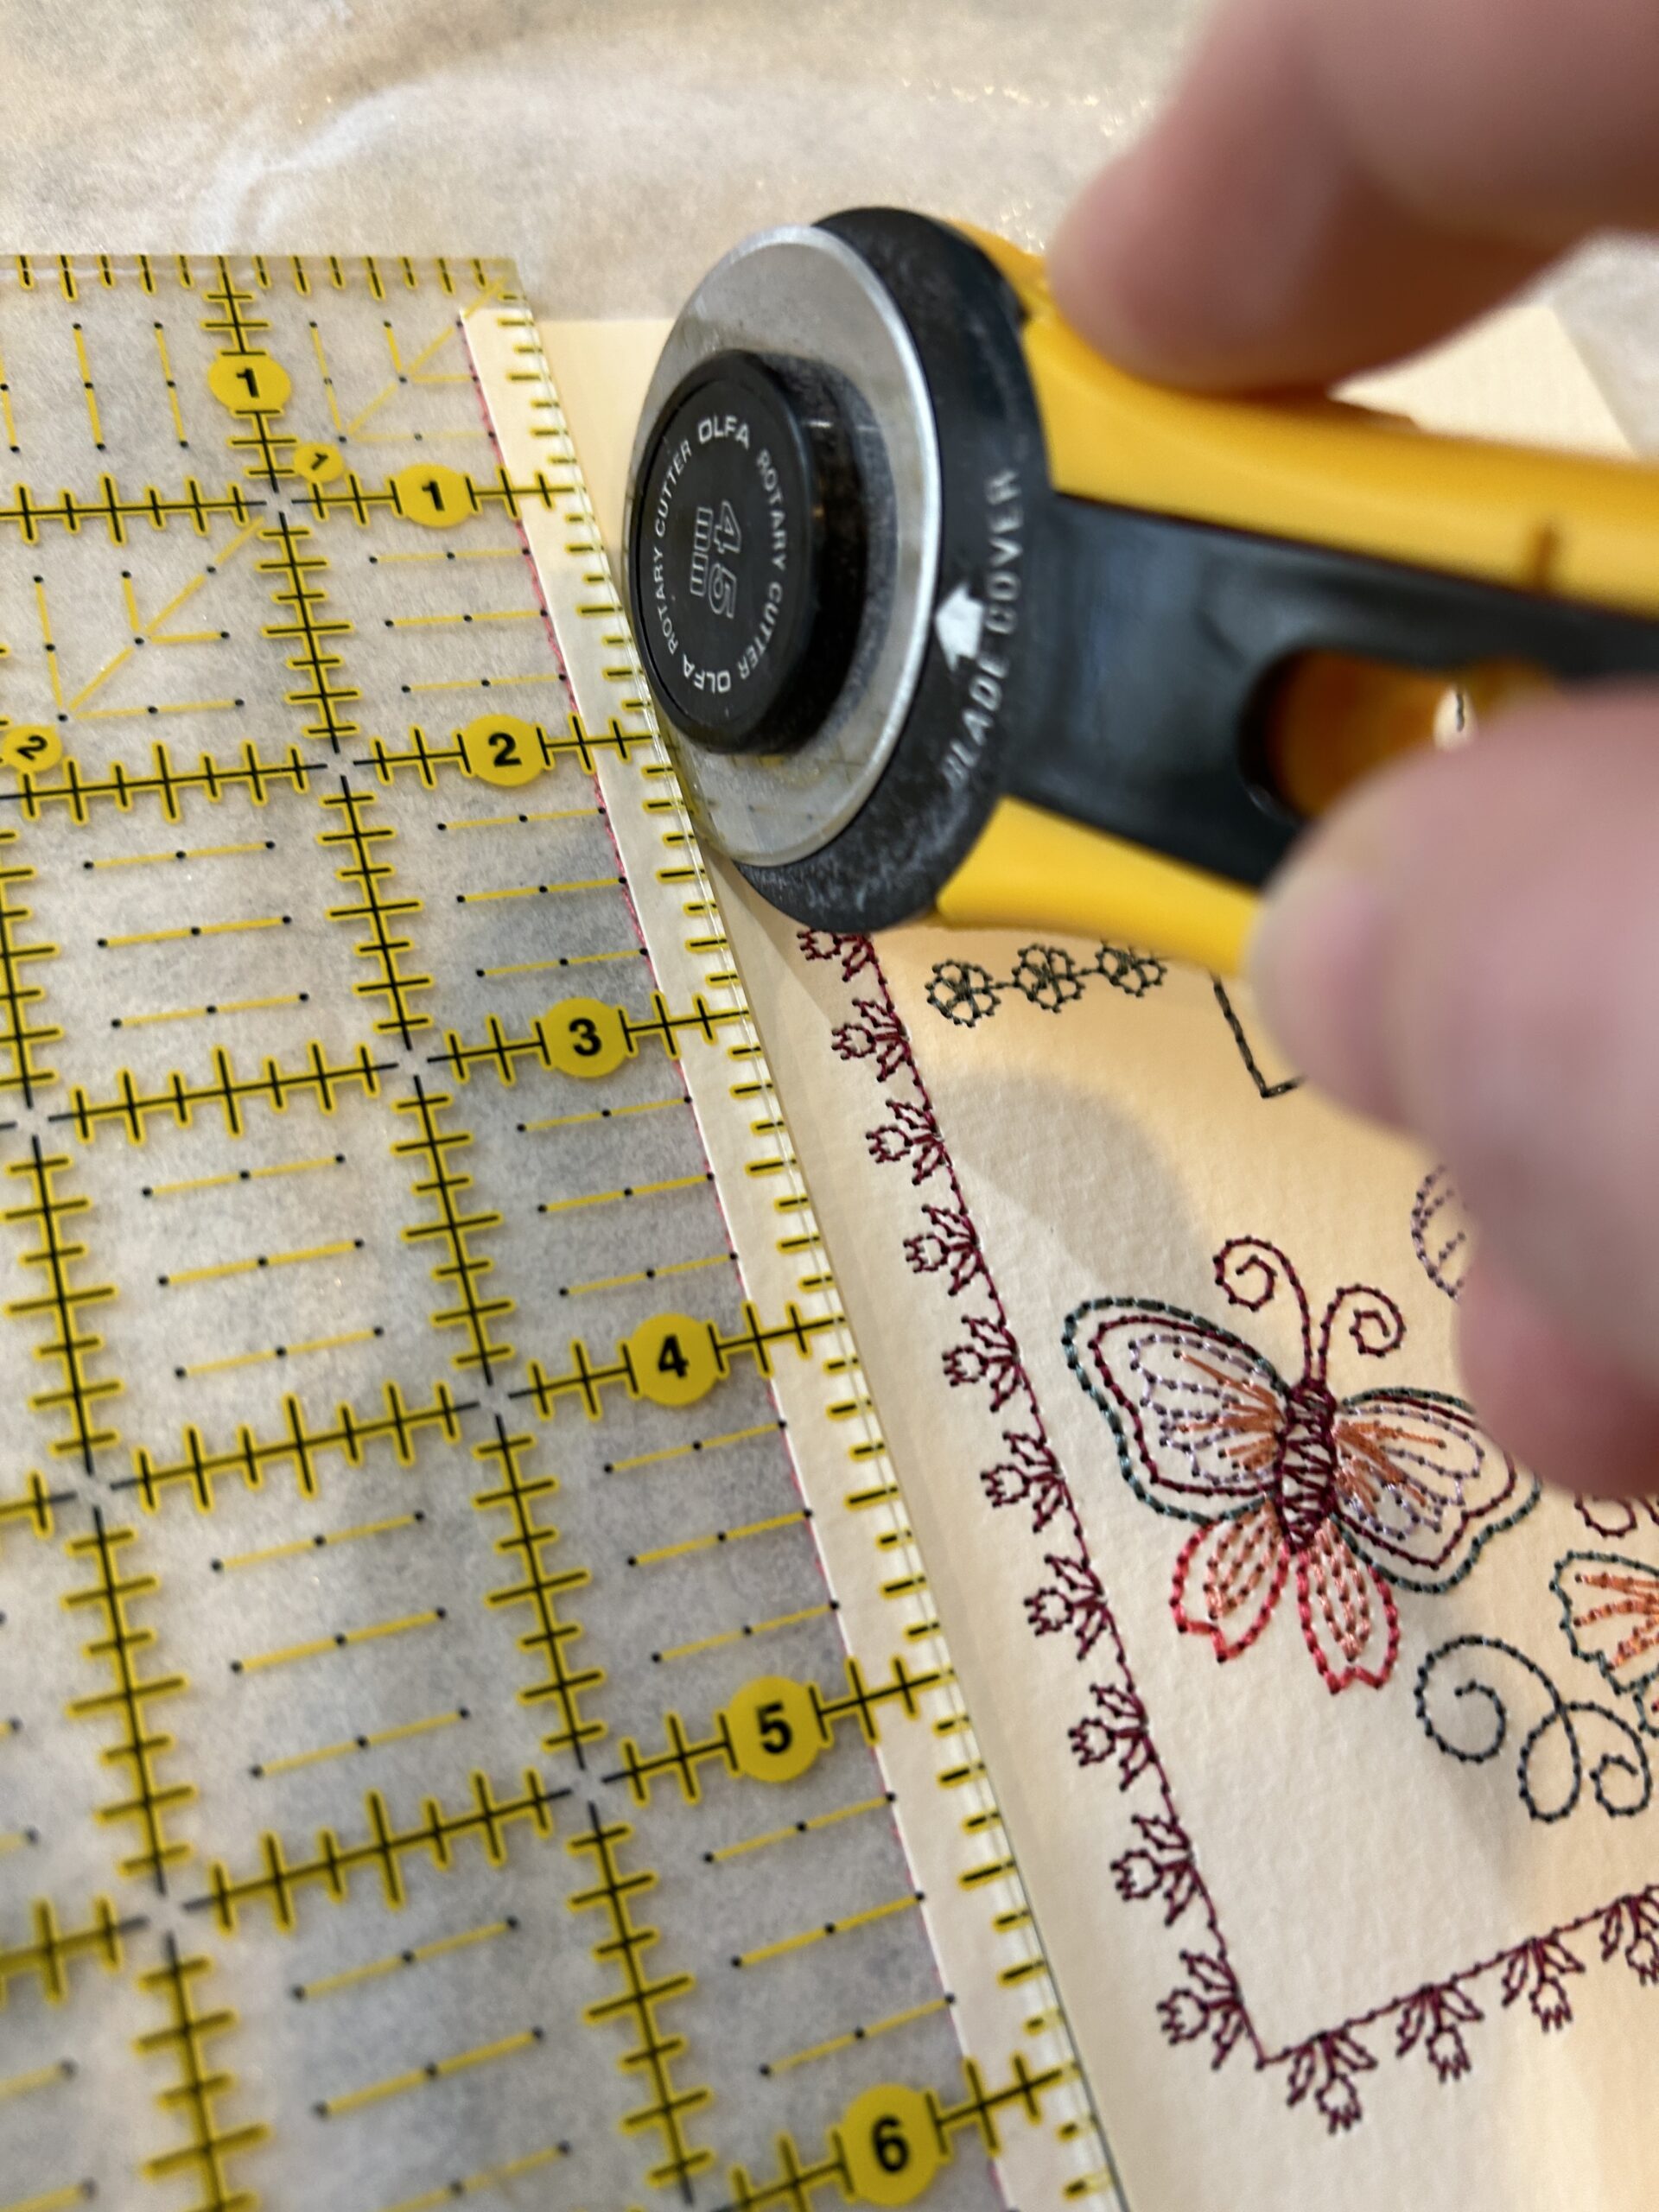
Continue until the pattern finishes. Remove your hoop from the machine.
Remove your design from the hoop. Trim the edges of the cardstock by a quarter inch on each side. It will now measure 6.5”x4.5”.
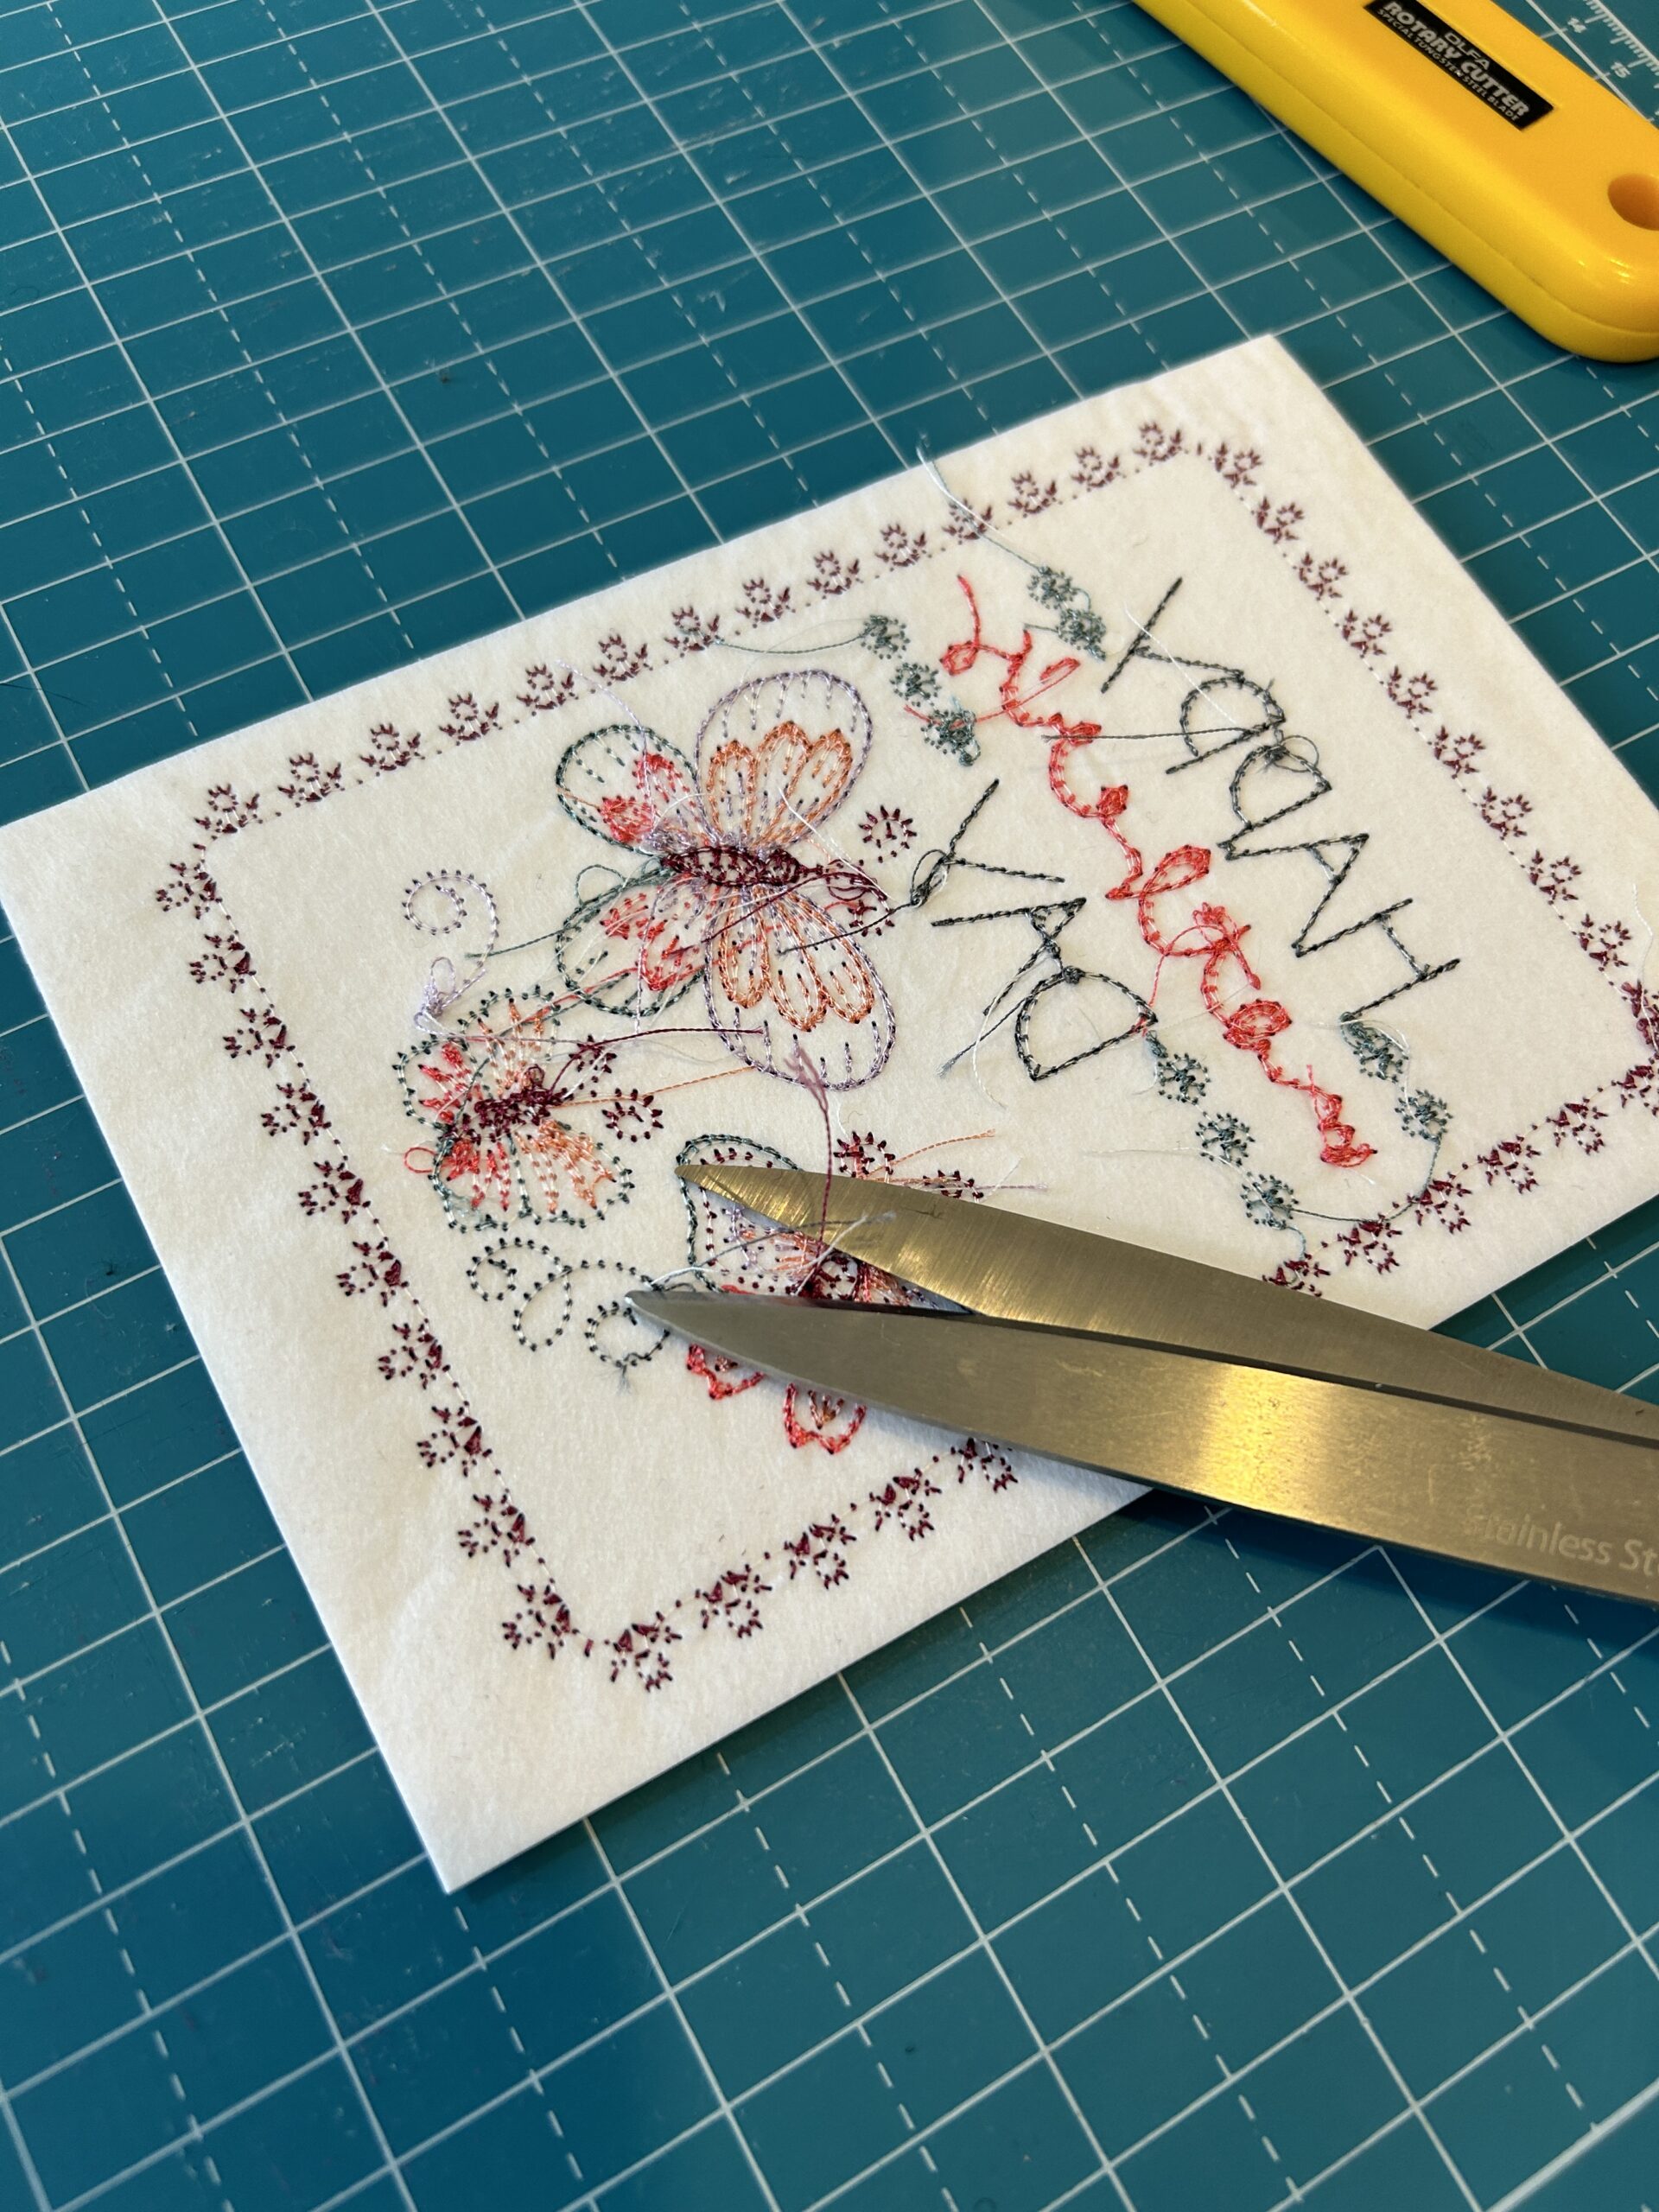
I like to clip the backside of the threads to help the back stick to the card better.
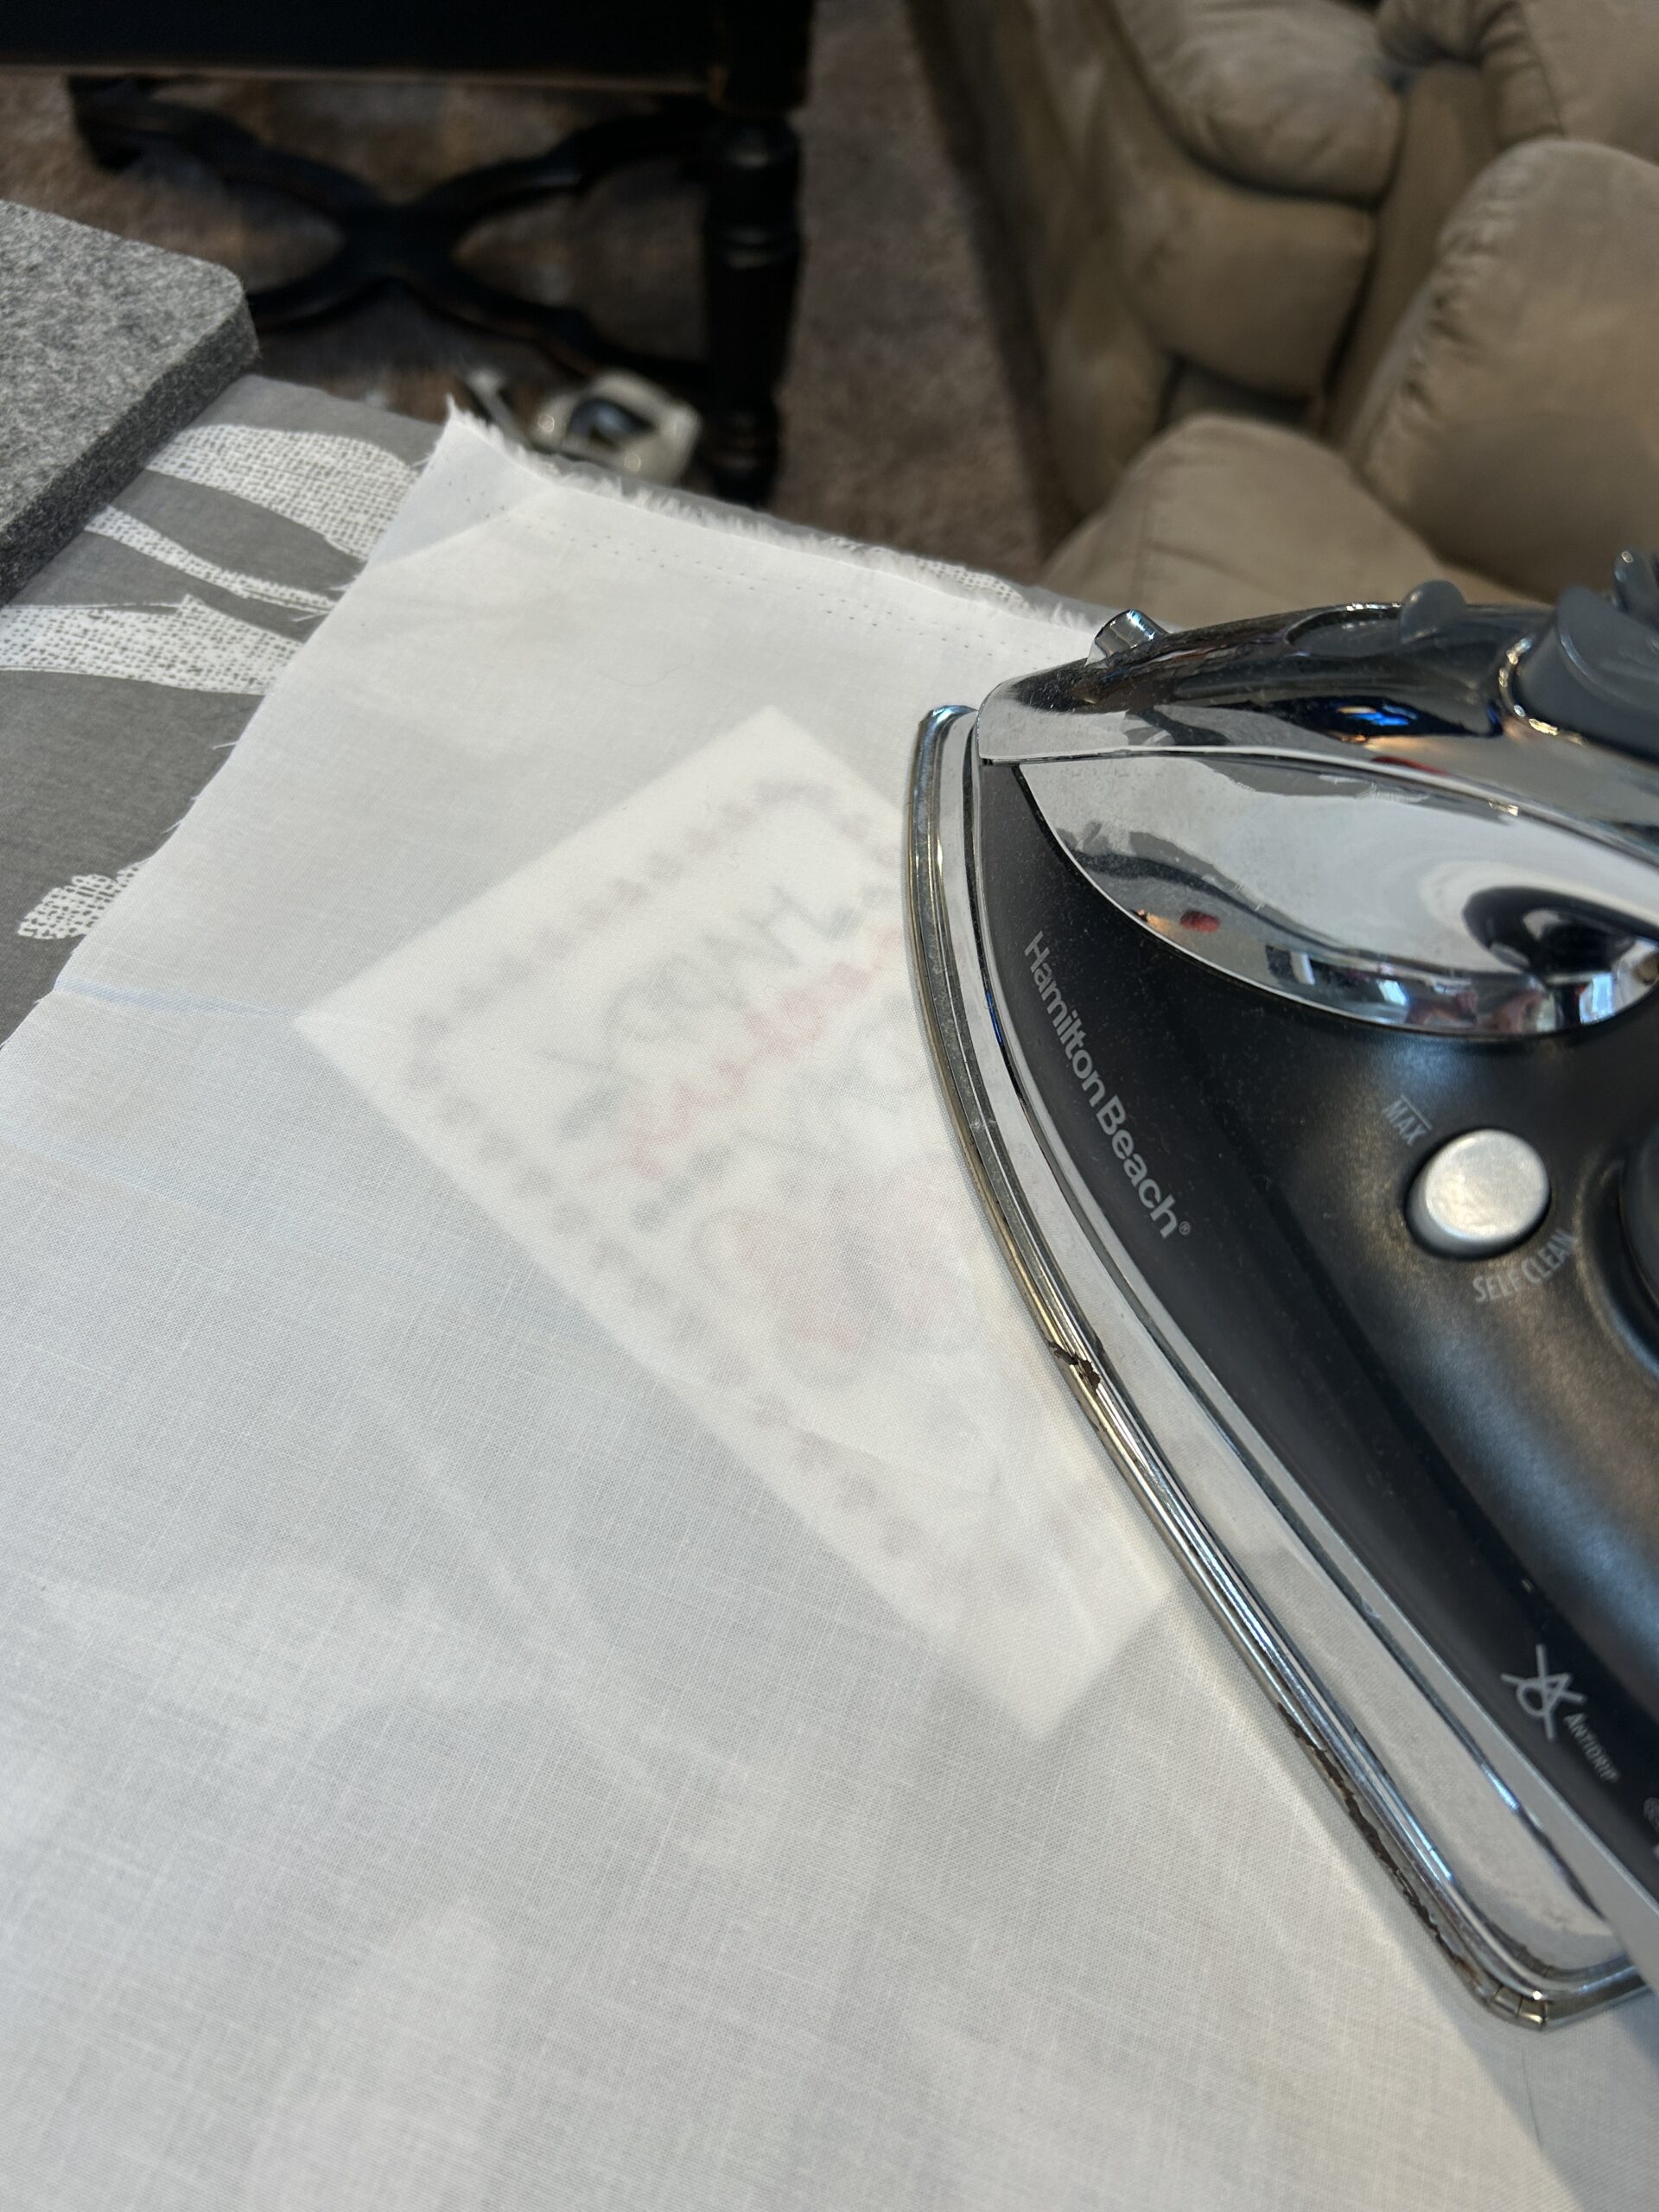
Press the stabilizer on the watercolor paper. To protect the stabilizer, I use a pressing cloth between my stabilizer and my iron.
Let’s assemble the paper part of the card. I used glue and attached the colored page to the 5x7 cardstock. Center it on the card so the border is equal all the way around.
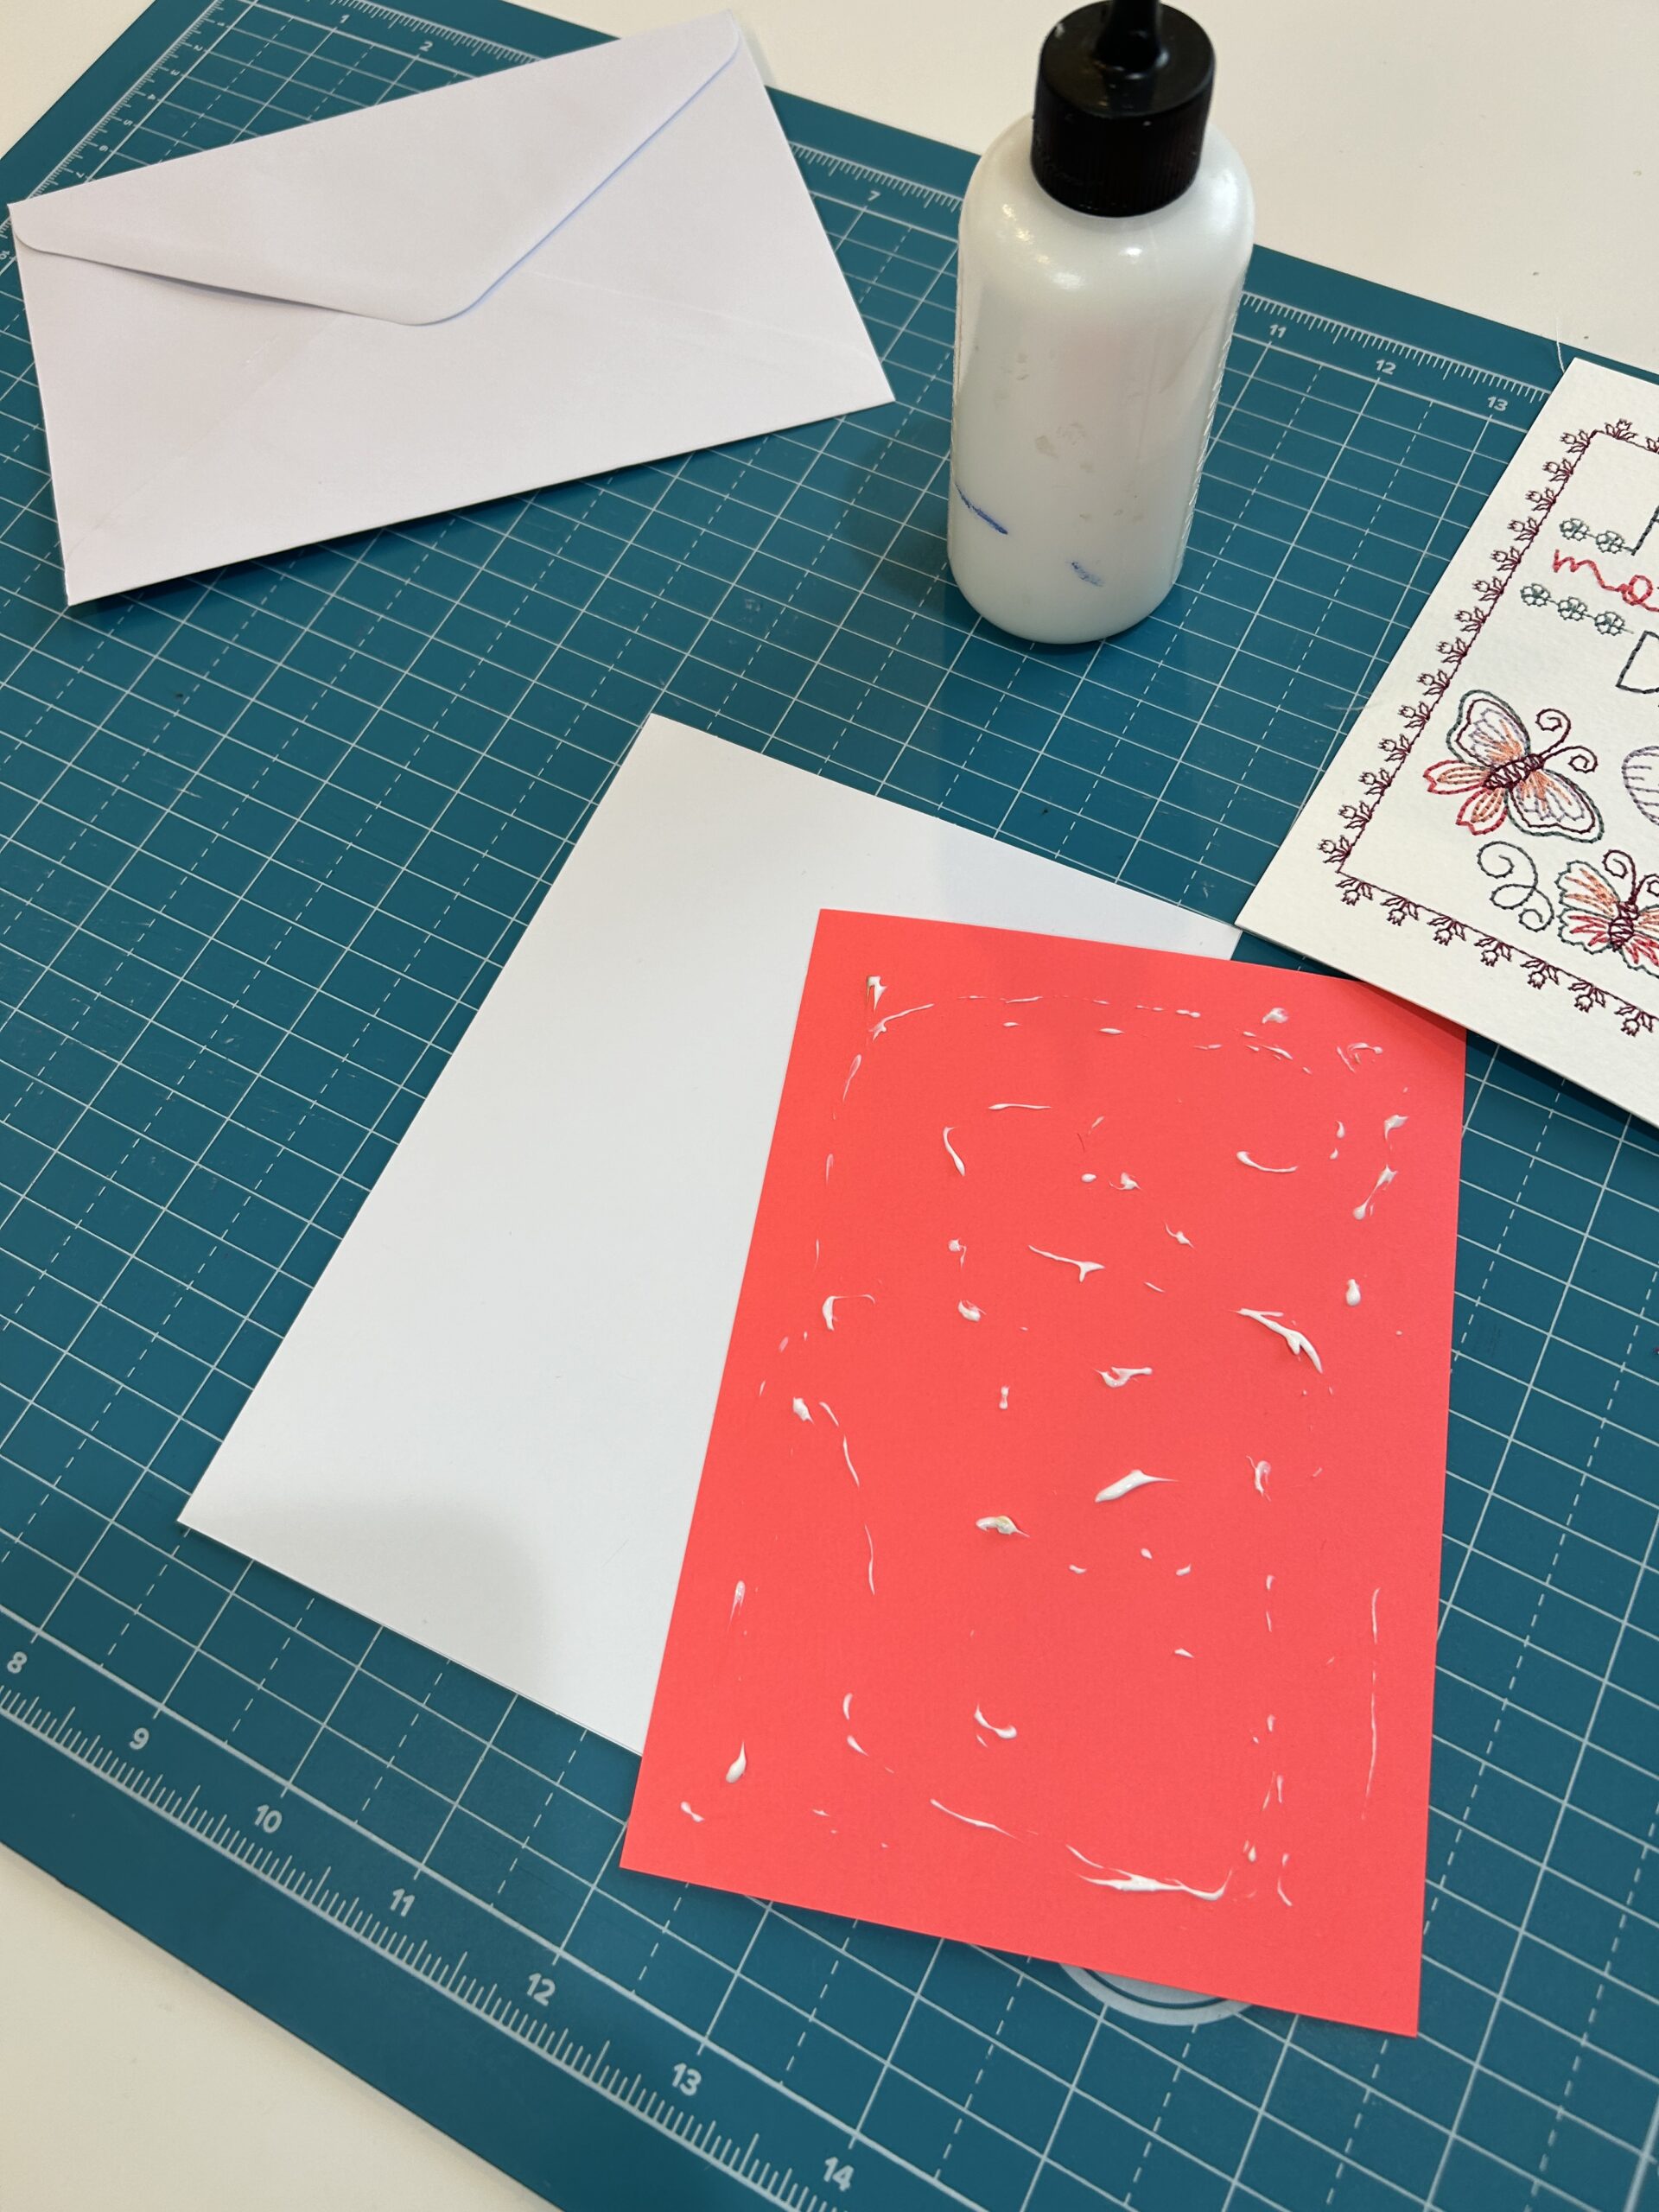
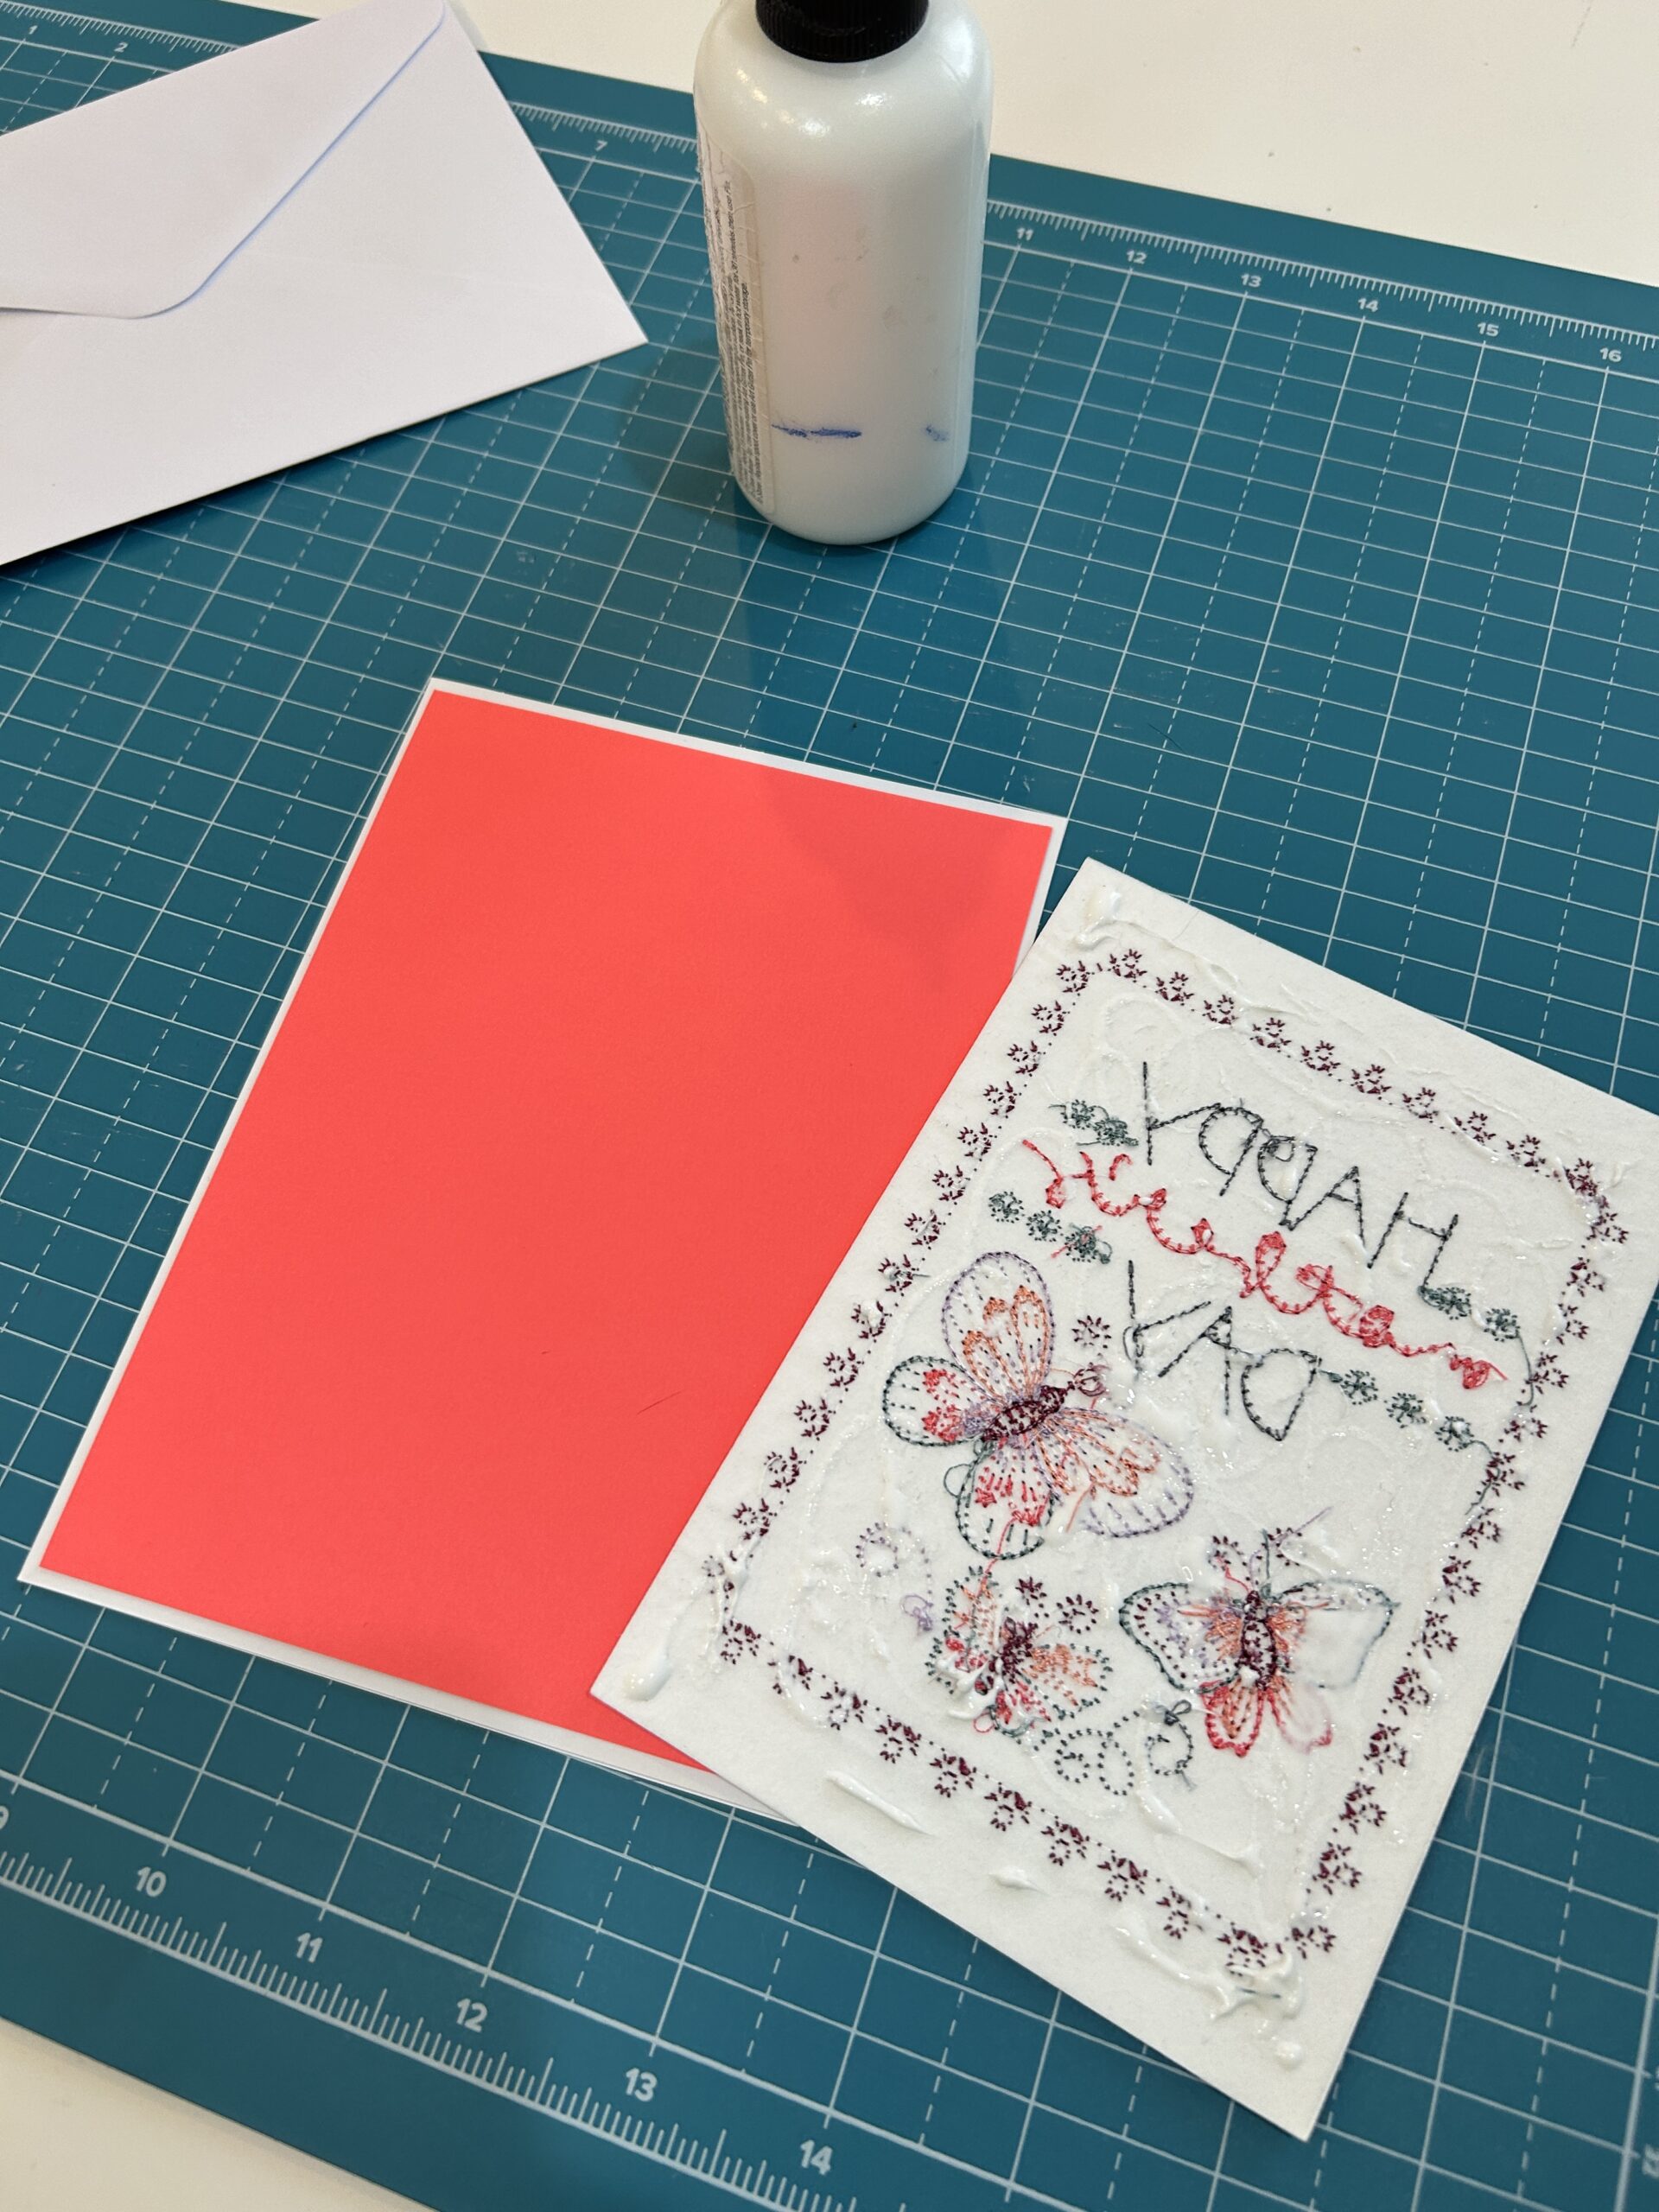
Then, I used glue on the backside of the embroidered watercolor paper and applied it directly to the stabilizer. I then centered it on the colored paper and pressed it in place. I used something heavy to hold it in place while the glue dries. You could also use double-stick tape to hold the layers in place.
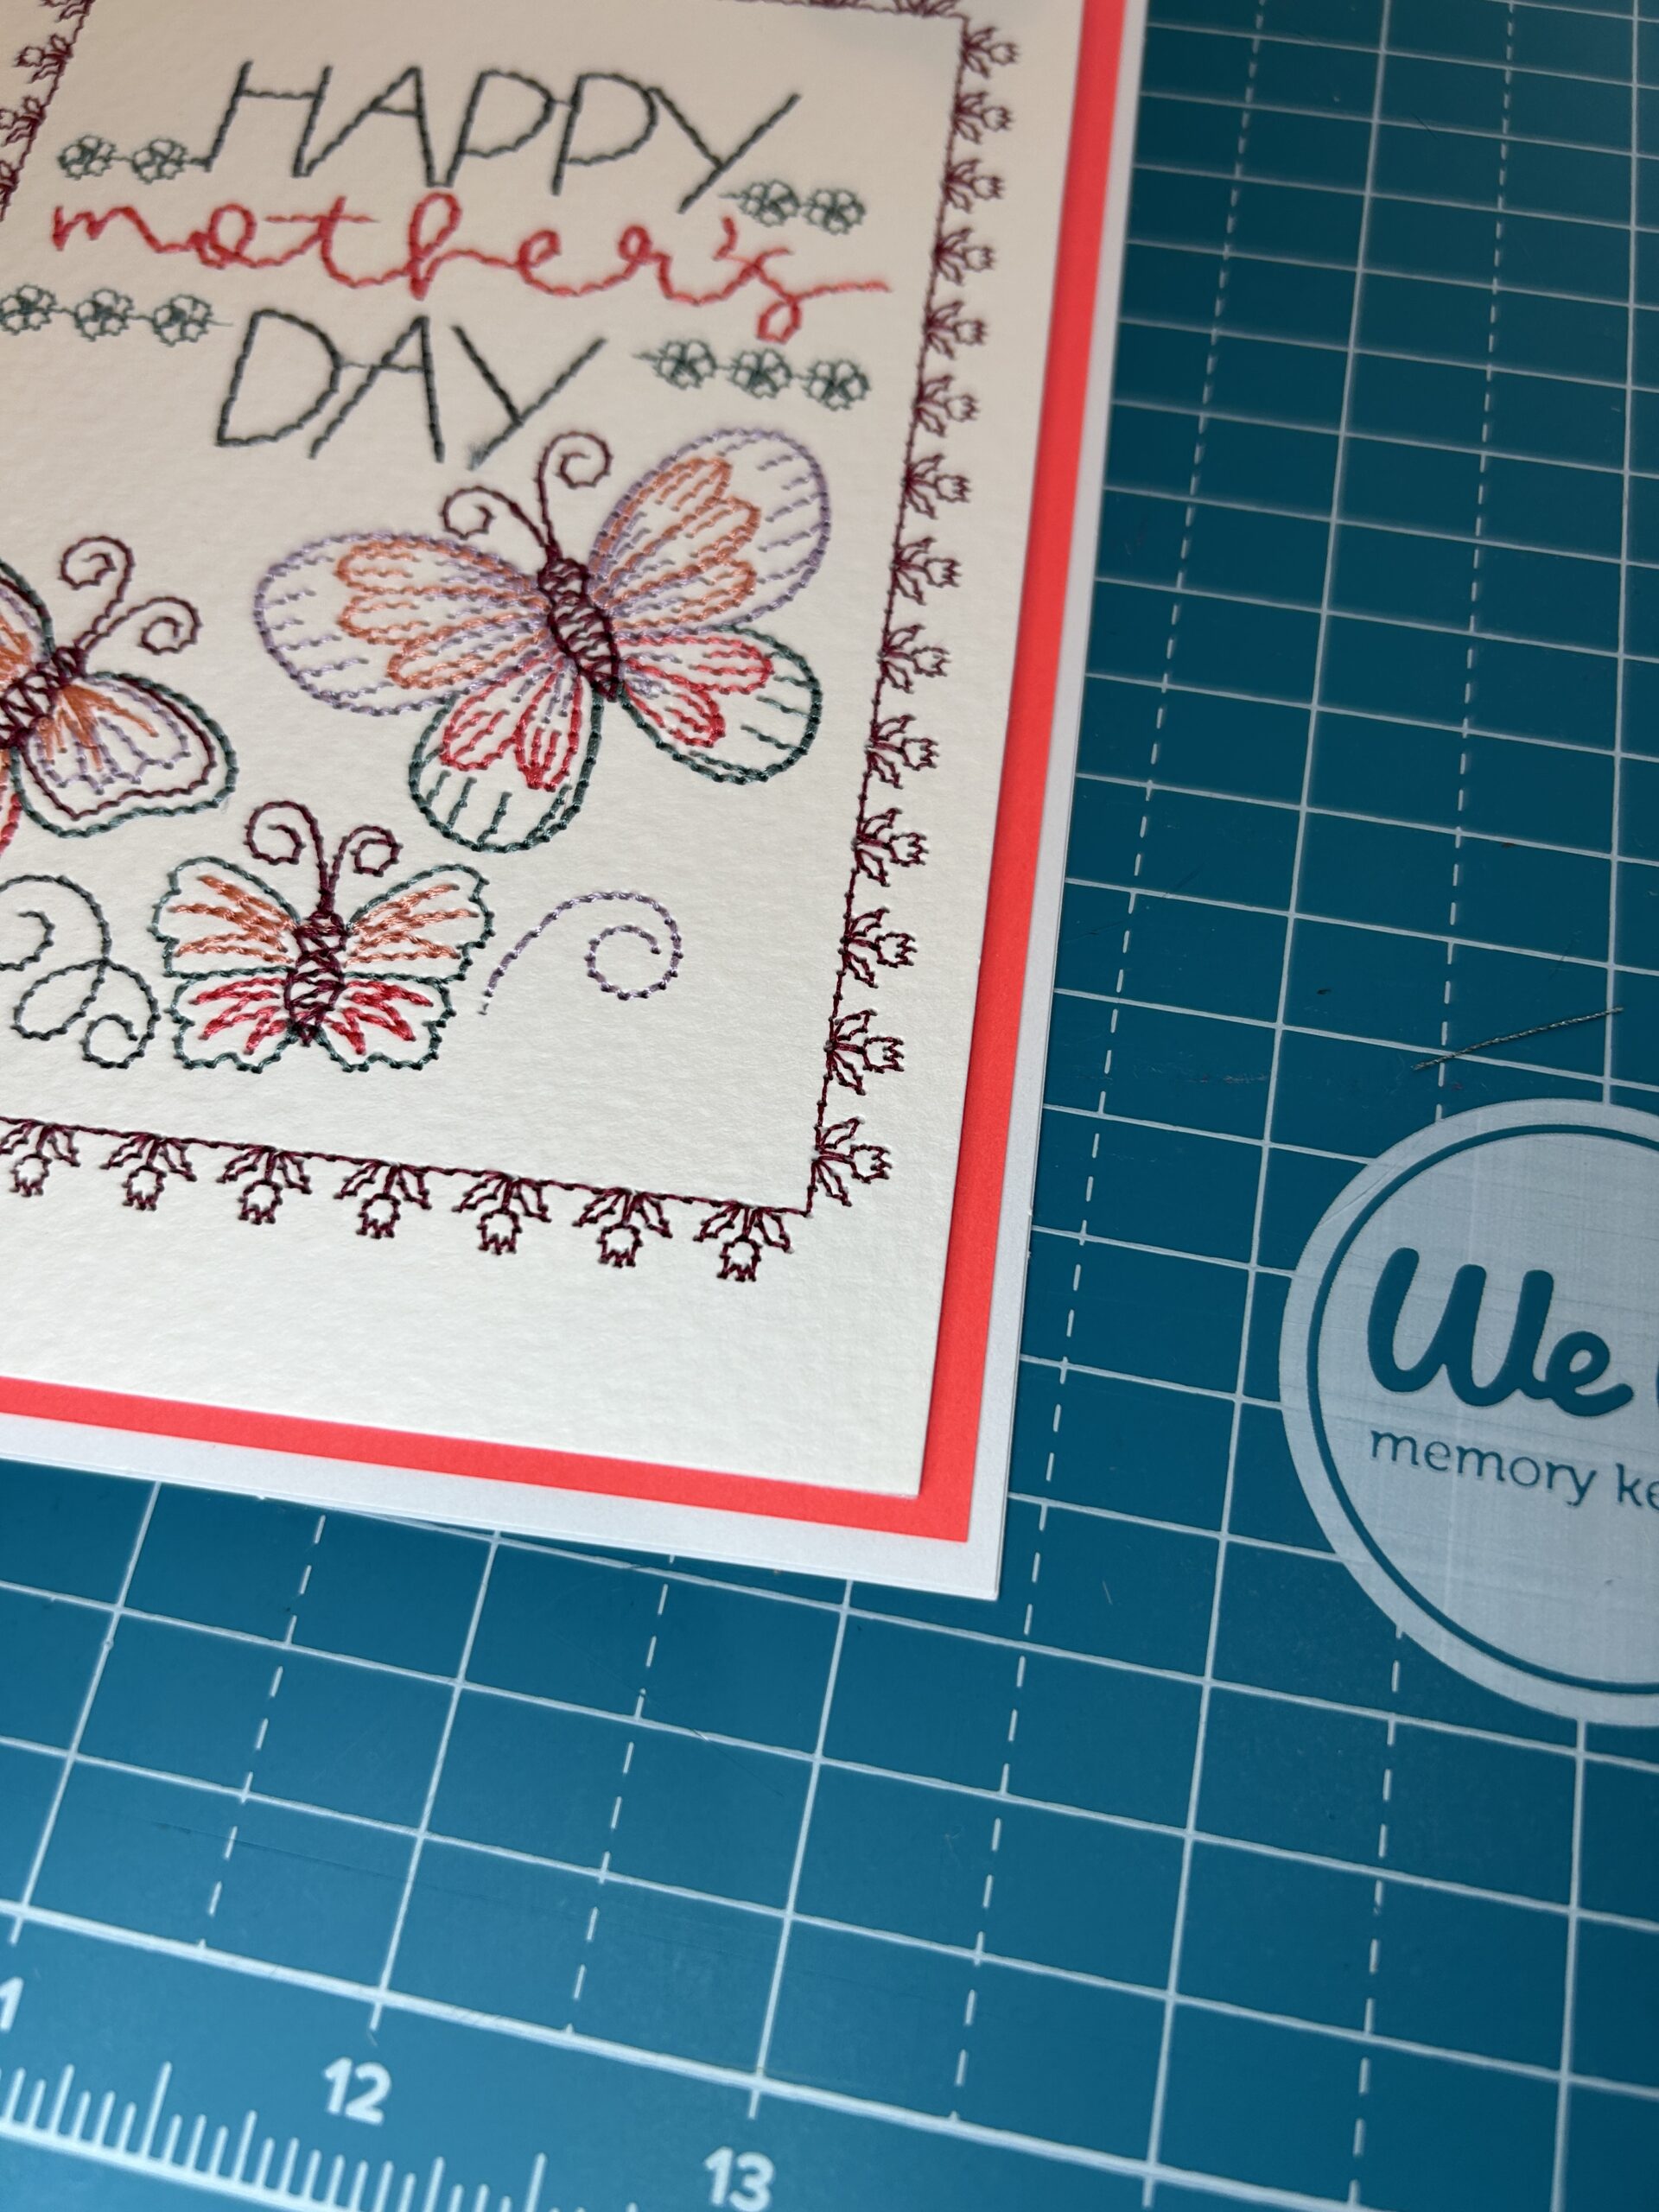
This is a close-up picture of the edges so you can see how I try to center them so the borders are equal all the way around.
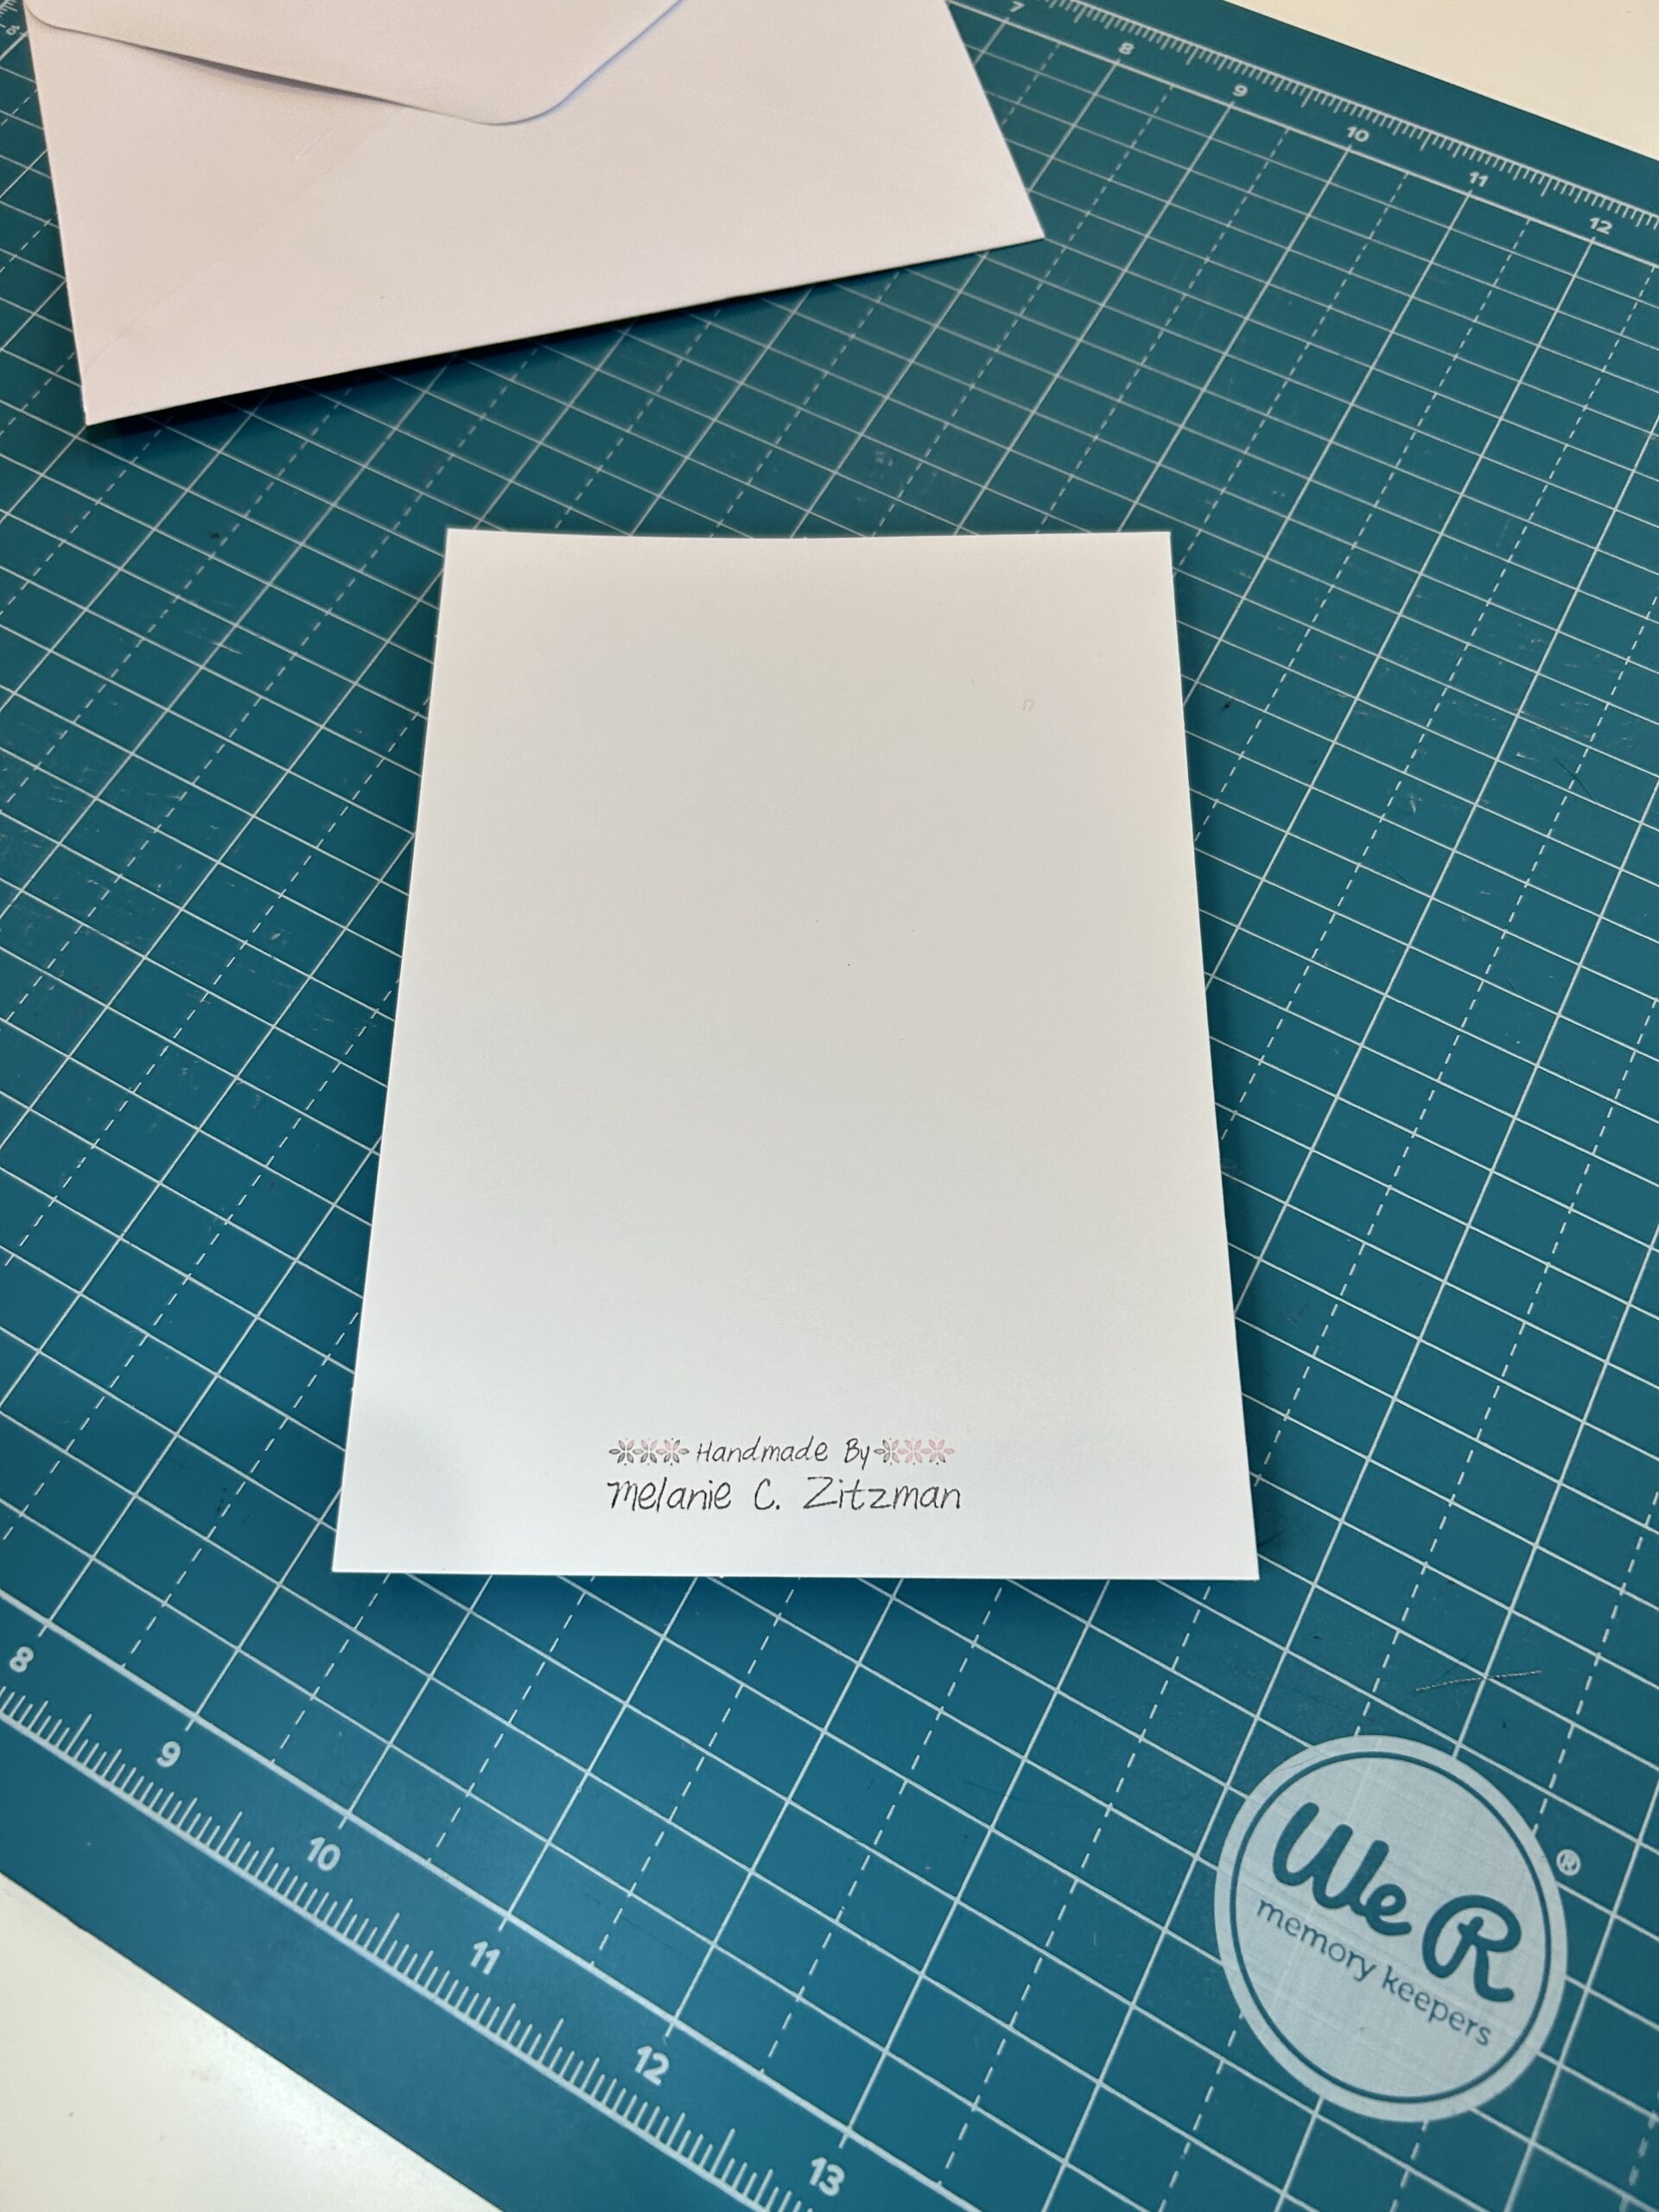
Add a small “handmade by” label to the back of your card for a personalized touch.
For an optional but pretty touch, you can decorate your envelope. You just need a piece of paper bigger than the envelope to do that. I trace the open envelope on the paper and cut it out.
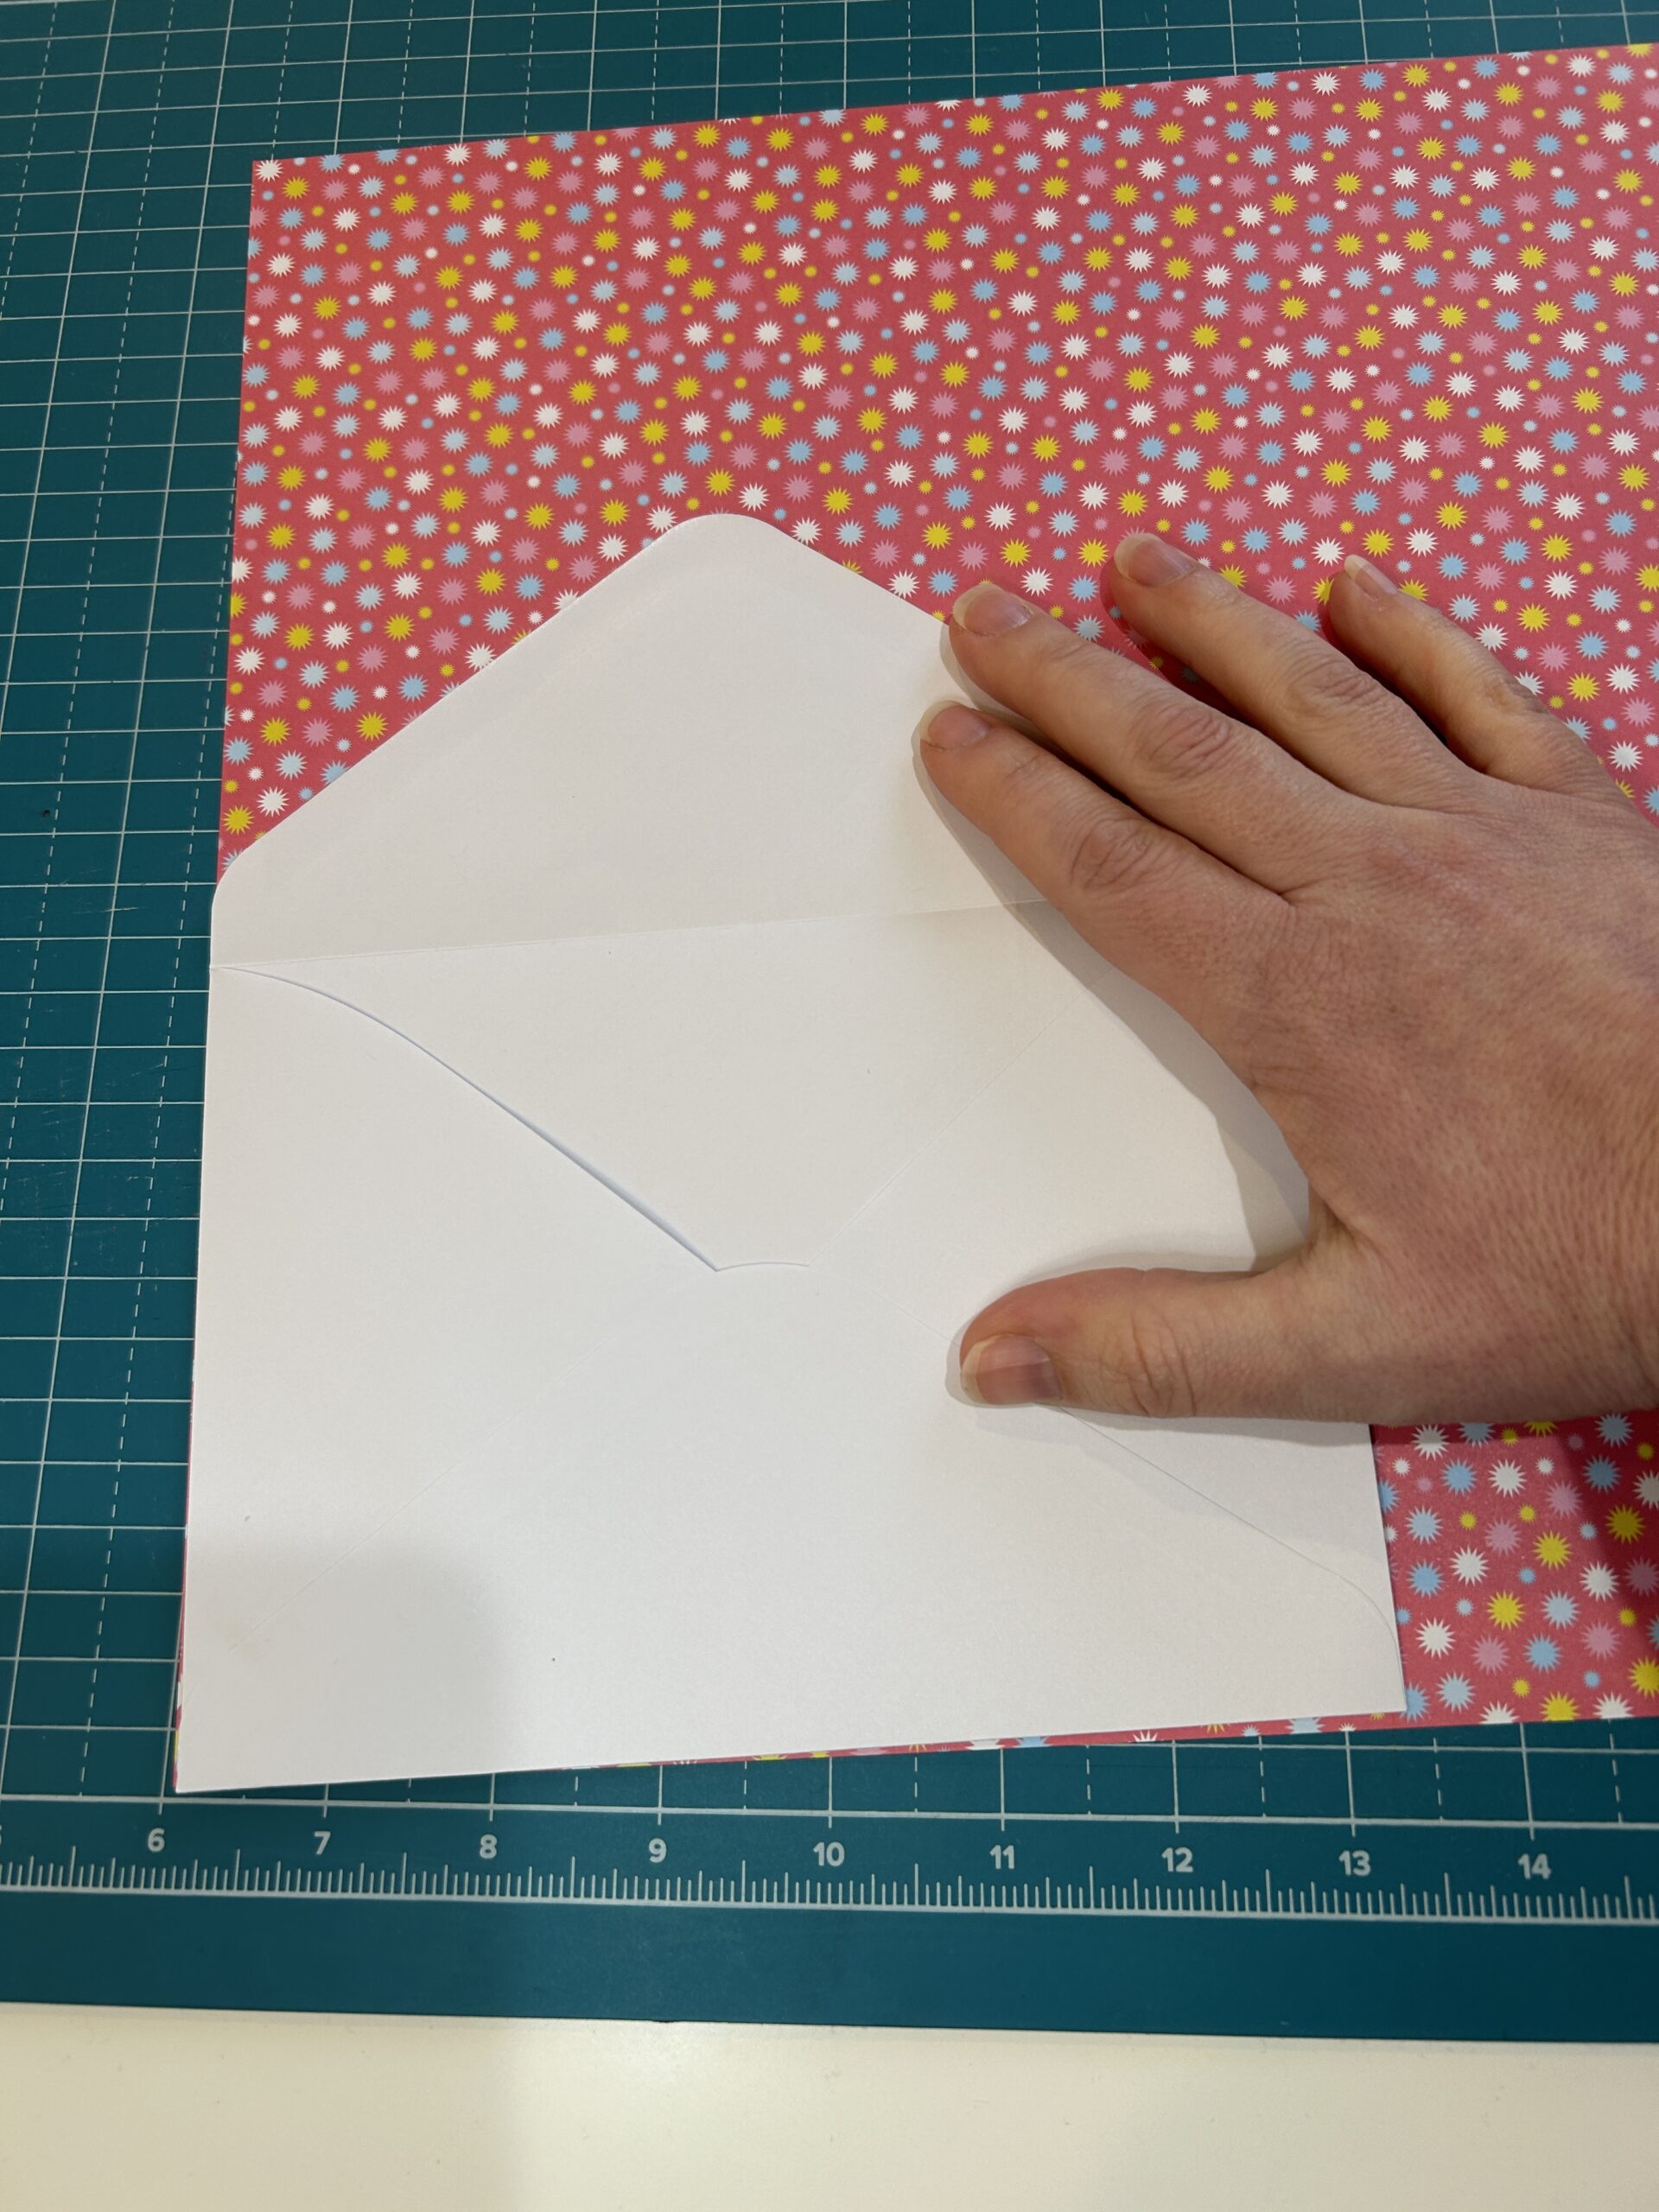
Cut 1/8” off each side and .75” off the bottom of the paper and throw them away.
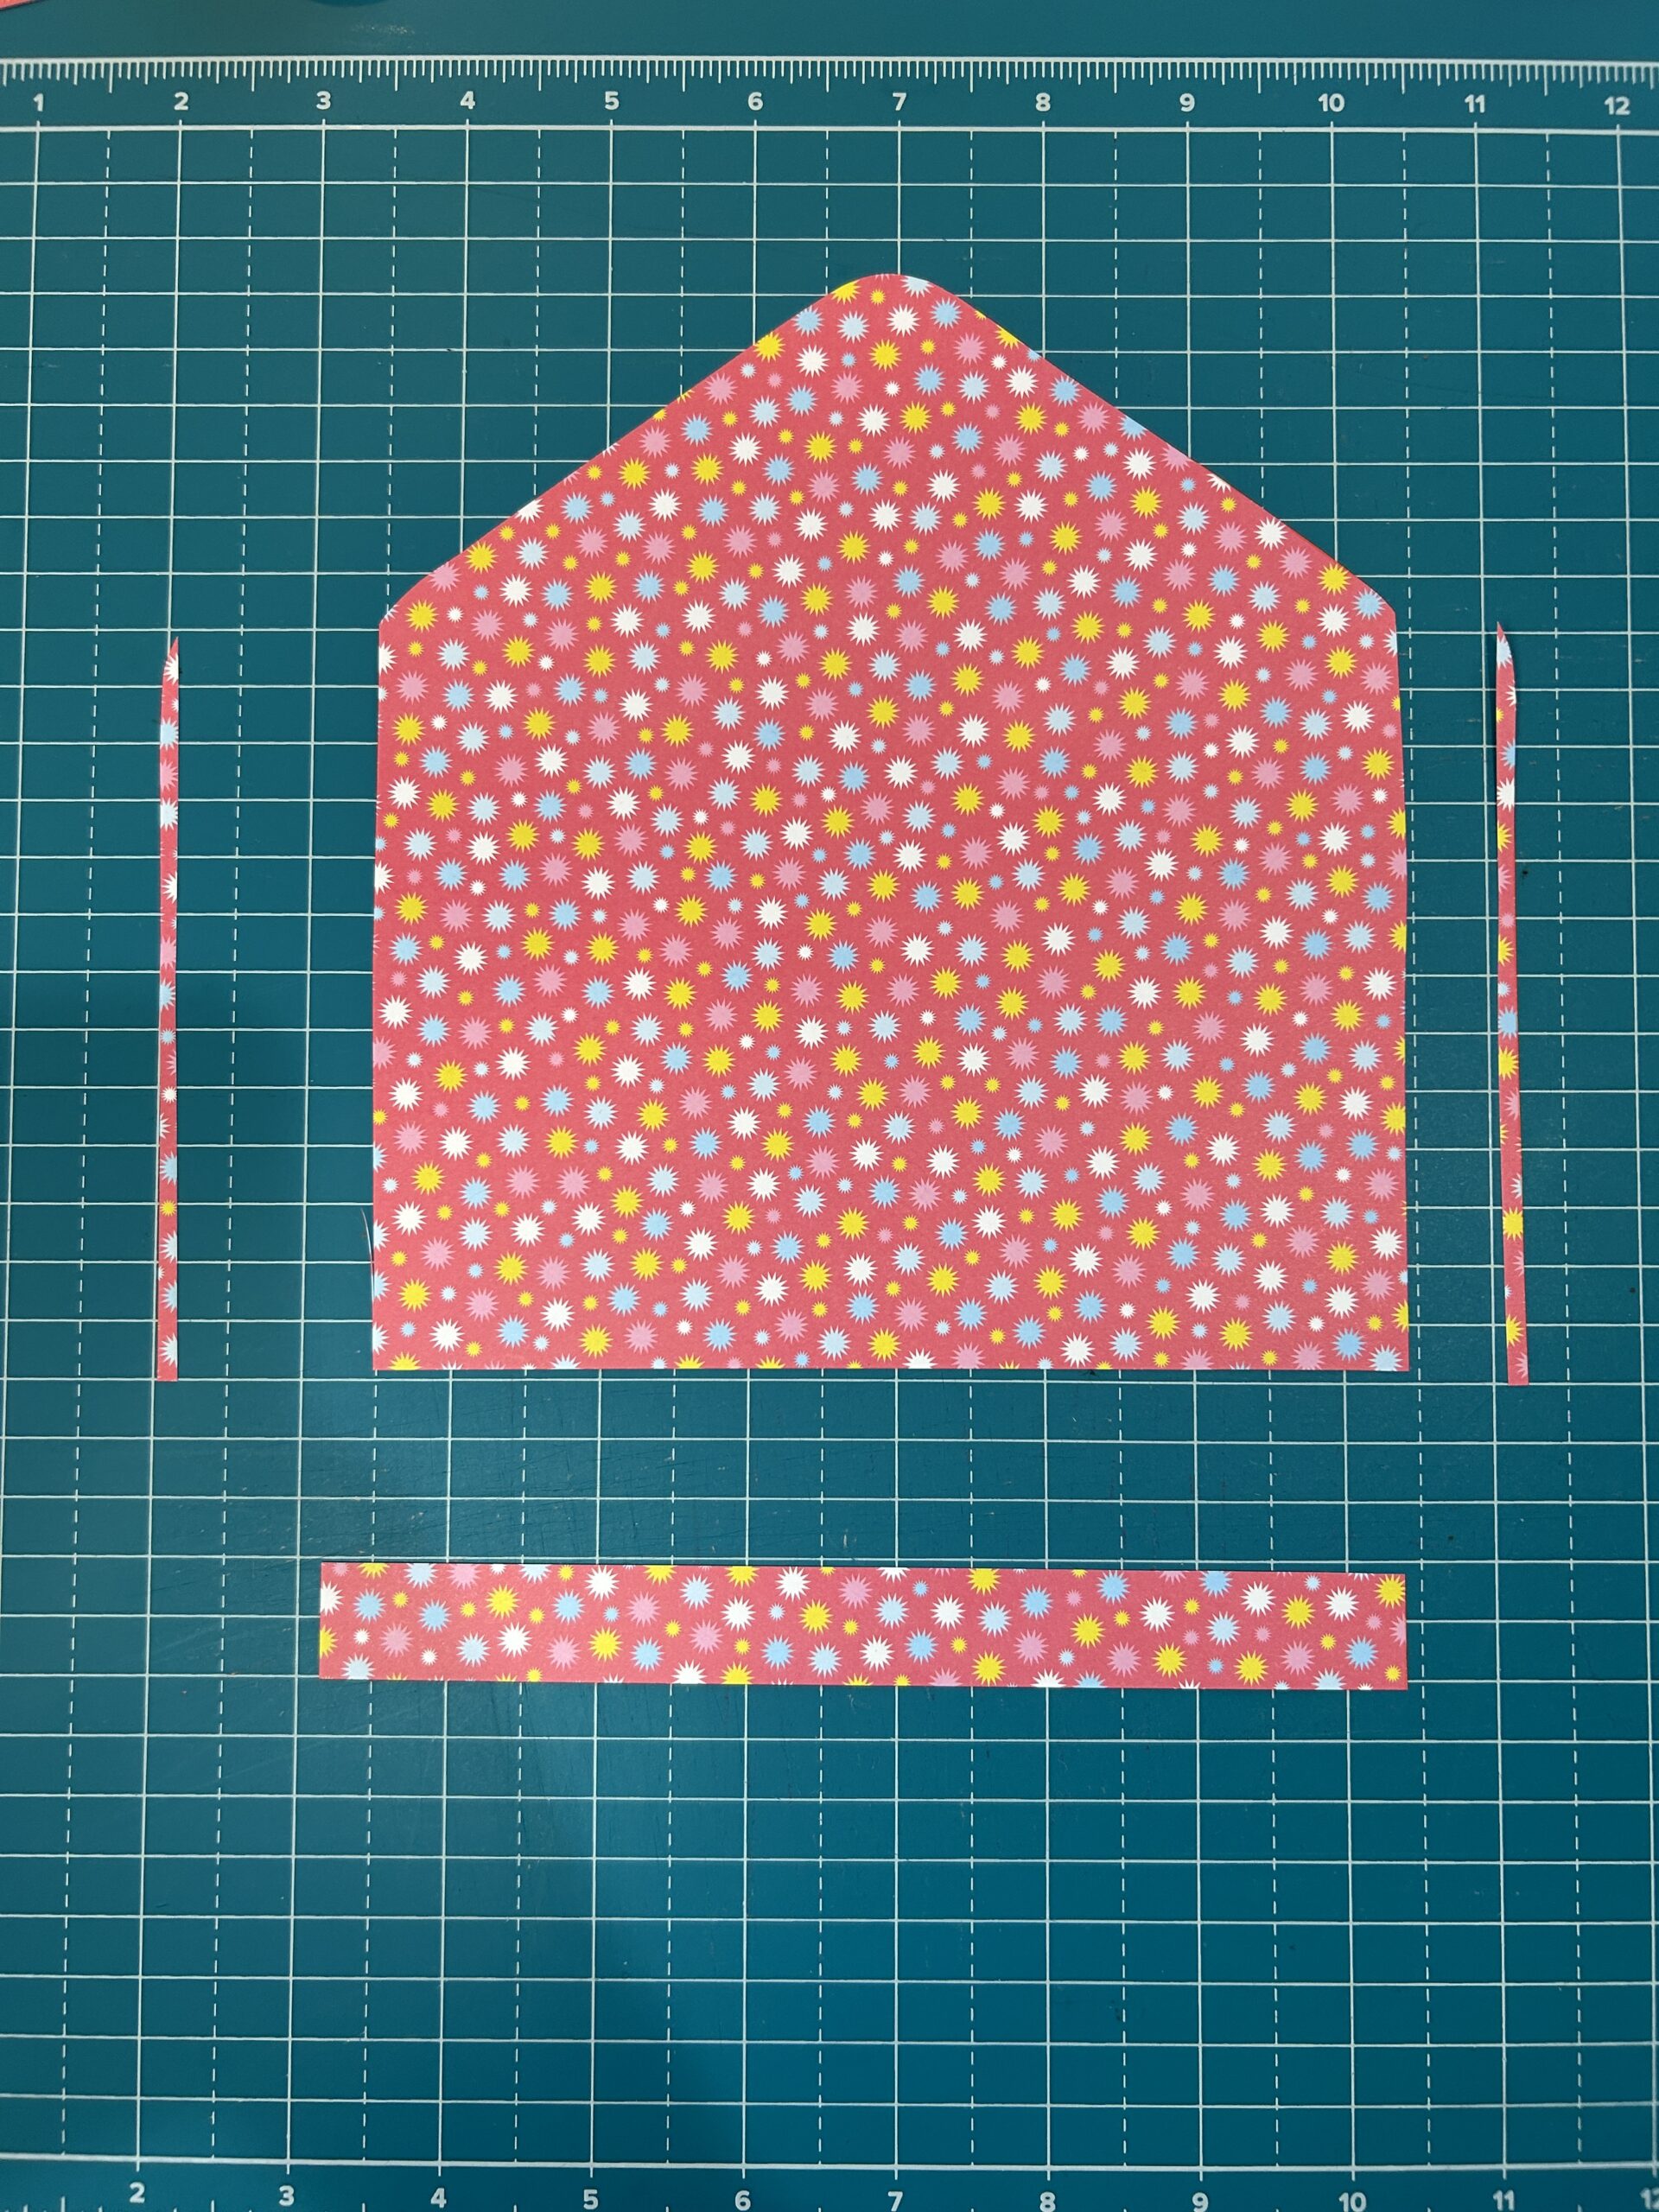
You can then slide it into the inside of the envelope and tape or glue it to the flap side of the envelope. Make sure you don’t cover the adhesive when closing the envelope. Now you have a pretty envelope for your gorgeous card!
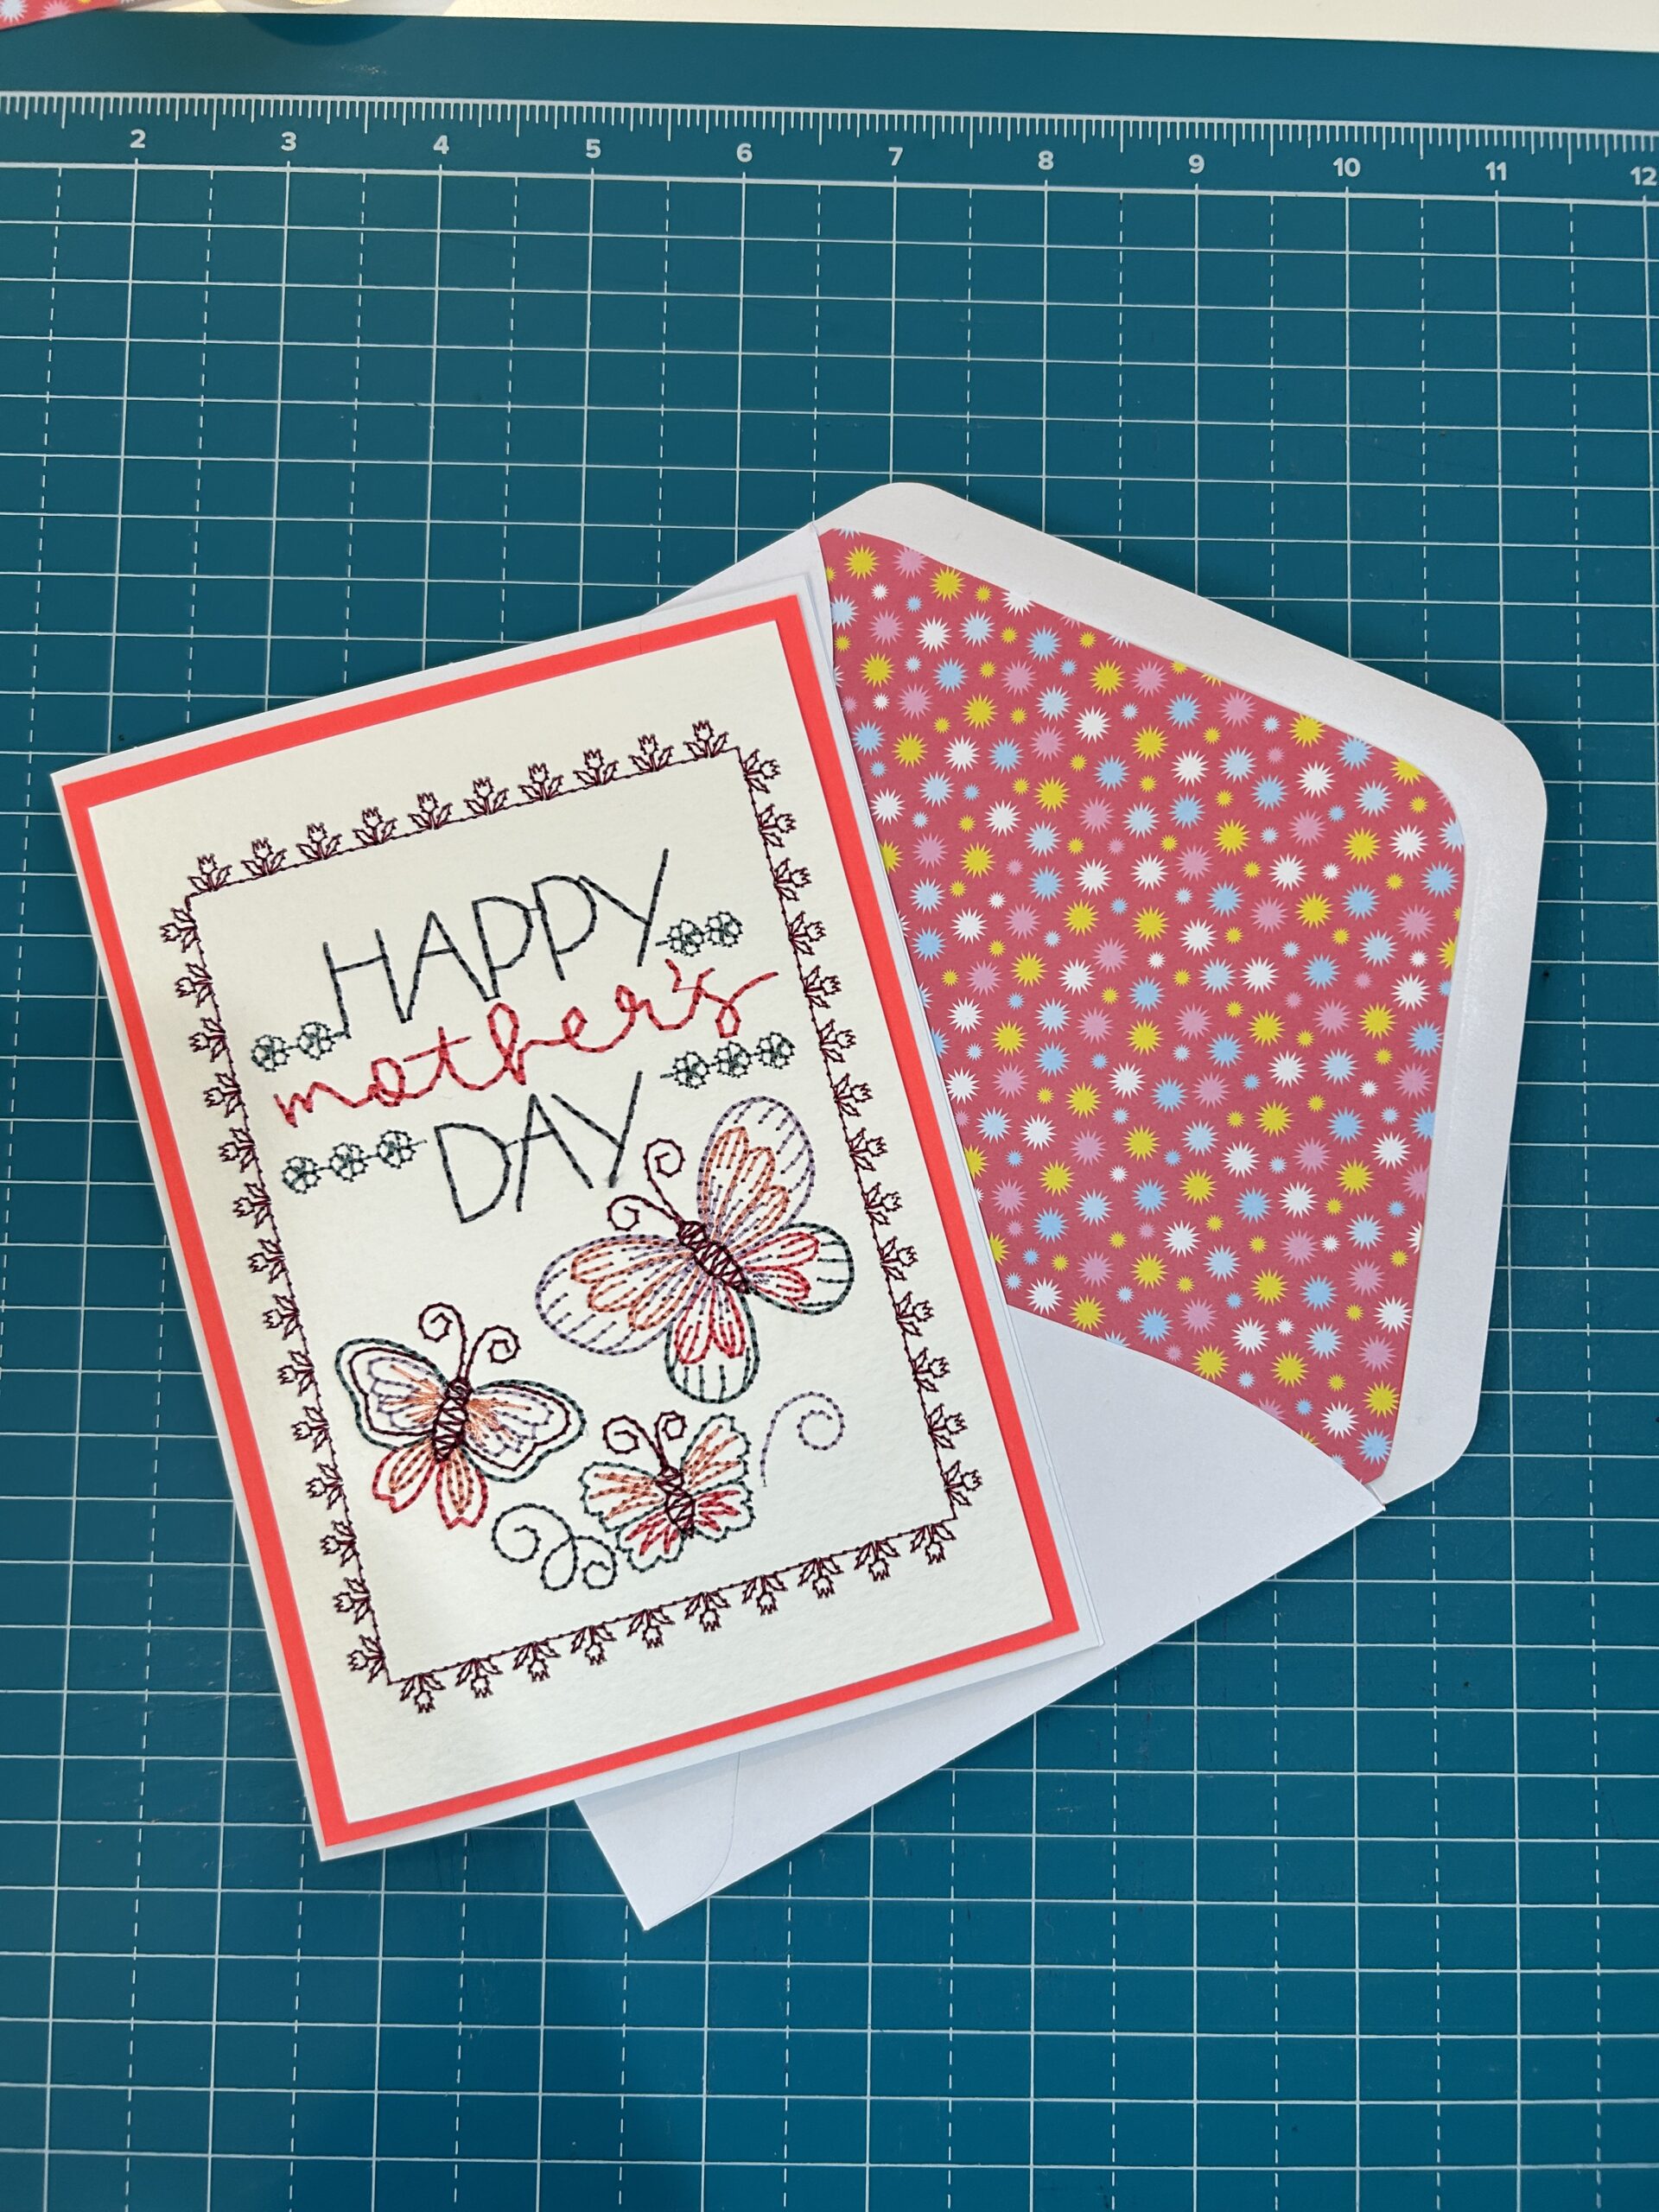
I’m sure the special women in your life will appreciate all the work you put into this one-of-a-kind embroidered Mother’s Day card for them! Happy Mother's Day!