Toggle Nav
 Inspire.
Create.
Stitch.
Inspire.
Create.
Stitch.
Search
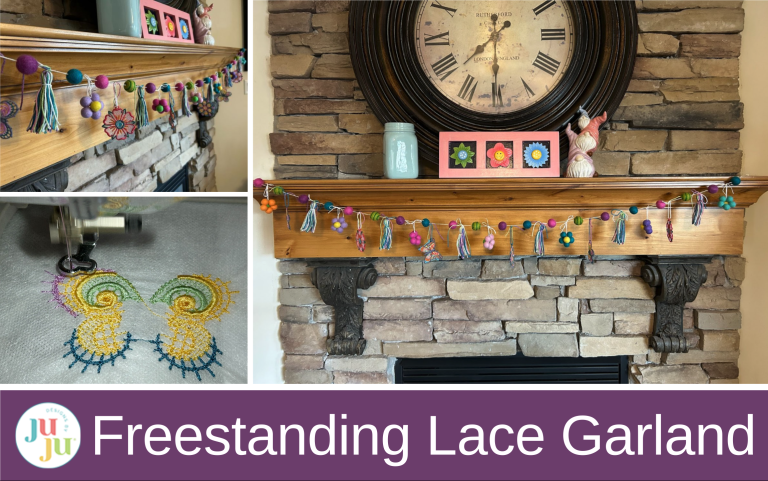
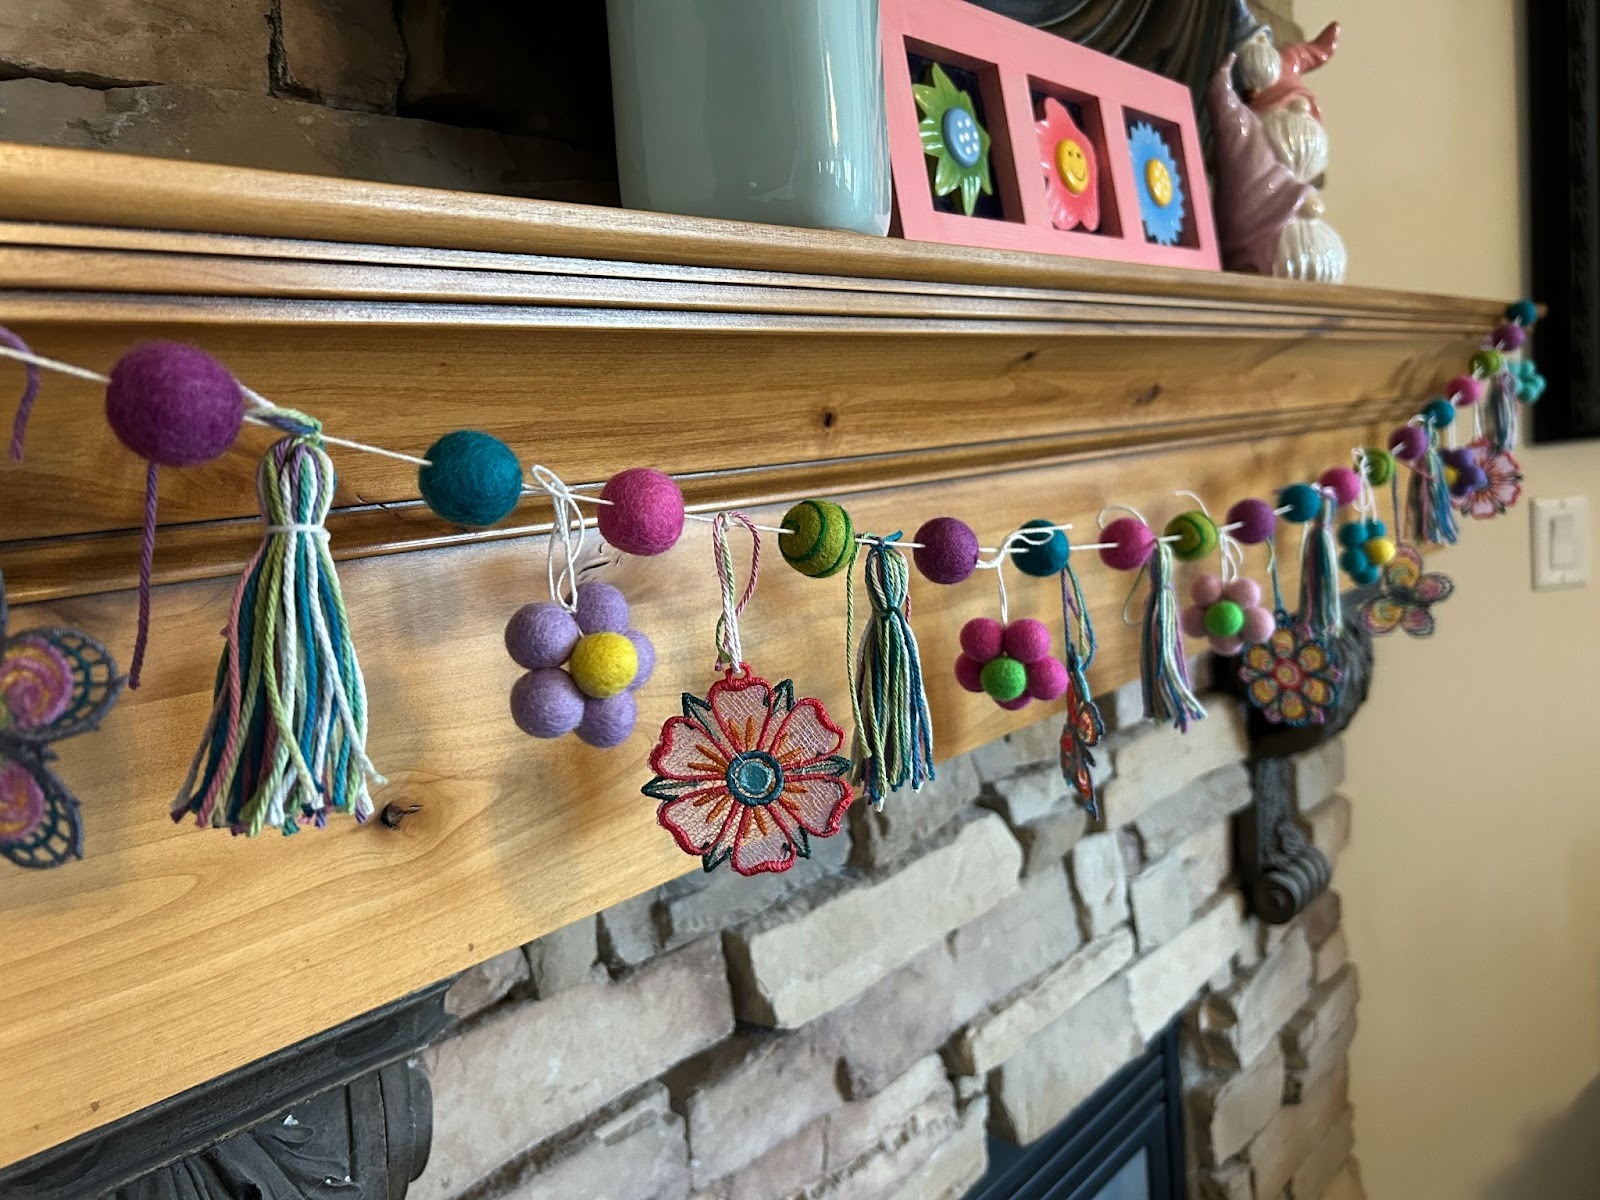
Make a delicate freestanding lace garland that is quick to stitch and easy to personalize with your favorite accents.
DBJJ has so many beautiful freestanding lace designs. I wanted to take some of them and incorporate them with some wool balls, some of them made into flowers, and some tassels. It ended up being a beautiful garland that looks so nice hanging on my mantle. The best part was it was super easy to do. I love those kinds of projects—a little work and a lot of impact!
Don’t forget to check out the DBJJ team’s favorite supplies in the Designs by JuJu Amazon store.
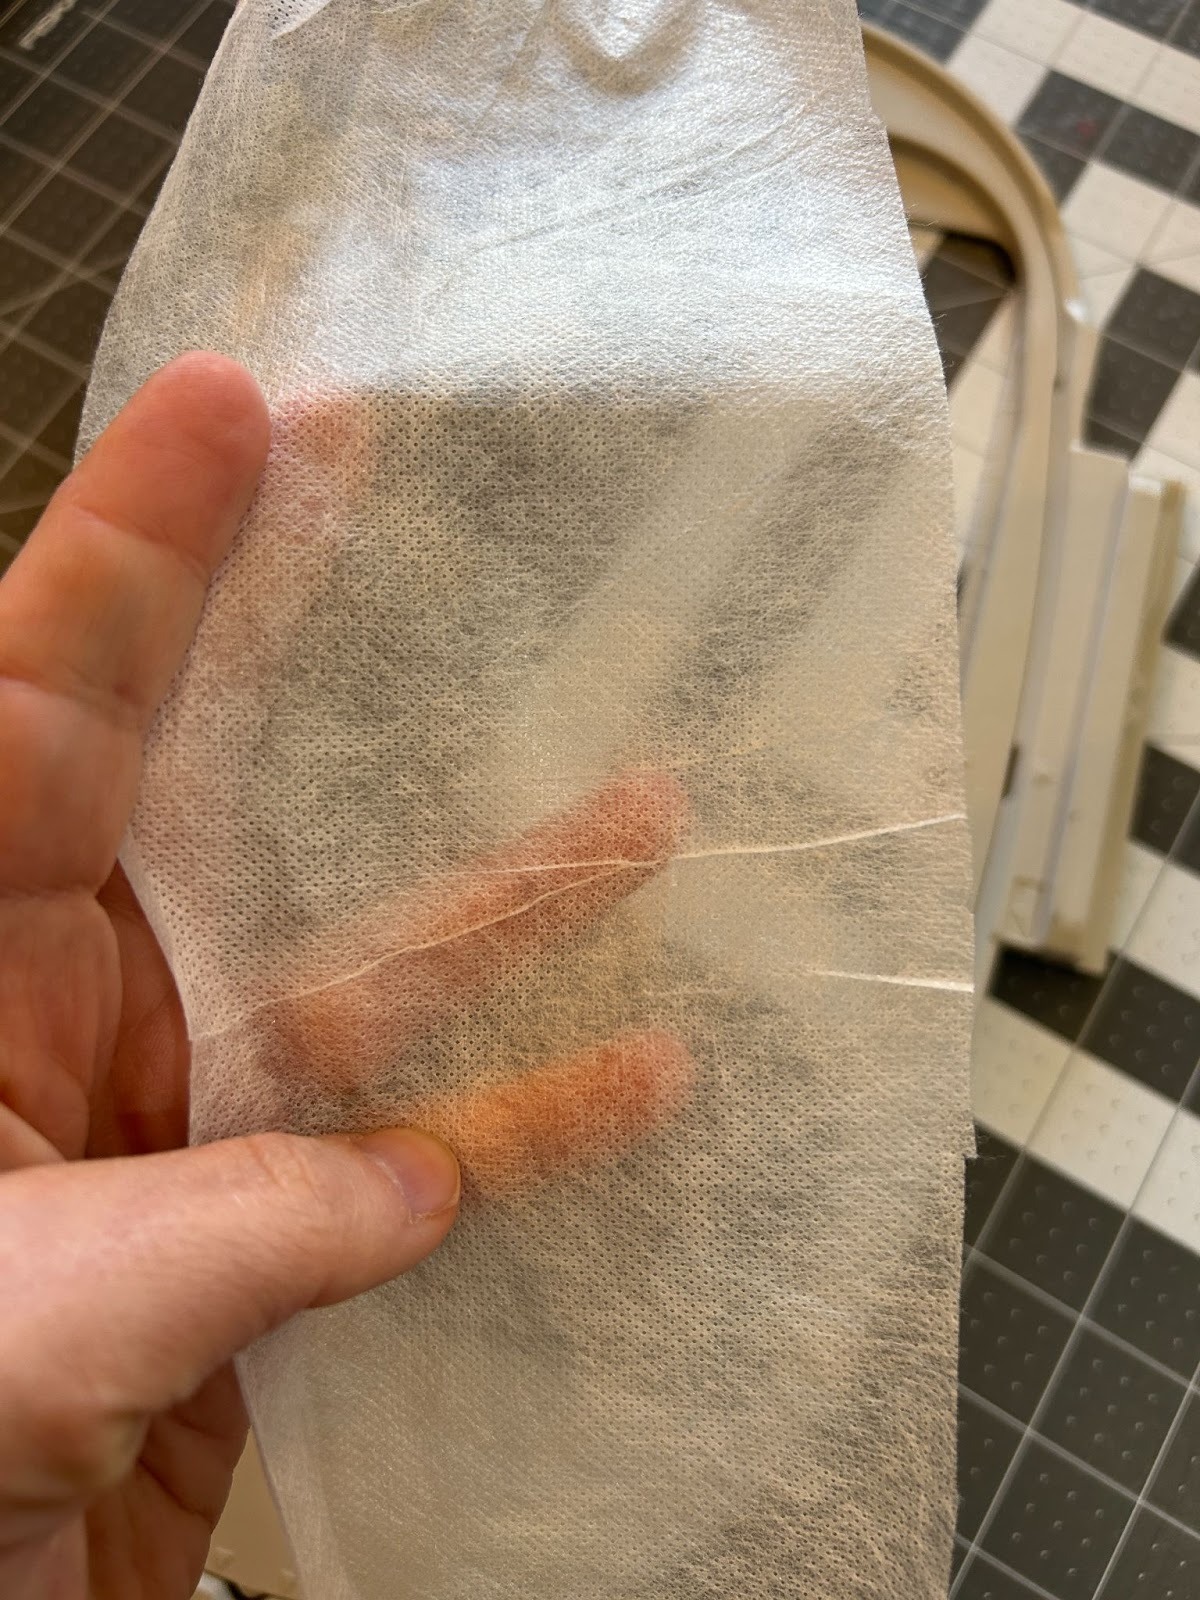
We will be using a wash-away, water-soluble stabilizer. Make sure you are using the one that looks like fibers for the stabilizer. The one that is clear and looks like plastic wrap is a topper that you would use on top of a fuzzy fabric so the stitches don’t sink into the fabric. If you try to use the clear one as a stabilizer in the hoop, it will just punch through and your designs won’t work. So choose the one that looks opaque and kind of fibrous.
My stabilizer had been stored in a tight roll for a while and was kind of wrinkled. So I decided to experiment and see if I could press it.
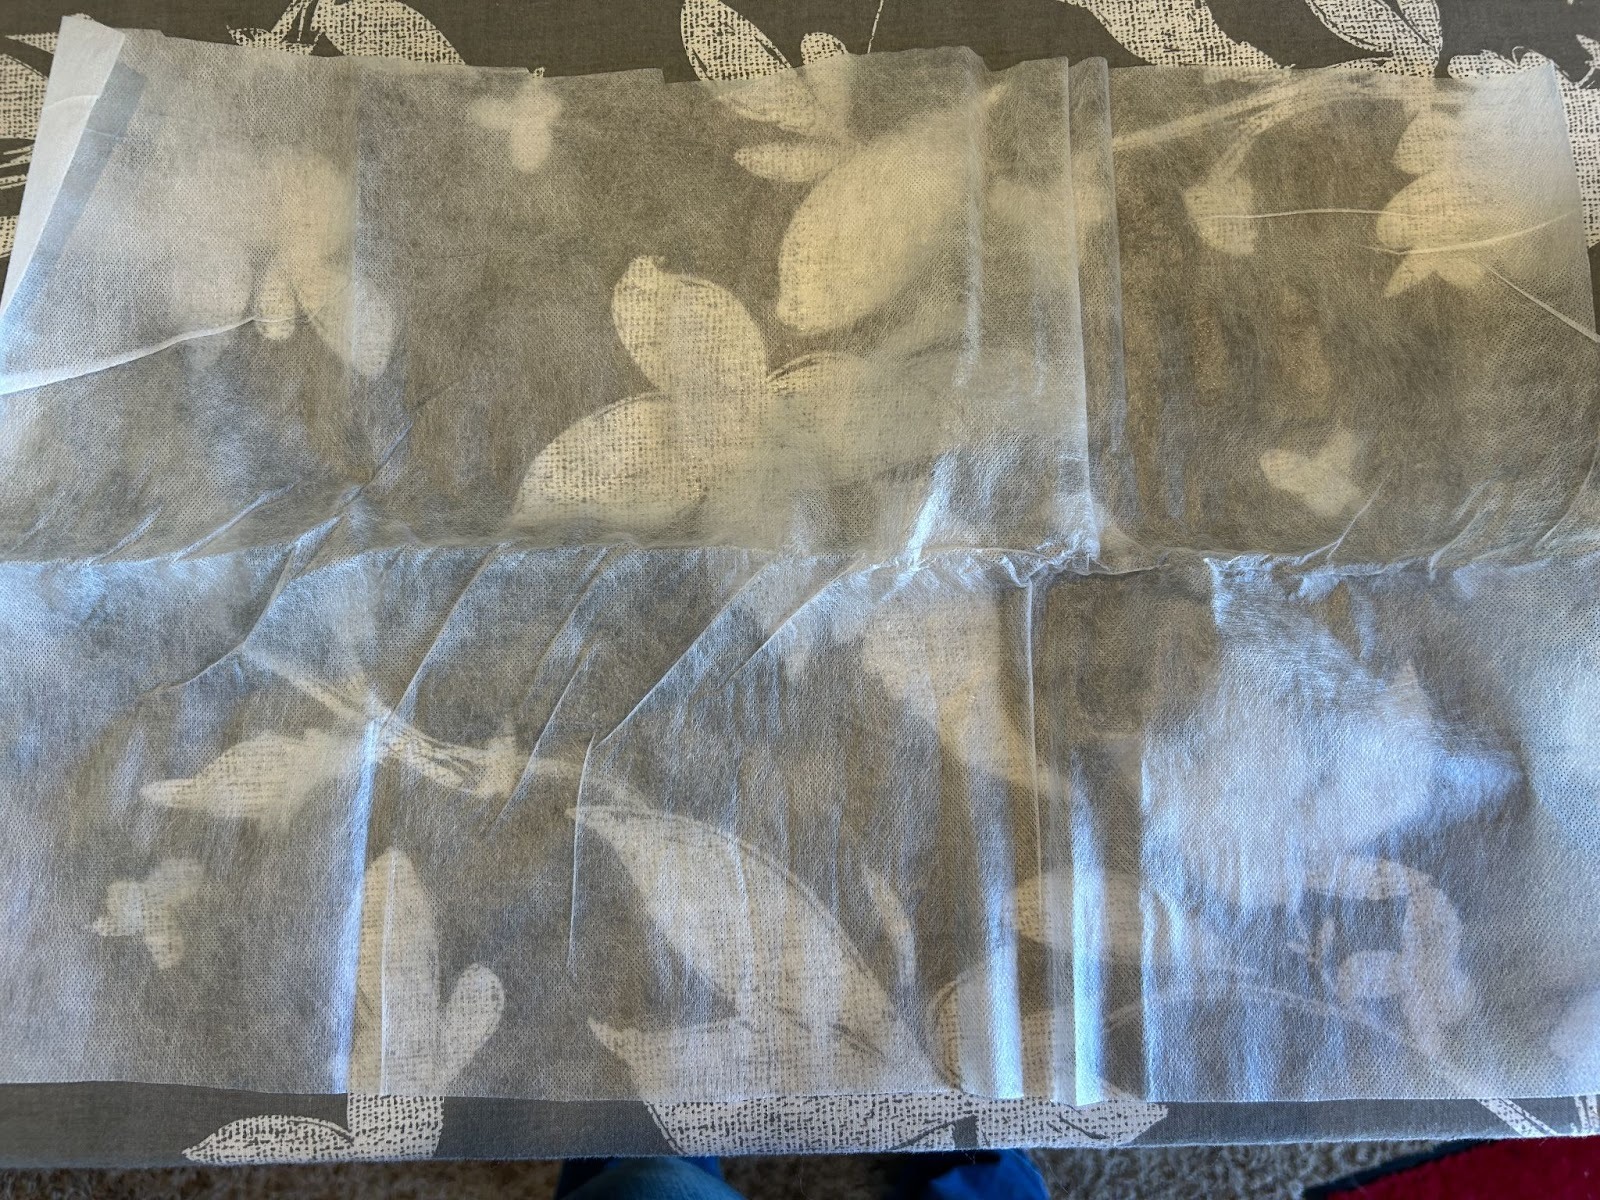
The answer is yes, but only on a very cool iron. I started it on medium and melted an edge of it (the bottom right). Once it was just barely warm it did press, but I moved the iron quickly. Your experience may be different depending on your brand, but start with low heat and move the iron quickly.
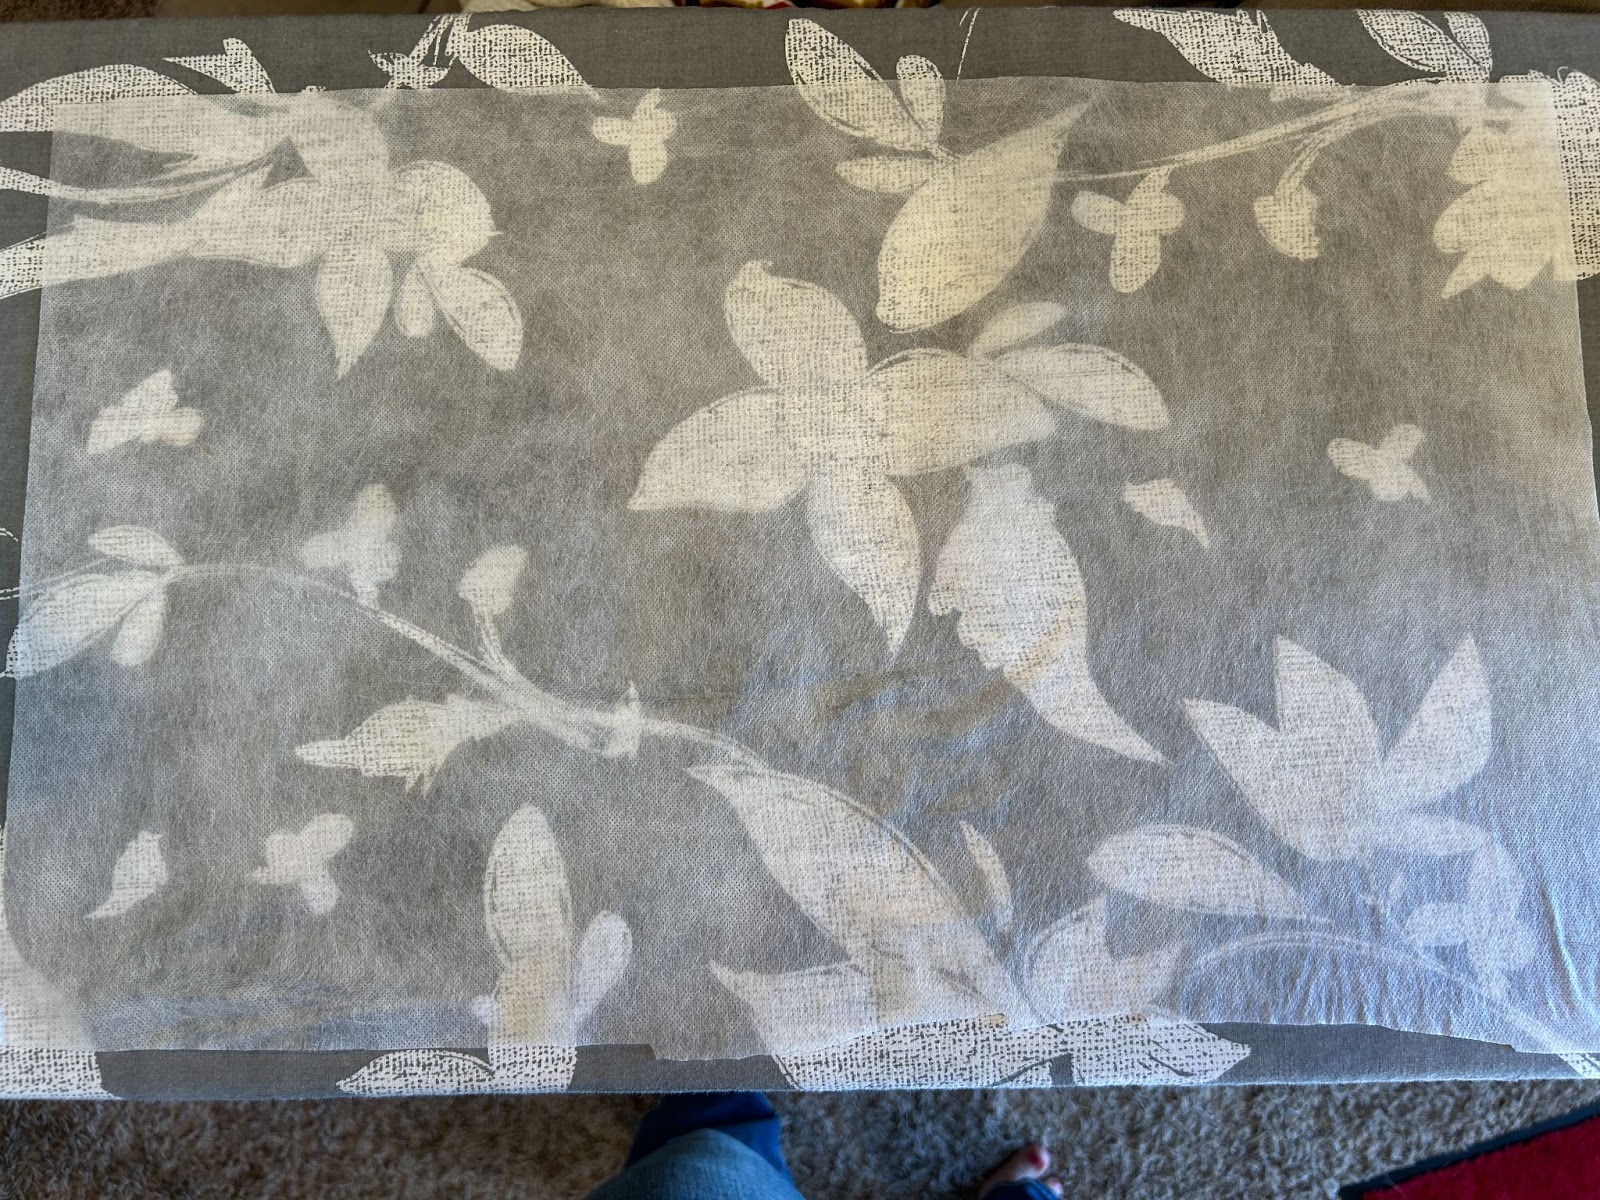
Hoop your stabilizer. I used three layers of stabilizer because I’m loading my larger hoop up with designs. I have found this to give me better results with my machine because of all the stitches. I might have gotten away with only two layers, but I didn’t want to get halfway through and realize I should have used more.

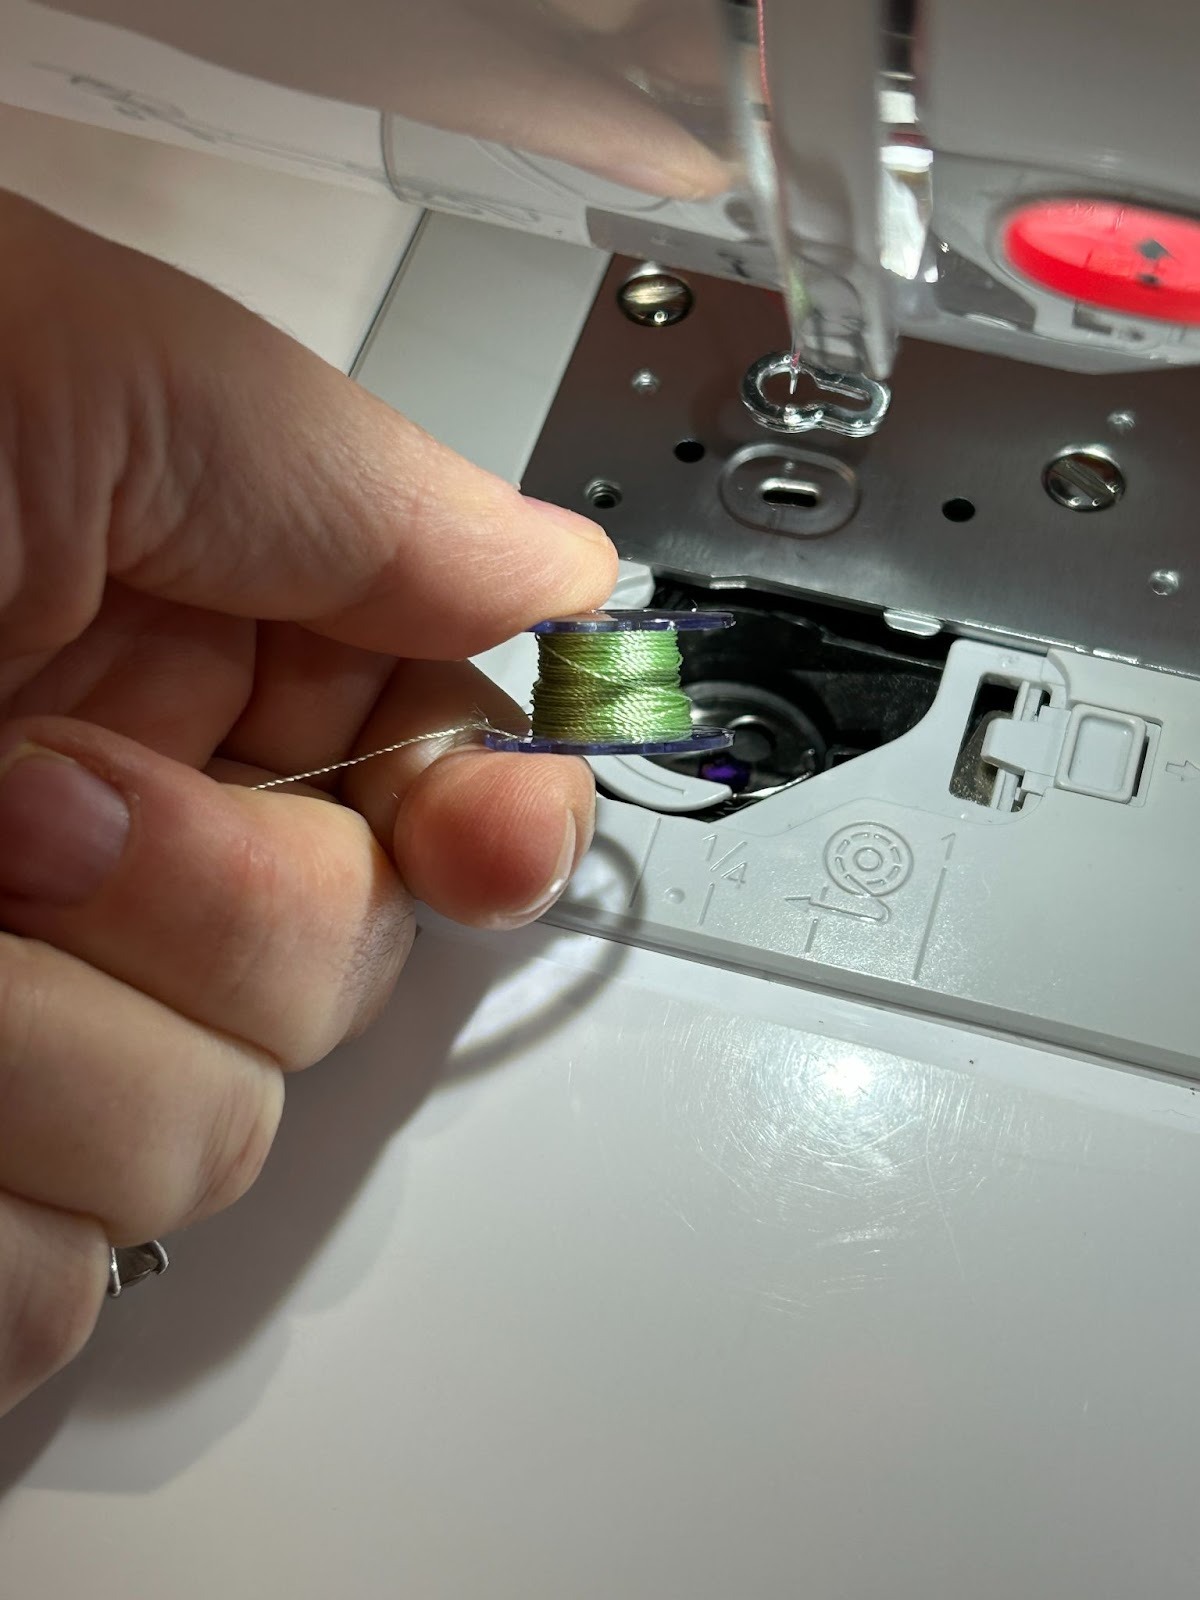
One of the best ways to make FSL successful is to match your bobbin thread to your top thread. The designs will be seen from both sides, so matching top thread and bobbin thread makes them look finished on both sides.
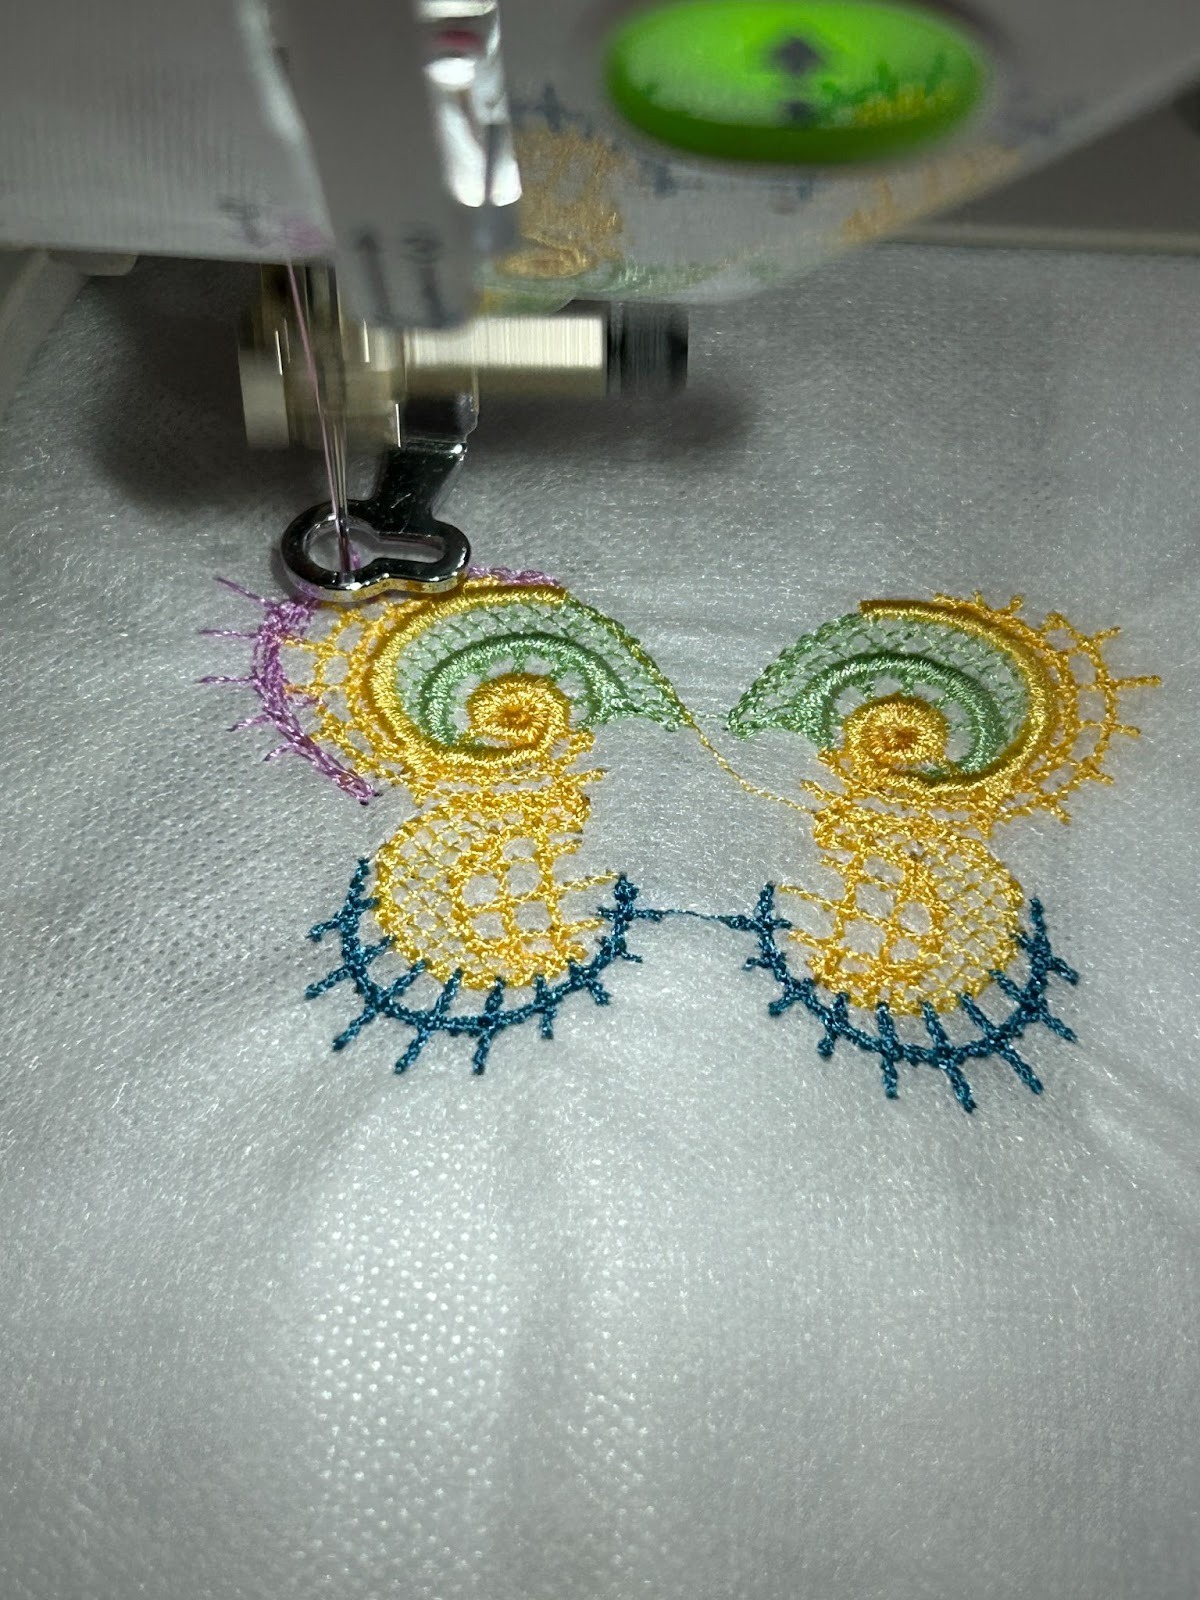
Load your design into your machine and start stitching it out.

When it comes time for a thread change, I like to trim the threads from the back. This is easy to remember because you need to change your bobbin to match your next thread.
Continue through the steps, changing the threads and bobbins as your design shows.
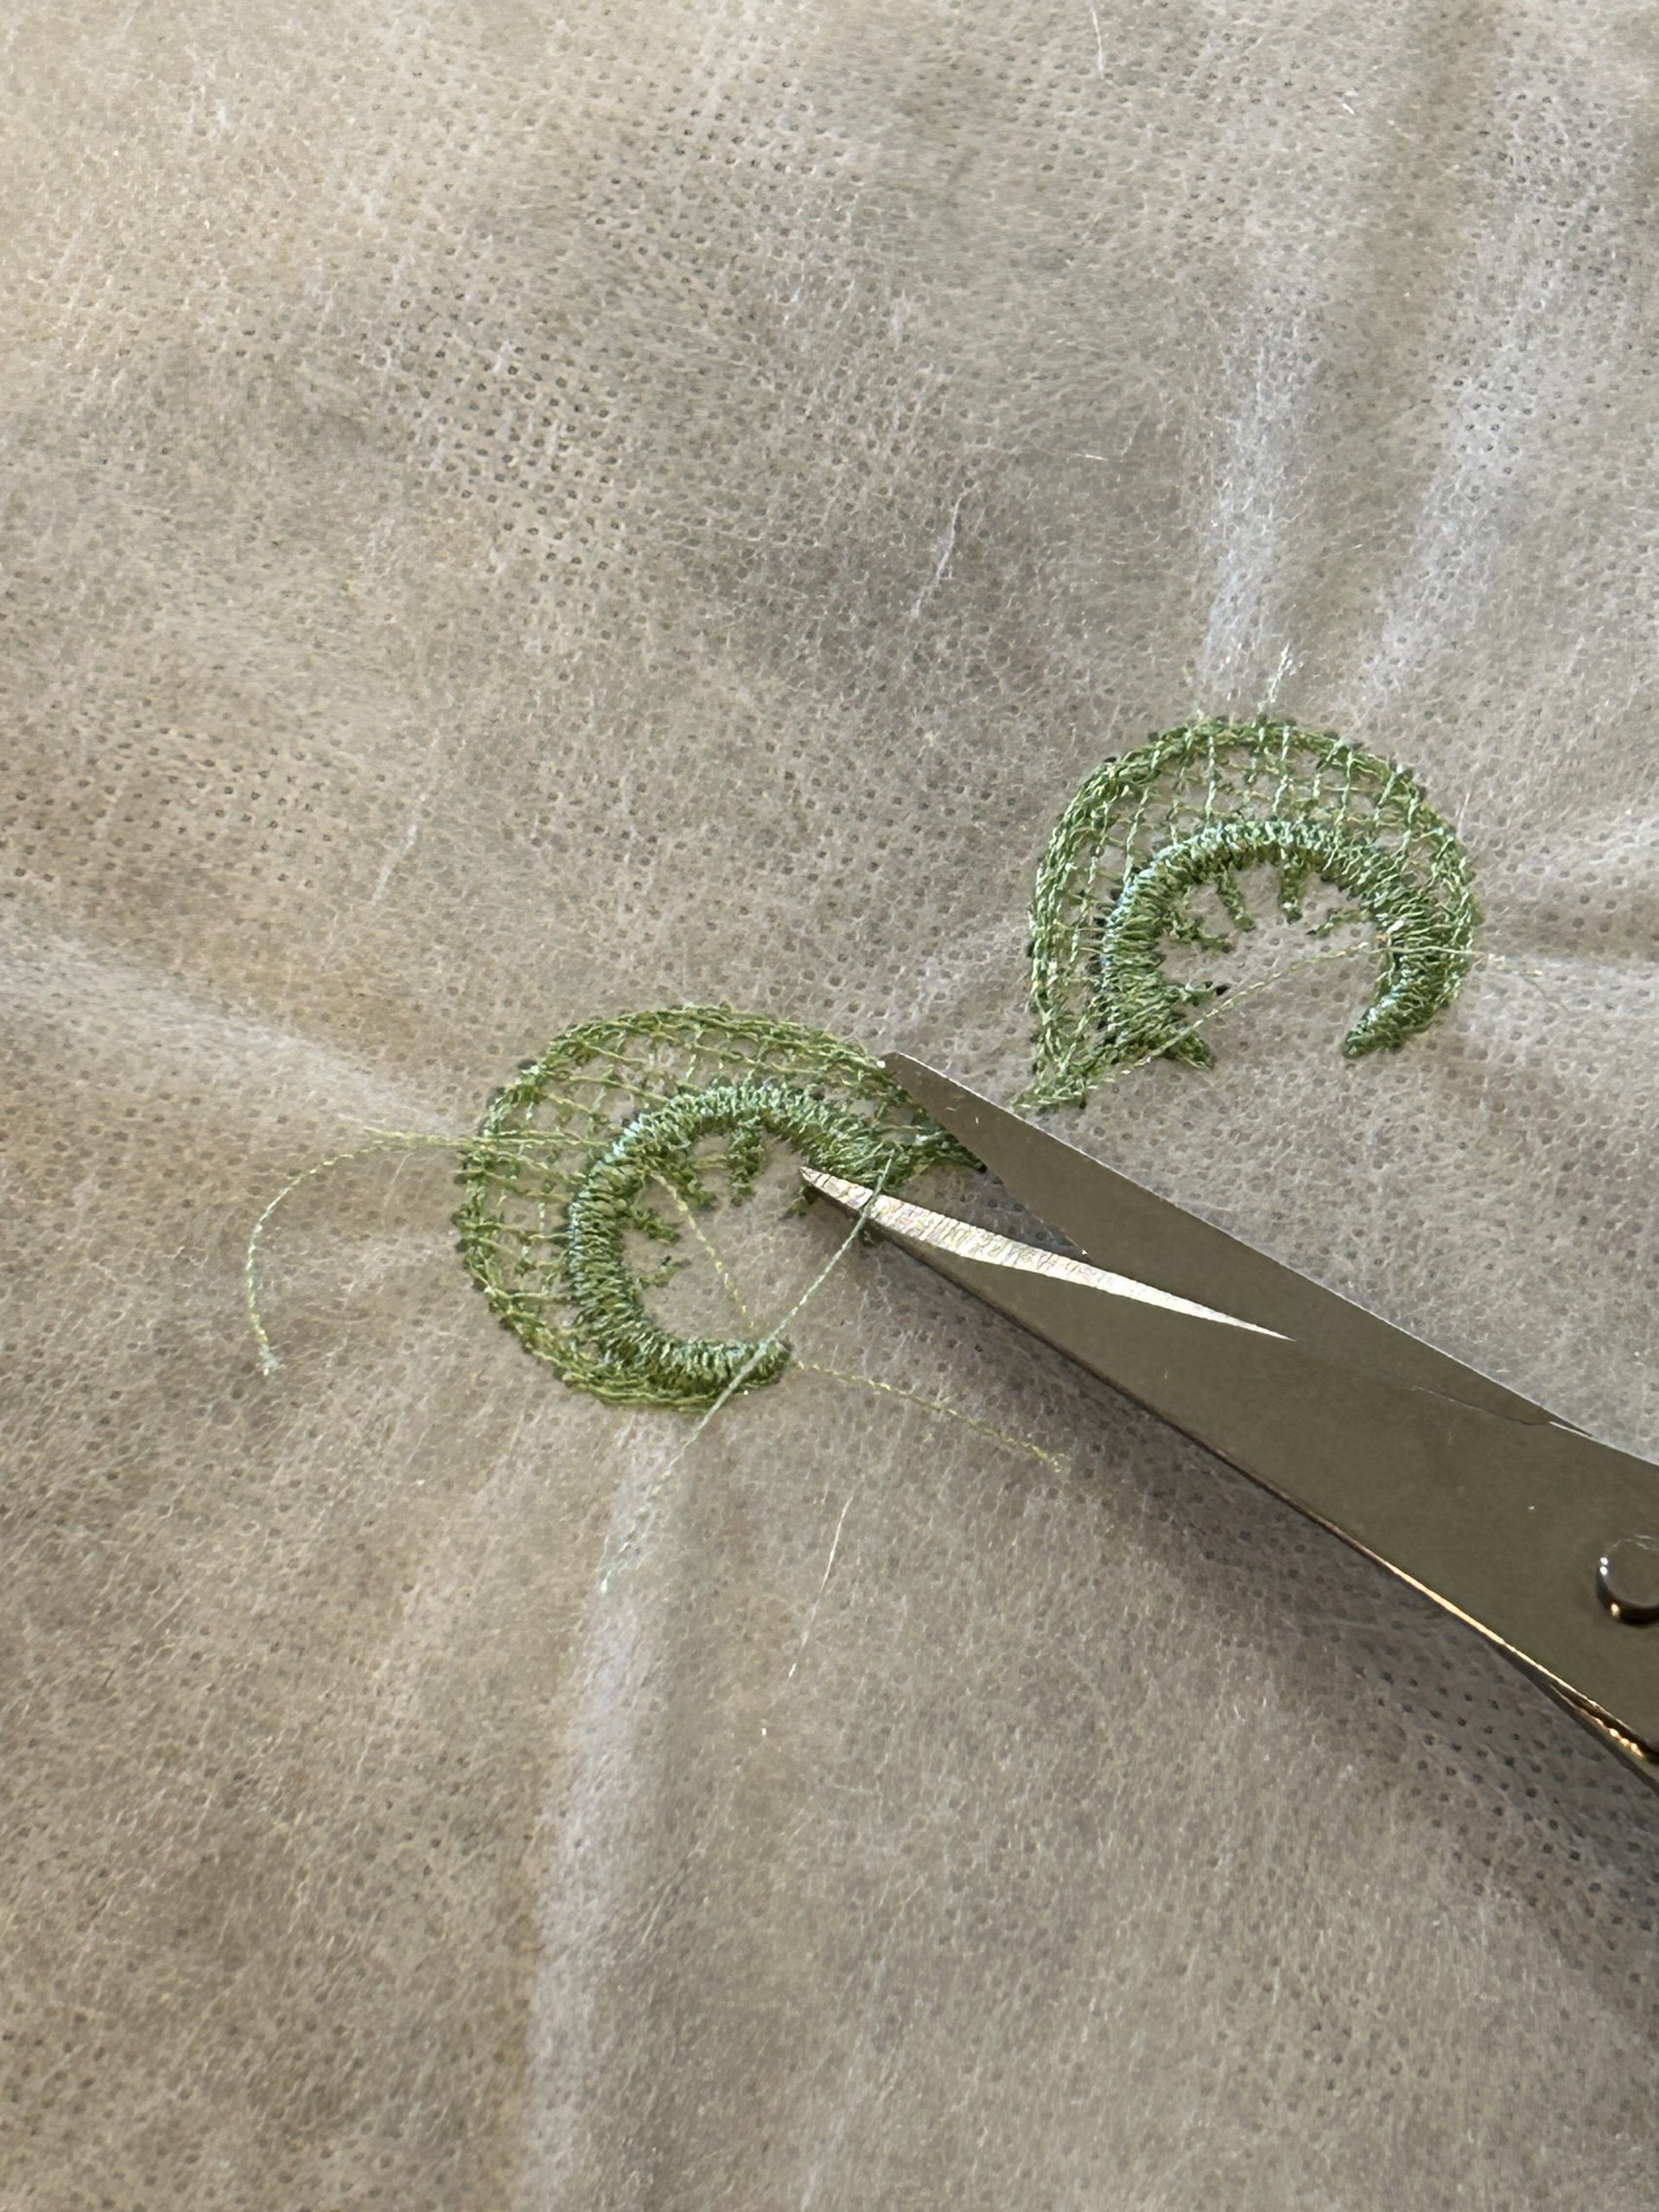
When your design is finished, remove the hoop from the machine and trim any threads that may be left.

Remove your designs from the hoop.

And trim the stabilizer close to the stitches. I give about ¼” around the design to ensure I don't clip a stitch. I’m not super precise with this step.

Now comes the fun part—we get to wash away the stabilizer. I fill a container in my sink with warm water.
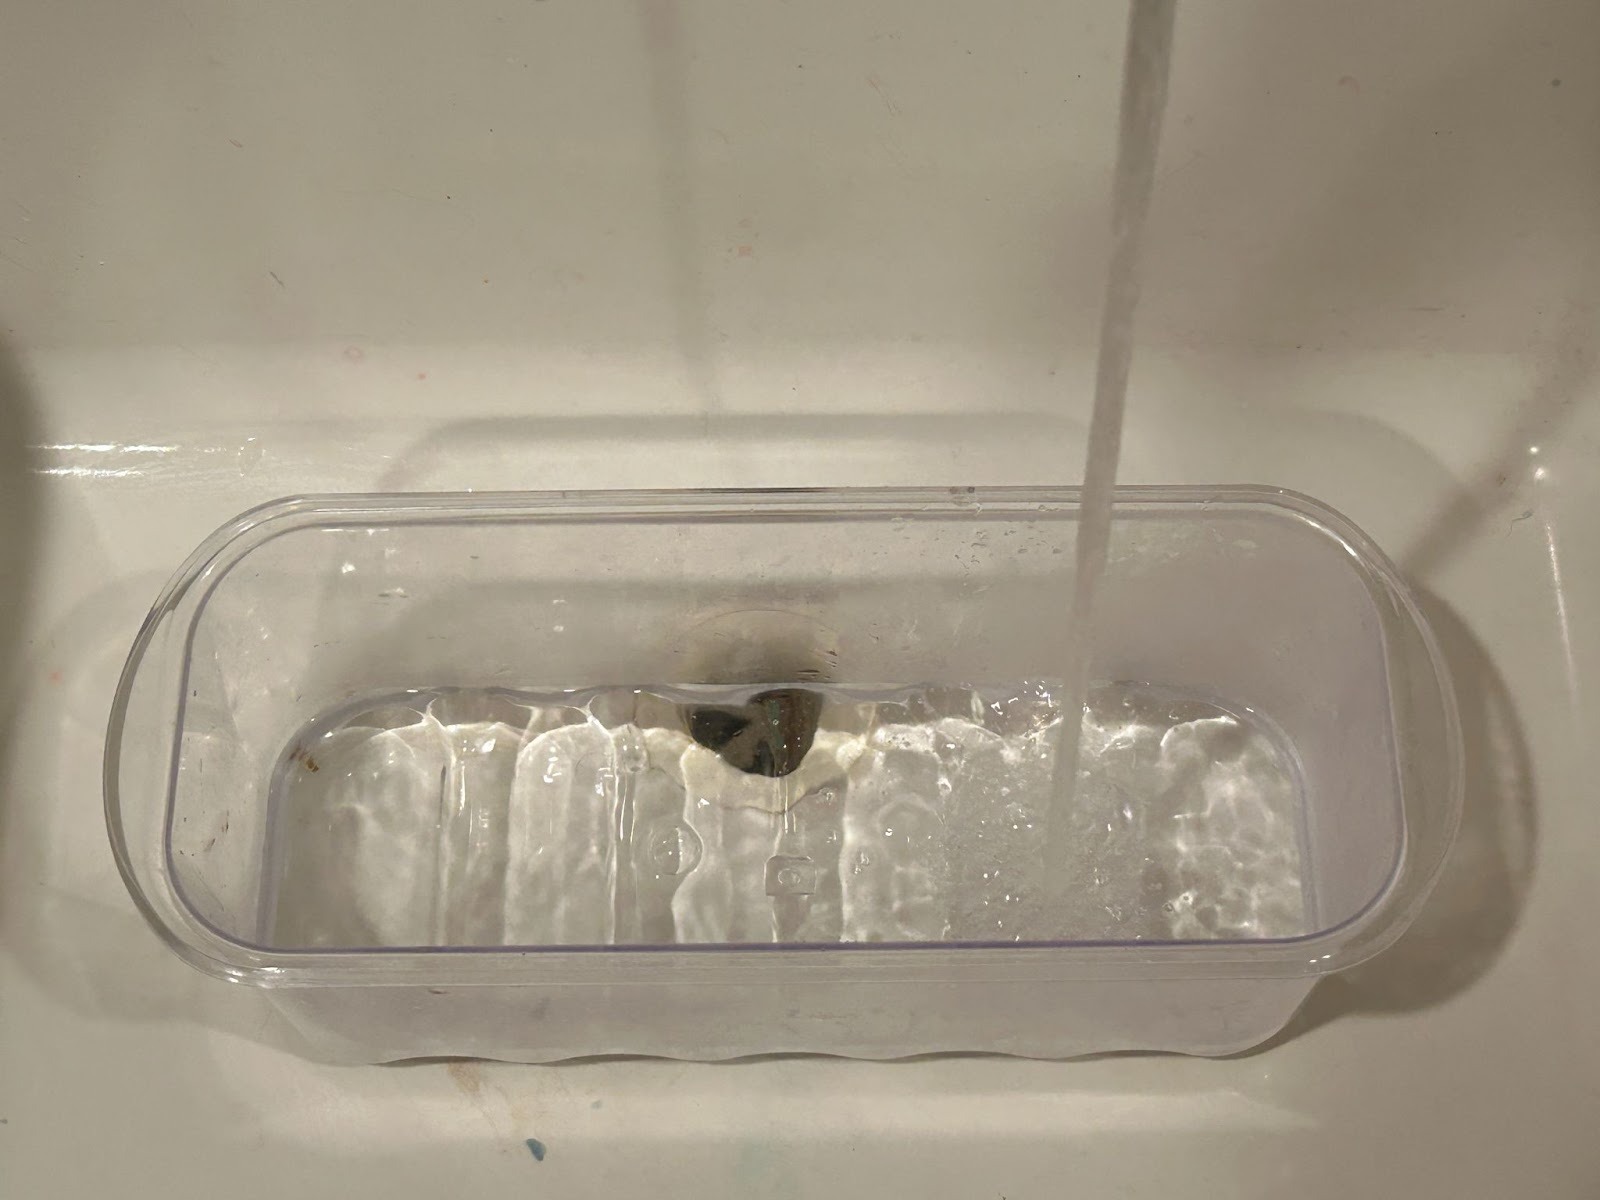
Then let your designs go for a swim.
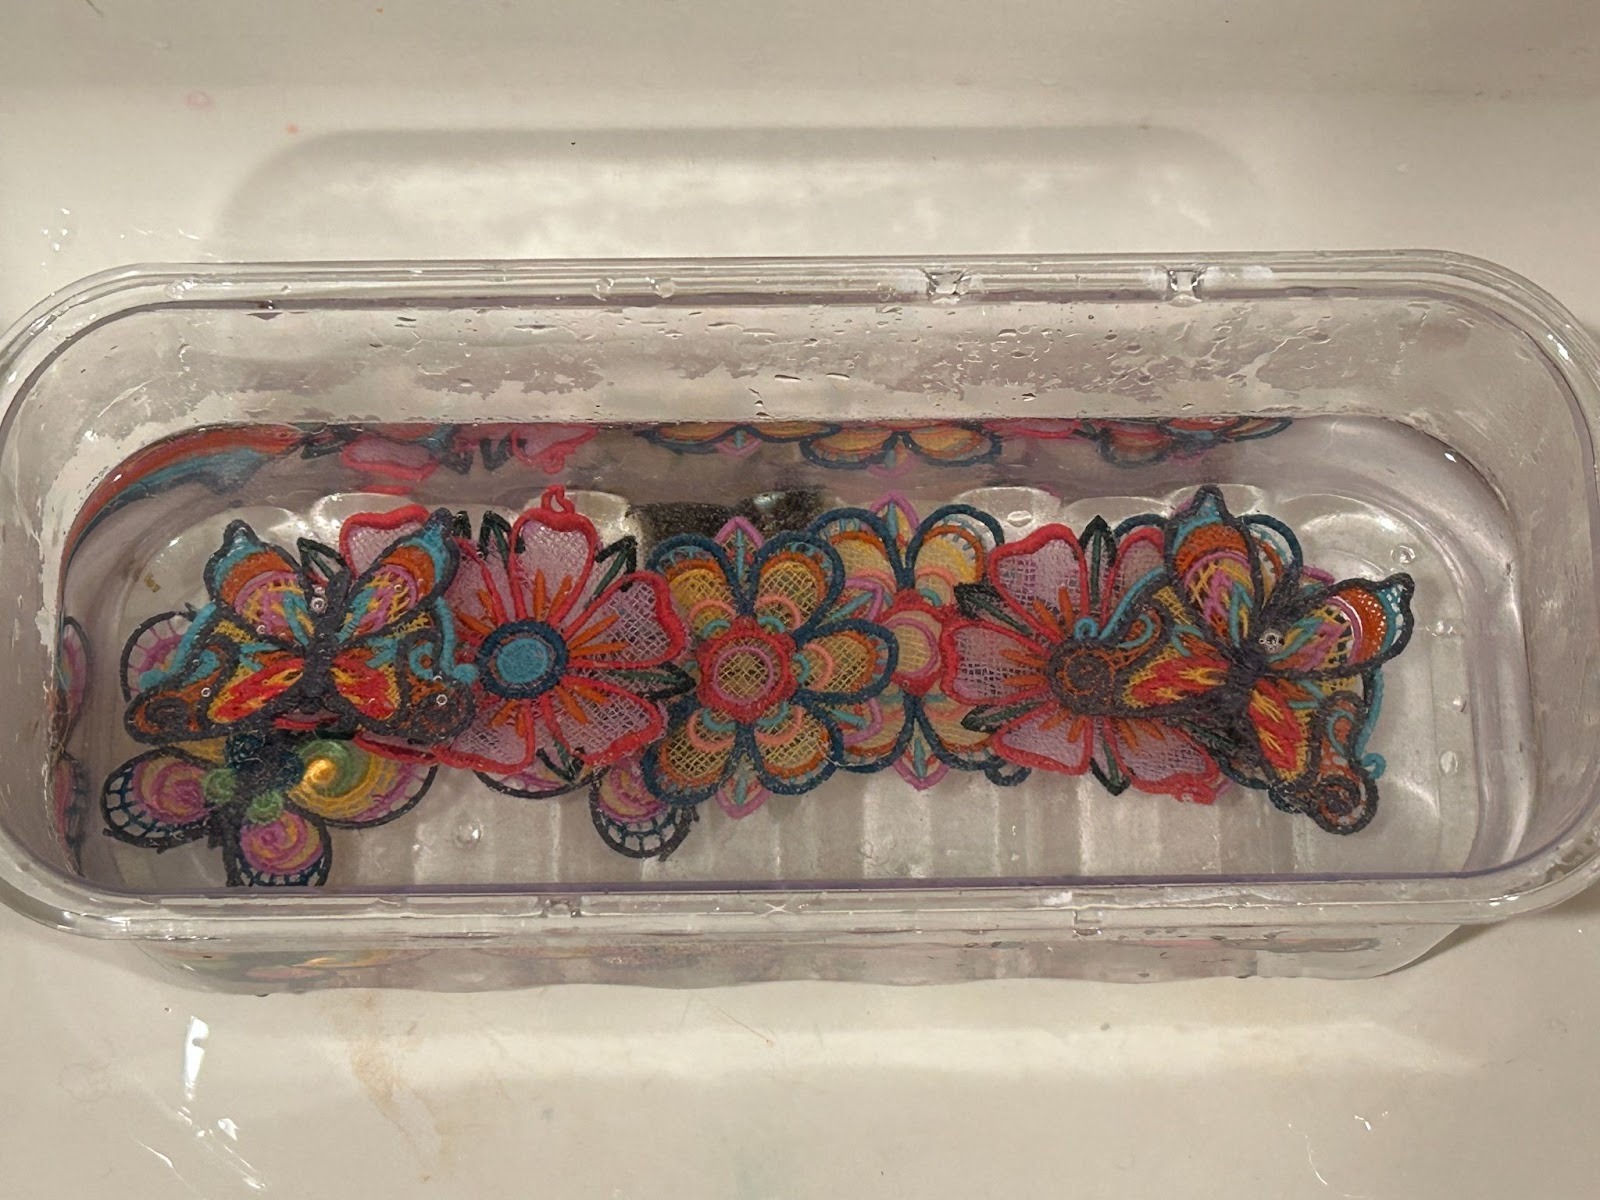
After they have soaked for a little bit, I pick up a design and swish it in the water. You can tell the stabilizer is dissolving from the design. You can use your fingernail to scratch away the edges if they aren’t loosening, but I find that mine usually disappear with a shake under the water. Hold them to the light and check to see if all the stabilizer has dissolved between the stitches.
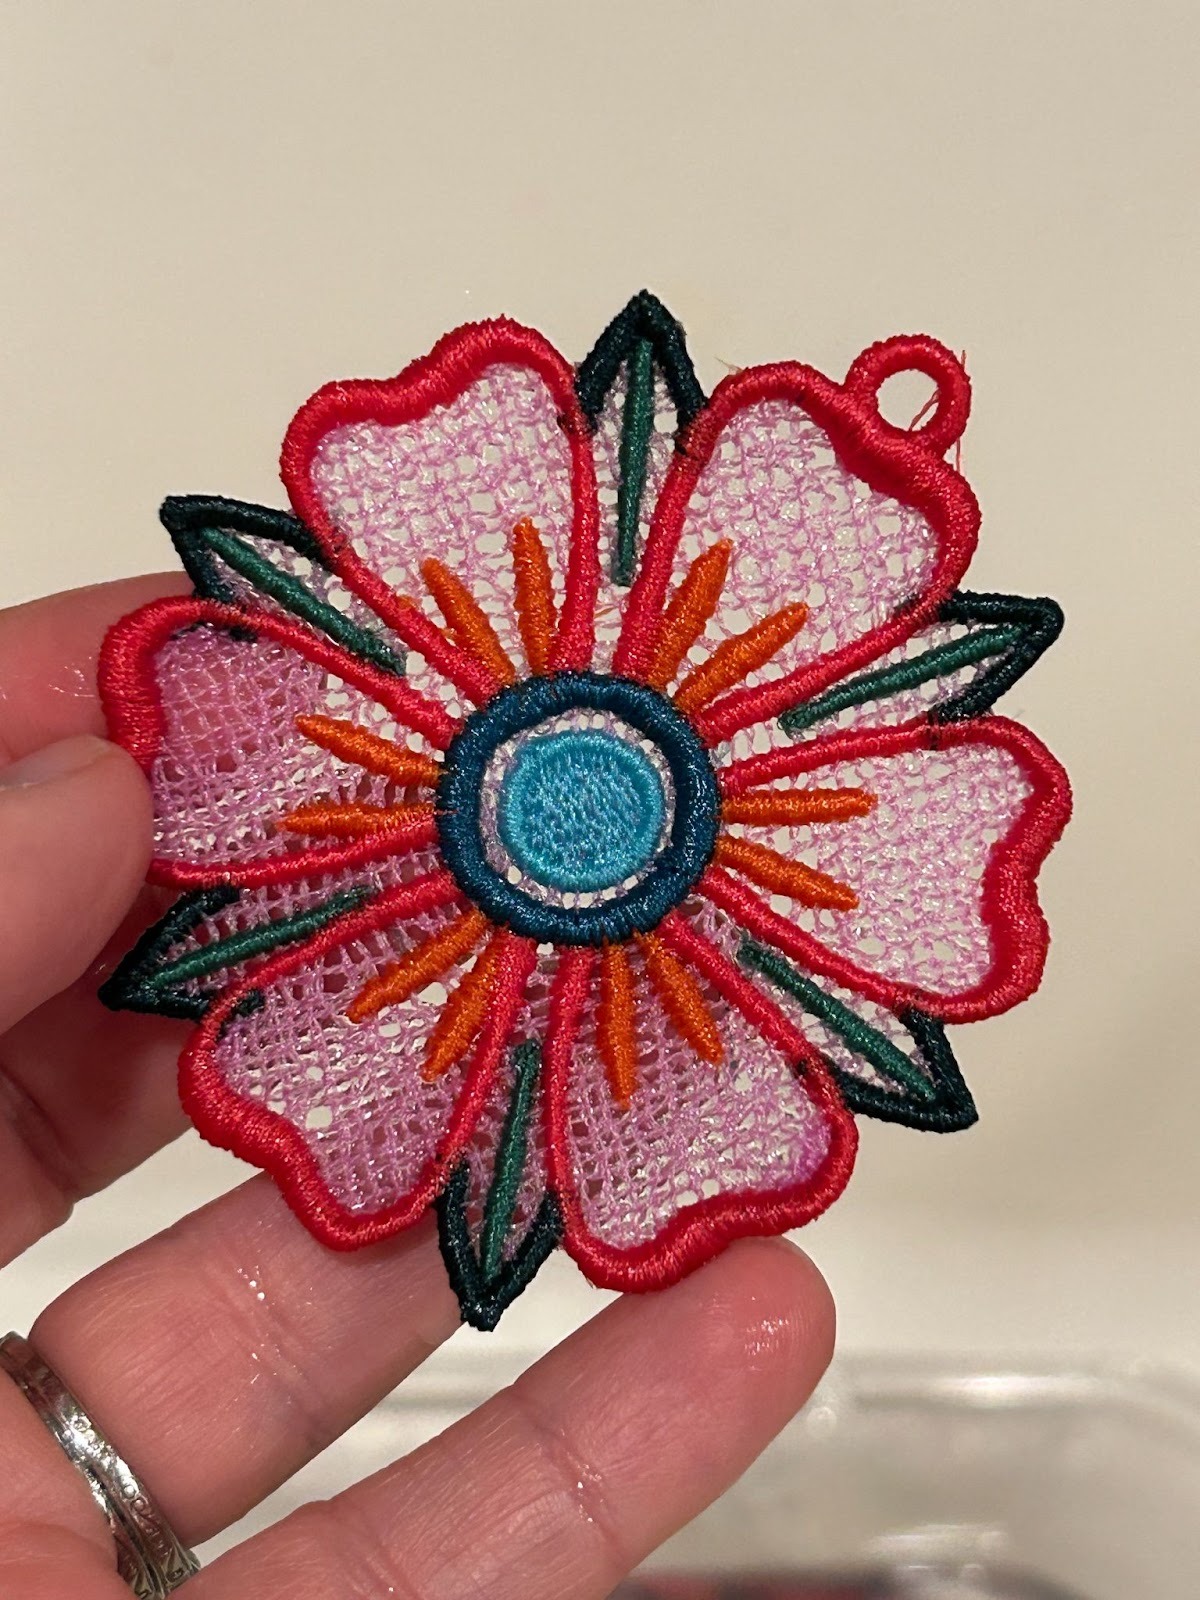
After you don’t see any more stabilizer, shake them to remove as much water as possible before placing them on a towel to dry. You want to make sure they are as flat as possible. There will be a little stabilizer left in the threads, and they will dry stiff. If they are curved or wrinkled, they will dry that way. I let them dry overnight before checking on them.
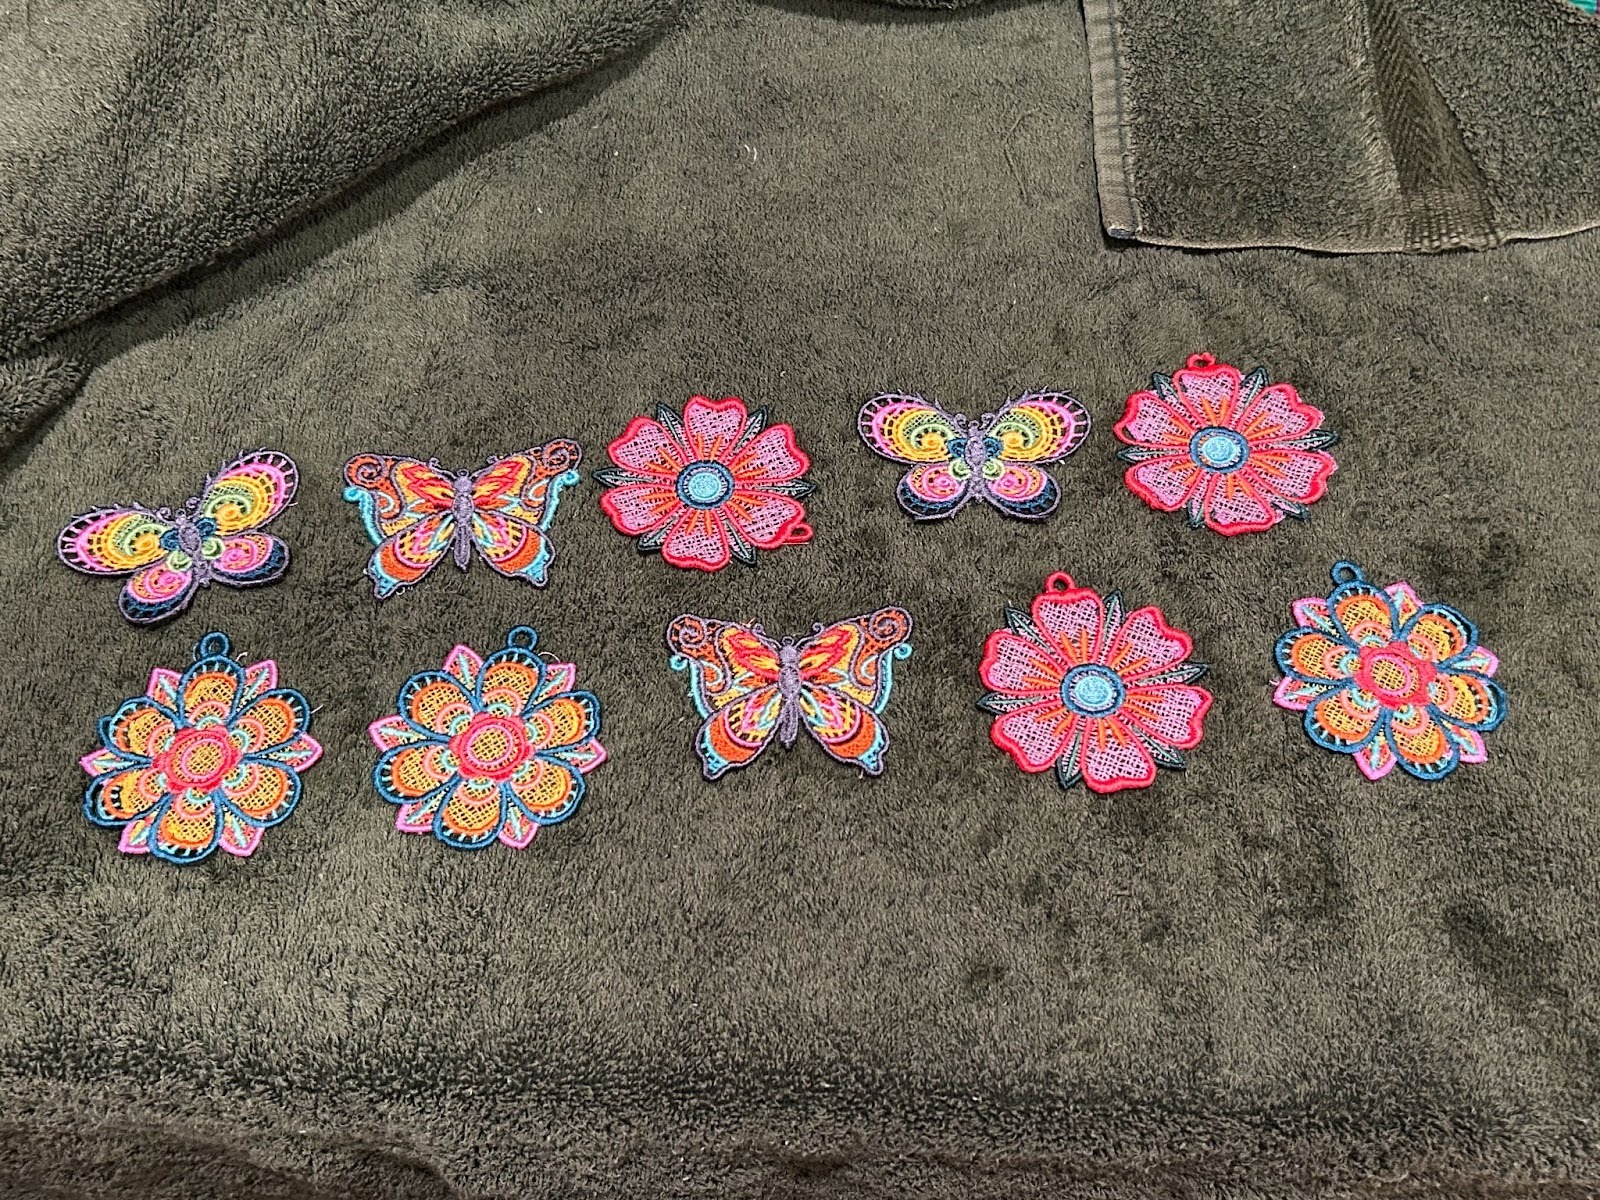
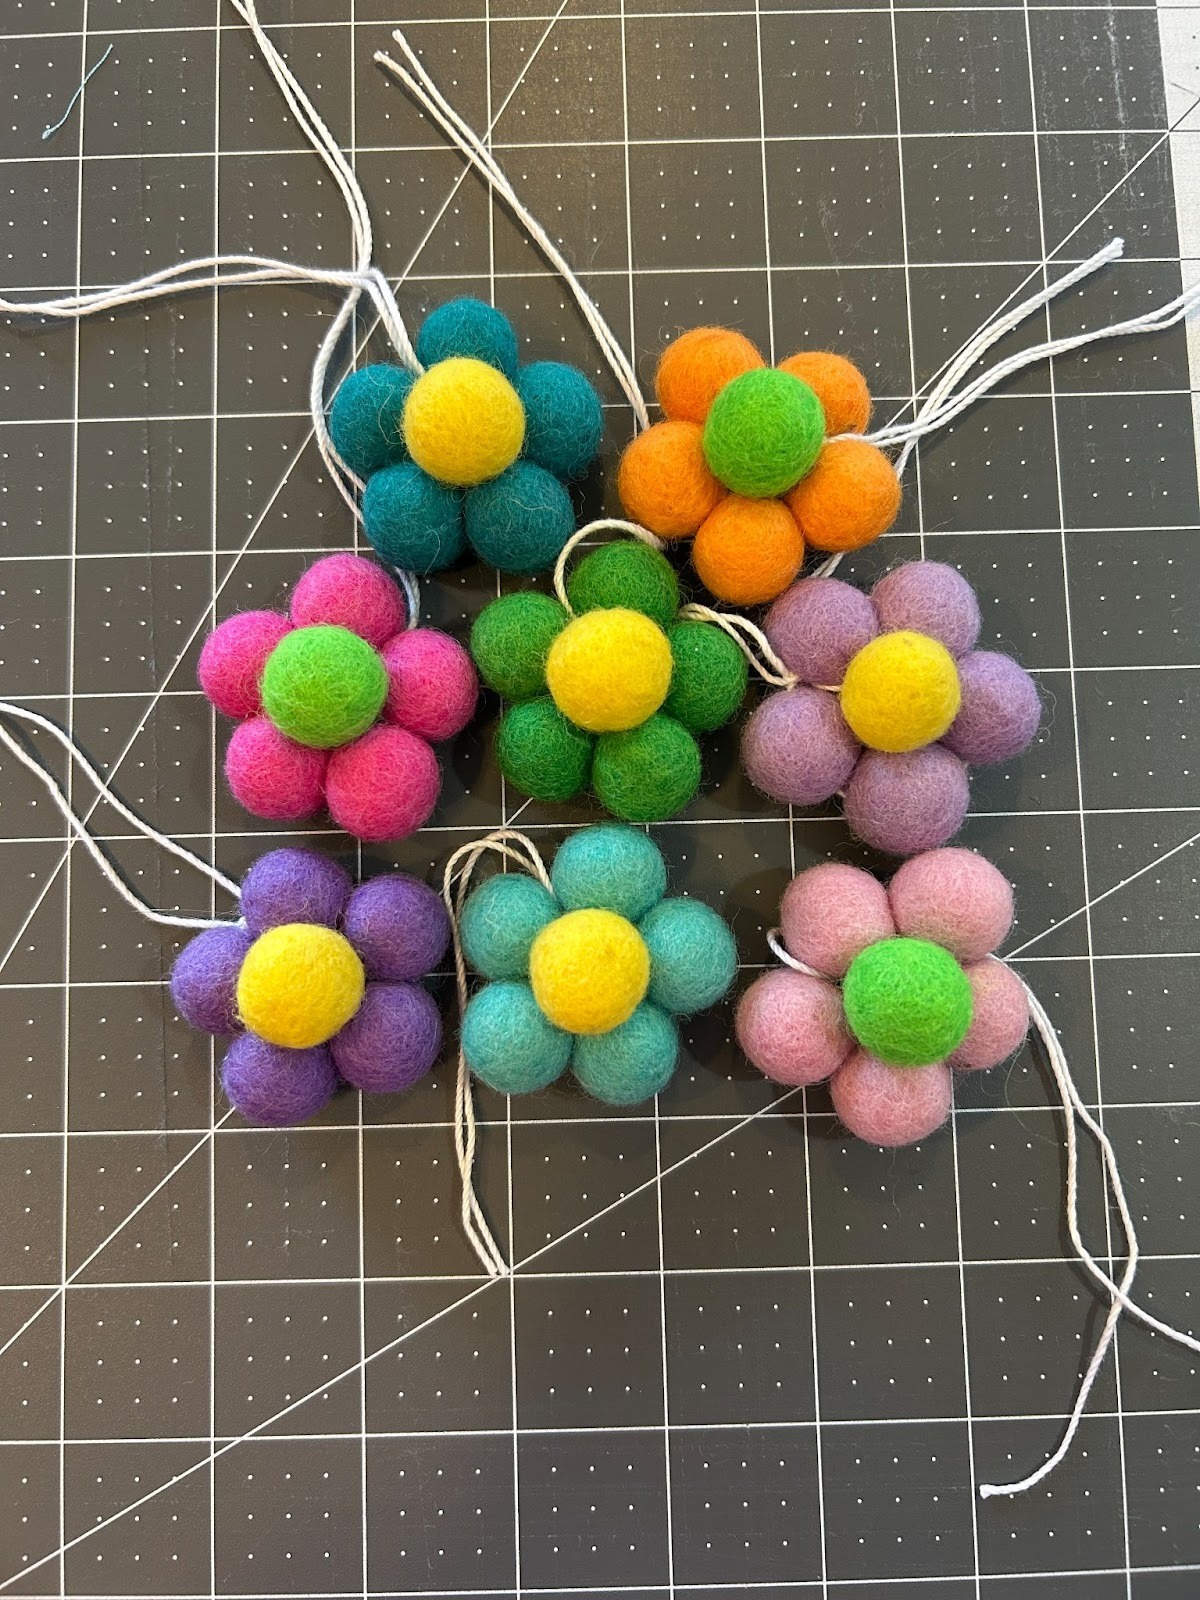
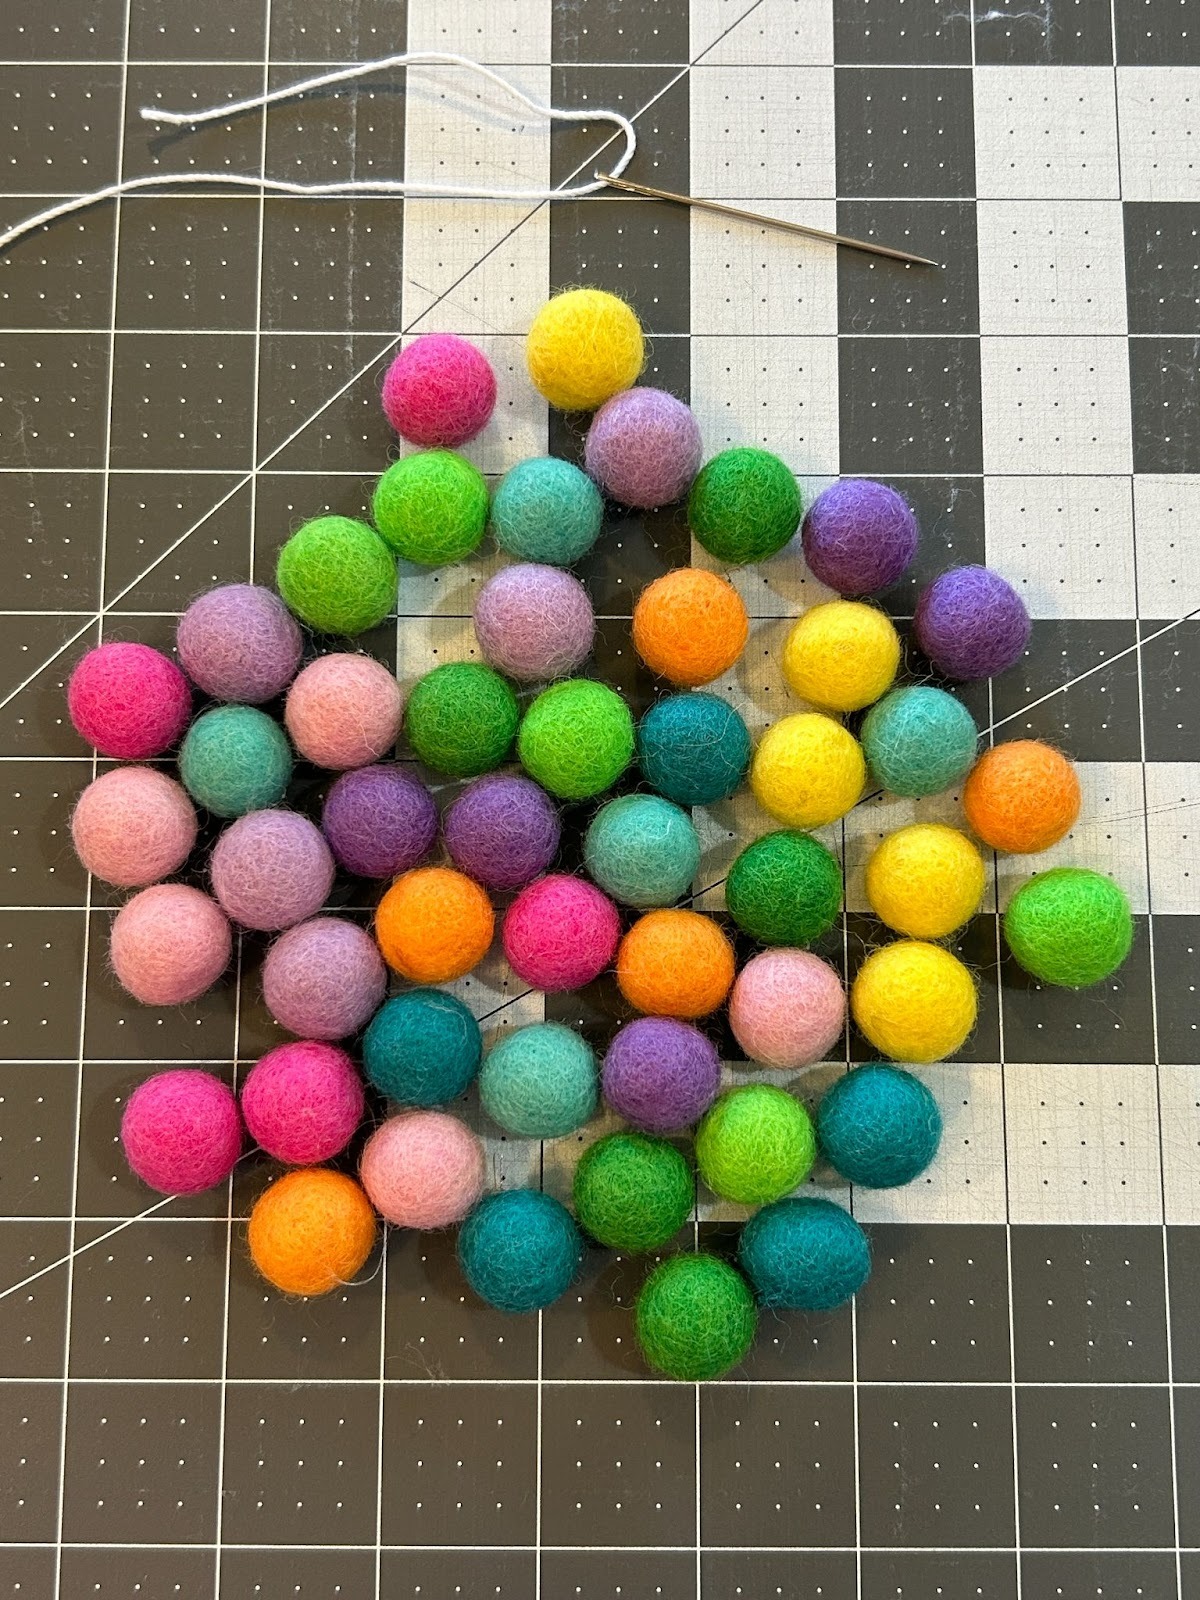
While the freestanding lace designs dried, I moved on to prepping the other things I wanted to use in my garland. I gathered my pack of .6” wool ball and crochet thread to make my wool flowers.
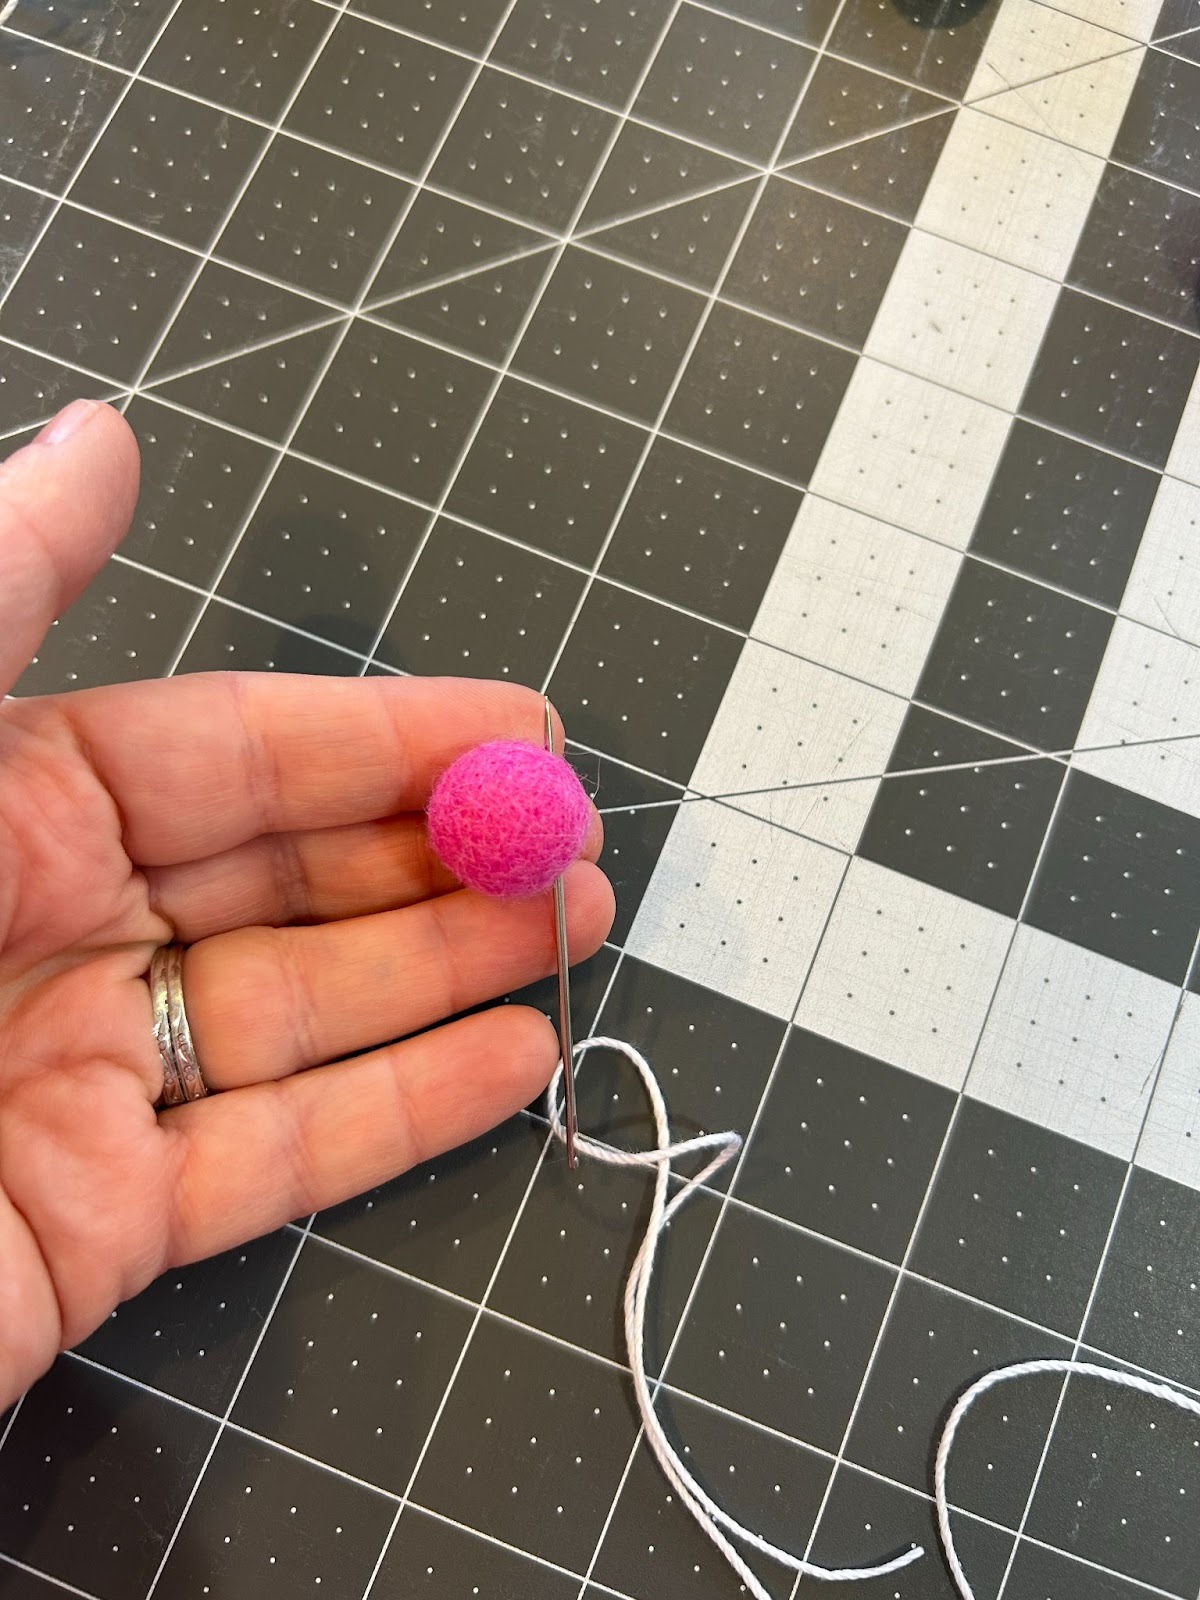
You will need five balls for the petals and one for the center, and about 18” of thread in your big needle. Starting with the petals, thread through the bottom ¼ of the ball. Keep a long tail for your flower.
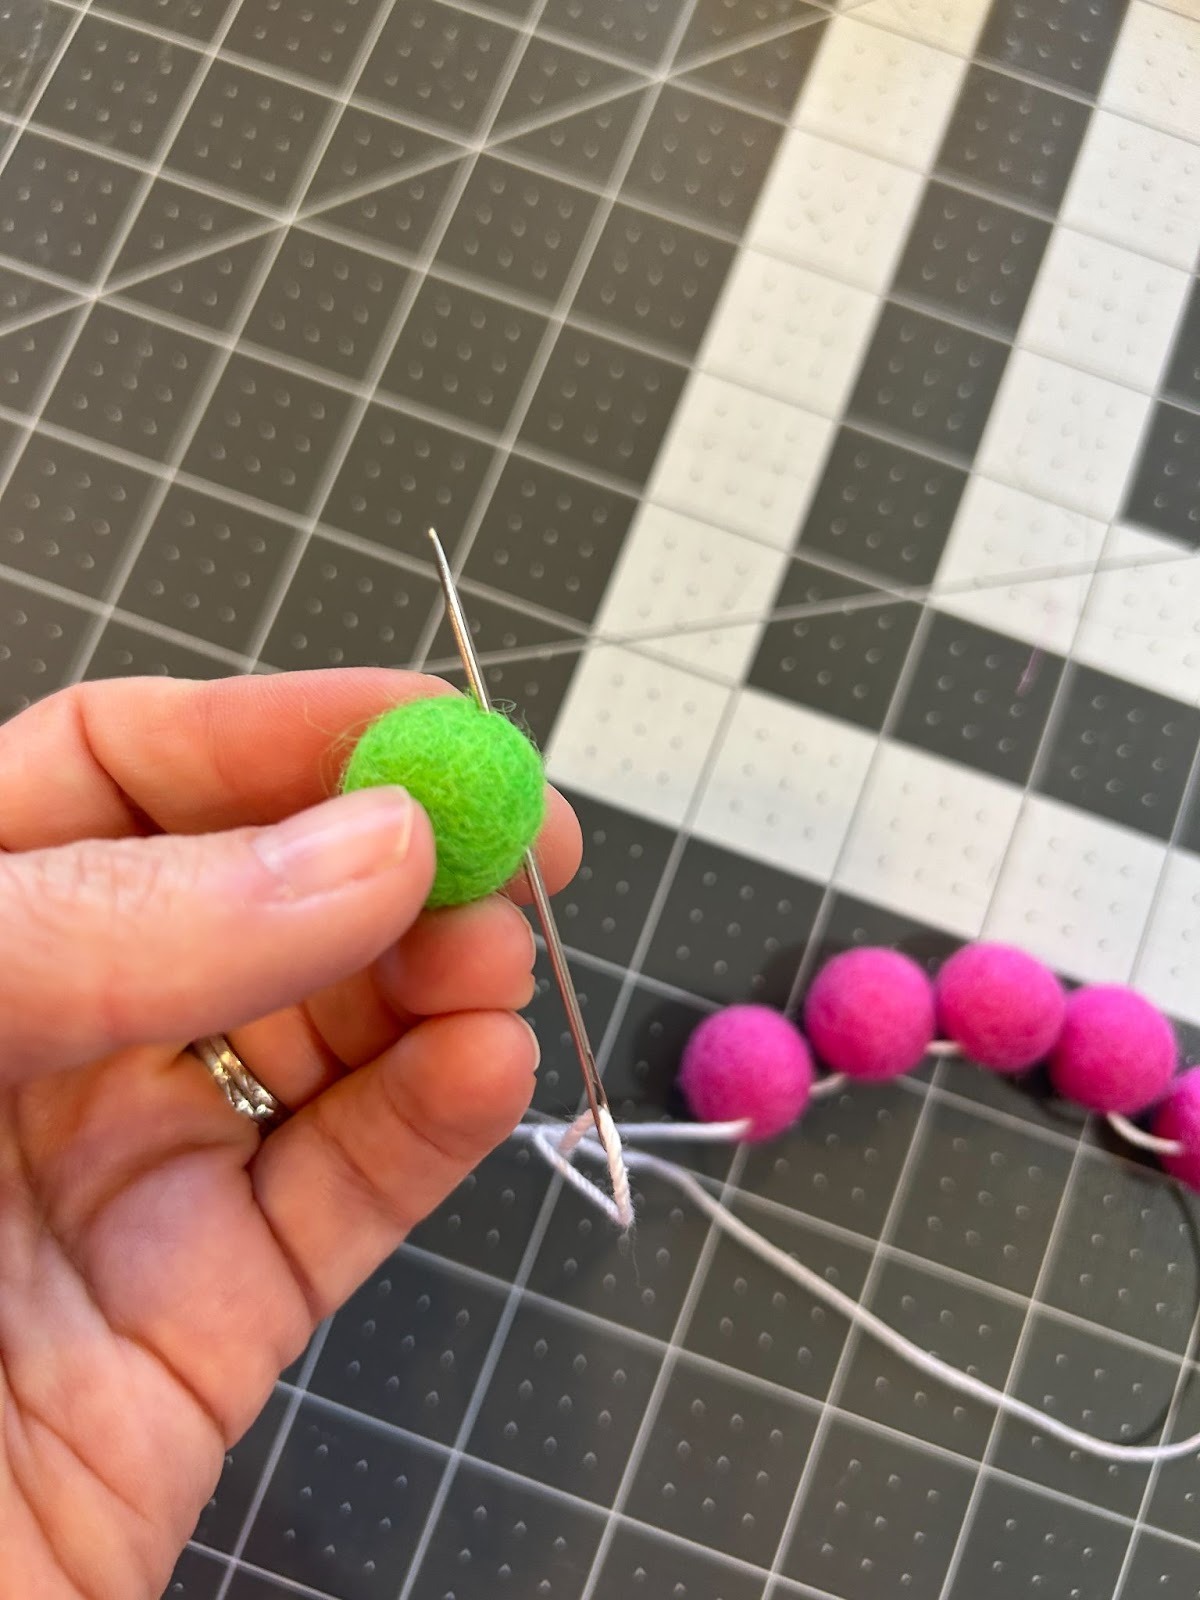
Do this for all five of the petals.

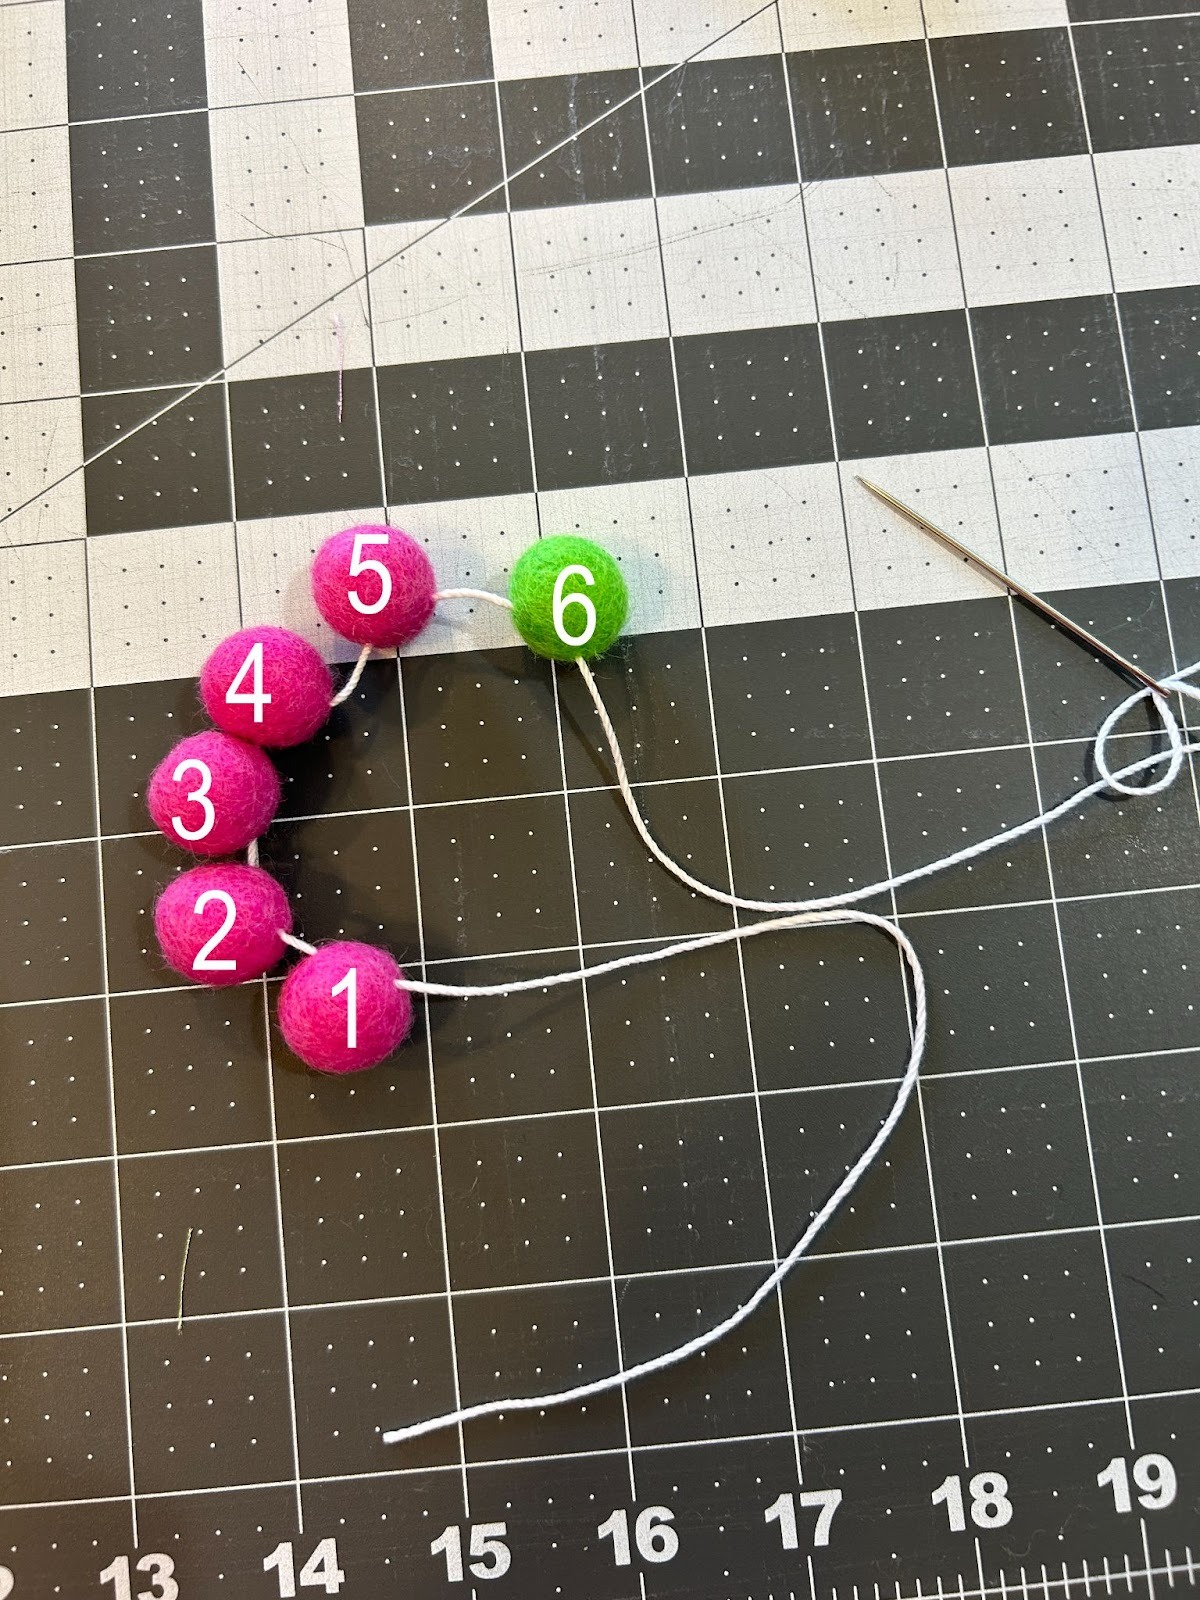
Now thread the center of the flower on the string, the same ¼ from the edge.
Once they have all been threaded, number them according to the order in which they were put on the string.
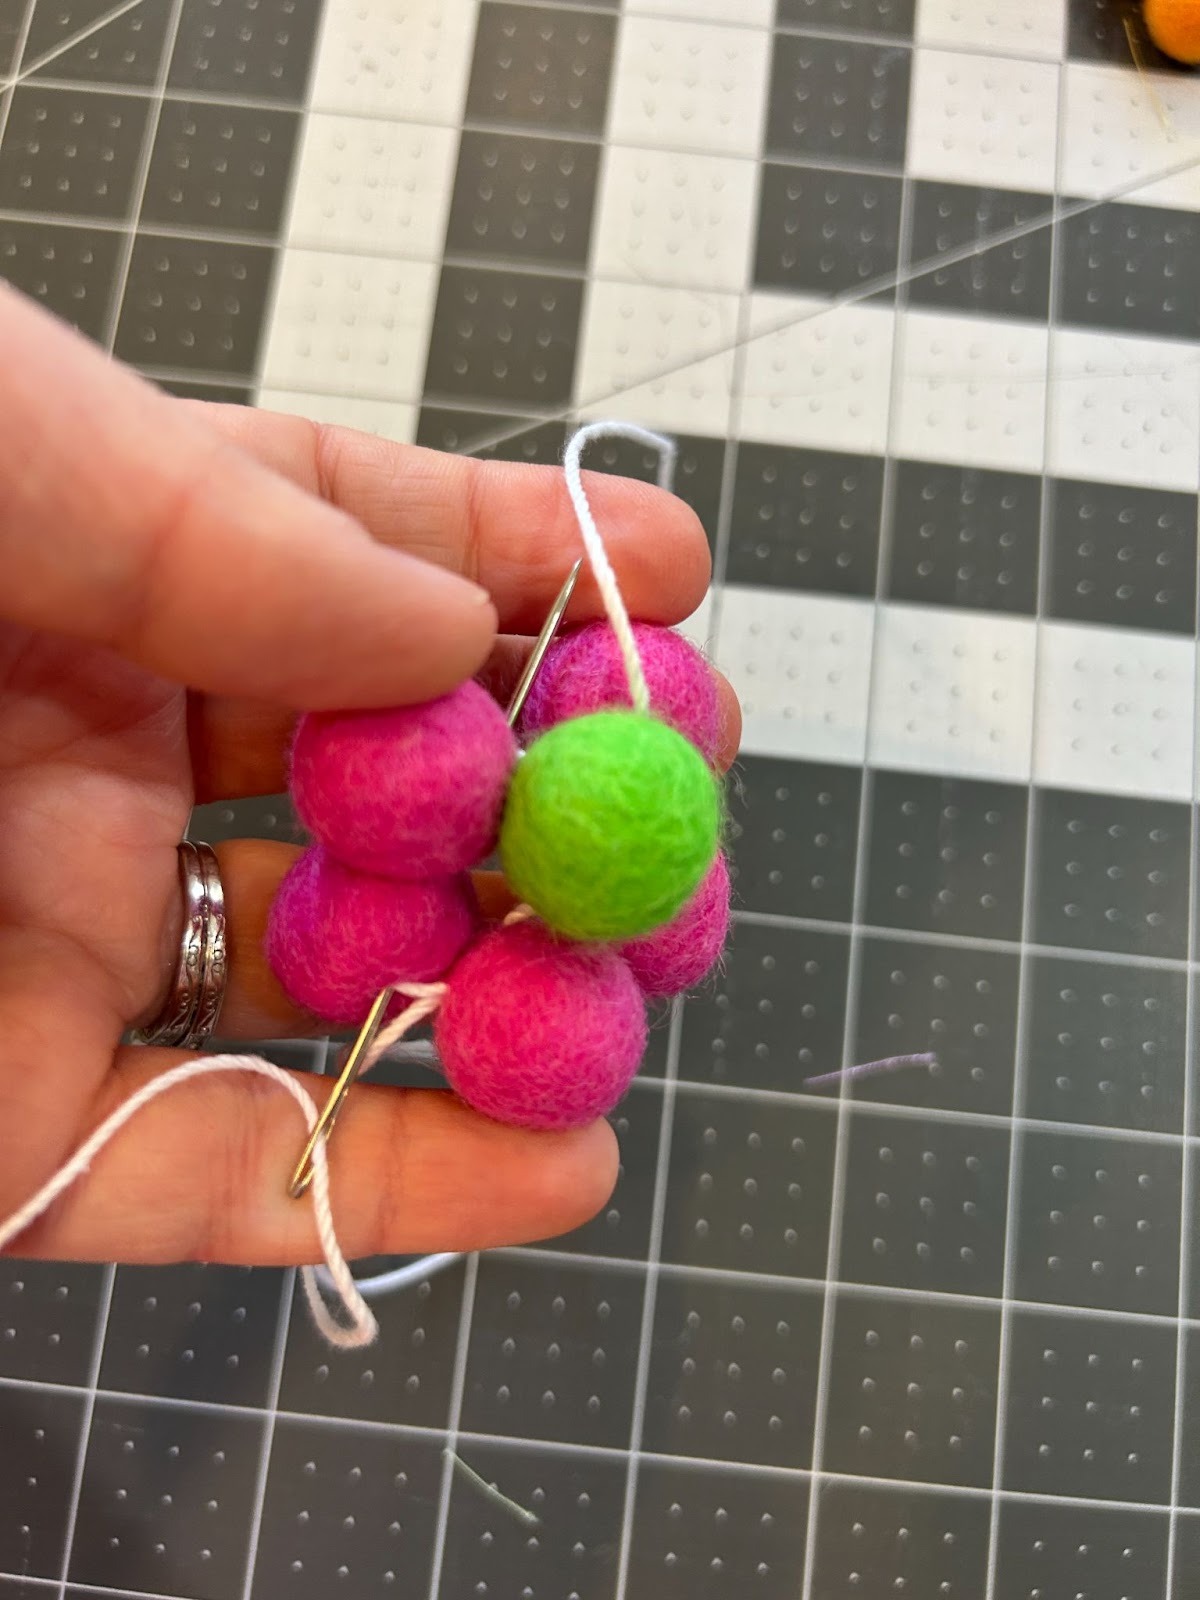
Now we will arrange the flower so that the petals are around the edge and the center sits above them a little bit. Have your needle come down over the top of the middle petal. You don’t need things to be tight at this point. You will be able to tighten it in the upcoming steps.

Now to connect them, pierce the middle petal (#3) with the needle and come out as close as you can to the place where the first string runs through.

Then thread through the fourth and fifth petals on the string. Keep your stitches close to the other stitches you did.
Tighten your stitches so that the flower comes together. Your threads should be together at the top of the flower at this point, but petals 1 and 5 are not connected to each other yet.
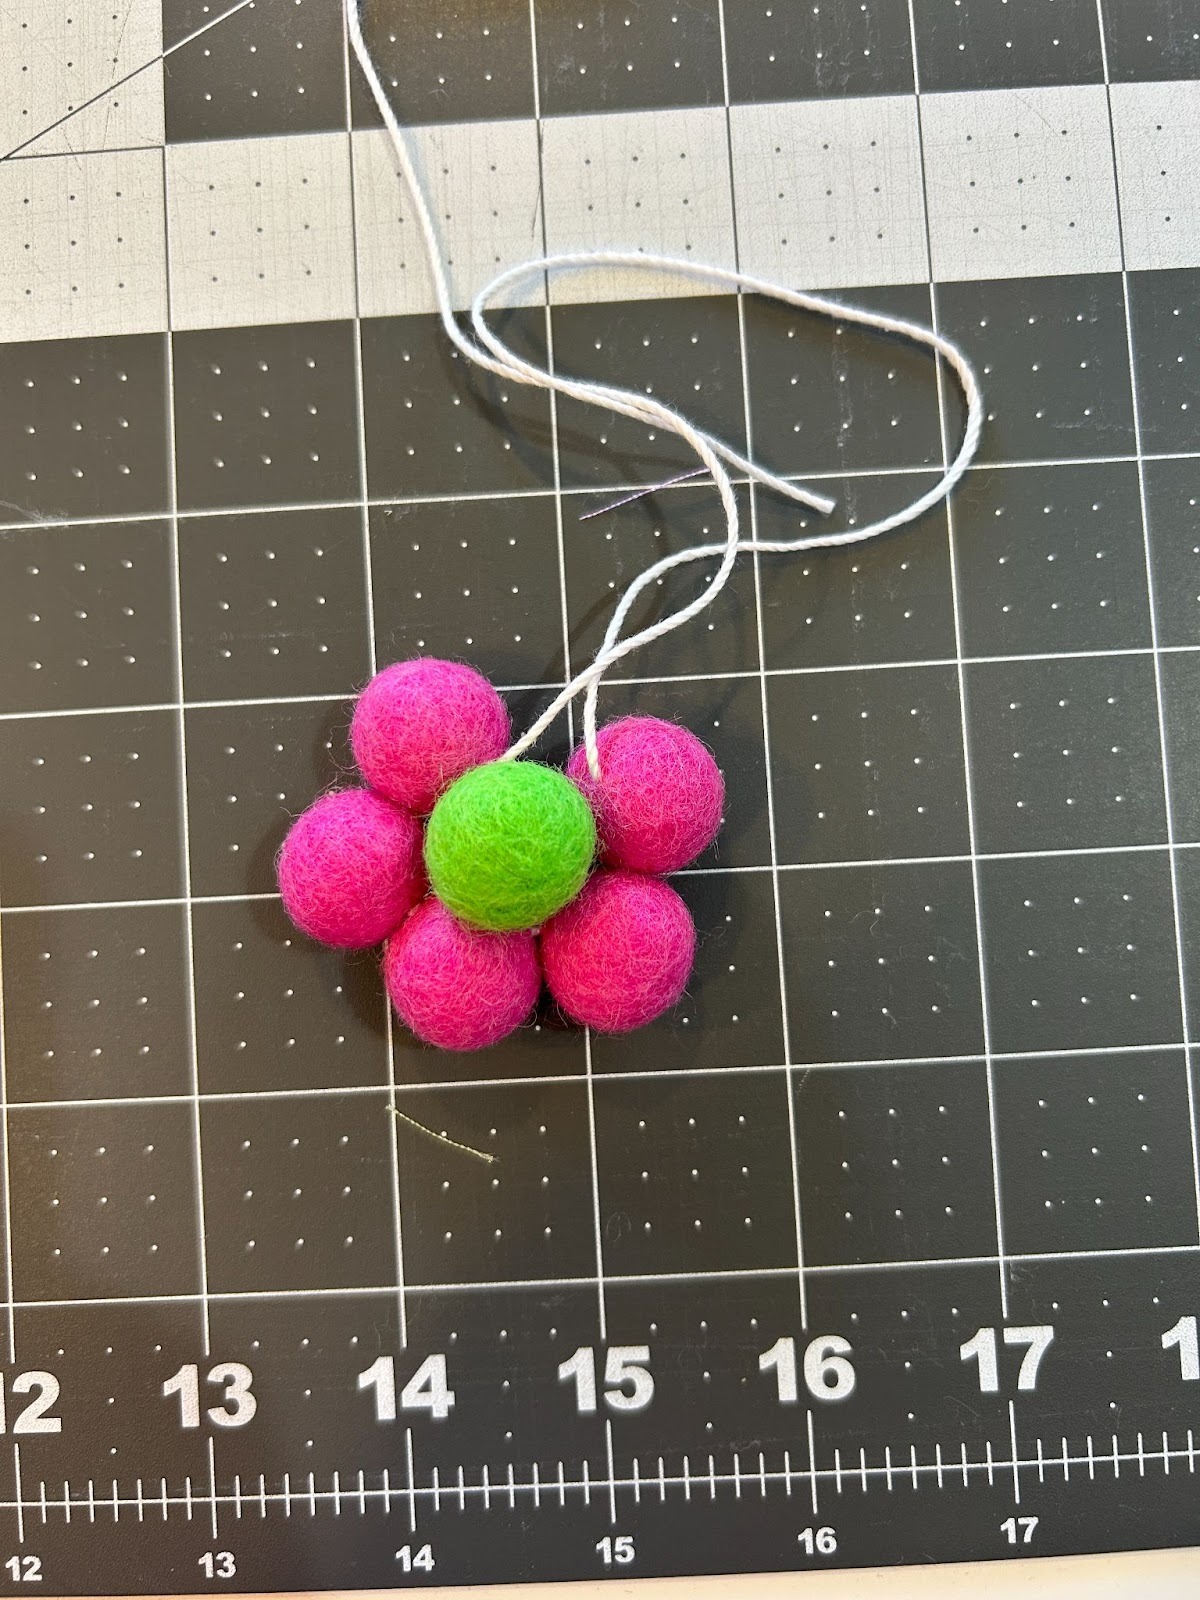
Tie a knot in the string between #1 and #5. This will hold these two petals together. Ensure the flower is as tight as you’d like before you finish your knot.
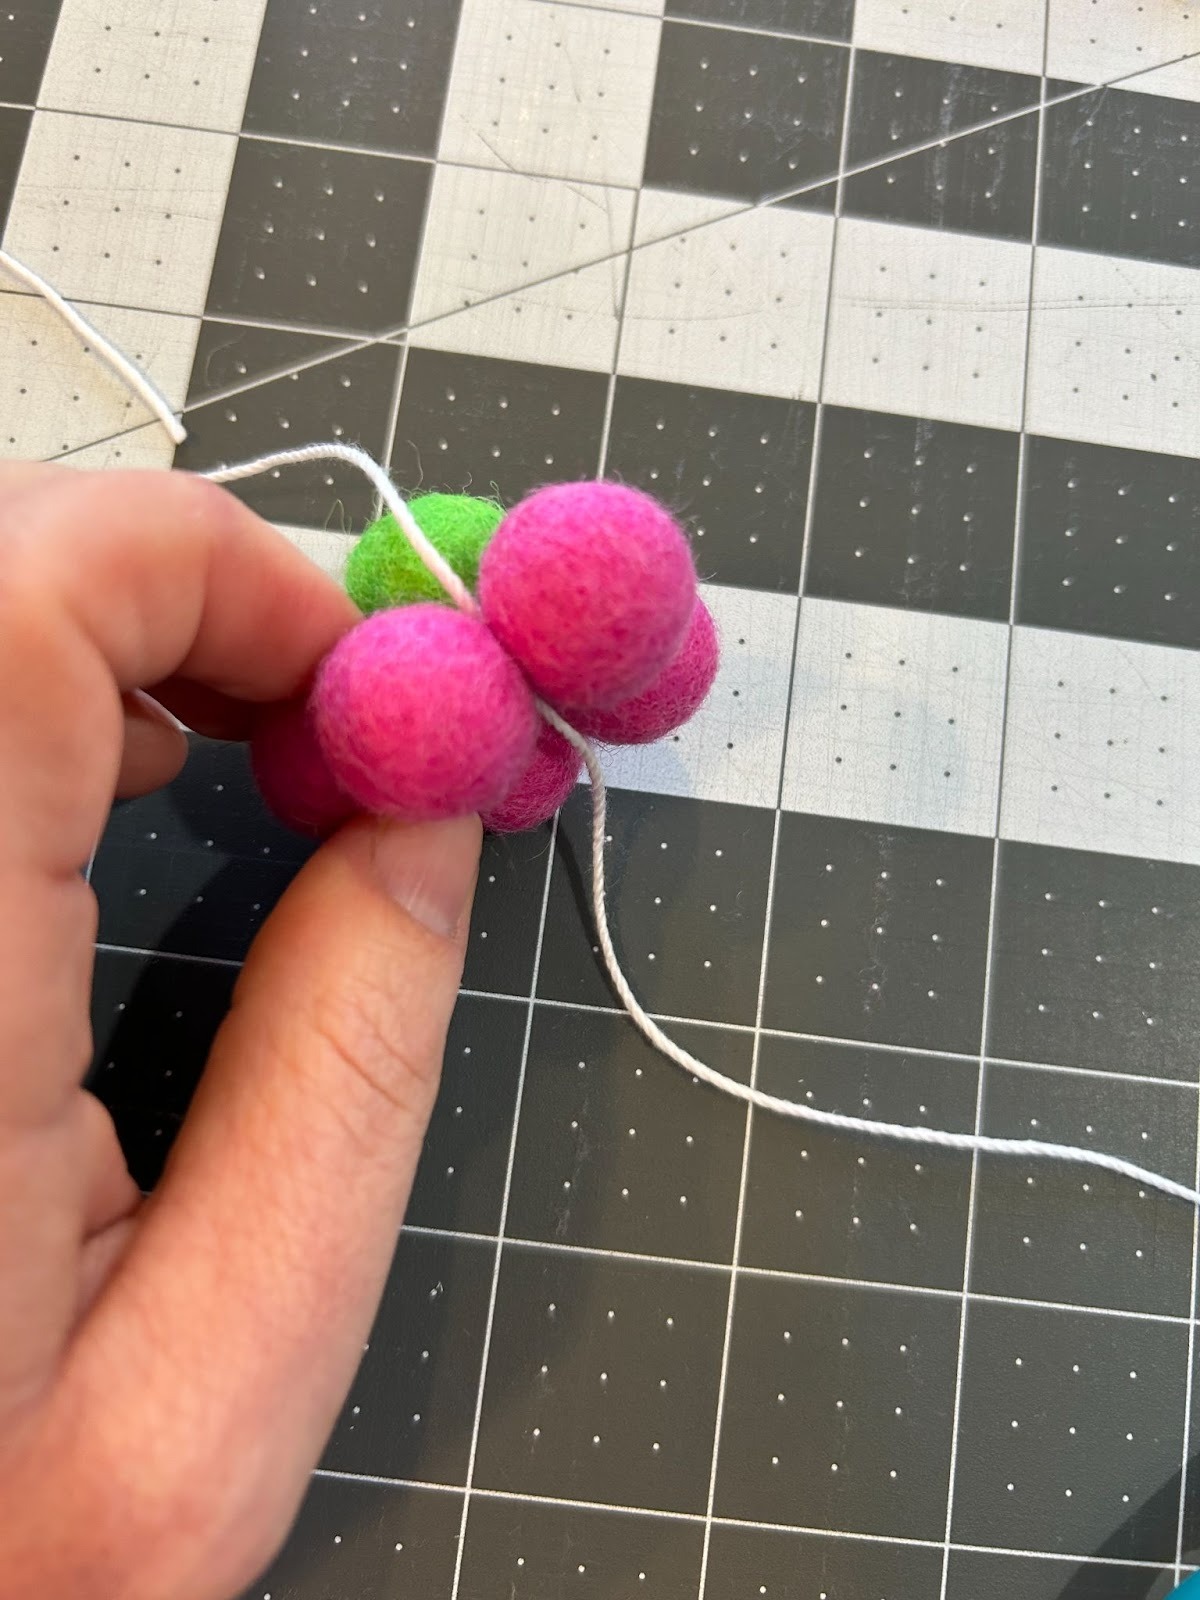
There is your finished flower. I take the strings and pull them to the back of the flower. I use the long ties to tie to my garland but you can trim them if you’d like to tie them another way.

Make as many as you want in as many colors as you’d like.
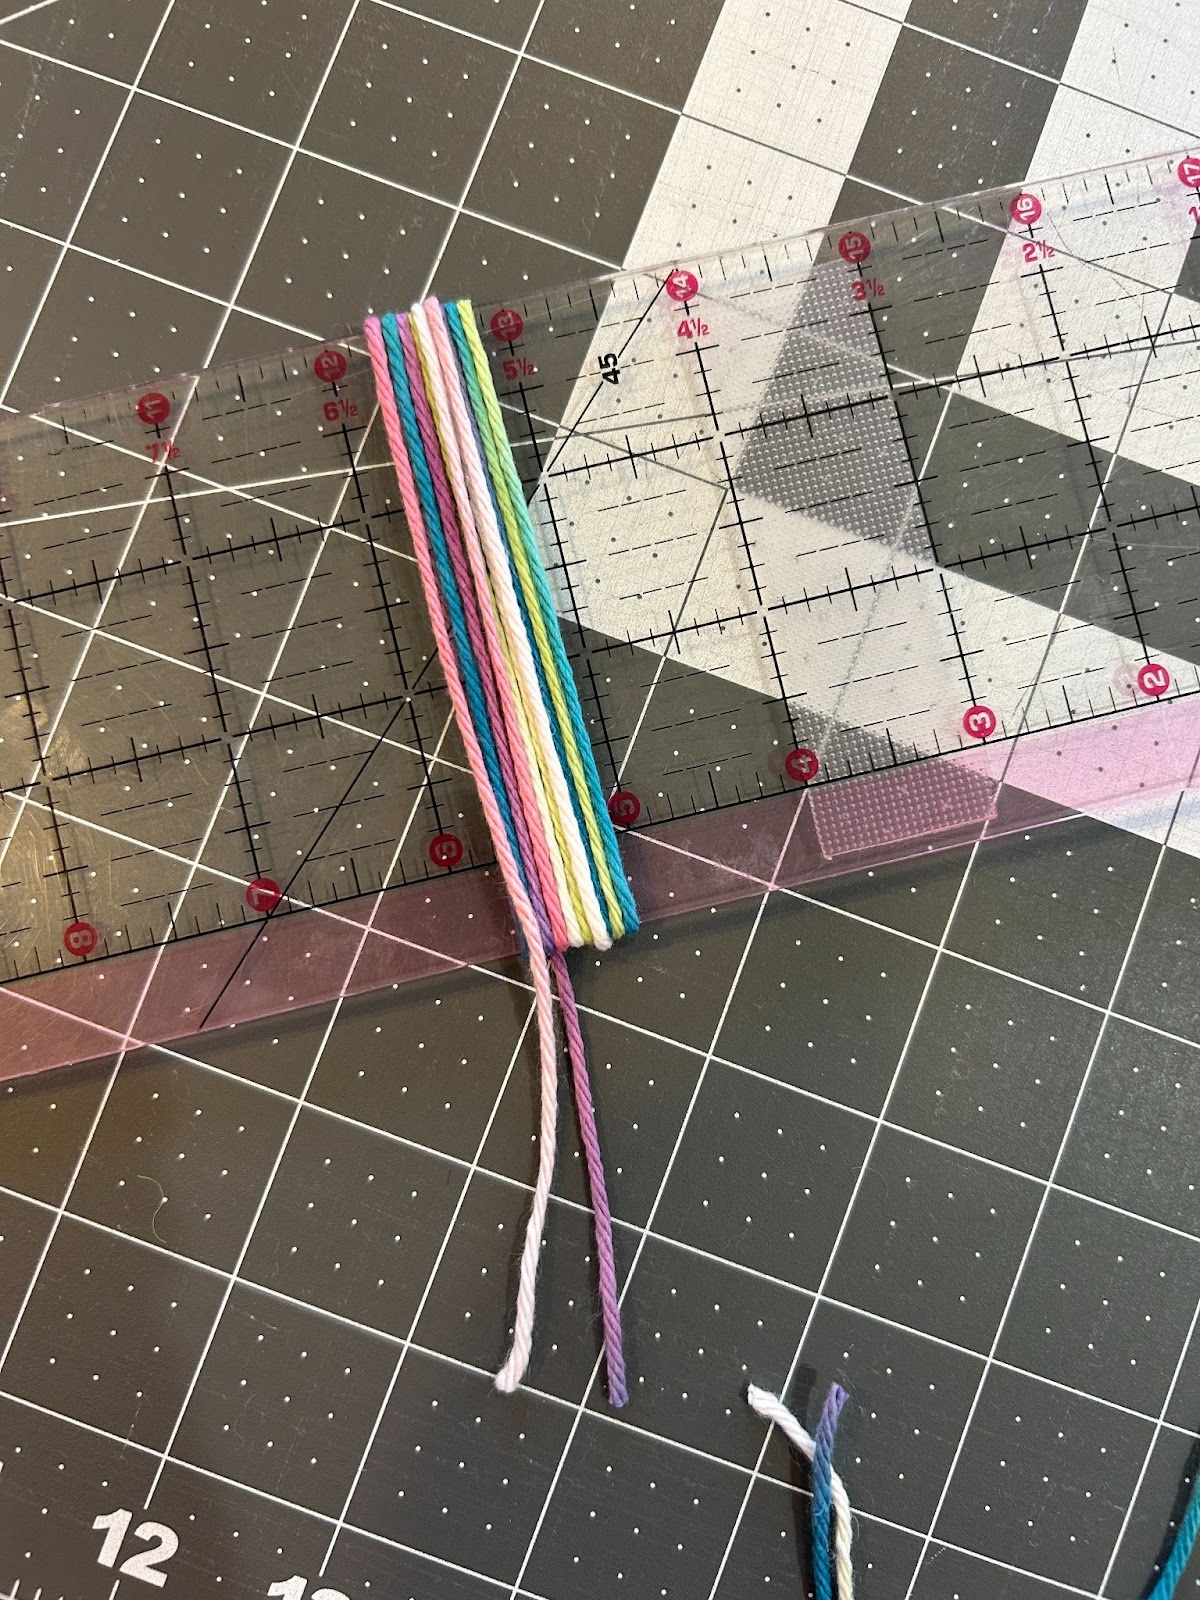
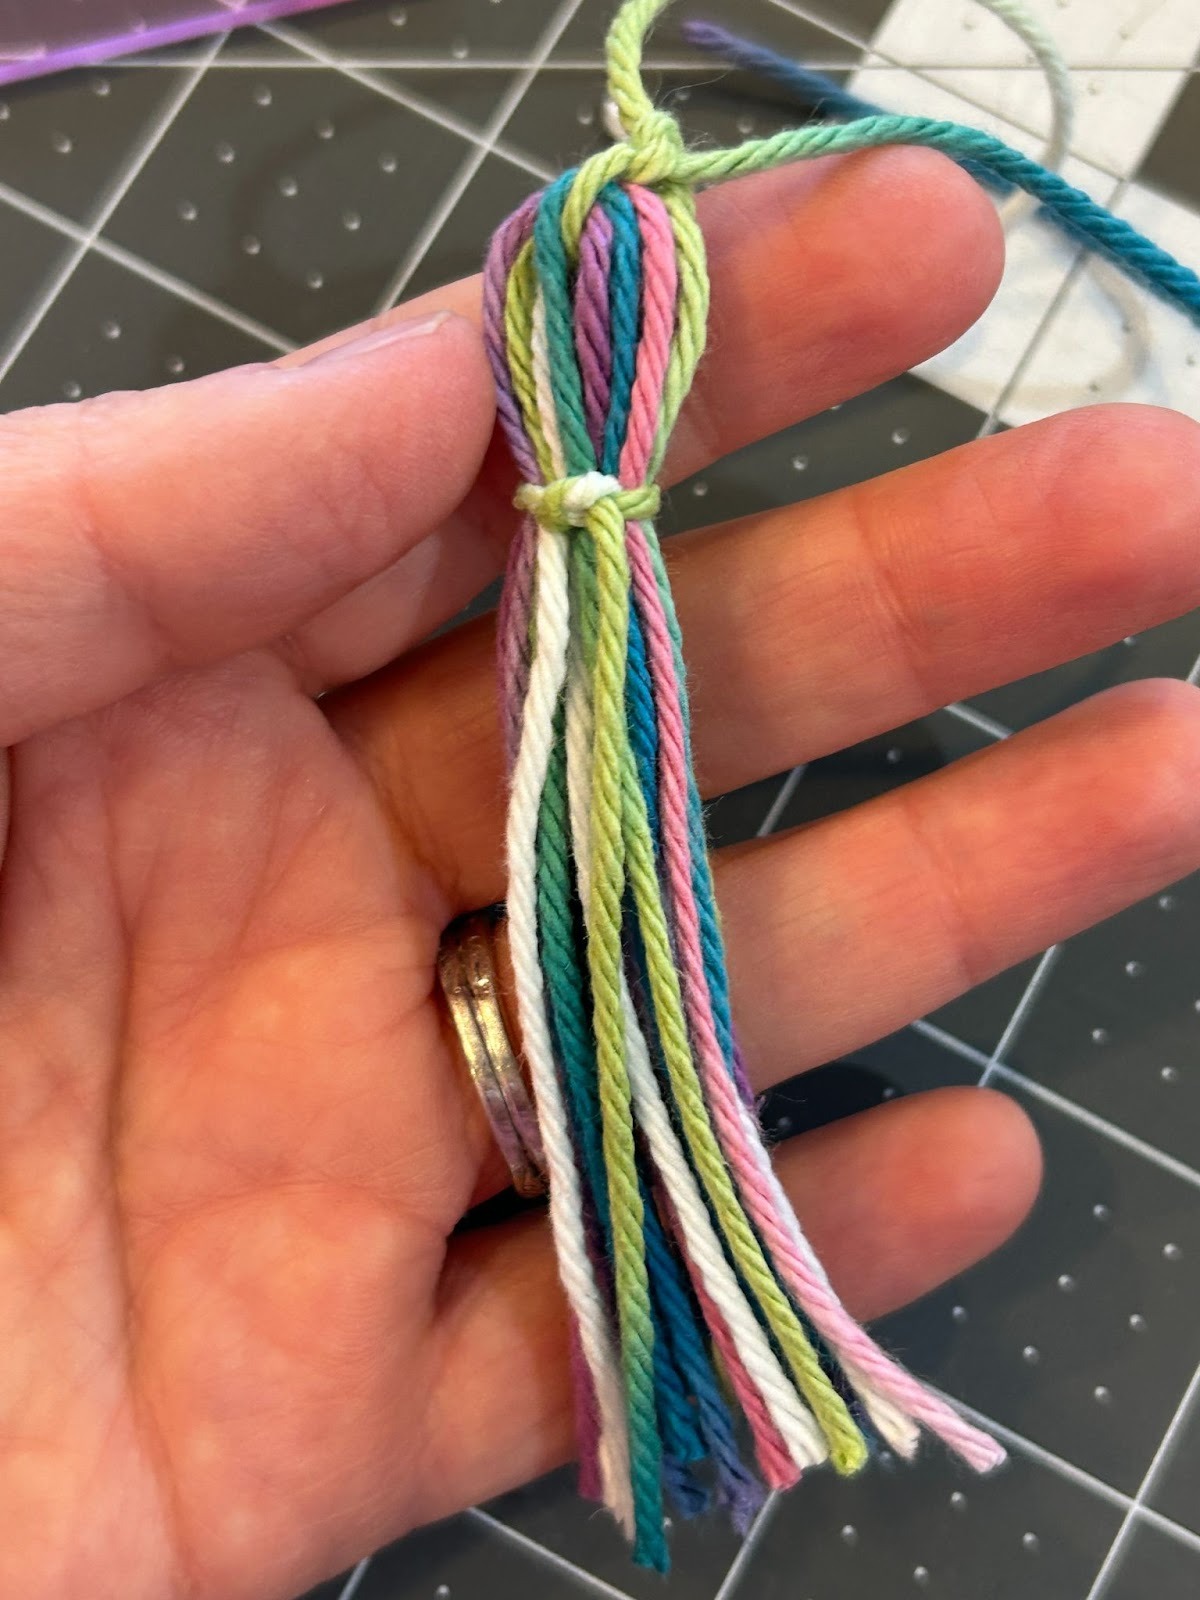
I thought it would be fun to have some yarn tassels on my garland, and they are easy enough to make. I used my 3½” x 18” ruler and a ball of yarn to make them, but you can make them with anything that you can wrap the yarn around that is the length you want them to be (a piece of cardboard or wood, for example).
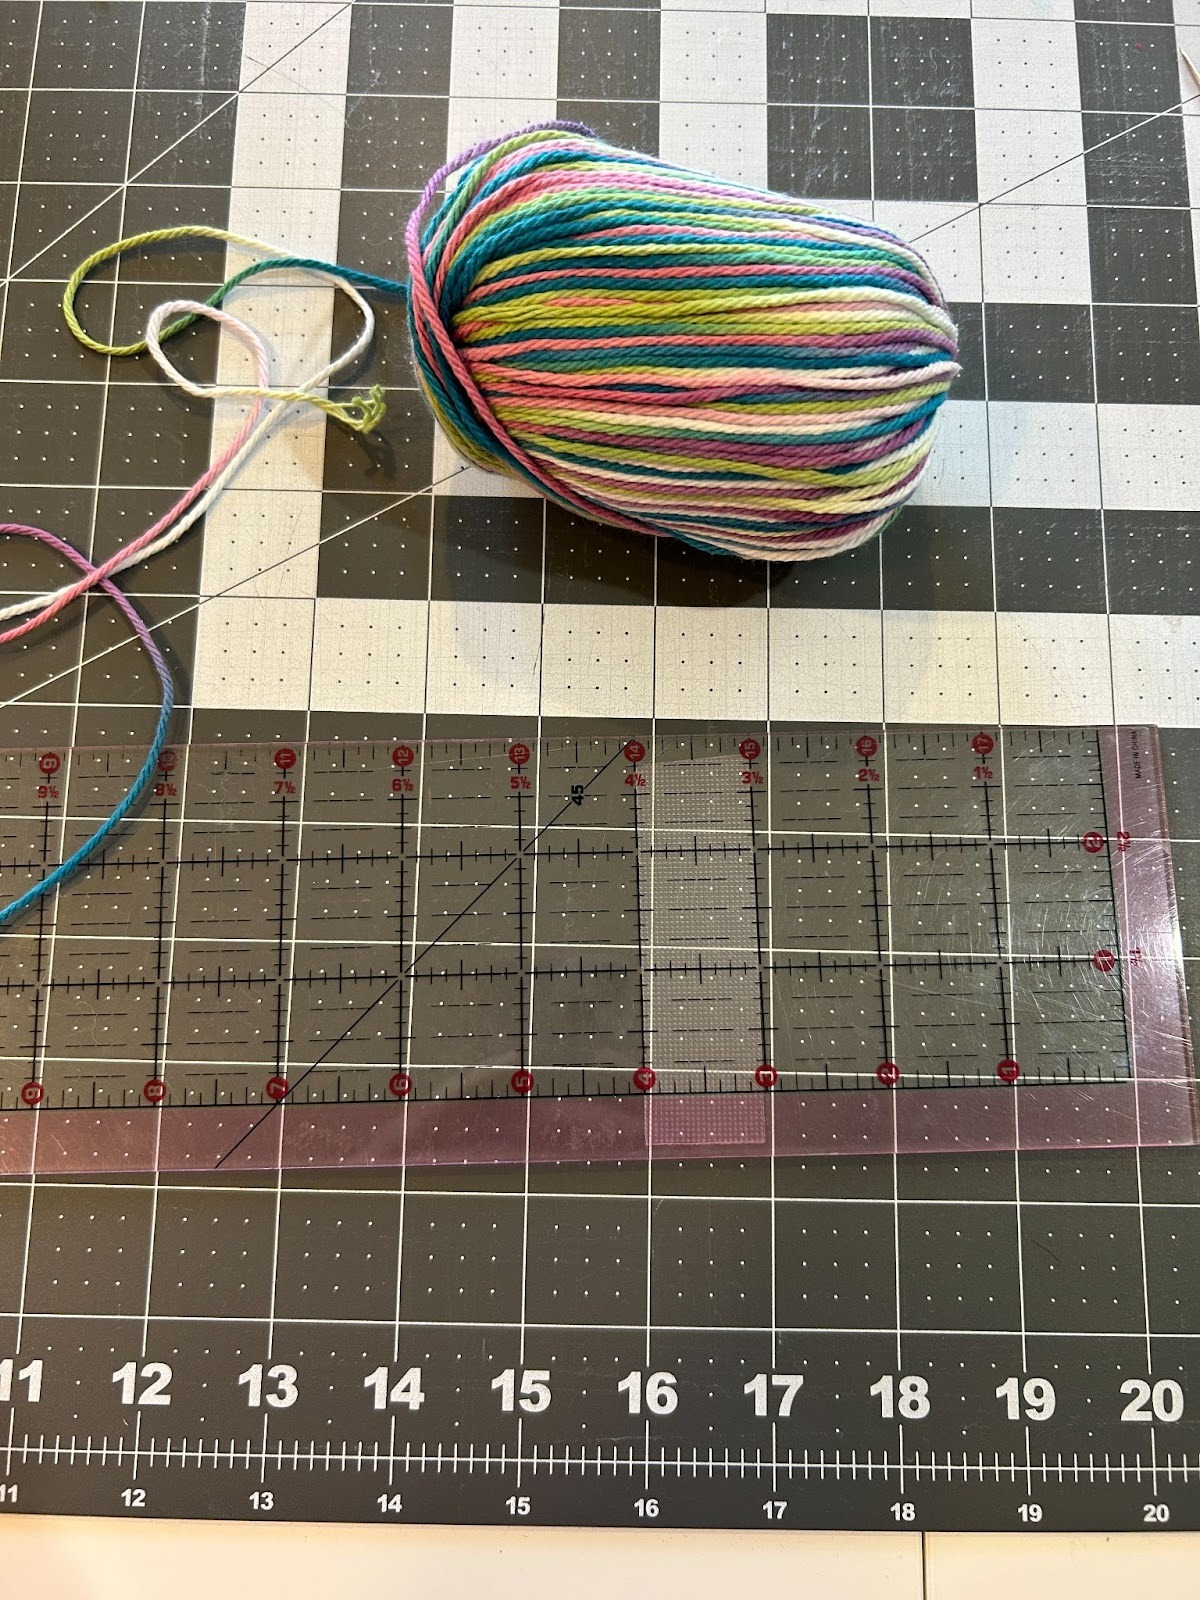
Start by wrapping the yarn around the ruler. I did 10 wraps for the first one. (See my notes later on how many wraps I decided on in the end.) Try to keep your wraps together and the same tension. I like to leave long tails so they can be trimmed later.
Using a 10” piece of yarn, thread it under the wraps.
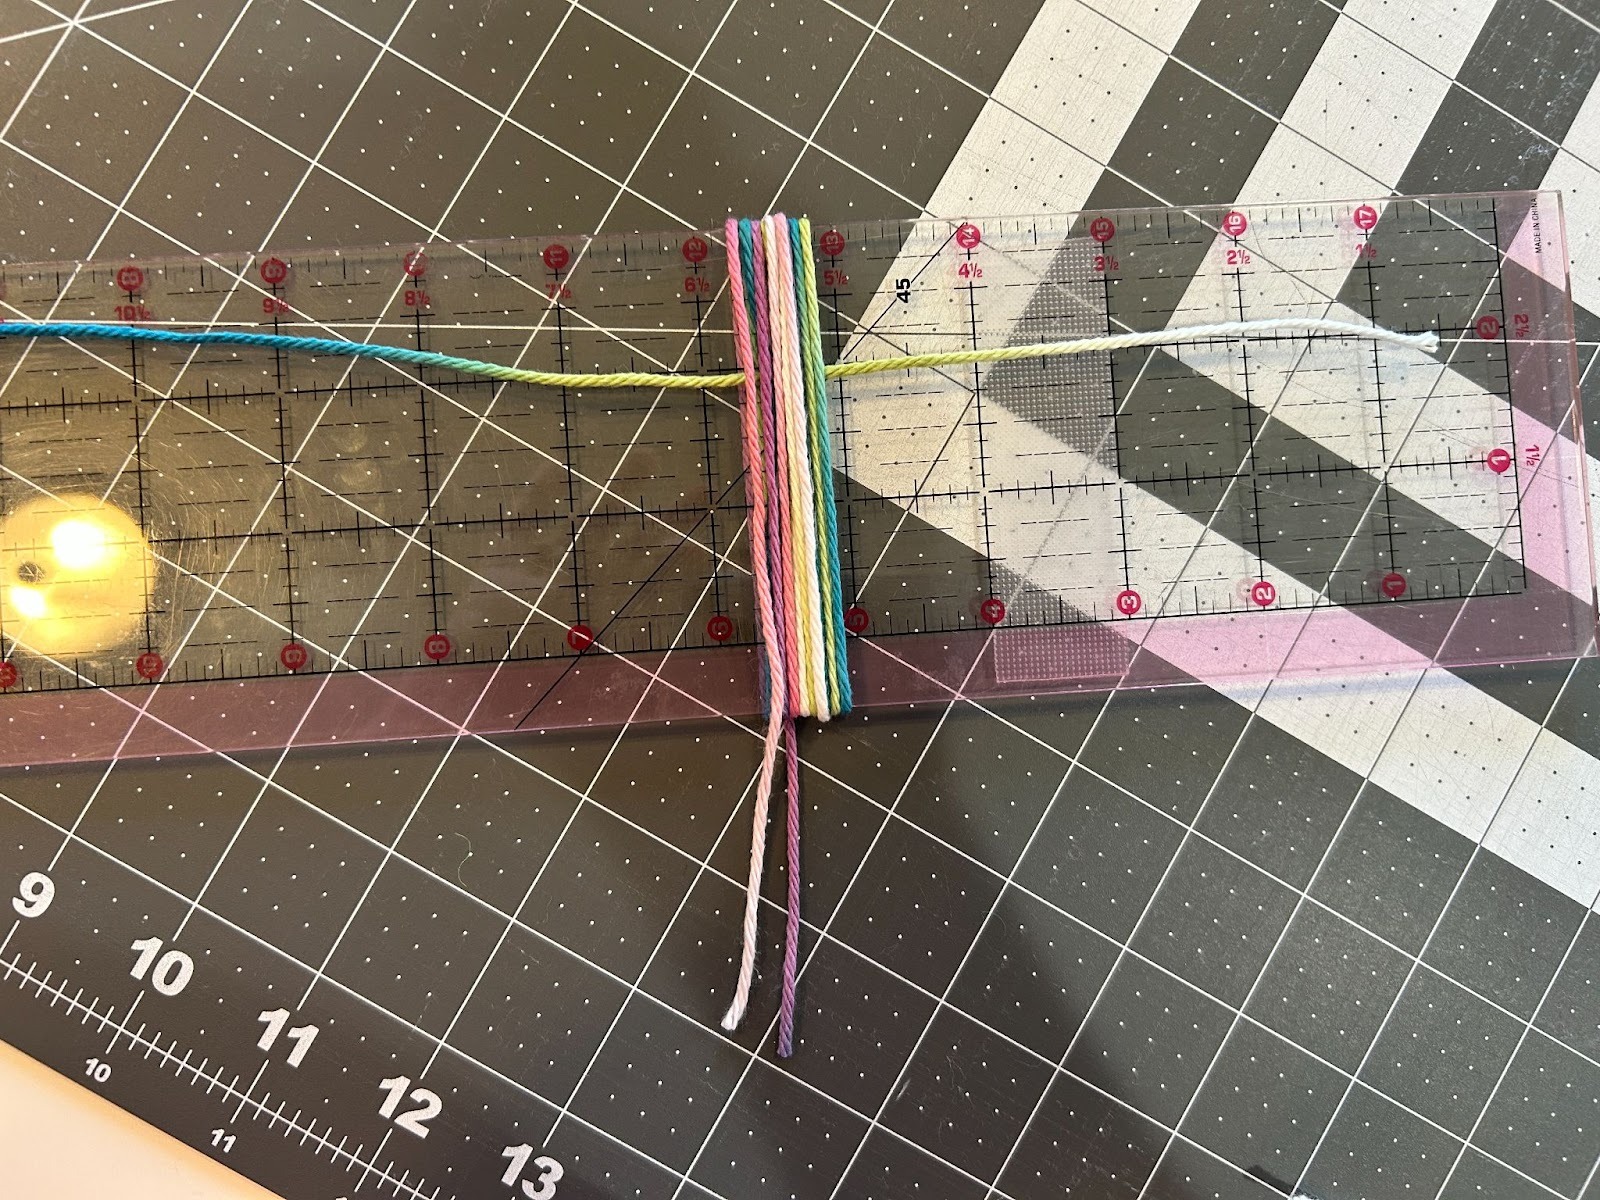
Pull it to the top of the ruler and tie it in a knot.

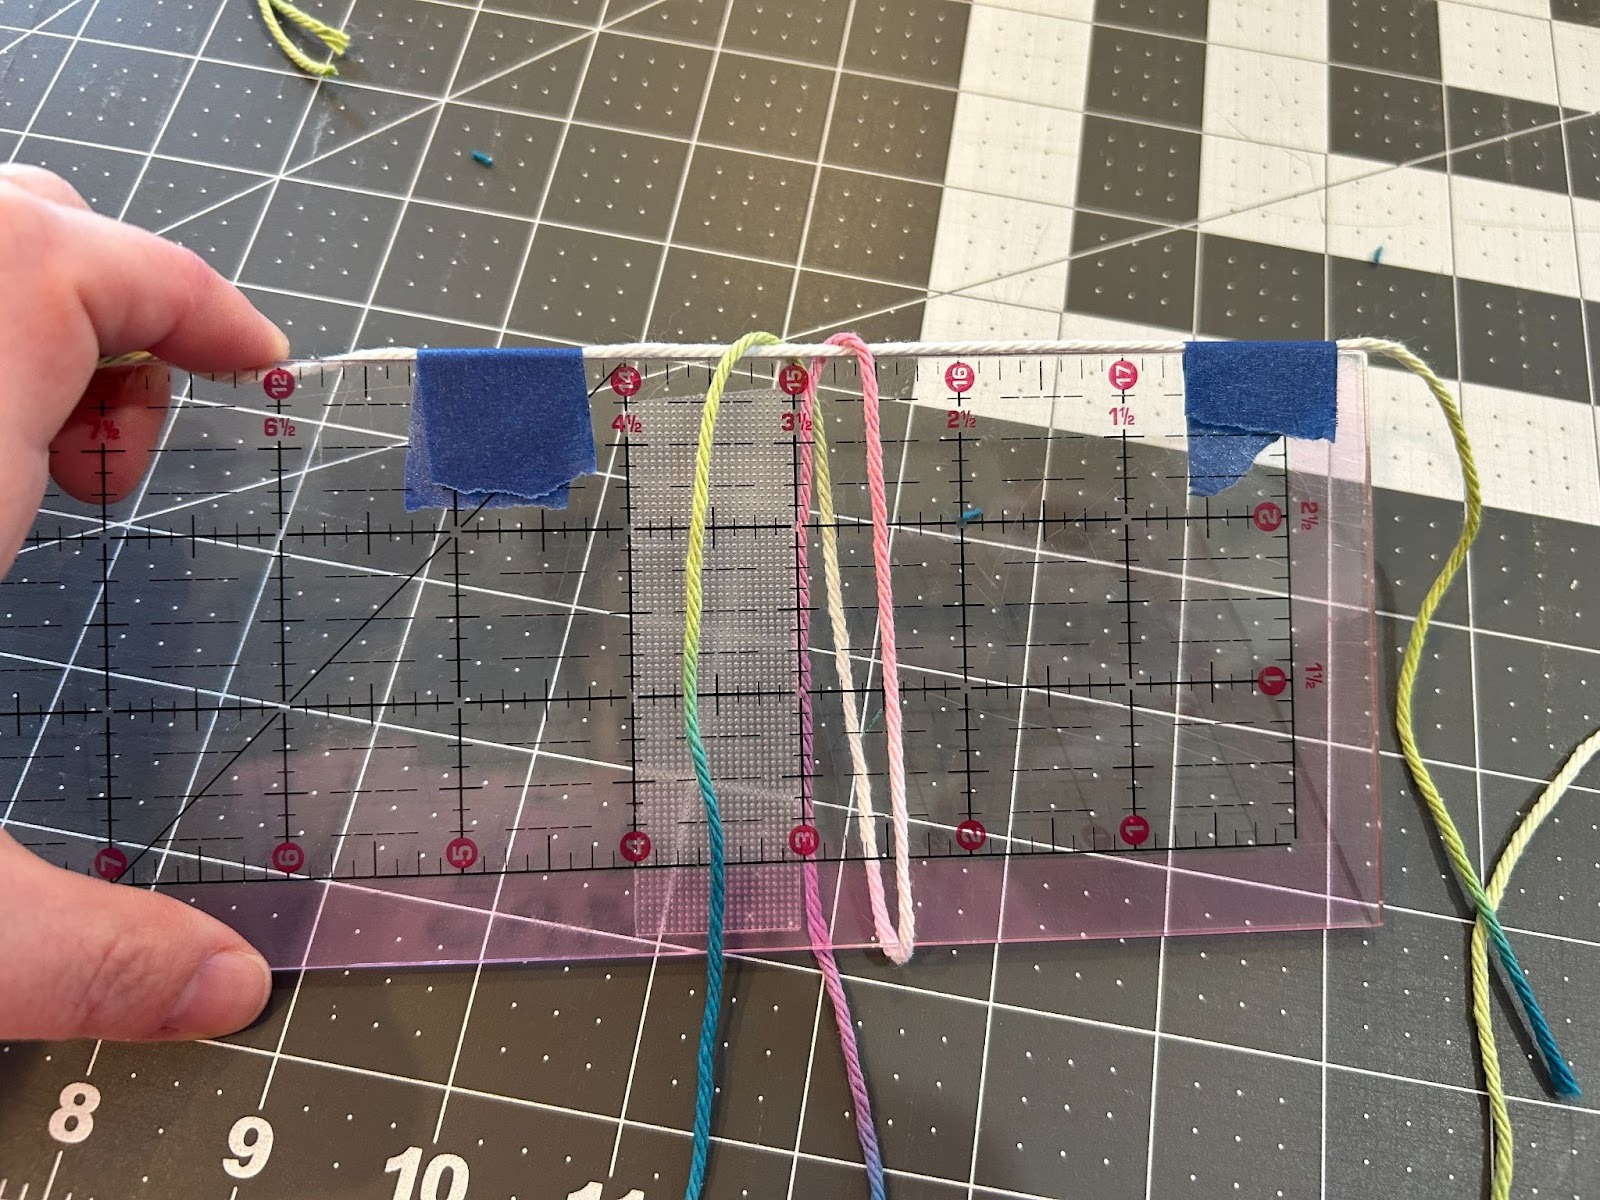
You can now slide your yarn off the ruler (or whatever you wrapped). Then decide where you want to have your next tie. I chose to place mine at about ¾” for my 3½” tassels.
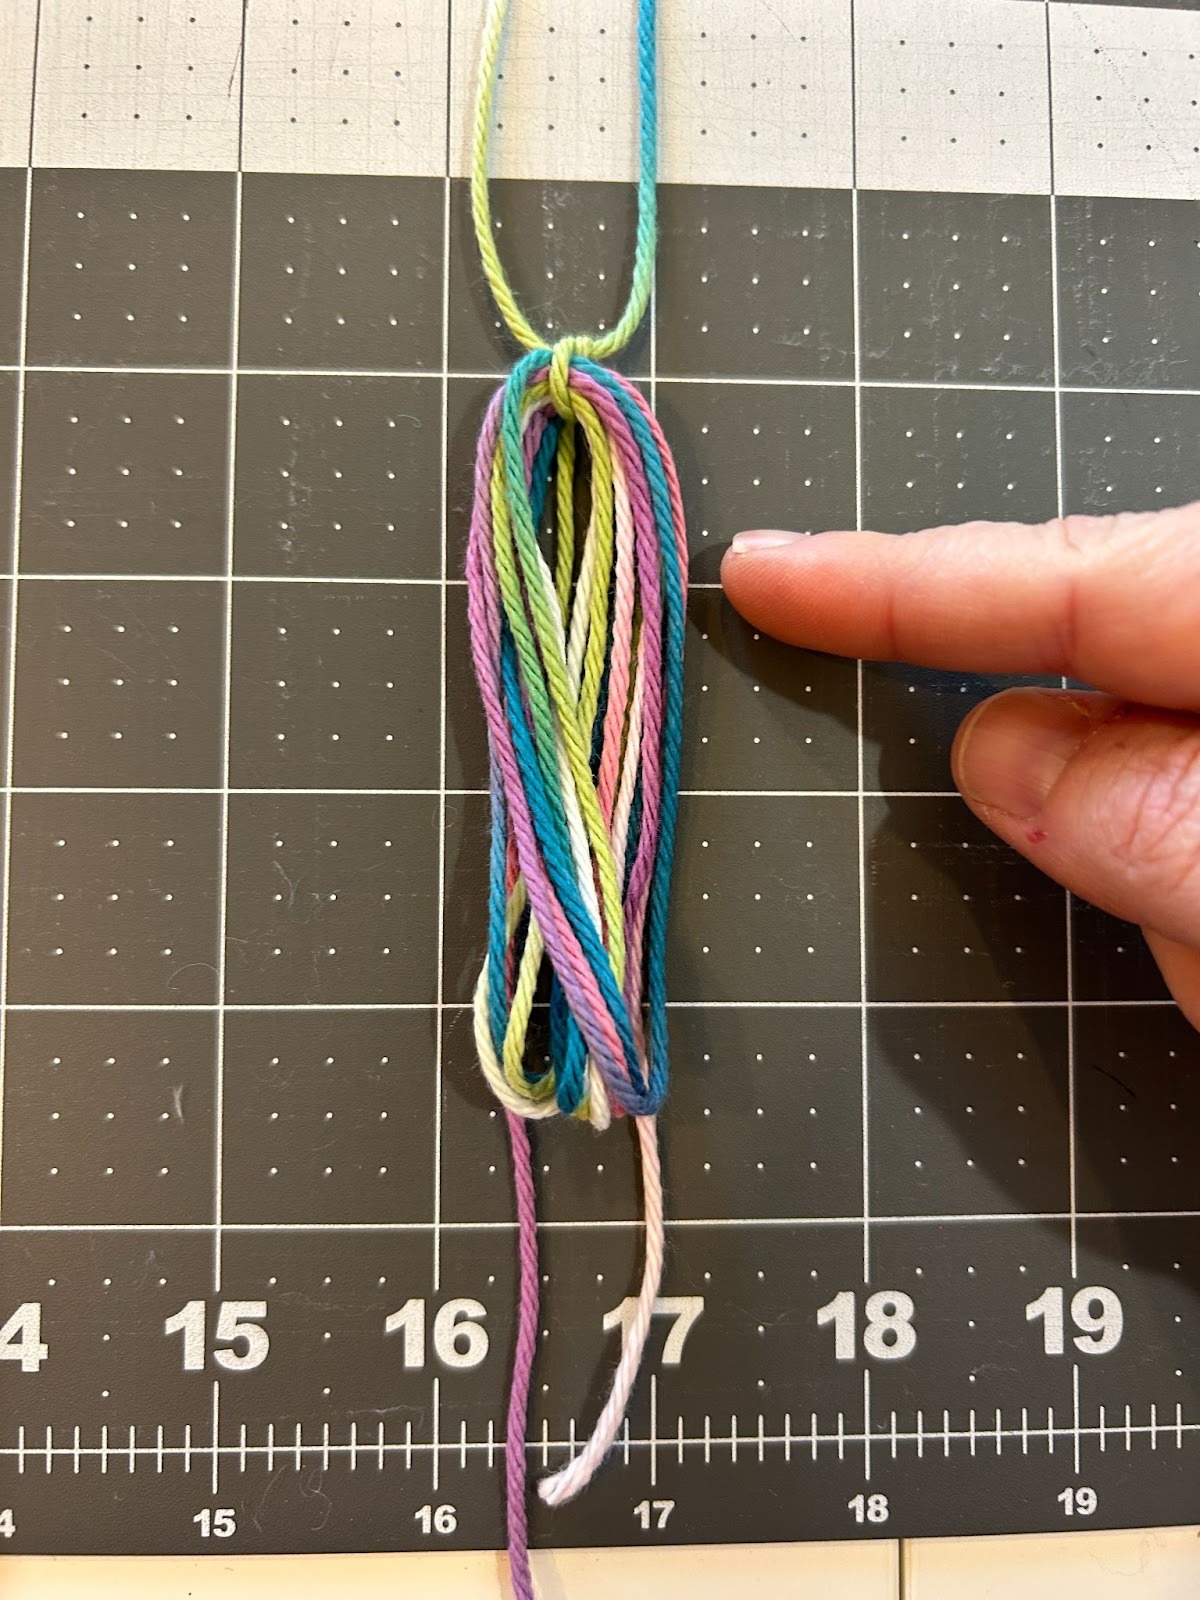
Place a 12” piece of yarn behind the tassel in the spot you decided on.

Tie it in a knot, and make this one really tight. One tail will be going “up” in direction.

Cut your loops at the bottom.

For a nice finish, I insert my yarn needle and push it under the tied-off yarn next to the knot, right next to the “up” tail.
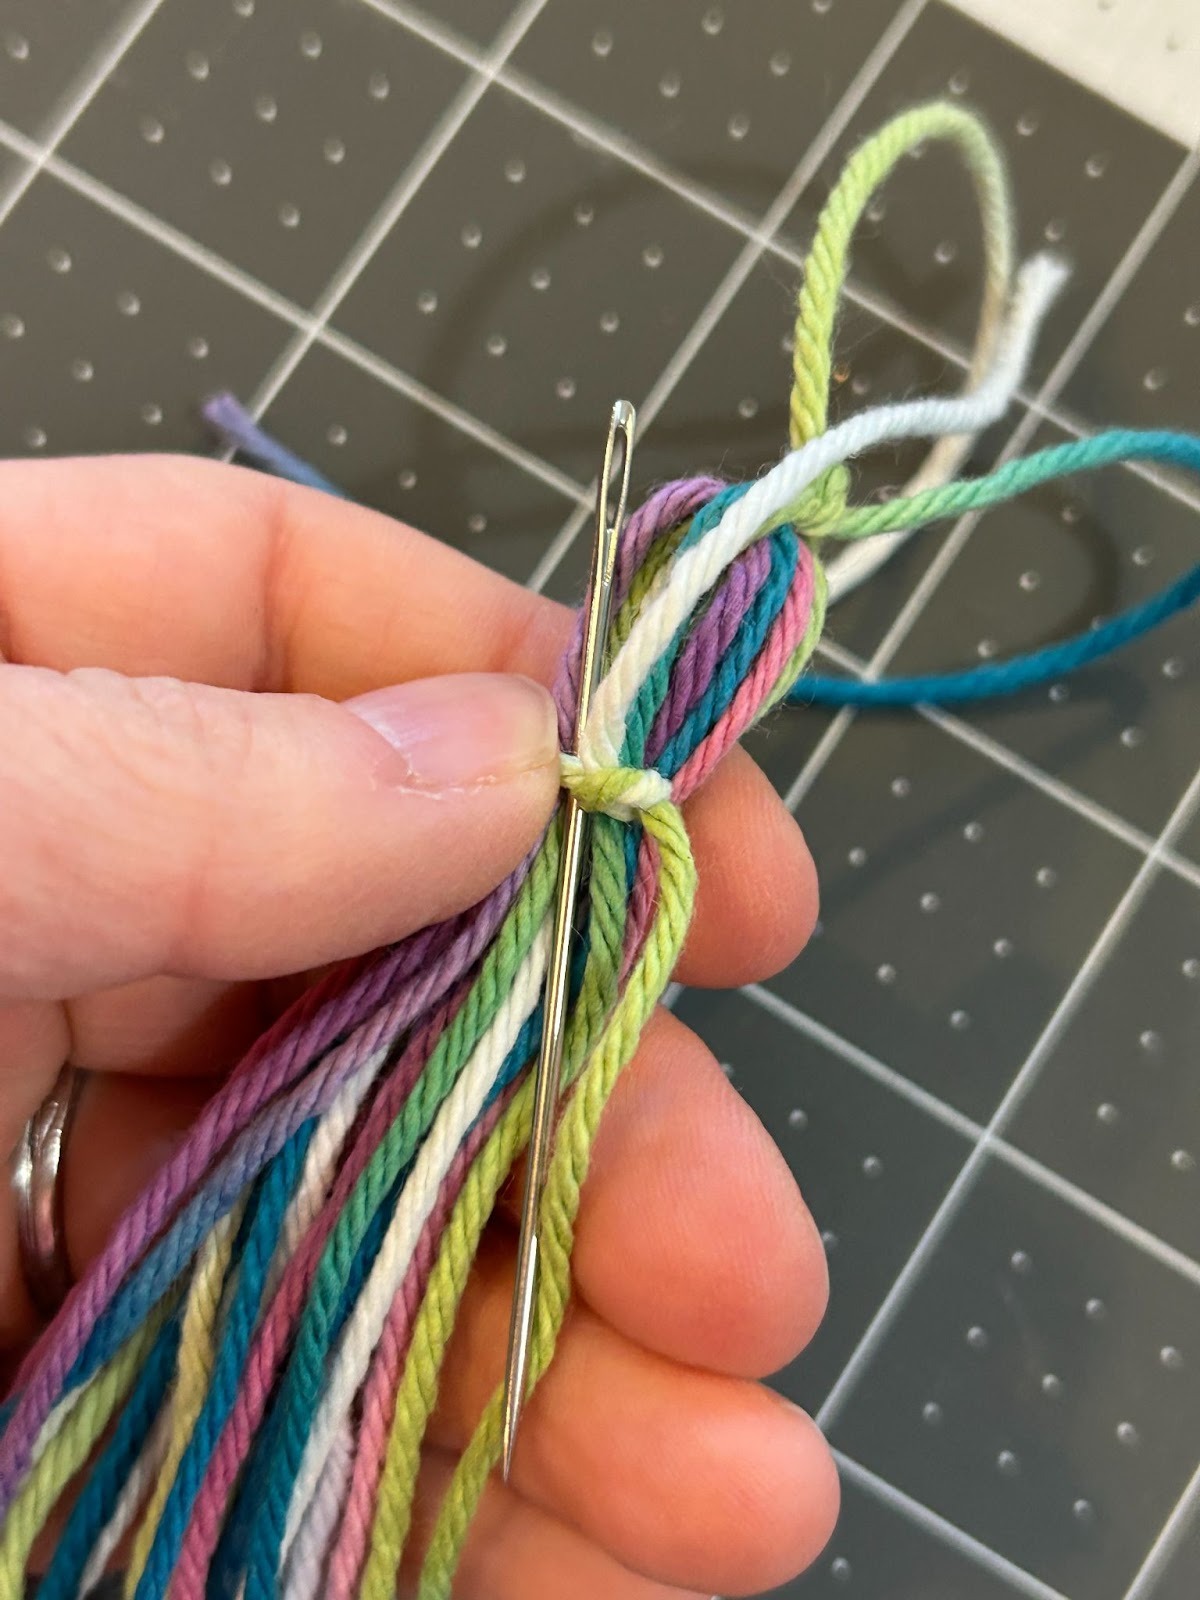
Thread the tail that is angled up in the eye of the needle.

Pull the yarn down and it will now become part of the tassel.
Trim the tails of your yarn to match the rest of the tassel.

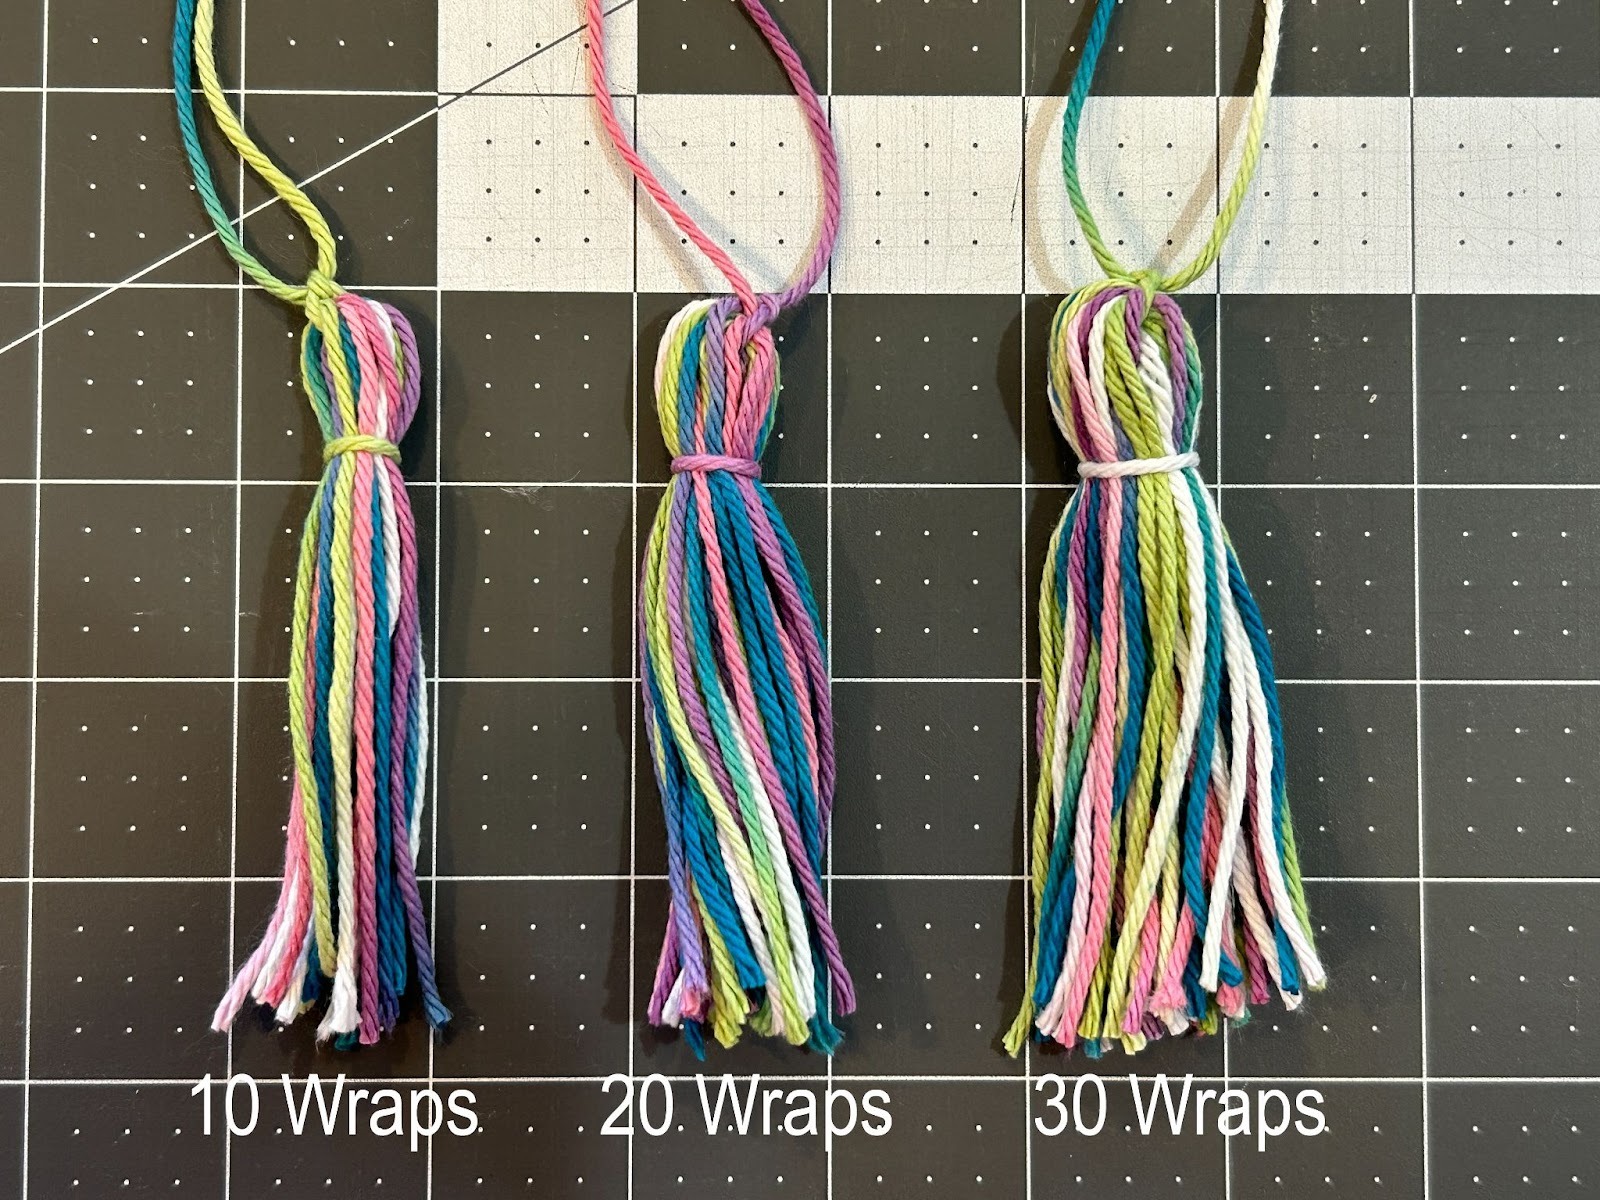
And there you have a finished tassel. I experimented and did tassels with 10, 20, and 30 wraps. This is how they looked finished. I used the 20-wrap tassels for my project.
When I did the tassels with more wraps I noticed it was harder to thread the yarn under that many wraps so I started placing the top piece of yarn across the top of my ruler and taping it in place, and then wrapping the yarn.
To finish the garland I took all of my larger wool balls, the wool ball flowers, the tassels, and the FSL designs and spaced them out along a string that was the length of my mantle. I tied everything in place using more yarn or string that I had from the project.
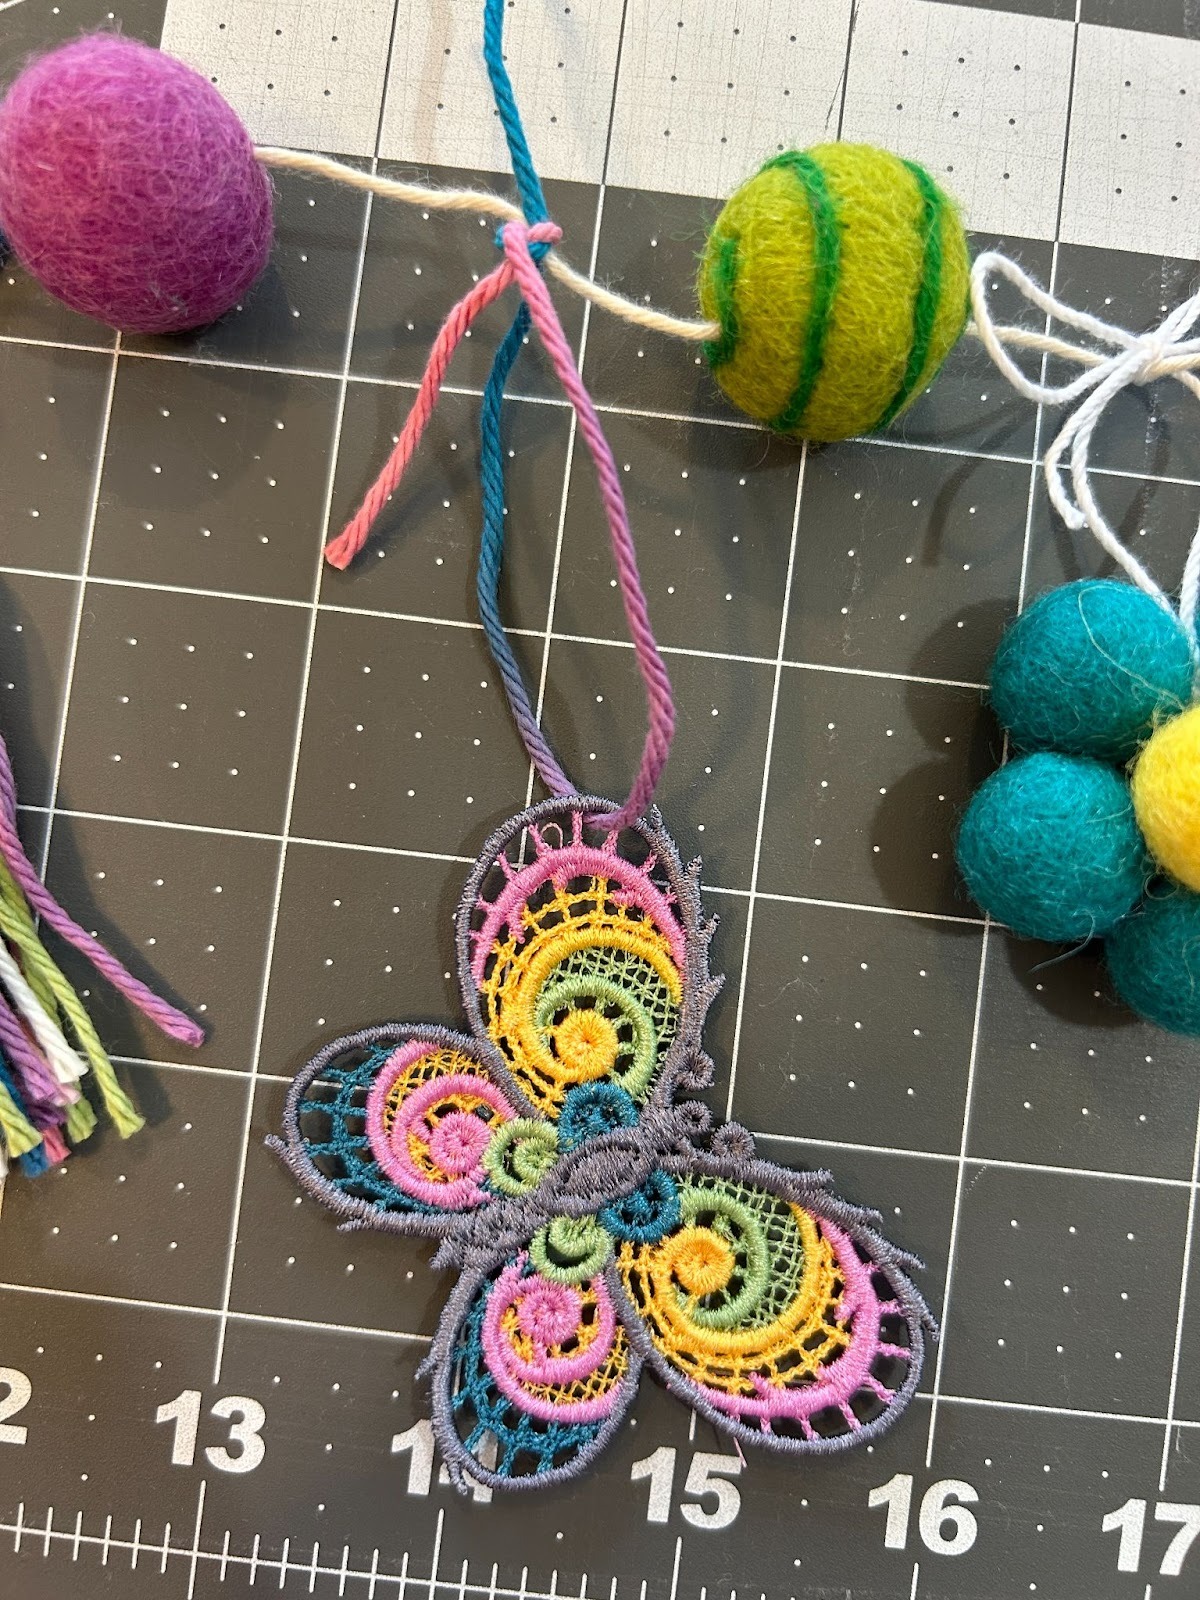
Hang the garland along a mantle, window, or mirror in your house to celebrate any occasion!

I love this project because it’s so flexible. DBJJ has so many FSL options that can be used for so many occasions, and you can create your garland to have as many or as few other items on it as your heart desires. So make some of these for your house and then share your results with us in the Designs by JuJu Embroidery Blessings Facebook Group, or anywhere on social media using the hashtag #designsbyjuju, so that we can all be inspired by your creativity!
