Toggle Nav
 Inspire.
Create.
Stitch.
Inspire.
Create.
Stitch.
Search
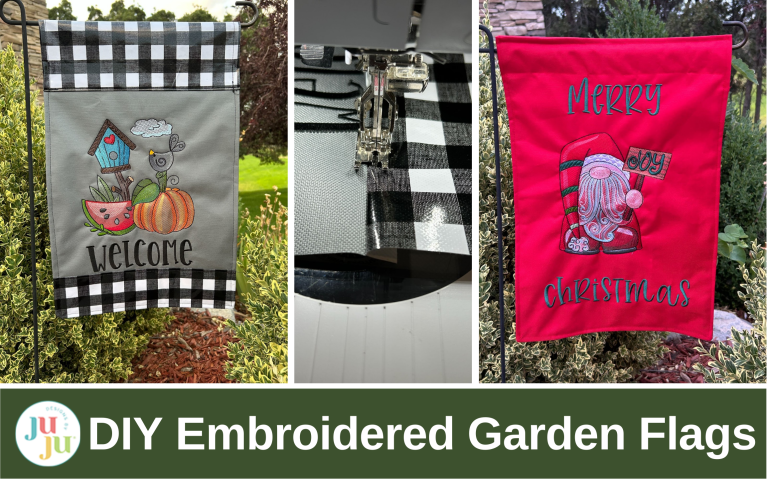
Learn how to embroider a custom garden flag that’s beautiful, durable, and ready to brighten your outdoor space.
A garden flag is such a fun and welcoming way to dress up your yard, and embroidering your own adds that personal touch that makes it truly unique. Whether you’re creating something seasonal, celebrating a special occasion, or simply adding personality to your outdoor space, this project is straightforward and rewarding.
With a little preparation and the right materials, you’ll be able to stitch up a flag that’s both beautiful and durable enough to handle the outdoors. You can make it double-sided or one-sided, depending on what works for your garden. I’ll show you how to do both. We will also make a flag with a coordinating border and one that is the same fabric all over.
Check out the DBJJ team’s favorite supplies in the Designs by JuJu Amazon store.

First, let’s talk about fabrics for our garden flags. When we are making an outdoor project, we need to have fabric that can stand up to the elements. I used a Shason Textile Pro Tuff Outdoor Fabric for my main fabric. There are also other brands that are meant to be outdoors, like Sunbrella®. Thicker fabrics, like a canvas or duck cloth, will be much more durable than the quilting cottons we often use inside. There are also sprays you can use to weatherproof and UV protect your fabrics. I’ve never tried them so I can’t speak to their effectiveness, but it’s an option if you want to try it.
I wanted my finished flag to measure 12” x 18” so I cut my fabrics 13” x 19”. This gives us ½” seam allowances to use on our flag. Center your fabric in the hoop with a stabilizer appropriate to your design. I used tearEZ for my first flag and magicMESH for my second flag. I like how the tear-away worked better for this application.

Stitch out your design on the fabric.

When you’re finished stitching, remove your hoop from the machine and the fabric from the hoop.

You can add words to the design if you’d like. I added Welcome to the back of this flag and I added Merry Christmas to the Santa design.

Clean up the back by removing the stabilizer and trimming threads. The back will not be seen. I always feel a little bit of relief when I know the back of my project will be hidden.

If you’re making a flag with a design on the back repeat these steps for the back piece.
To make a flag with coordinating borders, we will take the main piece of fabric and decide (depending on how big your stitched design is) how big you want your border to be. I wanted my border to be about 3½” from the bottom of my flag.

To cut the border we will add ½” to the height of our 3½” border. Cut it by the width of your flag, so on my flag it’s going to be 4” x 13”. This adds the seam allowance to our border.

Now we will cut the bottom off our main piece. We want to have the border come up 3½” but we need to subtract the seam allowance from this. So we will cut 3” off the bottom of the main piece.

Now we will line up the raw edges and sew them together using our ½” seam allowance.

My fabric wasn’t up to a warm iron, and so I finger pressed the seam toward the main fabric.

Once you’ve pressed your seam allowance (either with your fingers or an actual iron), you can run a topstitch to catch the seam allowance in the stitches and add a finishing look.

Repeat these steps for the back side. The only thing we will do differently on the back is press the seam allowance toward the border. This will help us nest the seams when we sew them together. Topstitch it on the border fabric to catch the seam allowance in the stitches.

We will now place the right sides of the flag together and clip. We will stitch on the right side, bottom, and left side. Your seams for the bottom border should lay flat next to each other.

After stitching, clip the bottom corners to remove the bulk to make turning easier.

Reaching through the top opening, turn your design right side out. Use a That Purple Thang to square out your corners and edges.

You can run a decorative stitch around the flag on the right side, bottom, and left side.

Now it’s time to decide how much of a top border you want. For the border piece we will add ½” to the length we want to finish it with AND we will double that measurement because it will fold over to the back side.
For my top border, I wanted it to finish at 4½” high so I added a ½” seam allowance to make it be 5” in height and then I doubled it to include the folding over. So I cut my border piece 13” x 10”. To cut off the piece off the main body, I subtracted the seam allowances’ ½” from the 4½” I wanted it to be, and cut off 4”.

At this point the top border piece is wider than the main flag. I turn one short side in ½” and topstitch it.

I like to check my width with the flag just in case I’m not being precise with my seam allowances. Fold the other short side over so it’s the same width as the main body and stitch it down.

On what you would want the front of your flag to be, place the top border with raw edges even and with the top right sides together, and stitch through all three layers.

On the last raw edge of the border, fold it under ½” and pin or clip in place. We won’t be sewing it quite yet.

Flip the whole flag over and press the seam allowance toward the top border. Finger press if your fabric is not iron-safe.

Fold over the border and slightly overlap the stitching line from where we attached the border to the front.

Topstitch the border down. I like to go about ¼” from the edge so the other side gets a nice topstitch too.

At this point I like to check my openings in the border. I’ve learned with previous flags I’ve made that if the opening is too large, it can get blown off my hanger! I like to have about a 2½” to 3½” opening. But measure your hanger and decide what works for you.

If you want to close the opening a bit, mark where your preferred measurement is and stitch the edge along the previous seam on the edge, sewing through both layers.

And now you have a flag with a border. I made mine double-sided so that I can change it if the whim strikes me, but it’s cute with only one side having a design too.

Stitch out your design on one of your body pieces. You can make this a double-sided flag if you’d like. I used a single design for this one. For the flag without borders, we will place the right sides of the two main pieces of fabric together. We will measure how big an opening we want for the hanger and add our seam allowance to it. I wanted a 3½” opening, so I marked my fabric 4” down from the top on each side.

We will stitch from this point to the bottom. Turn the corner and stitch along for about 4”. We need to leave an opening on the bottom of the flag for turning it right side out later. Sew the last 4” of the bottom side, and turn the corner and stitch up to the mark we made in the last step.

Now we will hem the top openings, front and back. These are the short sides that measure about 4” for my flag. On the top of the flag, hold the back out of the way while we stitch the front and vice versa. We will do this next step four times to edge stitch each piece.

Fold over one edge ½”. You have your previous seam allowance to line up with and it makes it easy. Make sure to hold the back out of the way for now.

Stitch the hem down from the previous stitching line to the top of the flag.

Repeat this three more times so all the edges of the openings are hemmed. Sometimes you’ll start at the top of the flag and sometimes you will start at the stitches. It doesn’t matter which way you do it.

Once everything is hemmed, bring both layers together and stitch along the top raw edge with your ½” seam allowance.

Your flag should now look something like this. The seam allowances look a little weird around the opening for the hanger, but it will be okay when we turn it right side out. Trim the corners of the bottom so you can finish with nice crisp corners.

Reach your hand through the bottom opening and turn it right side out. Use a Purple Thang to push out your corners and to ensure your seams are flat. Press your flag. At the bottom opening, turn your fabric in ½” and press it so that the edges are even.

Now we will topstitch the top seam. Just sew straight across the top. I like to do all my topstitching about ¼” from the edge so that I am catching in all the seam allowances.

Starting where the front and back are connected, stitch down one side, across the bottom, and up the other side, stopping where the opening for the hanger begins.

Since you pressed the bottom raw edges up half an inch, your topstitch should also close the opening in the bottom of your flag.

Now you will create the channel for your yard flag holder to go through. Measure down from the top edge the distance you want and stitch across the flag. I made mine 2” so that I didn’t stitch on my words, and it works for my flag. If you want to do 2½”–3” that’s fine too. Stitch it straight across the flag.

And you have your finished flags.

Whether you choose to make a flag with a decorative border or without, it will be a beautiful addition to your space.

I hope you’ve enjoyed making a garden flag for your yard. There are so many designs at Designs by JuJu that you can use to find something that shows off your style. You could even make one with a split monogram and your address.

Whatever you do, show off your style and personality. Please post your flags in the Designs by JuJu Embroidery Blessings Facebook Group or anywhere on social media using the hashtag #designsbyjuju and show everyone what you came up with. We love to be inspired by you!
