Toggle Nav
 Inspire.
Create.
Stitch.
Inspire.
Create.
Stitch.
Search
Coffee, creativity, and a little customization—let’s make these embroidery designs uniquely yours!
Who doesn’t love coffee or at least have coffee lovers in their lives? These designs are so cute and simple to customize. It’s easier to customize with Embrilliance, but if you don’t have software I’ll show you how you can change some of these designs to make them special. Make them for your own kitchen or as gifts! Follow along with me as I show you how to customize a few of the designs.
Check out the DBJJ team’s favorite supplies in the Designs by JuJu Amazon store.
A little background first. I wanted to write this article because way back when I originally fell in love with the Coffee Shop 1 and 2 sets, I had no idea how to change them. I know it’s perfectly fine to stitch them out just as they are, but I bought them for the fun of personalizing. At one point I even posted in the DBJJ Embroidery Blessings Facebook group asking about Embrilliance because I didn’t understand how the software worked or what the modules were about. I wish I’d been able to see the future in a crystal ball. When I finally decided to figure out how to change the wording and dates, I discovered it’s so much easier than I thought it would be!
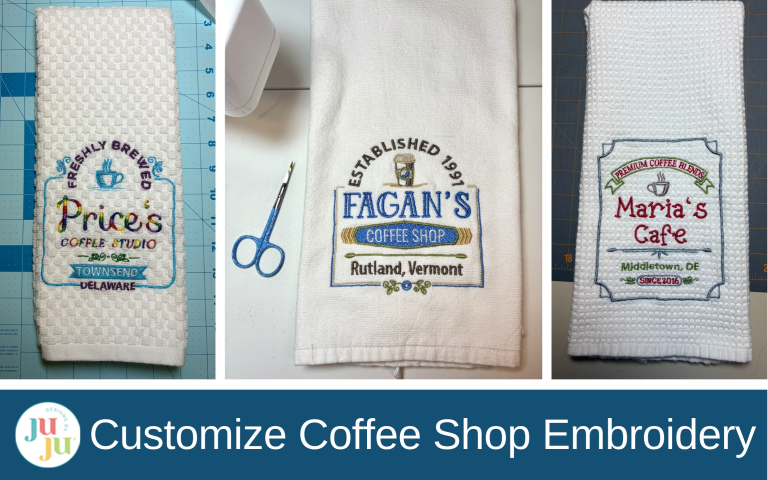
Since I wanted several samples to show you, I sent an email with the Coffee Shop 1 and Coffee Shop 2 design cards to some of my co-workers (I’m an elementary librarian). I asked if they were coffee drinkers and wanted a free towel. The response was a resounding, “Of course!” Even those that don’t drink coffee asked if I could make a towel for their daughter/husband/mother.

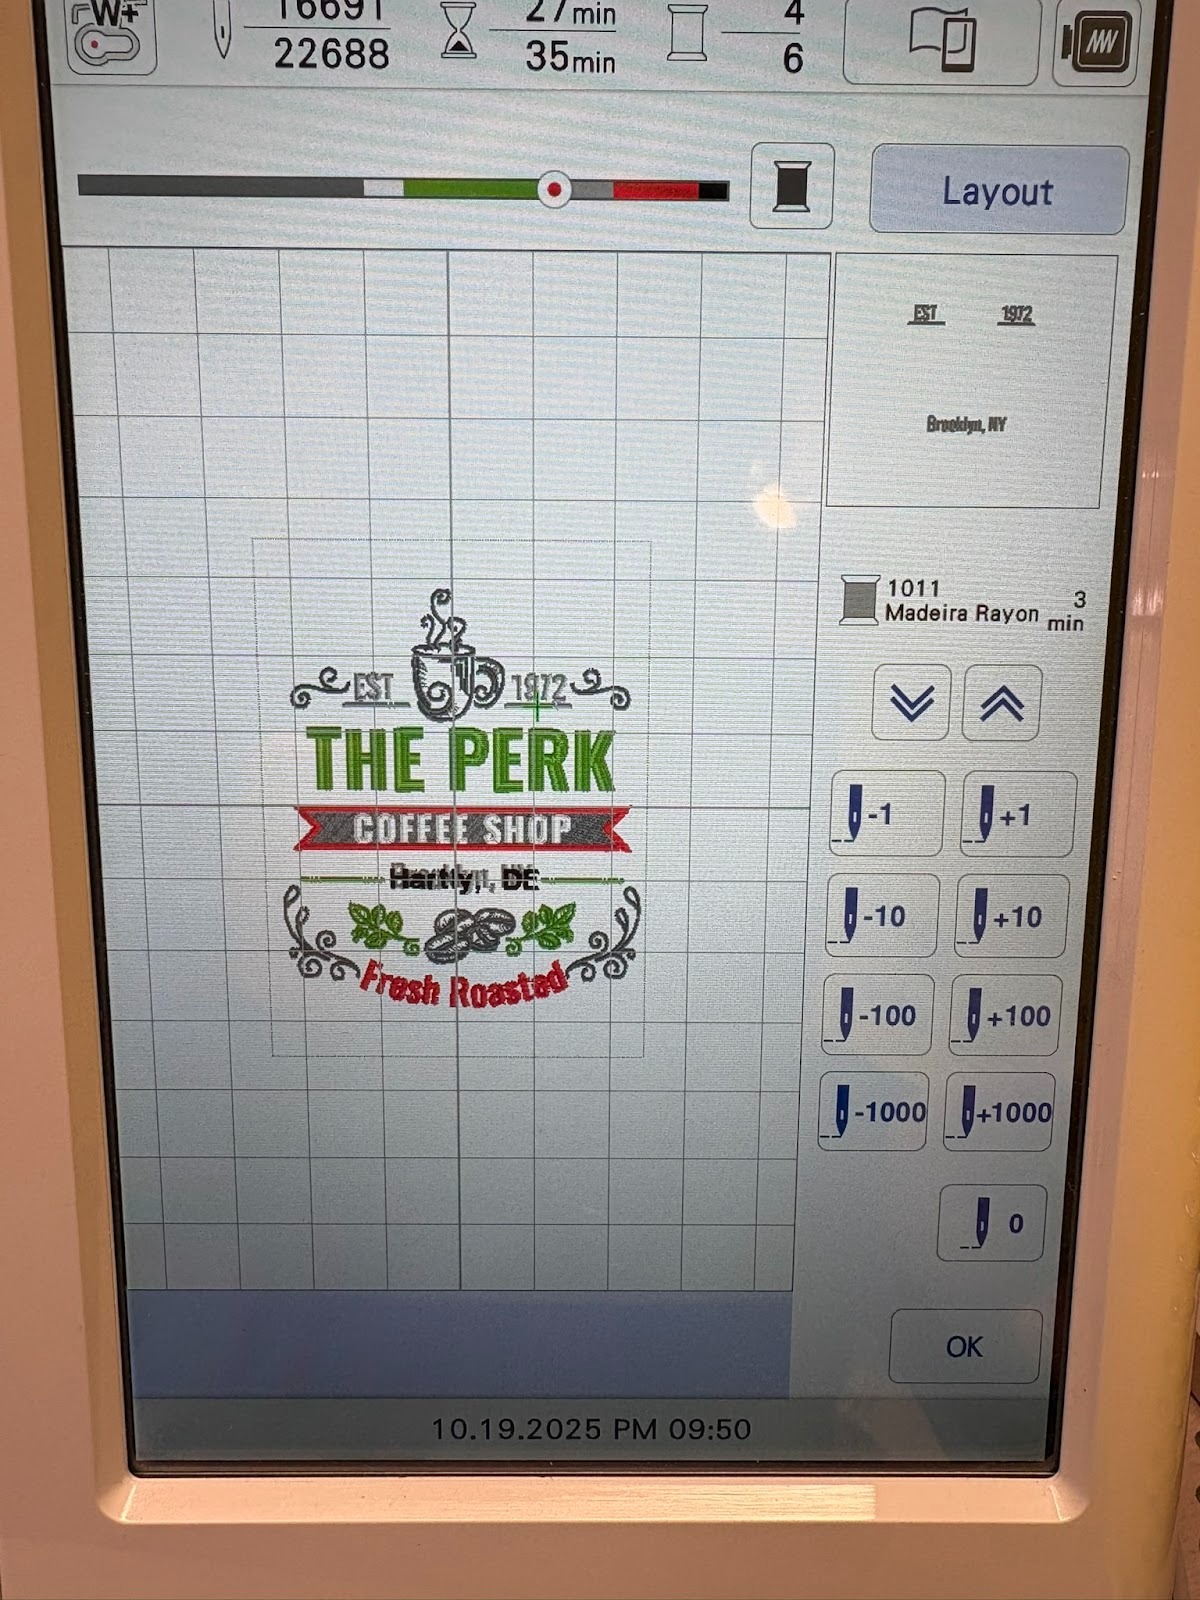
If you don’t have software, the easiest designs to work with are the ones without curves, and there are plenty of those. Here I’m showing how I changed The Perk on my embroidery machine. The first step is loading my design of choice into my machine. I always use the 5x7 designs.

The second step is to use the fonts from my own machine and add the town and state I want. I find the block font always looks great. I move the names right on top of the original town and state to confirm the placement and centering, since my sizes might be a little different.

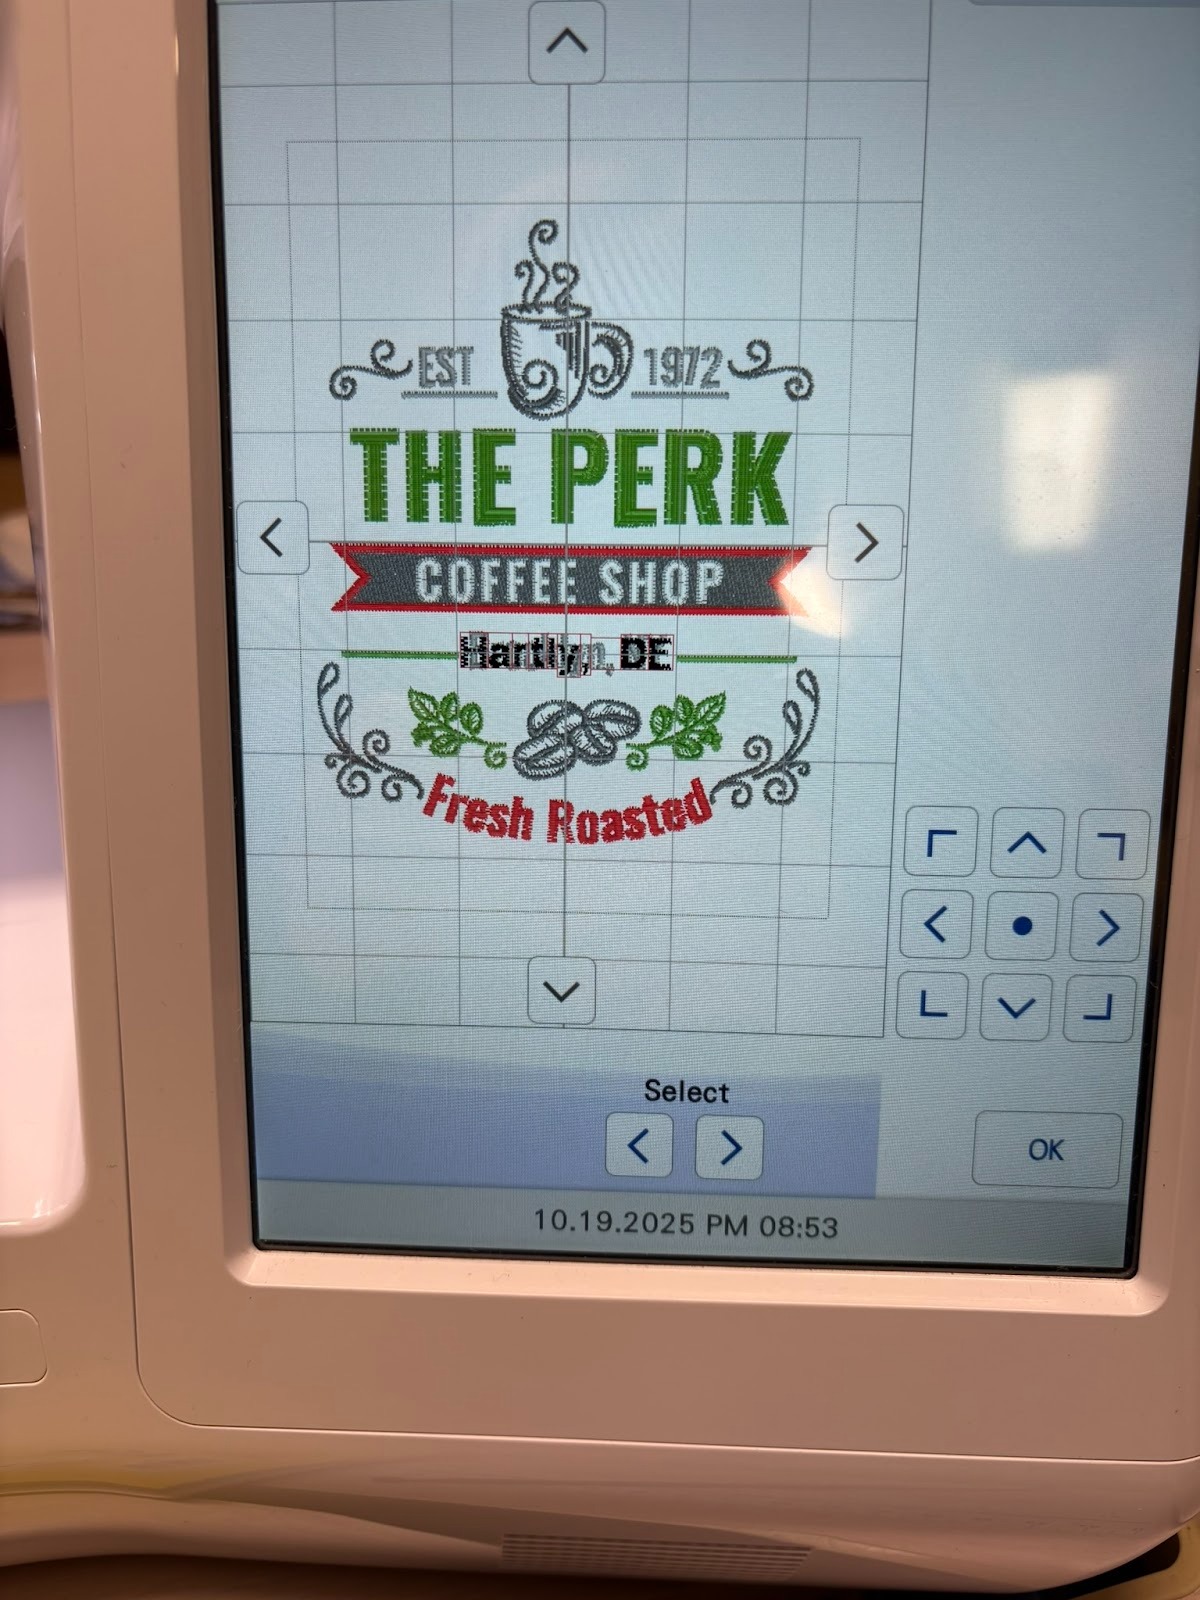
My co-worker didn’t want any date on the towel. Because of this, I skipped Step 4 completely. If she had wanted a date, I would have changed it by doing the same thing I did for the location. I probably would have kept the EST and the lines and made sure to stop and advance the design as needed so I could stitch out the correct year.

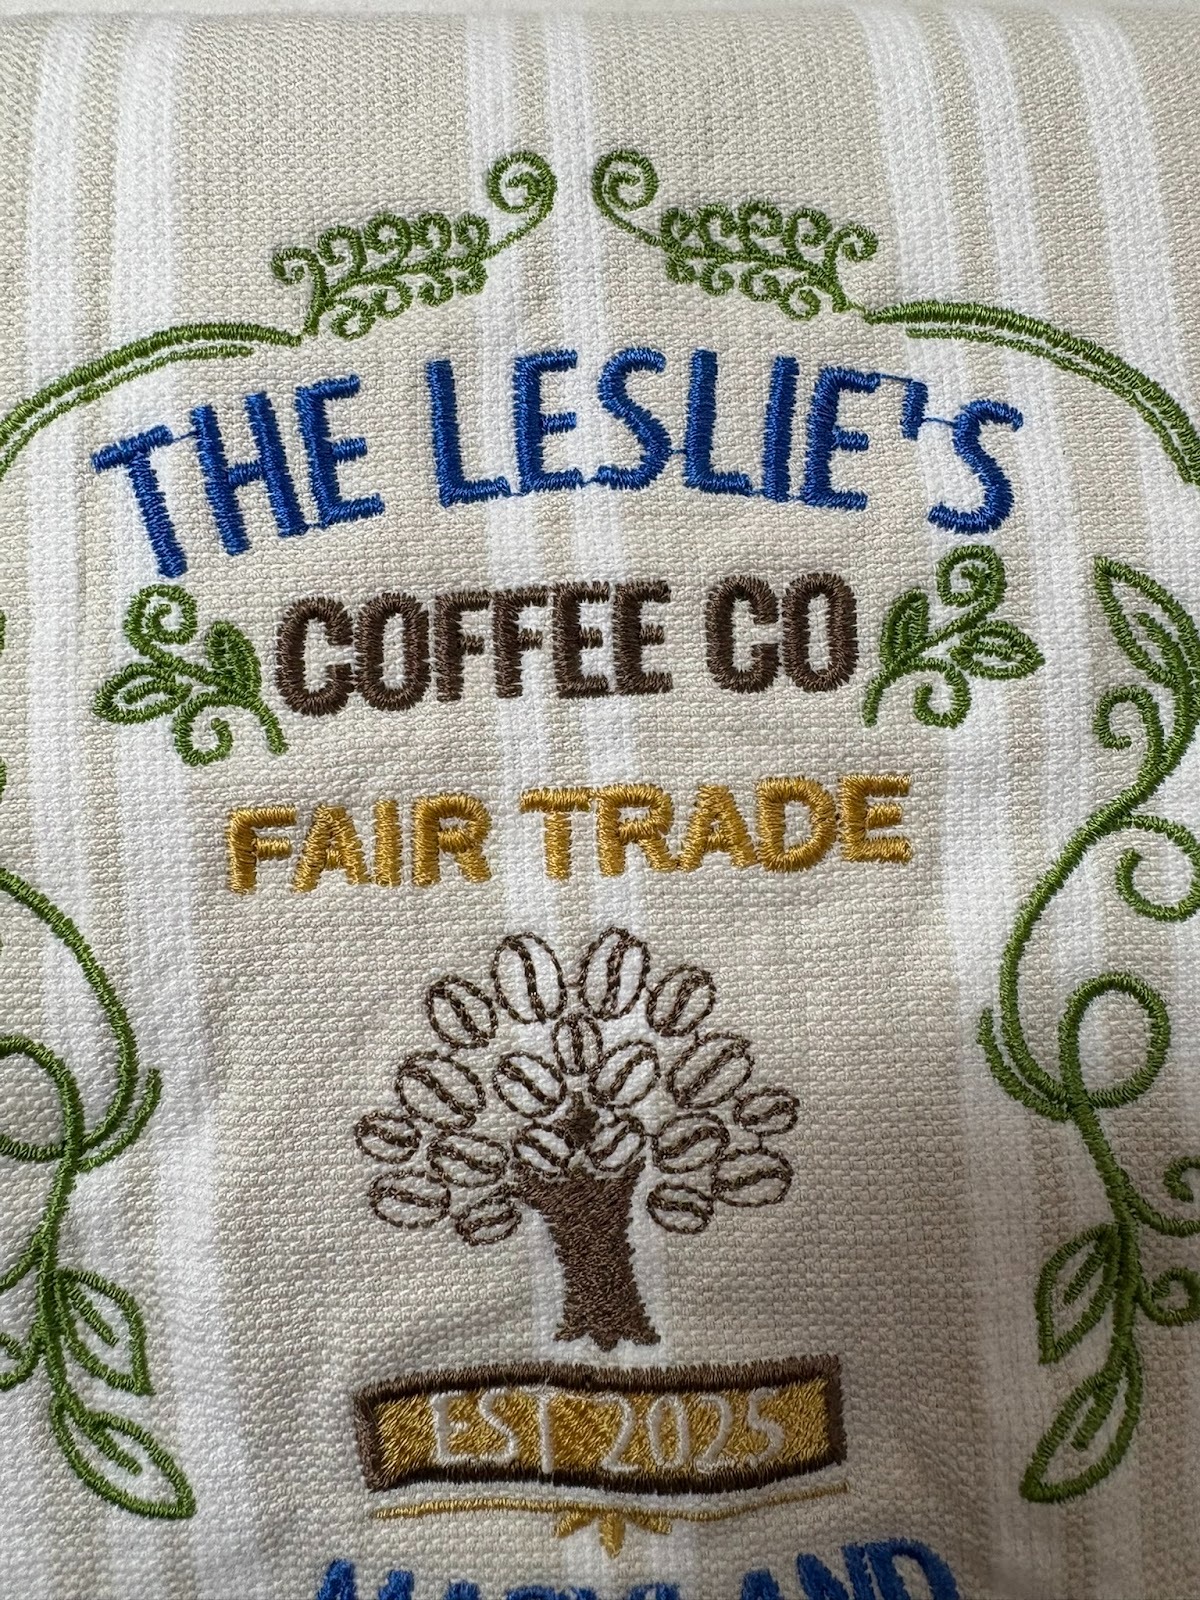
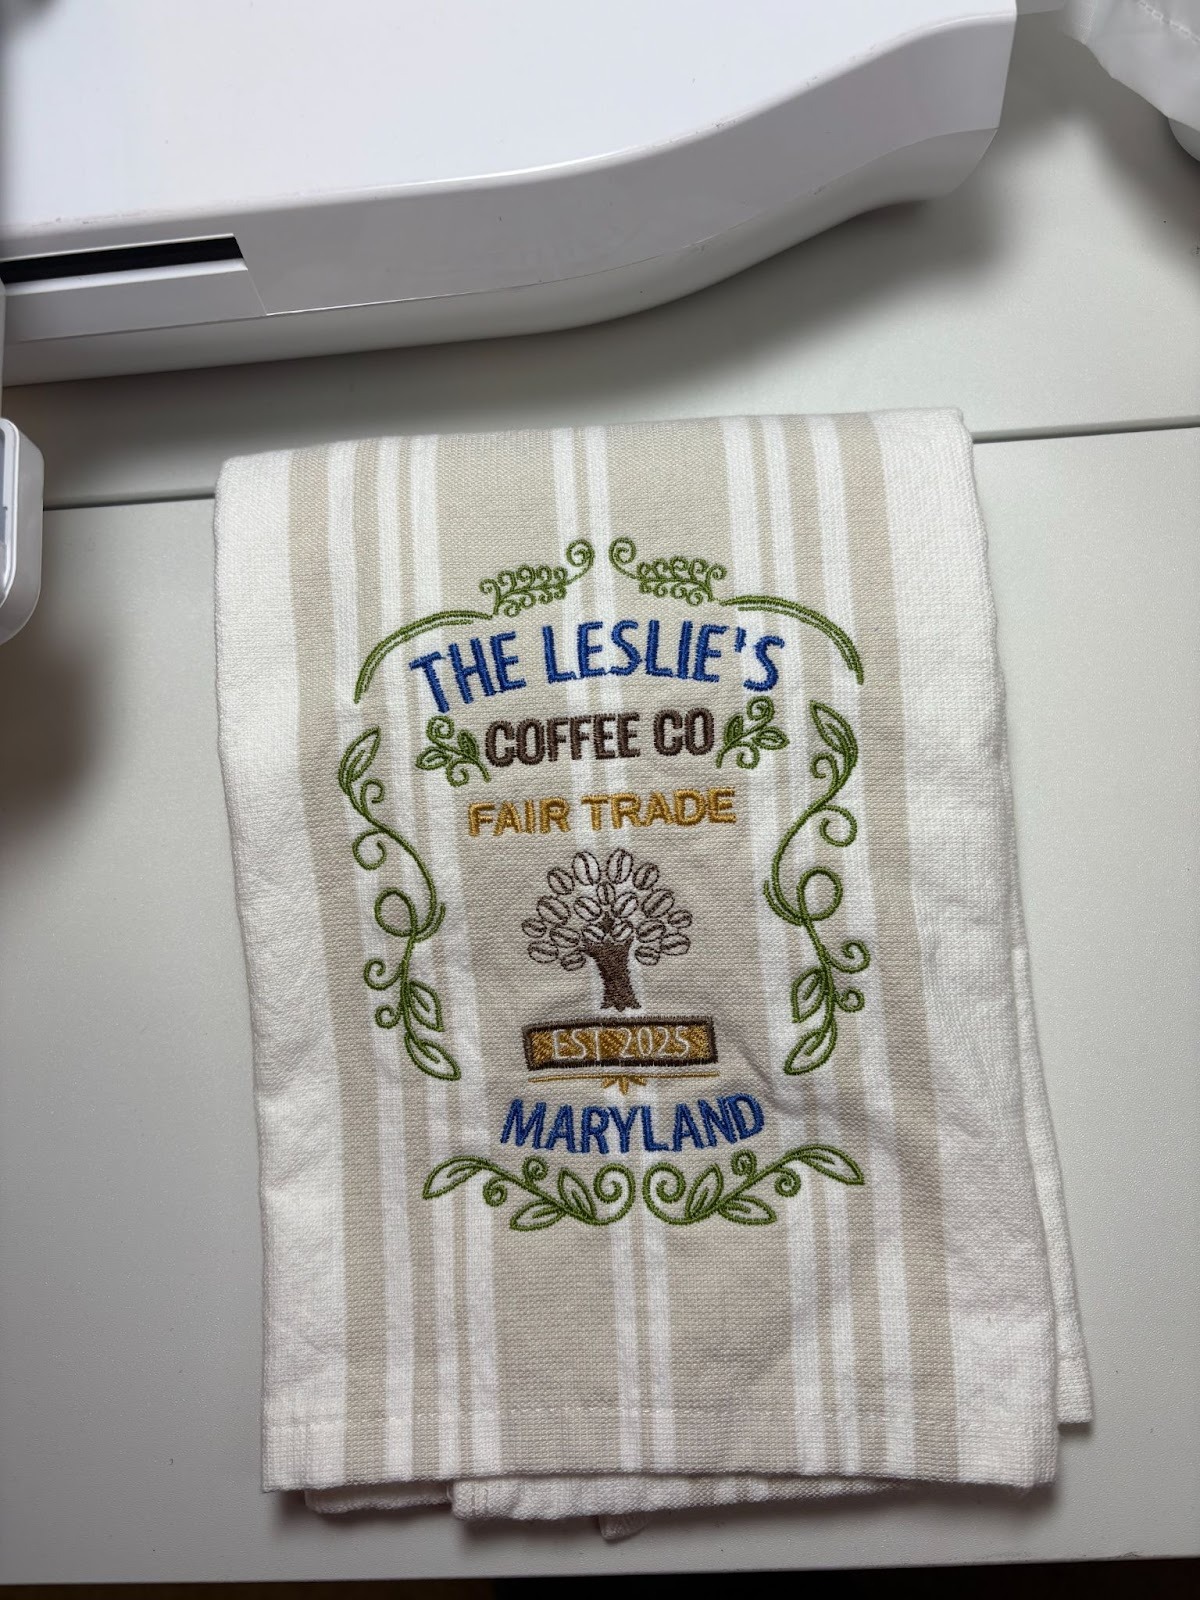
The towel below was done the same way except for the name Carolyn. I used the free BX version of Embrilliance to make the name using the Mia Embroidery Font and then added it to the Lucy design. It takes a little time and patience to do this design and work out where you want the name, town, and state, but it’s worth it.

I’m giving fonts its own heading because I want this information to stand out for you.
Font Sizes - When you’re working with fonts, choose the closest font size needed for your design. Sometimes that means I try a couple of different sizes before I find the best one. Yes, you can size them up or down on your machine, but they’re meant to be resized minimally so they stitch out correctly. I used the Mia 1” font above.

Jump Stitches - Sometimes there are jump stitches in the names. These are threads going from one element to another, like in the letters in “The Leslie’s” shown below. In a recent post I saw someone asking if it’s safe to trim them. I reached out to Janay with Designs by JuJu to get an answer that would better educate both me and you. The great news is that if we are using “a DBJJ font via a BX file, it is safe to trim those stitches because each letter has a tie-off stitch.” I put that part of her answer in quotes to make sure we all note that it says we should be in a BX file. Even if the letters stitch out too close for your machine to trim those stitches automatically, it is safe to trim them.
Here is her detailed answer for the Embrilliance font I was using at the time:
“With an Embrilliance built-in font, it may depend on your settings whether it's safe to trim those jumps without risk of unraveling. What is important is that there are tie-off stitches at the end of each letter.
If your text looks like this on your computer screen without a stitched thread showing between the letters, then it would be safe to trim the jump. You can zoom in and see tie-off stitches:

However, if you do see a stitch on your screen between letters, it's possible there aren't ties on either side of that stitch, which means removing it might cause unraveling. You can zoom in and watch it in stitch simulator one stitch at a time to determine if there is a tie-off stitch at the end.”
My takeaway is that I’ll probably use a DBJJ font via BX 99.9% of the time so I don’t need to worry about whether or not it’s safe to trim the jump stitches.
Essentials is often the module that embroiderers in the DBJJ Blessings Facebook group recommend as a great starting point with Embrilliance. This module will make it easy for you to do a lot of customization.
I’m going to show you how I customized the Fair Trade design for The Leslie’s. You can watch this video or read the steps below.
I opened Embrilliance. Once you load your serial number, you’ll never need to do that again. Next I dragged the 5x7 size of the Fair Trade design onto the Embrilliance screen.

The design is on the screen. I wanted to change out Mainstreet, Pittsburgh, and the date.

I clicked on the A (Create Letters) key which is on the right side of the toolbar. This makes the letters ABC pop up.
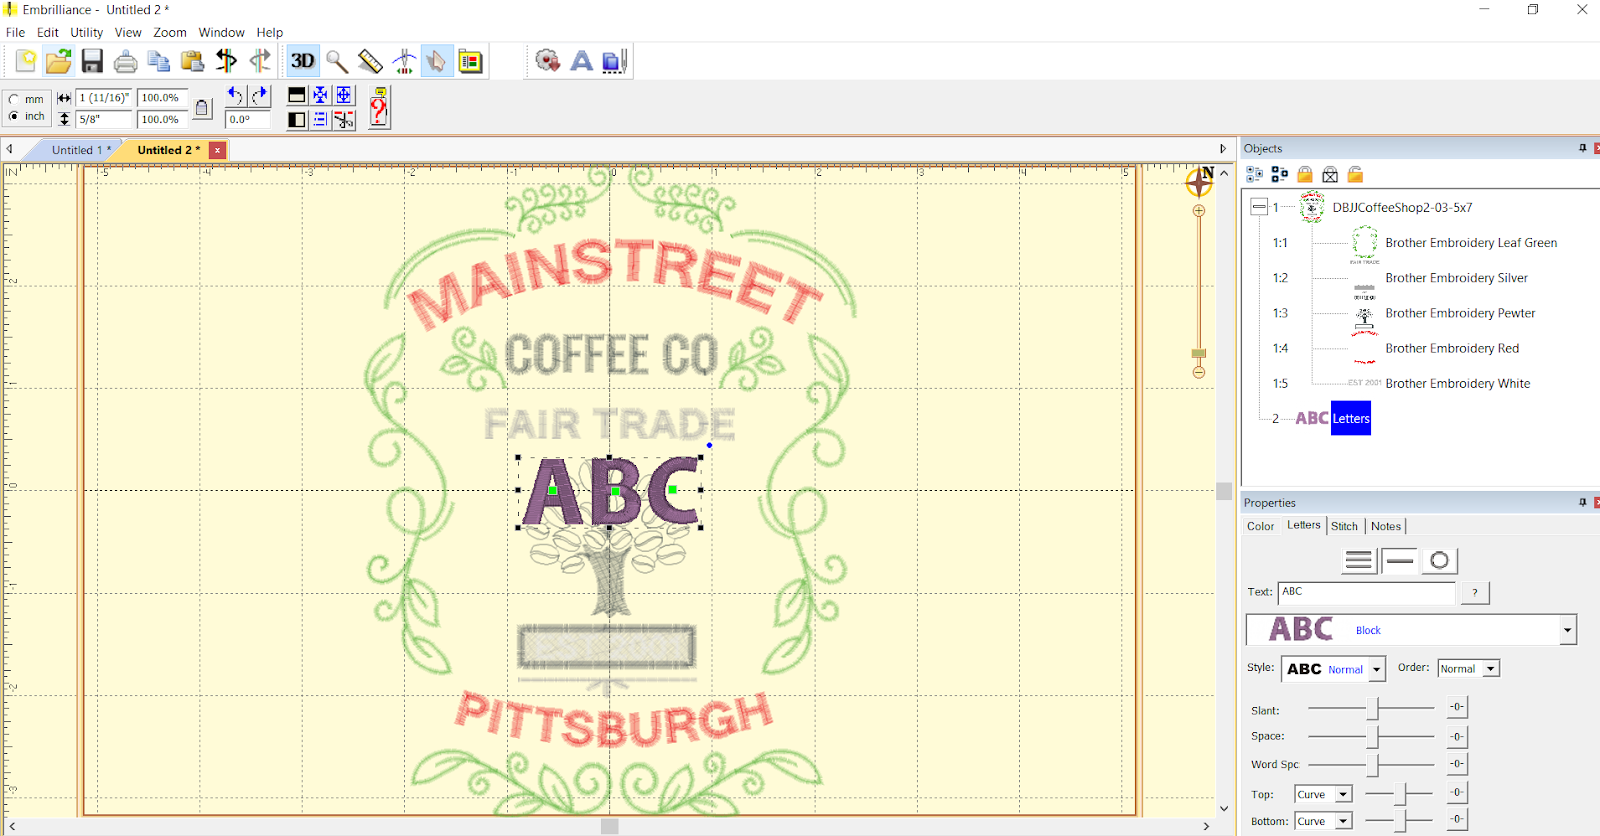
I started with “The Leslie’s” first. If you look at the grey box in the right bottom corner of the photo above, you’ll see that ABC is showing in the TEXT box. That’s where you’ll type the names you want. I typed in “The Leslie’s” and pressed enter. ABC changed to “The Leslie’s.” Below that box is the font box. When I clicked on the arrow all the fonts that I’ve dragged into Embrilliance are there. I chose the DBJJ Librarian Embroidery Font for this example. I used the .50” size so that I didn’t resize too much.
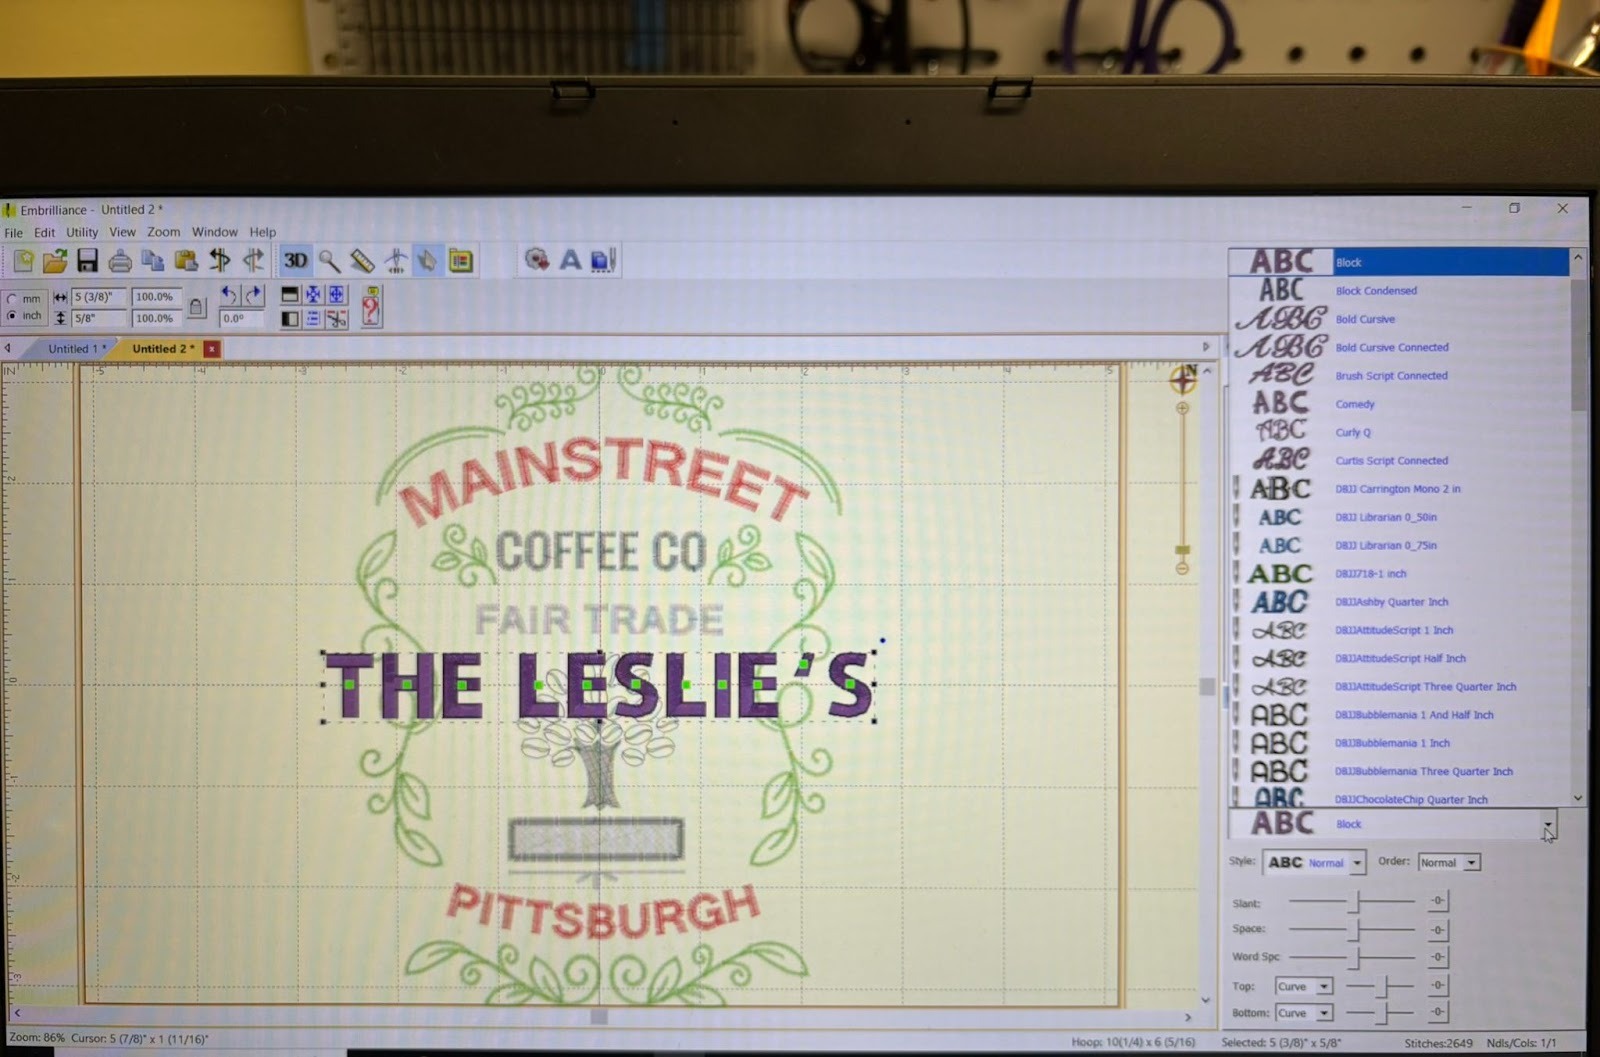
I usually leave the original design showing so it helps me with size and placement of my changes. I needed to curve the new name. In the photo below you’ll see the circle that I clicked on and the slider that I used to achieve the curve needed. (Sorry that I don’t know the official names of these.) I then moved “The Leslie’s” directly on top of Mainstreet and made sure I liked the size and curve. I did the same for changing Pittsburgh to Maryland. One thing I needed to do was check the box that said “Place on bottom” so the curve was the opposite direction for Maryland.
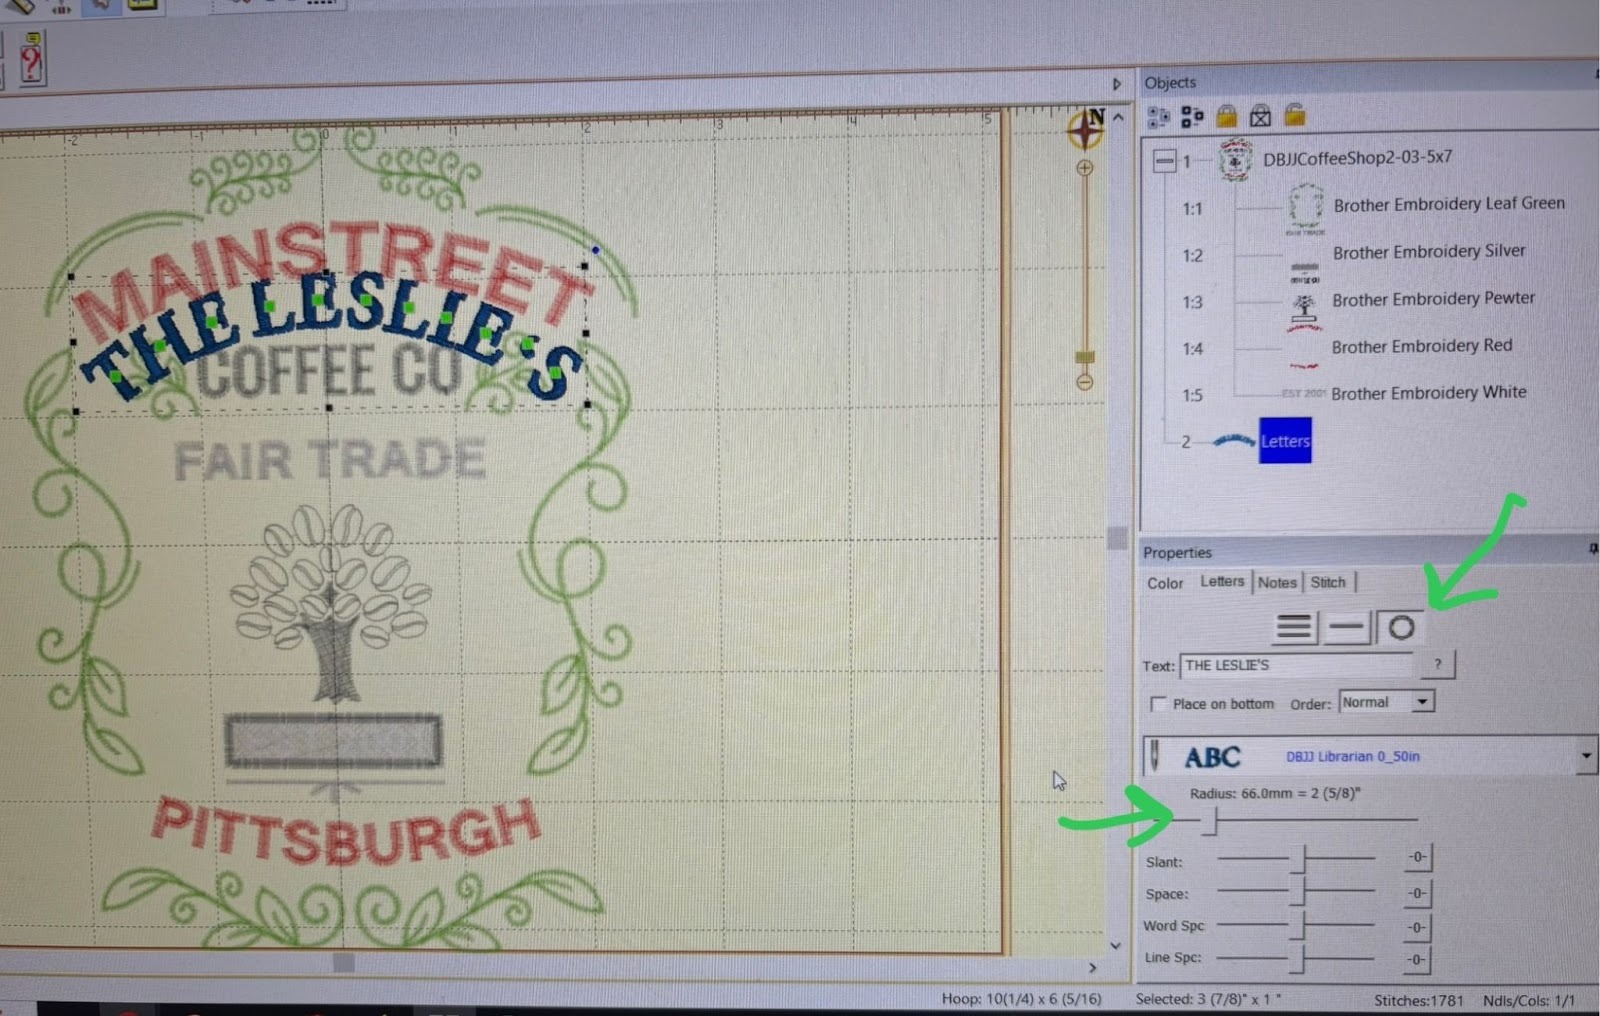
Once I had customized the name and town, I deleted the original step to get rid of Mainstreet and Pittsburgh. If you look at the photo above, you can see that was Step 1:4. To delete it, I clicked on it and used my computer’s delete button.

I did the same for customizing the date. I deleted the step for the original date and, using a ¼” font, I changed it to say EST 2025. I found that a ¼” font is often needed on the designs when a date is in a banner or bar and very small.
One thing I forgot to say in my video is SAVE YOUR FILE in both Stitch and Working! This will let you go back and use the PES file to make other customized changes with some of the work already done for you.
Enthusiast has an advantage that Essentials doesn’t: it lets you edit stitches. In the photos below I show that Step 1:6 embroiders the name and some other elements. It would be much easier to delete Brewster’s completely, leaving the other features. You can watch how to do that in this video (sorry about the static at the beginning). The photos below also show how to use the Edit Stitches feature.
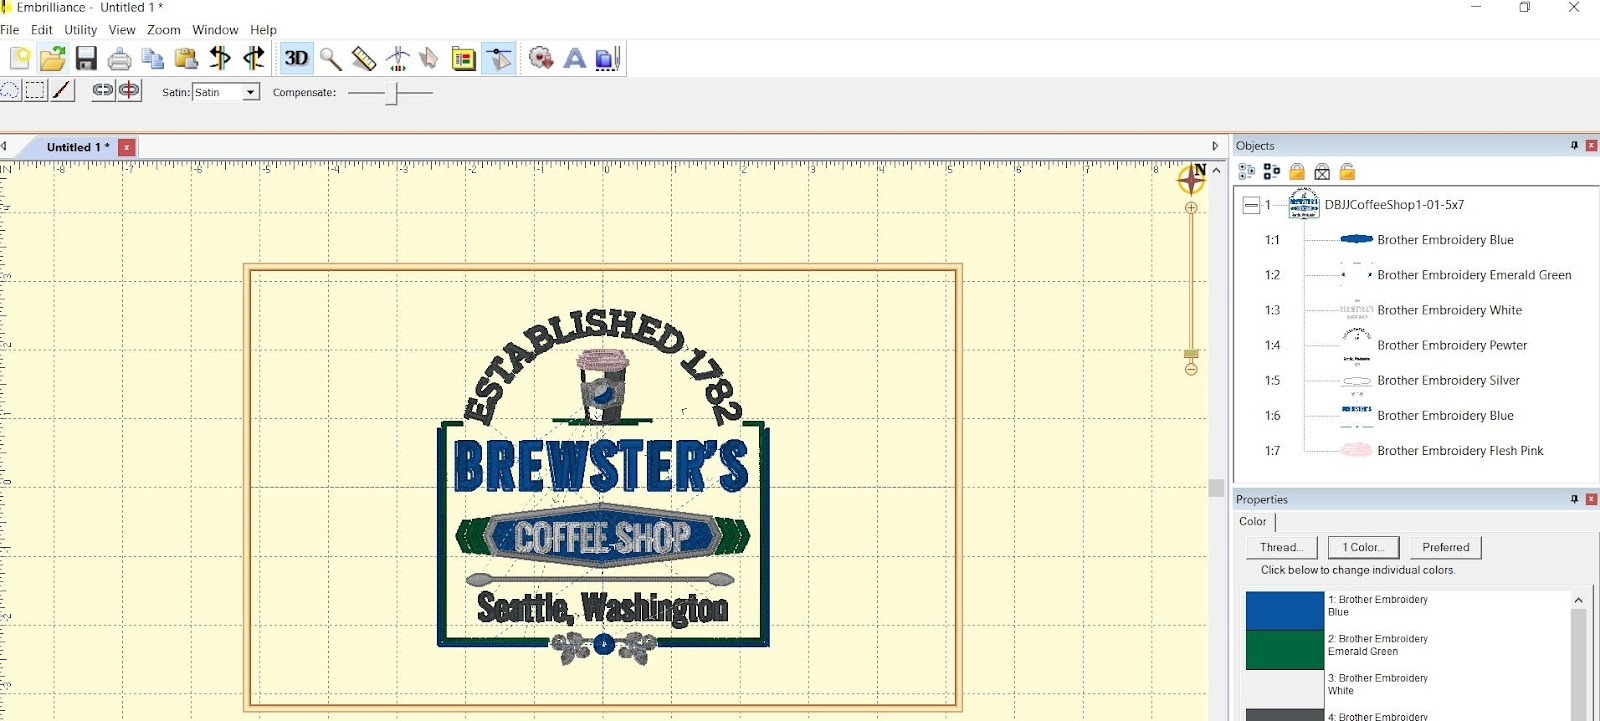

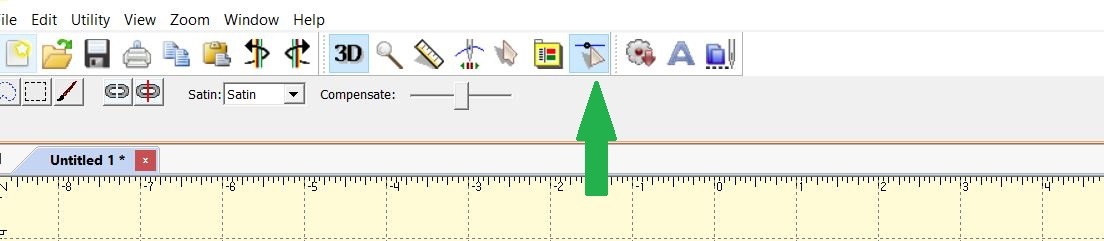
To delete stitches, click on the Edit Stitch button, which the green arrow is pointing to in the photo below. When you do that, the two boxes to the far left appear. One was a squiggly shape and the one to the right of that shows a square. You can use either one to wrap around the element of the design you want to delete. Once it’s wrapped, press the delete key on your computer and the element is gone. It’s so much easier to see in the video so I hope you watch it.

One thing that Enthusiast doesn’t let you do is resize, so if your font size is not working, you will have to try another size or maybe even another font.
Once your design is set with your customization features, remember the nuts and bolts of embroidering on towels so you’re happy with the completed project. Be sure you wash and dry your towels before embroidering. I recently purchased some waffle towels that I thought would be great. I’m glad I threw them into the washer as soon as I returned home—they came out all shrunken and misshapen. THAT would have been a colossal disaster!
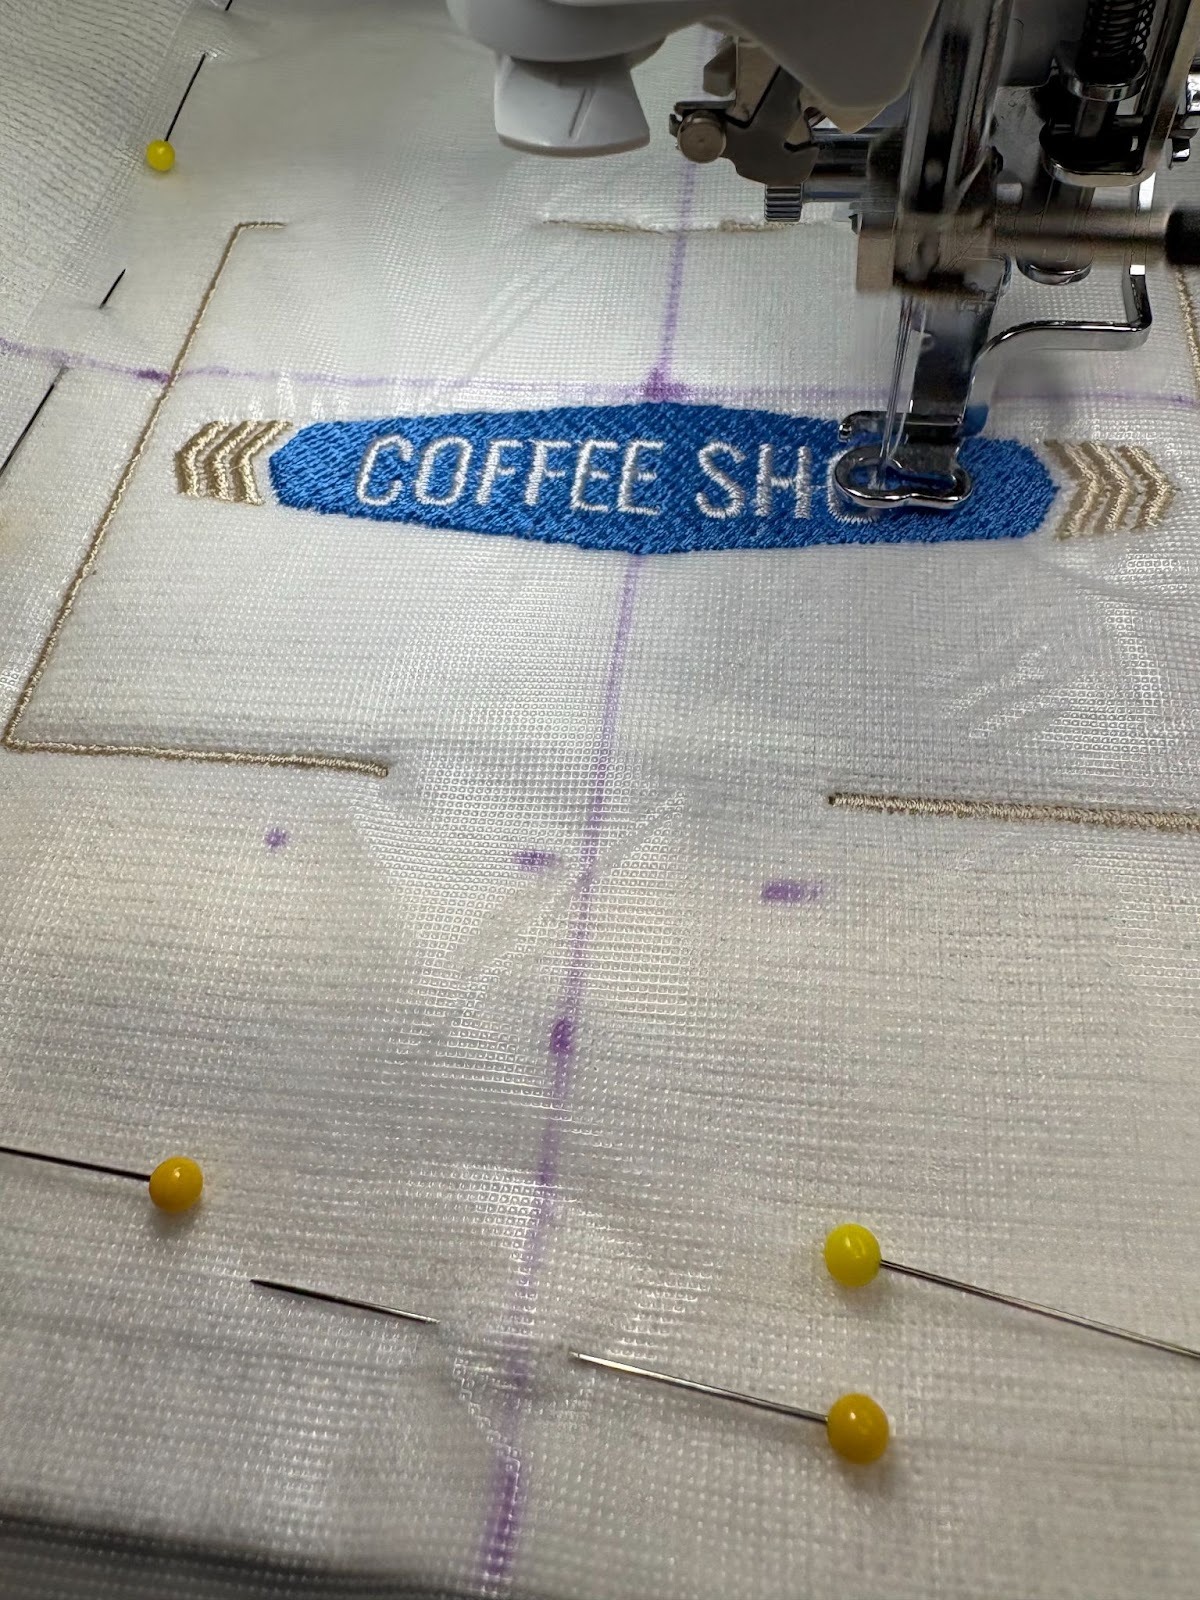
First, use a tear-away stabilizer in the hoop. I usually place the bottom of the design 2” from the bottom hem of the towel and use a water-soluble marker to draw my centering lines. Then float the towel with 505® Temporary Adhesive. Next, add a water-soluble topper. The topper is important because it prevents the stitches from sinking into the towel. I pin the topper down and then run the trial feature to ensure the pins aren’t going to be in the way. Once the stabilizer is hooped, the towel is floated (or hooped if you prefer), and the topper is on, you’re ready to embroider your customized design!

My co-workers loved their towels! I loved making them because it gave me opportunities to change out phrases on the towels, not only names and dates. I also liked the color schemes they came up with, several of which were meaningful to them. Many told me they’re giving them as Christmas gifts, which I’m “chuffed” (very pleased) about.


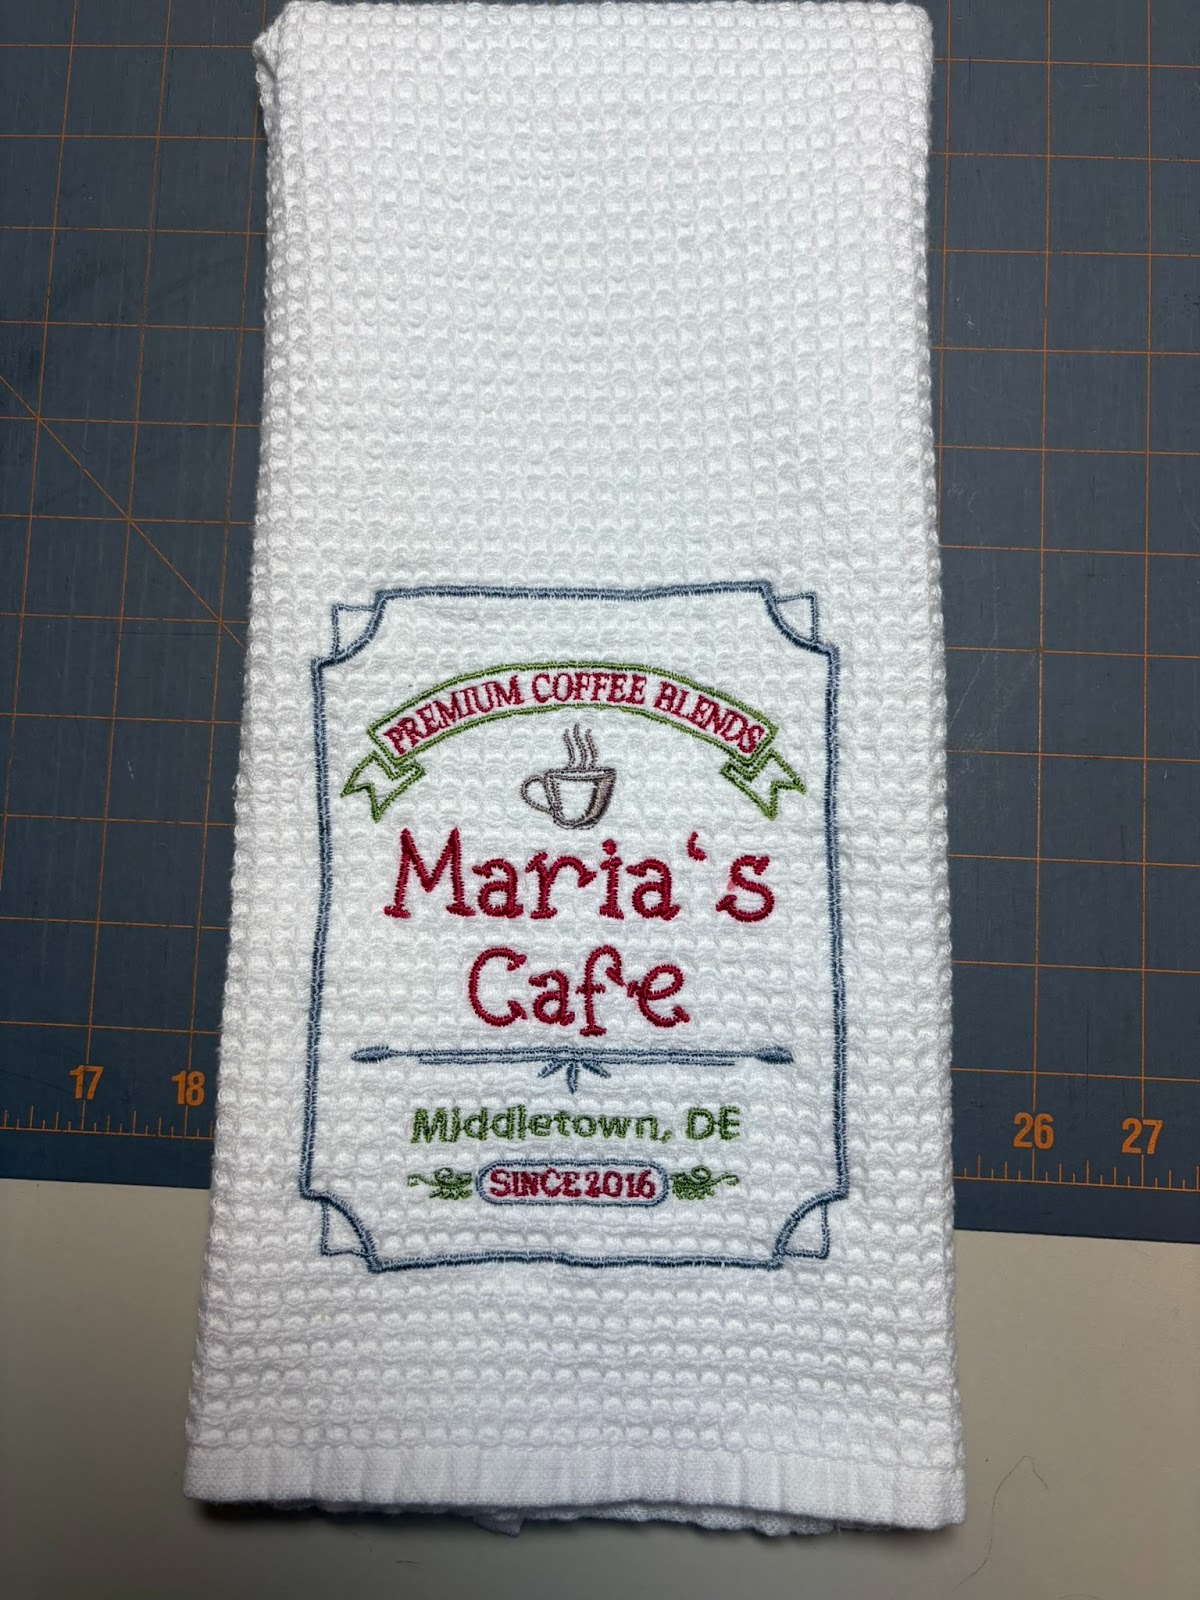
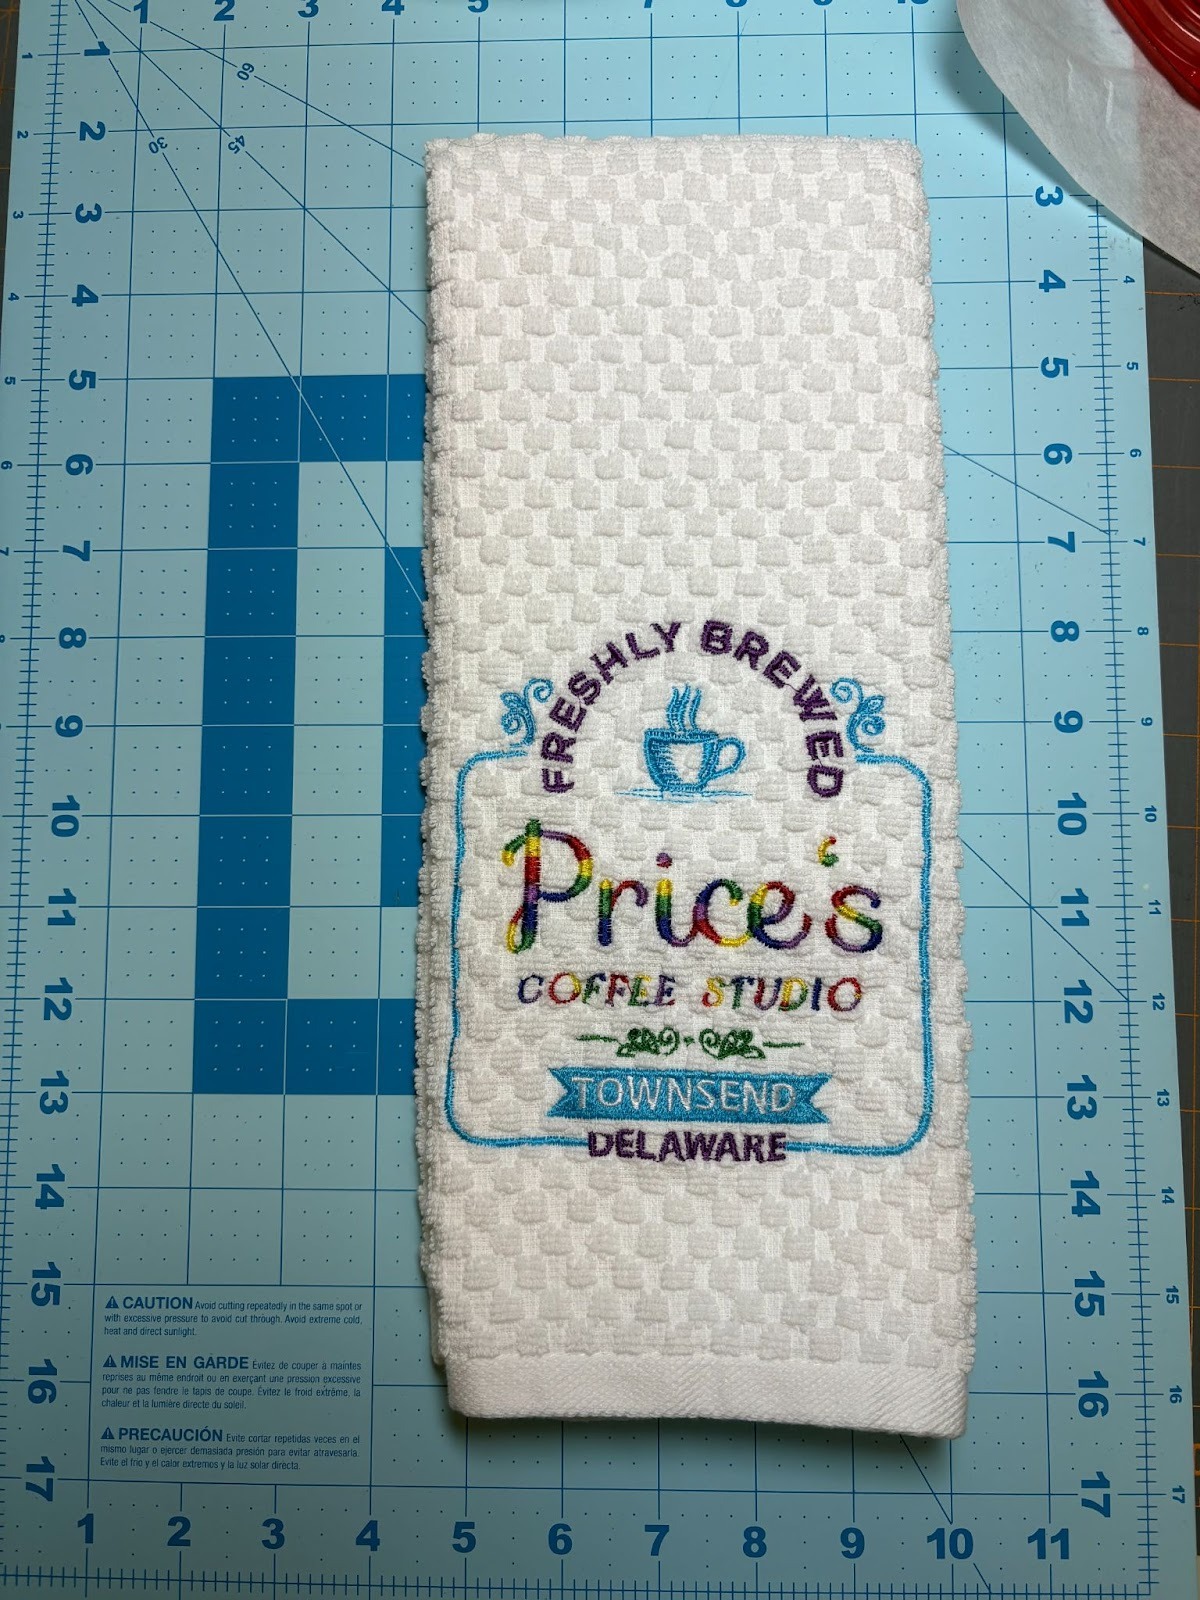

Consider adding personalized kitchen towels to the list of quick and easy gifts that Sandie recently shared in the blog. They really don’t take long. Some of the more popular designs that people requested were Brewster’s from Coffee Shop 1, and Lucy’s, The Perk, and Charlie’s from Coffee Shop 2. Of course you don’t have to make towels—these designs would be awesome on fabric baskets too!
Please be sure to share your projects in the Designs by JuJu Embroidery Blessings Facebook group, or use the hashtag #designsbyjuju anywhere on social media. We all love to see what you create!